Record History
This feature is provided by the plugin «Record history», included in Professional Edition and above commercial editionsIntroduction
The Record History plugin tracks data changes by automatically saving snapshots and differences of create, update, and delete operations. It helps users quickly review data modifications and audit operation activities.
Enabling Record History
Add Collections and Fields
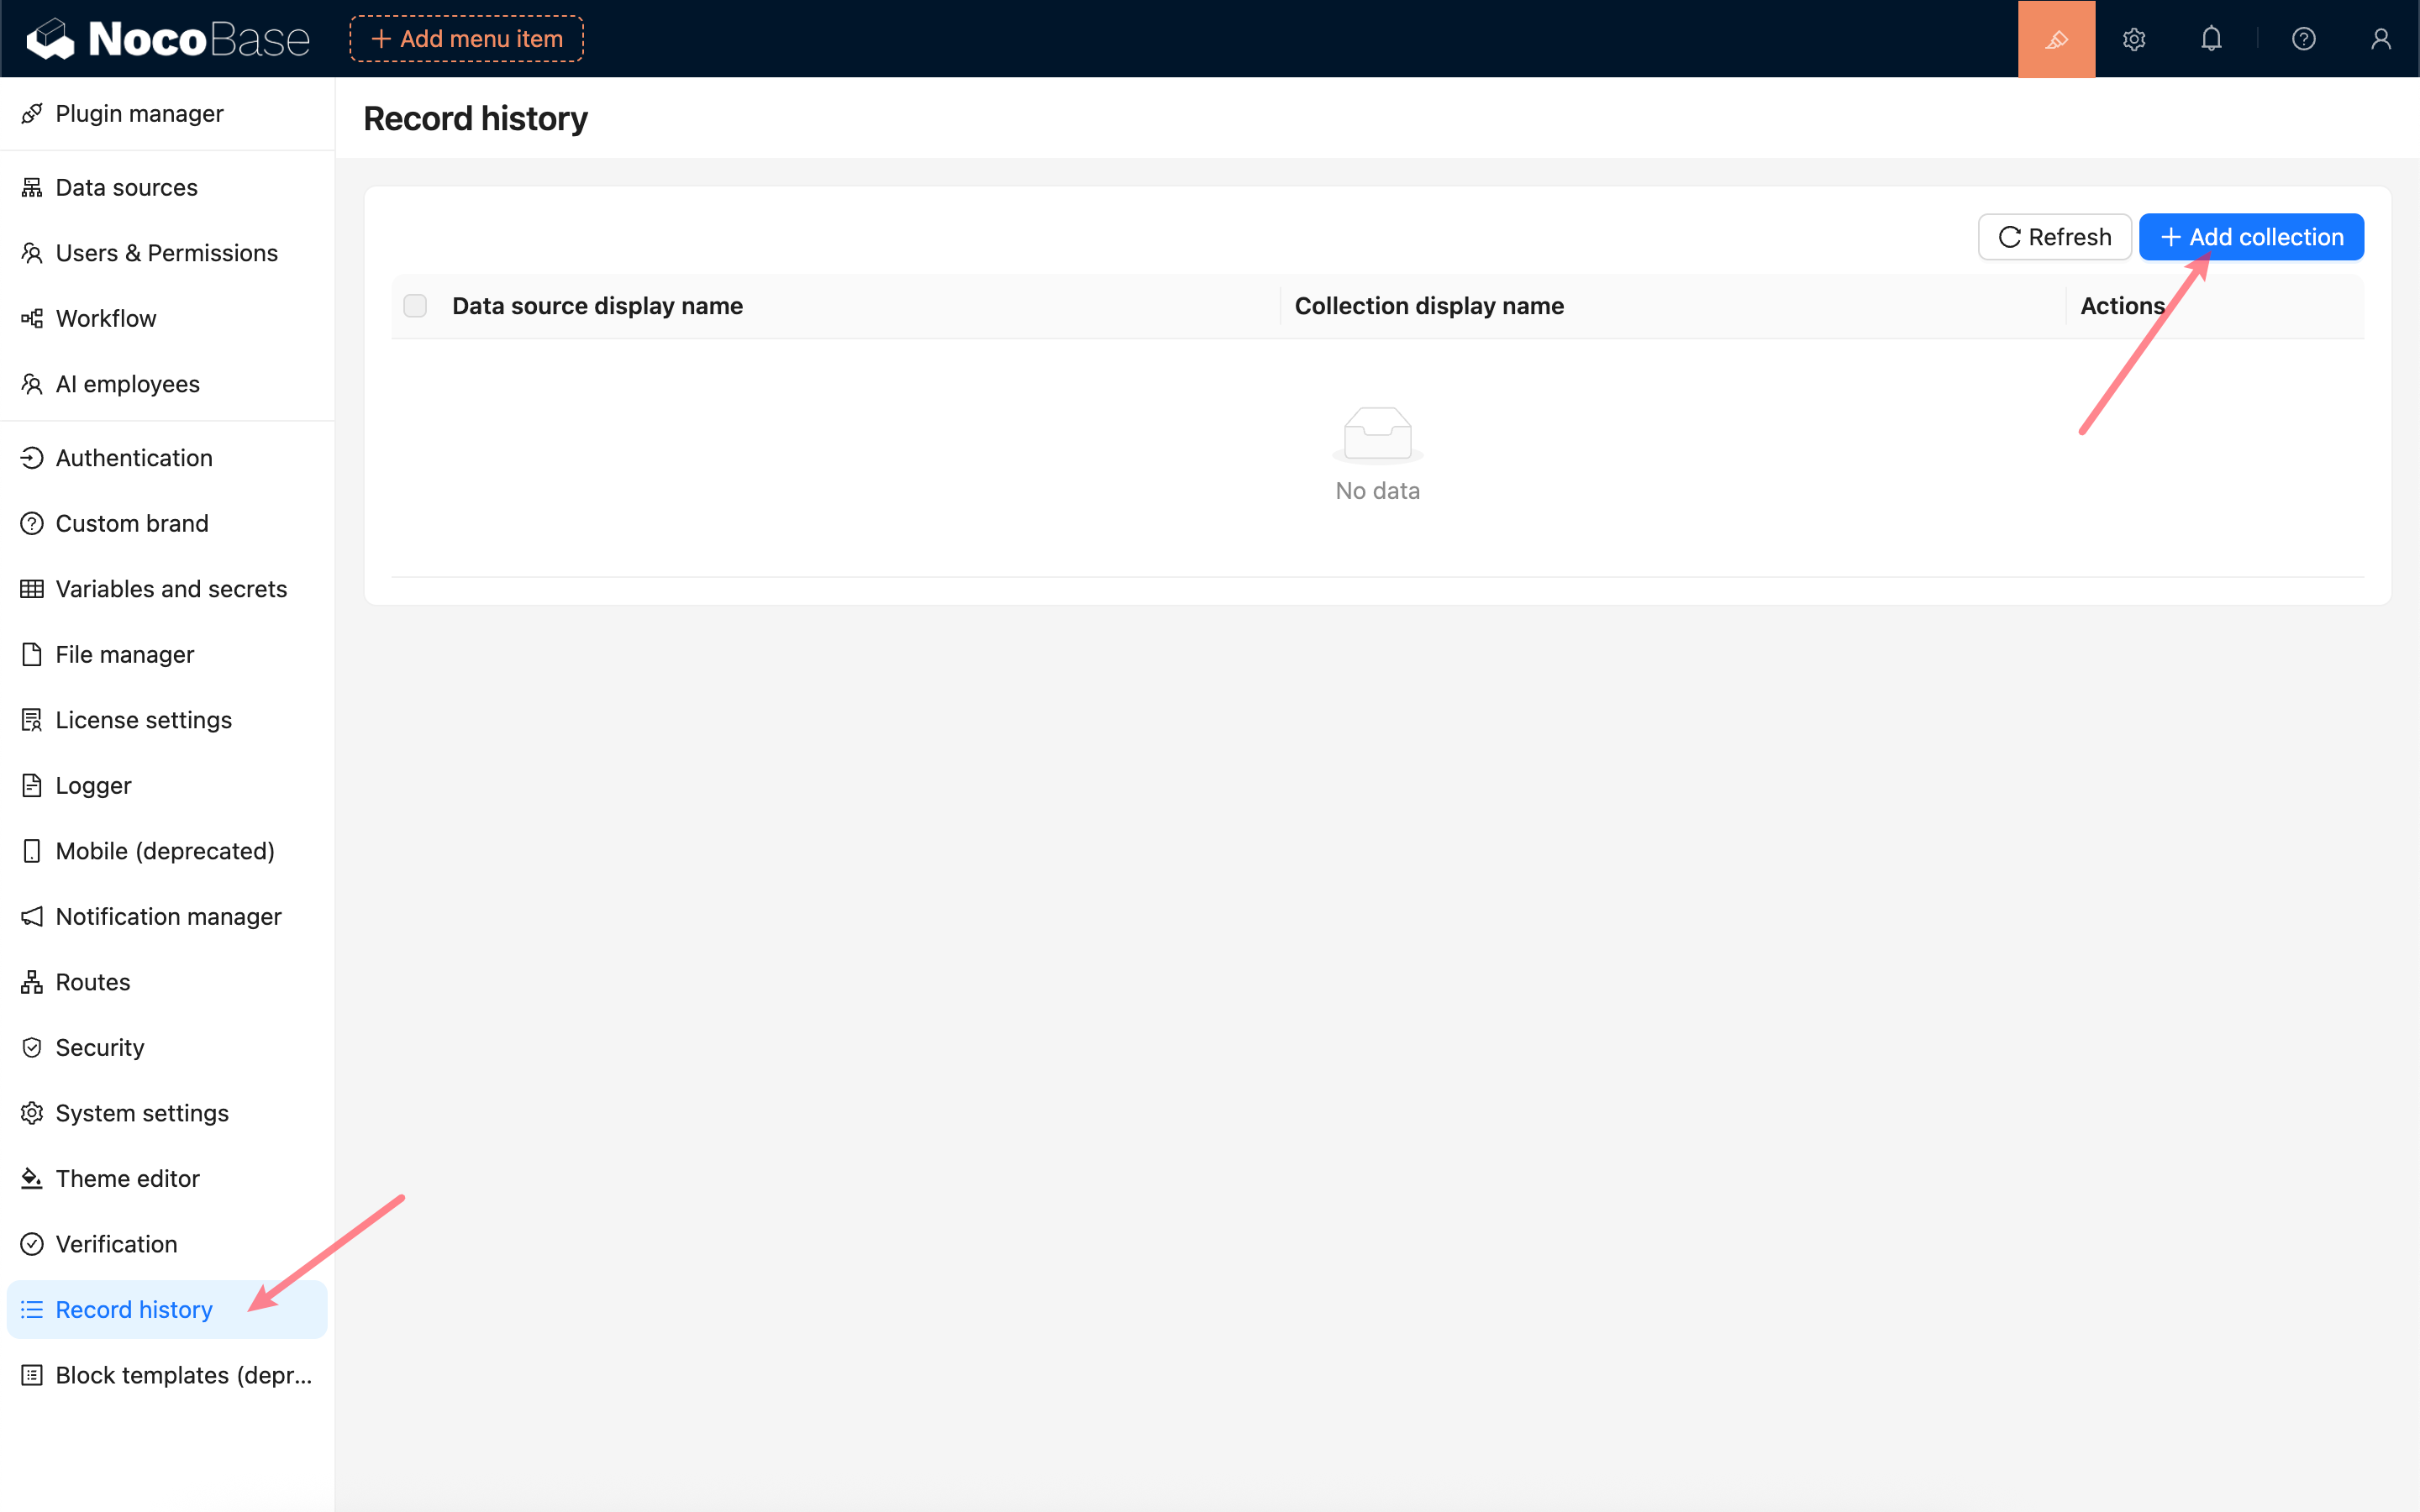
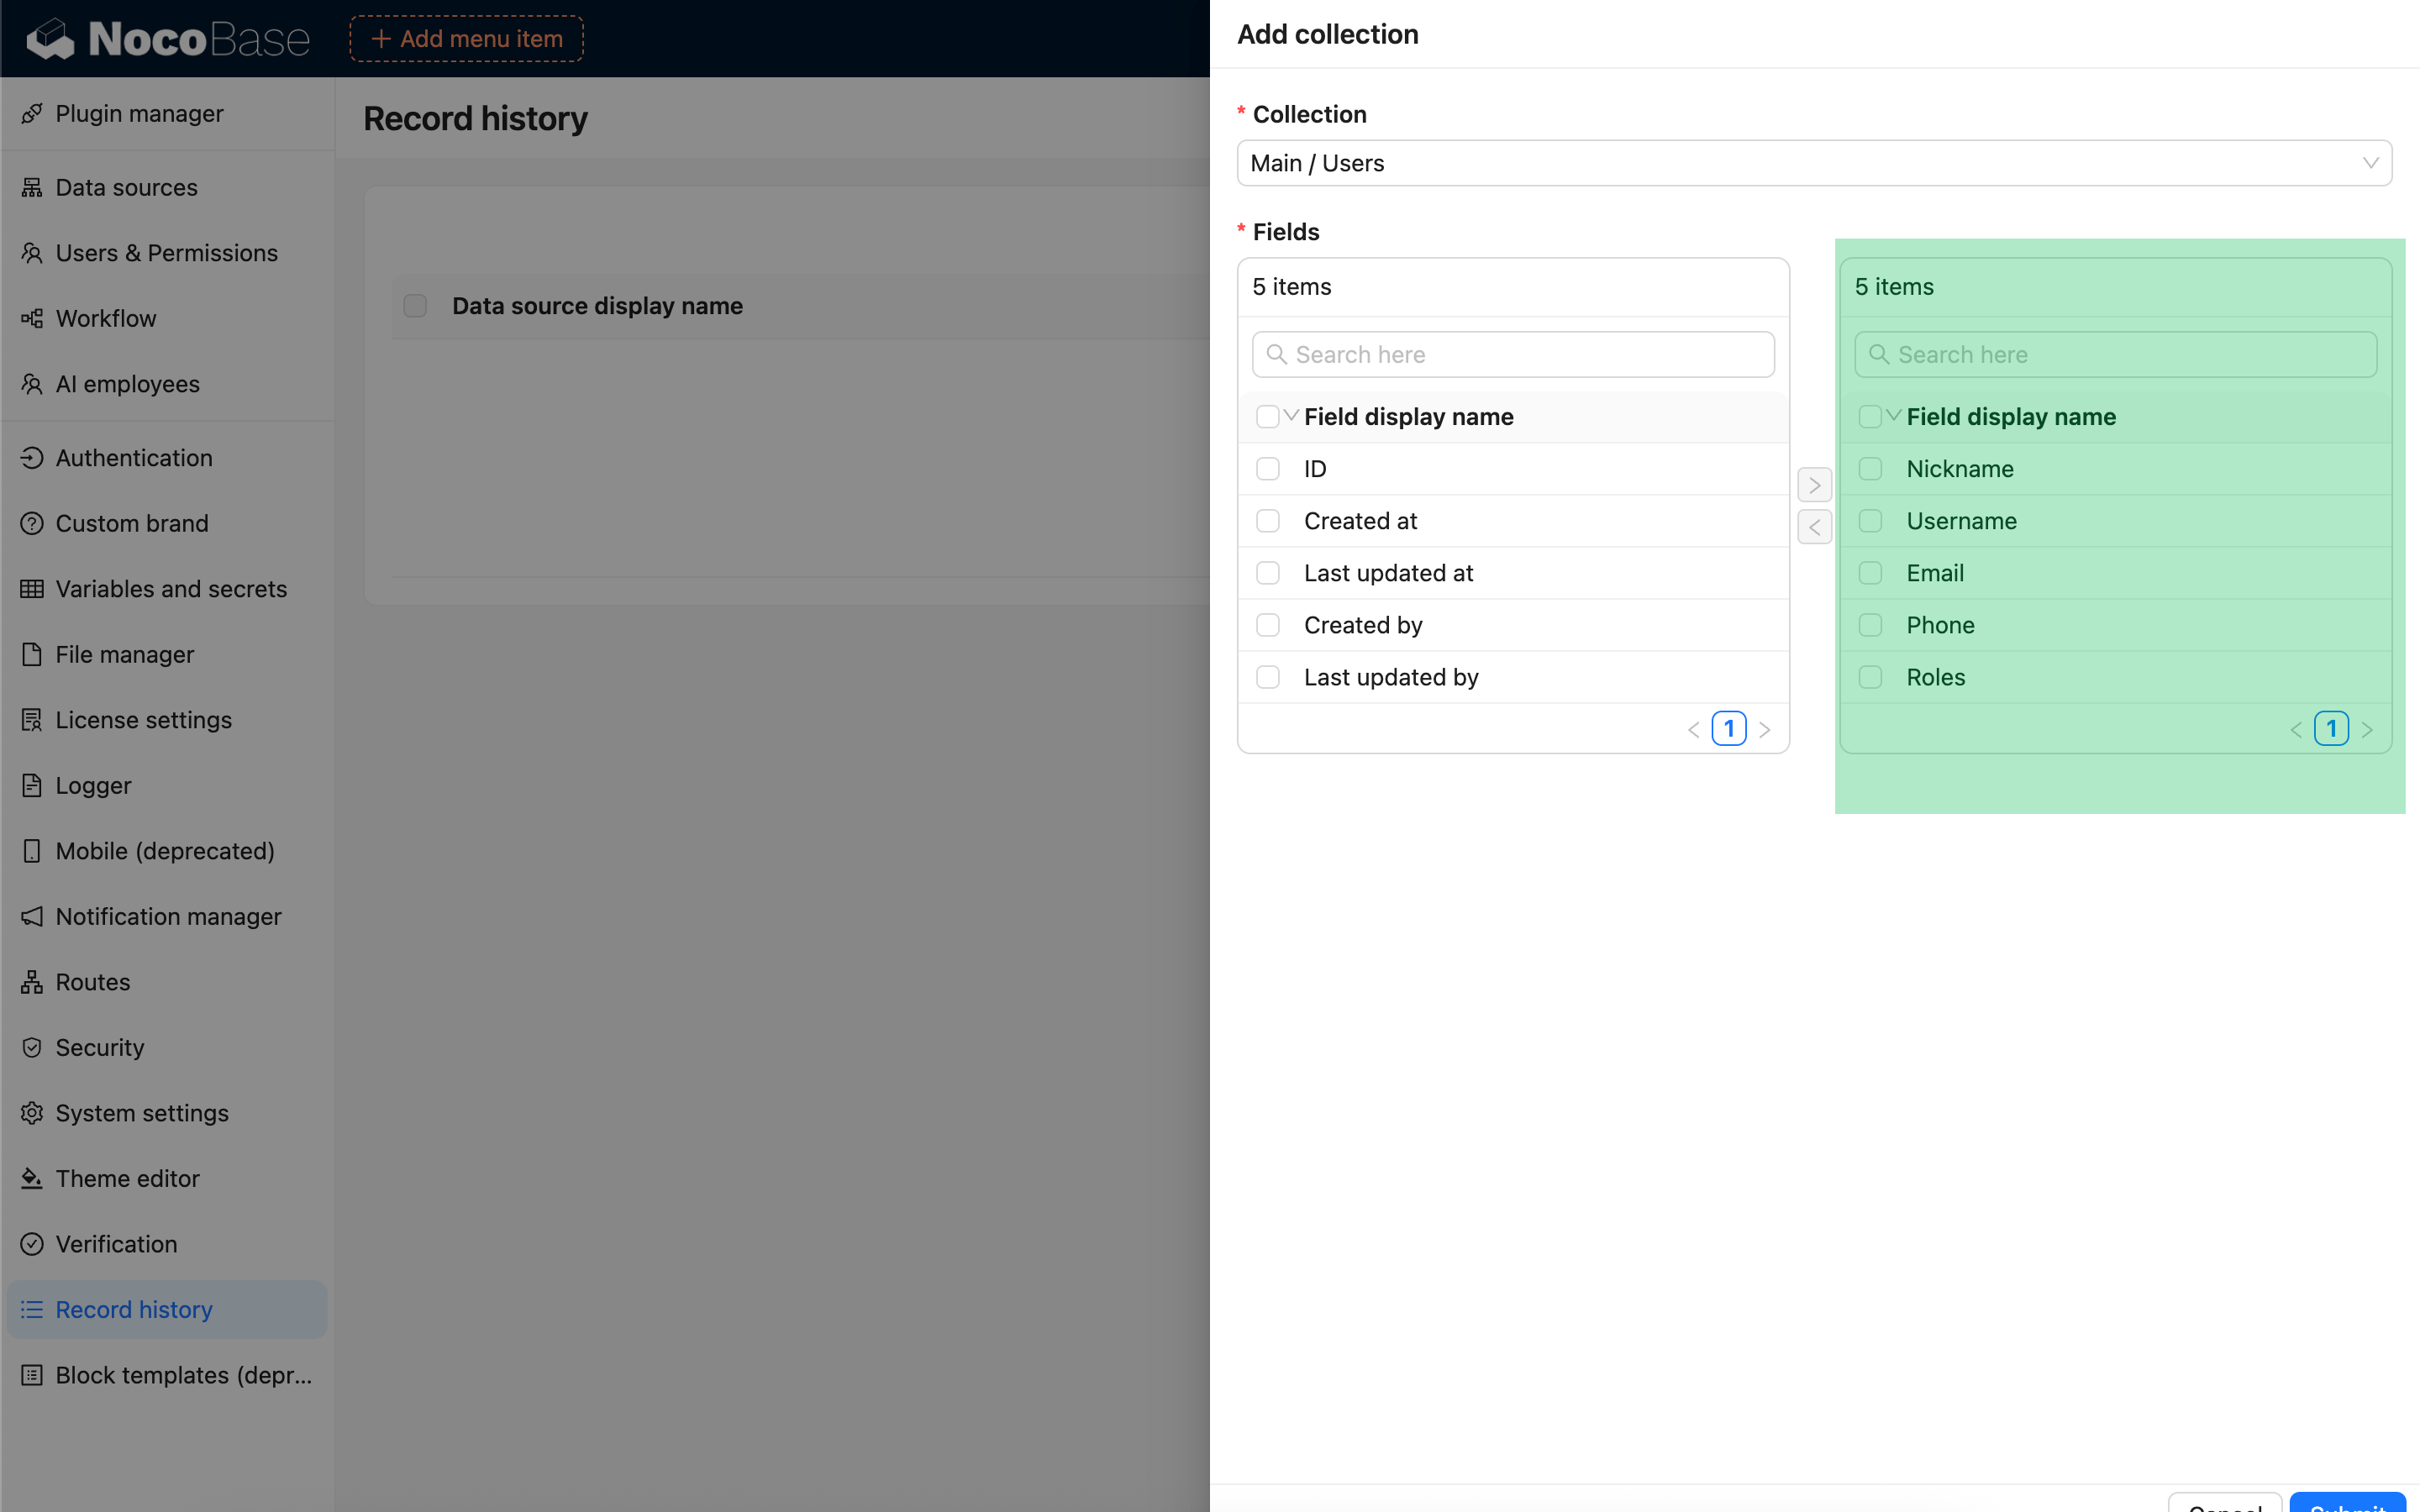
First, go to the Record History plugin settings page to add the collections and fields for which you want to track history. To improve recording efficiency and avoid data redundancy, it is recommended to track only essential fields. Fields such as unique ID, createdAt, updatedAt, createdBy, and updatedBy usually do not need to be recorded.
Sync Historical Data Snapshots
- For records created before history tracking is enabled, changes can only be logged after the first update generates a snapshot; the initial update or deletion will not be recorded.
- To preserve the history of existing data, you can perform a one-time snapshot sync.
- The snapshot size per collection is calculated as: number of records × number of tracked fields.
- For large datasets, it is recommended to filter by data scope and sync only important records.
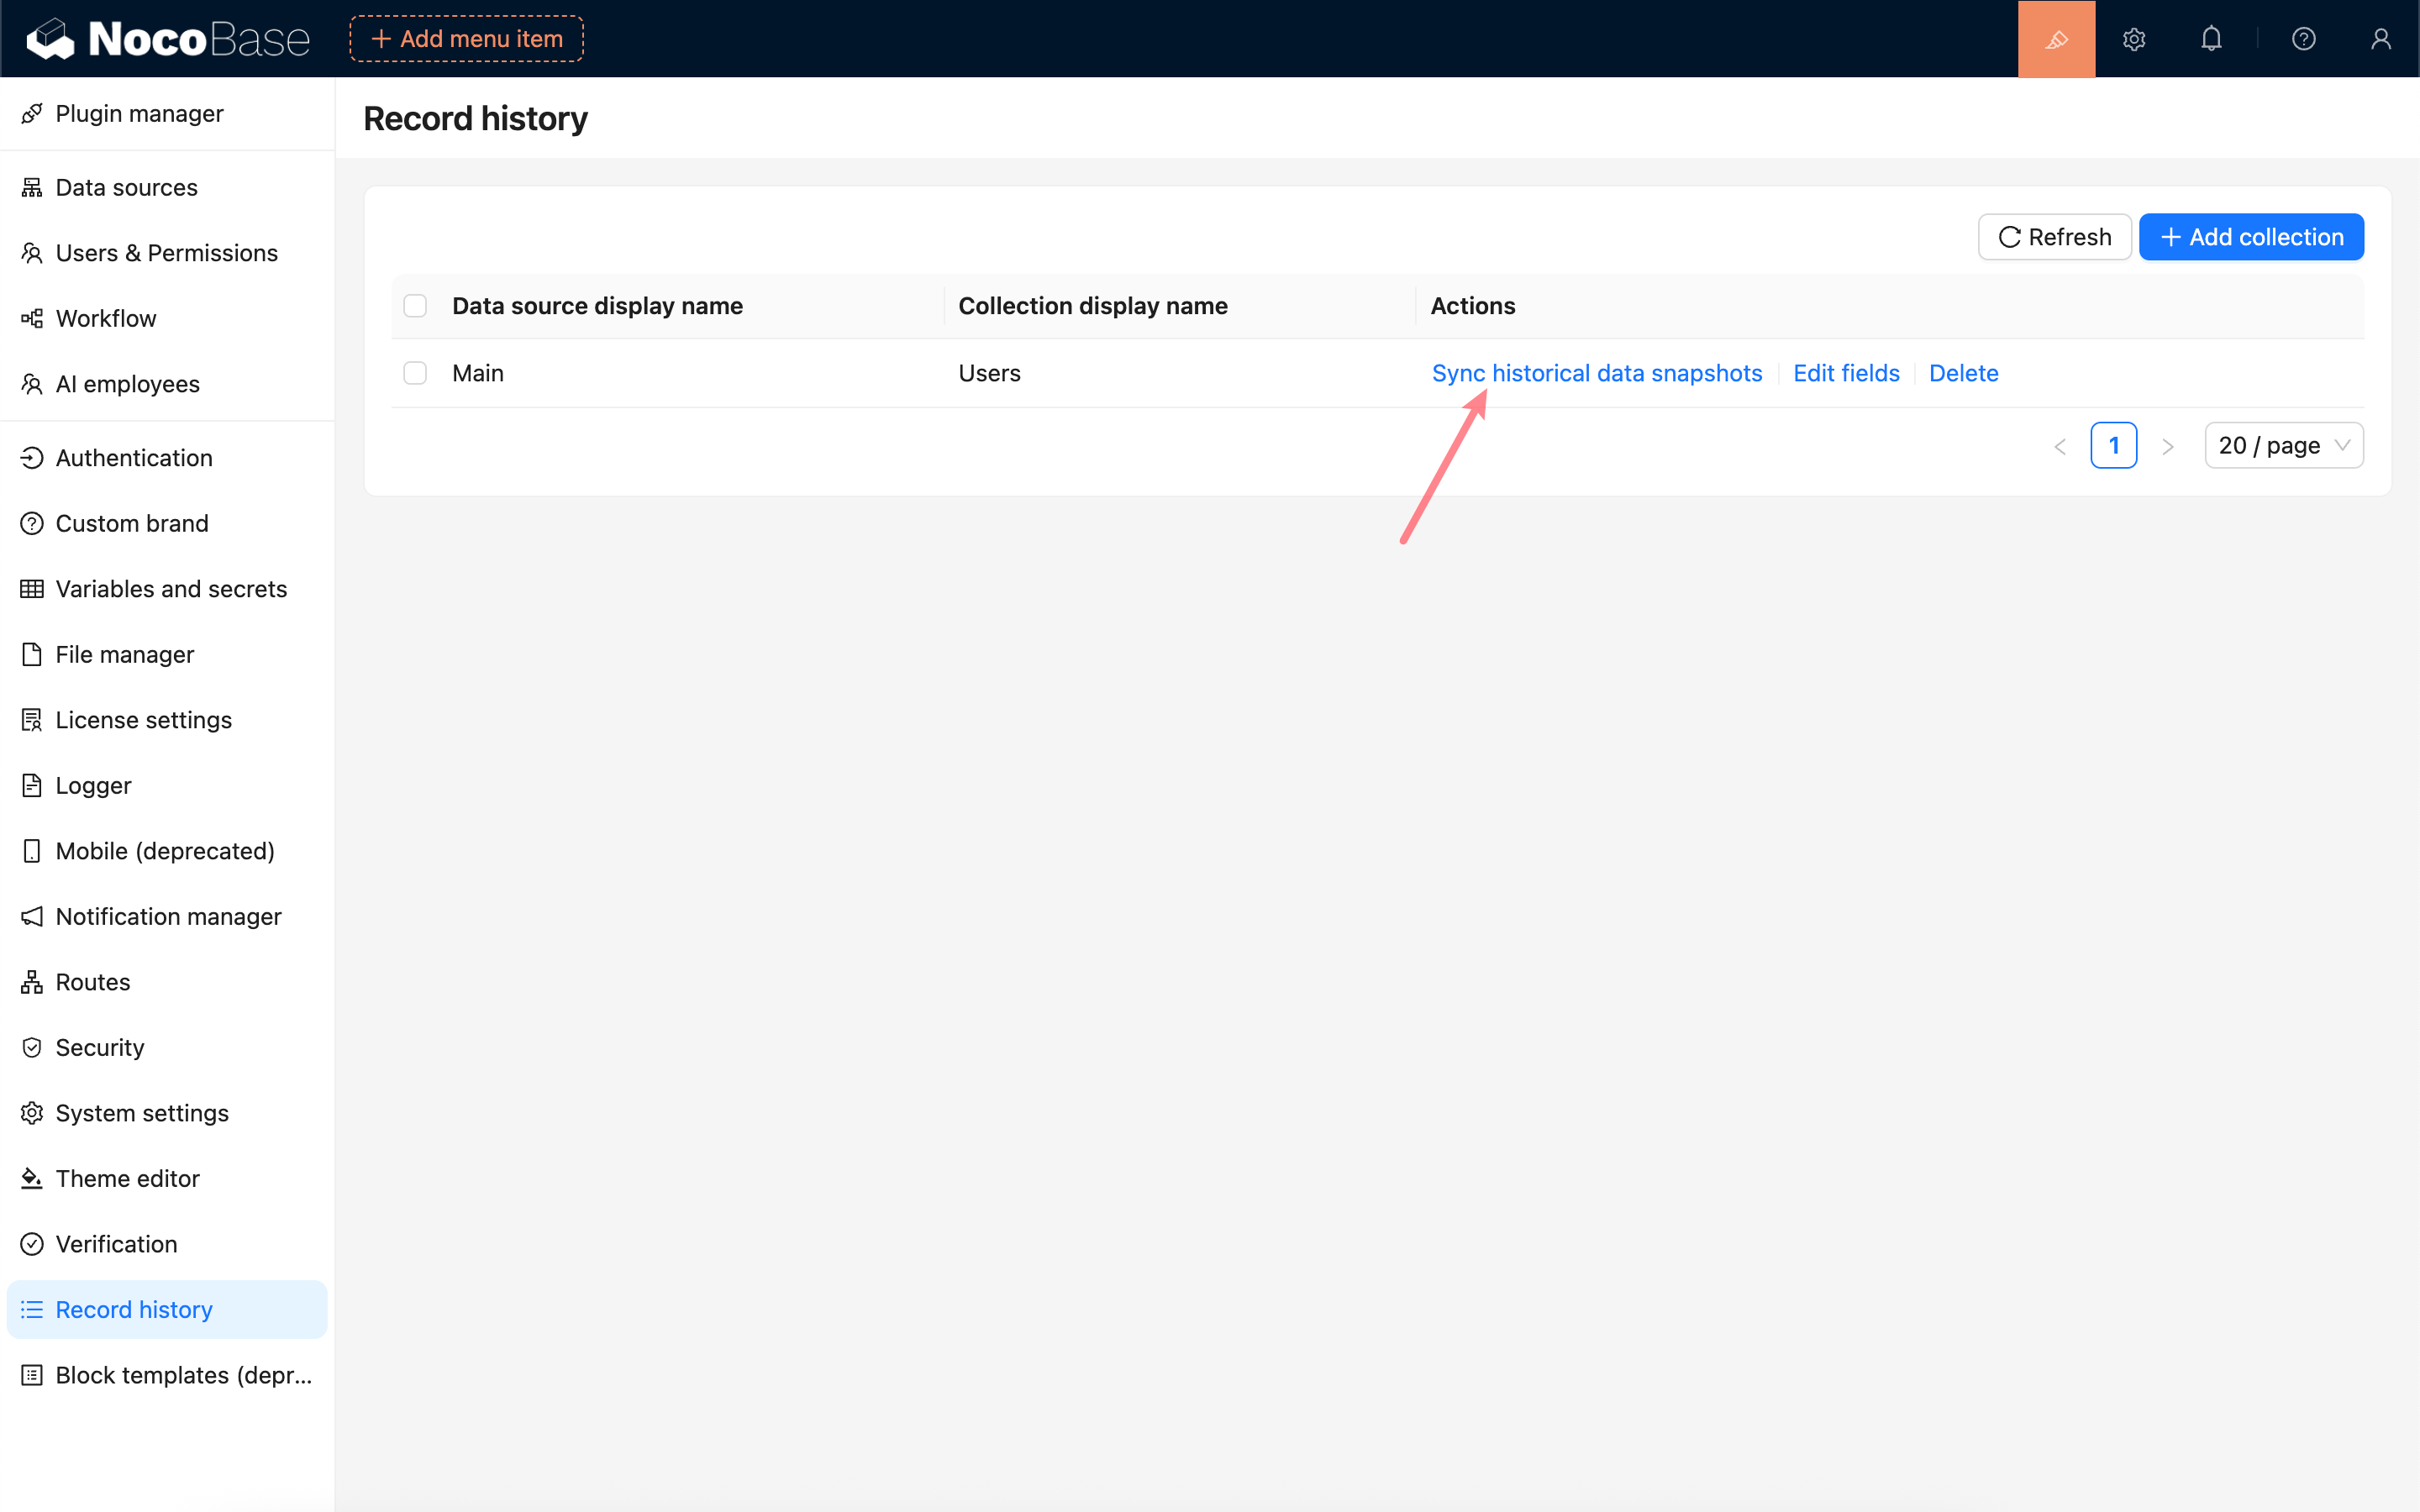
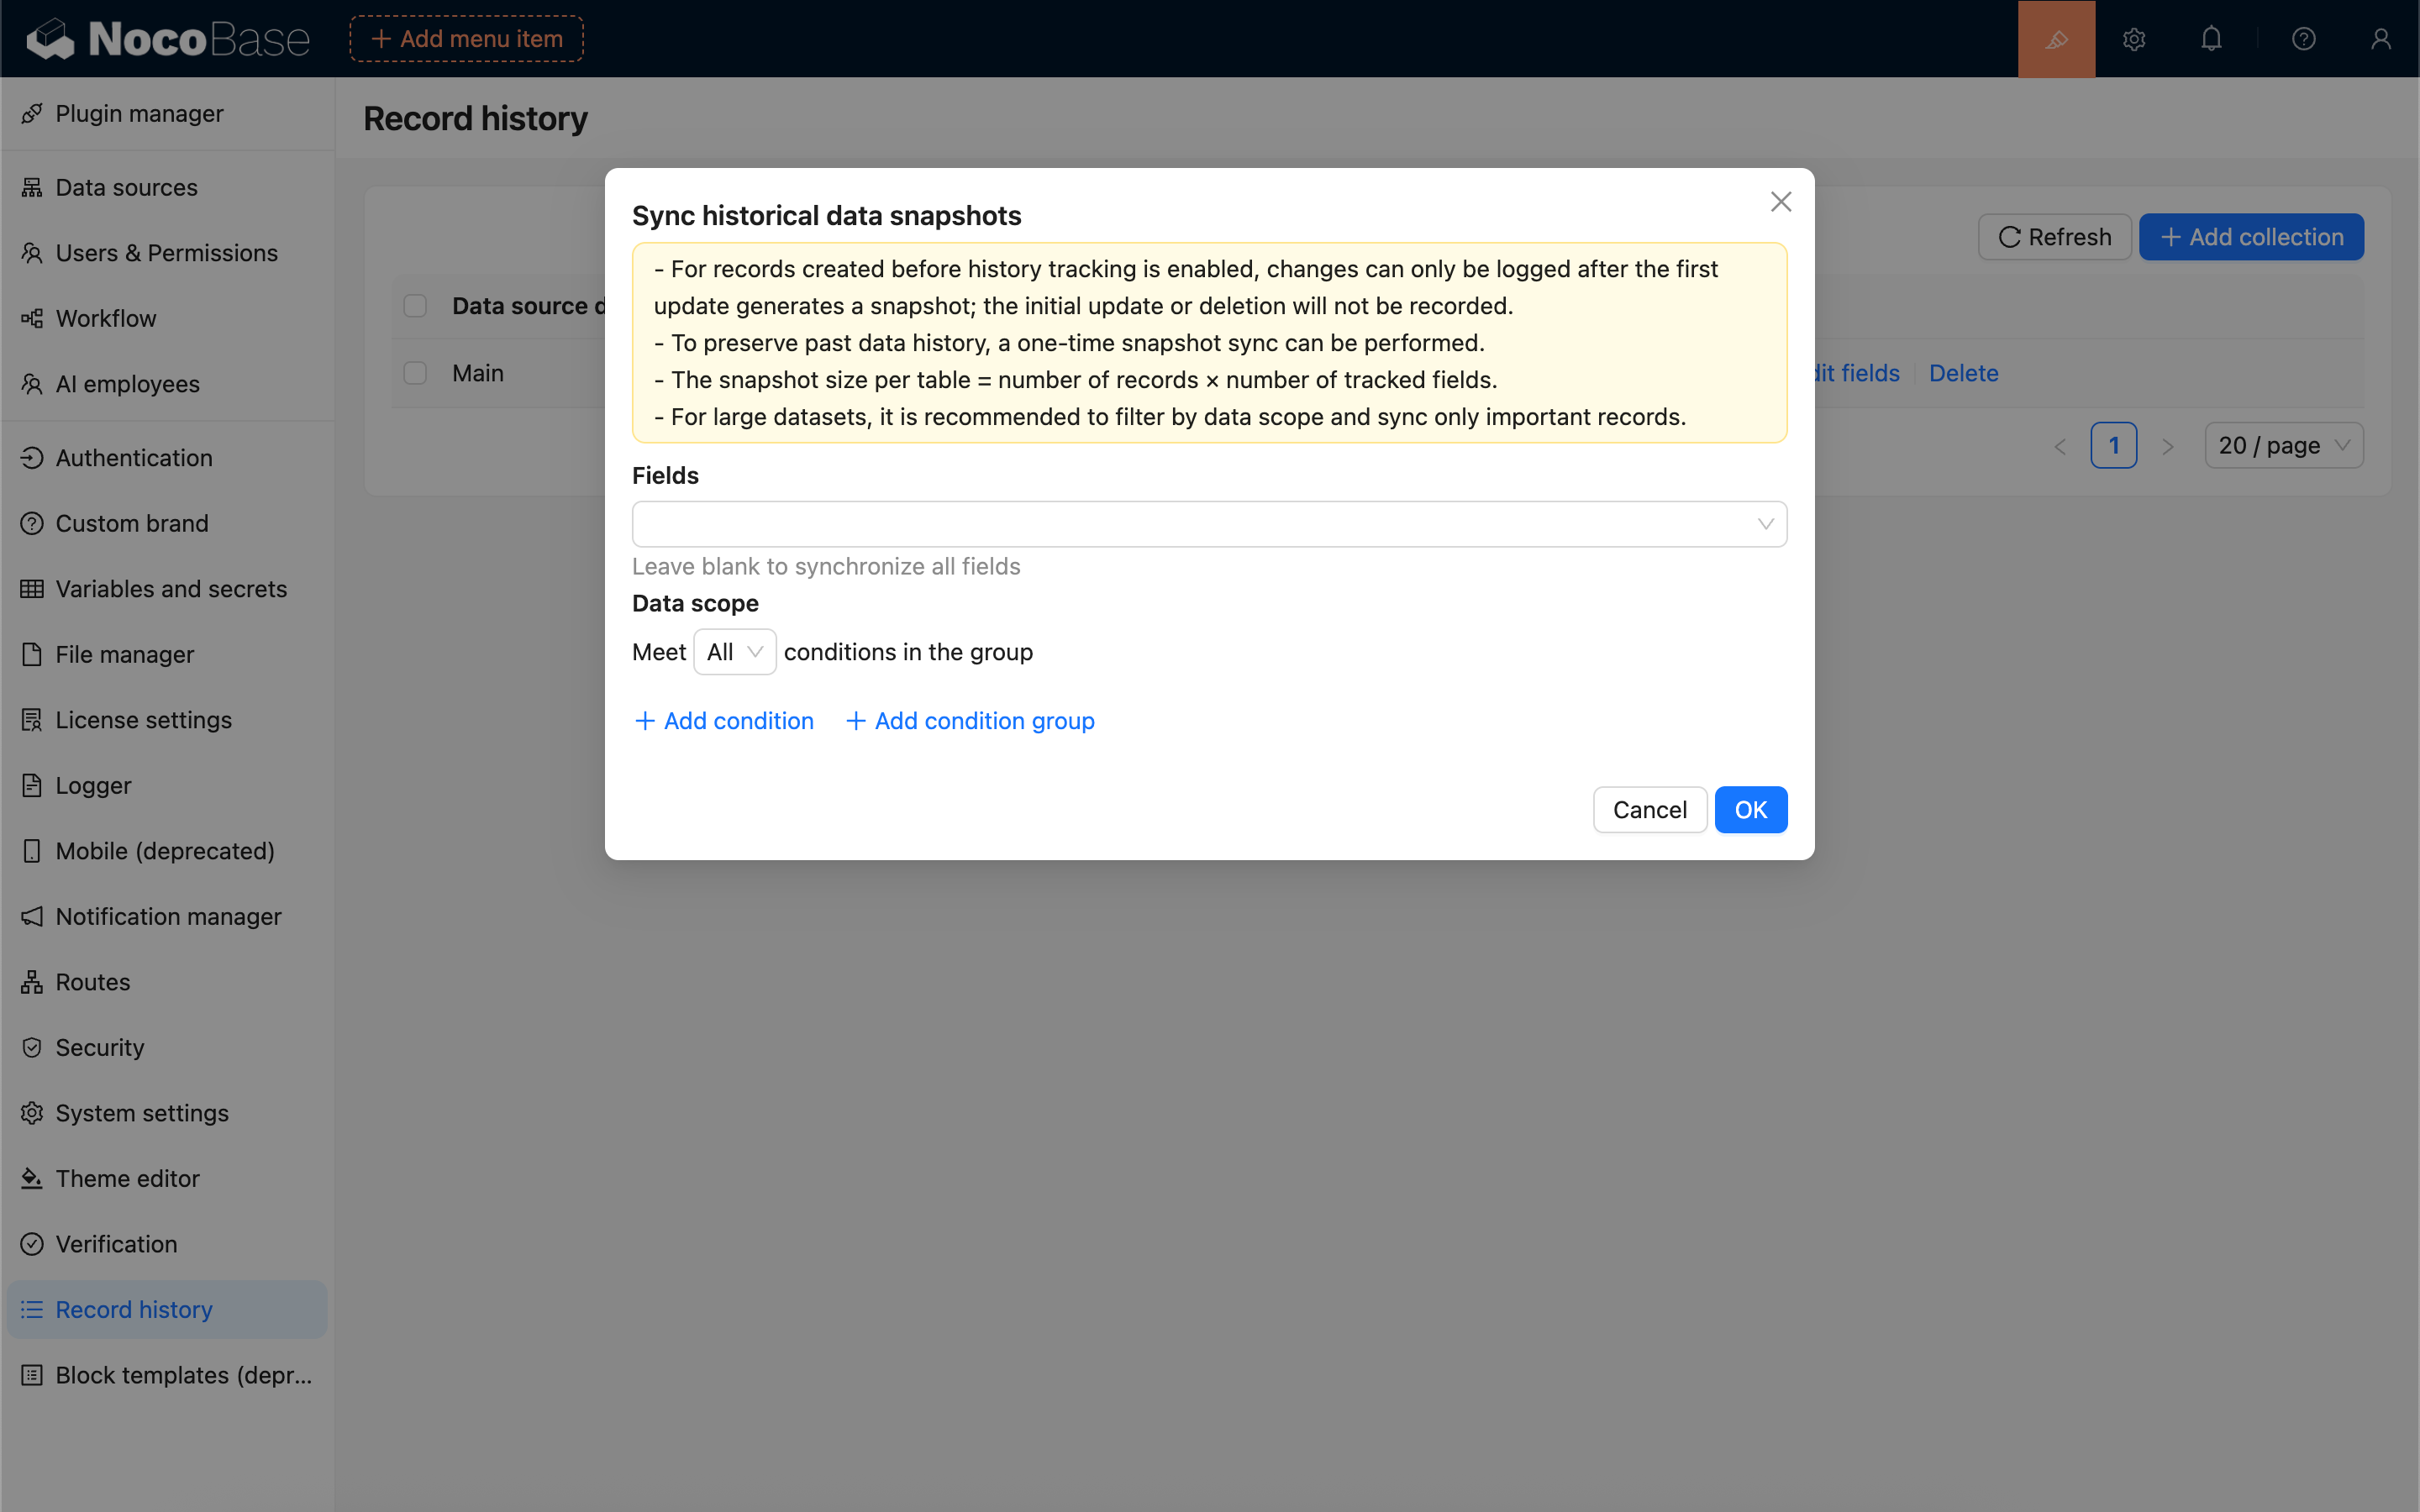
Click “Sync Historical Snapshots”, configure the fields and data scope, and start the synchronization.
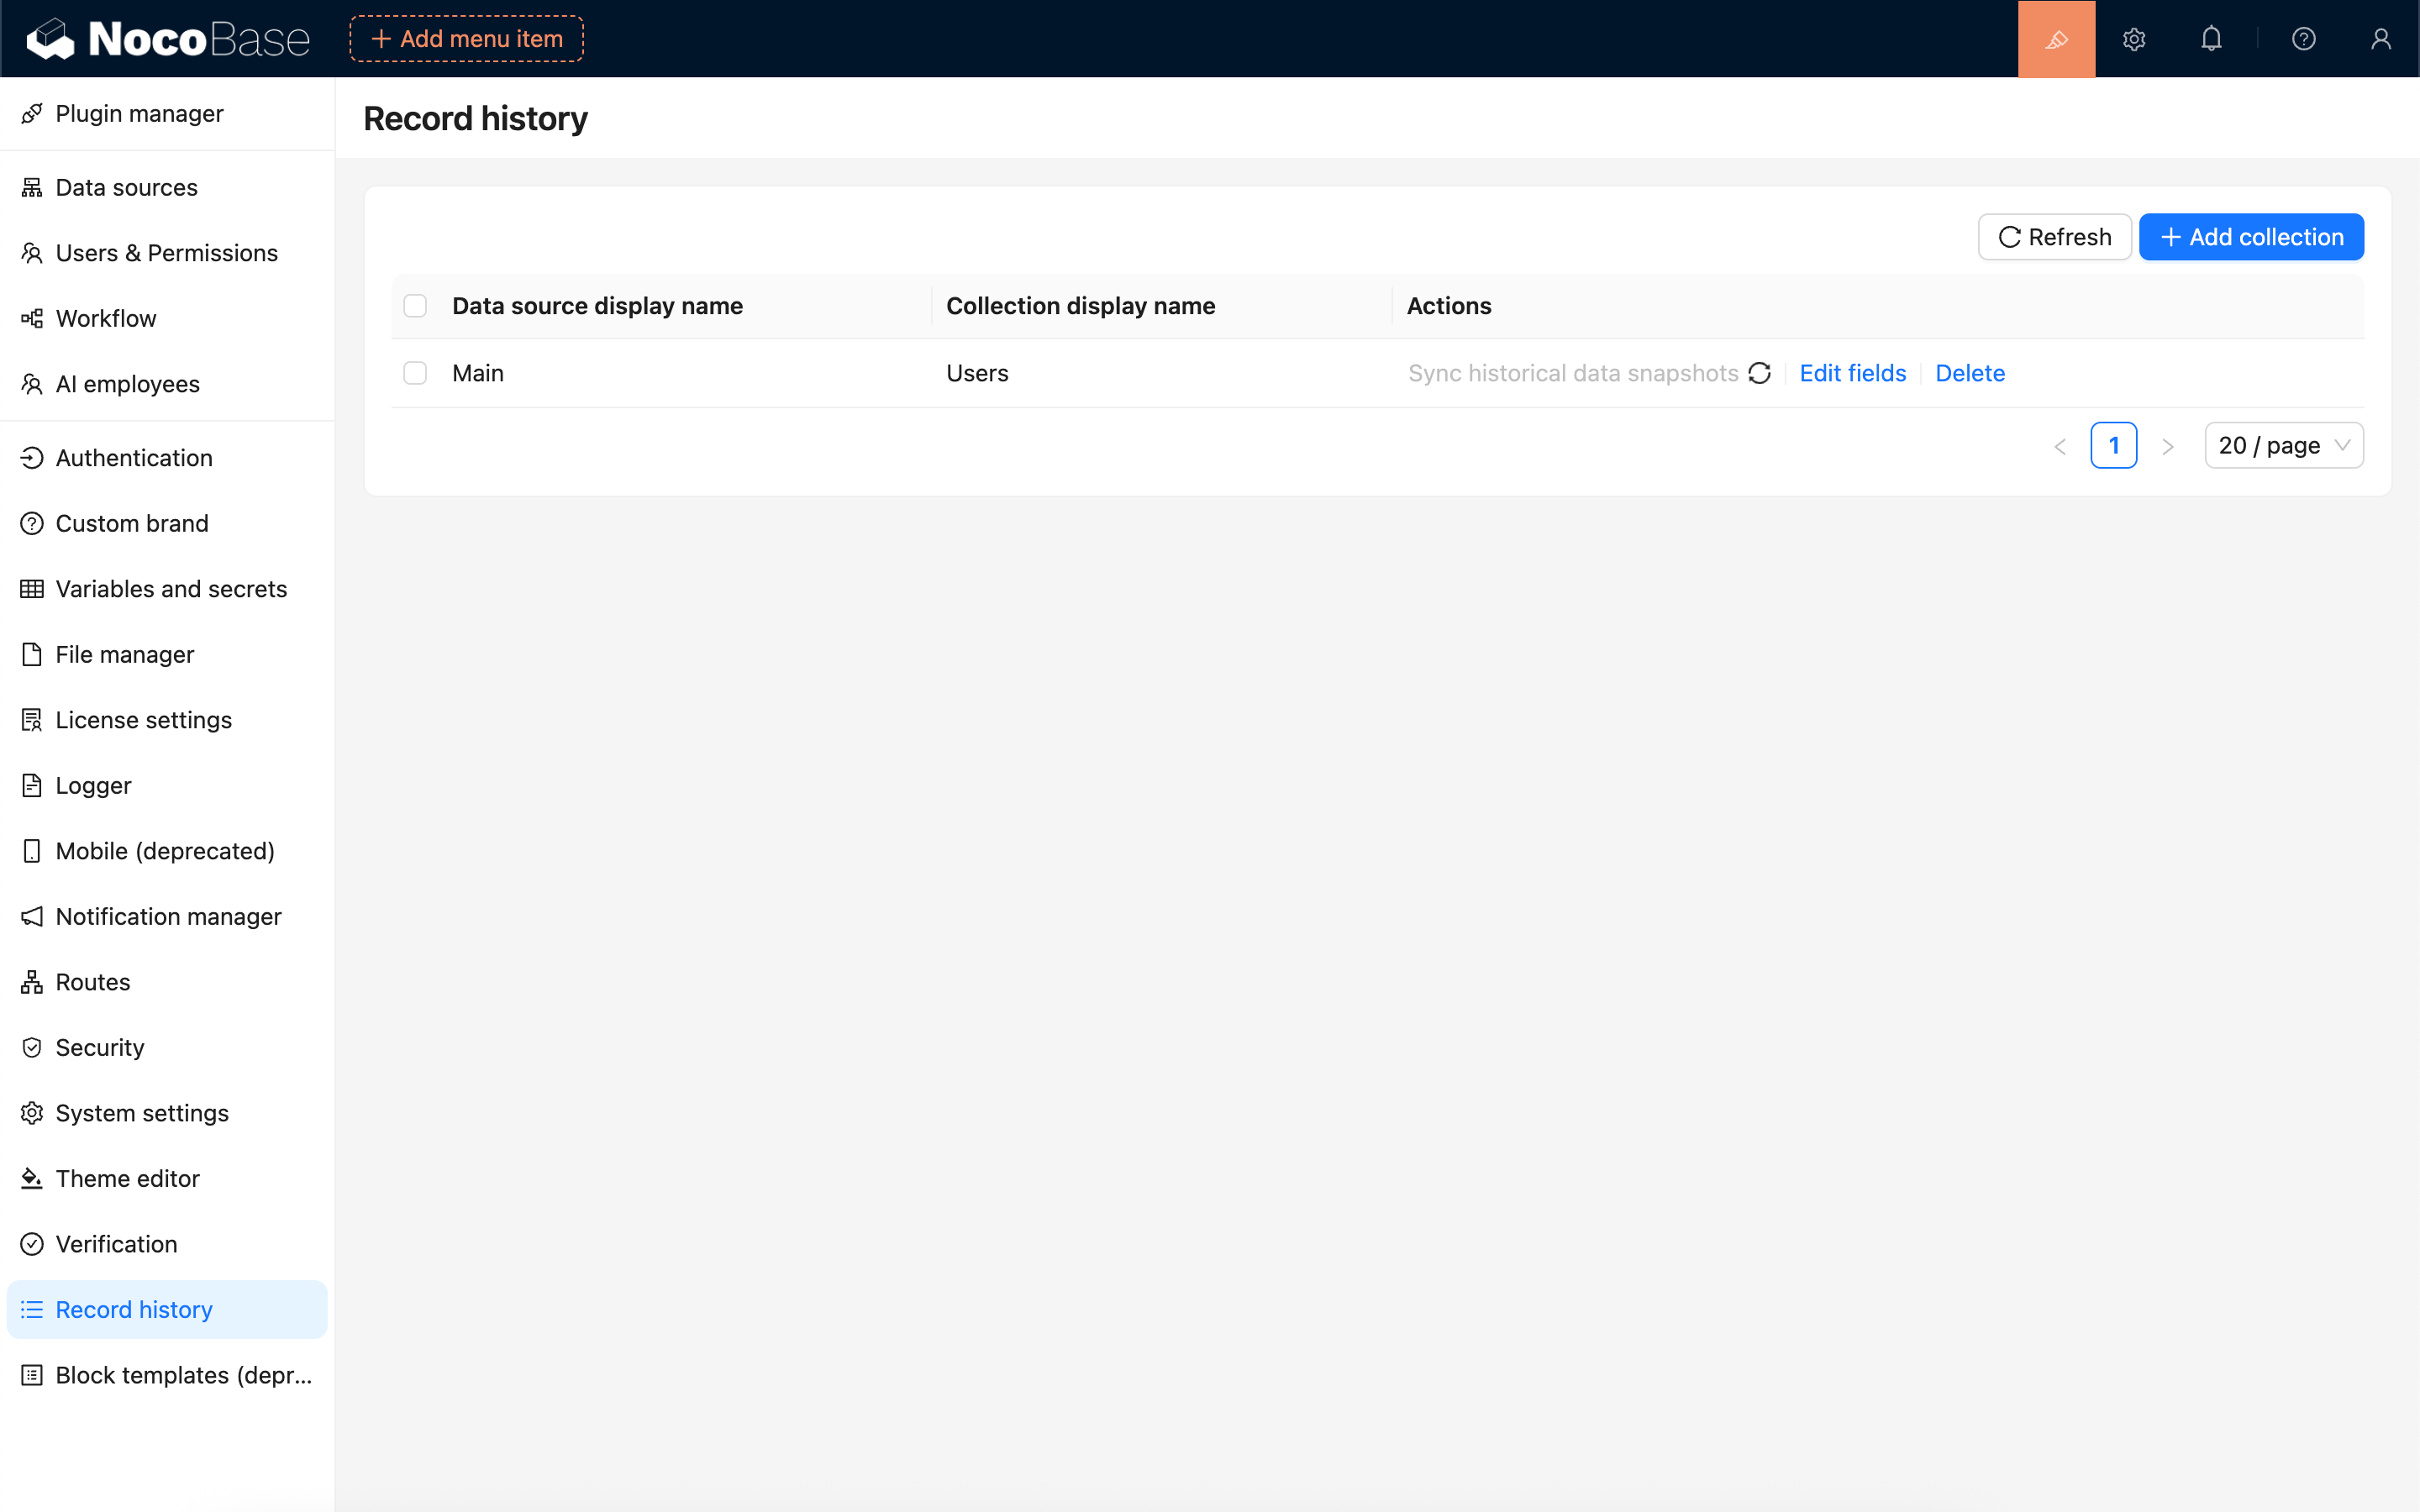
The synchronization task will be queued and run in the background. You can refresh the list to check its completion status.
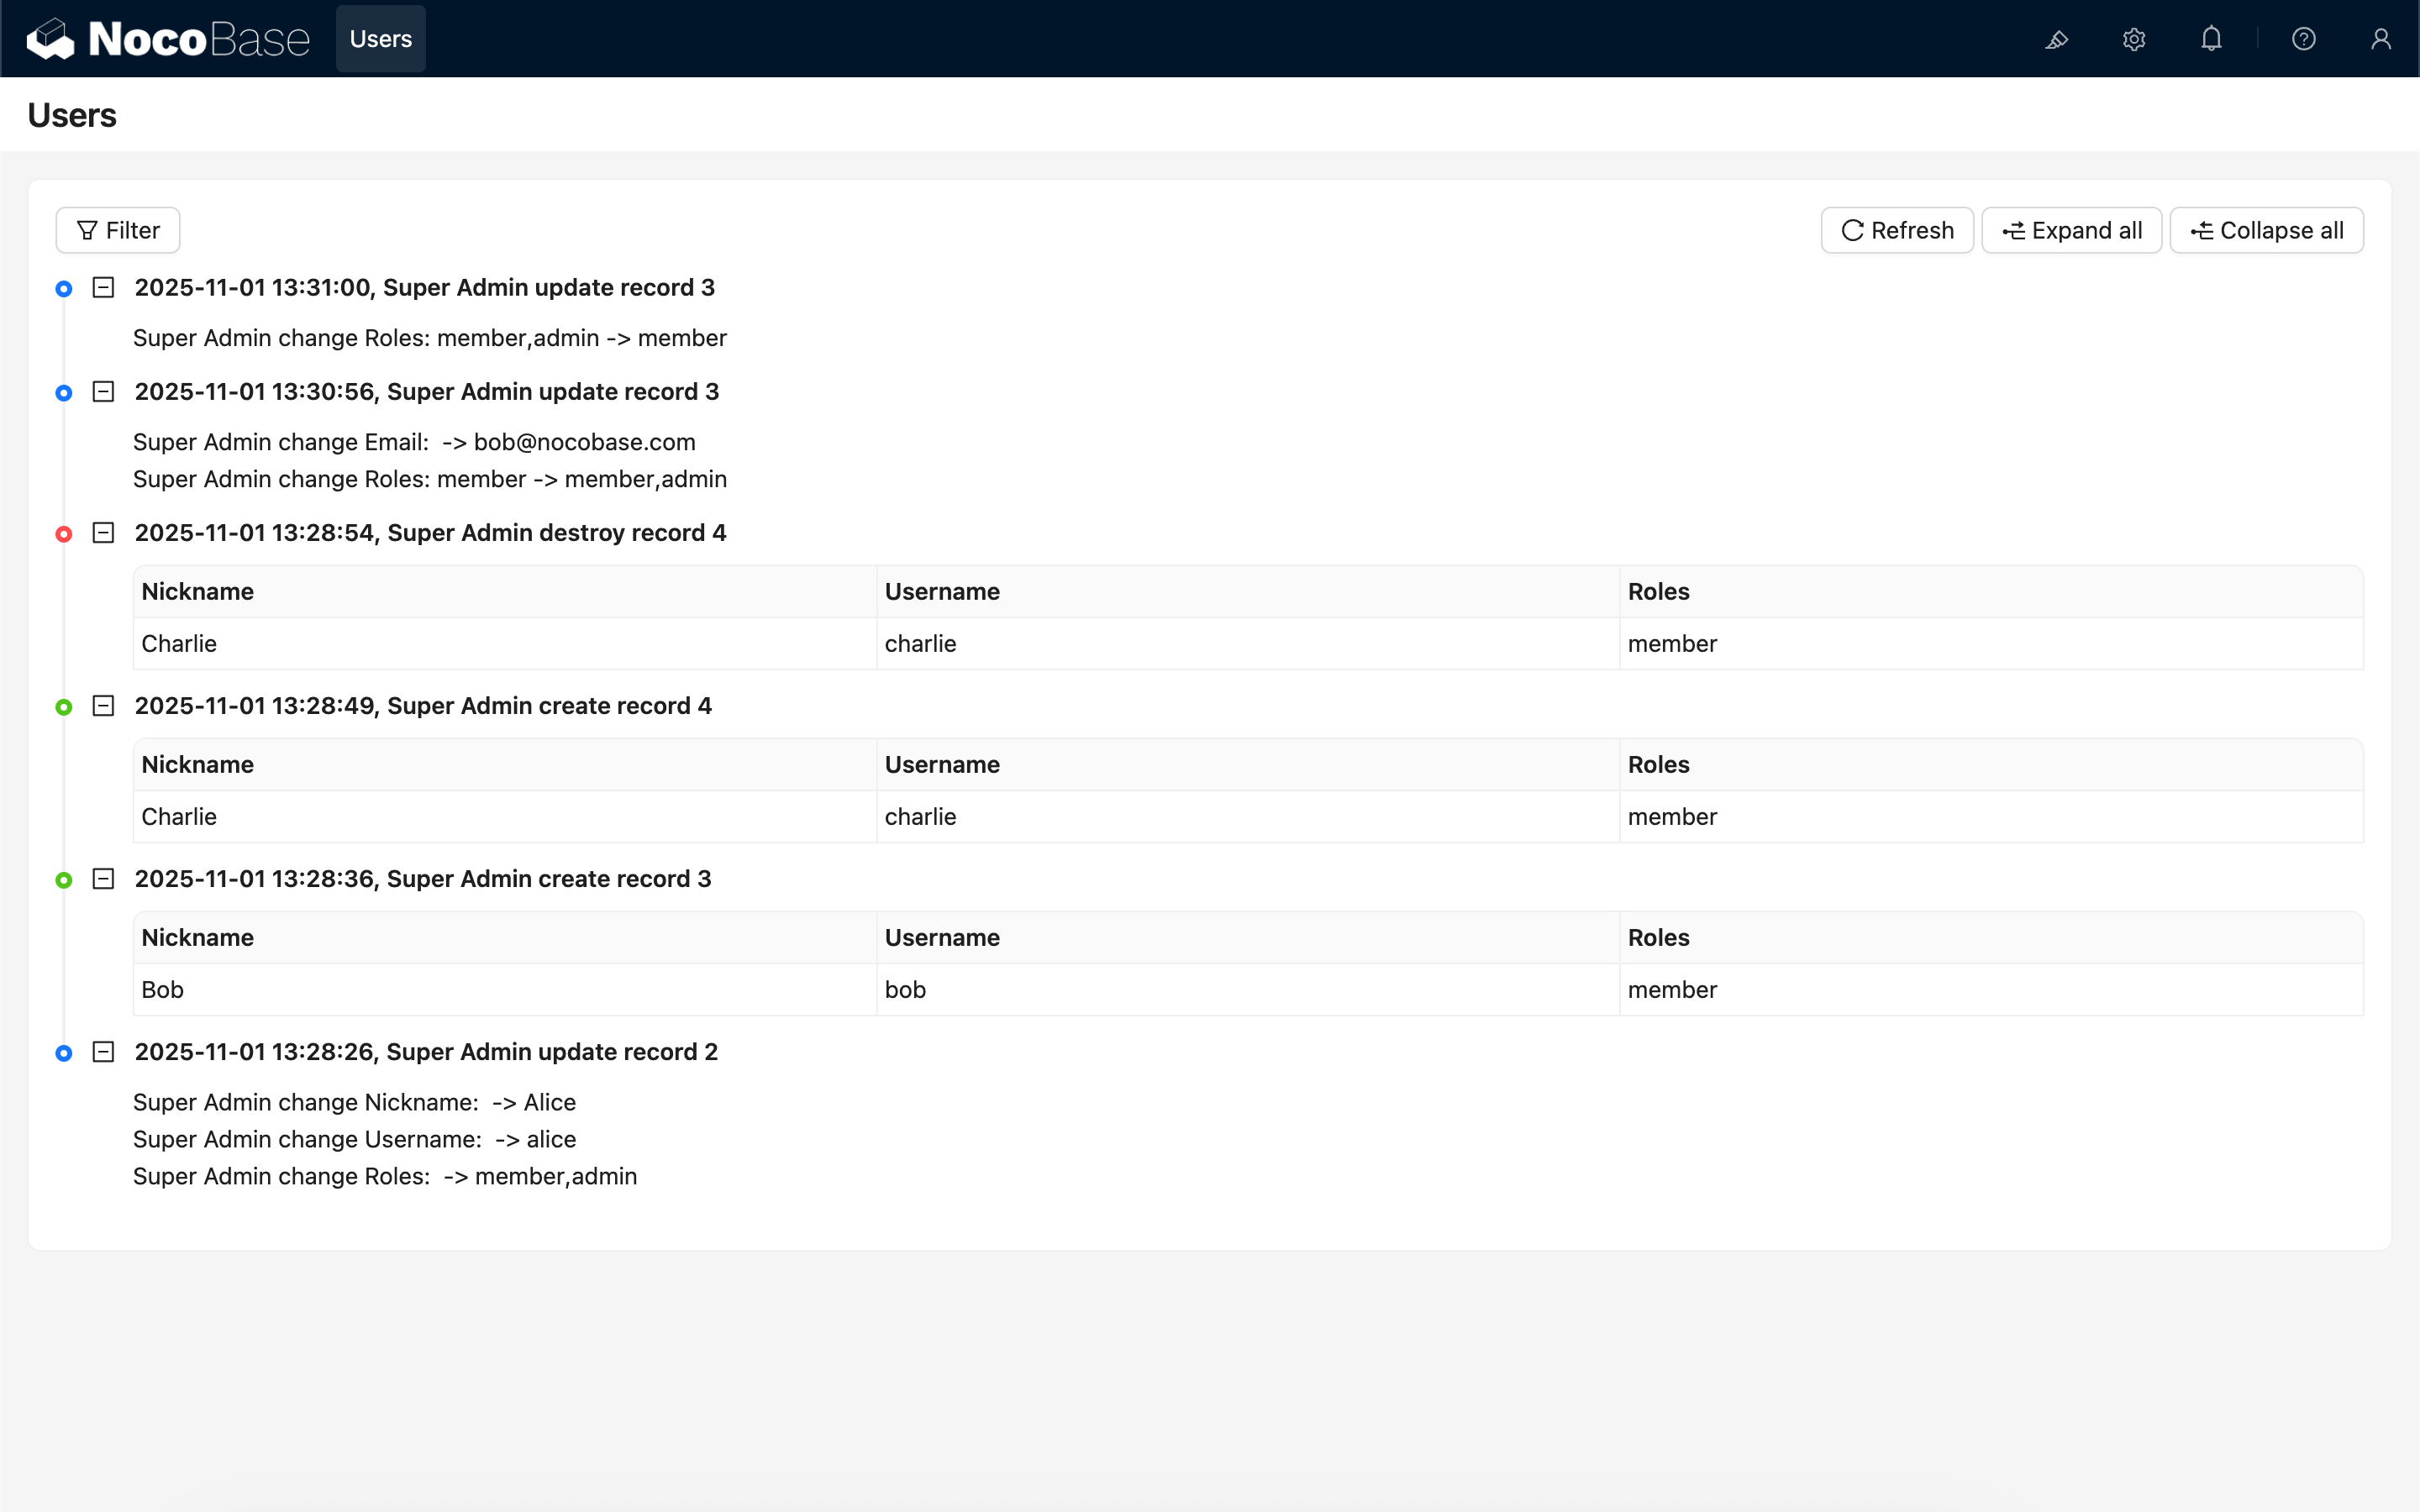
Using the Record History Block
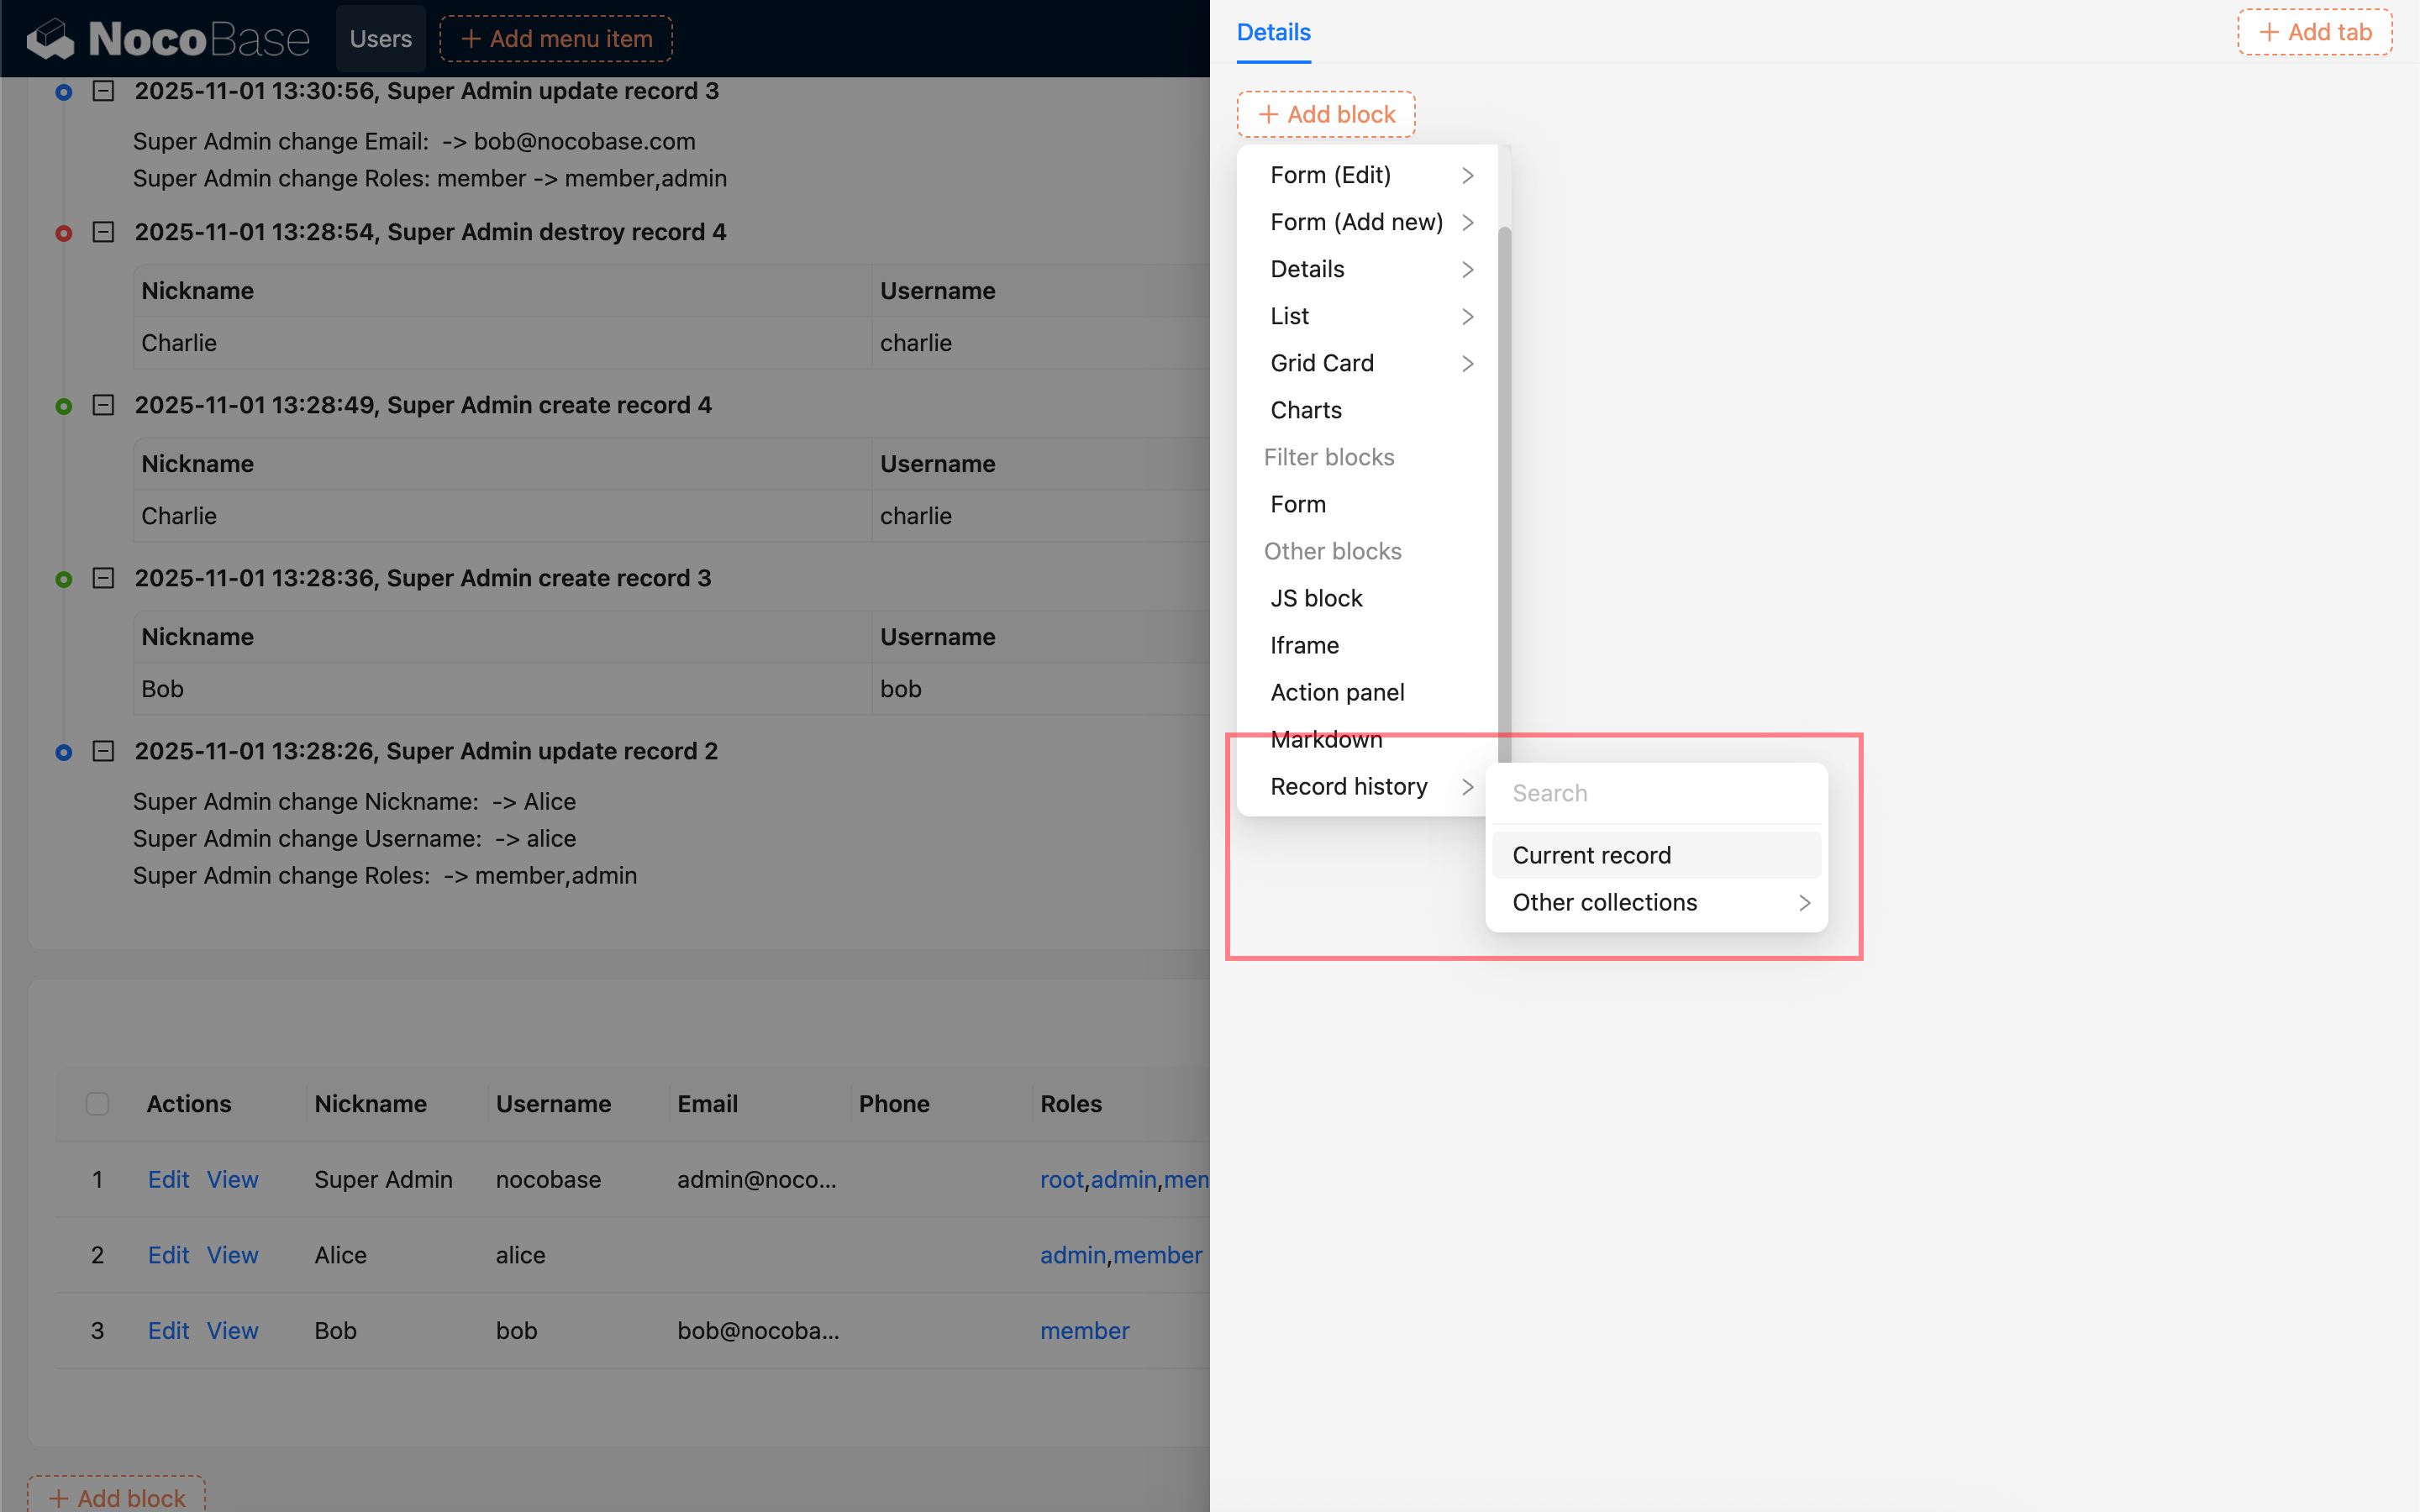
Add a Block
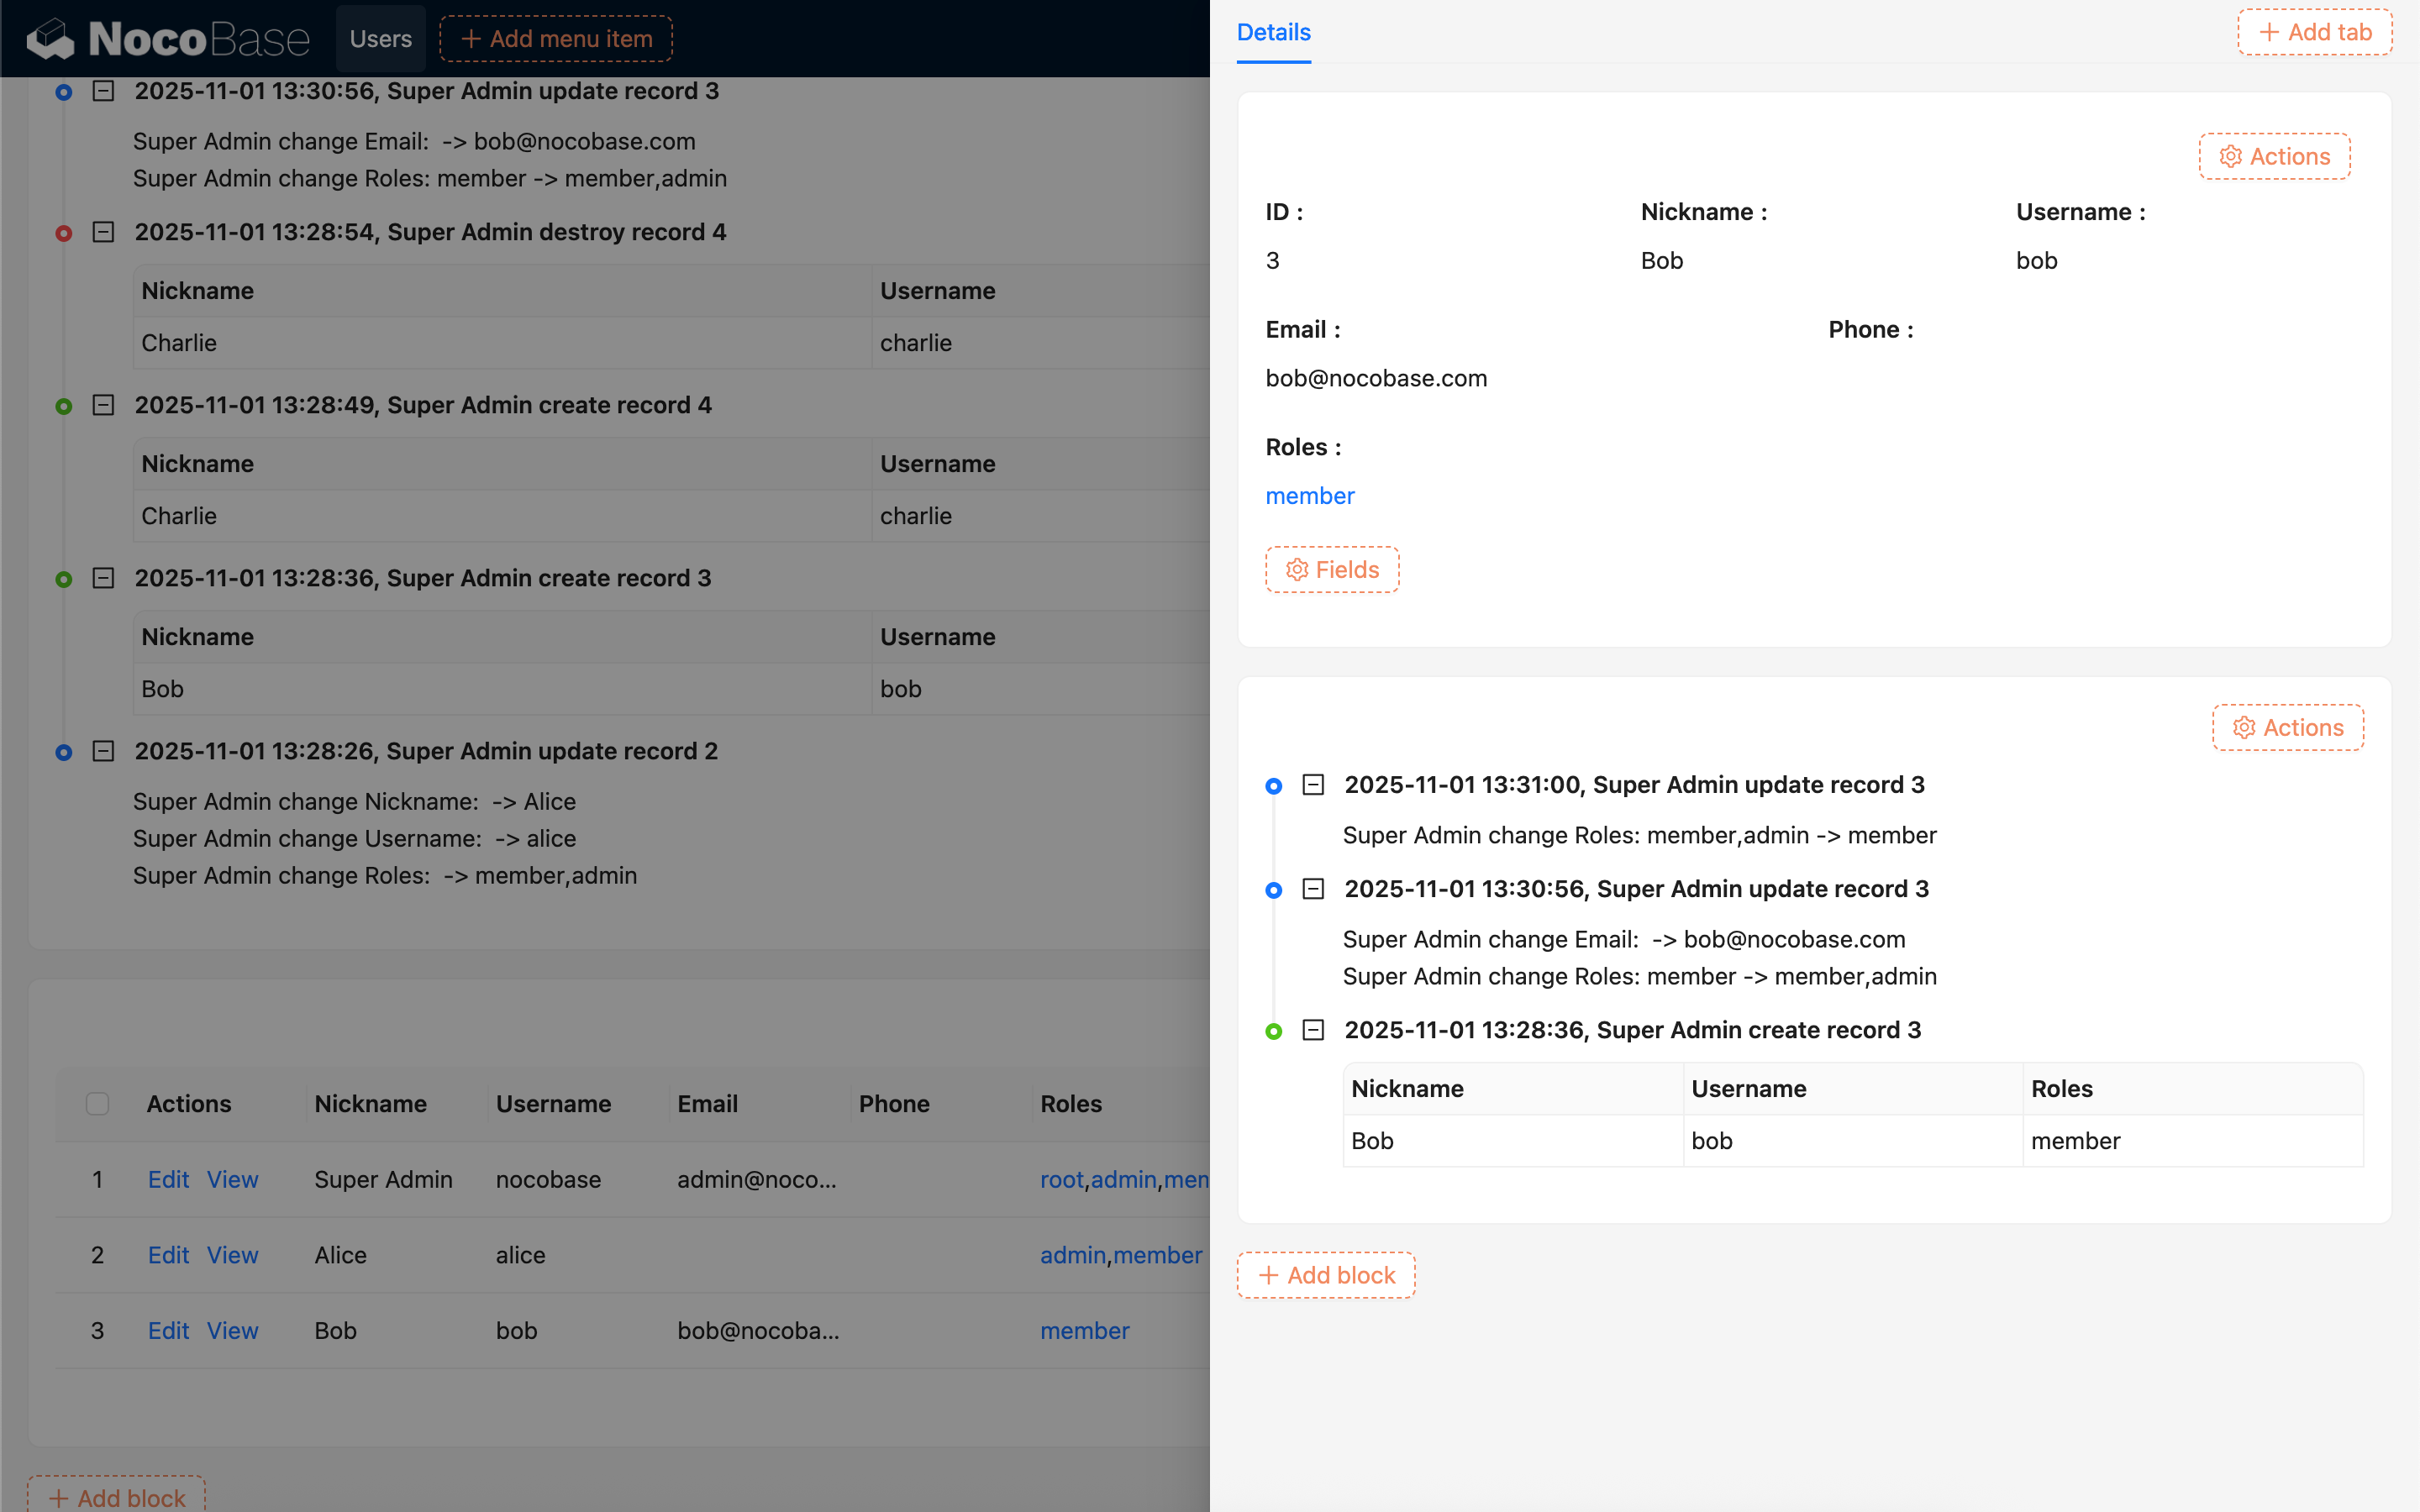
Select the Record History Block and choose a collection to add the corresponding history block to your page.
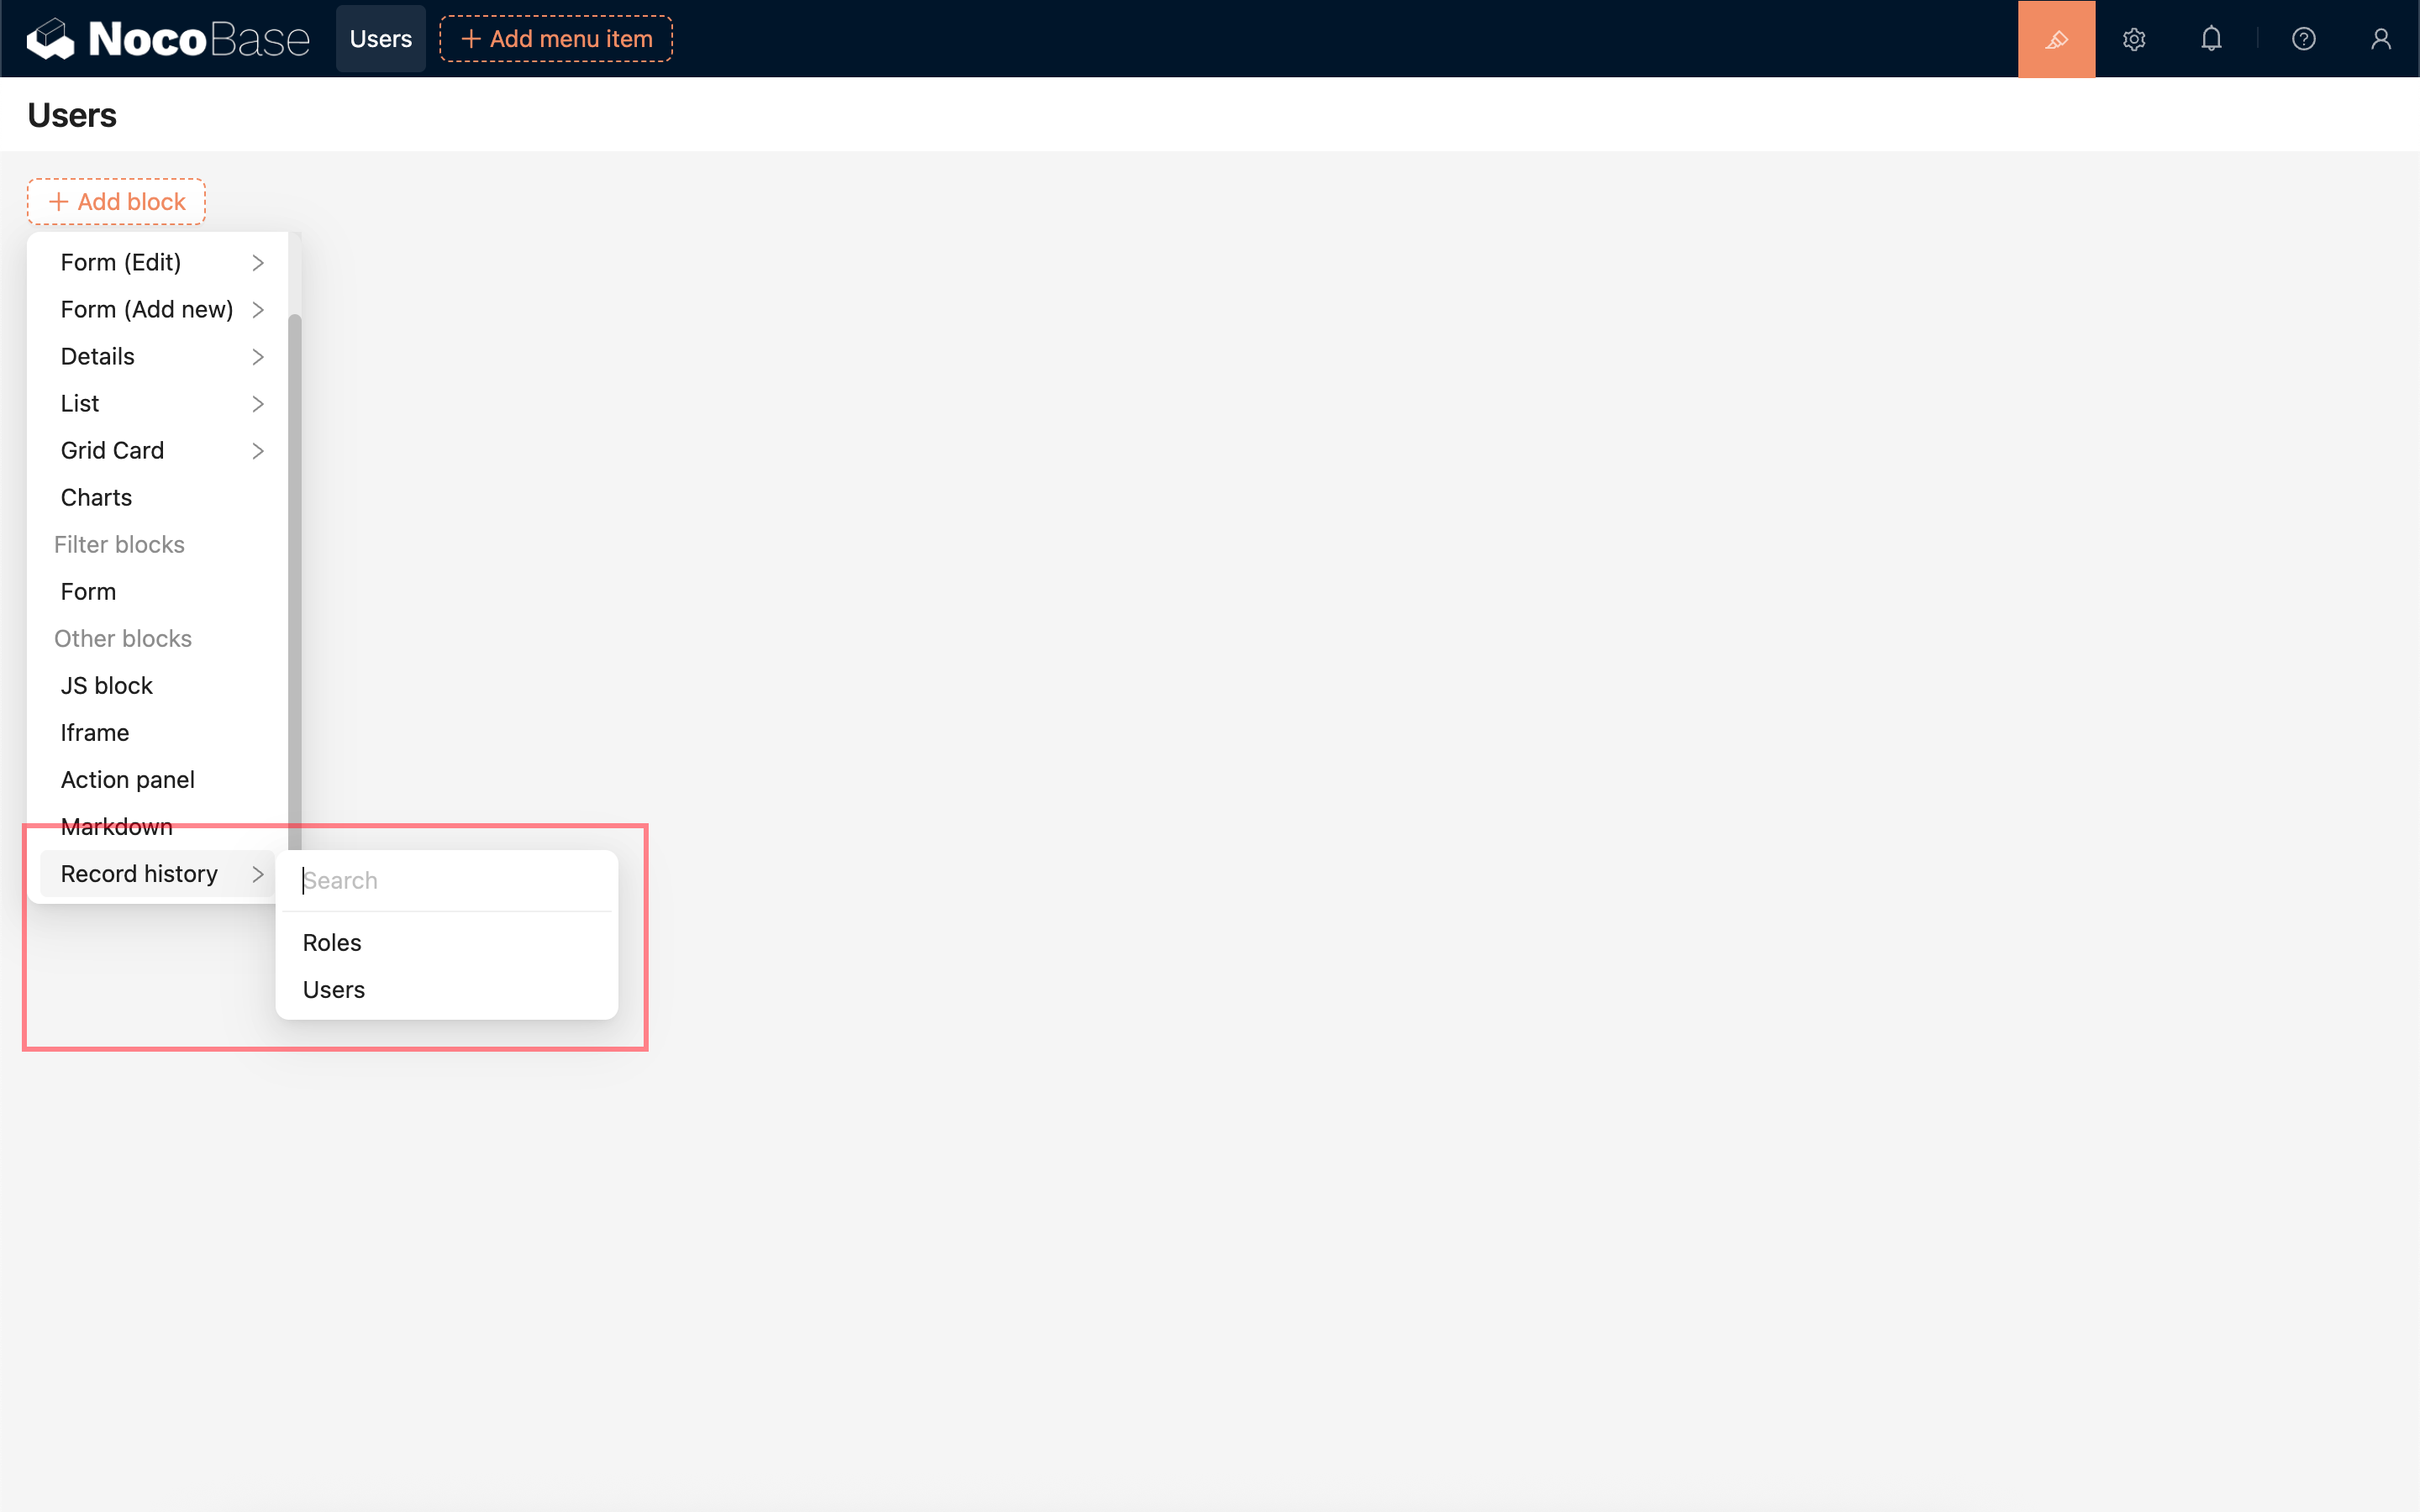
If you are adding a history block inside a record's details pop-up, you can select “Current Record” to display the history specific to that record.
Edit Description Templates
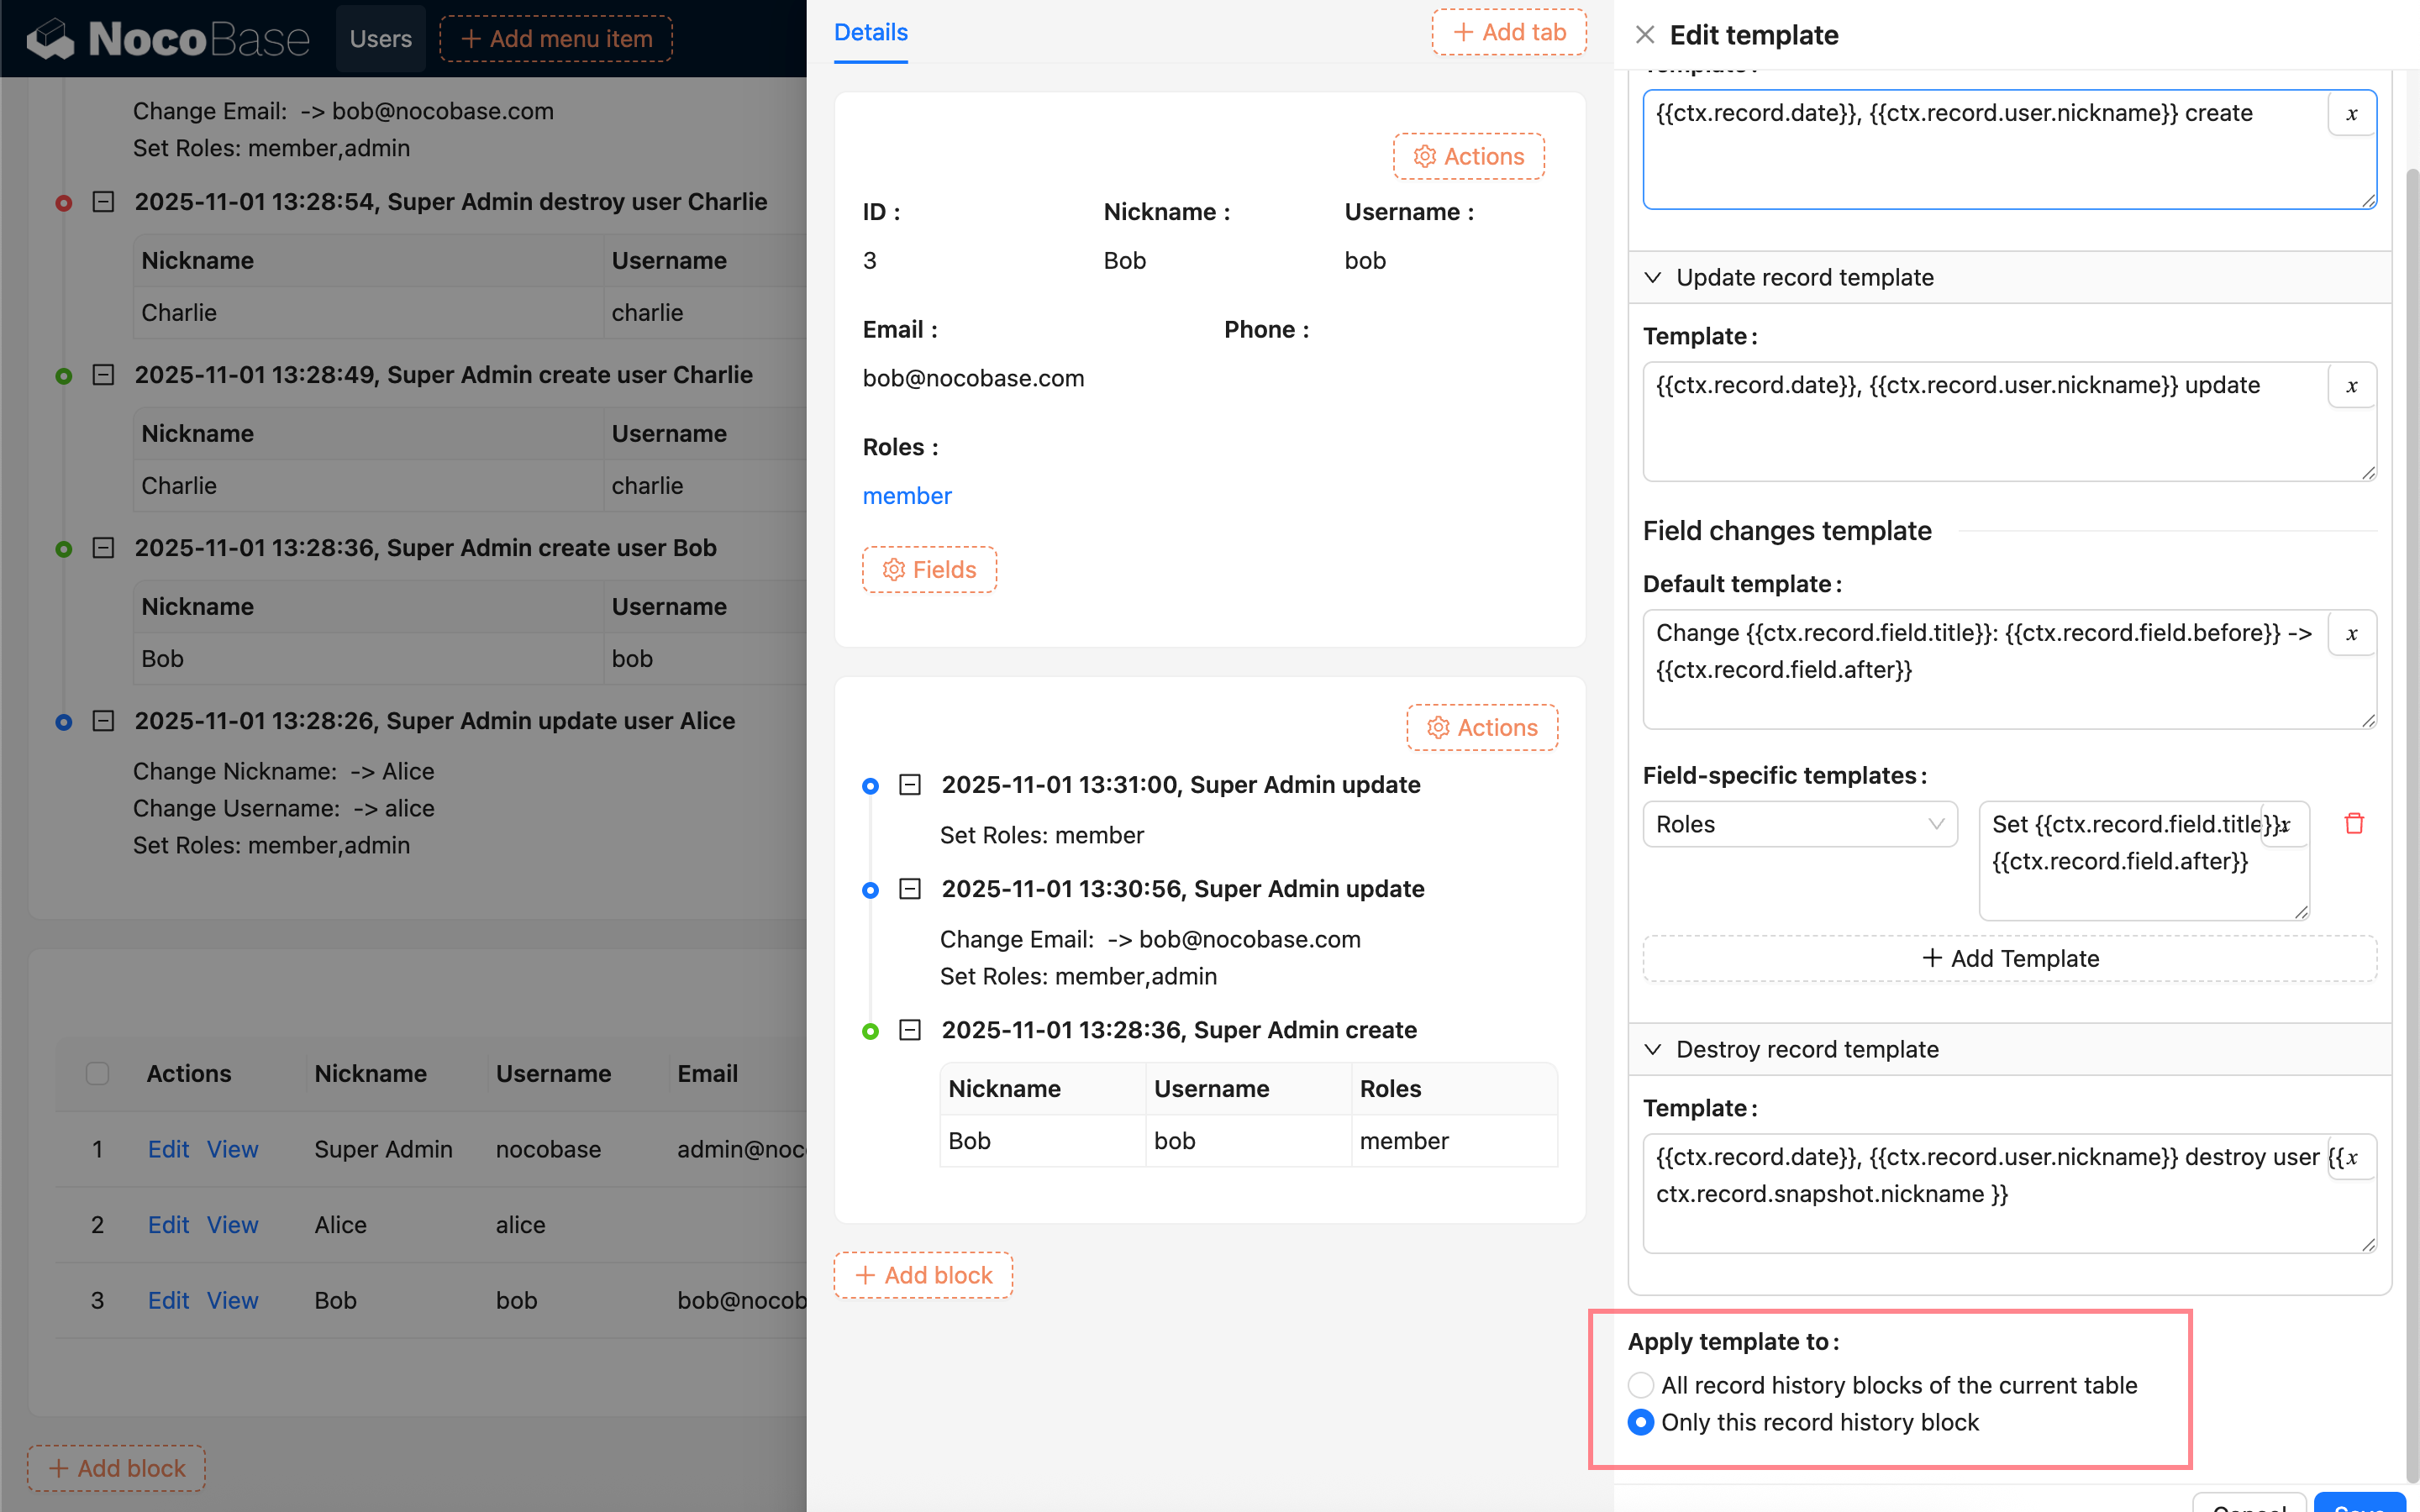
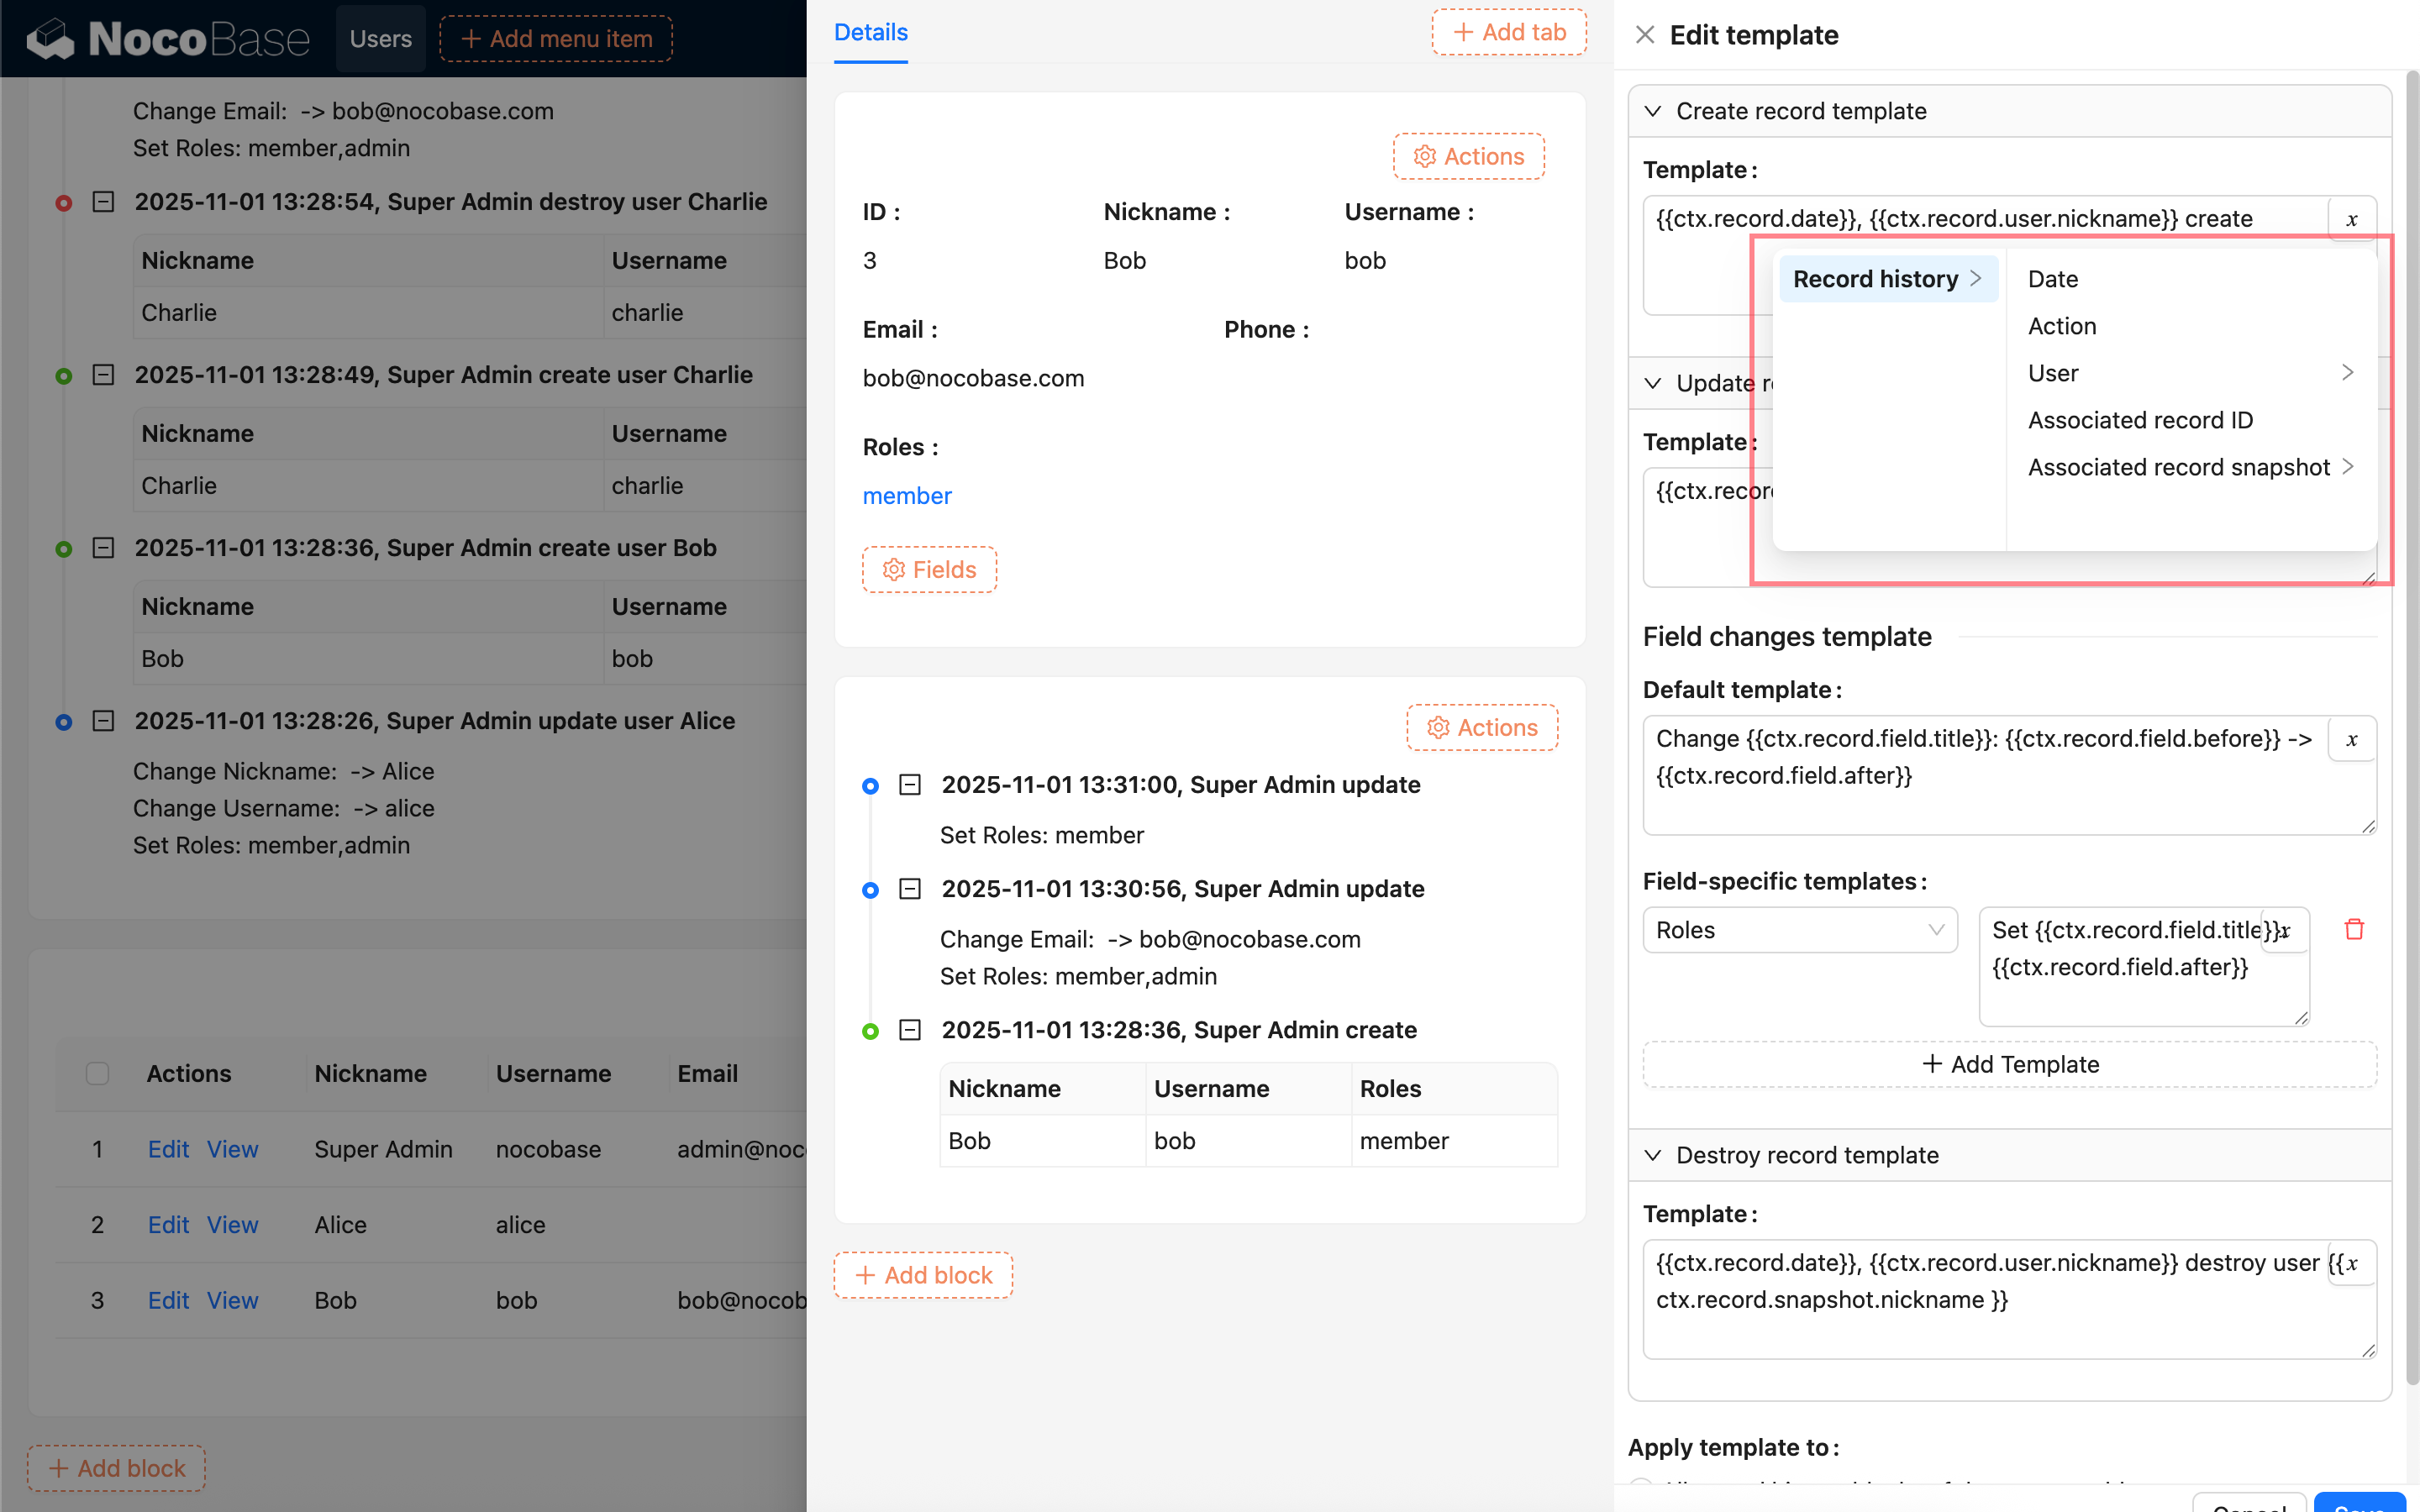
Click Edit Template in the block settings to configure the description text for the operation records.
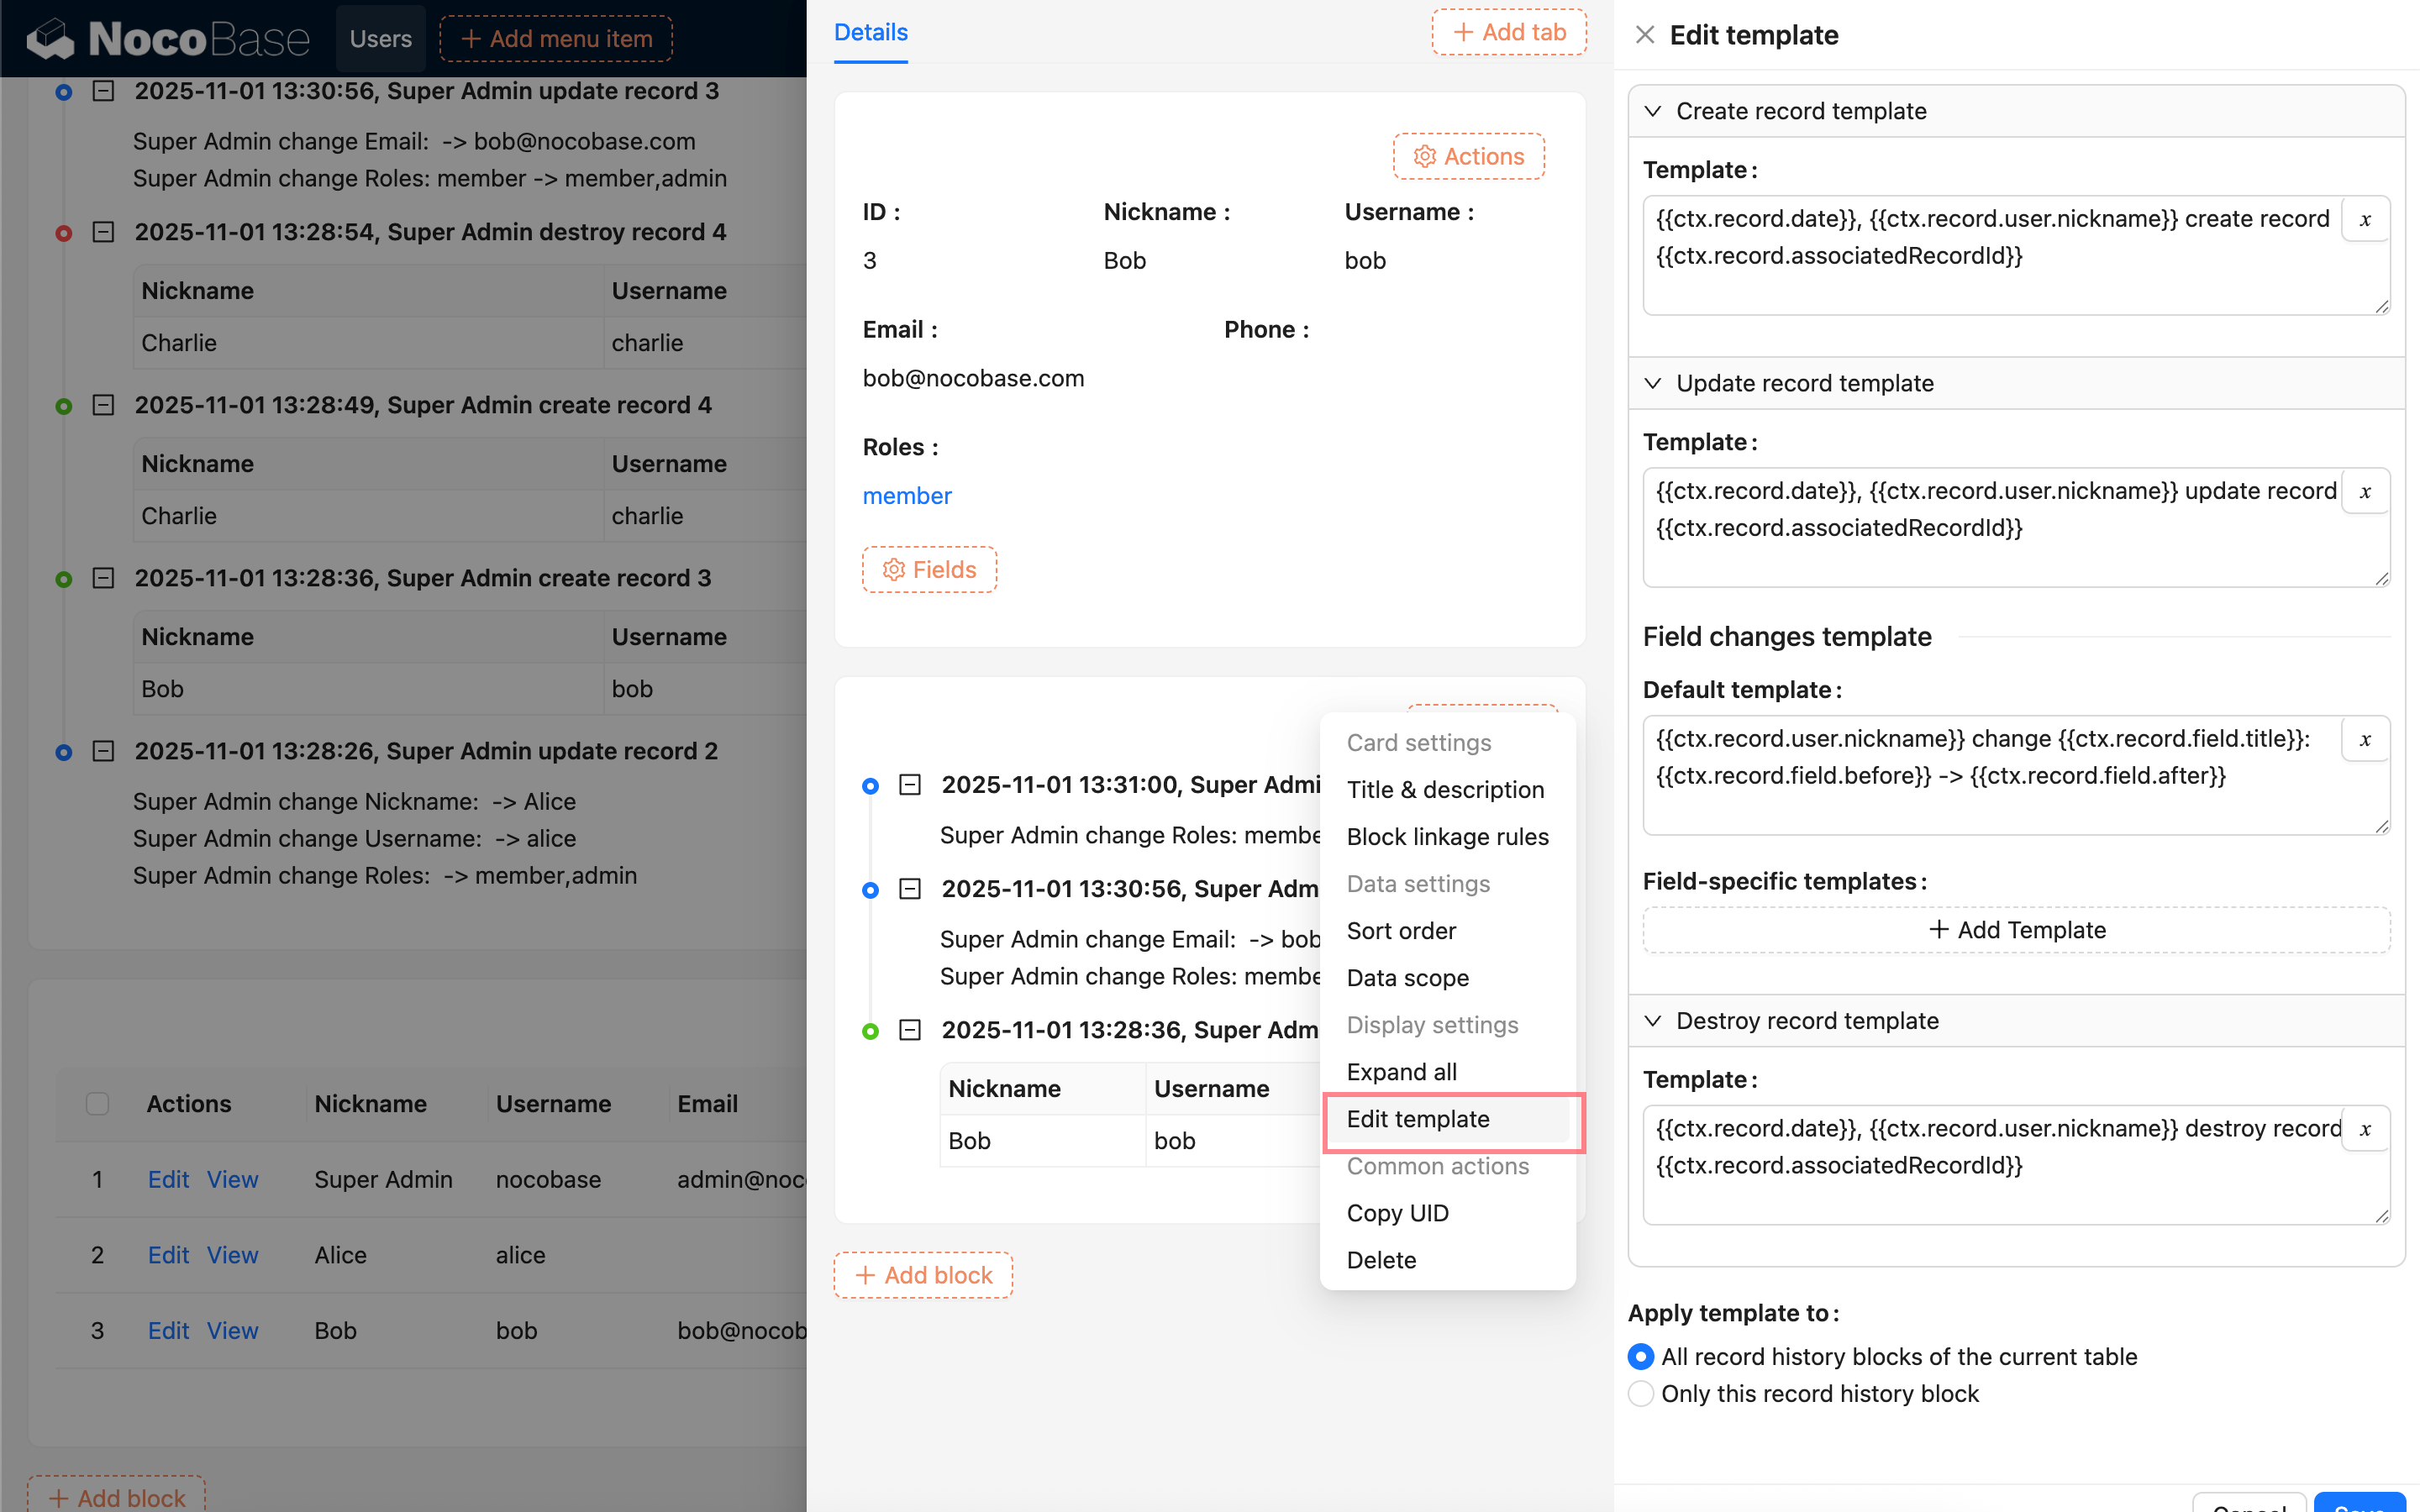
You can configure separate description templates for create, update, and delete operations. For update operations, you can also configure the description template for field changes, either as a single template for all fields or for specific fields individually.
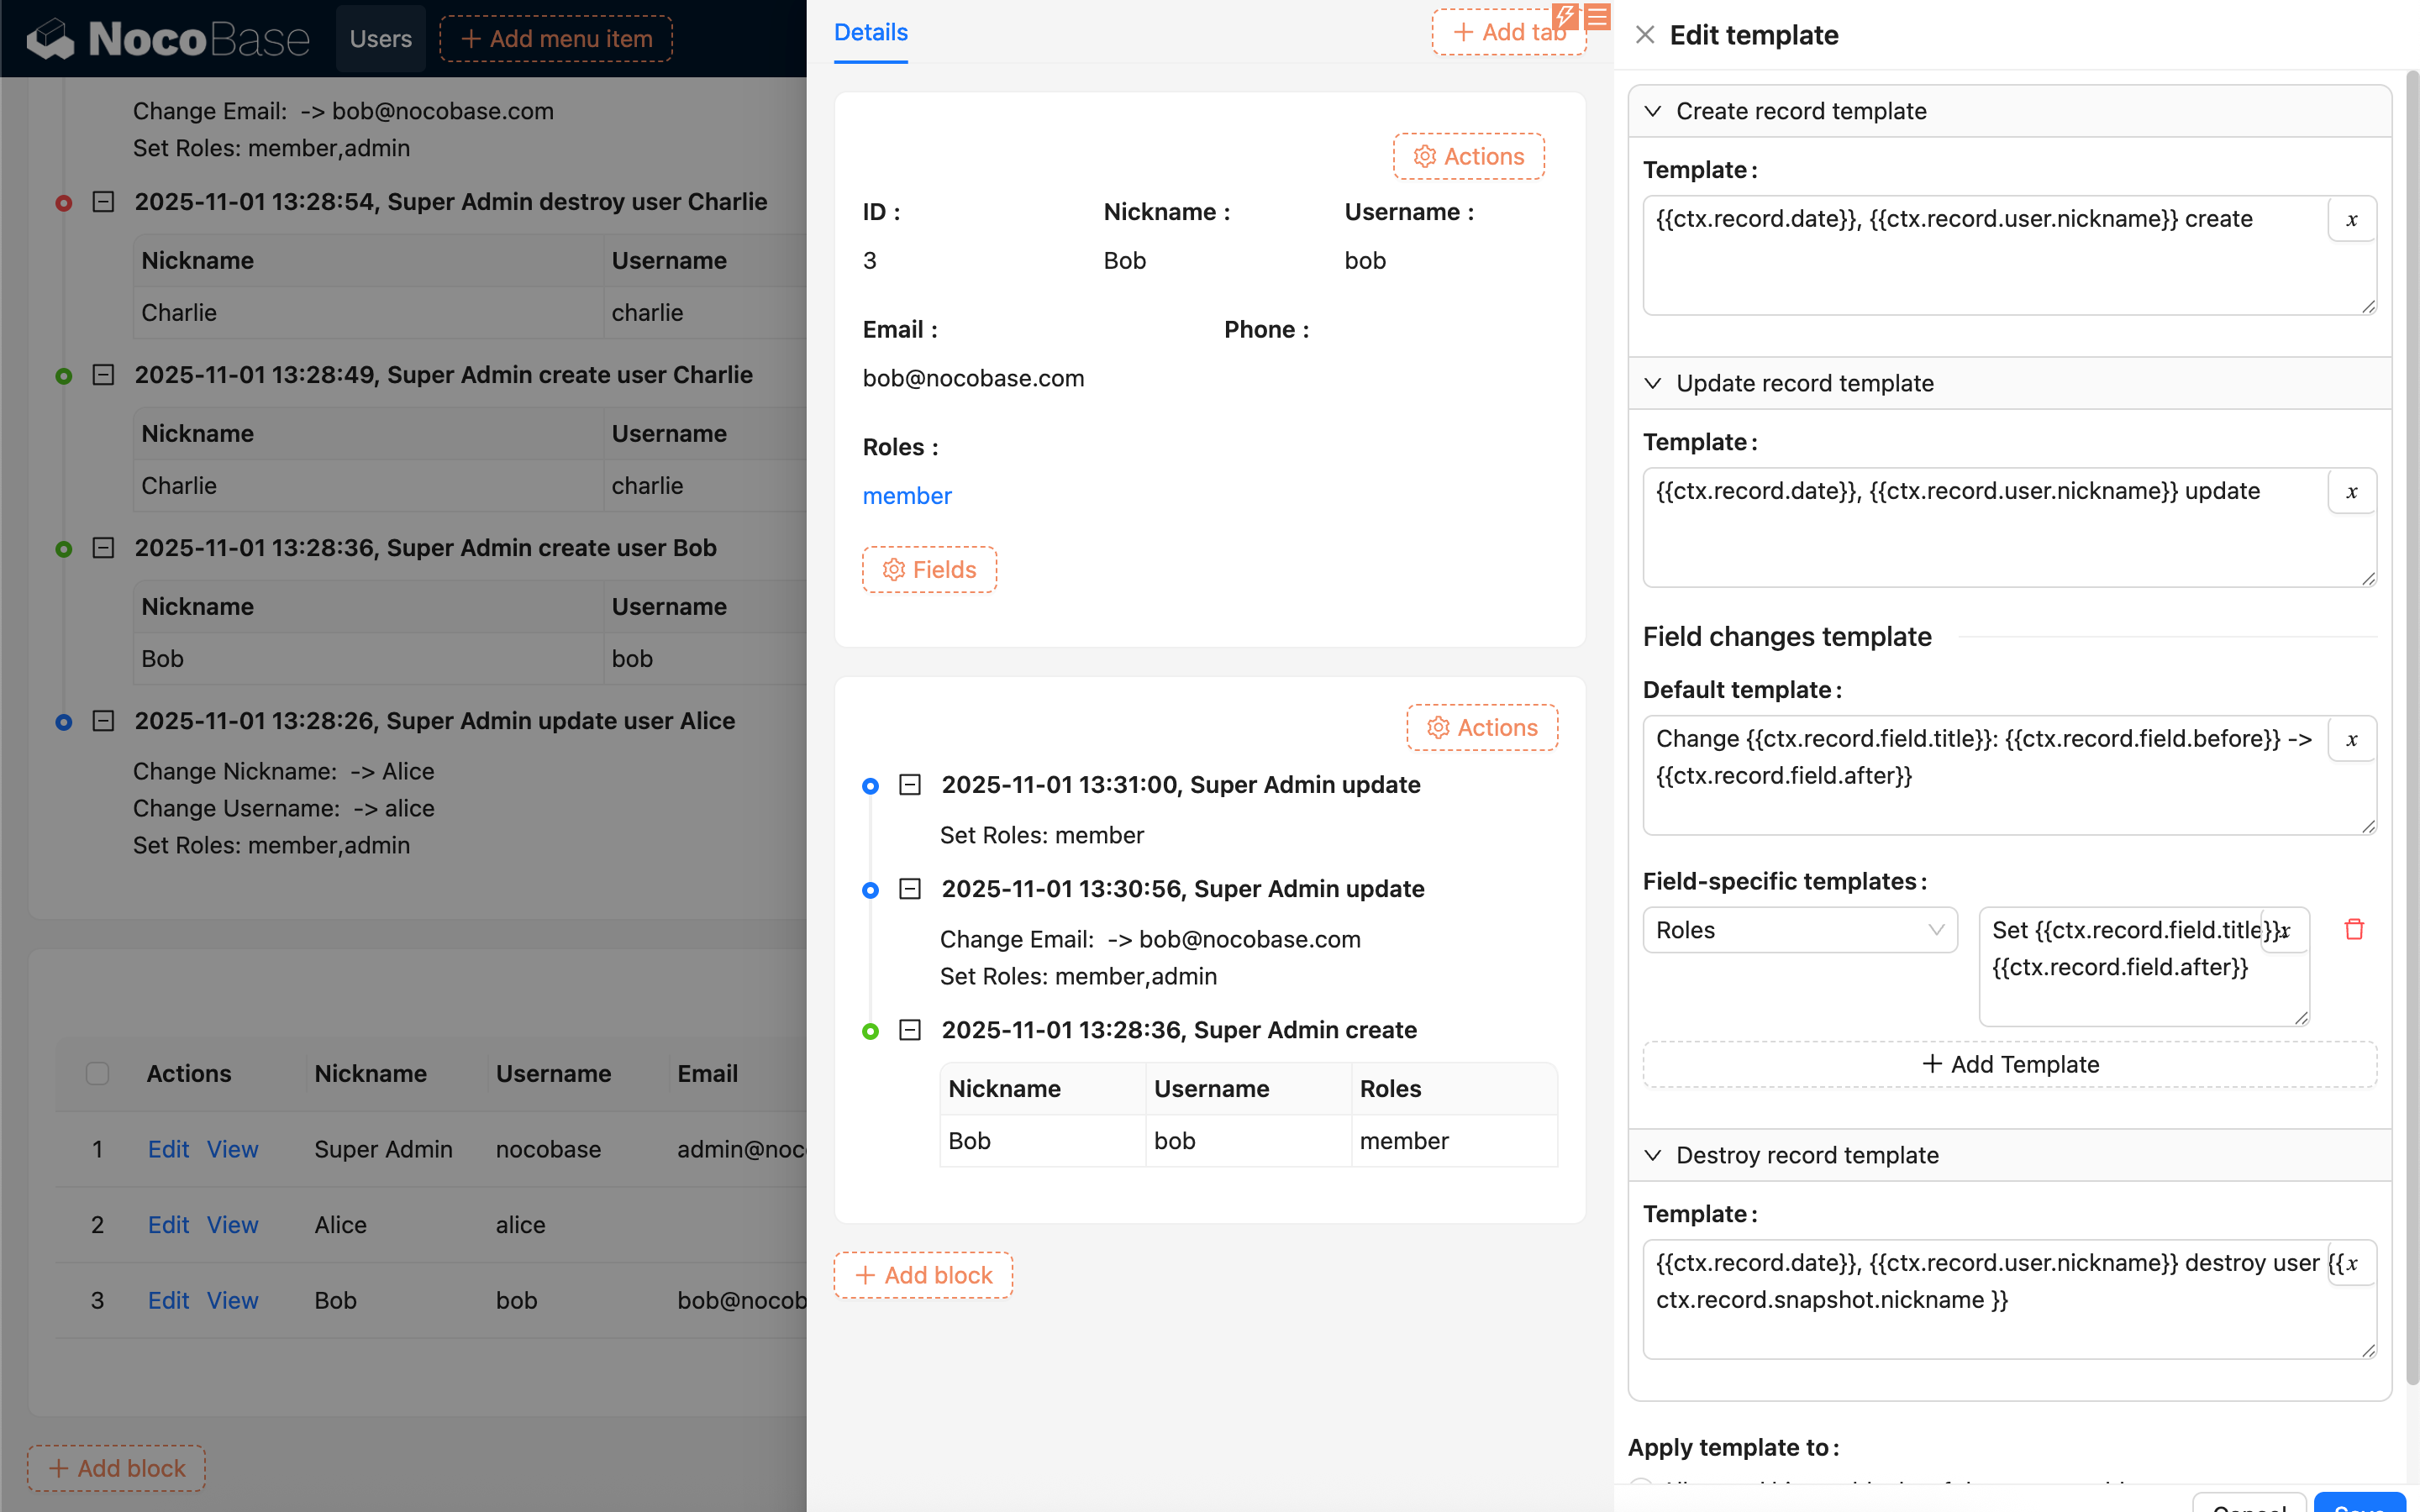
Variables can be used when configuring the text.
After configuration, you can choose to apply the template to All record history blocks of the current collection or Only this record history block.