扩展通知渠道类型
NocoBase支持按需扩展通知渠道类型,如短信通知,app推送等。
客户端
渠道类型注册
客户端渠道配置和消息配置界面通过通知管理插件客户端提供的接口registerChannelType进行注册:
服务端
继承抽象类
服务端开发的核心是需要继承抽象类BaseNotificationChannel并实现send方法,send方法内部是扩展插件发送通知的业务逻辑
服务端注册
下面需要调用通知服务端内核的registerChannelType方法,将开发好的服务端实现类注册进内核中:
完整示例
下面以一个通知扩展插件样例来详细描述如何开发一个扩展插件。 假设我们要使用某平台的短信网关为NocoBase增加短信通知功能。
插件创建
- 执行创建插件命令
yarn pm add @nocobase/plugin-notification-example
客户端开发
客户端部分我们需要开发两个form组件,ChannelConfigForm(渠道配置表单) 和MessageConfigForm(消息配置表单)
ChannelConfigFrom
某平台发短信时需要APIkey和secret,所以我们的渠道表单内容主要包括以上两项。在src/client目录下新建ChannelConfigForm.tsx文件,文件内容如下:
MessageConfigForm
消息配置表单,主要包括接收人receivers和消息内容content的配置。在src/client目录下新建MessageConfigForm.tsx文件,组件接收variableOptions作为变量参数,目前内容表单会在工作流节点配置,一般需要消费工作流节点变量。具体文件内容如下:
客户端组件注册
表单配置组件开发好后,需要调用通知管理内核注册,假设我们的平台名称是Example, 则编辑后的src/client/index.tsx文件内容如下:
至此,客户端的开发已经完成
服务端开发
服务端开发的核心是需要继承抽象类BaseNotificationChannel并实现send方法,send方法内部是扩展插件发送通知的业务逻辑,这里因为是示例,就简单把接收的参数打印出来。在src/server目录下新增文件example-server.ts文件,文件内容如下:
下面需要调用通知服务端内核的registerChannelType方法注册服务端扩展插件,编辑后的src/clinet/plugin.ts文件内容如下:
插件注册启动
- 执行注册命令
yarn p add @nocobase/plugin-notification-example - 执行启用命令
yarn pm enable @nocobase/plugin-notification-example
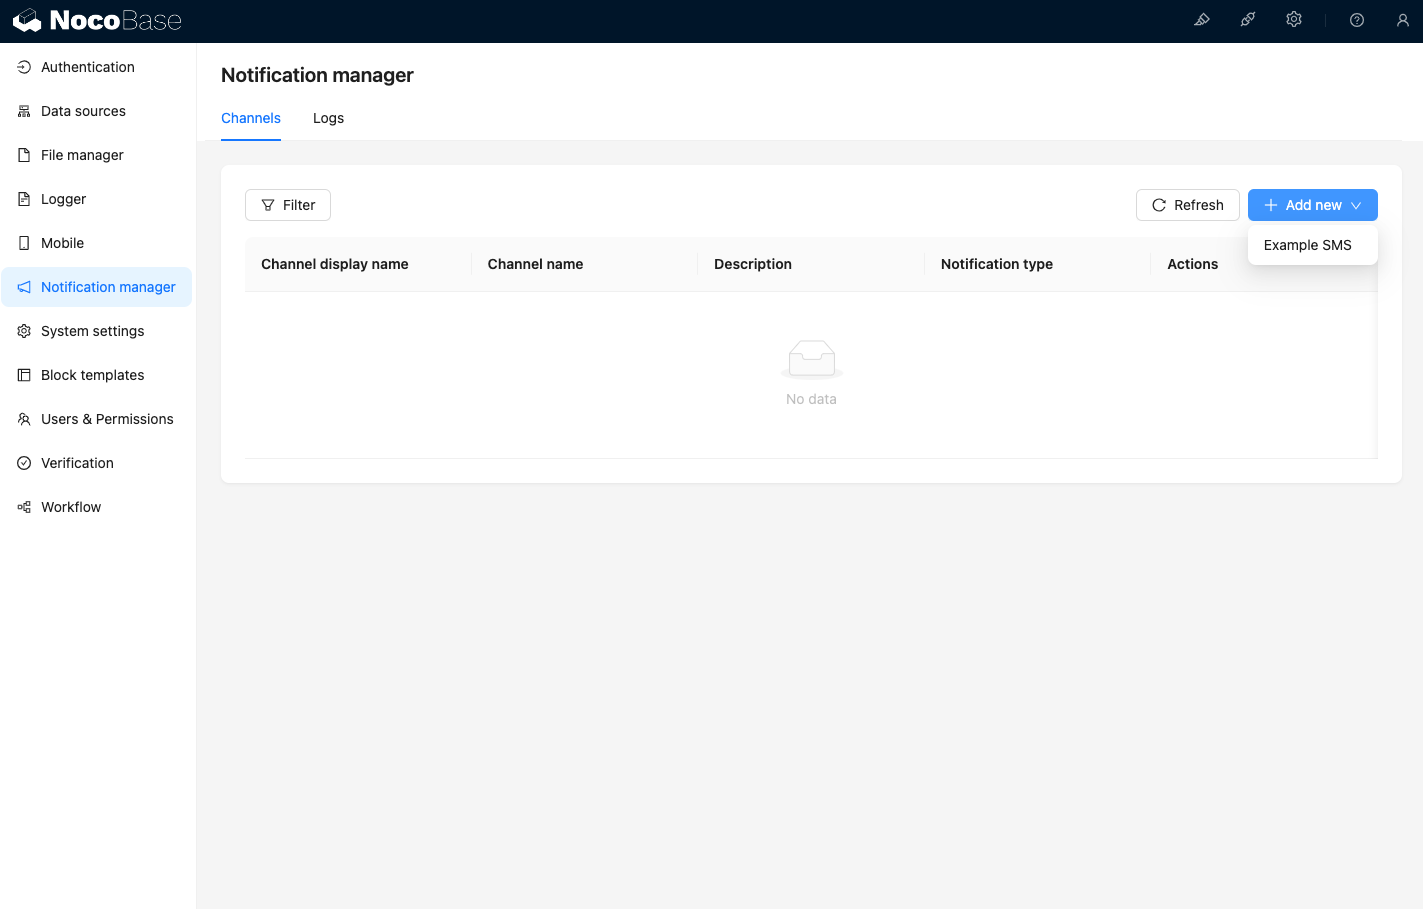
渠道配置
此时访问通知管理的渠道页面,可以看到Example SMS已被启用
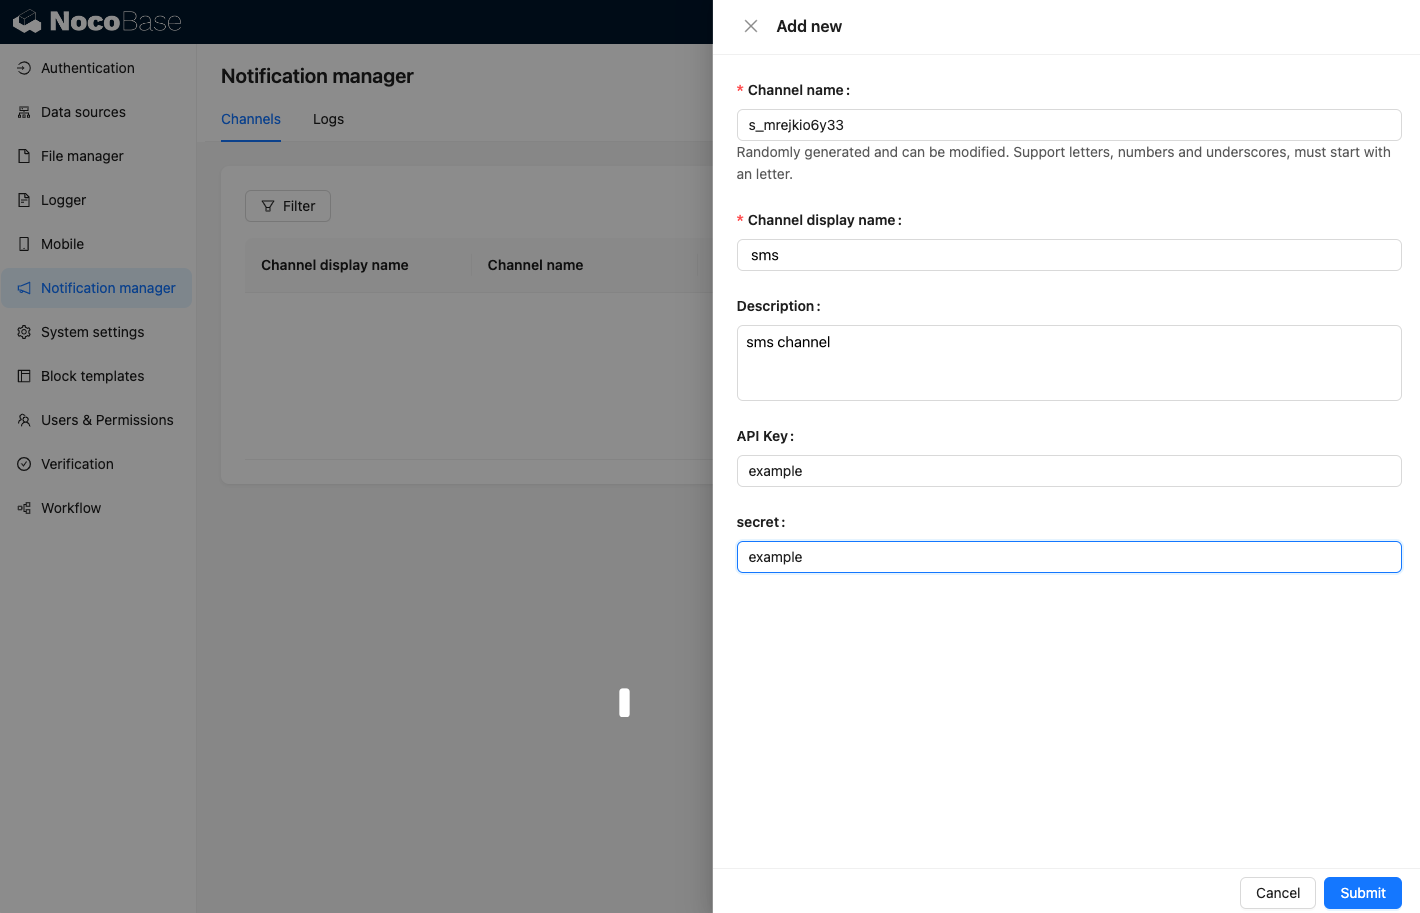
新增一个示例渠道
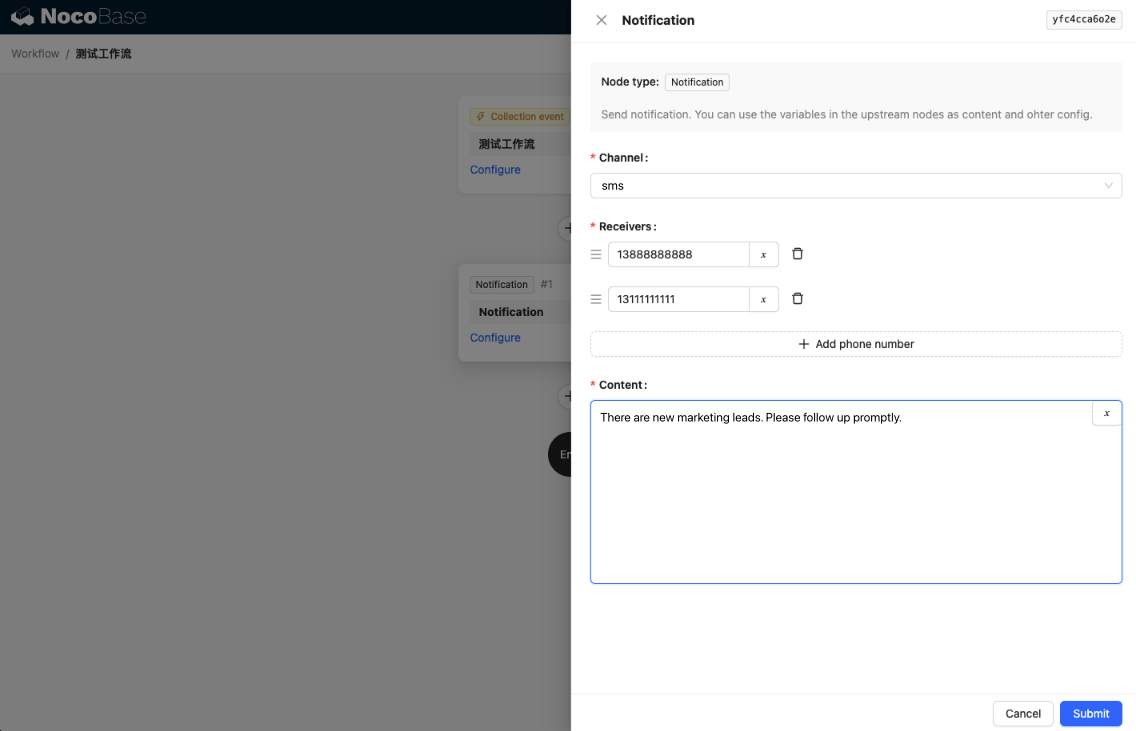
新增一个工作流并配置通知节点
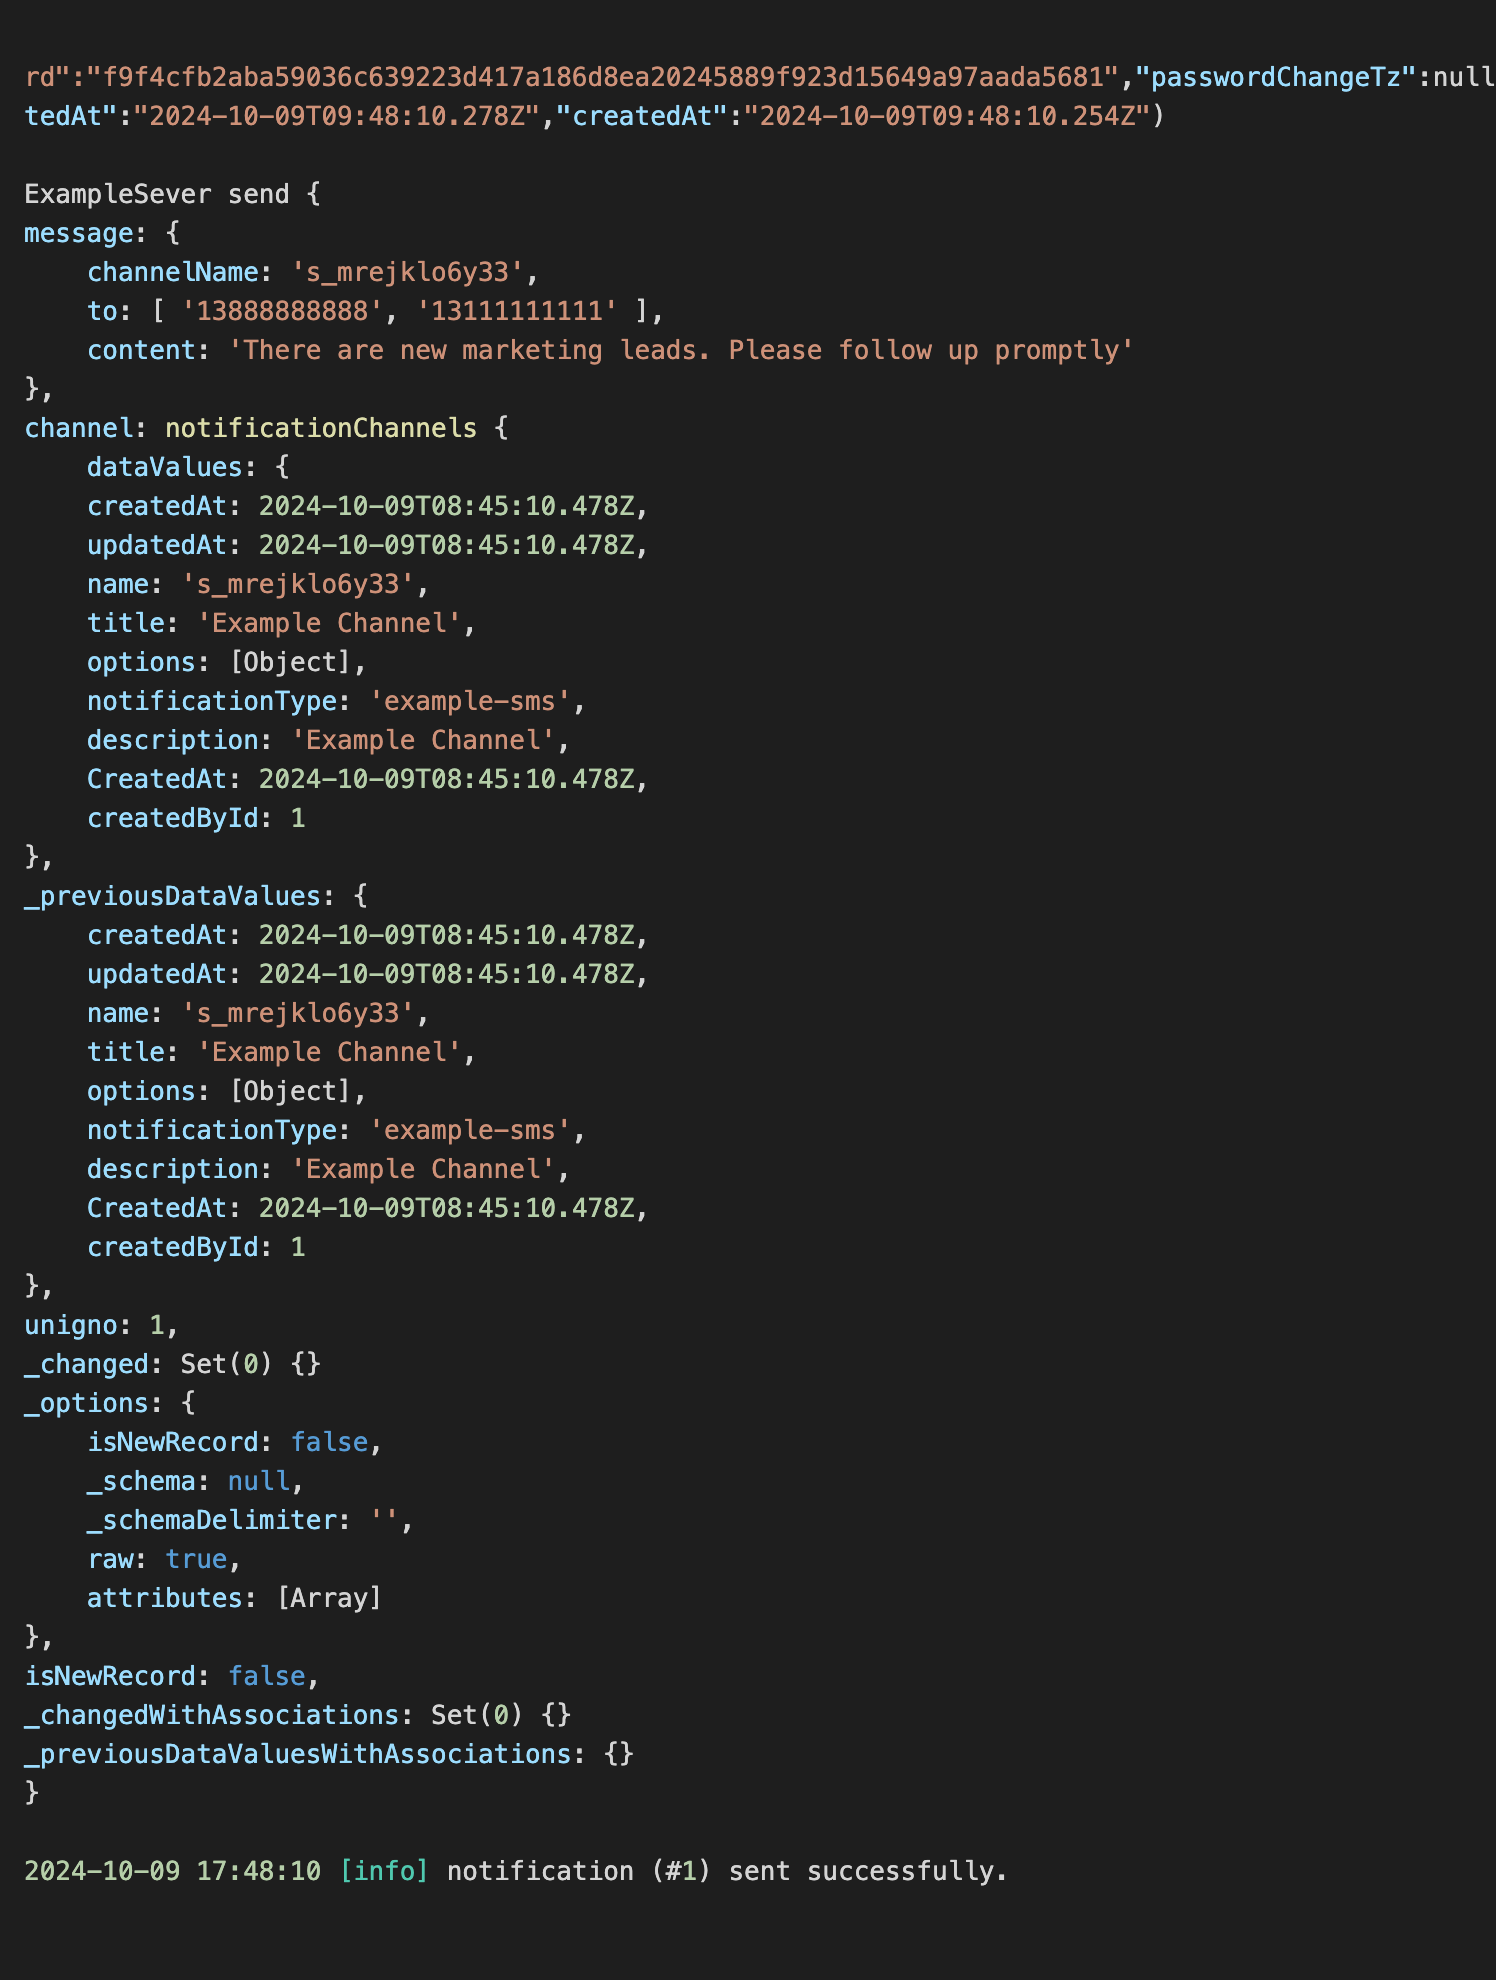
触发工作流执行,可以看到控制台输出如下信息