

Using API Keys in NocoBase
This guide demonstrates how to use API Keys in NocoBase to retrieve data through a practical "To-Dos" example. Follow the step-by-step instructions below to understand the complete workflow.
1 Understanding API Keys
An API Key is a secure token that authenticates API requests from authorized users. It functions as a credential that validates the identity of the requester when accessing the NocoBase system via web applications, mobile apps, or backend scripts.
In the HTTP request header, you'll see a format like:
The "Bearer" prefix indicates that the following string is an authenticated API Key used to verify the requester's permissions.
Common Use Cases
API Keys are typically used in the following scenarios:
- Client Application Access: Web browsers and mobile apps use API Keys to authenticate user identity, ensuring only authorized users can access data.
- Automated Task Execution: Background processes and scheduled tasks use API Keys to securely execute updates, data synchronization, and logging operations.
- Development and Testing: Developers use API Keys during debugging and testing to simulate authenticated requests and verify API responses.
API Keys provide multiple security benefits: identity verification, usage monitoring, request rate limiting, and threat prevention, ensuring the stable and secure operation of NocoBase.
2 Creating API Keys in NocoBase
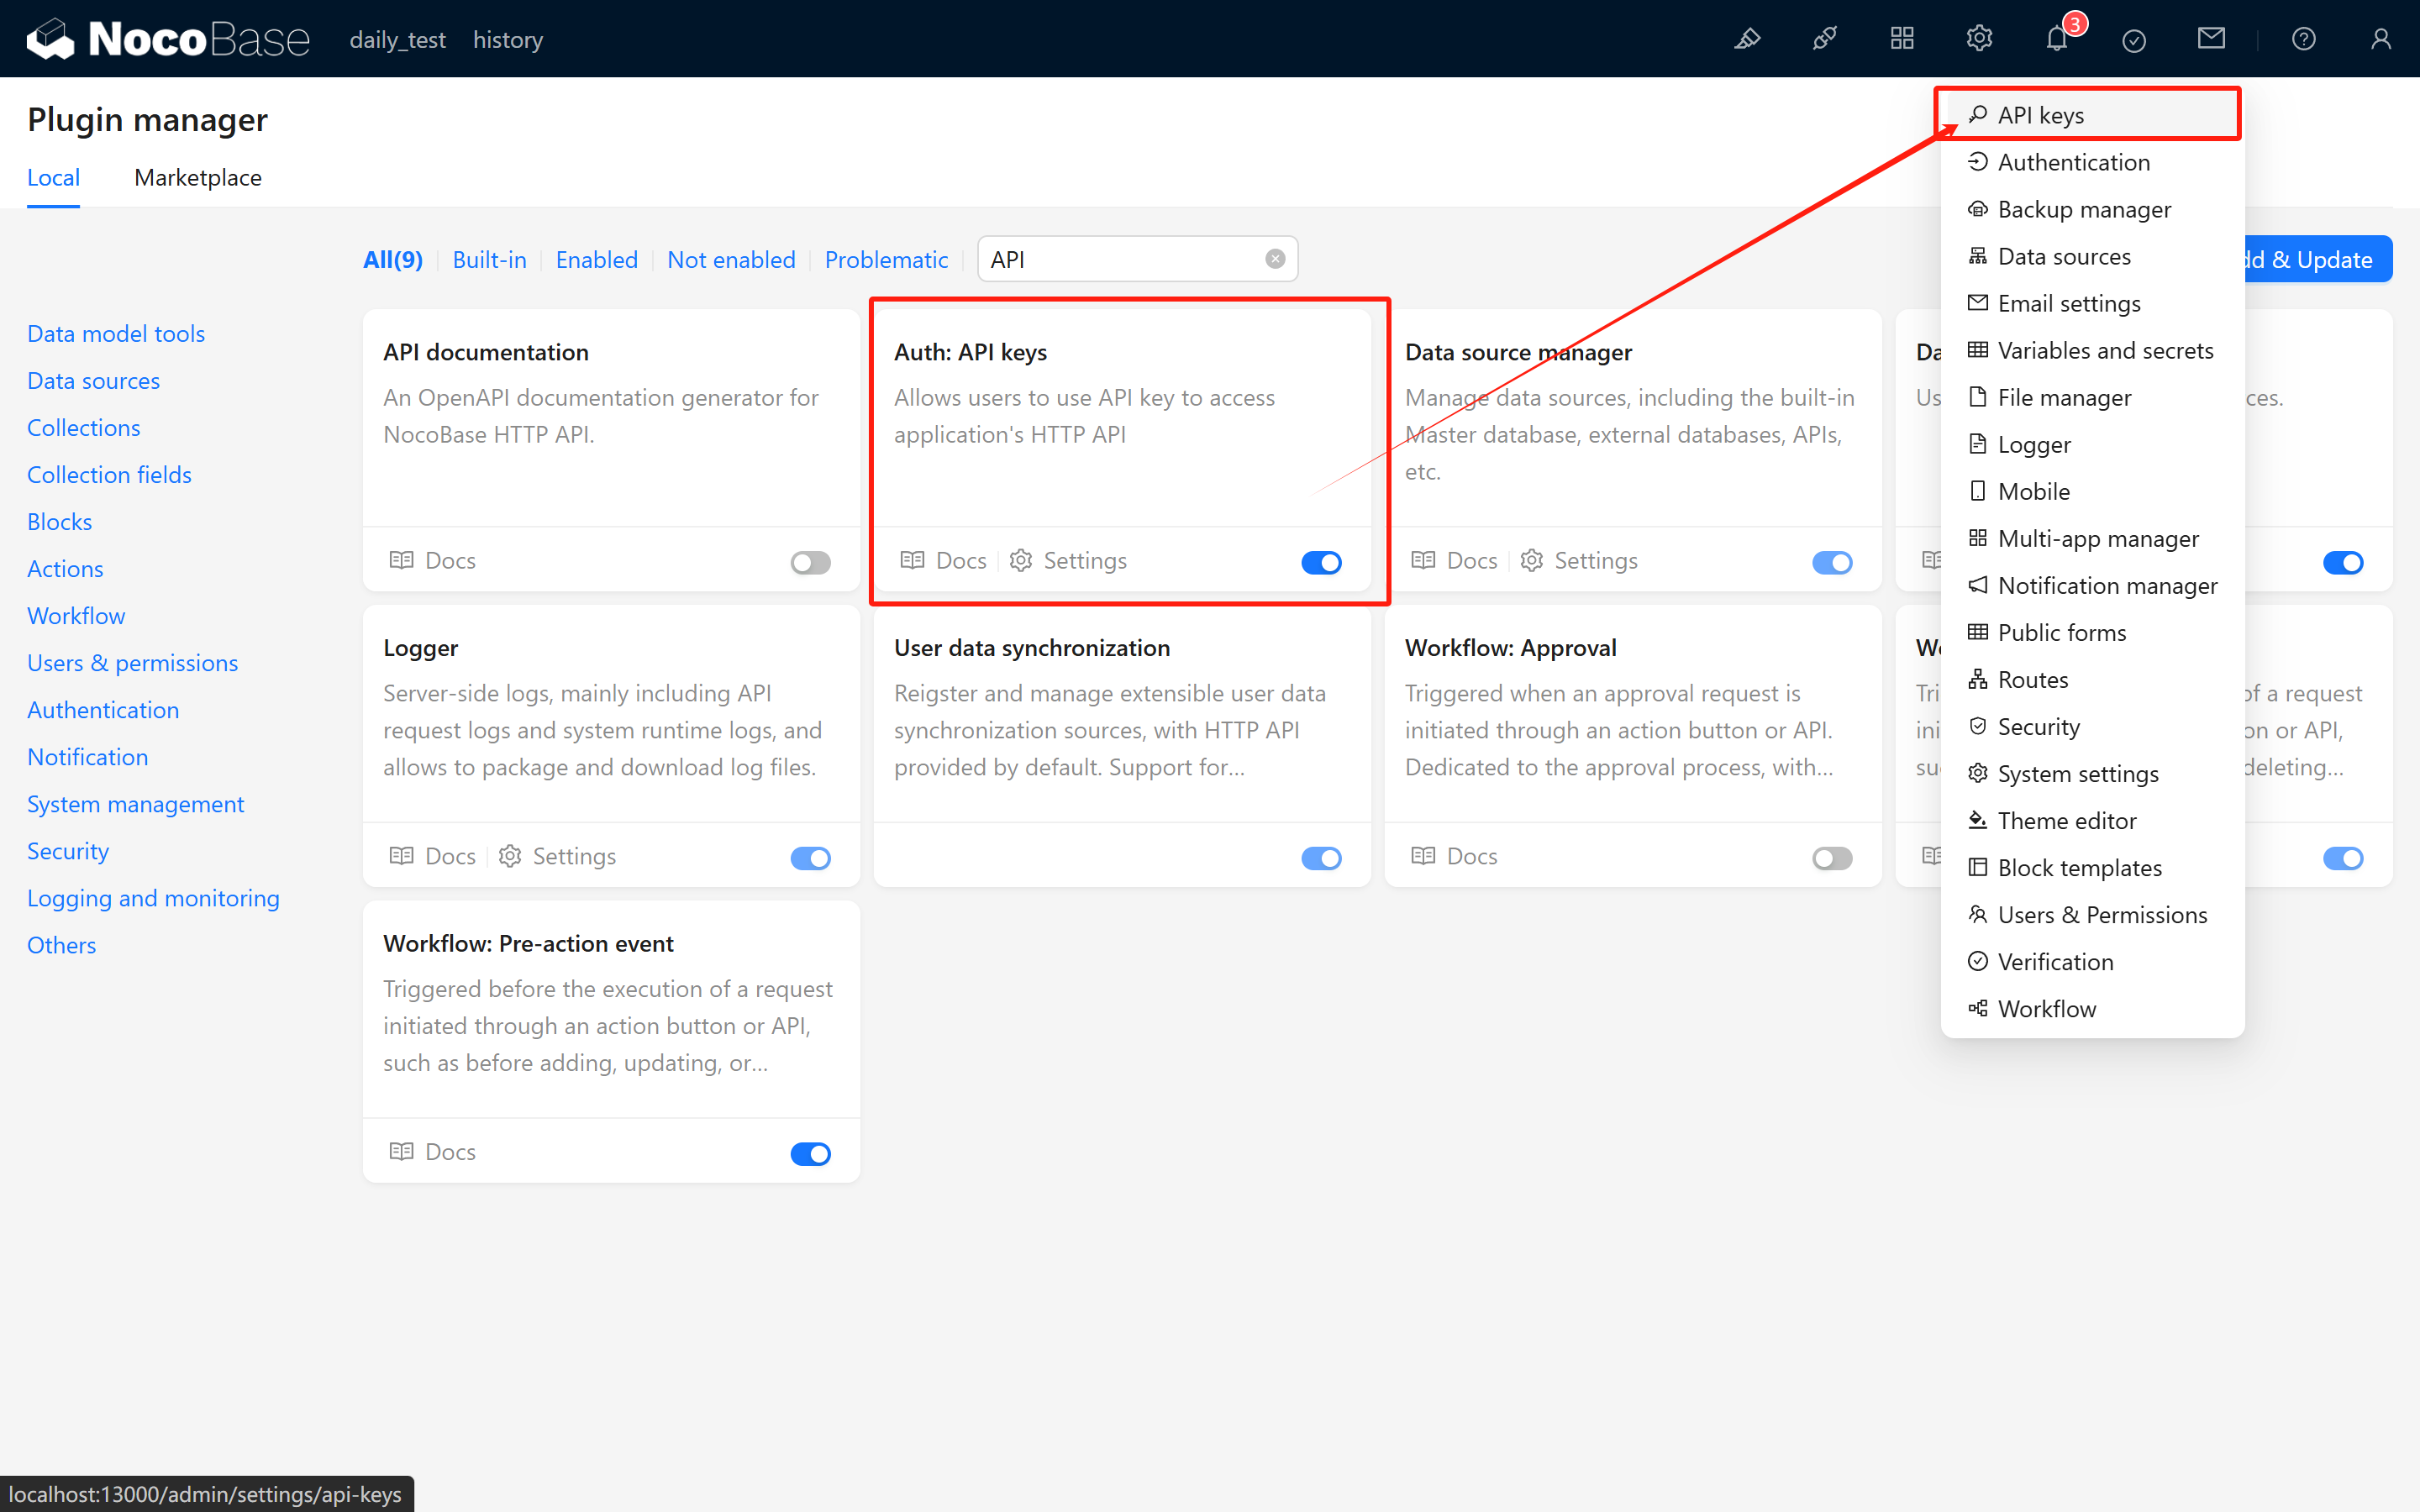
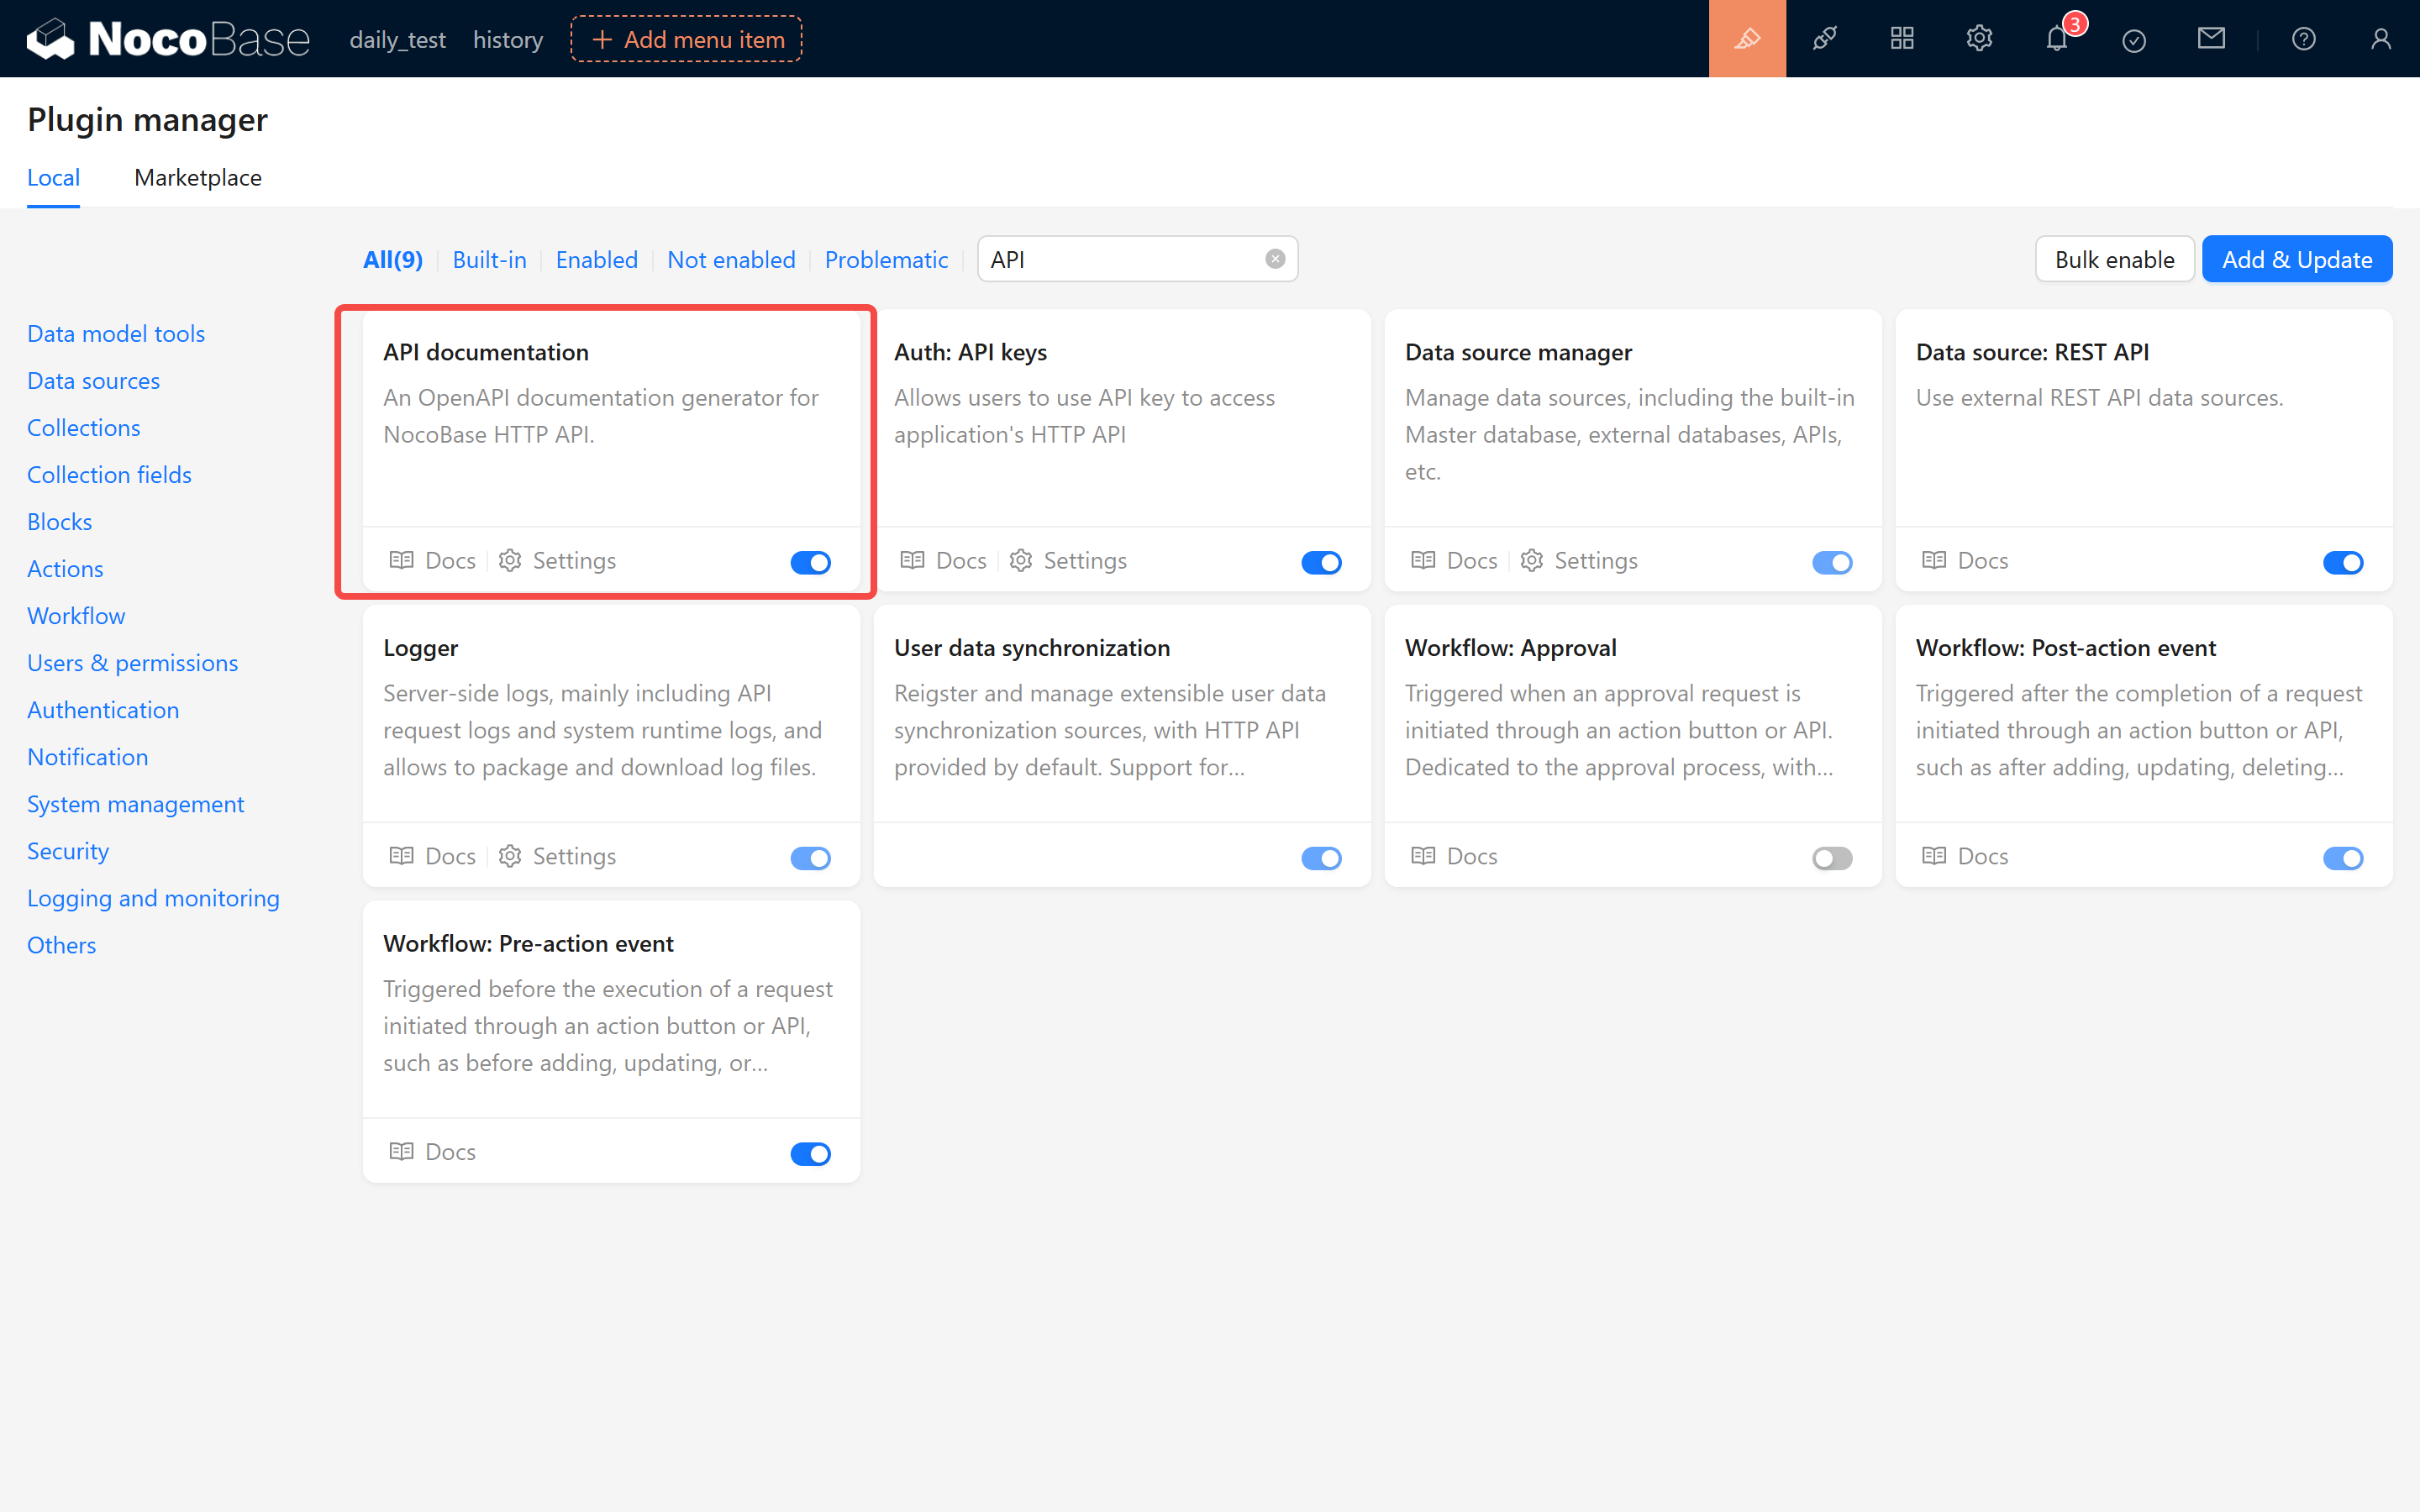
2.1 Activate the Auth: API Keys Plugin
Ensure that the built-in Auth: API Keys plugin is activated. Once enabled, a new API Keys configuration page will appear in the system settings.
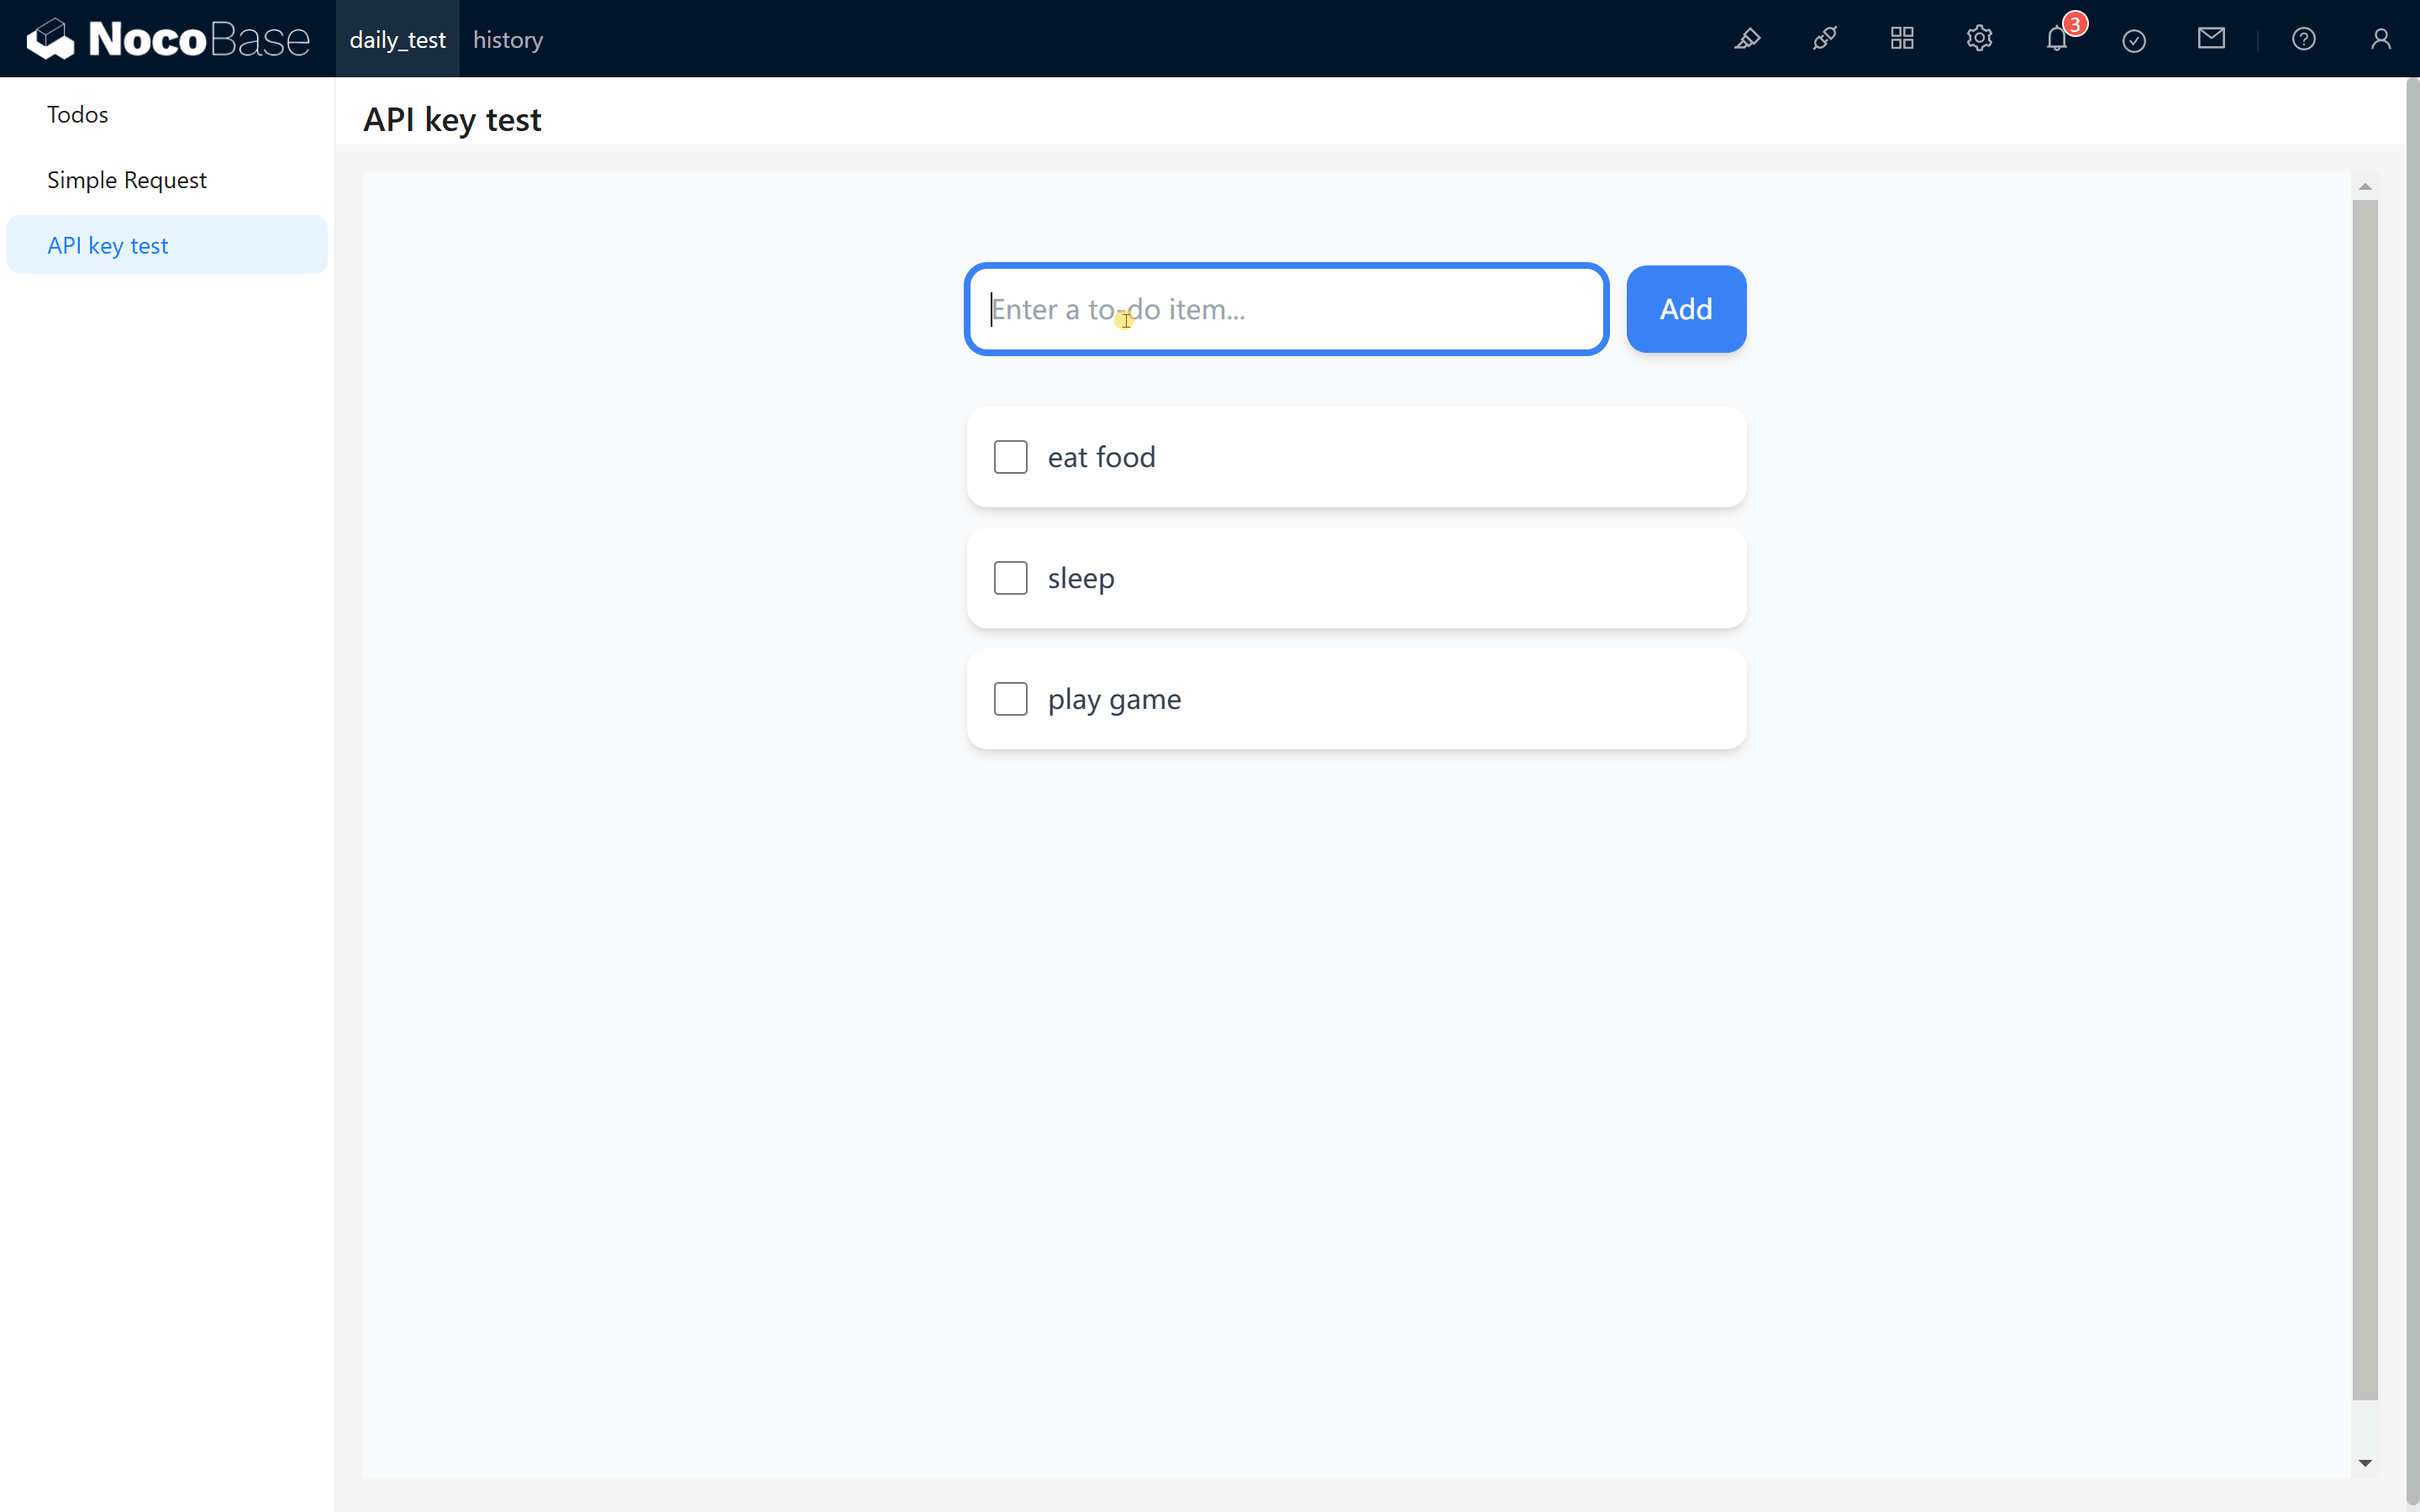
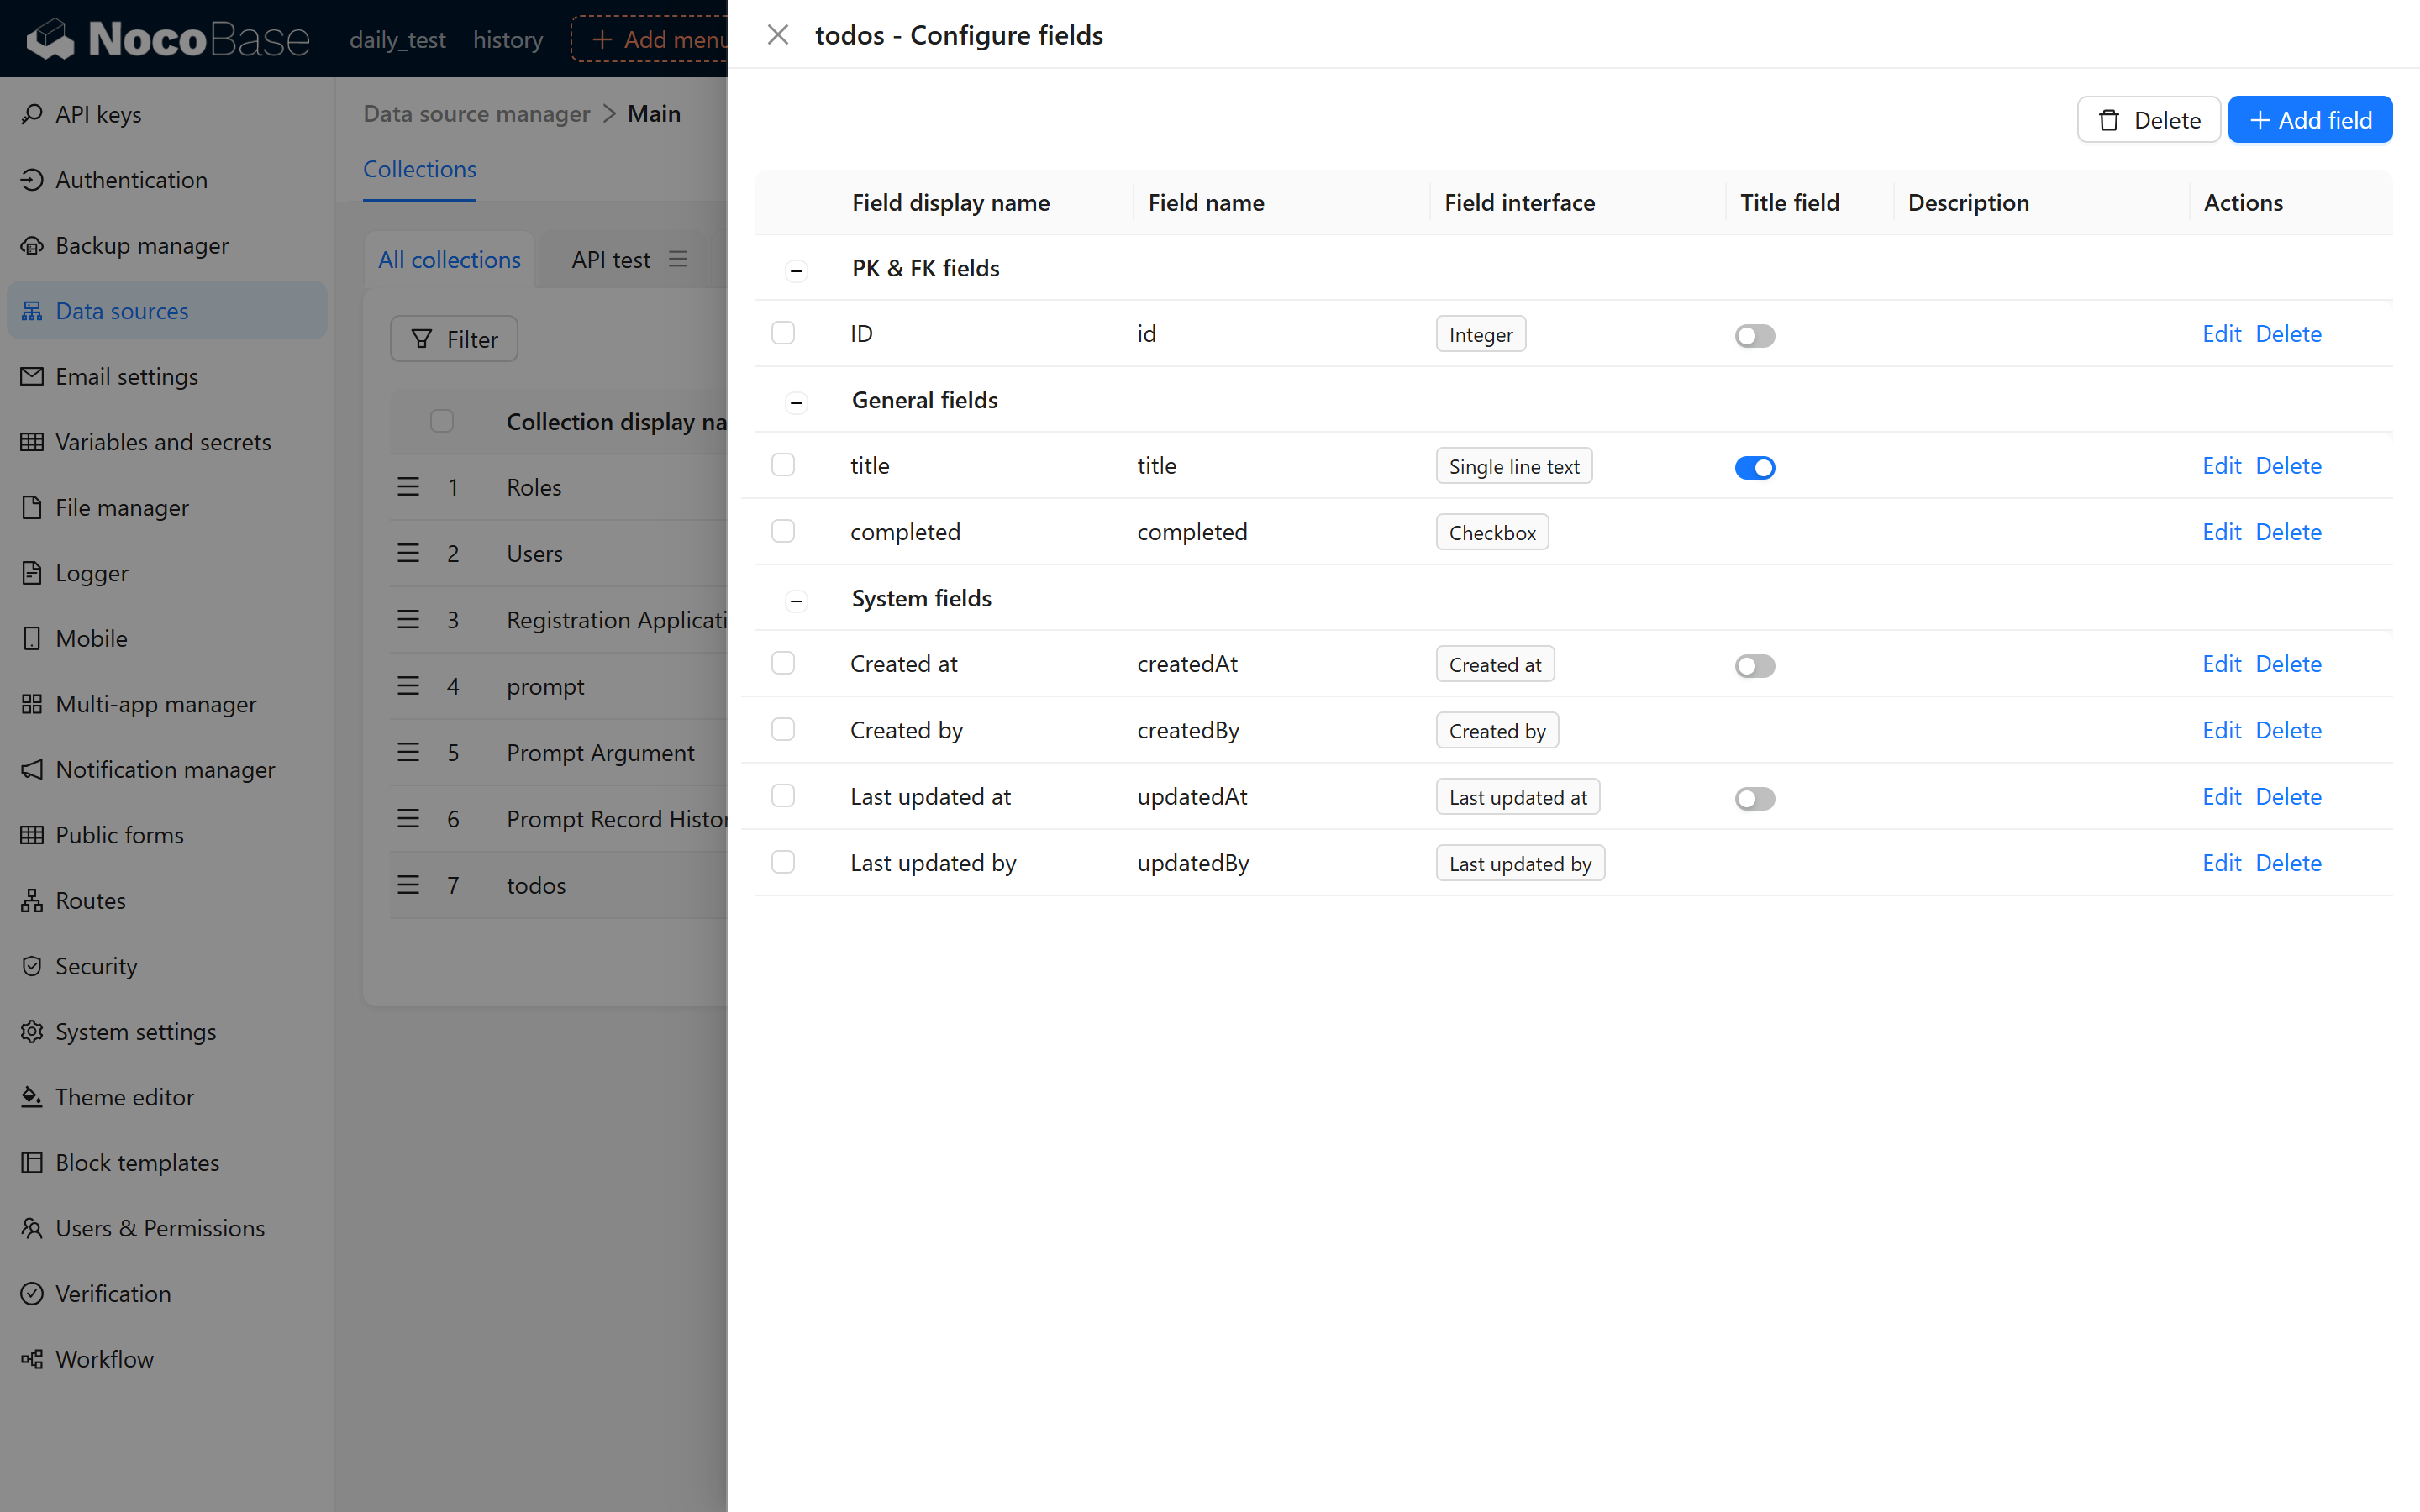
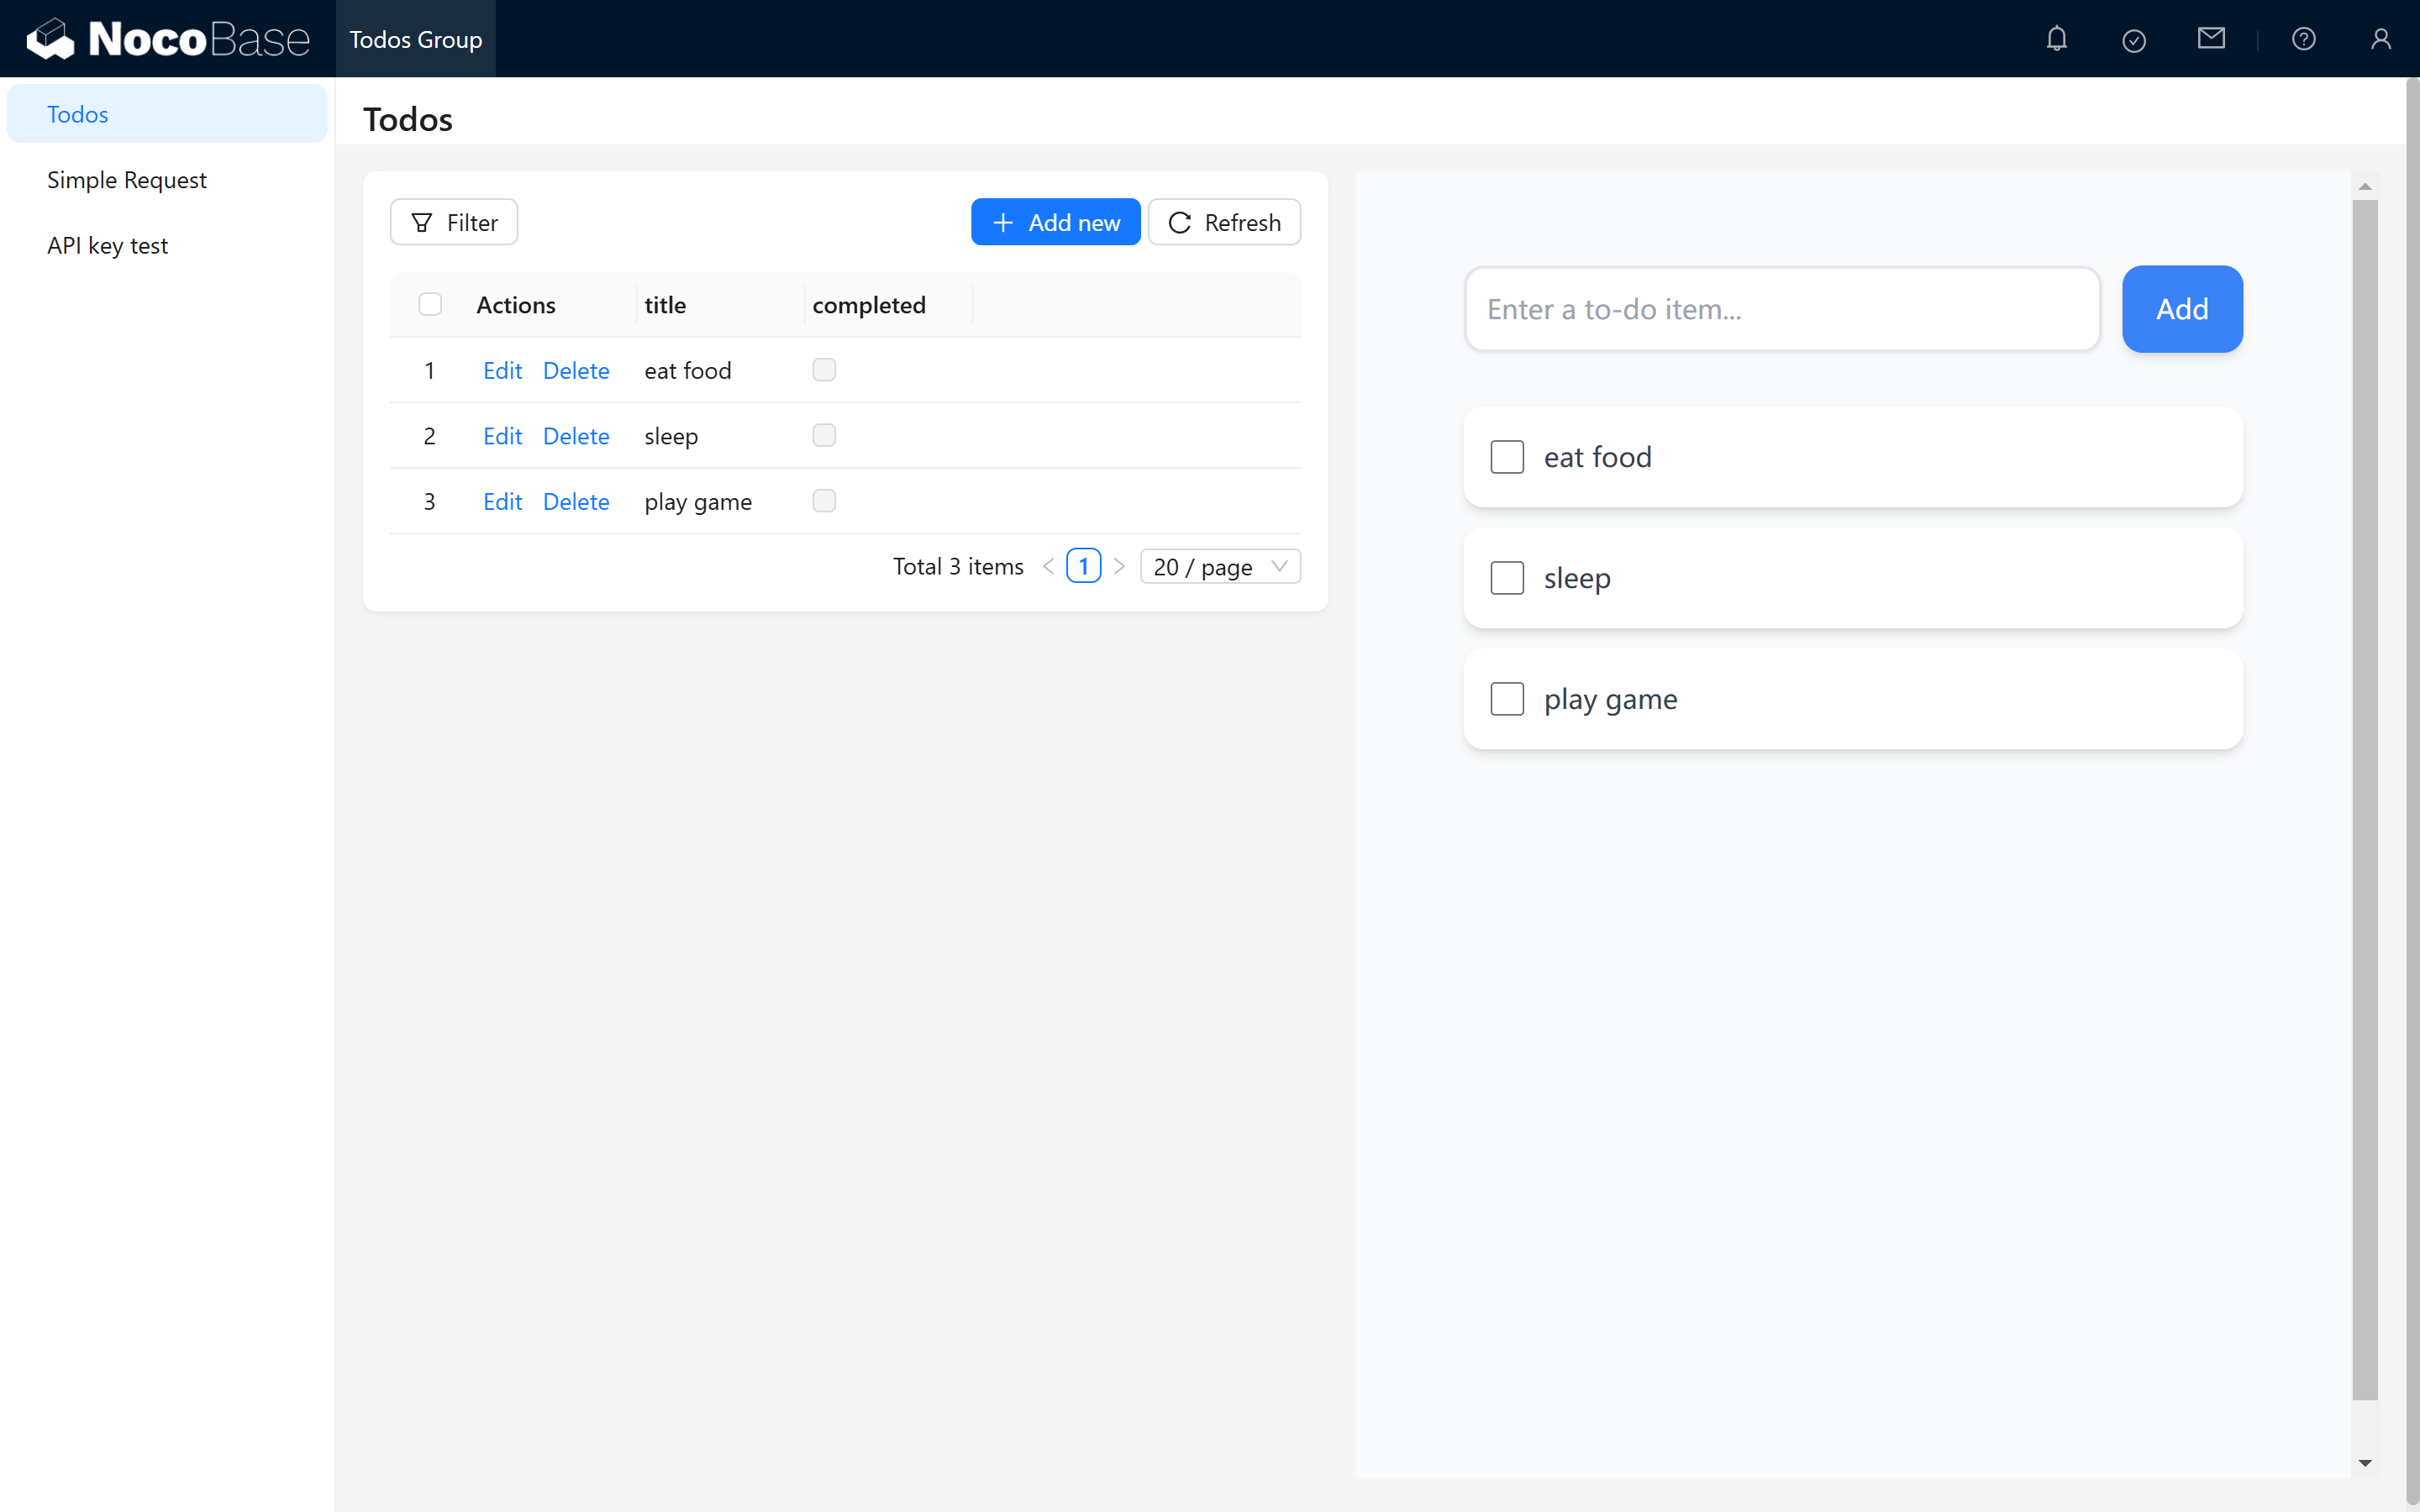
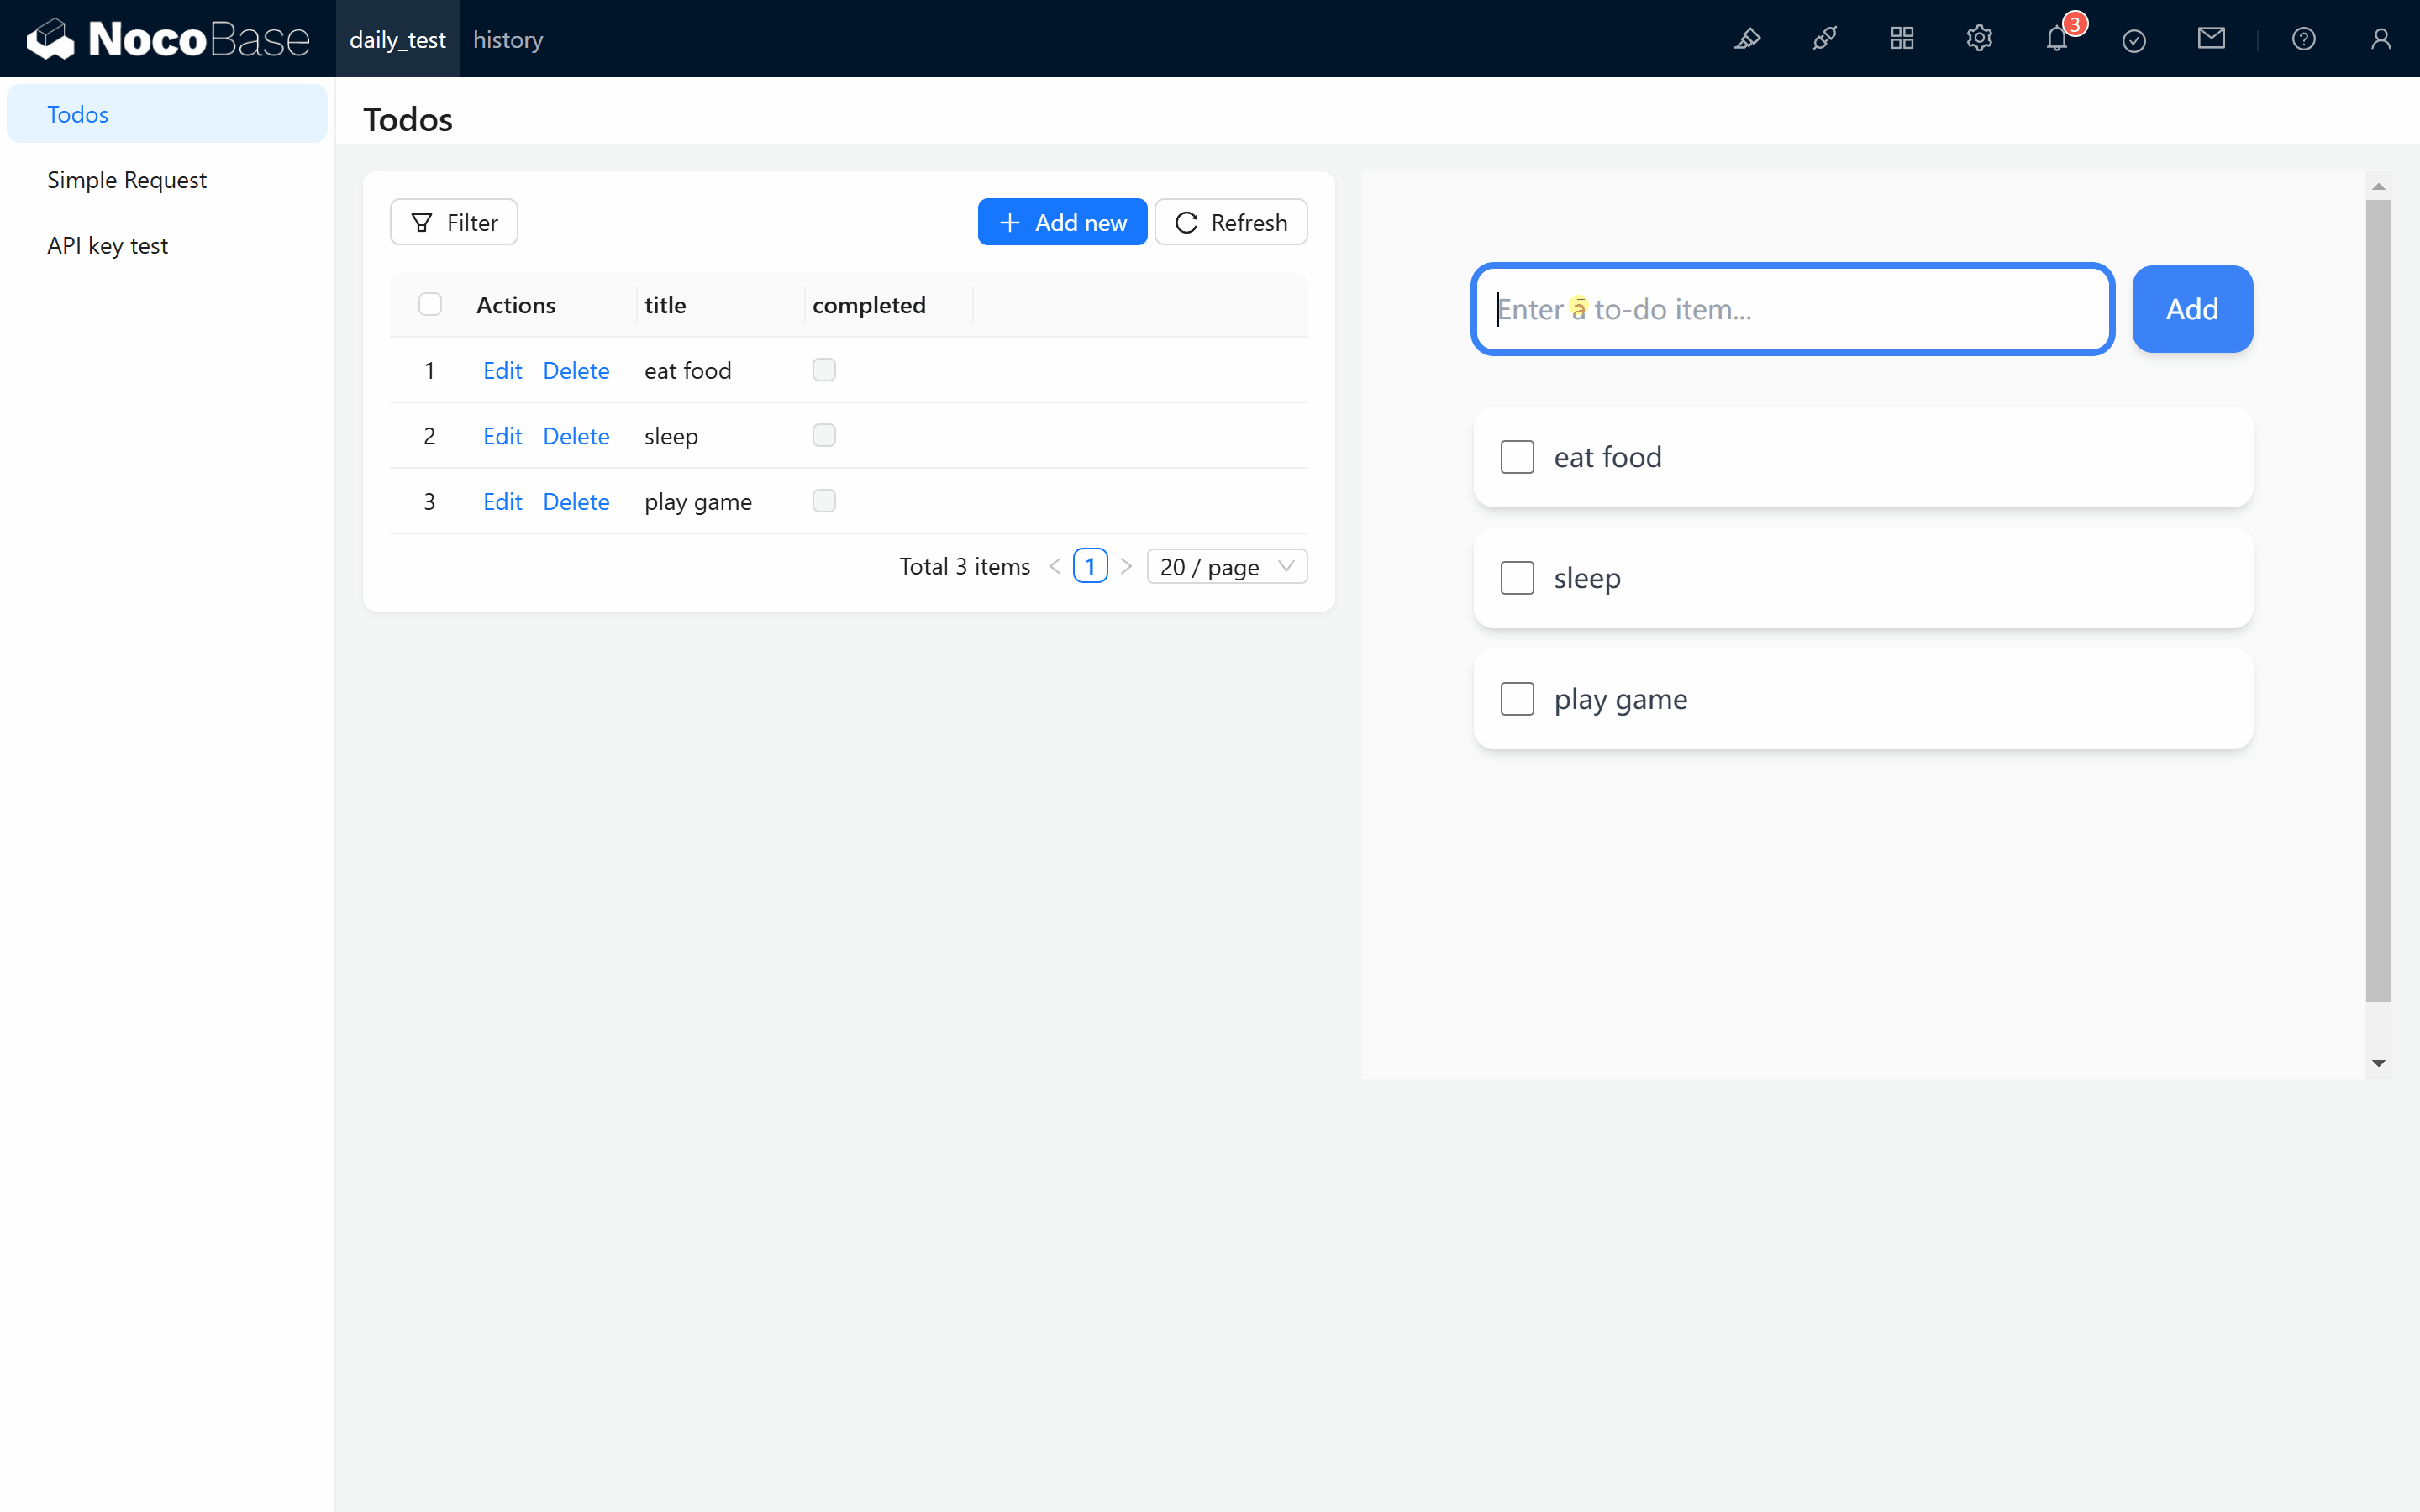
2.2 Create a Test Collection
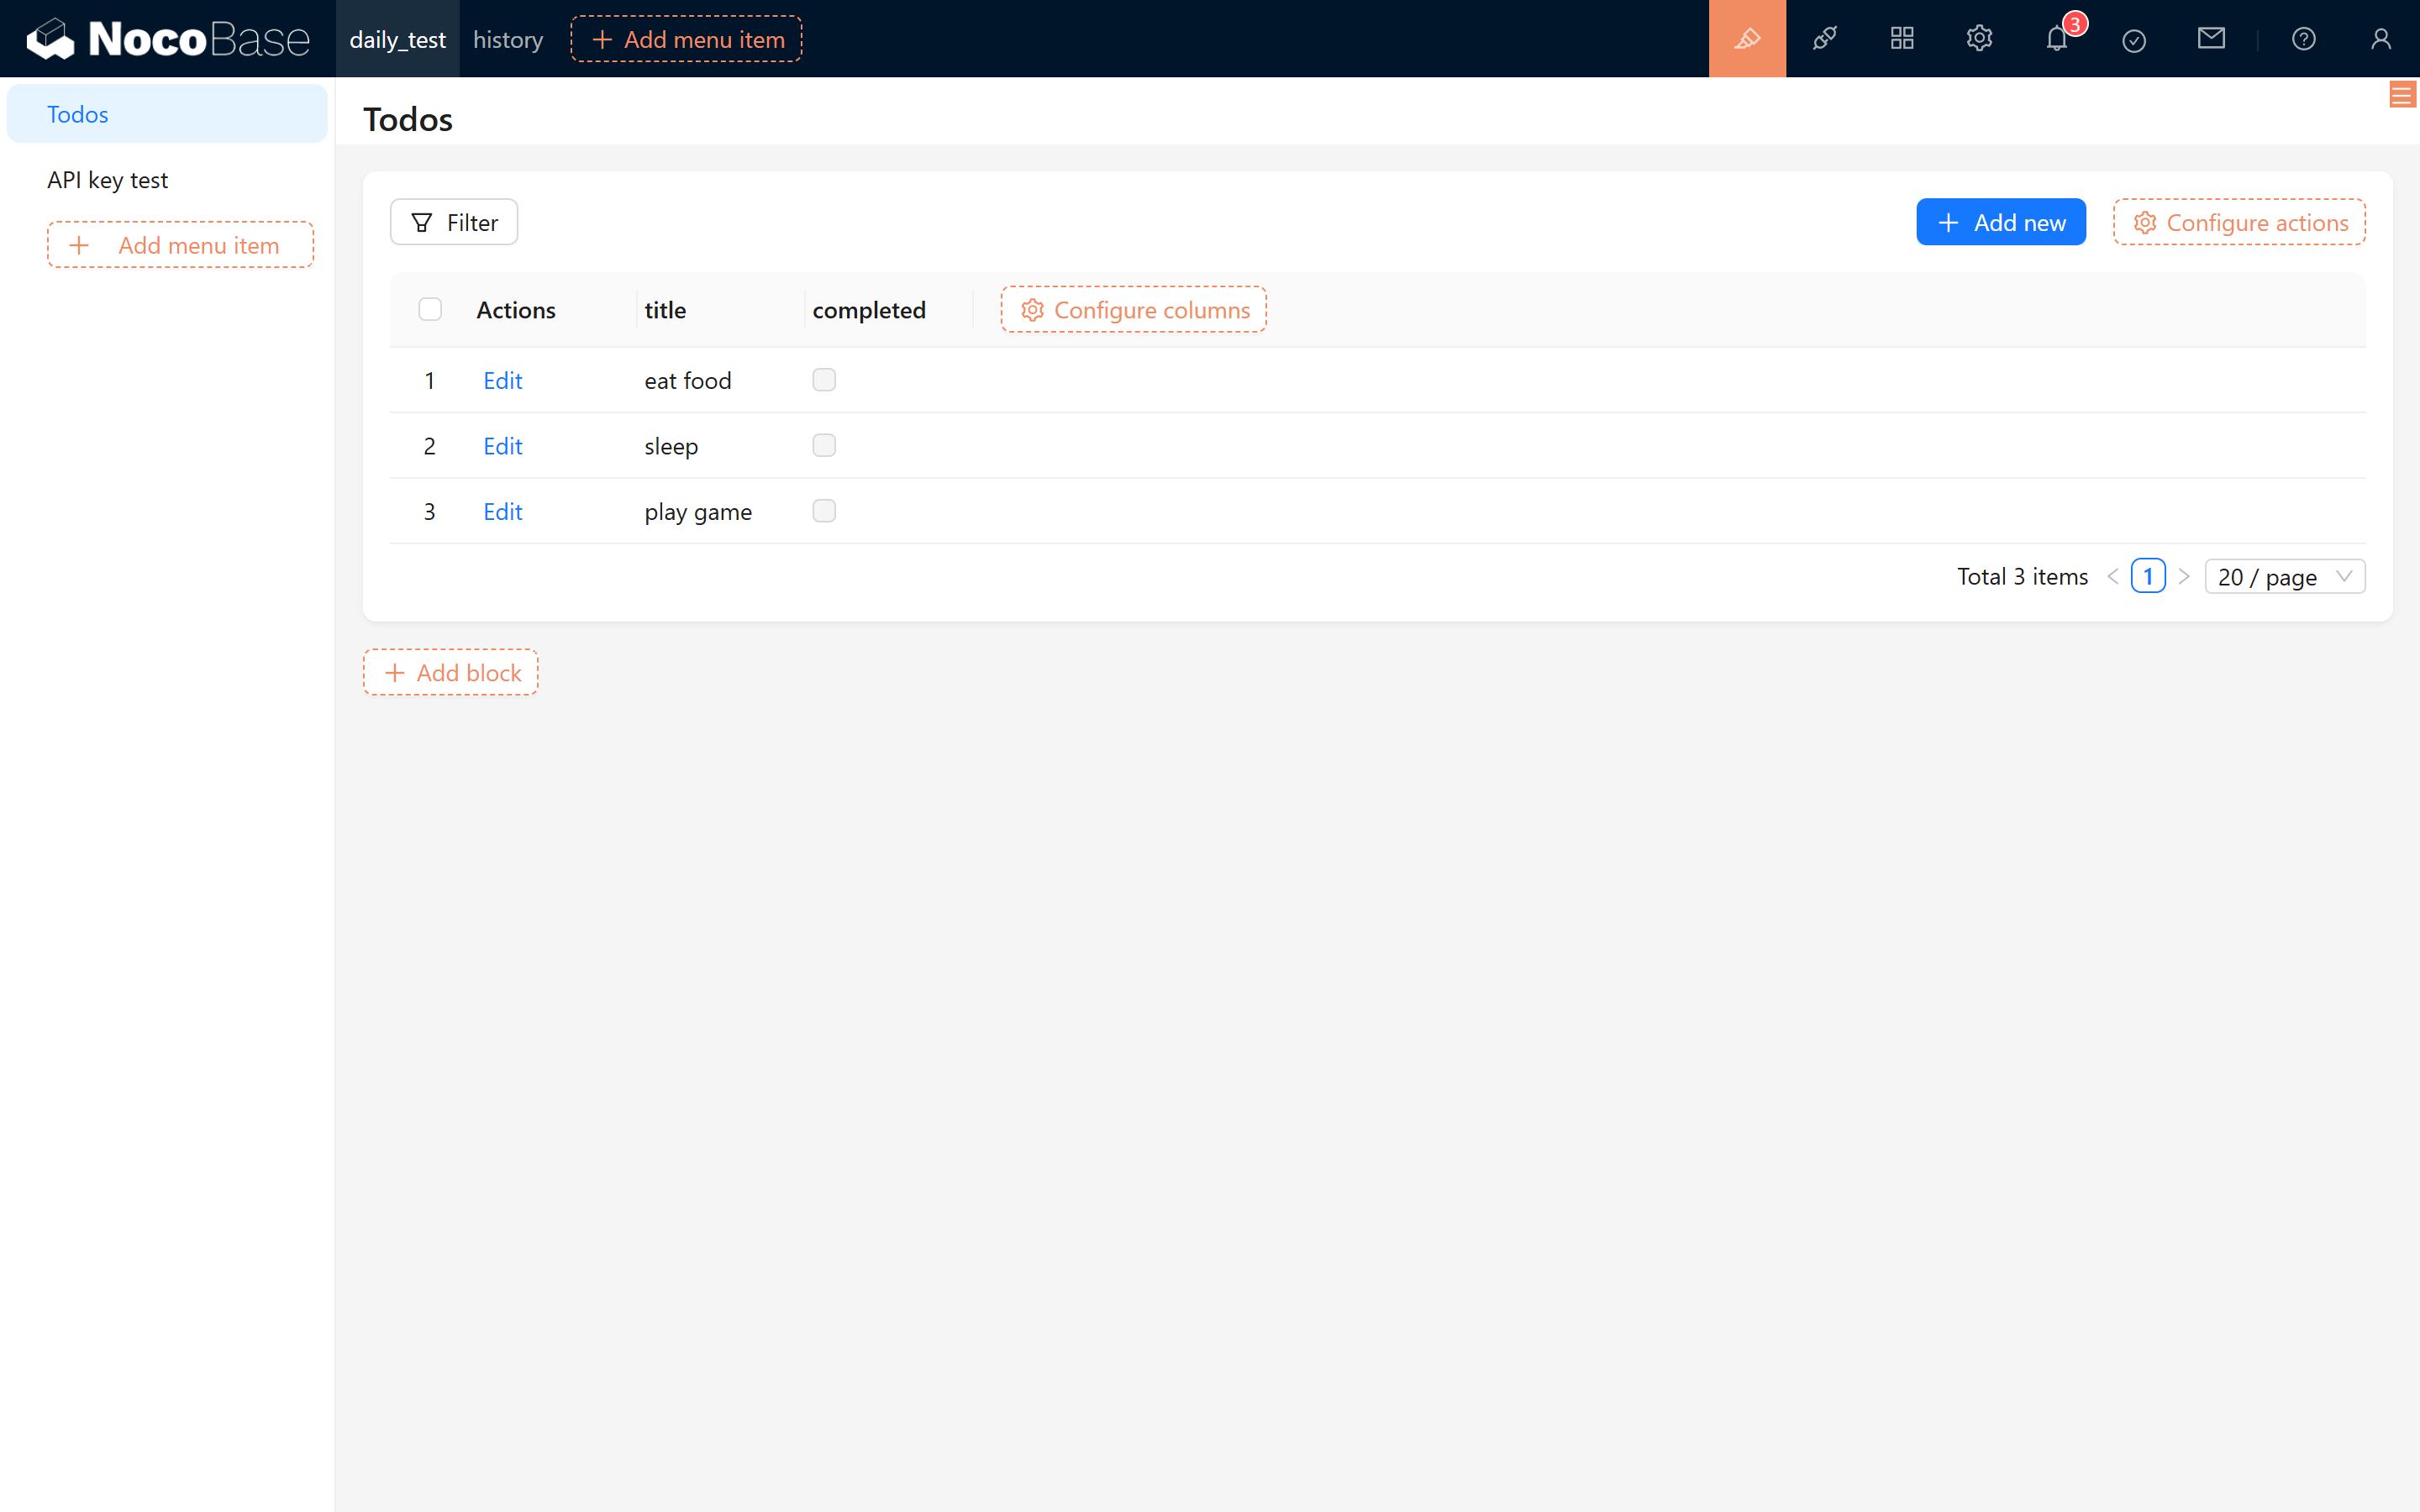
For demonstration purposes, create a collection named todos with the following fields:
idtitlecompleted
Add some sample records to the collection:
- eat food
- sleep
- play games
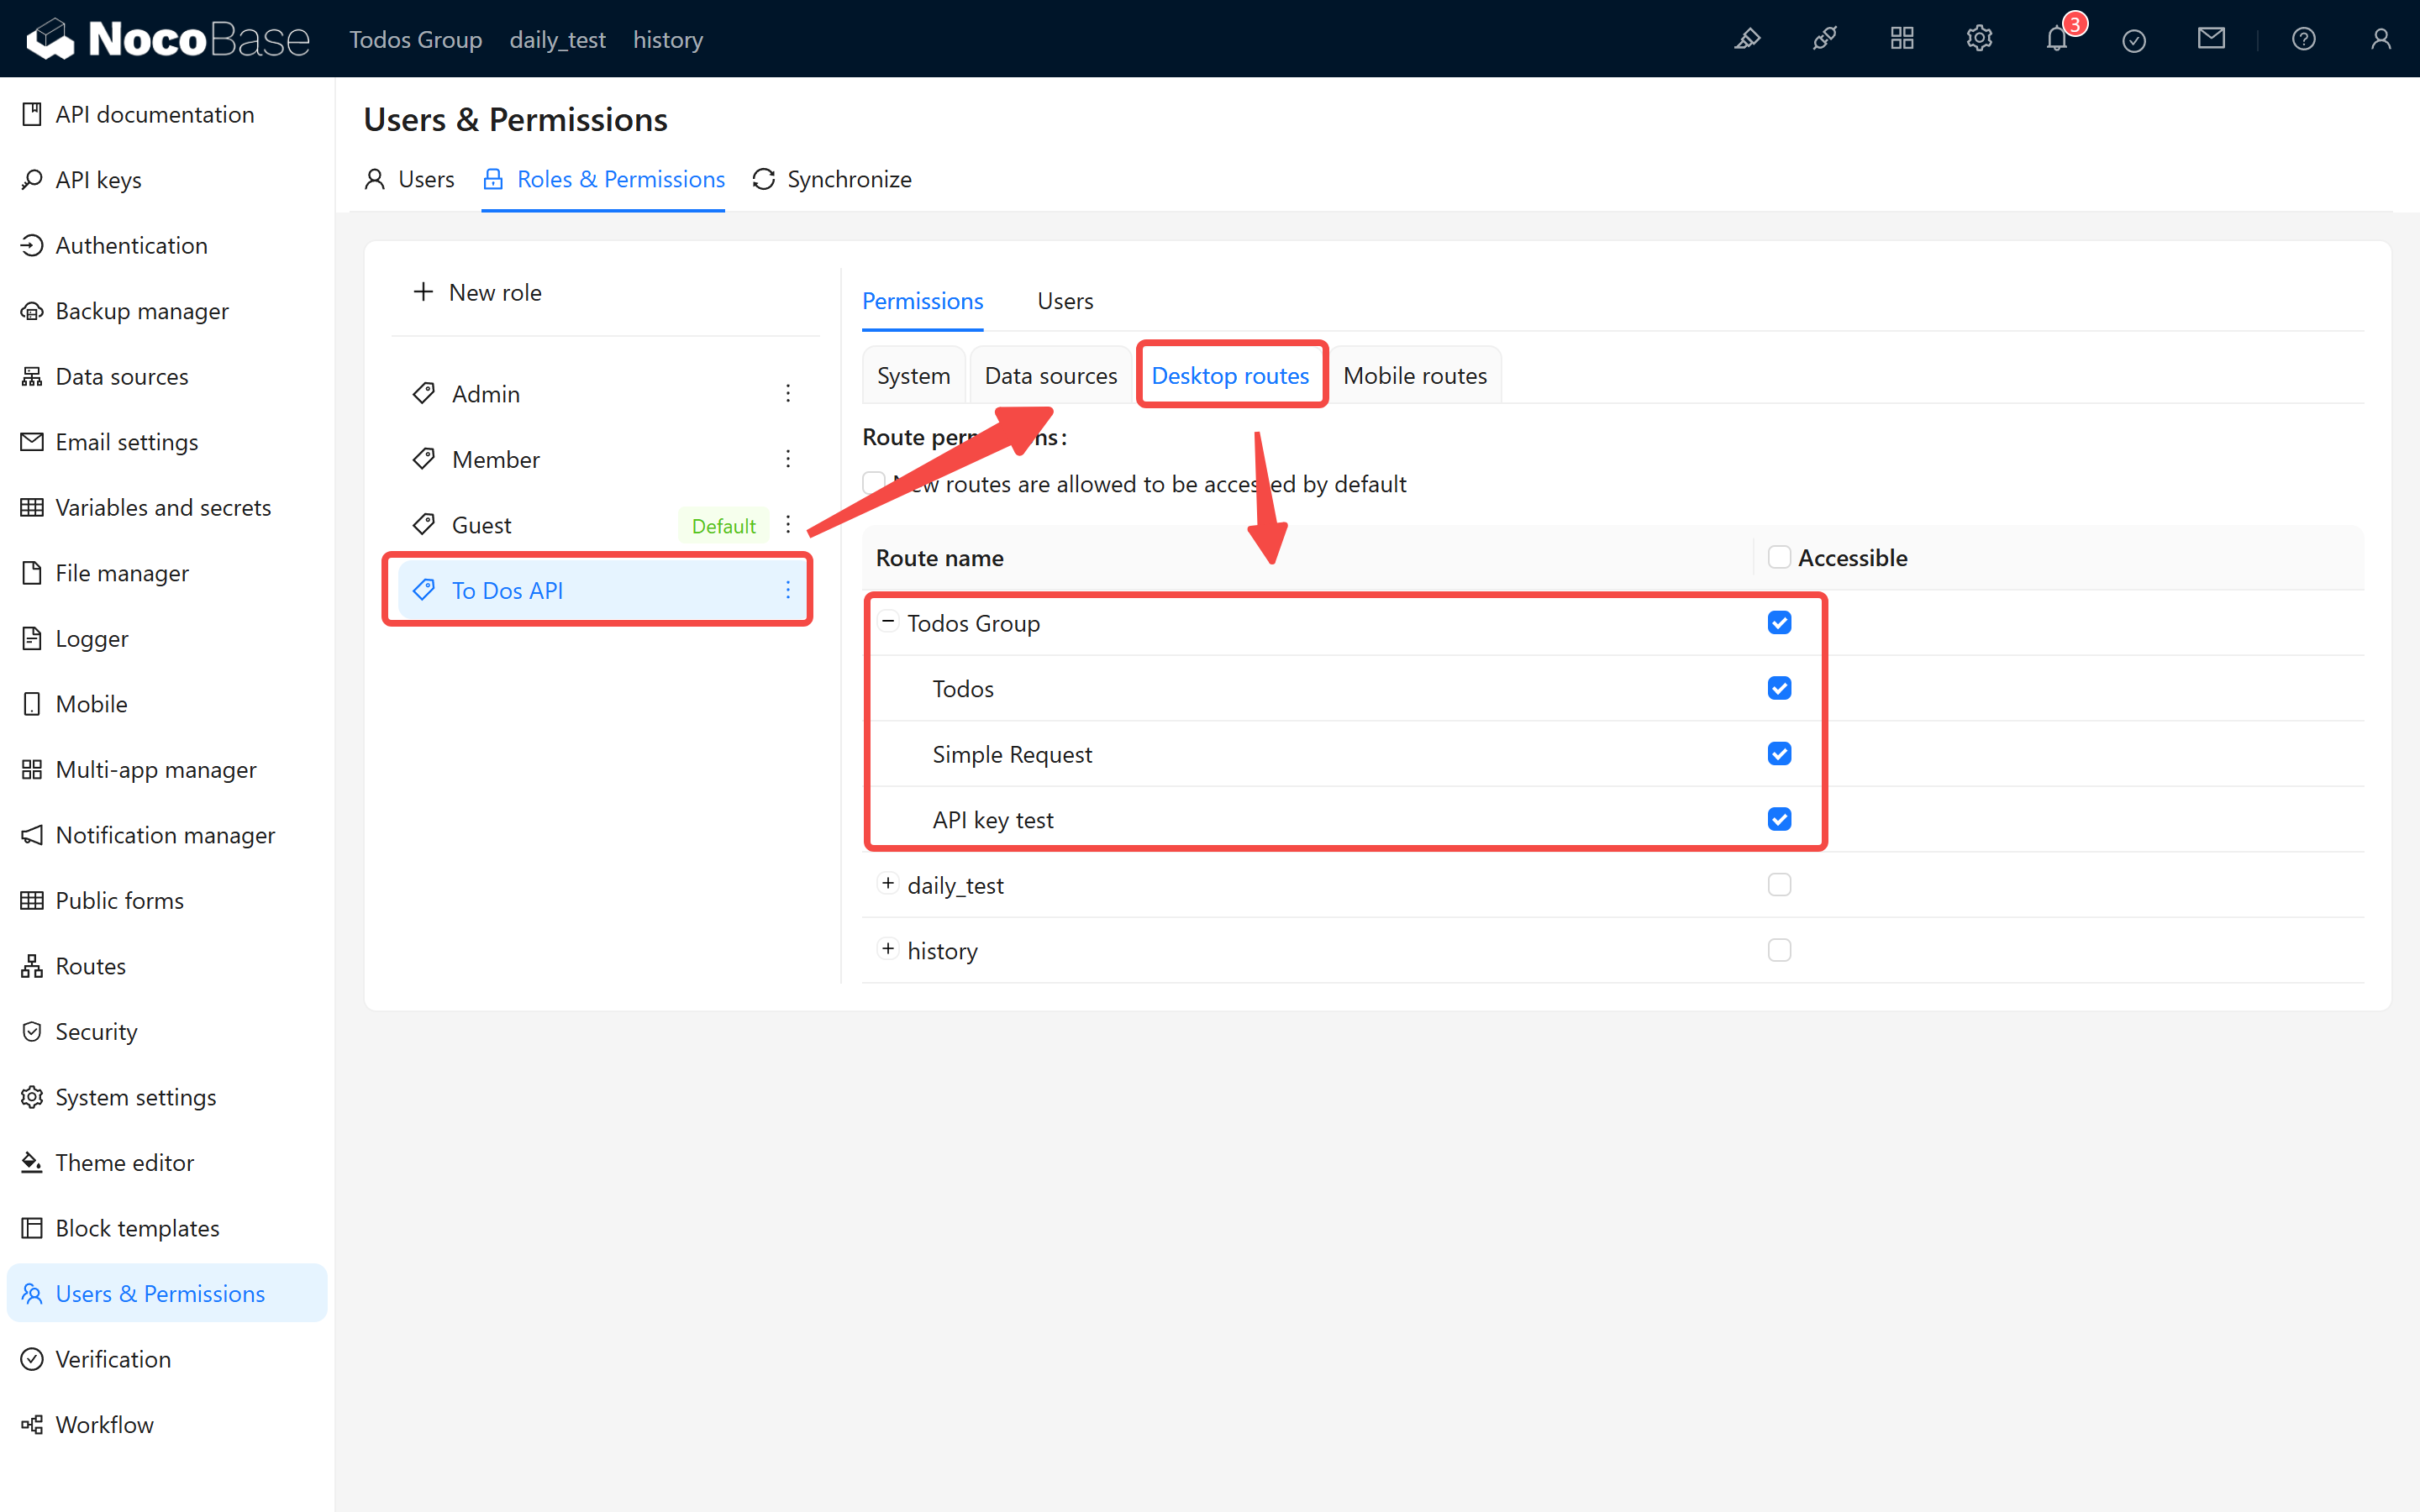
2.3 Create and Assign a Role
API Keys are bound to user roles, and the system determines request permissions based on the assigned role. Before creating an API Key, you must create a role and configure the appropriate permissions. Create a role named "To Dos API Role" and grant it full access to the todos collection.
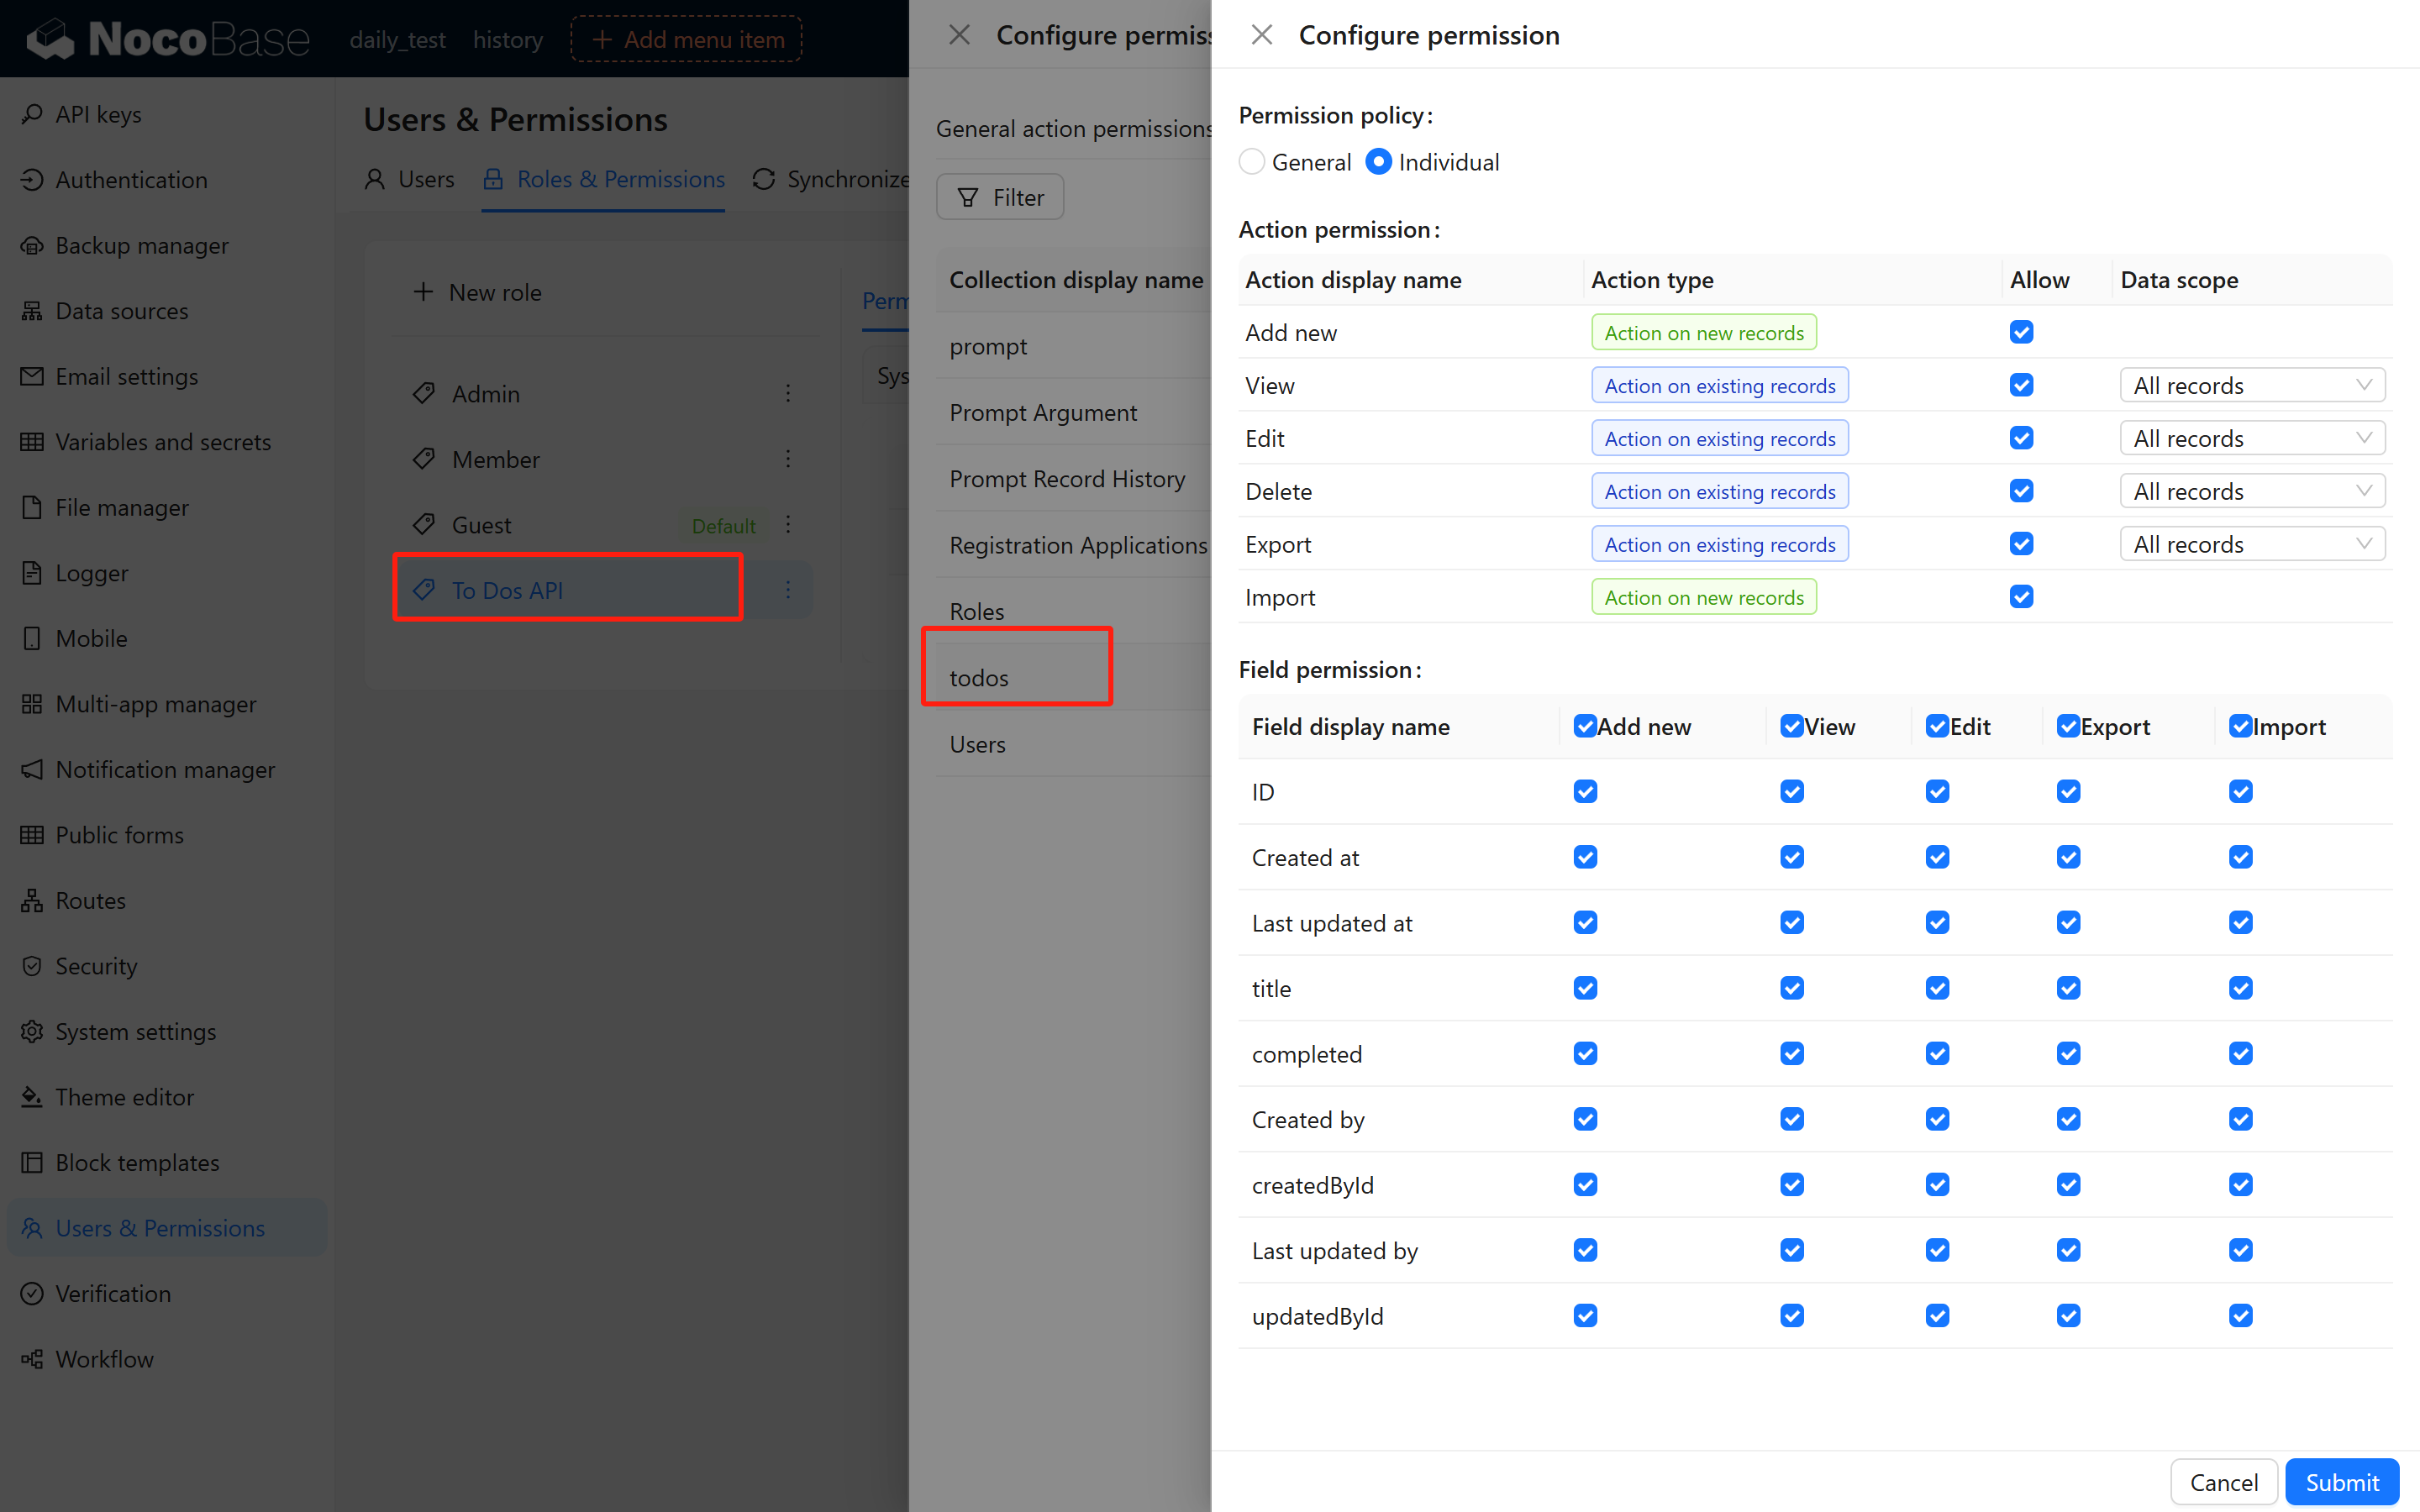
If the "To Dos API Role" is not available when creating an API Key, ensure that the current user has been assigned this role:
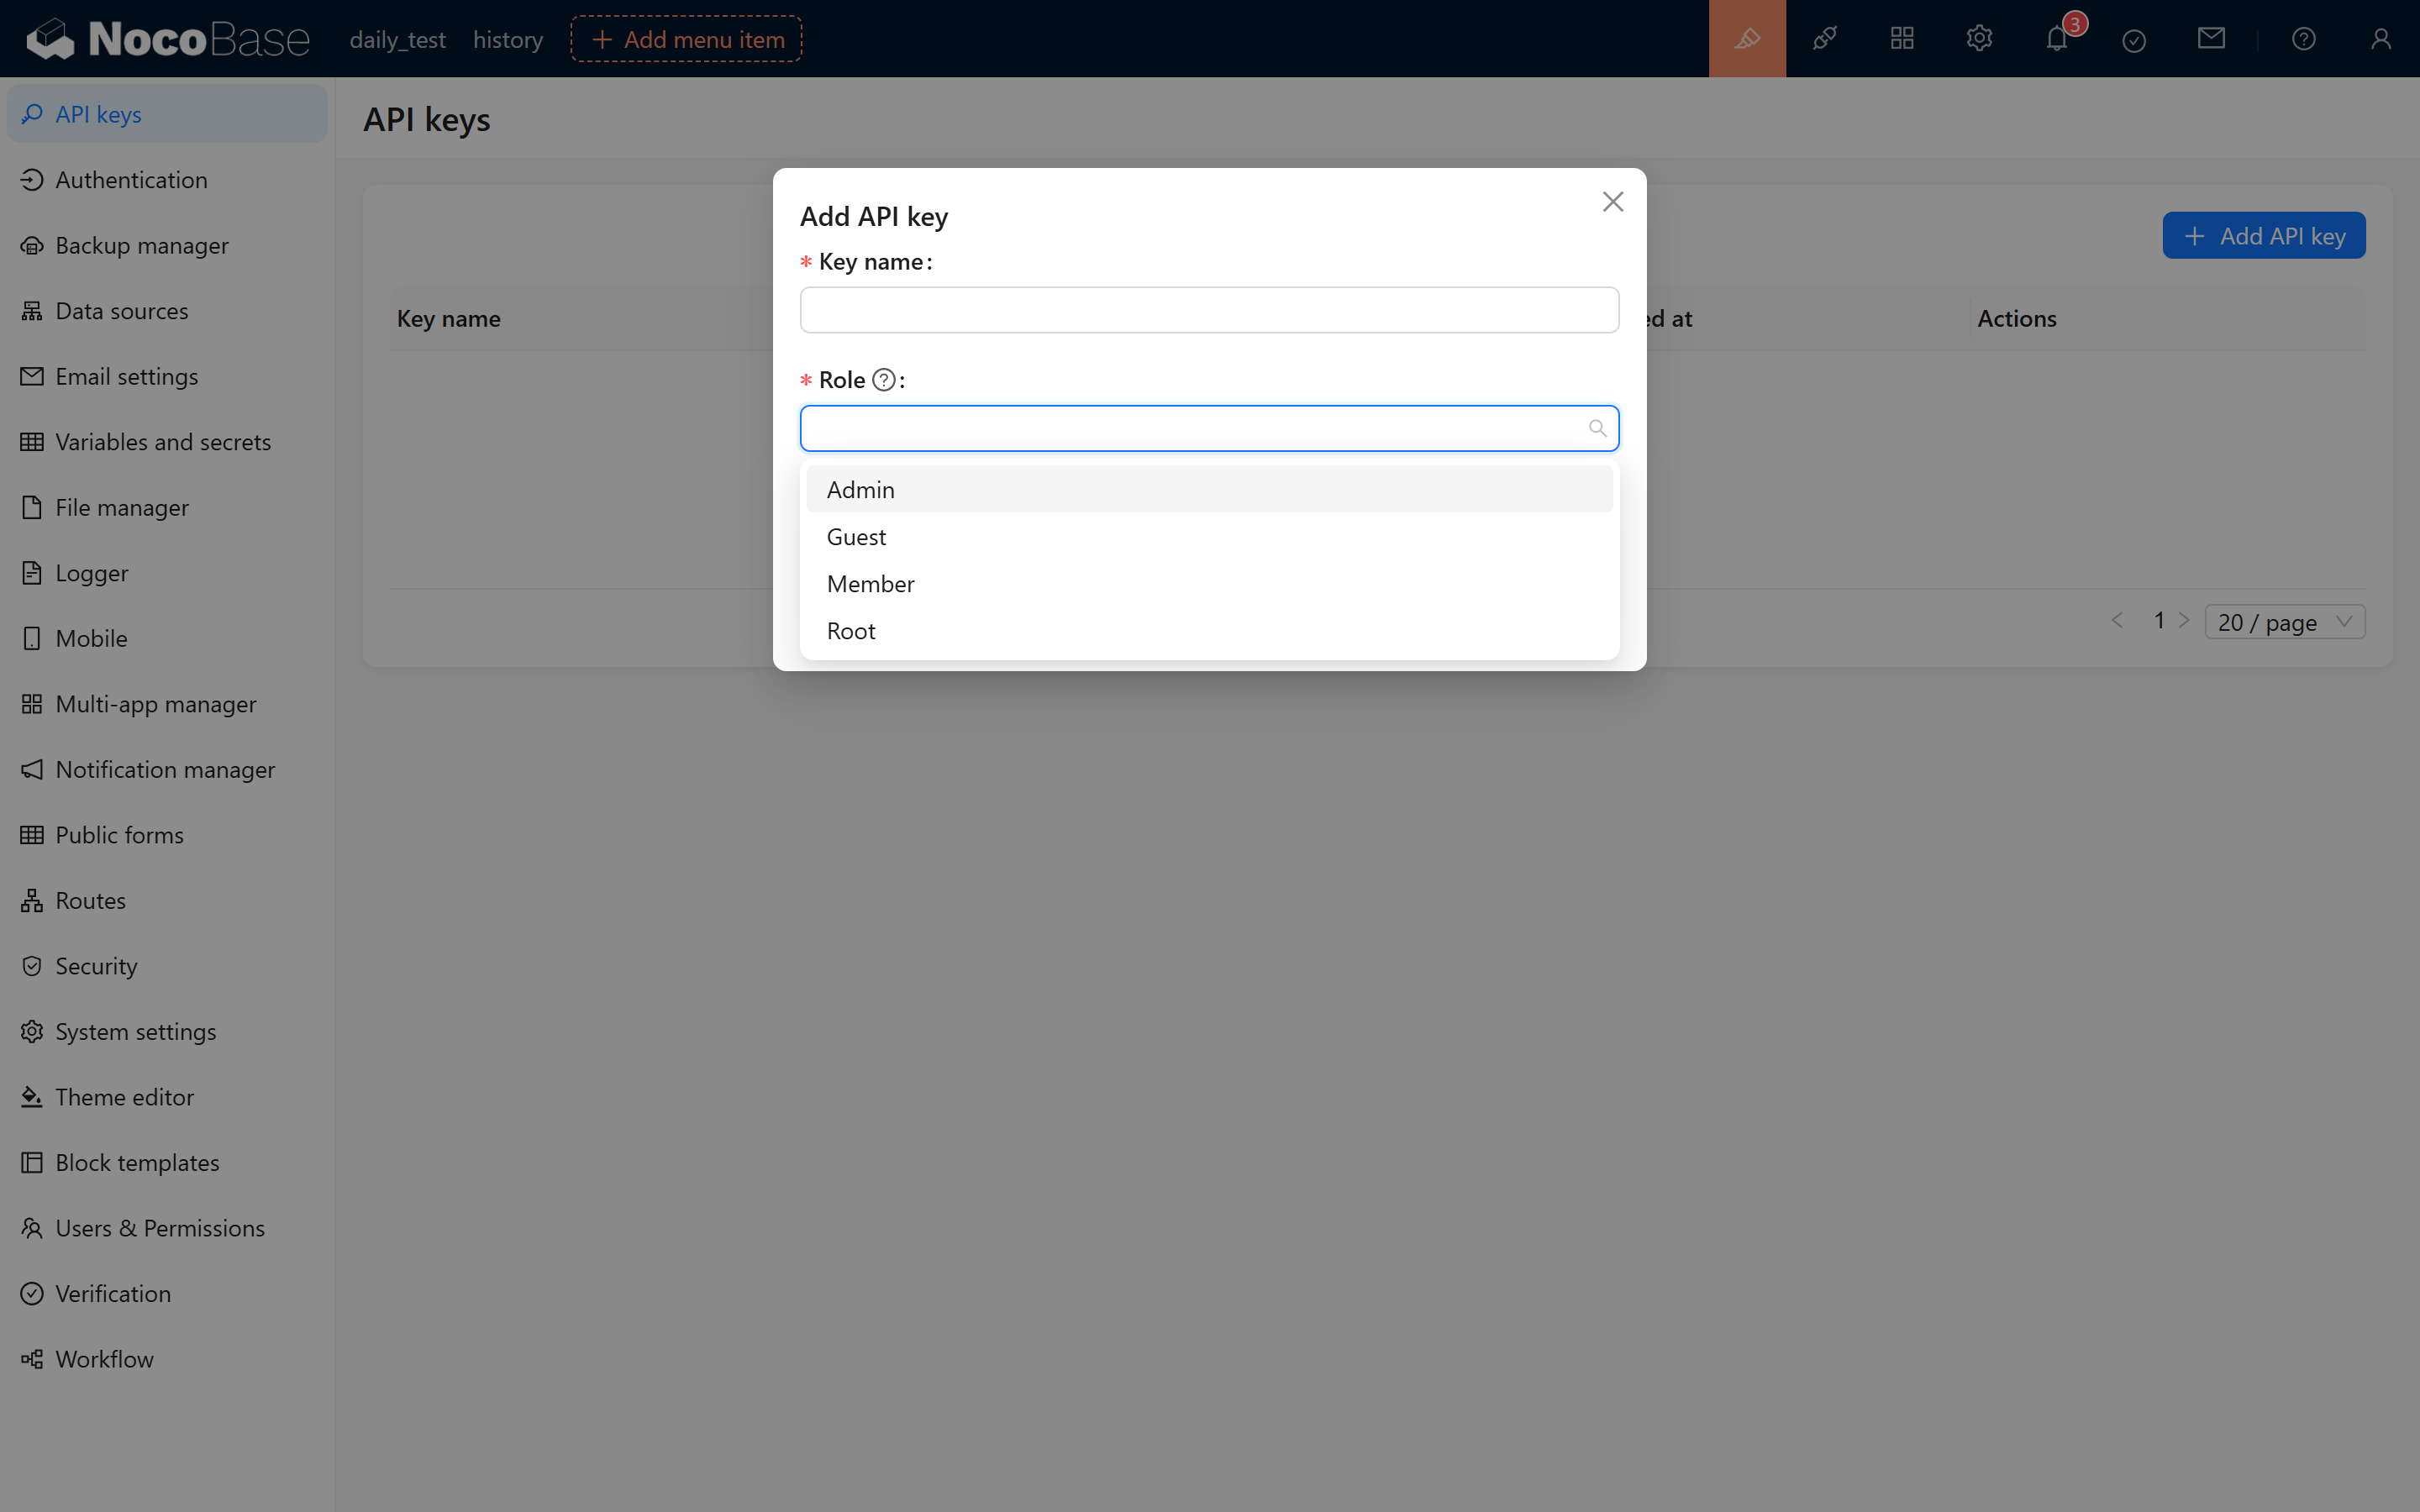
After role assignment, refresh the page and navigate to the API Keys management page. Click "Add API Key" to verify that the "To Dos API Role" appears in the role selection.

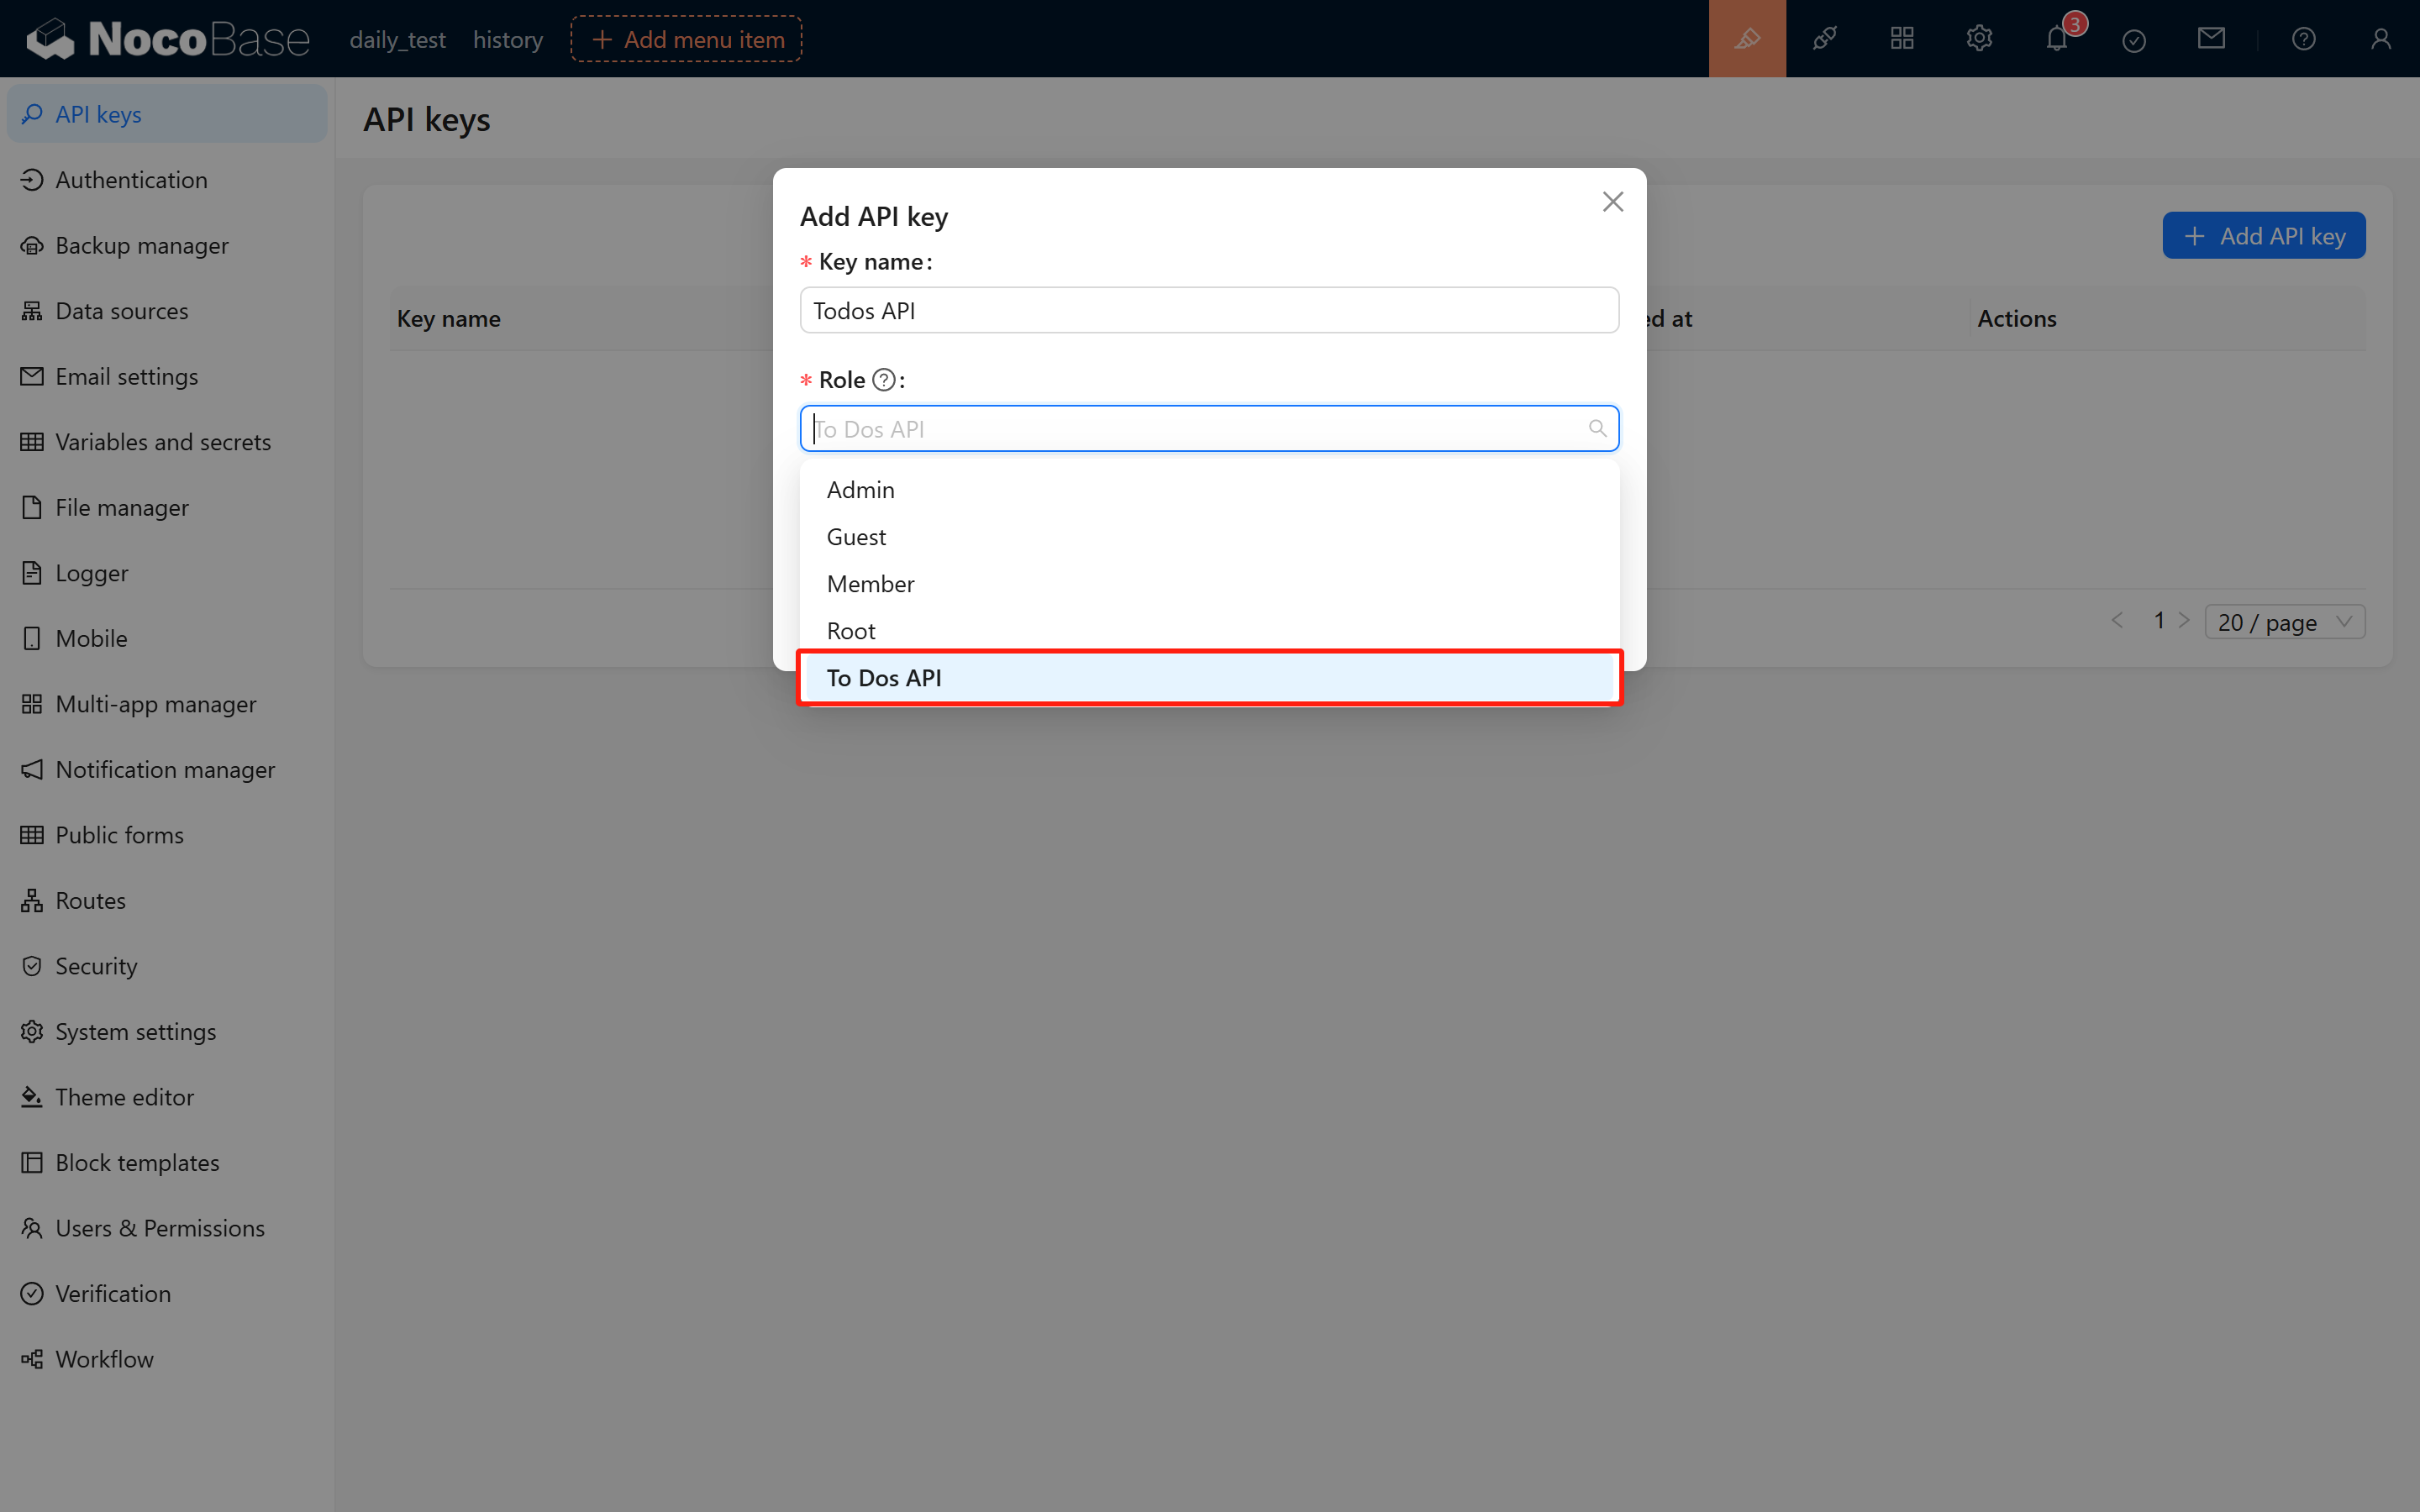
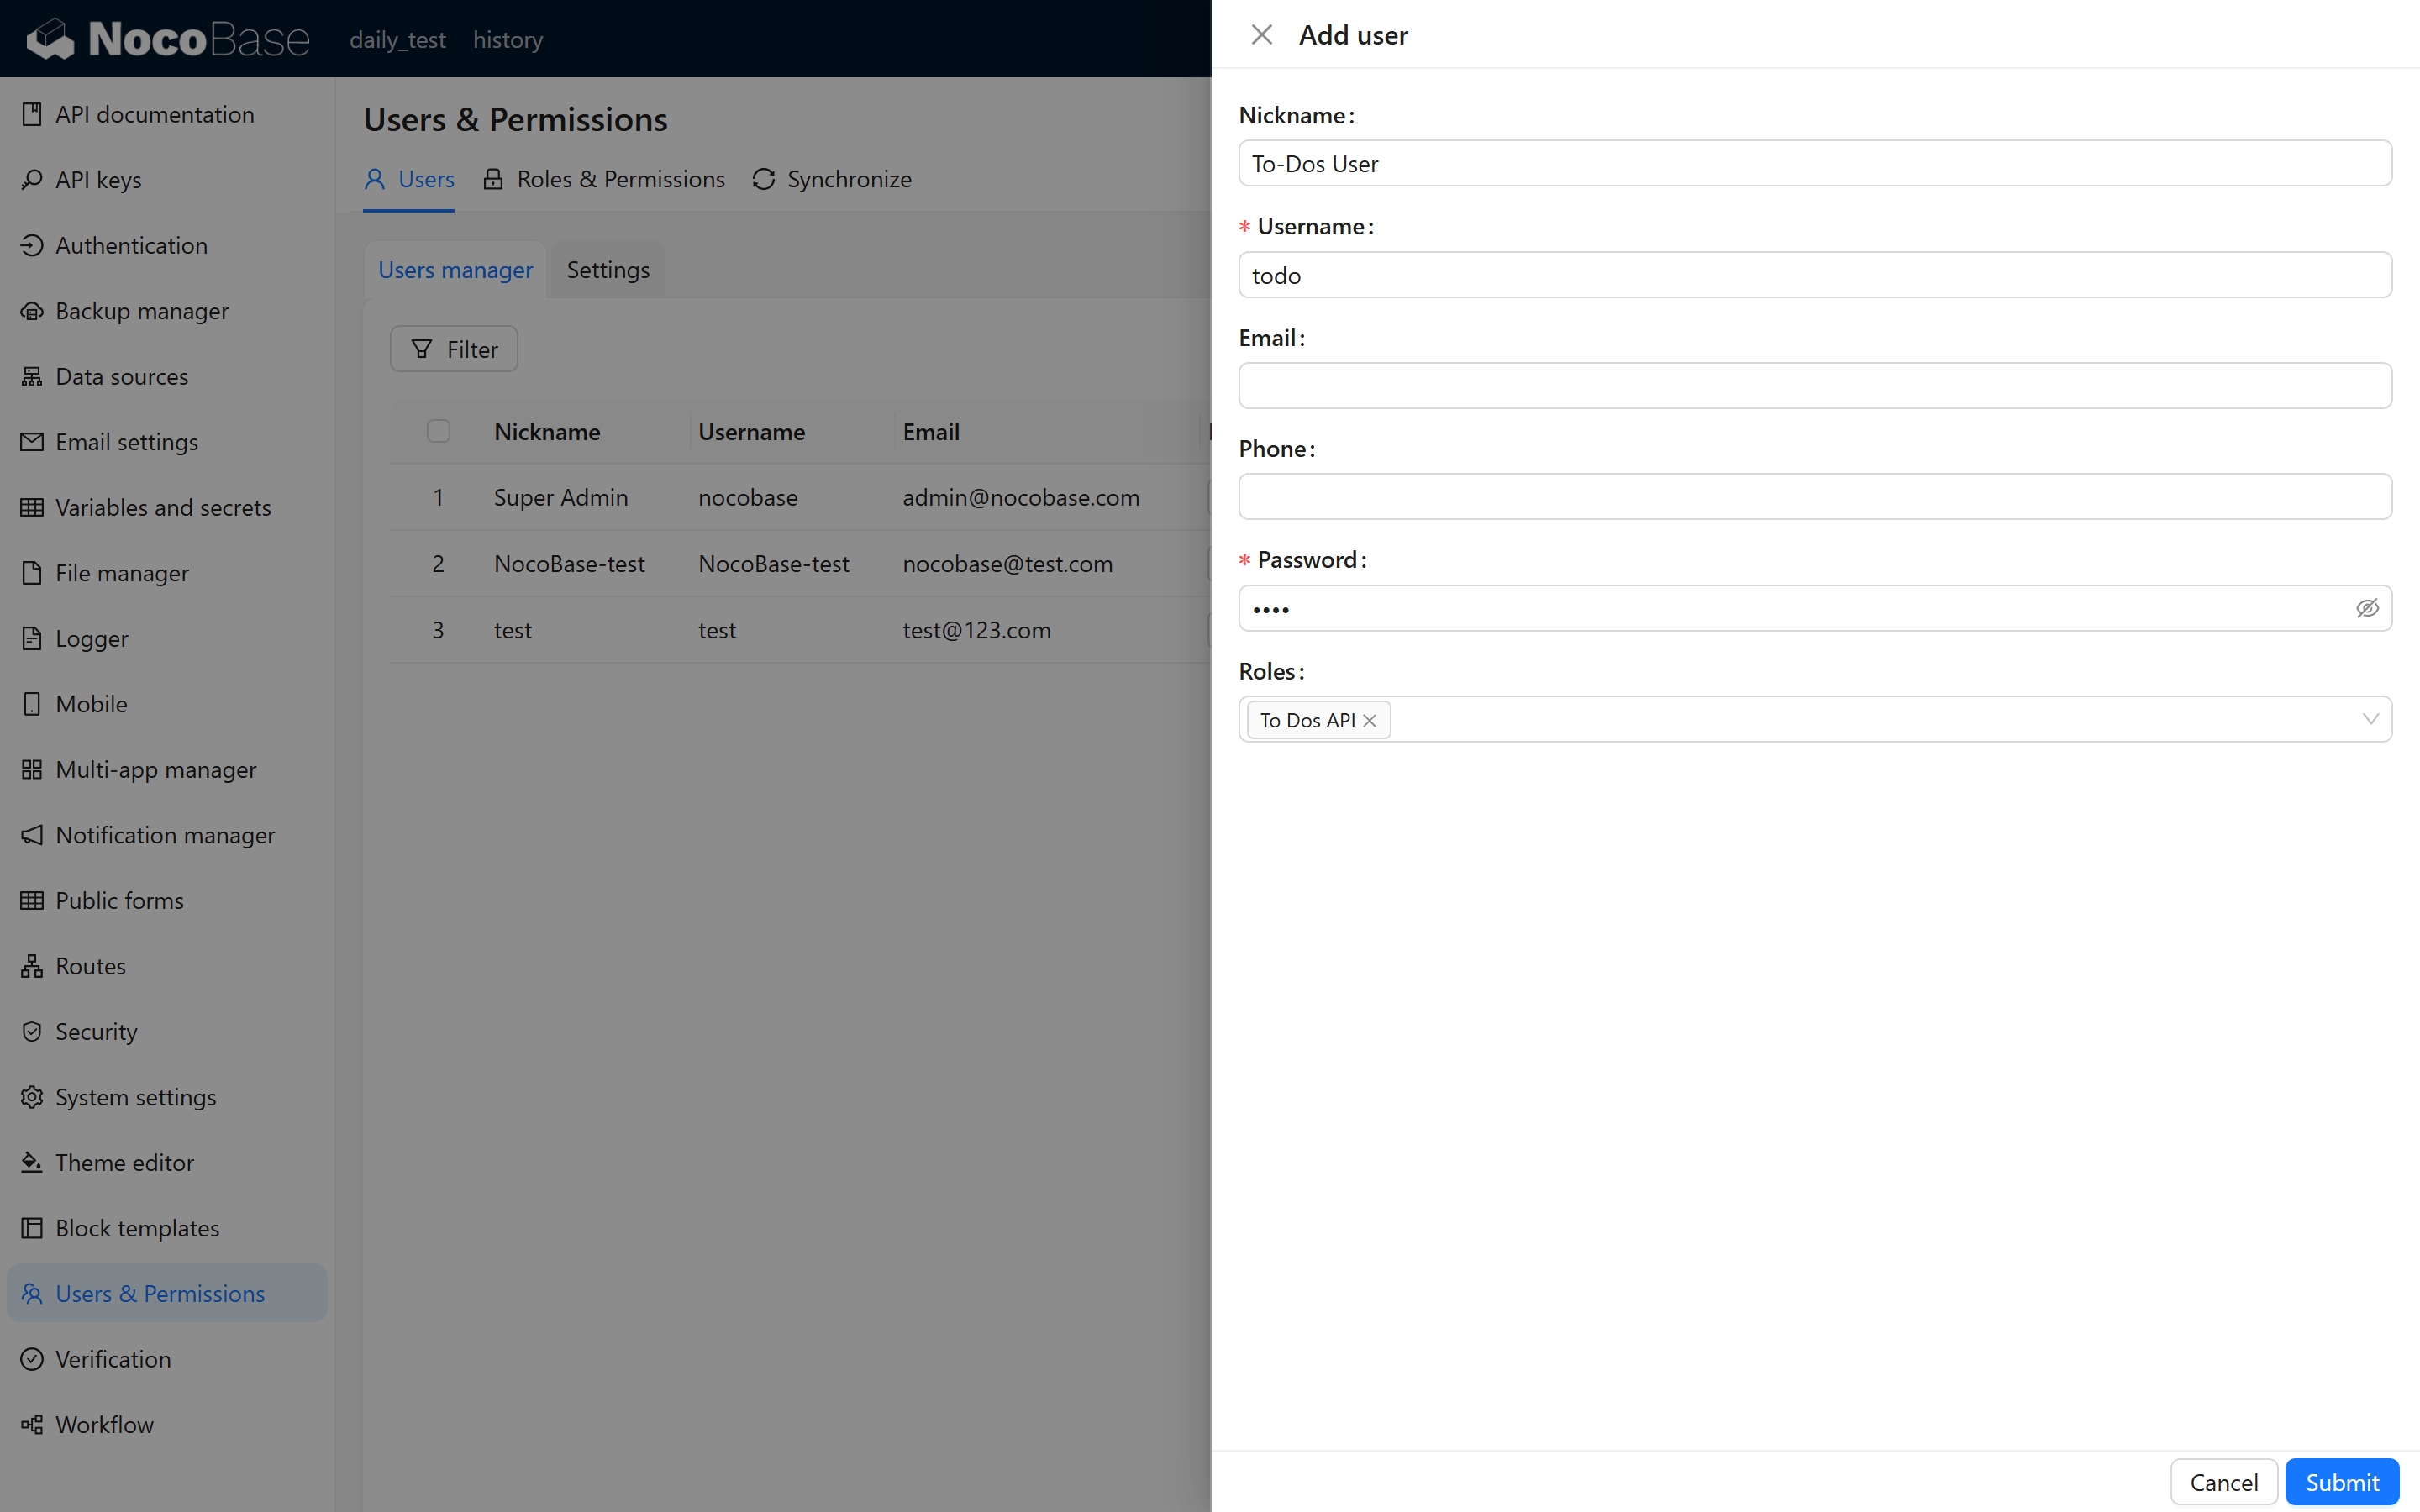
For better access control, consider creating a dedicated user account (e.g., "To Dos API User") specifically for API Key management and testing. Assign the "To Dos API Role" to this user.
2.4 Generate and Save the API Key
After submitting the form, the system will display a confirmation message with the newly generated API Key. Important: Copy and securely store this key immediately, as it will not be displayed again for security reasons.
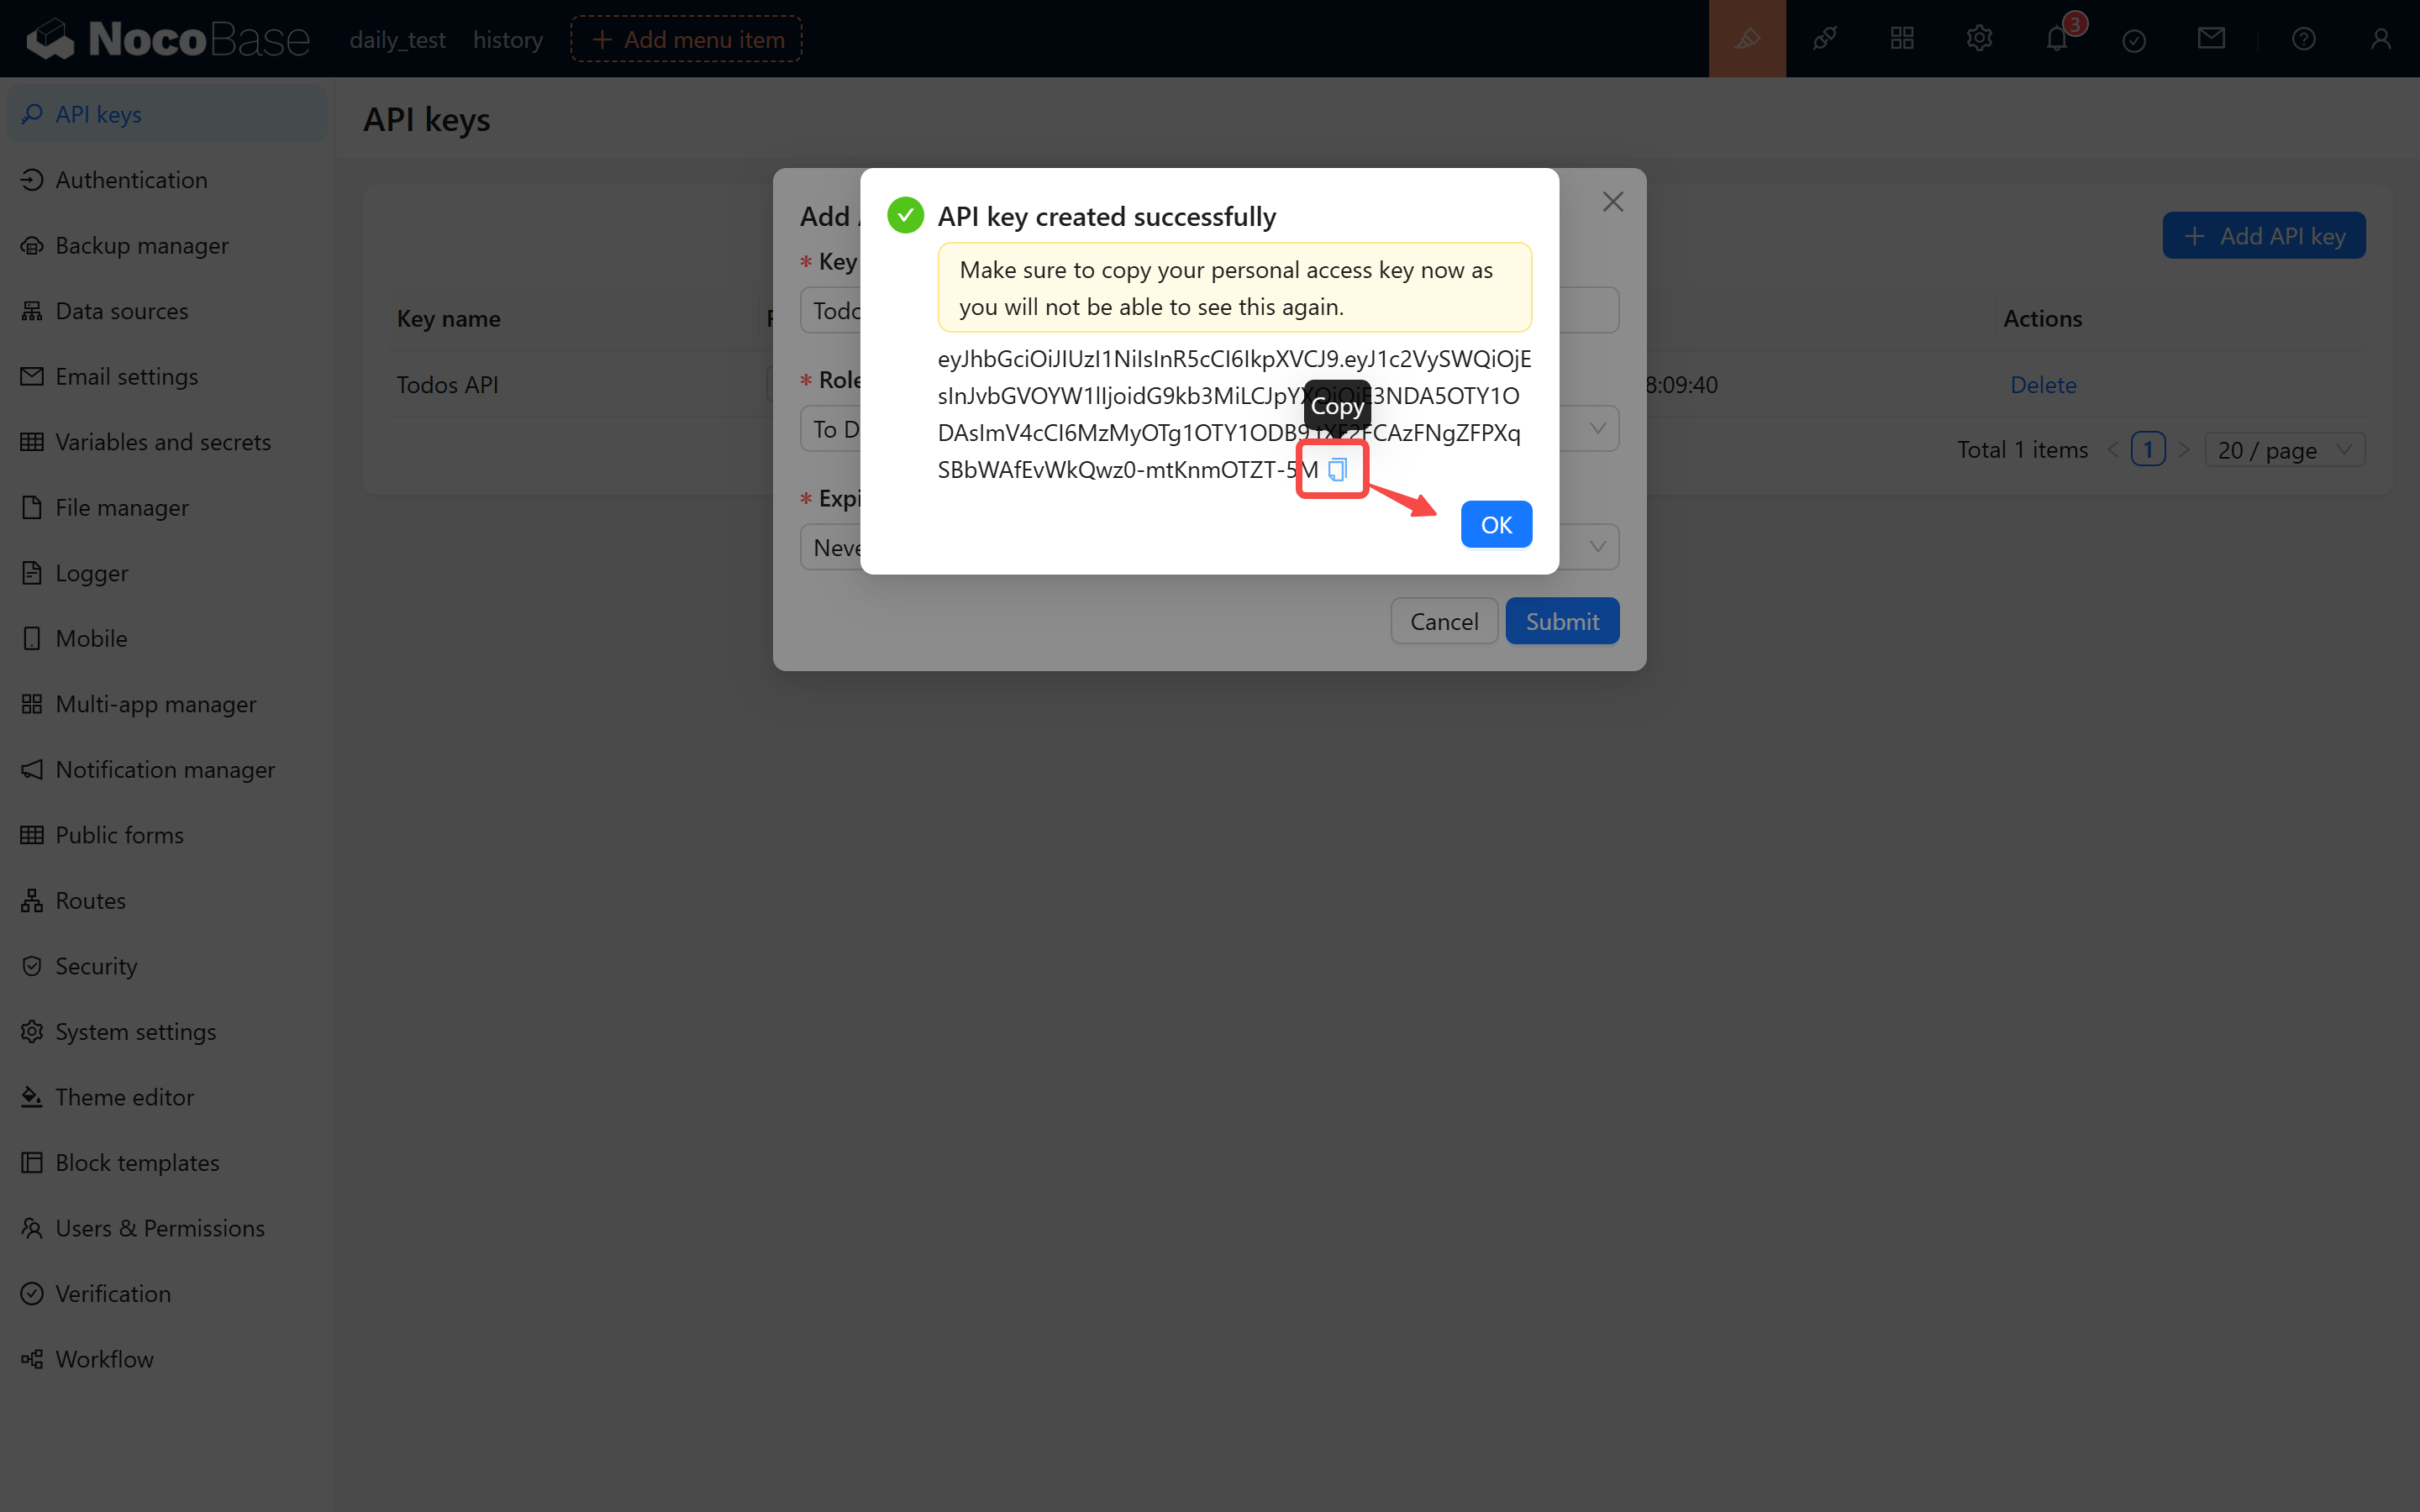
Example API Key:
2.5 Important Notes
- The API Key's validity period is determined by the expiration setting configured during creation.
- API Key generation and verification depend on the
APP_KEYenvironment variable. Do not modify this variable, as doing so will invalidate all existing API Keys in the system.
3 Testing API Key Authentication
3.1 Using the API Documentation Plugin
Open the API Documentation plugin to view the request methods, URLs, parameters, and headers for each API endpoint.
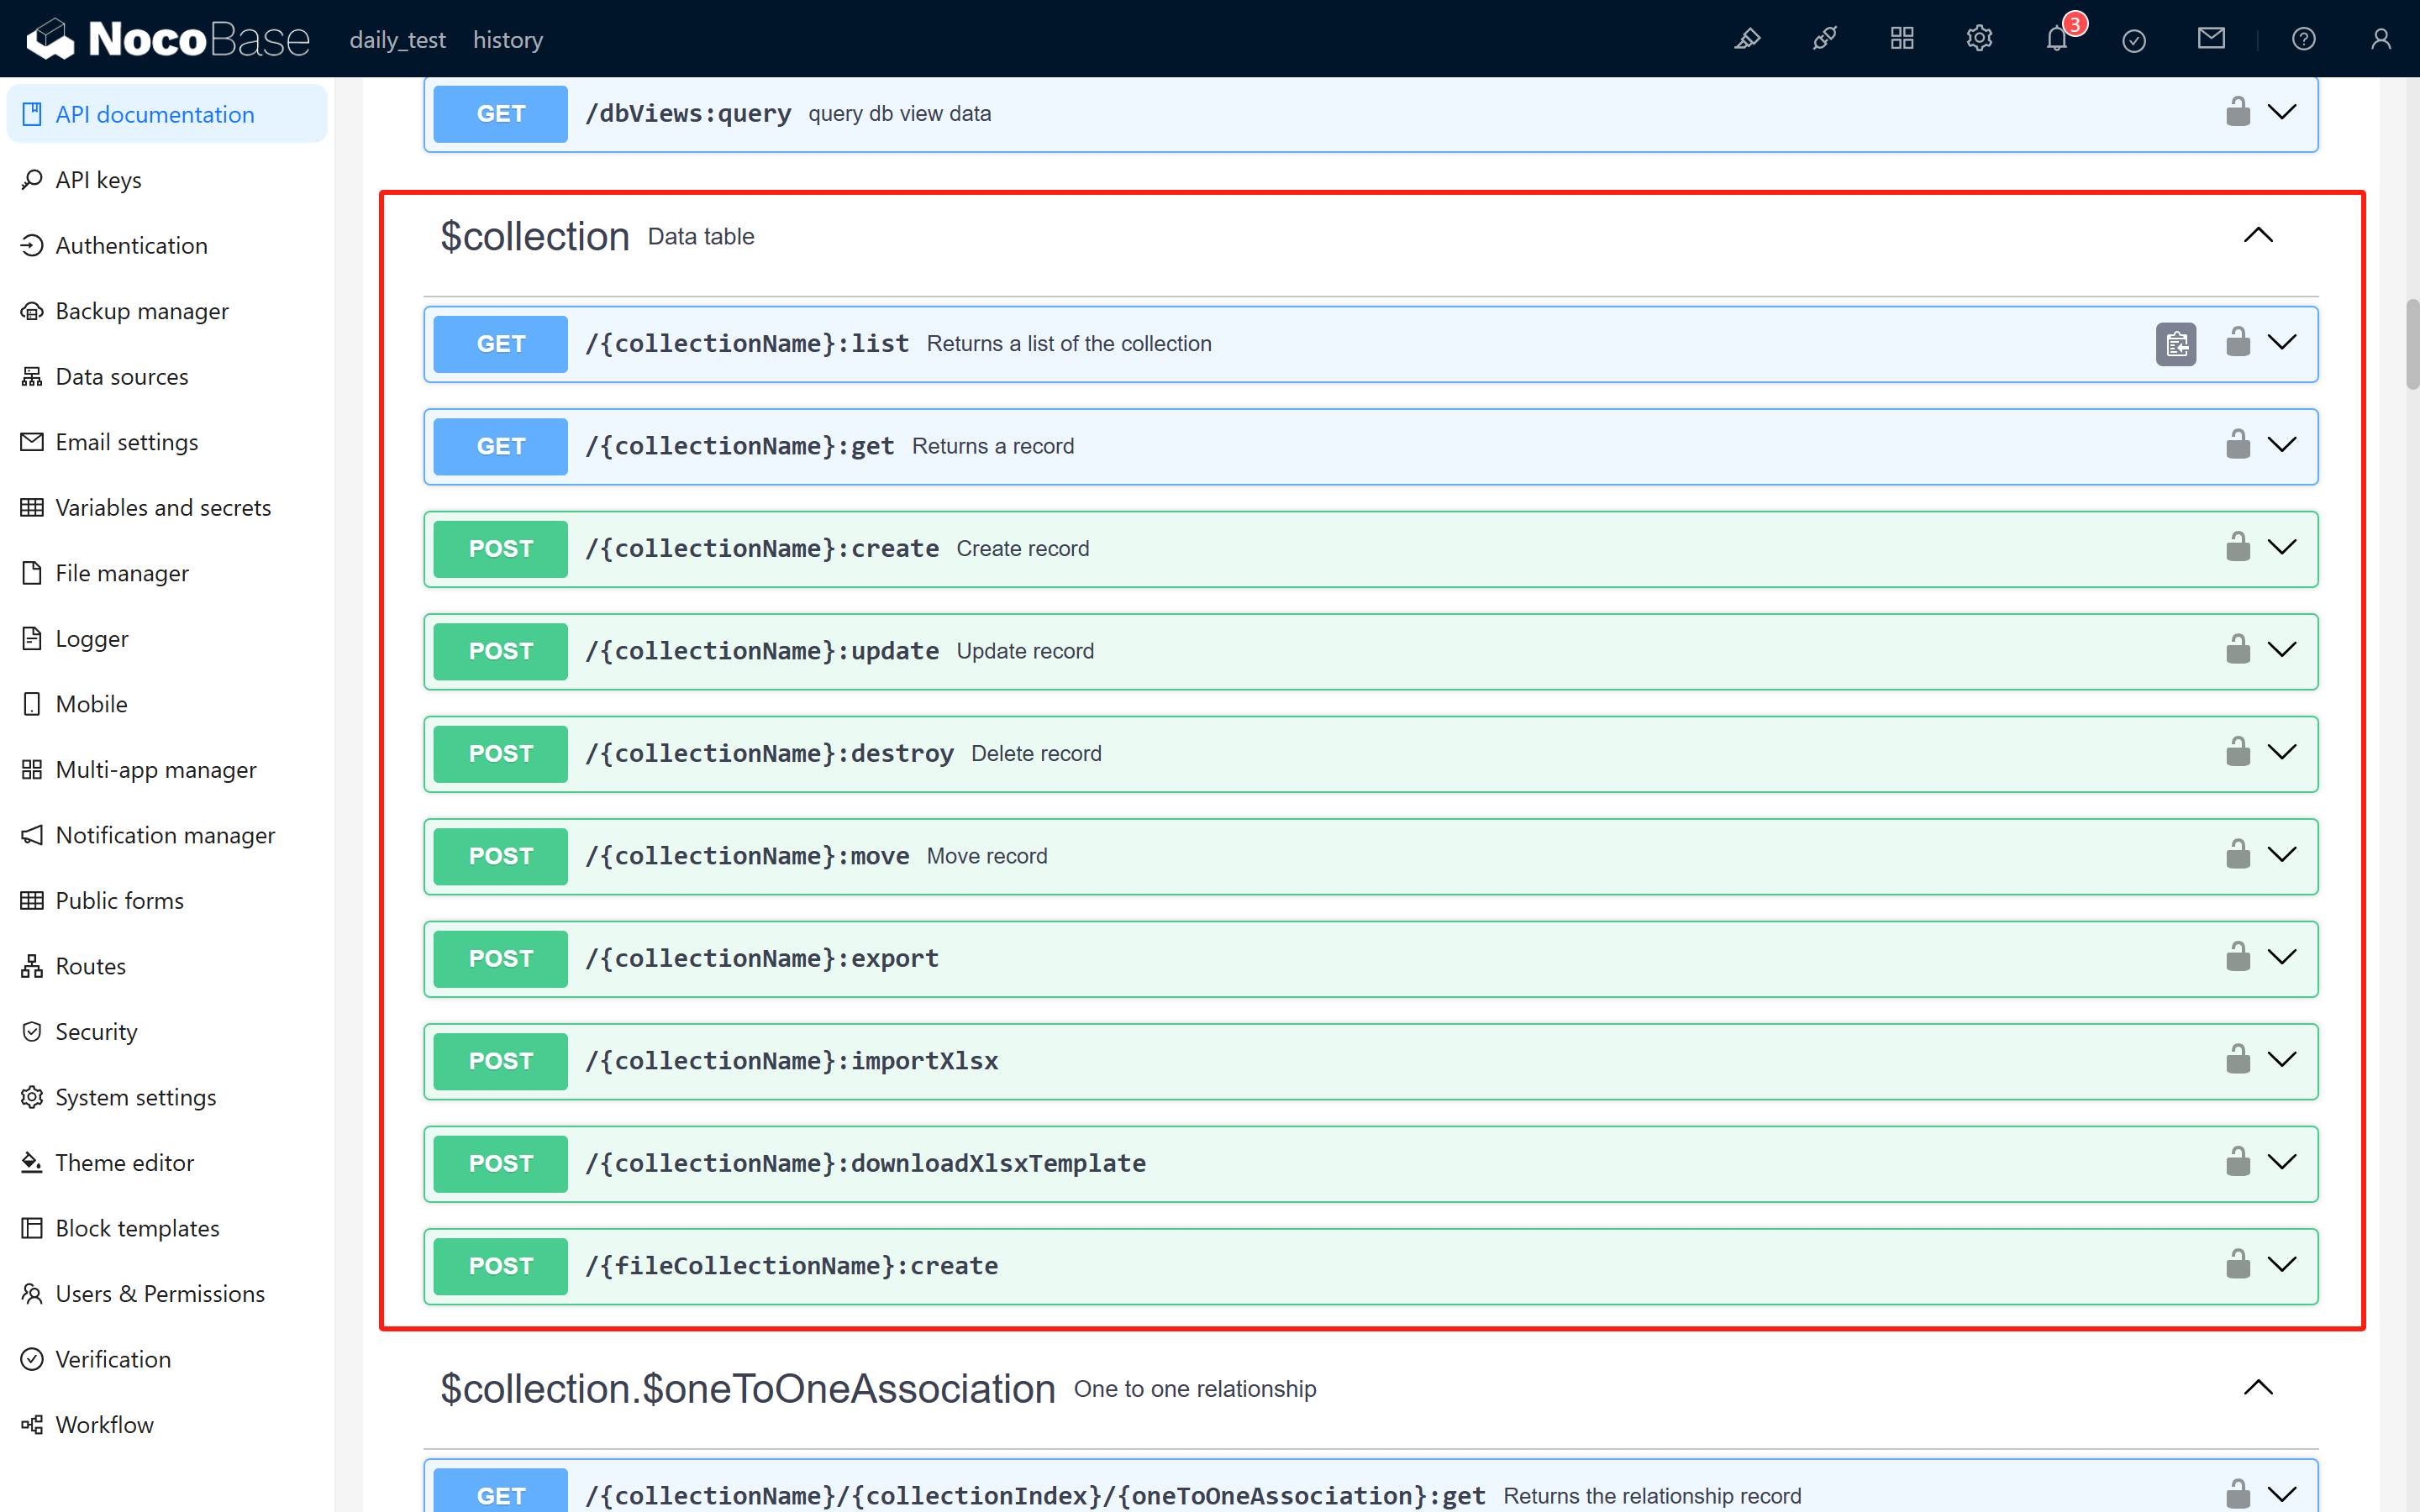
3.2 Understanding Basic CRUD Operations
NocoBase provides standard CRUD (Create, Read, Update, Delete) APIs for data manipulation:
-
List Query (list API):
-
Create Record (create API):
-
Update Record (update API):
-
Delete Record (delete API):
Where:
{baseURL}: Your NocoBase system URL{collectionName}: The collection name
Example: For a local instance at localhost:13000 with a collection named todos:
3.3 Testing with Postman
Create a GET request in Postman with the following configuration:
- URL: The request endpoint (e.g.,
http://localhost:13000/api/todos:list) - Headers: Add
Authorizationheader with the value:
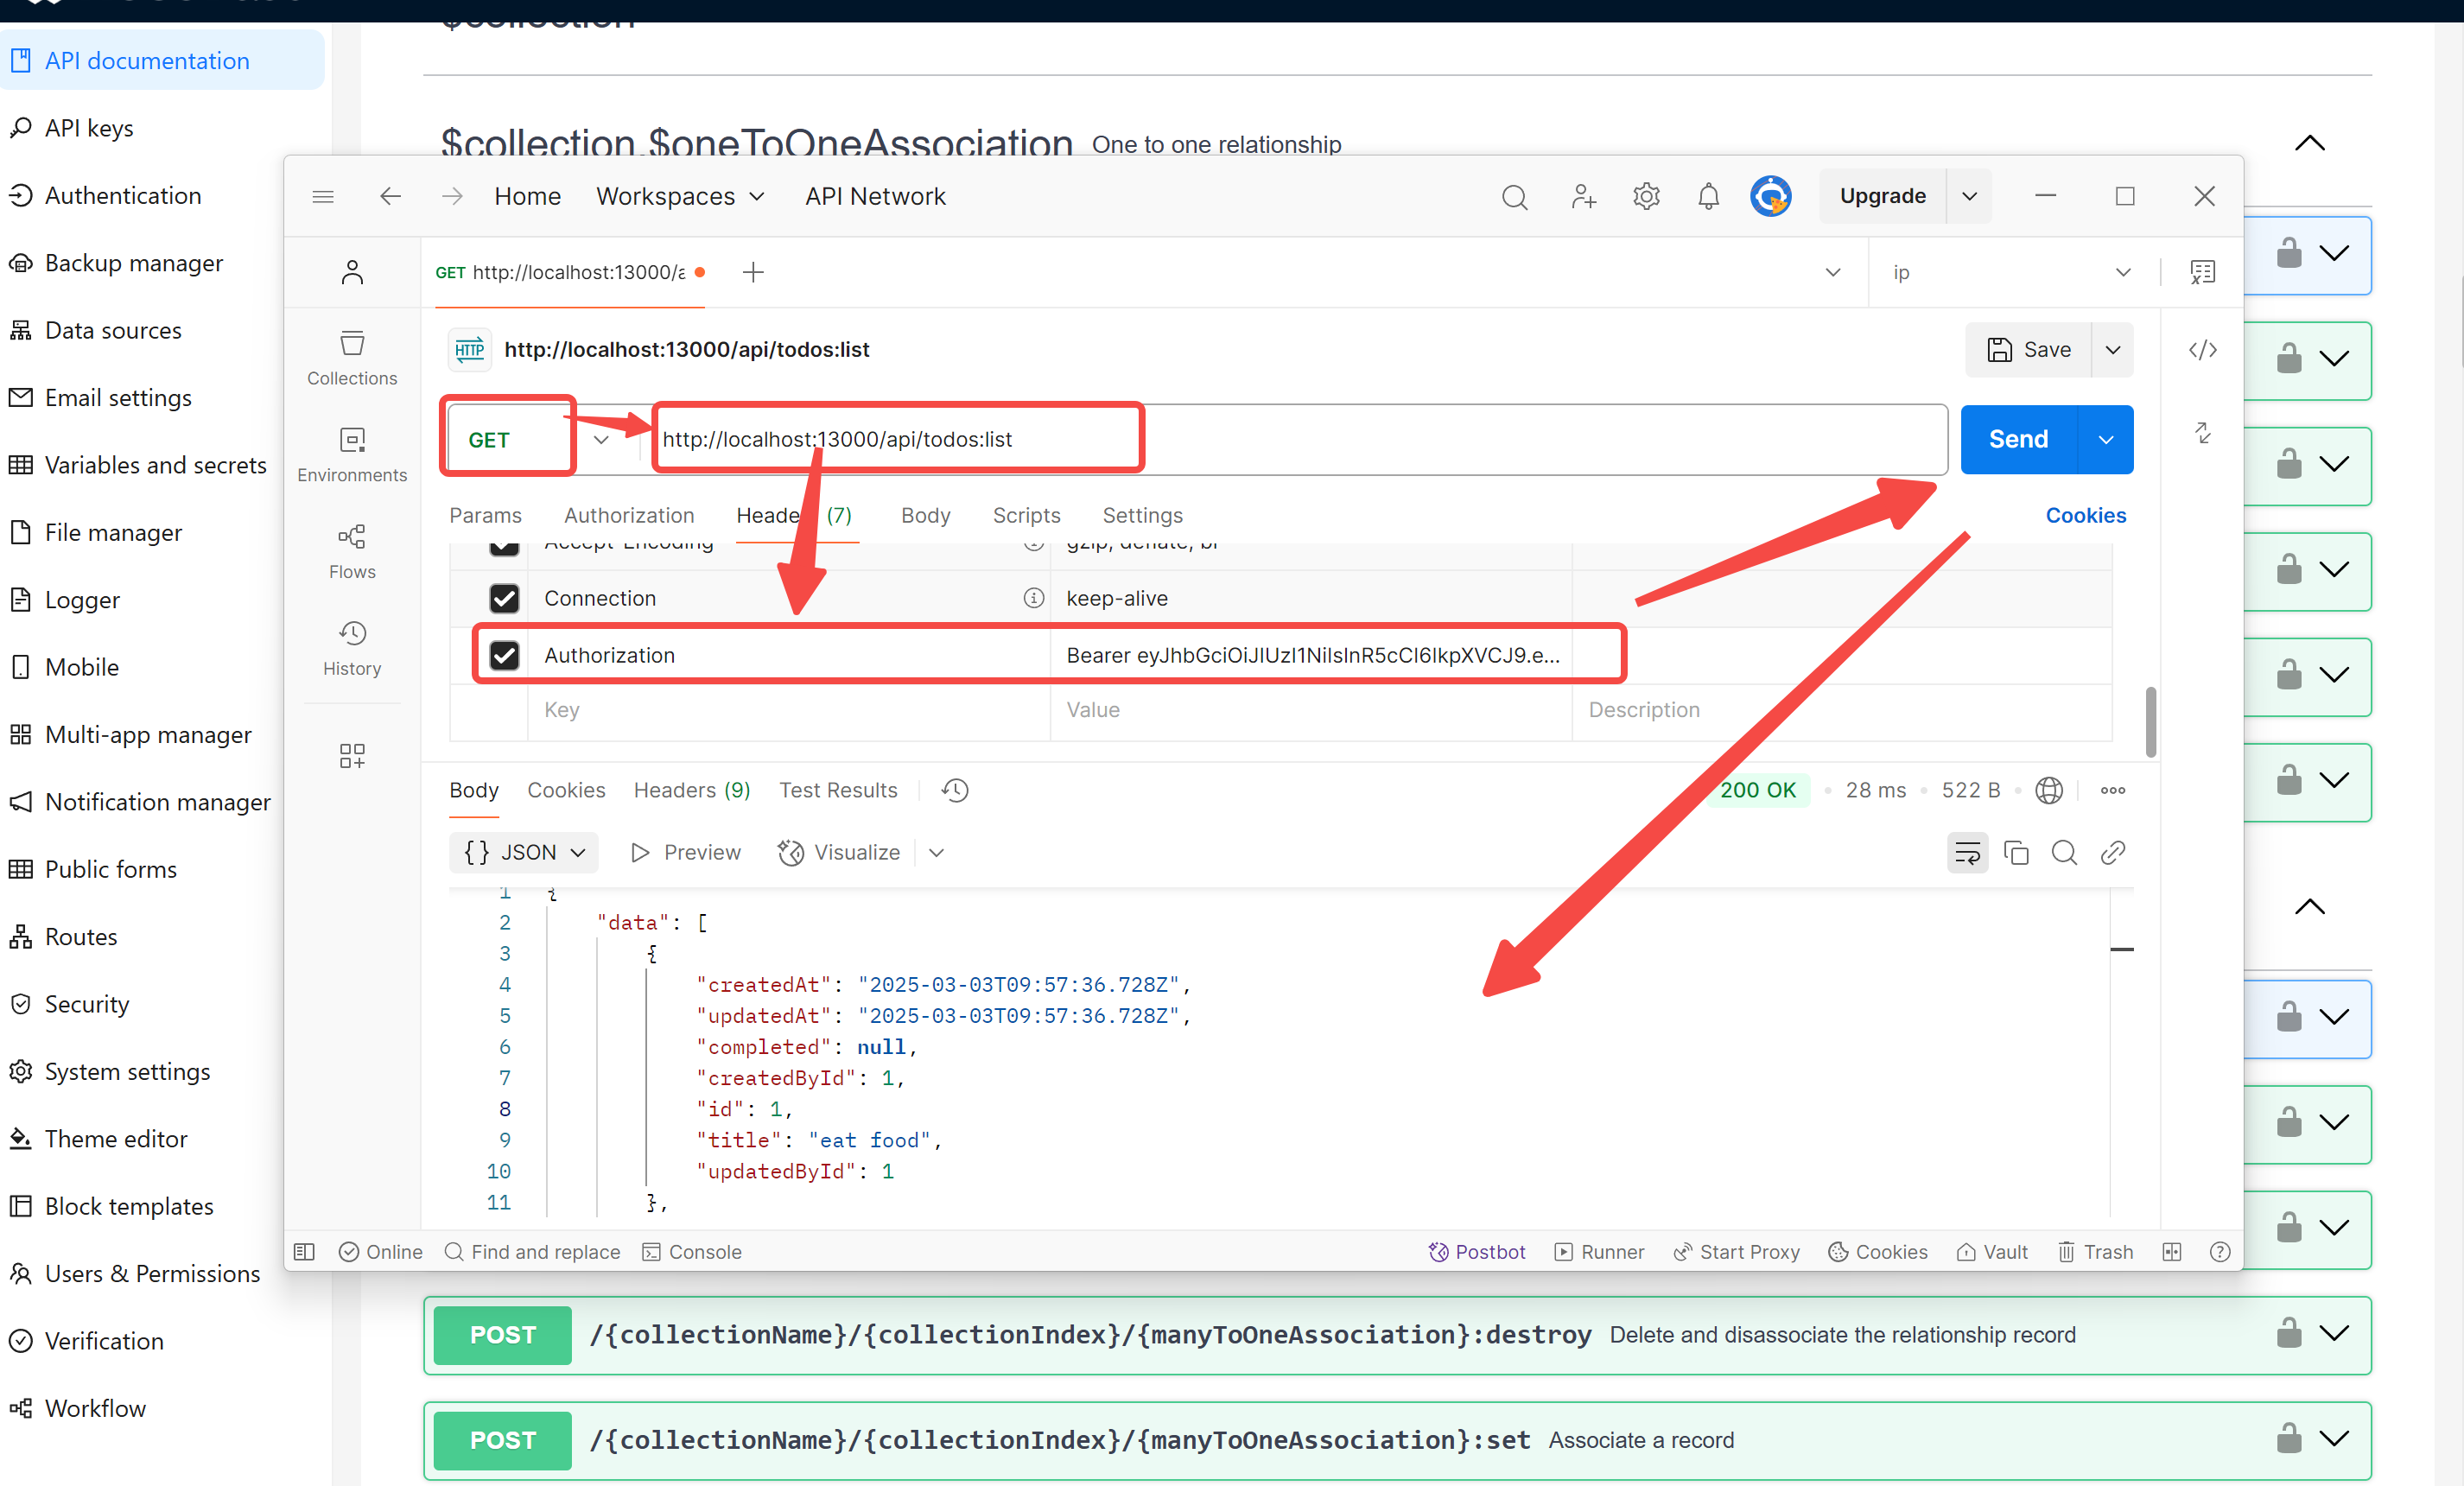
Successful Response:
Error Response (Invalid/Expired API Key):
Troubleshooting: Verify role permissions, API Key binding, and token format if authentication fails.
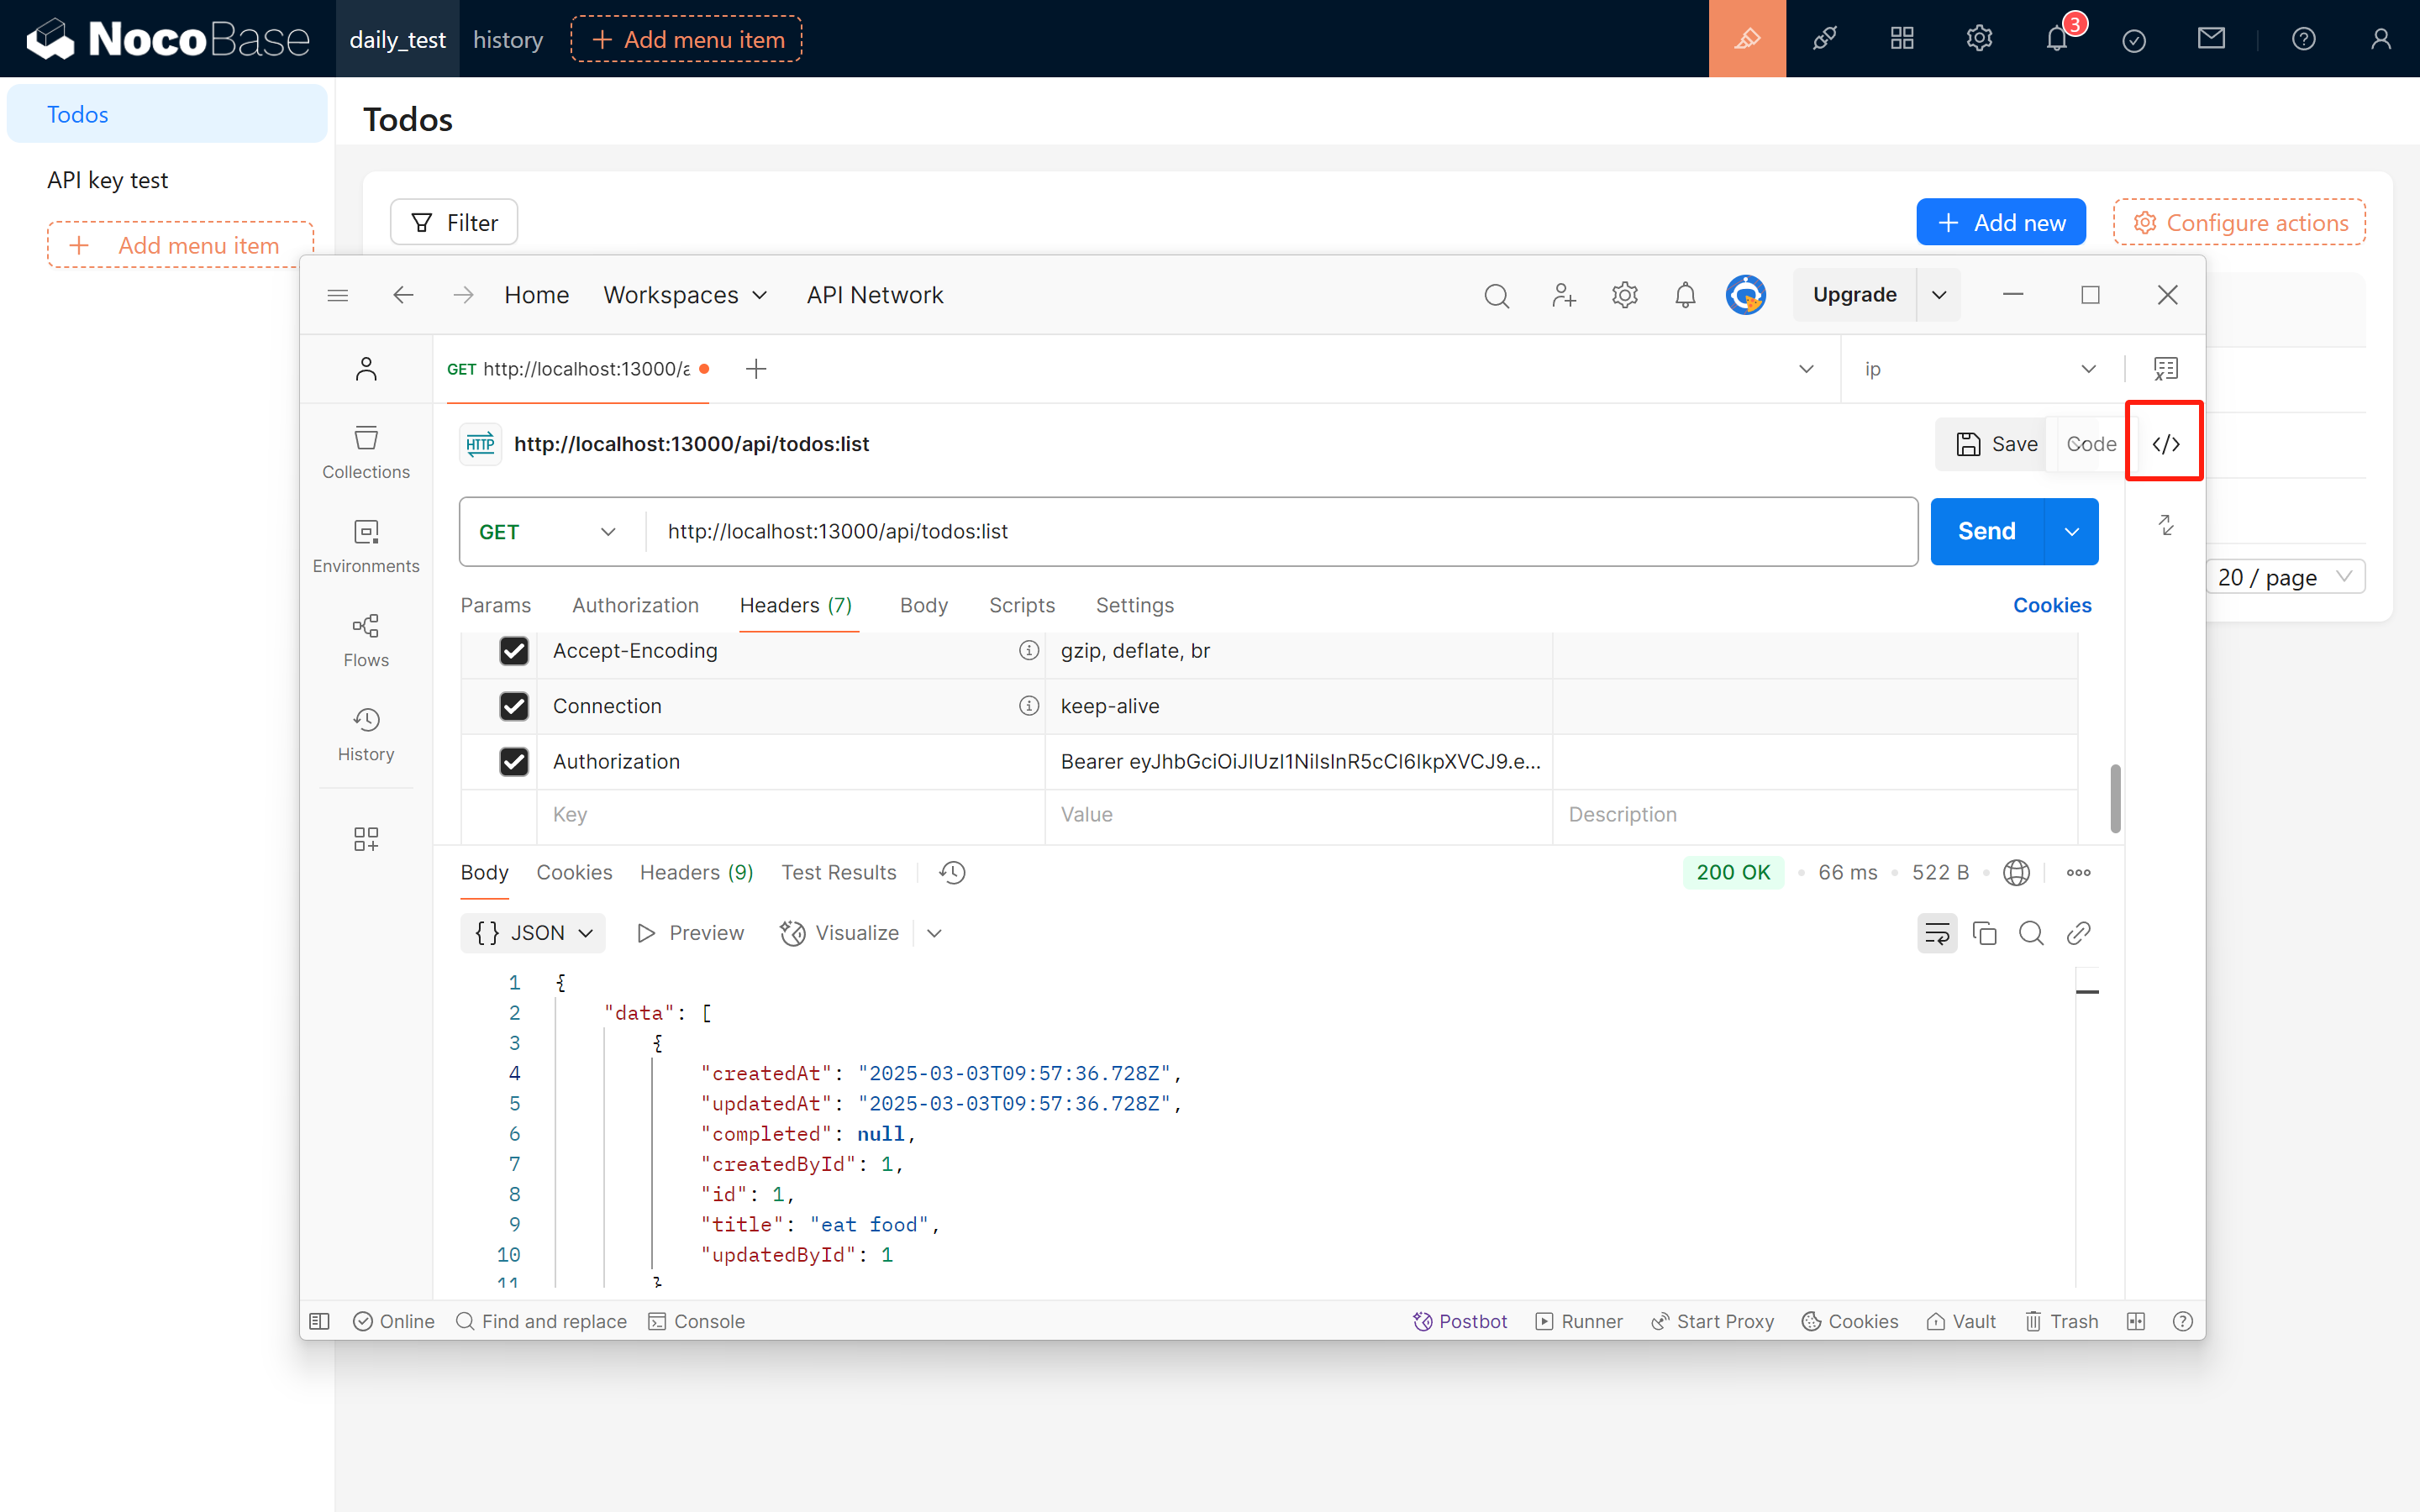
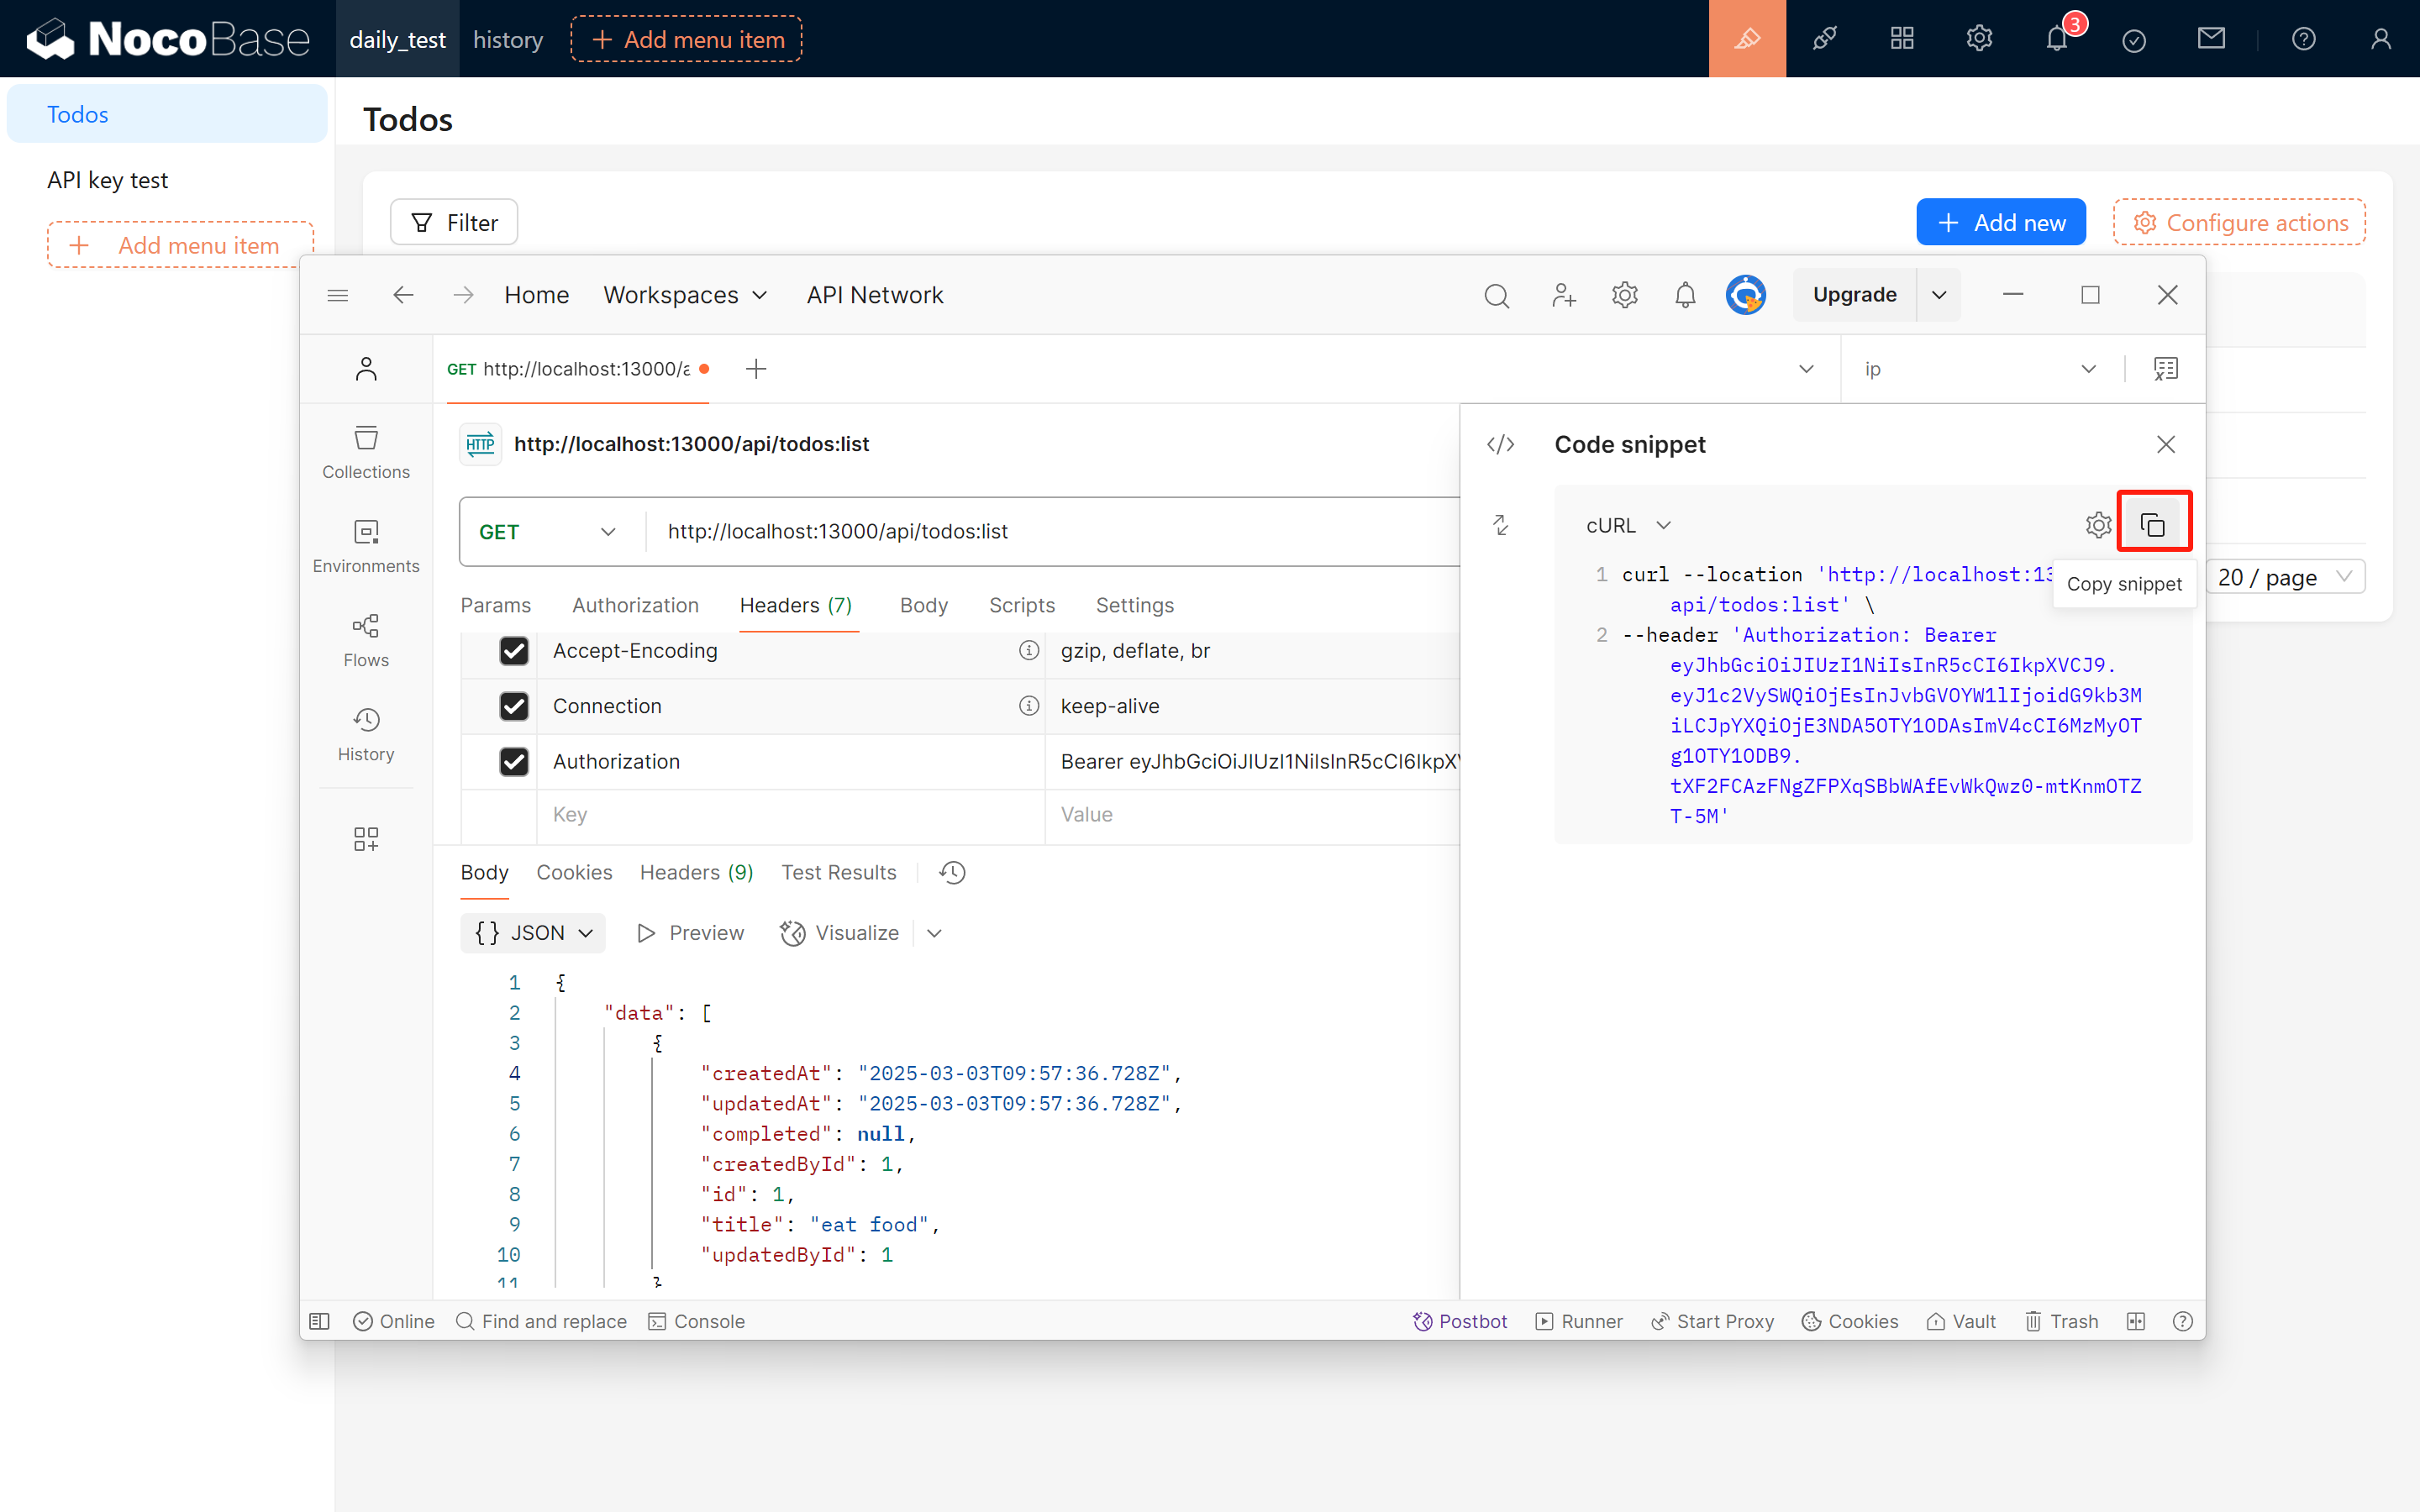
3.4 Export Request Code
Postman allows you to export the request in various formats. Example cURL command:
4 Using API Keys in JS Block
NocoBase 2.0 supports writing native JavaScript code directly in pages using JS blocks. This example demonstrates how to fetch external API data using API Keys.
Creating a JS Block
In your NocoBase page, add a JS block and use the following code to fetch to-do list data:
Key Points
- ctx.requireAsync(): Dynamically loads external libraries (like axios) for HTTP requests
- ctx.message: Displays user notifications (loading, success, error messages)
- API Key Authentication: Pass the API Key in the
Authorizationheader withBearerprefix - Response Handling: Process the returned data as needed (display, transform, etc.)
5 Summary
This guide covered the complete workflow for using API Keys in NocoBase:
- Setup: Activating the API Keys plugin and creating a test collection
- Configuration: Creating roles with appropriate permissions and generating API Keys
- Testing: Validating API Key authentication using Postman and the API Documentation plugin
- Integration: Using API Keys in JS blocks
Additional Resources: