

이 문서는 AI로 번역되었습니다. 부정확한 내용이 있을 경우 영어 버전을 참조하세요
Iframe 블록
This feature is provided by the plugin «블록: iframe»소개
Iframe 블록을 사용하면 외부 웹 페이지나 콘텐츠를 현재 페이지에 삽입할 수 있습니다. 사용자는 URL을 설정하거나 HTML 코드를 직접 삽입하여 외부 애플리케이션을 페이지에 쉽게 통합할 수 있습니다. HTML 페이지를 사용할 경우, 특정 표시 요구 사항에 맞춰 콘텐츠를 유연하게 사용자 정의할 수 있으며, 이는 특히 맞춤형 표시가 필요한 시나리오에 적합합니다. 페이지 전환 없이 외부 리소스를 로드할 수 있어 사용자 경험과 페이지의 상호작용 효과를 향상시킵니다.
설치
내장 플러그인이며, 별도의 설치가 필요 없습니다.
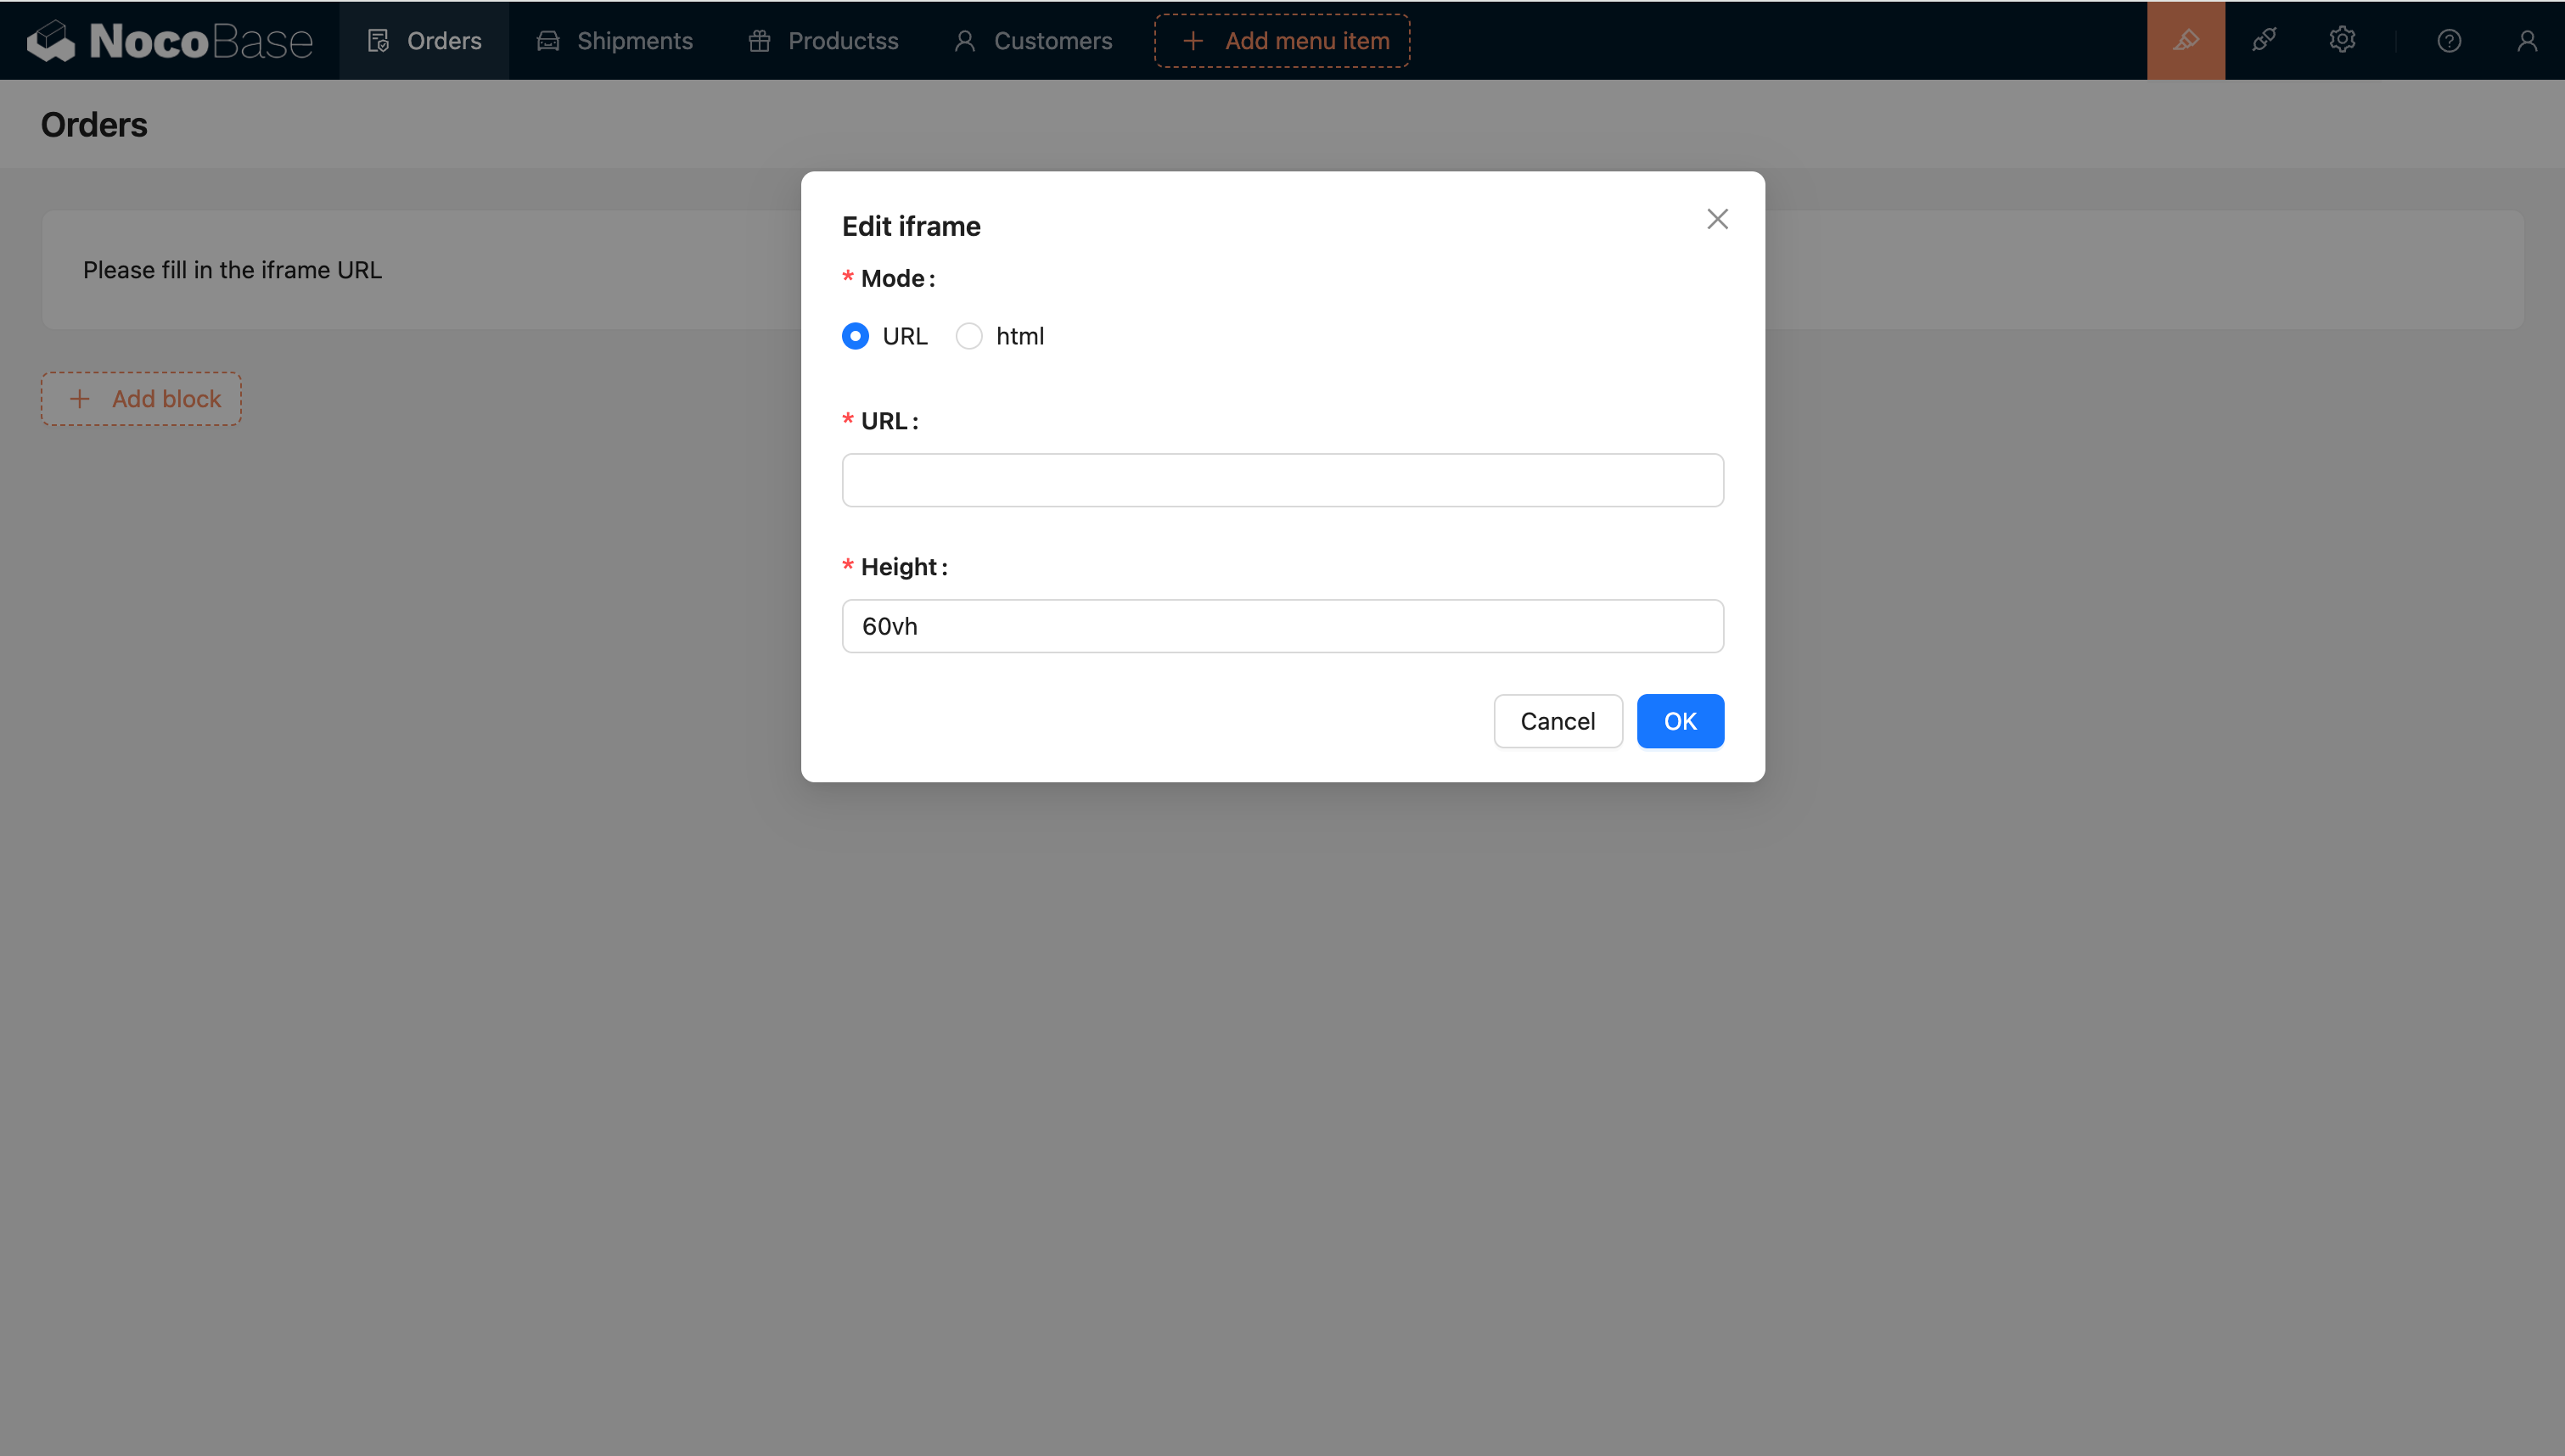
블록 추가
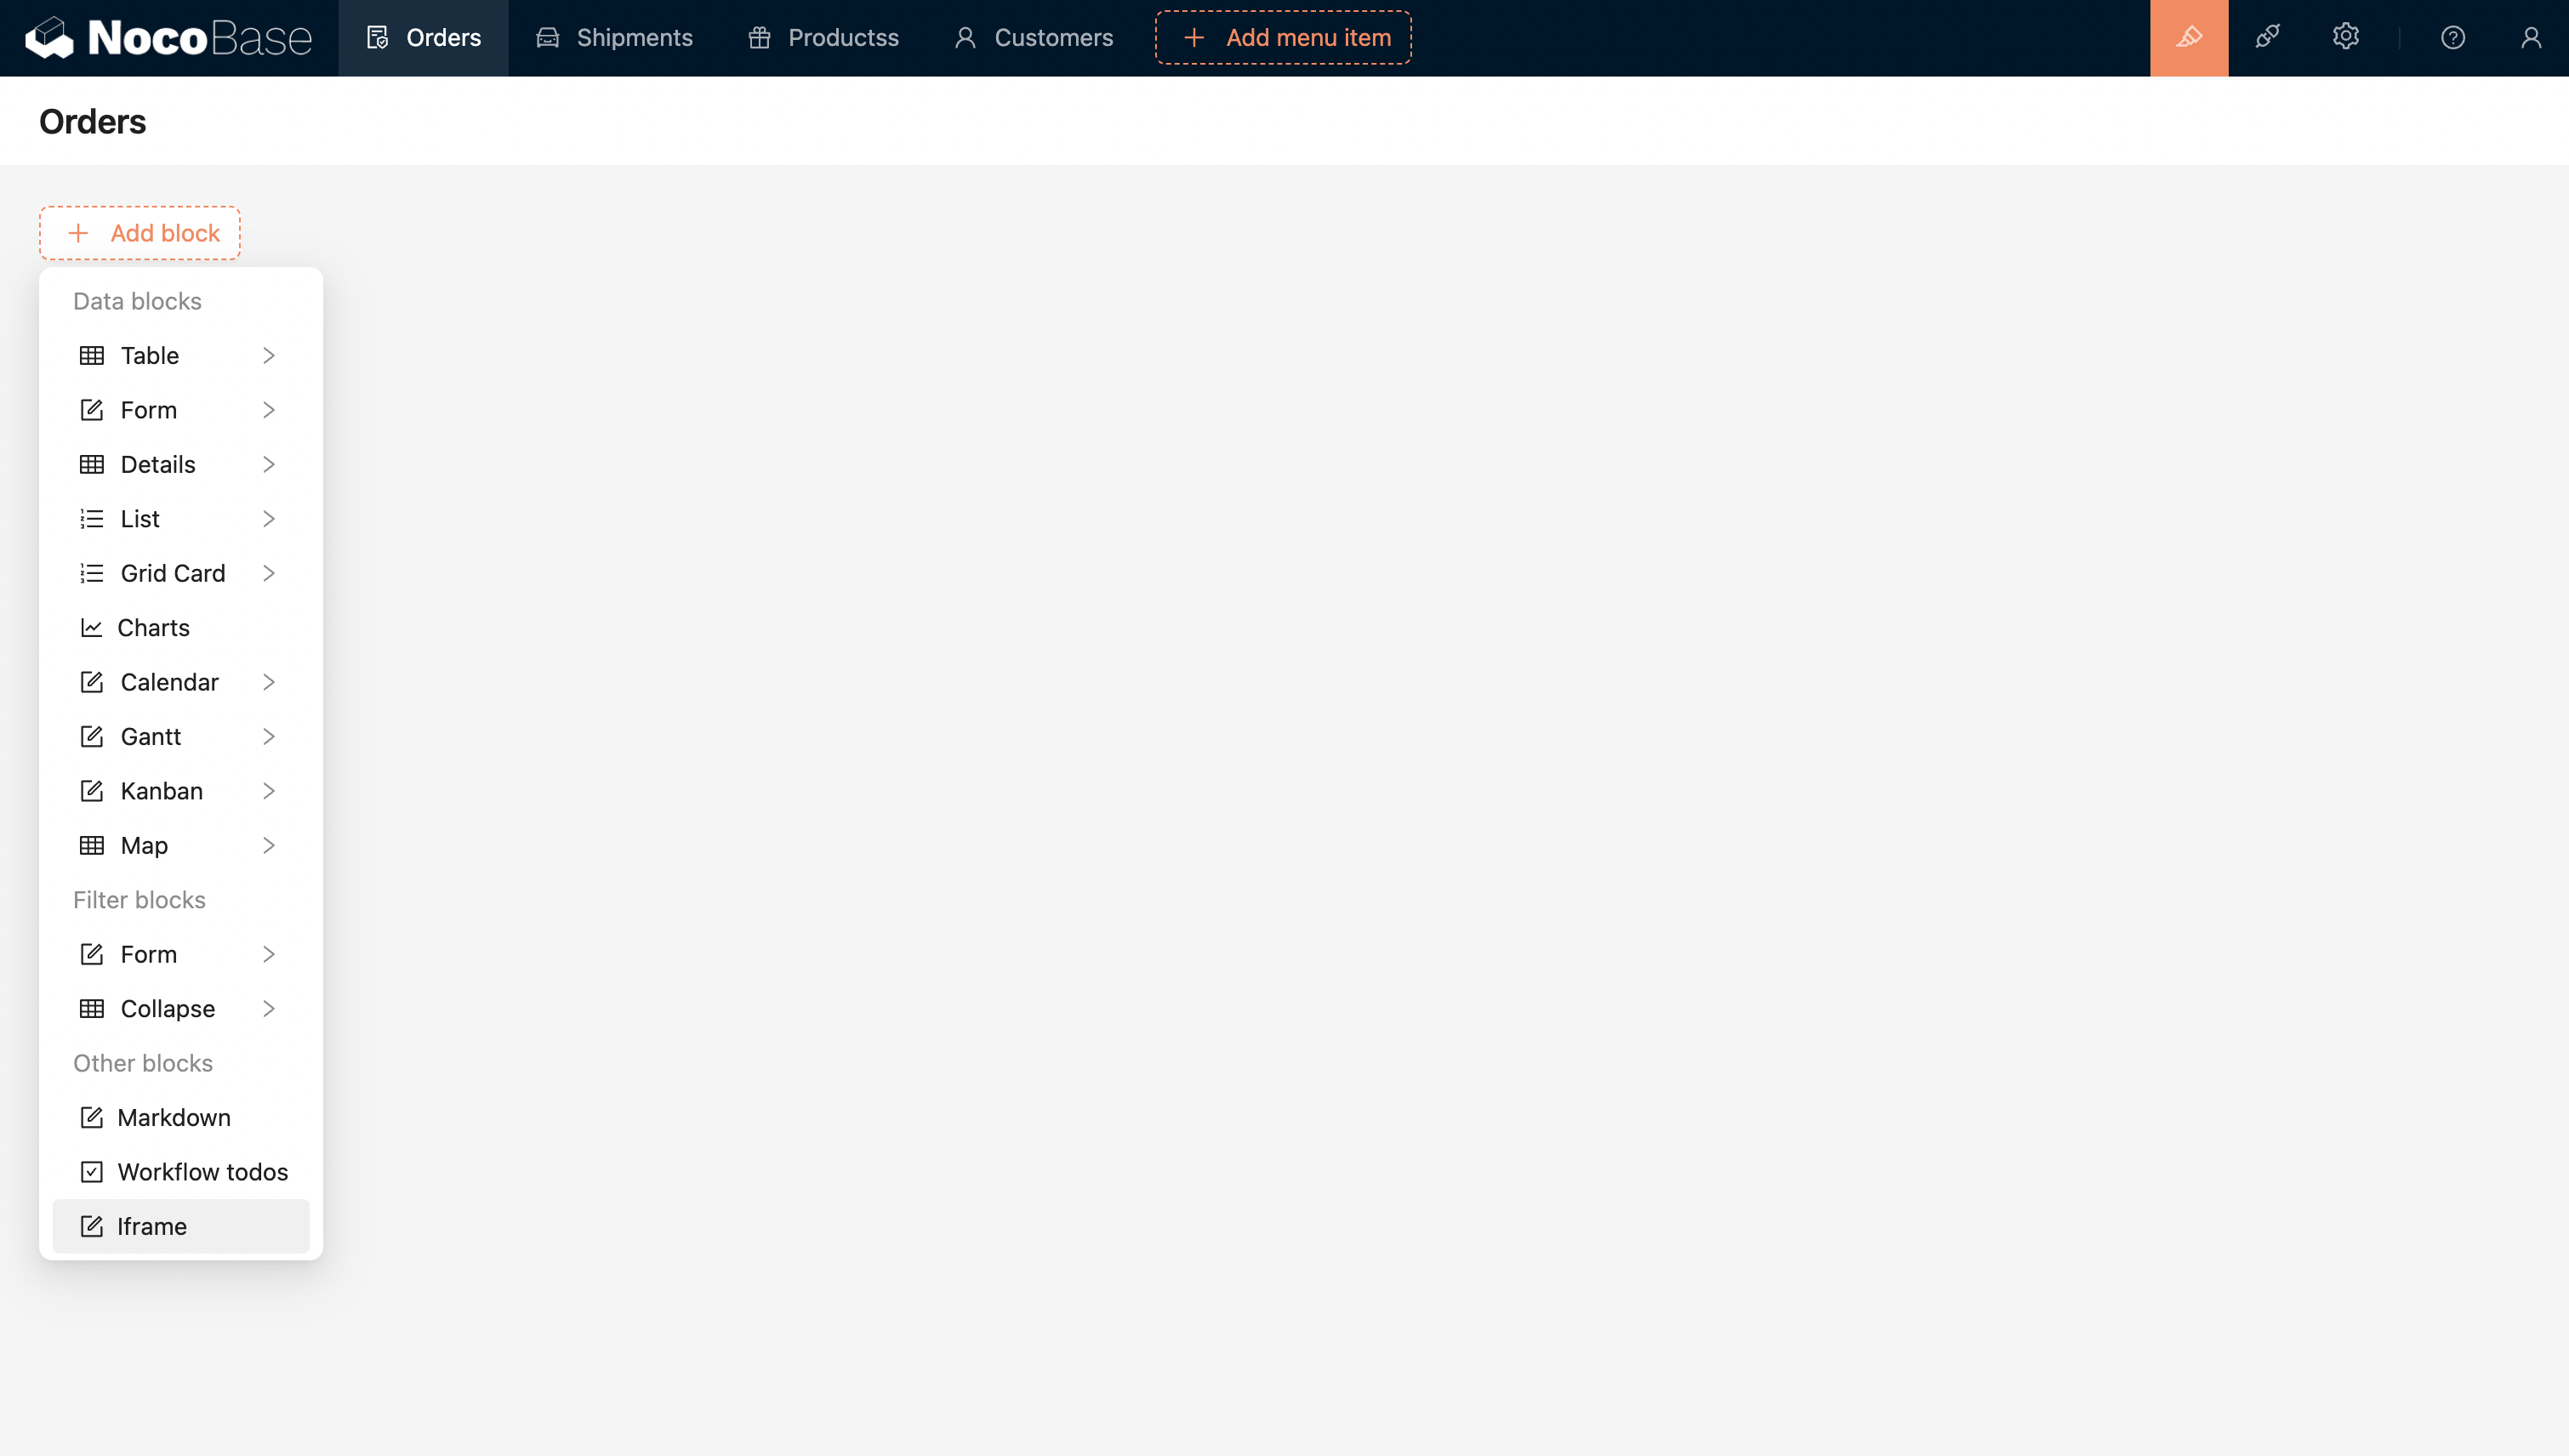
URL 또는 HTML을 설정하여 외부 애플리케이션을 바로 삽입할 수 있습니다.
템플릿 엔진
문자열 템플릿
기본 템플릿 엔진입니다.
Handlebars
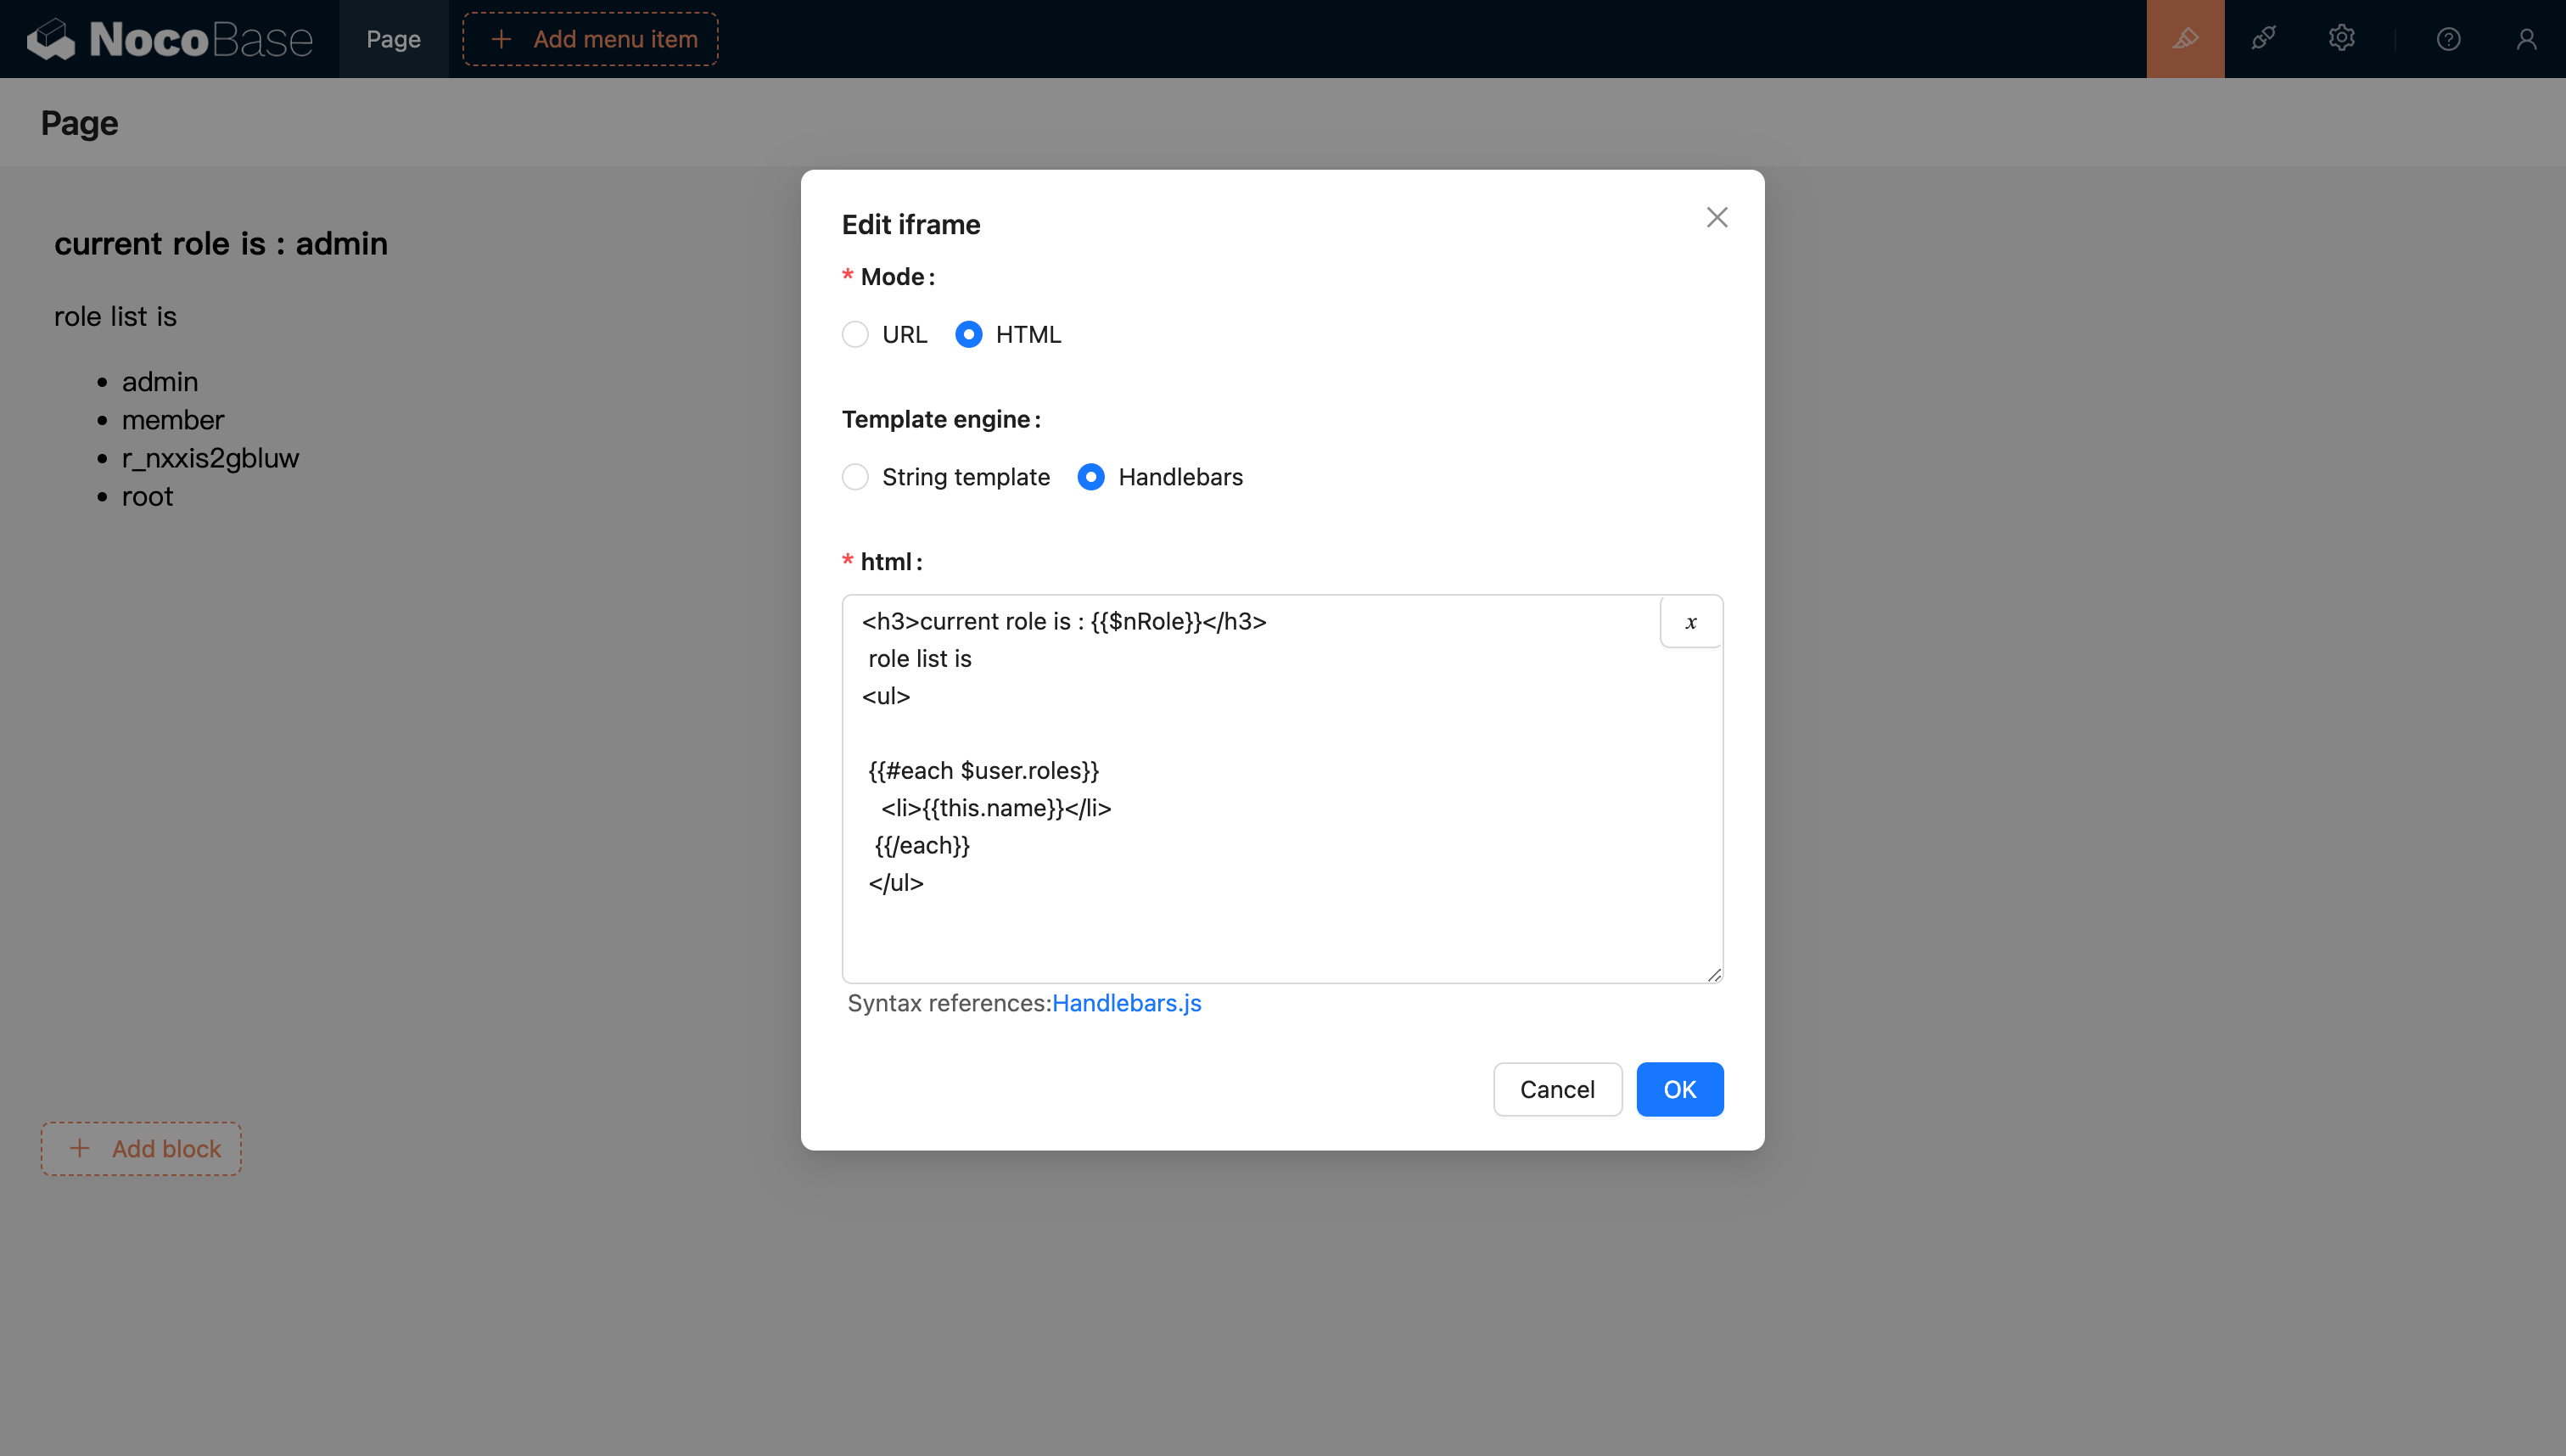
자세한 내용은 Handlebars 템플릿 문서를 참조하십시오.
변수 전달
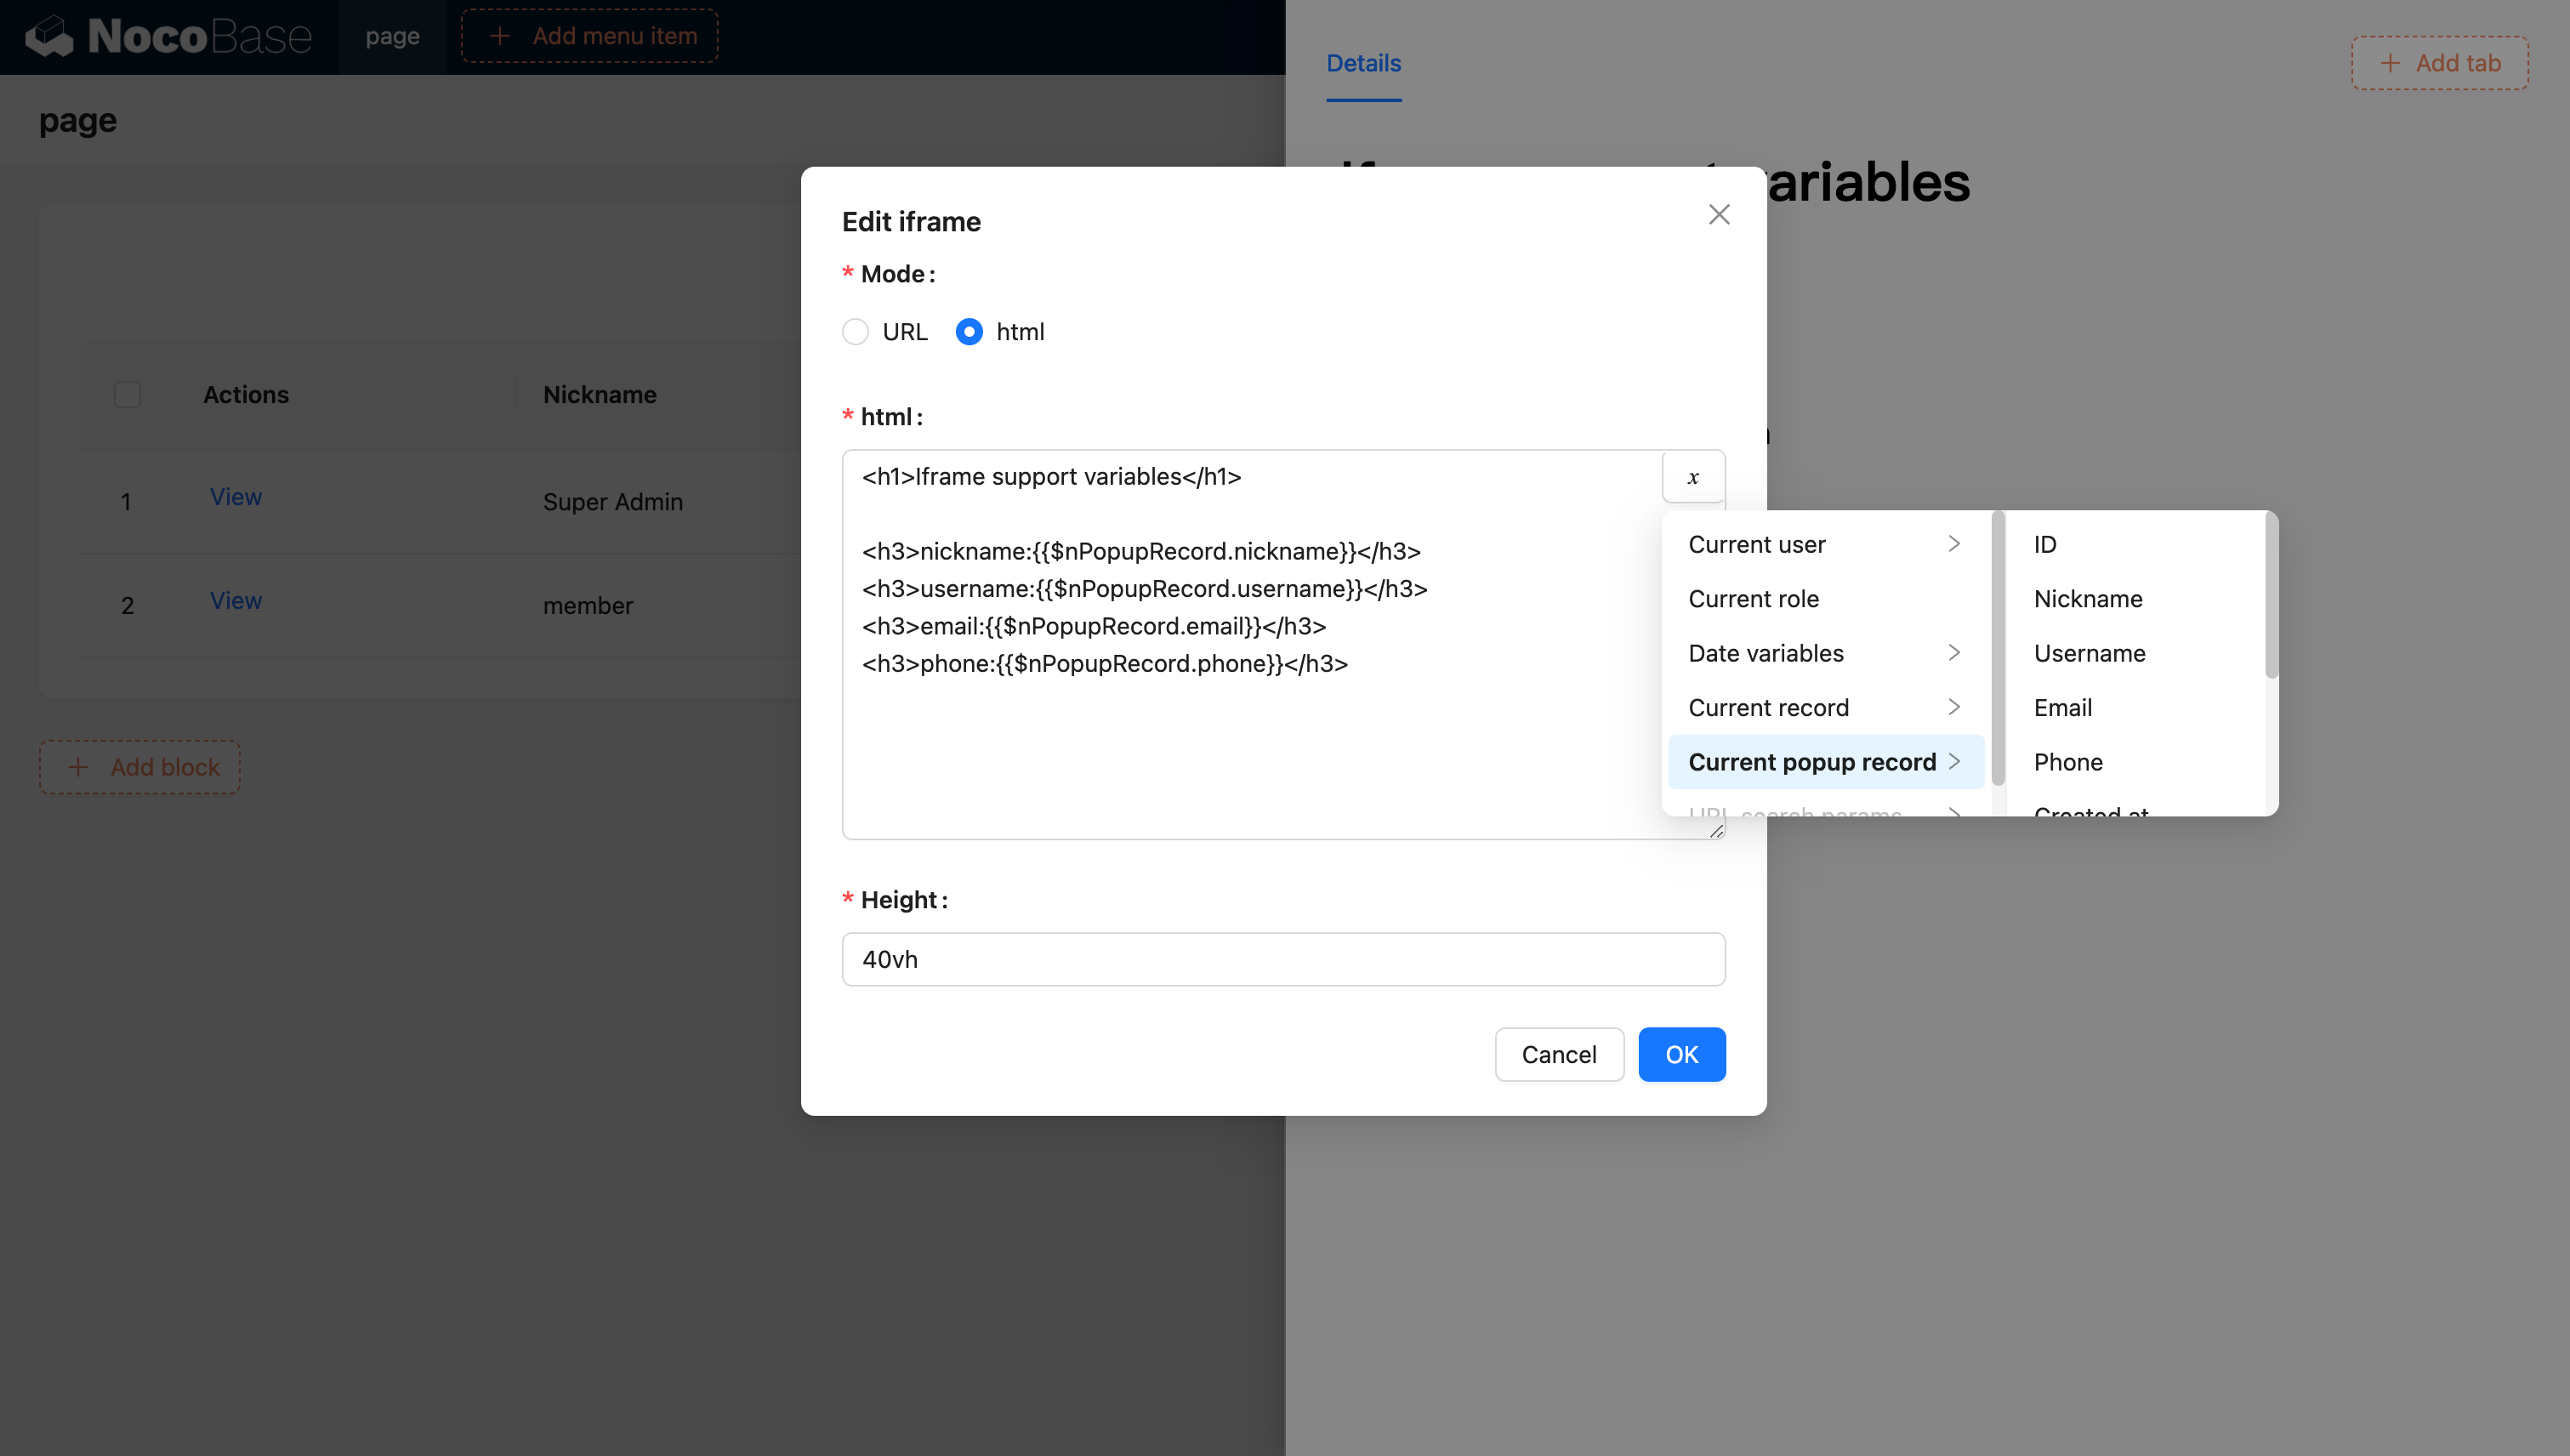
HTML 변수 파싱 지원
현재 블록 컨텍스트의 변수 선택기에서 변수를 선택하는 것을 지원합니다.
코드를 통해 애플리케이션에 변수를 주입하고 사용하는 것을 지원합니다.
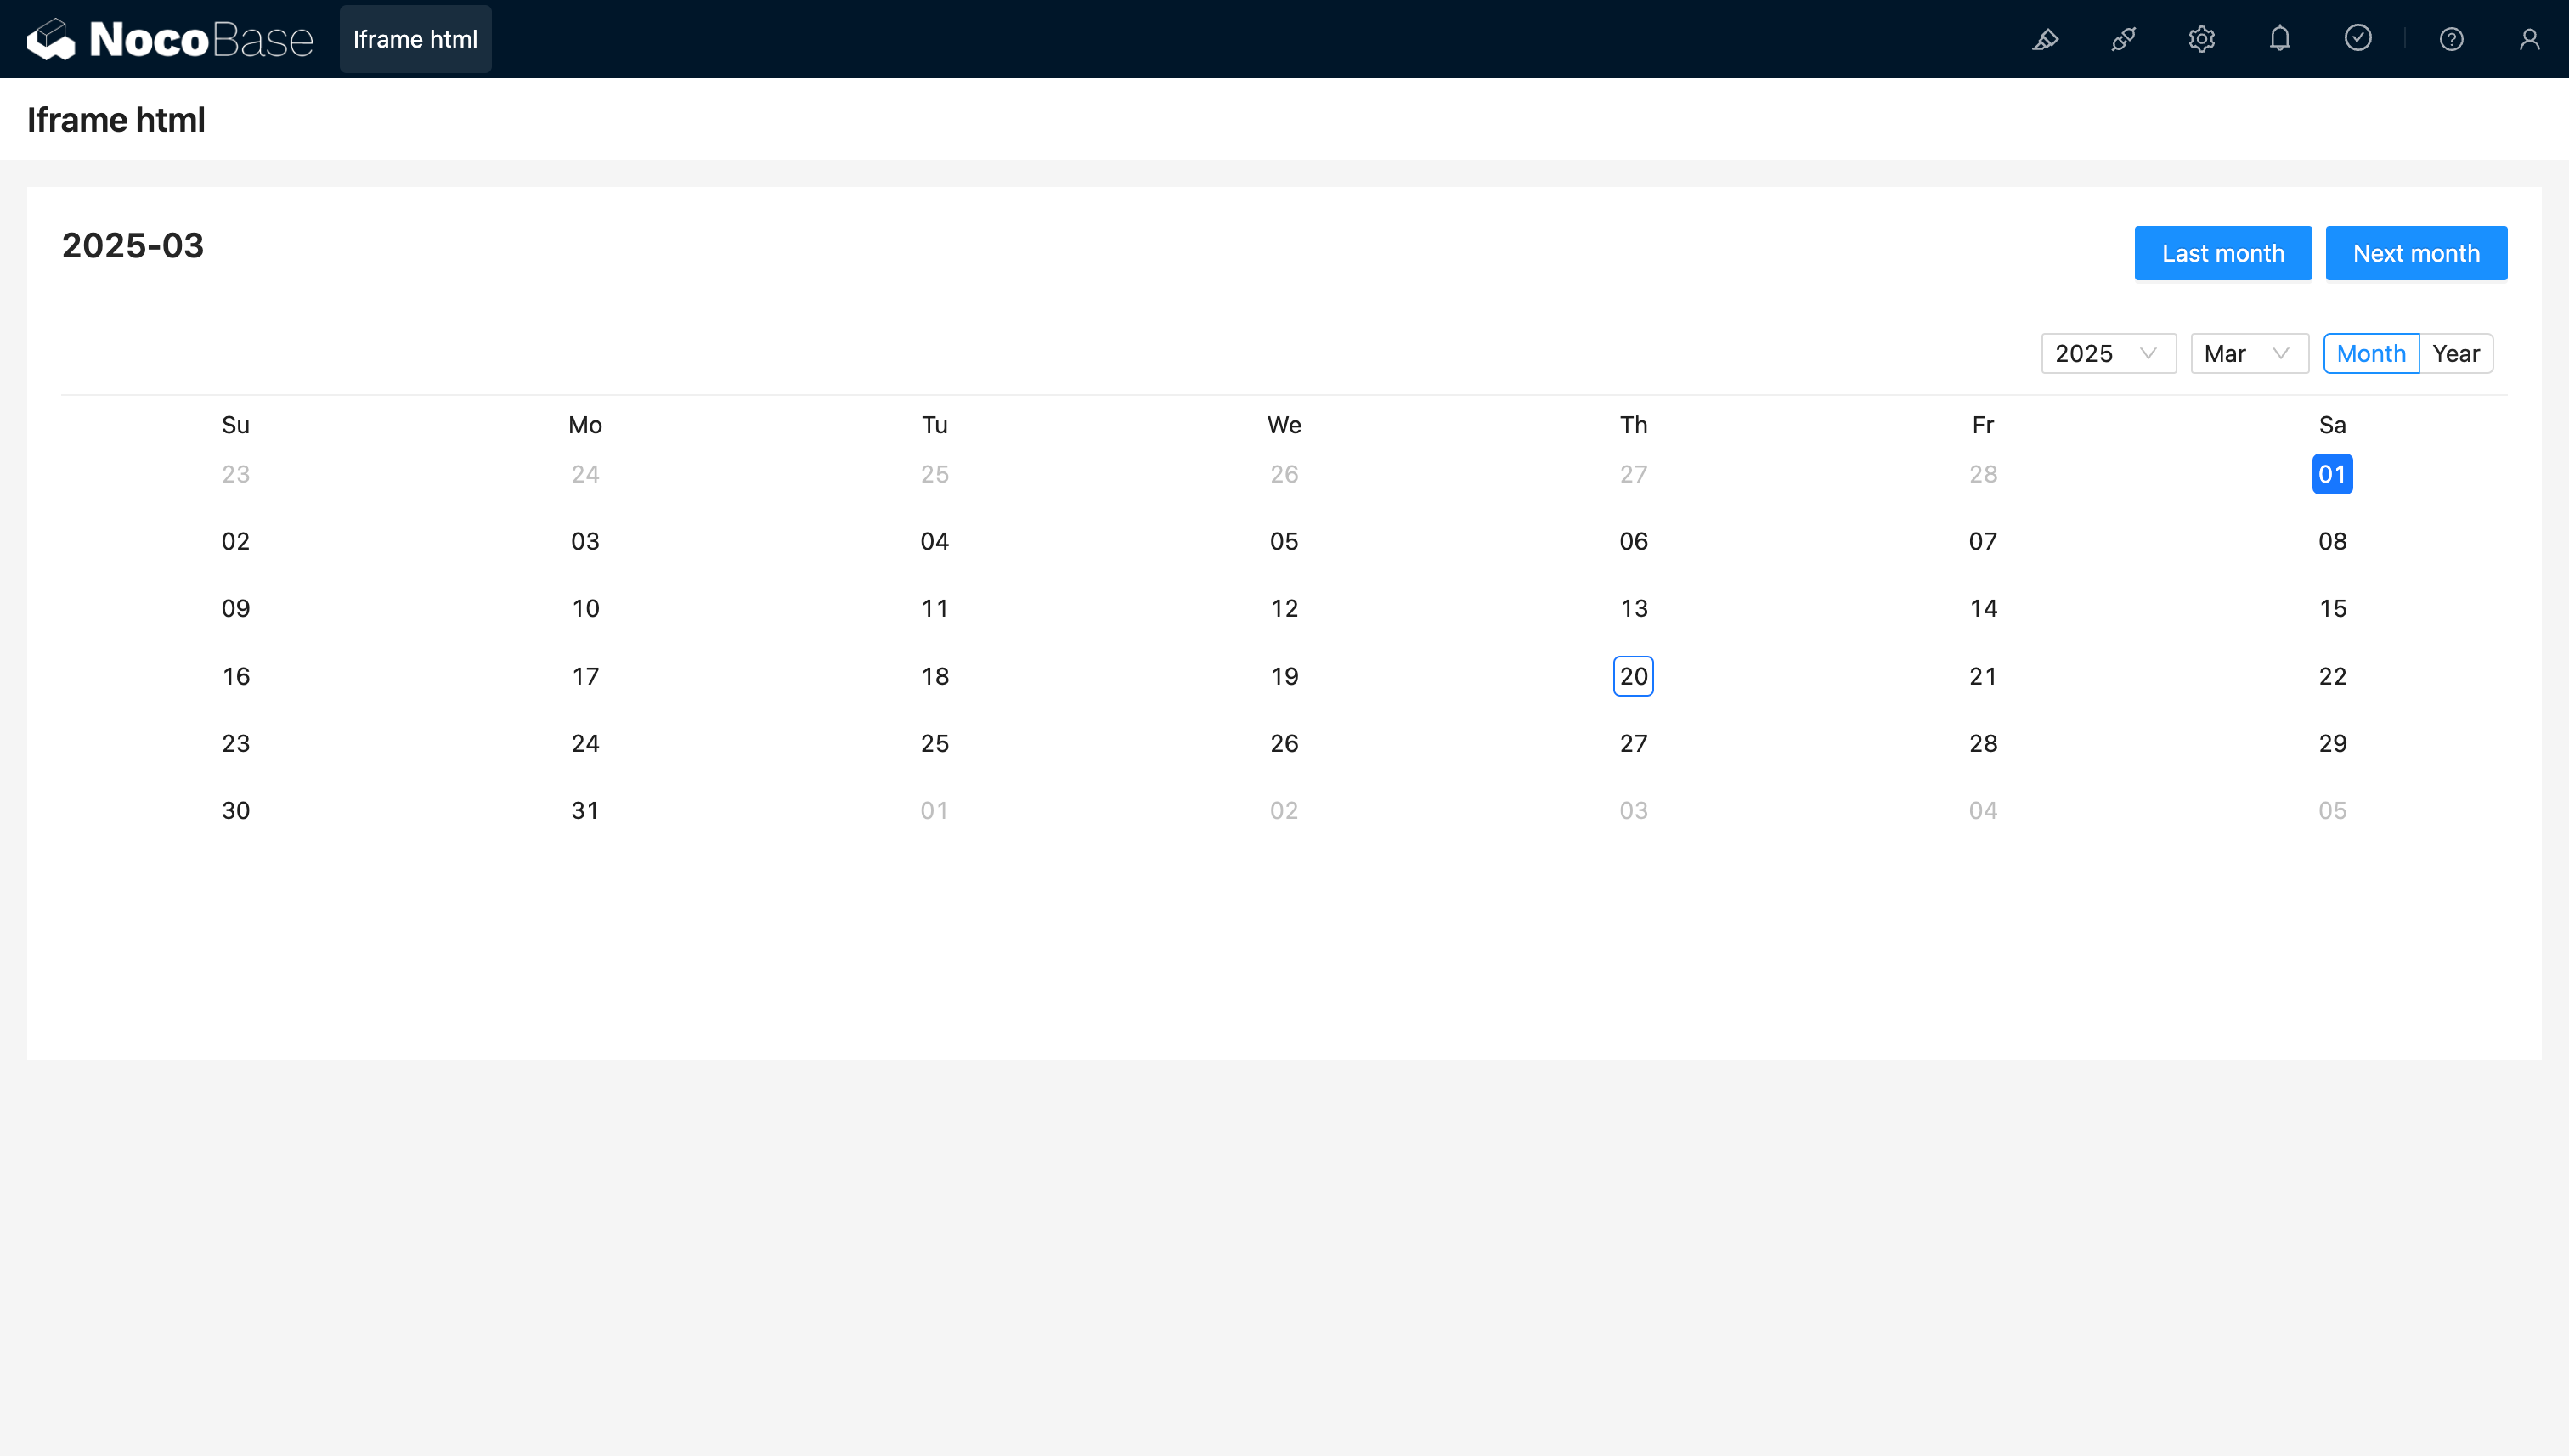
코드를 통해 사용자 정의 변수를 애플리케이션에 주입하고 HTML에서 사용할 수도 있습니다. 예를 들어, Vue 3와 Element Plus를 사용하여 동적 캘린더 애플리케이션을 만드는 방법은 다음과 같습니다.
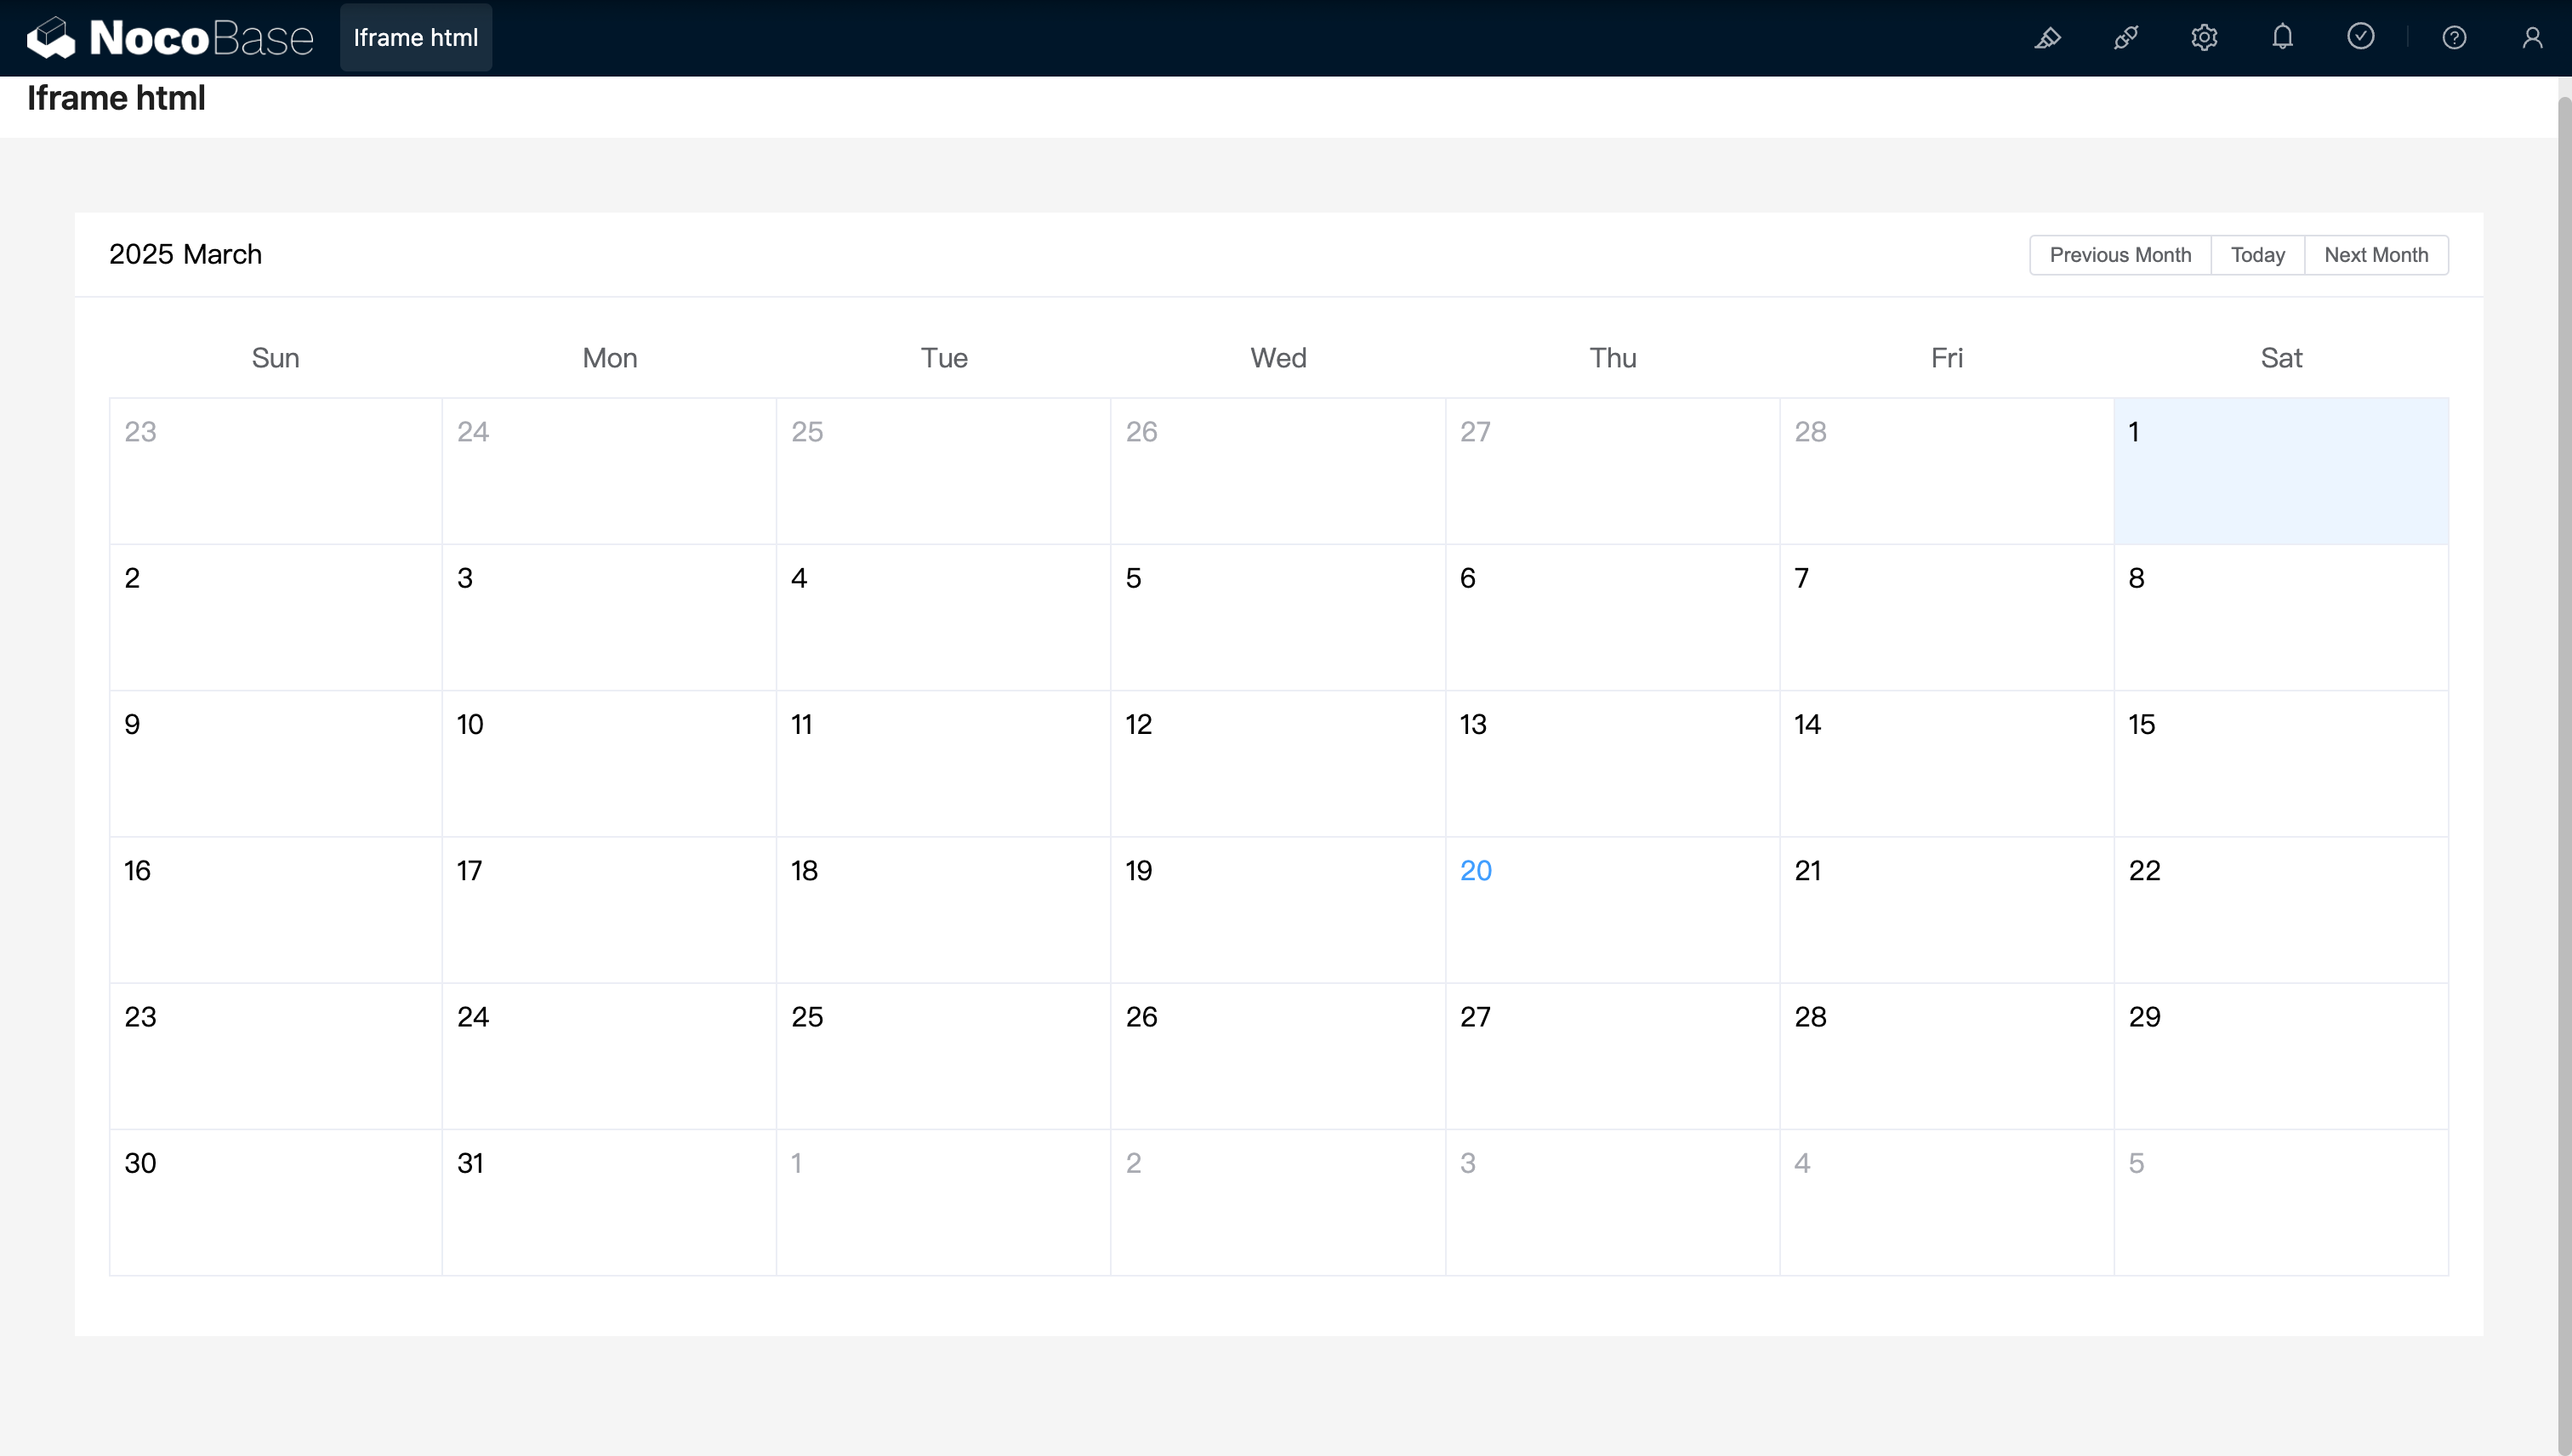
예시: React와 Ant Design (antd)을 사용하여 생성된 간단한 캘린더 컴포넌트로, dayjs를 함께 사용하여 날짜를 처리합니다.
URL 변수 지원
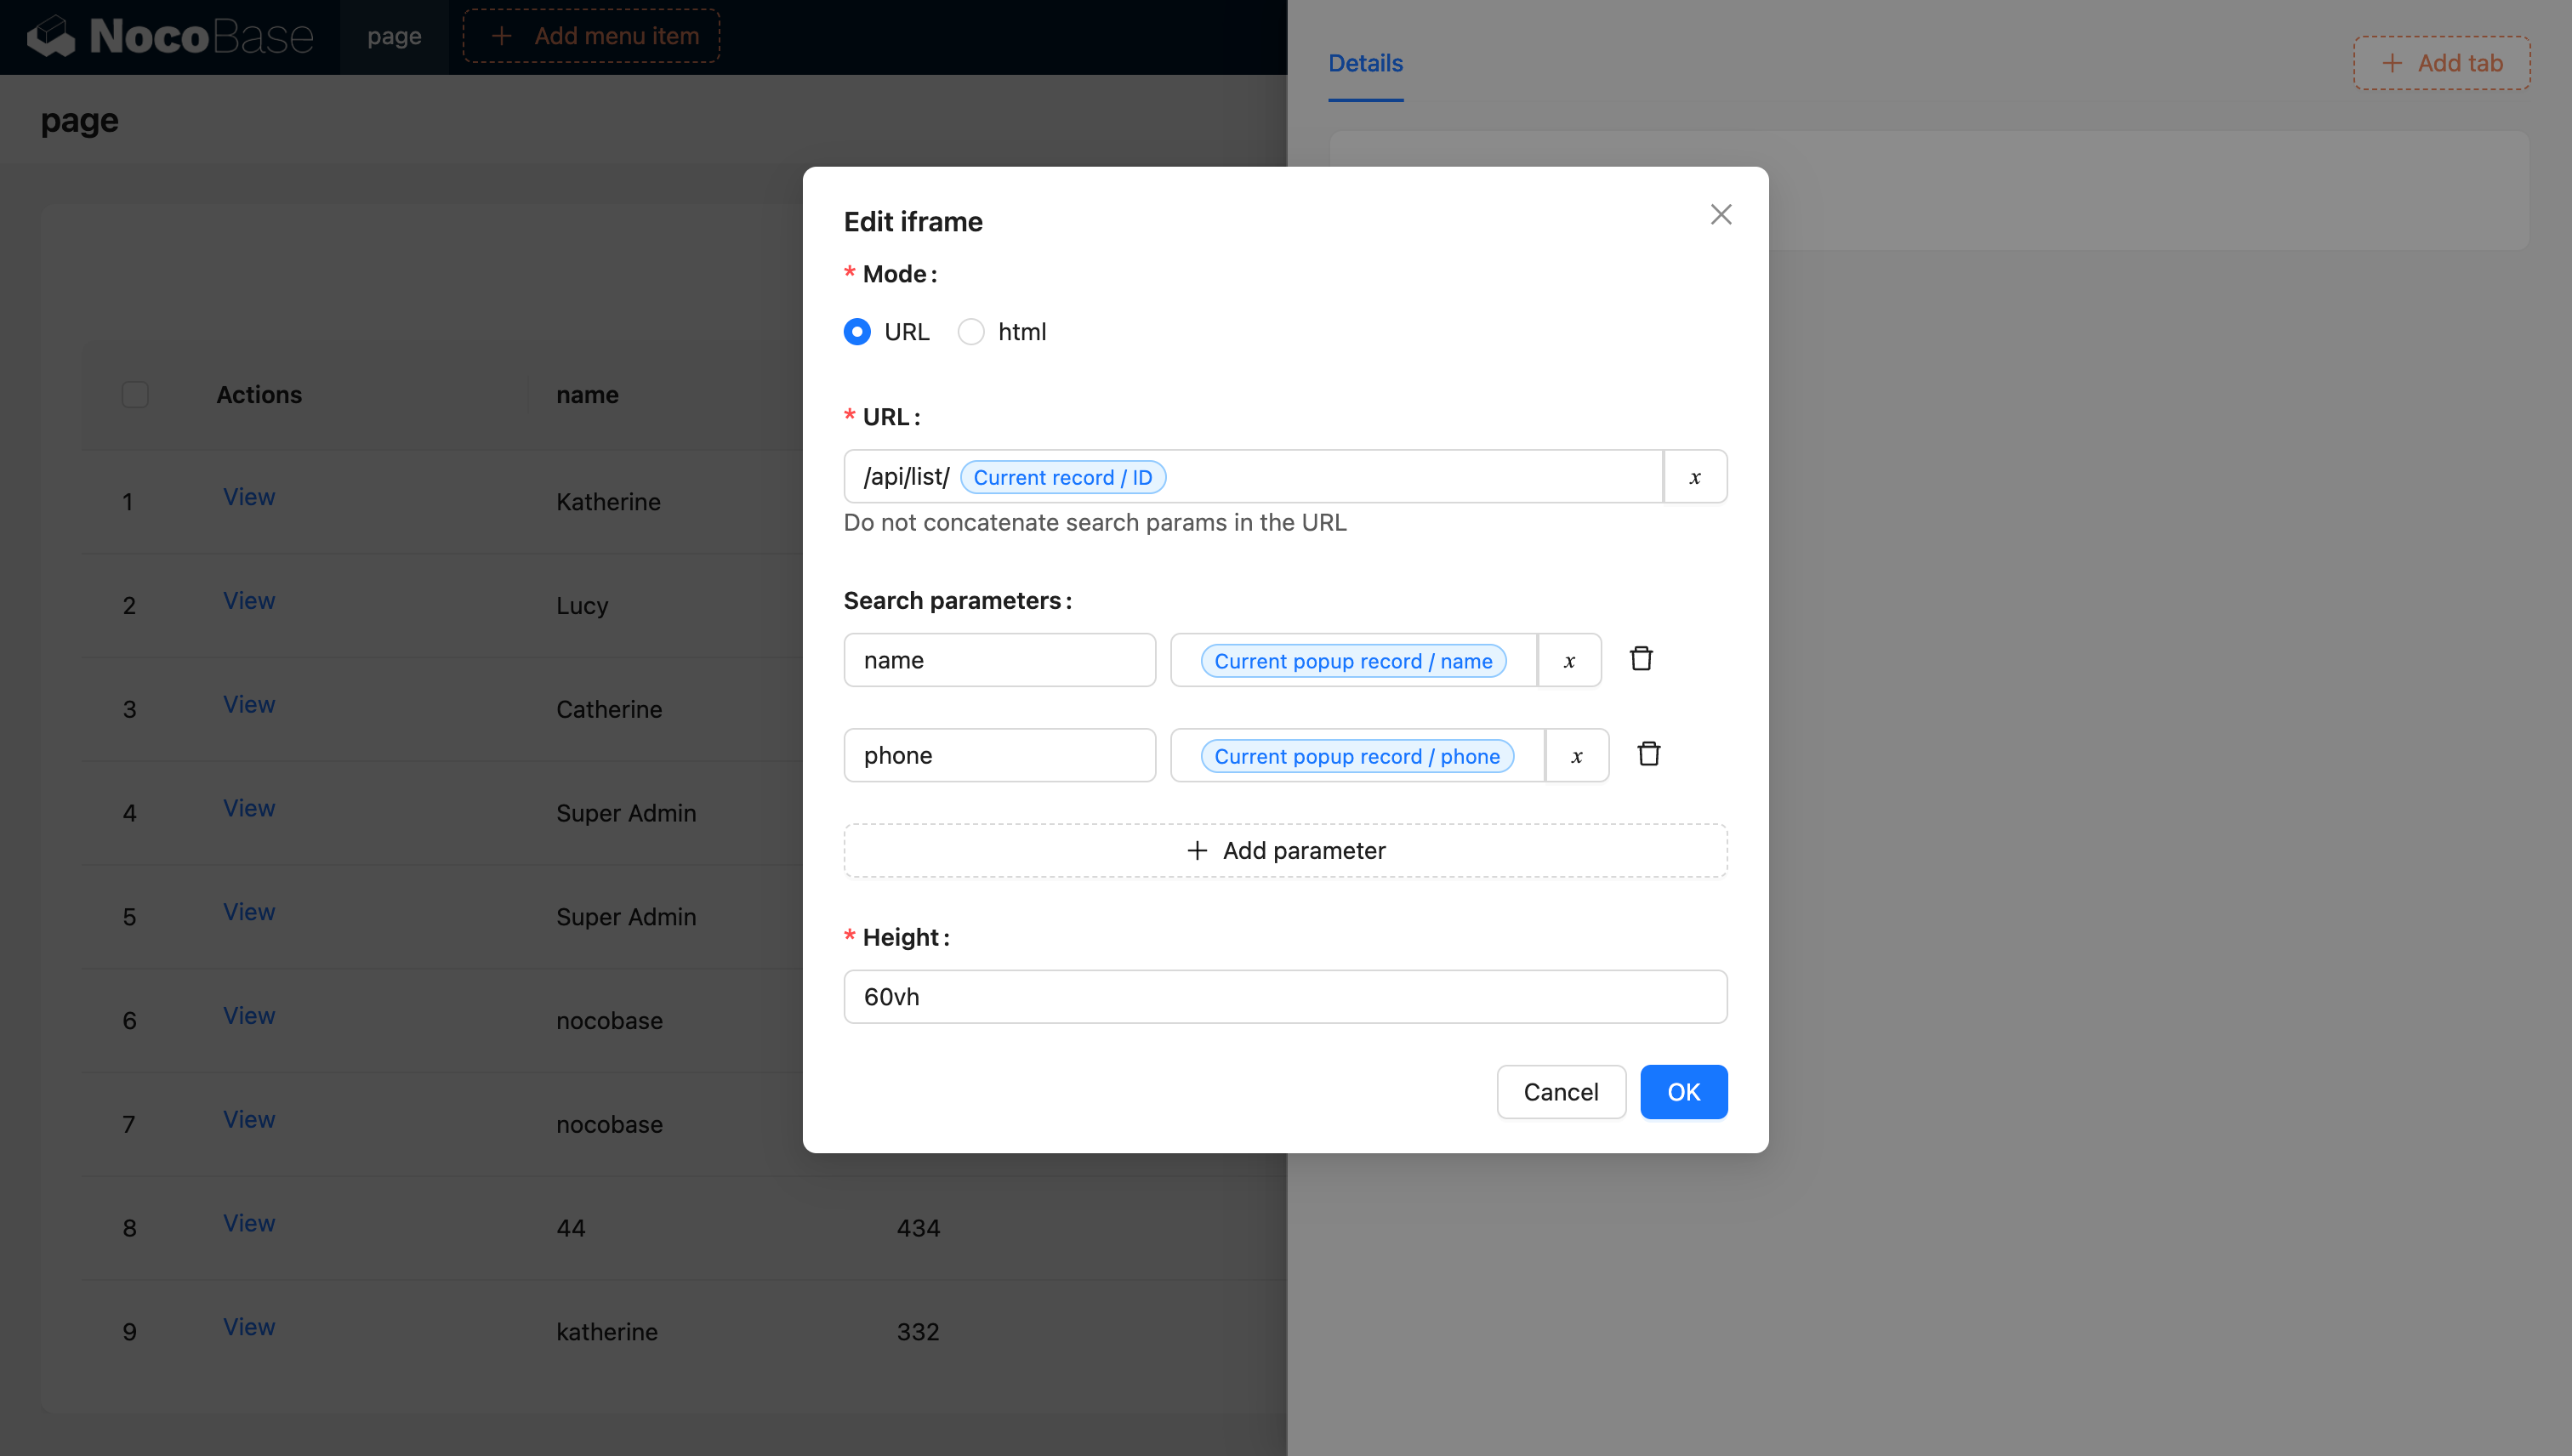
변수에 대한 자세한 내용은 [변수 문서](변수 문서)를 참조하십시오.
JS 블록을 사용하여 Iframe 생성 (NocoBase 2.0)
NocoBase 2.0에서는 JS 블록을 사용하여 iframe을 동적으로 생성하고 더 많은 제어 권한을 가질 수 있습니다. 이 방법은 iframe의 동작과 스타일을 사용자 정의하는 데 더 나은 유연성을 제공합니다.
기본 예시
JS 블록을 생성하고 다음 코드를 사용하여 iframe을 만드세요:
주요 사항
- ctx.element: 현재 JS 블록 컨테이너의 DOM 요소
- sandbox 속성: iframe 콘텐츠의 보안 제한을 제어합니다.
allow-scripts: iframe이 스크립트를 실행하도록 허용합니다.allow-same-origin: iframe이 자체 출처에 접근하도록 허용합니다.
- replaceChildren(): 컨테이너의 모든 자식 요소를 iframe으로 대체합니다.
로딩 상태를 포함한 고급 예시
로딩 상태와 오류 처리를 통해 iframe 생성을 개선할 수 있습니다.
보안 고려 사항
iframe을 사용할 때 다음 보안 모범 사례를 고려하십시오:
- HTTPS 사용: 가능한 한 항상 HTTPS를 통해 iframe 콘텐츠를 로드하십시오.
- 샌드박스 권한 제한: 필요한 샌드박스 권한만 활성화하십시오.
- 콘텐츠 보안 정책: 적절한 CSP 헤더를 구성하십시오.
- 동일 출처 정책: 교차 출처 제한에 유의하십시오.
- 신뢰할 수 있는 출처: 신뢰할 수 있는 도메인에서만 콘텐츠를 로드하십시오.