

Write Your First Plugin
This guide will walk you through creating a block plugin that can be used in pages from scratch, helping you understand the basic structure and development workflow of NocoBase plugins.
Prerequisites
Before getting started, make sure you have successfully installed NocoBase. If not, you can refer to the following installation guides:
Once installation is complete, you can officially start your plugin development journey.
Step 1: Create Plugin Skeleton via CLI
Execute the following command in the repository root directory to quickly generate an empty plugin:
After the command runs successfully, it will generate basic files in the packages/plugins/@my-project/plugin-hello directory. The default structure is as follows:
After creation, you can access the plugin manager page in your browser (default URL: http://localhost:13000/admin/settings/plugin-manager) to confirm whether the plugin appears in the list.
Step 2: Implement a Simple Client Block
Next, we'll add a custom block model to the plugin to display a welcome message.
- Create a new block model file
client/models/HelloBlockModel.tsx:
- Register the block model. Edit
client/models/index.tsto export the new model for frontend runtime loading:
After saving the code, if you're running a development script, you should see hot-reload logs in the terminal output.
Step 3: Activate and Test the Plugin
You can enable the plugin via command line or interface:
-
Command Line
-
Management Interface: Access the plugin manager, find
@my-project/plugin-hello, and click "Activate".
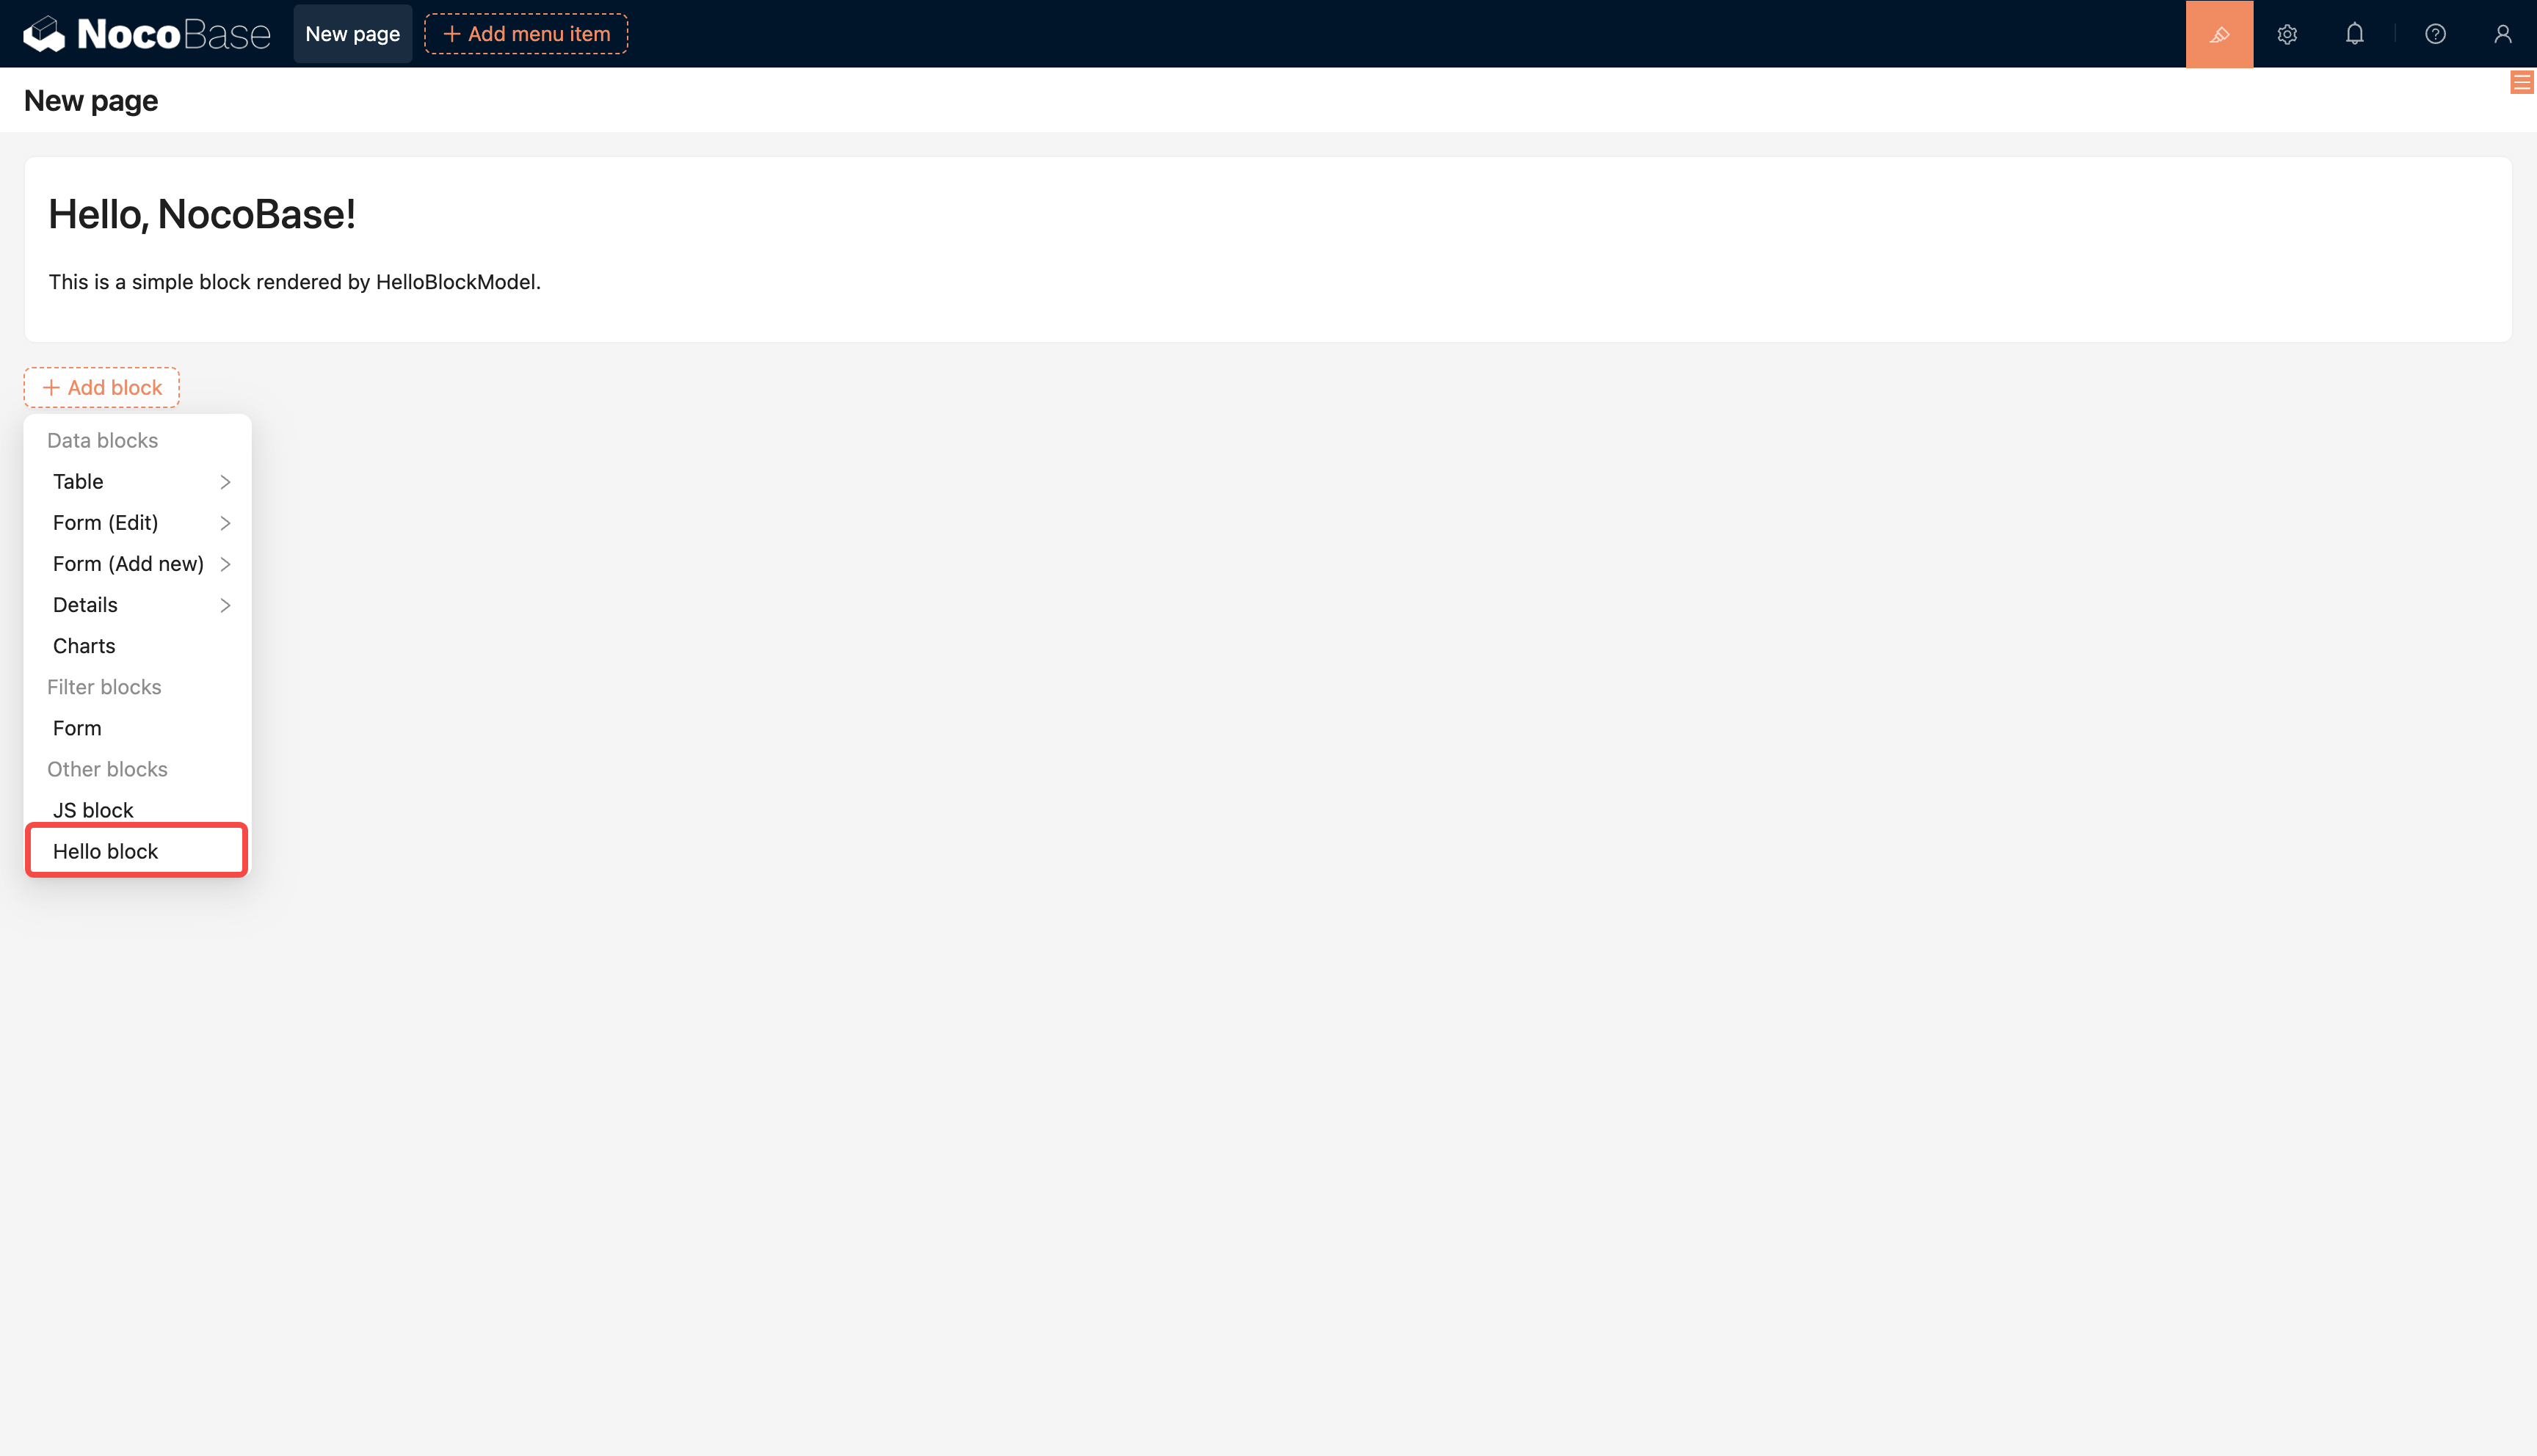
After activation, create a new "Modern page (v2)" page. When adding blocks, you'll see "Hello block". Insert it into the page to see the welcome content you just wrote.
Step 4: Build and Package
When you're ready to distribute the plugin to other environments, you need to build and package it first:
Note: If the plugin is created in the source repository, the first build will trigger a full repository type check, which may take some time. It's recommended to ensure dependencies are installed and the repository is in a buildable state.
After the build completes, the package file is located at storage/tar/@my-project/plugin-hello.tar.gz by default.
Step 5: Upload to Another NocoBase Application
Upload and extract to the target application's ./storage/plugins directory. For details, see Install and Upgrade Plugins.