Authentication: WeCom
This feature is provided by the commercial plugin «WeCom», please purchase to useIntroduction
The WeCom plugin allows users to log in to NocoBase using their WeCom accounts.
Enable Plugin
Create and Configure a WeCom Custom-built Application
Go to the WeCom admin console to create a custom-built application.
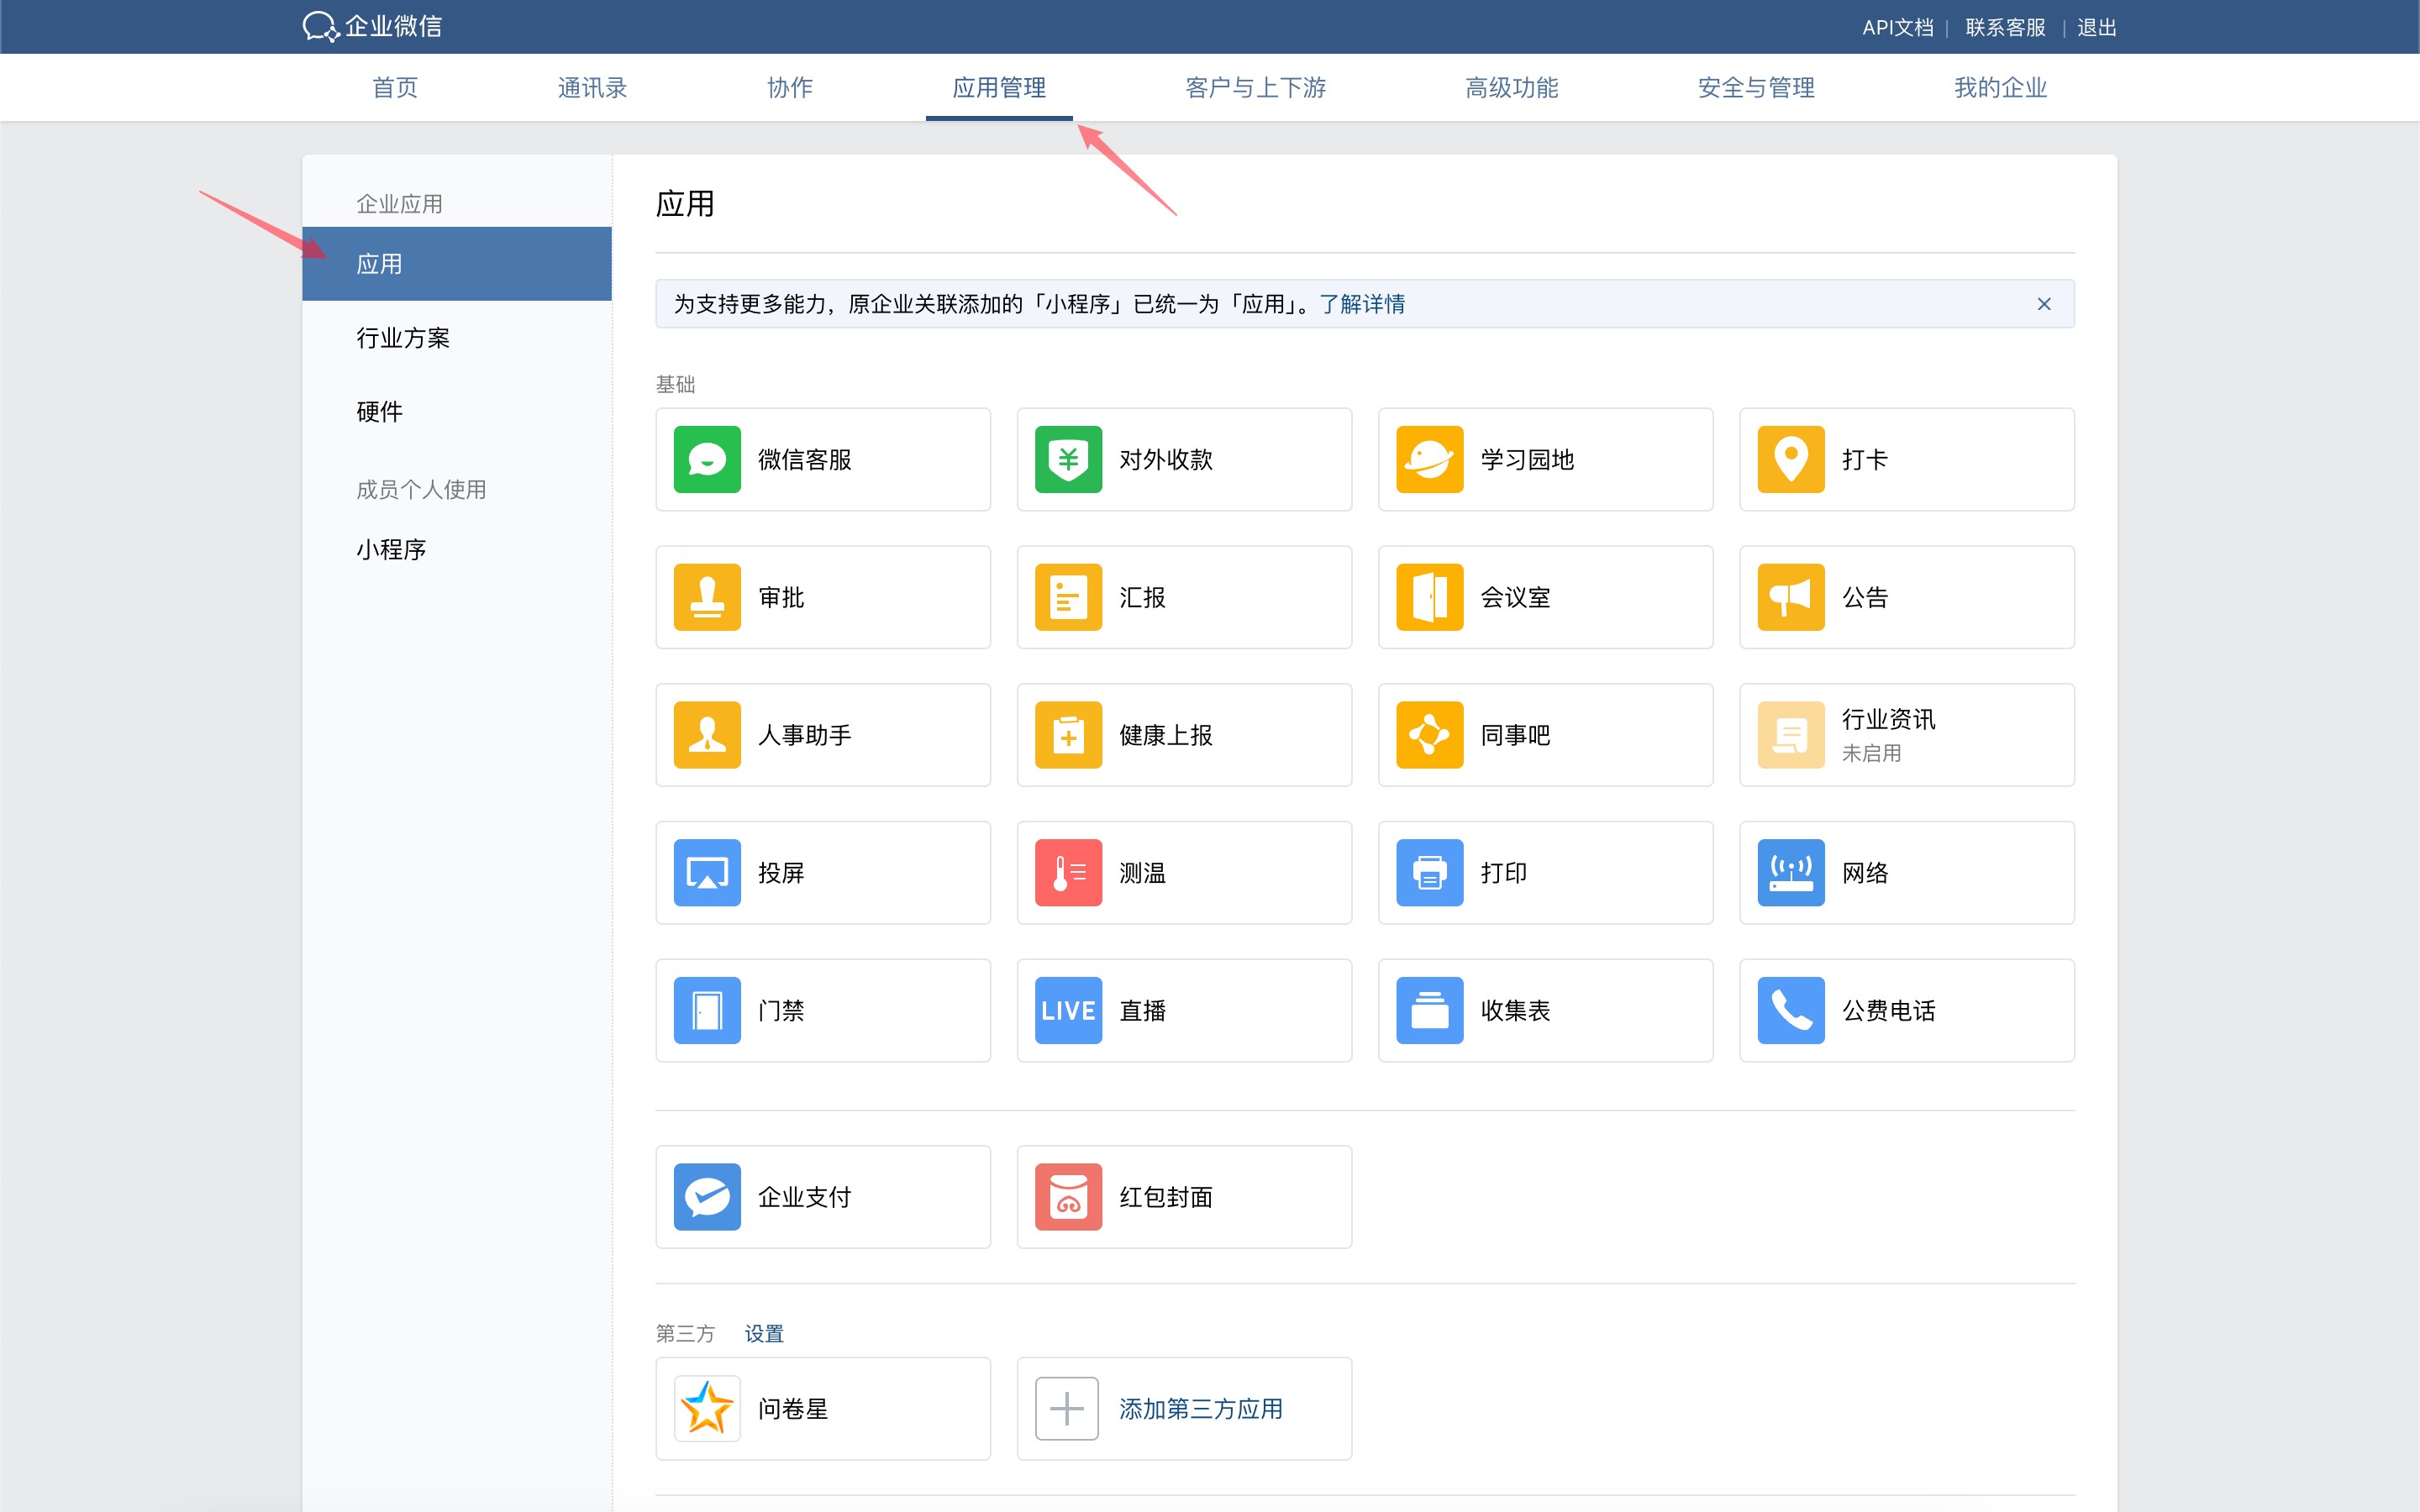
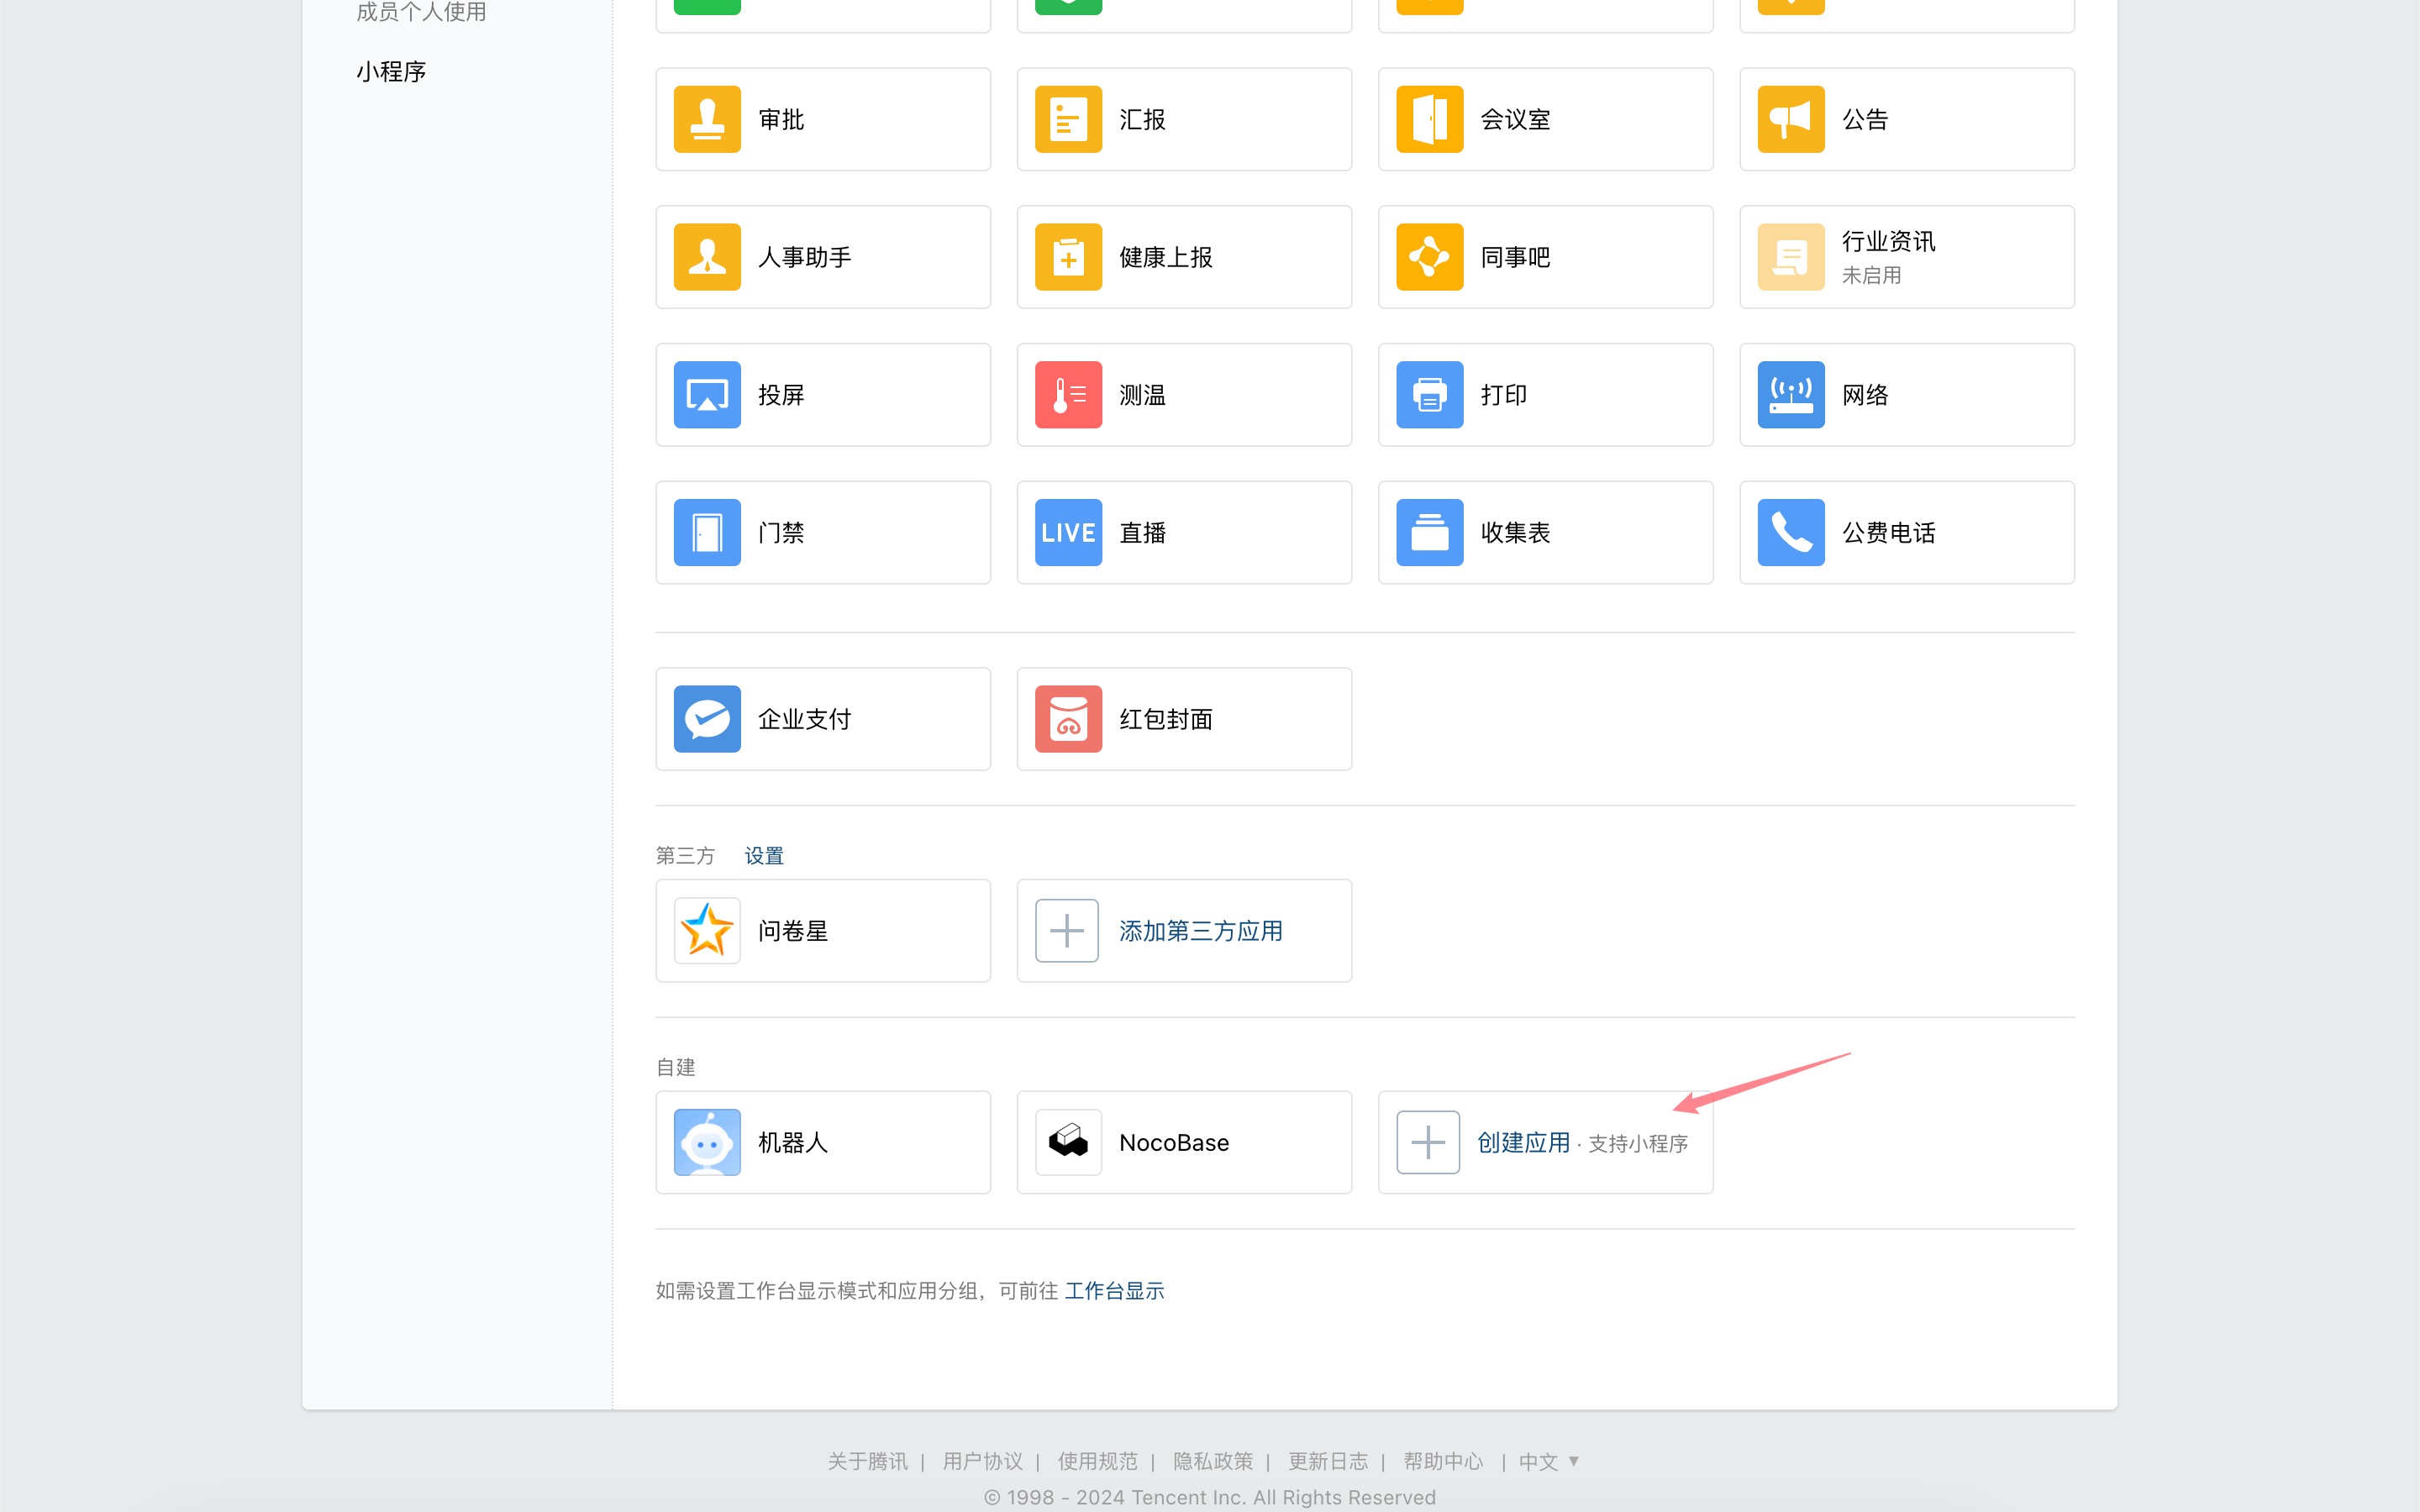
Click the application to enter its details page, scroll down, and click "WeCom Authorized Login".
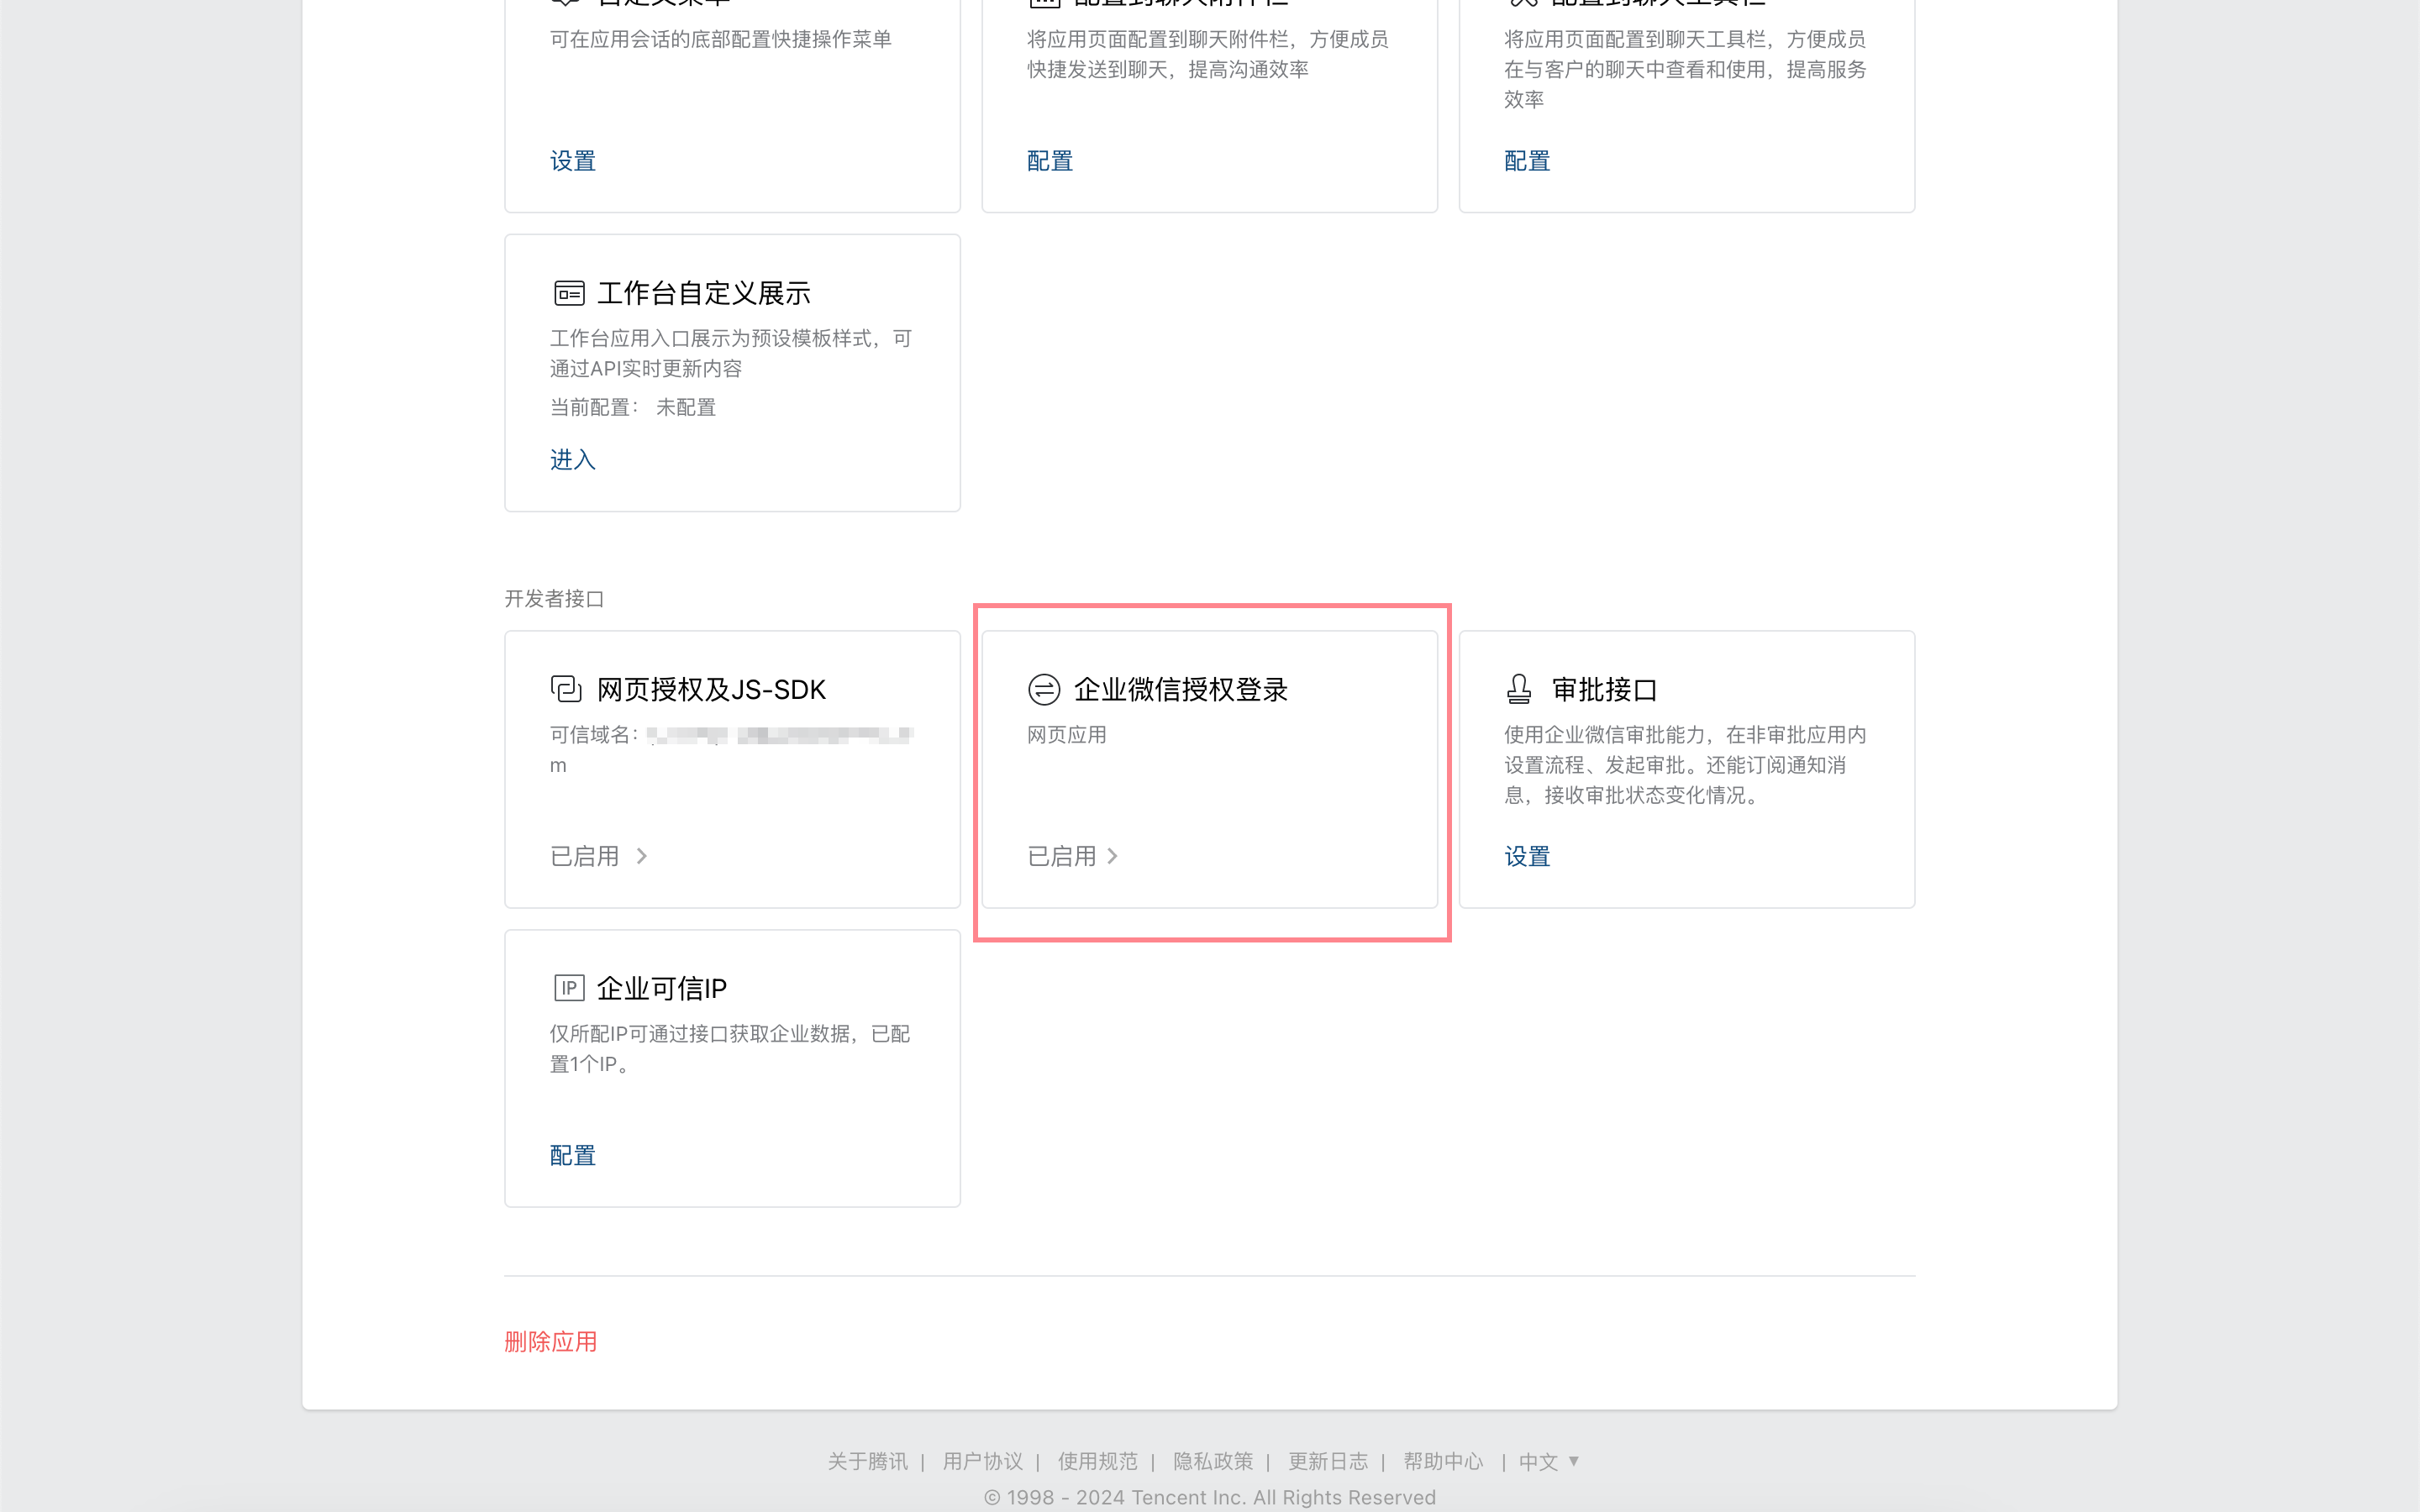
Set the authorized callback domain to your NocoBase application domain.

Return to the app details page and click "Web Authorization and JS-SDK".
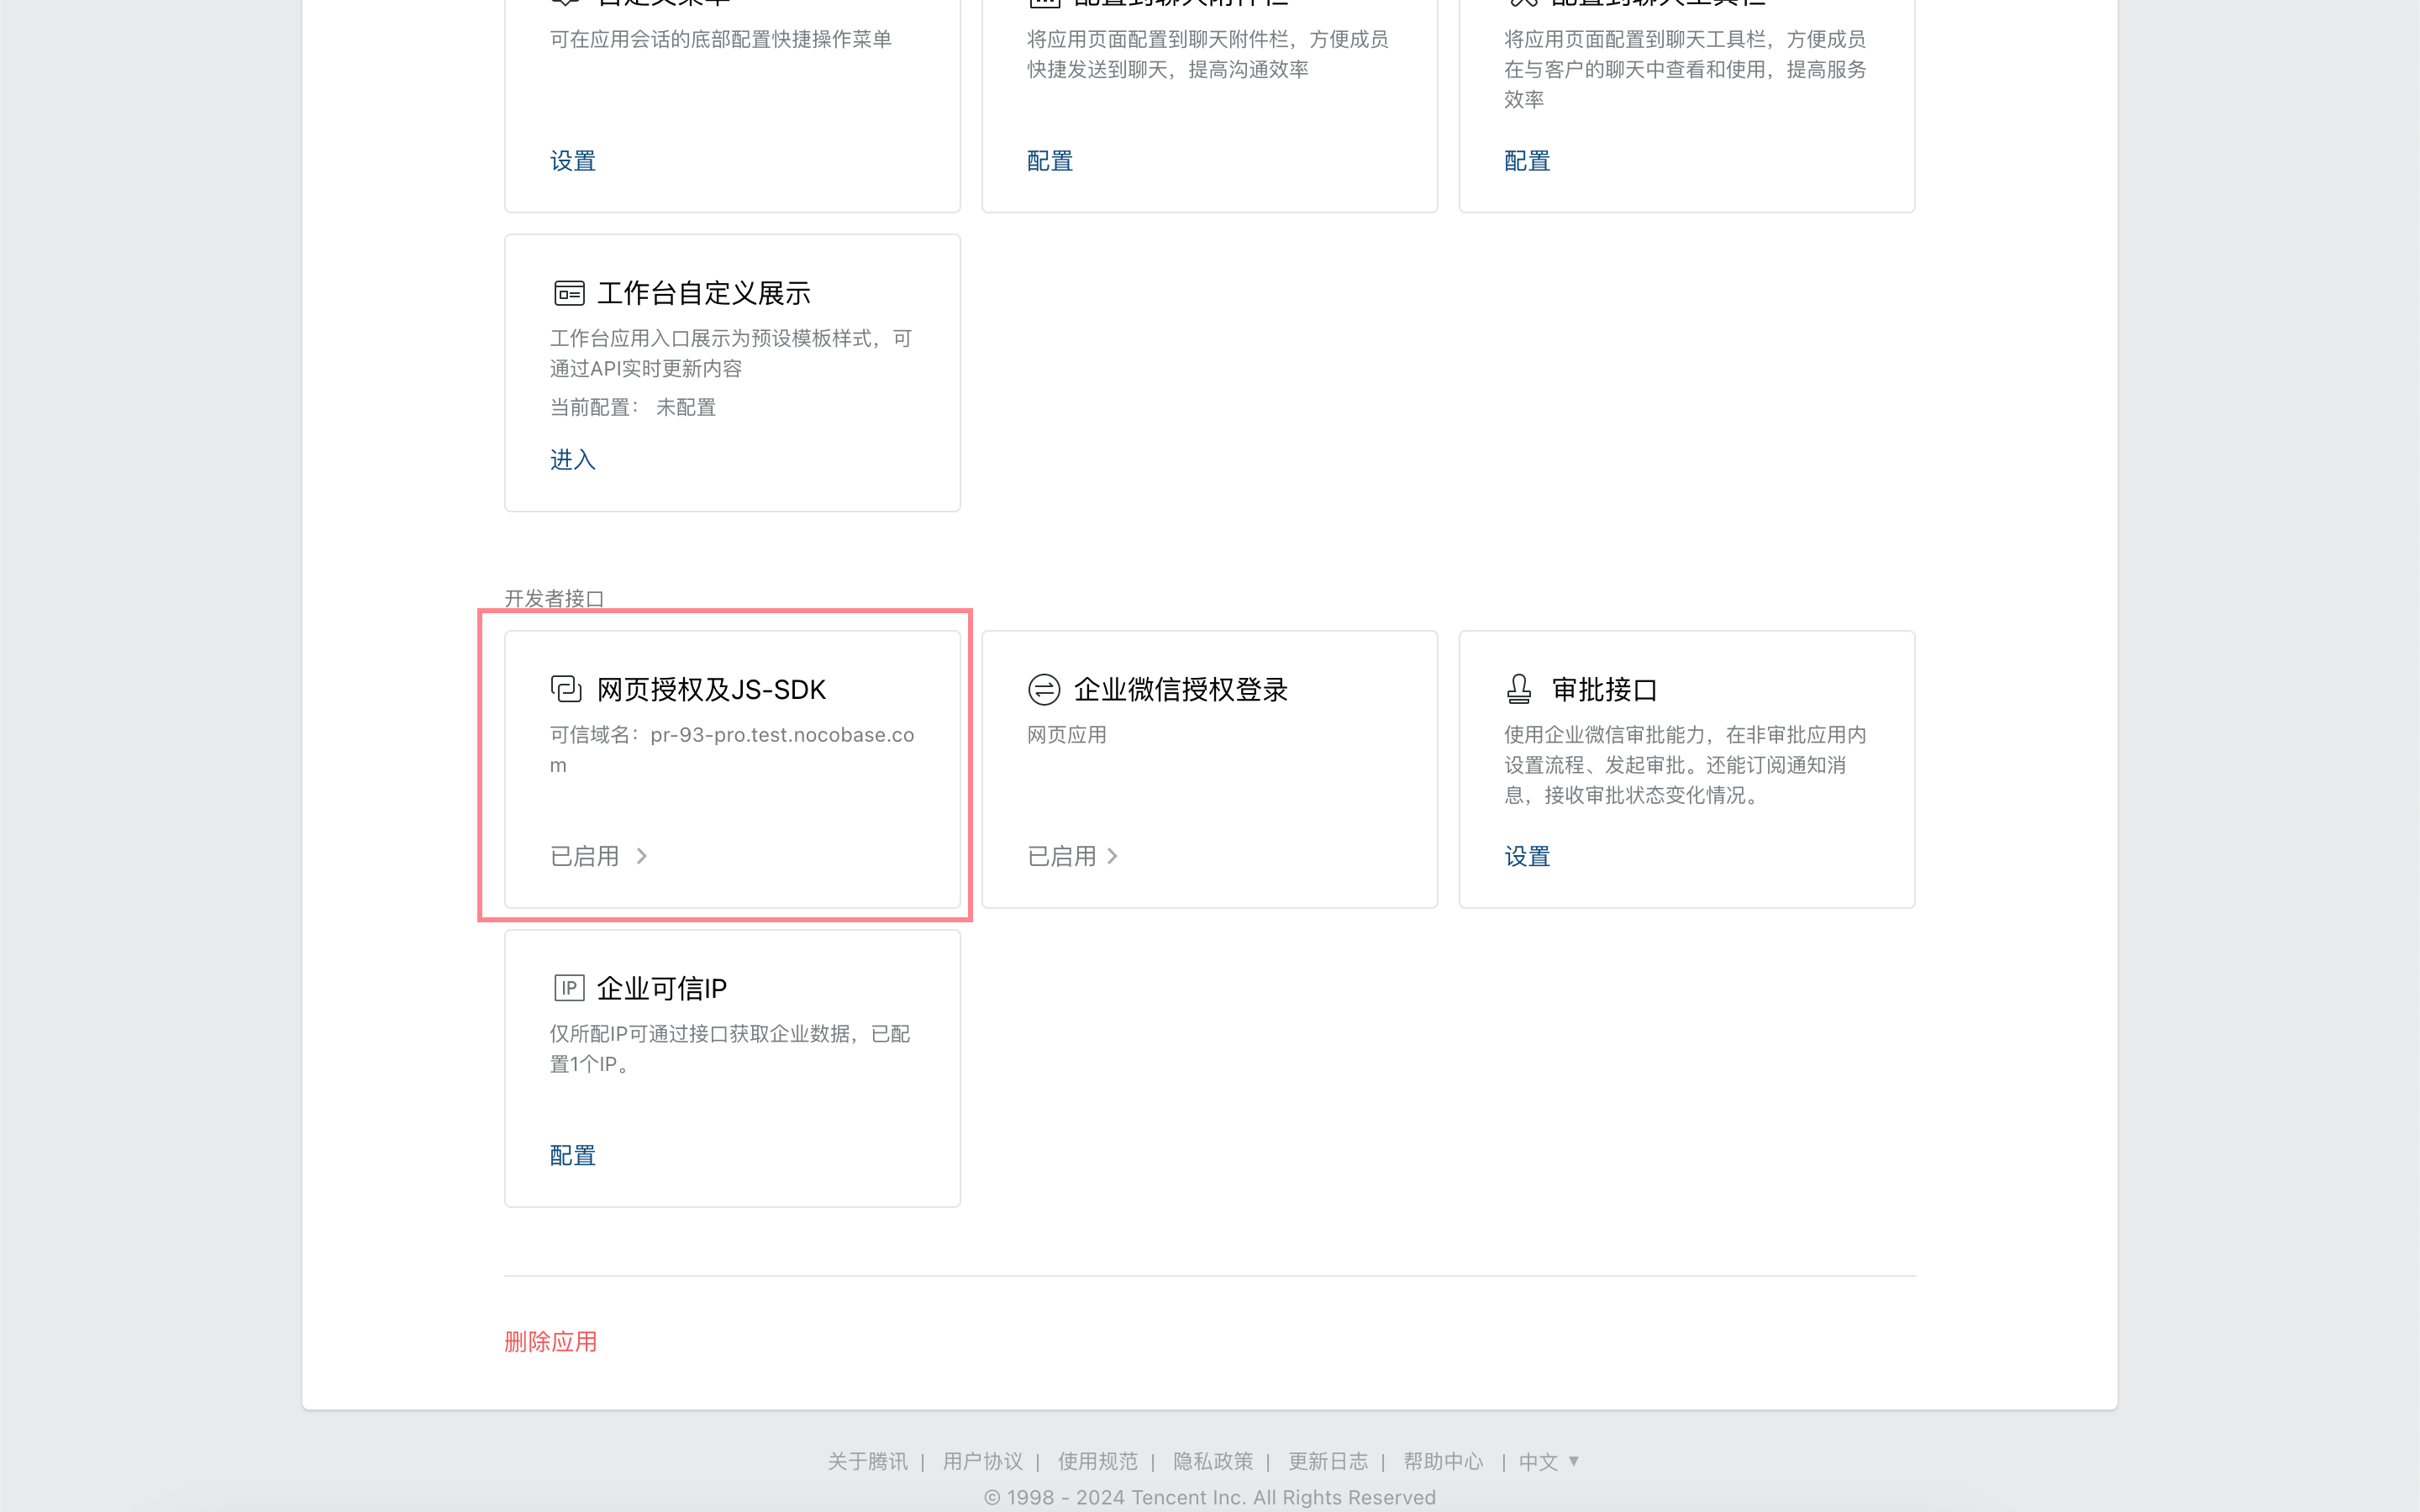
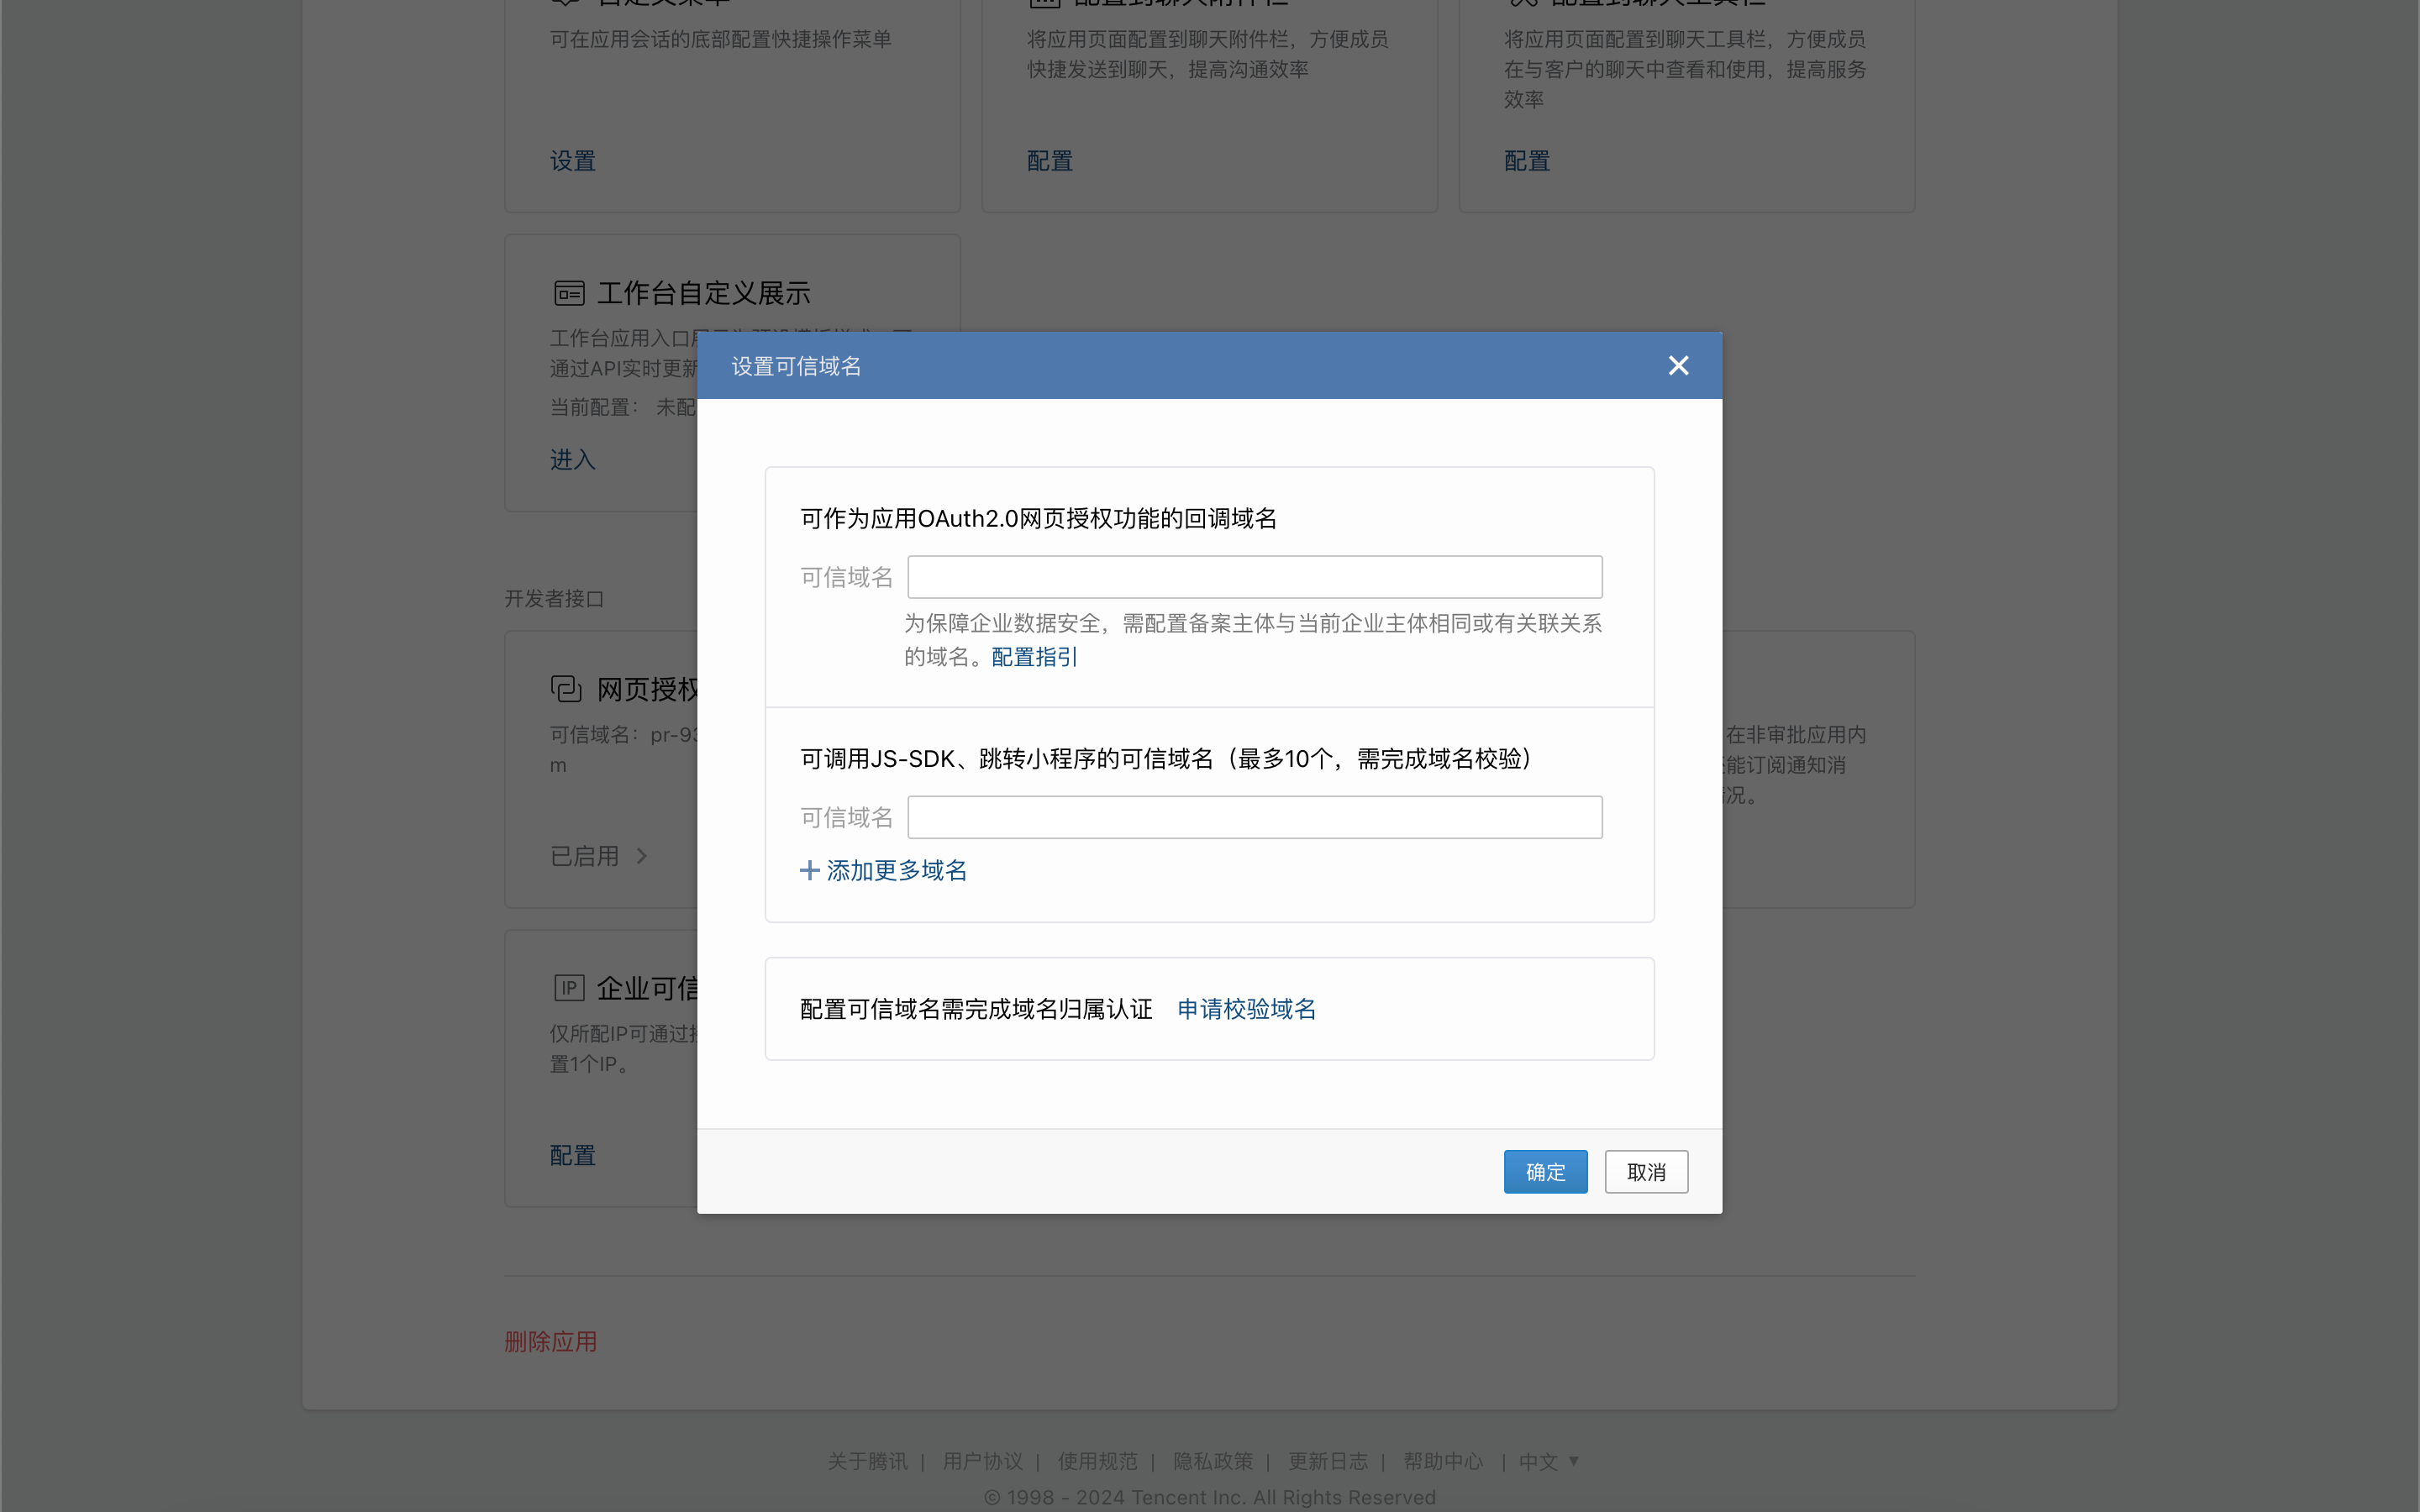
Set and verify the callback domain for the app's OAuth2.0 web authorization feature.
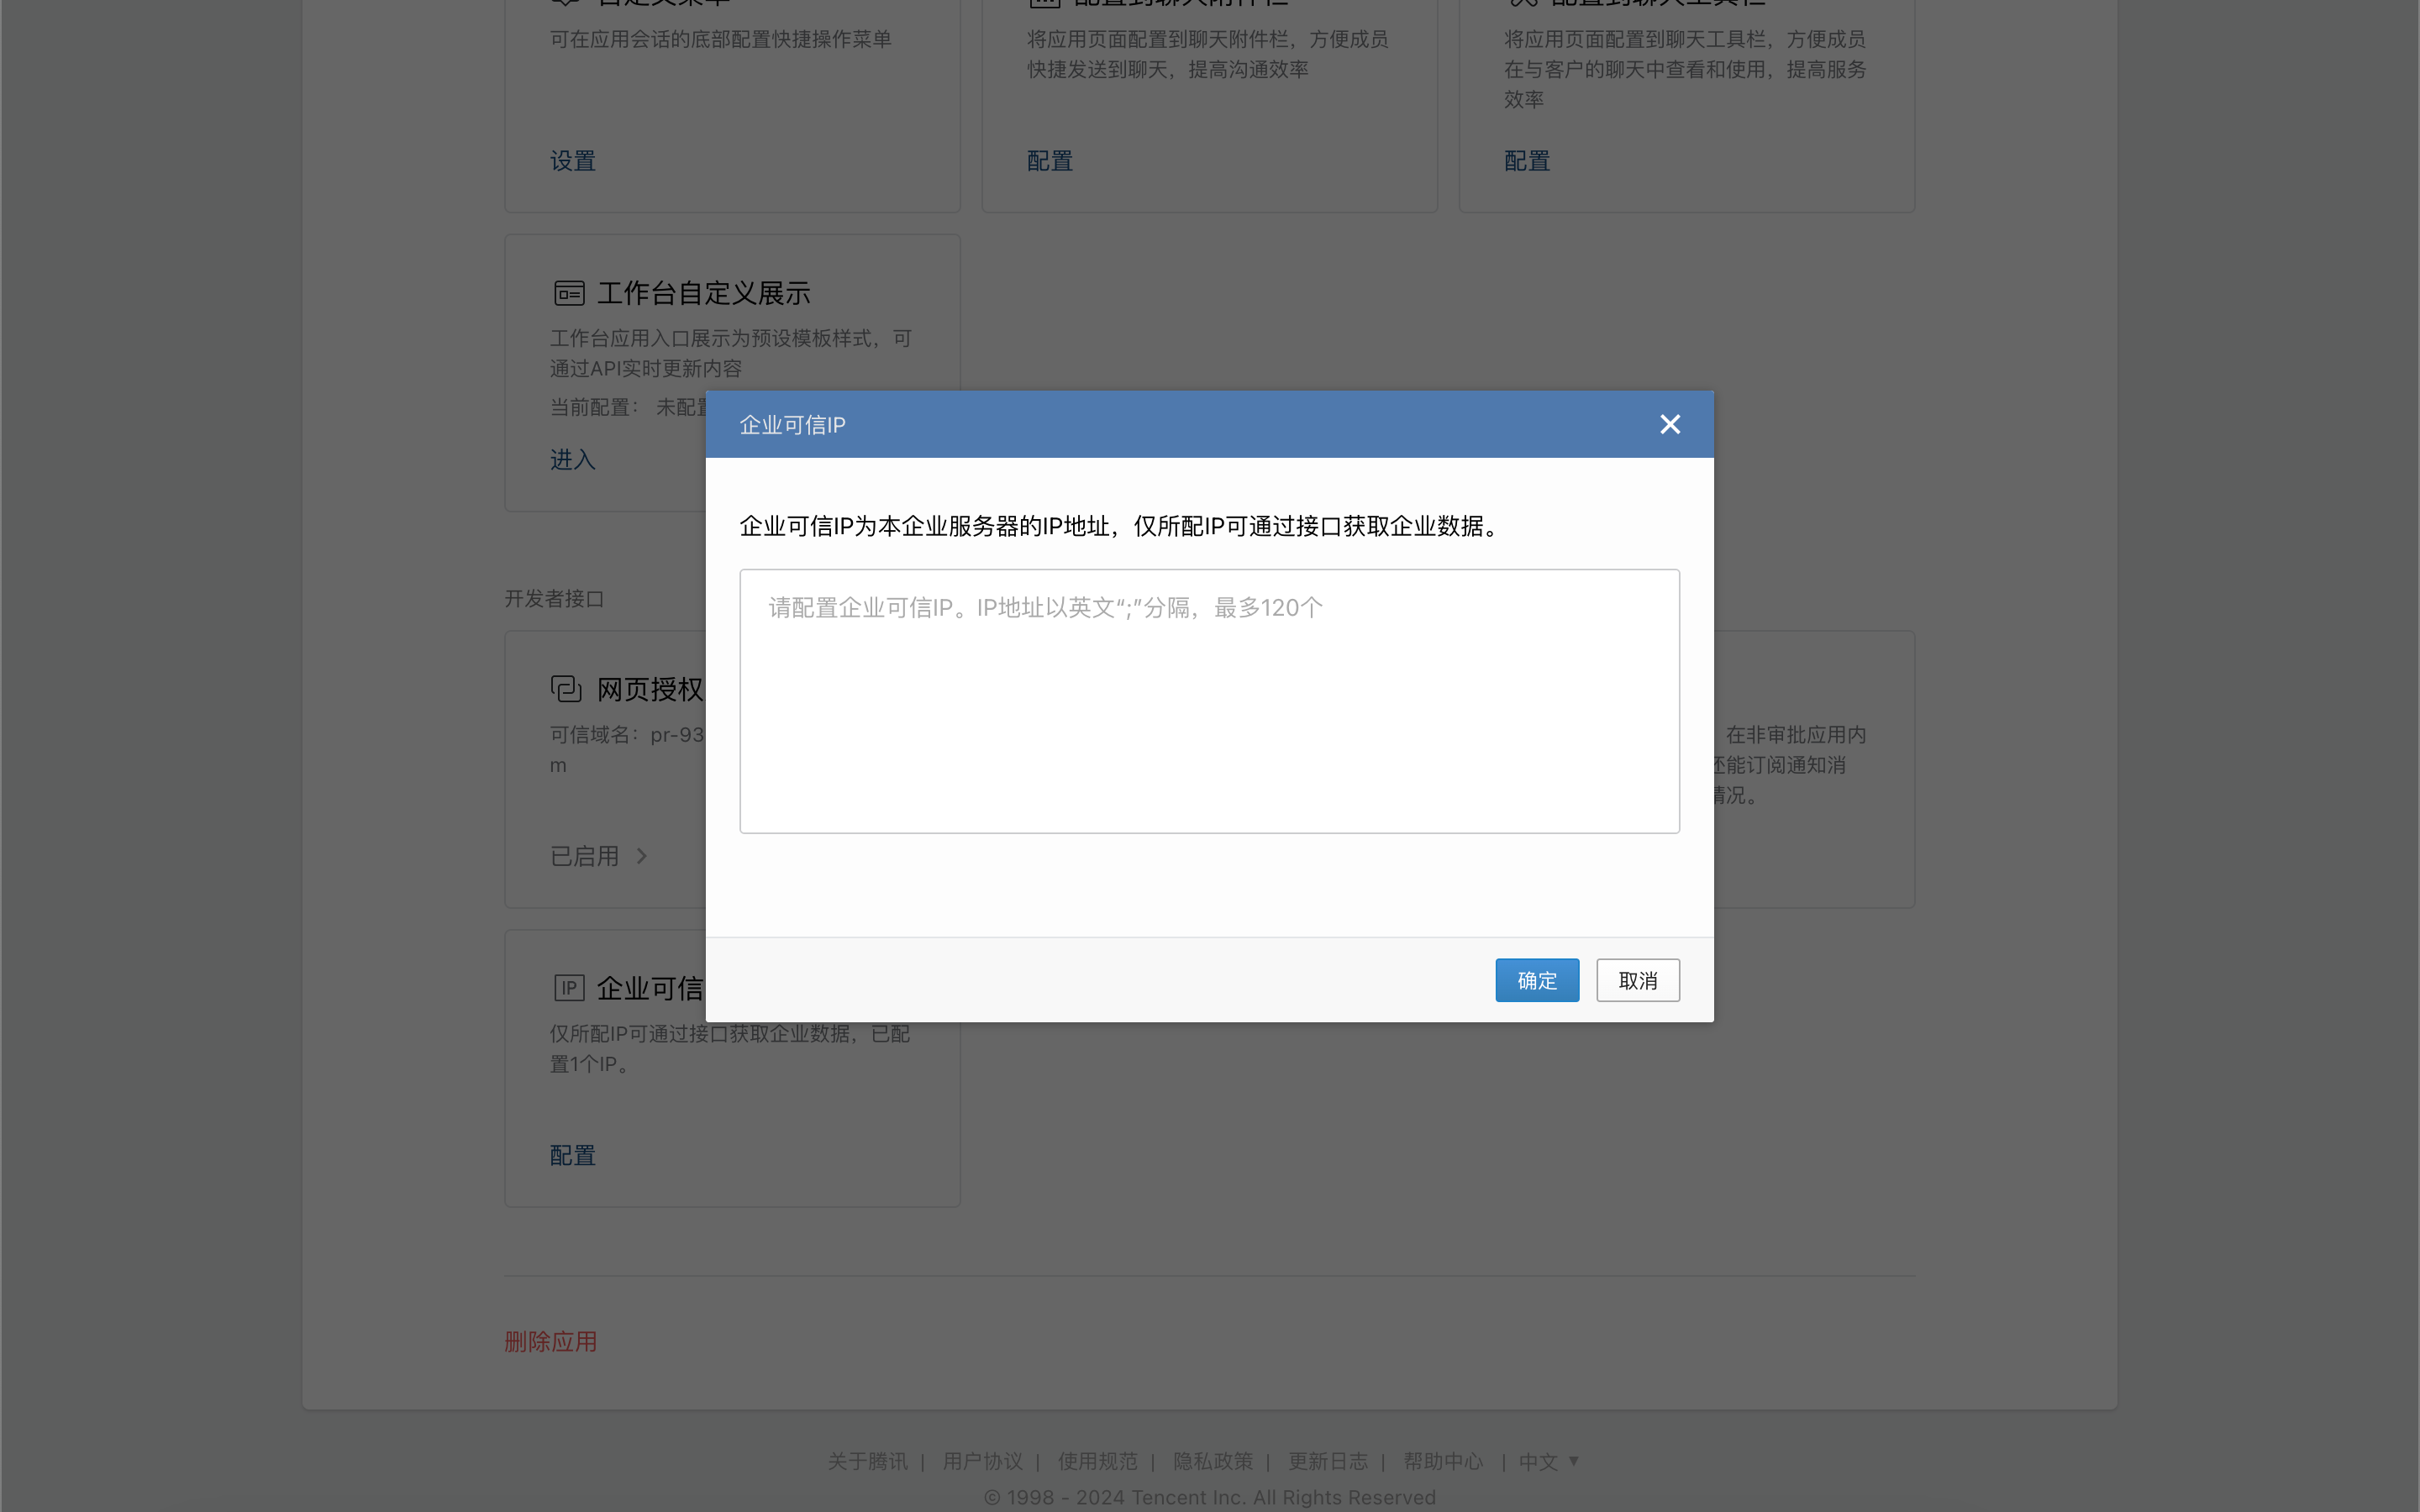
On the app details page, click "Corporate Trusted IP".
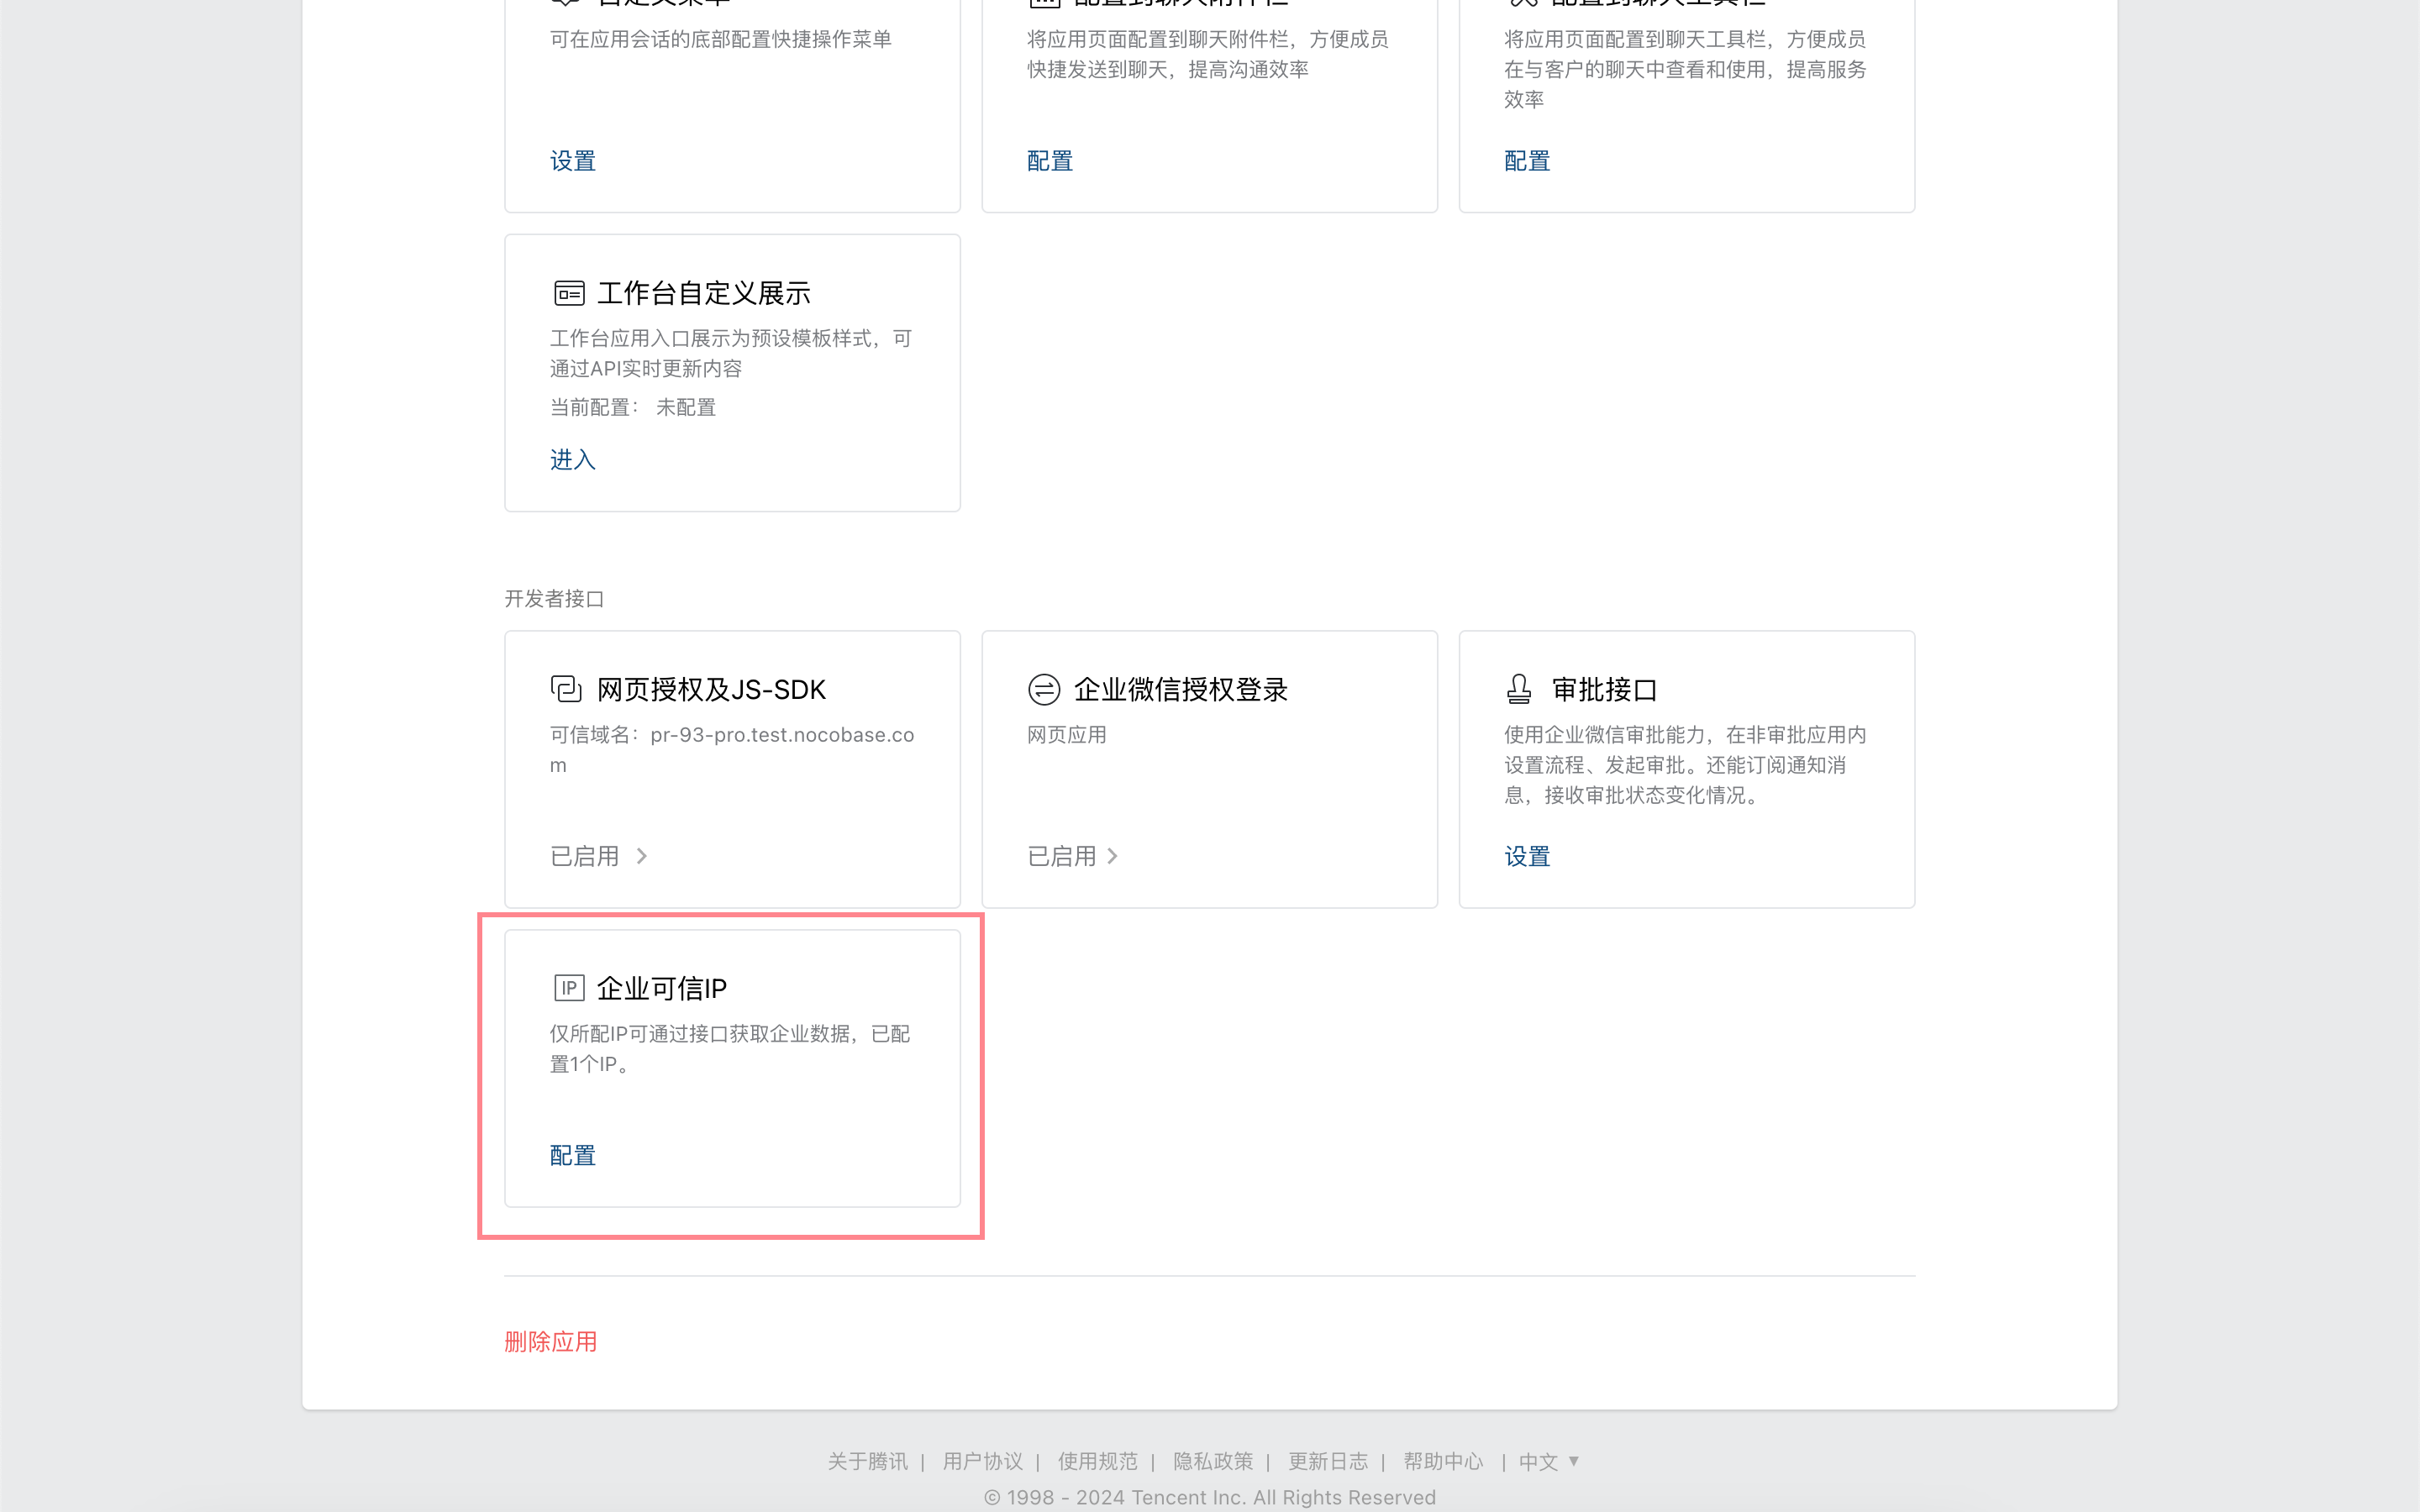
Configure the NocoBase application IP.
Get Credentials from the WeCom Admin Console
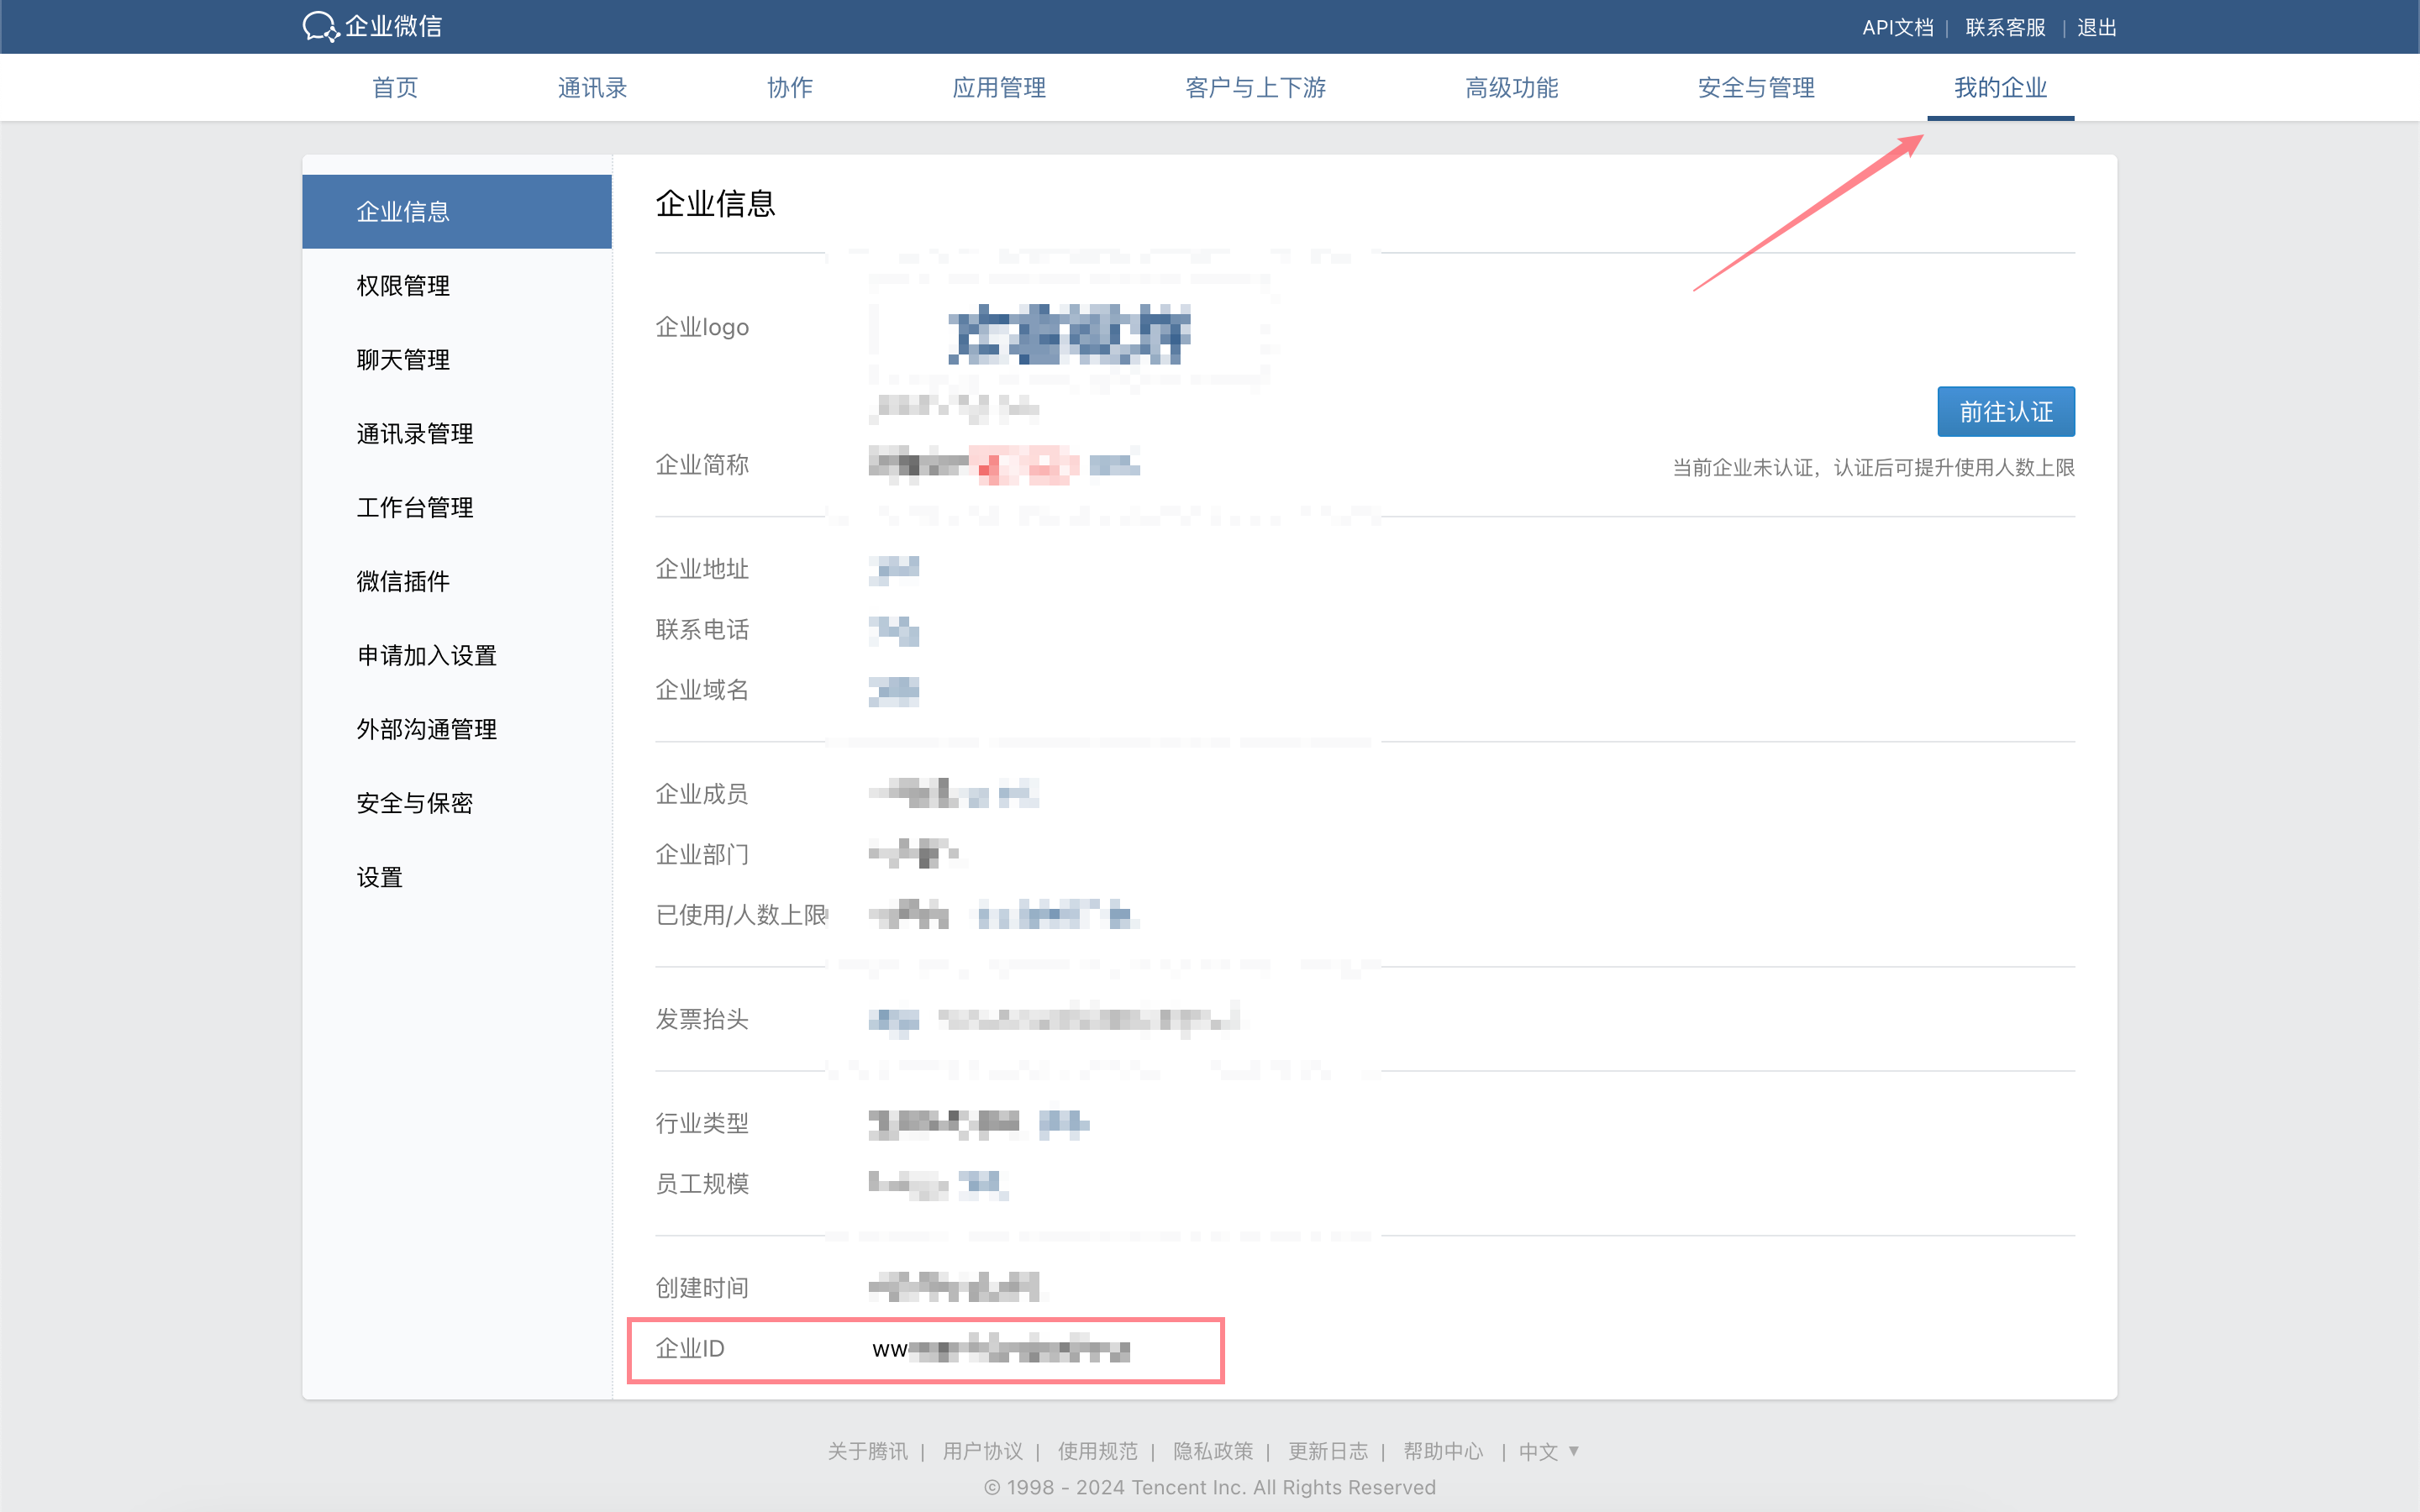
In the WeCom admin console, under "My Company", copy the "Company ID".
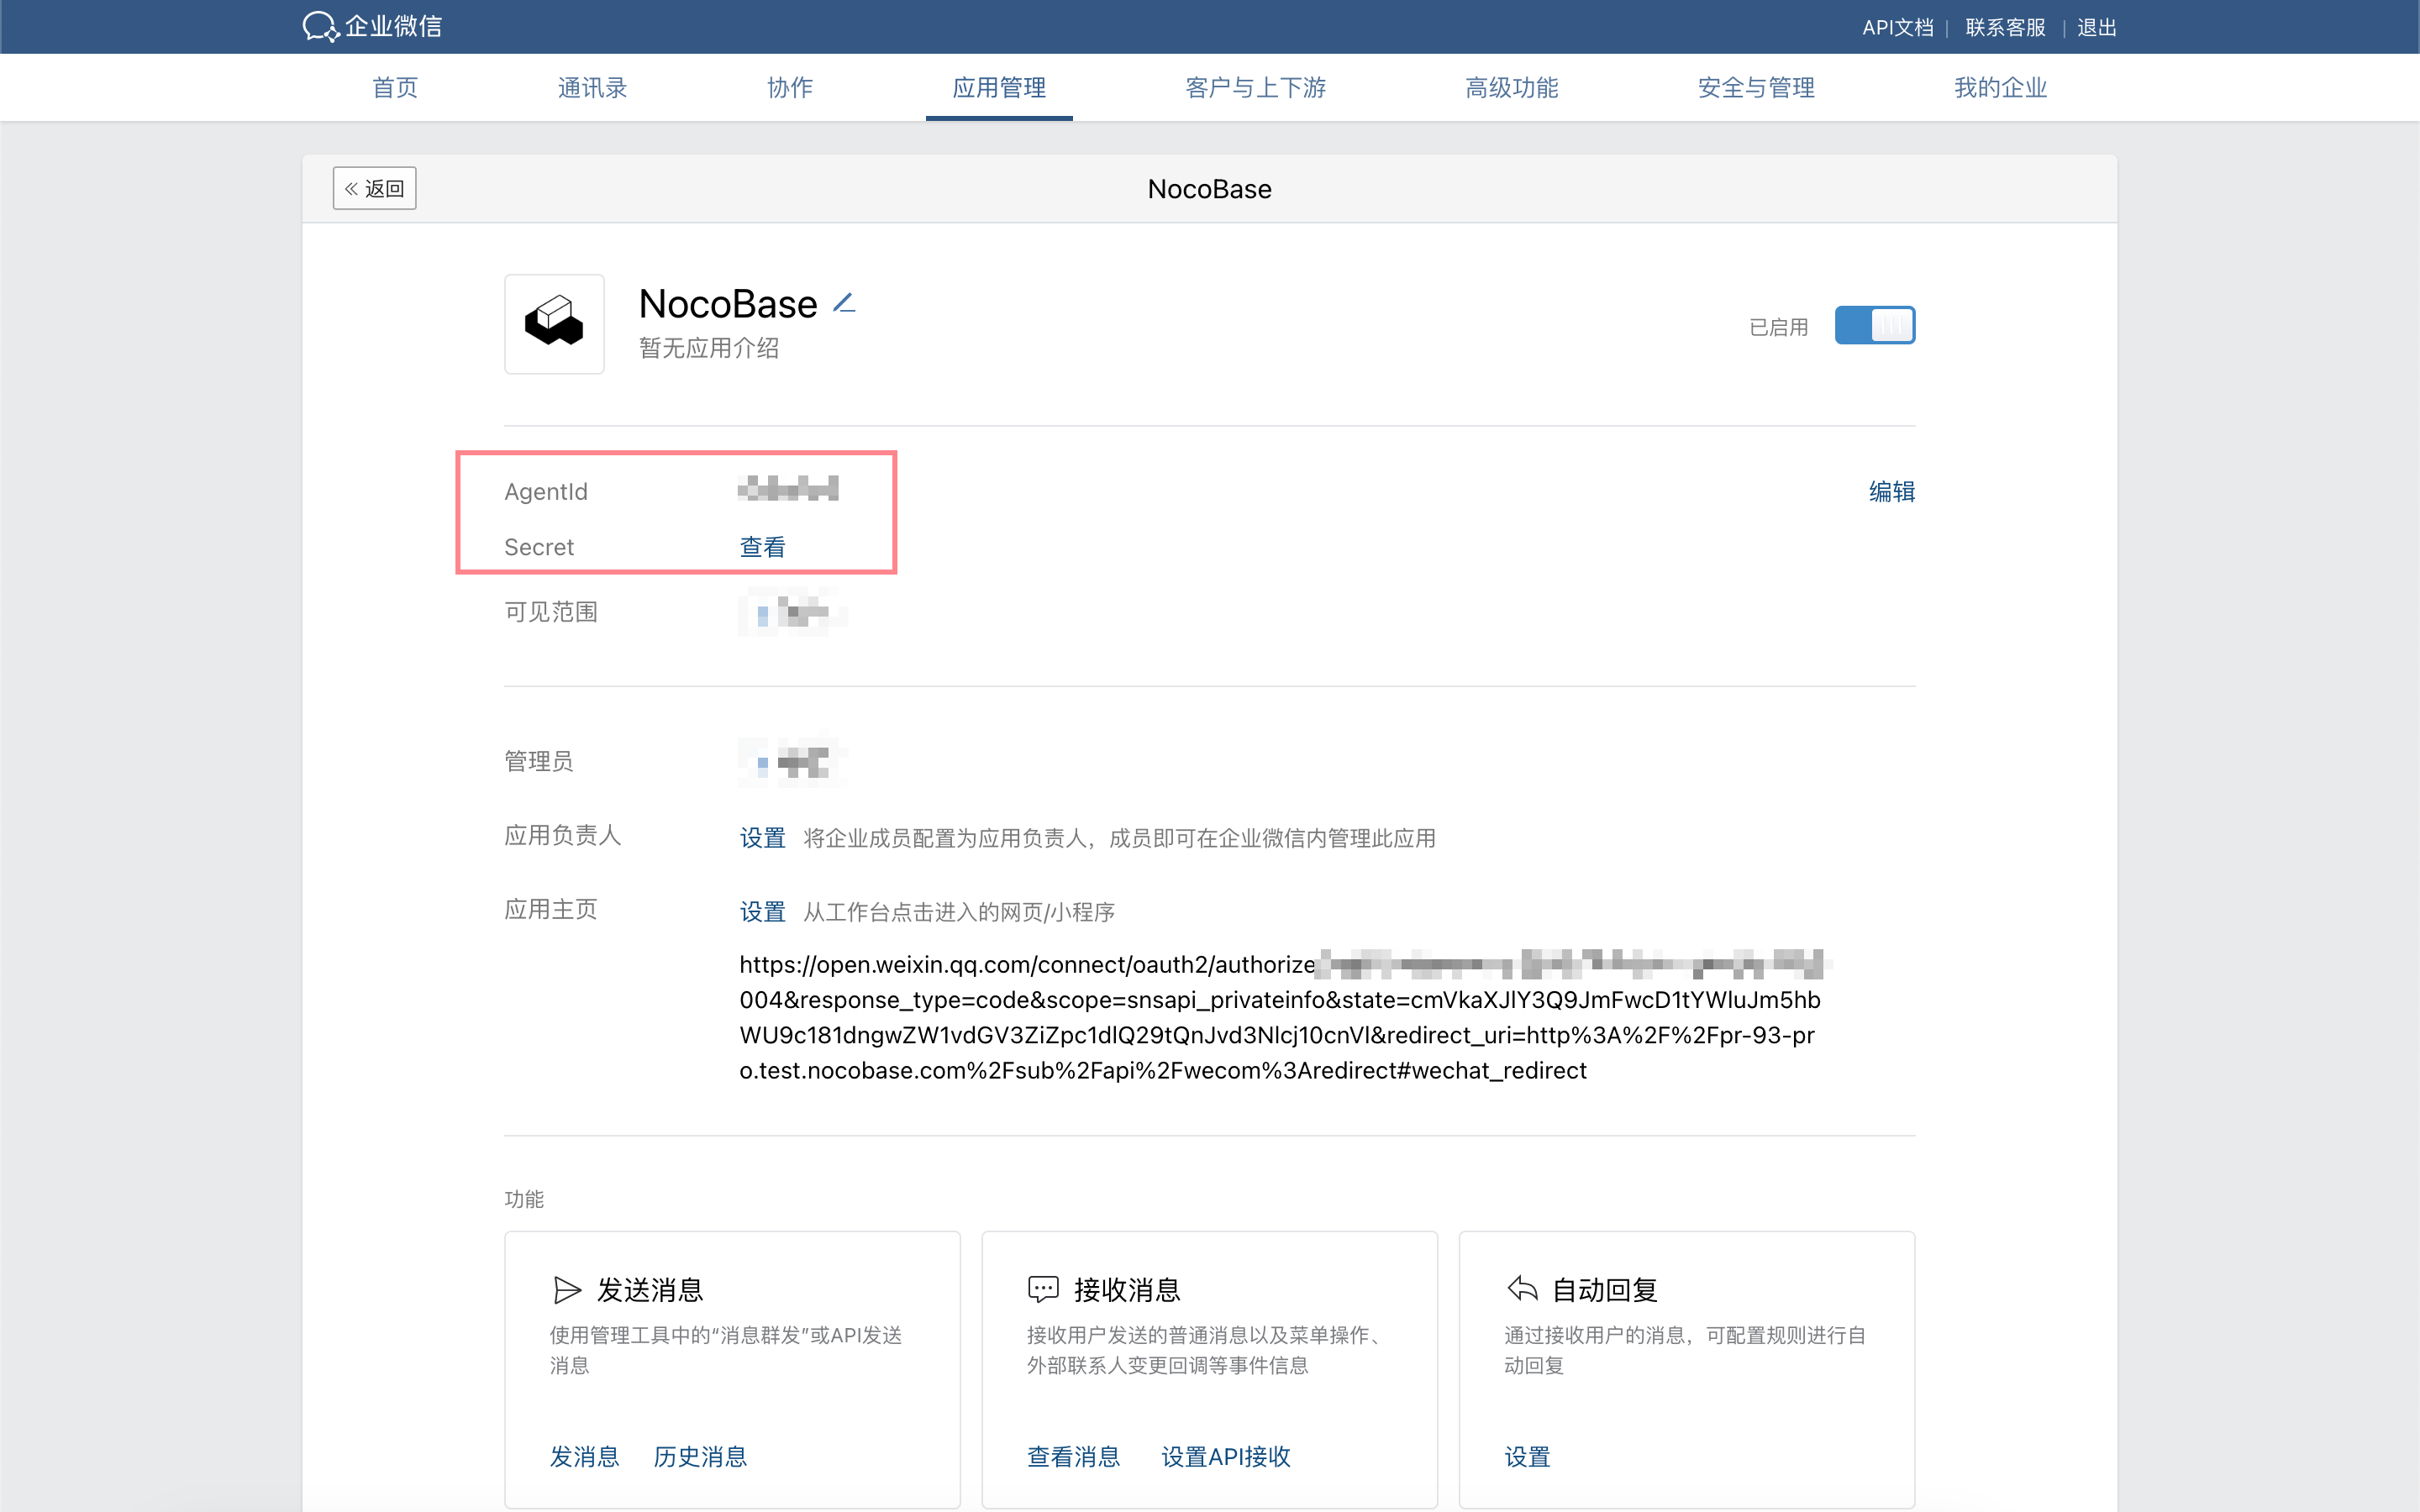
In the WeCom admin console, under "App Management", go to the details page of the application created in the previous step and copy the AgentId and Secret.
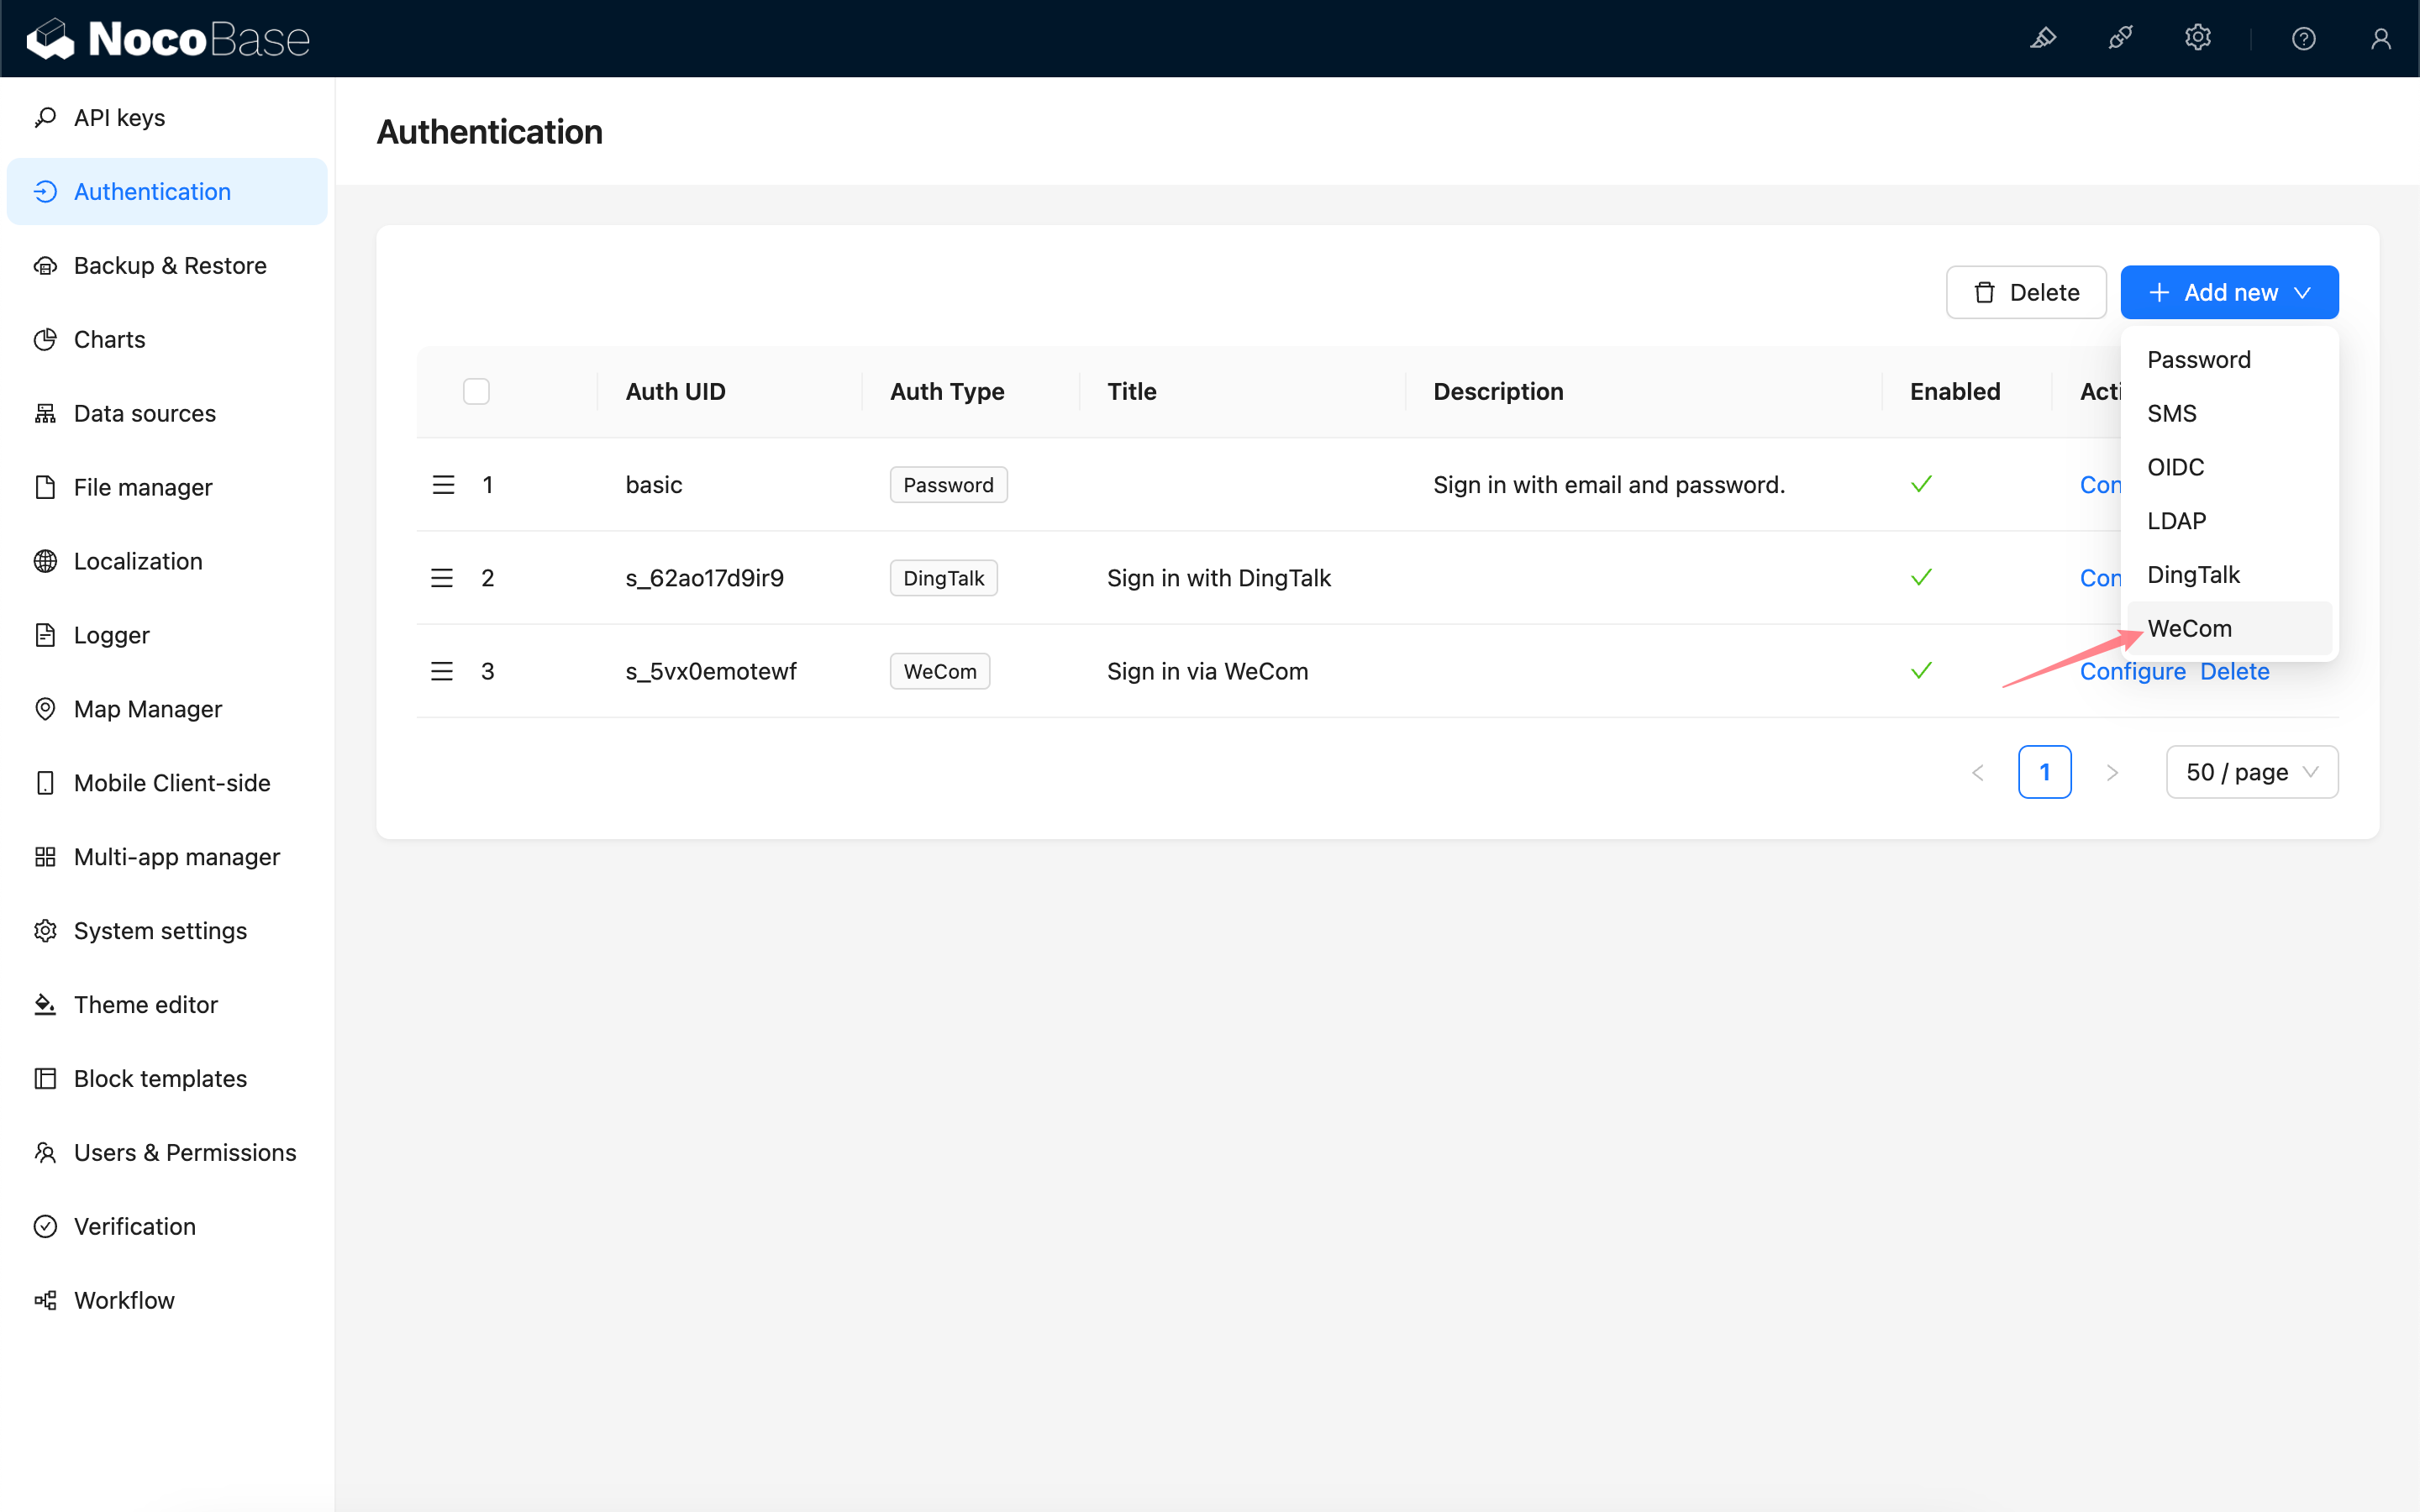
Add WeCom Authentication in NocoBase
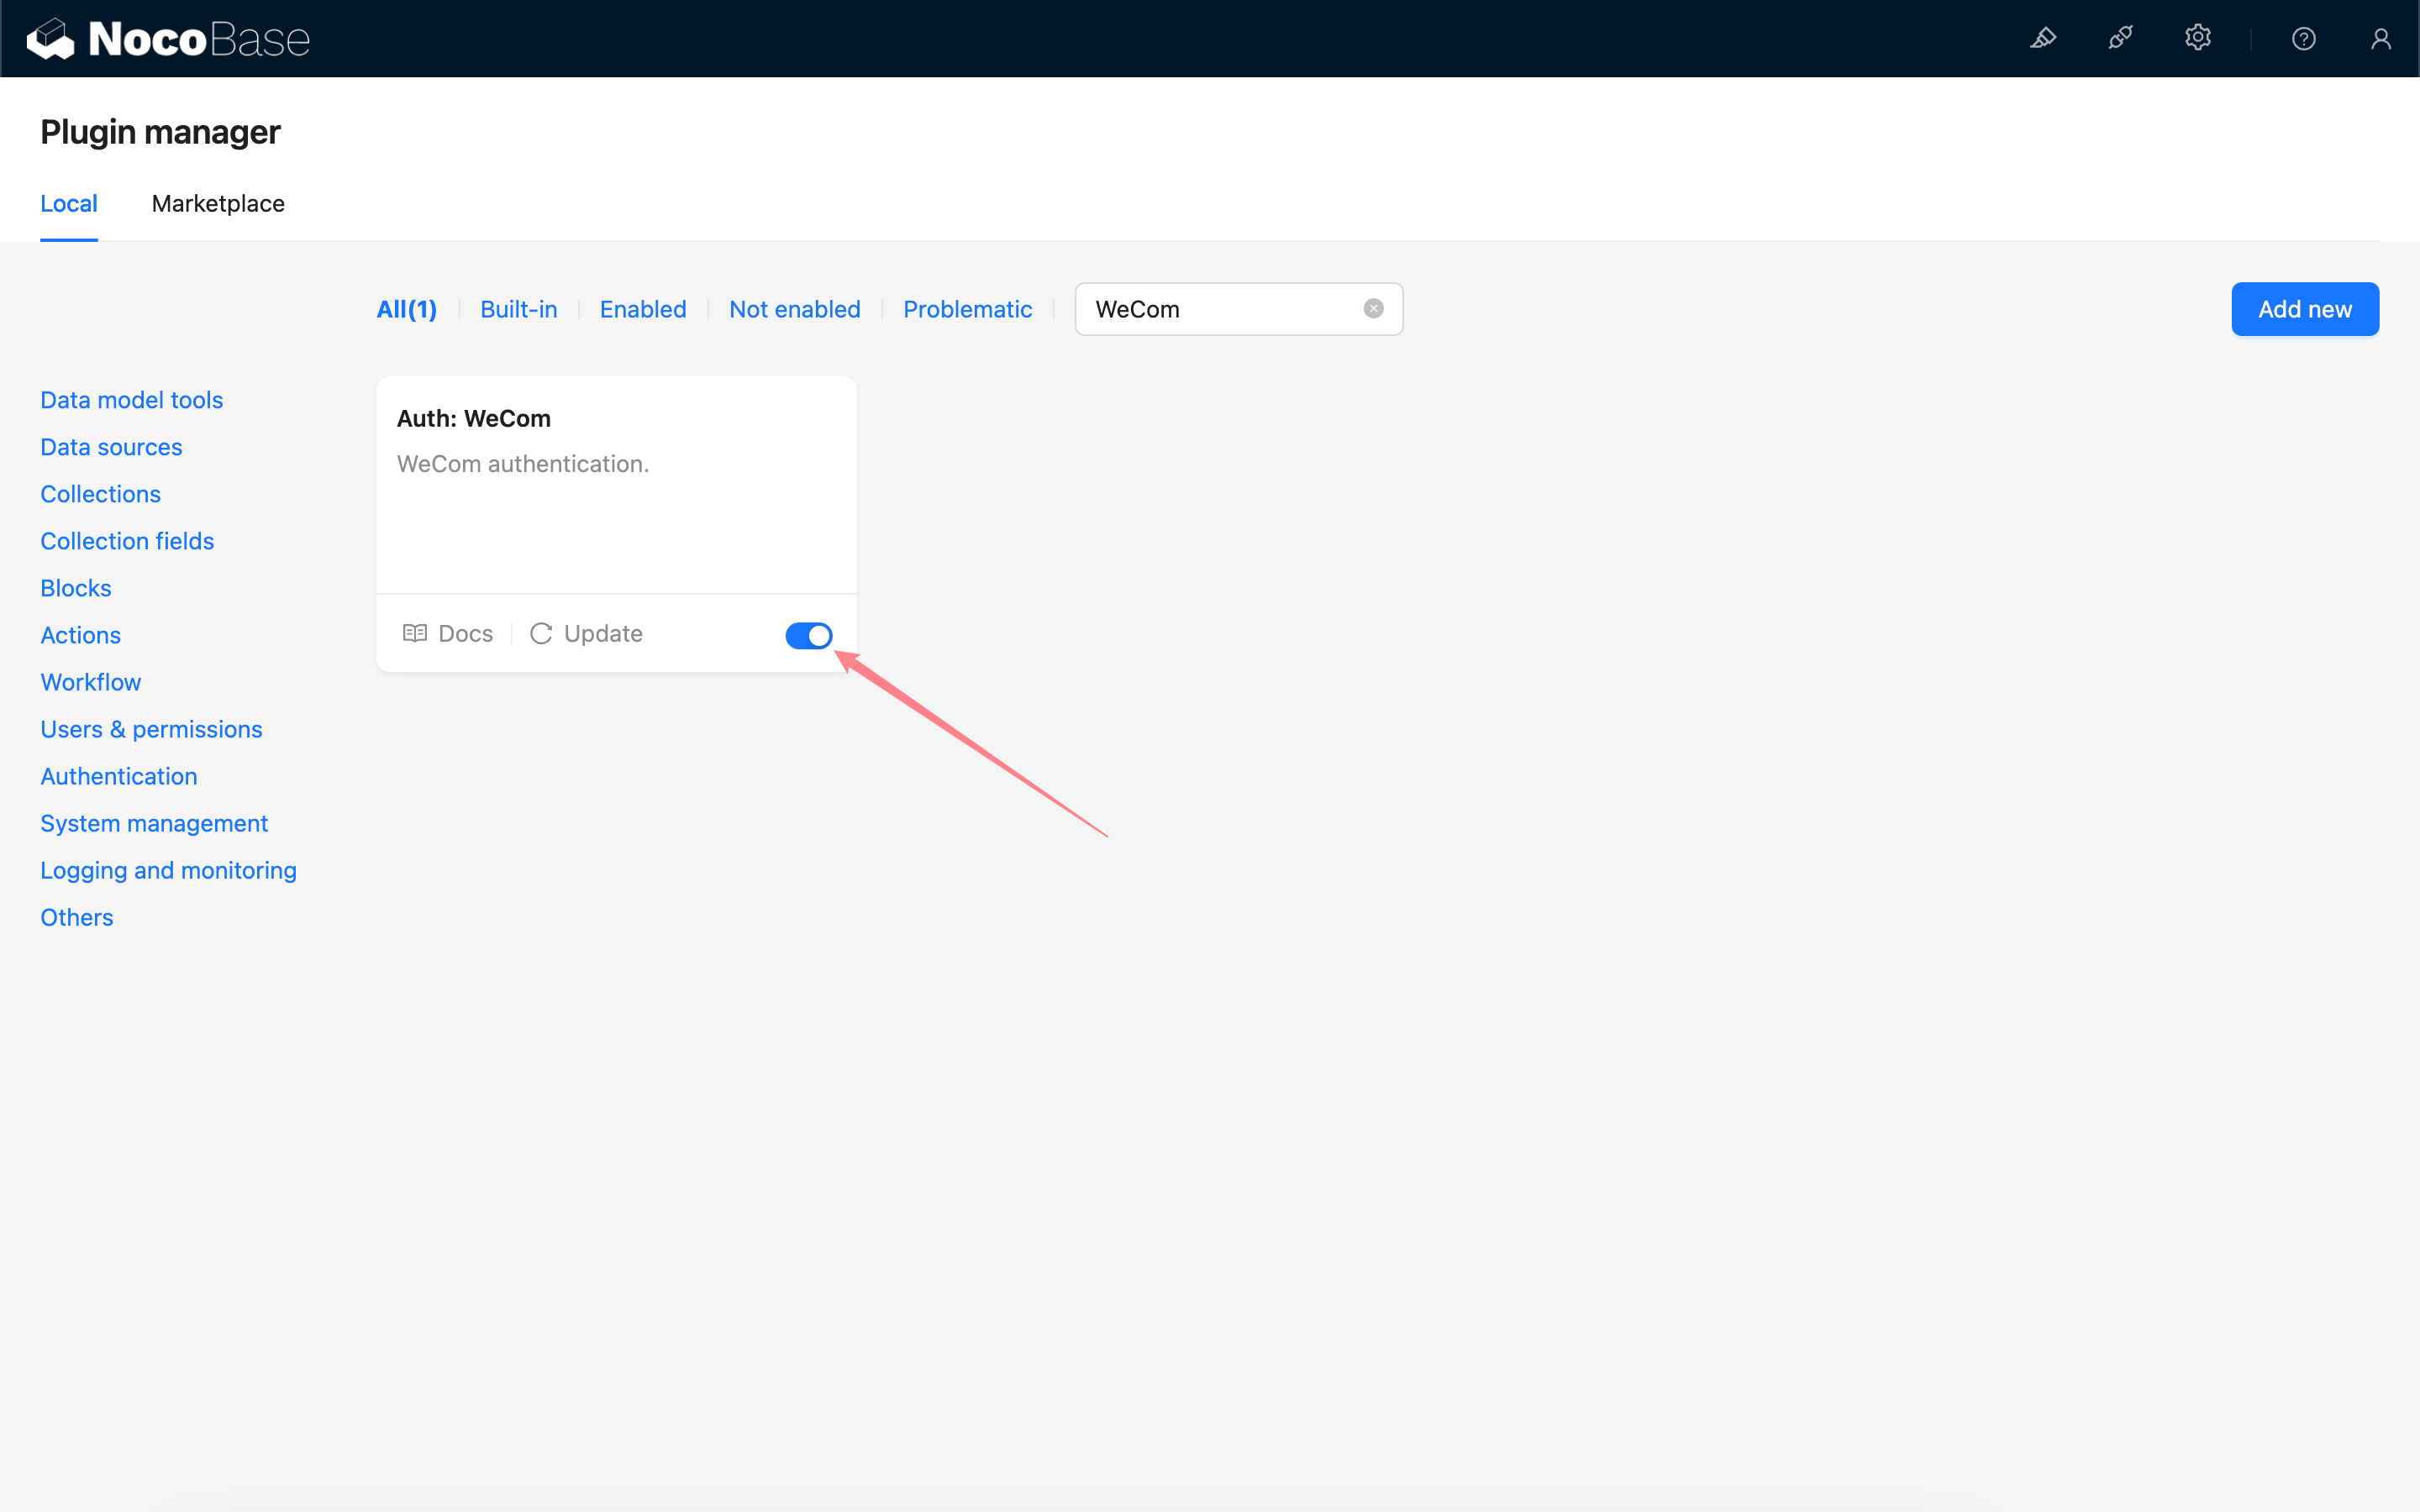
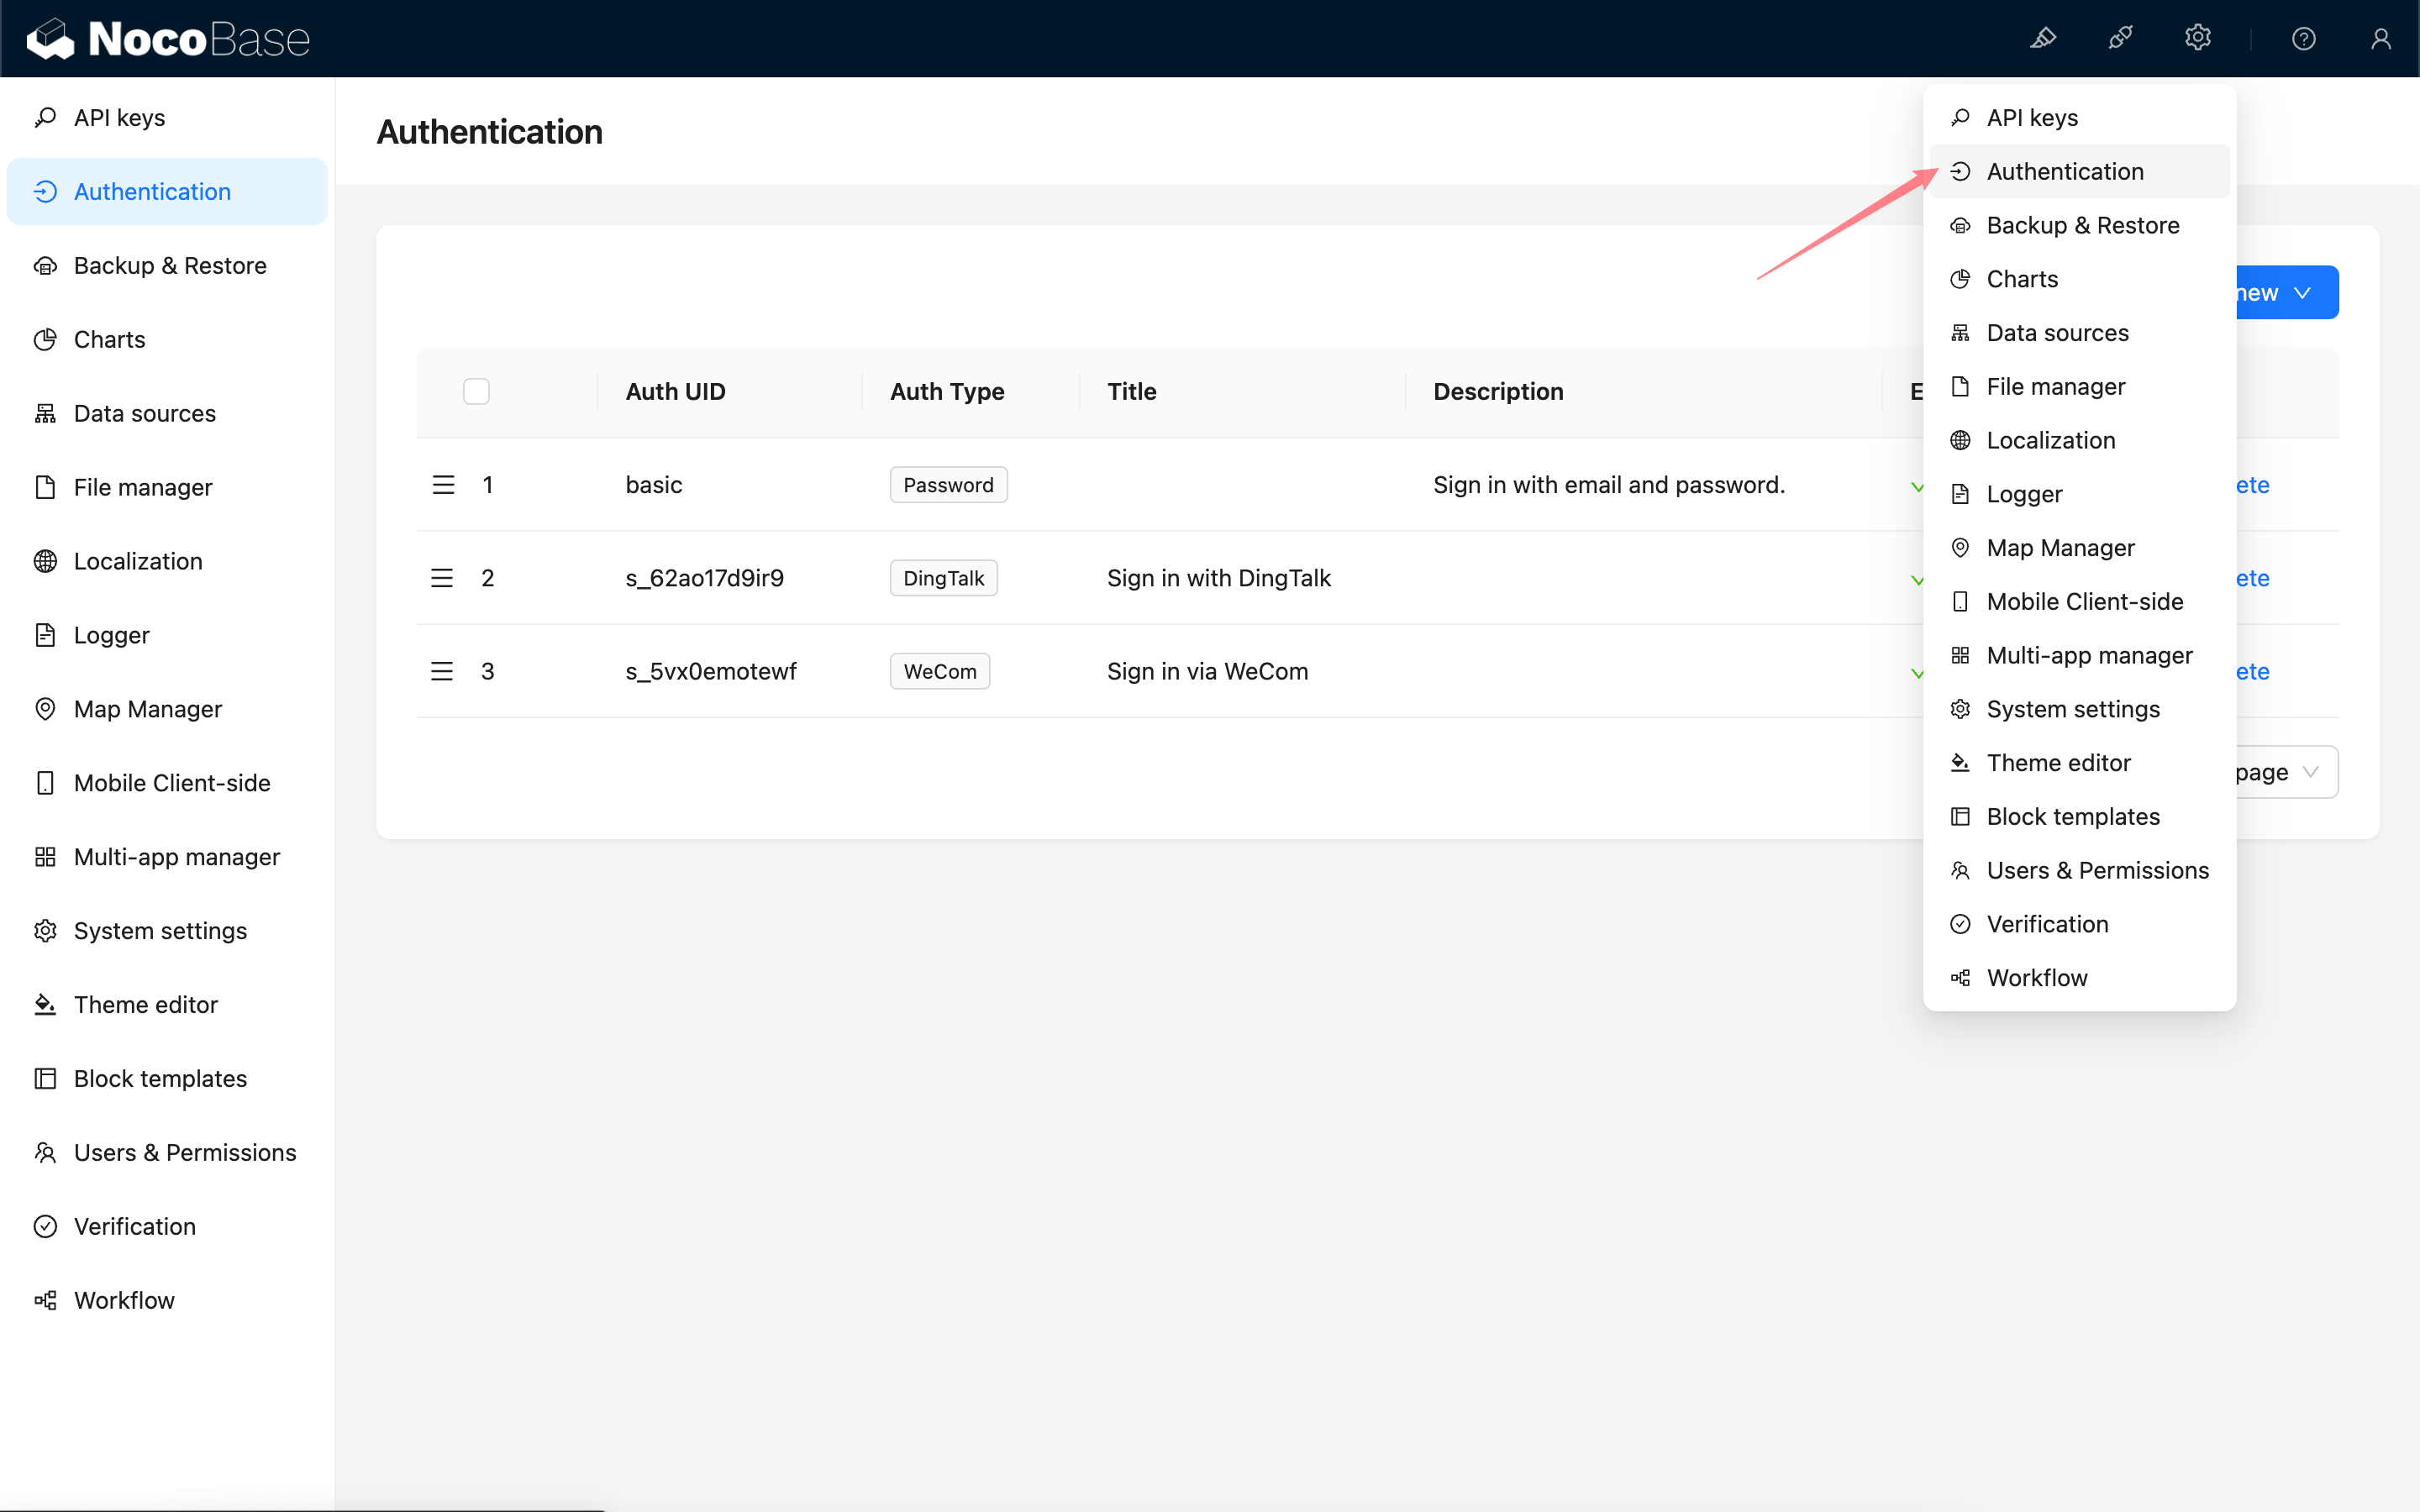
Go to the user authentication plugin management page.
Add - WeCom
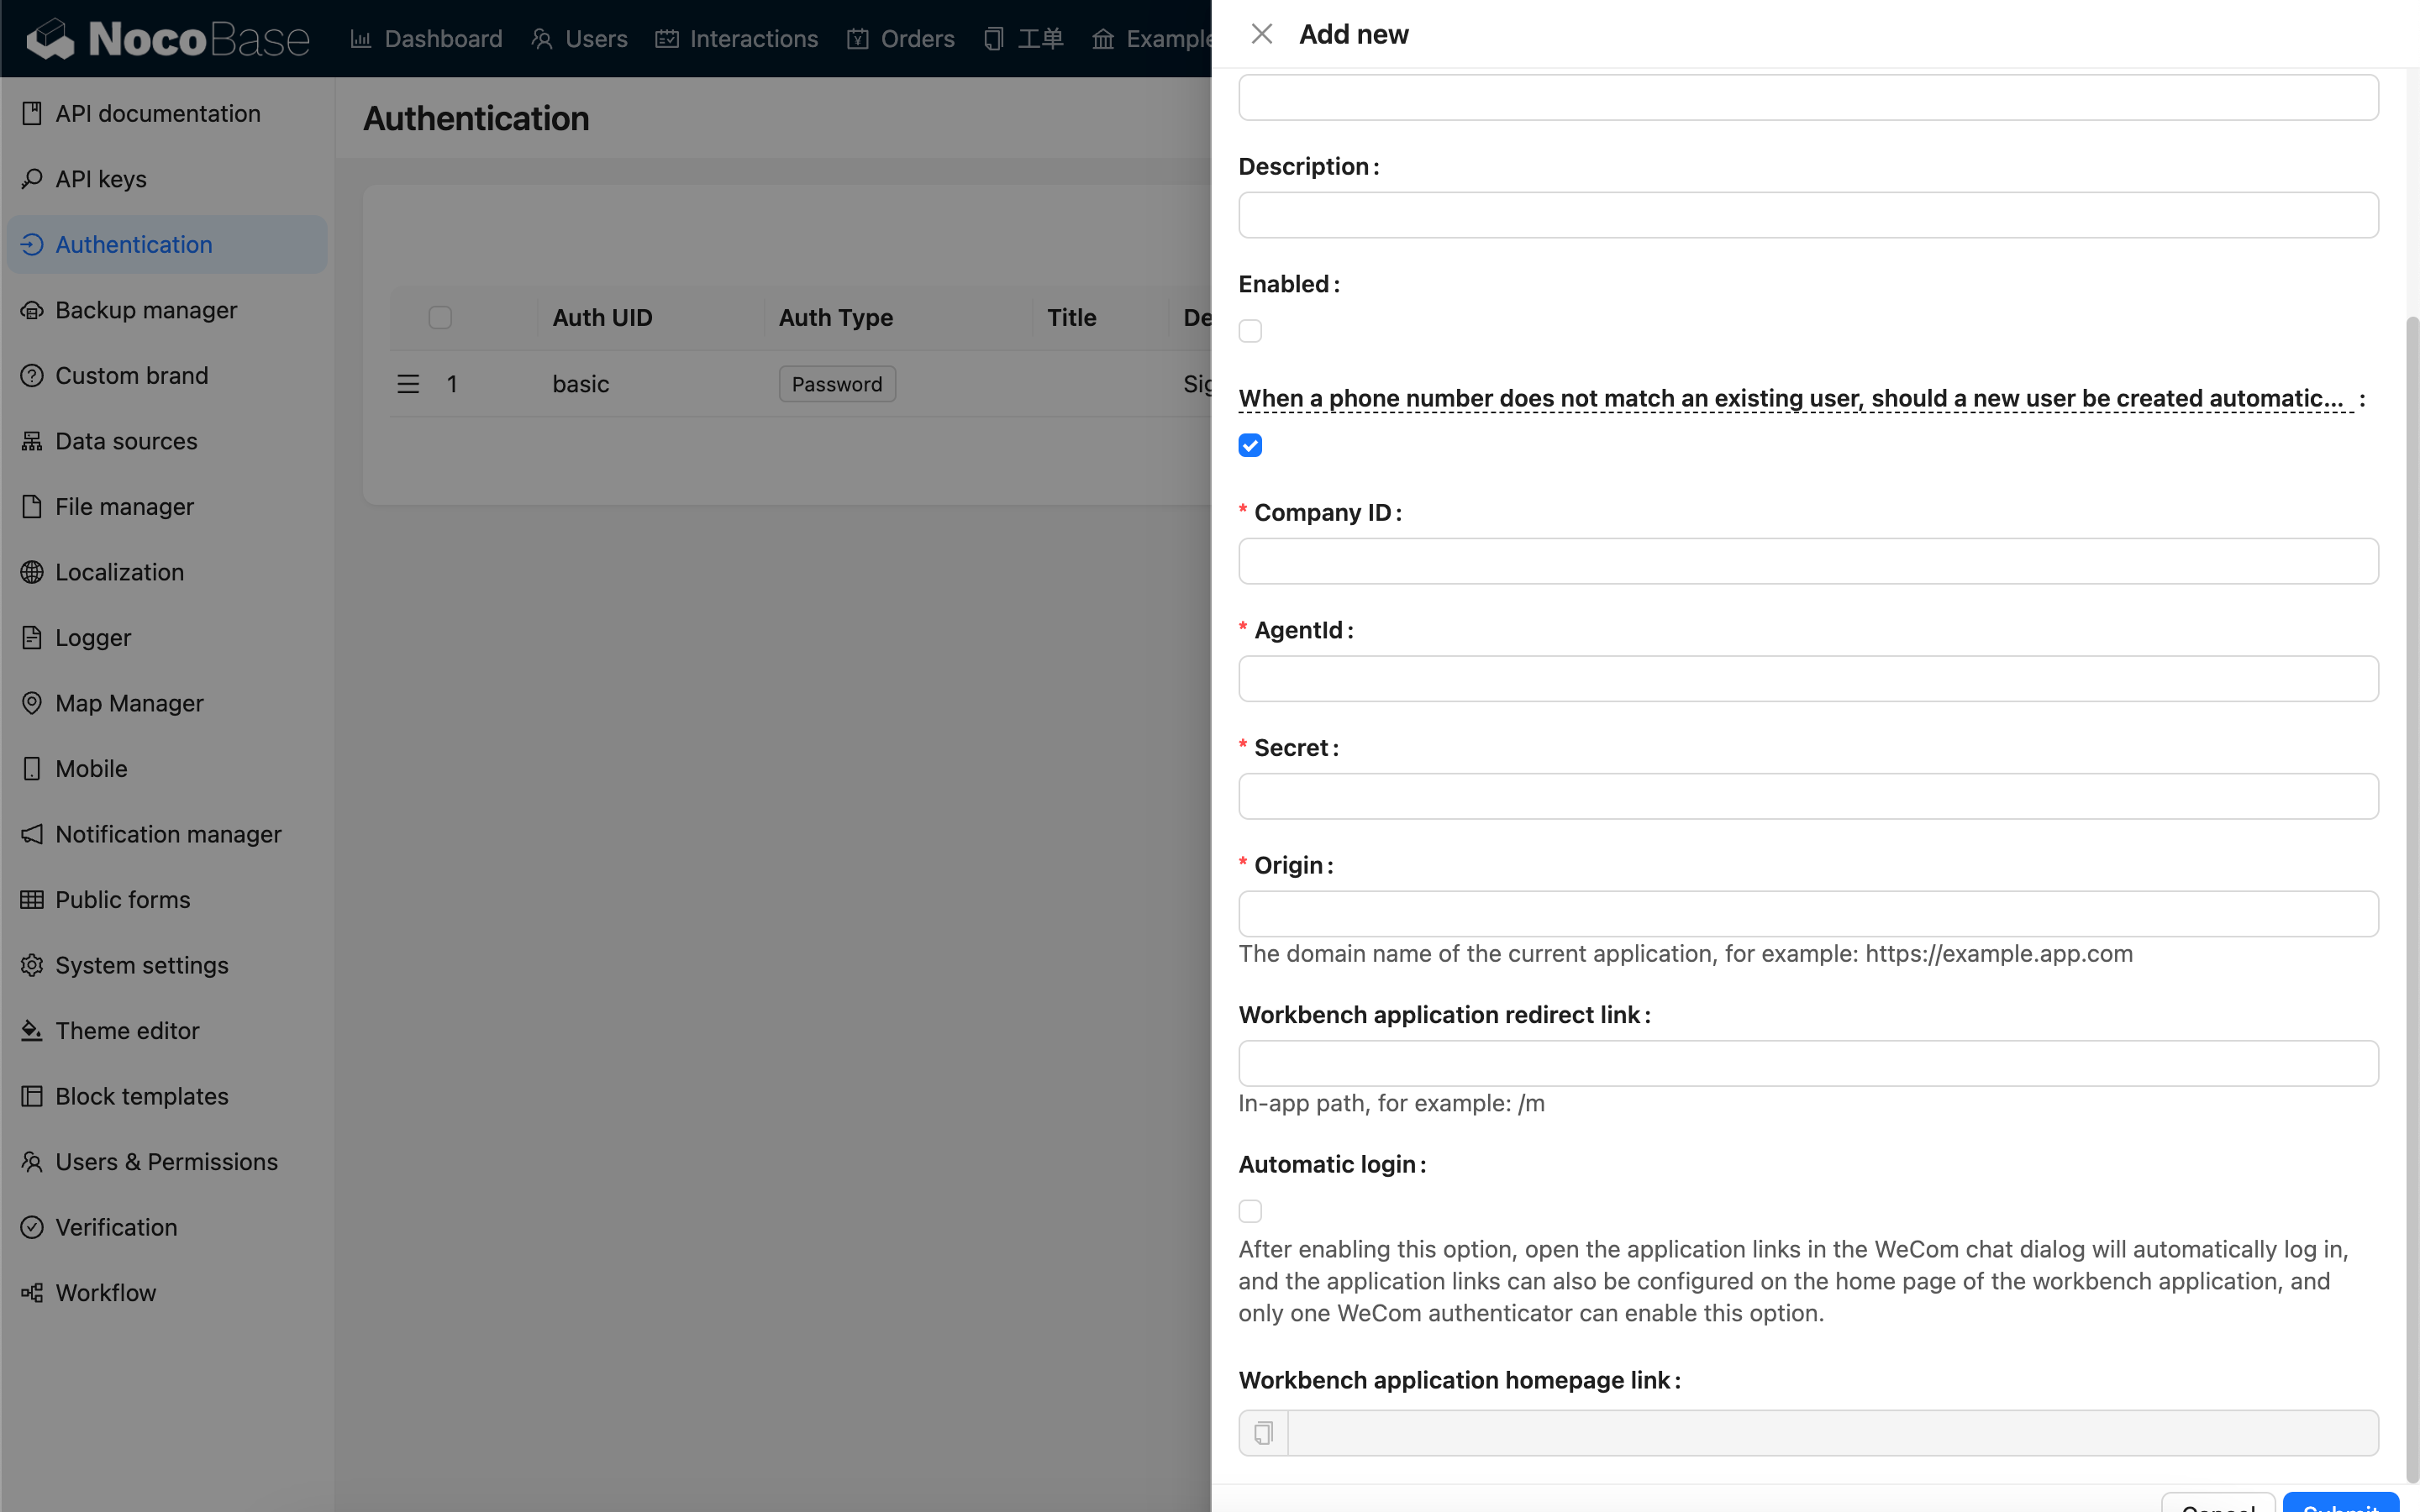
Configuration
| Option | Description | Version Requirement |
|---|---|---|
| When a phone number does not match an existing user, should a new user be created automatically | When a phone number does not match an existing user, whether to automatically create a new user. | - |
| Company ID | Company ID, obtained from the WeCom admin console. | - |
| AgentId | Obtained from the custom-built application configuration in the WeCom admin console. | - |
| Secret | Obtained from the custom-built application configuration in the WeCom admin console. | - |
| Origin | The current application domain. | - |
| Workbench application redirect link | The application path to redirect to after a successful login. | v1.4.0 |
| Automatic login | Automatically log in when the application link is opened in the WeCom browser. When multiple WeCom authenticators are configured, only one can have this option enabled. | v1.4.0 |
| Workbench application homepage link | Workbench application homepage link. | - |
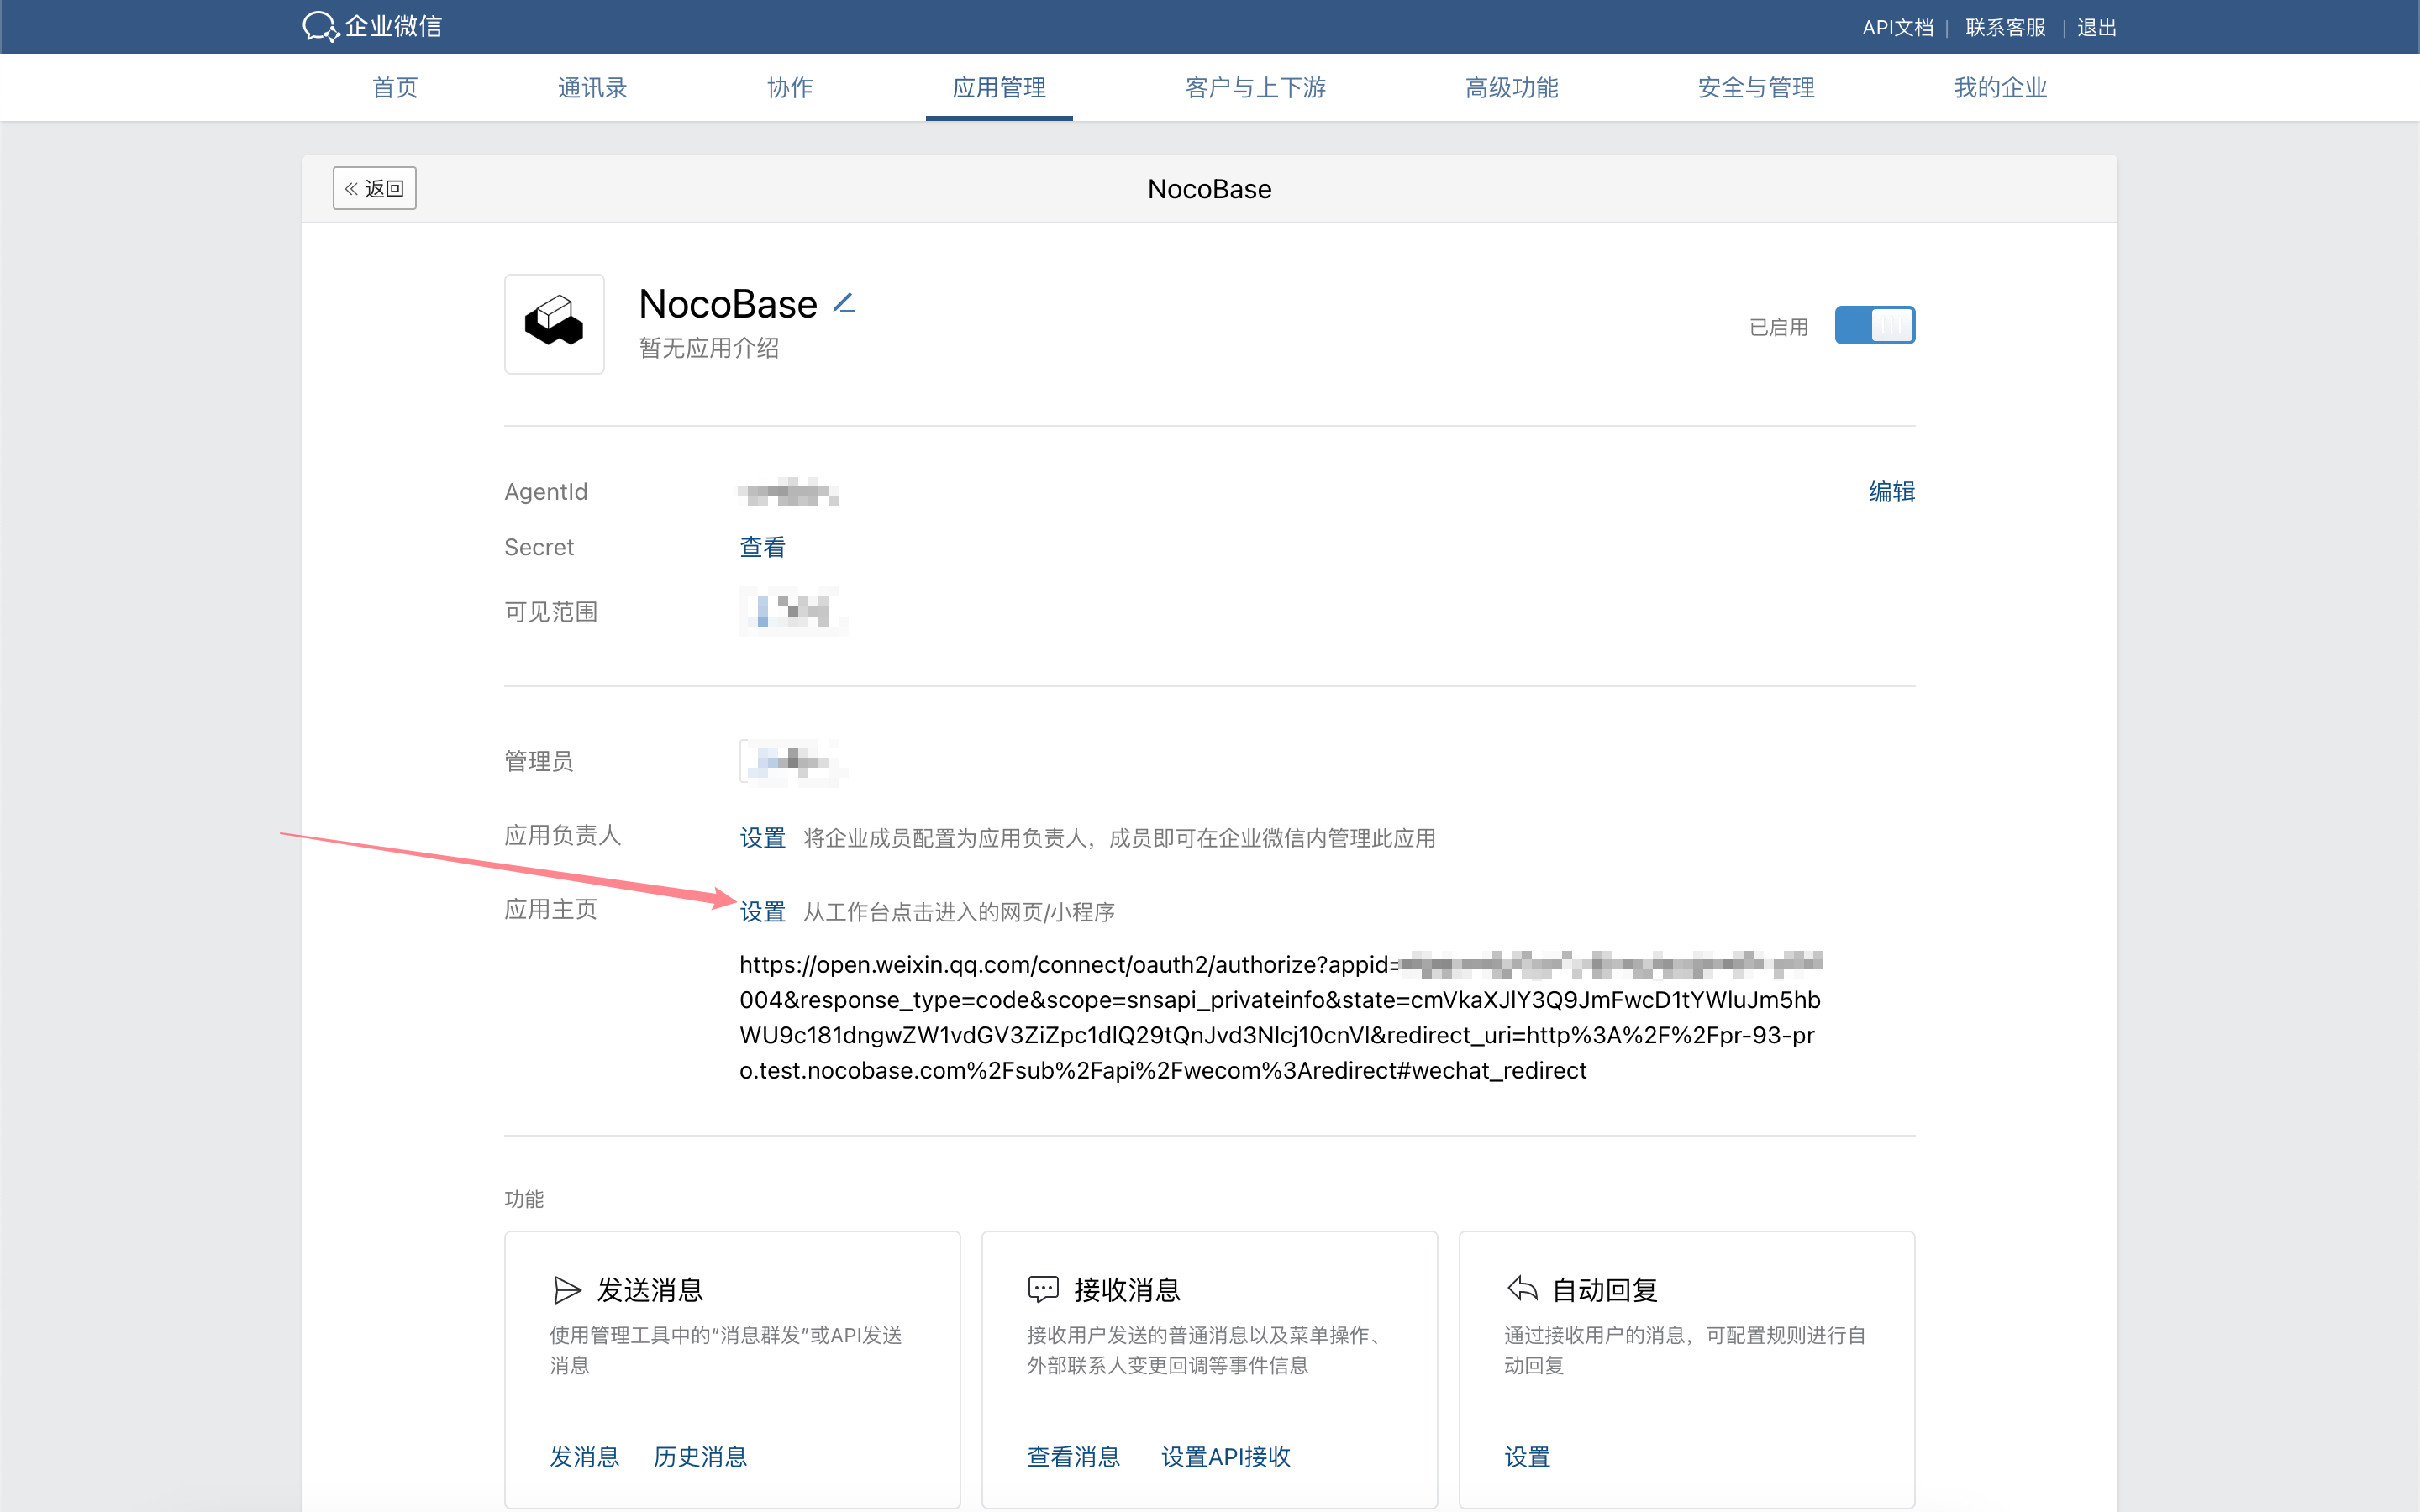
Configure WeCom Application Homepage
For versions v1.4.0 and above, when the "Automatic login" option is enabled, the application homepage link can be simplified to: https://<url>/<path>, for example, https://example.nocobase.com/admin.
You can also configure separate links for mobile and desktop, for example, https://example.nocobase.com/m and https://example.nocobase.com/admin.
Go to the WeCom admin console and paste the copied workbench application homepage link into the application homepage address field of the corresponding application.

Login
Visit the login page and click the button below the login form to initiate third-party login.
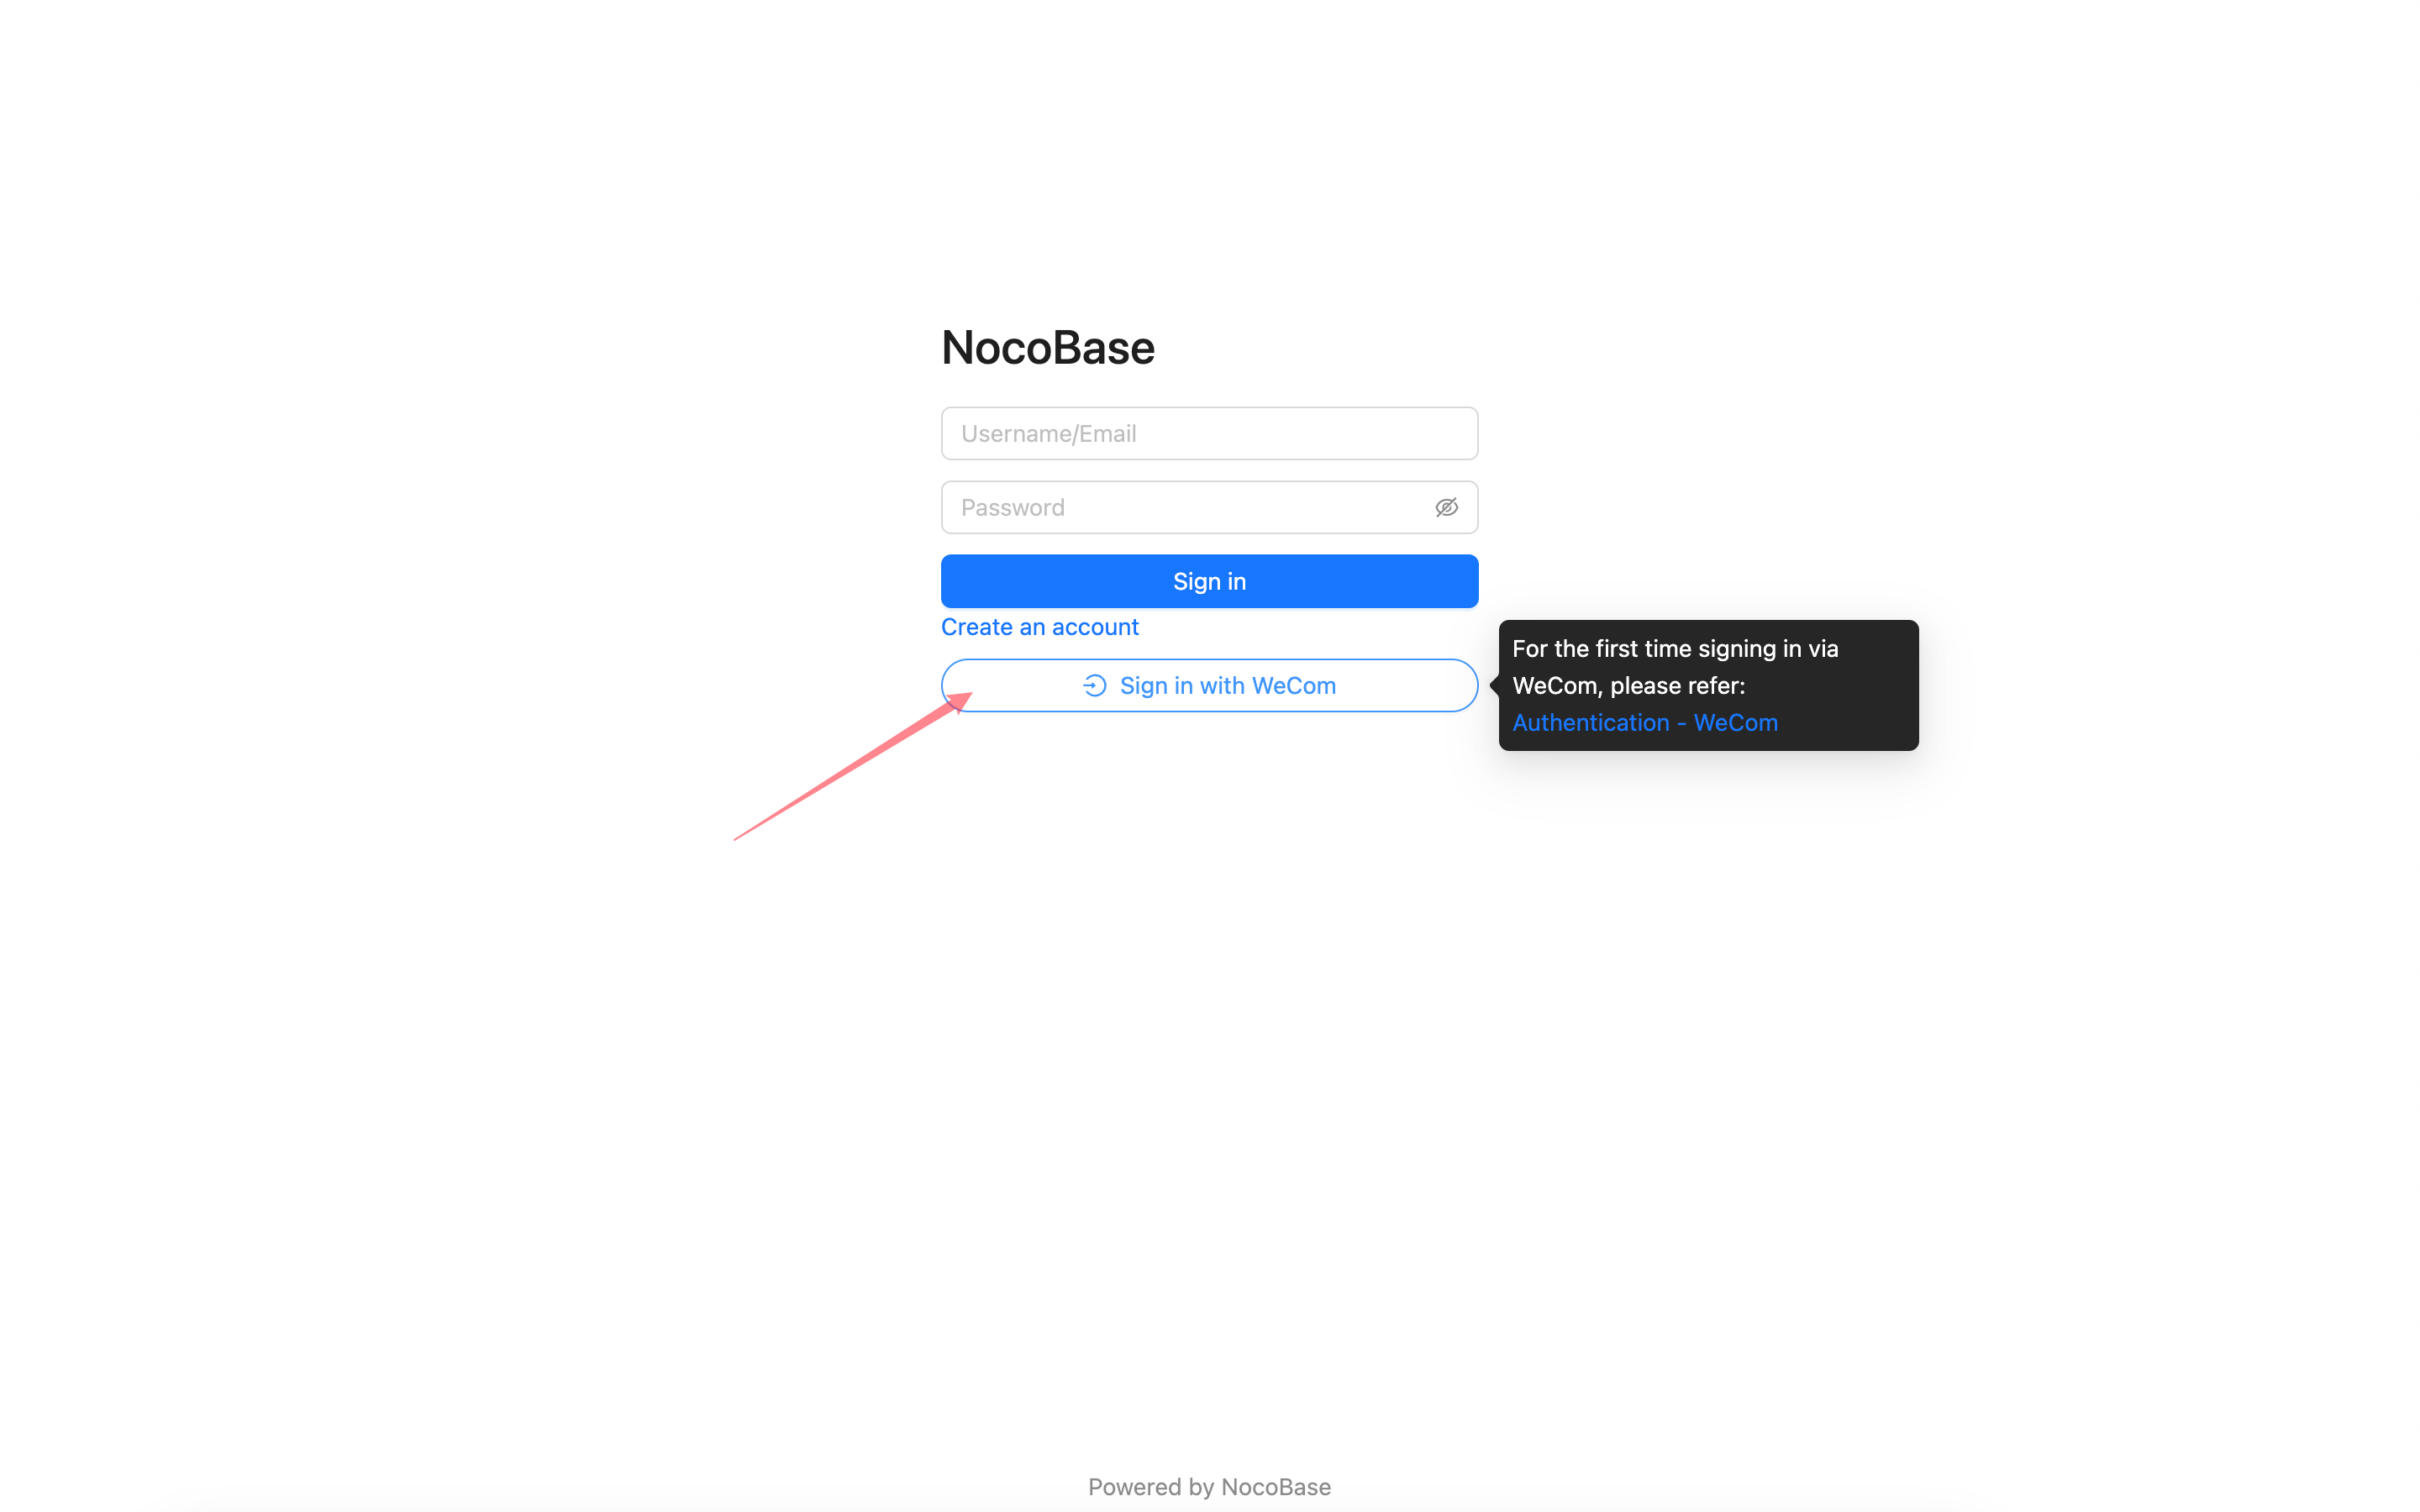
Due to WeCom's permission restrictions on sensitive information like phone numbers, authorization can only be completed within the WeCom client. When logging in with WeCom for the first time, please follow the steps below to complete the initial login authorization within the WeCom client.
First-time Login
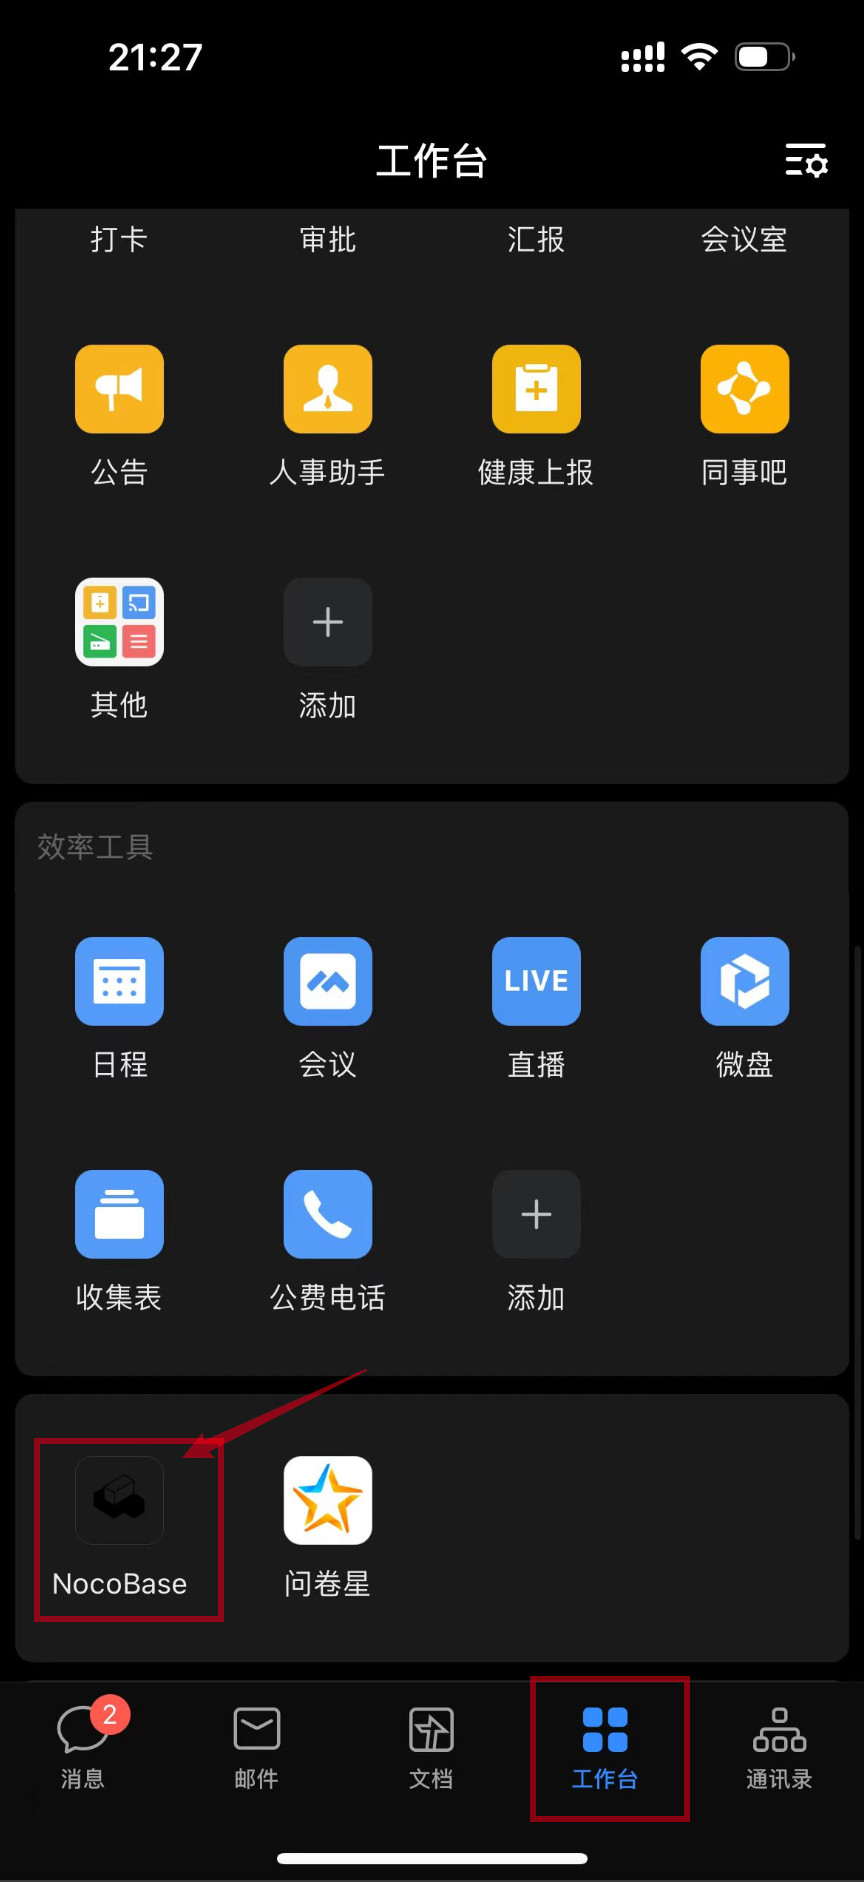
From the WeCom client, go to the Workbench, scroll to the bottom, and click the application to enter the homepage you previously configured. This will complete the initial authorization. Afterward, you can use WeCom to log in to your NocoBase application.