

File Storage: S3 (Pro)
File storage: S3 (Pro)Professional Edition+Introduction
Building on the file management plugin, this version adds support for file storage types compatible with the S3 protocol. Any object storage service supporting the S3 protocol can be seamlessly integrated, such as Amazon S3, Alibaba Cloud OSS, Tencent Cloud COS, MinIO, Cloudflare R2, etc., enhancing the compatibility and flexibility of storage services.
Features
-
Client Upload: Files are uploaded directly to the storage service without passing through the NocoBase server, enabling a more efficient and faster upload experience.
-
Private Access: All file URLs are signed temporary authorization addresses, ensuring secure and time-limited access to files.
Use Cases
-
File Table Management: Centrally manage and store all uploaded files, supporting various file types and storage methods for easy classification and retrieval.
-
Attachment Field Storage: Store attachments uploaded via forms or records and associate them with specific data entries.
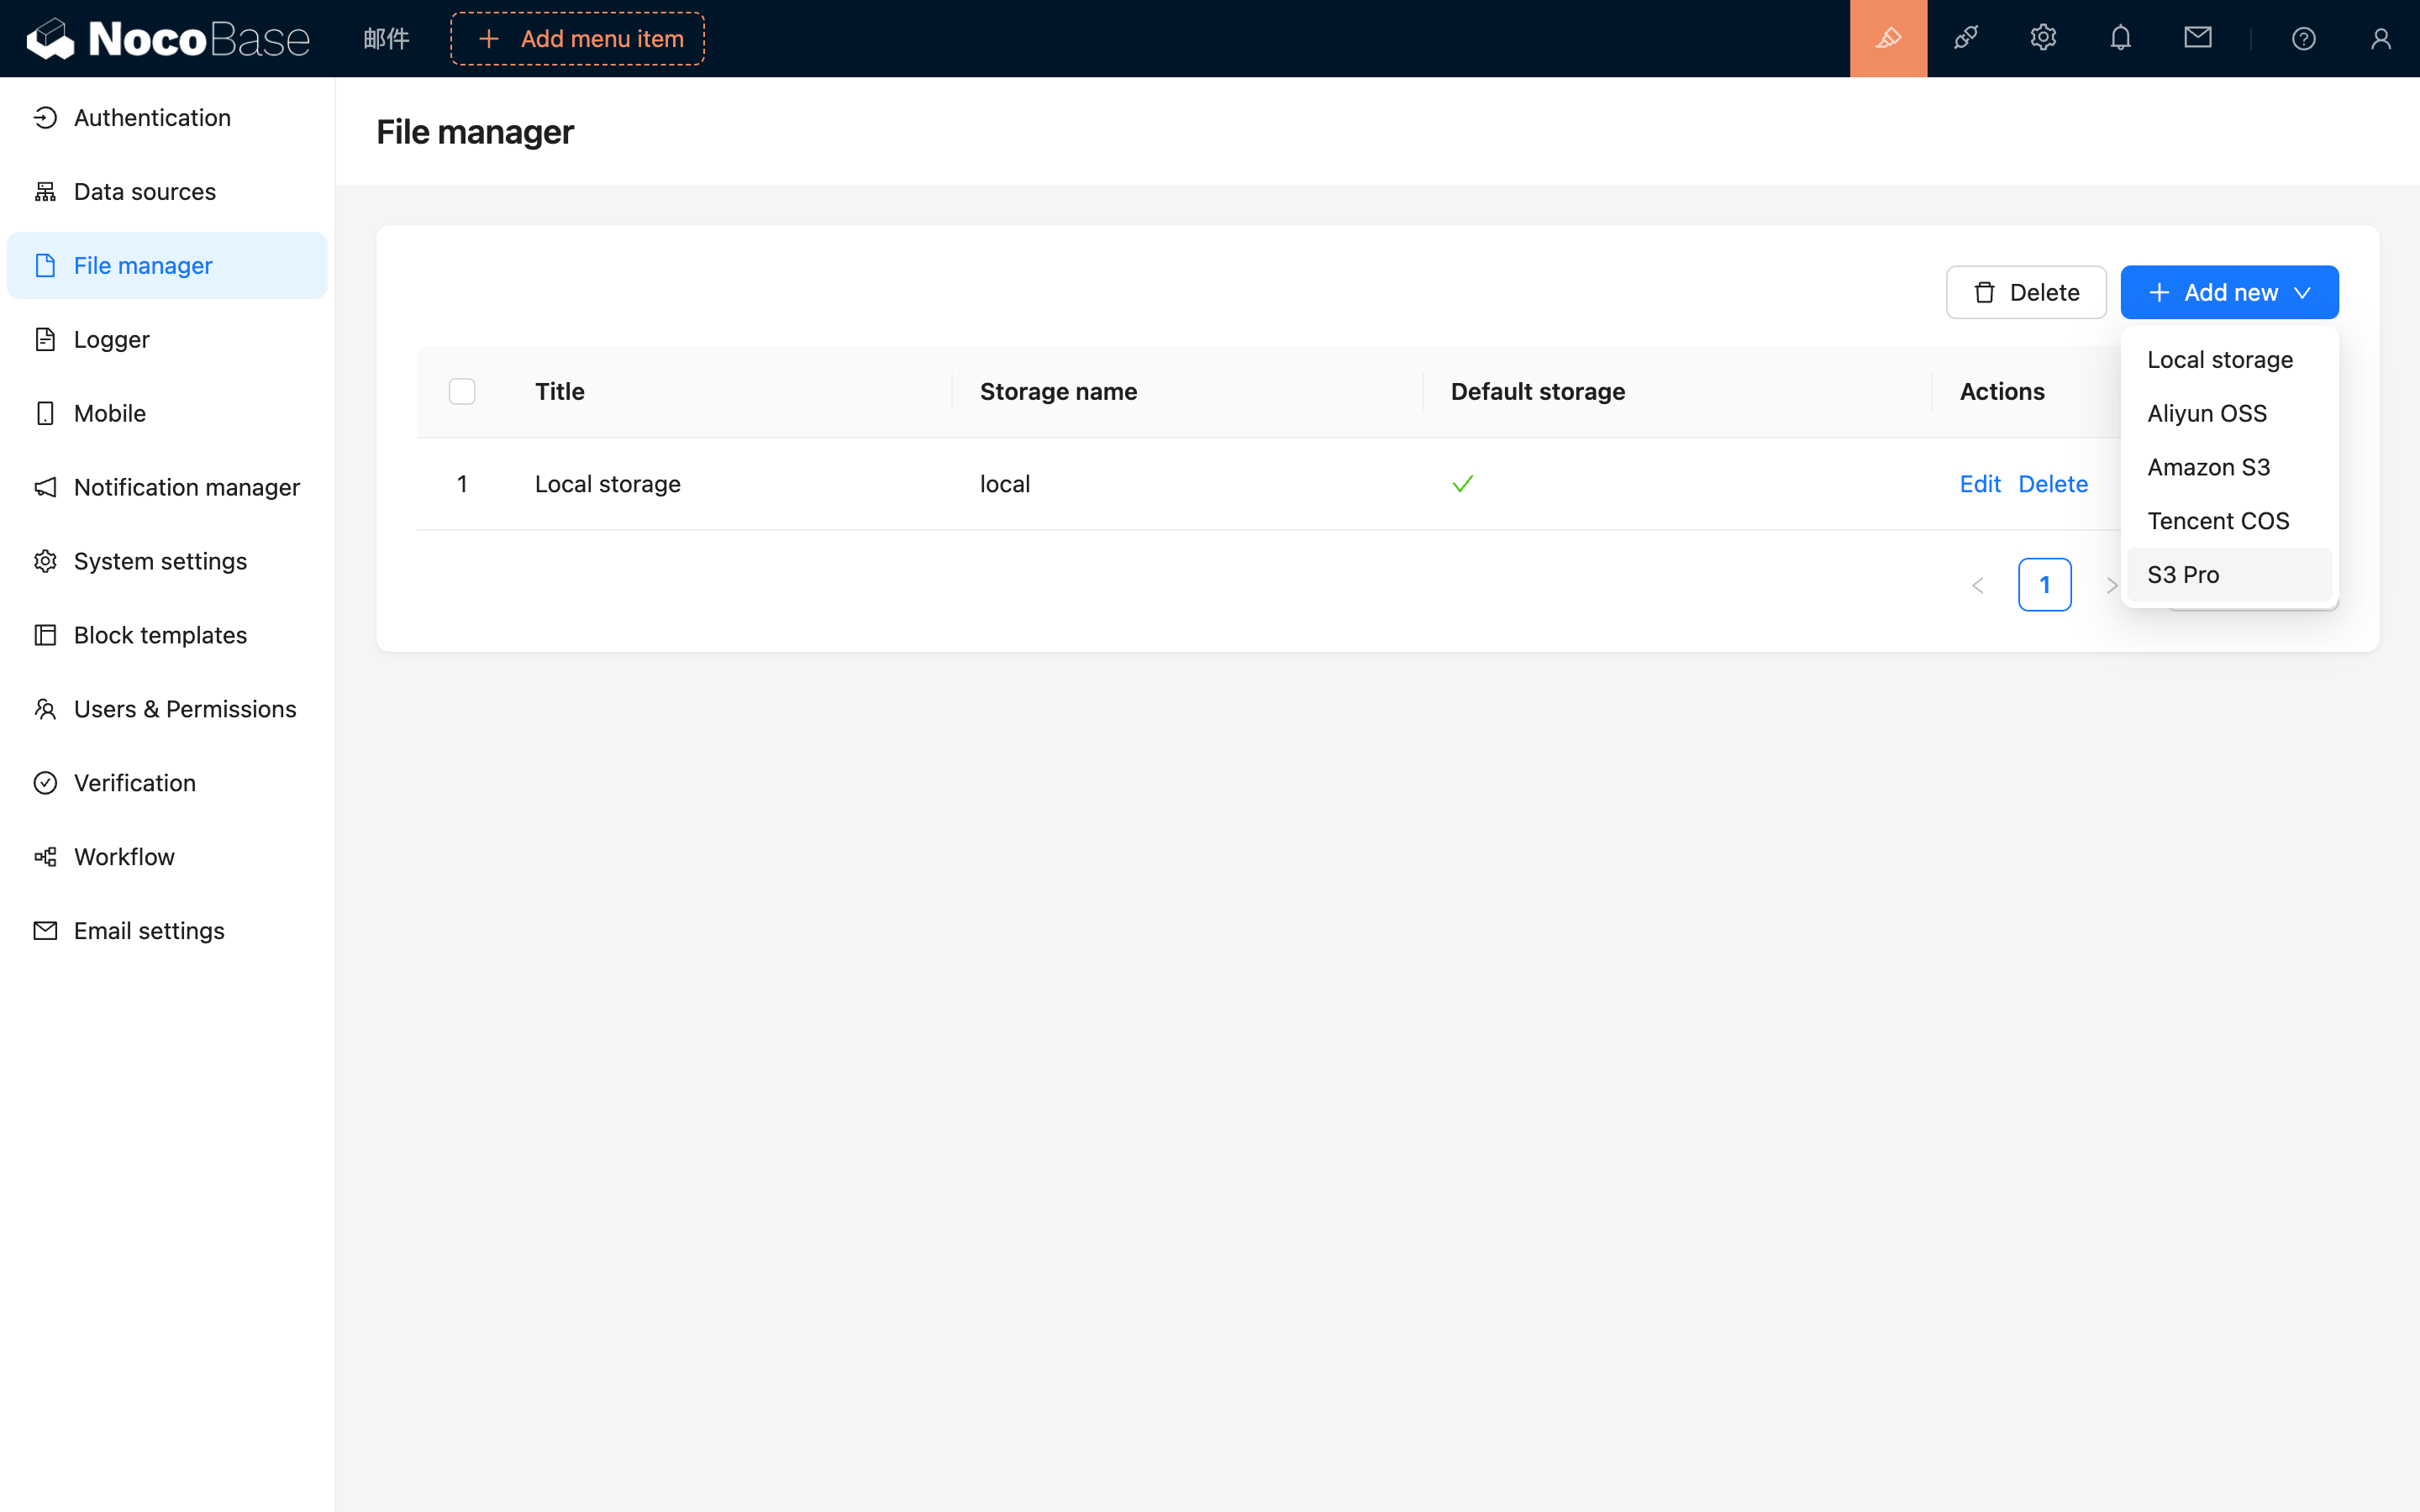
Plugin Configuration
-
Enable the
plugin-file-storage-s3-proplugin. -
Navigate to "Setting -> FileManager" to access the file management settings.
-
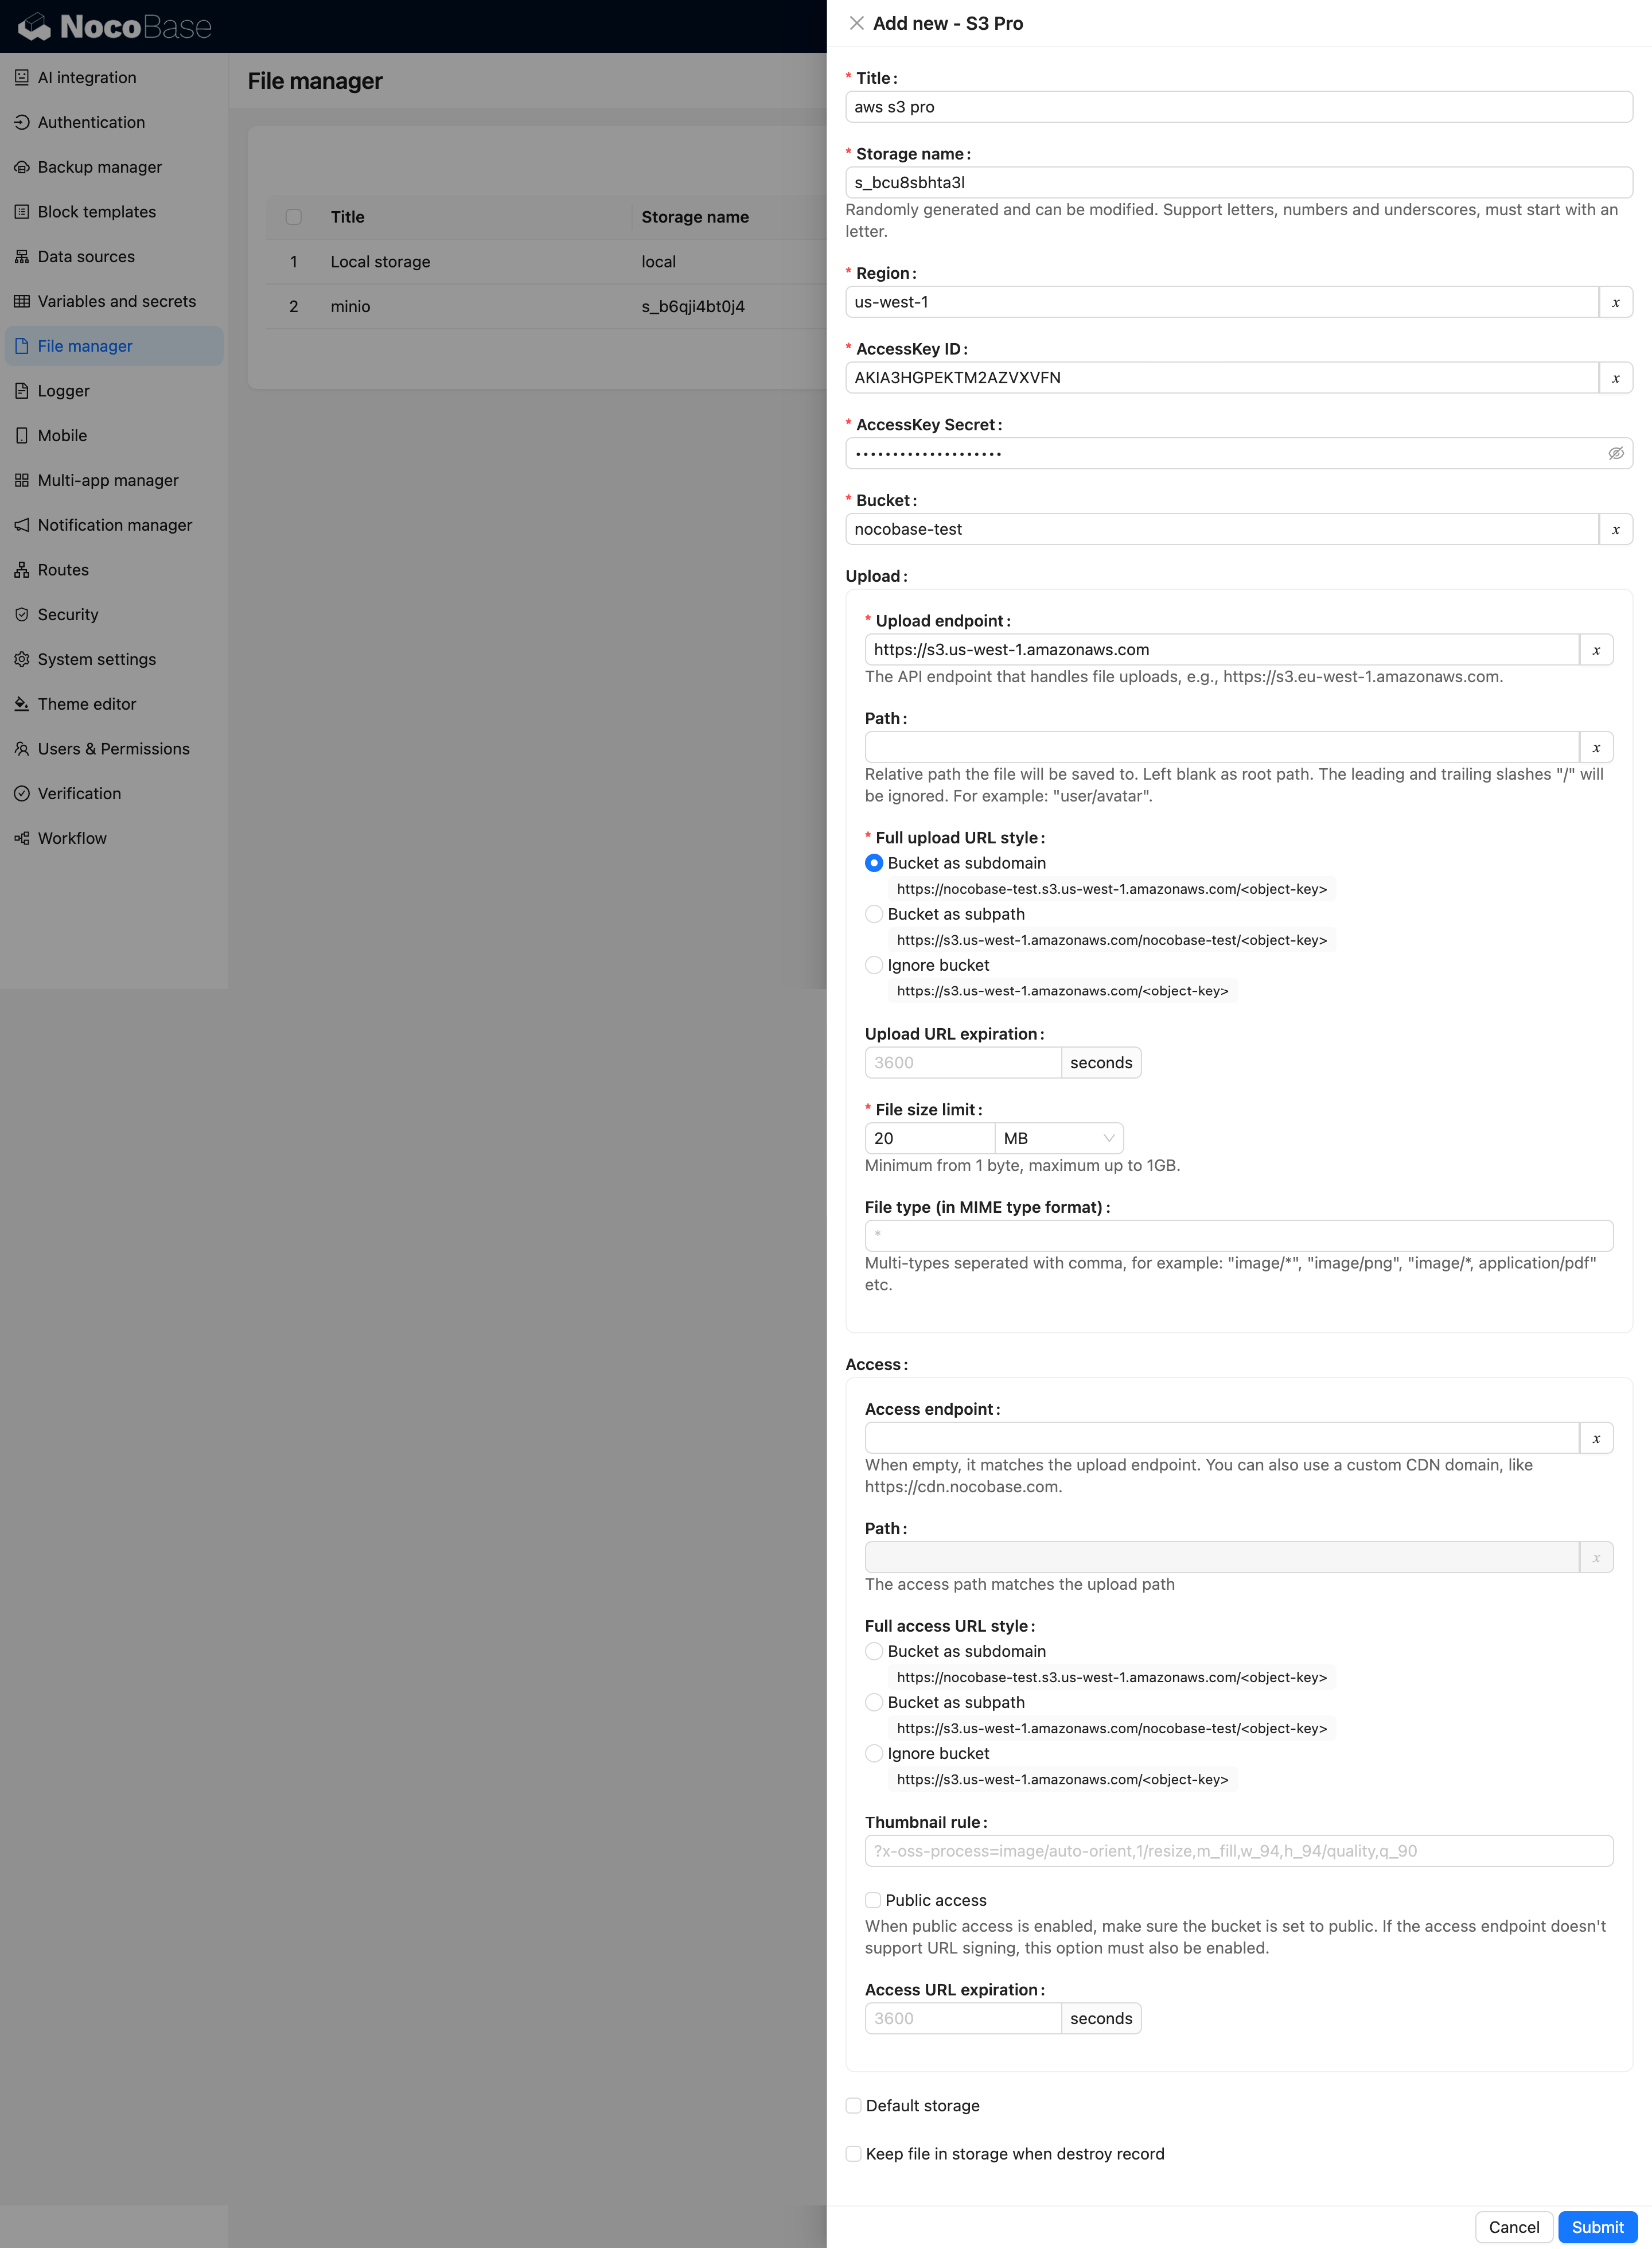
Click the "Add new" button and select "S3 Pro".
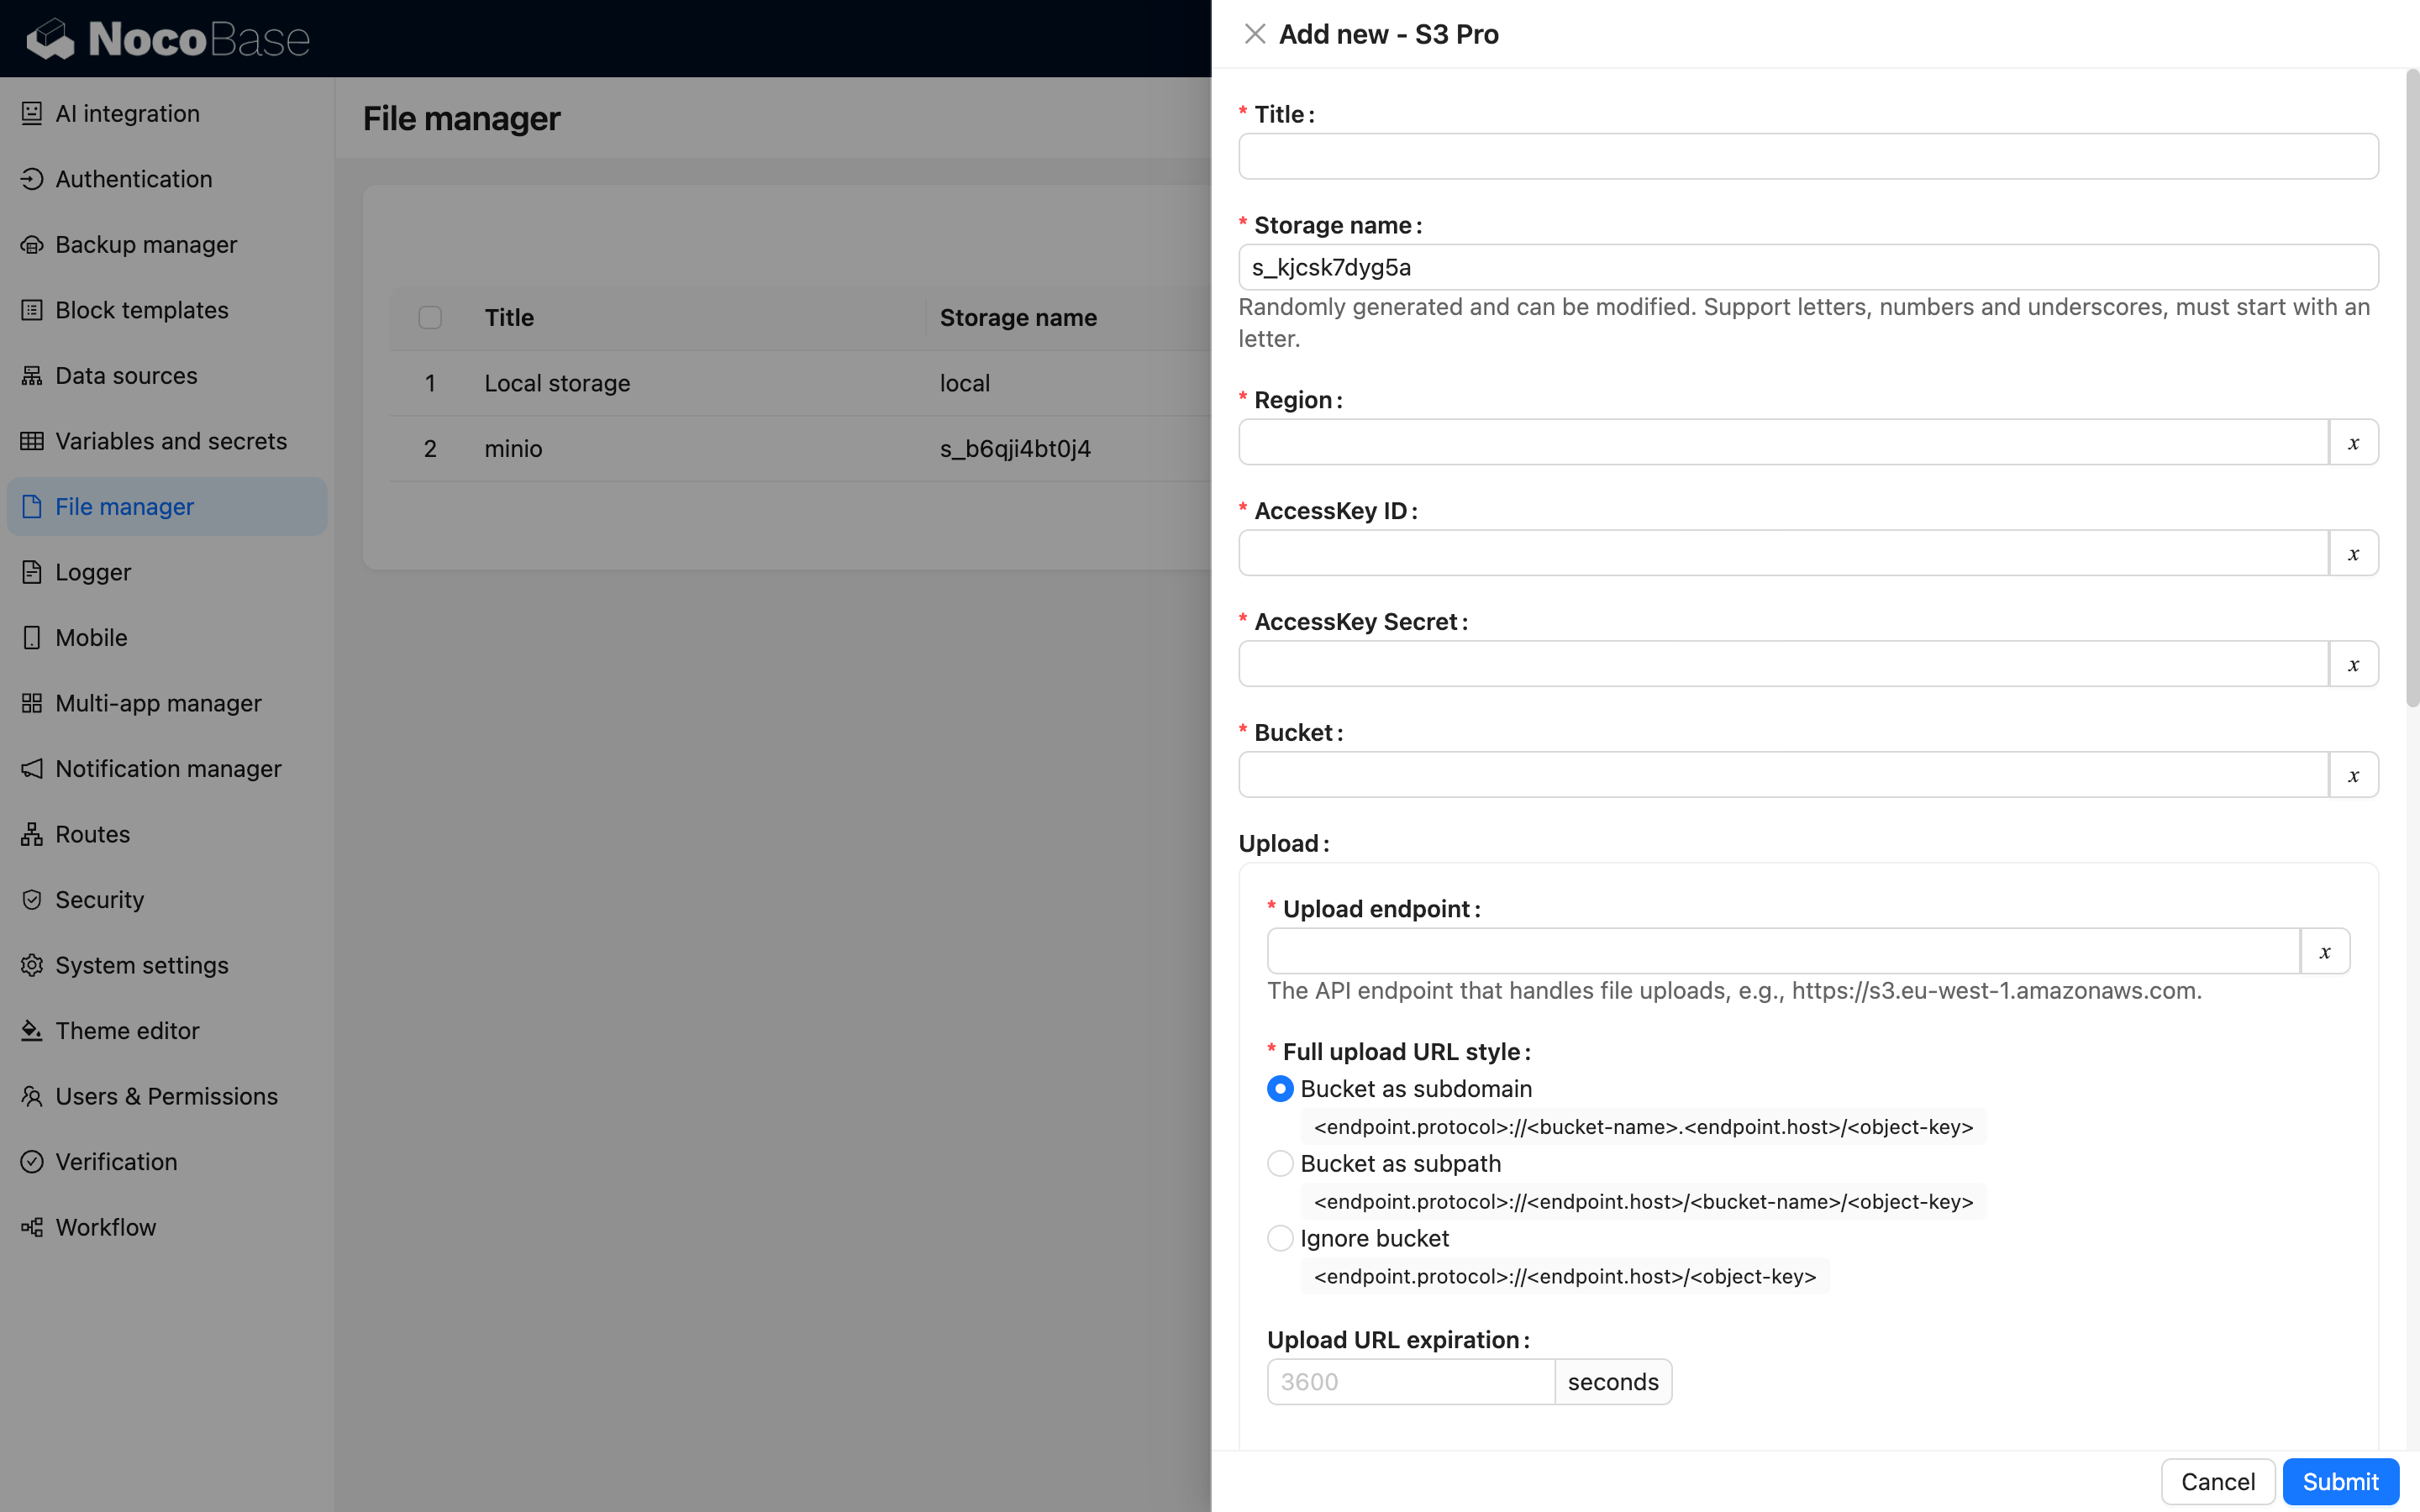
- In the pop-up window, you will see a detailed form to fill out. Refer to the following documentation to obtain the relevant parameters for your file service and correctly input them into the form.
Service Provider Configuration
Amazon S3
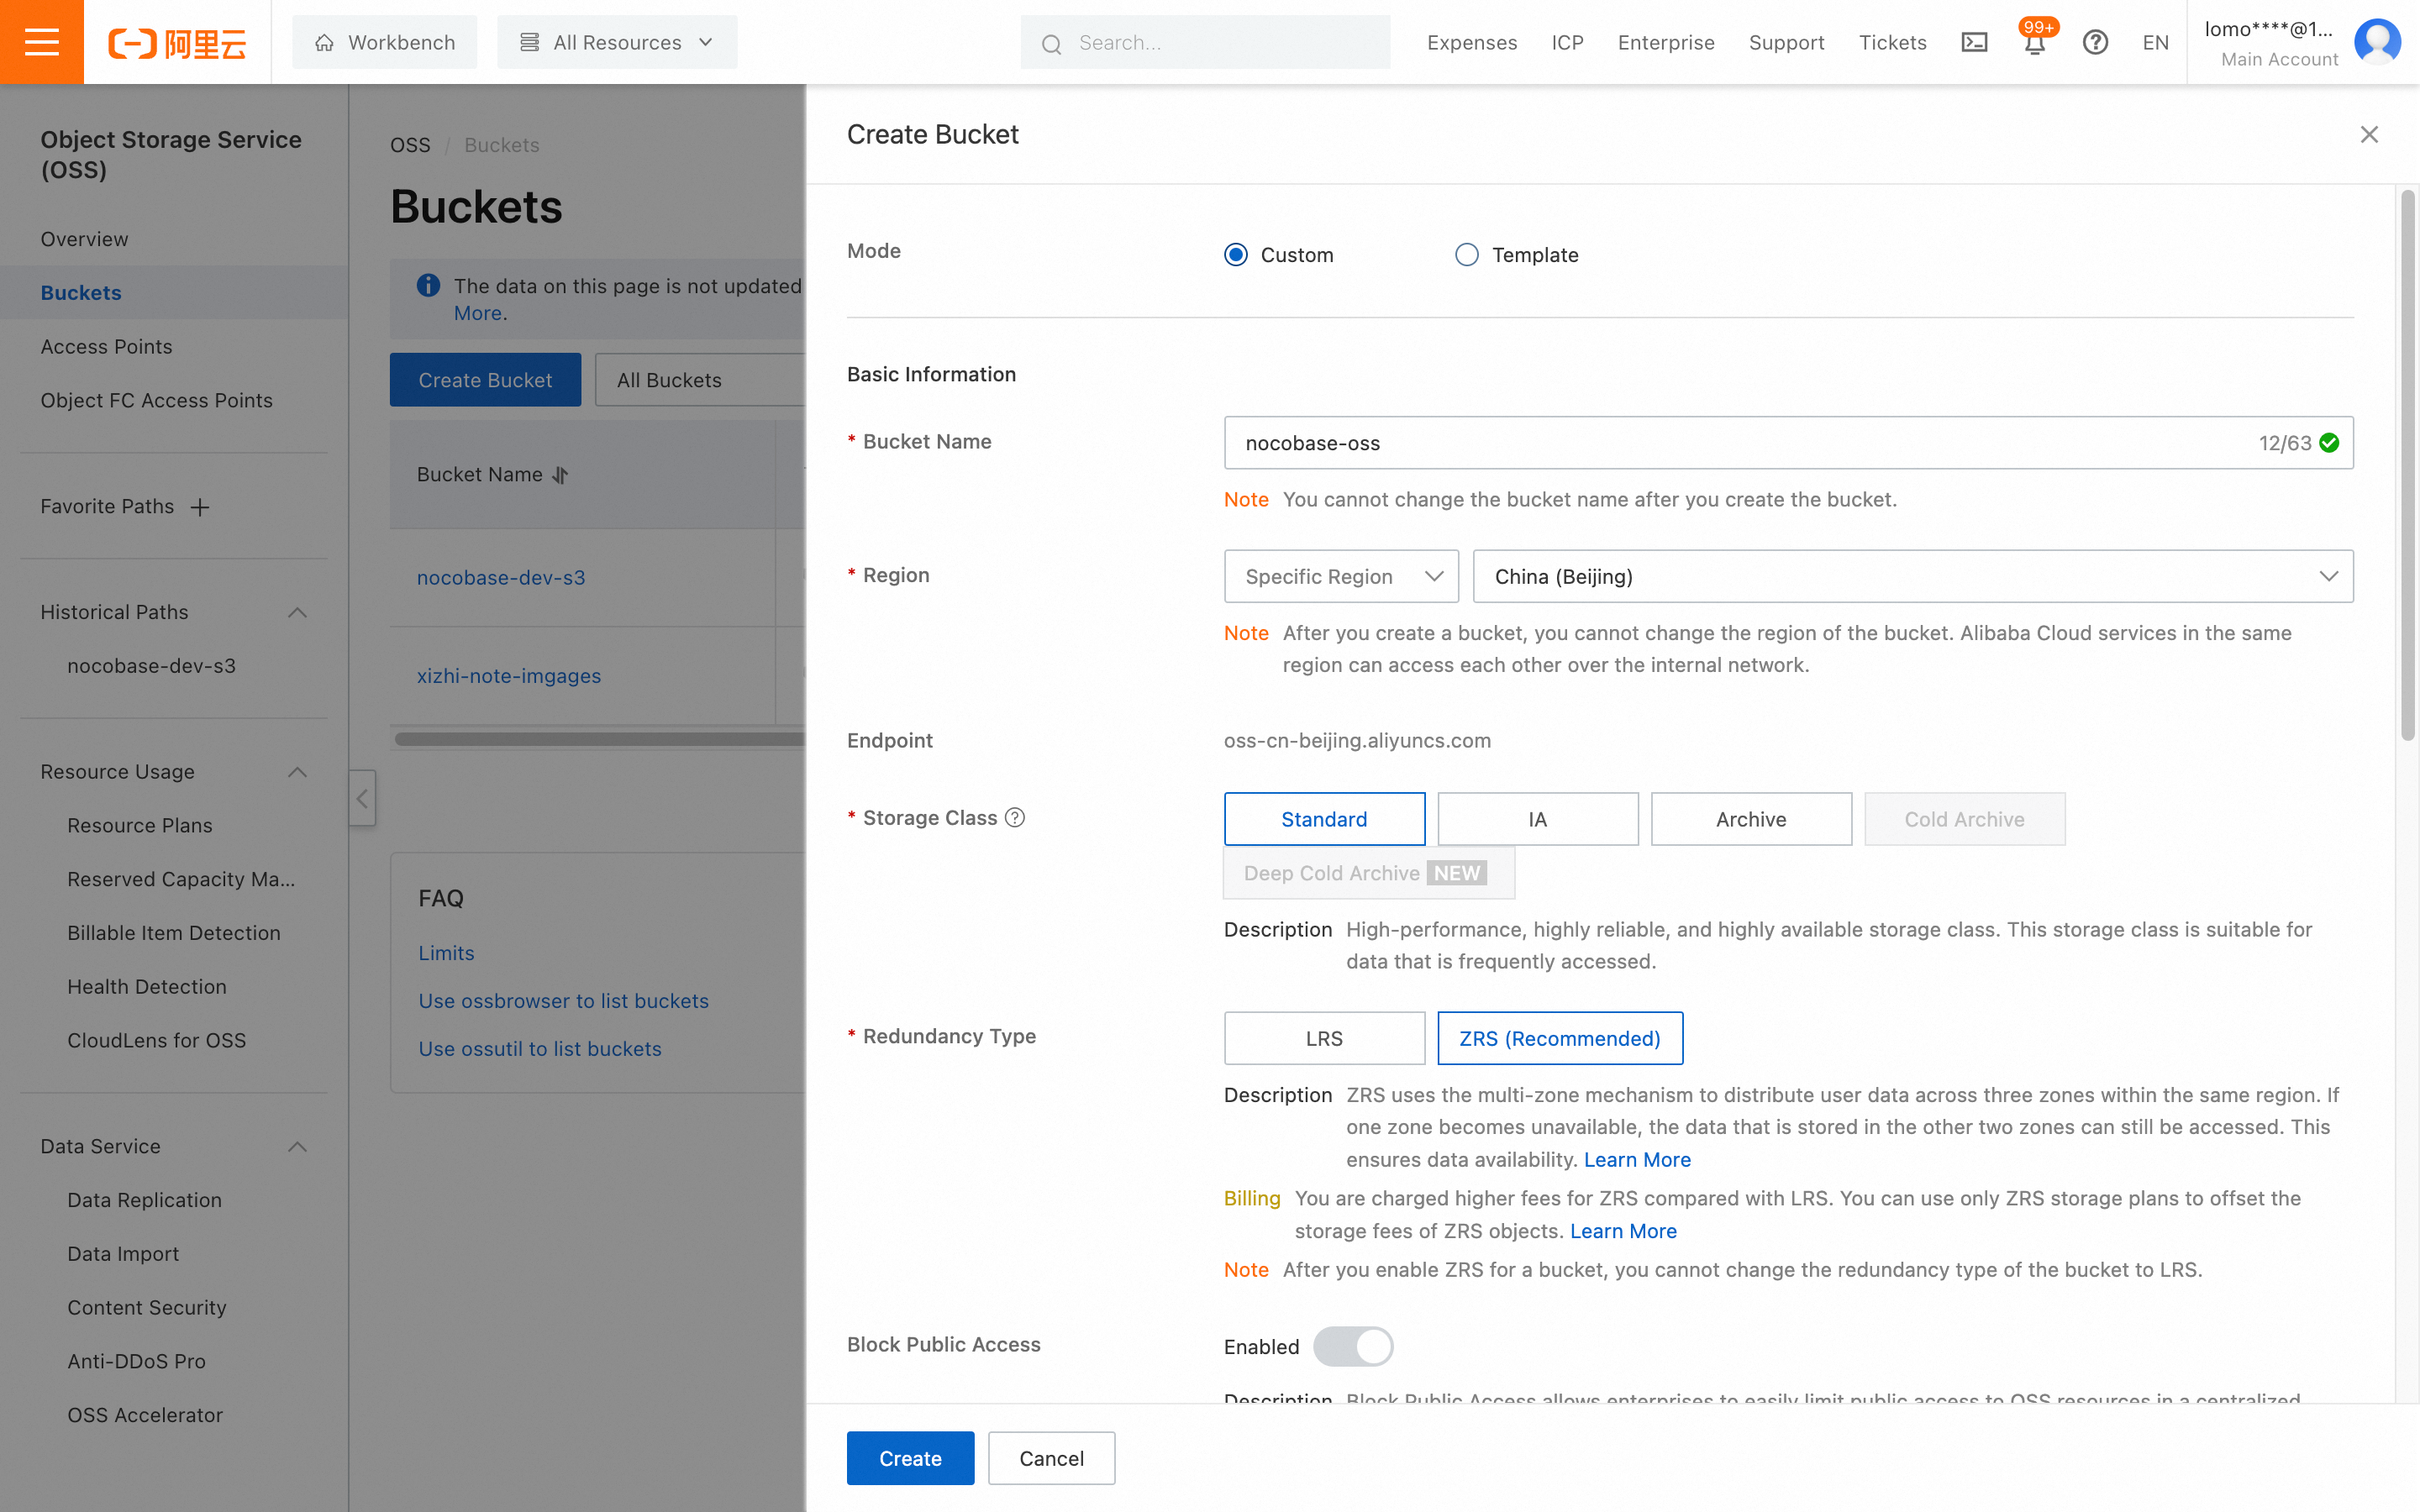
Bucket Creation
-
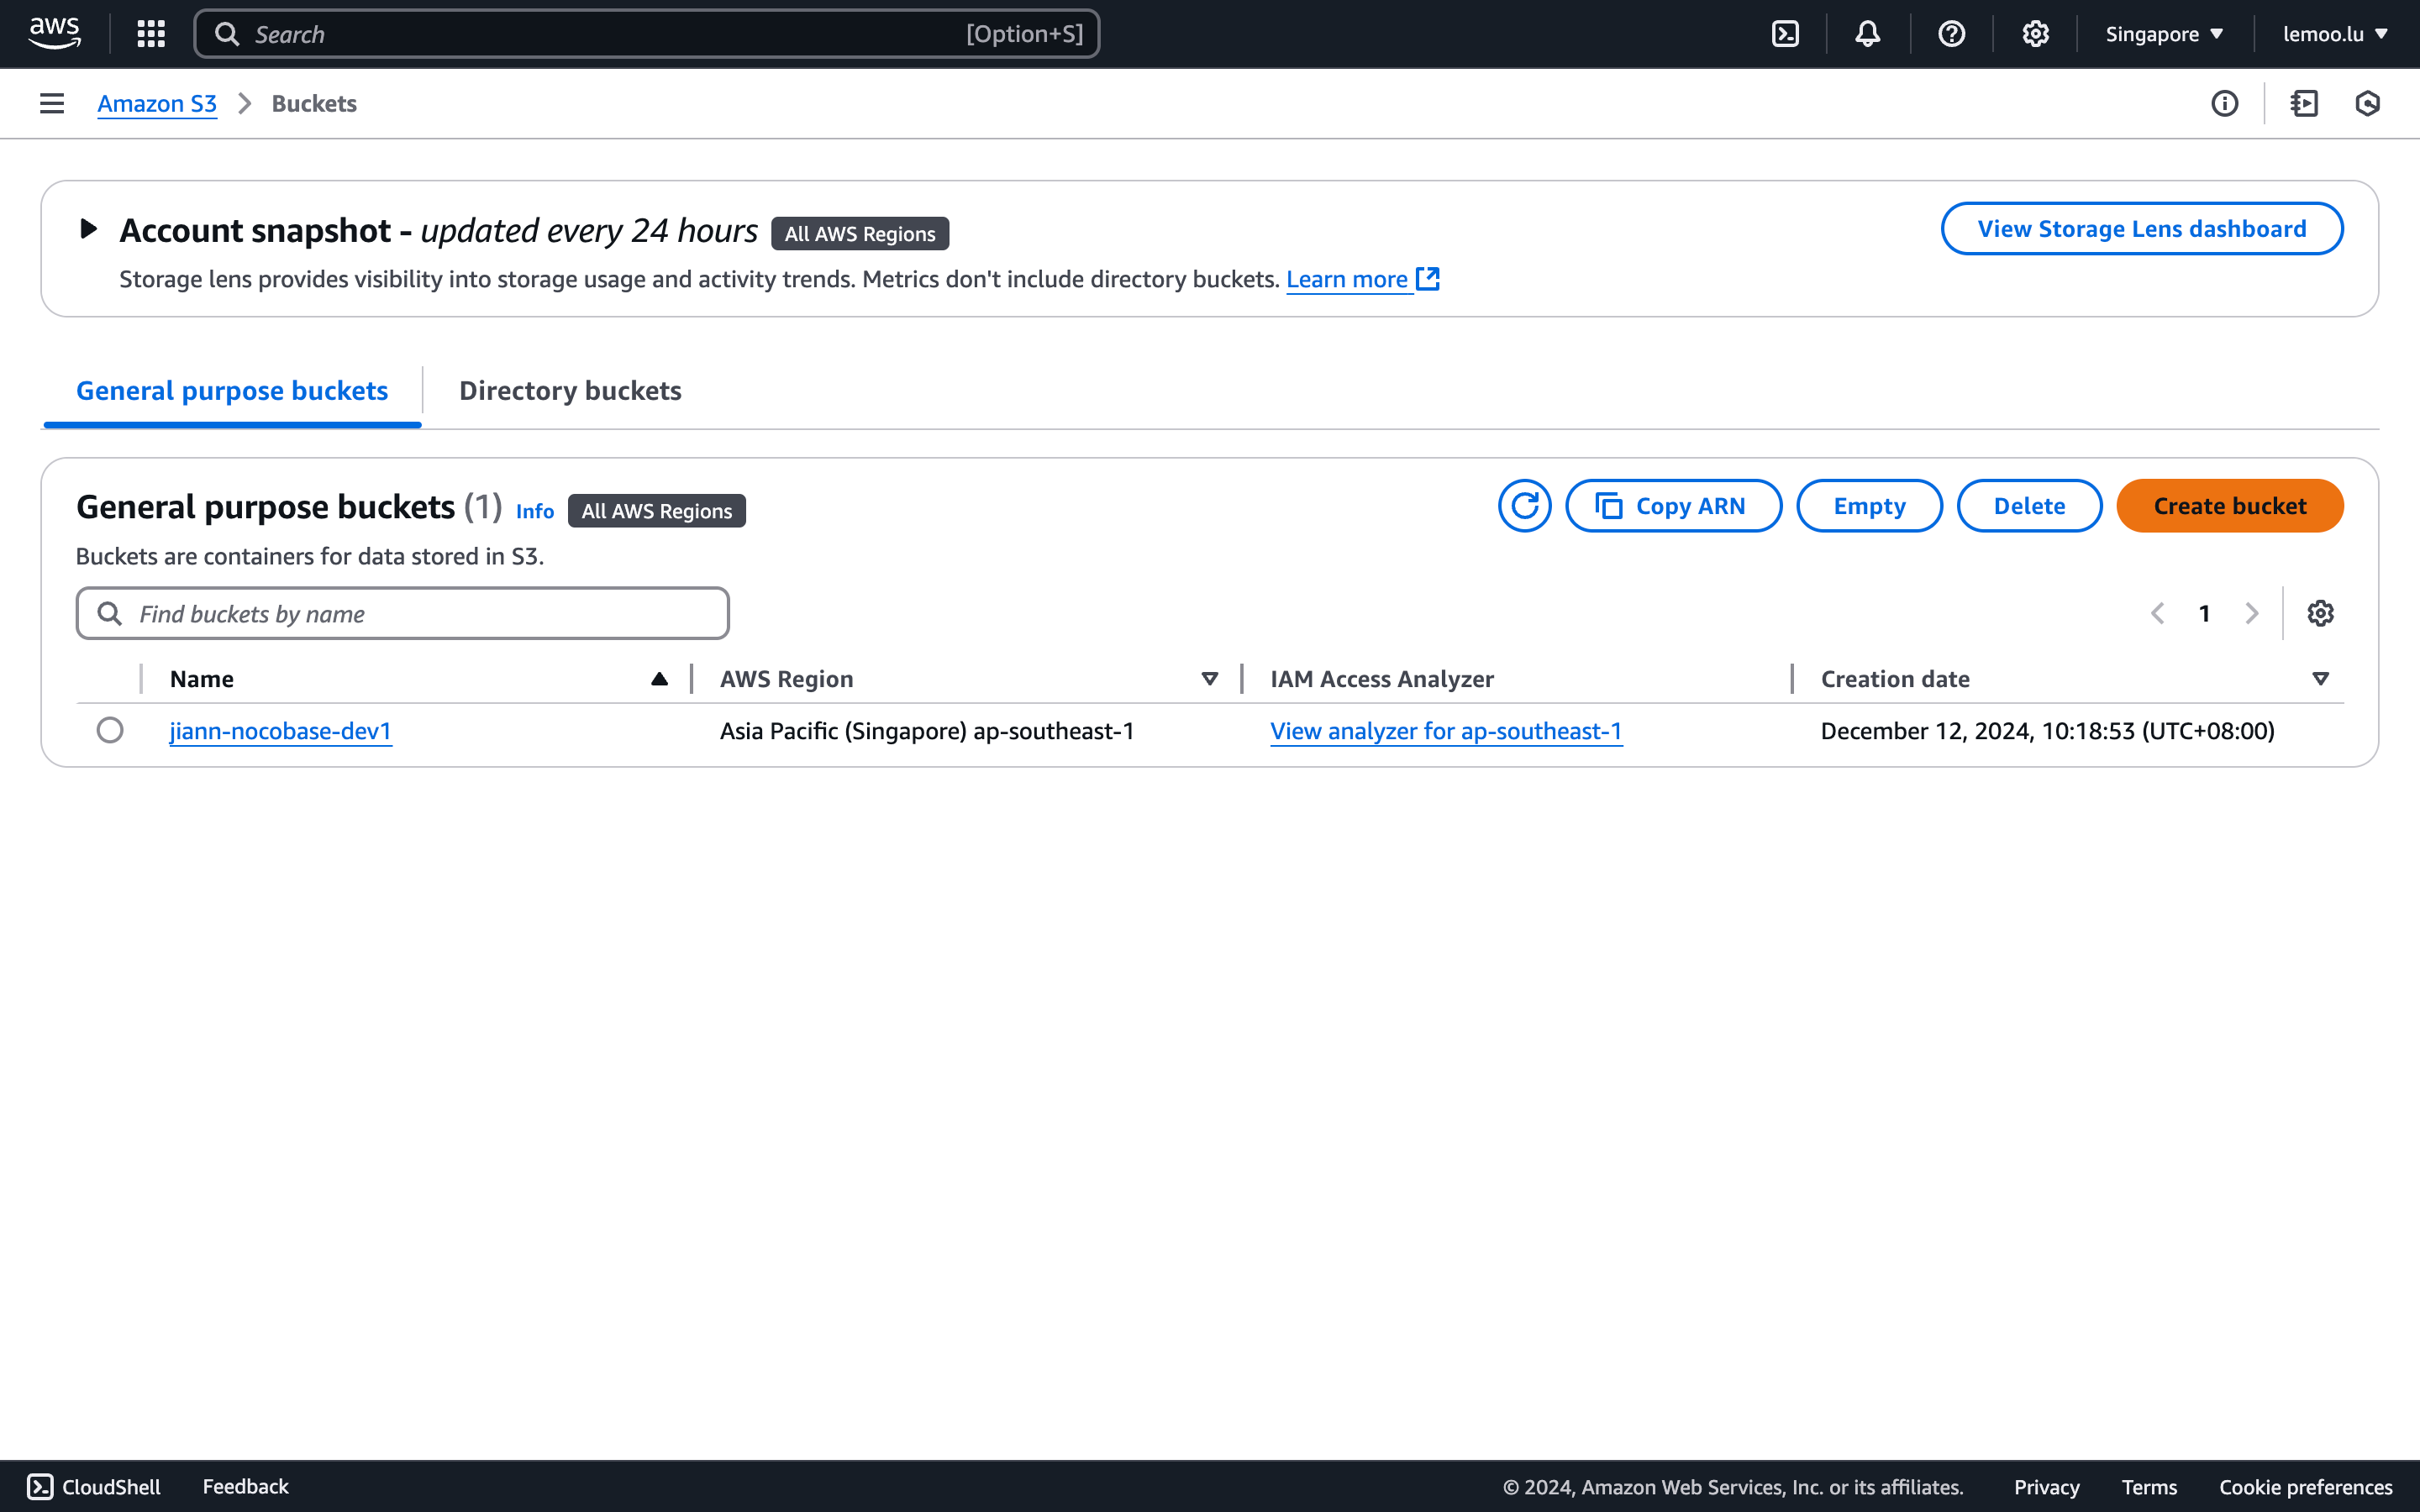
Visit Amazon S3 Console.
-
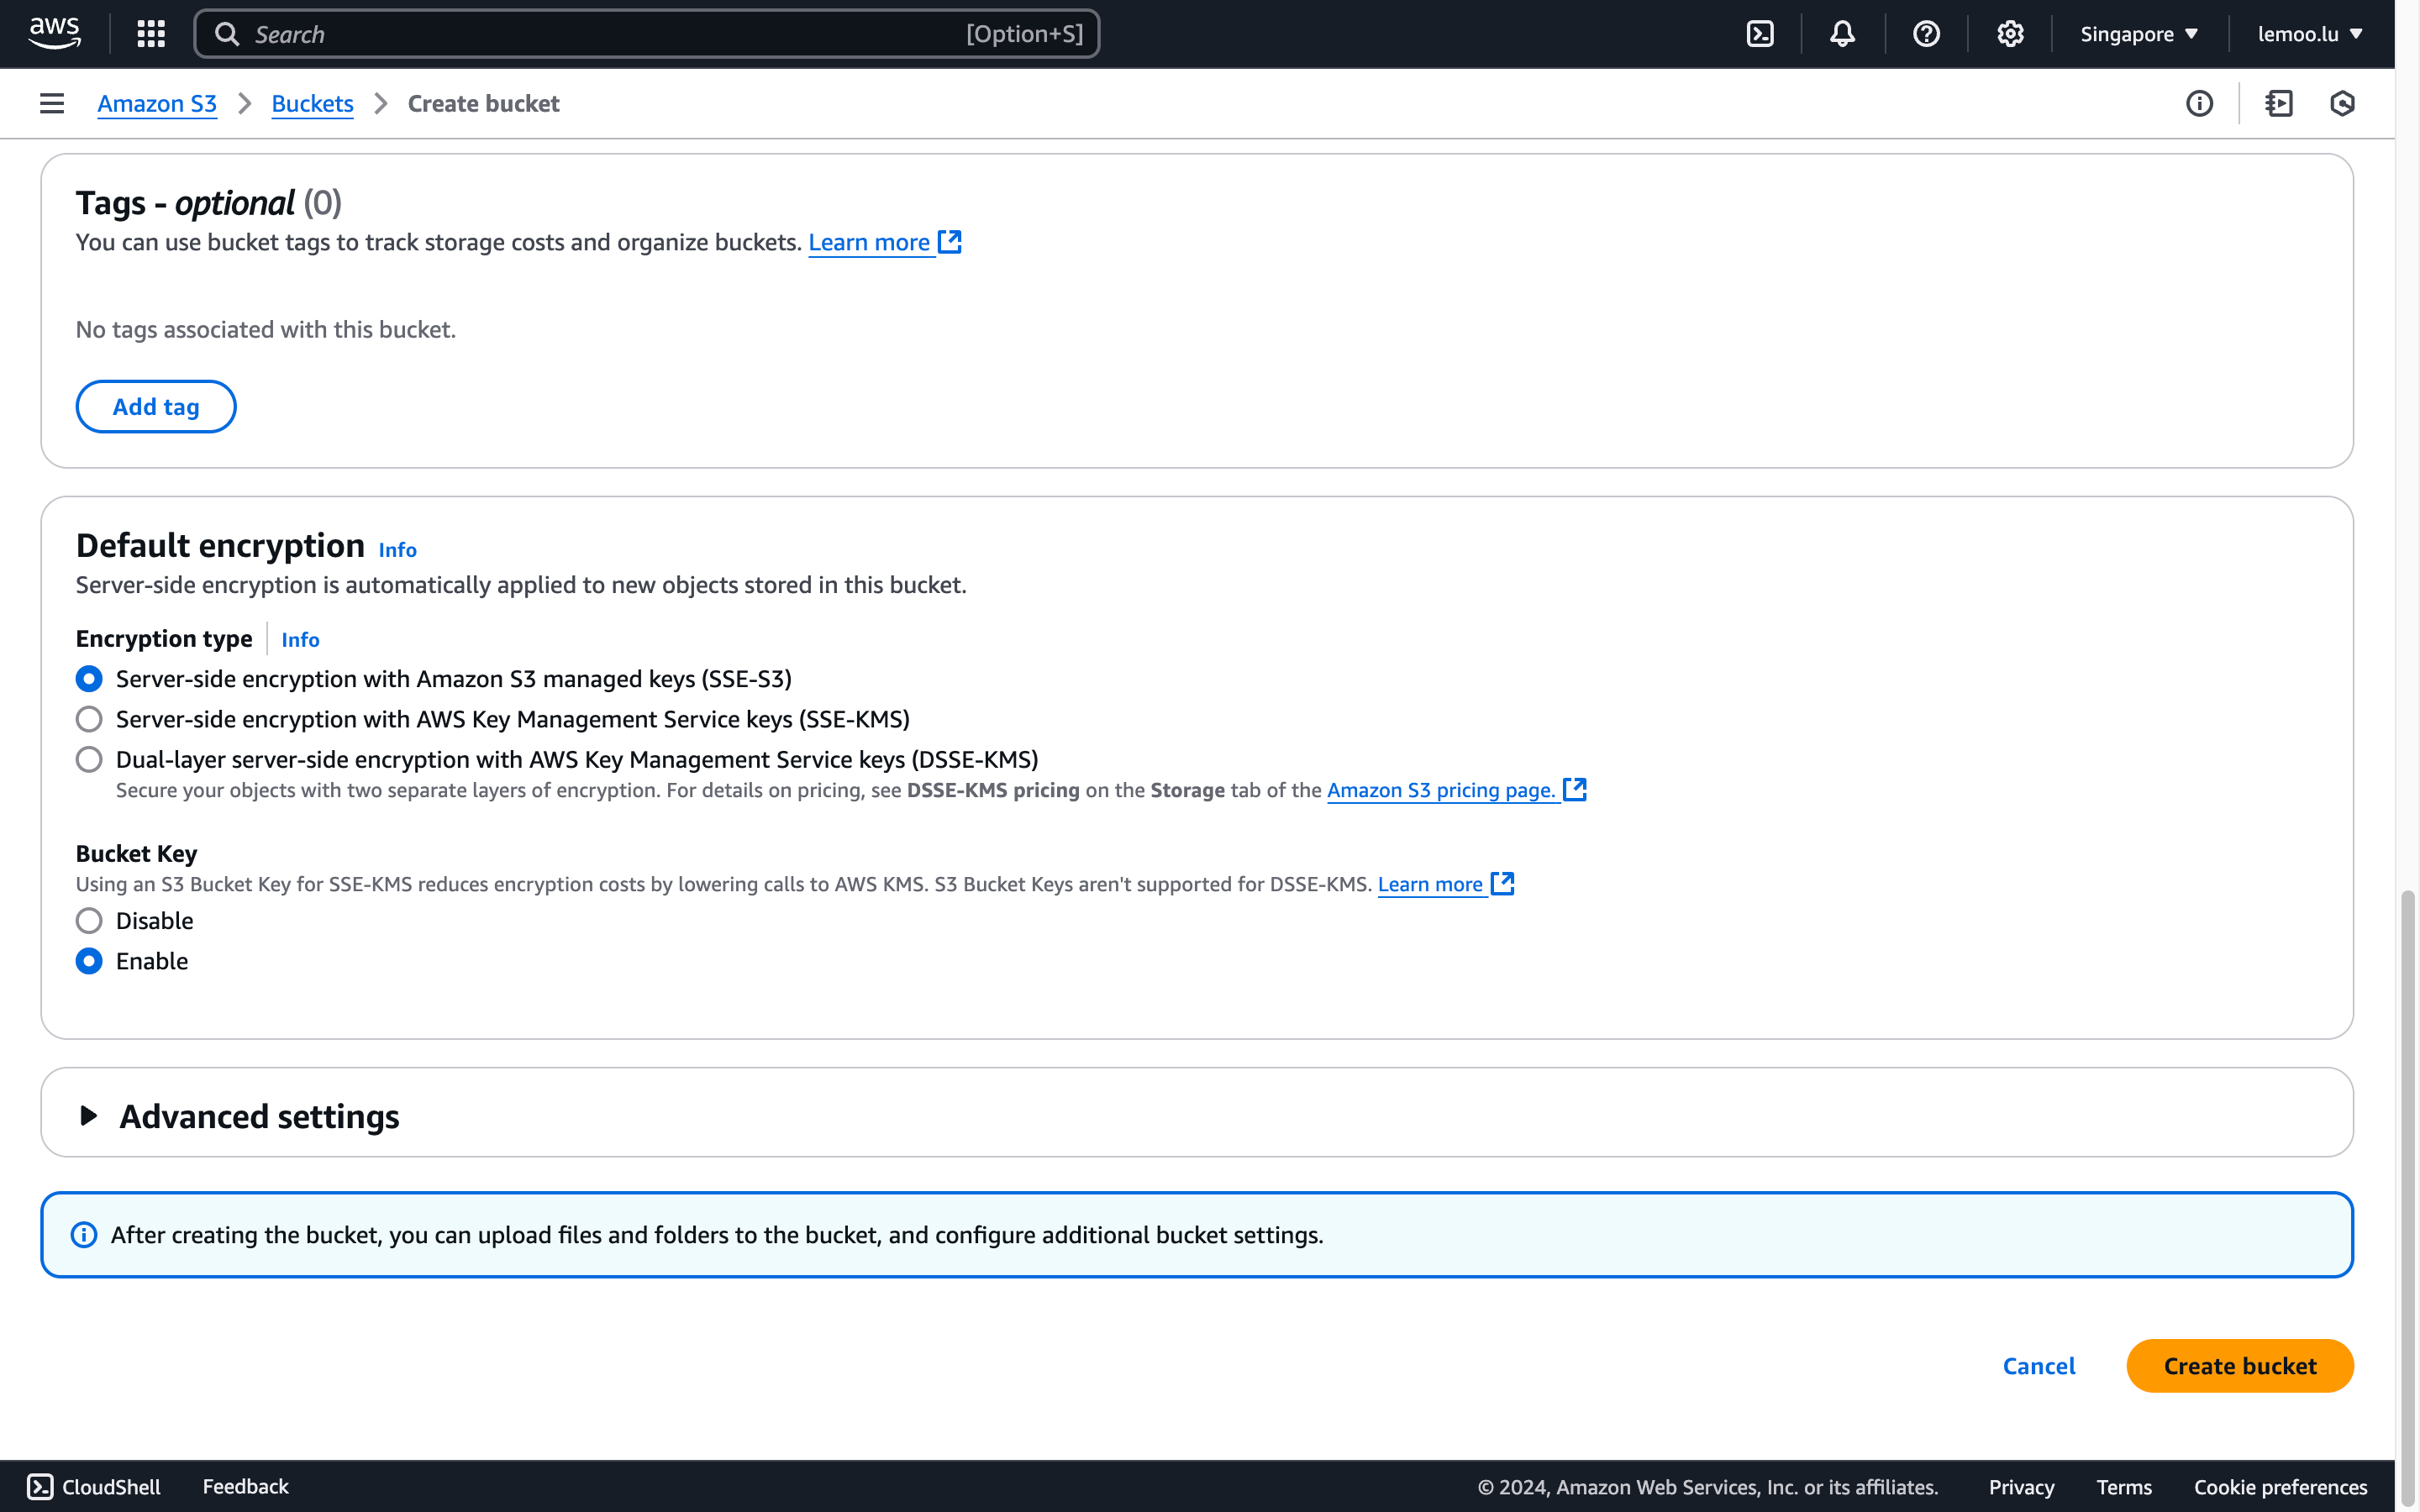
Click the "Create bucket" button on the right-hand side.
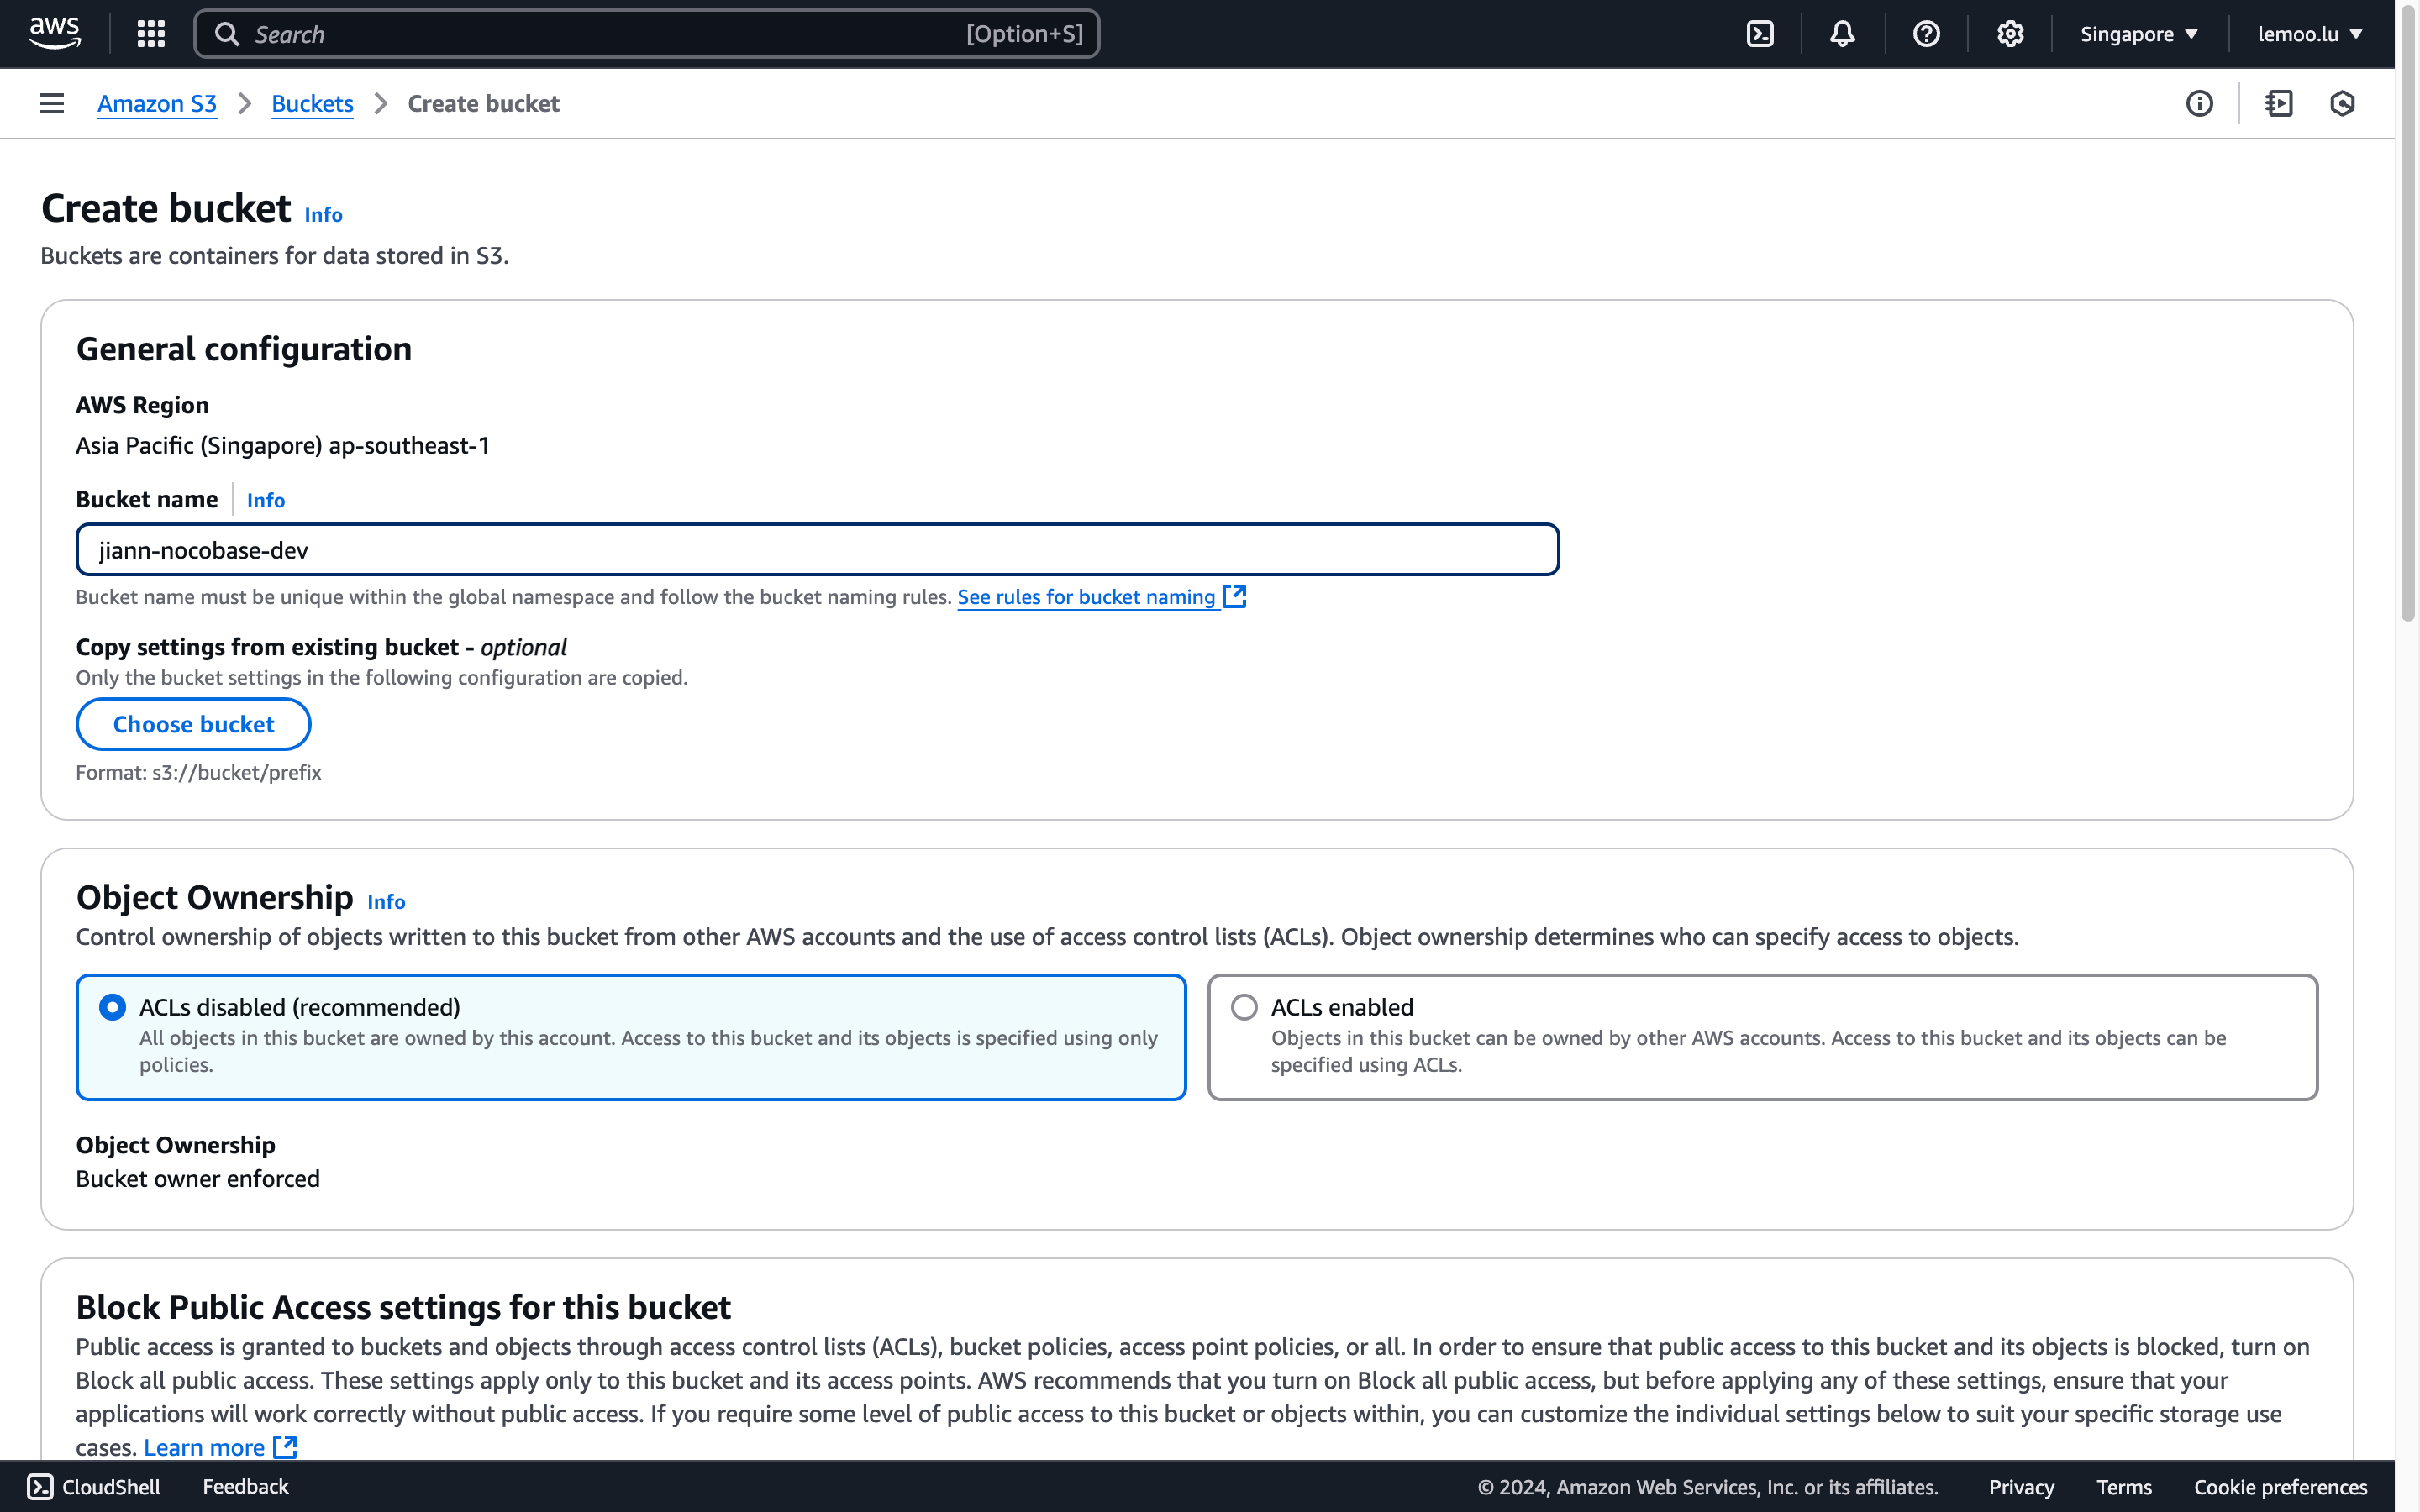
- Fill in the
Bucket Name, leave other fields as default, scroll to the bottom, and click the "Create" button to complete the process.
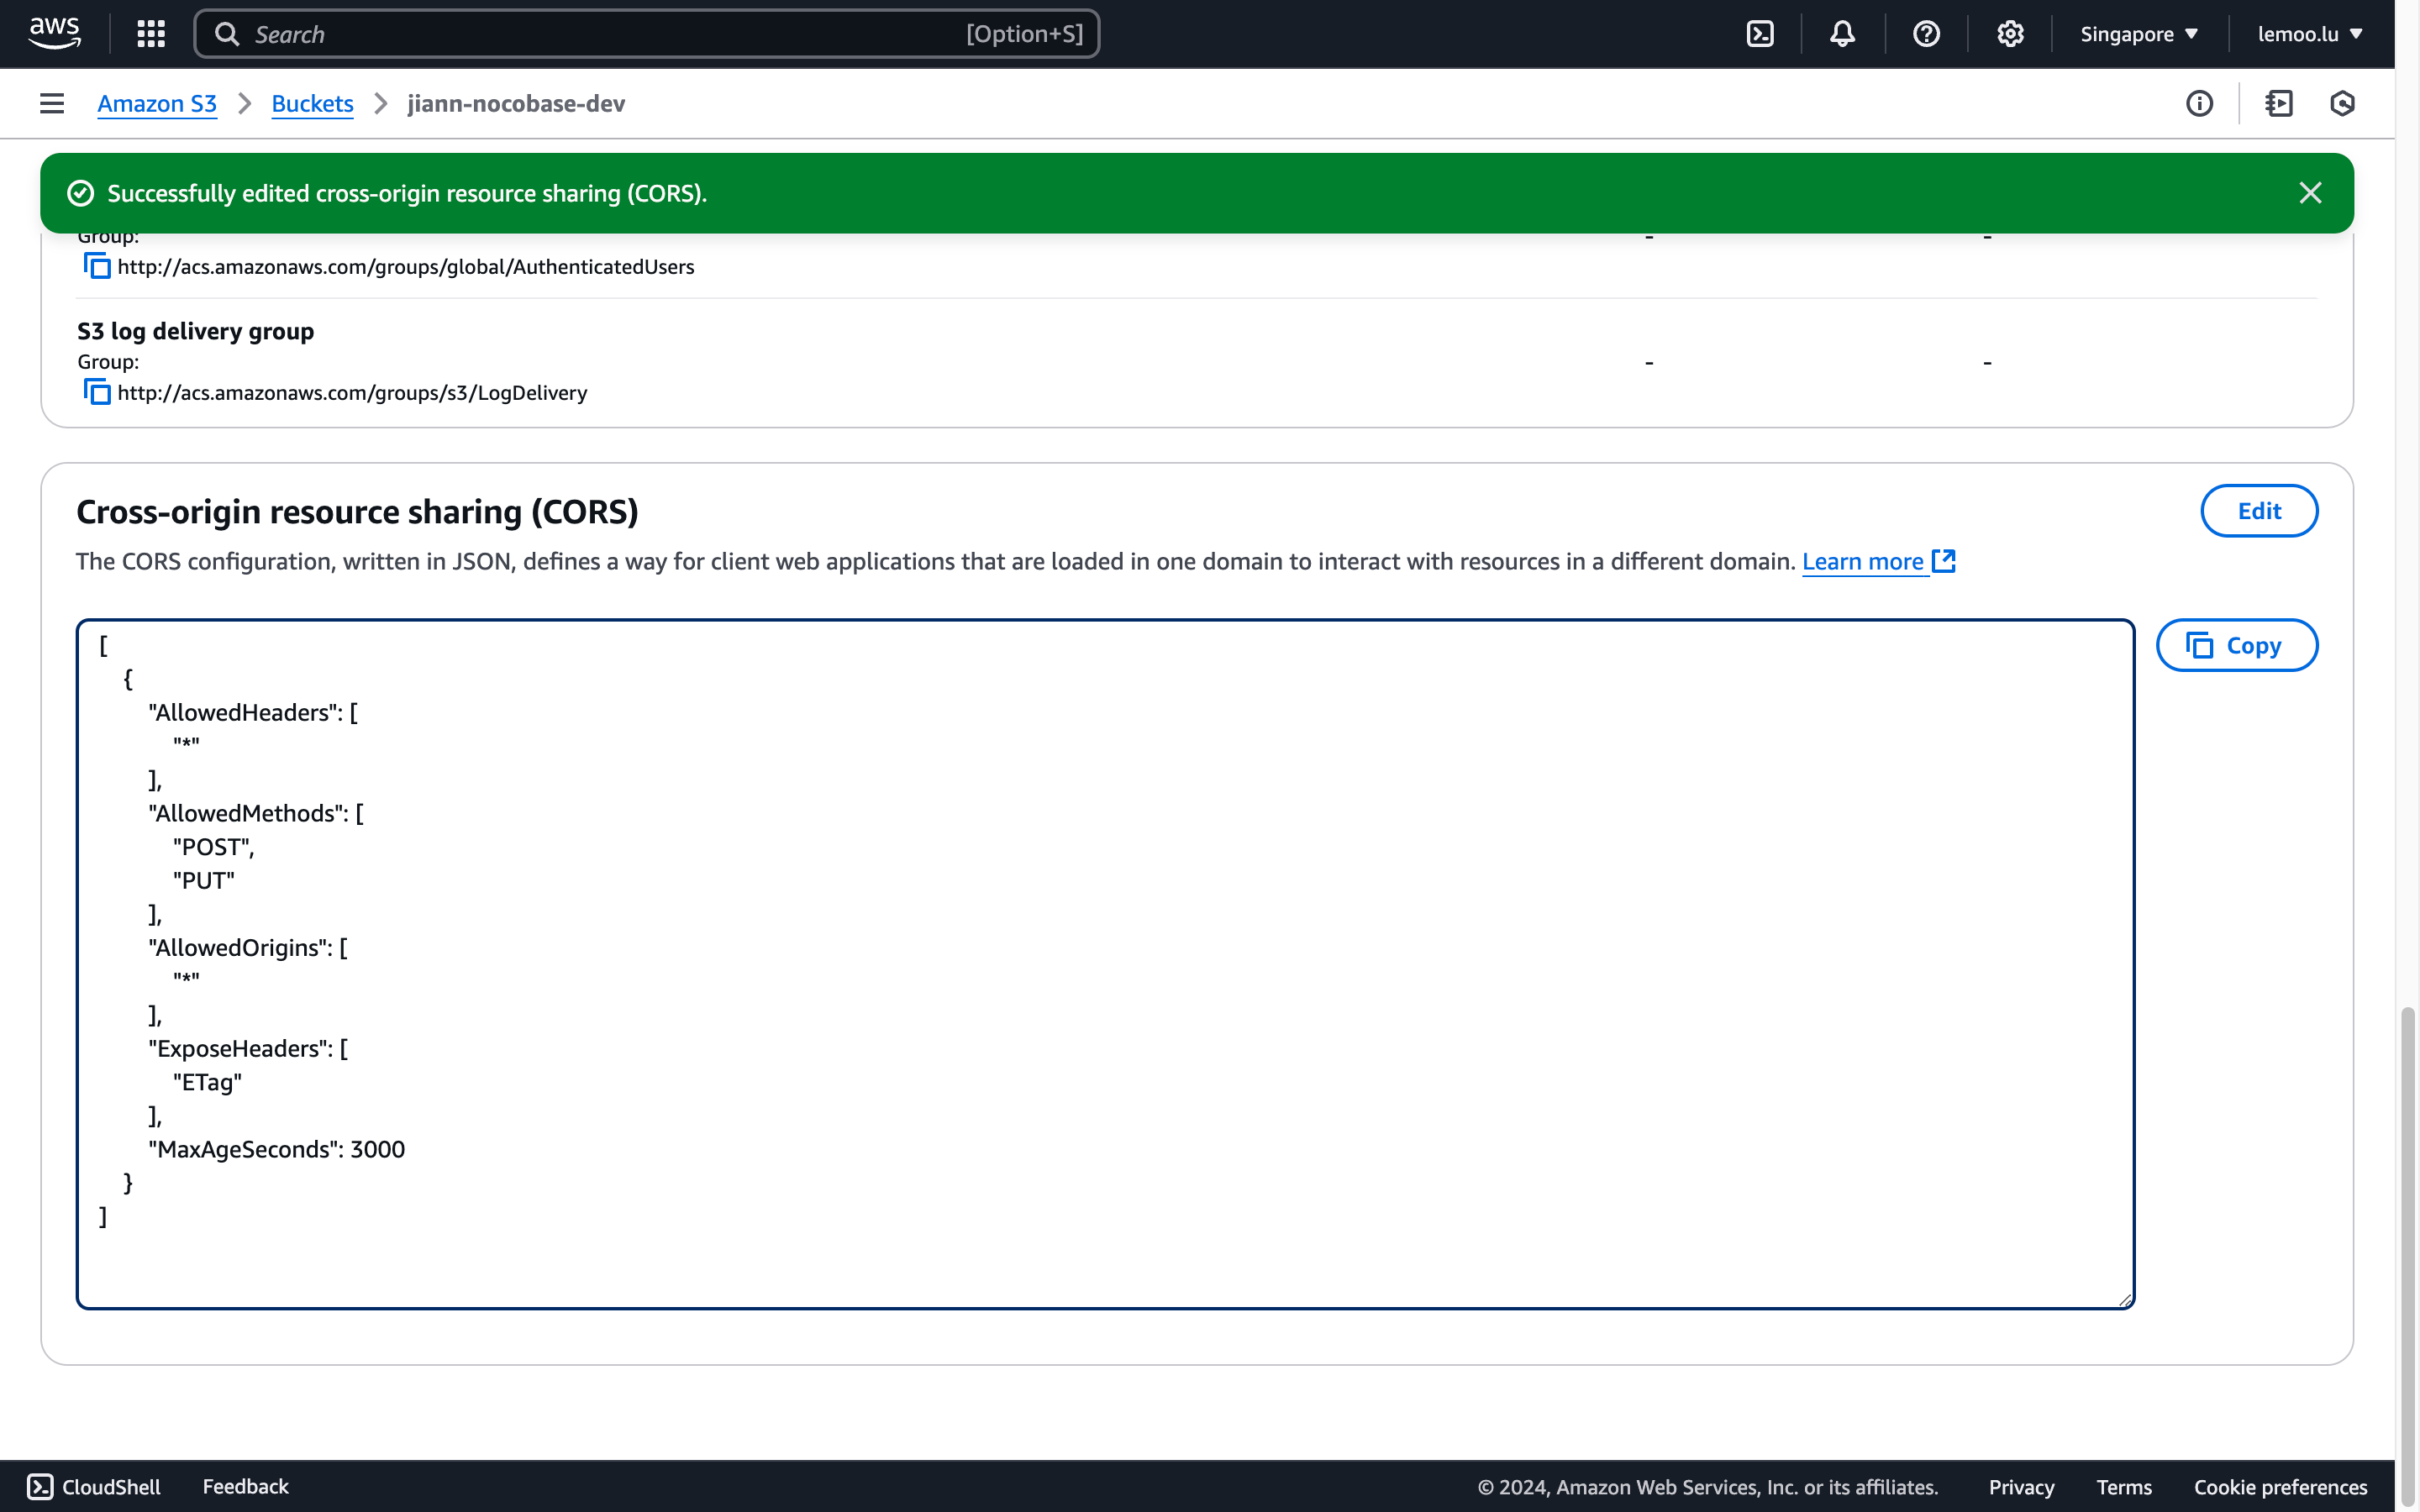
CORS Configuration
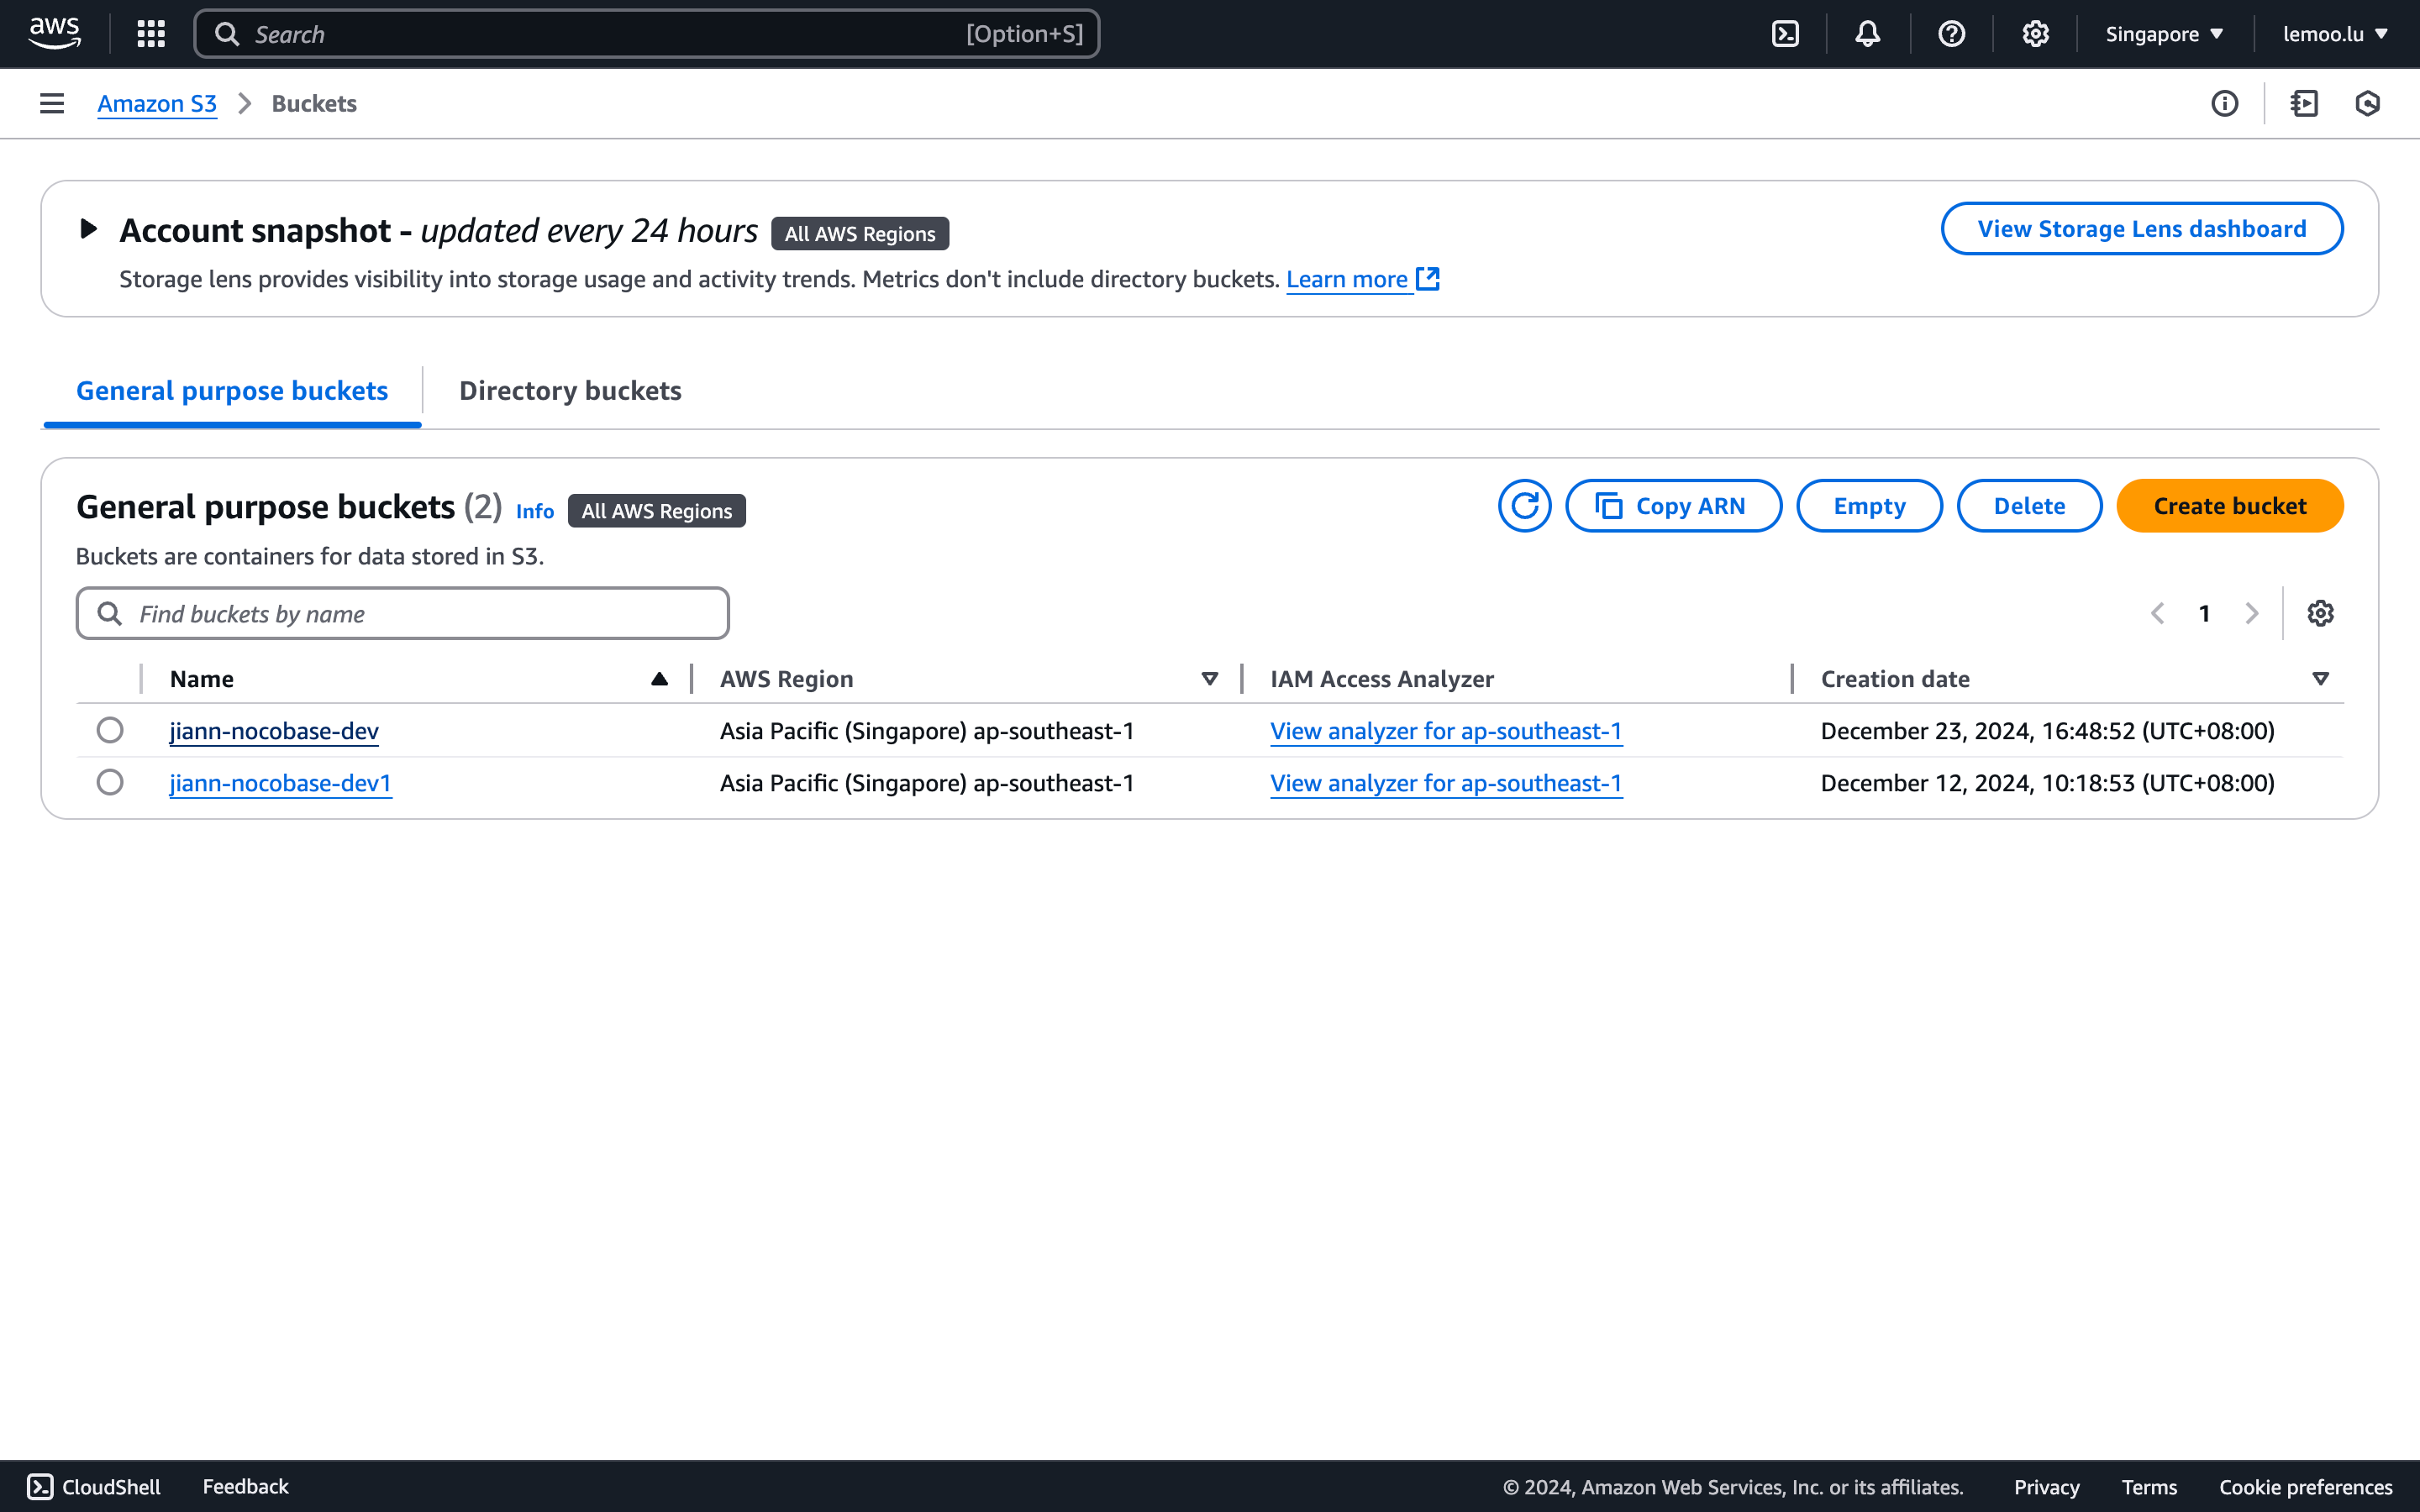
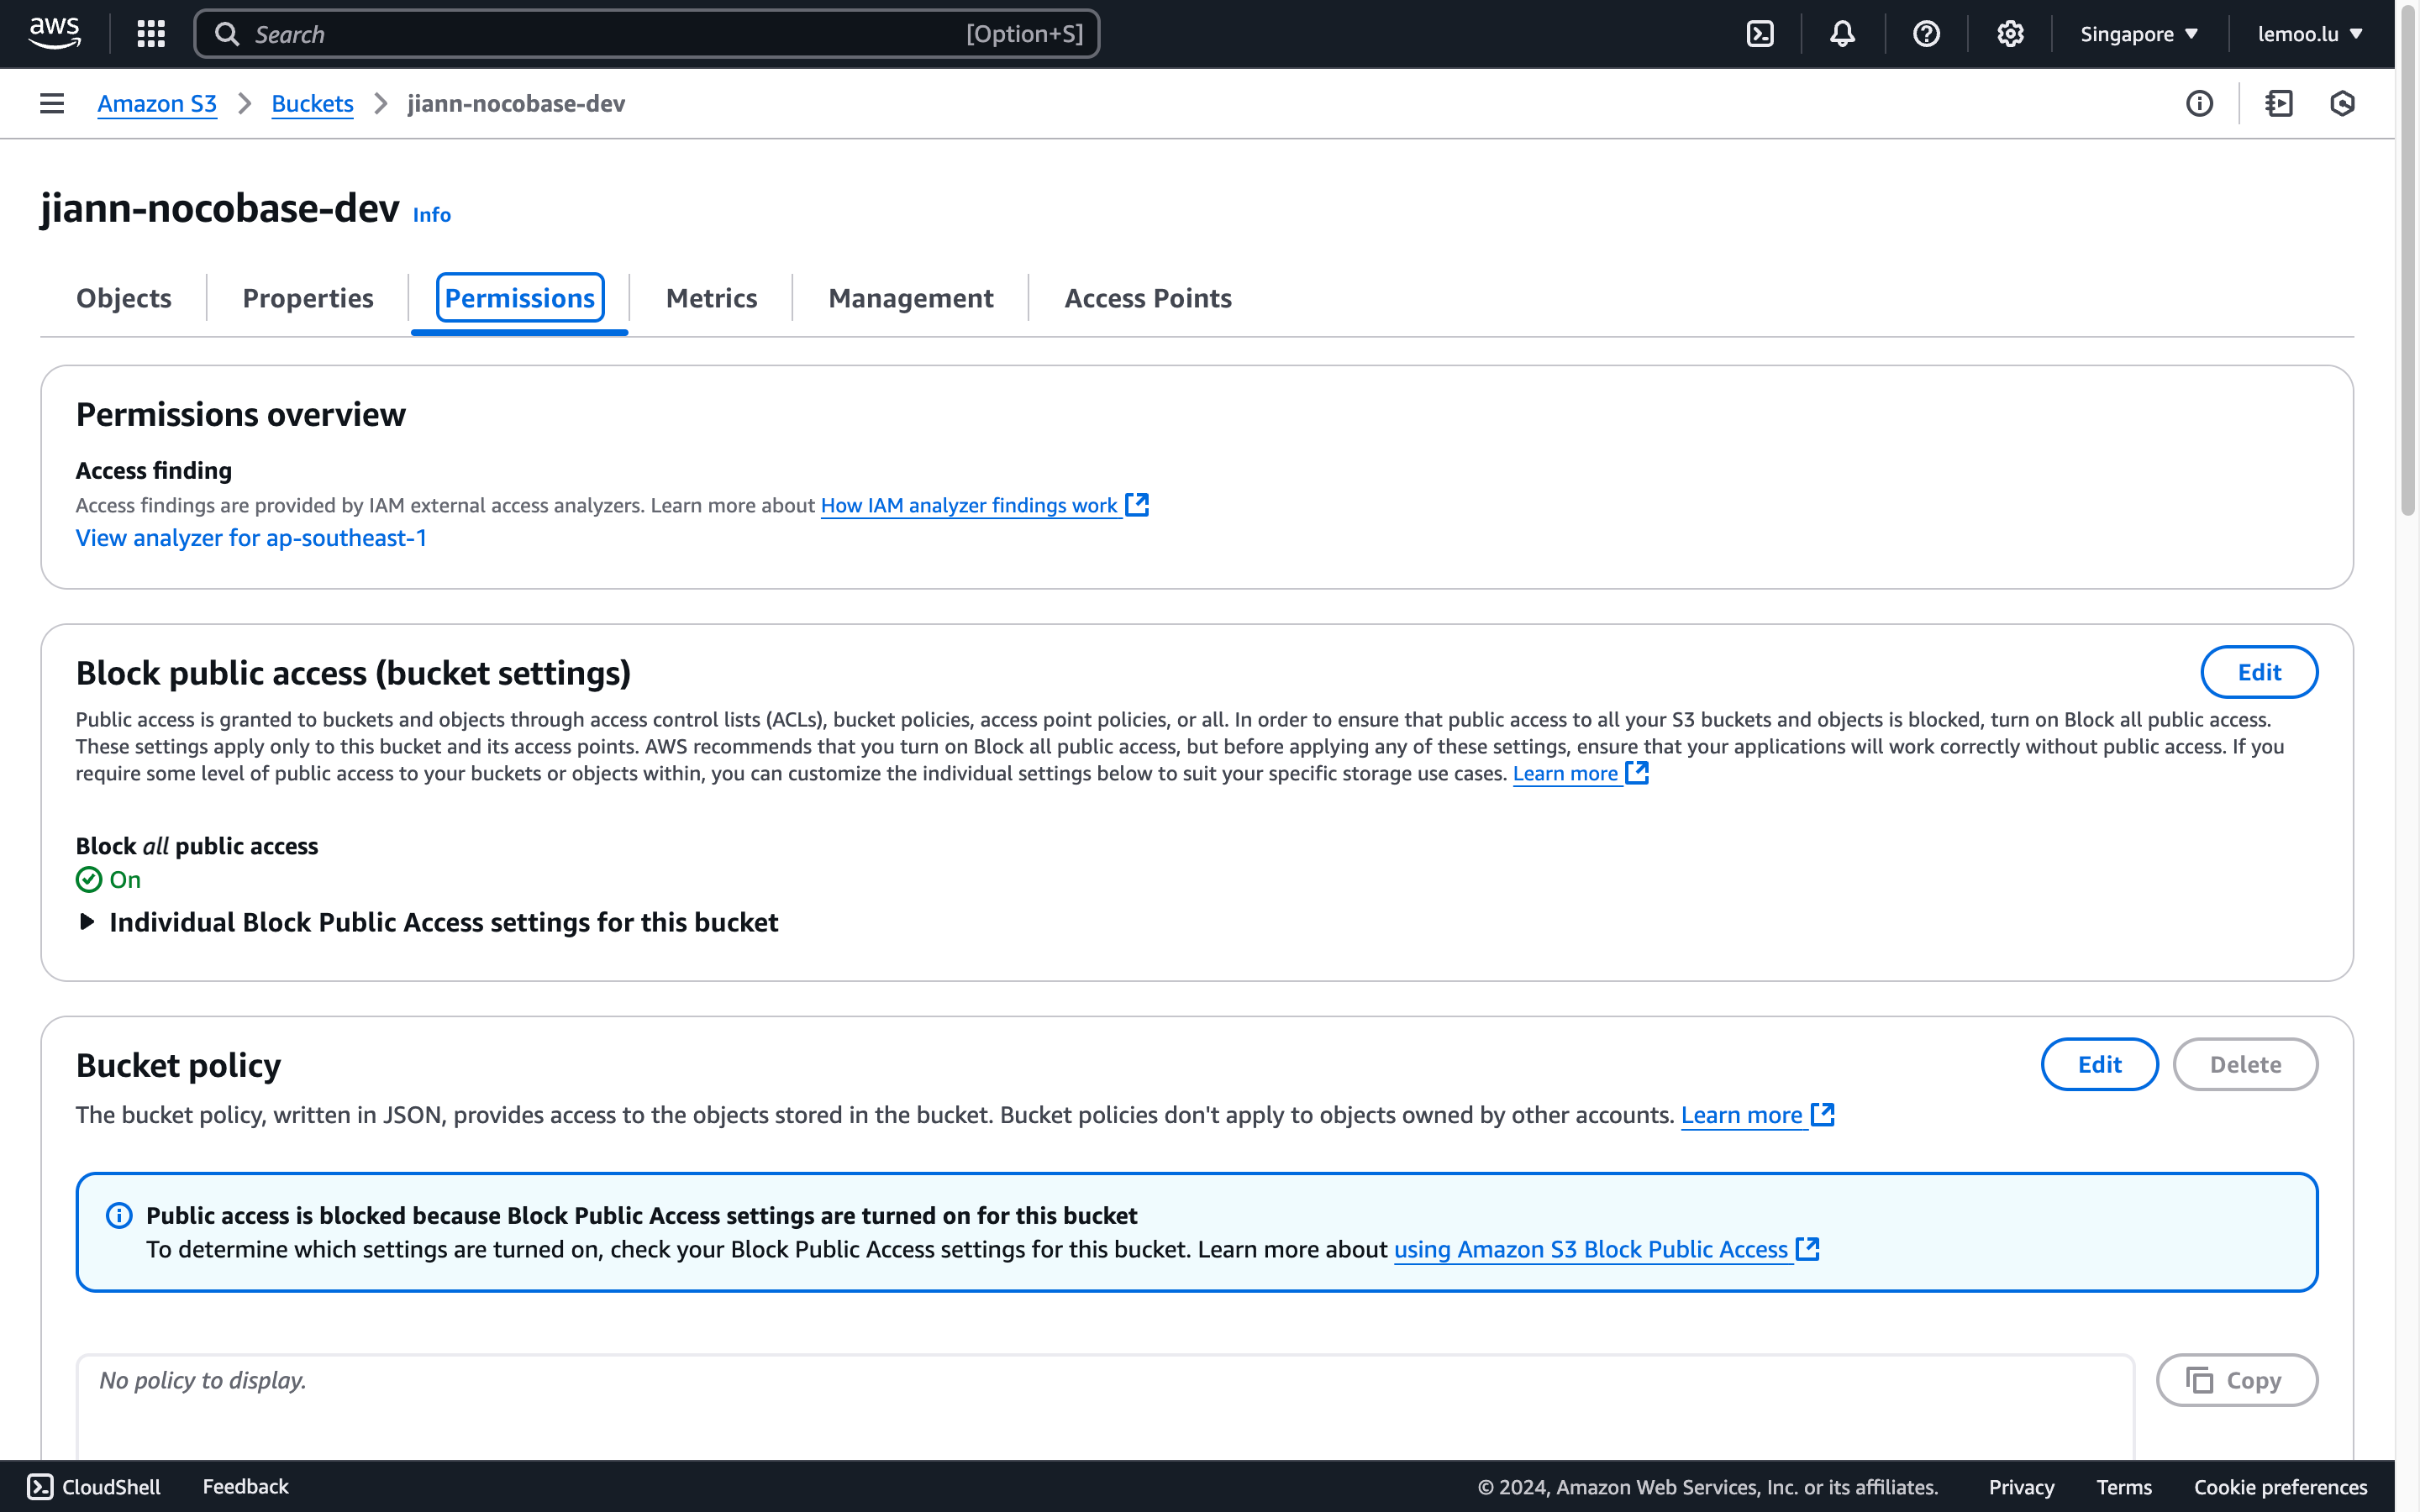
- In the bucket list, find and click the newly created bucket to access its details.
- Navigate to the "Permission" tab and scroll down to the CORS configuration section.
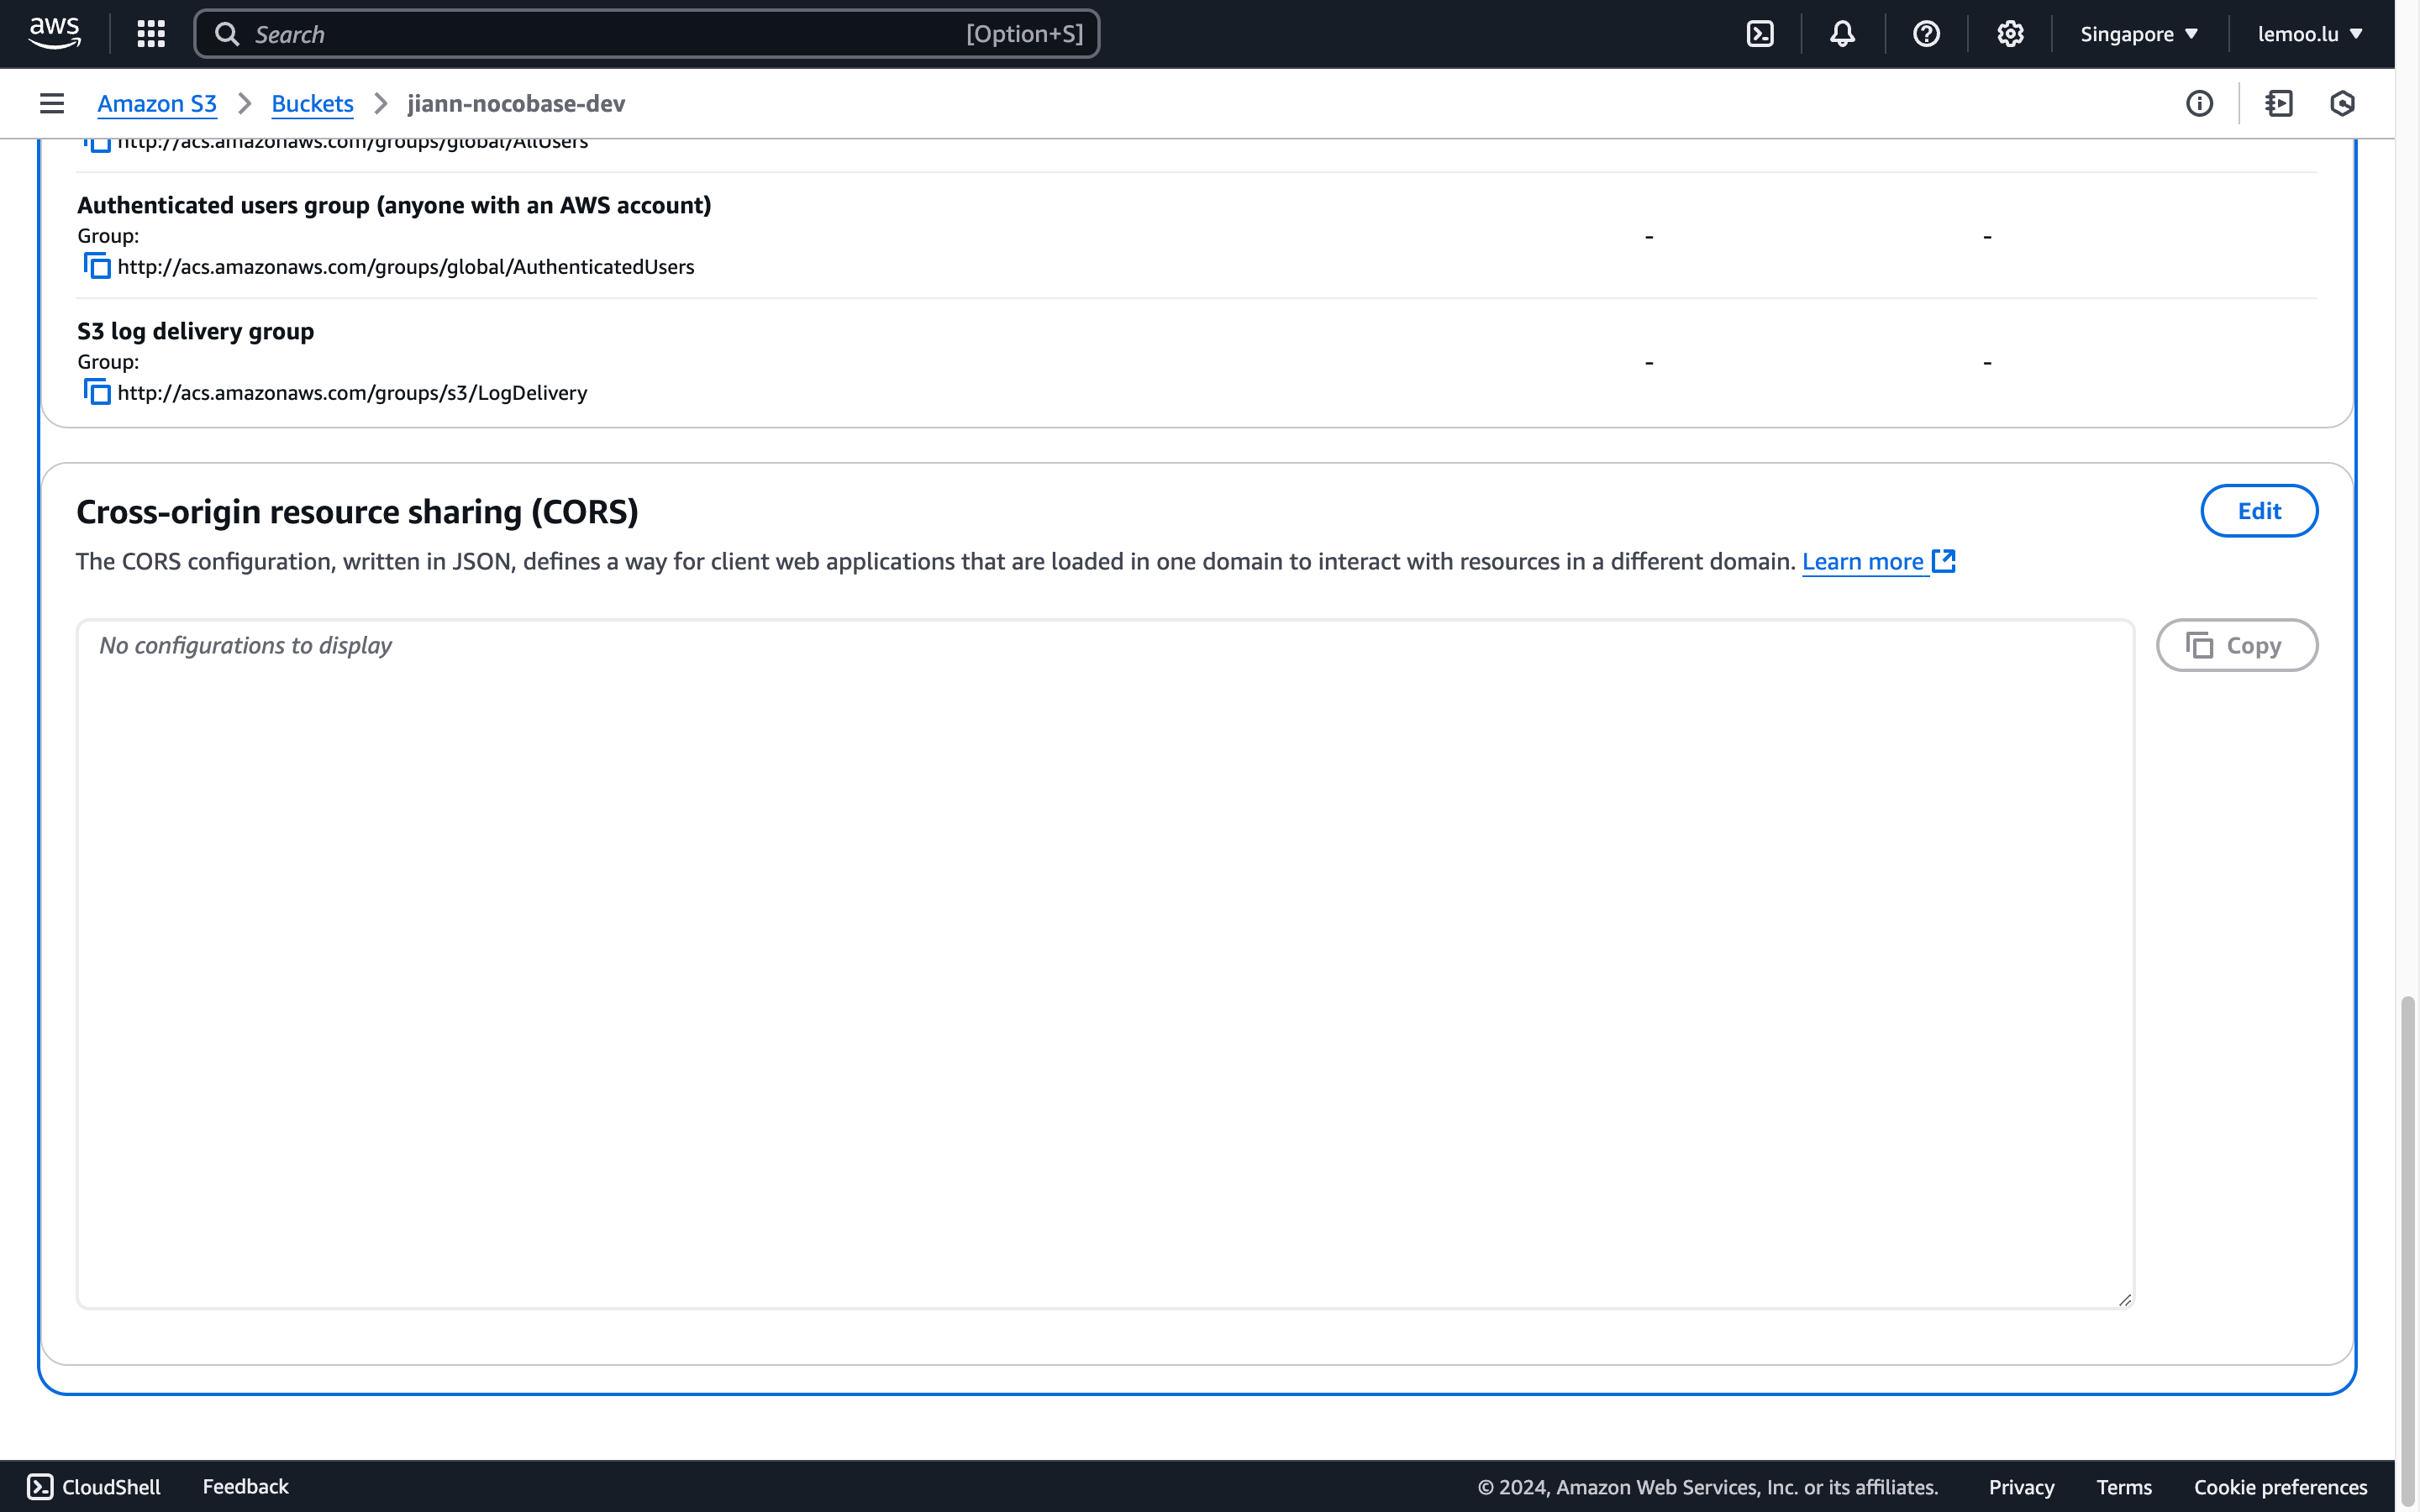
- Enter the following configuration (customize as needed) and save.
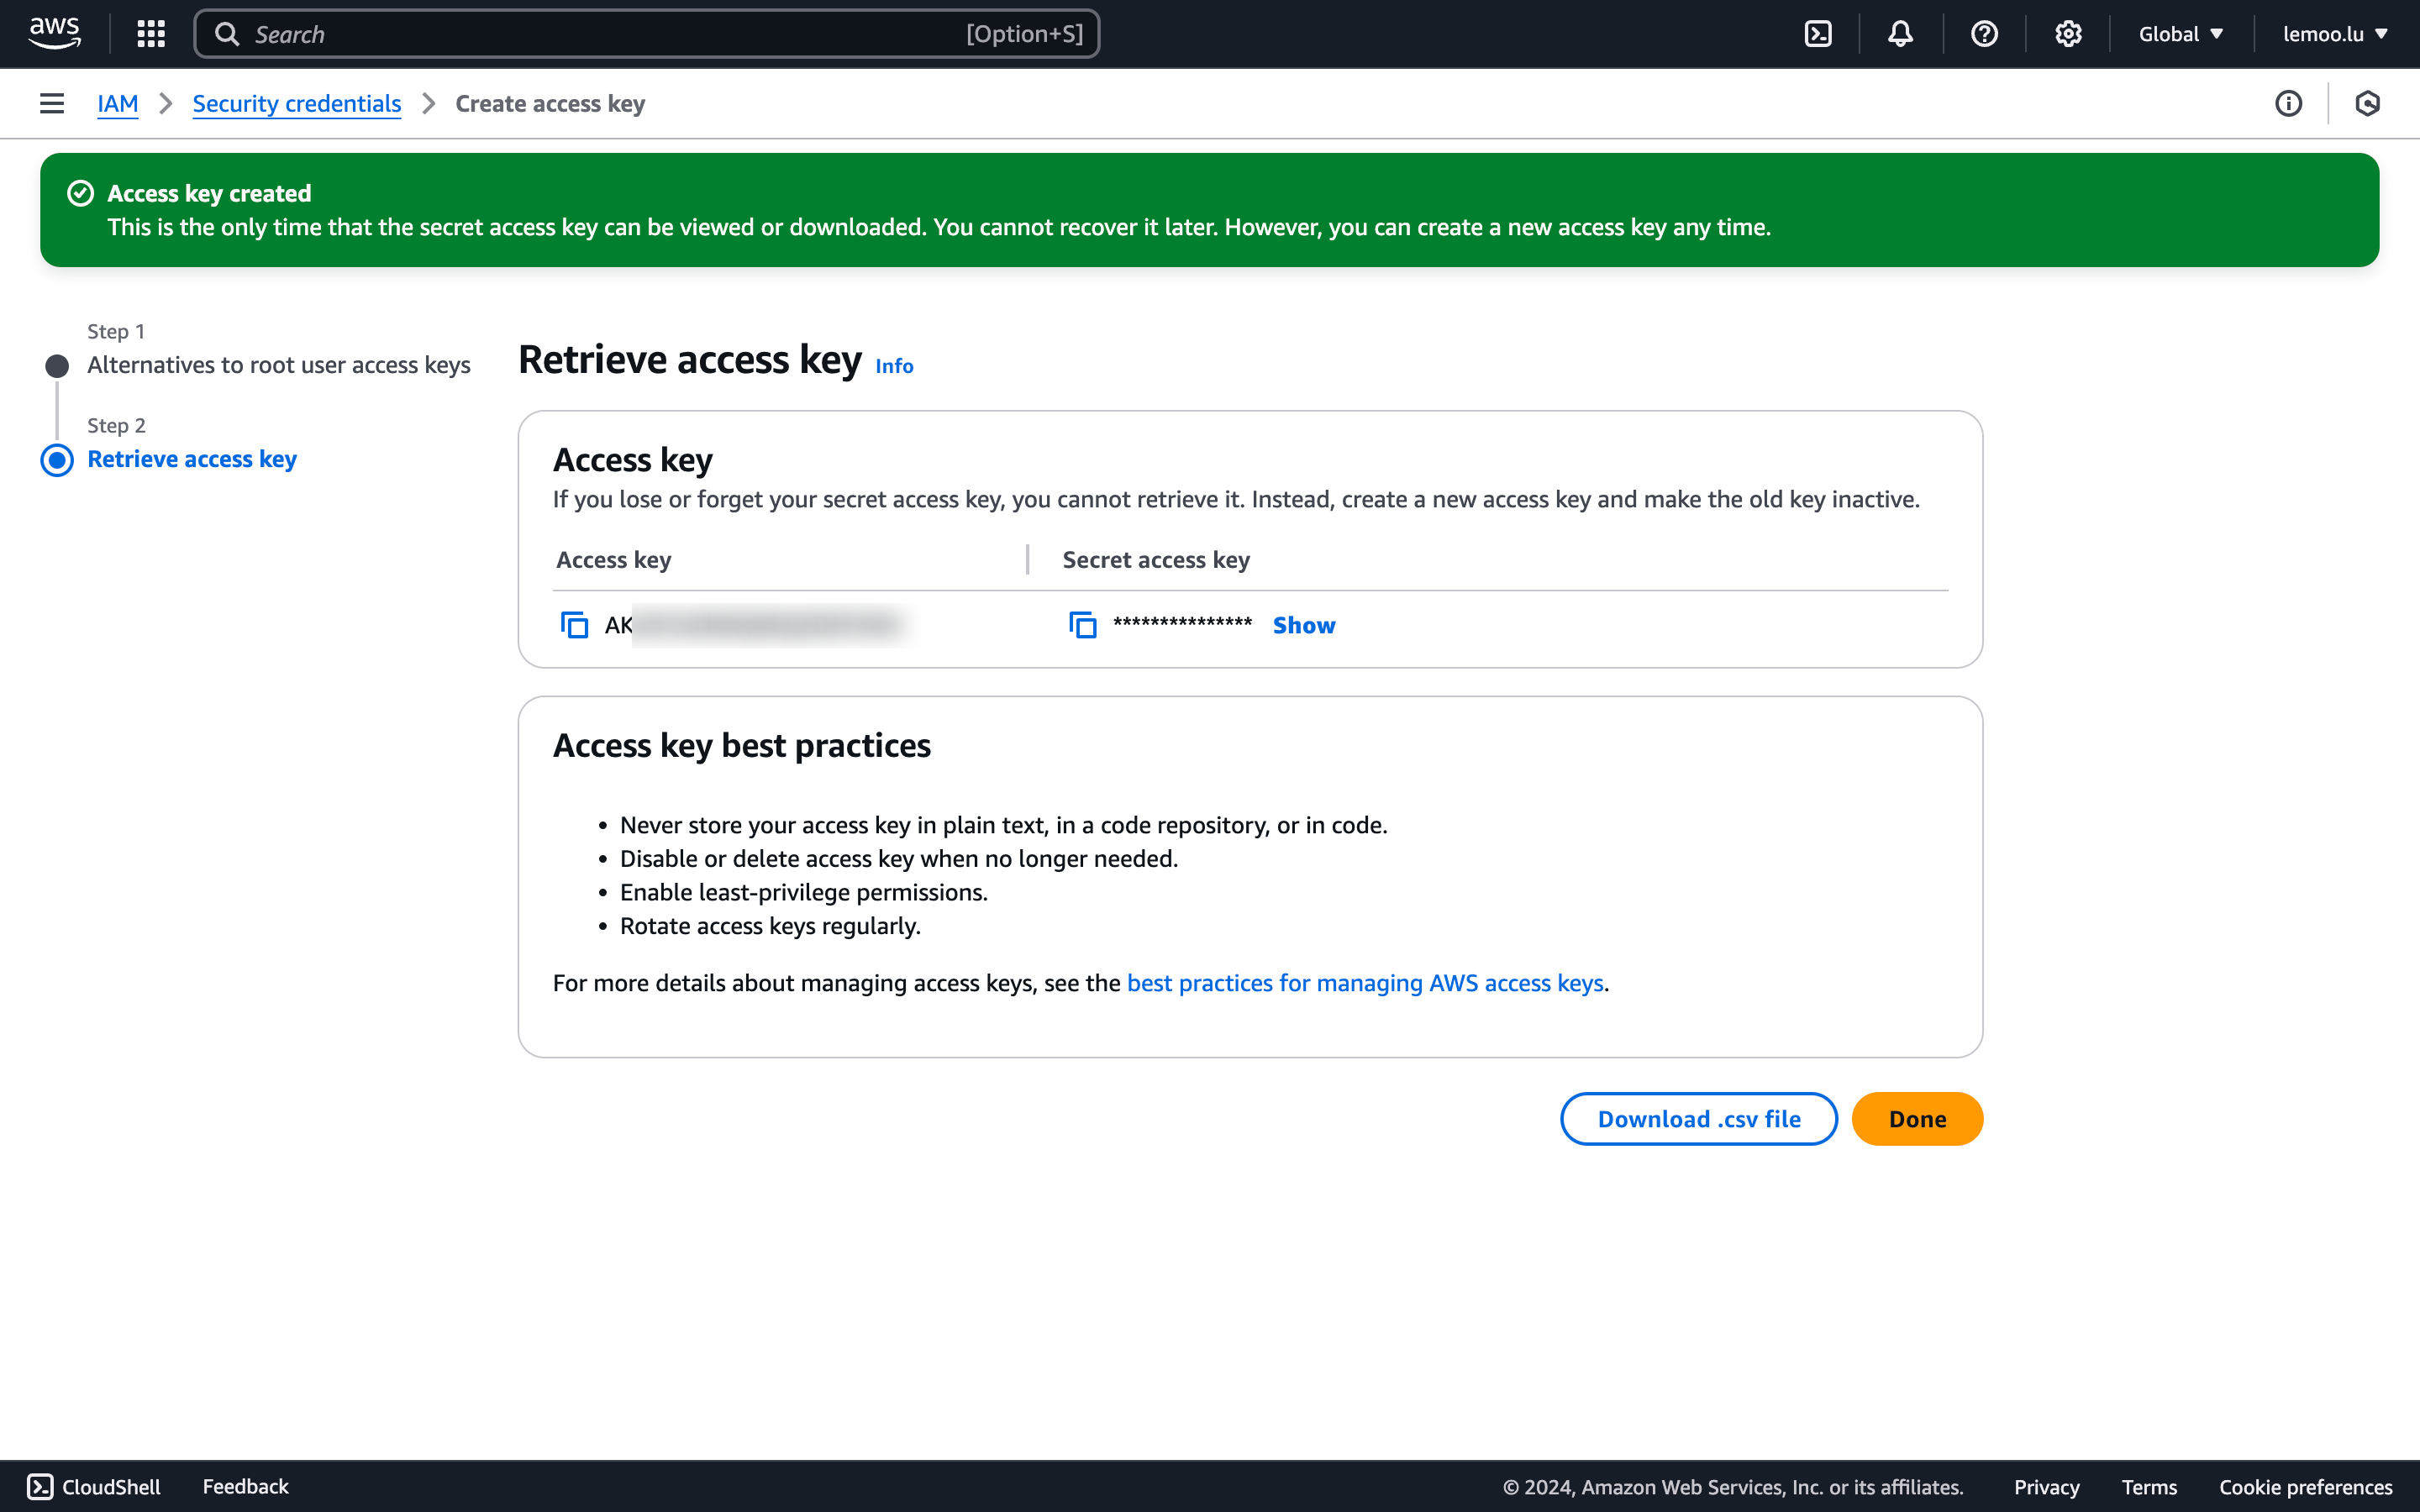
AccessKey and SecretAccessKey Retrieval
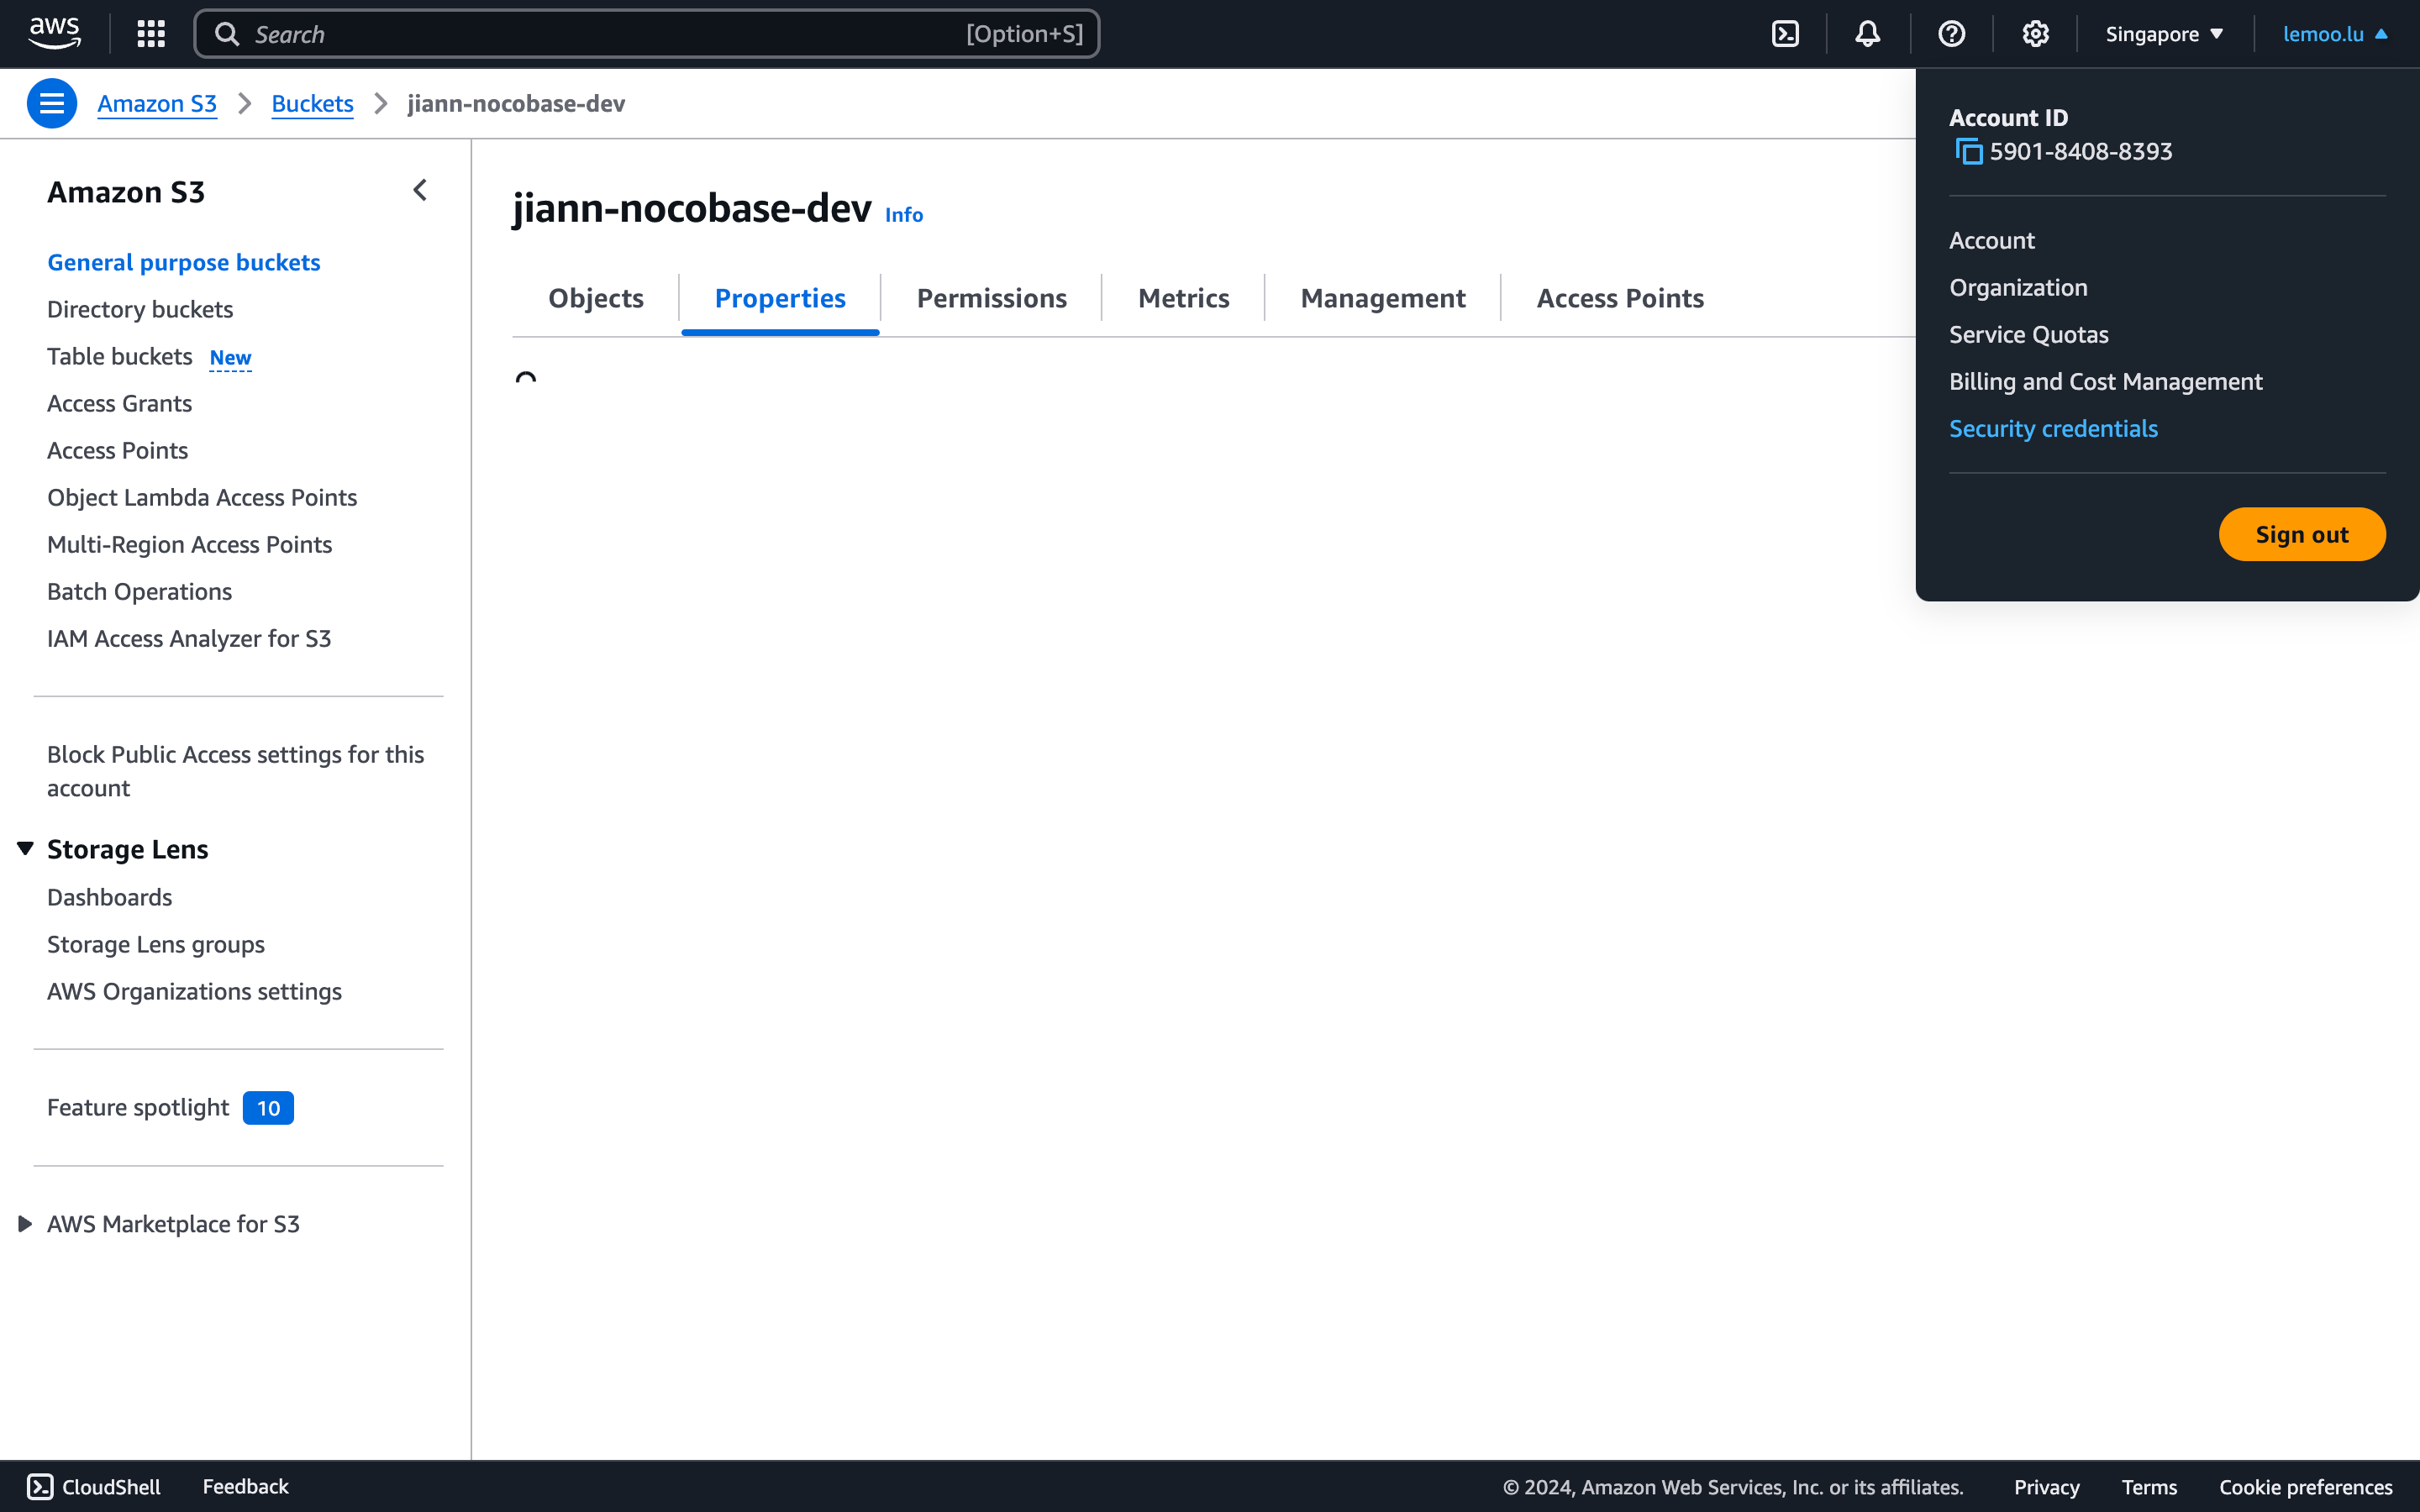
- Click the "Security credentials" button in the top-right corner.
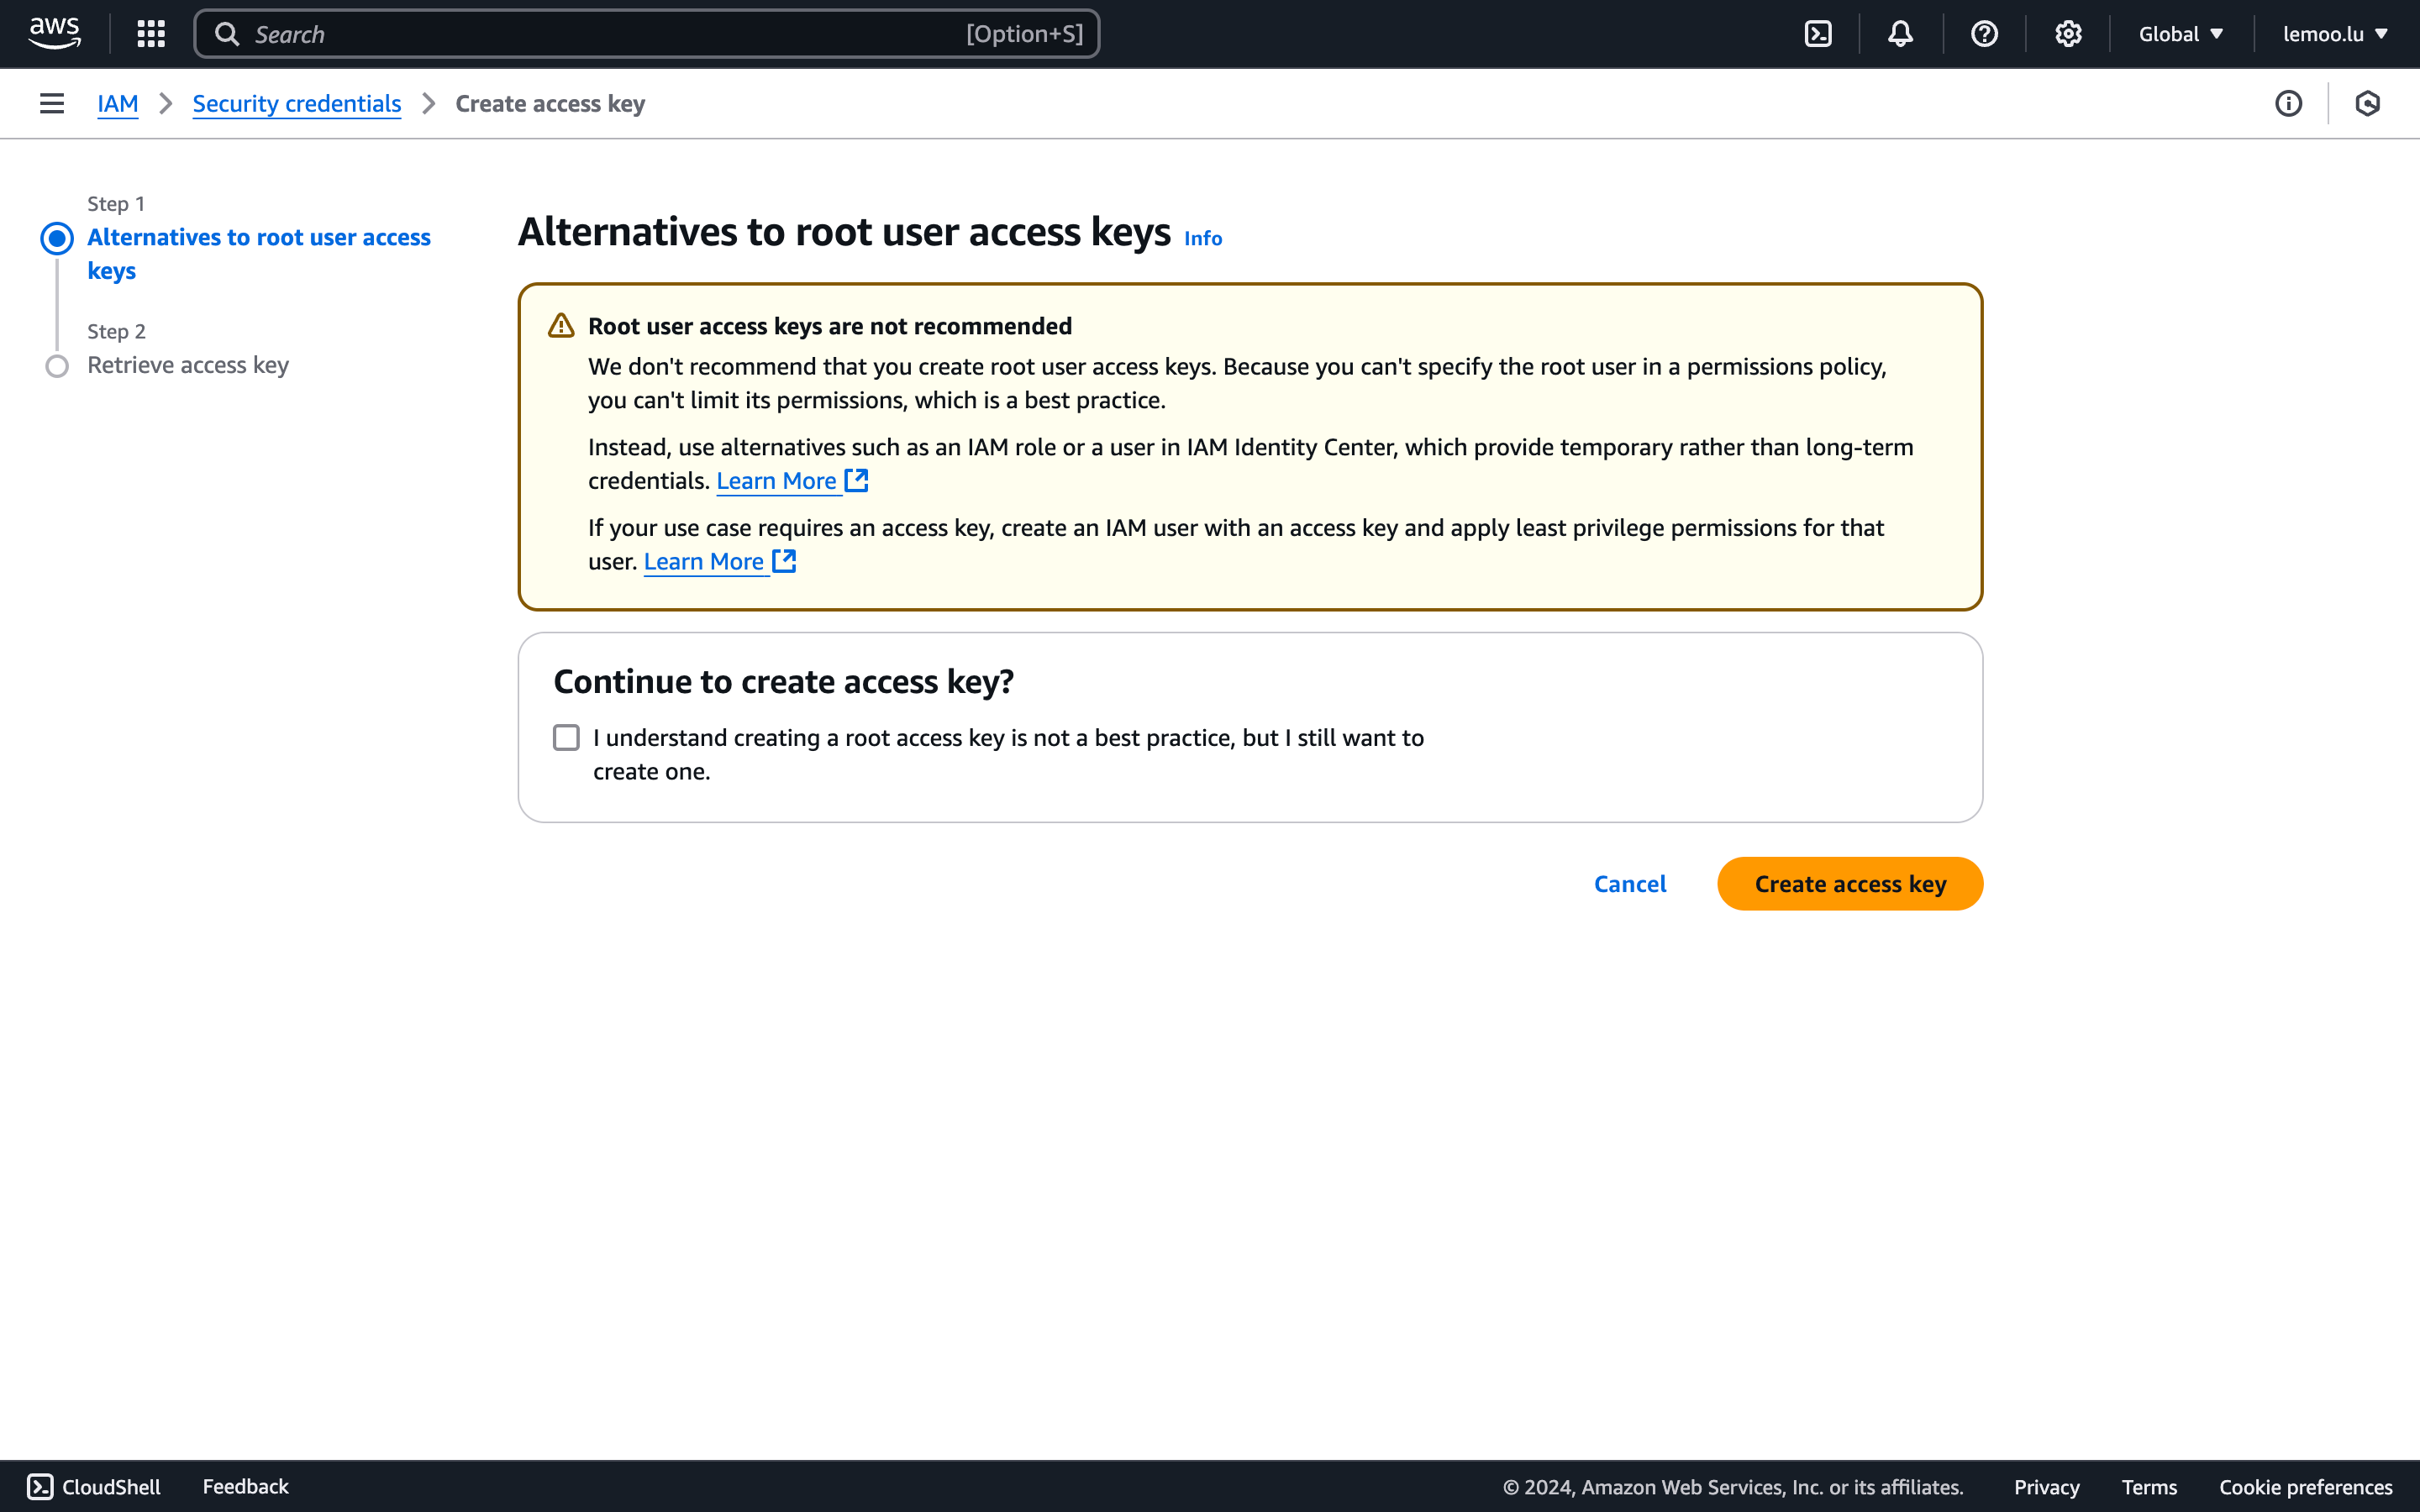
- Scroll to the "Access Keys" section and click "Create Access Key."
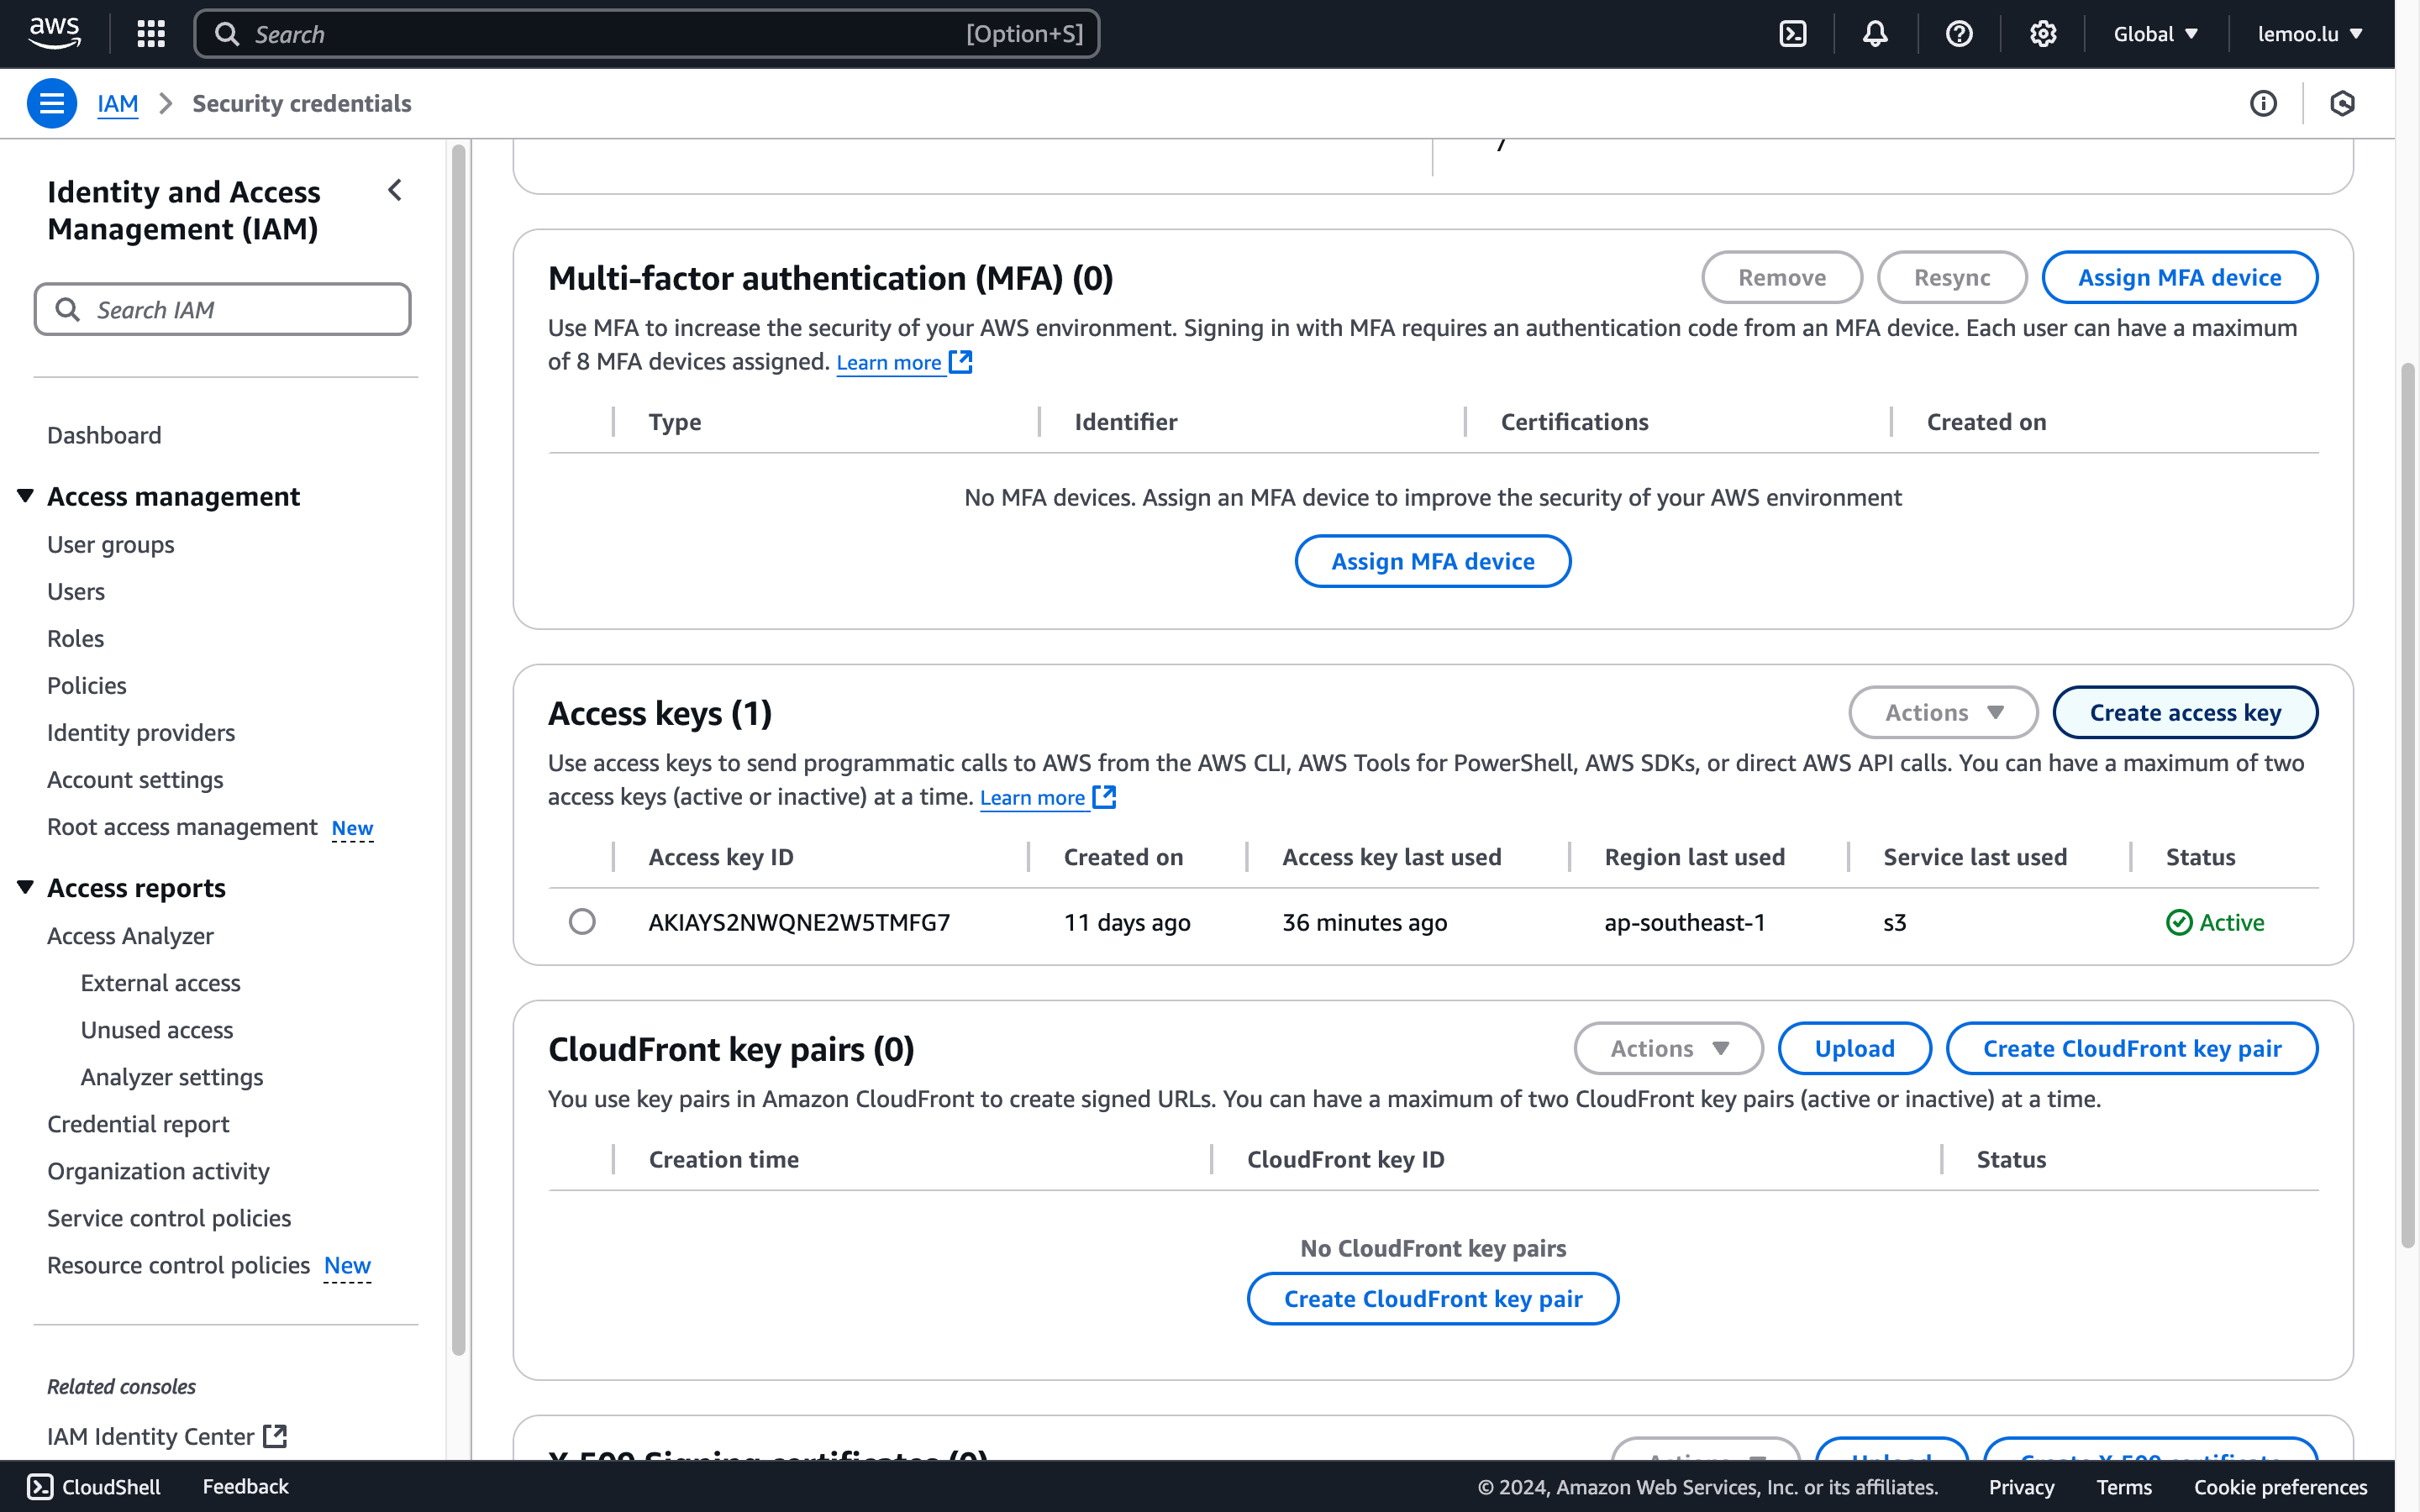
- Agree to the terms (IAM usage is recommended for production environments).
- Save the displayed Access Key and Secret Access Key.
Parameter Retrieval and Configuration
-
Use the retrieved
AccessKey IDandAccessKey Secret. -
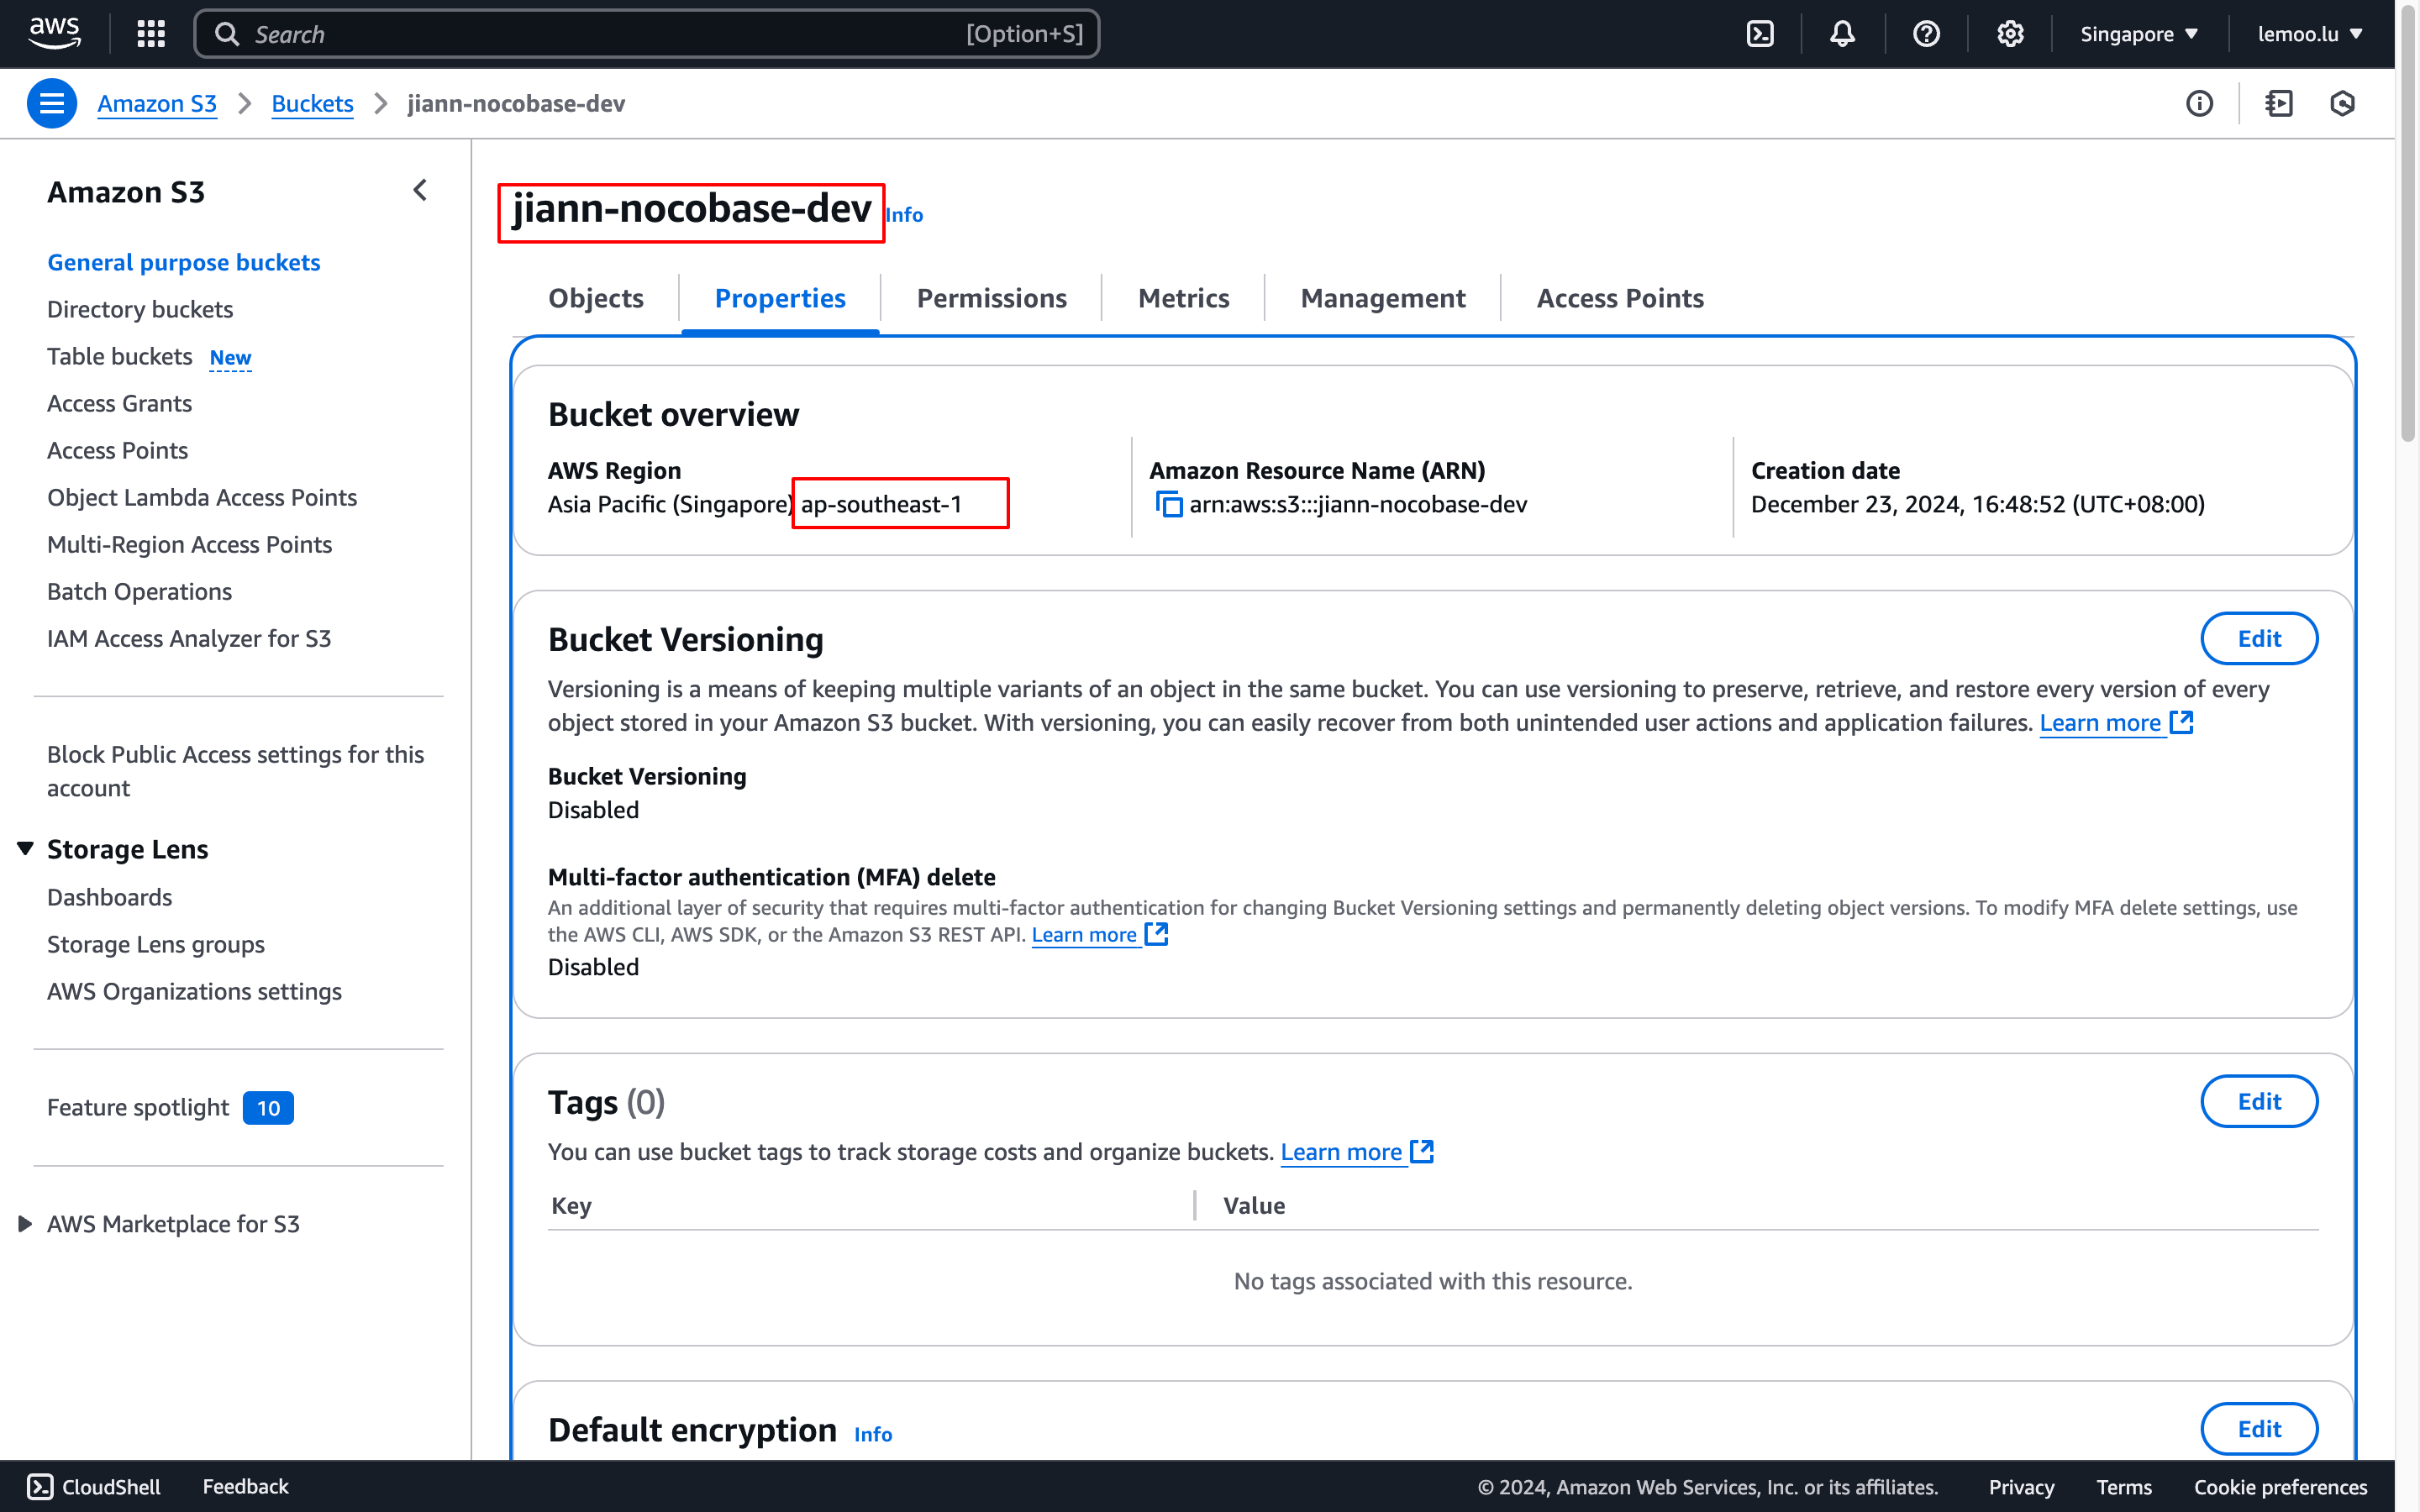
Visit the bucket's properties panel to find the
Bucket NameandRegion.
Public Access (Optional)
This is an optional configuration. Configure it when you need to make uploaded files completely public.
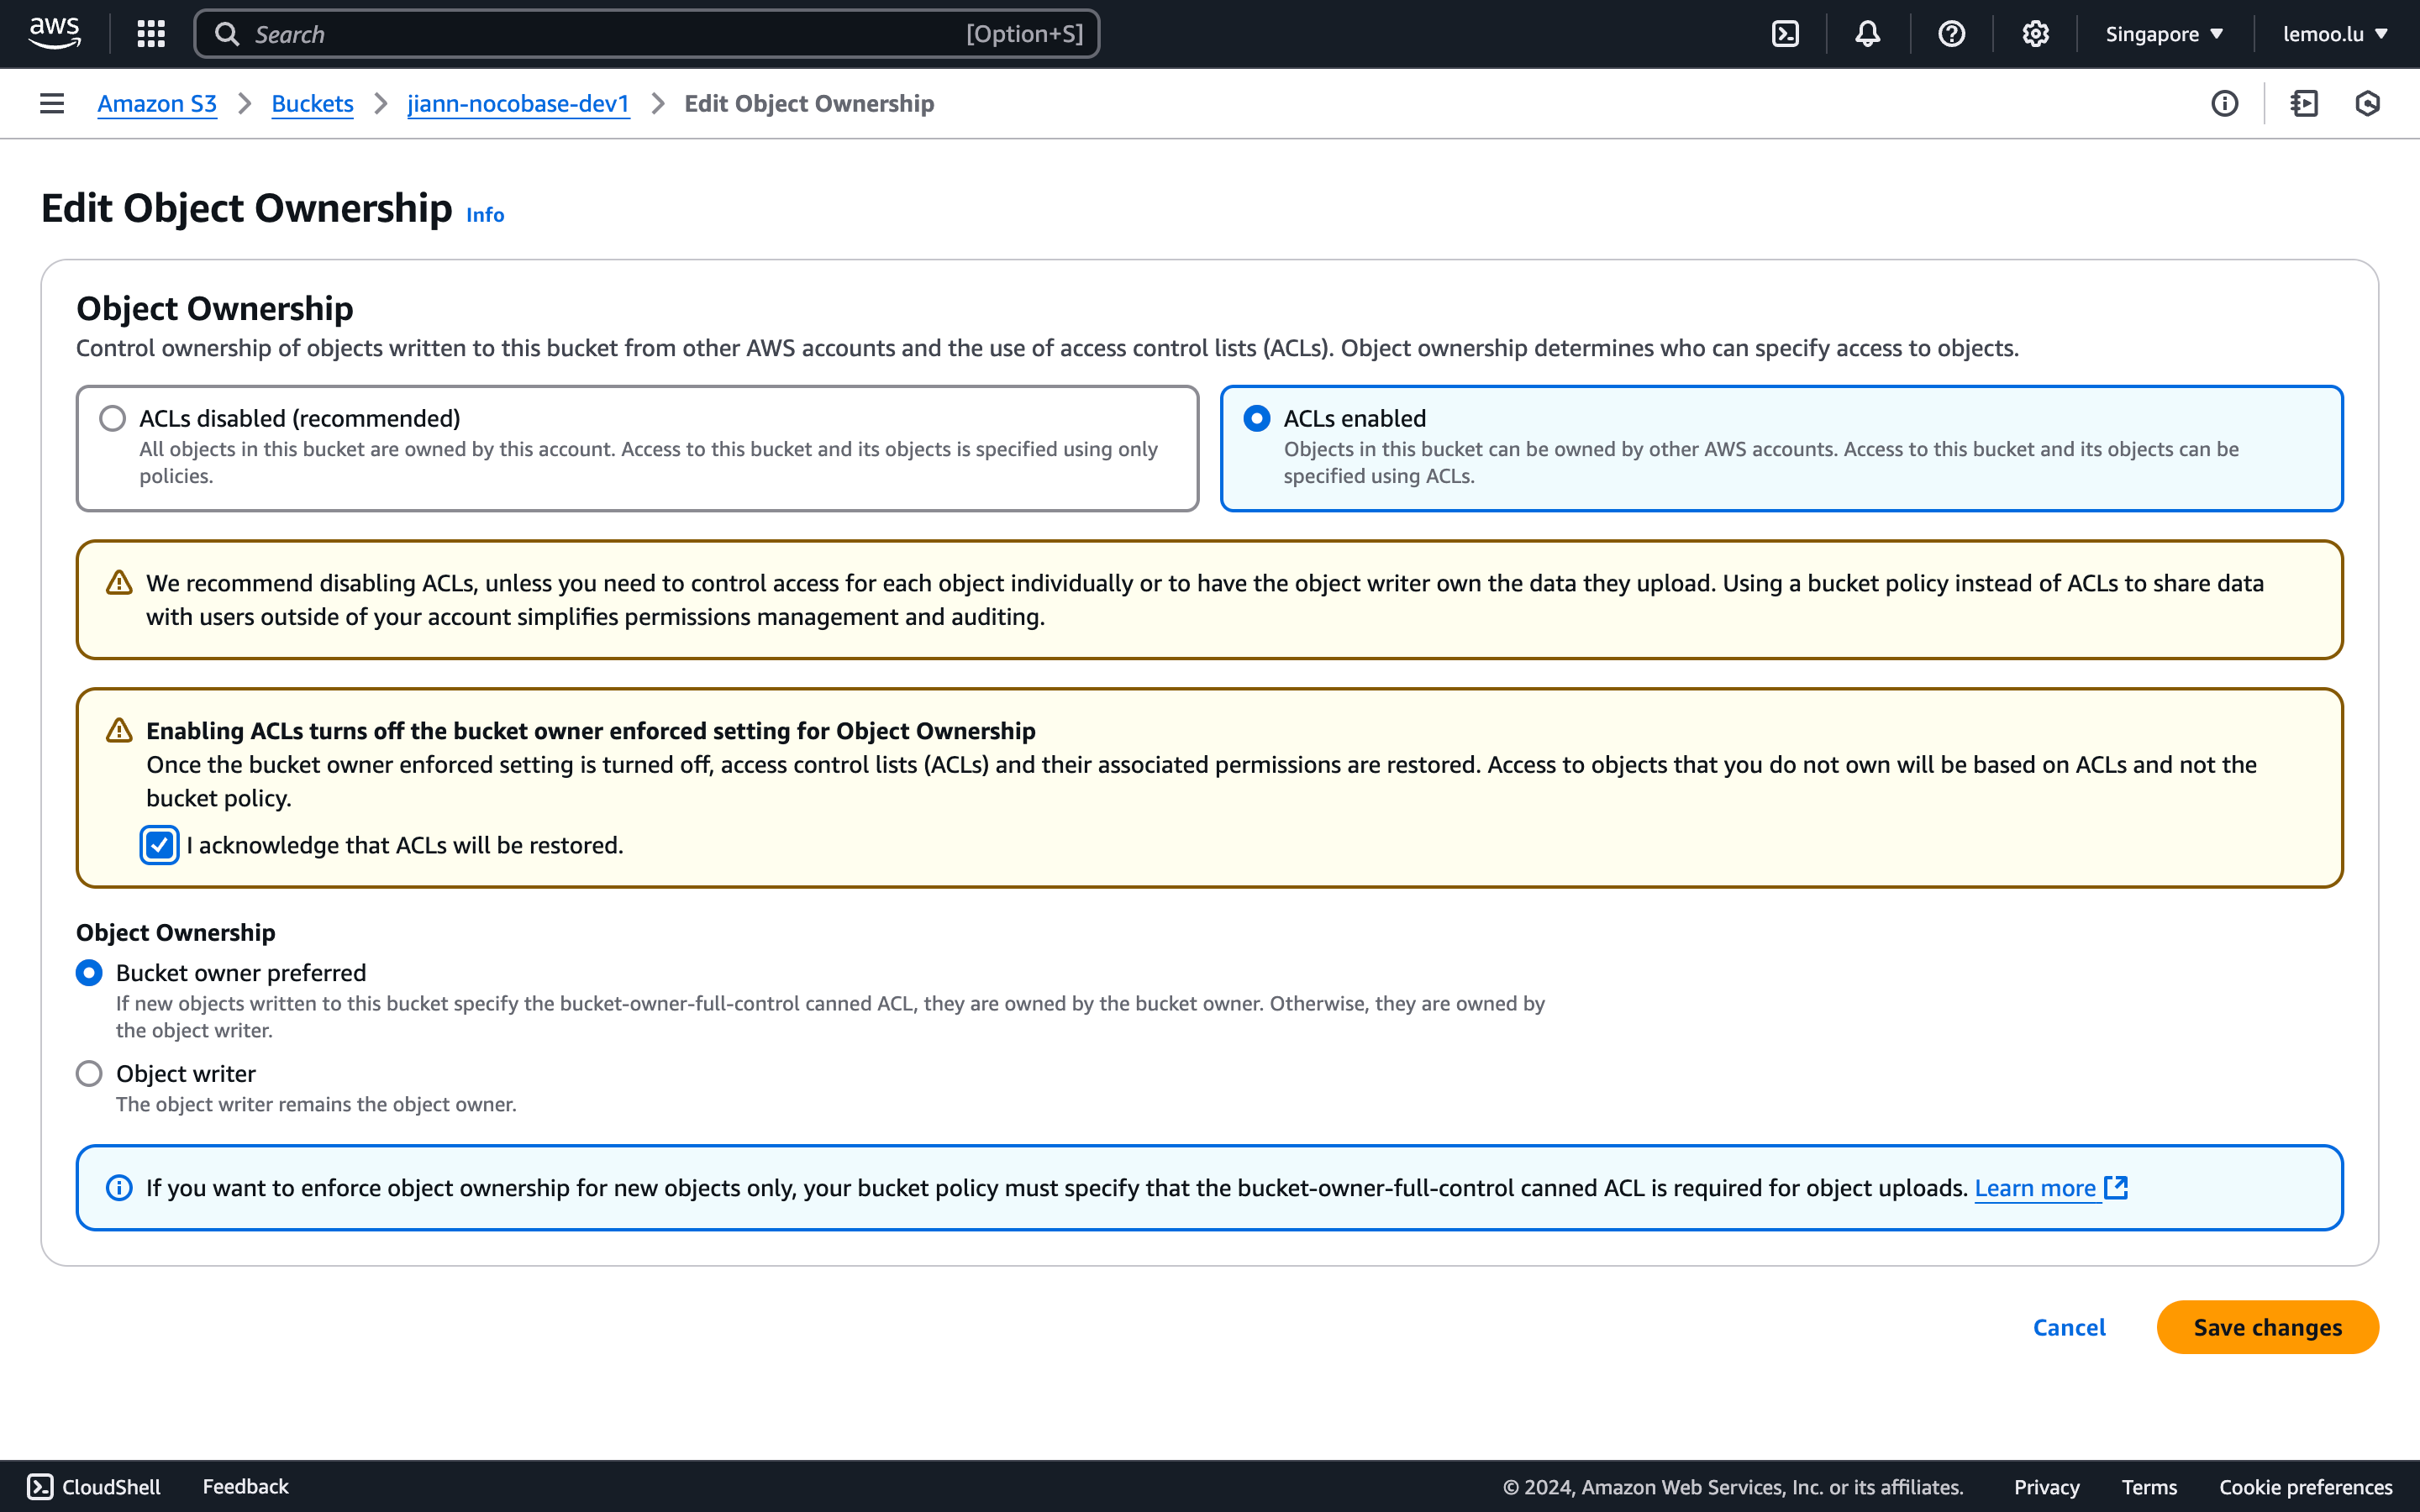
- In the Permissions panel, scroll to "Object Ownership," click "Edit," and enable ACLs.
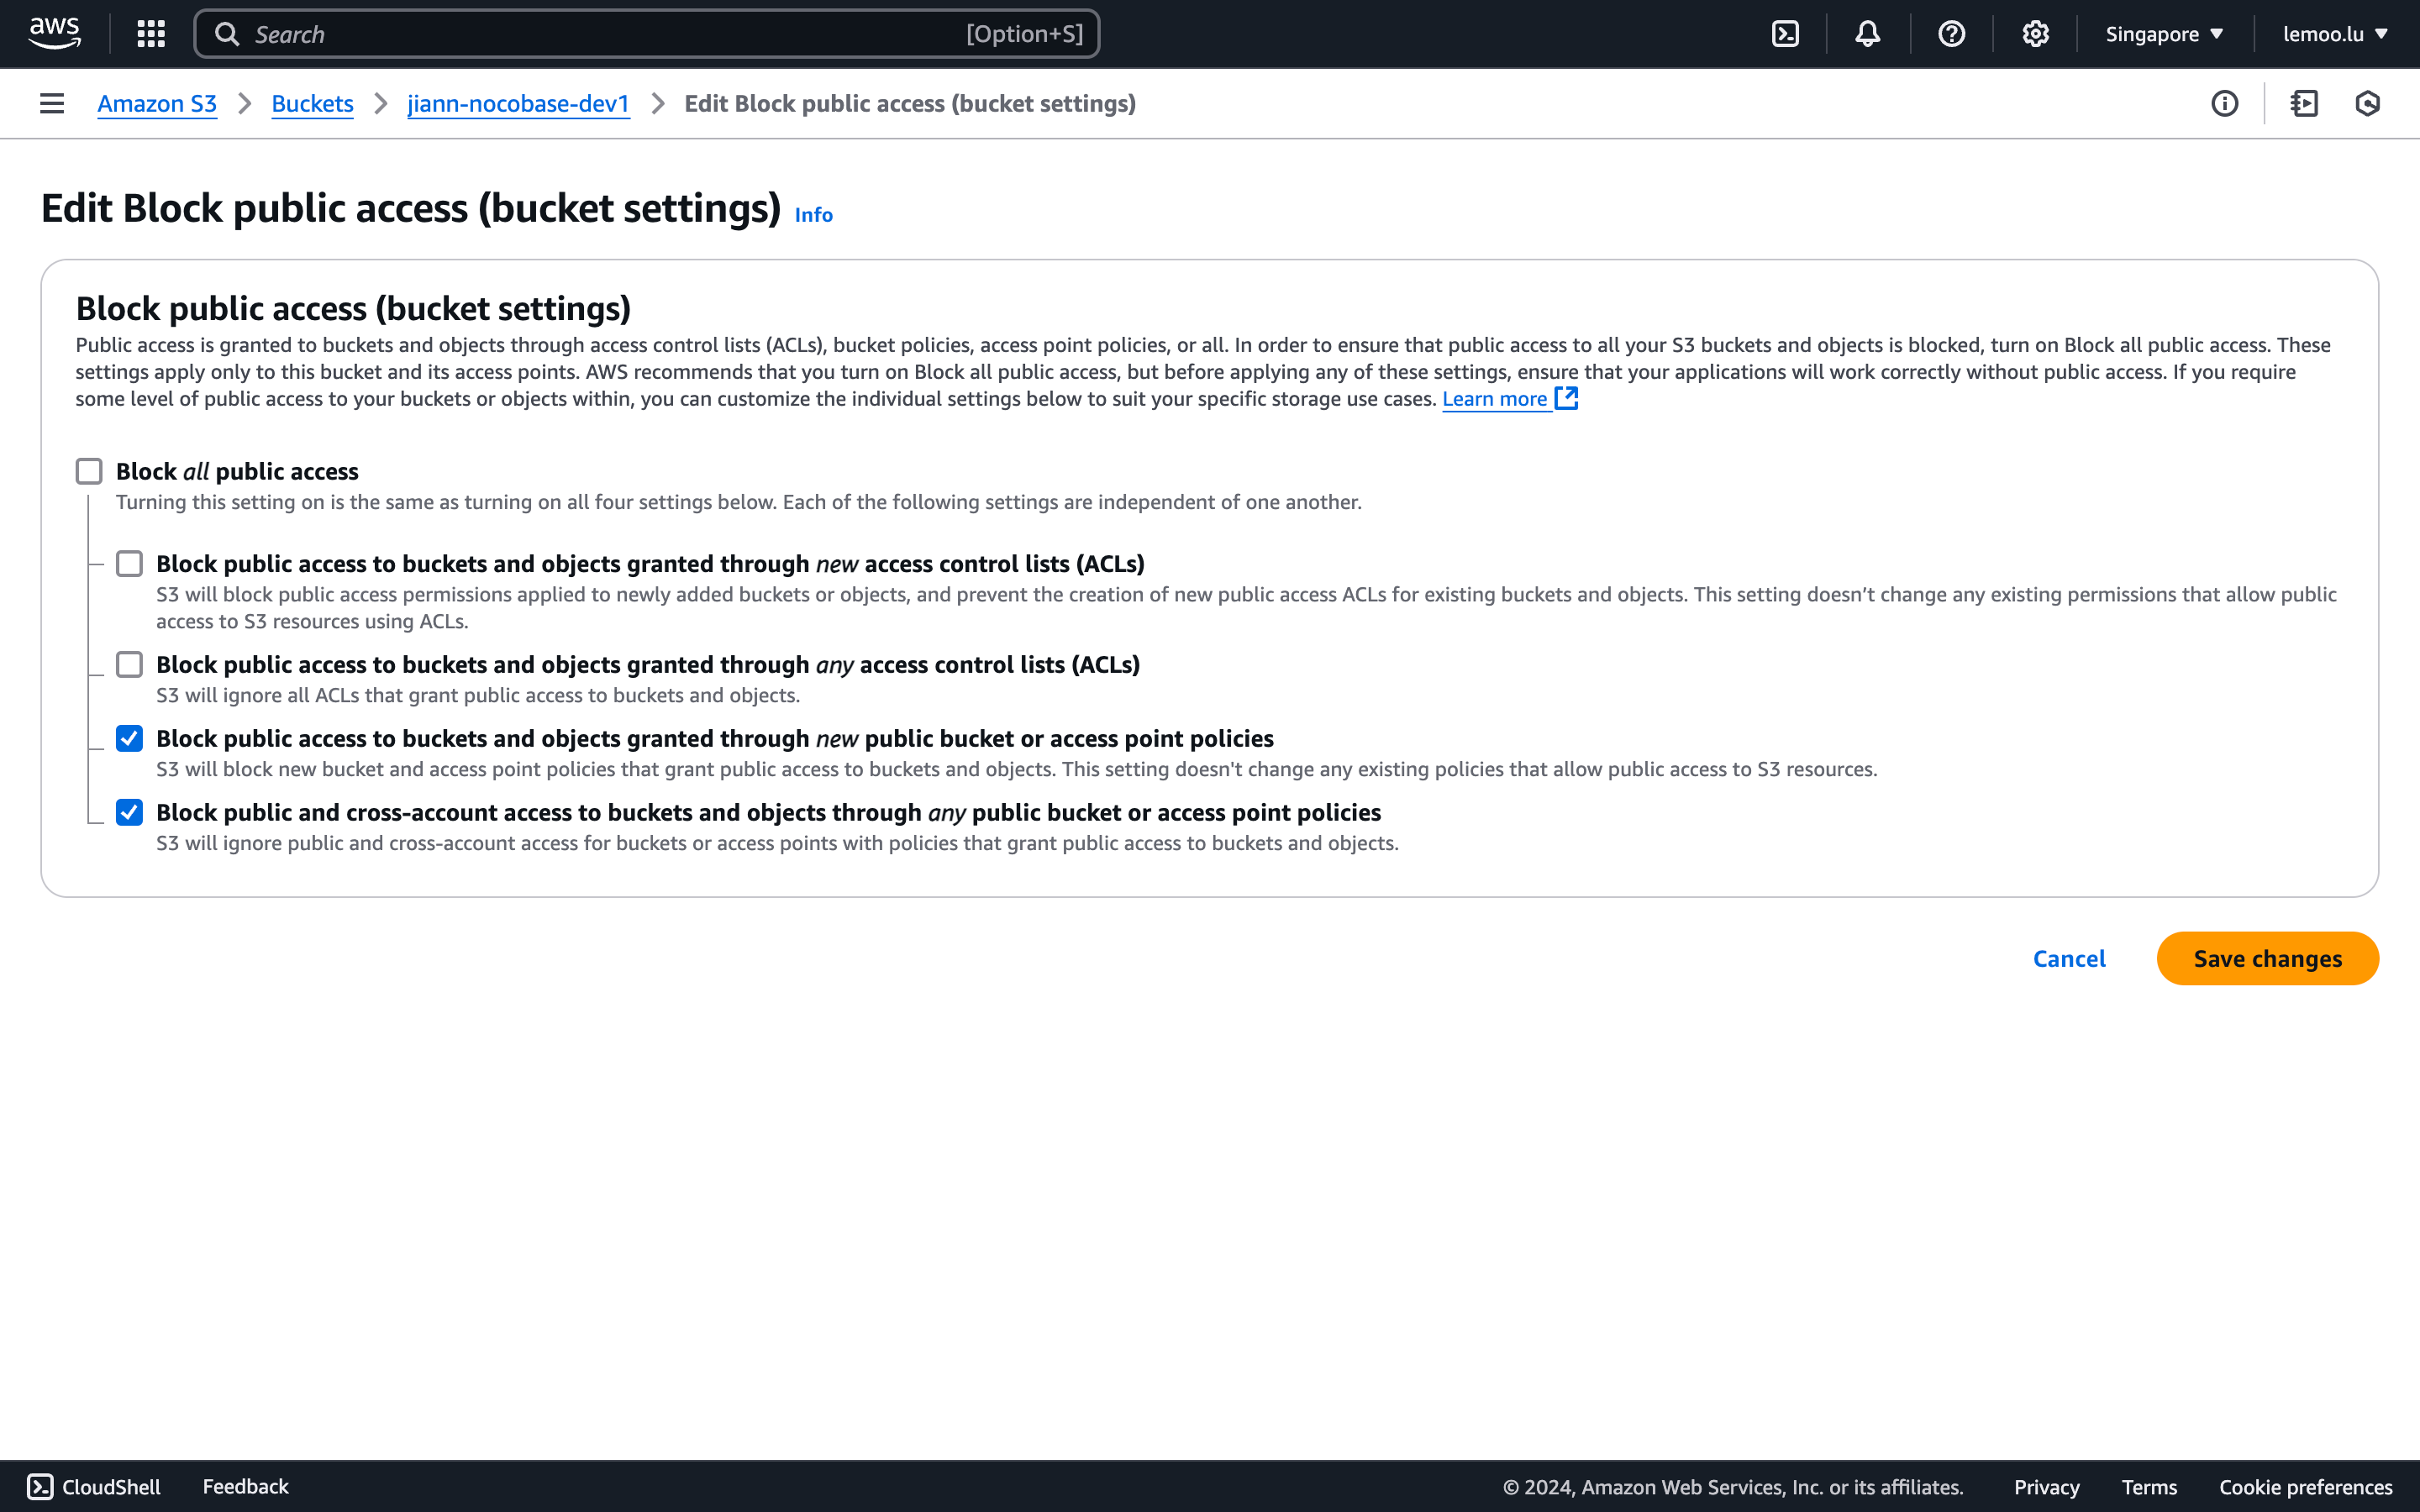
- Scroll to "Block public access," click "Edit," and set it to allow ACL control.
- Check "Public access" in NocoBase.
Thumbnail Configuration (Optional)
This configuration is optional and should be used when you need to optimize the image preview size or effect. Please note, this deployment may incur additional costs. For more details, refer to AWS's terms and pricing.
-
Click the
Launch in the AWS Consolebutton at the bottom of the page to start the deployment.
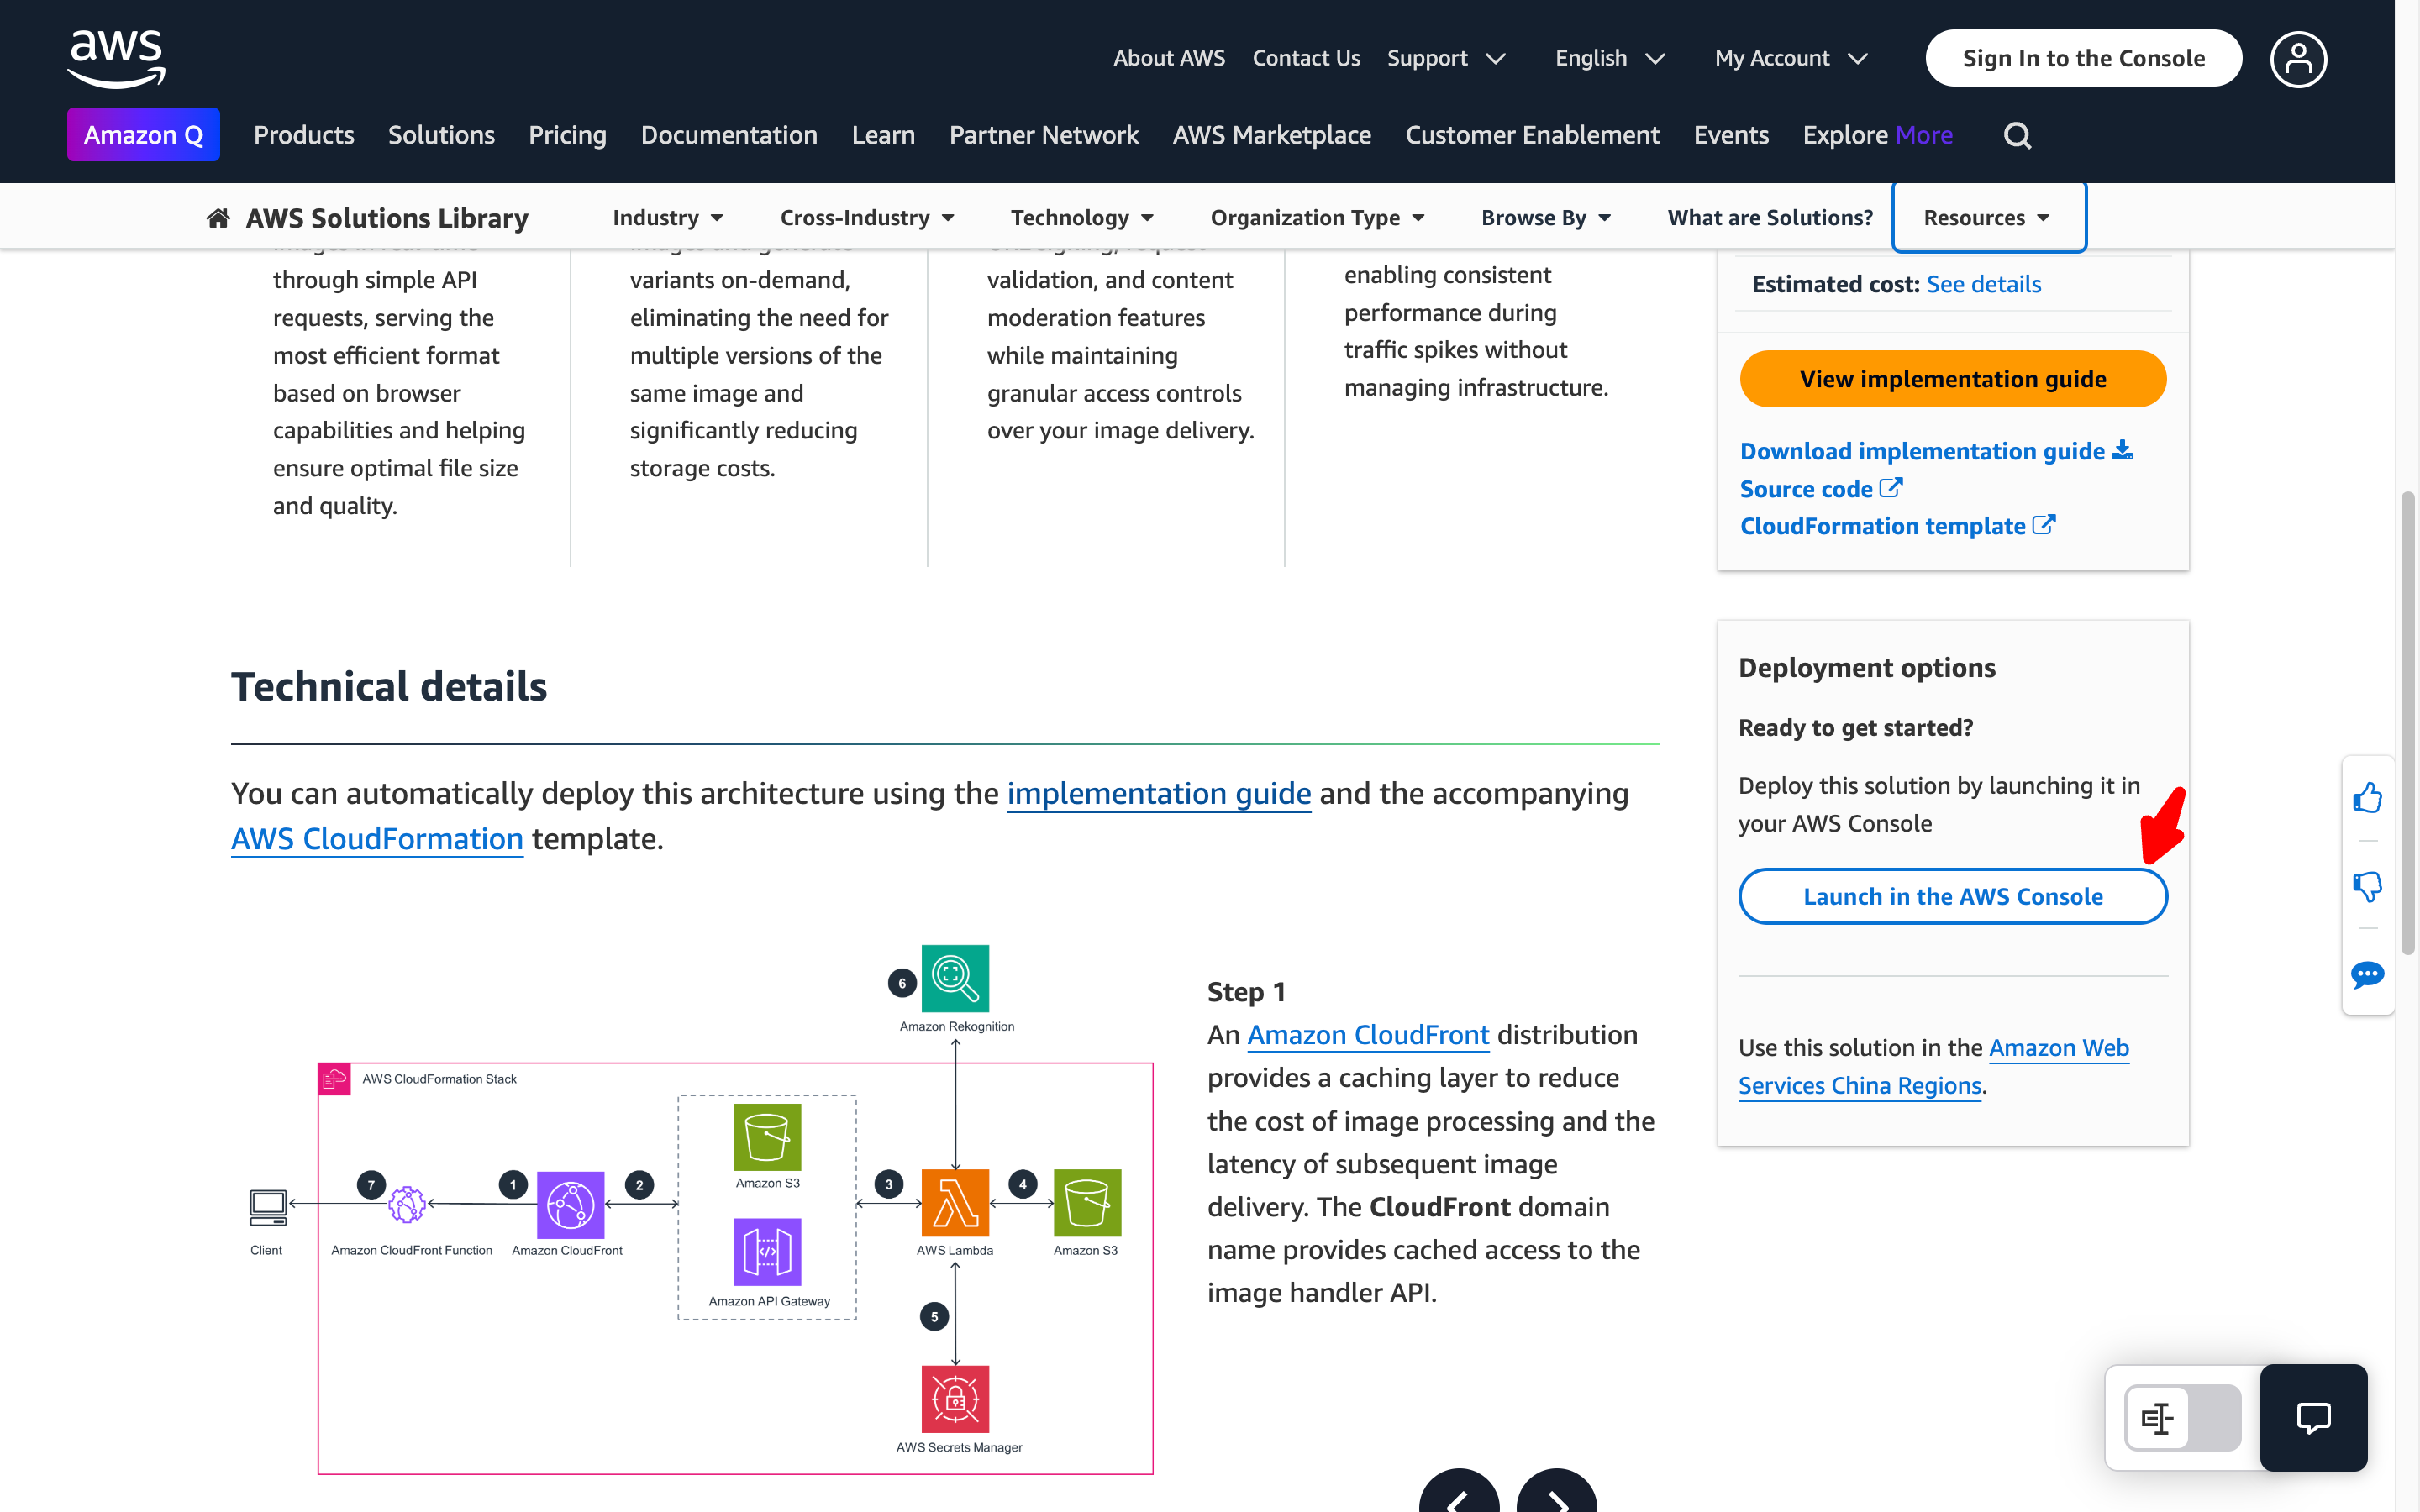
- Follow the prompts to complete the configuration. The following options need special attention:
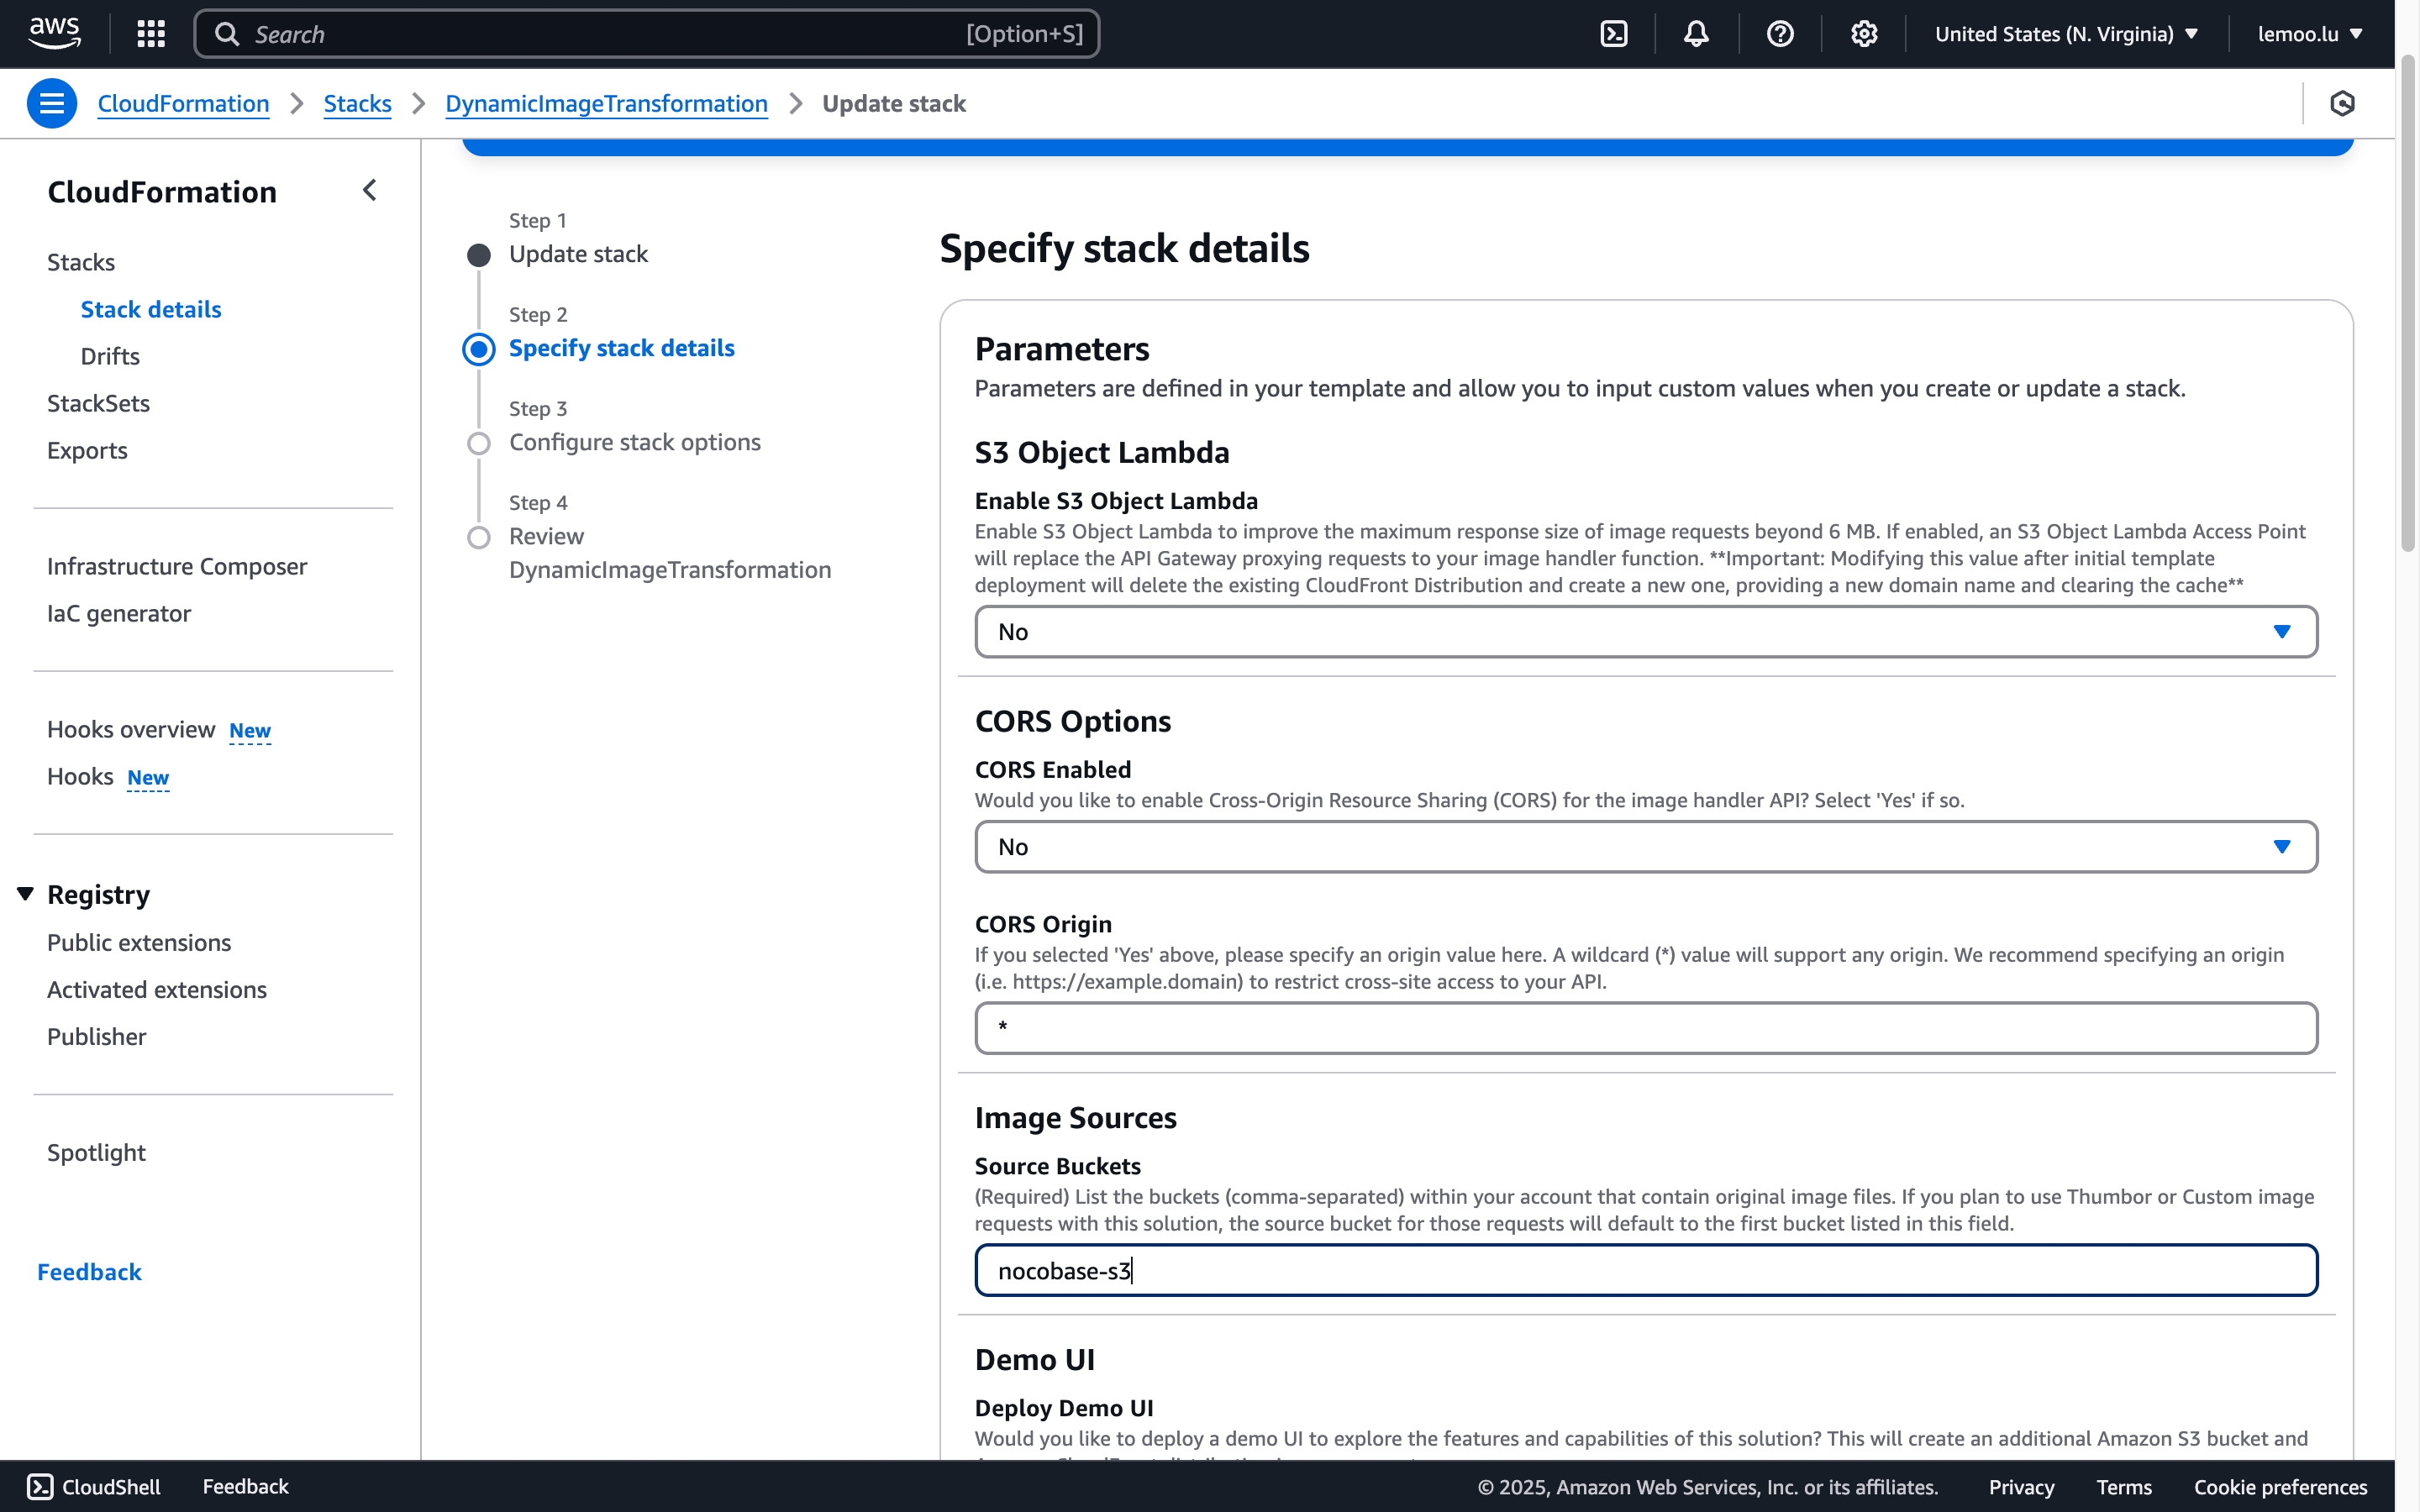
- When creating the stack, you need to specify the Amazon S3 bucket name that contains the source images. Please enter the bucket name you created earlier.
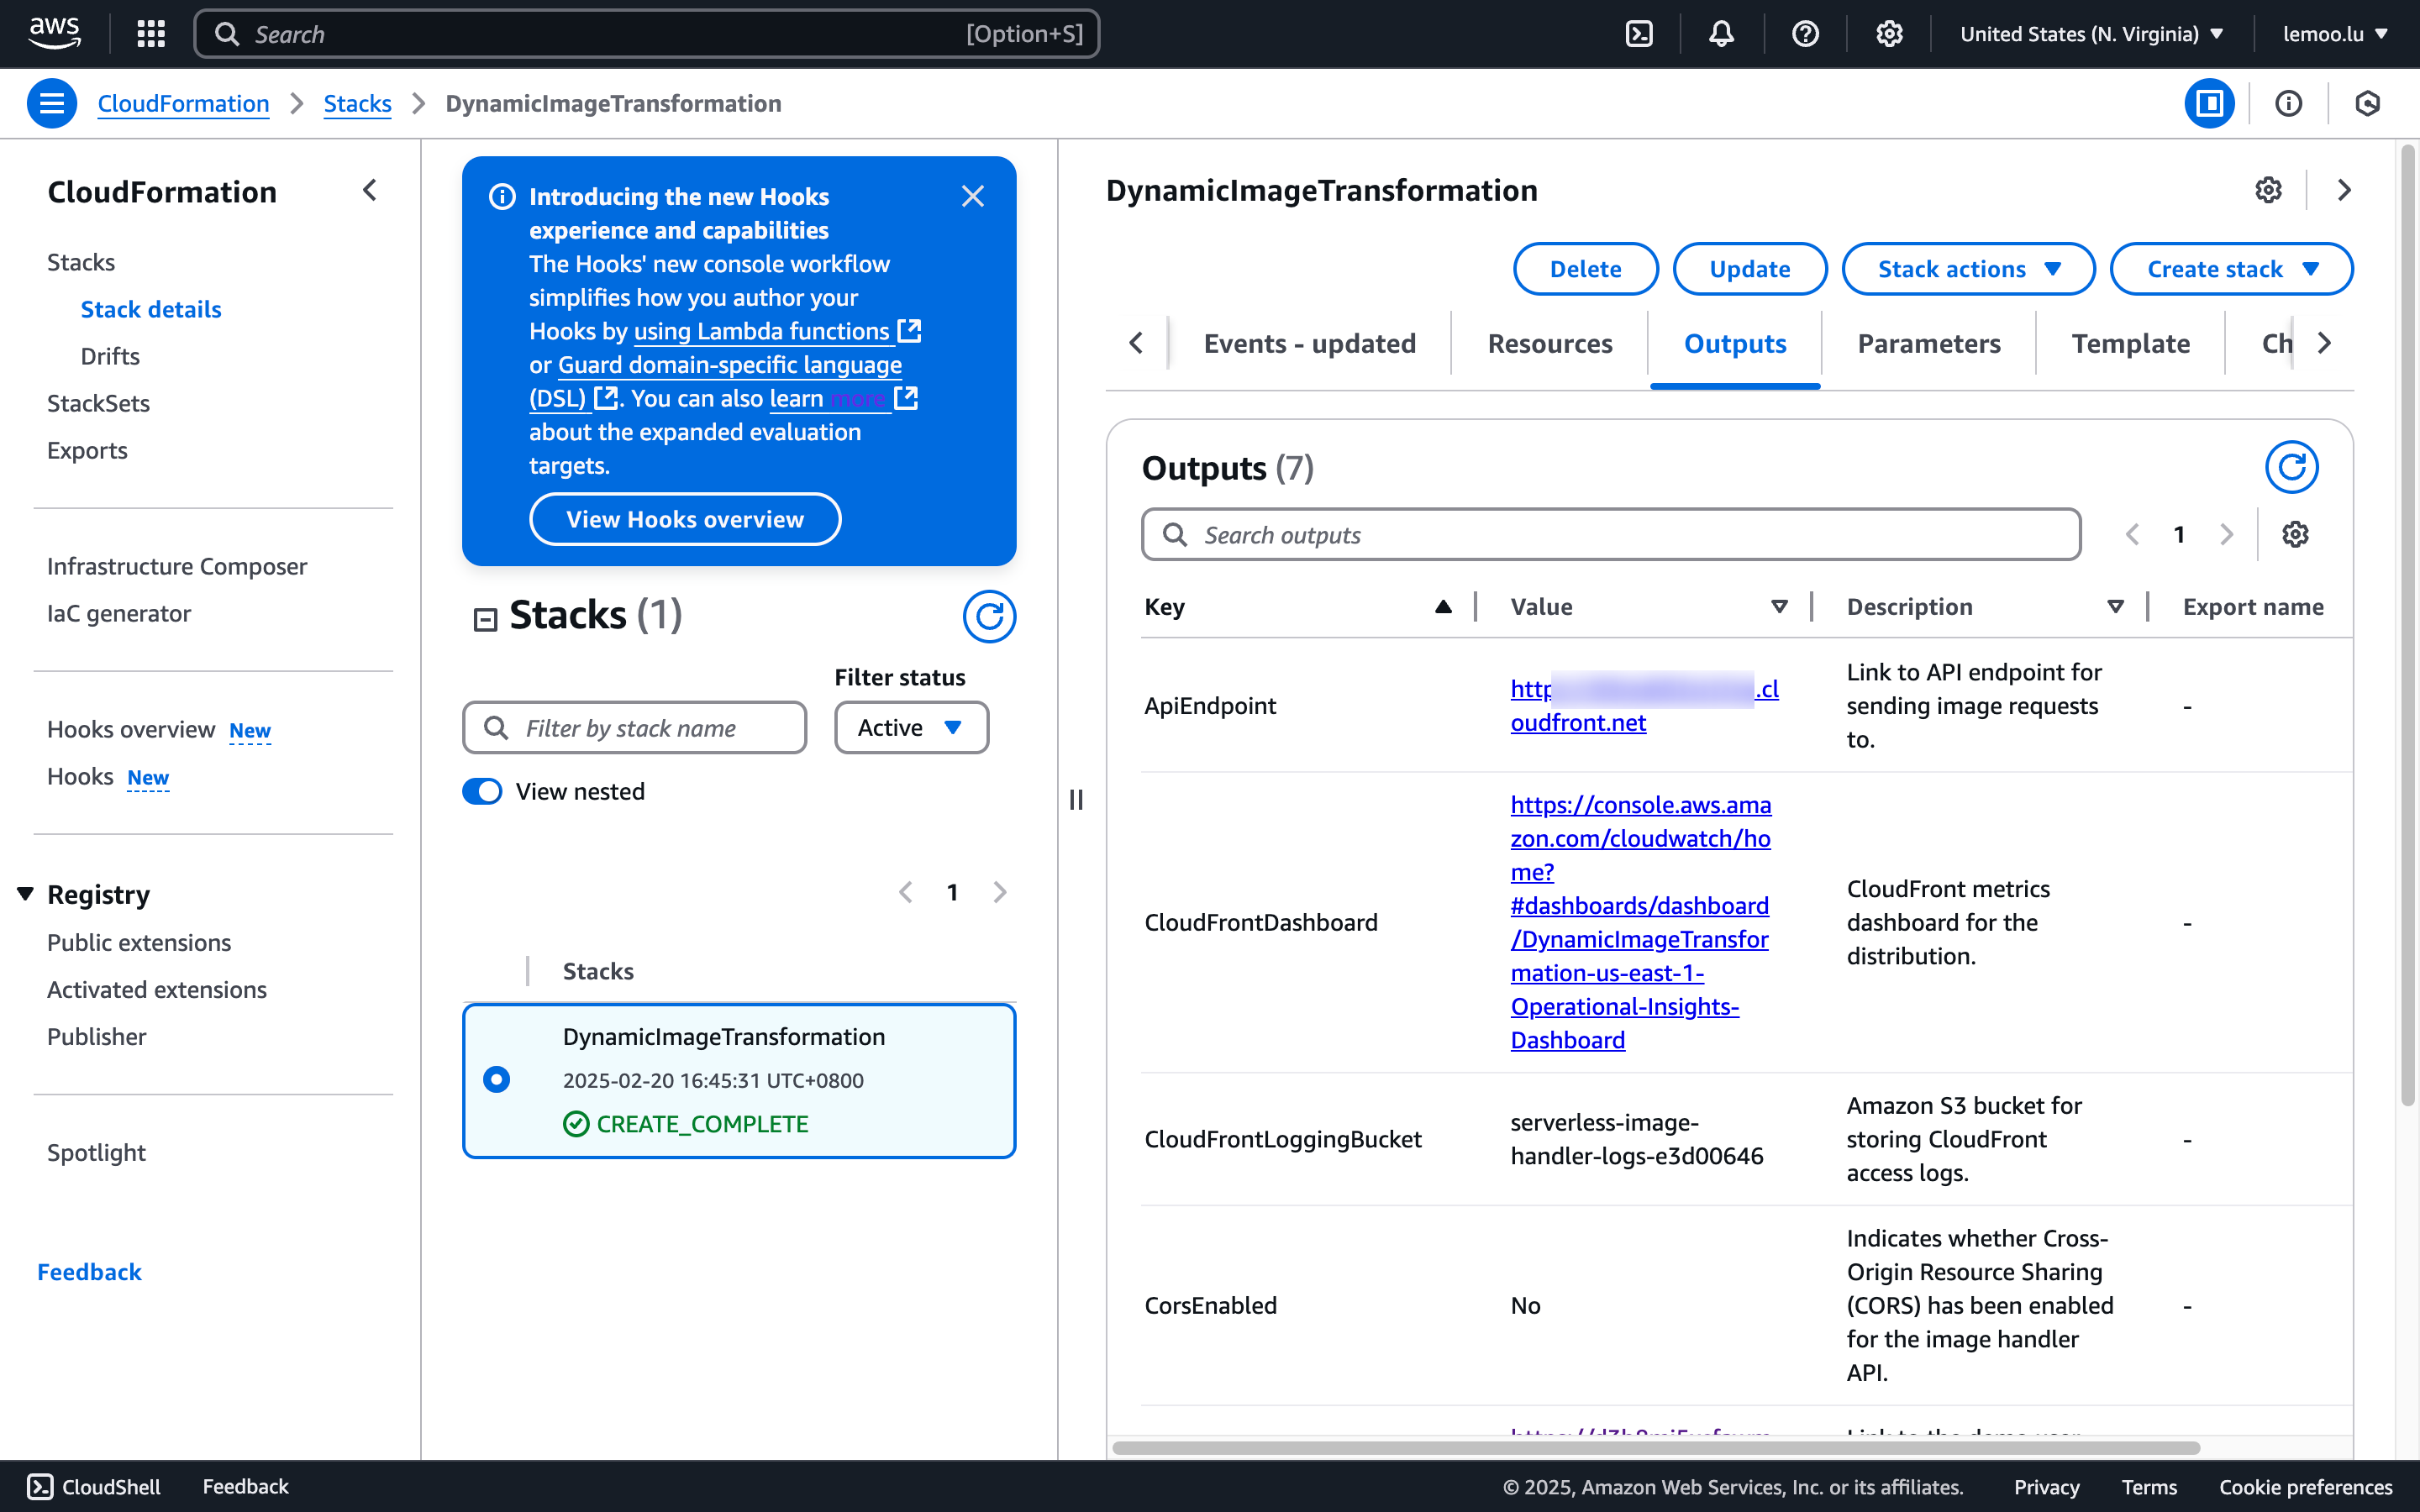
- If you chose to deploy the demo UI, after deployment, you can use the UI to test the image processing functionality. In the AWS CloudFormation console, select your stack, go to the "Outputs" tab, find the value corresponding to the
DemoUrlkey, and click the link to open the demo interface. - This solution uses the
sharpNode.js library for efficient image processing. You can download the source code from the GitHub repository and customize it as needed.
-
Once the configuration is complete, wait for the deployment status to change to
CREATE_COMPLETE. -
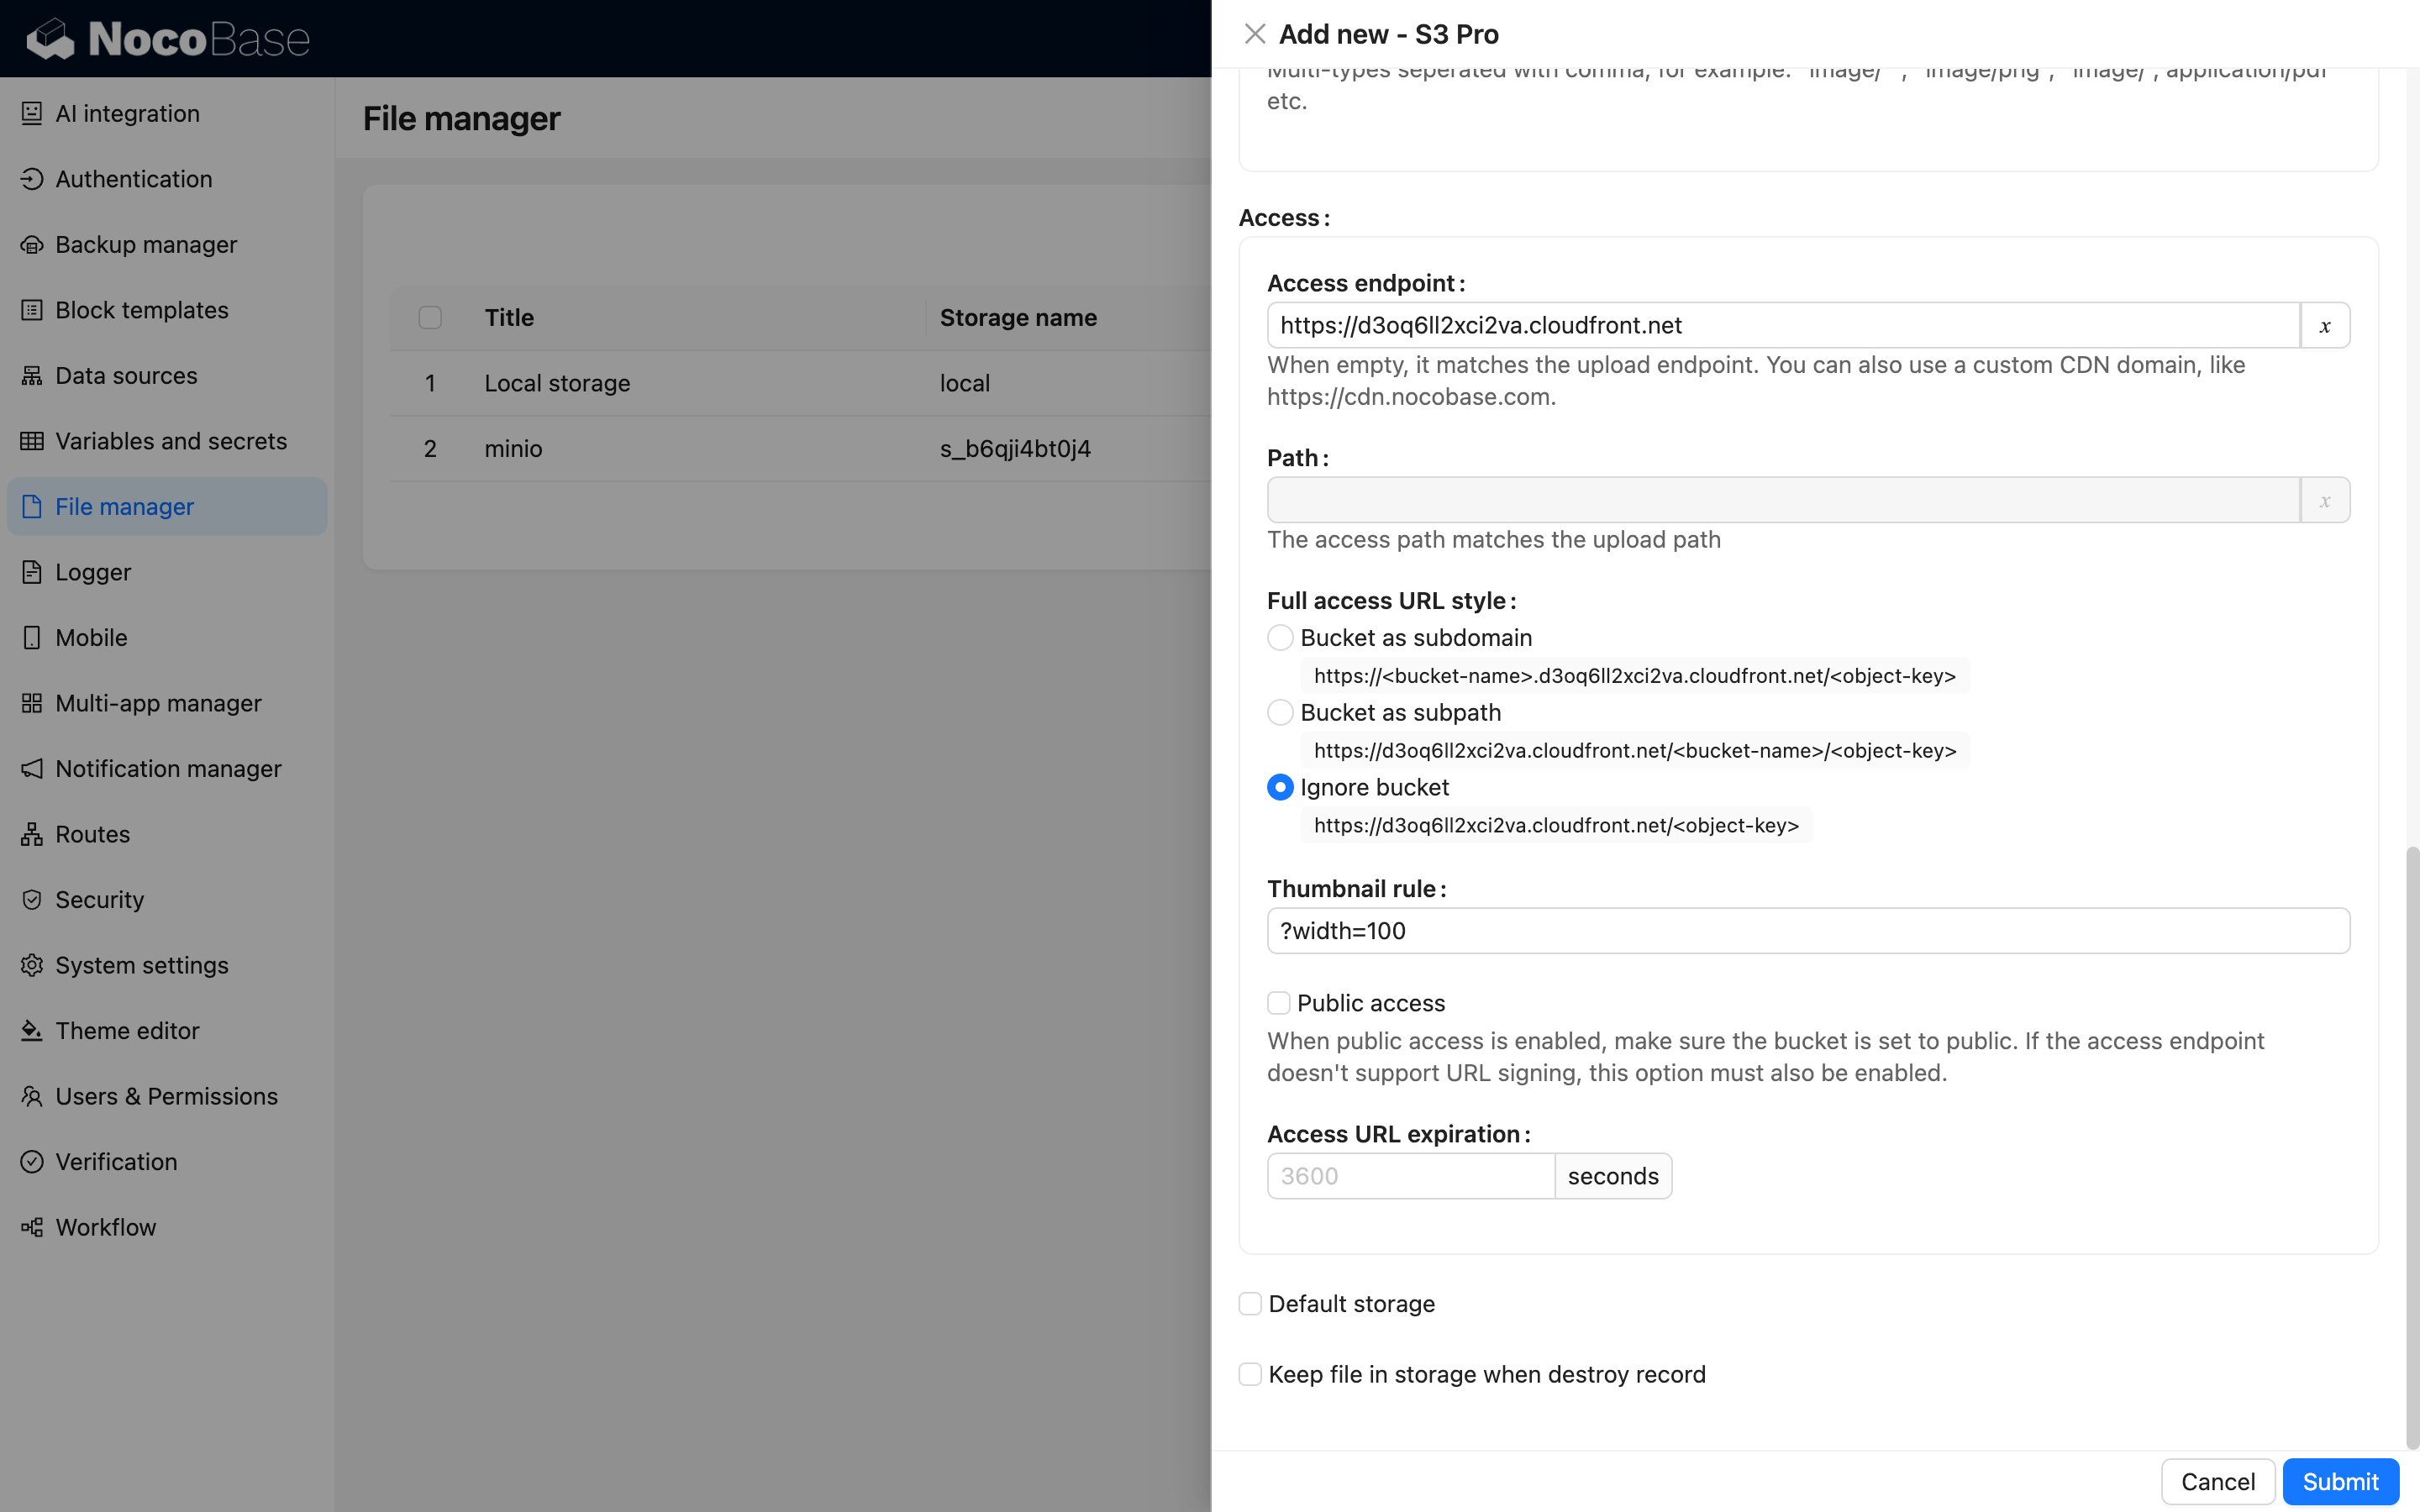
In the NocoBase configuration, please note the following:
Thumbnail rule: Fill in the image processing parameters, such as?width=100. For details, refer to the AWS documentation.Access endpoint: Enter the value from Outputs -> ApiEndpoint after deployment.Full access URL style: Select Ignore (as the bucket name has already been filled in the configuration, it is not needed for access).
Configuration Example
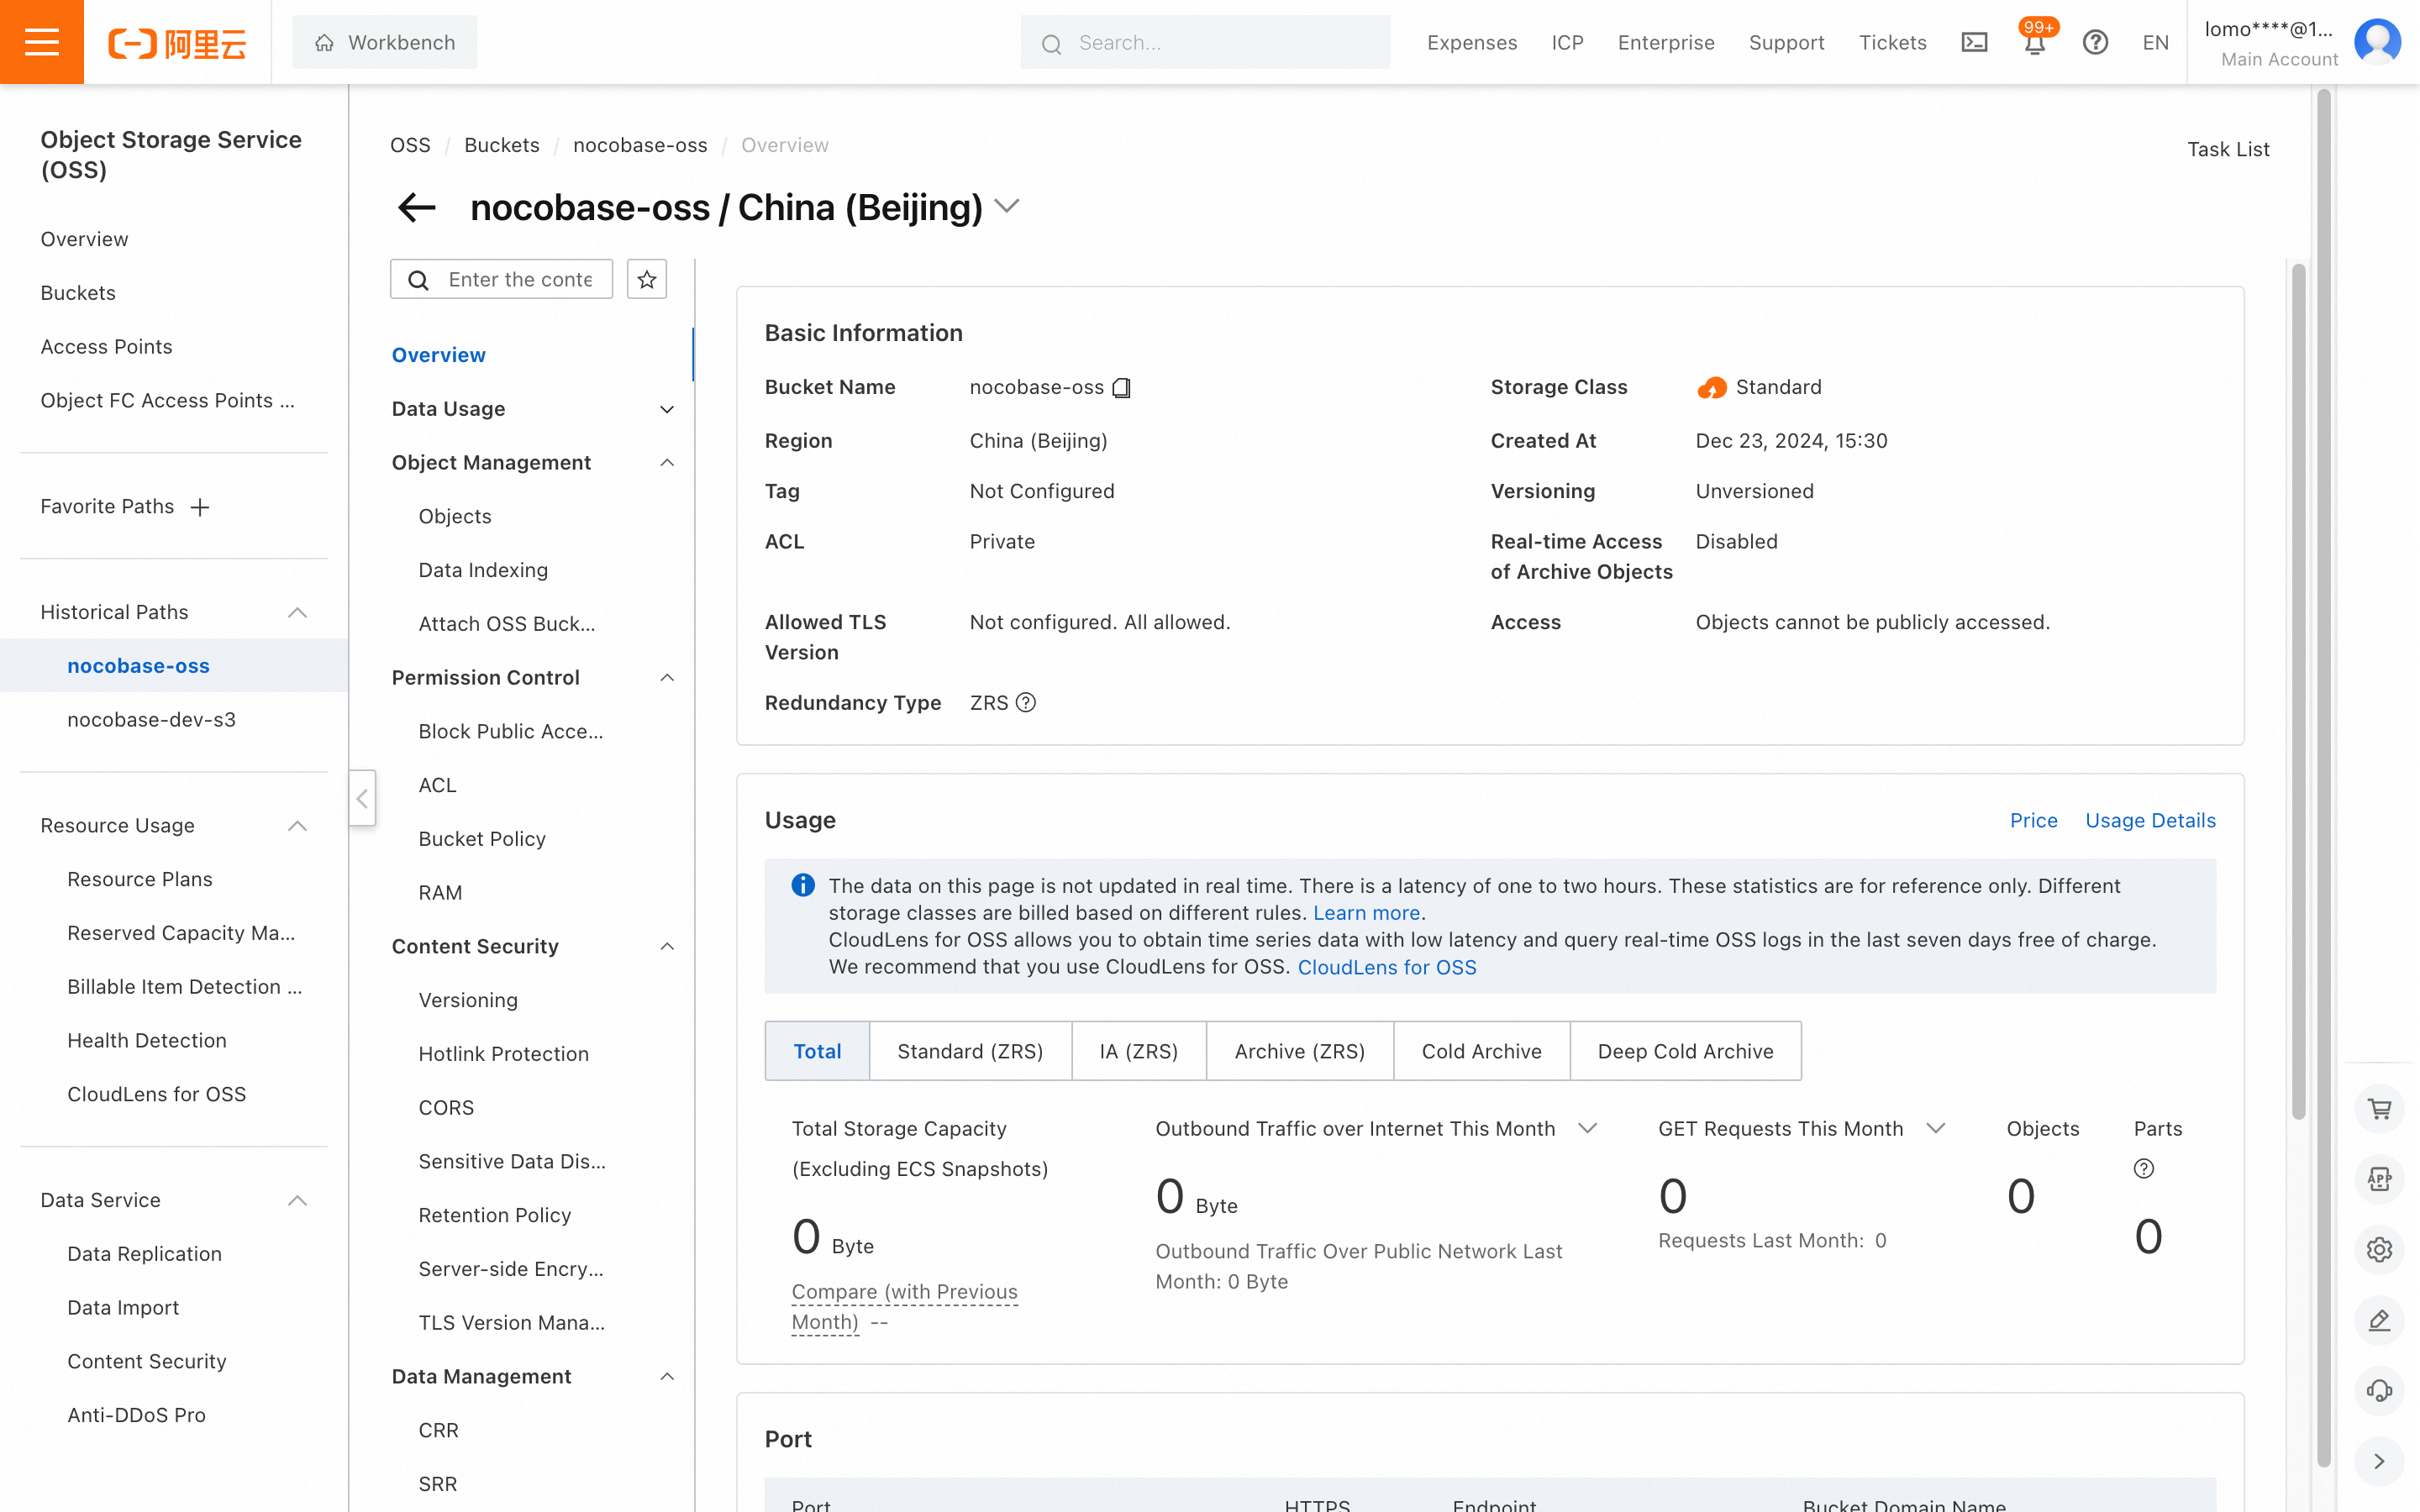
Alibaba Cloud OSS
Bucket Creation
- Open the OSS Console.
- Select "Buckets" from the left menu and click "Create Bucket."
-
Fill in the bucket details and click "Create."
Bucket Name: Choose based on your business needs.Region: Select the nearest region for your users.- Other settings can remain default or customized as needed.
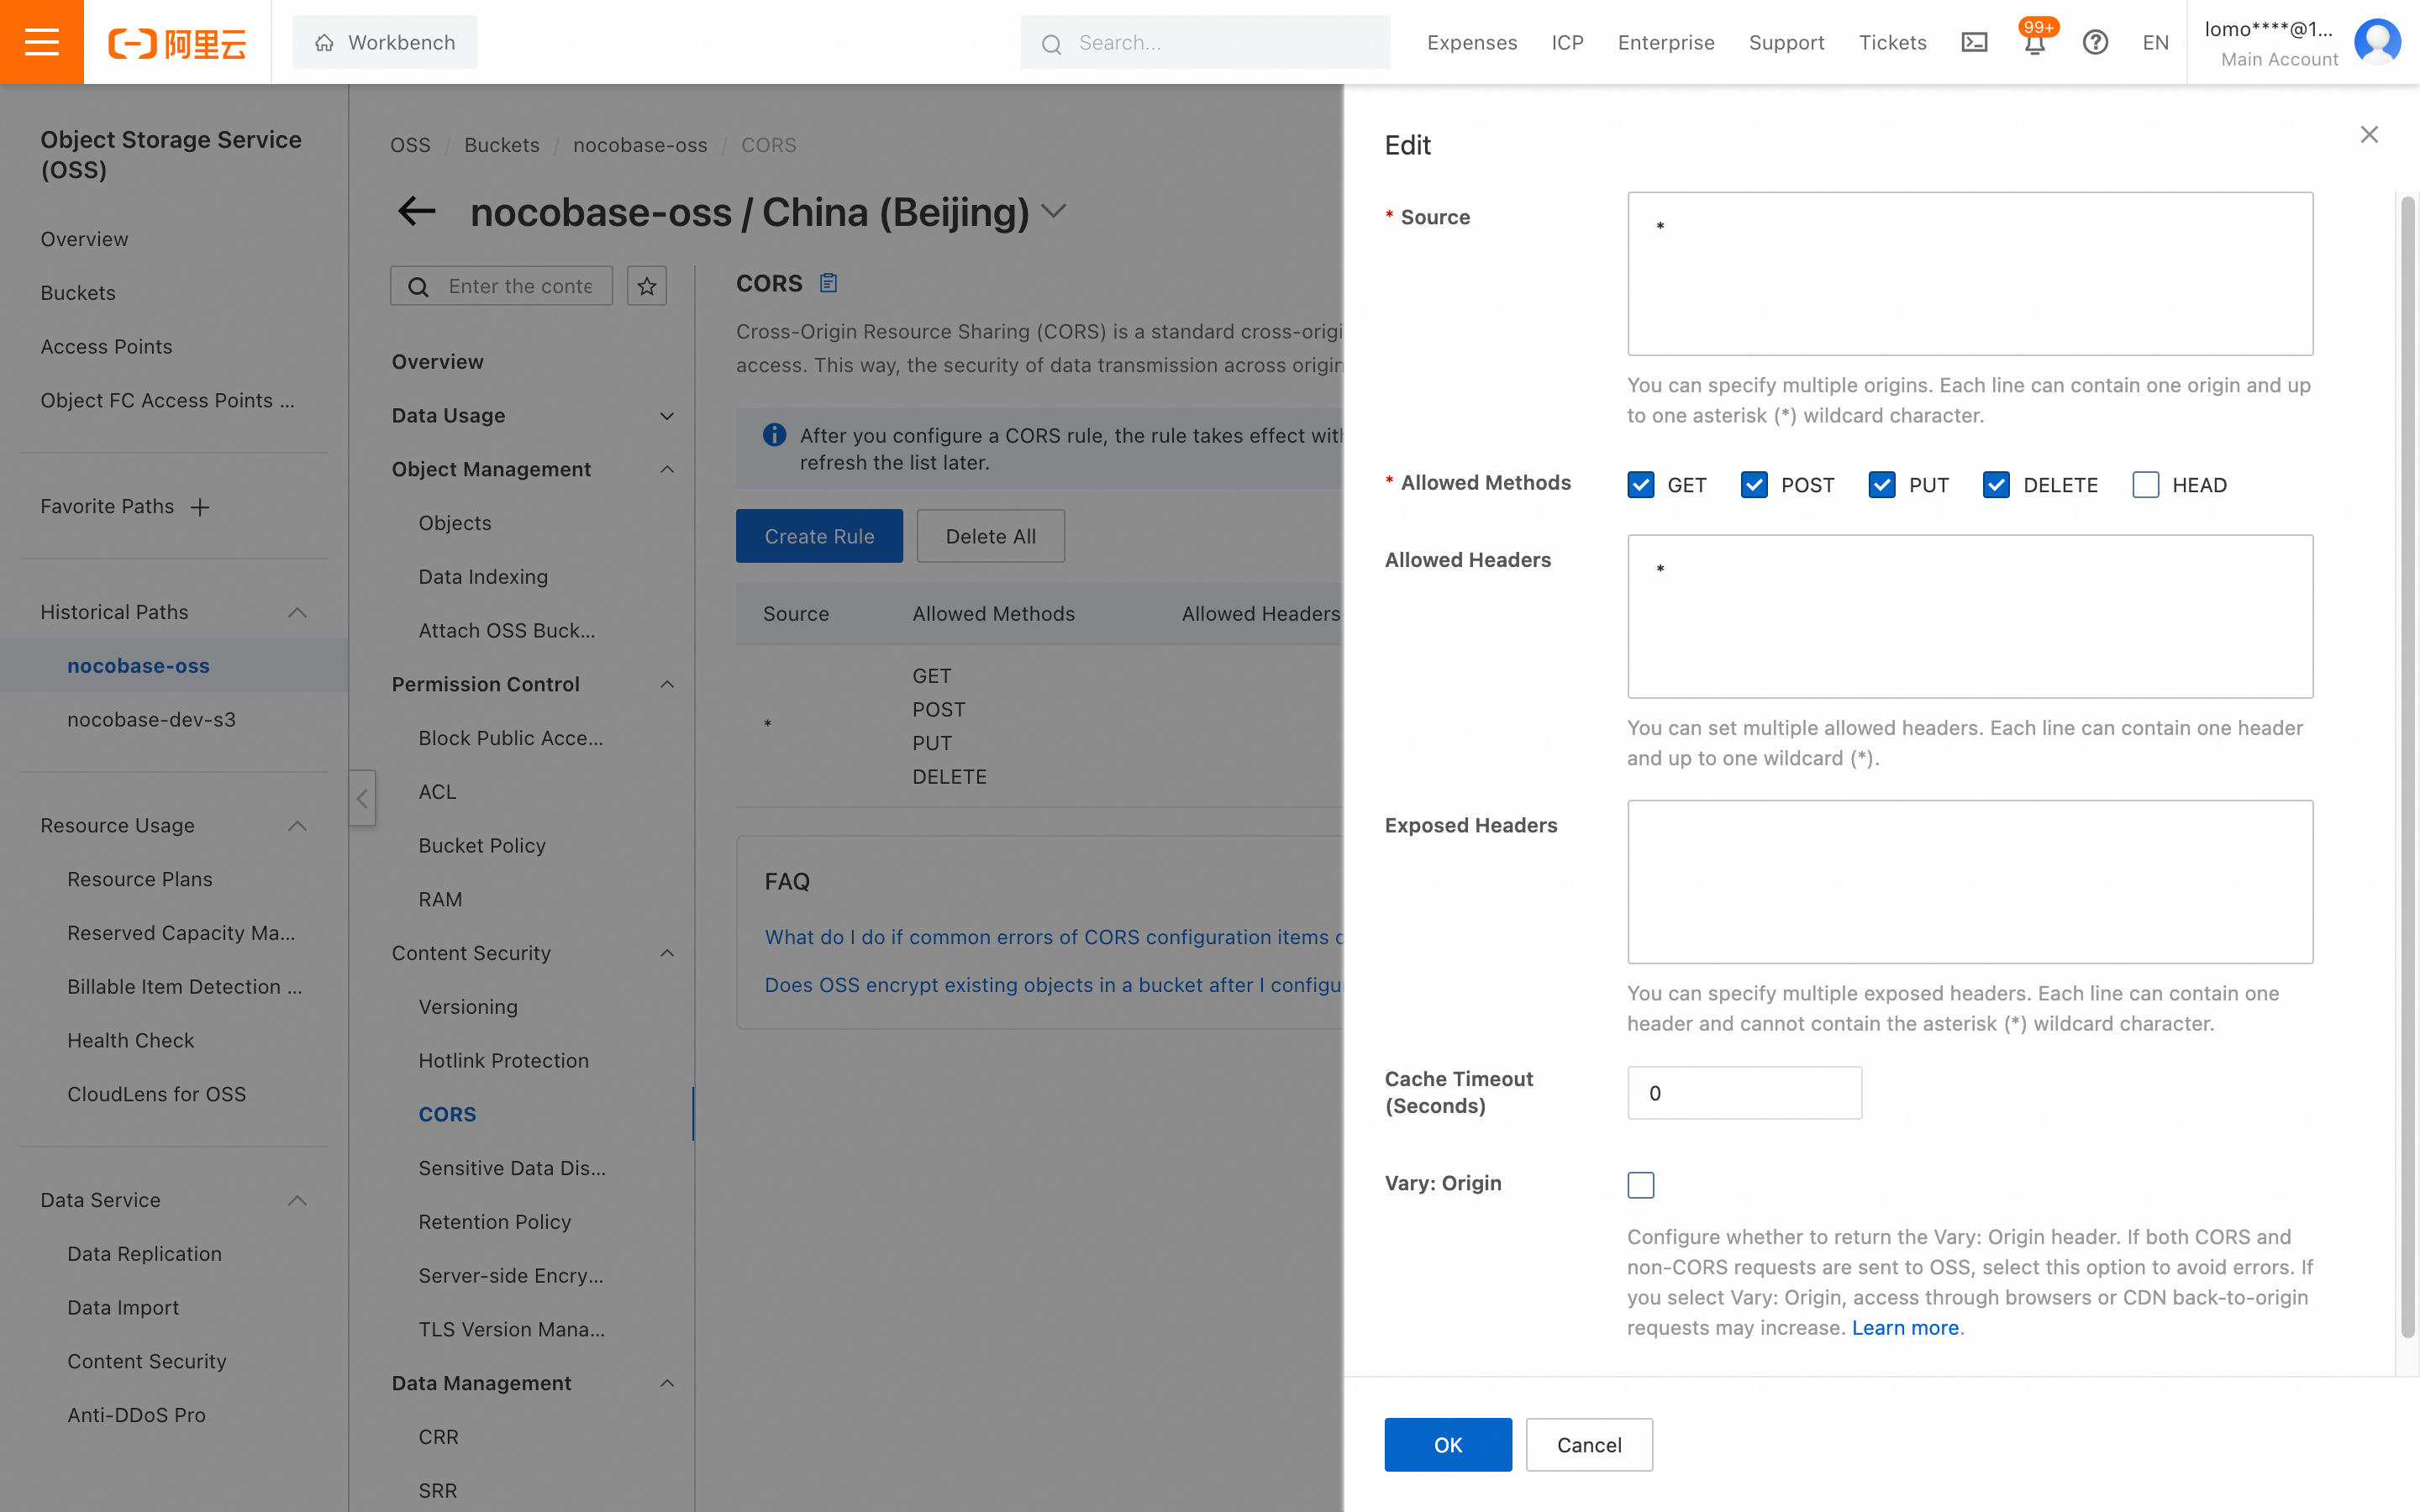
CORS Configuration
- Navigate to the bucket details page of the bucket you just created.
- Click "Content Security -> CORS" in the middle menu.
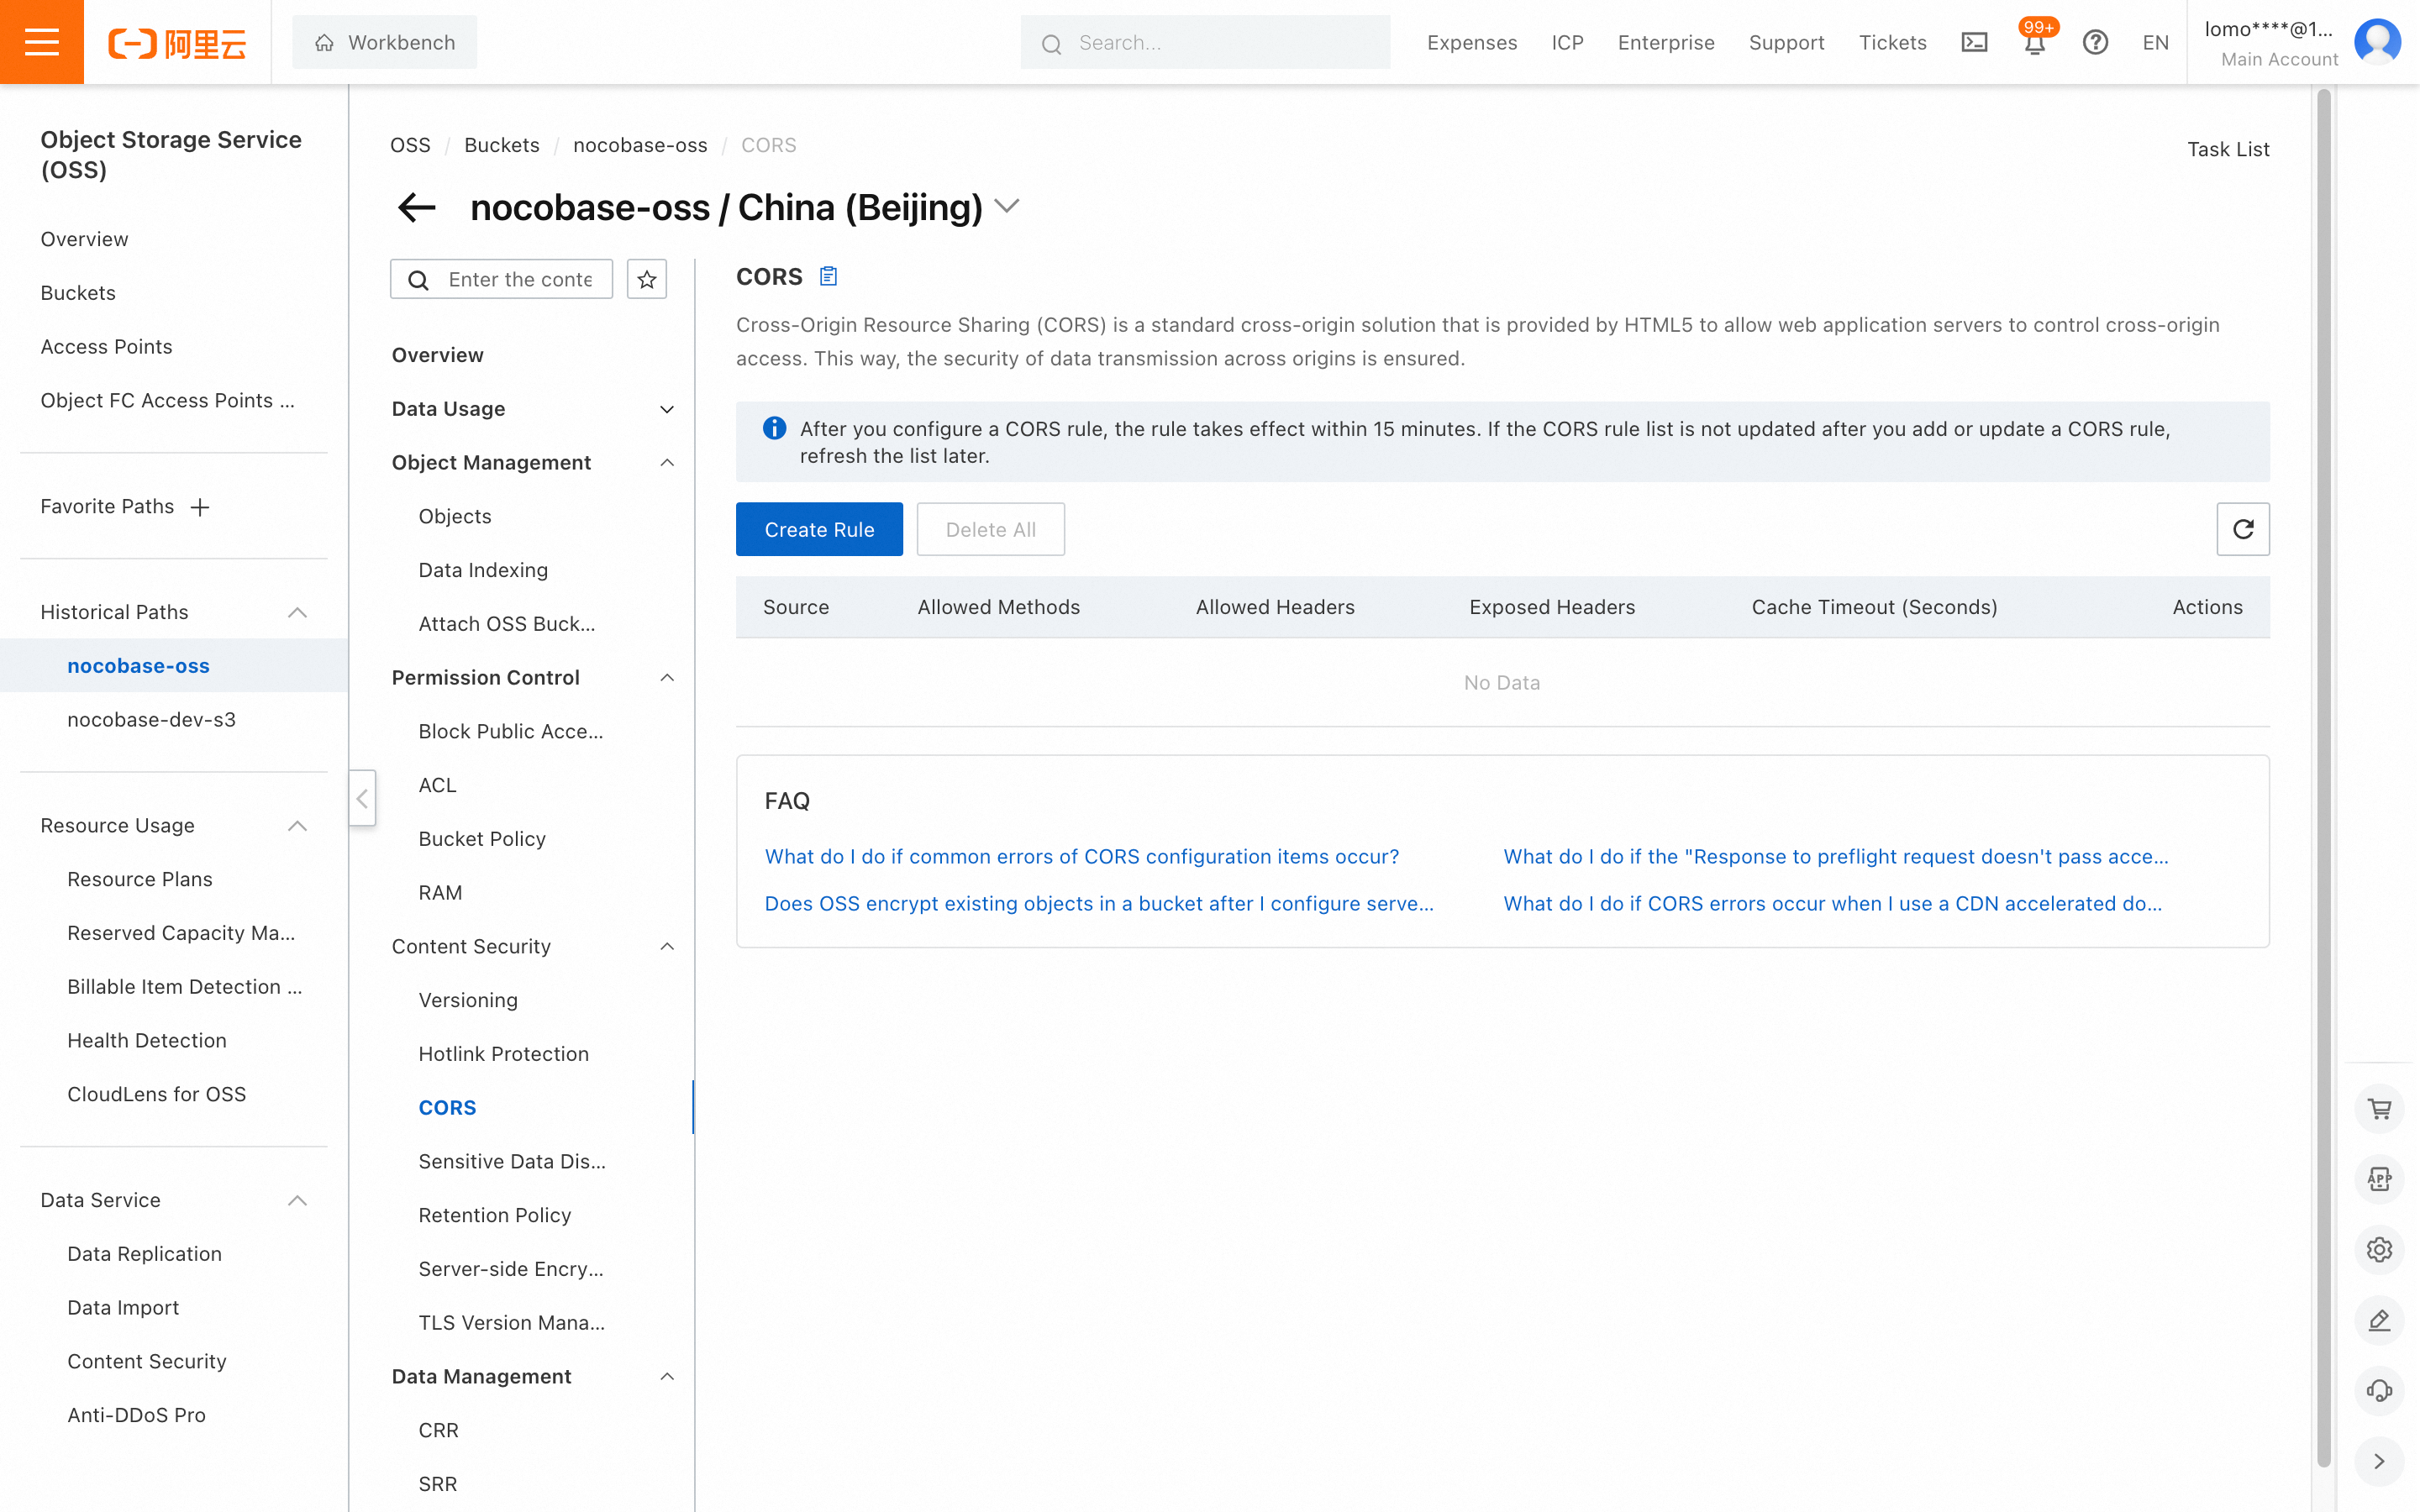
- Click "Create Rule," complete the fields, scroll down, and click "OK." You can refer to the screenshot below or configure more detailed settings.
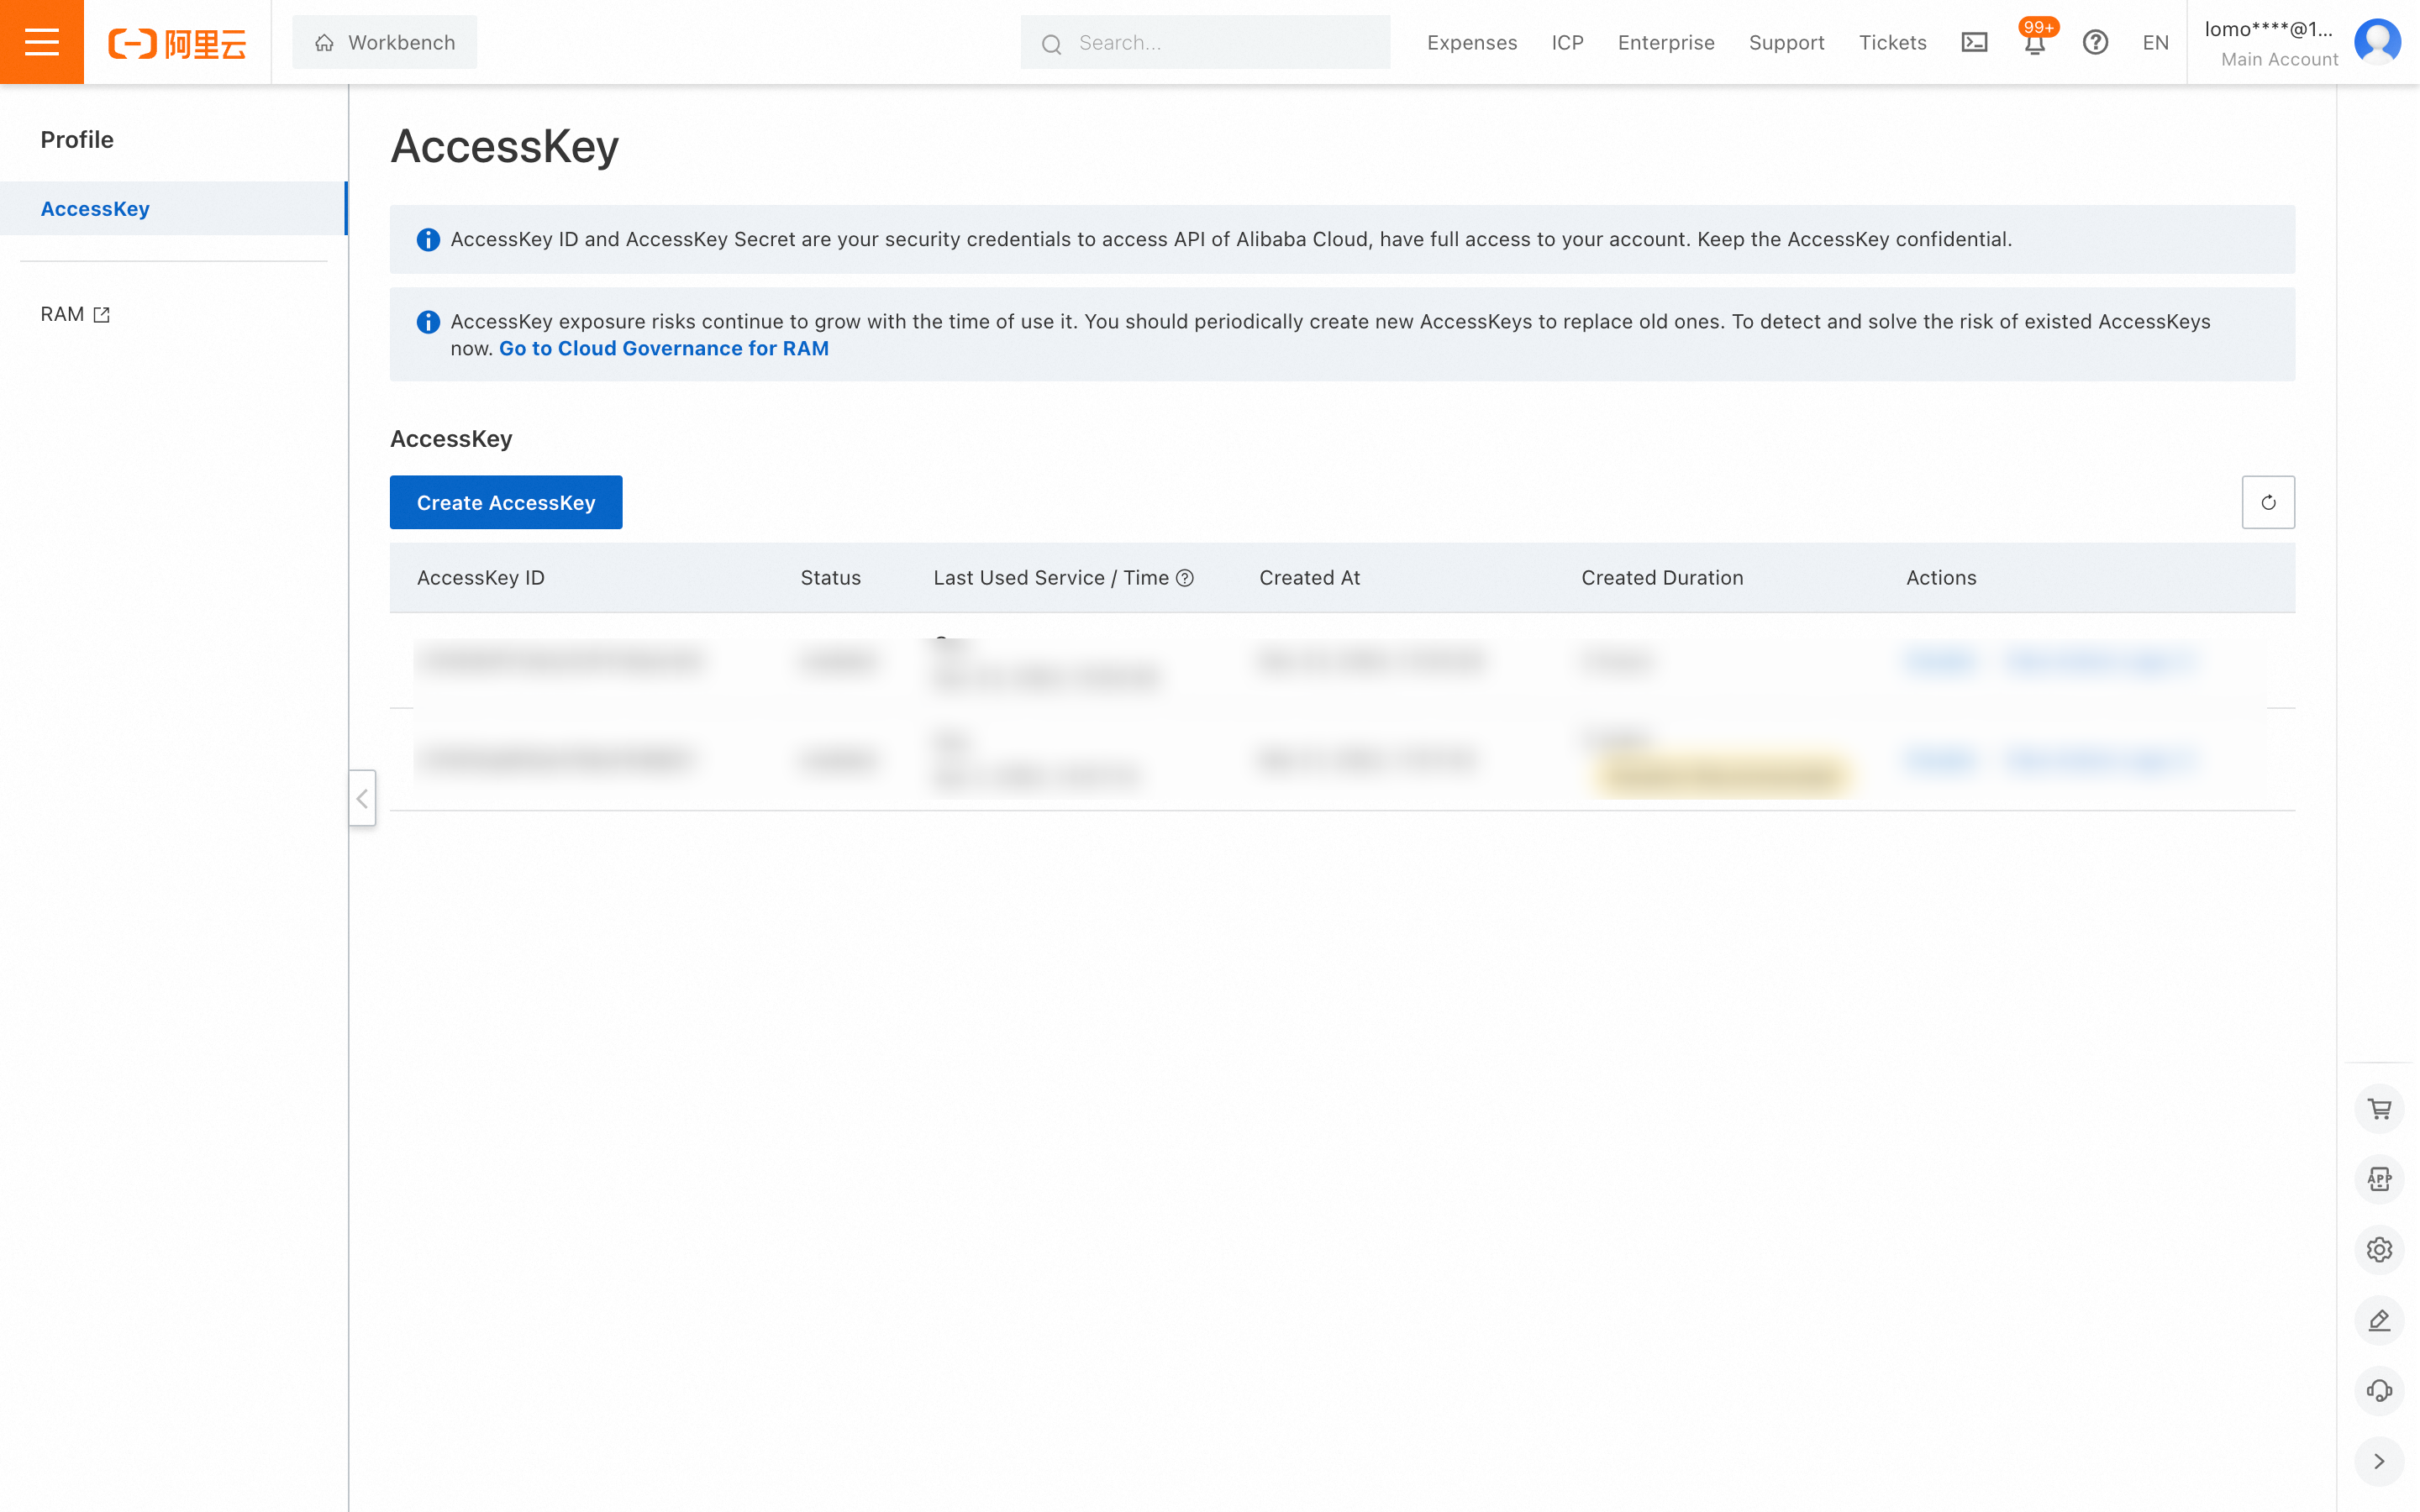
AccessKey and SecretAccessKey Retrieval
- Click "AccessKey" under your account avatar in the top right corner.
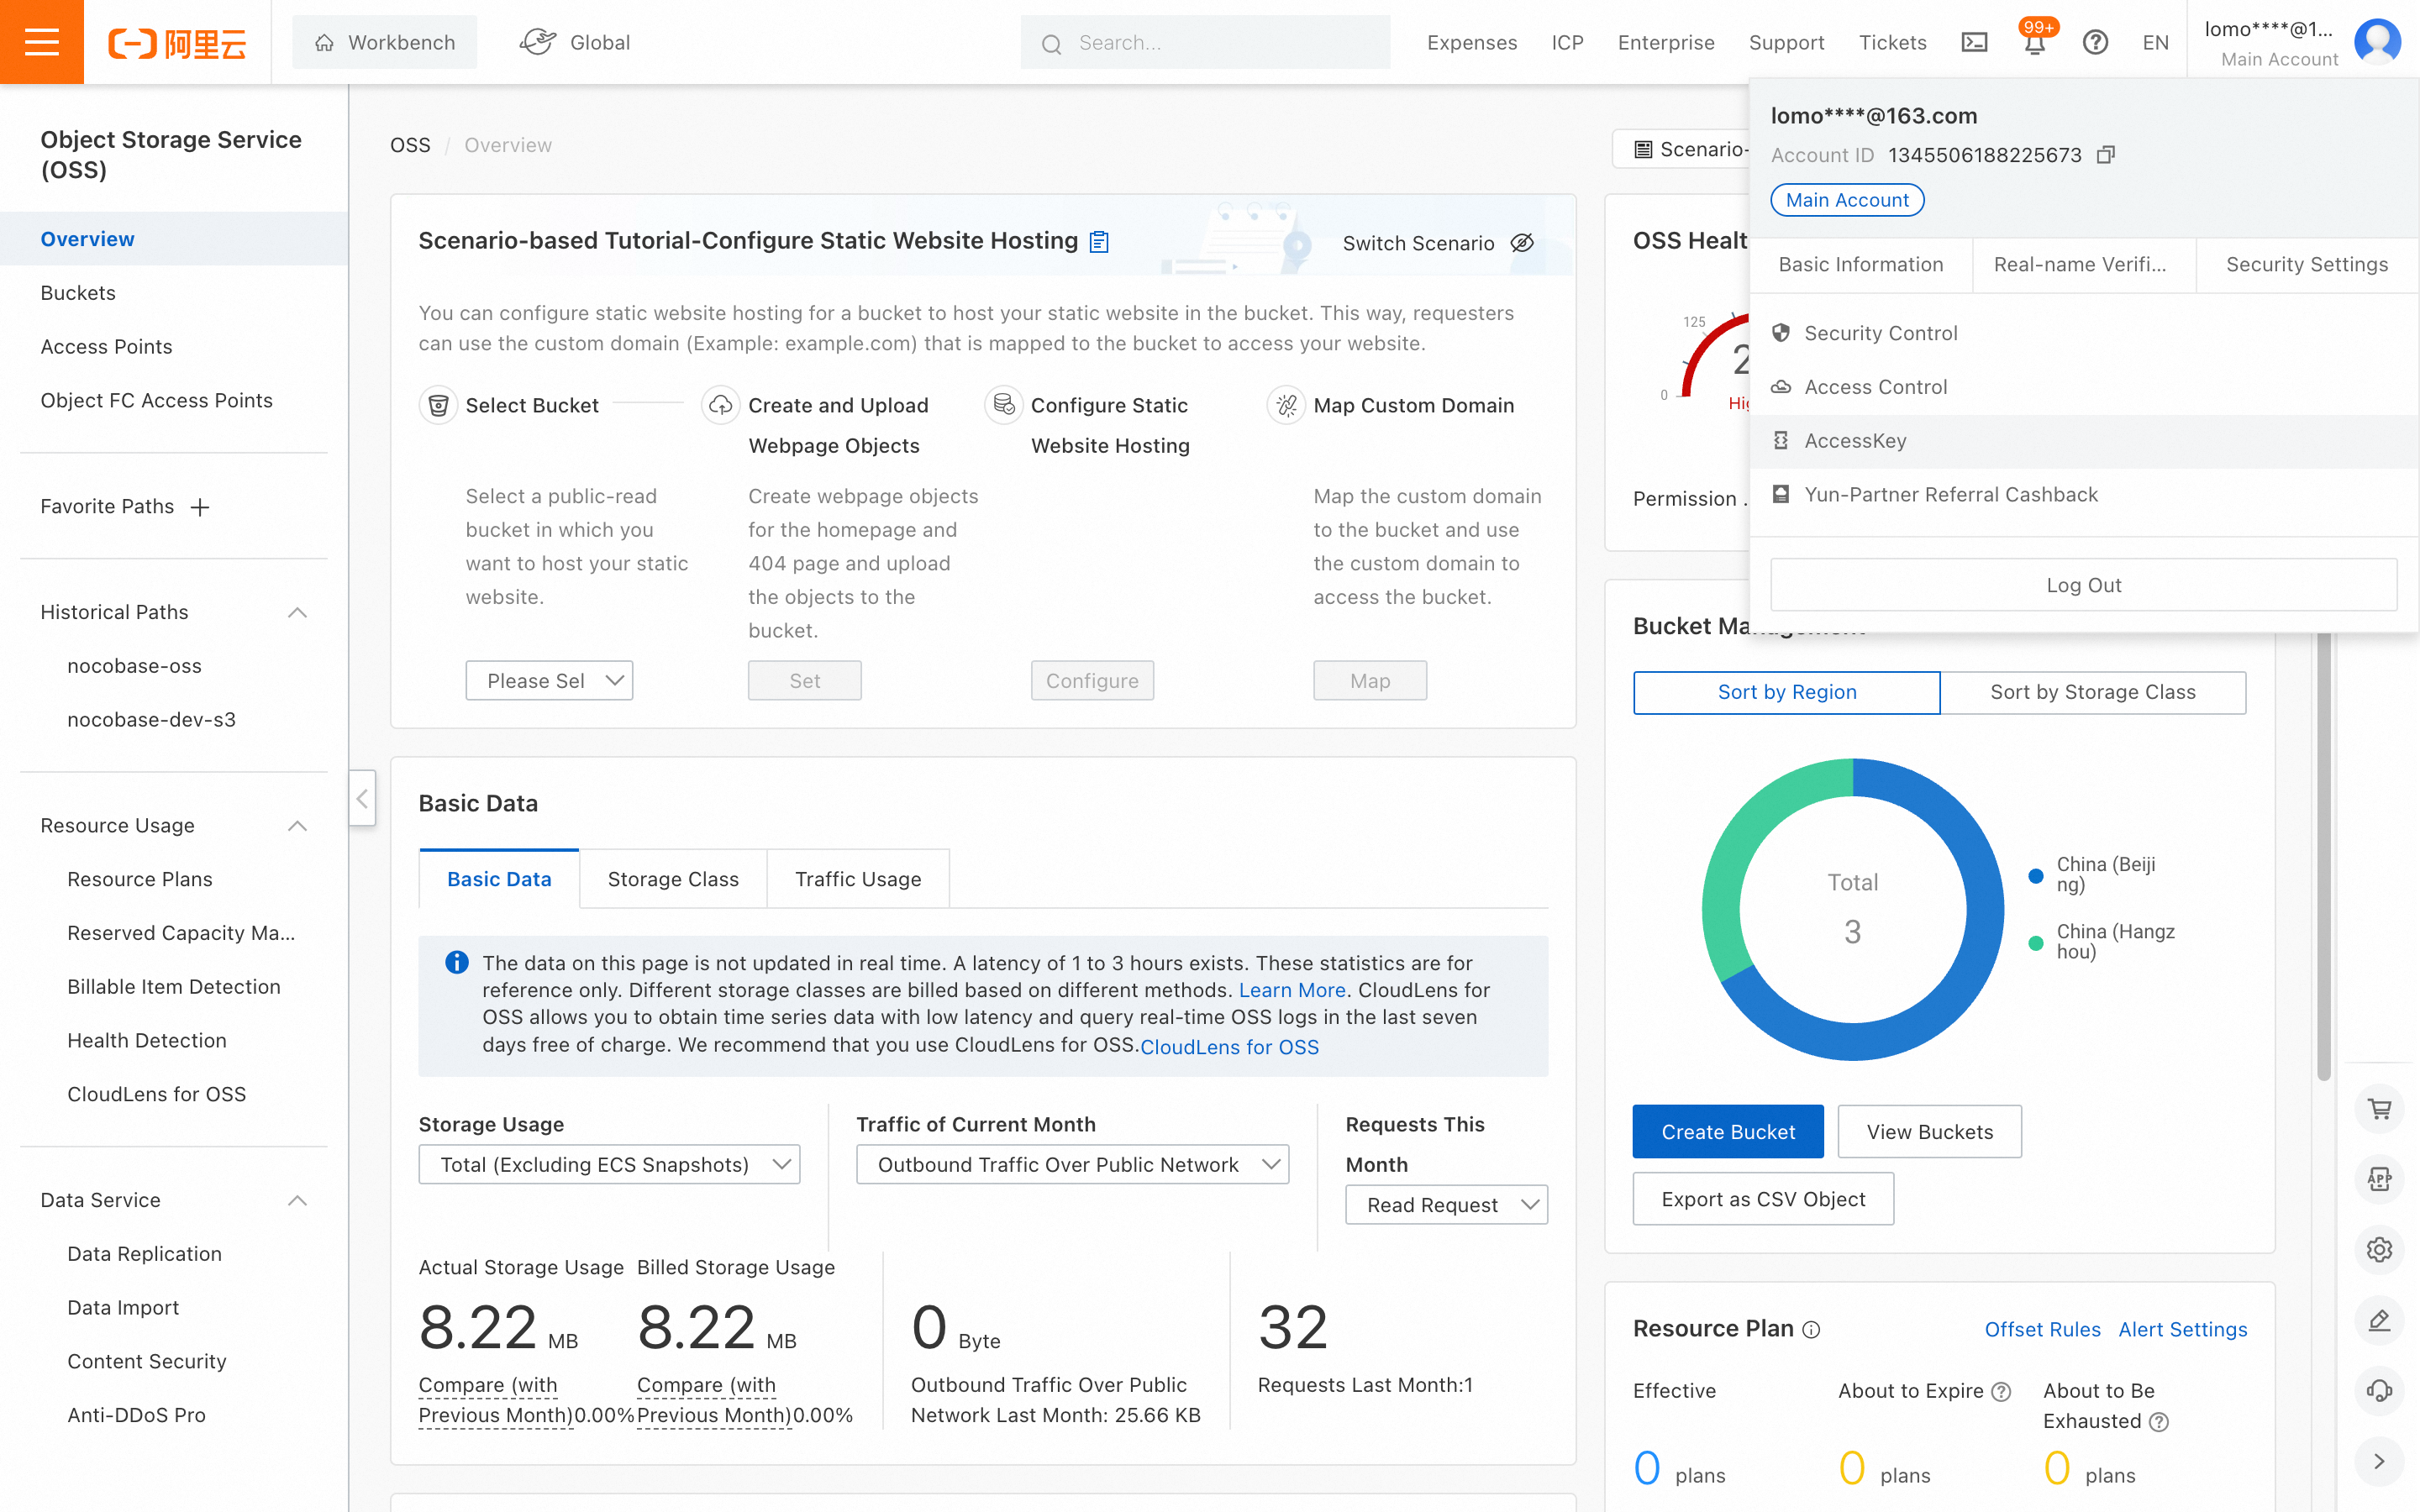
-
For demonstration purposes, we will create an AccessKey using the main account. In a production environment, it is recommended to use RAM to create the AccessKey. For instructions, please refer to the Alibaba Cloud documentation.
-
Click the "Create AccessKey" button.
- Complete the account verification.
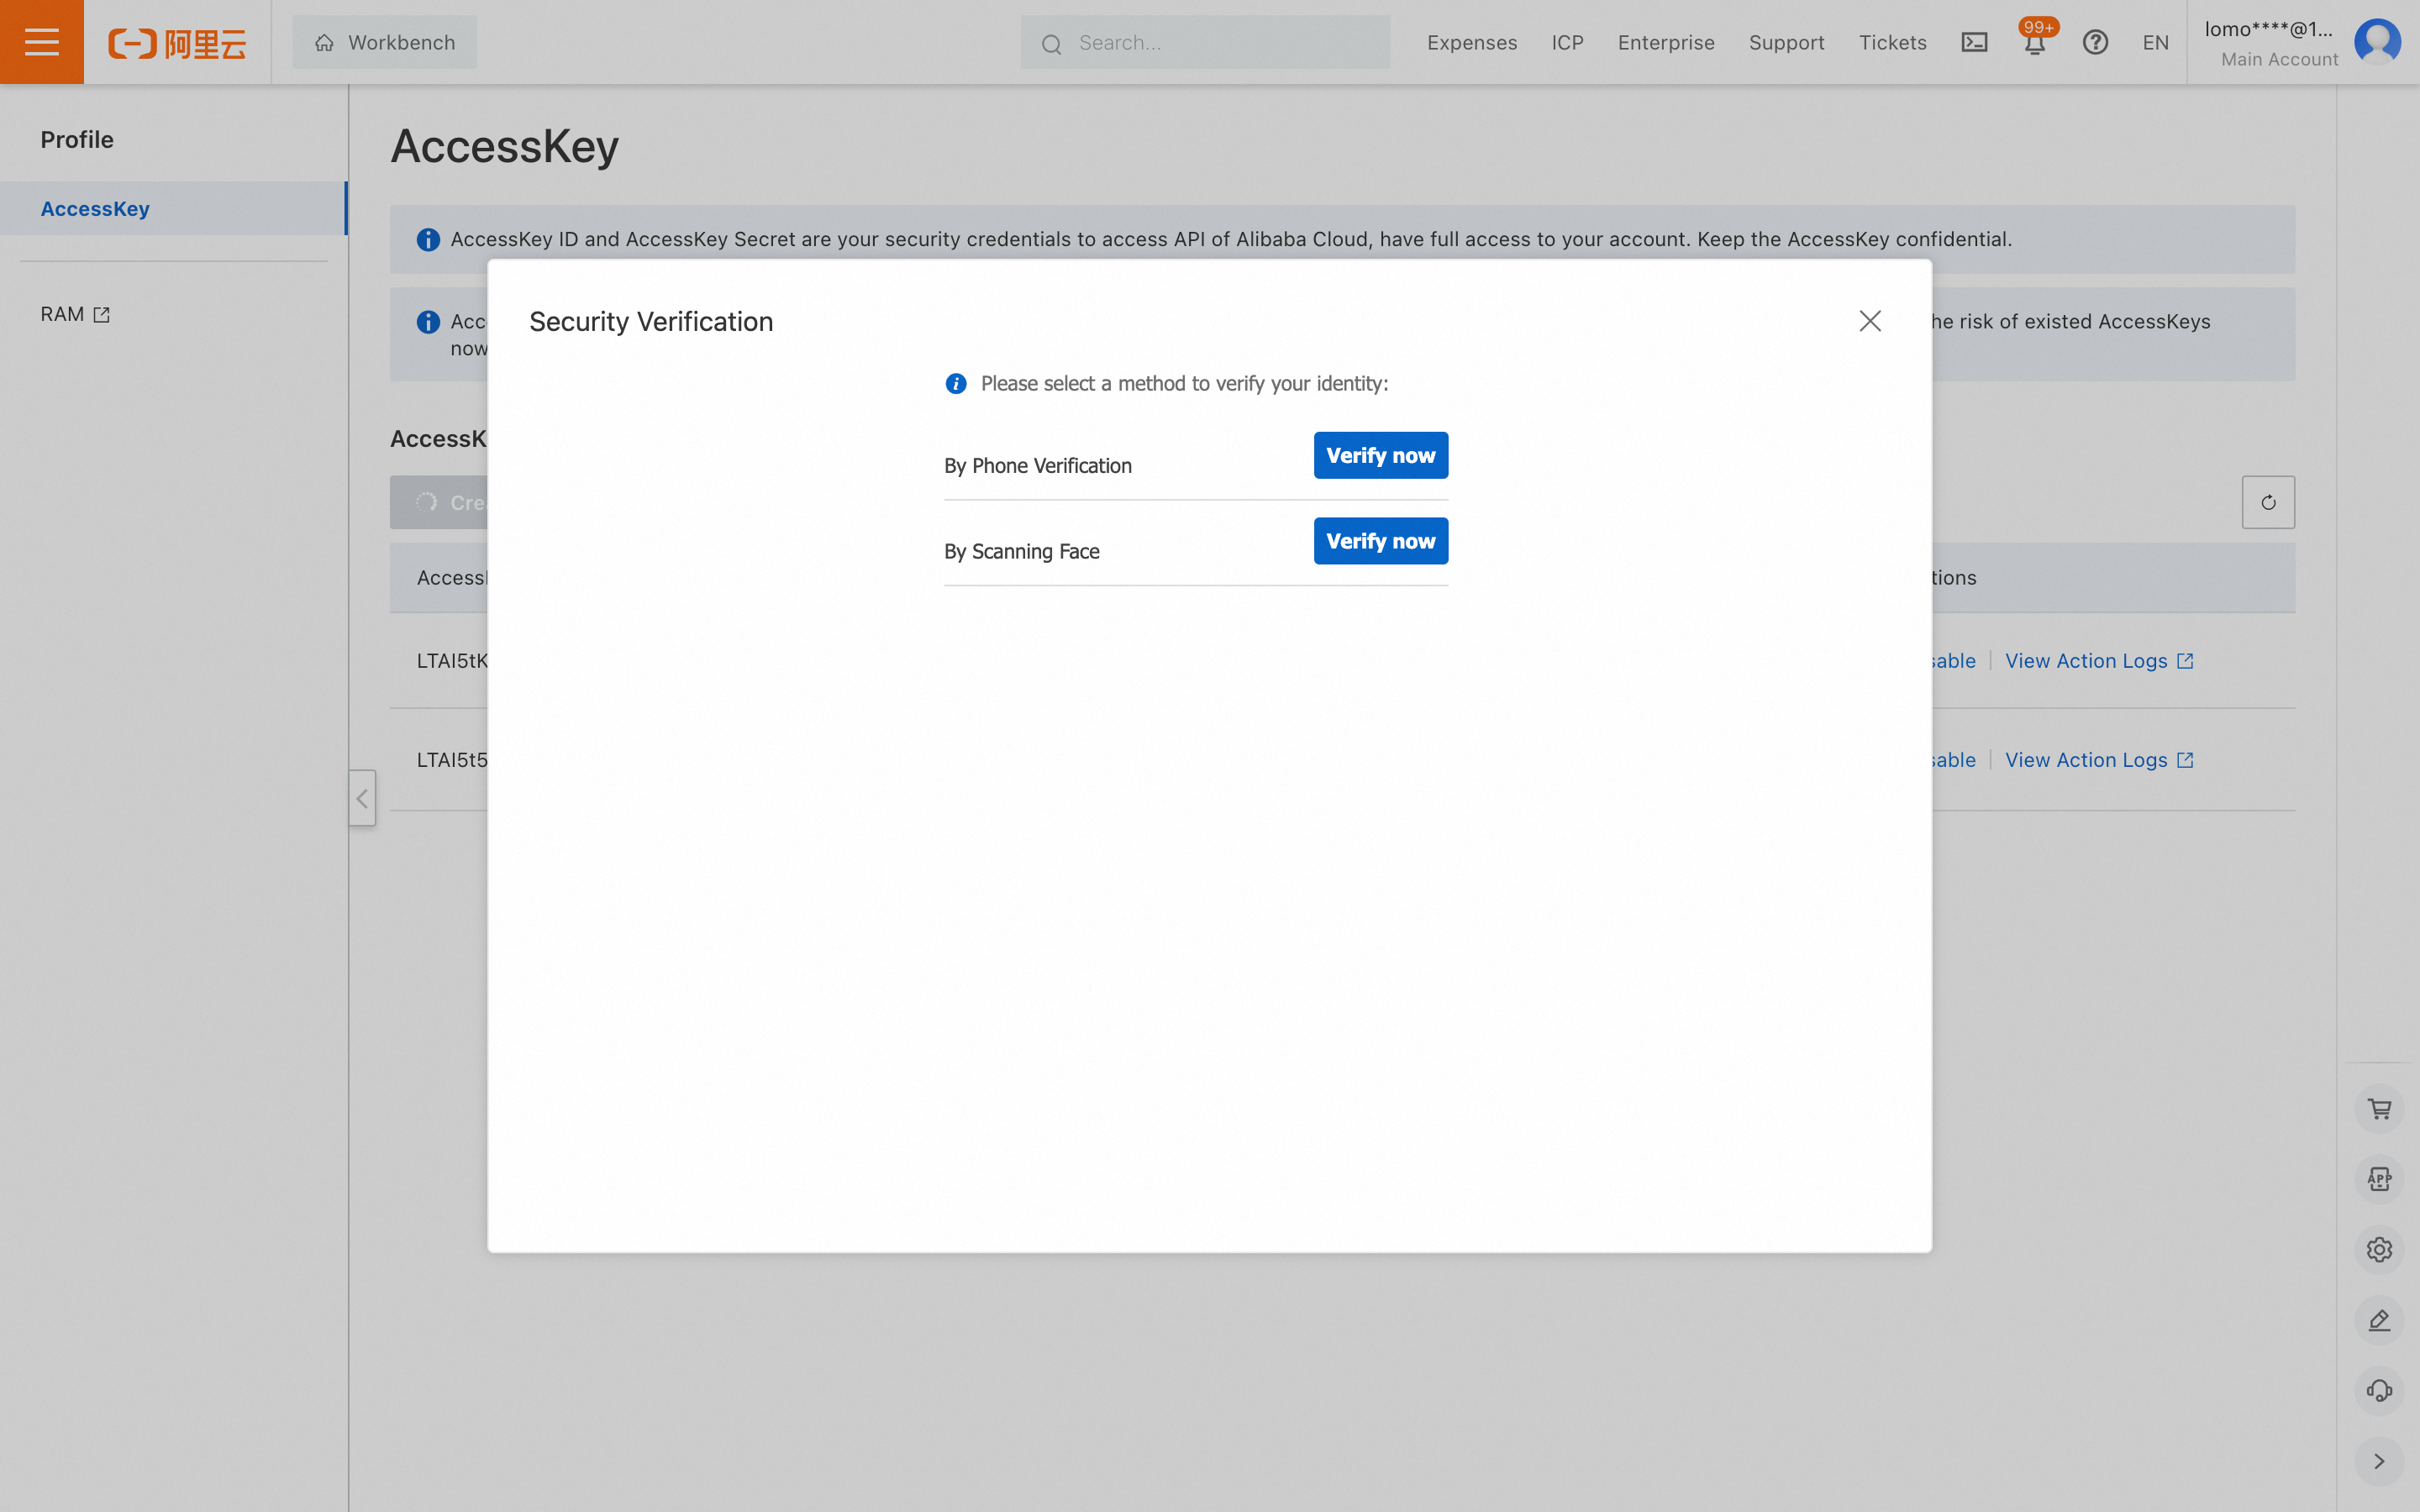
- Save the displayed Access Key and Secret Access Key.

Parameter Retrieval and Configuration
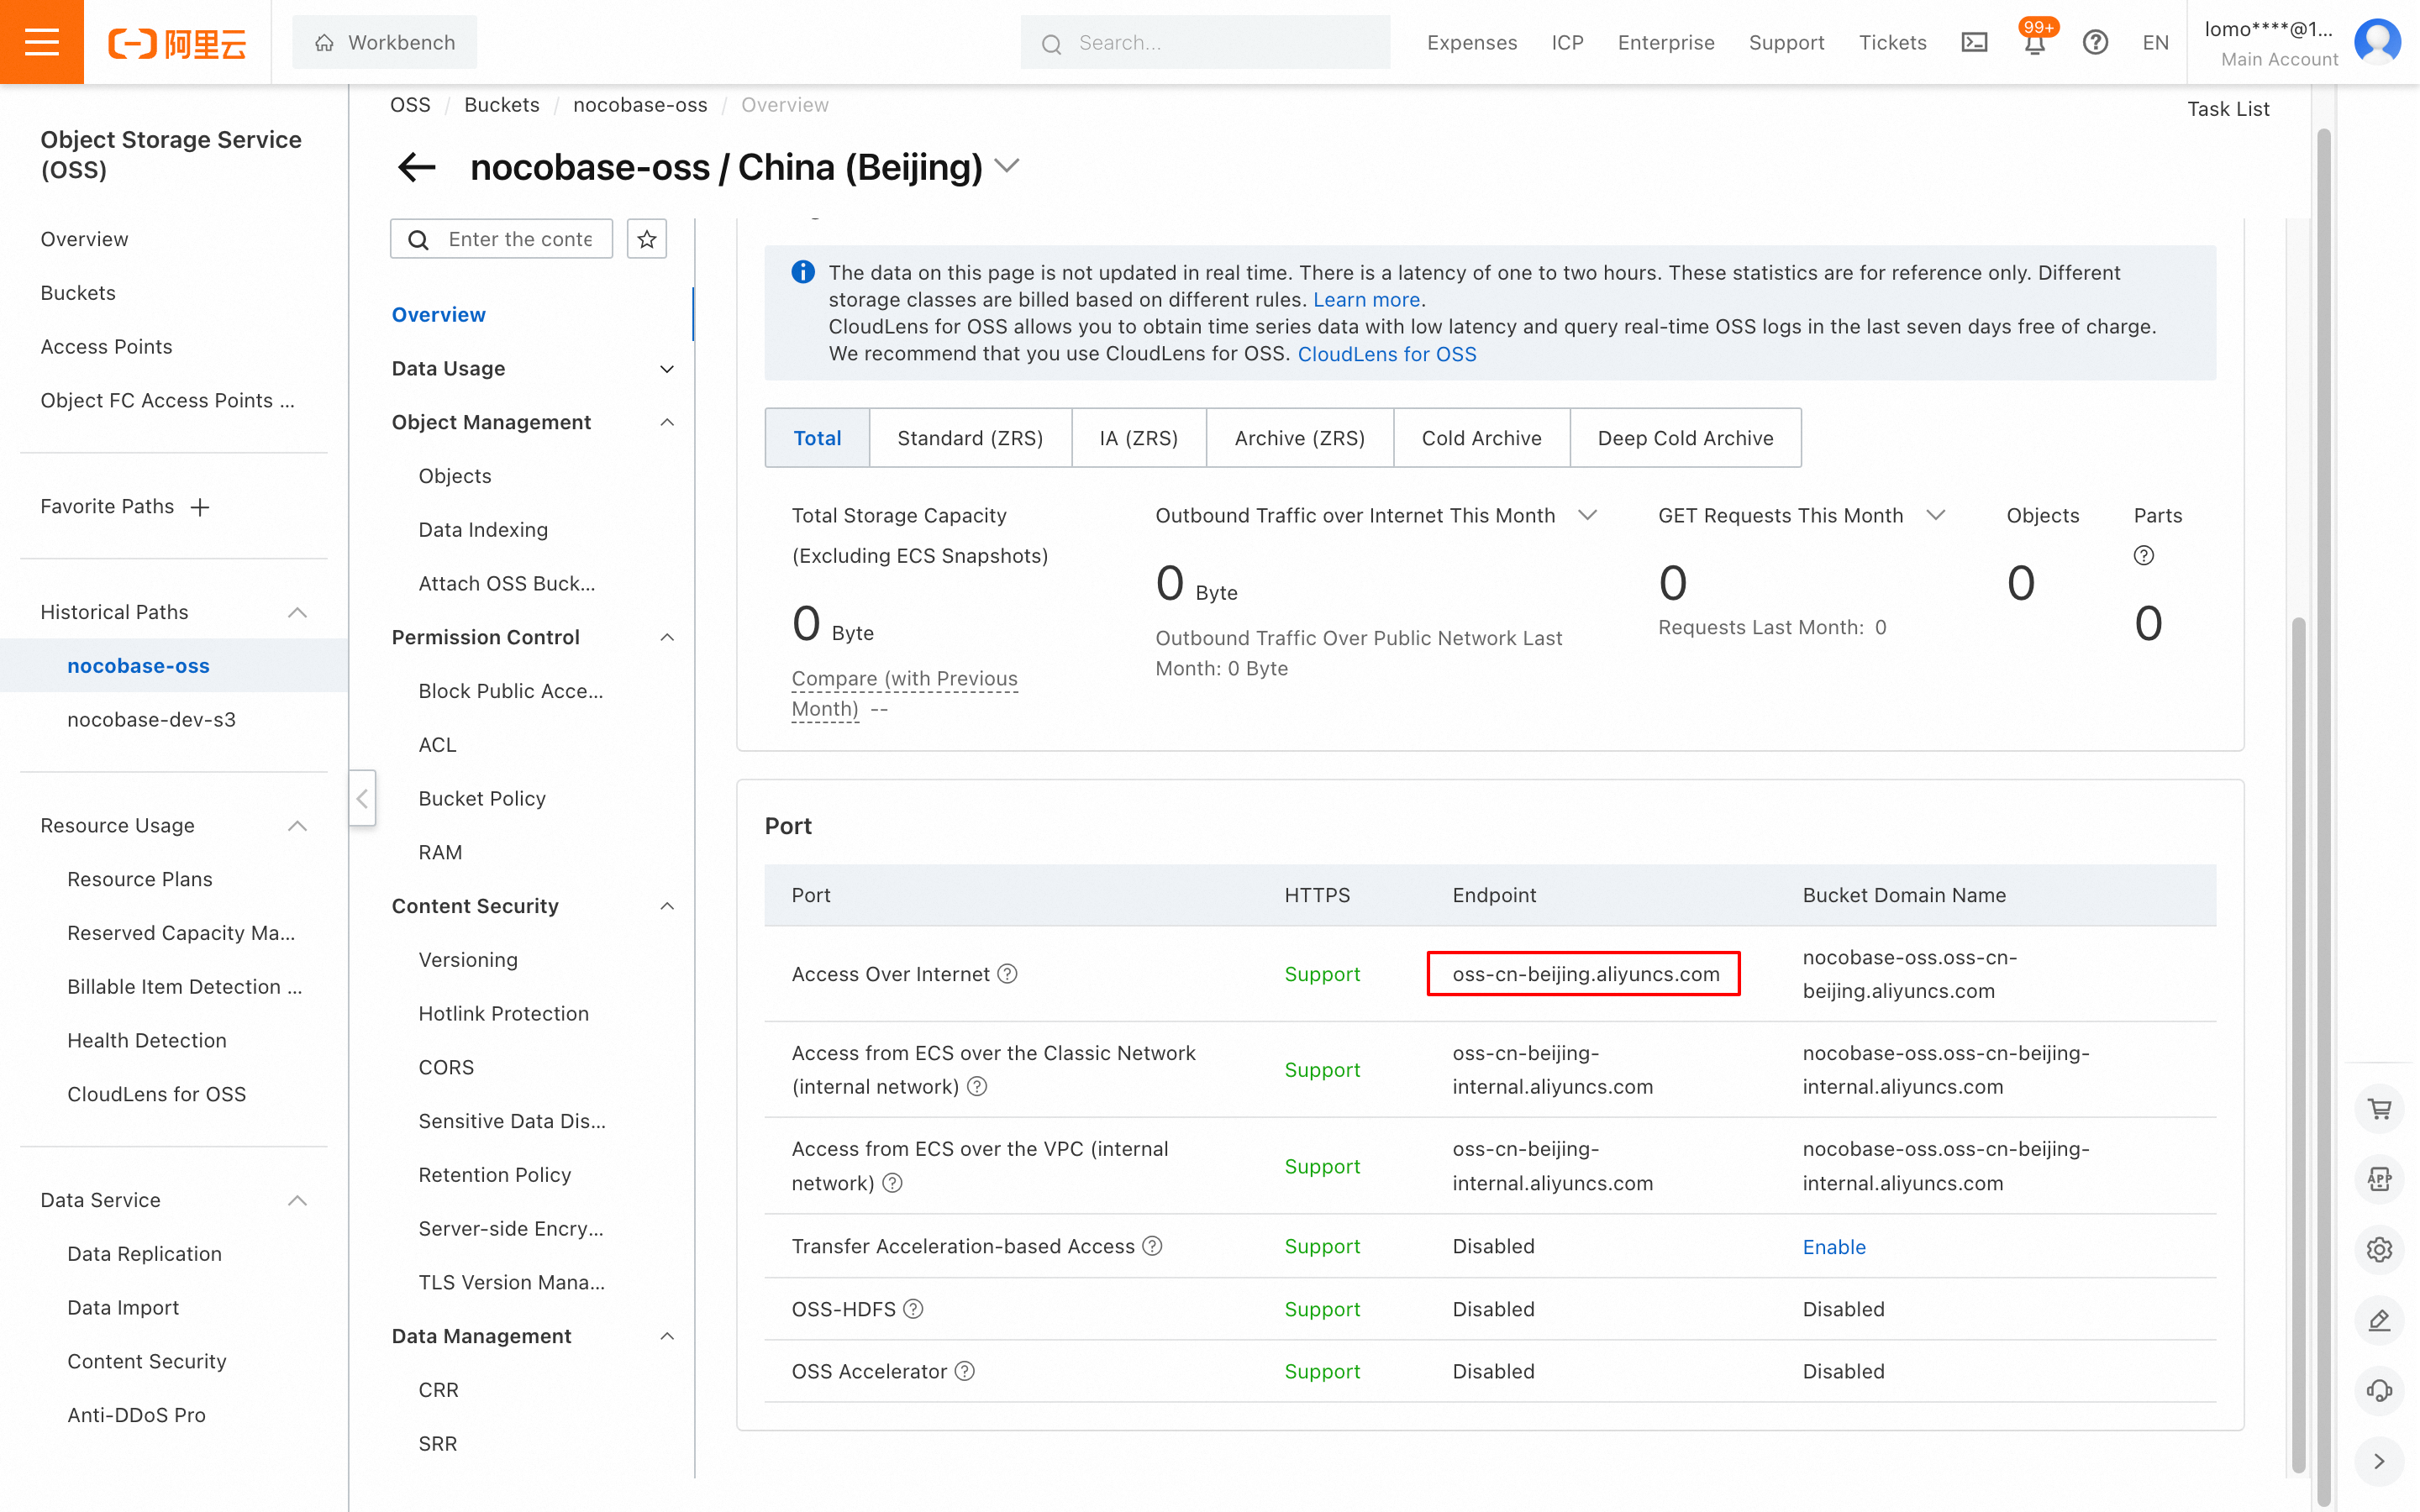
-
Use the
AccessKey IDandAccessKey Secretobtained in the previous step. -
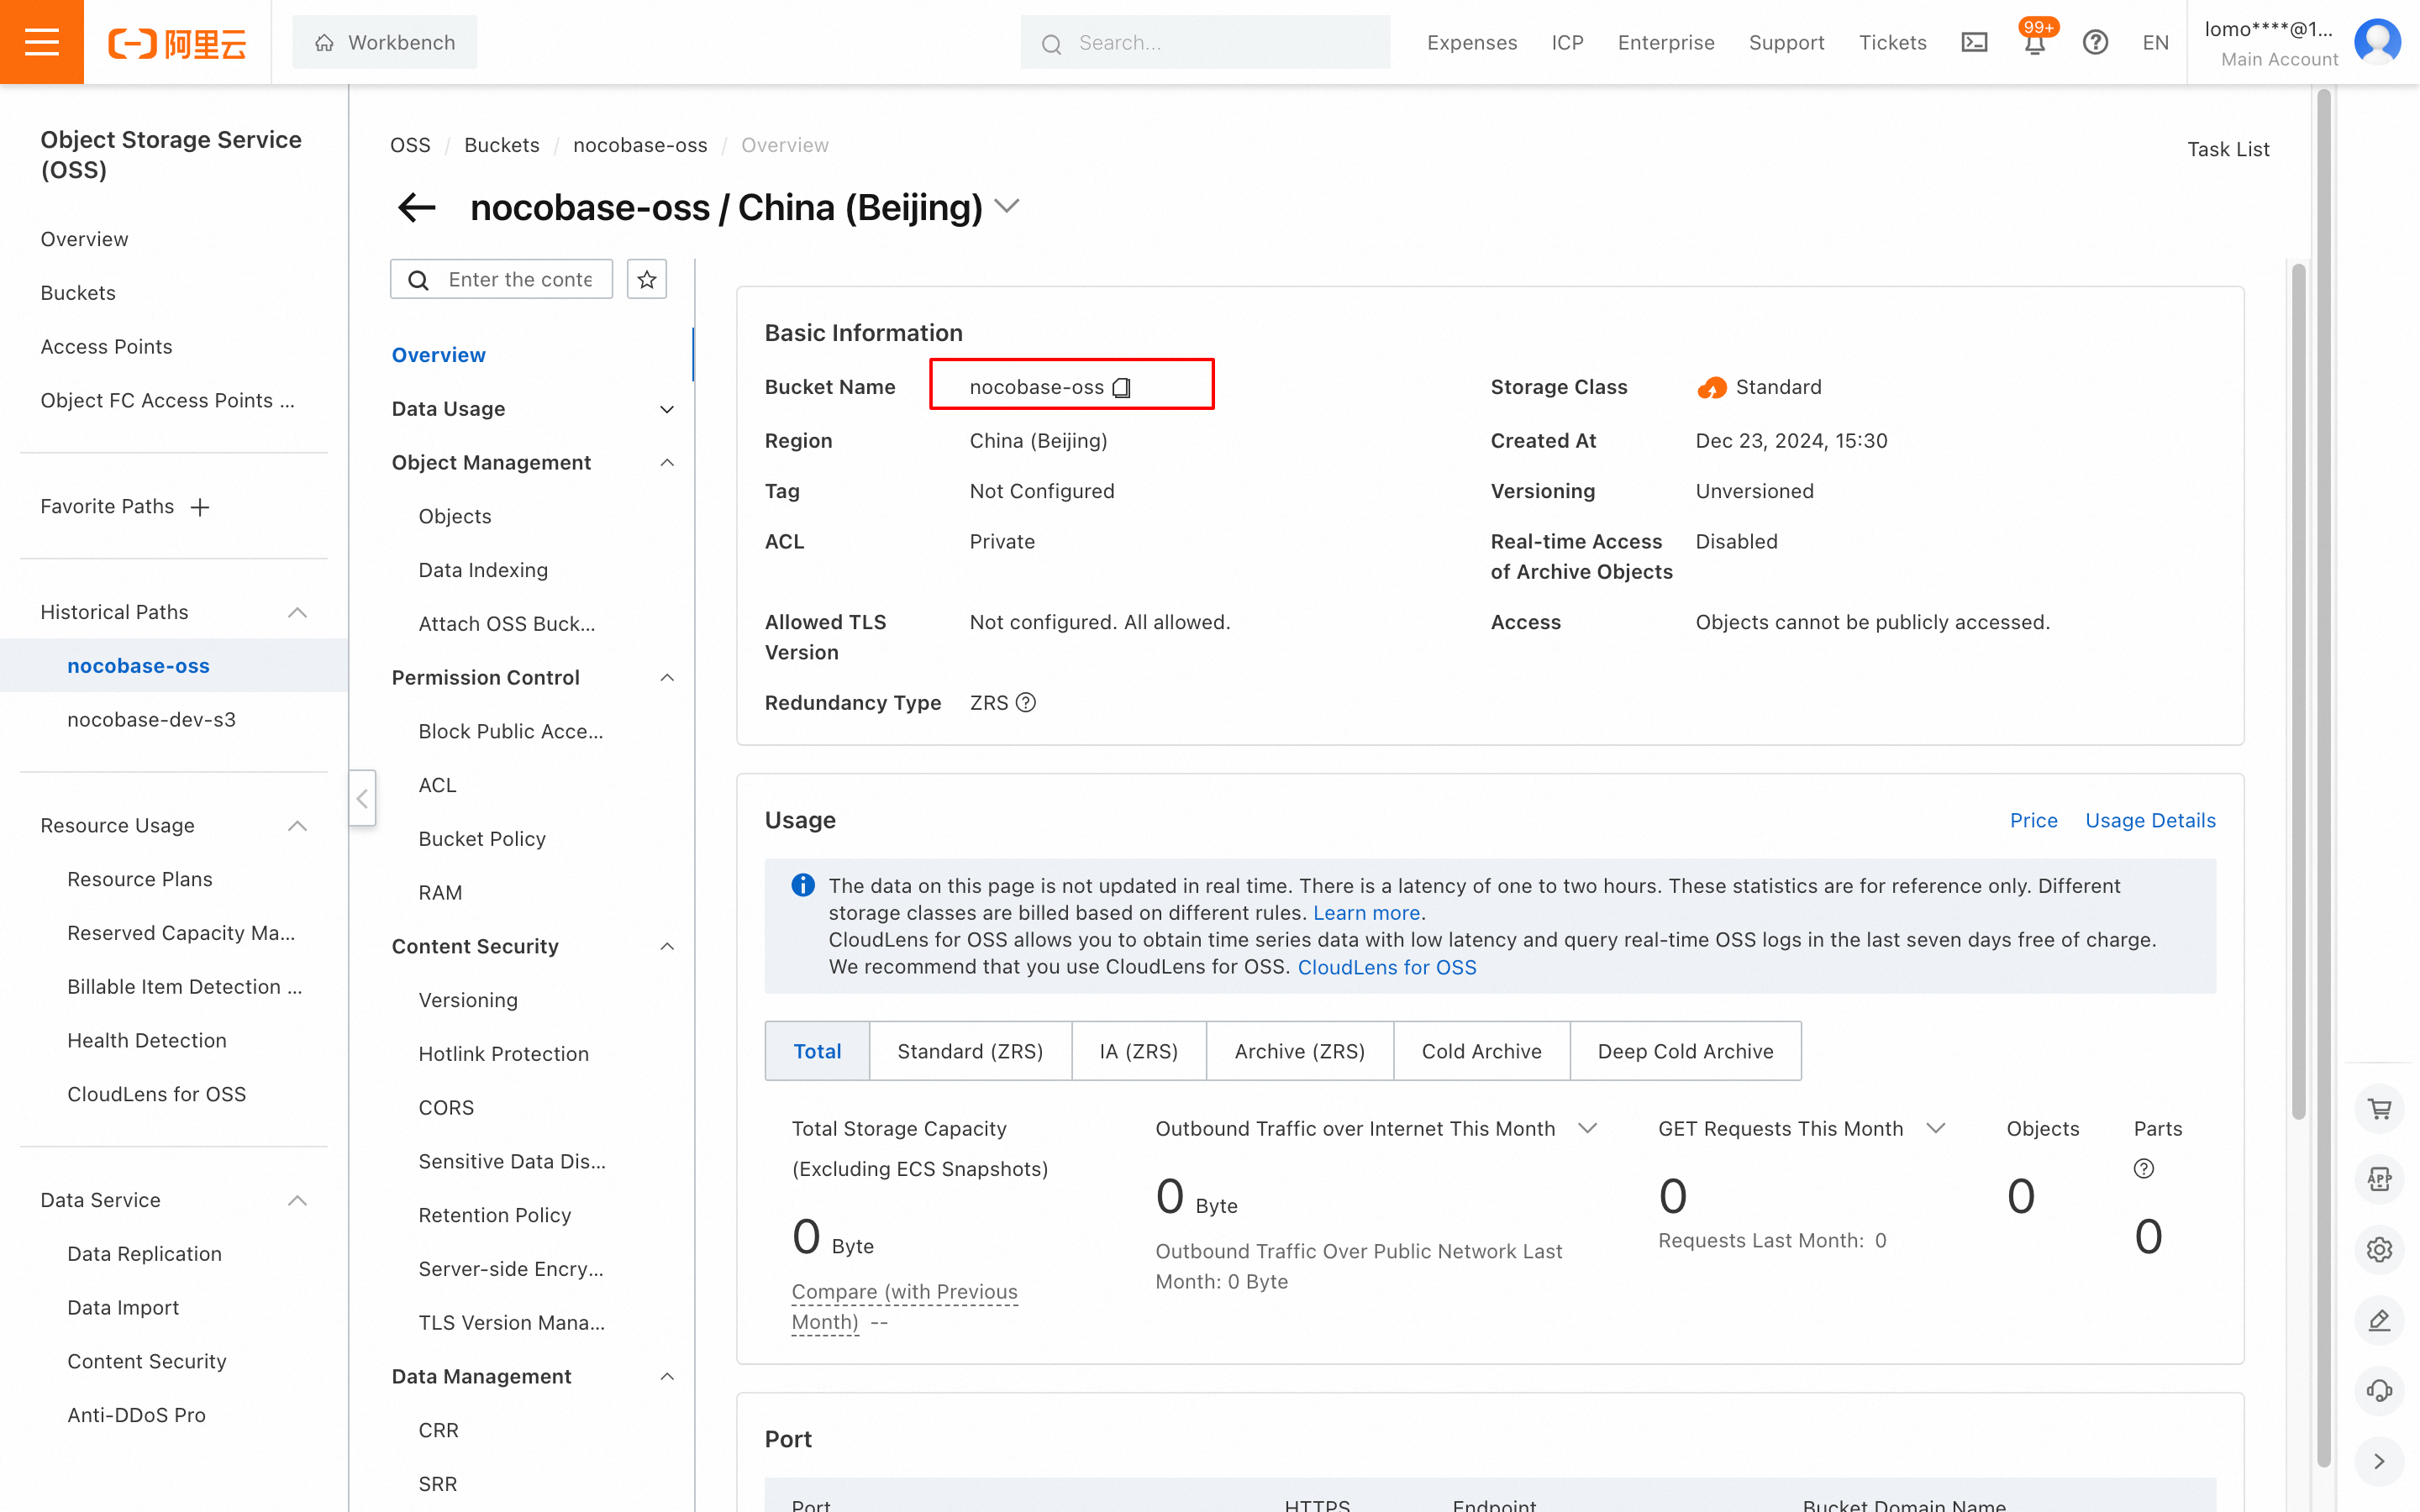
Go to the bucket details page to get the
Bucketname.
- Scroll down to get the
Region(the trailing ".aliyuncs.com" is not needed).
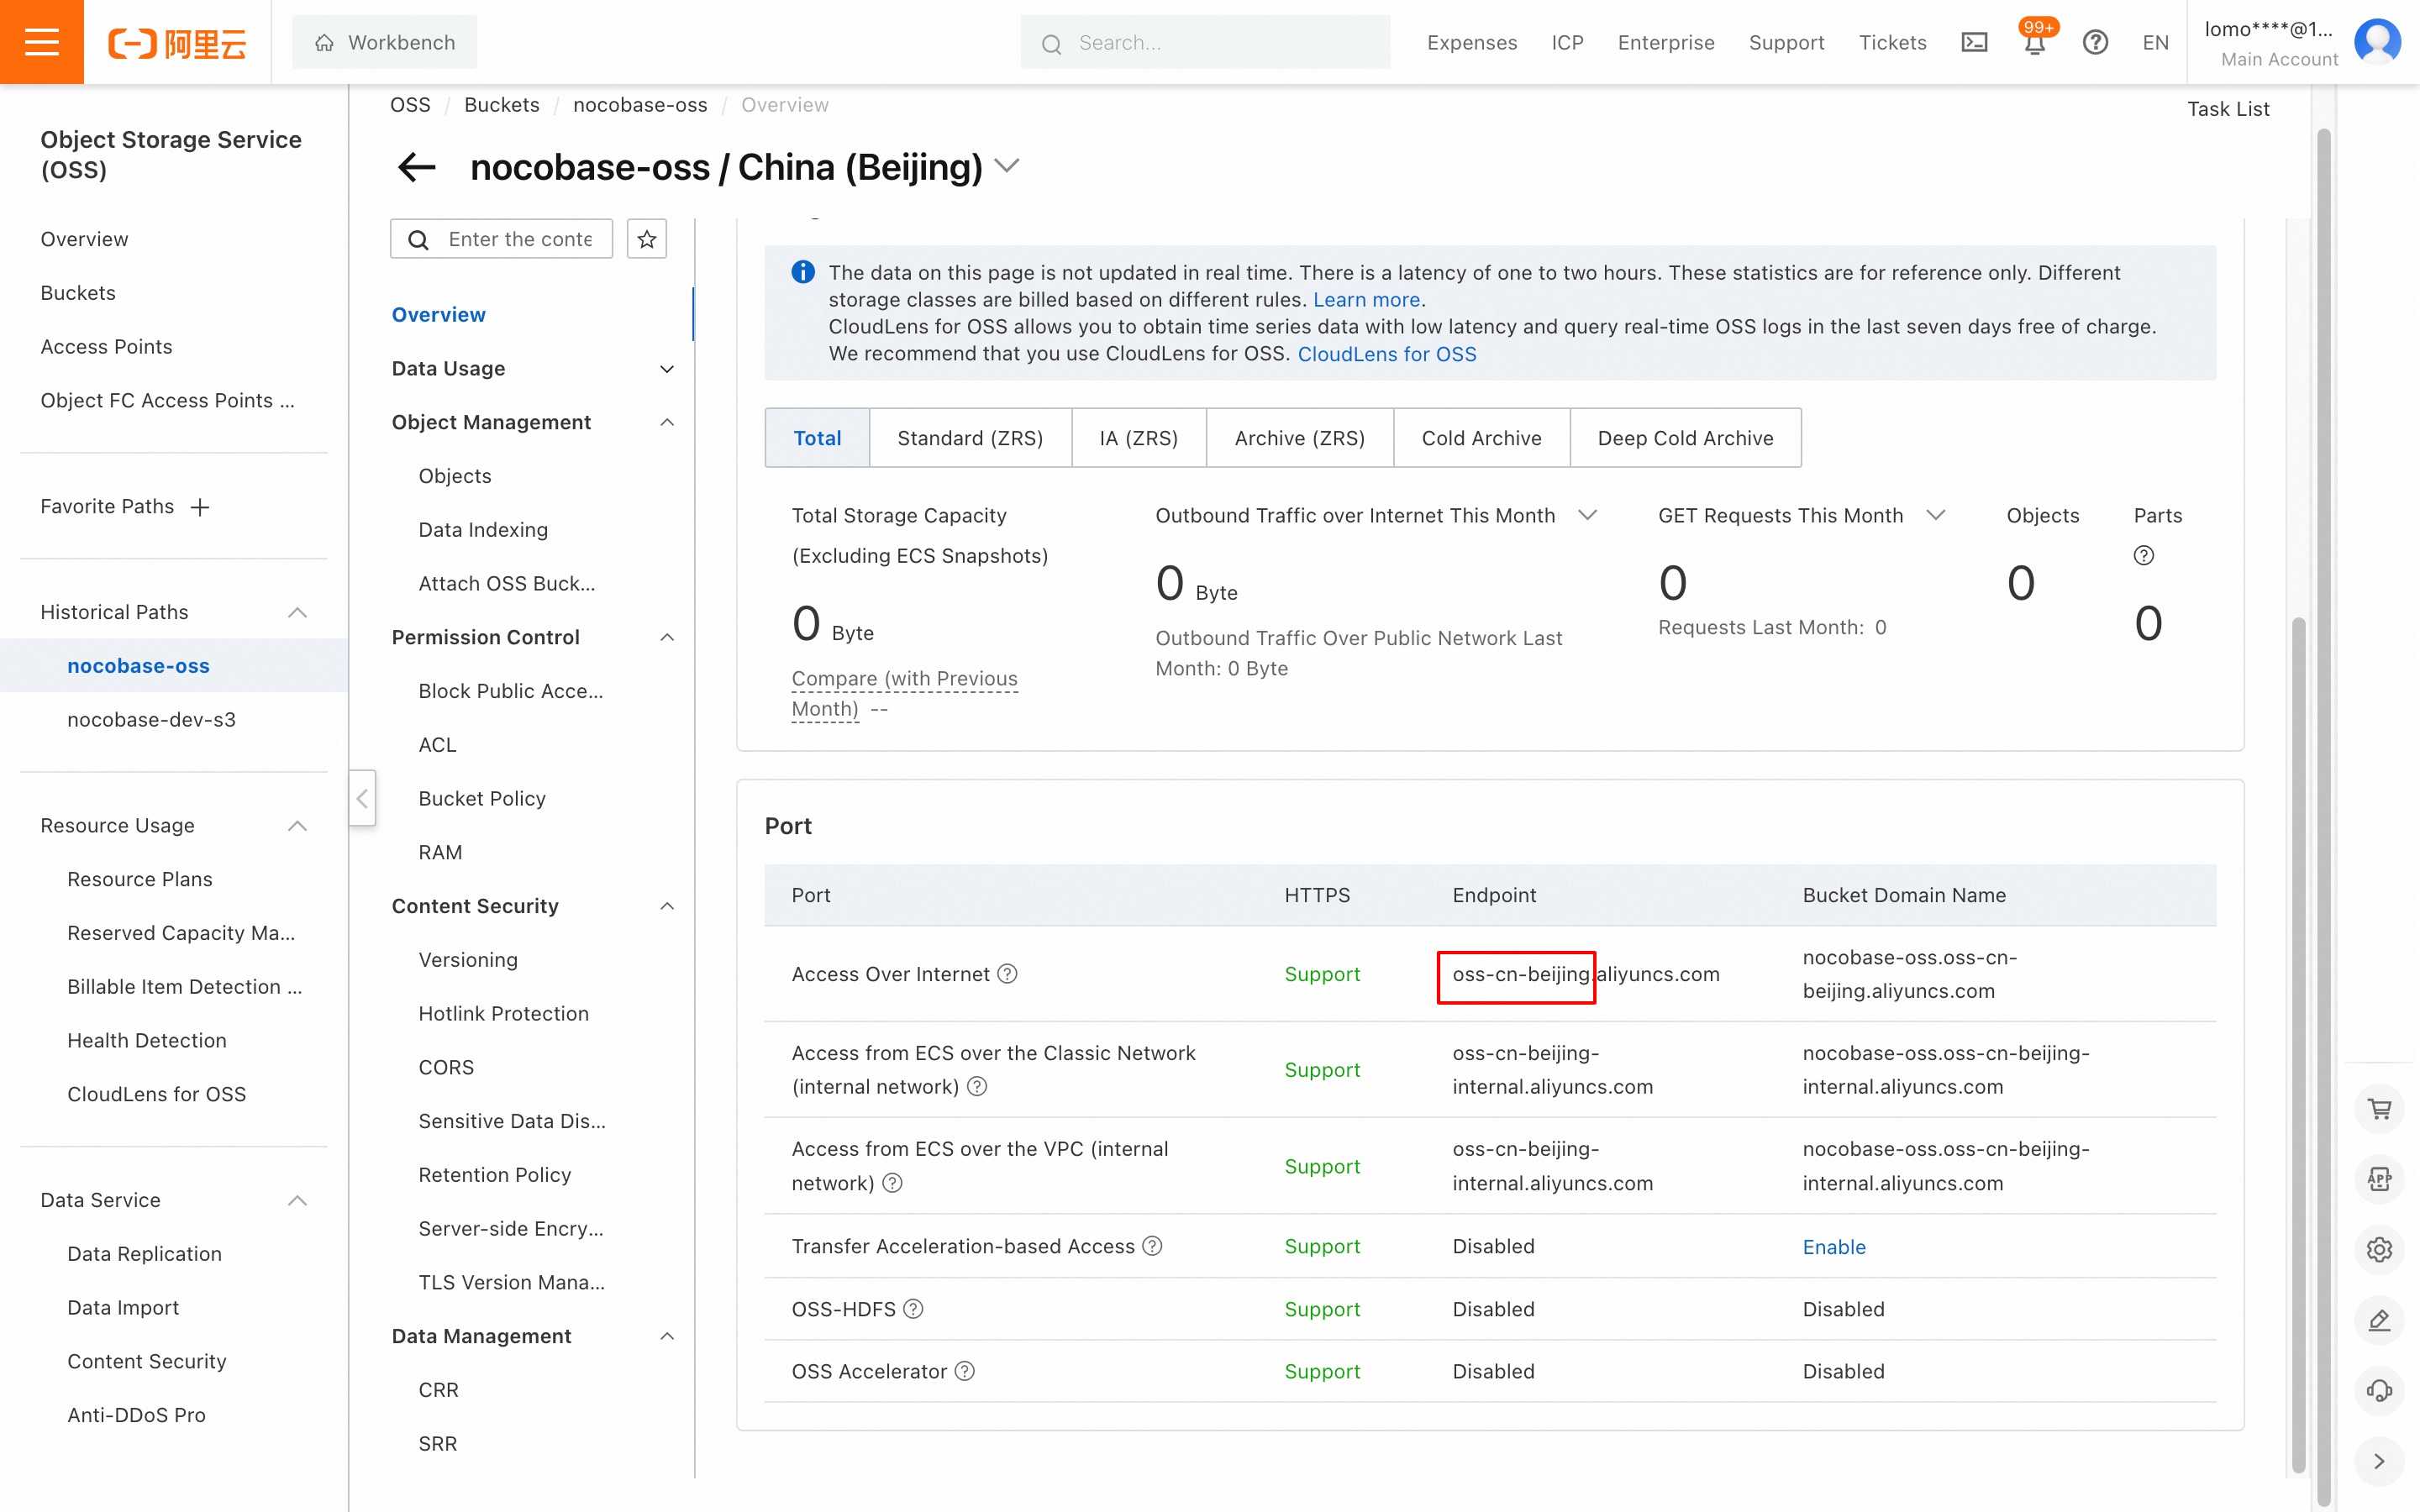
- Get the endpoint address and add the
https://prefix when entering it into NocoBase.
Thumbnail Configuration (Optional)
This configuration is optional and should only be used when optimizing the image preview size or effect.
-
Fill in the relevant parameters for
Thumbnail rule. For specific parameter settings, refer to the Alibaba Cloud documentation on Image Processing. -
Keep the
Full upload URL styleandFull access URL stylesettings the same.
Configuration Example
MinIO
Bucket Creation
- Click on the Buckets menu on the left -> Click Create Bucket to open the creation page.
- Enter the Bucket name, then click the Save button.
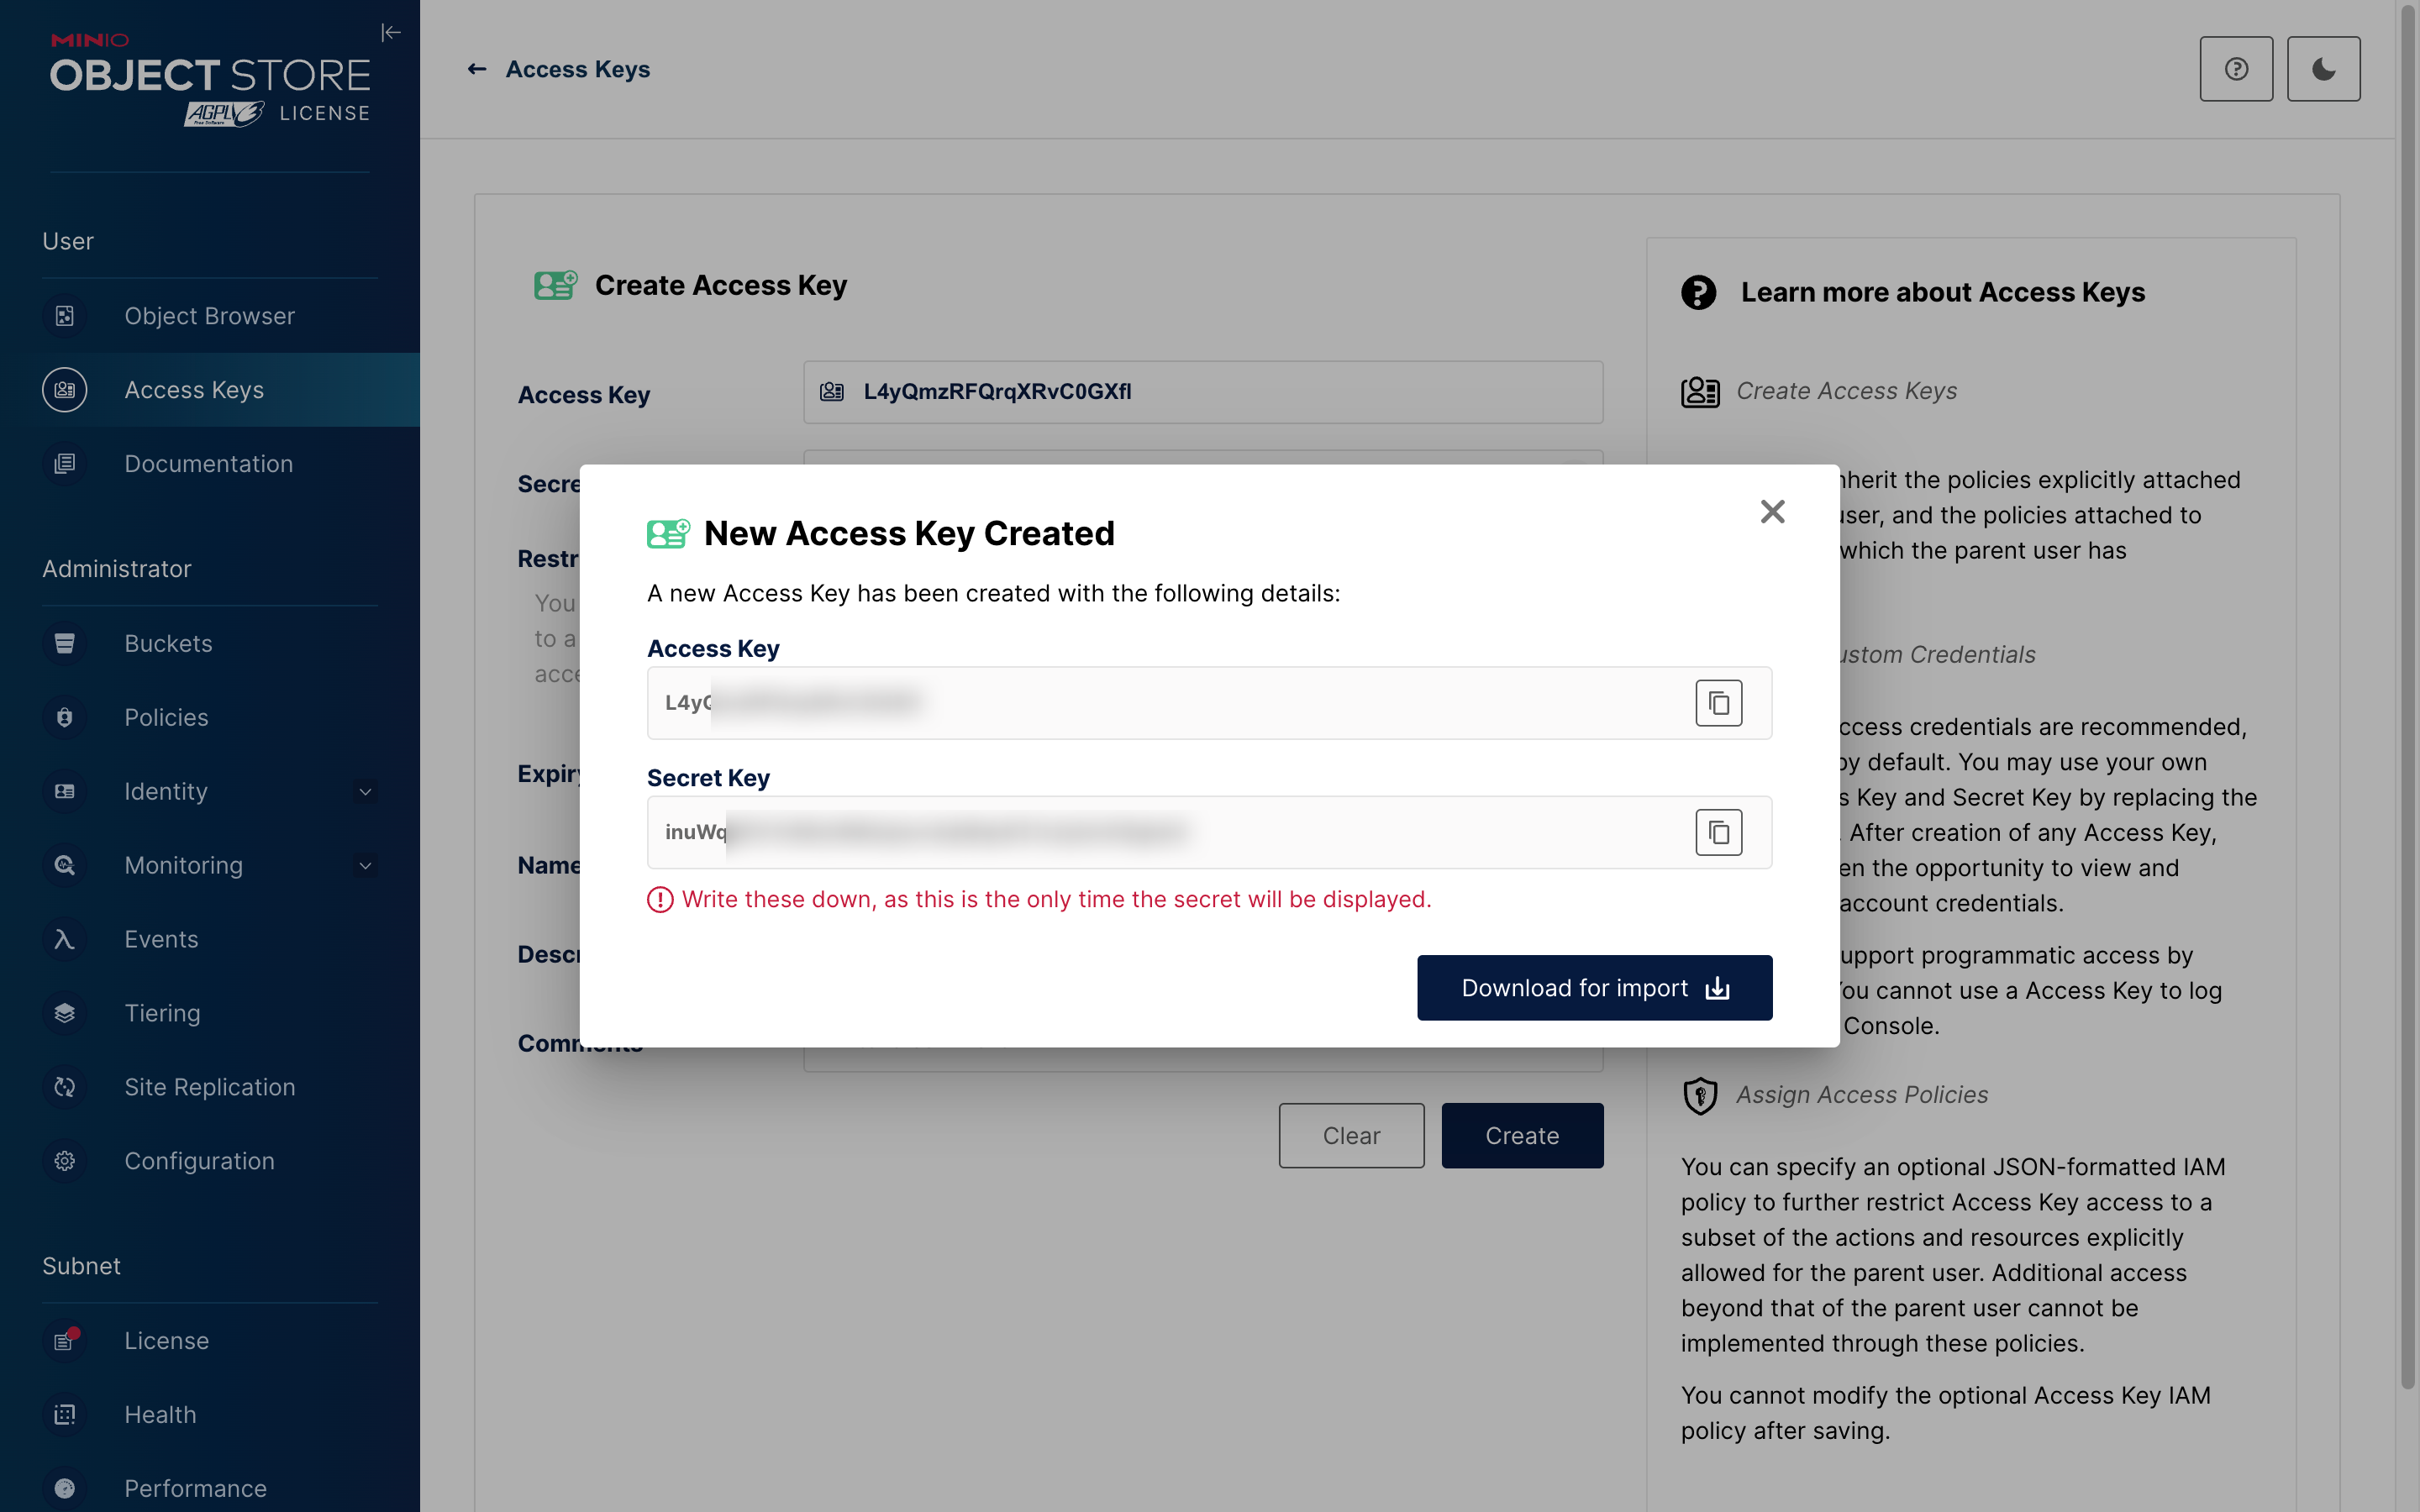
AccessKey and SecretAccessKey Retrieval
- Navigate to Access Keys -> Click the Create access key button to open the creation page.
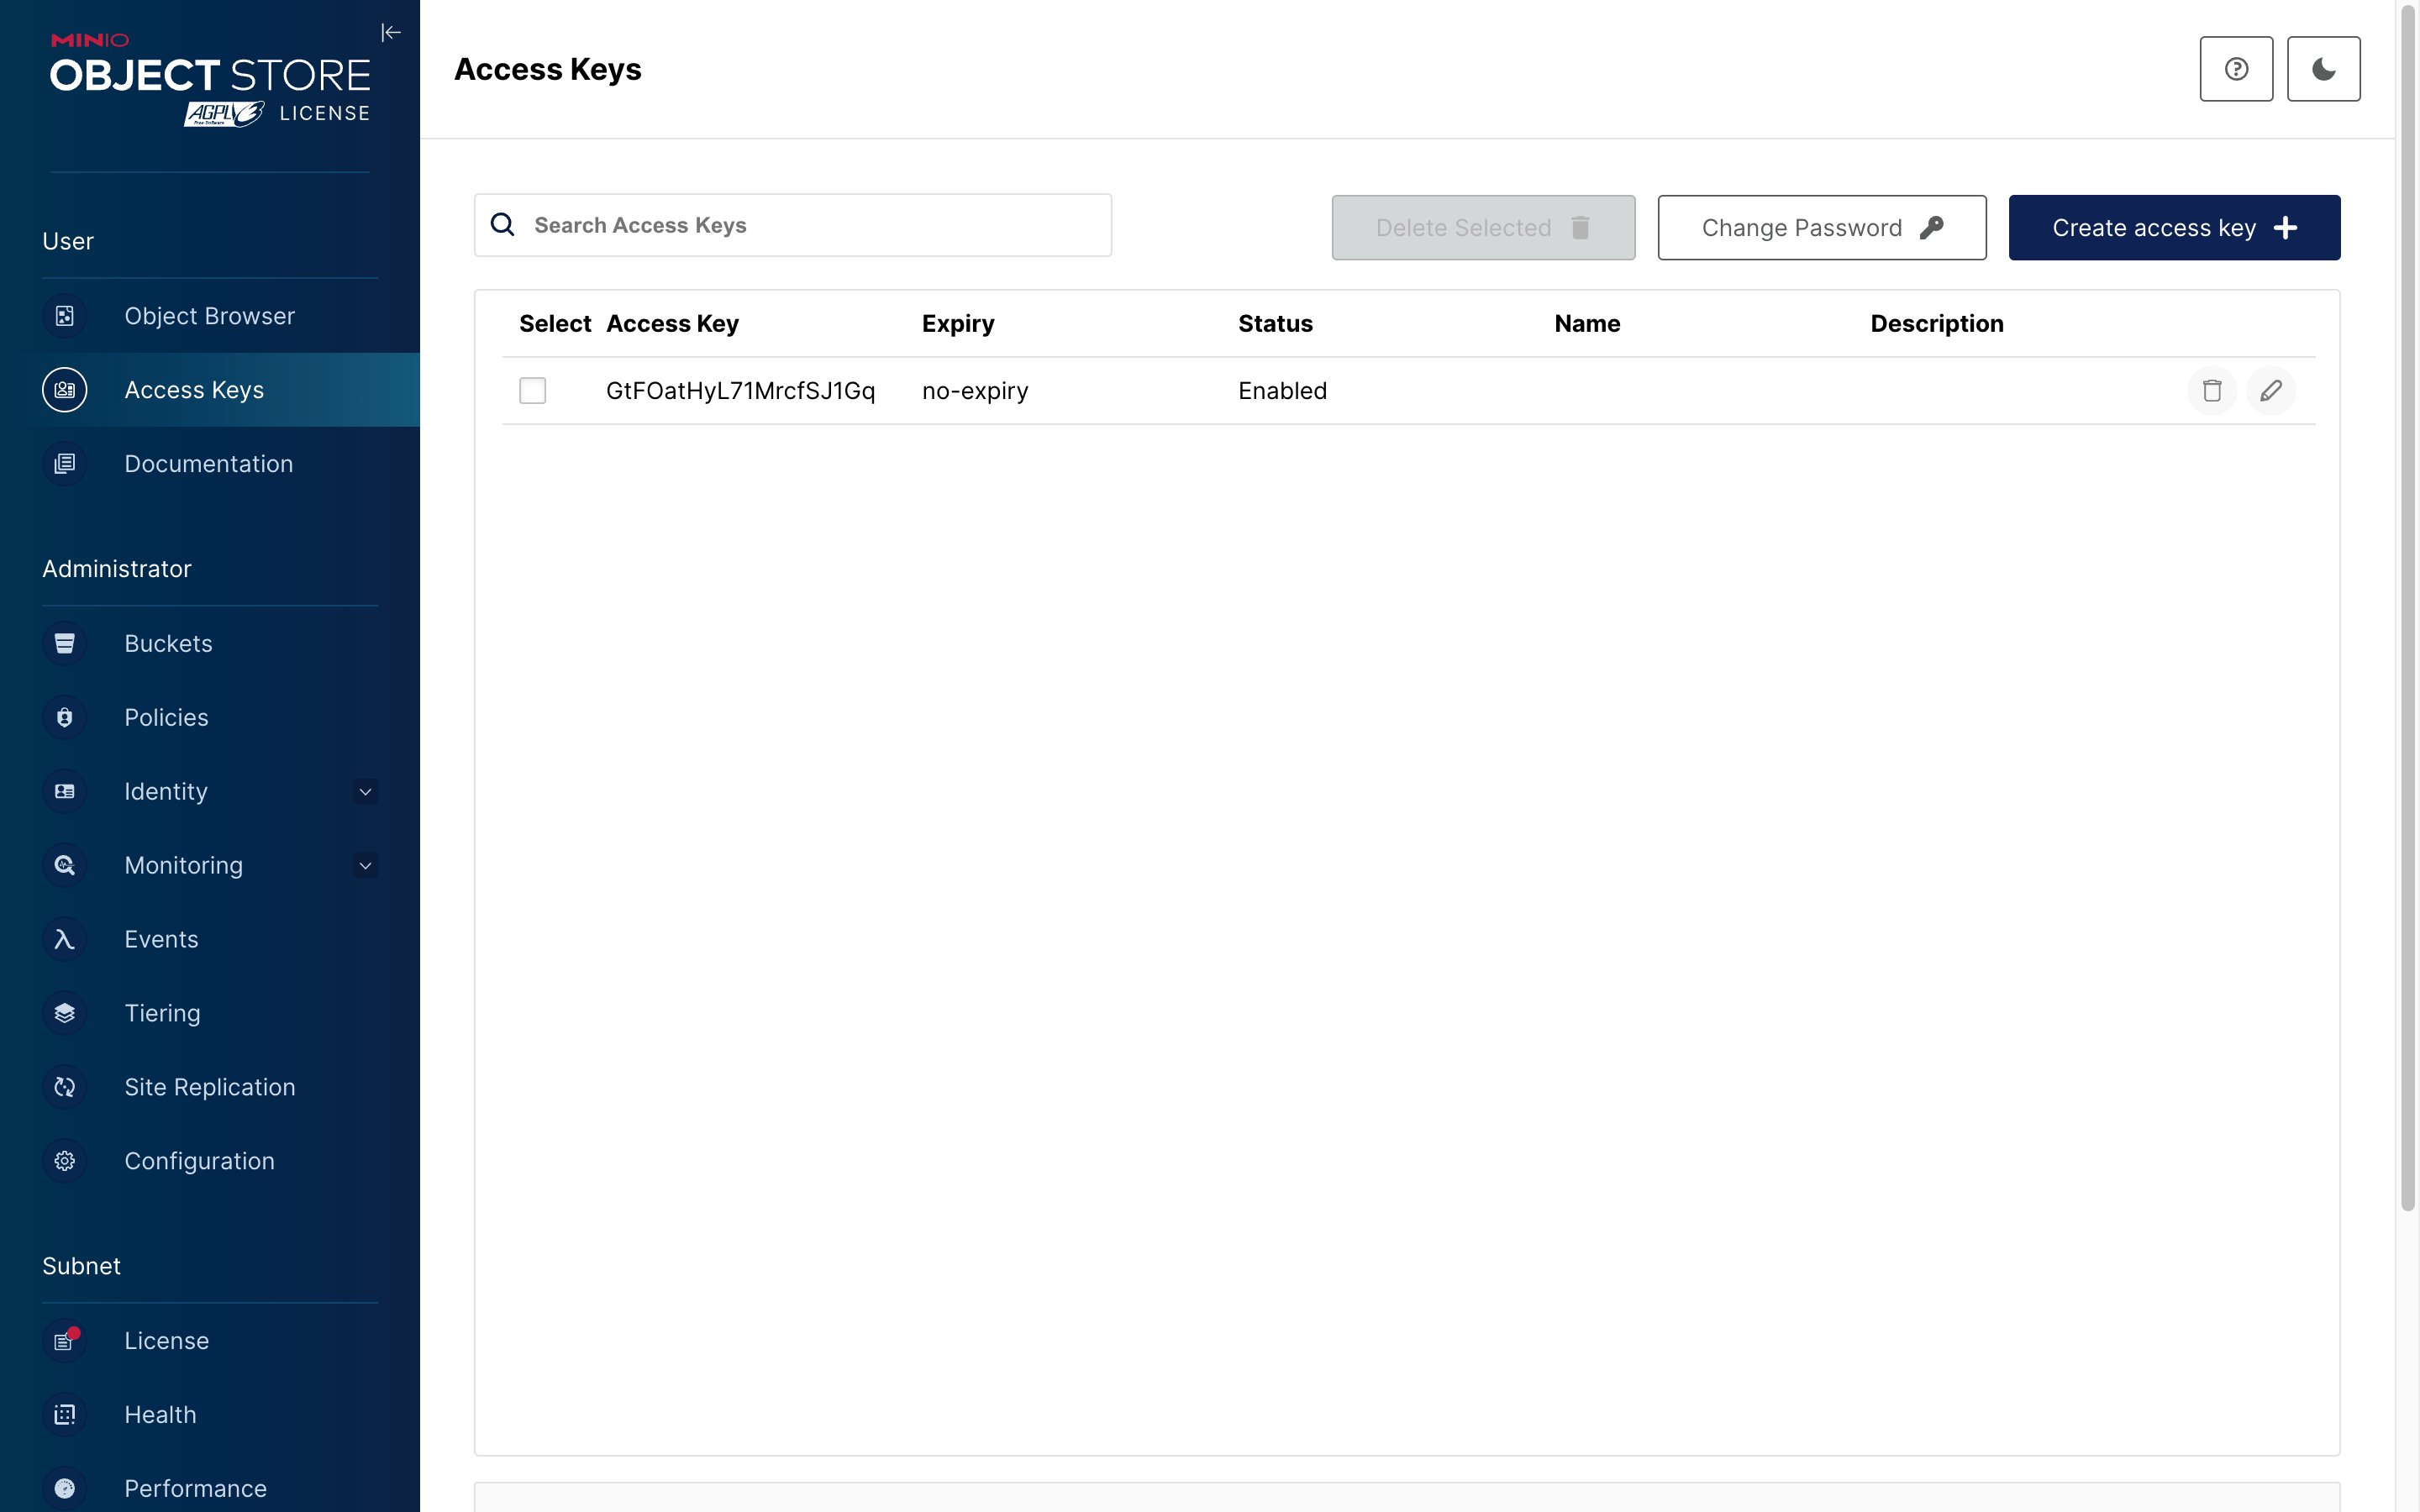
- Click the Save button.
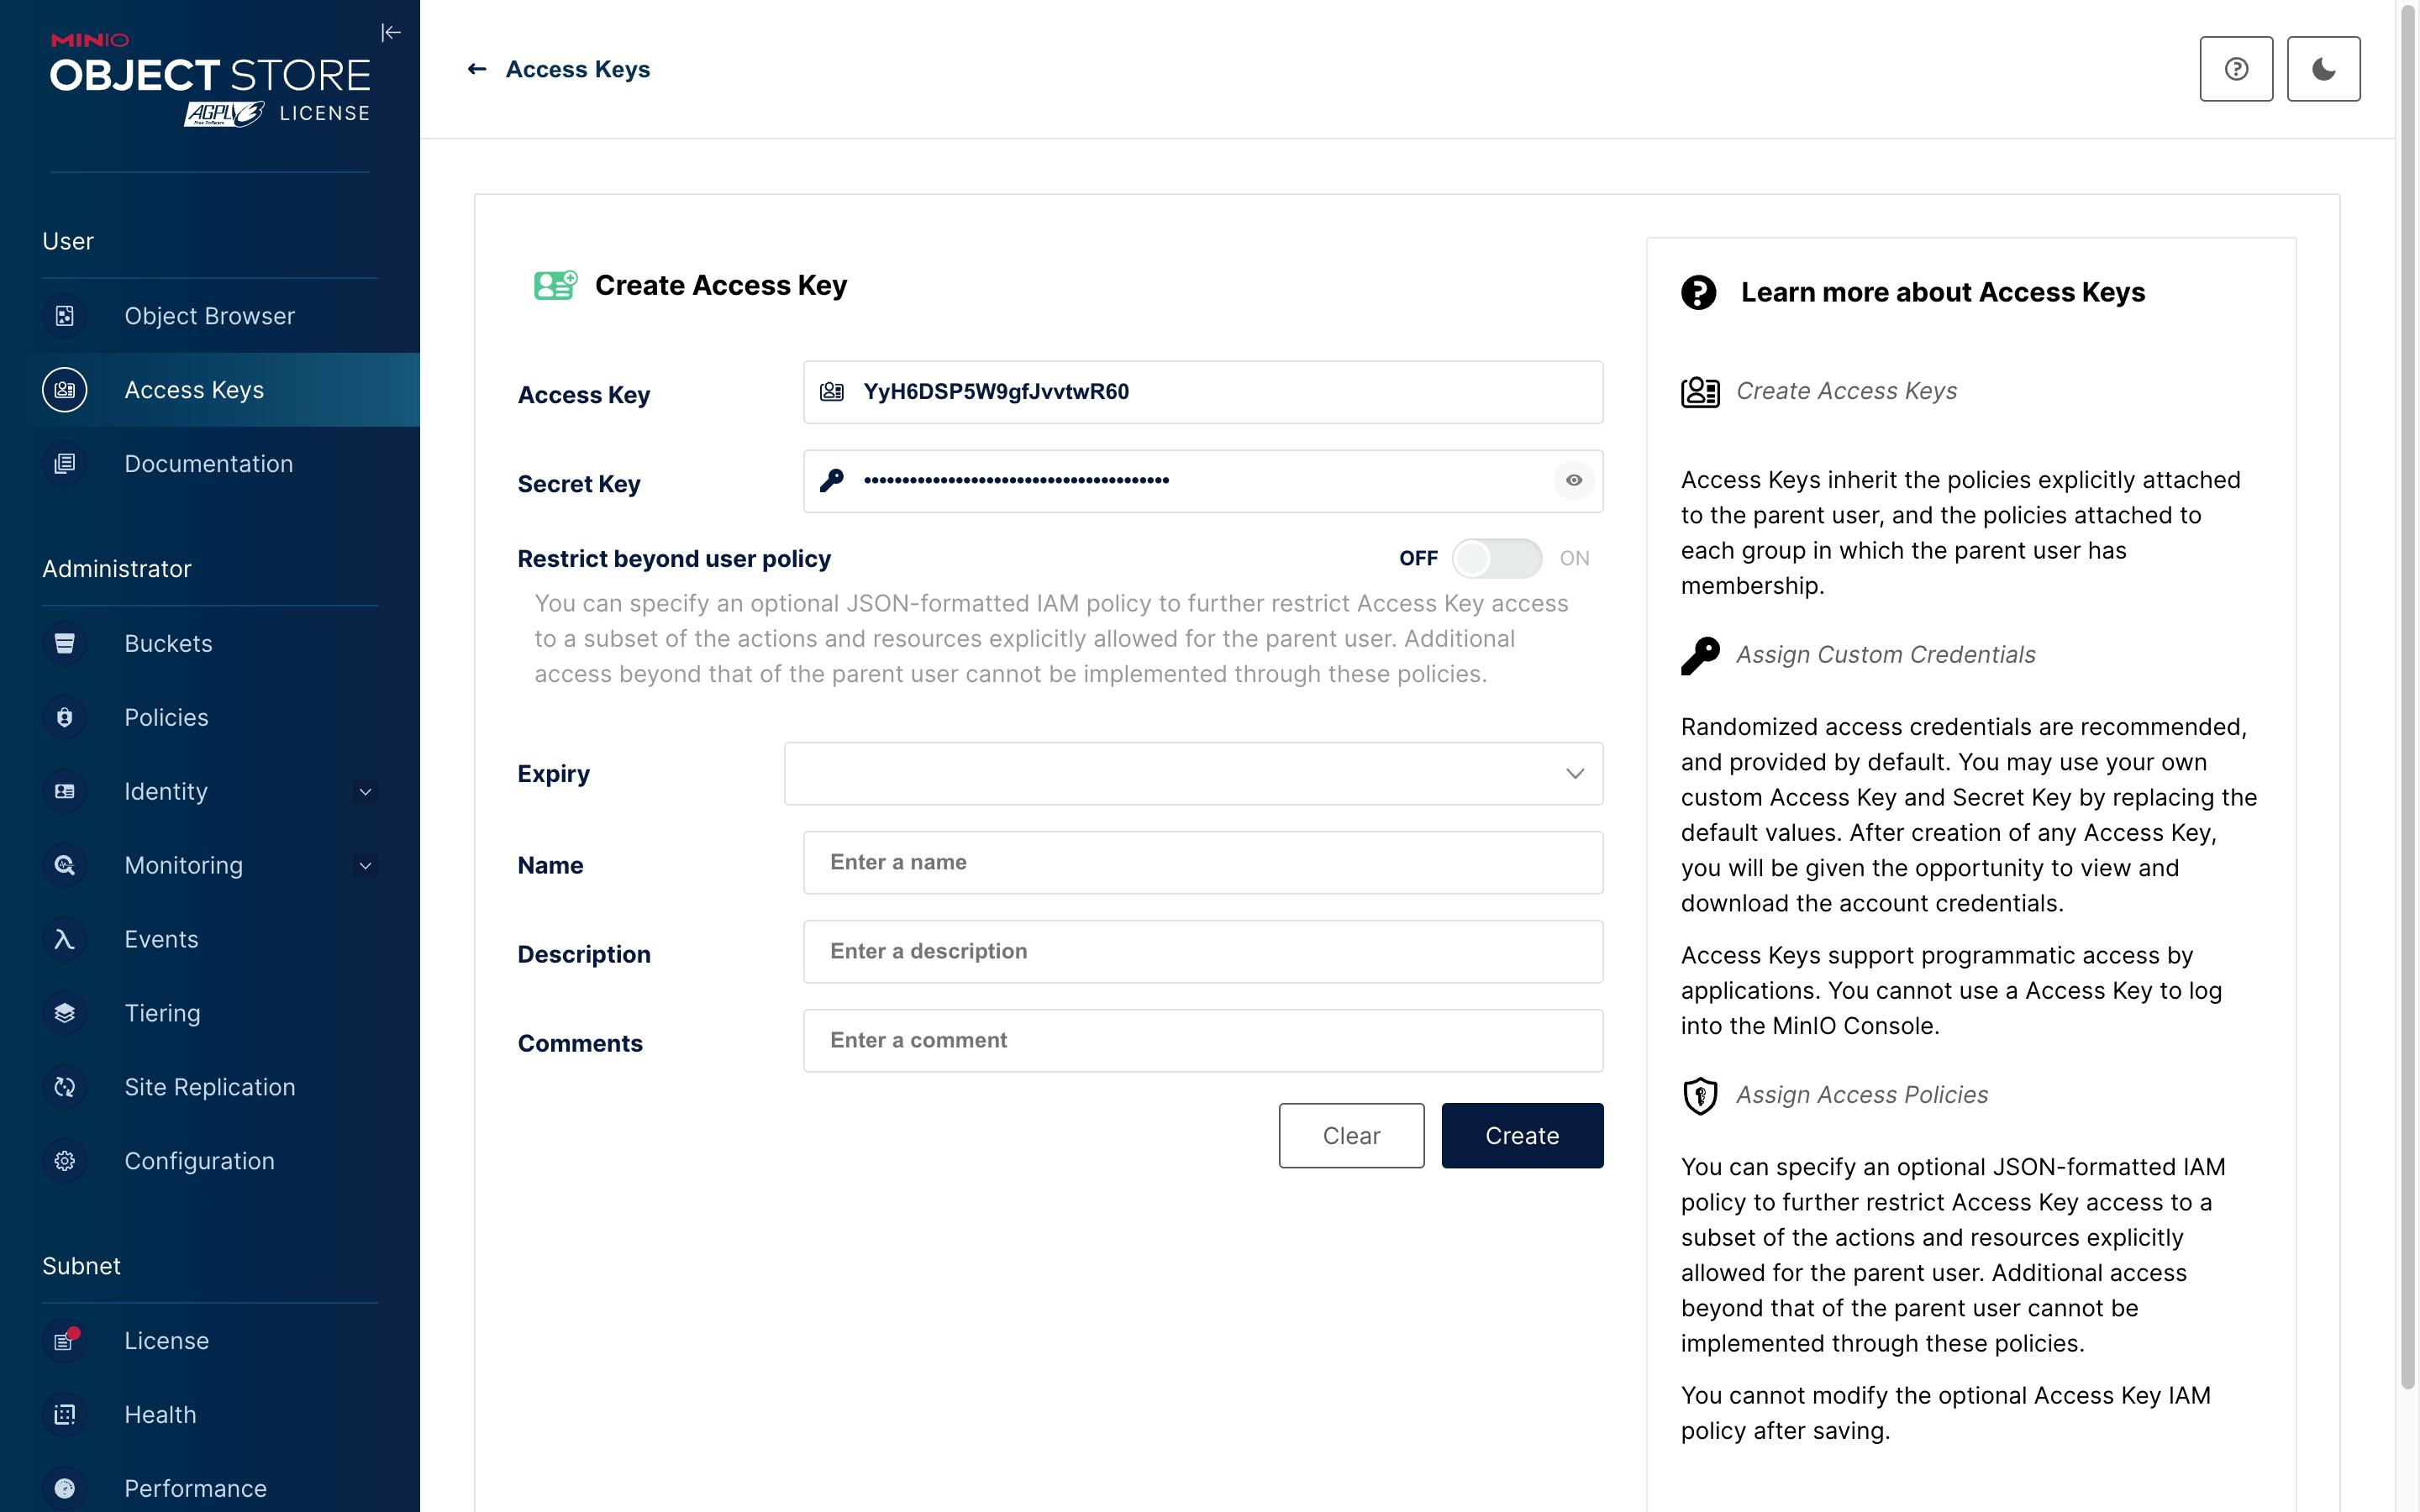
- Save the Access Key and Secret Key from the popup window for future configuration.
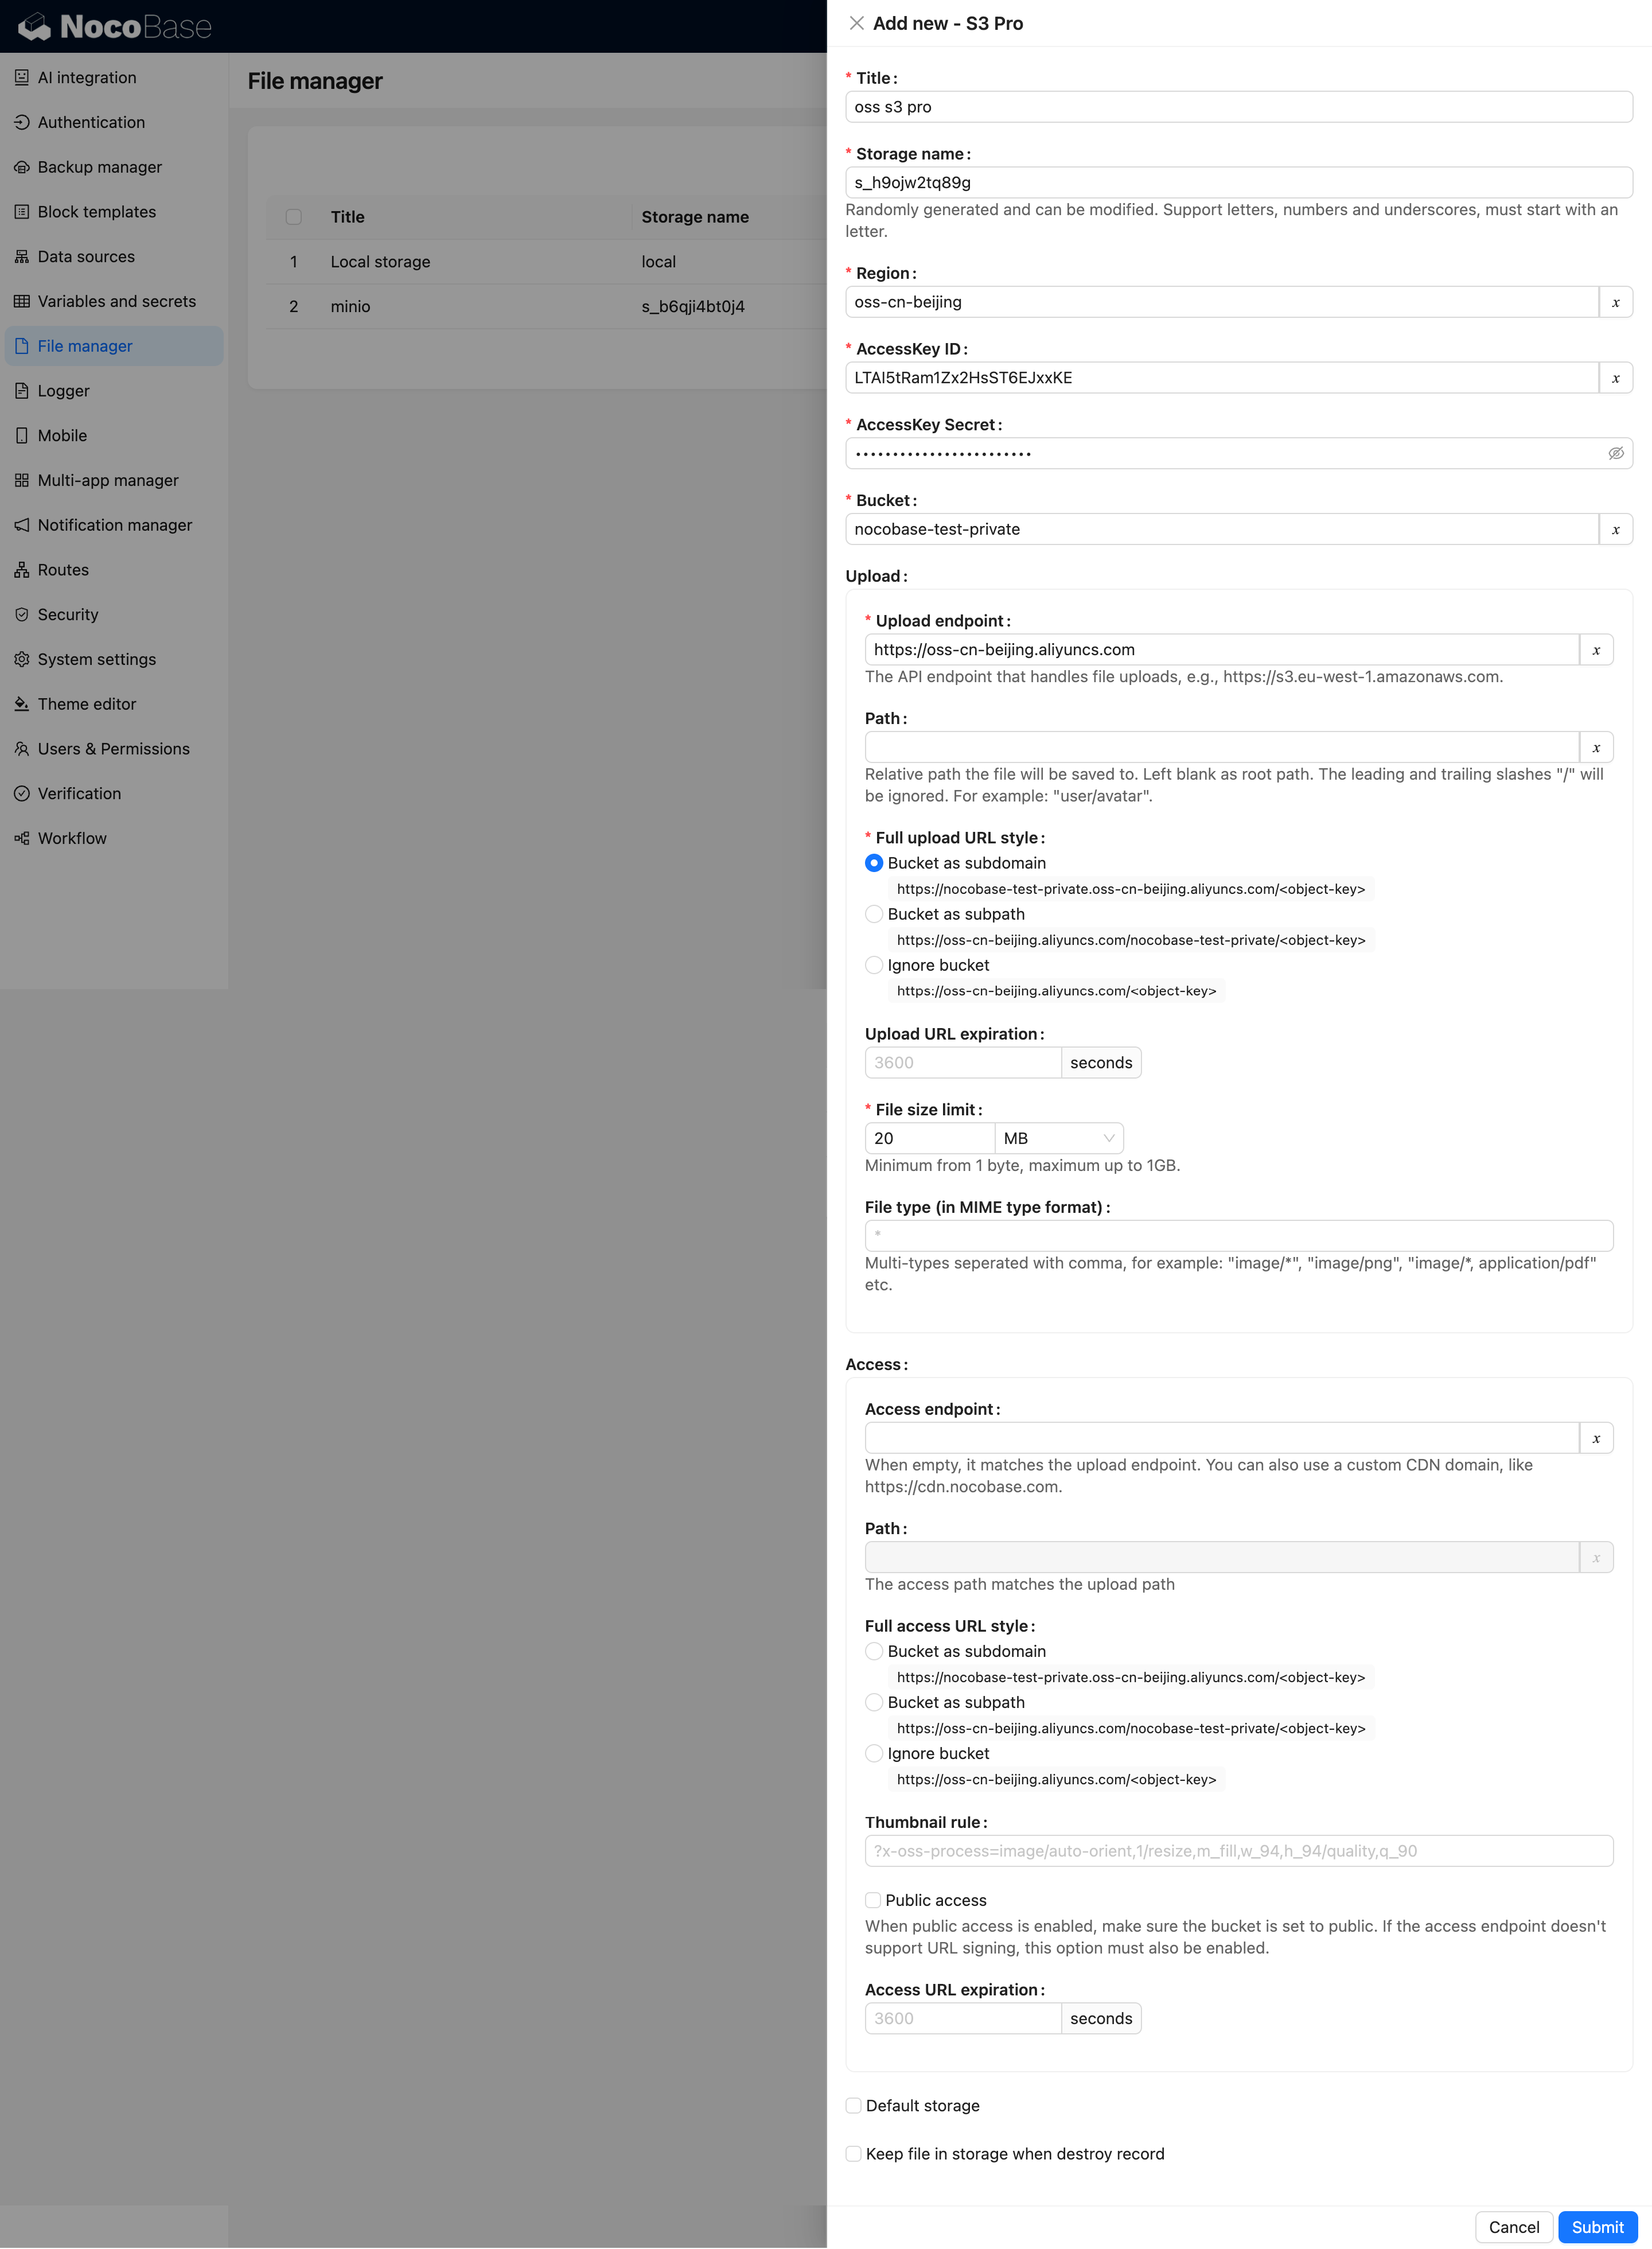
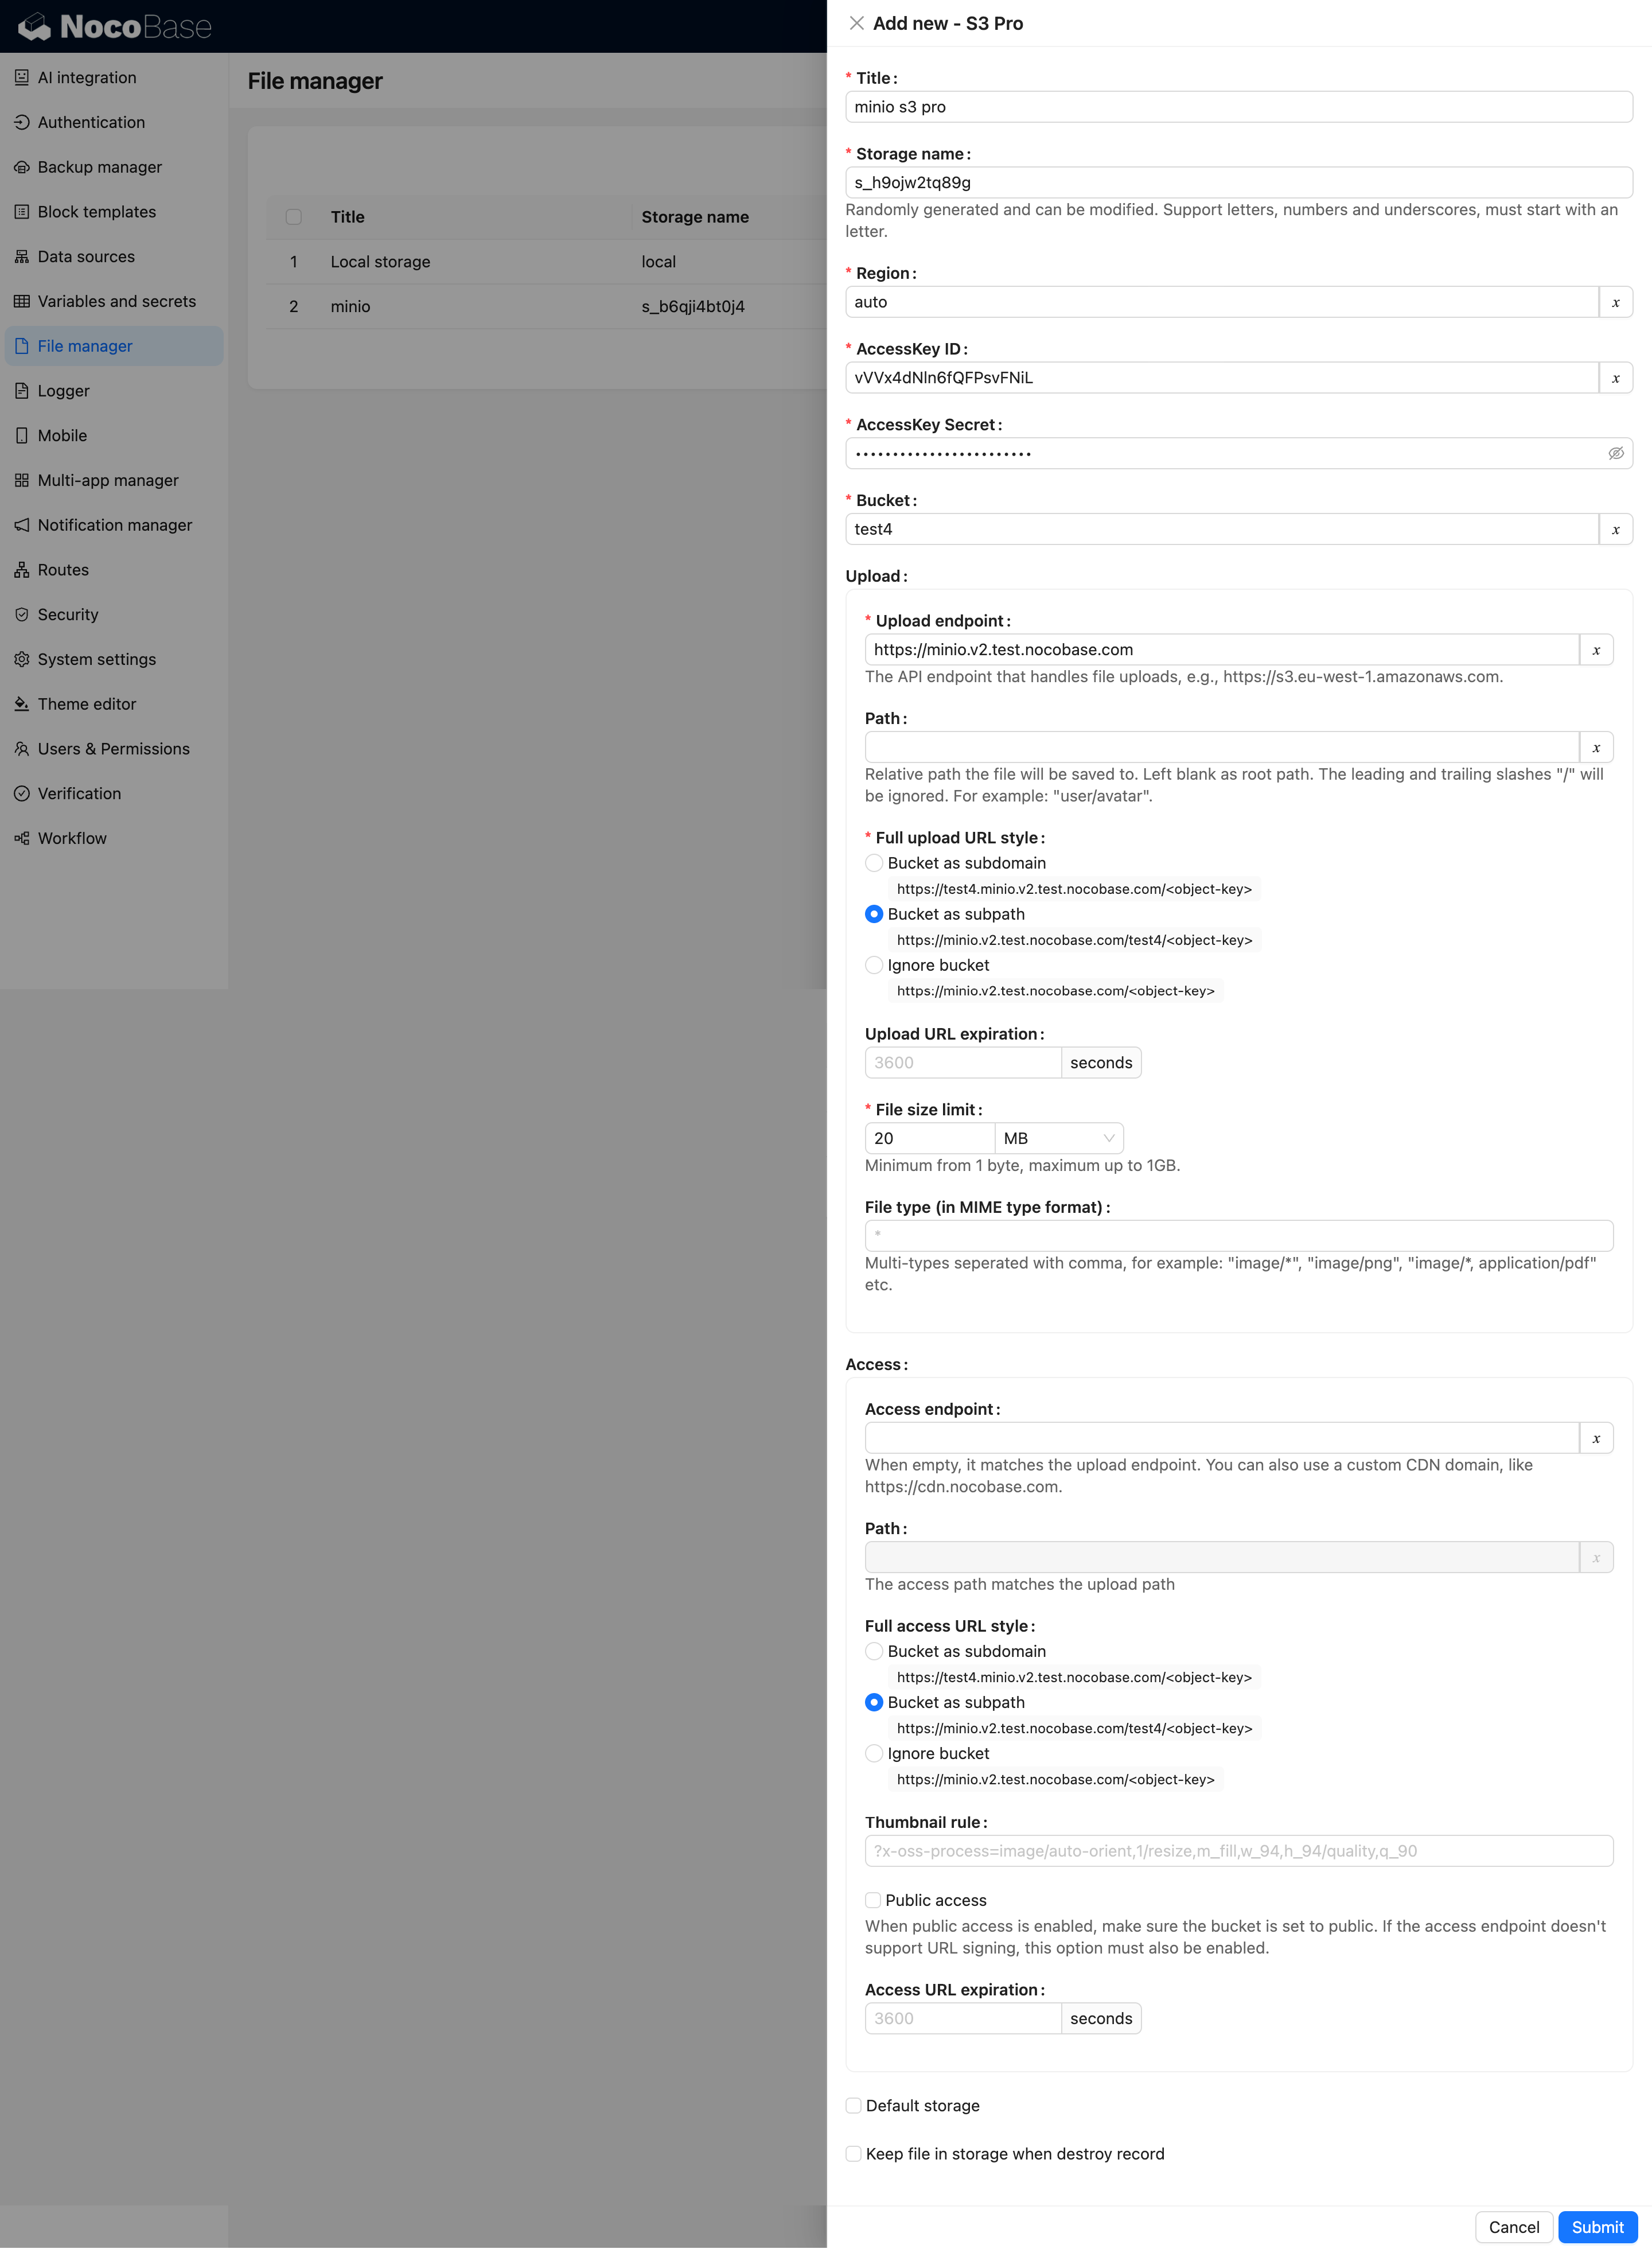
Parameter Configuration
-
Go to the File manager page in NocoBase.
-
Click the Add new button and select S3 Pro.
-
Fill out the form:
- AccessKey ID and AccessKey Secret: Use the values saved from the previous step.
- Region: Privately deployed MinIO does not have the concept of a region; you can set it to
"auto". - Endpoint: Enter the domain name or IP address of your deployed service.
- Set Full access URL style to Path-Style.
Configuration Example
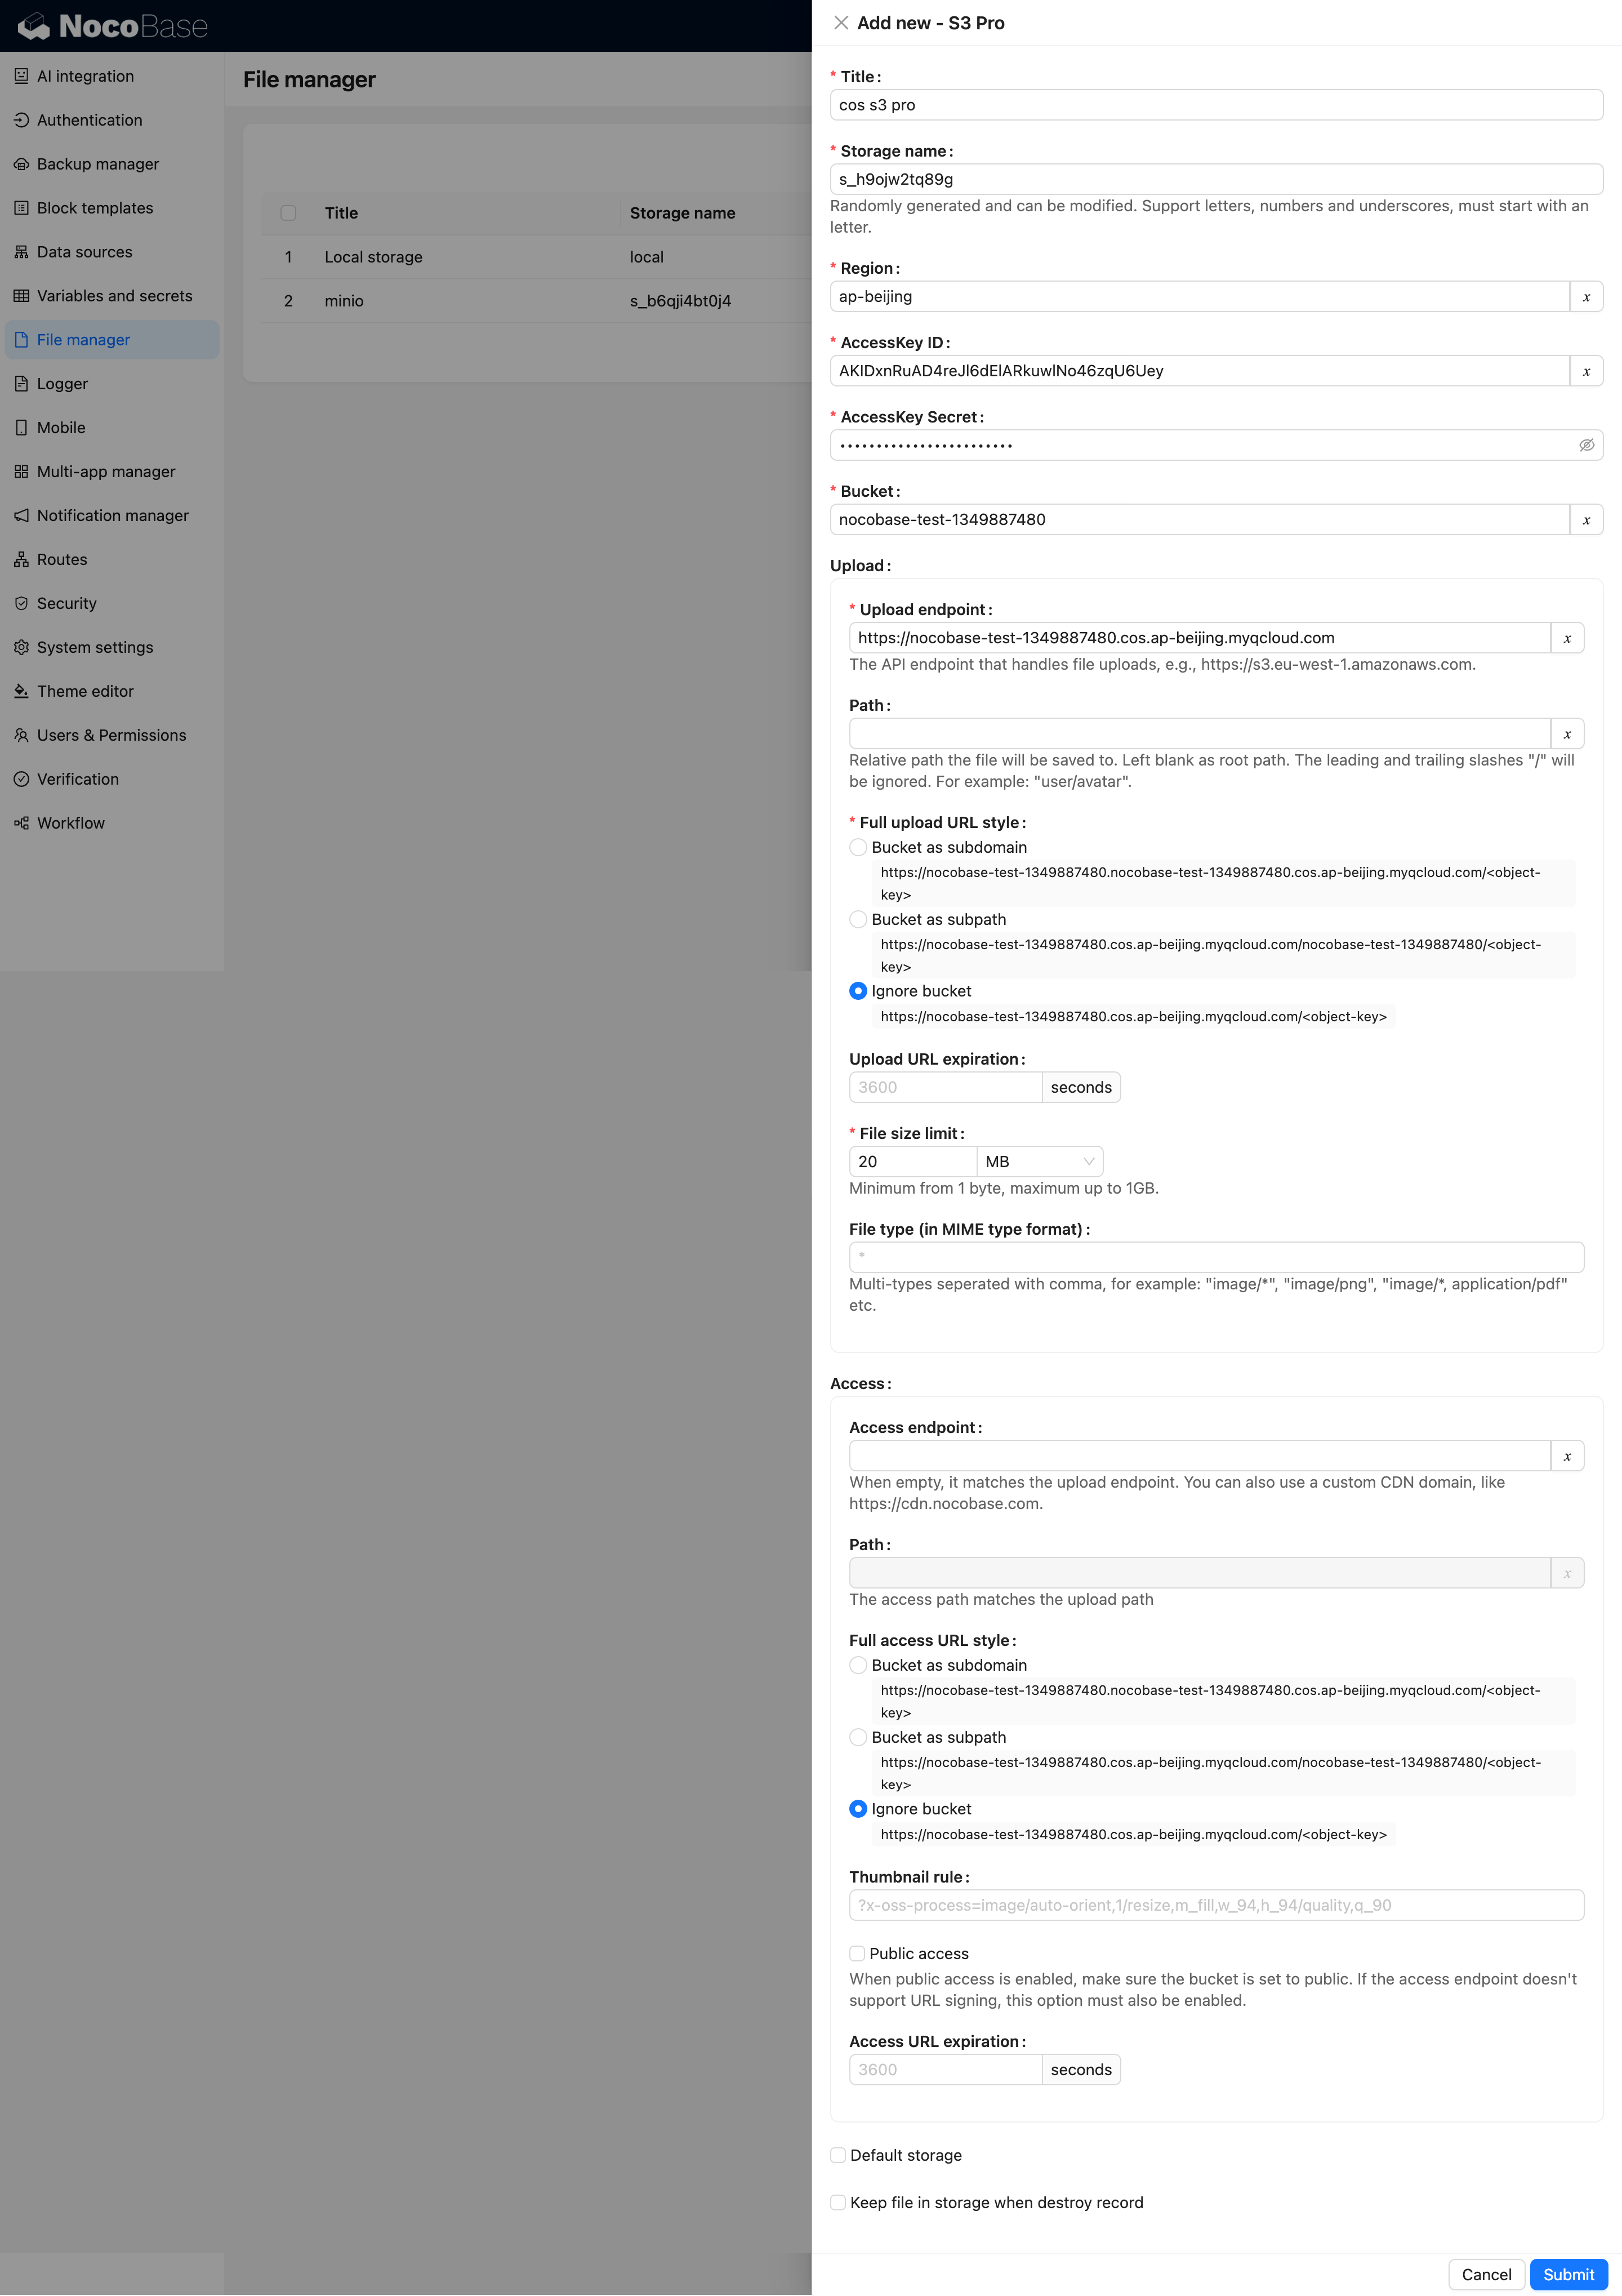
Tencent COS
Refer to the configurations for the file services above. The logic is similar.
Configuration Example
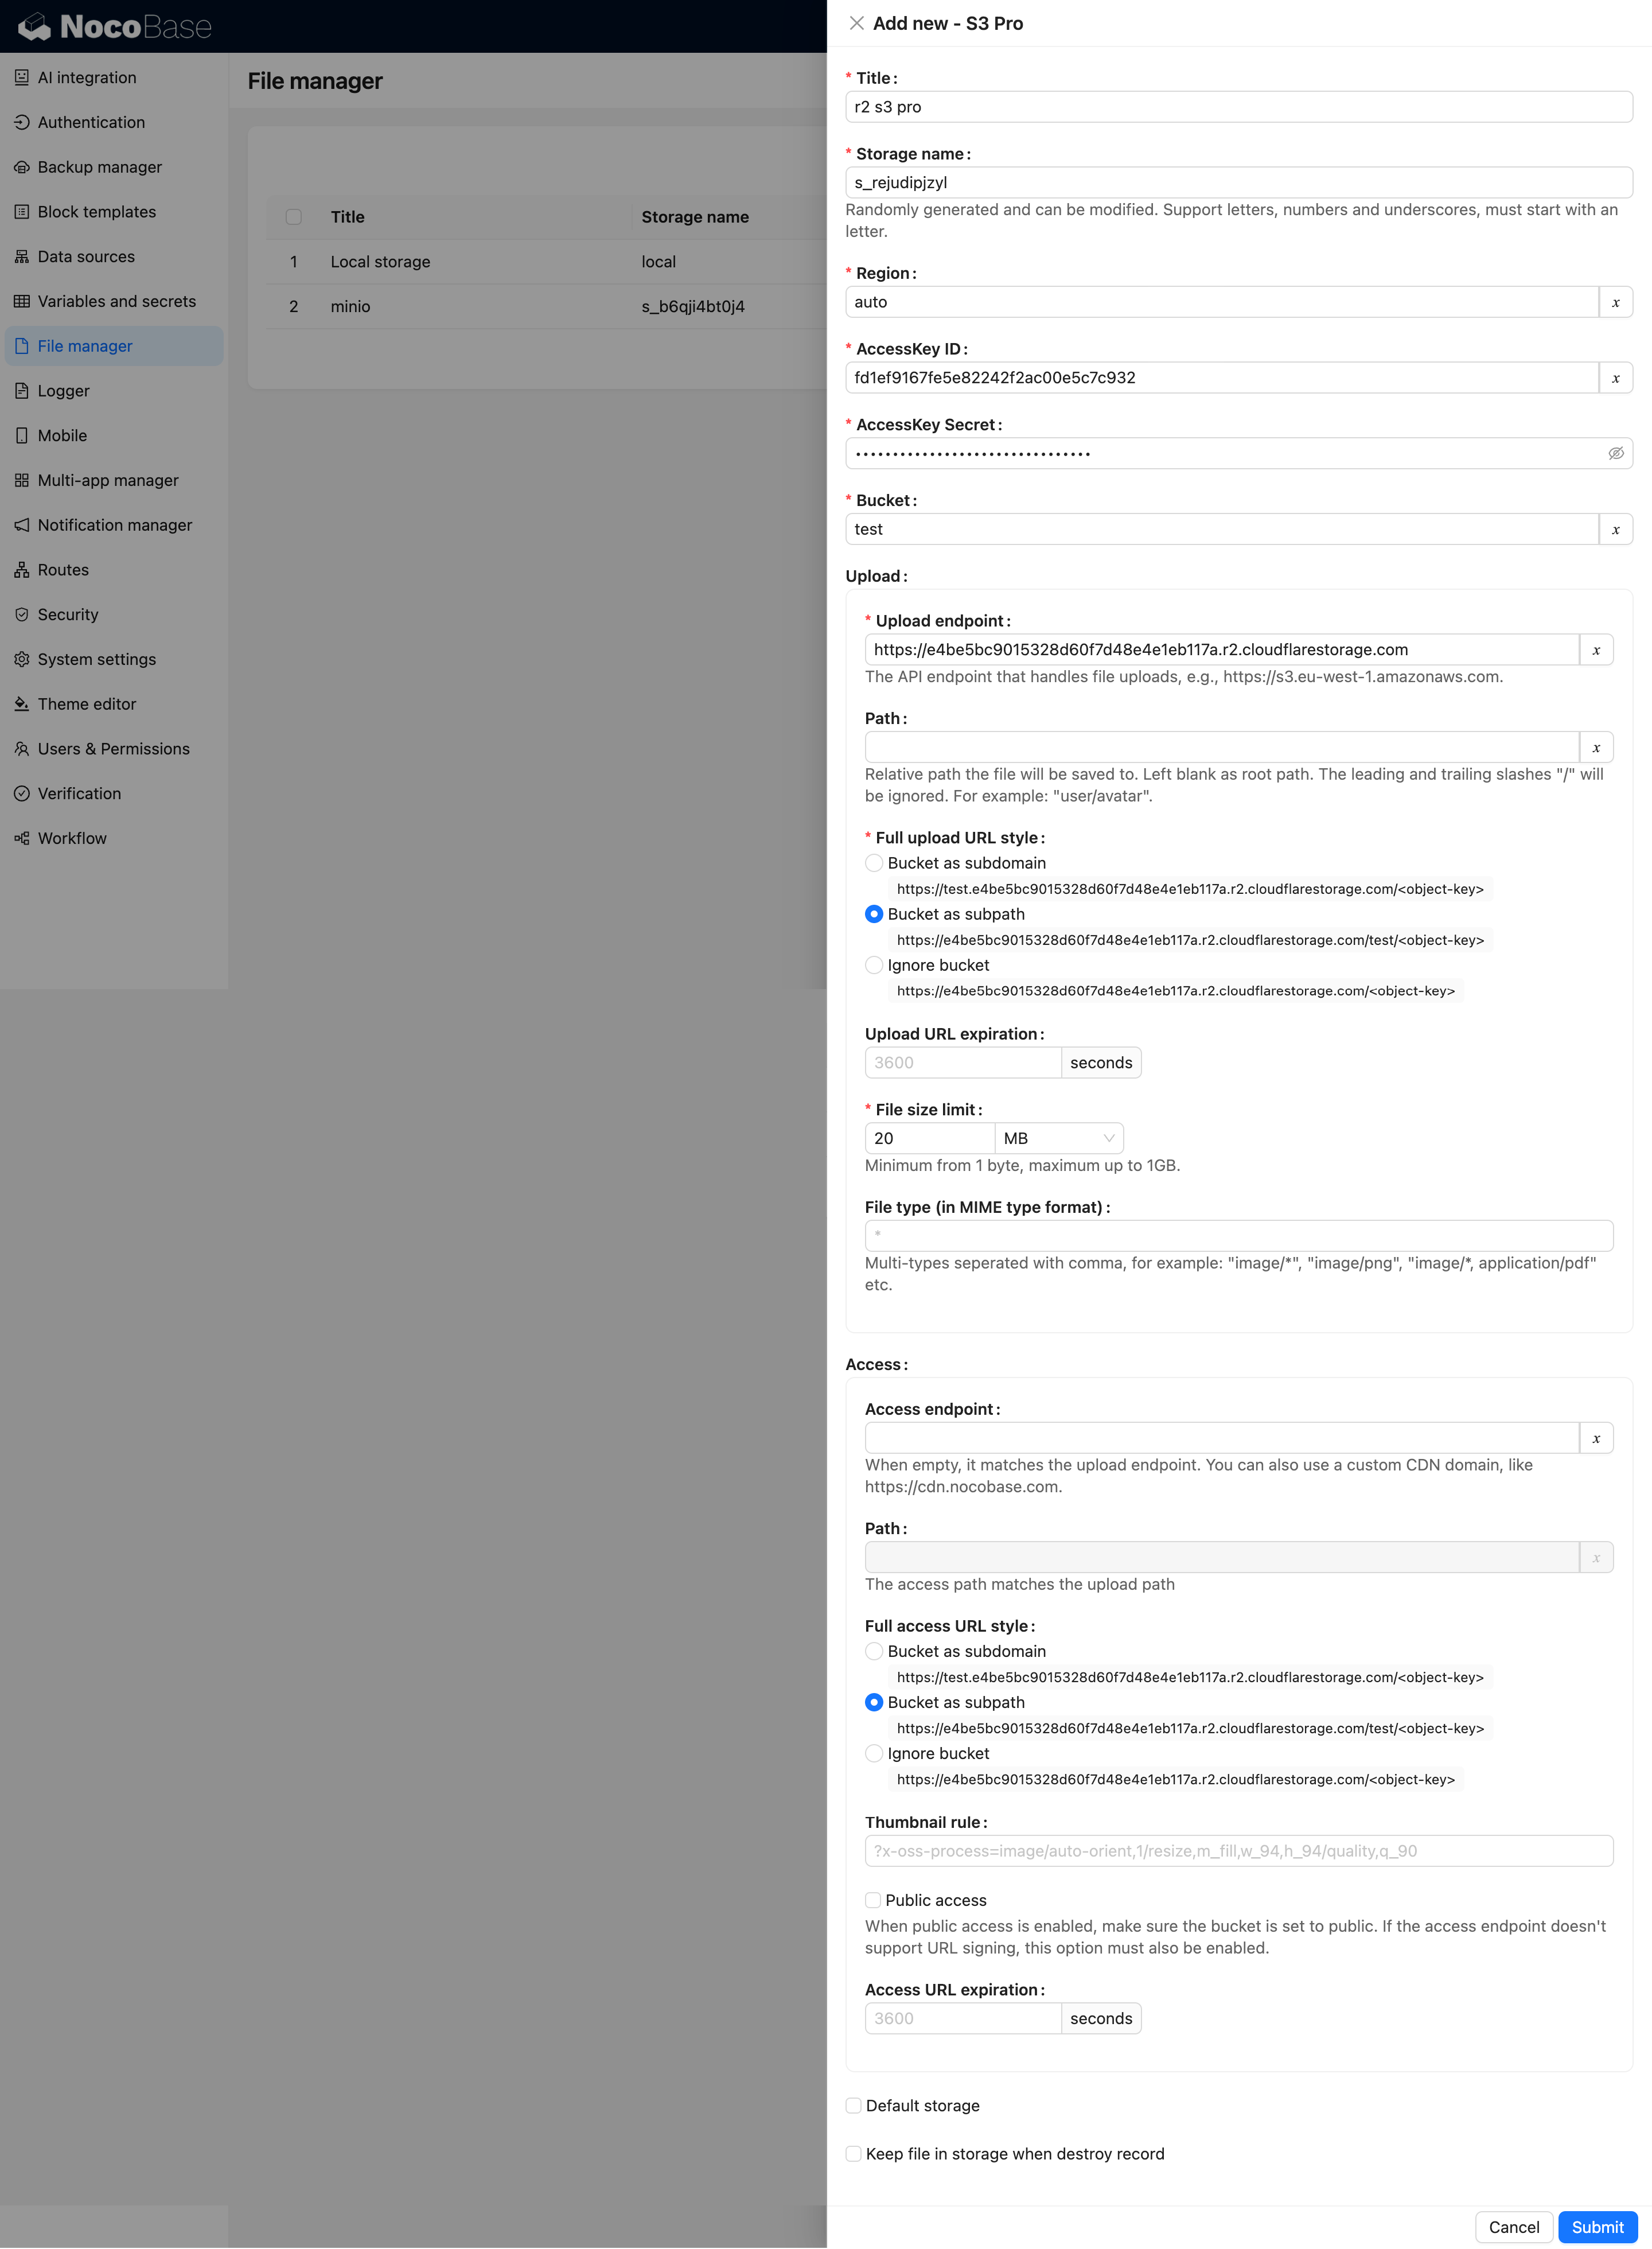
Cloudflare R2
Refer to the configurations for the file services above. The logic is similar.
Configuration Example
User Guide
Refer to the file-manager plugin documentation.