

เอกสารนี้แปลโดย AI หากมีข้อมูลที่ไม่ถูกต้อง โปรดดูเวอร์ชันภาษาอังกฤษ
Microsoft Entra ID
https://learn.microsoft.com/en-us/entra/identity-platform/quickstart-register-app https://learn.microsoft.com/en-us/entra/identity-platform/v2-protocols-oidc
การเพิ่ม Authenticator ใน NocoBase
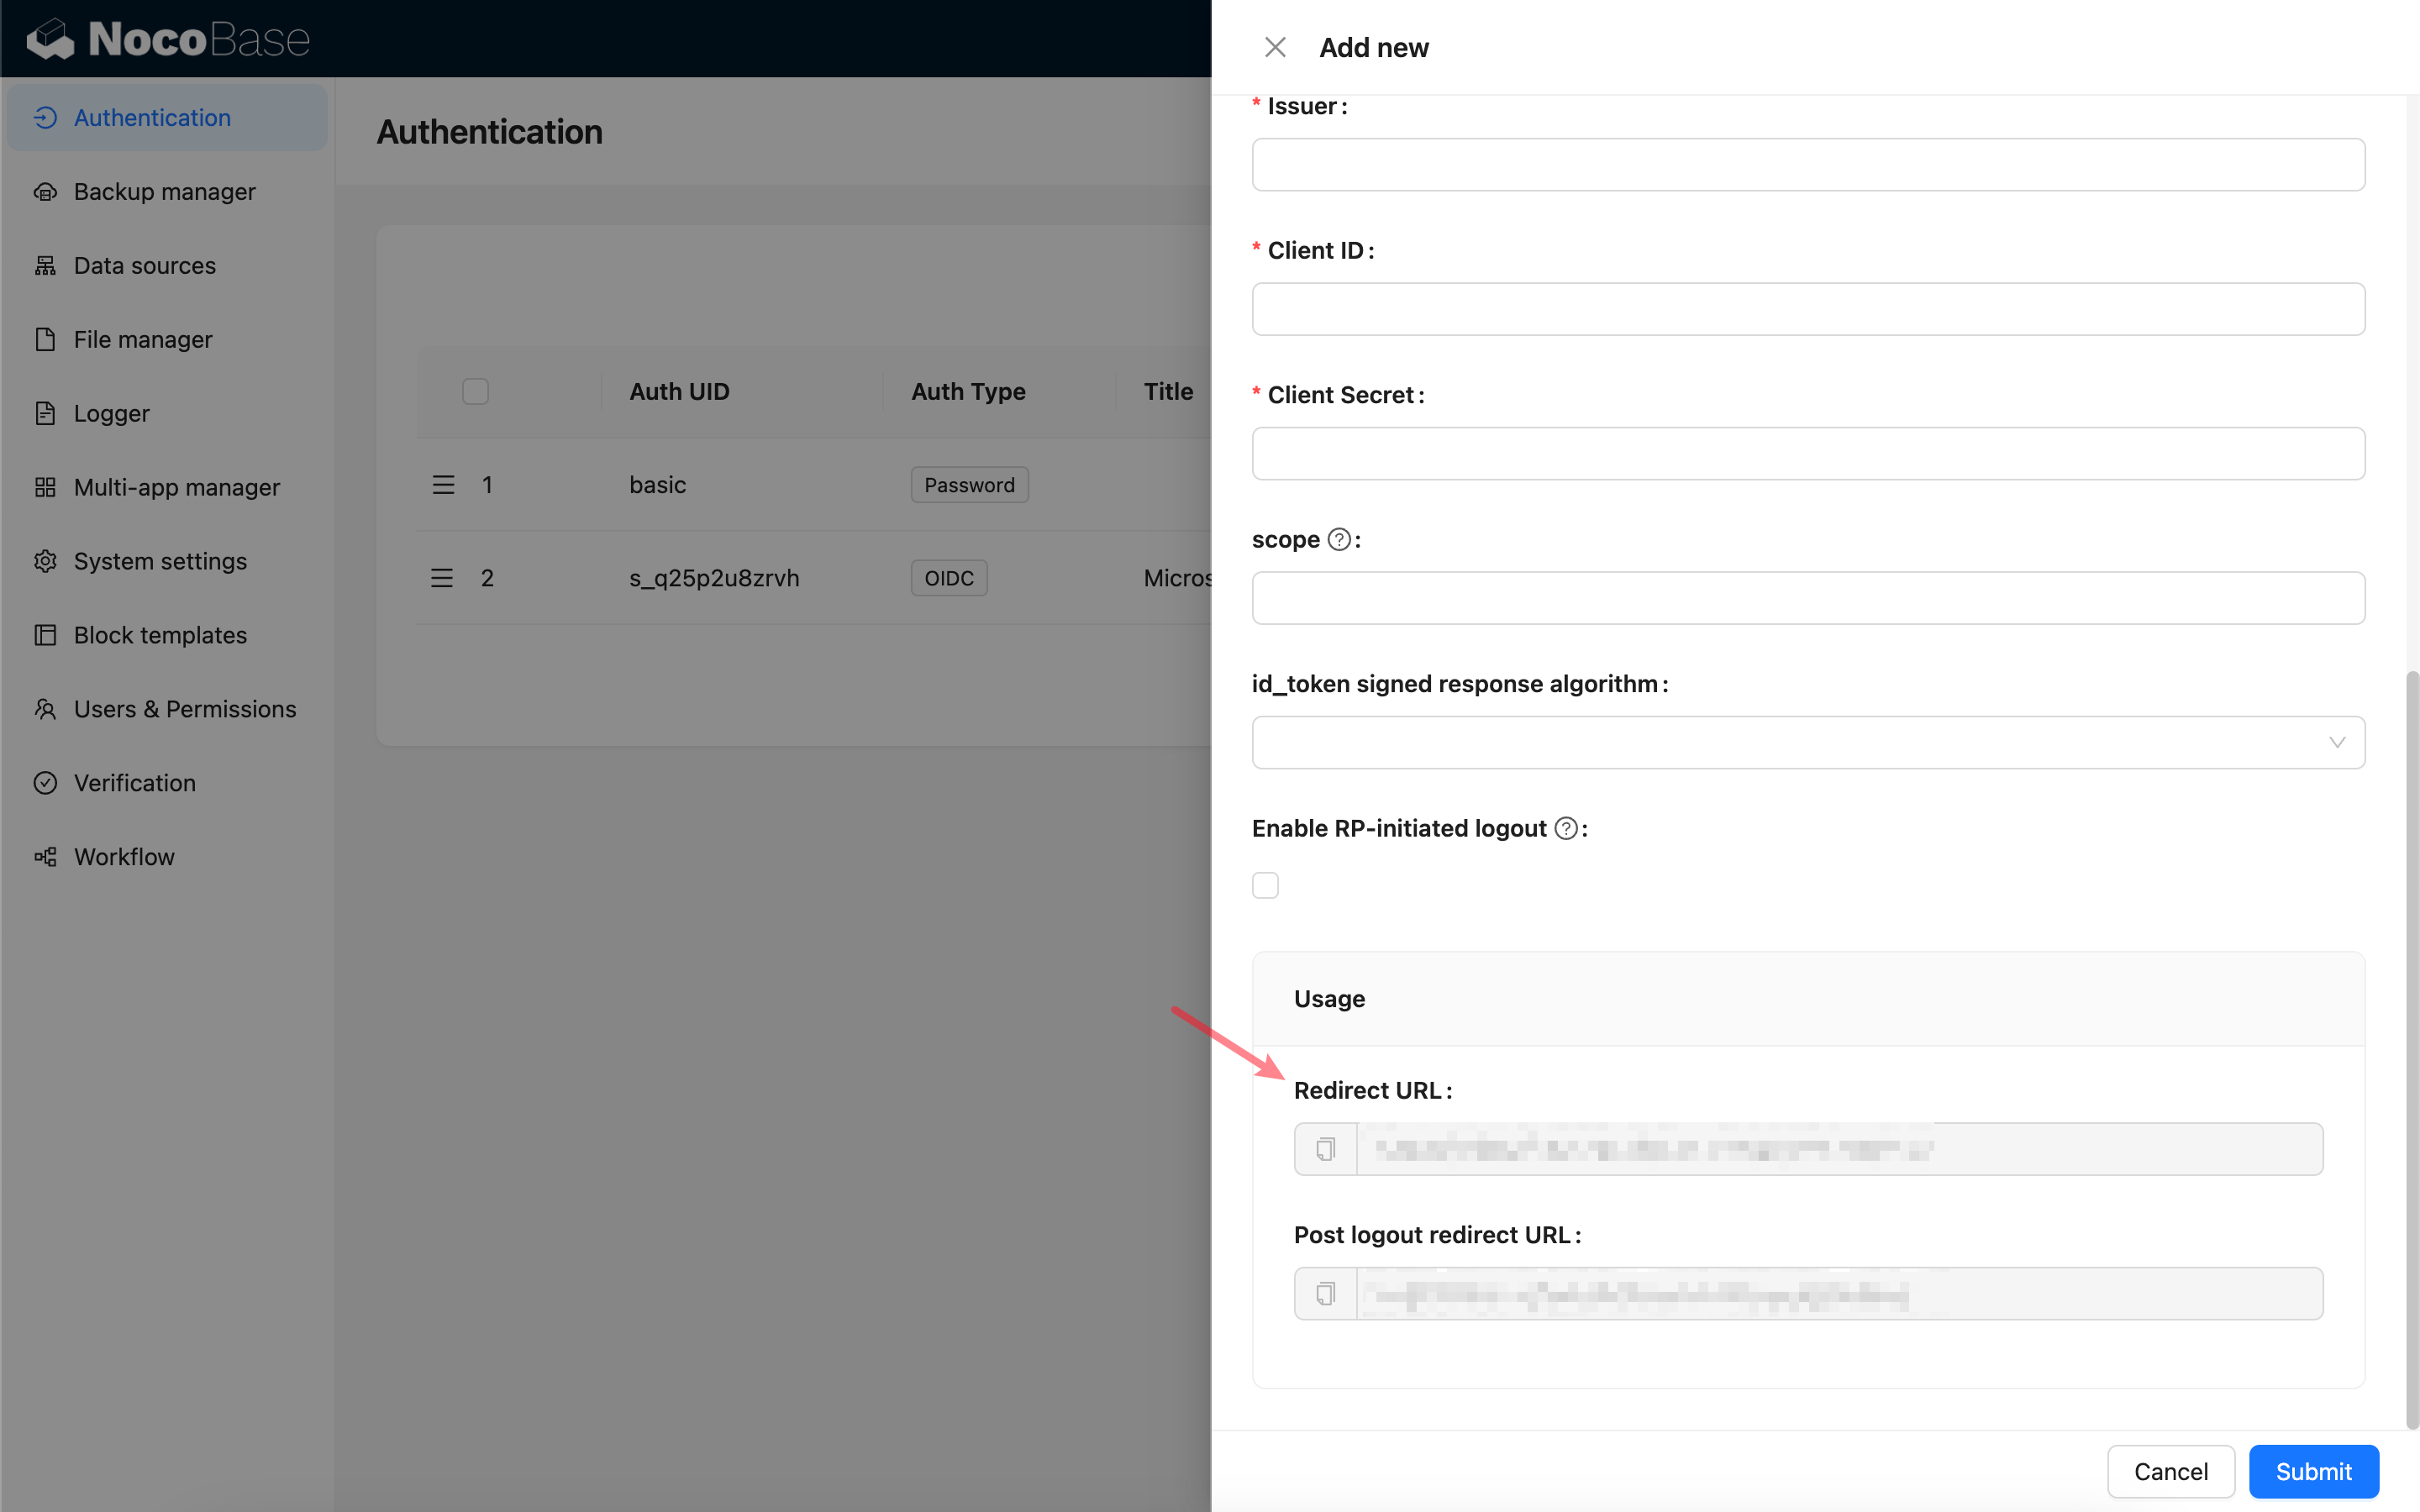
ขั้นแรก ให้เพิ่ม Authenticator ใหม่ใน NocoBase โดยไปที่ การตั้งค่าปลั๊กอิน (Plugin Settings) -> การยืนยันตัวตนผู้ใช้ (User Authentication) -> เพิ่ม (Add) -> OIDC ครับ/ค่ะ
คัดลอก Callback URL ครับ/ค่ะ
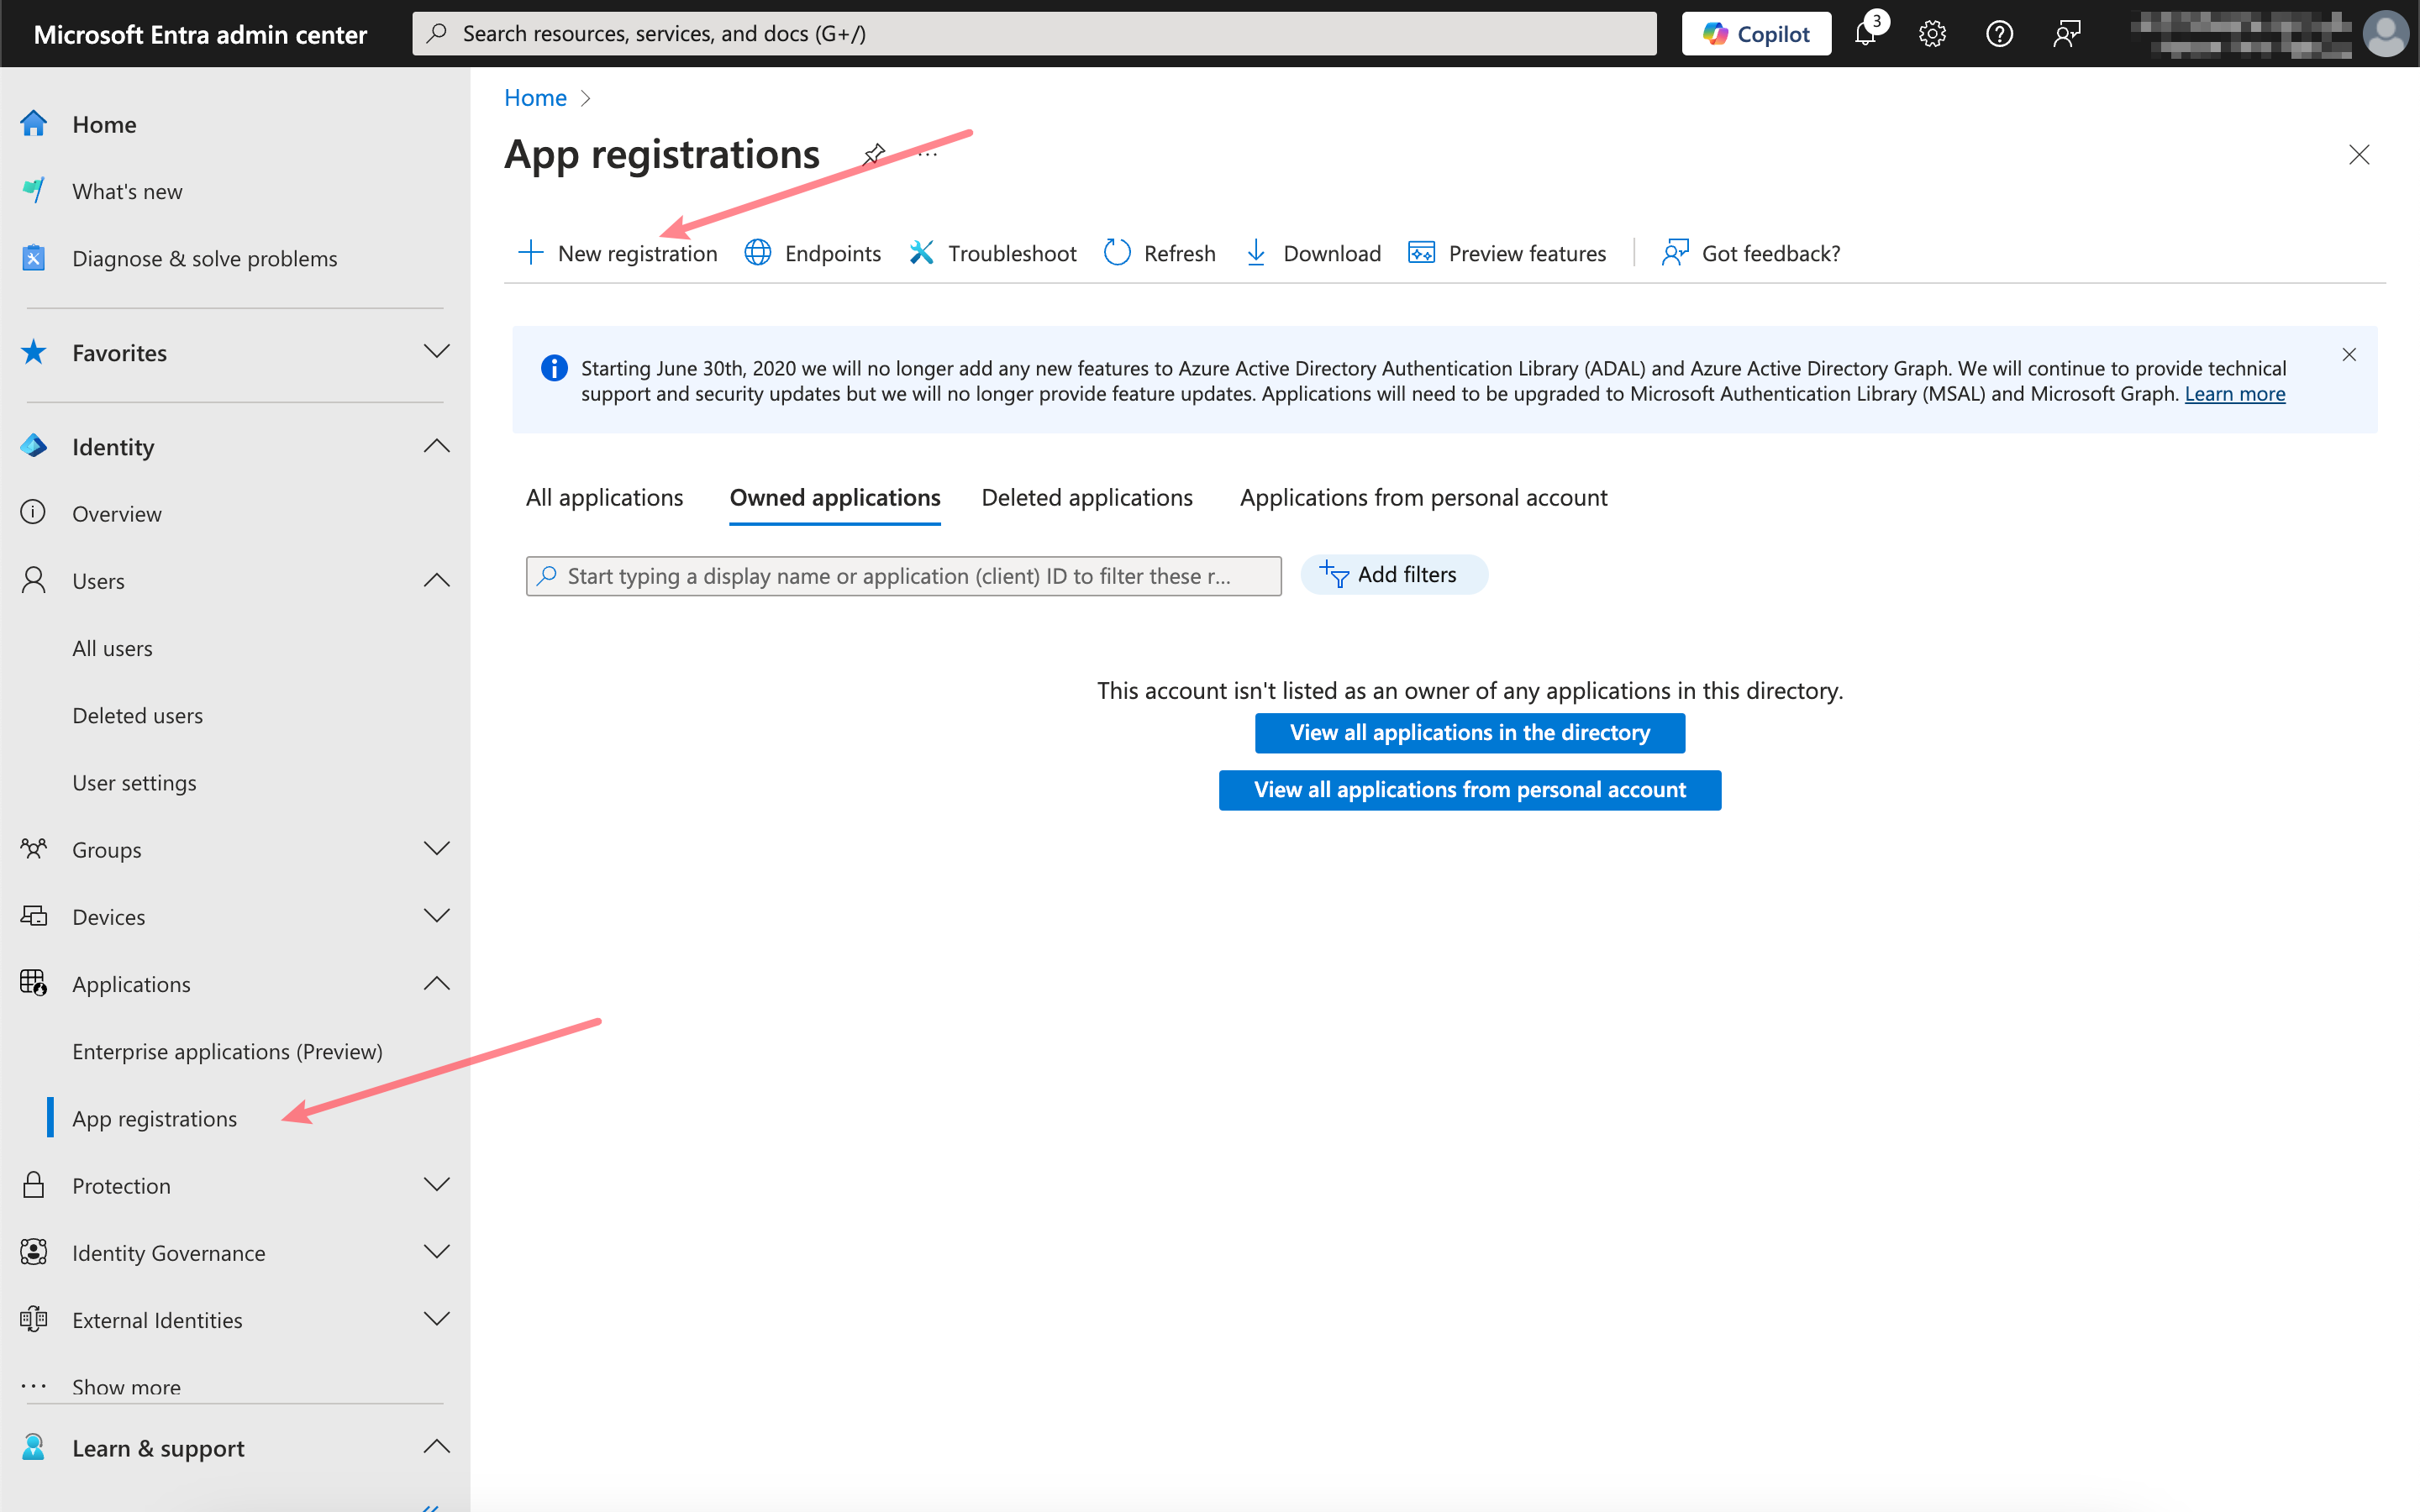
การลงทะเบียนแอปพลิเคชัน
เปิด Microsoft Entra admin center แล้วลงทะเบียนแอปพลิเคชันใหม่ครับ/ค่ะ
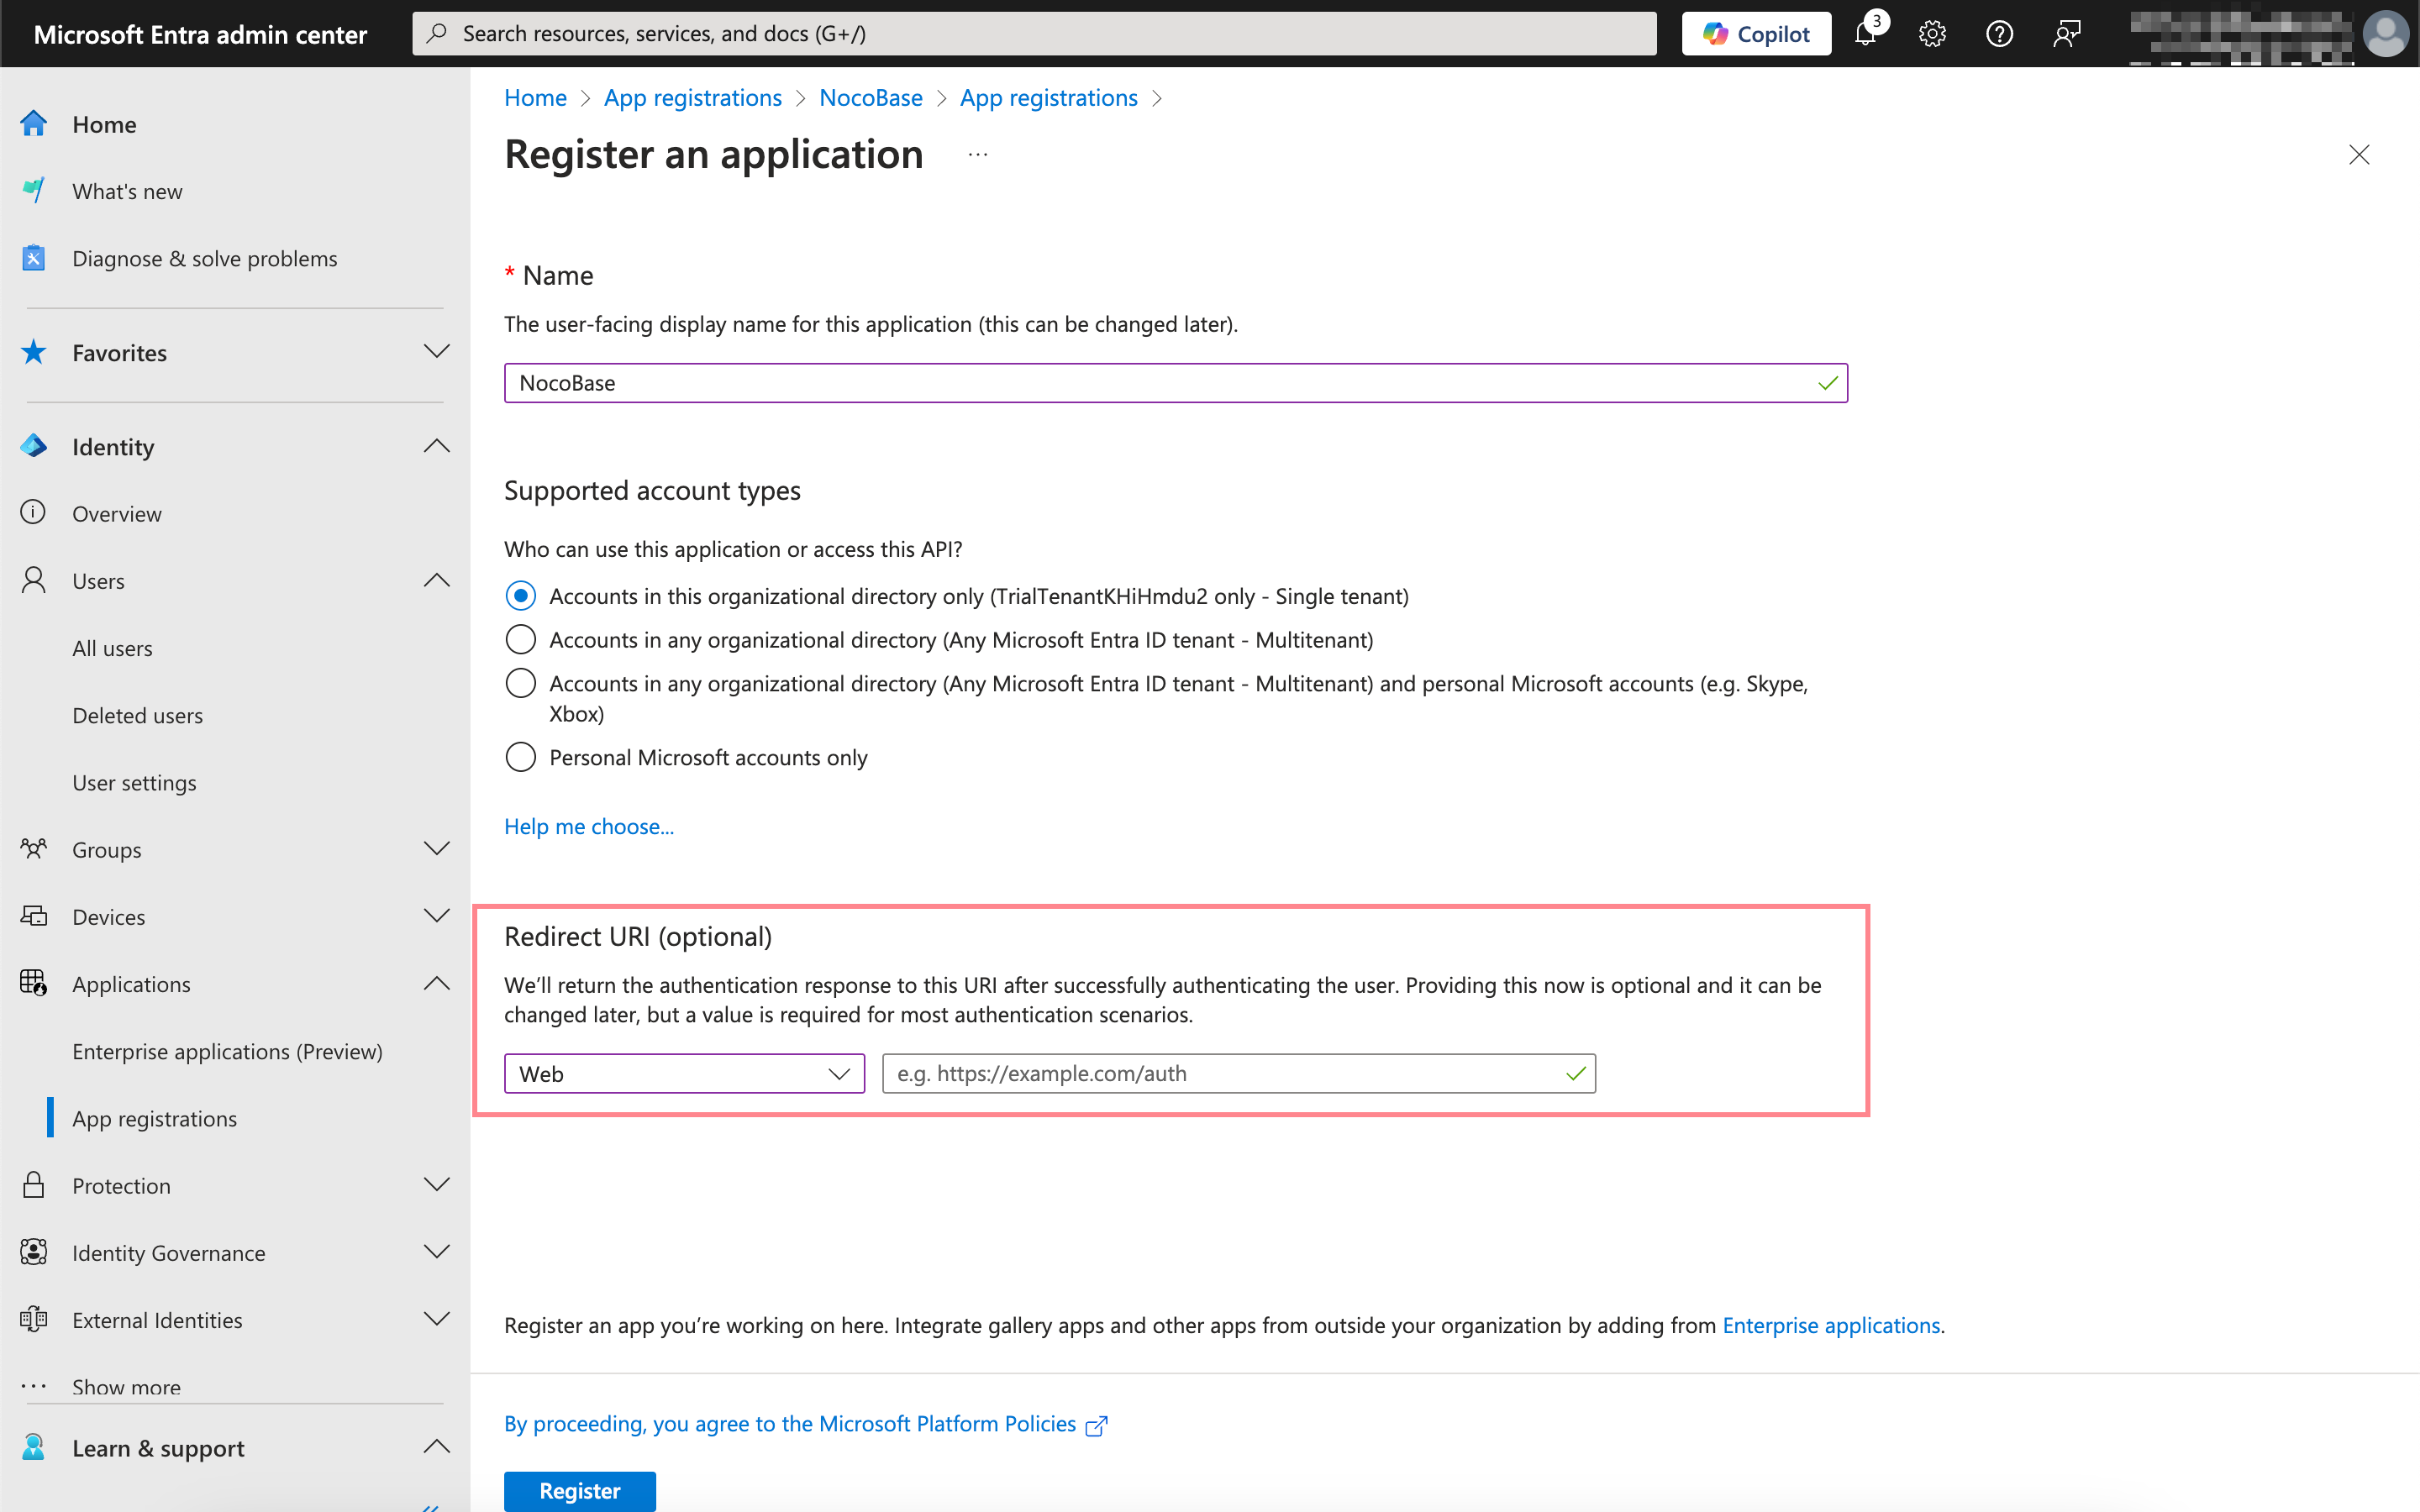
วาง Callback URL ที่คุณคัดลอกไว้เมื่อสักครู่ลงในช่องนี้ครับ/ค่ะ
การรับและกรอกข้อมูลที่เกี่ยวข้อง
คลิกเข้าไปที่แอปพลิเคชันที่คุณเพิ่งลงทะเบียน จากนั้นคัดลอก Application (client) ID และ Directory (tenant) ID จากหน้าภาพรวม (Overview) ครับ/ค่ะ
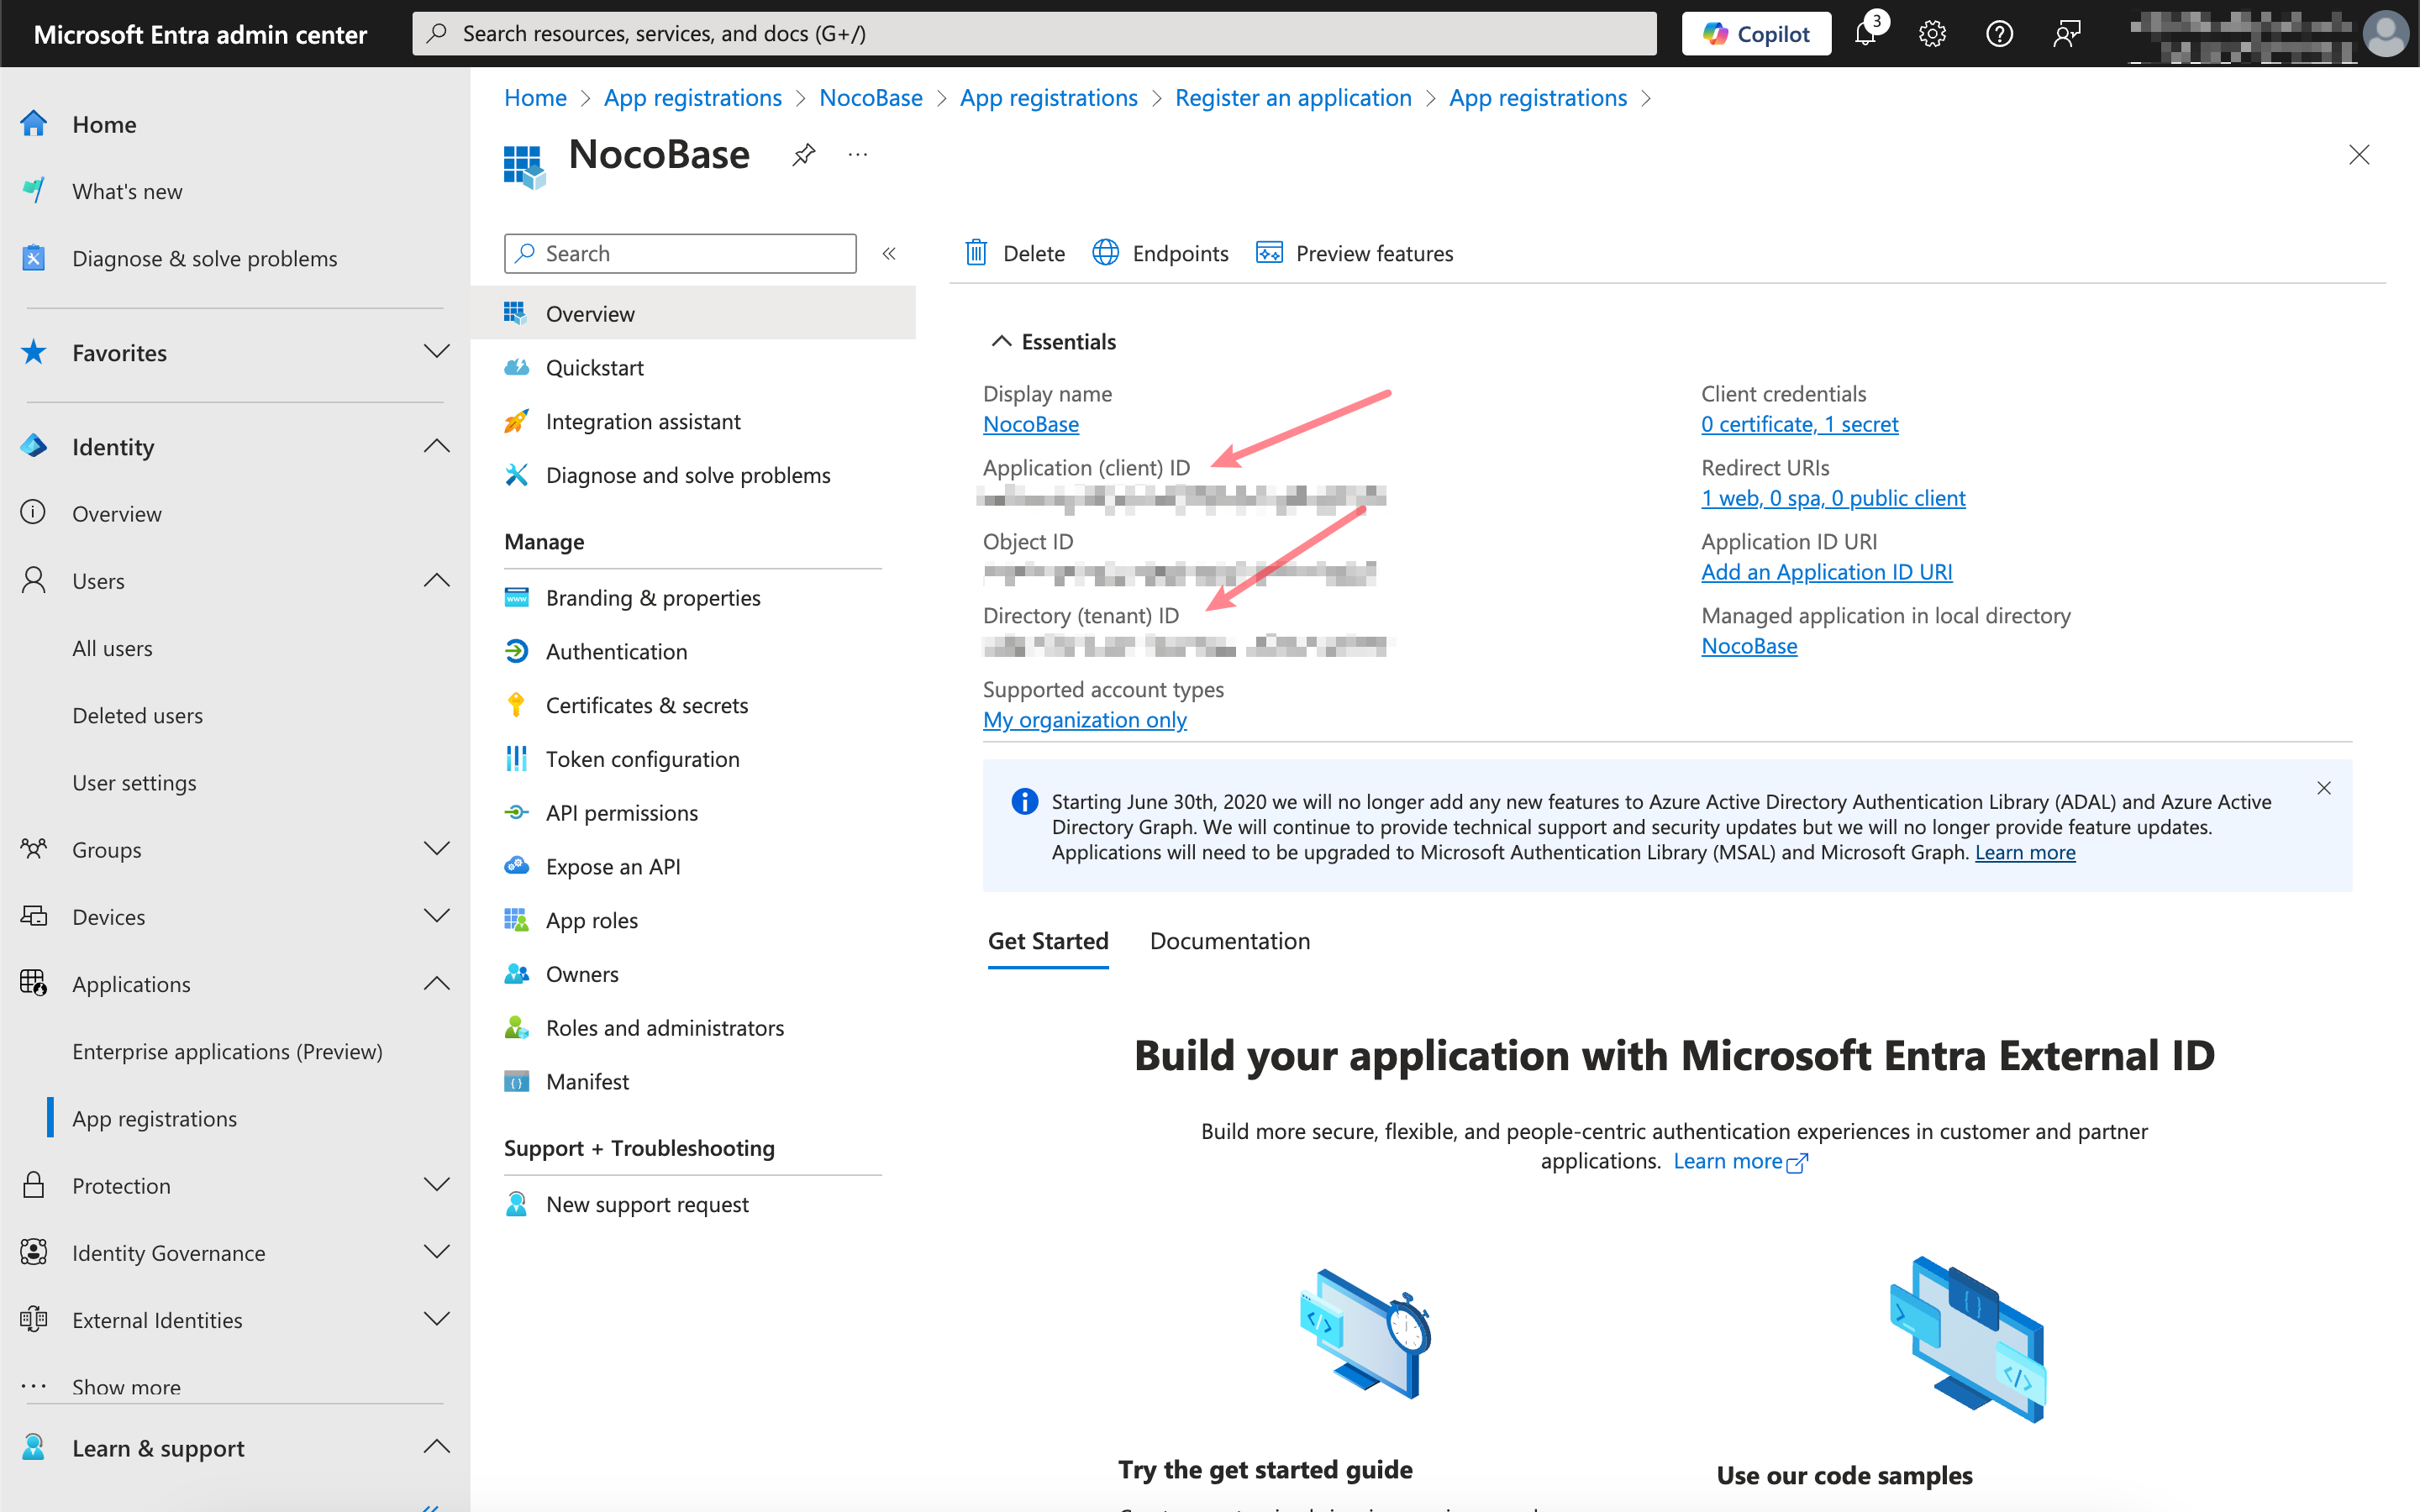
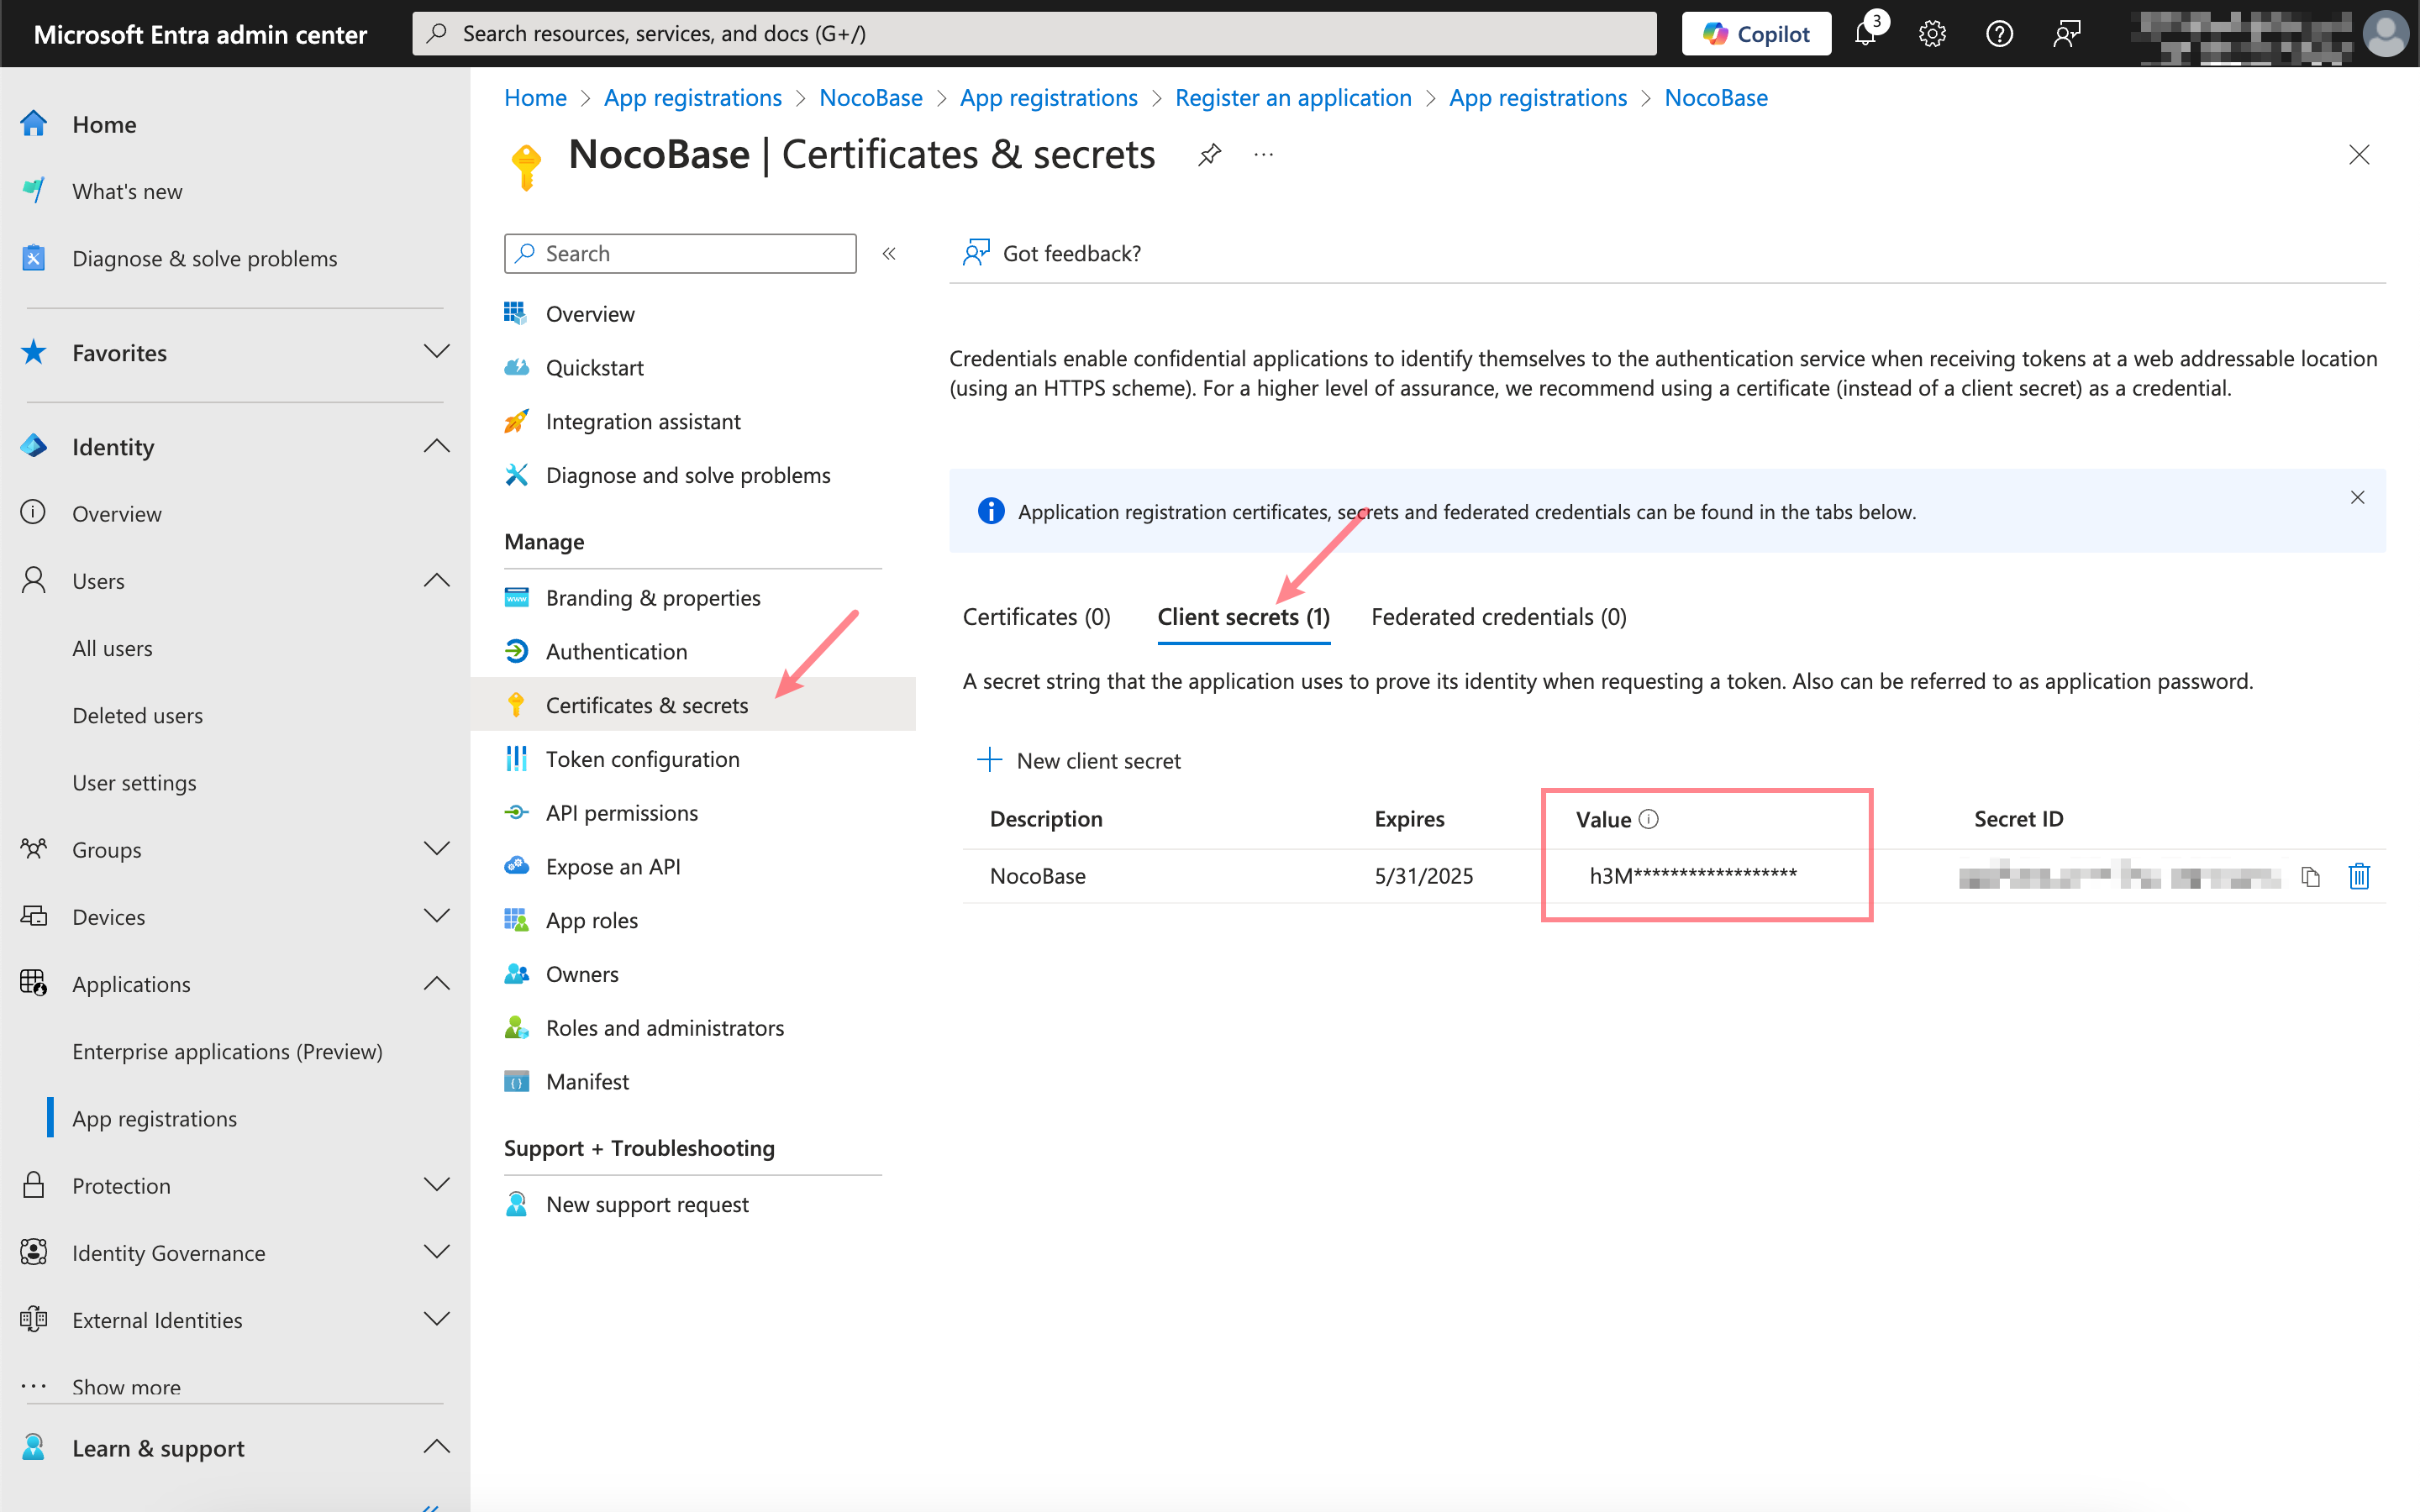
คลิกที่ Certificates & secrets จากนั้นสร้าง Client secret ใหม่ แล้วคัดลอก Value ครับ/ค่ะ
ข้อมูล Microsoft Entra และการตั้งค่า Authenticator ของ NocoBase มีความสัมพันธ์กันดังนี้ครับ/ค่ะ:
| ข้อมูล Microsoft Entra | ช่องการตั้งค่า Authenticator ของ NocoBase |
|---|---|
| Application (client) ID | Client ID |
| Client secrets - Value | Client secret |
| Directory (tenant) ID | Issuer: https://login.microsoftonline.com/{tenant}/v2.0/.well-known/openid-configuration, โดย {tenant} ต้องแทนที่ด้วย Directory (tenant) ID ที่เกี่ยวข้อง |