Advanced
This feature is provided by the plugin «AI employees»Introduction
In the AI Employee plugin, you can configure data sources and preset some collection queries. These are then sent as application context when conversing with the AI employee, who will answer based on the collection query results.
Data Source Configuration
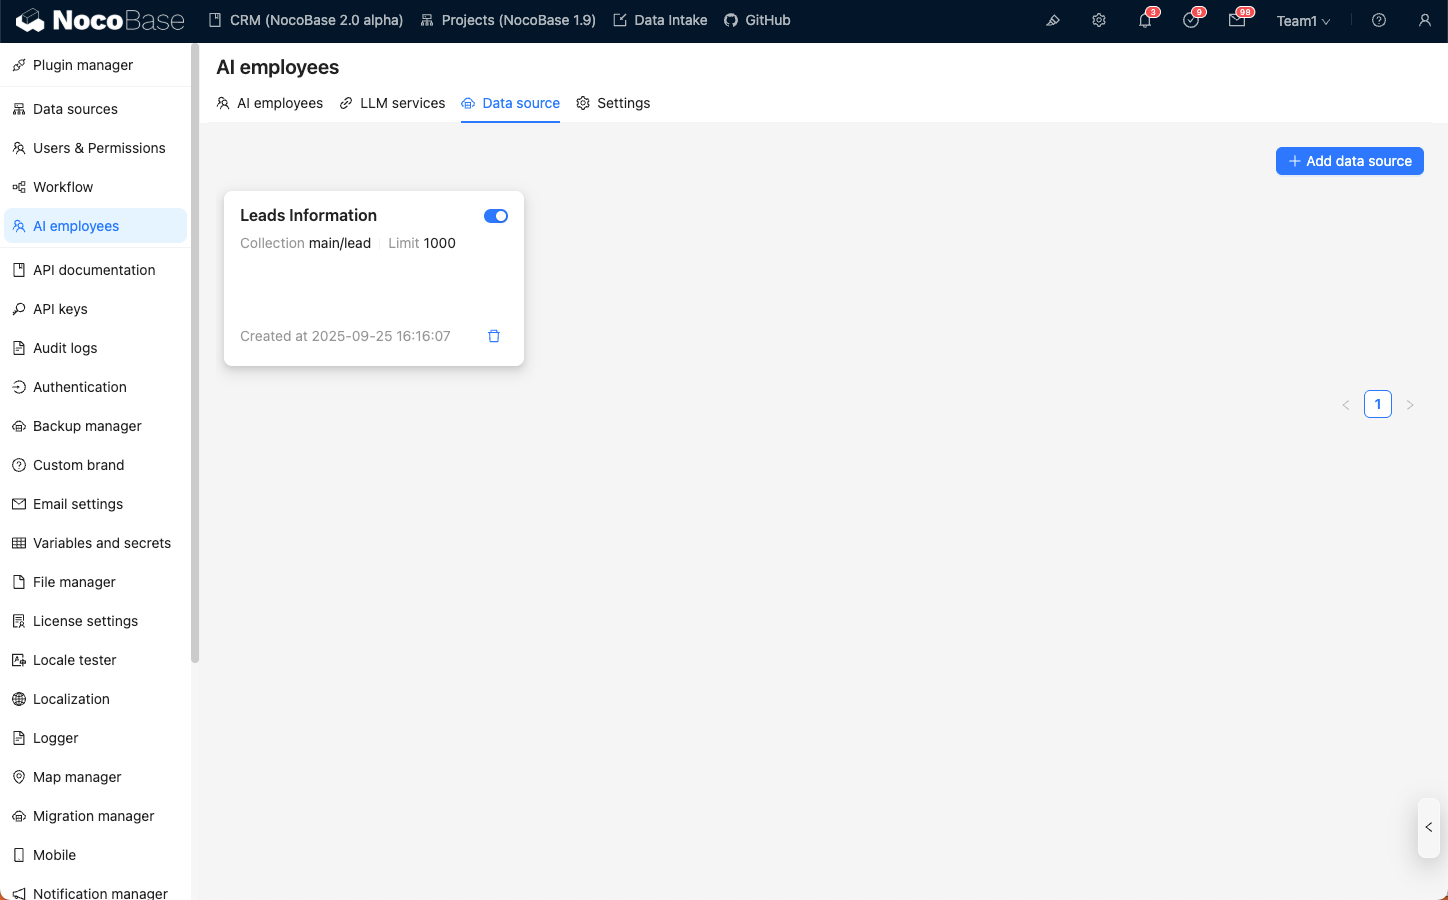
Go to the AI Employee plugin configuration page, click the Data source tab to enter the AI employee data source management page.
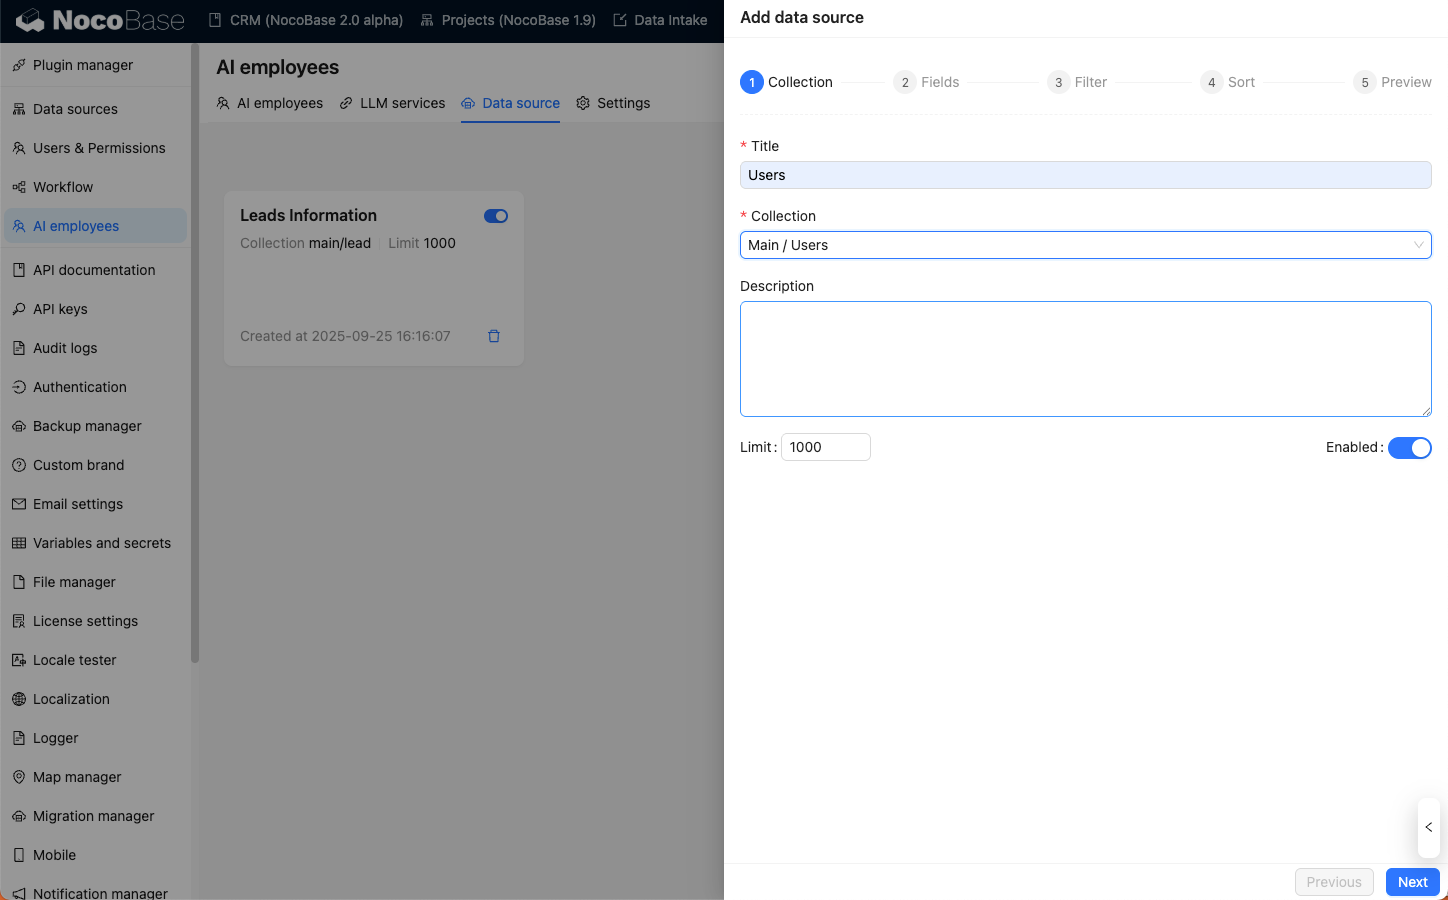
Click the Add data source button to enter the data source creation page.
Step 1: Enter basic Collection information:
- In the
Titleinput box, enter a memorable name for the data source; - In the
Collectioninput box, select the data source and collection to use; - In the
Descriptioninput box, enter a description for the data source. - In the
Limitinput box, enter the query limit for the data source to avoid returning too much data that exceeds the AI conversation context.
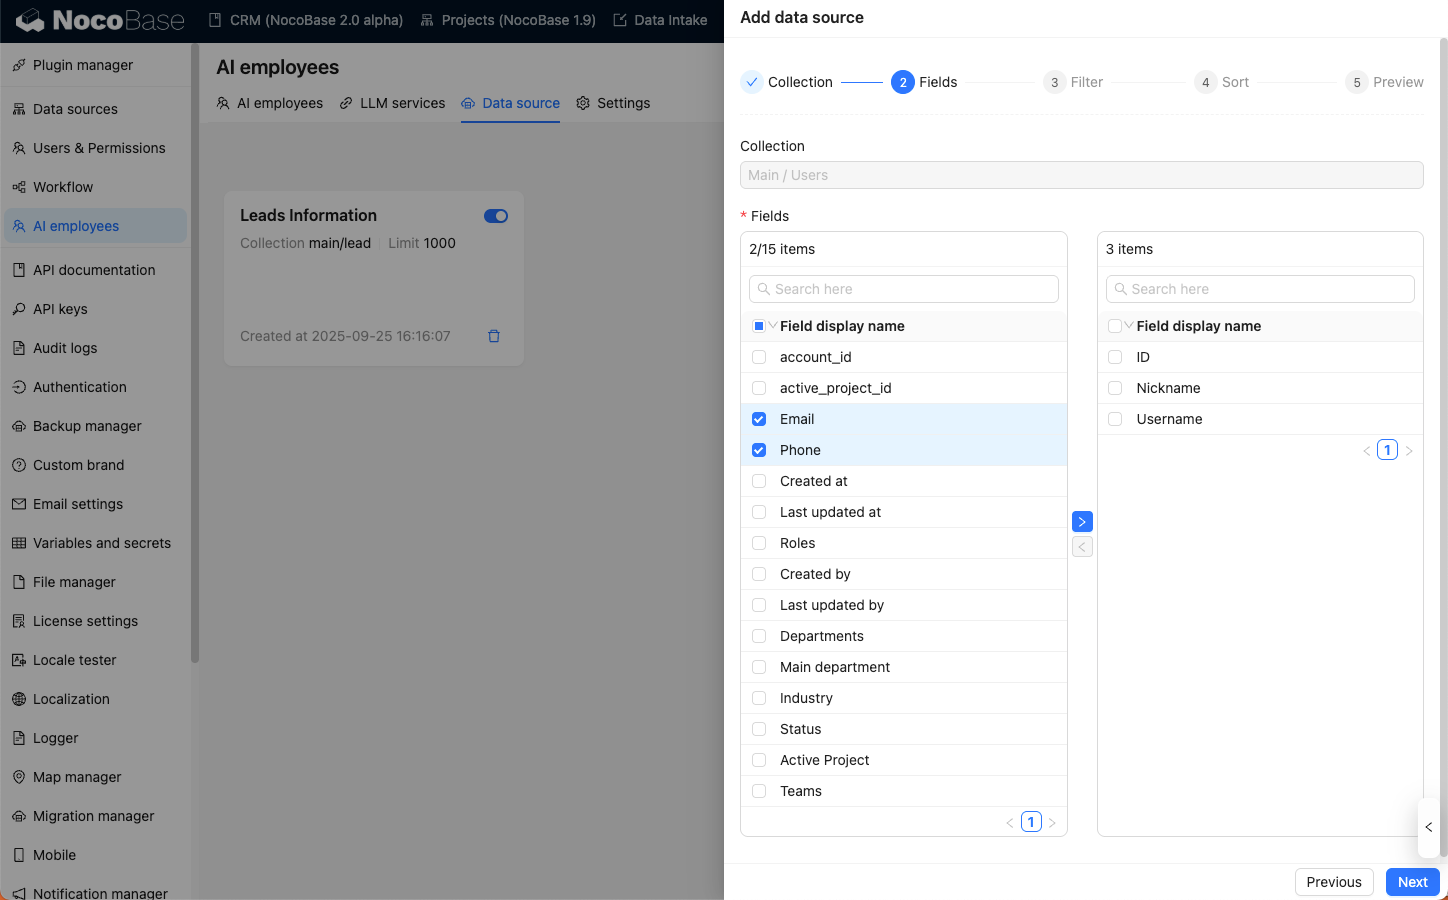
Step 2: Select the fields to query:
In the Fields list, check the fields you want to query.
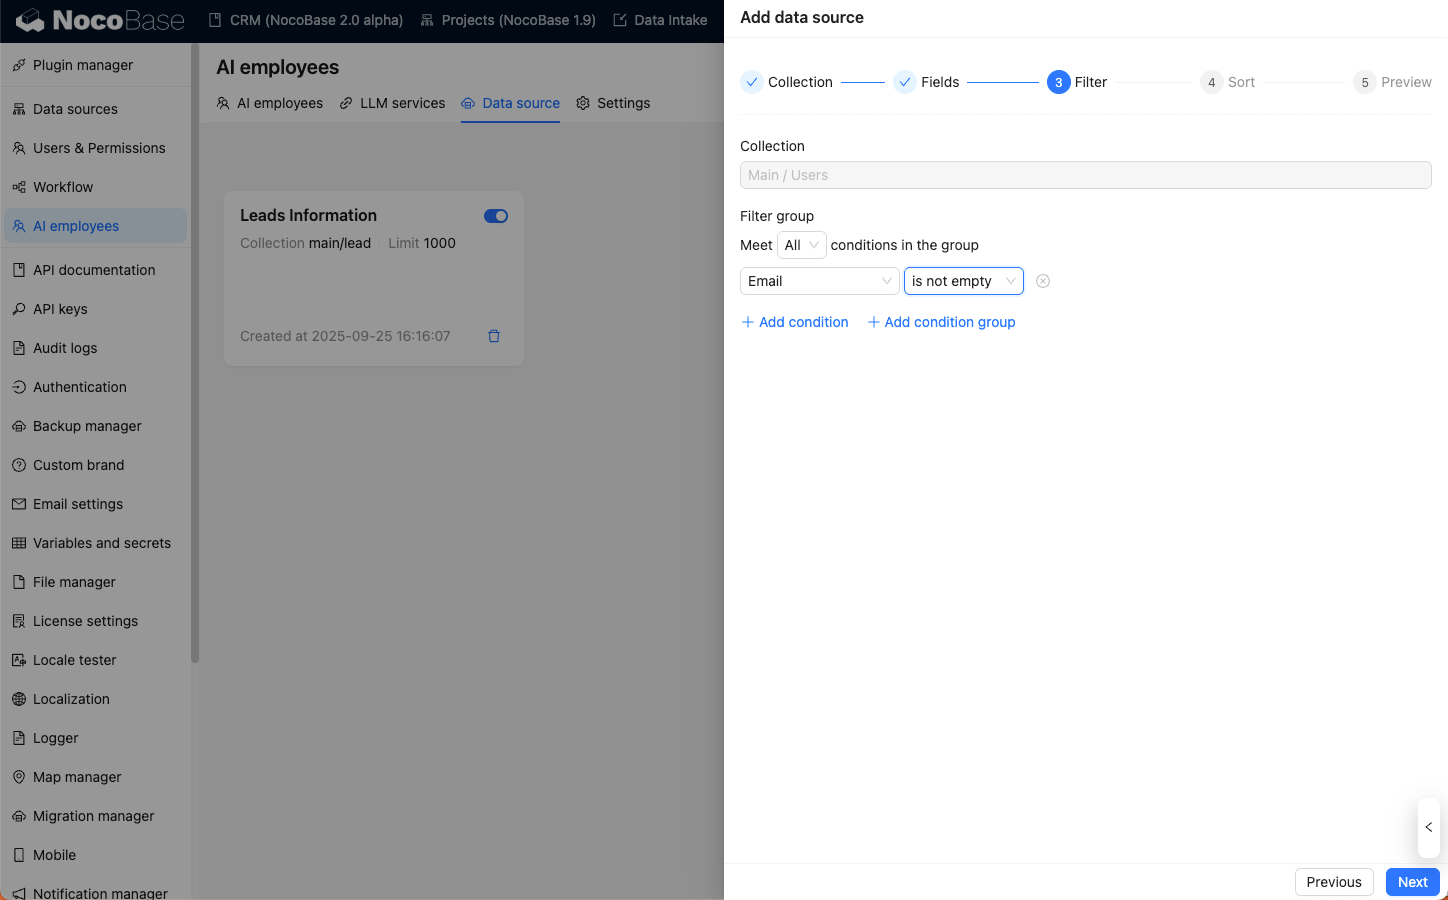
Step 3: Set query conditions:
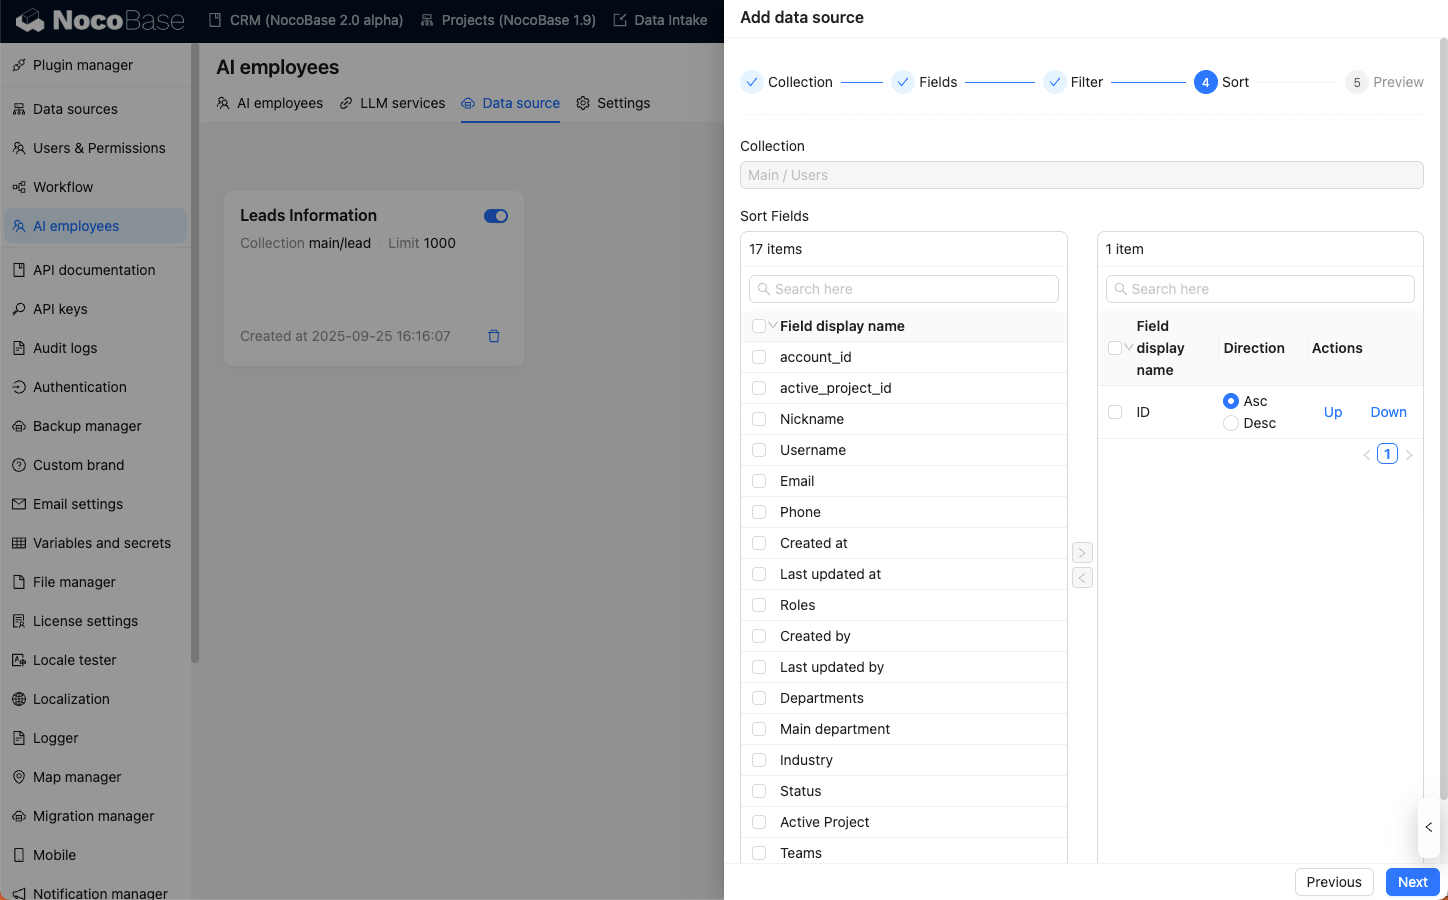
Step 4: Set sorting conditions:
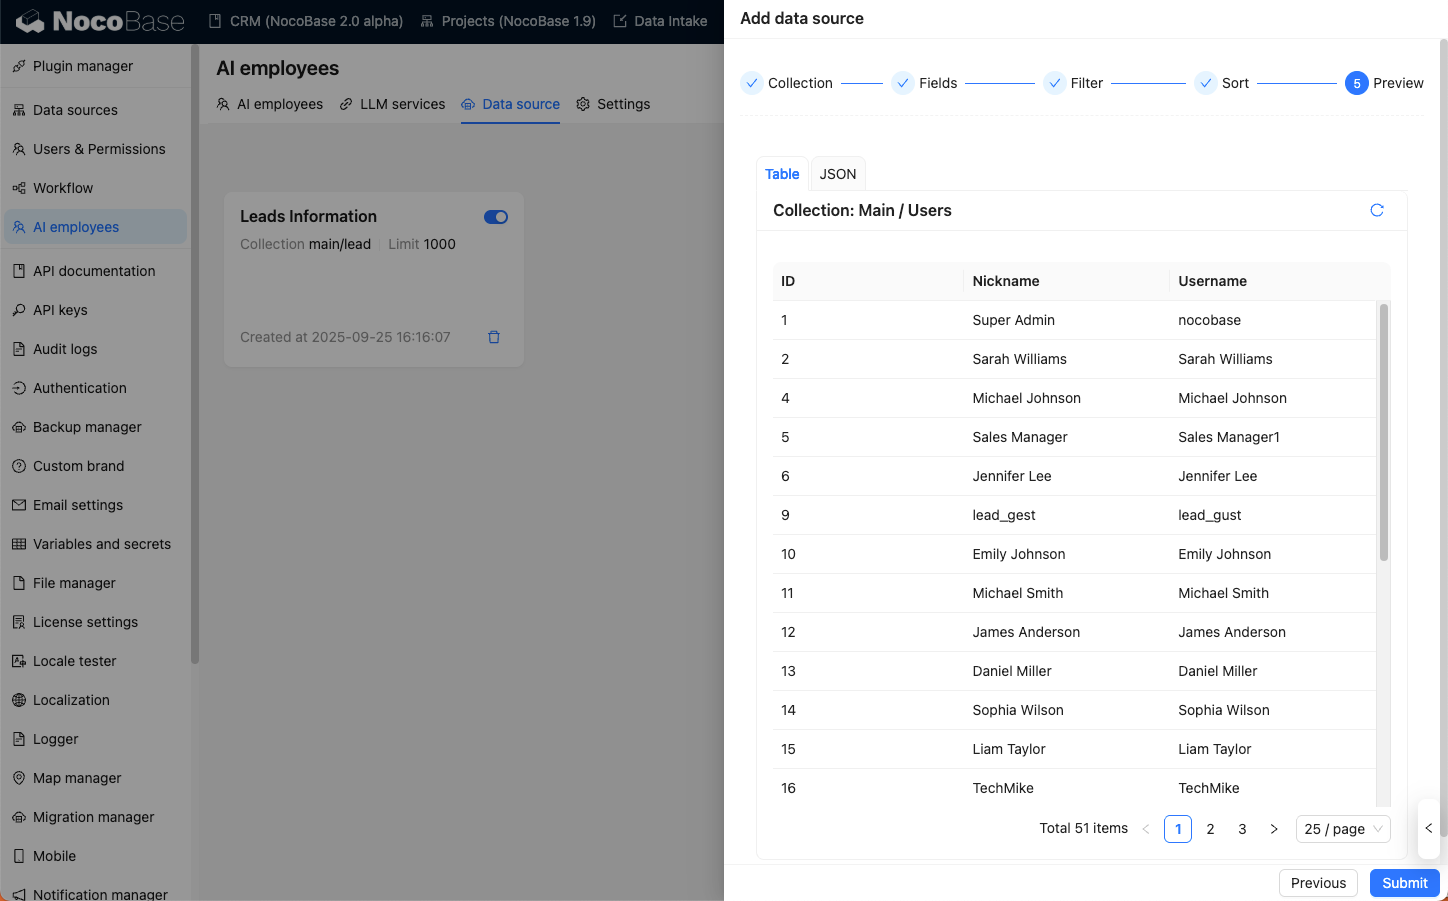
Finally, before saving the data source, you can preview the data source query results.
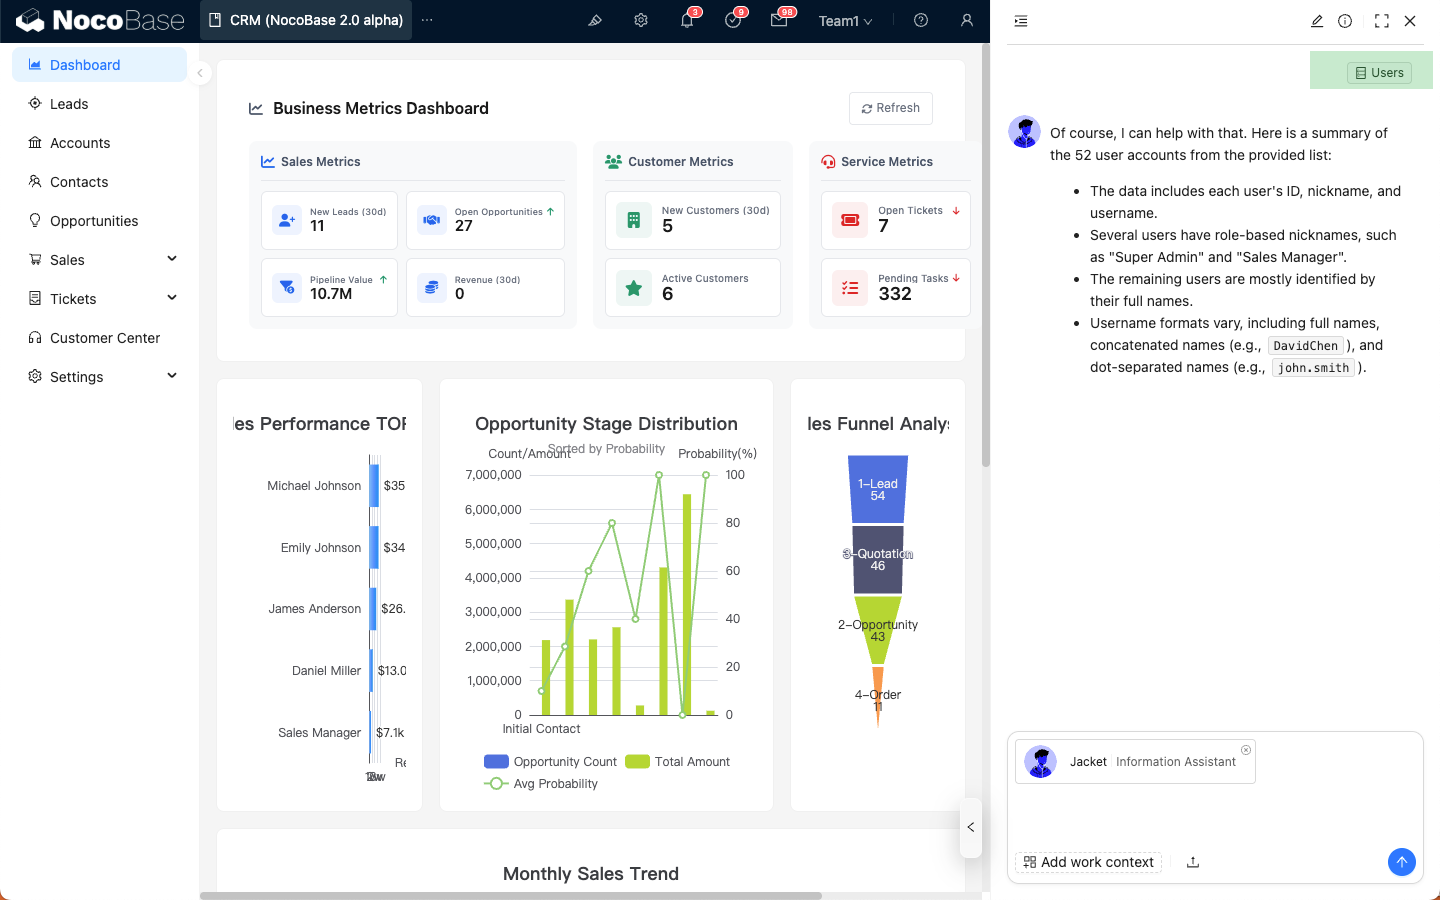
Sending Data Sources in Conversations
In the AI employee dialog box, click the Add work context button in the lower-left corner, select Data source, and you will see the data source you just added.
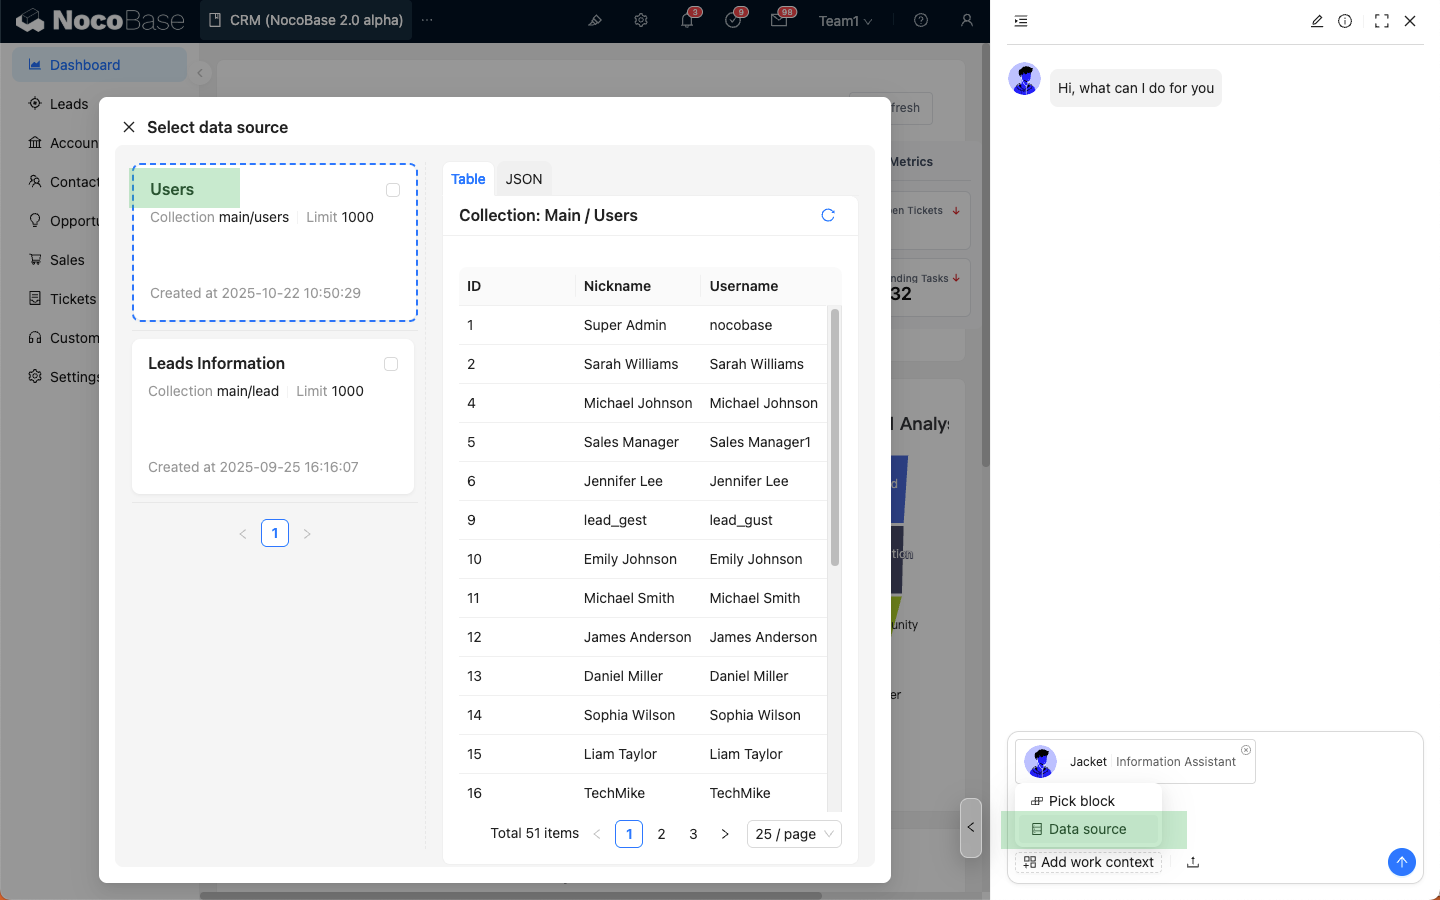
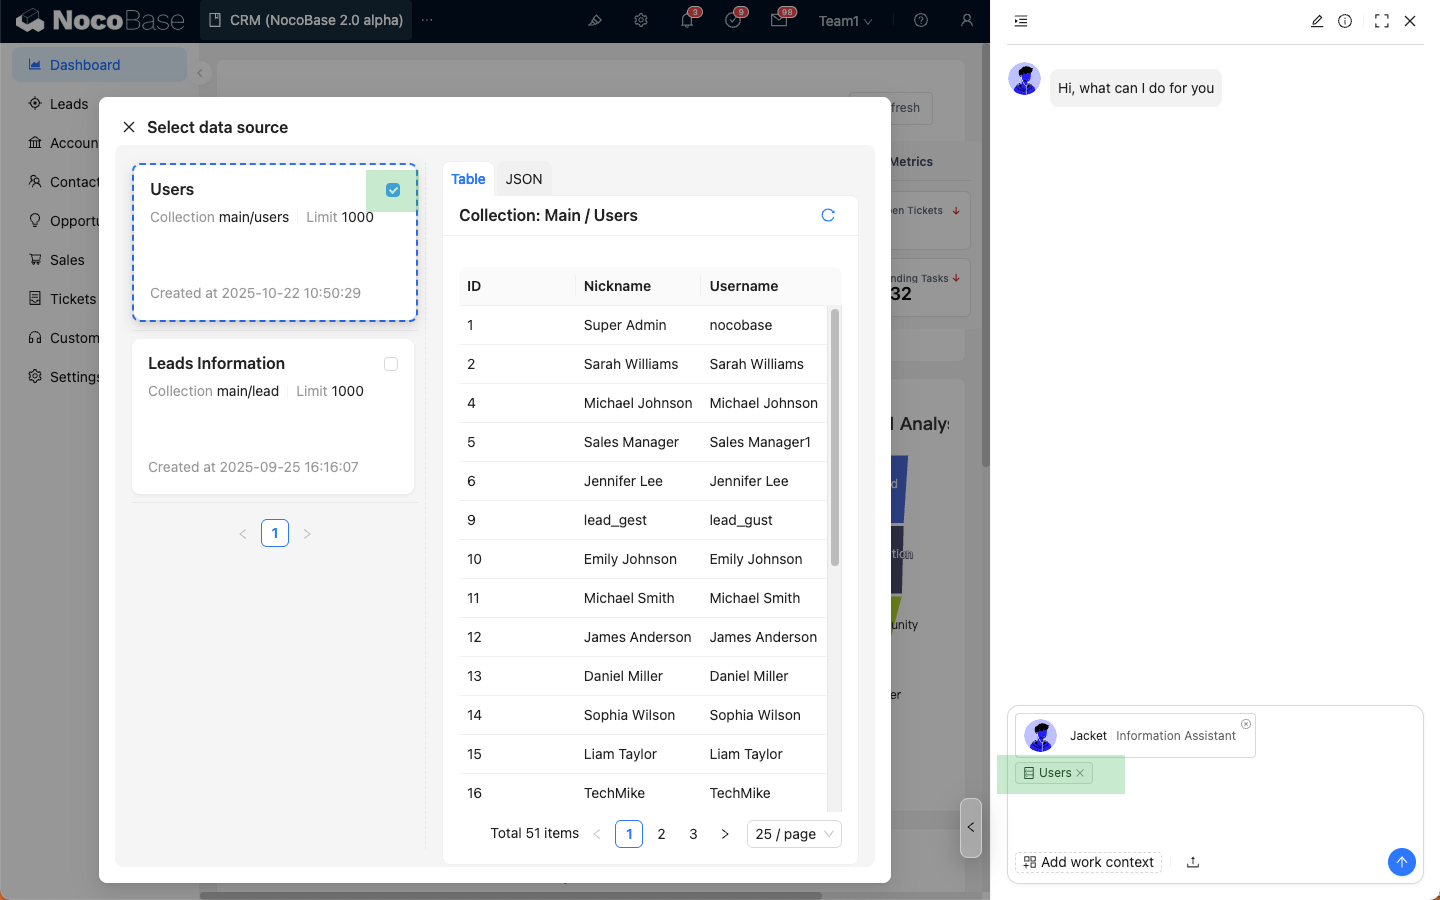
Check the data source you want to send, and the selected data source will be attached to the dialog box.
After entering your question, just like sending a regular message, click the send button, and the AI employee will reply based on the data source.
The data source will also appear in the message list.
Notes
The data source will automatically filter data based on the current user's ACL permissions, showing only the data the user has access to.