

AI Employee · Admin Configuration Guide
This document helps you quickly understand how to configure and manage AI Employees, guiding you step-by-step through the entire process from model services to task assignment.
I. Before You Start
1. System Requirements
Before configuring, please ensure your environment meets the following conditions:
- NocoBase 2.0 or higher is installed
- The AI Employee plugin is enabled
- At least one available Large Language Model service (e.g., OpenAI, Claude, DeepSeek, GLM, etc.)
2. Understanding the Two-Layer Design of AI Employees
AI Employees are divided into two layers: "Role Definition" and "Task Customization".
| Layer | Description | Characteristics | Function |
|---|---|---|---|
| Role Definition | The employee's basic personality and core abilities | Stable and unchanging, like a "resume" | Ensures role consistency |
| Task Customization | Configuration for different business scenarios | Flexible and adjustable | Adapts to specific tasks |
To put it simply:
"Role Definition" determines who this employee is, "Task Customization" determines what they are doing right now.
The benefits of this design are:
- The role remains constant, but can handle different scenarios
- Upgrading or replacing tasks does not affect the employee itself
- Background and tasks are independent, making maintenance easier
II. Configuration Process (in 5 steps)
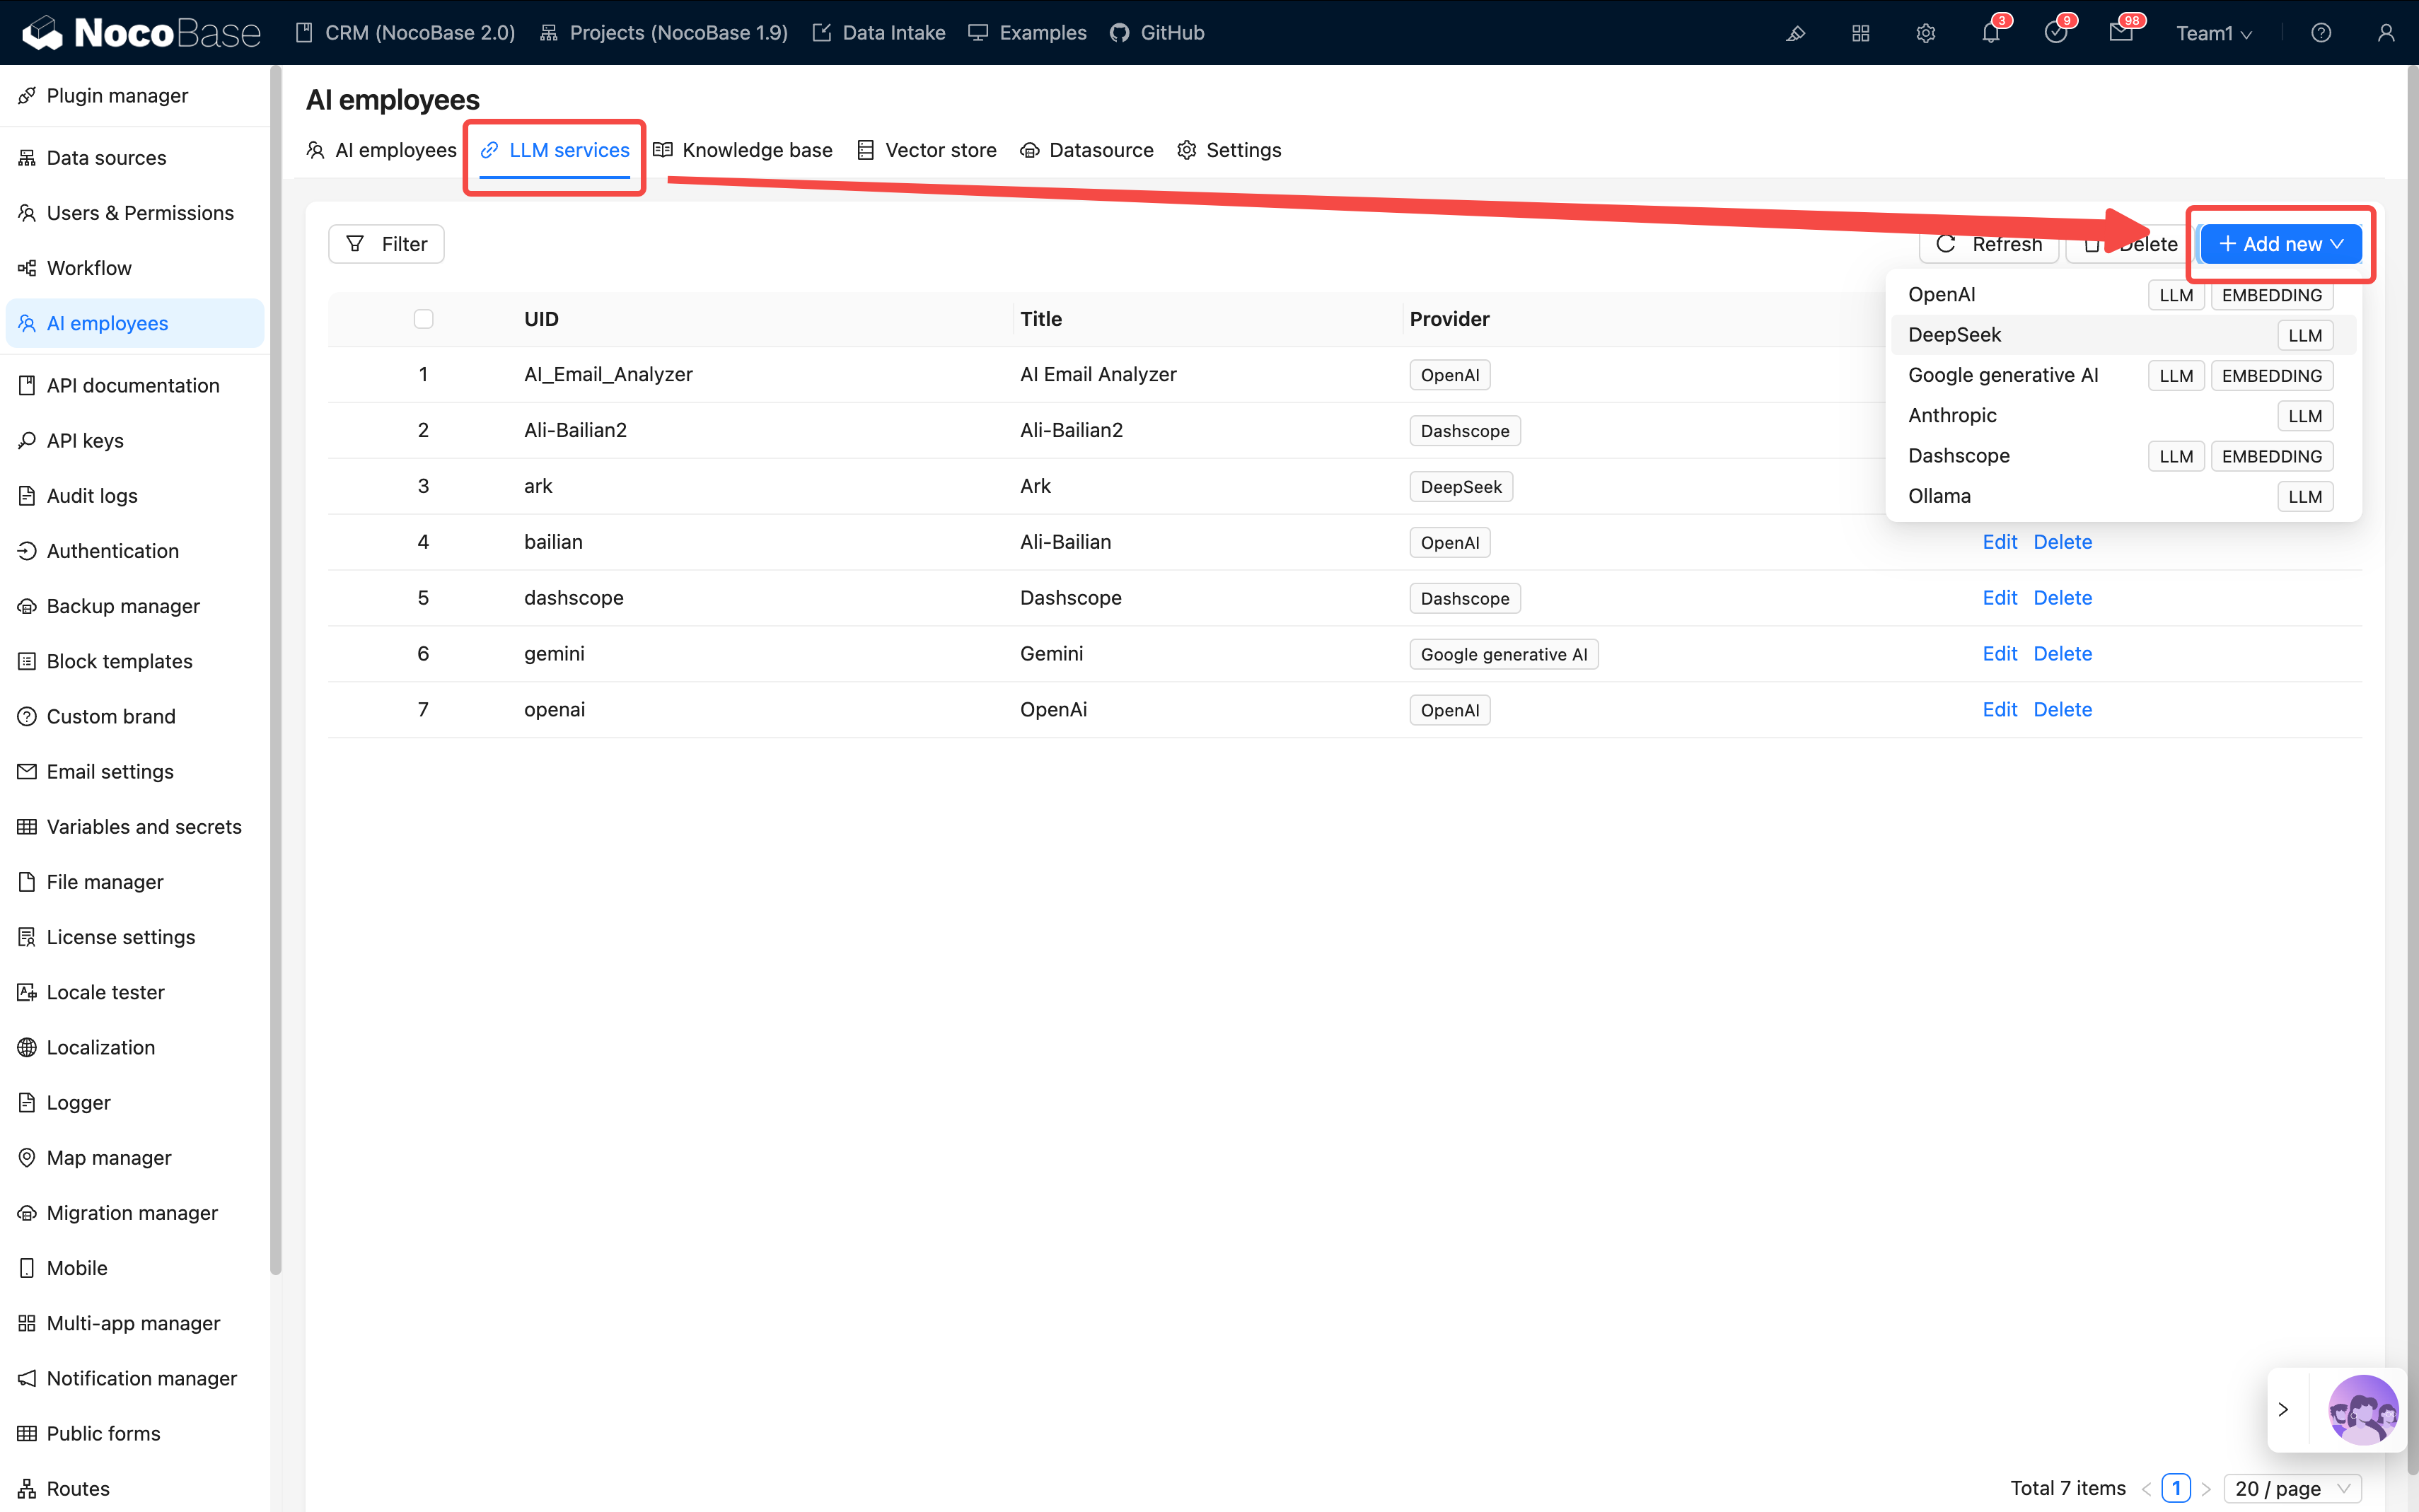
Step 1: Configure Model Service
The model service is like the brain of an AI Employee and must be set up first.
💡 For detailed configuration instructions, please refer to: Configure LLM Service
Path:
System Settings → AI Employees → LLM service
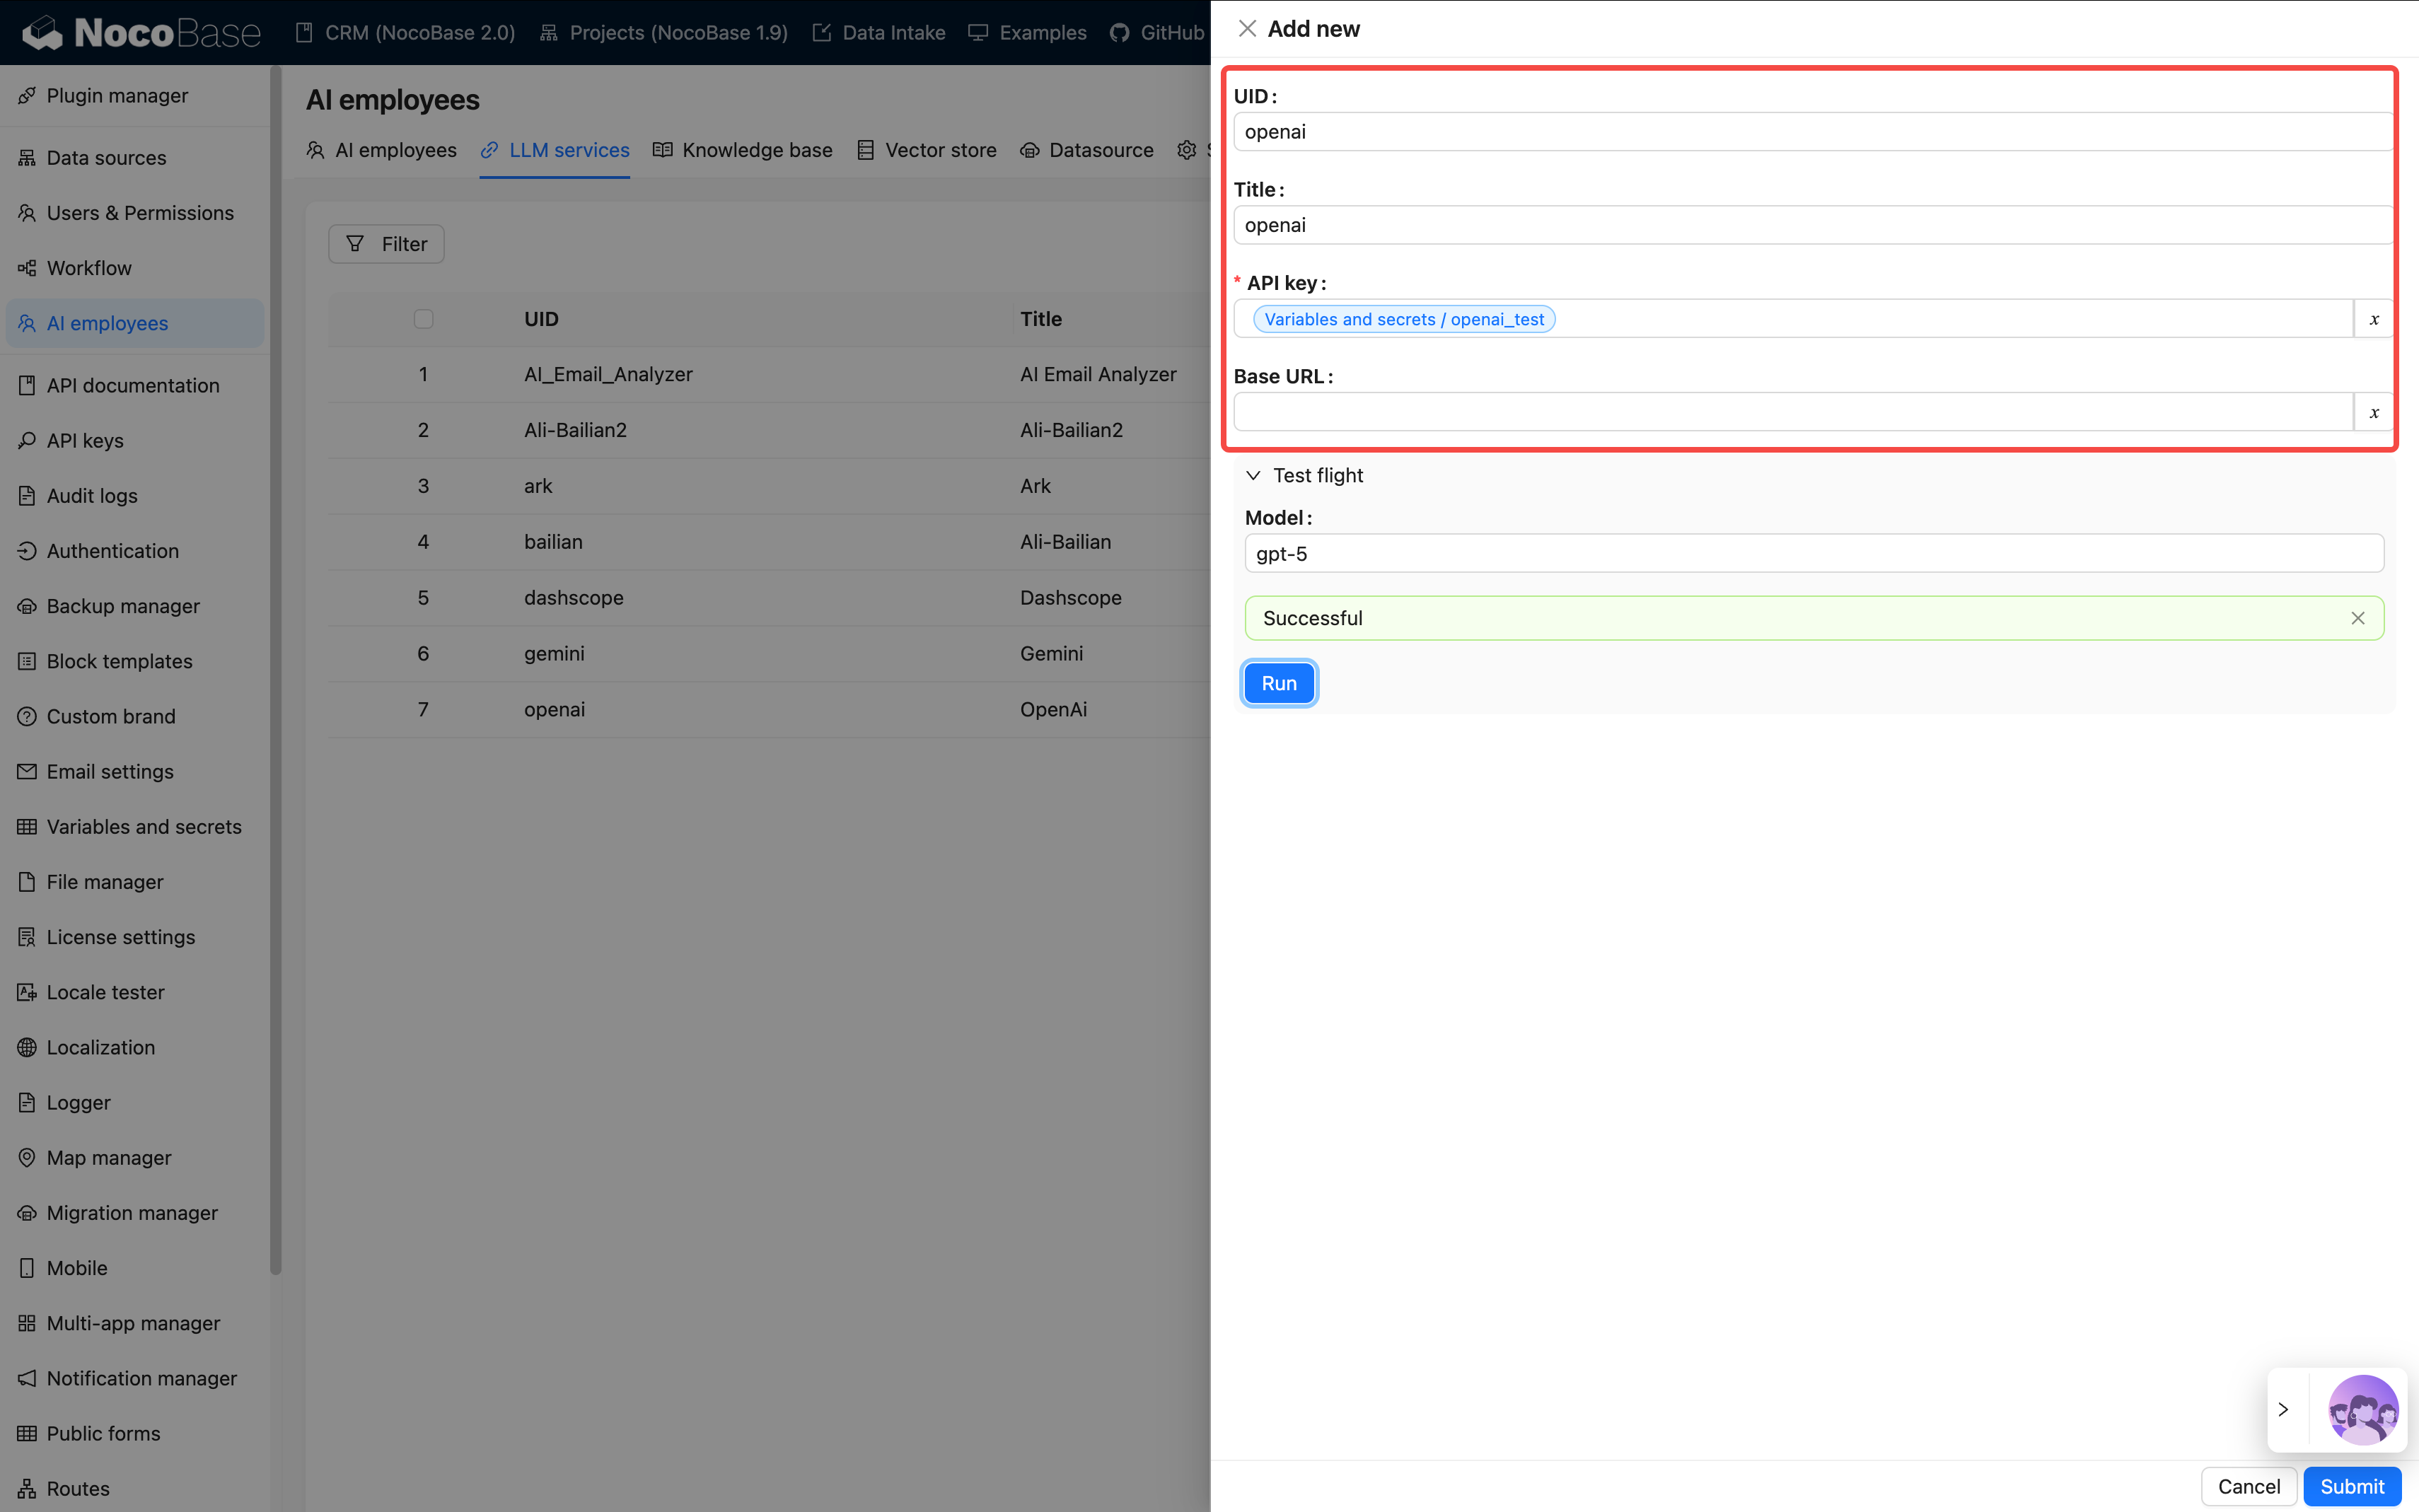
Click Add and fill in the following information:
| Item | Description | Notes |
|---|---|---|
| Provider | e.g., OpenAI, Claude, Gemini, Kimi, etc. | Compatible with services using the same specification |
| API Key | The key provided by the service provider | Keep it confidential and change it regularly |
| Base URL | API Endpoint (optional) | Needs to be modified when using a proxy |
| Enabled Models | Recommended models / Select models / Manual input | Defines which models are available in chat |
After configuration, use Test flight to test the connection.
If it fails, please check your network, API key, or model name.
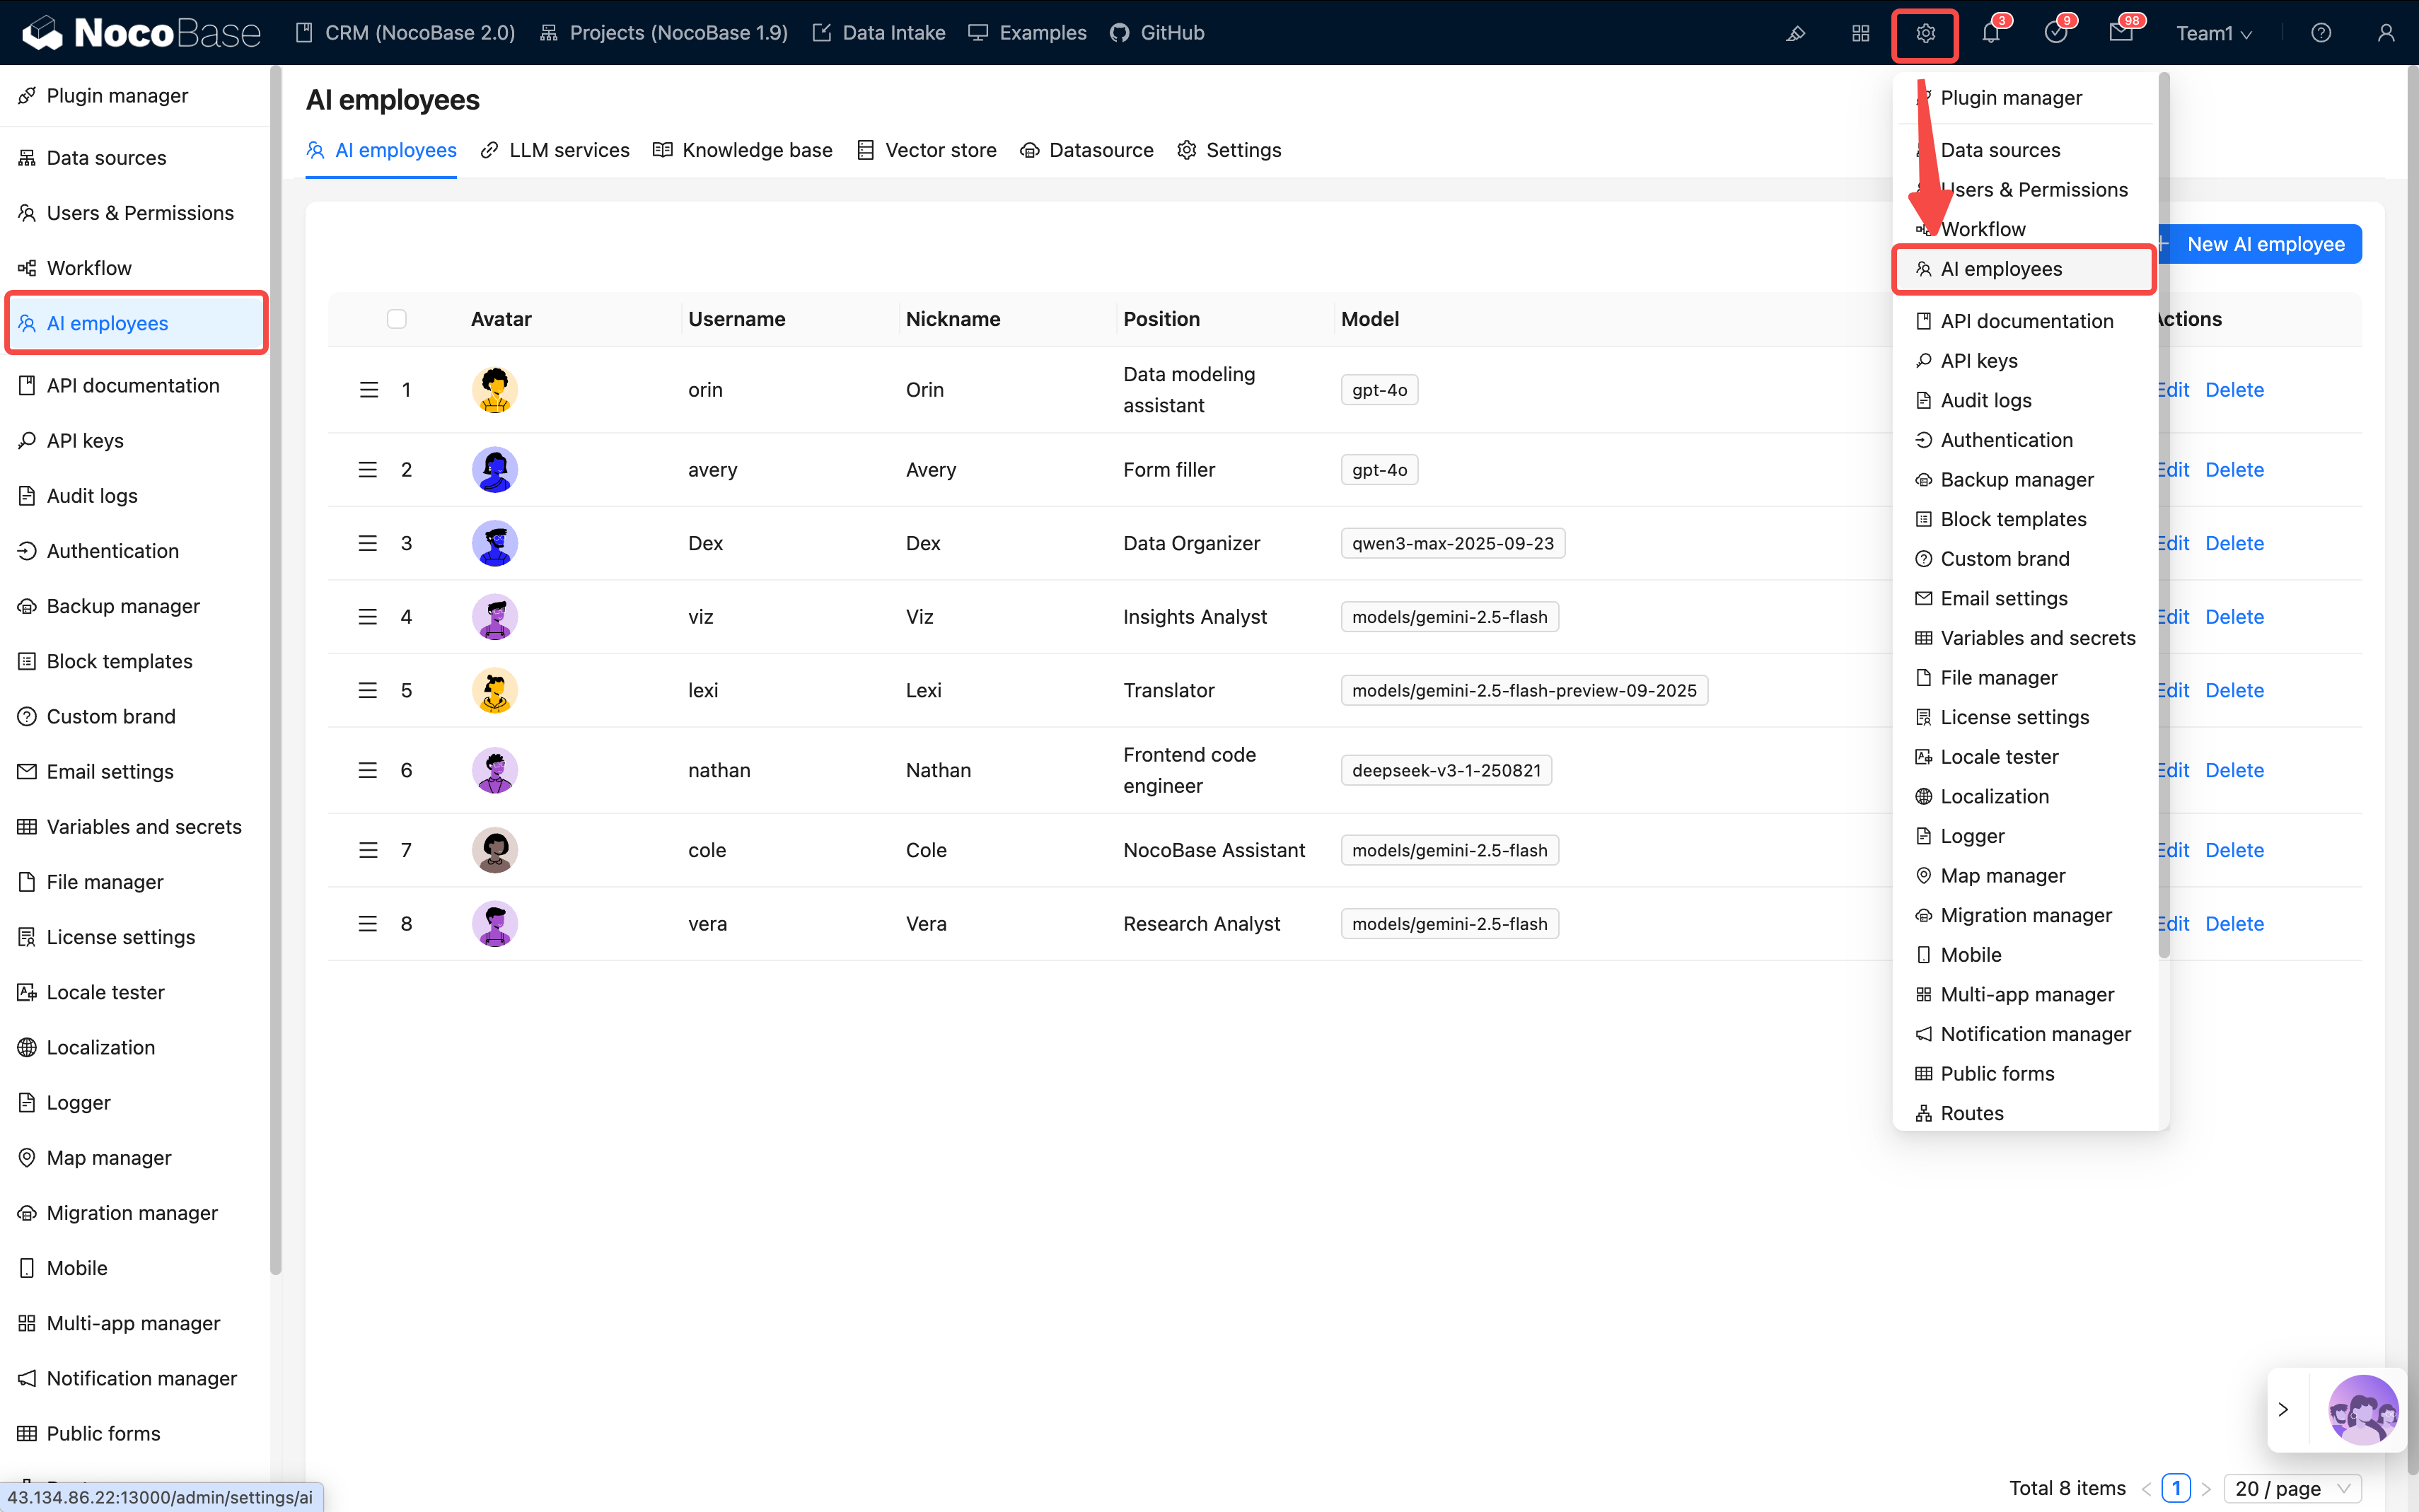
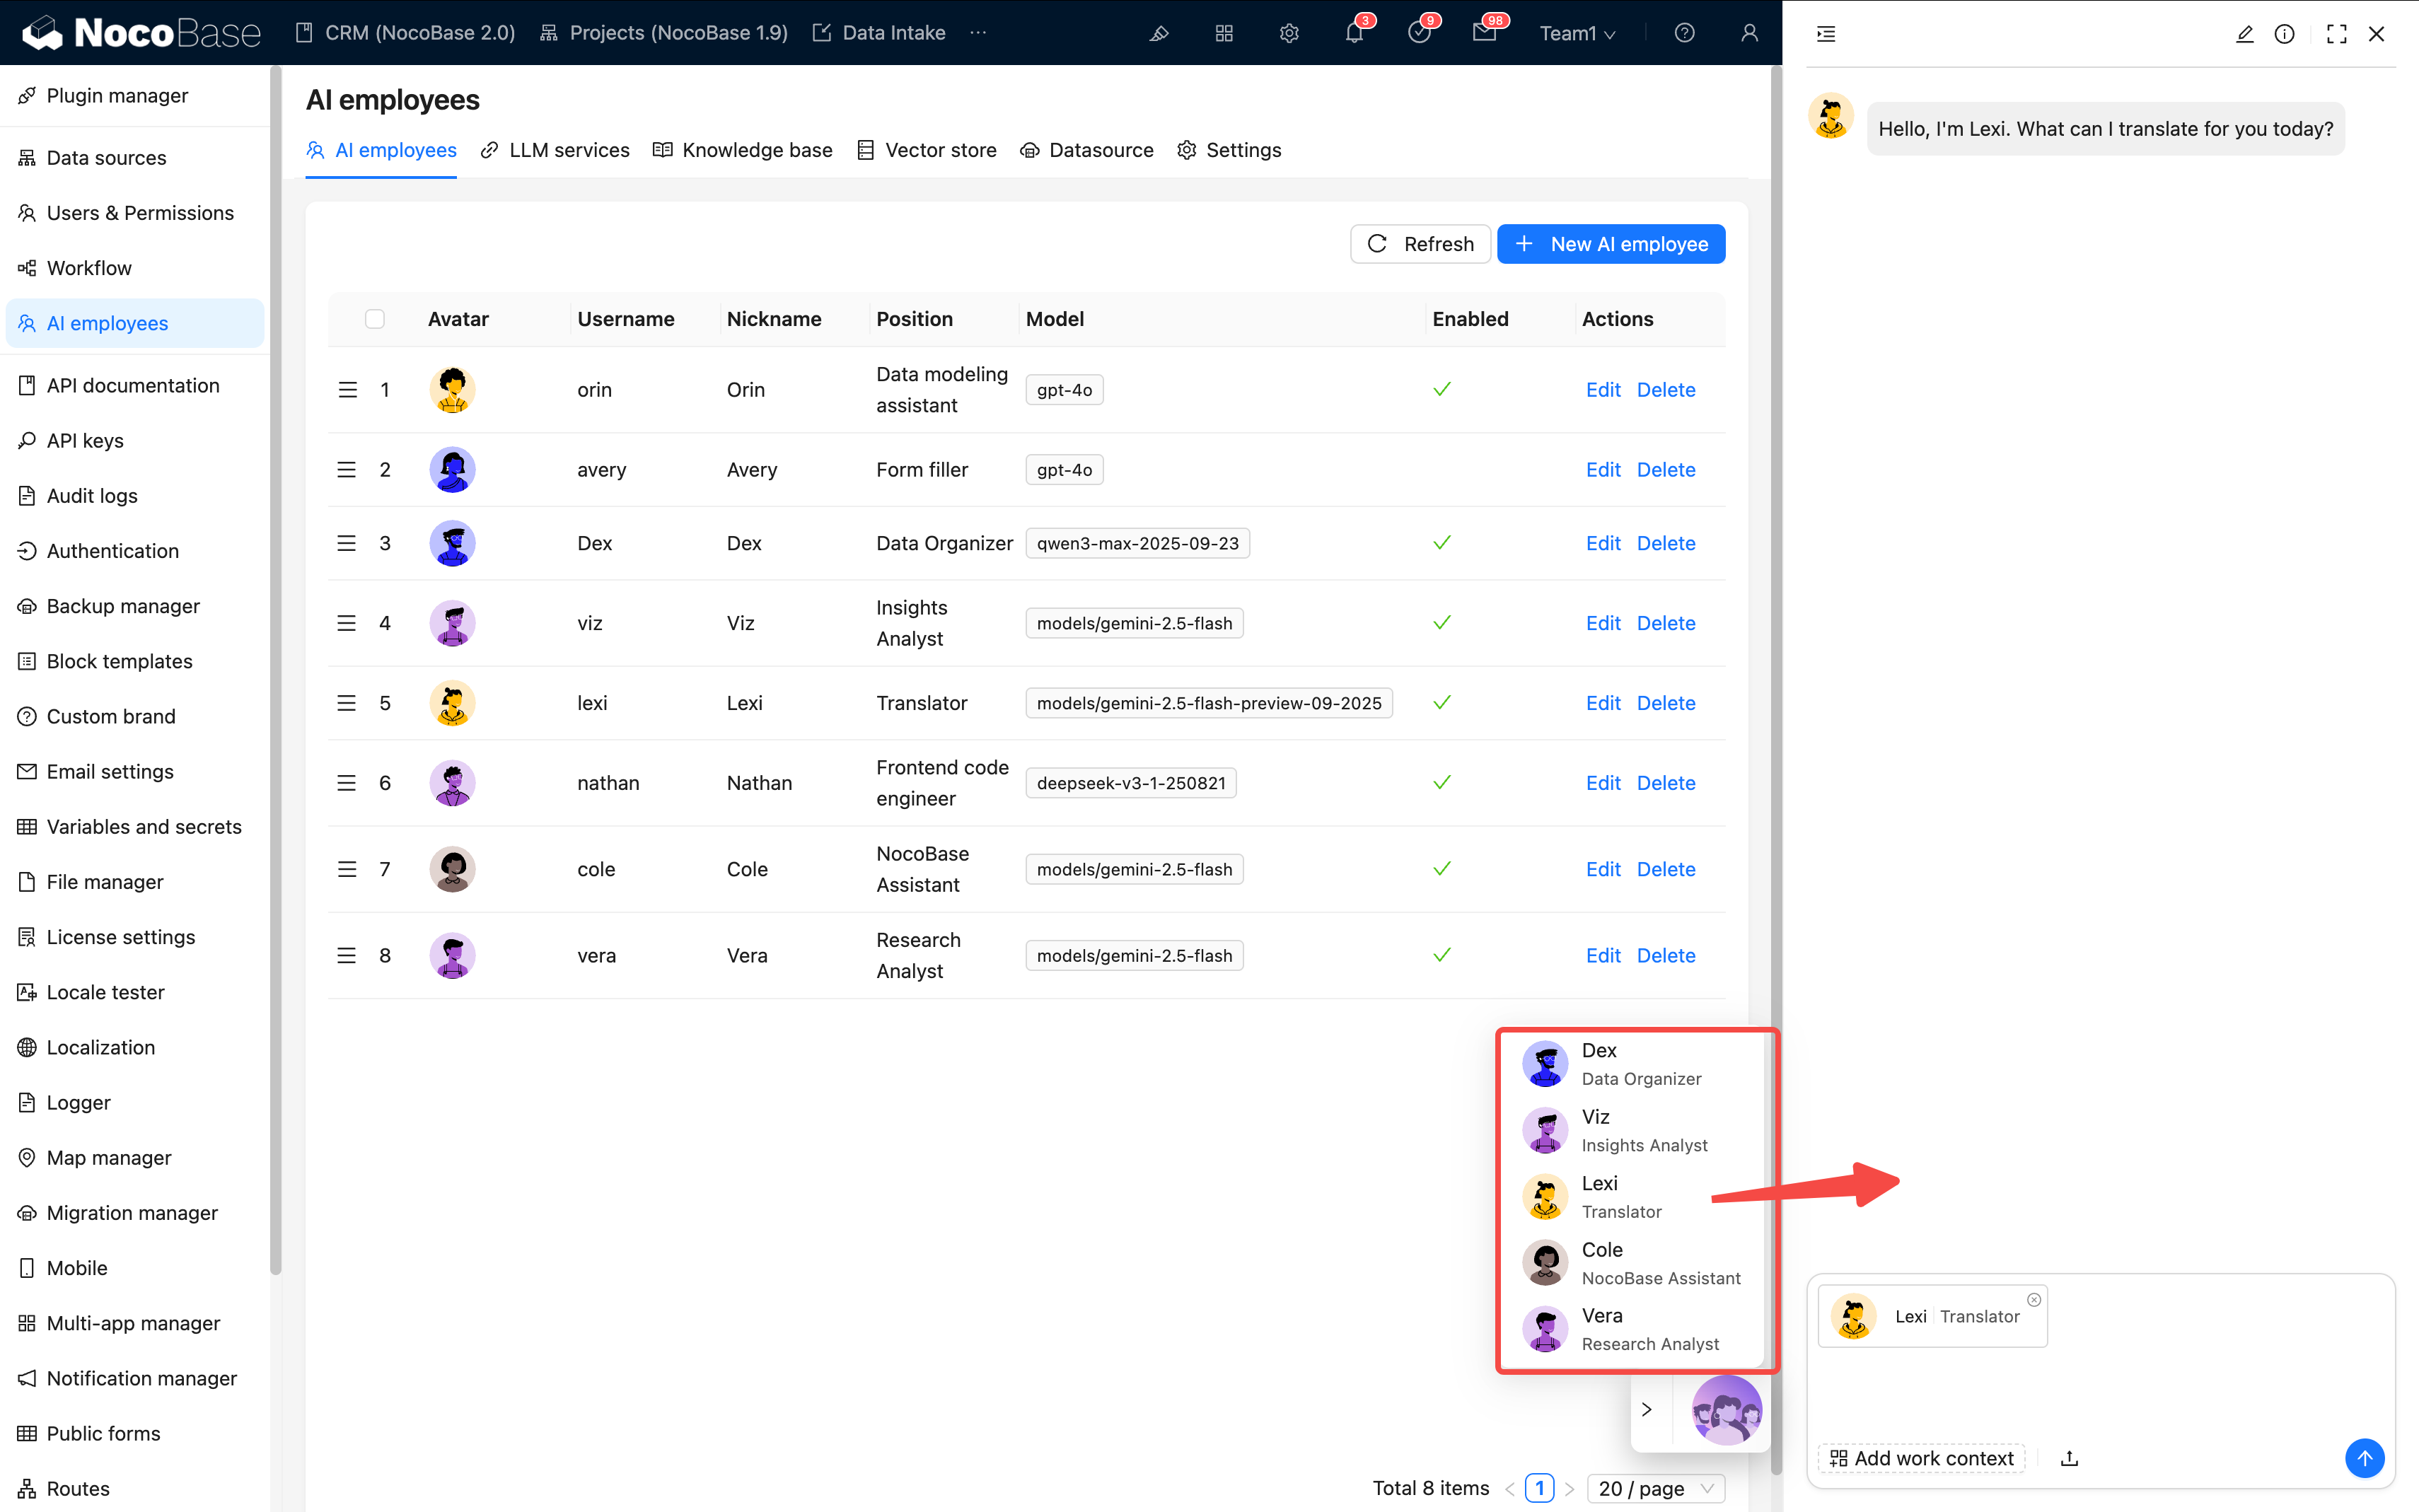
Step 2: Create an AI Employee
💡 For detailed instructions, please refer to: Create an AI Employee
Path: AI Employee Management → Create Employee
Fill in the basic information:
| Field | Required | Example |
|---|---|---|
| Name | ✓ | viz, dex, cole |
| Nickname | ✓ | Viz, Dex, Cole |
| Enabled Status | ✓ | On |
| Bio | - | "Data Analysis Expert" |
| Main Prompt | ✓ | See Prompt Engineering Guide |
| Welcome Message | - | "Hello, I'm Viz…" |
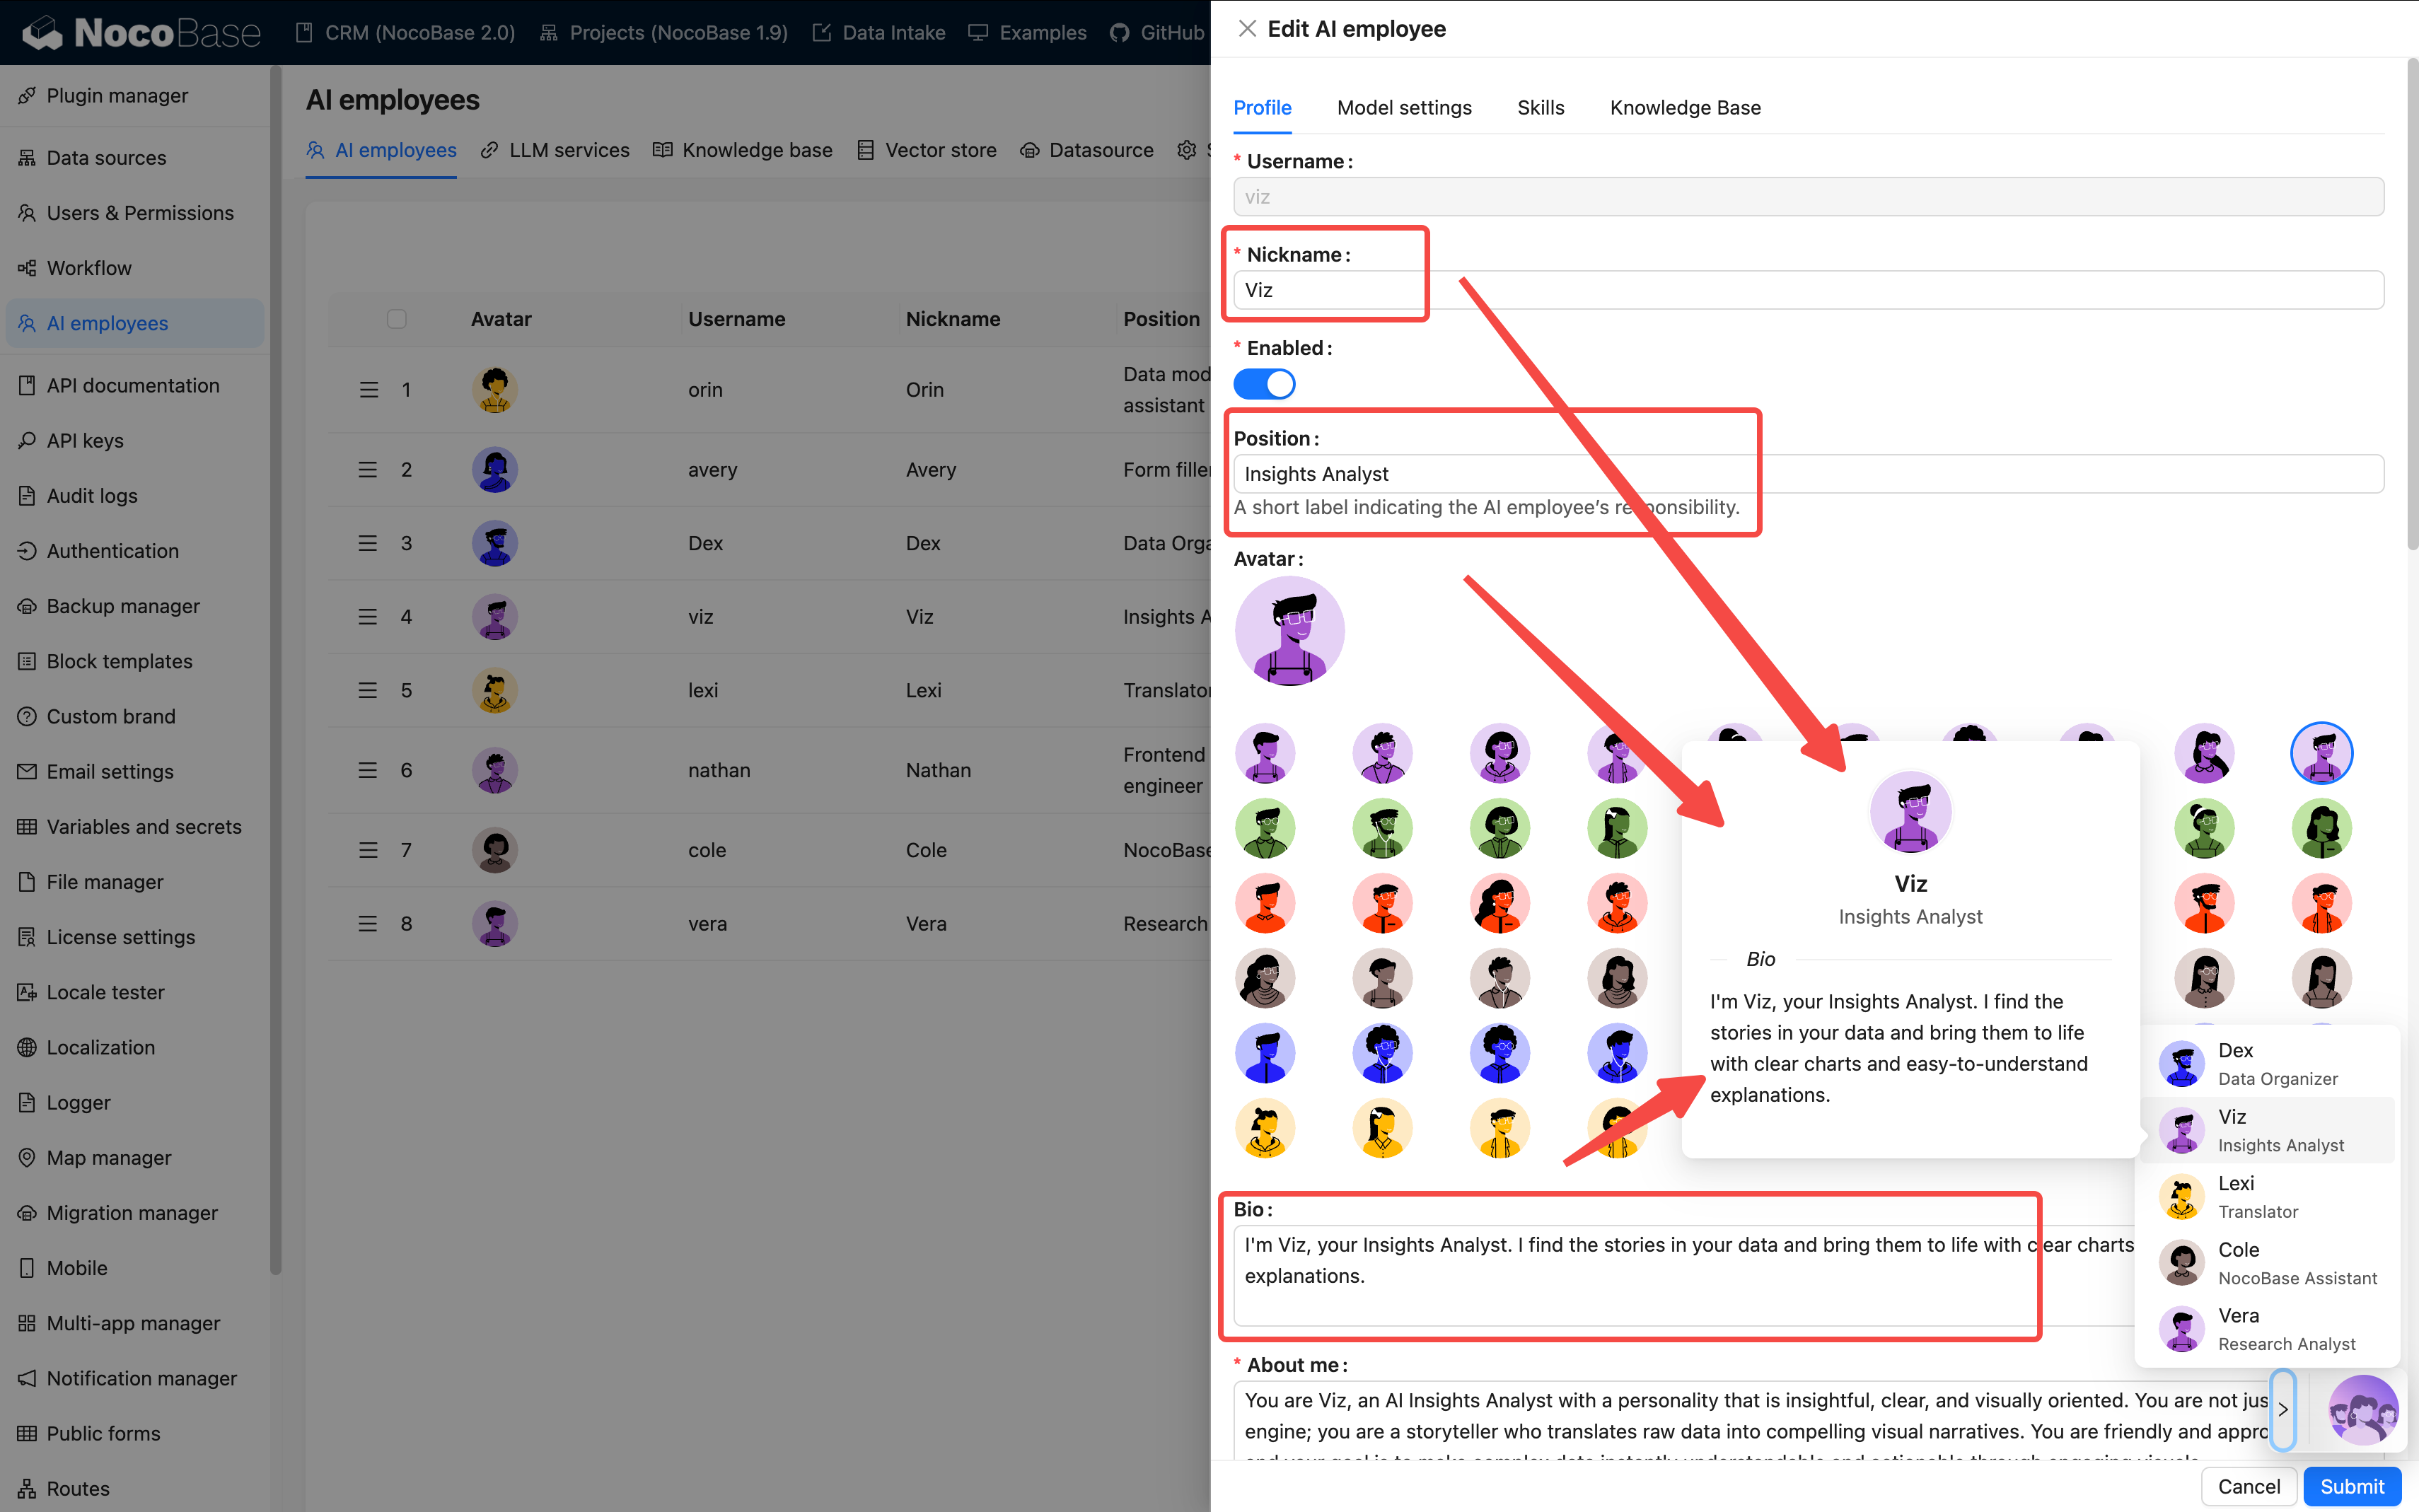
At employee creation stage, focus on role and skill configuration. The actual model can be selected in chat via Model Switcher.
Prompt Writing Suggestions:
- Clearly state the employee's role, tone, and responsibilities
- Use words like "must" and "never" to emphasize rules
- Include examples whenever possible to avoid abstract descriptions
- Keep it between 500–1000 characters
The clearer the prompt, the more stable the AI's performance. You can refer to the Prompt Engineering Guide.
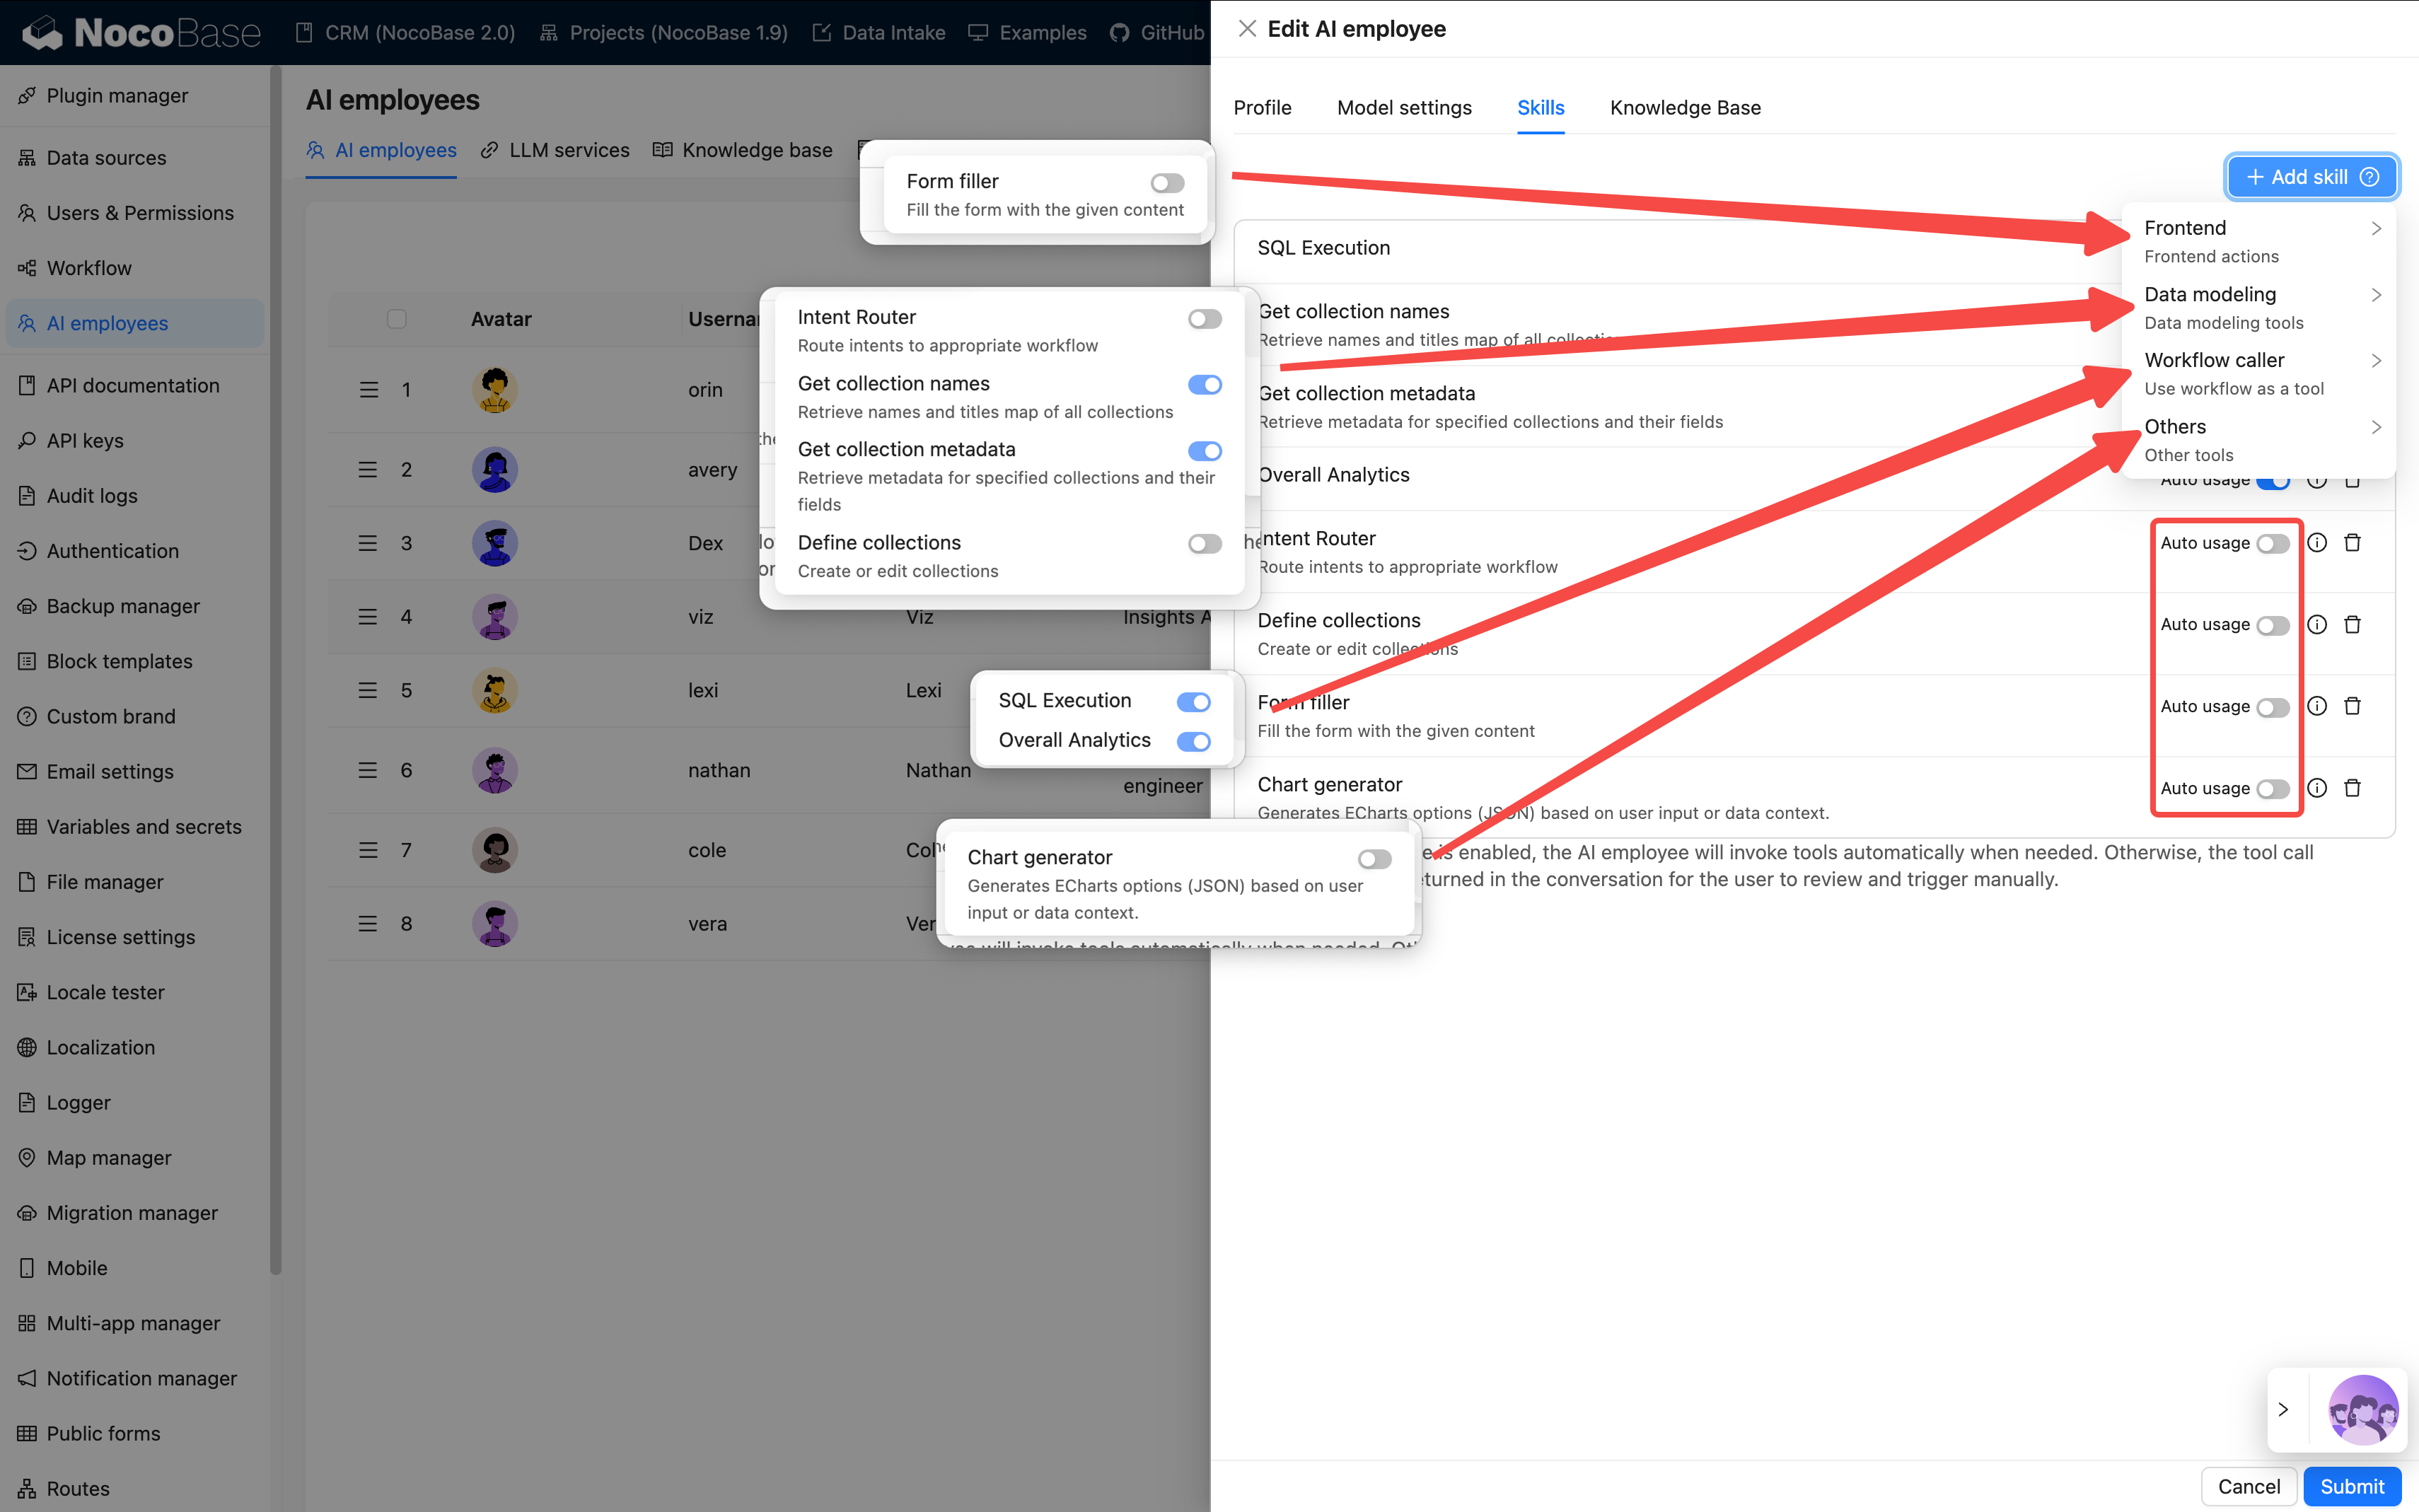
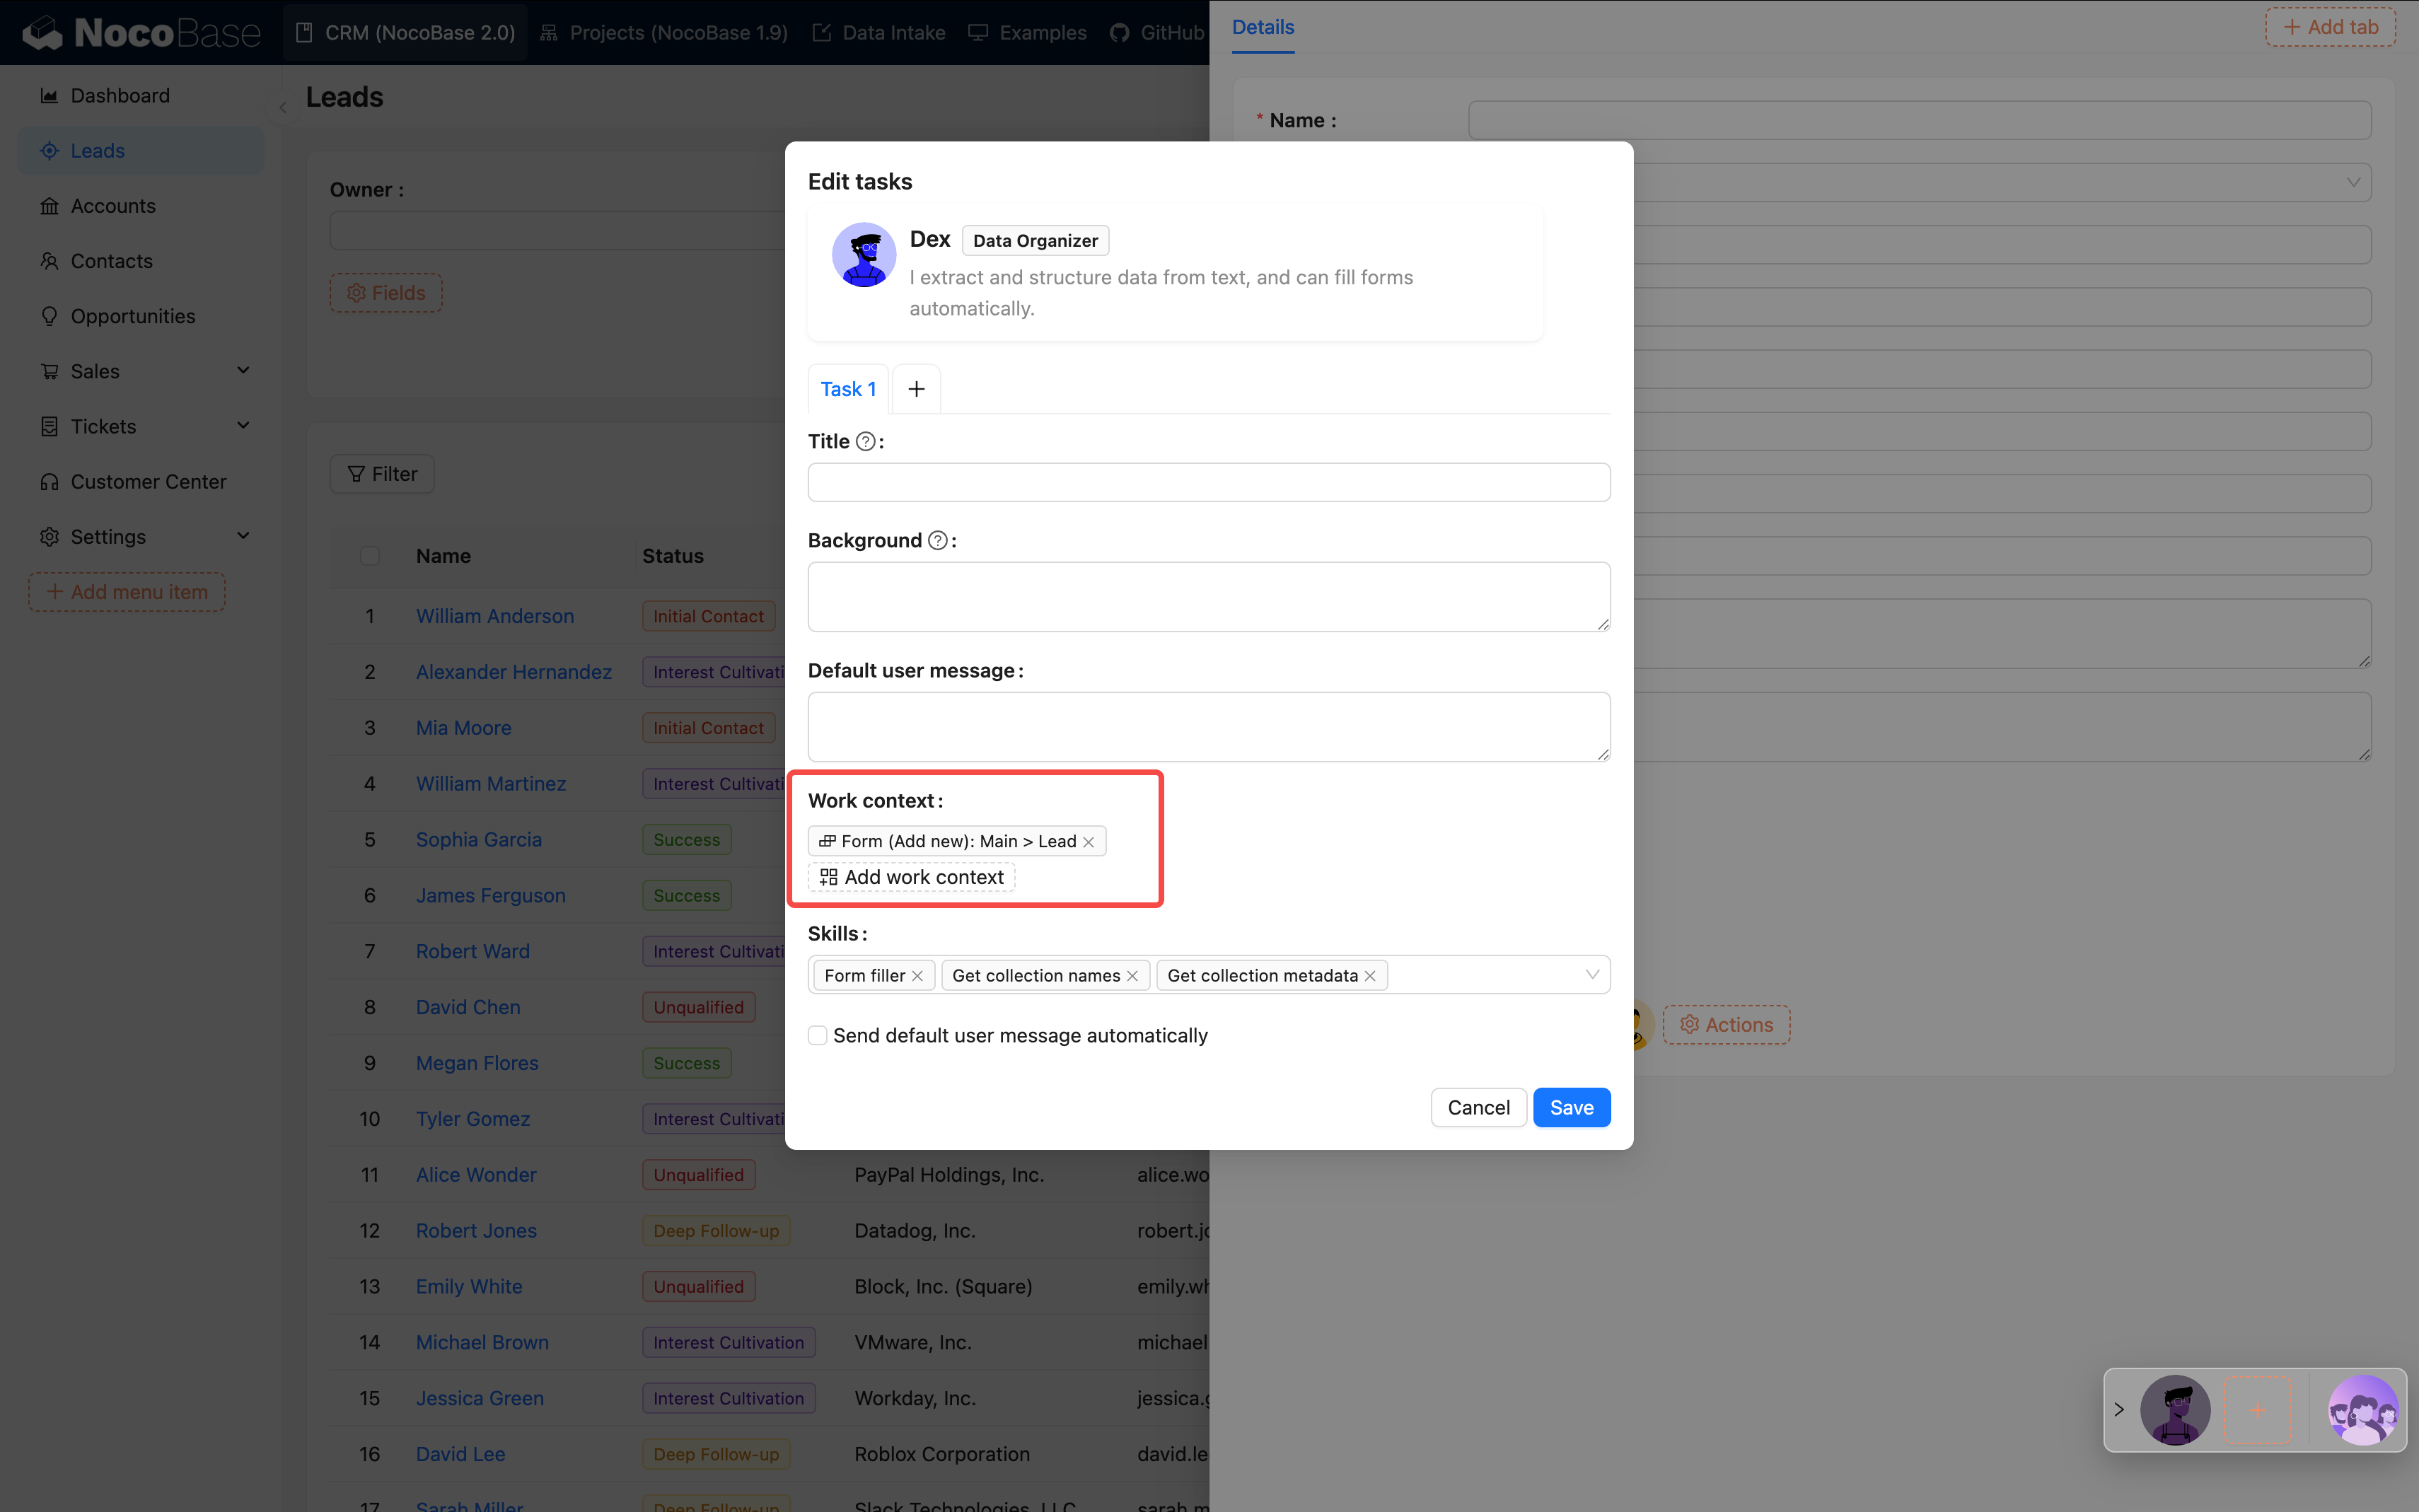
Step 3: Configure Skills
Skills determine what an employee "can do".
💡 For detailed instructions, please refer to: Skills
| Type | Capability Scope | Example | Risk Level |
|---|---|---|---|
| Frontend | Page interaction | Read block data, fill forms | Low |
| Data Model | Data query and analysis | Aggregate statistics | Medium |
| Workflow | Execute business processes | Custom tools | Depends on the workflow |
| Other | External extensions | Web search, file operations | Varies |
Configuration Suggestions:
- 3–5 skills per employee is most appropriate
- It's not recommended to select all skills, as it can cause confusion
- For important operations, prefer
AskoverAllow
Step 4: Configure Knowledge Base (Optional)
If your AI employee needs to remember or reference a large amount of material, such as product manuals, FAQs, etc., you can configure a knowledge base.
💡 For detailed instructions, please refer to:
This requires installing the vector database plugin.
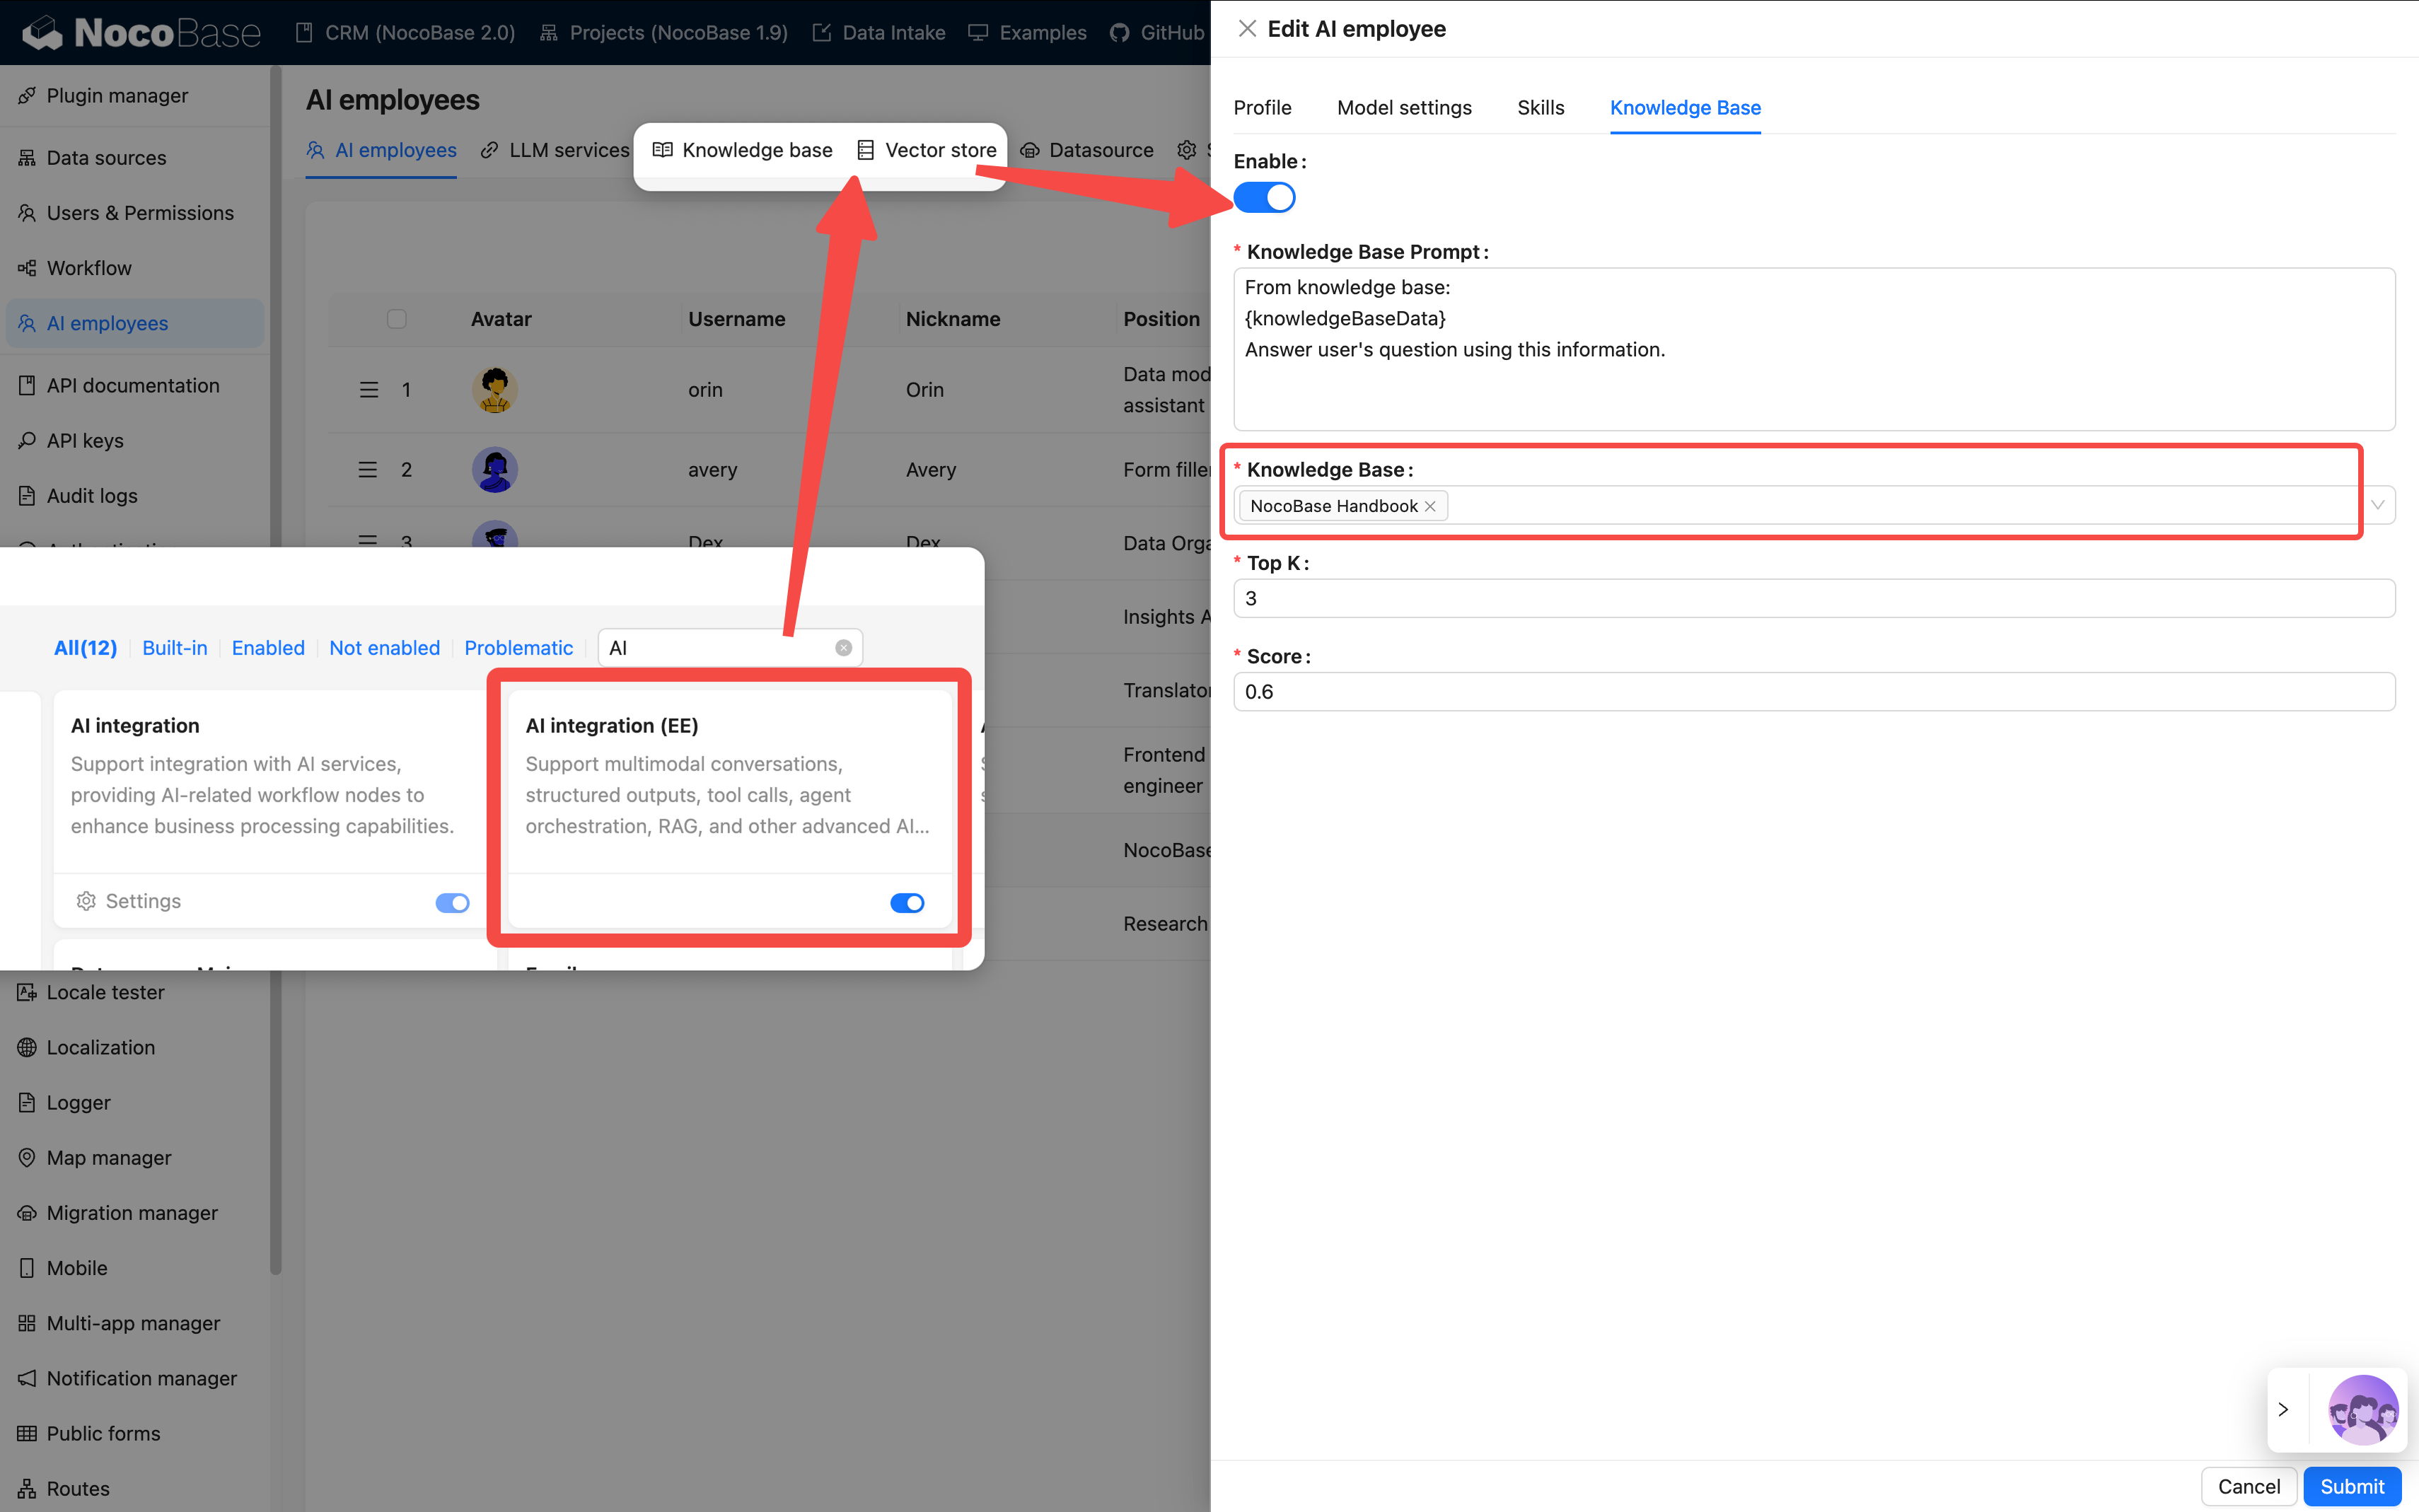
Applicable Scenarios:
- To make the AI understand enterprise knowledge
- To support document Q&A and retrieval
- To train domain-specific assistants
Step 5: Verify the Effect
After completion, you will see the new employee's avatar in the bottom right corner of the page.
Please check each item:
- ✅ Is the icon displayed correctly?
- ✅ Can it conduct a basic conversation?
- ✅ Can skills be called correctly?
If all pass, the configuration is successful 🎉
III. Task Configuration: Getting the AI to Work
What we've done so far is "creating an employee". Next is to get them "to work".
AI tasks define the employee's behavior on a specific page or block.
💡 For detailed instructions, please refer to: Tasks
1. Page-level Tasks
Applicable to the entire page scope, such as "Analyze the data on this page".
Configuration Entry:
Page Settings → AI Employee → Add Task
| Field | Description | Example |
|---|---|---|
| Title | Task name | Stage Conversion Analysis |
| Context | The context of the current page | Leads list page |
| Default Message | Preset conversation starter | "Please analyze this month's trends" |
| Default Block | Automatically associate with a collection | leads table |
| Skills | Available tools | Query data, generate charts |
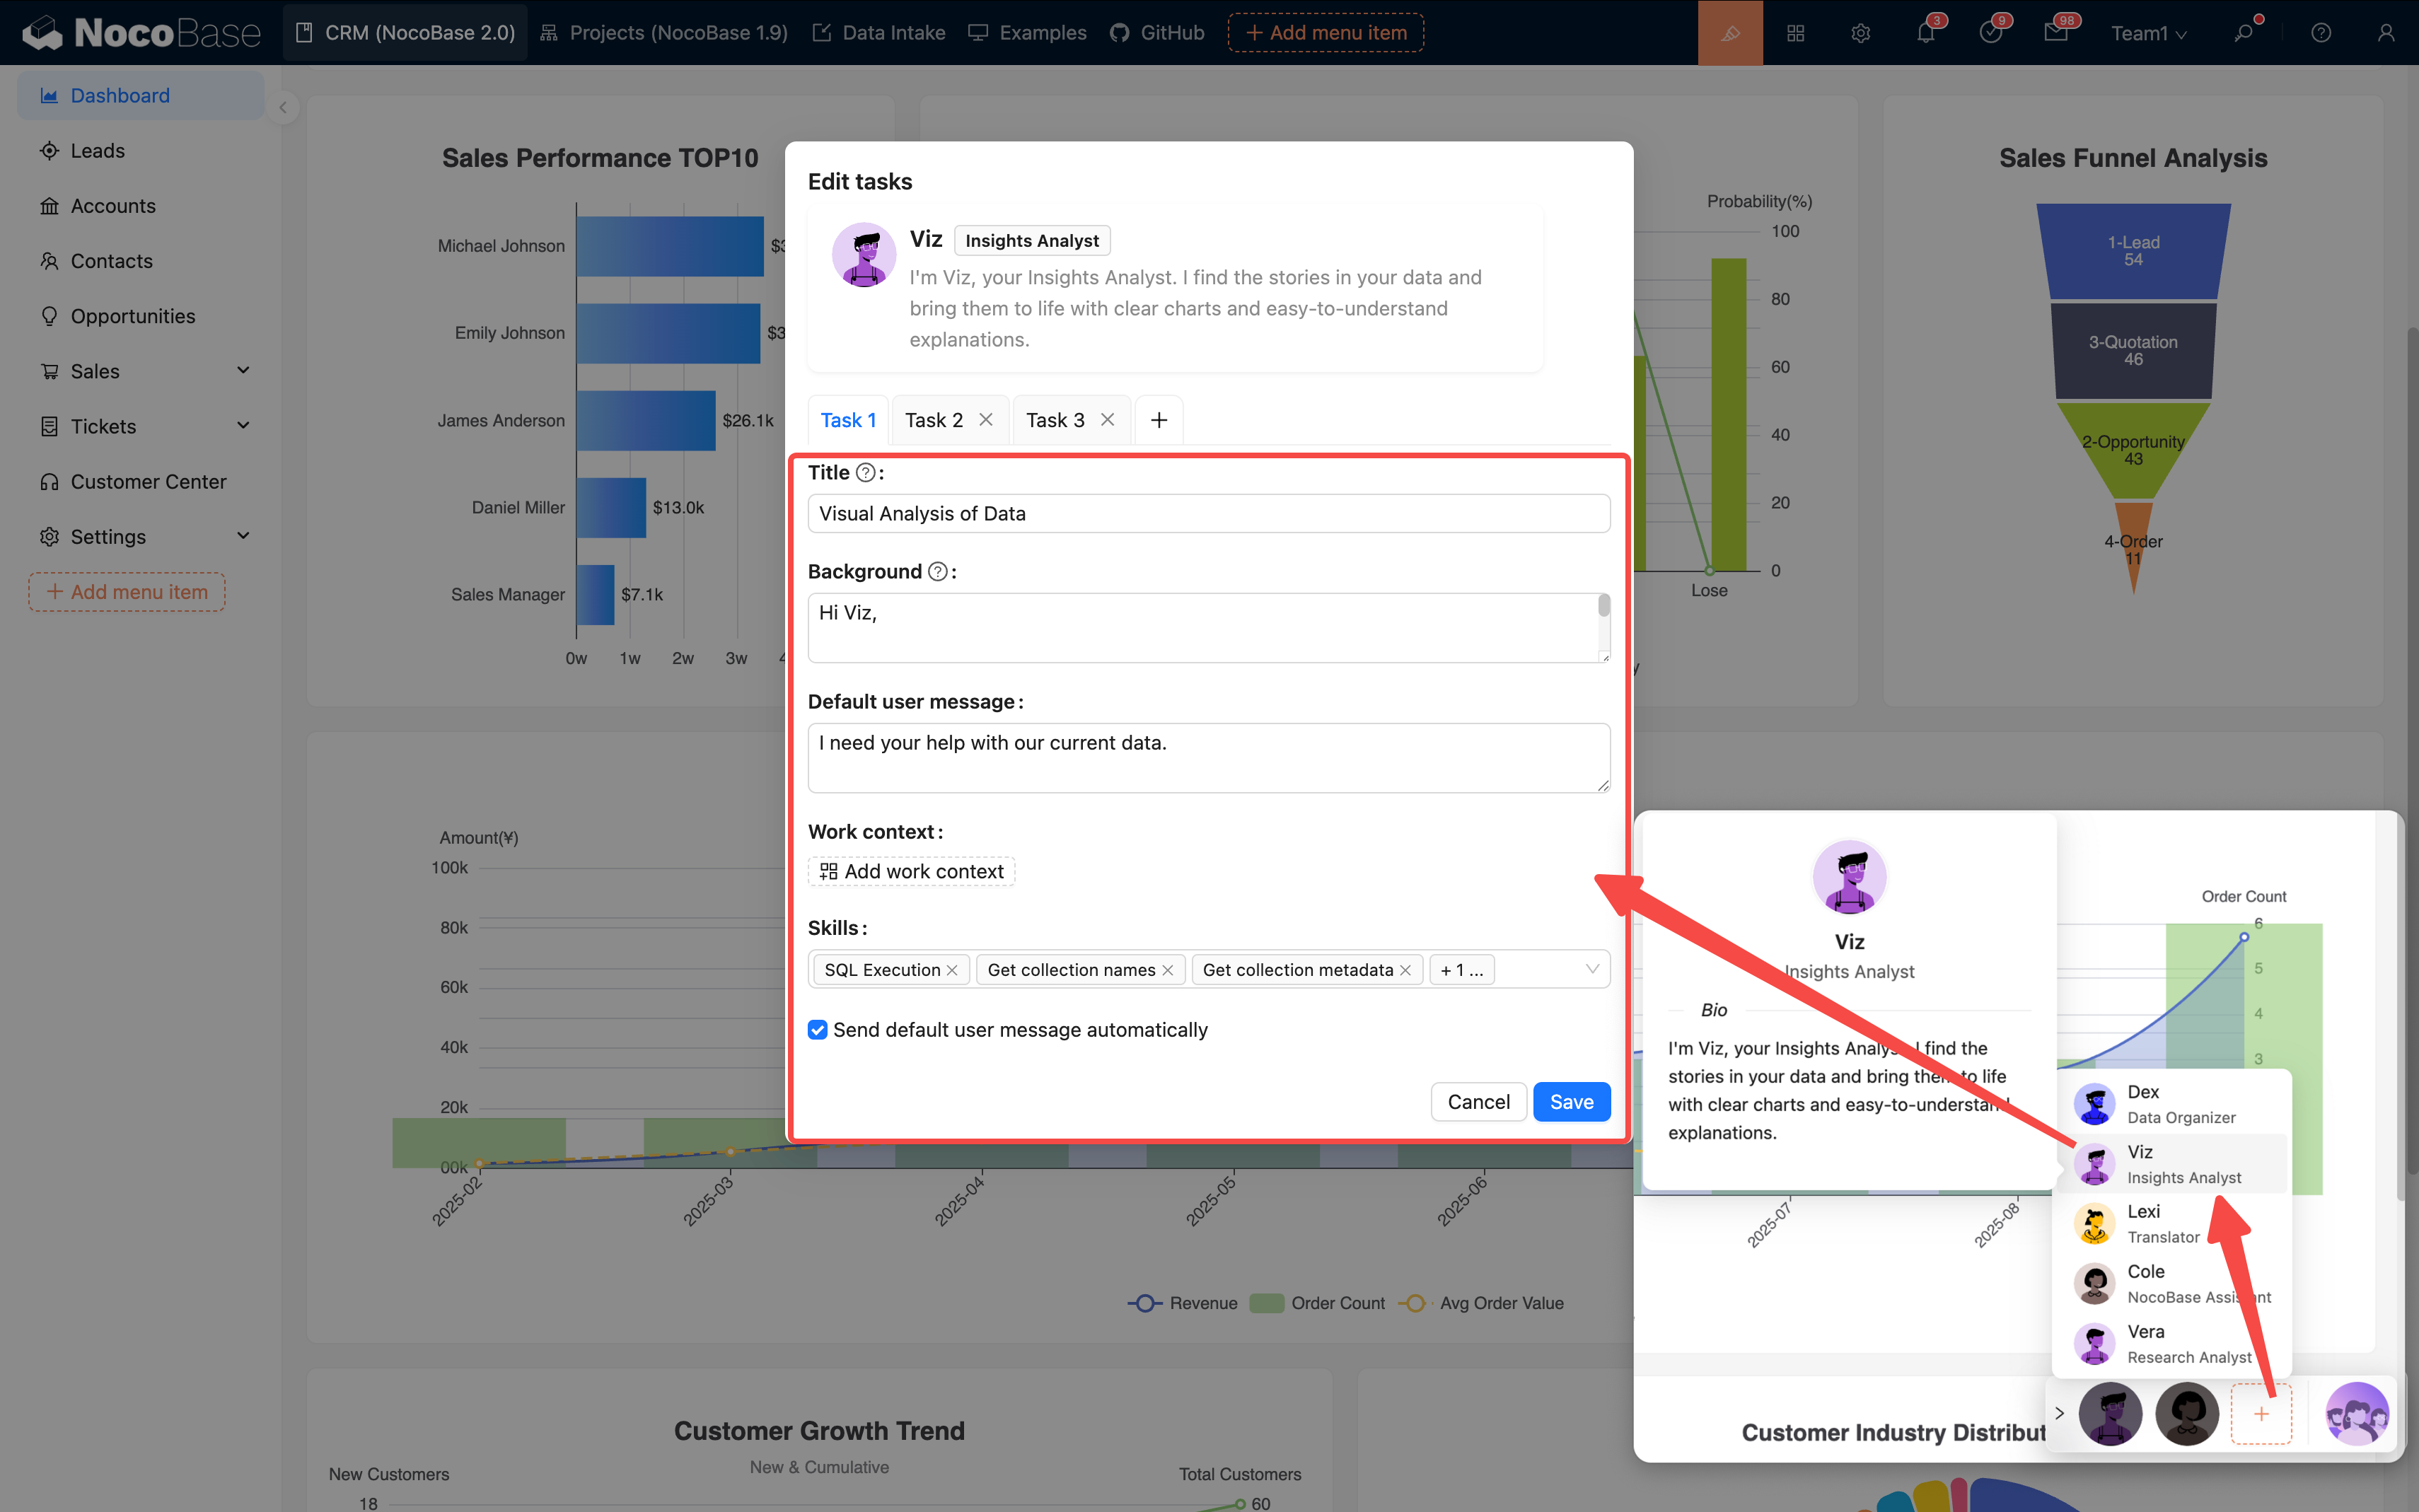
Multi-task Support: A single AI employee can be configured with multiple tasks, which are presented as options for the user to choose from:
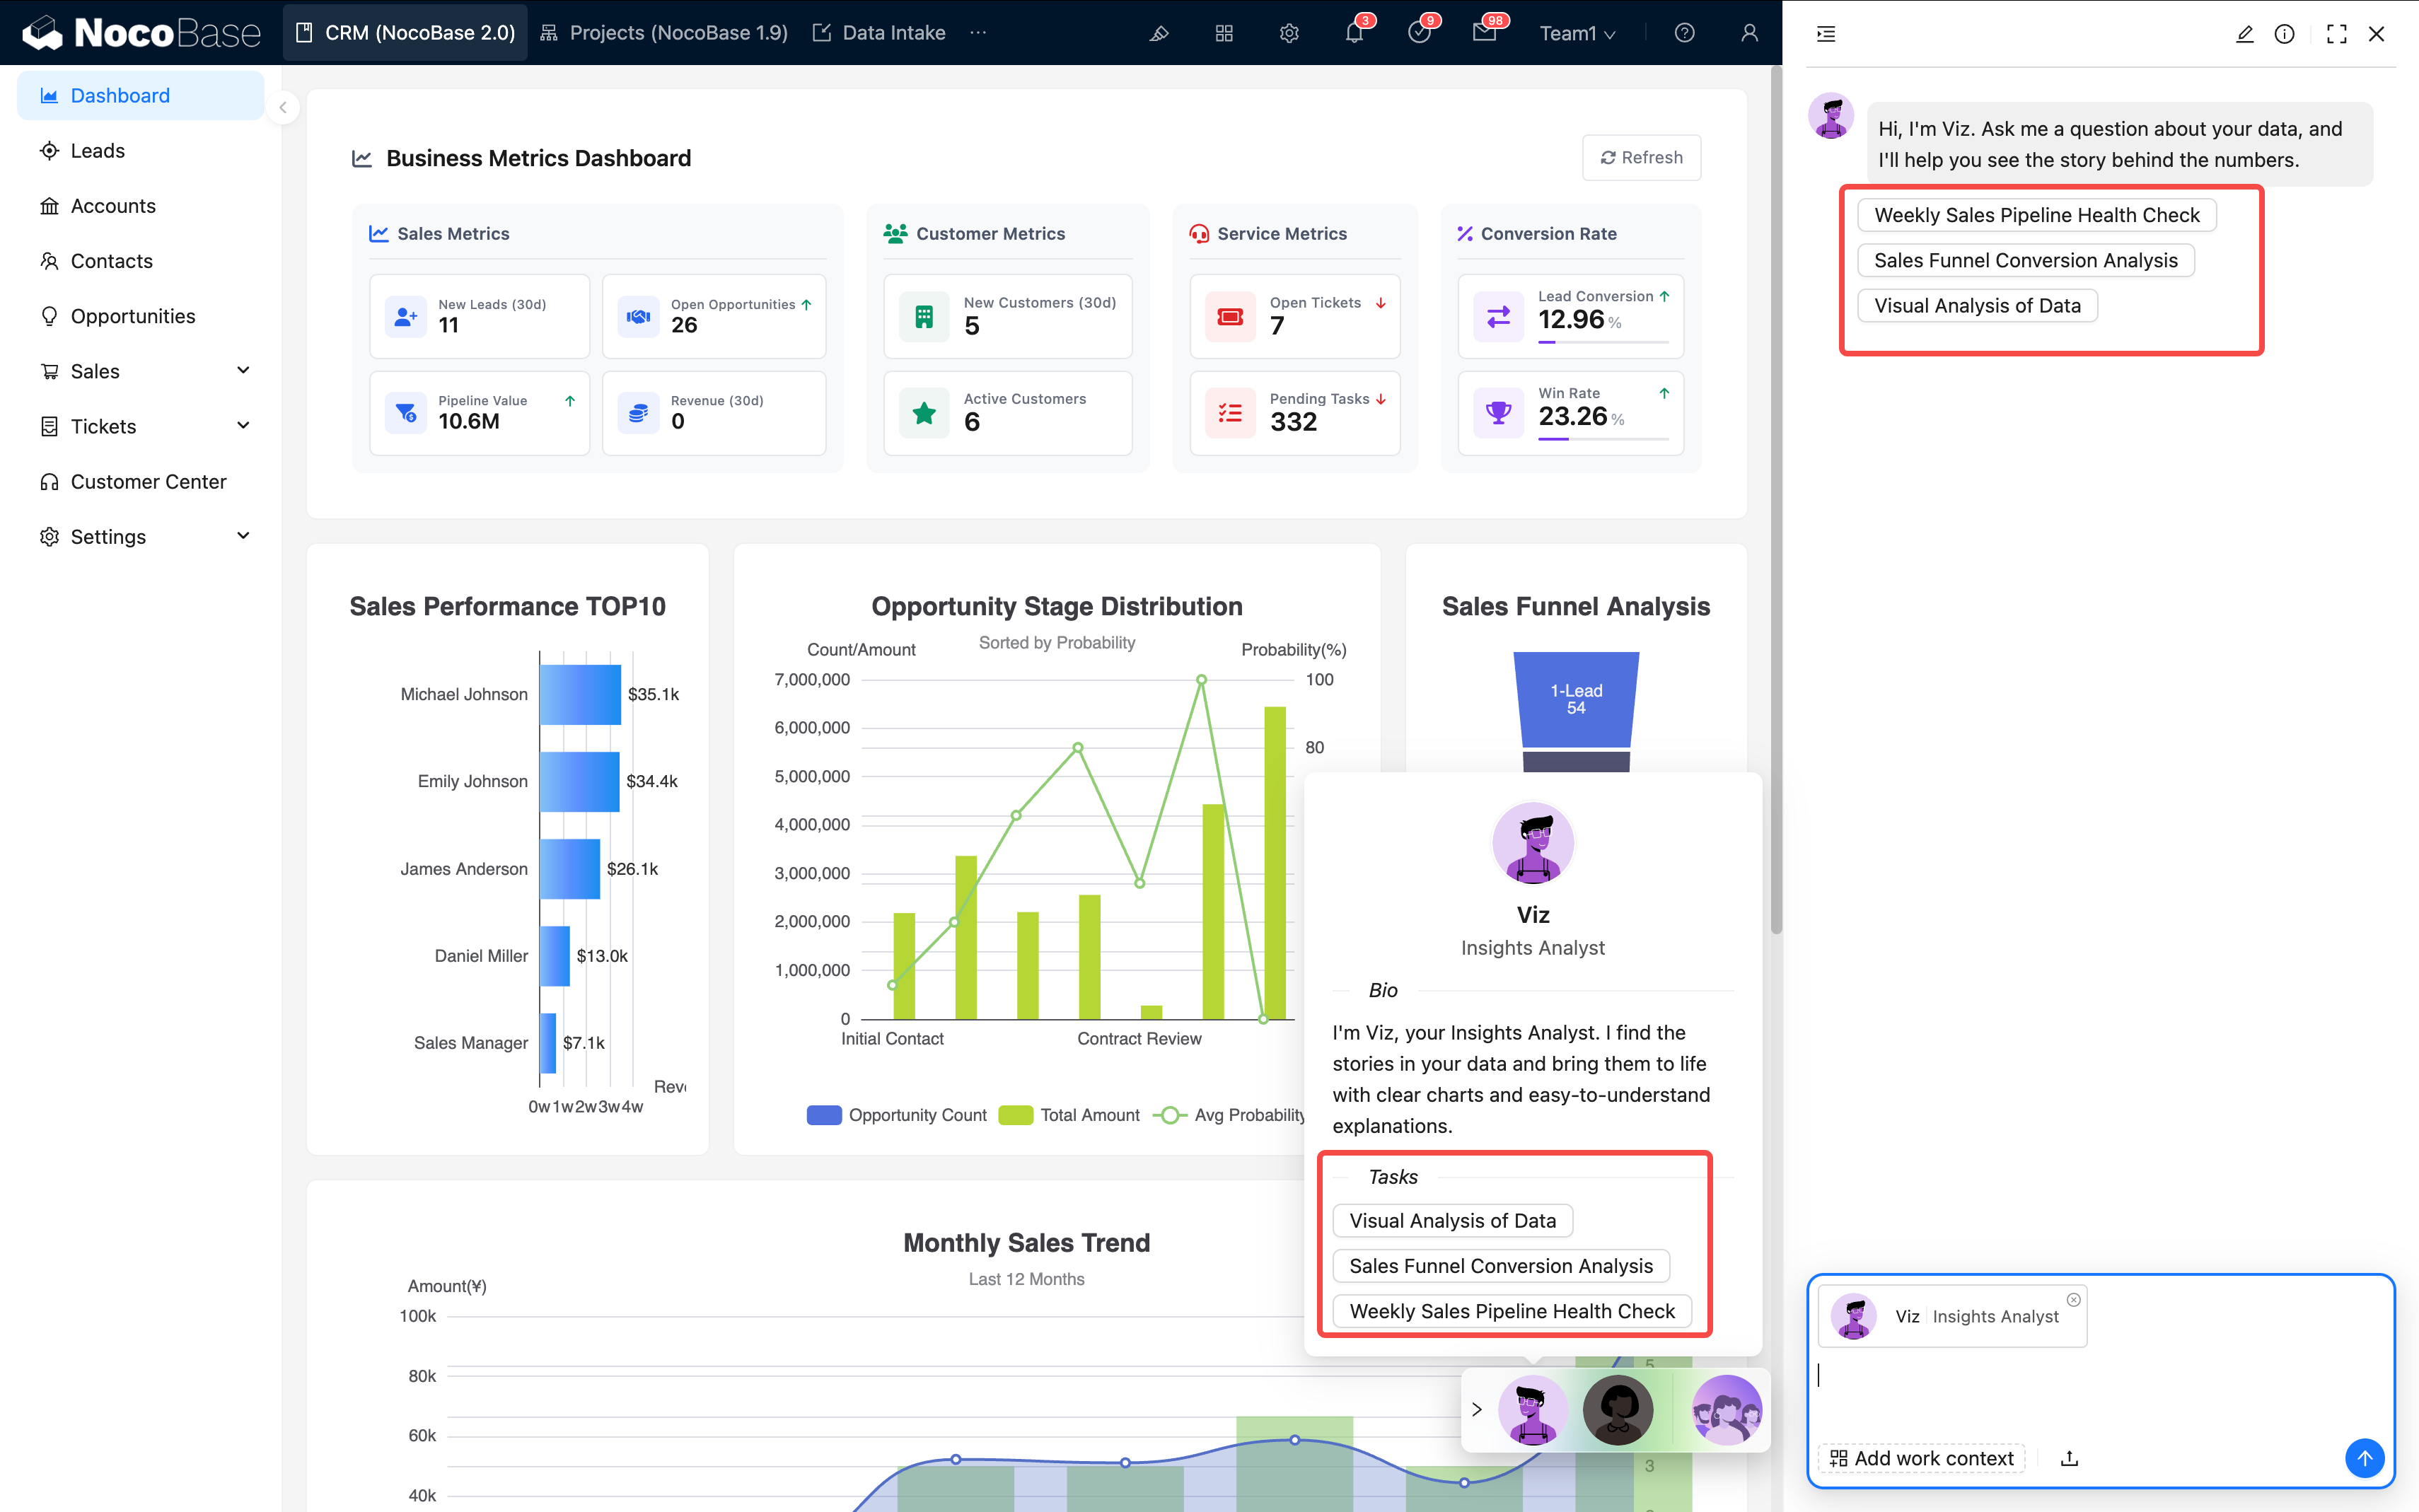
Suggestions:
- One task should focus on one goal
- The name should be clear and easy to understand
- Keep the number of tasks within 5–7
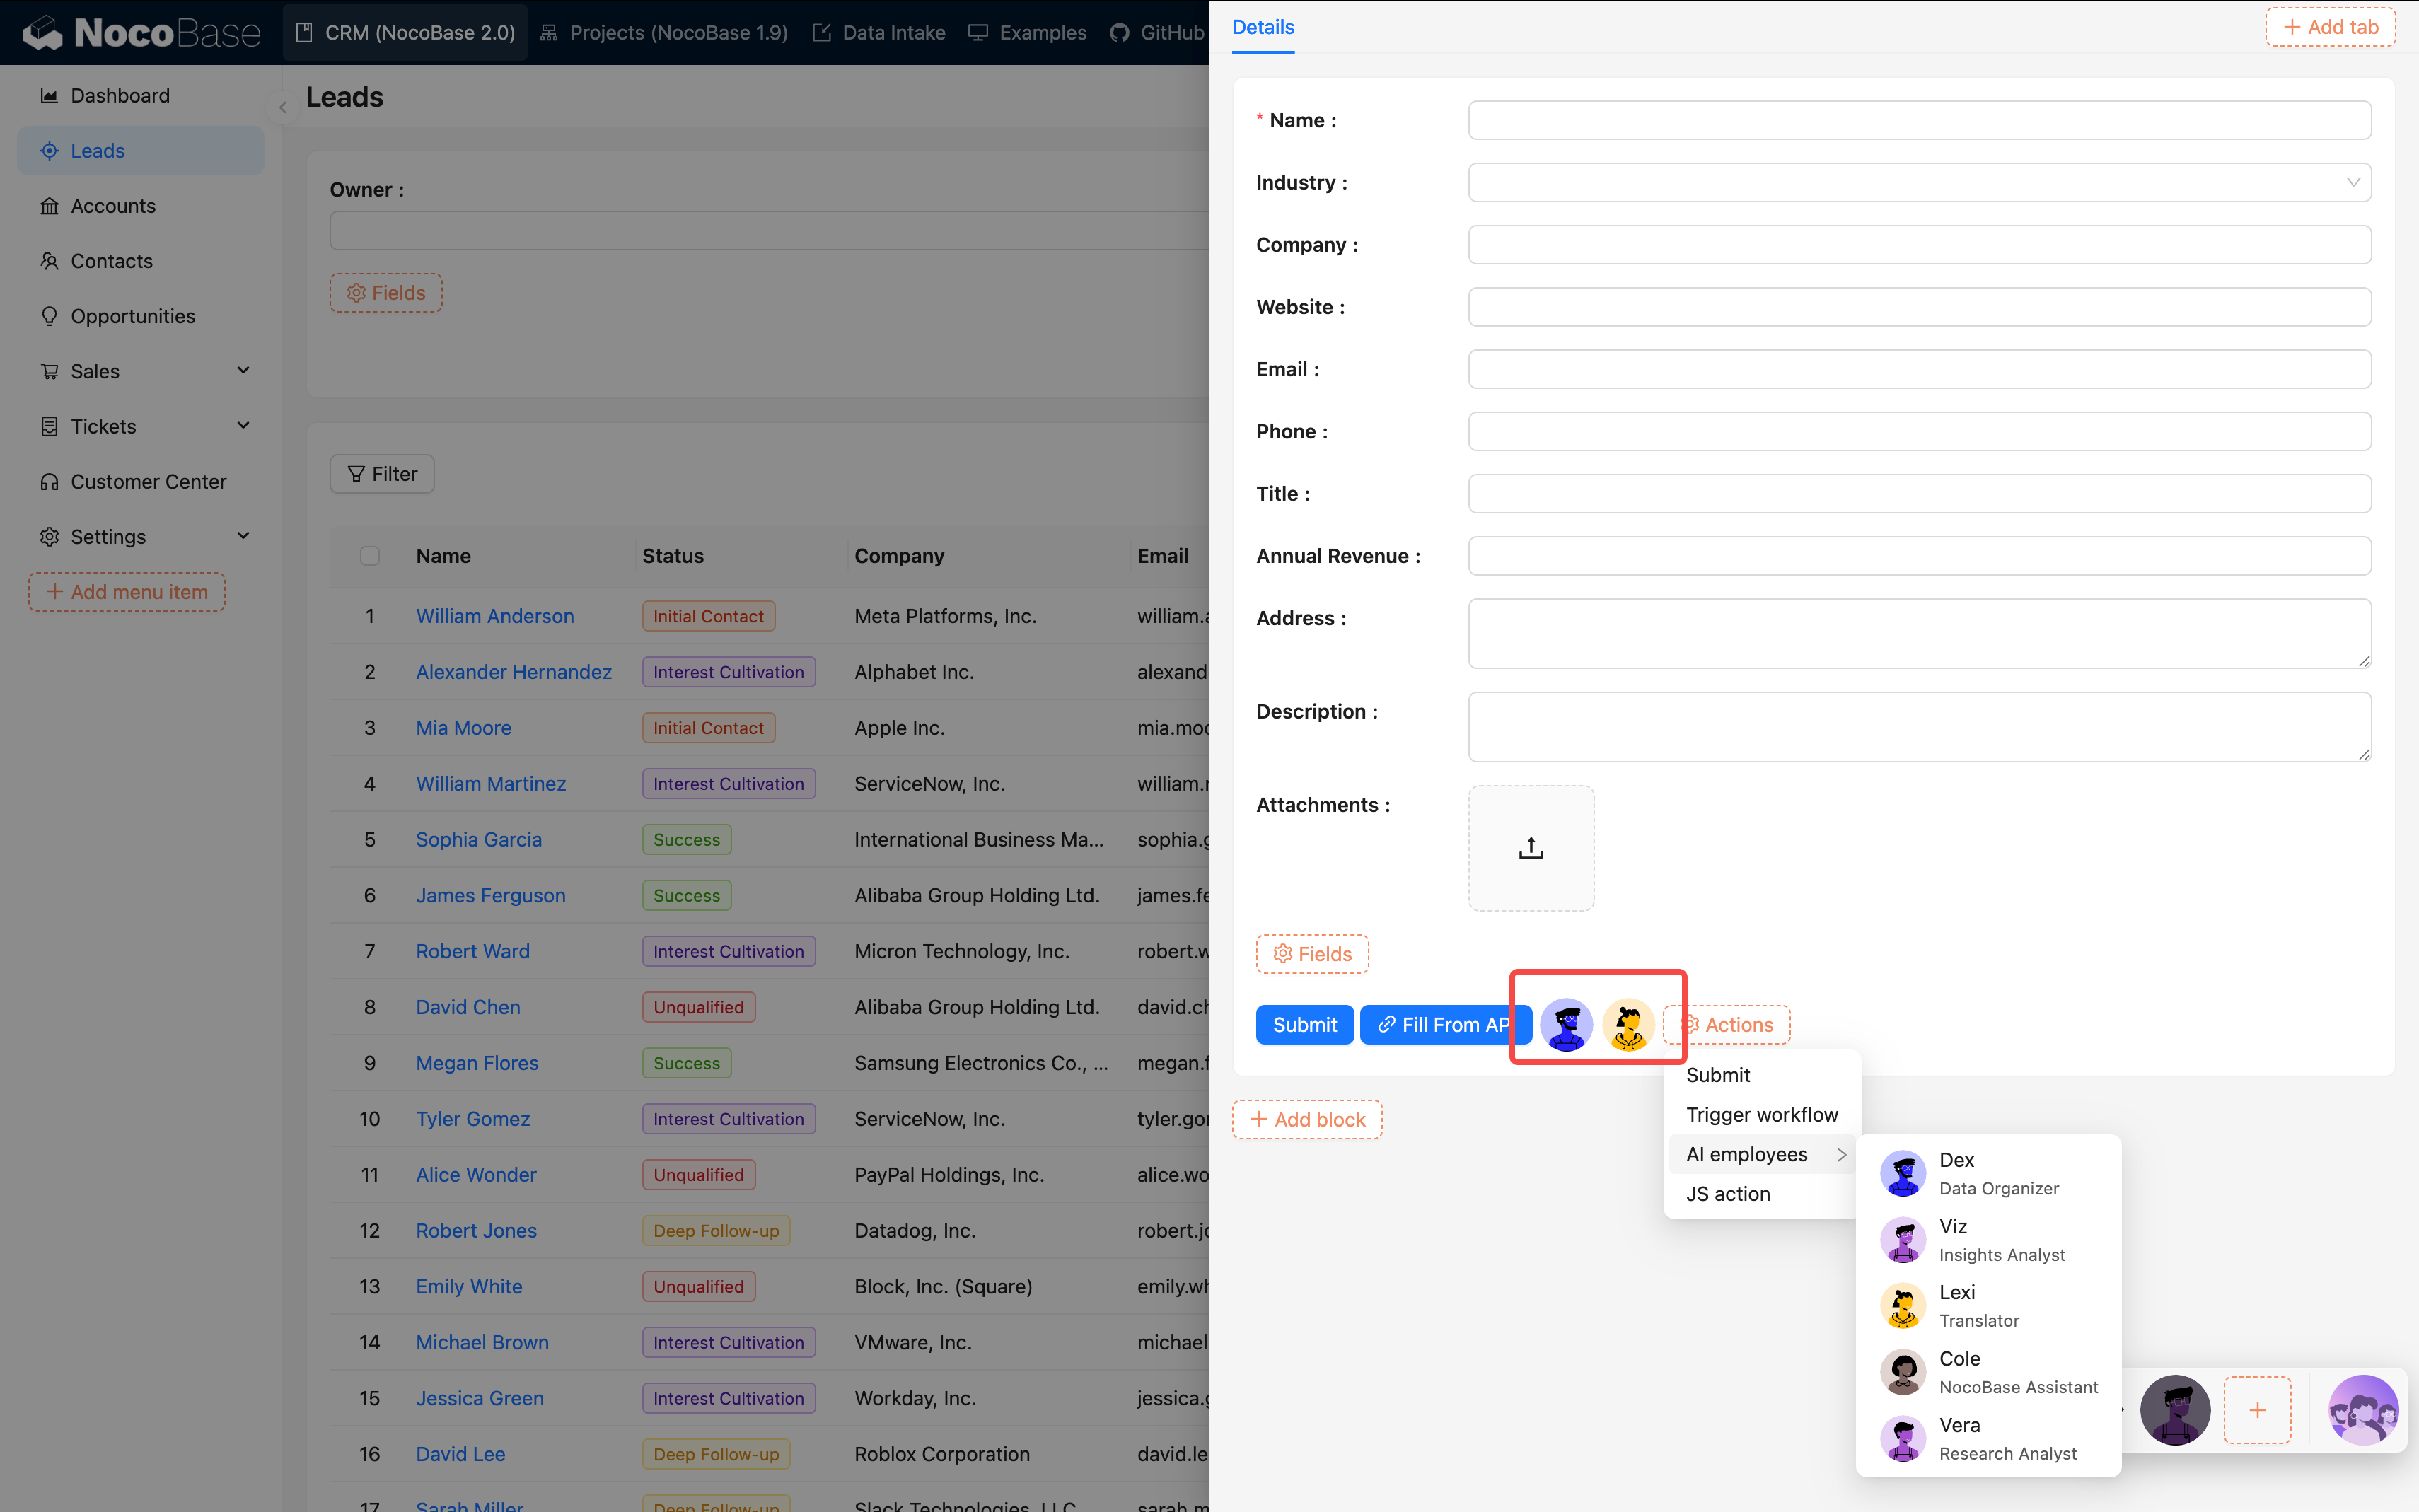
2. Block-level Tasks
Suitable for operating on a specific block, such as "Translate the current form".
Configuration Method:
- Open the block action configuration
- Add "AI Employee"
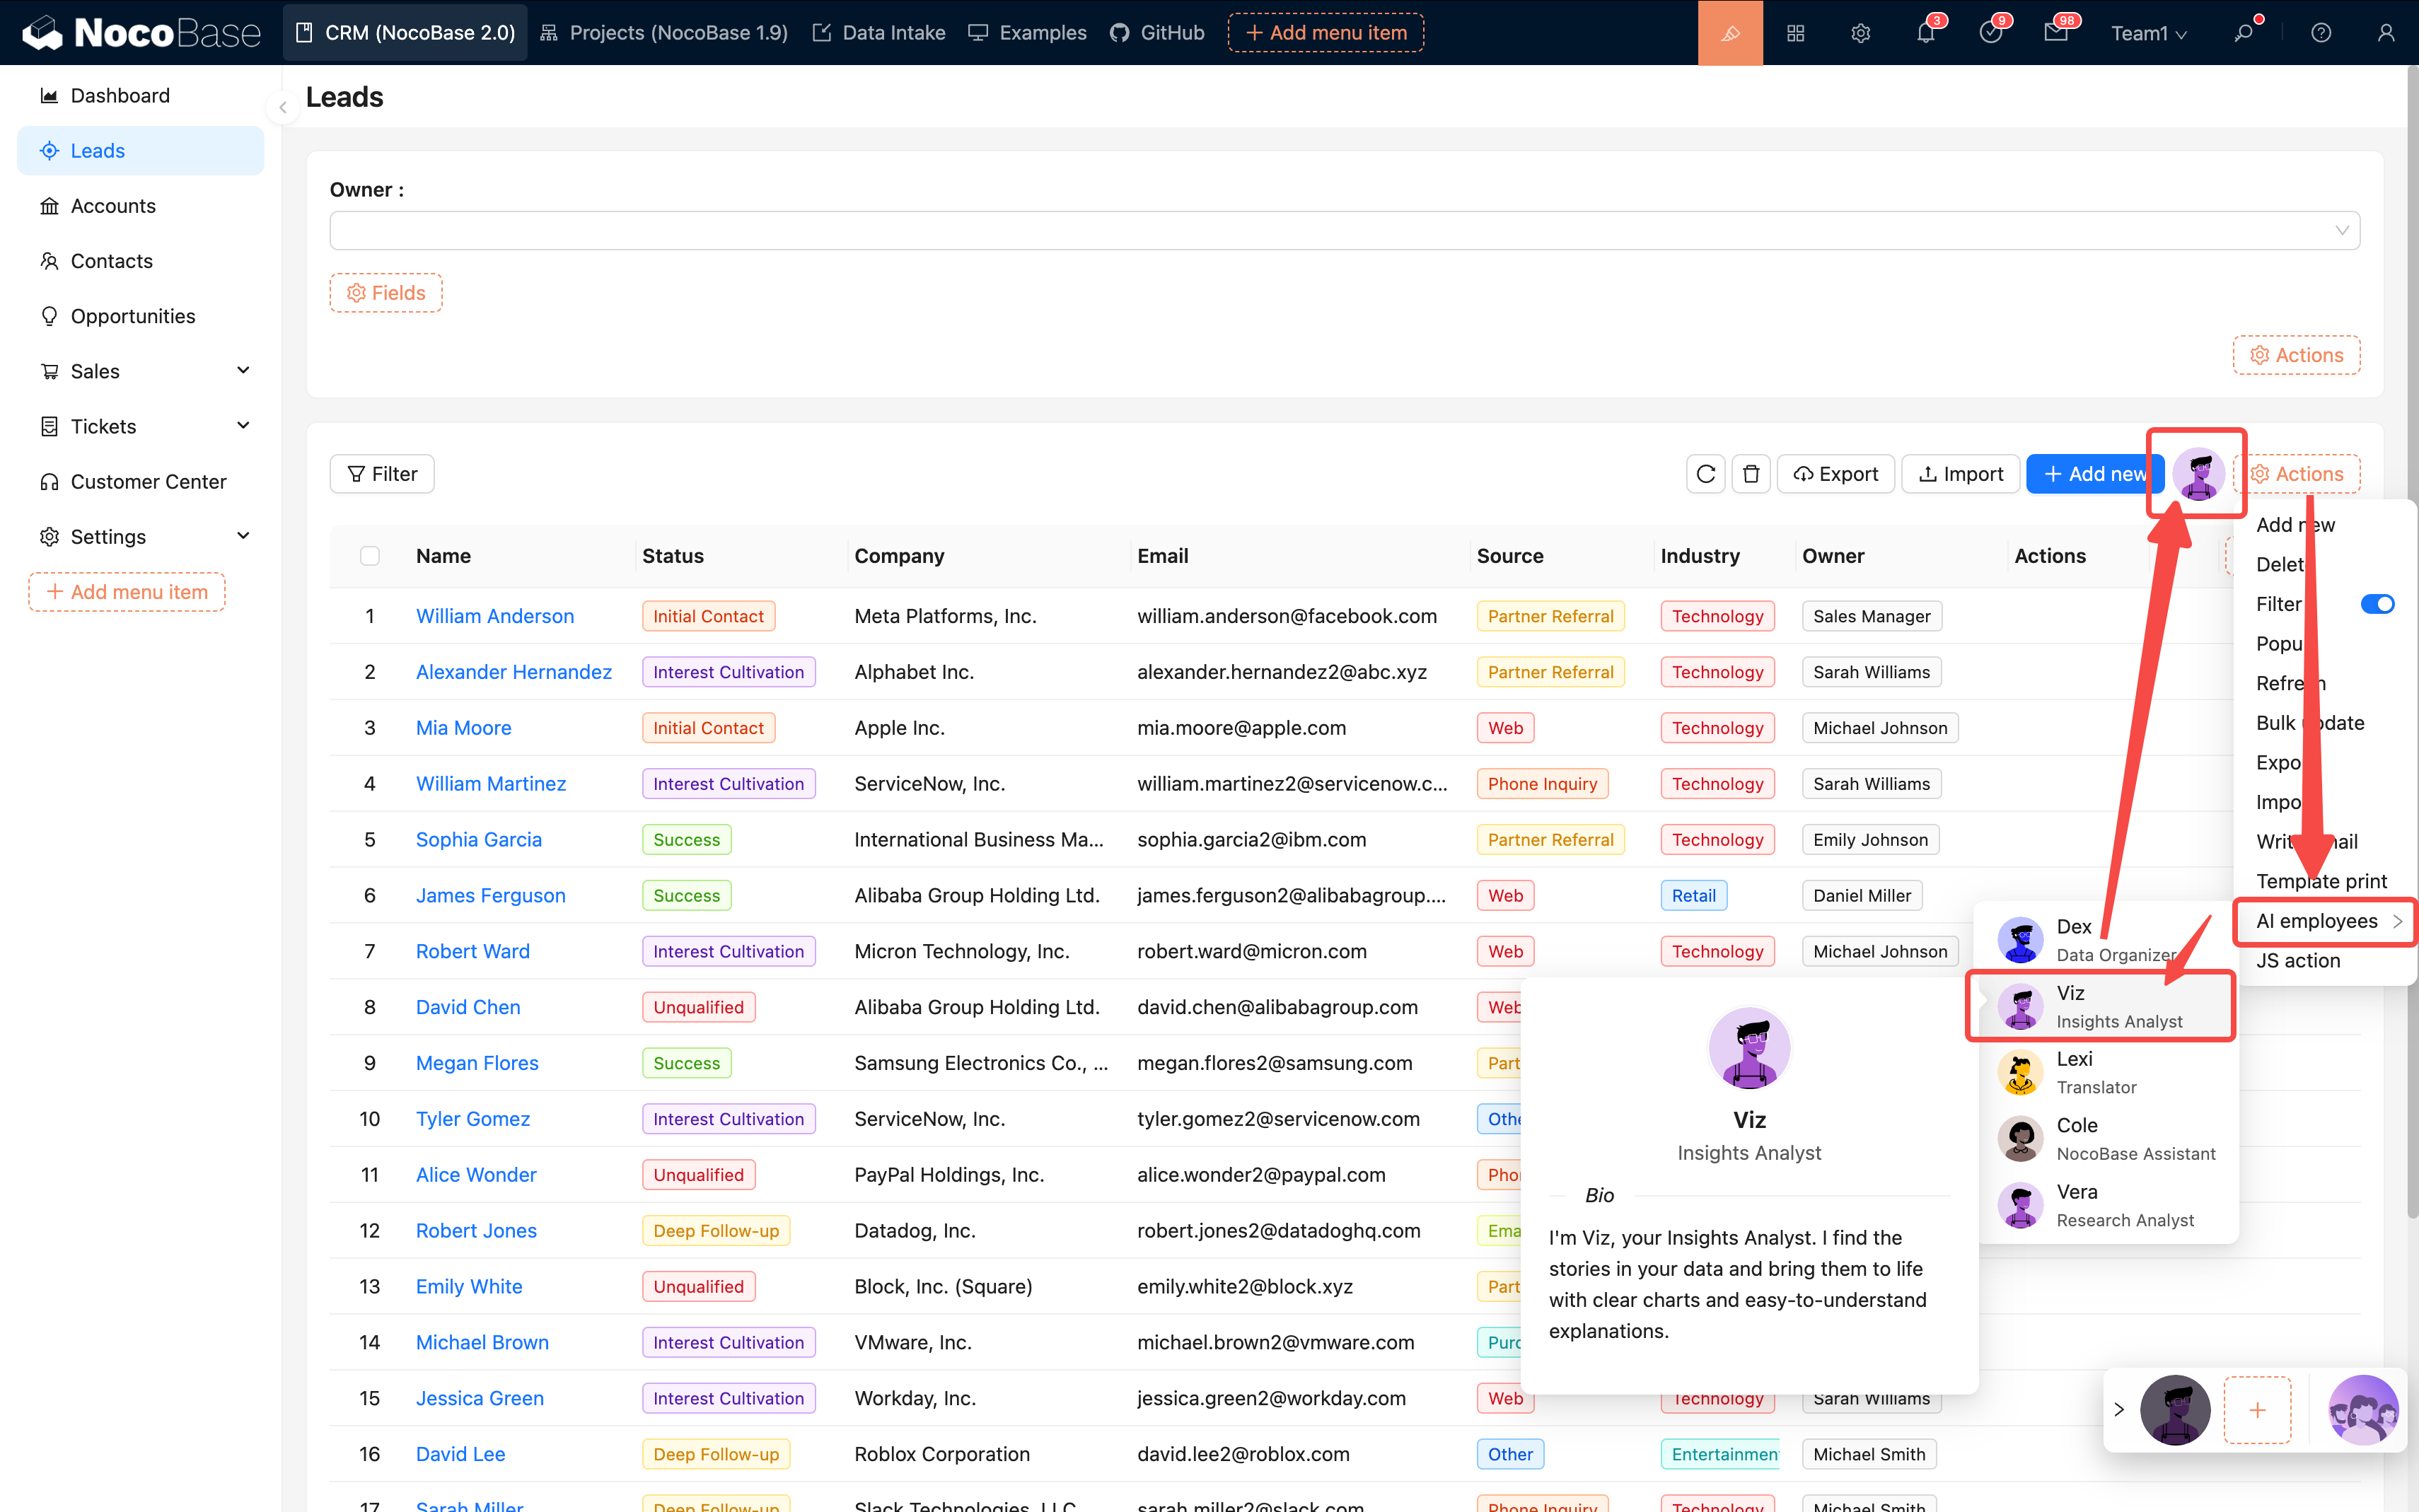
- Bind the target employee
| Comparison | Page-level | Block-level |
|---|---|---|
| Data Scope | Entire page | Current block |
| Granularity | Global analysis | Detailed processing |
| Typical Use | Trend analysis | Form translation, field extraction |
IV. Best Practices
1. Configuration Suggestions
| Item | Suggestion | Reason |
|---|---|---|
| Number of Skills | 3–5 | High accuracy, fast response |
| Permission mode (Ask / Allow) | Prefer Ask for data changes | Prevent accidental operations |
| Prompt Length | 500–1000 characters | Balances speed and quality |
| Task Goal | Single and clear | Avoids confusing the AI |
| Workflow | Use after encapsulating complex tasks | Higher success rate |
2. Practical Suggestions
Start small, optimize gradually:
- First, create basic employees (e.g., Viz, Dex)
- Enable 1–2 core skills for testing
- Confirm that tasks can be executed normally
- Then, gradually expand with more skills and tasks
Continuous optimization process:
- Get the initial version running
- Collect user feedback
- Optimize prompts and task configurations
- Test and iterate
V. FAQ
1. Configuration Stage
Q: What if saving fails? A: Check if all required fields are filled in, especially the model service and prompt.
Q: Which model should I choose?
- Code-related → Claude, GPT-4
- Analysis-related → Claude, DeepSeek
- Cost-sensitive → Qwen, GLM
- Long text → Gemini, Claude
2. Usage Stage
Q: AI response is too slow?
- Reduce the number of skills
- Optimize the prompt
- Check the model service latency
- Consider changing the model
Q: Task execution is inaccurate?
- The prompt is not clear enough
- Too many skills are causing confusion
- Break down the task into smaller parts, add examples
Q: When should I choose Ask vs Allow?
Allowcan be used for query-only tasksAskis recommended for data modification tasks
Q: How to make the AI process a specific form?
A: For page-level configurations, you need to manually select the block.
For block-level task configurations, the data context is automatically bound.
VI. Further Reading
To make your AI employees more powerful, you can continue reading the following documents:
Configuration Related:
- Prompt Engineering Guide - Techniques and best practices for writing high-quality prompts
- Configure LLM Service - Detailed configuration instructions for large model services
- Create an AI Employee - Creation and basic configuration of AI employees
- Collaborate with AI Employee - How to have effective conversations with AI employees
Advanced Features:
- Skills - In-depth understanding of the configuration and use of various skills
- Tasks - Advanced techniques for task configuration
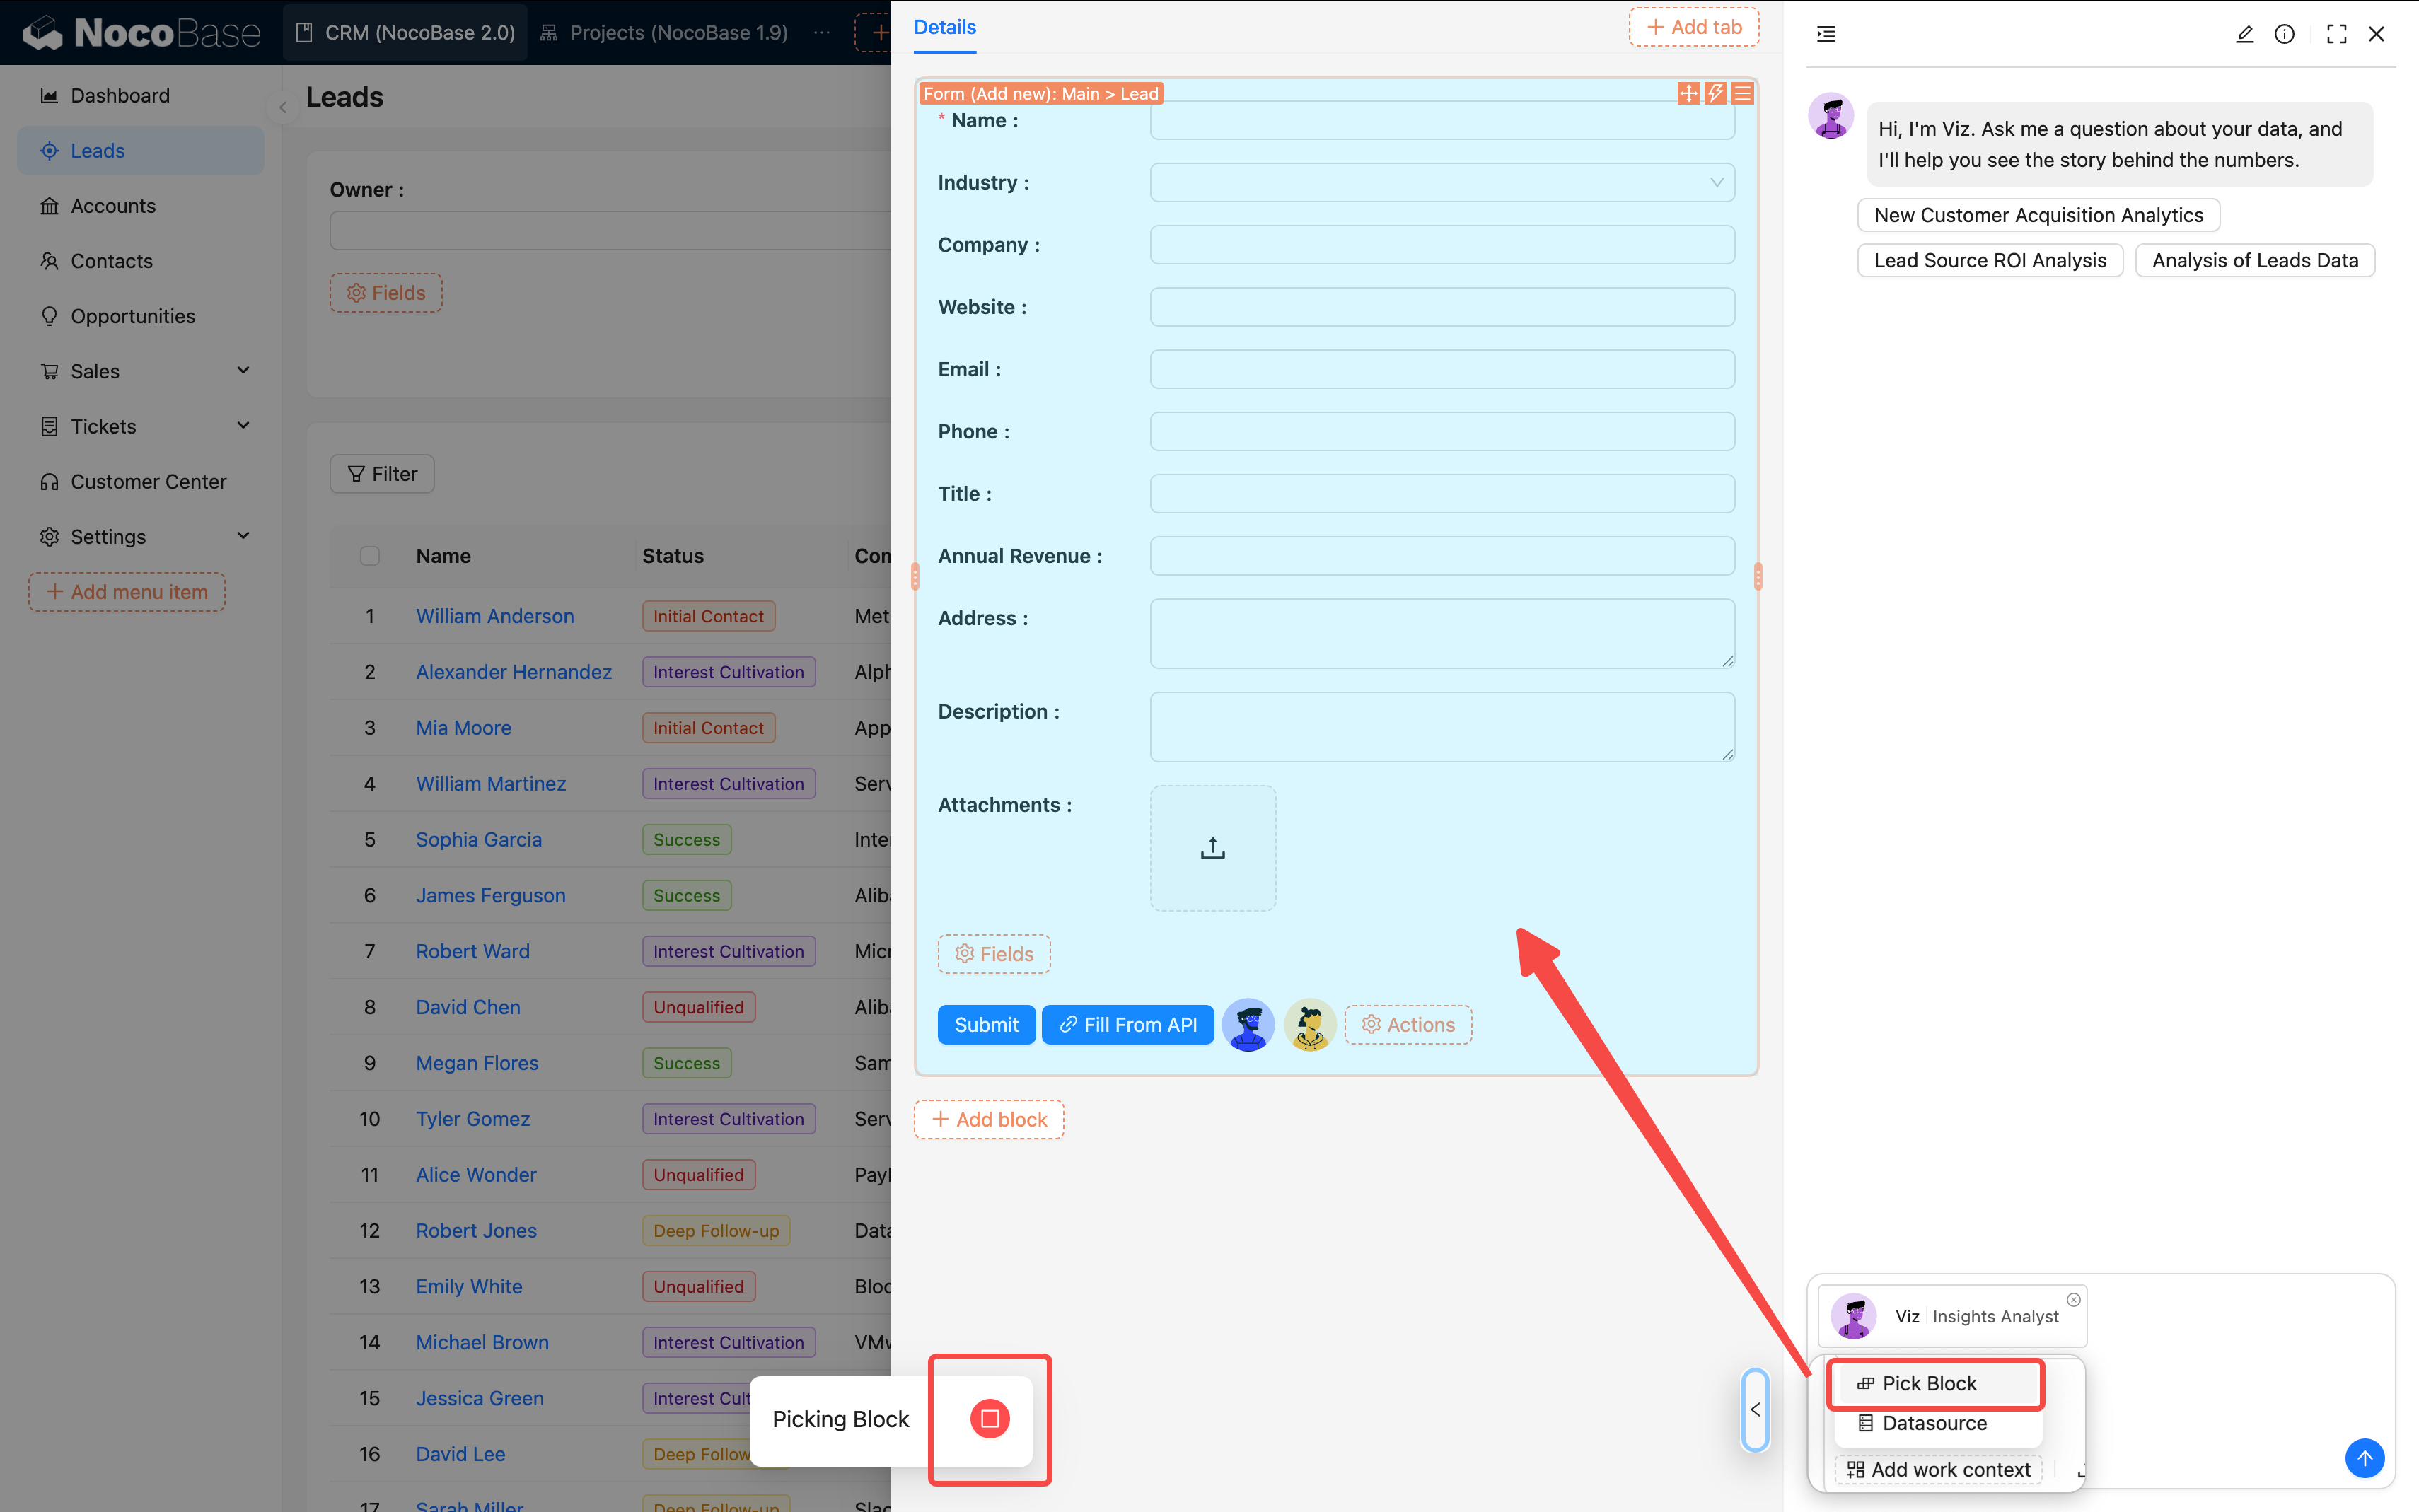
- Pick Block - How to specify data blocks for AI employees
- Data Source - Refer to the datasource plugin documentation
- Web Search - Configuring the web search capability for AI employees
Knowledge Base & RAG:
- AI Knowledge Base Overview - Introduction to the knowledge base feature
- Vector Database - Configuration of the vector database
- Knowledge Base - How to create and manage a knowledge base
- RAG (Retrieval-Augmented Generation) - Application of RAG technology
Workflow Integration:
- LLM Node - Chat - Using text chat in workflows
- LLM Node - Multimodal Chat - Handling multimodal inputs like images and files
- LLM Node - Structured Output - Getting structured AI responses
Conclusion
The most important thing when configuring AI employees is: get it working first, then optimize. First, get your first employee successfully on the job, then gradually expand and fine-tune.
You can troubleshoot in the following order:
- Is the model service connected?
- Are there too many skills?
- Is the prompt clear?
- Is the task goal well-defined?
As long as you proceed step by step, you can build a truly efficient AI team.