

Quick Start
Let's start from scratch and take 5 minutes to quickly understand and use NocoBase AI Employees.
1. Install Plugin
AI Employees are built into NocoBase (@nocobase/plugin-ai), ready to use out of the box without separate installation.
2. Configure LLM Service
Before using AI Employees, you need to connect to an online LLM Service.
NocoBase currently supports mainstream online LLM Services such as OpenAI, Gemini, Claude, DeepSeek, Qwen (Aliyun), etc. Recommended models (tested): gemini-3, deepseek-chat, qwen3-max.
In addition to online LLM Services, NocoBase also supports connecting to Ollama local models.
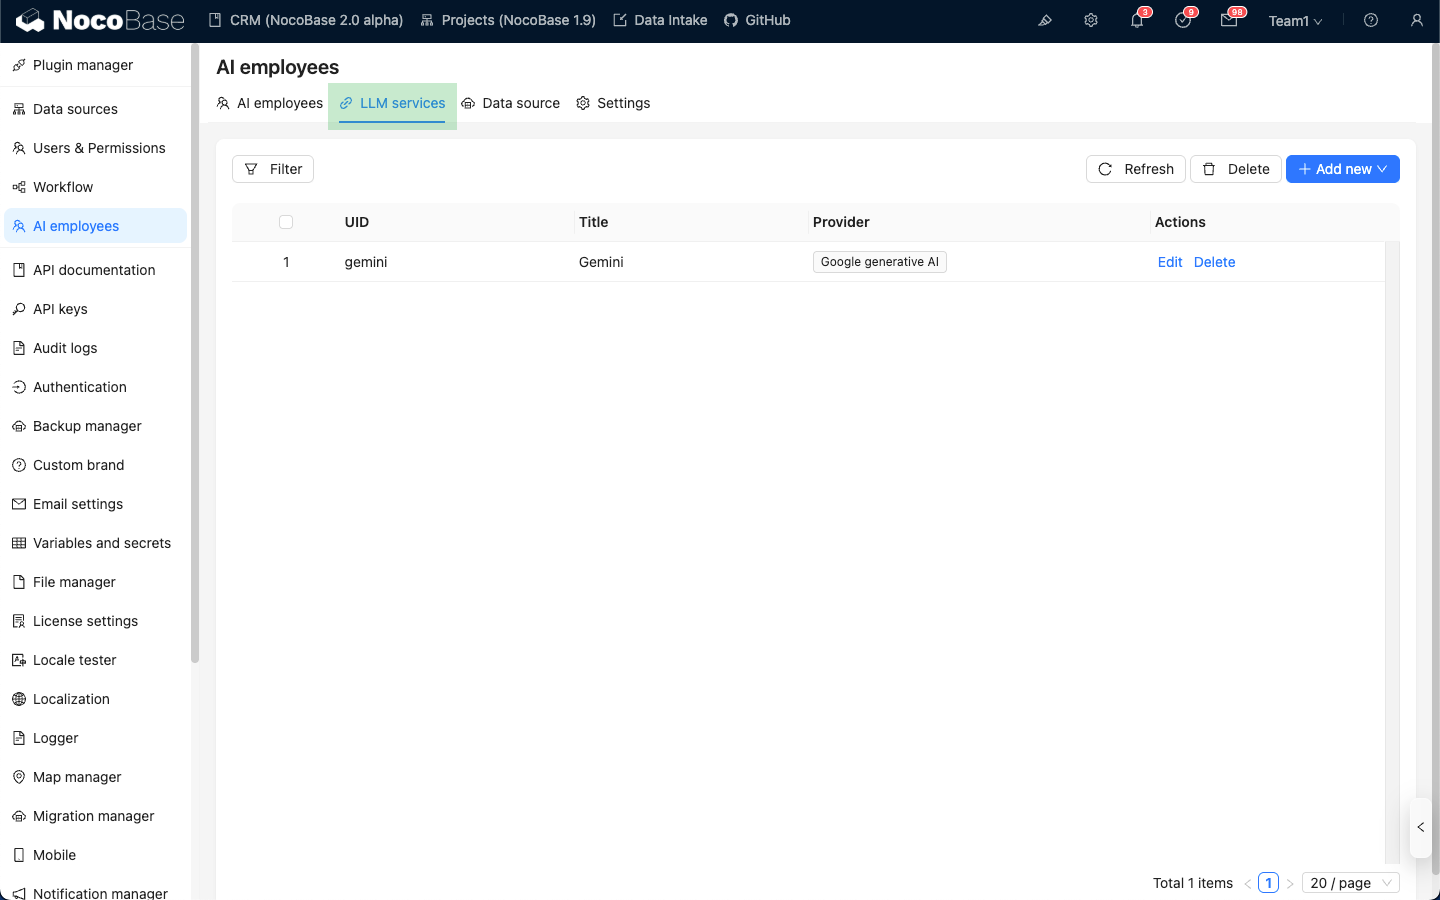
- Go to System Settings -> AI Employees -> LLM Service.
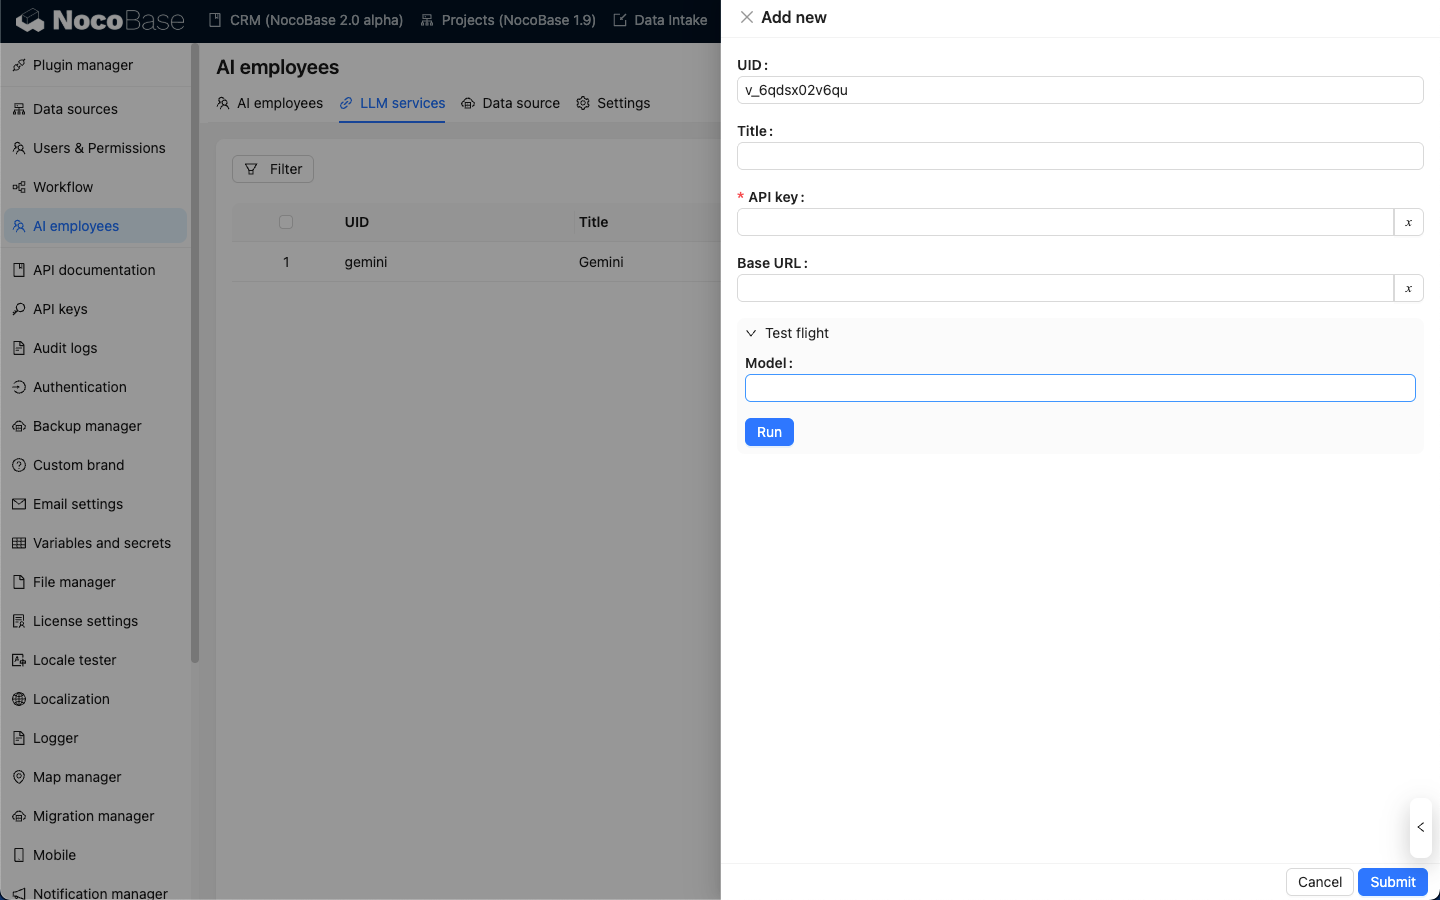
- Click Add New and select your model provider.
- Enter the API Key and Base URL (optional).
- Click Test Connection to ensure the configuration is correct.
3. Enable Built-in Employees
NocoBase comes with several built-in AI Employees out of the box, covering common scenarios.
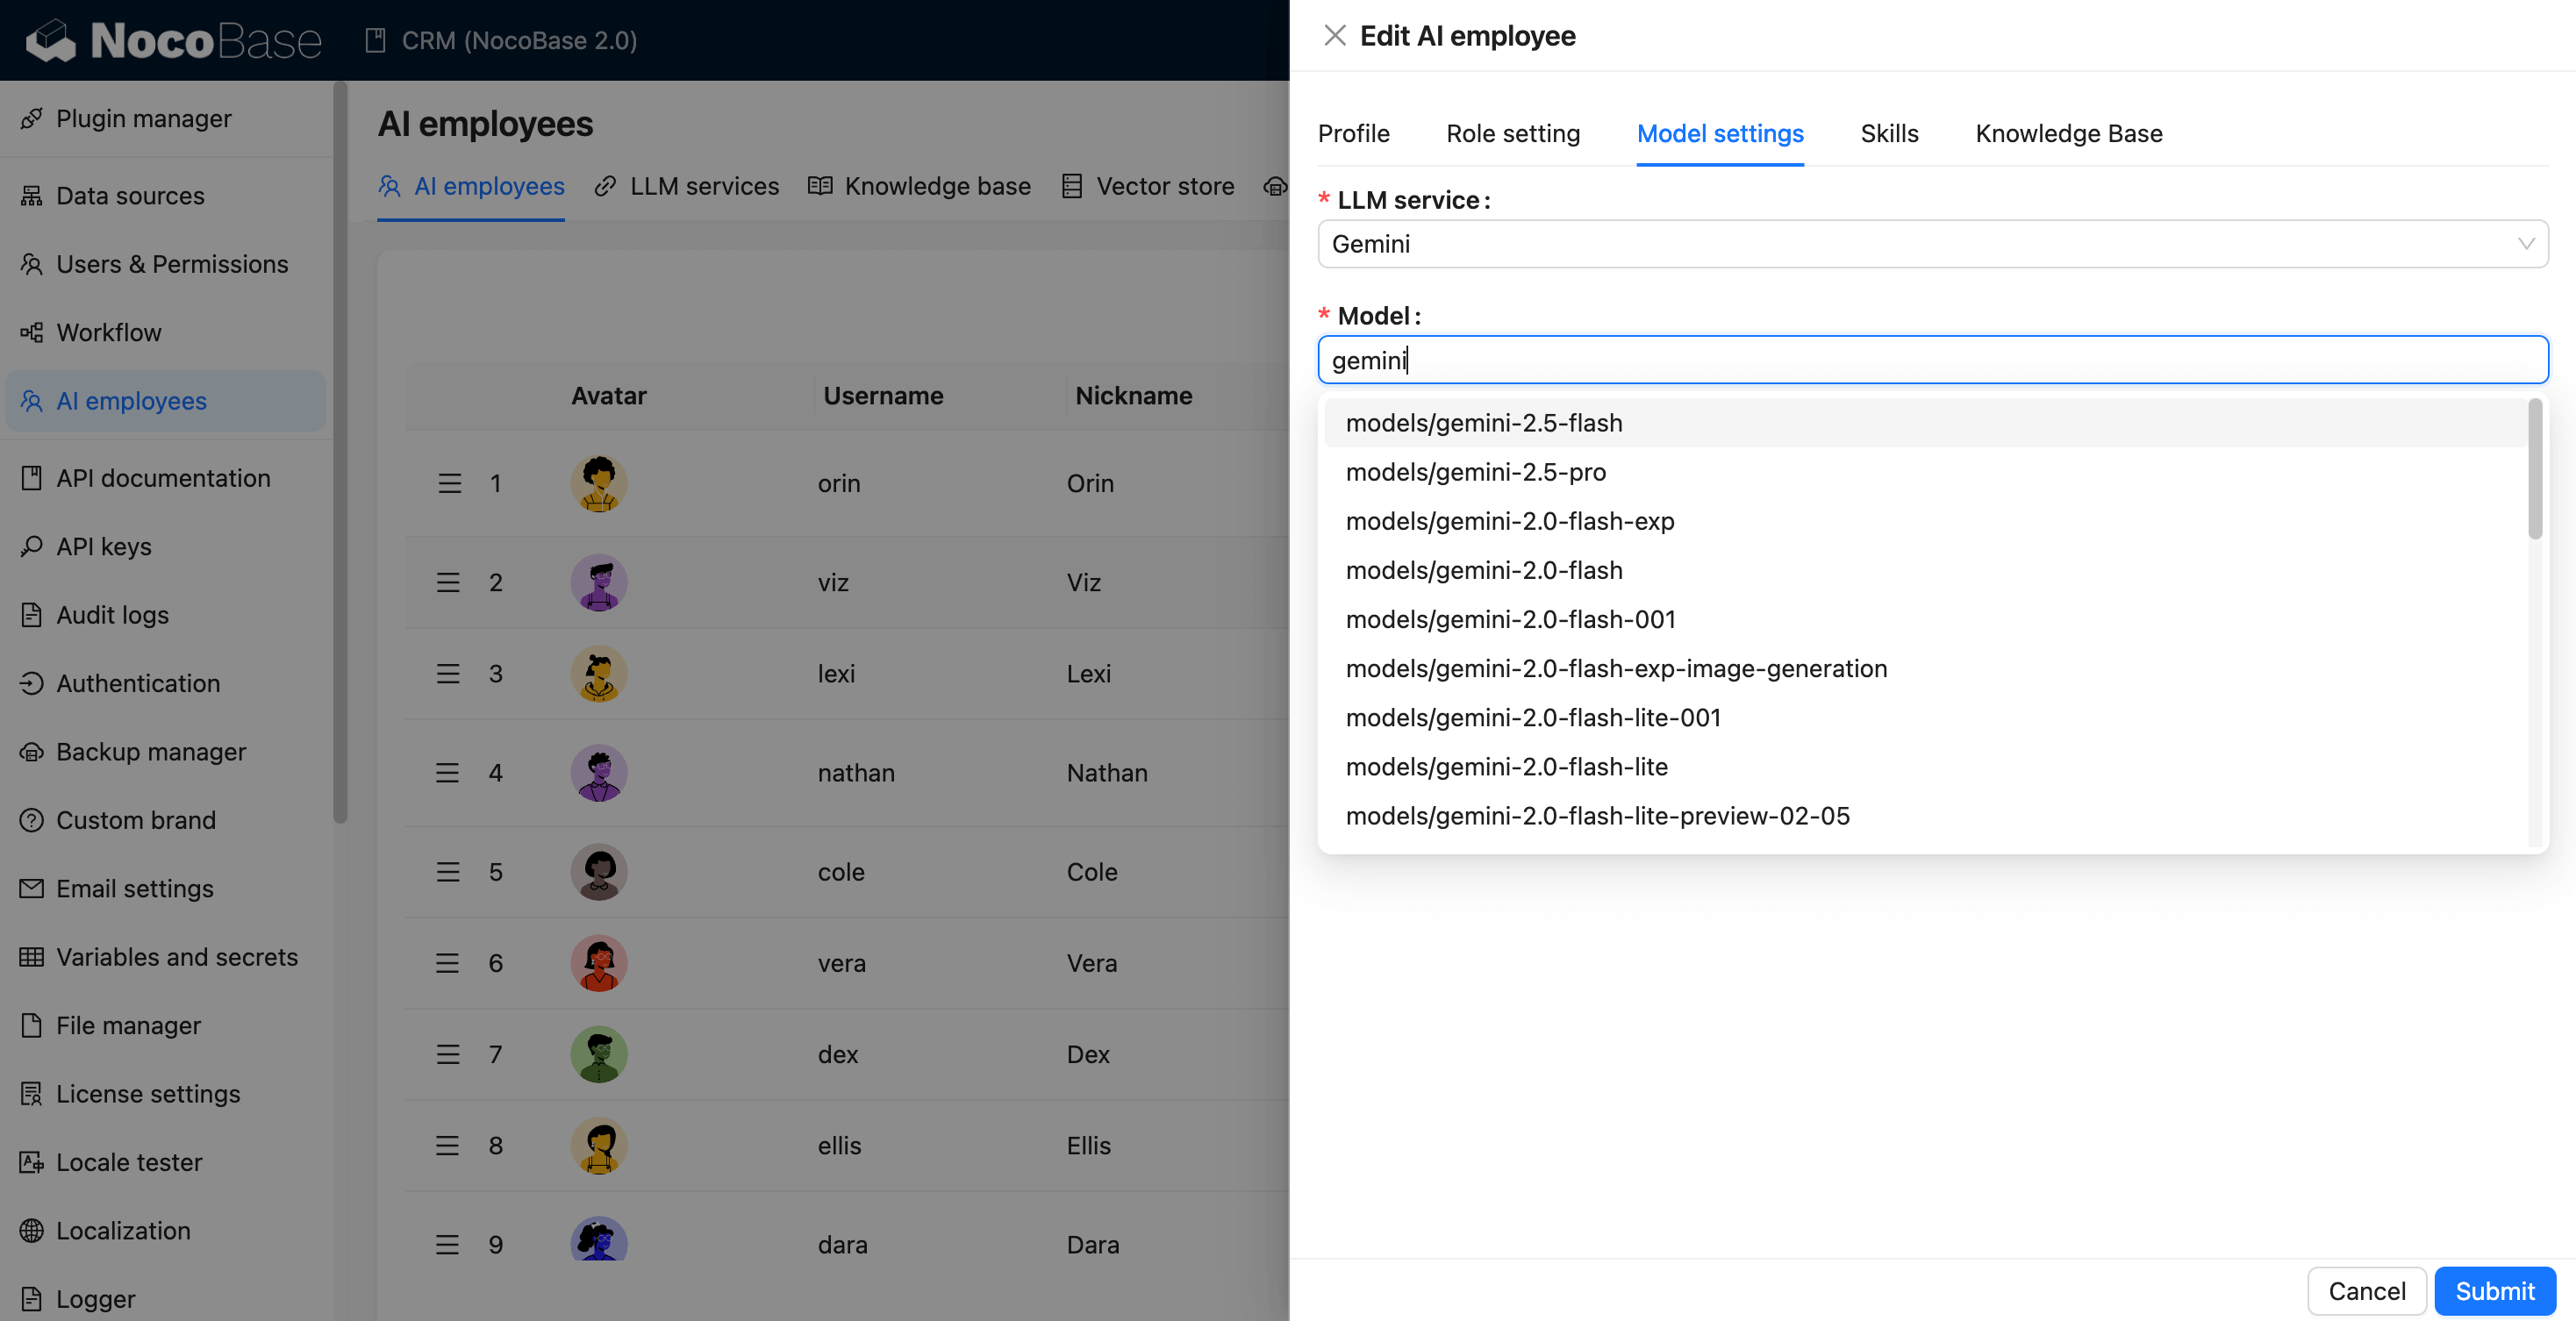
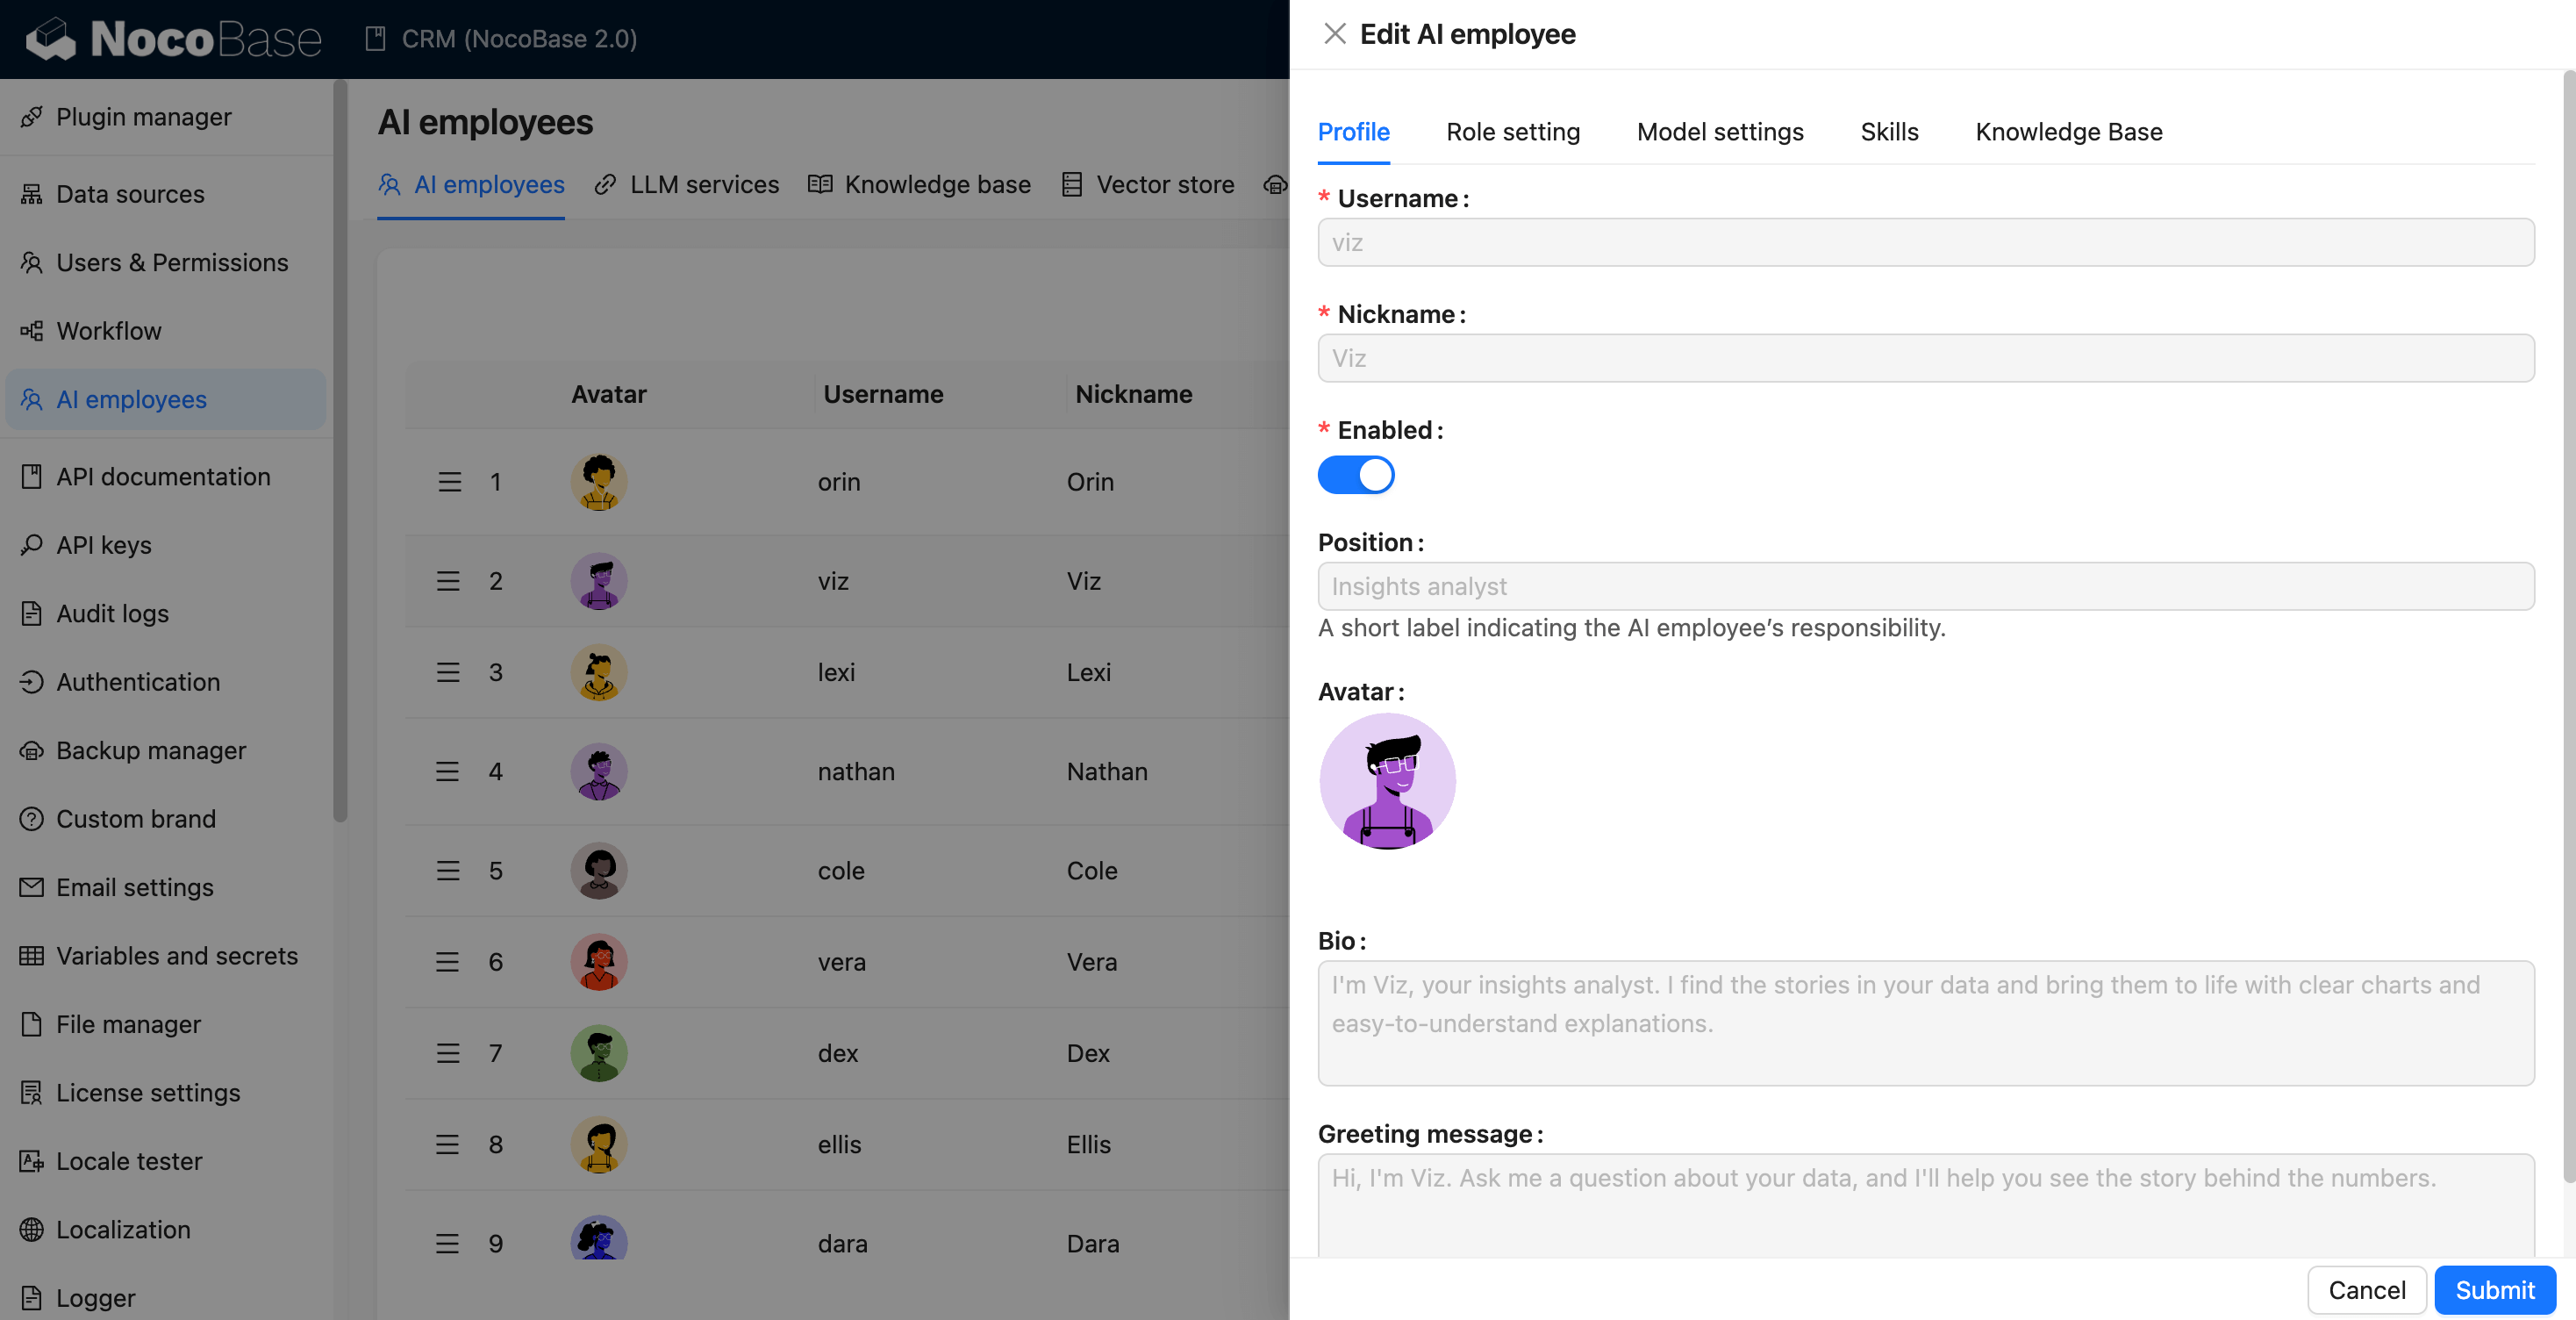
- Go to System Settings -> AI Employees list page.
- Find the AI Employee you need, for example Viz (Insight Analyst).
- Click Edit, in Model Settings, select the LLM Service and Model configured earlier. Recommended: gemini-3, deepseek-chat, qwen3-max.
- In the Profile tab, click the Enabled switch.
- Click Submit at the bottom to save and take effect.
4. Start Collaborating
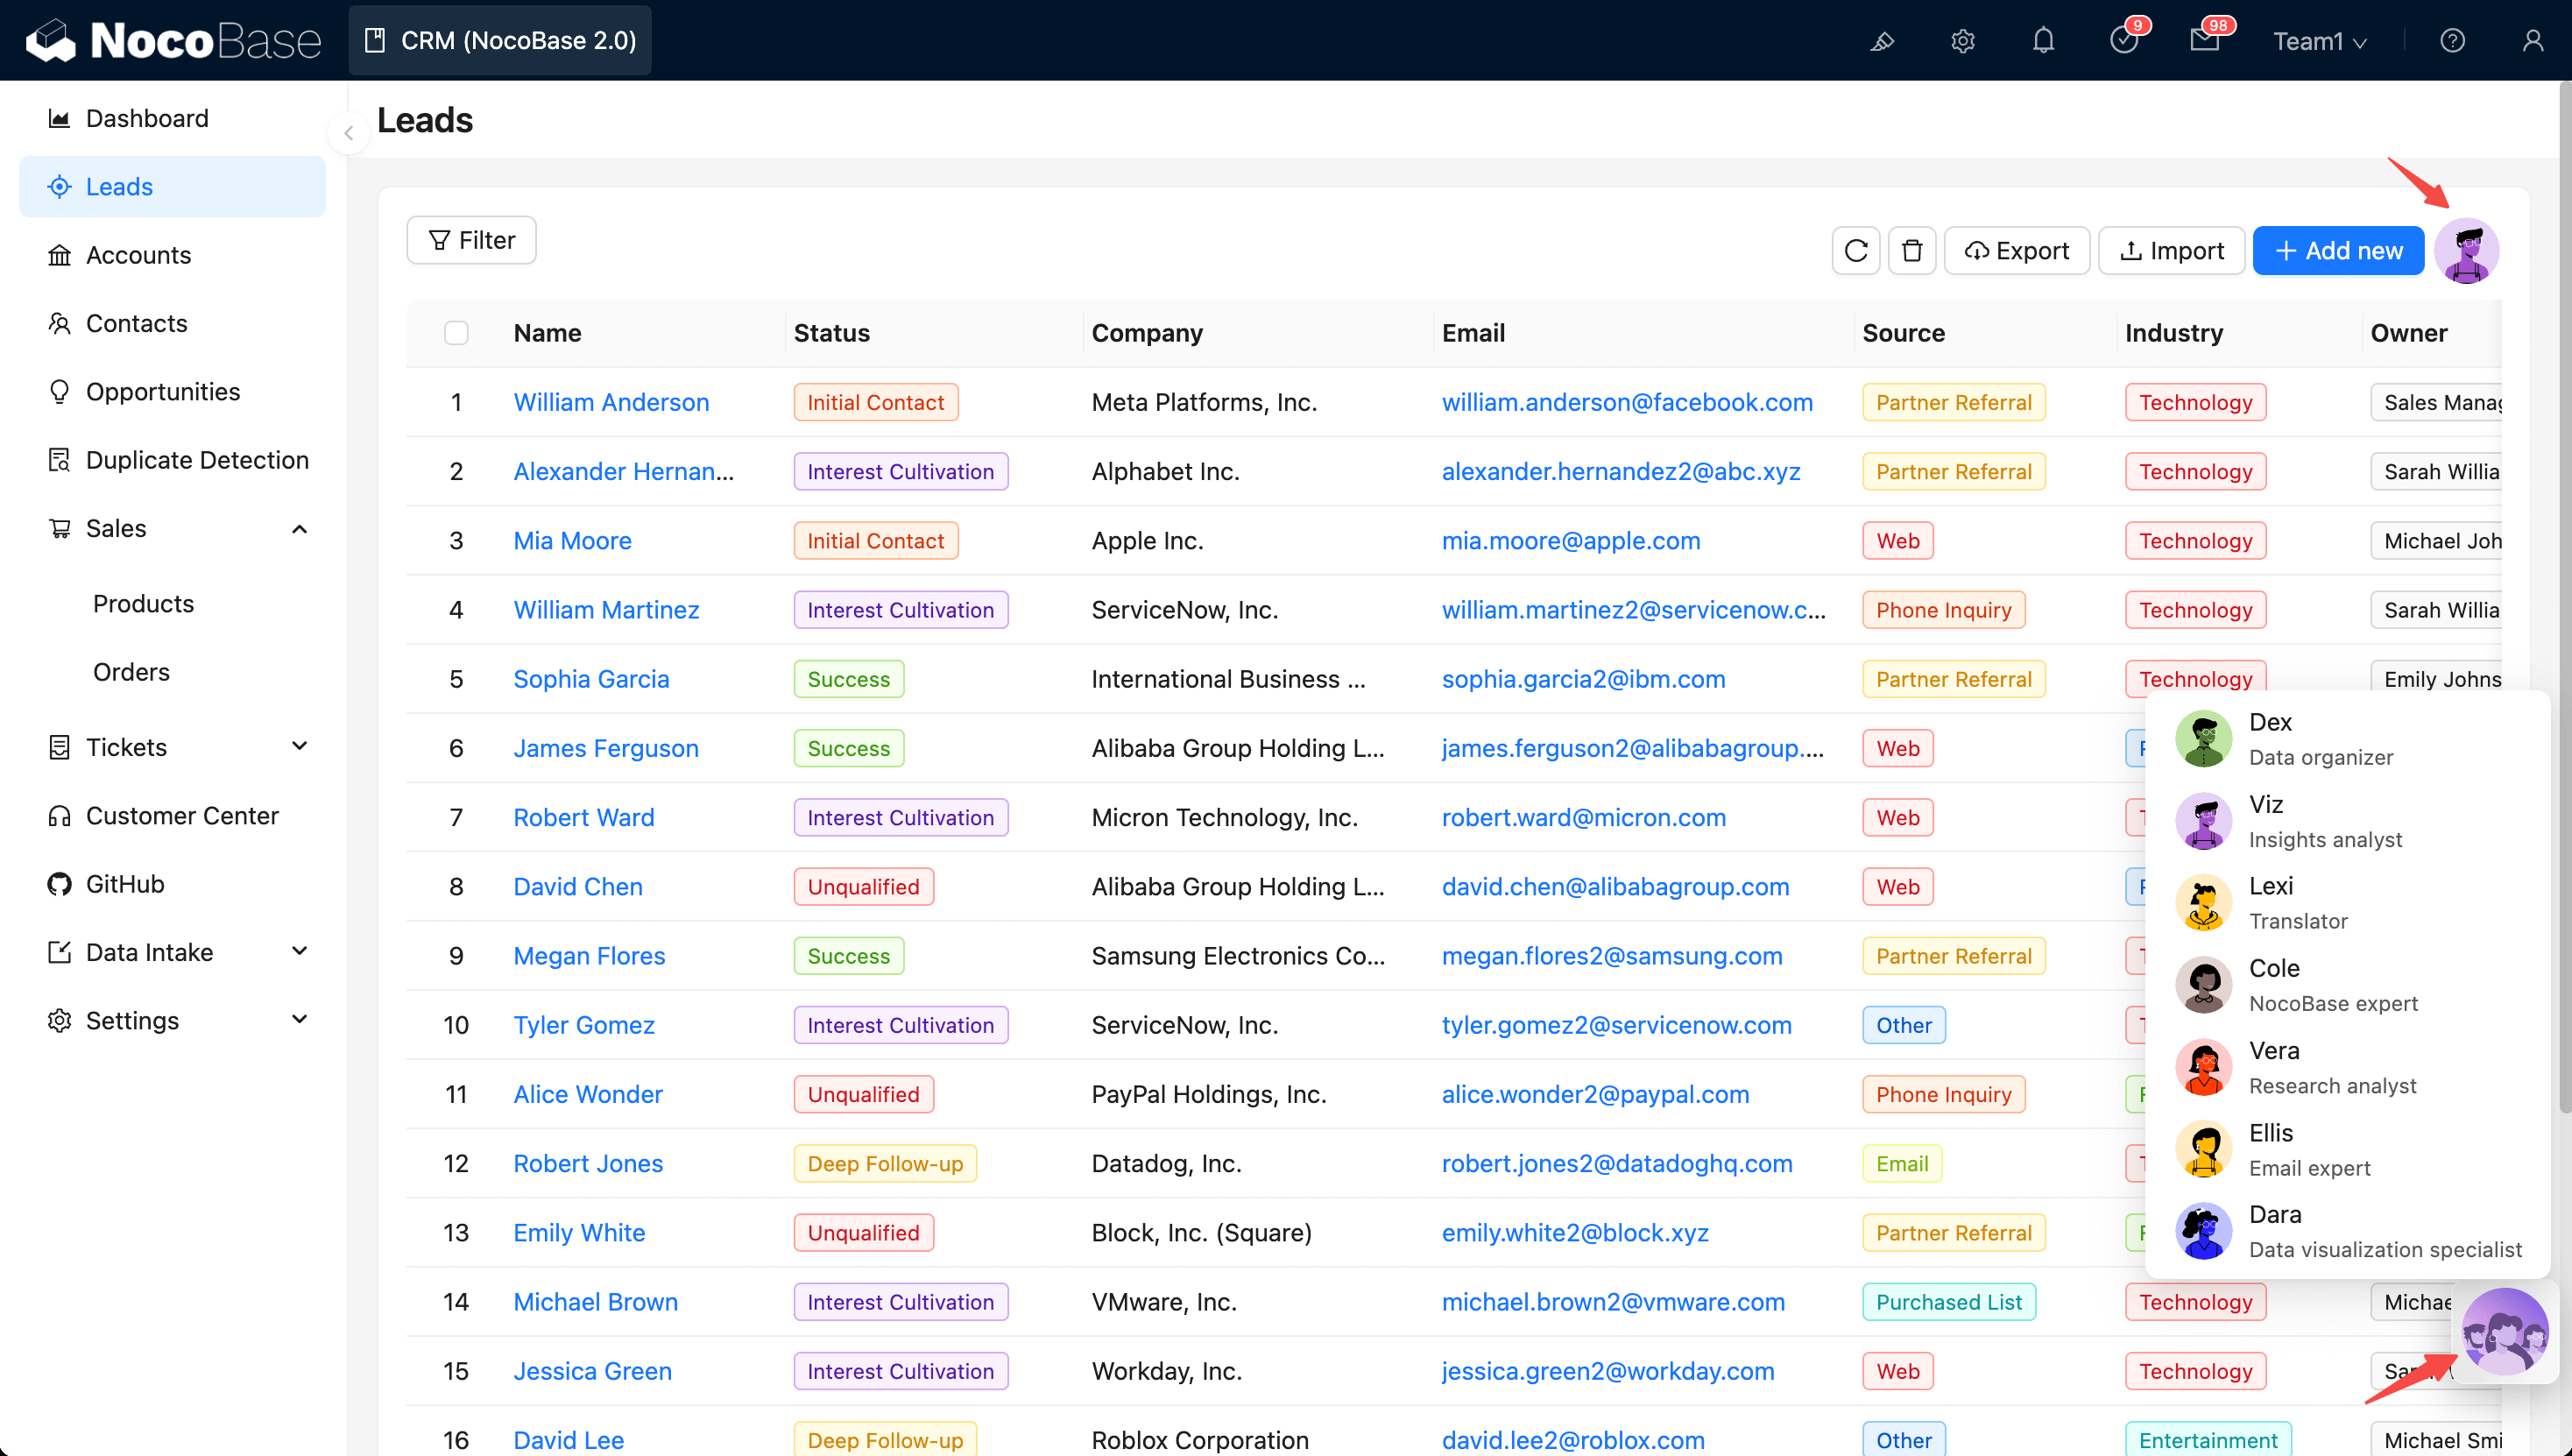
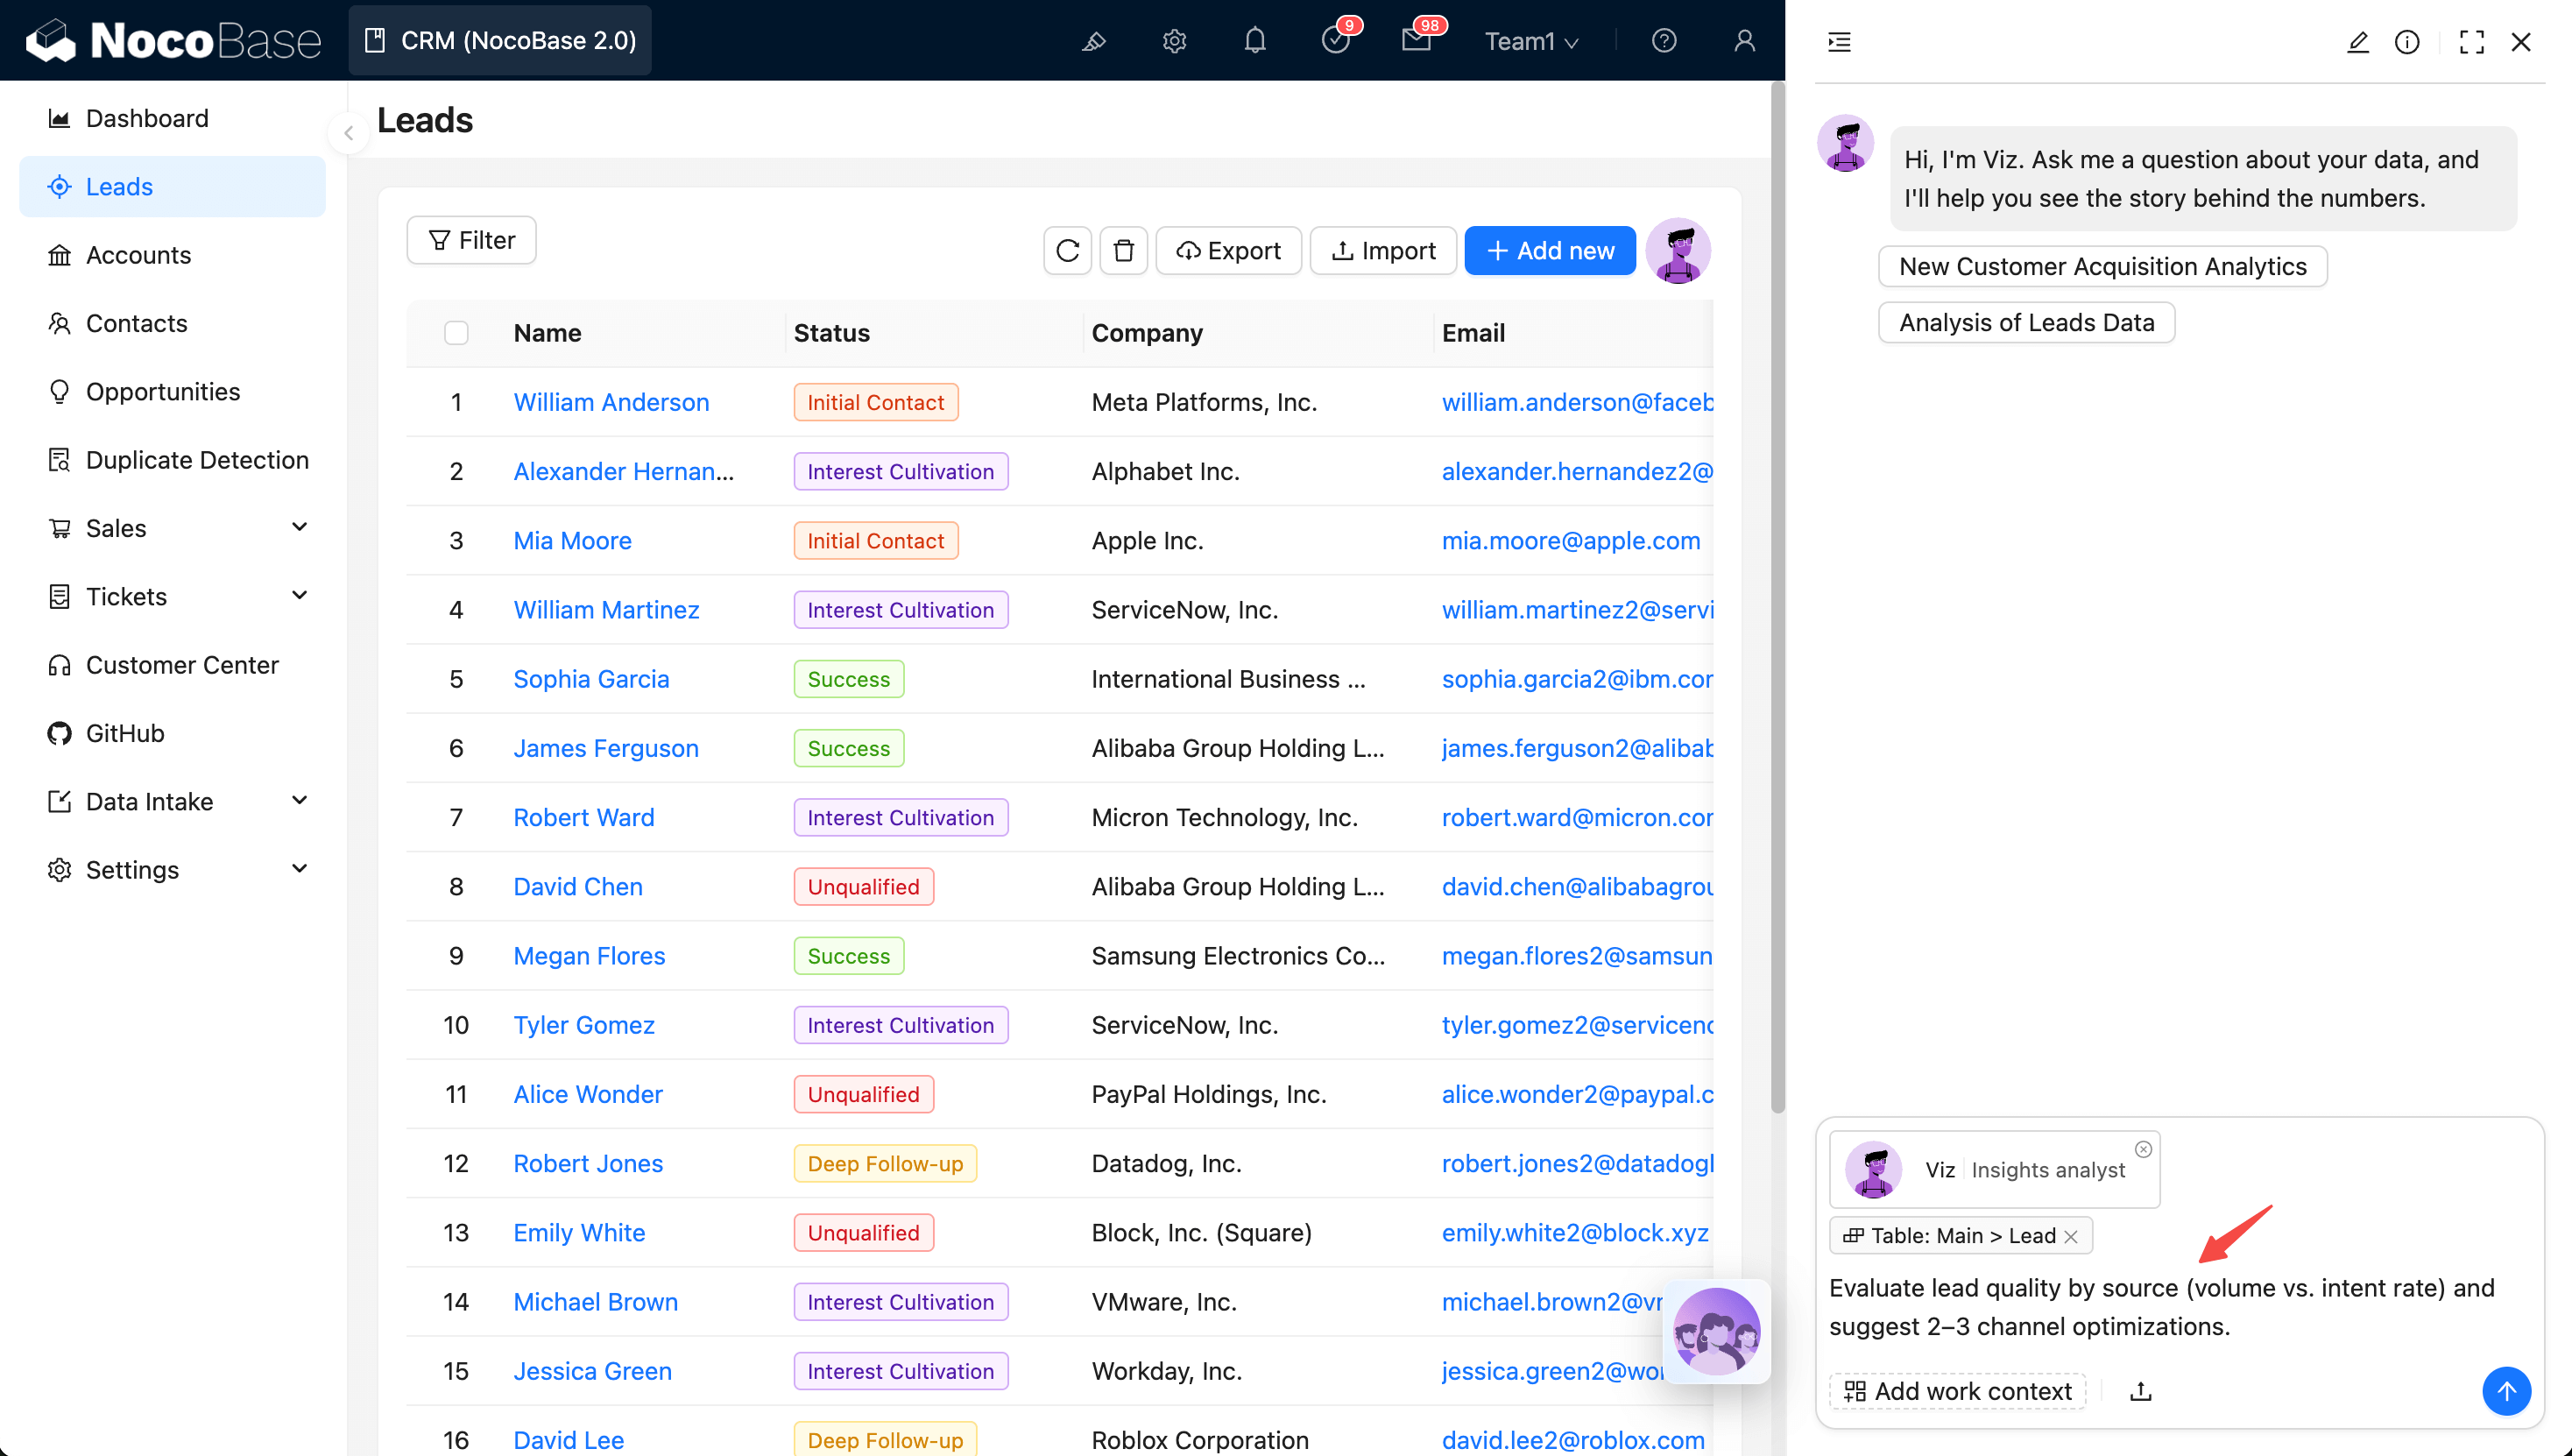
- Return to the application interface, click the AI Floating Ball in the bottom right corner, select the employee you want, and start collaborating.
- Try sending a command:
"Please analyze the quantity and quality (high intent ratio) of leads by source, and provide 2–3 channel optimization suggestions."
You can also Add Work Context, Upload Files, etc., to let the AI better understand the current environment and needs.
Congratulations! You have successfully completed this AI workflow experience. You can continue to explore AI Employees in other roles to further improve business efficiency.
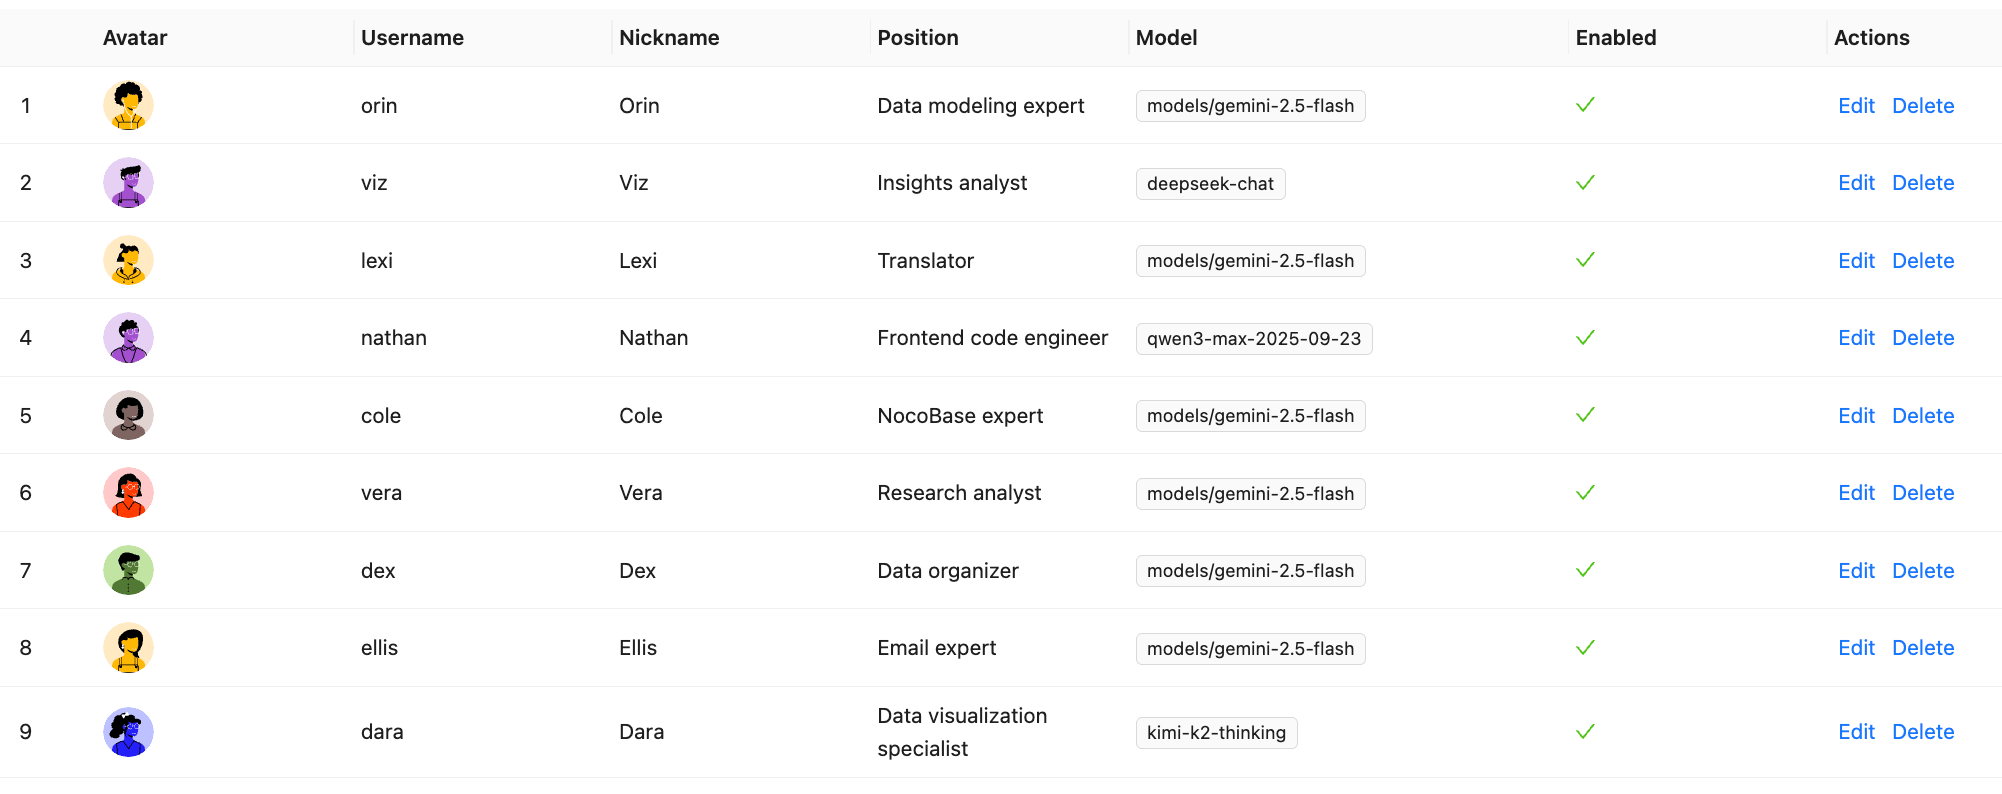
Built-in Employees Overview
NocoBase provides several built-in AI Employees for specific scenarios.
You just need to configure the Model for them to start working.
| Employee Name | Role Positioning | Core Capabilities |
|---|---|---|
| Cole | NocoBase Assistant | Product usage Q&A, document retrieval |
| Ellis | Email Expert | Email writing, summary generation, reply suggestions |
| Dex | Data Organizer | Field translation, formatting, information extraction |
| Viz | Insight Analyst | Data insight, trend analysis, key indicator interpretation |
| Lexi | Translation Assistant | Multilingual translation, communication assistance |
| Vera | Research Analyst | Web search, information aggregation, in-depth research |
| Dara | Data Visualization Expert | Chart configuration, visual report generation |
| Orin | Data Modeling Expert | Assist in designing data table structures, field suggestions |
| Nathan | Frontend Engineer | Assist in writing frontend code snippets, style adjustments |
Remarks
Some built-in AI Employees will not appear in the AI Employee list in the bottom right corner. They have exclusive work scenarios, for example:
- Orin will only appear on the data configuration page;
- Dara will only appear on the chart configuration page;
- Nathan will only appear on the JS Editor.