TIP
यह दस्तावेज़ AI द्वारा अनुवादित किया गया है। किसी भी अशुद्धि के लिए, कृपया अंग्रेजी संस्करण देखें
सूचना चैनल प्रकारों का विस्तार करना
NocoBase आवश्यकतानुसार सूचना चैनल प्रकारों का विस्तार करने में सहायता करता है, जैसे SMS सूचनाएँ और ऐप पुश सूचनाएँ।
क्लाइंट
चैनल प्रकार पंजीकरण
क्लाइंट चैनल कॉन्फ़िगरेशन और मैसेज कॉन्फ़िगरेशन इंटरफ़ेस को नोटिफिकेशन मैनेजमेंट प्लगइन क्लाइंट द्वारा प्रदान किए गए registerChannelType मेथड के माध्यम से रजिस्टर किया जाता है:
import PluginNotificationManagerClient from '@nocobase/plugin-notification-manager/client';

class PluginNotificationExampleClient extends Plugin {
  async afterAdd() {}

  async beforeLoad() {}

  async load() {
    const notification = this.pm.get(PluginNotificationManagerClient);
    notification.registerChannelType({
      title: 'Example SMS', // चैनल प्रकार का नाम
      type: 'example-sms', // चैनल प्रकार पहचानकर्ता
      components: {
        ChannelConfigForm, // चैनल कॉन्फ़िगरेशन फ़ॉर्म
        MessageConfigForm, // मैसेज कॉन्फ़िगरेशन फ़ॉर्म
      },
    });
  }
}

export default PluginNotificationExampleClient;
सर्वर
एब्स्ट्रैक्ट क्लास का विस्तार करना
सर्वर डेवलपमेंट का मुख्य हिस्सा एब्स्ट्रैक्ट क्लास BaseNotificationChannel का विस्तार करना और send मेथड को लागू करना है। send मेथड के अंदर विस्तारित प्लगइन द्वारा सूचनाएँ भेजने का व्यावसायिक तर्क होता है।
import { BaseNotificationChannel } from '@nocobase/plugin-notification-manager';

export class ExampleServer extends BaseNotificationChannel {
  async send(args): Promise<any> {
    console.log('ExampleServer send', args);
    return { status: 'success', message: args.message };
  }
}
सर्वर पंजीकरण
इसके बाद, नोटिफिकेशन सर्वर कोर के registerChannelType मेथड को कॉल करके विकसित की गई सर्वर इंप्लीमेंटेशन क्लास को कोर में रजिस्टर करना होगा:
import PluginNotificationManagerServer from '@nocobase/plugin-notification-manager';
import { Plugin } from '@nocobase/server';
import { ExampleServer } from './example-server';
export class PluginNotificationExampleServer extends Plugin {
  async load() {
    const notificationServer = this.pm.get(PluginNotificationManagerServer) as PluginNotificationManagerServer;
    notificationServer.registerChannelType({ type: 'example-sms', Channel: ExampleServer });
  }
}

export default PluginNotificationExampleServer;
पूर्ण उदाहरण
यहां एक सूचना विस्तार प्लगइन का उदाहरण दिया गया है, जिसमें विस्तार प्लगइन को कैसे विकसित किया जाए, इसका विस्तार से वर्णन किया गया है।
मान लीजिए कि हम NocoBase में SMS सूचना कार्यक्षमता जोड़ने के लिए किसी प्लेटफ़ॉर्म के SMS गेटवे का उपयोग करना चाहते हैं।
प्लगइन निर्माण
- प्लगइन बनाने के लिए कमांड चलाएँ:
yarn pm add @nocobase/plugin-notification-example
क्लाइंट डेवलपमेंट
क्लाइंट के लिए, हमें दो फ़ॉर्म कंपोनेंट्स विकसित करने होंगे: ChannelConfigForm (चैनल कॉन्फ़िगरेशन फ़ॉर्म) और MessageConfigForm (मैसेज कॉन्फ़िगरेशन फ़ॉर्म)।
SMS मैसेज भेजने के लिए, एक API कुंजी और सीक्रेट की आवश्यकता होती है। इसलिए, हमारे चैनल फ़ॉर्म में मुख्य रूप से ये दो आइटम शामिल होंगे। src/client डायरेक्टरी में ChannelConfigForm.tsx नाम की एक नई फ़ाइल बनाएँ, फ़ाइल की सामग्री इस प्रकार है:
import React from 'react';
import { SchemaComponent } from '@nocobase/client';
import useLocalTranslation from './useLocalTranslation';

const ChannelConfigForm = () => {
  const t = useLocalTranslation();
  return (
    <SchemaComponent
      scope={{ t }}
      schema={{
        type: 'object',
        properties: {
          apiKey: {
            'x-decorator': 'FormItem',
            type: 'string',
            title: '{{t("ट्रांसपोर्ट")}}',
            'x-component': 'Input',
          },
          secret: {
            'x-decorator': 'FormItem',
            type: 'string',
            title: '{{t("ट्रांसपोर्ट")}}',
            'x-component': 'Input',
          },
        },
      }}
    />
  );
};

export default ChannelConfigForm;
मैसेज कॉन्फ़िगरेशन फ़ॉर्म में मुख्य रूप से प्राप्तकर्ताओं (receivers) और मैसेज सामग्री (content) का कॉन्फ़िगरेशन शामिल होता है। src/client डायरेक्टरी में MessageConfigForm.tsx नाम की एक नई फ़ाइल बनाएँ। यह कंपोनेंट variableOptions को एक वेरिएबल पैरामीटर के रूप में प्राप्त करता है। वर्तमान में, सामग्री फ़ॉर्म को वर्कफ़्लो नोड में कॉन्फ़िगर किया जाता है, और इसे आमतौर पर वर्कफ़्लो नोड वेरिएबल्स का उपयोग करने की आवश्यकता होती है। फ़ाइल की विशिष्ट सामग्री इस प्रकार है:
import React from 'react';
import { SchemaComponent } from '@nocobase/client';
import useLocalTranslation from './useLocalTranslation';

const MessageConfigForm = ({ variableOptions }) => {
  const { t } = useLocalTranslation();
  return (
    <SchemaComponent
      scope={{ t }}
      schema={{
        type: 'object',
        properties: {
          to: {
            type: 'array',
            required: true,
            title: `{{t("प्राप्तकर्ता")}}`,
            'x-decorator': 'FormItem',
            'x-component': 'ArrayItems',
            items: {
              type: 'void',
              'x-component': 'Space',
              properties: {
                sort: {
                  type: 'void',
                  'x-decorator': 'FormItem',
                  'x-component': 'ArrayItems.SortHandle',
                },
                input: {
                  type: 'string',
                  'x-decorator': 'FormItem',
                  'x-component': 'Variable.Input',
                  'x-component-props': {
                    scope: variableOptions,
                    useTypedConstant: ['string'],
                    placeholder: `{{t("फ़ोन नंबर")}}`,
                  },
                },
                remove: {
                  type: 'void',
                  'x-decorator': 'FormItem',
                  'x-component': 'ArrayItems.Remove',
                },
              },
            },
            properties: {
              add: {
                type: 'void',
                title: `{{t("फ़ोन नंबर जोड़ें")}}`,
                'x-component': 'ArrayItems.Addition',
              },
            },
          },
          content: {
            type: 'string',
            required: true,
            title: `{{t("सामग्री")}}`,
            'x-decorator': 'FormItem',
            'x-component': 'Variable.RawTextArea',
            'x-component-props': {
              scope: variableOptions,
              placeholder: 'Hi,',
              autoSize: {
                minRows: 10,
              },
            },
          },
        },
      }}
    />
  );
};

export default MessageConfigForm
क्लाइंट कंपोनेंट पंजीकरण
फ़ॉर्म कॉन्फ़िगरेशन कंपोनेंट्स विकसित करने के बाद, उन्हें सूचना प्रबंधन कोर में रजिस्टर करना होगा। मान लीजिए कि हमारे प्लेटफ़ॉर्म का नाम 'Example' है, तो src/client/index.tsx फ़ाइल की संपादित सामग्री इस प्रकार है:
import { Plugin } from '@nocobase/client';
import PluginNotificationManagerClient from '@nocobase/plugin-notification-manager/client';
import { tval } from '@nocobase/utils/client';
import ChannelConfigForm from './ChannelConfigForm';
import MessageConfigForm from './MessageConfigForm';

class PluginNotificationExampleClient extends Plugin {
  async afterAdd() {}

  async beforeLoad() {}

  async load() {
    const notification = this.pm.get(PluginNotificationManagerClient);
    notification.registerChannelType({
      title: tval('Example SMS', { ns: '@nocobase/plugin-notification-example' }),
      type: 'example-sms',
      components: {
        ChannelConfigForm,
        MessageConfigForm,
      },
    });
  }
}

export default PluginNotificationExampleClient;
इस बिंदु पर, क्लाइंट का डेवलपमेंट पूरा हो गया है।
सर्वर डेवलपमेंट
सर्वर डेवलपमेंट का मुख्य हिस्सा एब्स्ट्रैक्ट क्लास BaseNotificationChannel का विस्तार करना और send मेथड को लागू करना है। send मेथड में एक्सटेंशन प्लगइन द्वारा सूचनाएँ भेजने का बिजनेस लॉजिक होता है। चूंकि यह एक उदाहरण है, हम प्राप्त आर्ग्यूमेंट्स को बस प्रिंट करेंगे। src/server डायरेक्टरी में example-server.ts नाम की एक फ़ाइल जोड़ें, फ़ाइल की सामग्री इस प्रकार है:
import { BaseNotificationChannel } from '@nocobase/plugin-notification-manager';

export class ExampleServer extends BaseNotificationChannel {
  async send(args): Promise<any> {
    console.log('ExampleServer send', args);
    return { status: 'success', message: args.message };
  }
}
इसके बाद, src/server/plugin.ts फ़ाइल को एडिट करके सर्वर विस्तार प्लगइन को रजिस्टर करने के लिए नोटिफिकेशन सर्वर कोर के registerChannelType मेथड को कॉल करना होगा:
import PluginNotificationManagerServer from '@nocobase/plugin-notification-manager';
import { Plugin } from '@nocobase/server';
import { ExampleServer } from './example-server';
export class PluginNotificationExampleServer extends Plugin {
  async load() {
    const notificationServer = this.pm.get(PluginNotificationManagerServer) as PluginNotificationManagerServer;
    notificationServer.registerChannelType({ type: 'example-sms', Channel: ExampleServer });
  }
}

export default PluginNotificationExampleServer;
प्लगइन पंजीकरण और लॉन्च
- पंजीकरण कमांड चलाएँ:
yarn pm add @nocobase/plugin-notification-example
- सक्षम करने का कमांड चलाएँ:
yarn pm enable @nocobase/plugin-notification-example
चैनल कॉन्फ़िगरेशन
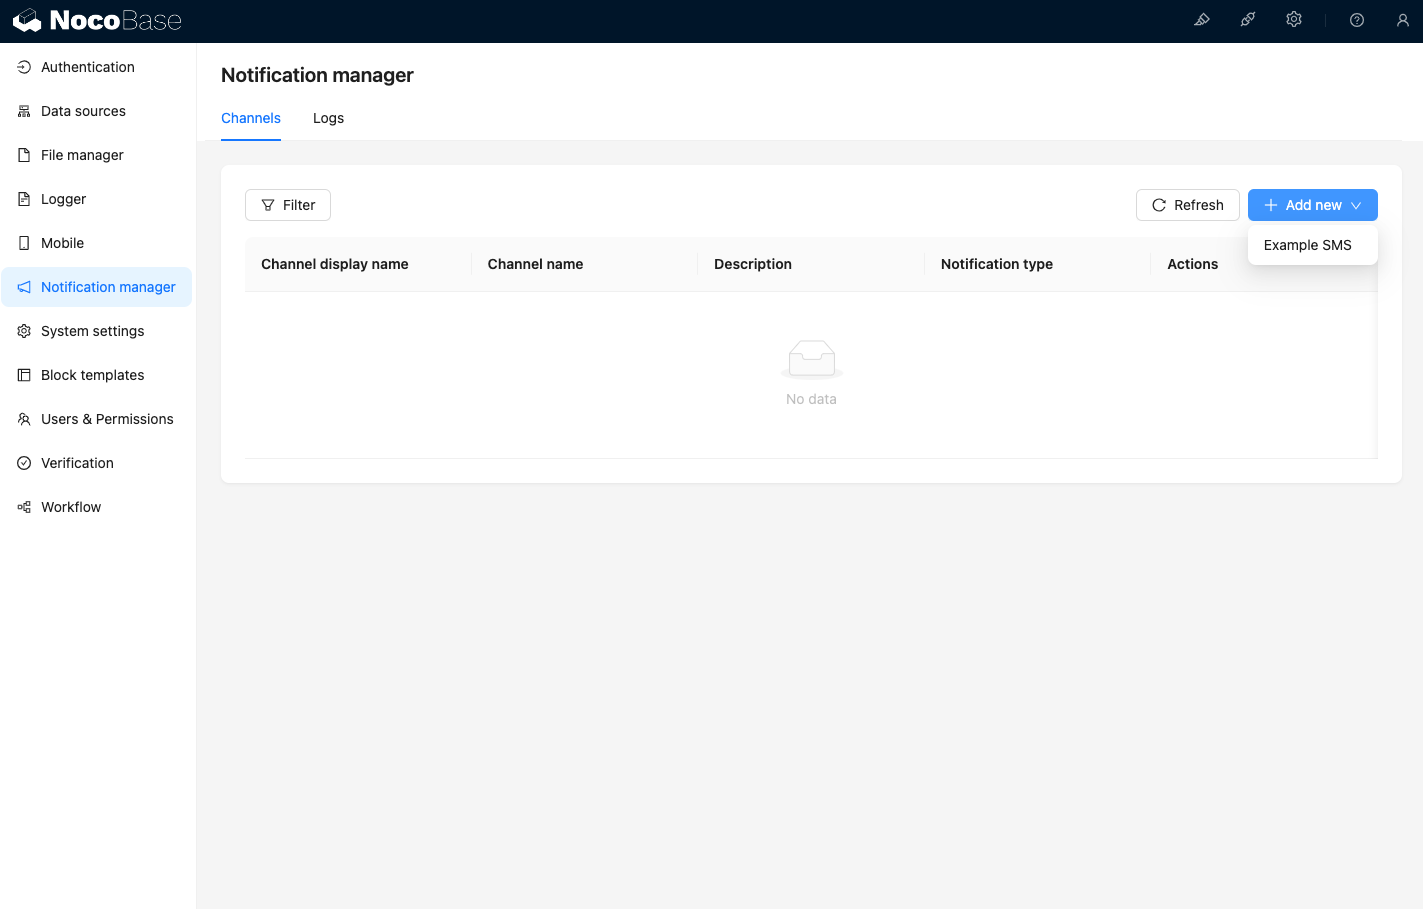
सूचना प्रबंधन चैनल पेज पर जाने पर, आप देखेंगे कि Example SMS चैनल सक्षम कर दिया गया है।
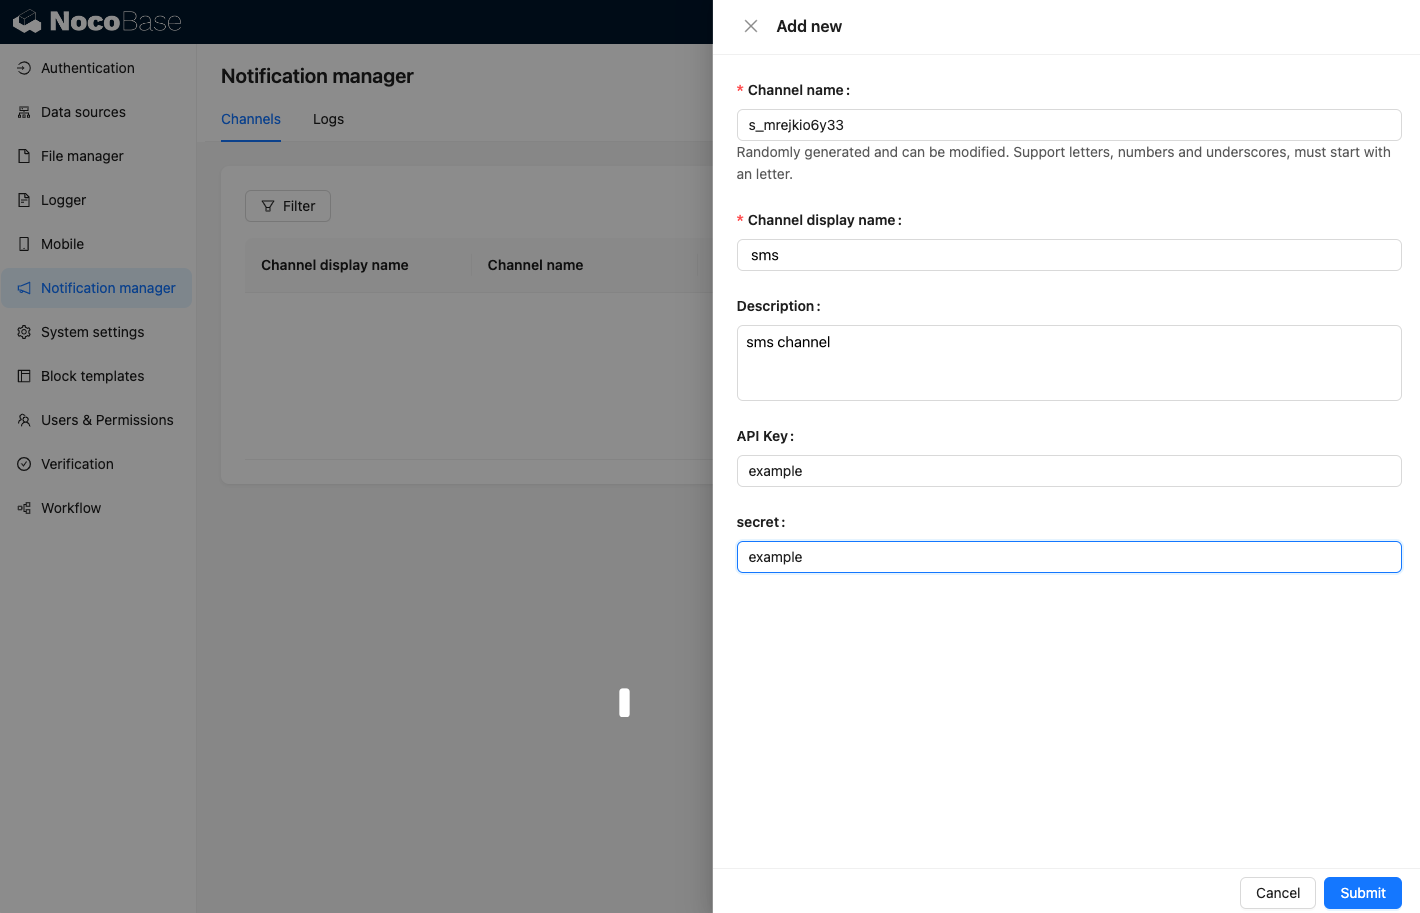
एक नमूना चैनल जोड़ें।
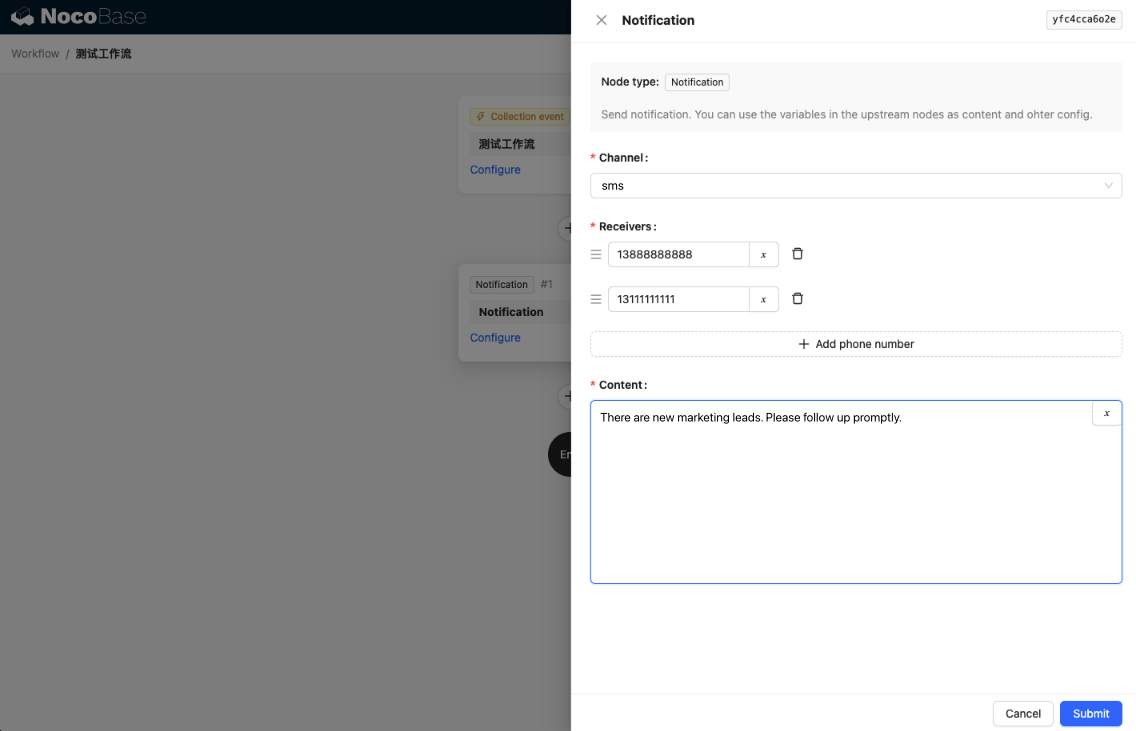
एक नया वर्कफ़्लो बनाएँ और सूचना नोड को कॉन्फ़िगर करें।
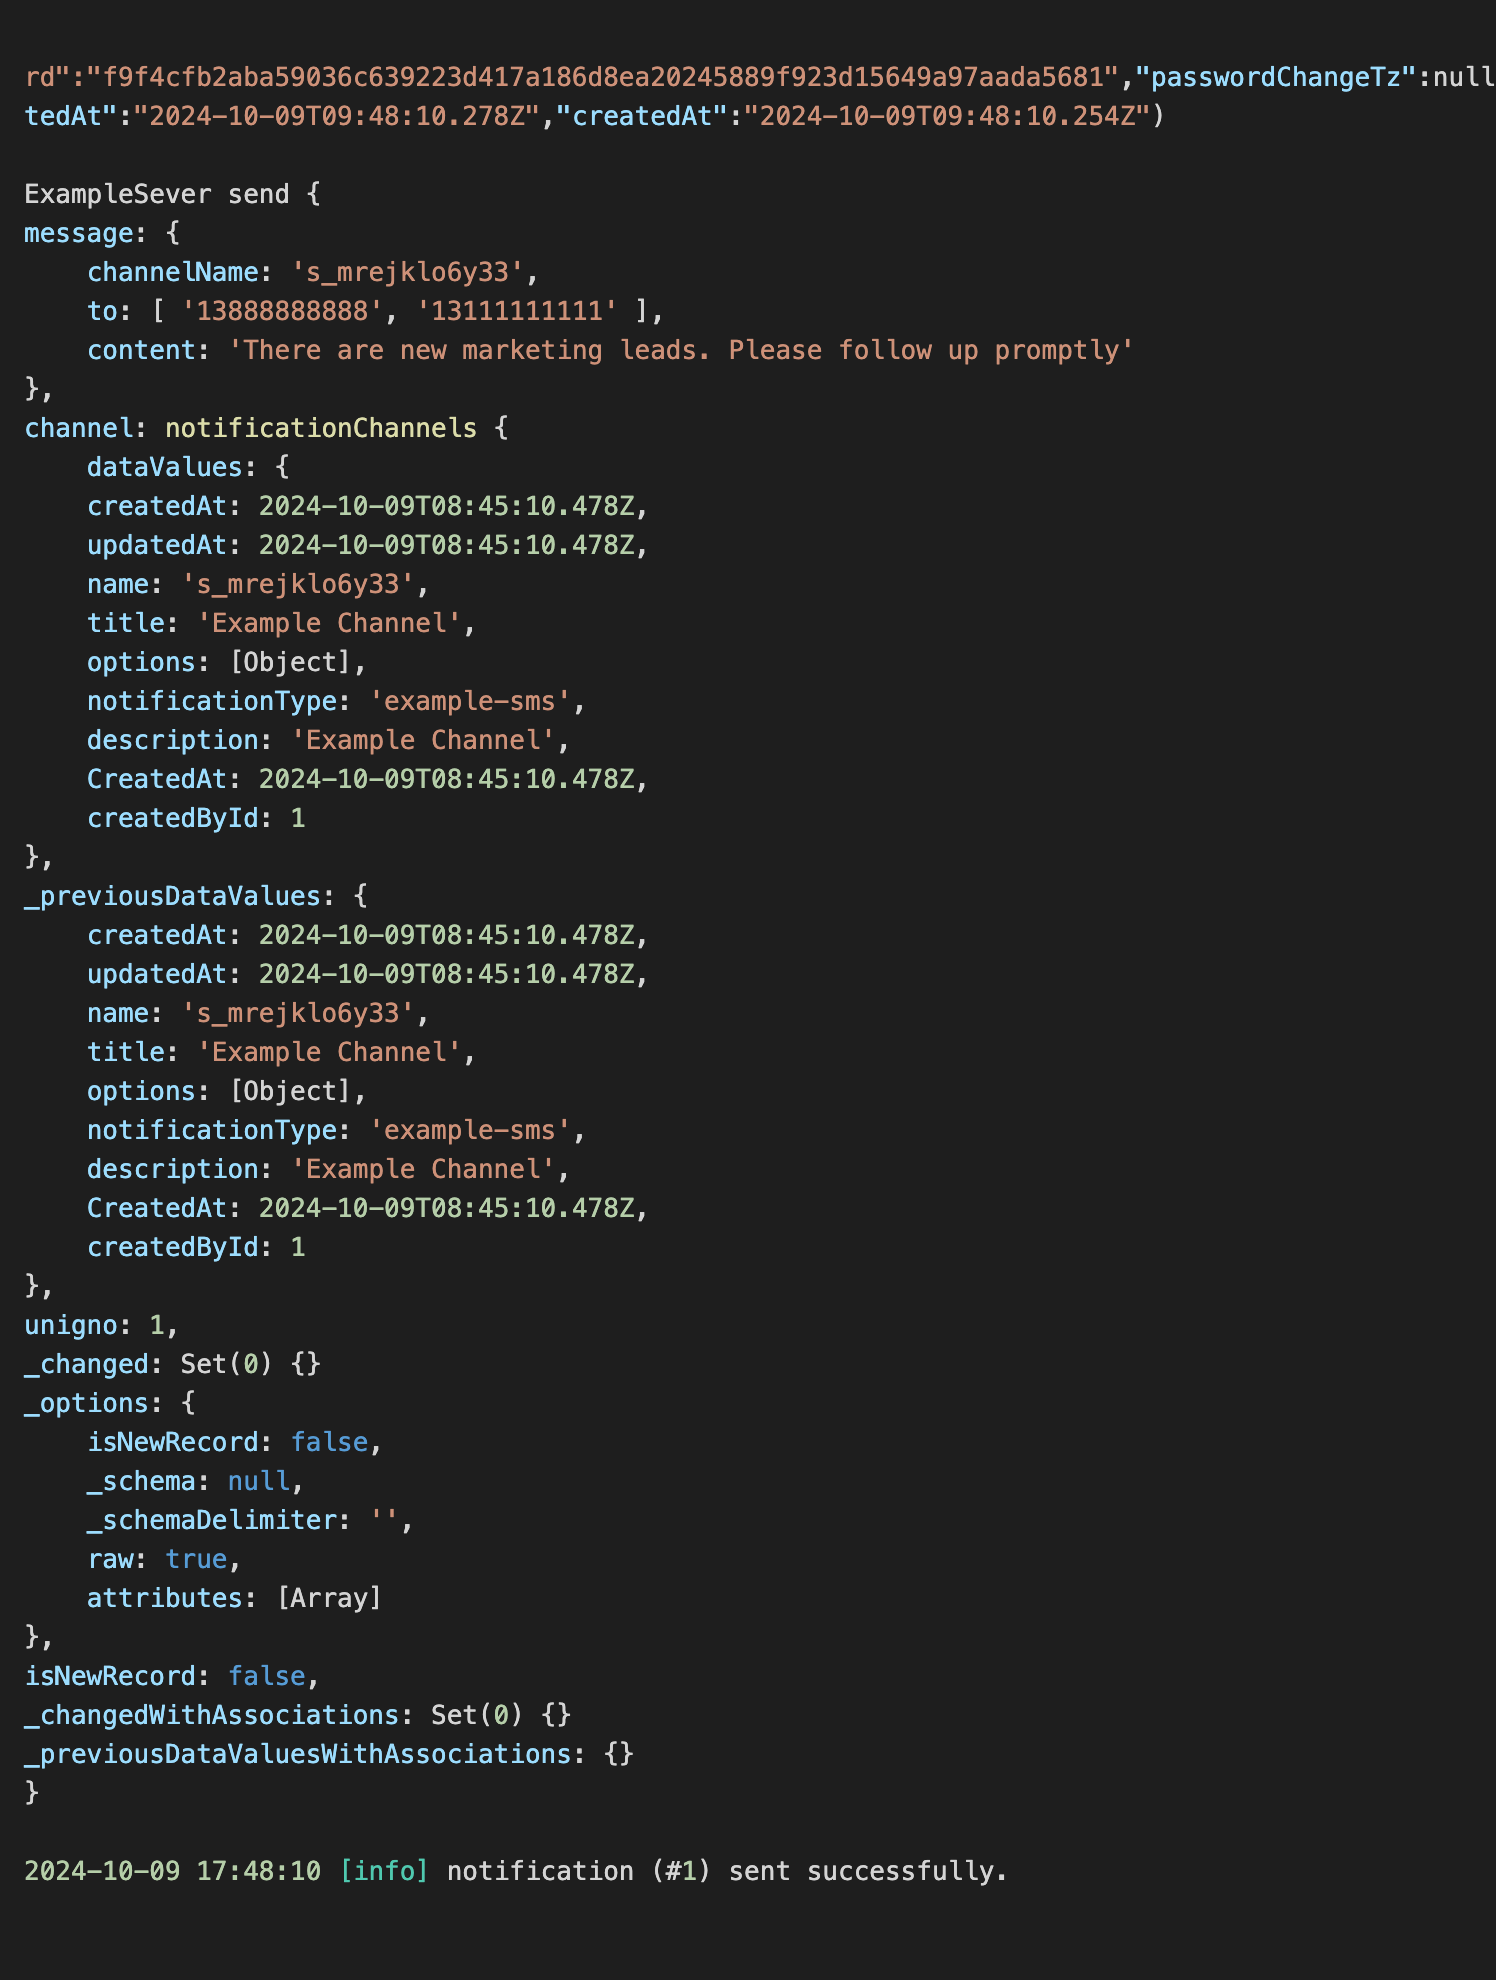
वर्कफ़्लो निष्पादन को ट्रिगर करें ताकि कंसोल में निम्नलिखित जानकारी आउटपुट देख सकें।