Avviso di traduzione IA
Questa documentazione è stata tradotta automaticamente dall'IA.
Estensione dei tipi di canale di notifica
NocoBase supporta l'estensione dei tipi di canale di notifica in base alle Sue esigenze, come le notifiche via SMS o le notifiche push per app.
Client
Registrazione del tipo di canale
L'interfaccia di configurazione del canale e di configurazione dei messaggi lato client viene registrata tramite il metodo registerChannelType fornito dal client del plugin di gestione delle notifiche:
import PluginNotificationManagerClient from '@nocobase/plugin-notification-manager/client';

class PluginNotificationExampleClient extends Plugin {
  async afterAdd() {}

  async beforeLoad() {}

  async load() {
    const notification = this.pm.get(PluginNotificationManagerClient);
    notification.registerChannelType({
      title: 'Example SMS', // Nome del tipo di canale
      type: 'example-sms', // Identificatore del tipo di canale
      components: {
        ChannelConfigForm, // Modulo di configurazione del canale
        MessageConfigForm, // Modulo di configurazione dei messaggi
      },
    });
  }
}

export default PluginNotificationExampleClient;
Server
Estensione della classe astratta
Il cuore dello sviluppo lato server consiste nell'estendere la classe astratta BaseNotificationChannel e implementare il metodo send, che contiene la logica di business per l'invio delle notifiche tramite il plugin esteso.
import { BaseNotificationChannel } from '@nocobase/plugin-notification-manager';

export class ExampleSever extends BaseNotificationChannel {
  async send(args): Promise<any> {
    console.log('ExampleSever send', args);
    return { status: 'success', message: args.message };
  }
}
Registrazione lato server
Successivamente, è necessario richiamare il metodo registerChannelType del core del server di notifica per registrare la classe di implementazione del server sviluppata al suo interno:
import PluginNotificationManagerServer from '@nocobase/plugin-notification-manager';
import { Plugin } from '@nocobase/server';
import { ExampleSever } from './example-server';
export class PluginNotificationExampleServer extends Plugin {
  async load() {
    const notificationServer = this.pm.get(PluginNotificationManagerServer) as PluginNotificationManagerServer;
    notificationServer.registerChannelType({ type: 'example-sms', Channel: ExampleSever });
  }
}

export default PluginNotificationExampleServer;
Esempio completo
Di seguito, un esempio di plugin di estensione per le notifiche descrive in dettaglio come sviluppare un'estensione. Supponiamo di voler aggiungere la funzionalità di notifica via SMS a NocoBase utilizzando un gateway SMS di una piattaforma.
Creazione del plugin
- Esegua il comando per creare il plugin:
yarn pm add @nocobase/plugin-notification-example
Sviluppo lato client
Per il client, dobbiamo sviluppare due componenti form: ChannelConfigForm (modulo di configurazione del canale) e MessageConfigForm (modulo di configurazione dei messaggi).
Per inviare messaggi SMS, sono necessari una chiave API (apiKey) e un segreto (secret). Pertanto, il nostro modulo di configurazione del canale includerà principalmente questi due elementi. Crei un nuovo file chiamato ChannelConfigForm.tsx nella directory src/client con il seguente contenuto:
import React from 'react';
import { SchemaComponent } from '@nocobase/client';
import useLocalTranslation from './useLocalTranslation';

const ChannelConfigForm = () => {
  const t = useLocalTranslation();
  return (
    <SchemaComponent
      scope={{ t }}
      schema={{
        type: 'object',
        properties: {
          apiKey: {
            'x-decorator': 'FormItem',
            type: 'string',
            title: '{{t("Trasporto")}}',
            'x-component': 'Input',
          },
          secret: {
            'x-decorator': 'FormItem',
            type: 'string',
            title: '{{t("Trasporto")}}',
            'x-component': 'Input',
          },
        },
      }}
    />
  );
};

export default ChannelConfigForm;
Il modulo di configurazione dei messaggi include principalmente la configurazione per i destinatari (receivers) e il contenuto del messaggio (content). Crei un nuovo file chiamato MessageConfigForm.tsx nella directory src/client. Il componente riceve variableOptions come parametro variabile. Attualmente, il modulo di contenuto viene configurato nel nodo del flusso di lavoro e in genere deve utilizzare le variabili del nodo del flusso di lavoro. Il contenuto specifico del file è il seguente:
import React from 'react';
import { SchemaComponent } => '@nocobase/client';
import useLocalTranslation from './useLocalTranslation';

const MessageConfigForm = ({ variableOptions }) => {
  const { t } = useLocalTranslation();
  return (
    <SchemaComponent
      scope={{ t }}
      schema={{
        type: 'object',
        properties: {
          to: {
            type: 'array',
            required: true,
            title: `{{t("Destinatari")}}`,
            'x-decorator': 'FormItem',
            'x-component': 'ArrayItems',
            items: {
              type: 'void',
              'x-component': 'Space',
              properties: {
                sort: {
                  type: 'void',
                  'x-decorator': 'FormItem',
                  'x-component': 'ArrayItems.SortHandle',
                },
                input: {
                  type: 'string',
                  'x-decorator': 'FormItem',
                  'x-component': 'Variable.Input',
                  'x-component-props': {
                    scope: variableOptions,
                    useTypedConstant: ['string'],
                    placeholder: `{{t("Numero di telefono")}}`,
                  },
                },
                remove: {
                  type: 'void',
                  'x-decorator': 'FormItem',
                  'x-component': 'ArrayItems.Remove',
                },
              },
            },
            properties: {
              add: {
                type: 'void',
                title: `{{t("Aggiungi numero di telefono")}}`,
                'x-component': 'ArrayItems.Addition',
              },
            },
          },
          content: {
            type: 'string',
            required: true,
            title: `{{t("Contenuto")}}`,
            'x-decorator': 'FormItem',
            'x-component': 'Variable.RawTextArea',
            'x-component-props': {
              scope: variableOptions,
              placeholder: 'Hi,',
              autoSize: {
                minRows: 10,
              },
            },
          },
        },
      }}
    />
  );
};

export default MessageConfigForm
Registrazione del componente client
Dopo aver sviluppato i componenti di configurazione del modulo, è necessario registrarli nel core di gestione delle notifiche. Supponendo che il nome della nostra piattaforma sia "Example", il contenuto del file src/client/index.tsx modificato è il seguente:
import { Plugin } from '@nocobase/client';
import PluginNotificationManagerClient from '@nocobase/plugin-notification-manager/client';
import { tval } from '@nocobase/utils/client';
import ChannelConfigForm from './ChannelConfigForm';
import MessageConfigForm from './MessageConfigForm';

class PluginNotificationExampleClient extends Plugin {
  async afterAdd() {}

  async beforeLoad() {}

  async load() {
    const notification = this.pm.get(PluginNotificationManagerClient);
    notification.registerChannelType({
      title: tval('Example SMS', { ns: '@nocobase/plugin-notification-example' }),
      type: 'example-sms',
      components: {
        ChannelConfigForm,
        MessageConfigForm,
      },
    });
  }
}

export default PluginNotificationExampleClient;
A questo punto, lo sviluppo del client è completato.
Sviluppo lato server
Il cuore dello sviluppo lato server consiste nell'estendere la classe astratta BaseNotificationChannel e implementare il metodo send. Il metodo send contiene la logica di business per l'invio delle notifiche da parte del plugin di estensione. Poiché si tratta di un esempio, stamperemo semplicemente gli argomenti ricevuti. Nella directory src/server, aggiunga un file chiamato example-server.ts con il seguente contenuto:
import { BaseNotificationChannel } from '@nocobase/plugin-notification-manager';

export class ExampleSever extends BaseNotificationChannel {
  async send(args): Promise<any> {
    console.log('ExampleSever send', args);
    return { status: 'success', message: args.message };
  }
}
Successivamente, registri il plugin di estensione lato server richiamando il metodo registerChannelType del core del server di notifica. Il contenuto del file src/server/plugin.ts modificato è il seguente:
import PluginNotificationManagerServer from '@nocobase/plugin-notification-manager';
import { Plugin } from '@nocobase/server';
import { ExampleSever } from './example-server';
export class PluginNotificationExampleServer extends Plugin {
  async load() {
    const notificationServer = this.pm.get(PluginNotificationManagerServer) as PluginNotificationManagerServer;
    notificationServer.registerChannelType({ type: 'example-sms', Channel: ExampleSever });
  }
}

export default PluginNotificationExampleServer;
Registrazione e avvio del plugin
- Esegua il comando di registrazione:
yarn pm add @nocobase/plugin-notification-example
- Esegua il comando di abilitazione:
yarn pm enable @nocobase/plugin-notification-example
Configurazione del canale
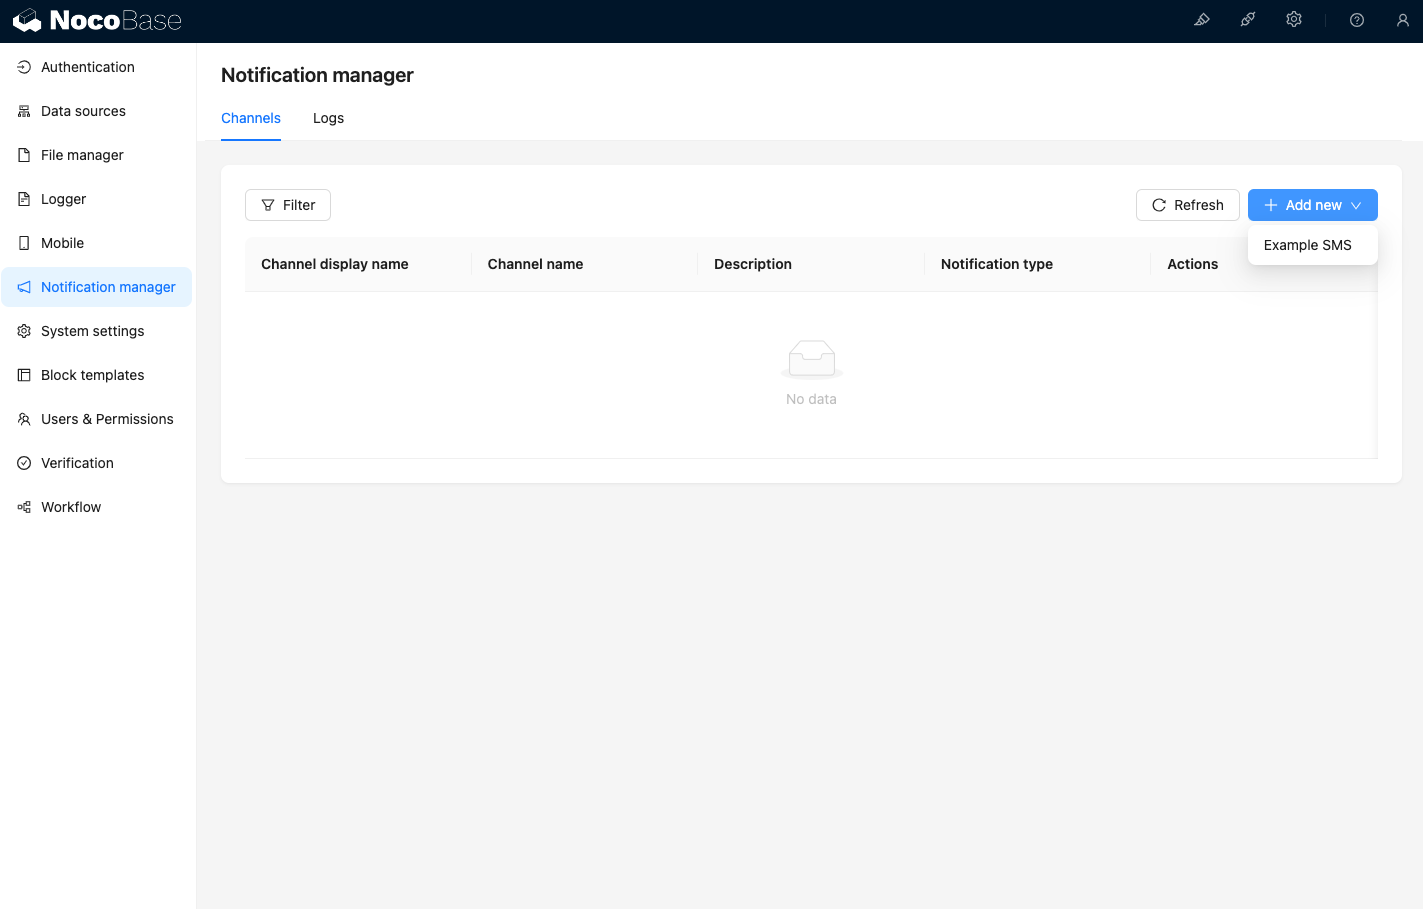
Visitando la pagina dei canali di gestione delle notifiche, potrà vedere che il canale Example SMS è stato abilitato.
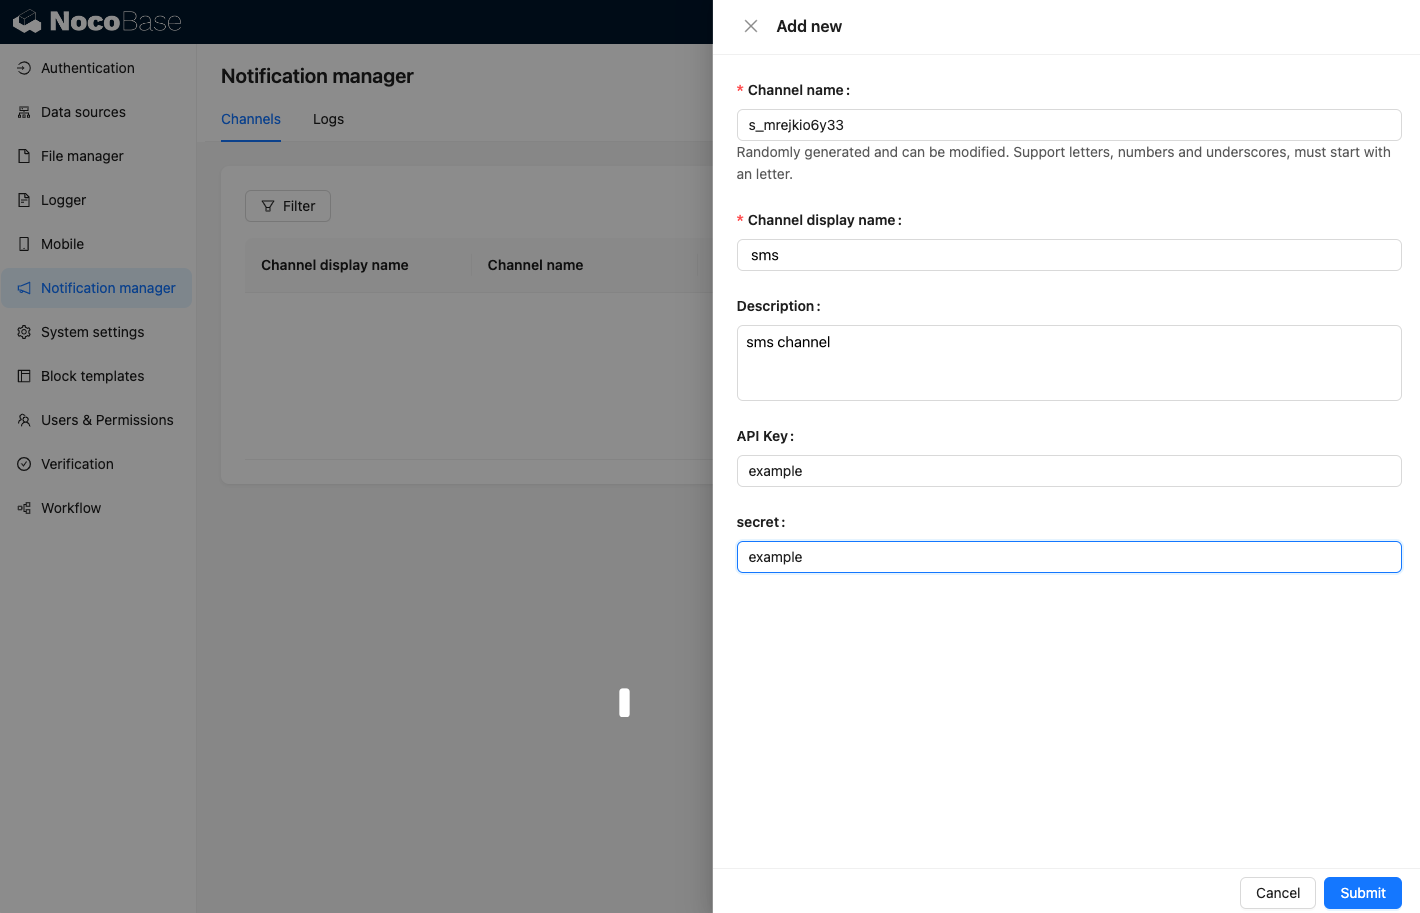
Aggiunga un canale di esempio.
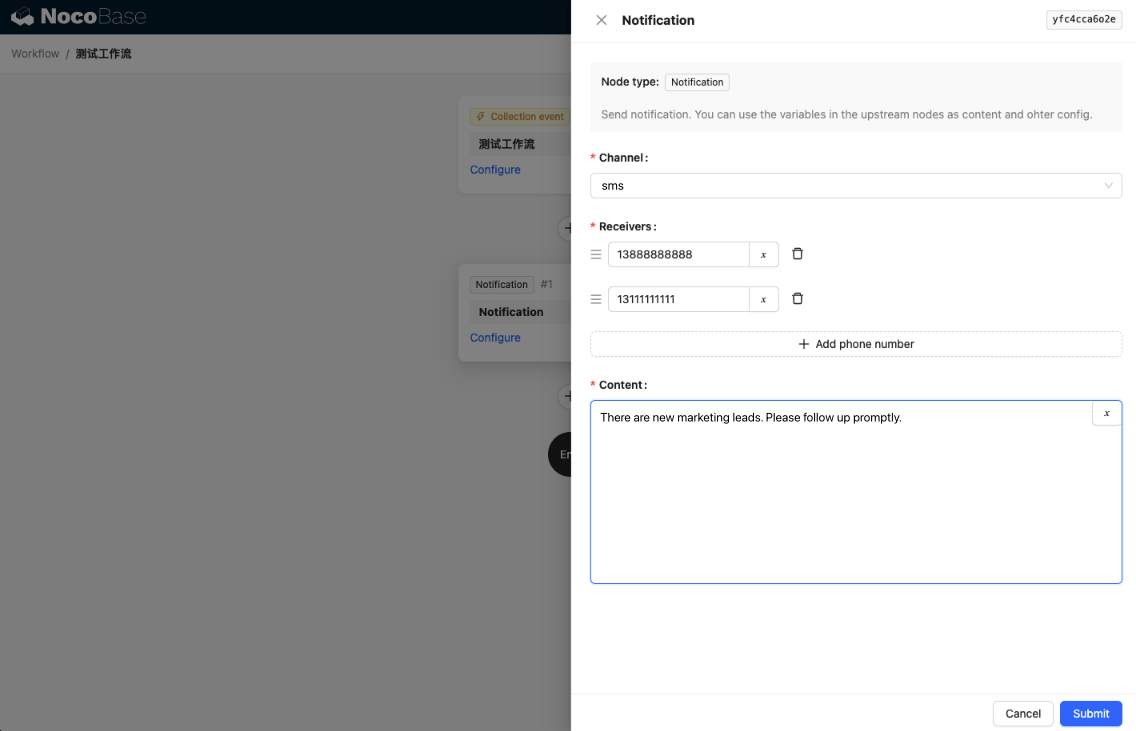
Crei un nuovo flusso di lavoro e configuri il nodo di notifica.
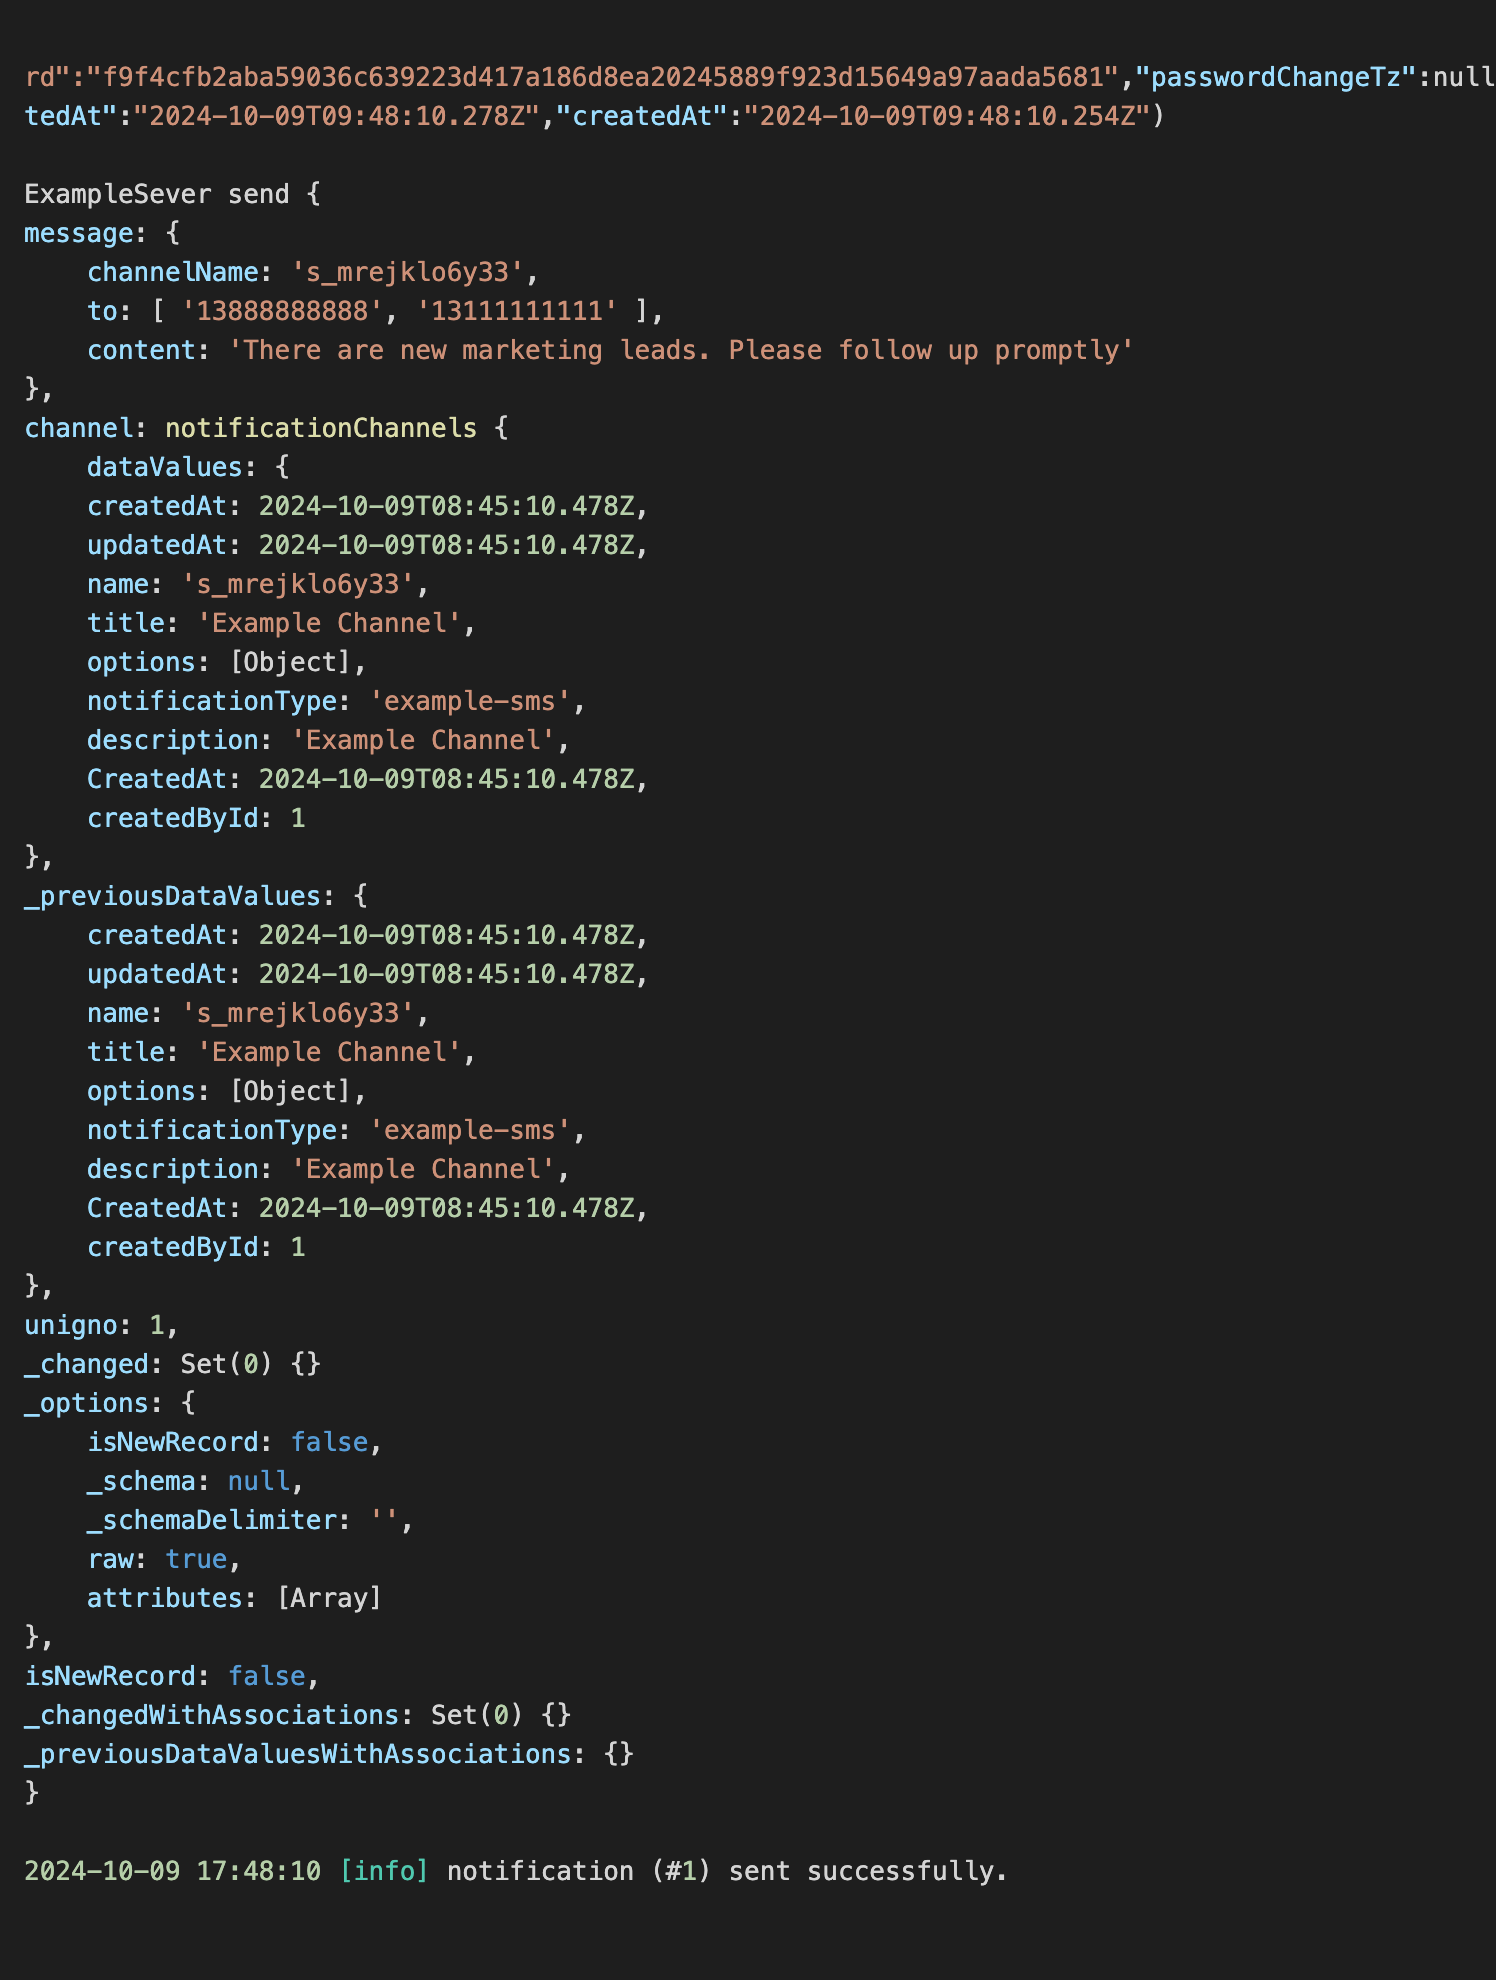
Avvii l'esecuzione del flusso di lavoro per visualizzare le seguenti informazioni nella console.