การขยายประเภทช่องทางการแจ้งเตือน
NocoBase รองรับการขยายประเภทช่องทางการแจ้งเตือนตามความต้องการ เช่น การแจ้งเตือนทาง SMS และการแจ้งเตือนแบบพุชบนแอป เป็นต้น ครับ/ค่ะ
ฝั่งไคลเอนต์
การลงทะเบียนประเภทช่องทาง
การตั้งค่าช่องทางฝั่งไคลเอนต์และหน้าจอการตั้งค่าข้อความจะถูกลงทะเบียนผ่านเมธอด registerChannelType ที่ปลั๊กอินจัดการการแจ้งเตือนฝั่งไคลเอนต์จัดเตรียมไว้ให้ครับ/ค่ะ
import PluginNotificationManagerClient from '@nocobase/plugin-notification-manager/client';

class PluginNotificationExampleClient extends Plugin {
  async afterAdd() {}

  async beforeLoad() {}

  async load() {
    const notification = this.pm.get(PluginNotificationManagerClient);
    notification.registerChannelType({
      title: 'Example SMS', // ชื่อประเภทช่องทาง
      type: 'example-sms', // ตัวระบุประเภทช่องทาง
      components: {
        ChannelConfigForm, // ฟอร์มการตั้งค่าช่องทาง
        MessageConfigForm, // ฟอร์มการตั้งค่าข้อความ
      },
    });
  }
}

export default PluginNotificationExampleClient;
ฝั่งเซิร์ฟเวอร์
การสืบทอดคลาส Abstract
หัวใจหลักของการพัฒนาฝั่งเซิร์ฟเวอร์คือการสืบทอดคลาส Abstract BaseNotificationChannel และนำเมธอด send ไปใช้งาน ซึ่งภายในเมธอด send นี้จะประกอบด้วยโลจิกทางธุรกิจสำหรับการส่งการแจ้งเตือนผ่านปลั๊กอินที่ขยายออกไปครับ/ค่ะ
import { BaseNotificationChannel } from '@nocobase/plugin-notification-manager';

export class ExampleSever extends BaseNotificationChannel {
  async send(args): Promise<any> {
    console.log('ExampleSever send', args);
    return { status: 'success', message: args.message };
  }
}
การลงทะเบียนฝั่งเซิร์ฟเวอร์
ถัดไป เราจะต้องเรียกใช้เมธอด registerChannelType ของแกนหลักการแจ้งเตือนฝั่งเซิร์ฟเวอร์ เพื่อลงทะเบียนคลาสที่นำไปใช้งานฝั่งเซิร์ฟเวอร์ที่เราพัฒนาขึ้นเข้าสู่แกนหลักครับ/ค่ะ
import PluginNotificationManagerServer from '@nocobase/plugin-notification-manager';
import { Plugin } from '@nocobase/server';
import { ExampleSever } from './example-server';
export class PluginNotificationExampleServer extends Plugin {
  async load() {
    const notificationServer = this.pm.get(PluginNotificationManagerServer) as PluginNotificationManagerServer;
    notificationServer.registerChannelType({ type: 'example-sms', Channel: ExampleSever });
  }
}

export default PluginNotificationExampleServer;
ตัวอย่างแบบเต็ม
ต่อไปนี้คือตัวอย่างปลั๊กอินการแจ้งเตือนแบบขยาย เพื่ออธิบายรายละเอียดเกี่ยวกับวิธีการพัฒนาปลั๊กอินส่วนขยายครับ/ค่ะ
สมมติว่าเราต้องการเพิ่มฟังก์ชันการแจ้งเตือนทาง SMS ให้กับ NocoBase โดยใช้ SMS gateway ของแพลตฟอร์มใดแพลตฟอร์มหนึ่งครับ/ค่ะ
การสร้างปลั๊กอิน
- รันคำสั่งเพื่อสร้างปลั๊กอิน:
yarn pm add @nocobase/plugin-notification-example
การพัฒนาฝั่งไคลเอนต์
สำหรับฝั่งไคลเอนต์ เราจำเป็นต้องพัฒนาคอมโพเนนต์ฟอร์มสองตัว ได้แก่ ChannelConfigForm (ฟอร์มการตั้งค่าช่องทาง) และ MessageConfigForm (ฟอร์มการตั้งค่าข้อความ) ครับ/ค่ะ
ในการส่งข้อความ SMS แพลตฟอร์มบางแห่งอาจต้องใช้ API key และ secret ดังนั้นเนื้อหาของฟอร์มช่องทางของเราจึงประกอบด้วยสองรายการนี้เป็นหลักครับ/ค่ะ ให้สร้างไฟล์ใหม่ชื่อ ChannelConfigForm.tsx ในไดเรกทอรี src/client โดยมีเนื้อหาดังนี้:
import React from 'react';
import { SchemaComponent } from '@nocobase/client';
import useLocalTranslation from './useLocalTranslation';

const ChannelConfigForm = () => {
  const t = useLocalTranslation();
  return (
    <SchemaComponent
      scope={{ t }}
      schema={{
        type: 'object',
        properties: {
          apiKey: {
            'x-decorator': 'FormItem',
            type: 'string',
            title: '{{t("Transport")}}',
            'x-component': 'Input',
          },
          secret: {
            'x-decorator': 'FormItem',
            type: 'string',
            title: '{{t("Transport")}}',
            'x-component': 'Input',
          },
        },
      }}
    />
  );
};

export default ChannelConfigForm;
ฟอร์มการตั้งค่าข้อความจะประกอบด้วยการตั้งค่าสำหรับผู้รับ (receivers) และเนื้อหาข้อความ (content) เป็นหลักครับ/ค่ะ ให้สร้างไฟล์ใหม่ชื่อ MessageConfigForm.tsx ในไดเรกทอรี src/client โดยคอมโพเนนต์นี้จะรับ variableOptions เป็นพารามิเตอร์ตัวแปร ปัจจุบันฟอร์มเนื้อหาจะถูกกำหนดค่าในโหนดเวิร์กโฟลว์ ซึ่งโดยทั่วไปแล้วจะต้องใช้ตัวแปรของโหนดเวิร์กโฟลว์ เนื้อหาไฟล์เฉพาะมีดังนี้:
import React from 'react';
import { SchemaComponent } from '@nocobase/client';
import useLocalTranslation from './useLocalTranslation';

const MessageConfigForm = ({ variableOptions }) => {
  const { t } = useLocalTranslation();
  return (
    <SchemaComponent
      scope={{ t }}
      schema={{
        type: 'object',
        properties: {
          to: {
            type: 'array',
            required: true,
            title: `{{t("Receivers")}}`,
            'x-decorator': 'FormItem',
            'x-component': 'ArrayItems',
            items: {
              type: 'void',
              'x-component': 'Space',
              properties: {
                sort: {
                  type: 'void',
                  'x-decorator': 'FormItem',
                  'x-component': 'ArrayItems.SortHandle',
                },
                input: {
                  type: 'string',
                  'x-decorator': 'FormItem',
                  'x-component': 'Variable.Input',
                  'x-component-props': {
                    scope: variableOptions,
                    useTypedConstant: ['string'],
                    placeholder: `{{t("Phone number")}}`,
                  },
                },
                remove: {
                  type: 'void',
                  'x-decorator': 'FormItem',
                  'x-component': 'ArrayItems.Remove',
                },
              },
            },
            properties: {
              add: {
                type: 'void',
                title: `{{t("Add phone number")}}`,
                'x-component': 'ArrayItems.Addition',
              },
            },
          },
          content: {
            type: 'string',
            required: true,
            title: `{{t("Content")}}`,
            'x-decorator': 'FormItem',
            'x-component': 'Variable.RawTextArea',
            'x-component-props': {
              scope: variableOptions,
              placeholder: 'Hi,',
              autoSize: {
                minRows: 10,
              },
            },
          },
        },
      }}
    />
  );
};

export default MessageConfigForm
การลงทะเบียนคอมโพเนนต์ฝั่งไคลเอนต์
หลังจากพัฒนาคอมโพเนนต์การตั้งค่าฟอร์มเสร็จแล้ว เราจะต้องเรียกใช้แกนหลักการจัดการการแจ้งเตือนเพื่อลงทะเบียนครับ/ค่ะ สมมติว่าชื่อแพลตฟอร์มของเราคือ Example ไฟล์ src/client/index.tsx ที่แก้ไขแล้วจะมีเนื้อหาดังนี้:
import { Plugin } from '@nocobase/client';
import PluginNotificationManagerClient from '@nocobase/plugin-notification-manager/client';
import { tval } from '@nocobase/utils/client';
import ChannelConfigForm from './ChannelConfigForm';
import MessageConfigForm from './MessageConfigForm';

class PluginNotificationExampleClient extends Plugin {
  async afterAdd() {}

  async beforeLoad() {}

  async load() {
    const notification = this.pm.get(PluginNotificationManagerClient);
    notification.registerChannelType({
      title: tval('Example SMS', { ns: '@nocobase/plugin-notification-example' }),
      type: 'example-sms',
      components: {
        ChannelConfigForm,
        MessageConfigForm,
      },
    });
  }
}

export default PluginNotificationExampleClient;
ณ จุดนี้ การพัฒนาฝั่งไคลเอนต์ก็เสร็จสมบูรณ์แล้วครับ/ค่ะ
การพัฒนาฝั่งเซิร์ฟเวอร์
หัวใจหลักของการพัฒนาฝั่งเซิร์ฟเวอร์คือการสืบทอดคลาส Abstract BaseNotificationChannel และนำเมธอด send ไปใช้งาน ซึ่งเมธอด send นี้จะประกอบด้วยโลจิกทางธุรกิจสำหรับปลั๊กอินส่วนขยายในการส่งการแจ้งเตือนครับ/ค่ะ เนื่องจากนี่เป็นเพียงตัวอย่าง เราจะแสดงพารามิเตอร์ที่ได้รับออกมาในคอนโซลเท่านั้นครับ/ค่ะ ให้เพิ่มไฟล์ใหม่ชื่อ example-server.ts ในไดเรกทอรี src/server โดยมีเนื้อหาดังนี้:
import { BaseNotificationChannel } from '@nocobase/plugin-notification-manager';

export class ExampleSever extends BaseNotificationChannel {
  async send(args): Promise<any> {
    console.log('ExampleSever send', args);
    return { status: 'success', message: args.message };
  }
}
ถัดไป เราจะต้องเรียกใช้เมธอด registerChannelType ของแกนหลักการแจ้งเตือนฝั่งเซิร์ฟเวอร์เพื่อลงทะเบียนปลั๊กอินส่วนขยายฝั่งเซิร์ฟเวอร์ครับ/ค่ะ ไฟล์ src/server/plugin.ts ที่แก้ไขแล้วจะมีเนื้อหาดังนี้:
import PluginNotificationManagerServer from '@nocobase/plugin-notification-manager';
import { Plugin } from '@nocobase/server';
import { ExampleSever } from './example-server';
export class PluginNotificationExampleServer extends Plugin {
  async load() {
    const notificationServer = this.pm.get(PluginNotificationManagerServer) as PluginNotificationManagerServer;
    notificationServer.registerChannelType({ type: 'example-sms', Channel: ExampleSever });
  }
}

export default PluginNotificationExampleServer;
การลงทะเบียนและเปิดใช้งานปลั๊กอิน
- รันคำสั่งลงทะเบียน:
yarn pm add @nocobase/plugin-notification-example
- รันคำสั่งเปิดใช้งาน:
yarn pm enable @nocobase/plugin-notification-example
การตั้งค่าช่องทาง
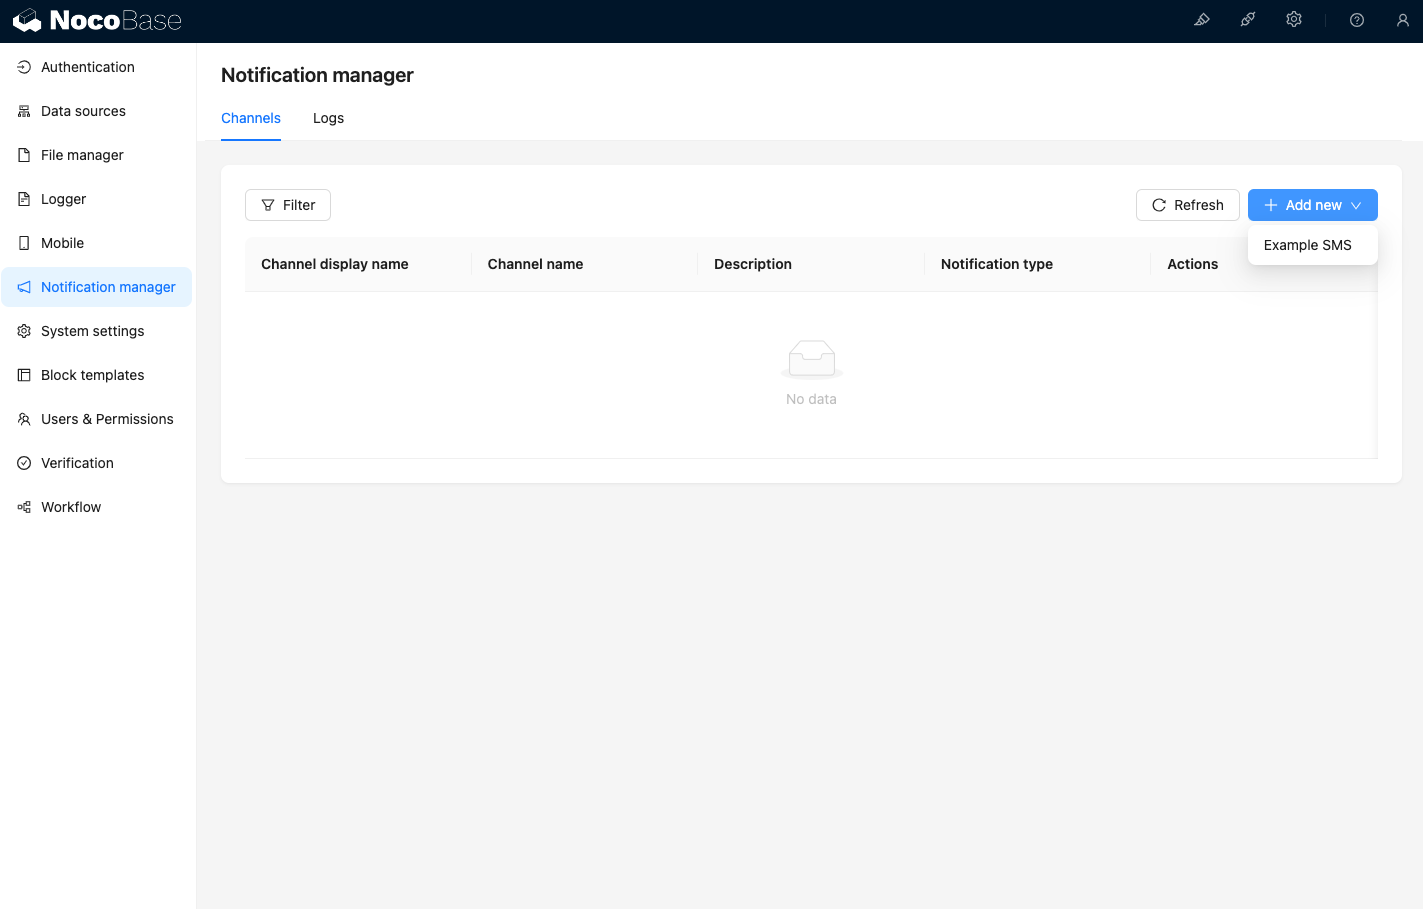
เมื่อเข้าสู่หน้าช่องทางการจัดการการแจ้งเตือน คุณจะเห็นว่าช่องทาง Example SMS ได้รับการเปิดใช้งานแล้วครับ/ค่ะ
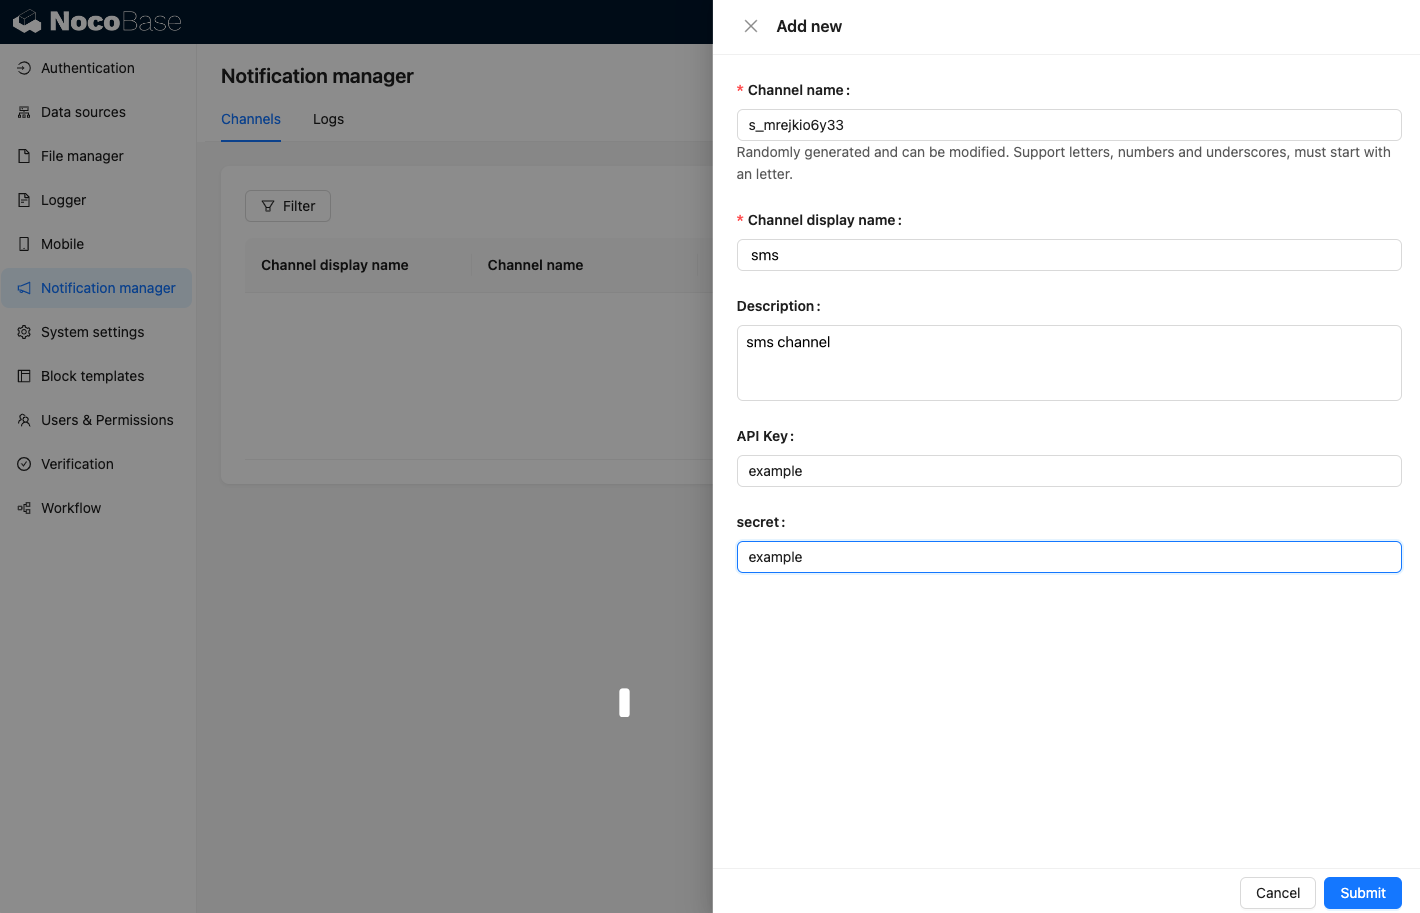
เพิ่มช่องทางตัวอย่างใหม่ครับ/ค่ะ
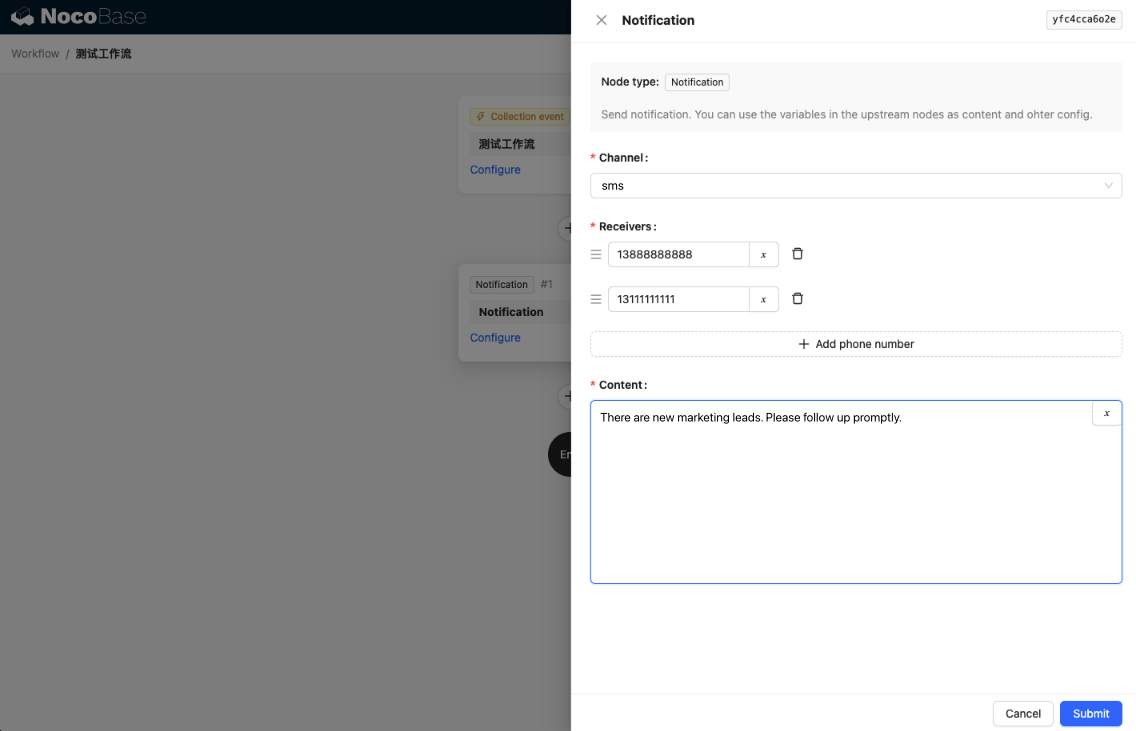
สร้างเวิร์กโฟลว์ใหม่และตั้งค่าโหนดการแจ้งเตือนครับ/ค่ะ
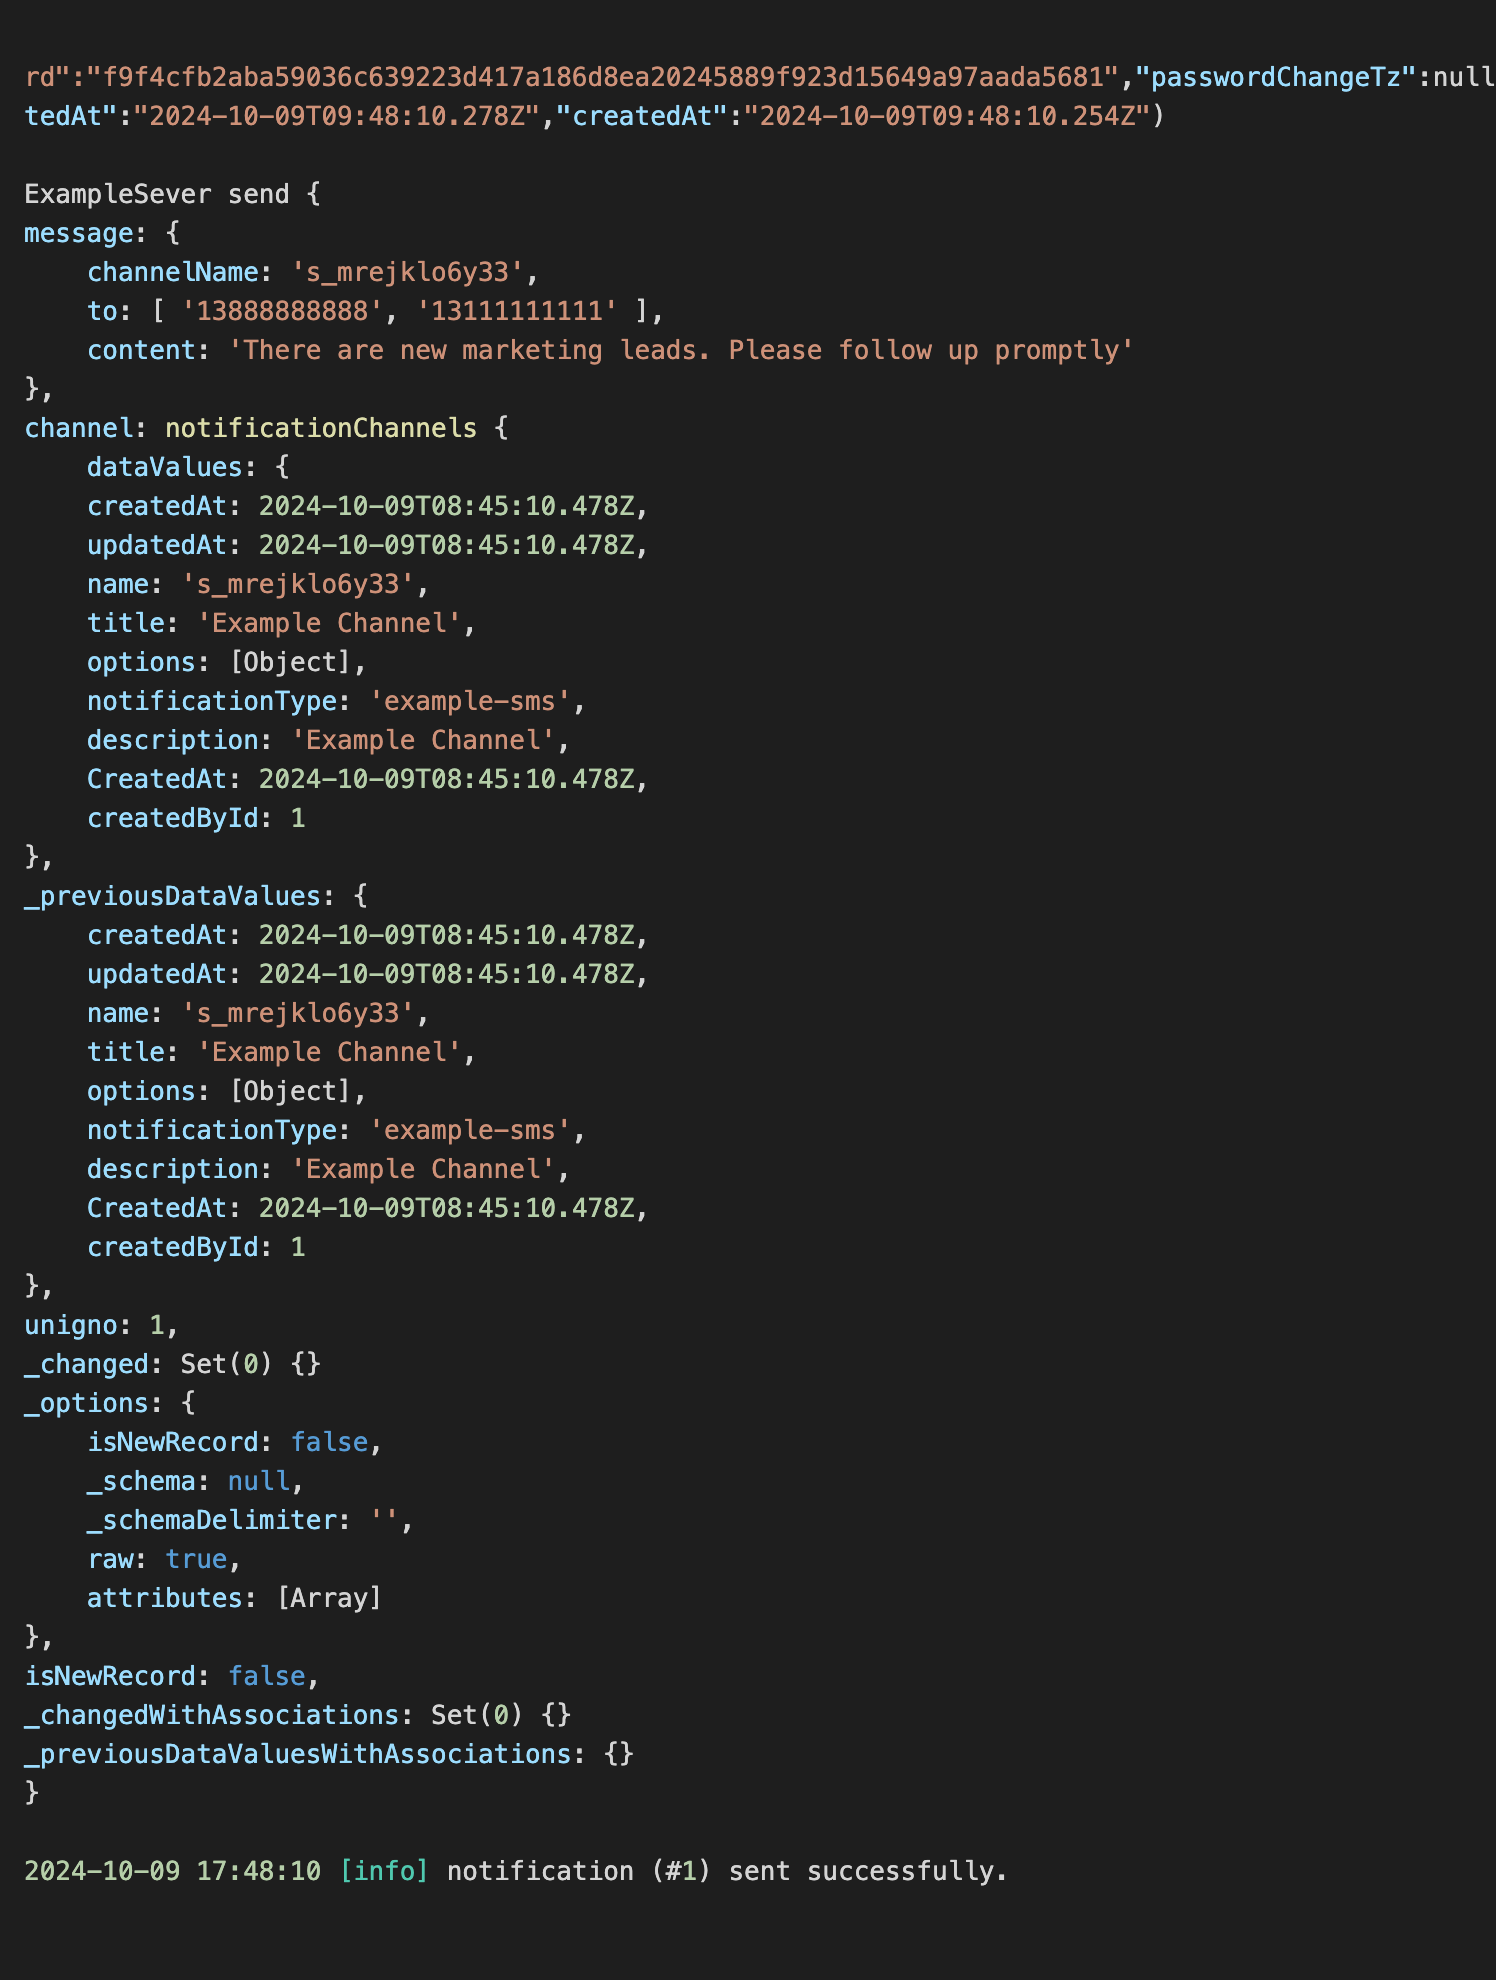
เมื่อเรียกใช้งานเวิร์กโฟลว์ คุณจะเห็นข้อมูลต่อไปนี้แสดงในคอนโซลครับ/ค่ะ