

Chapter 6: User & Permissions
In team collaboration, it’s essential for everyone to clearly understand their roles and permissions to ensure smooth progress. Today, we will learn about role creation and permission management to make teamwork more streamlined and organized.
Don’t worry—this process is simple. We’ll guide you through it step by step, providing guidance at each critical stage. If you encounter any issues, please feel free to reach out to our official forum for assistance.
Requirements Analysis
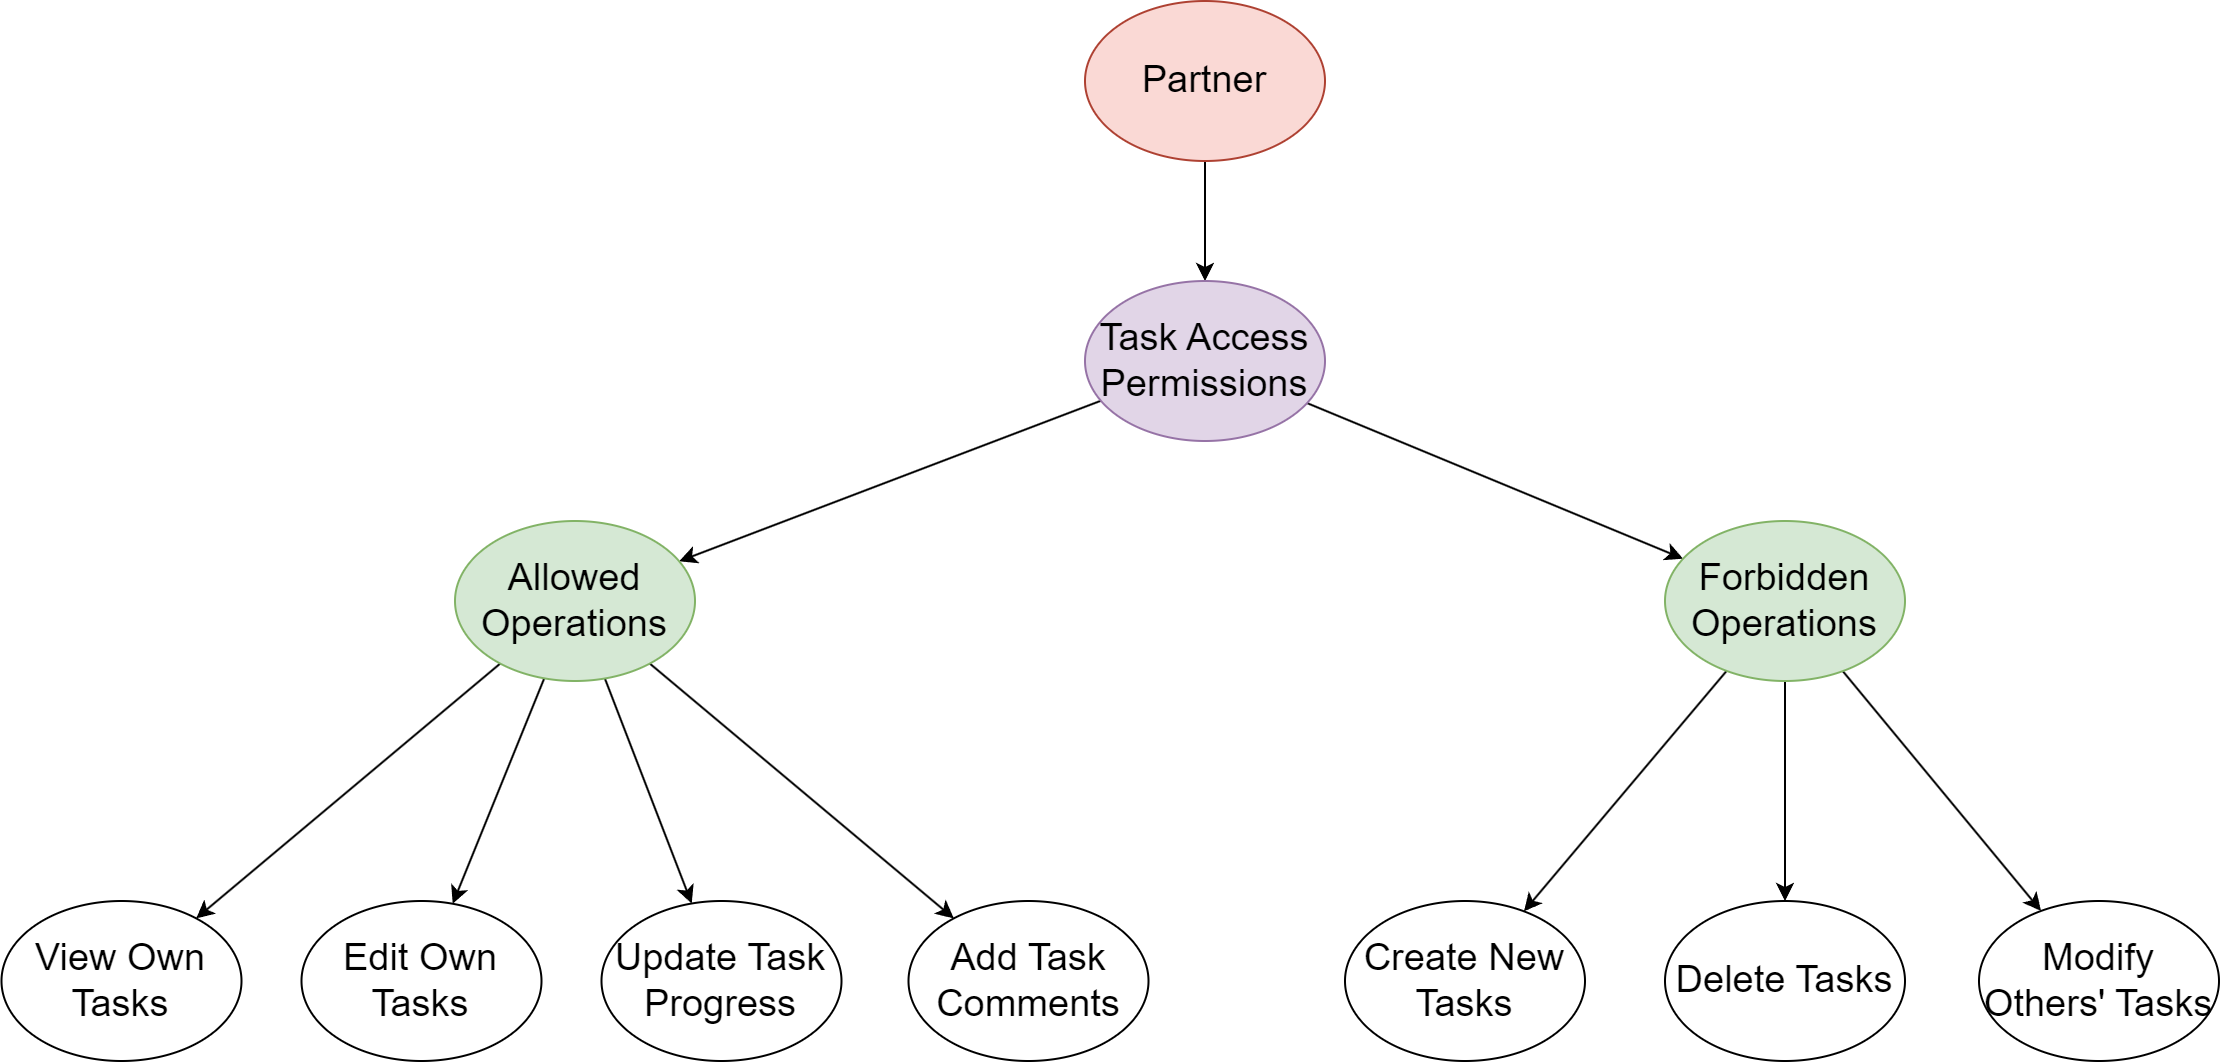
We need a "Partner" role with specific permissions to participate in task management but without the ability to freely modify others' tasks. This approach allows us to assign tasks and collaborate flexibly.
Introduction to Roles and Permissions: Roles and permissions are essential mechanisms for managing user access and operations. Each user can have multiple roles.
By setting role permissions, we can control user behavior and operations within the system, as well as limit displayed functionality, which is crucial for access control. Using roles and permissions to bind users enables you to manage your system more effectively. As an administrator, you can assign and adjust permissions as needed.
6.1 Role Creation and Assignment
6.1.1 Creating the “Partner” Role
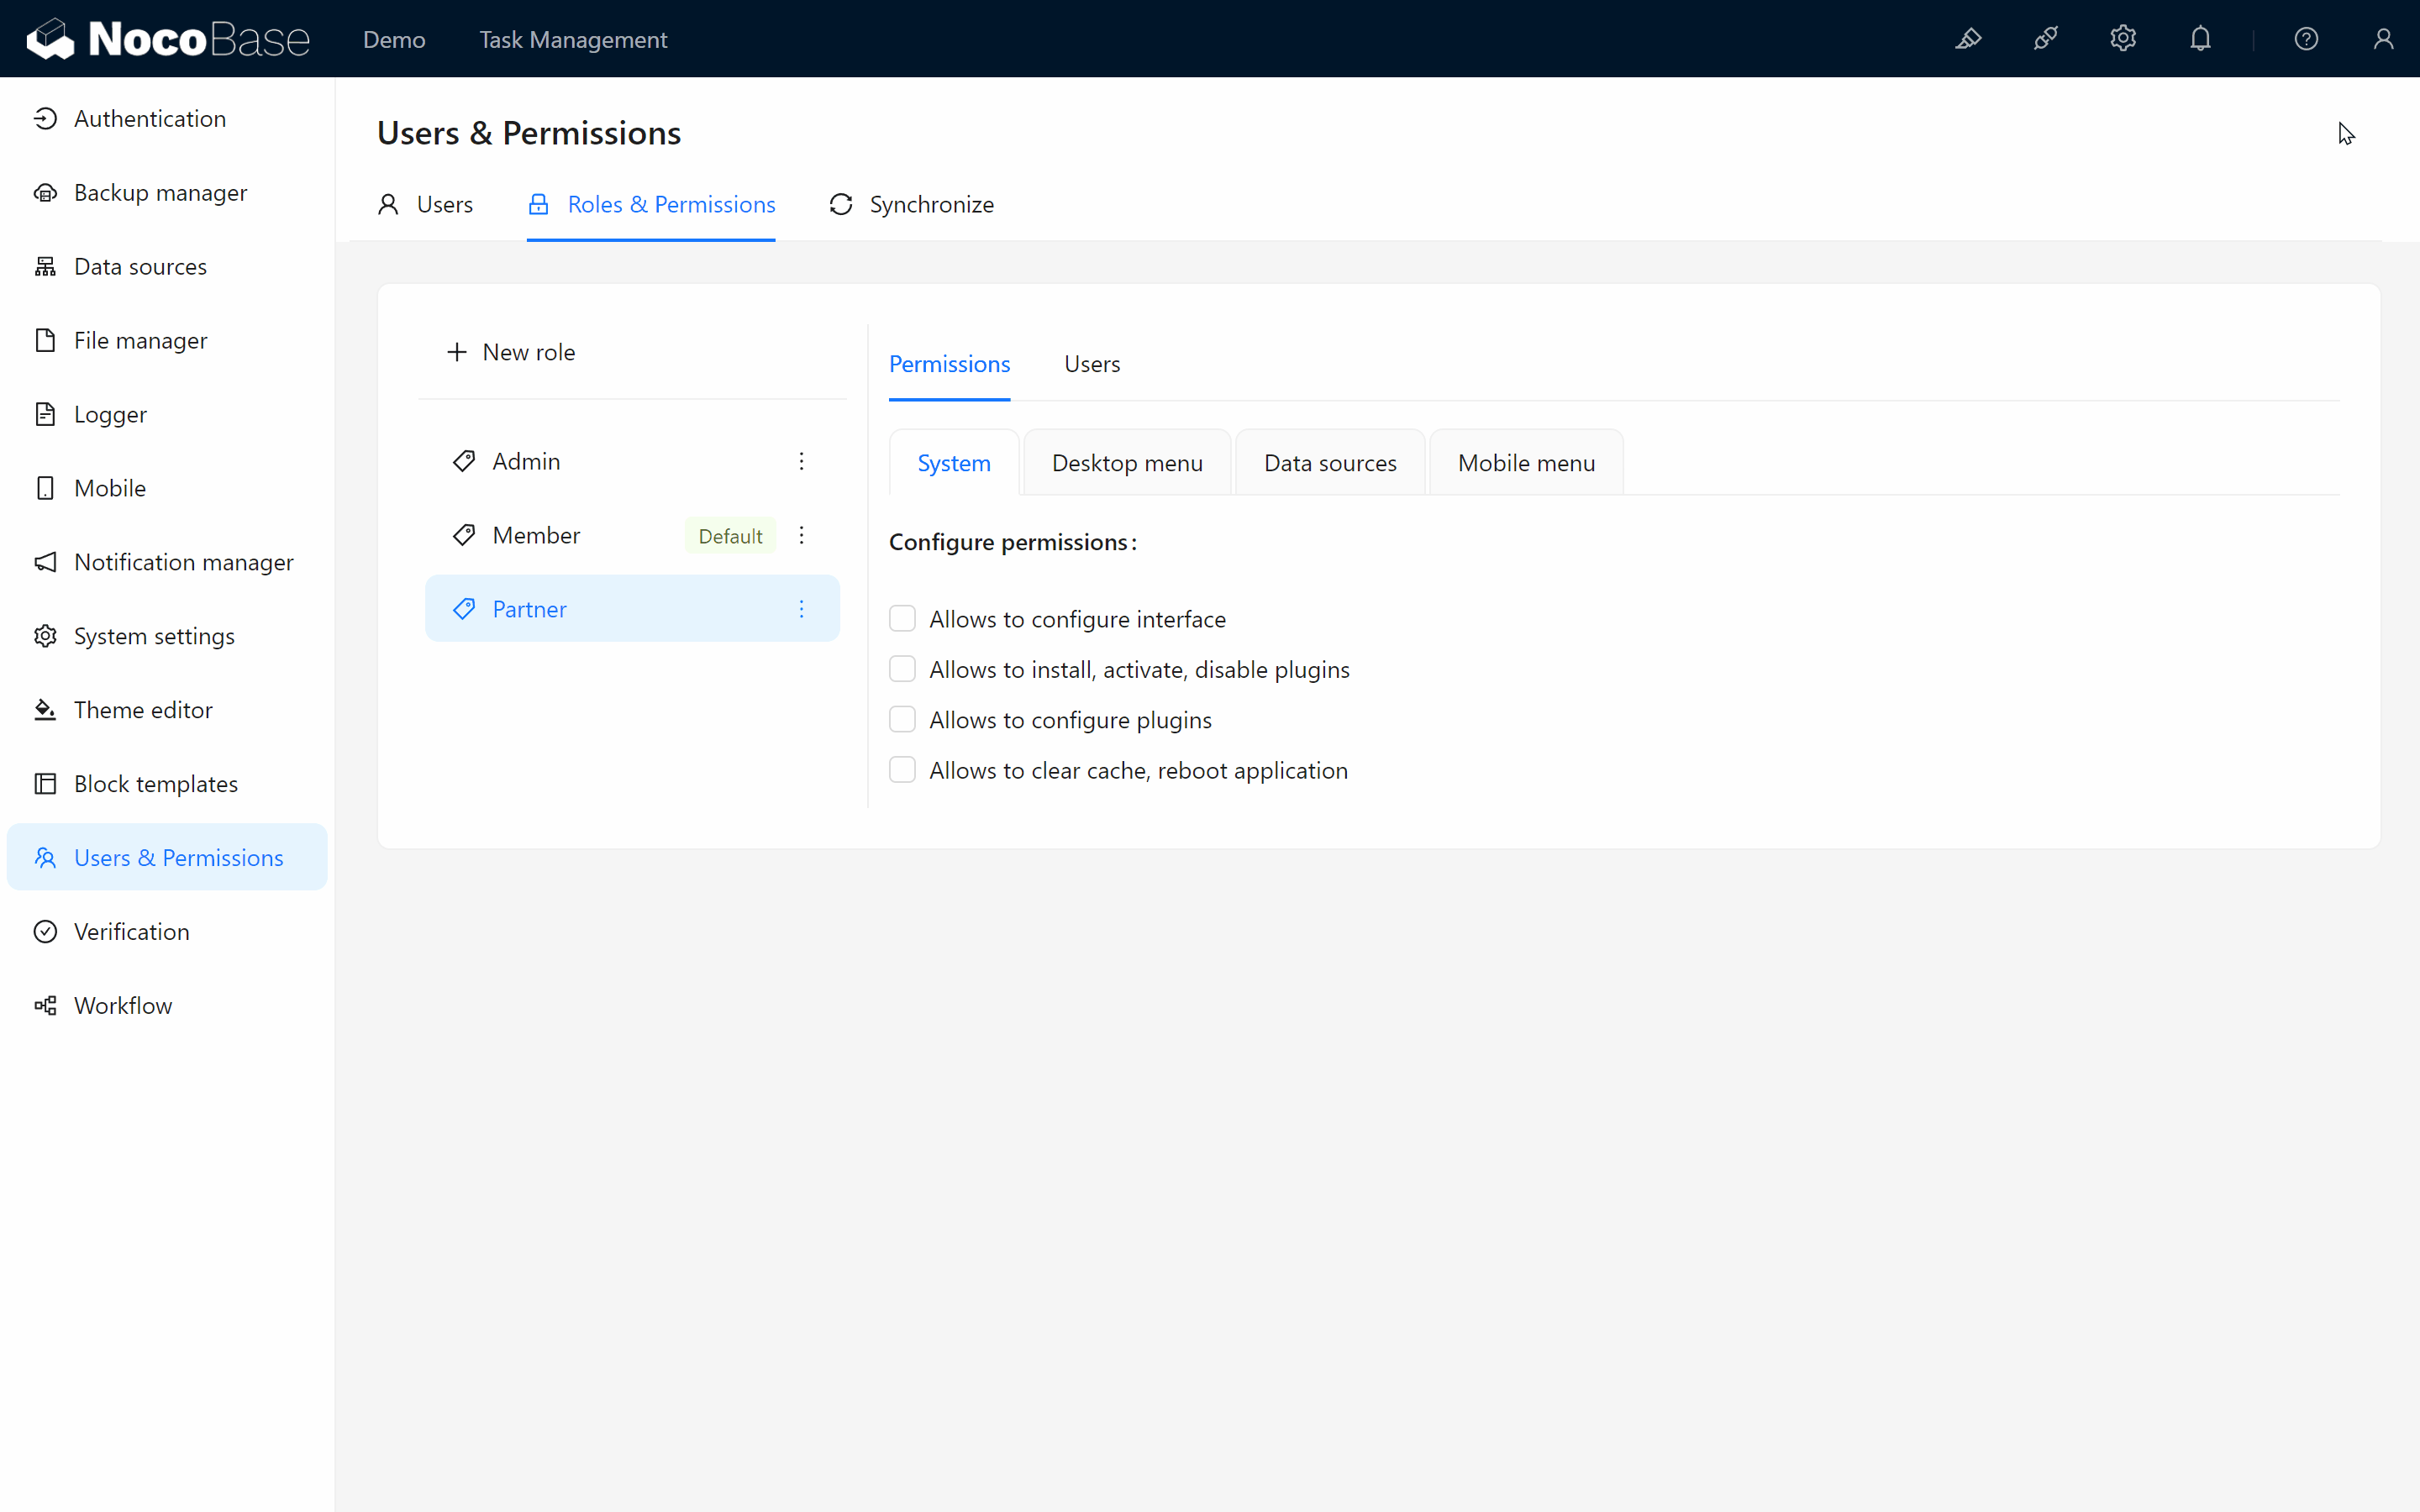
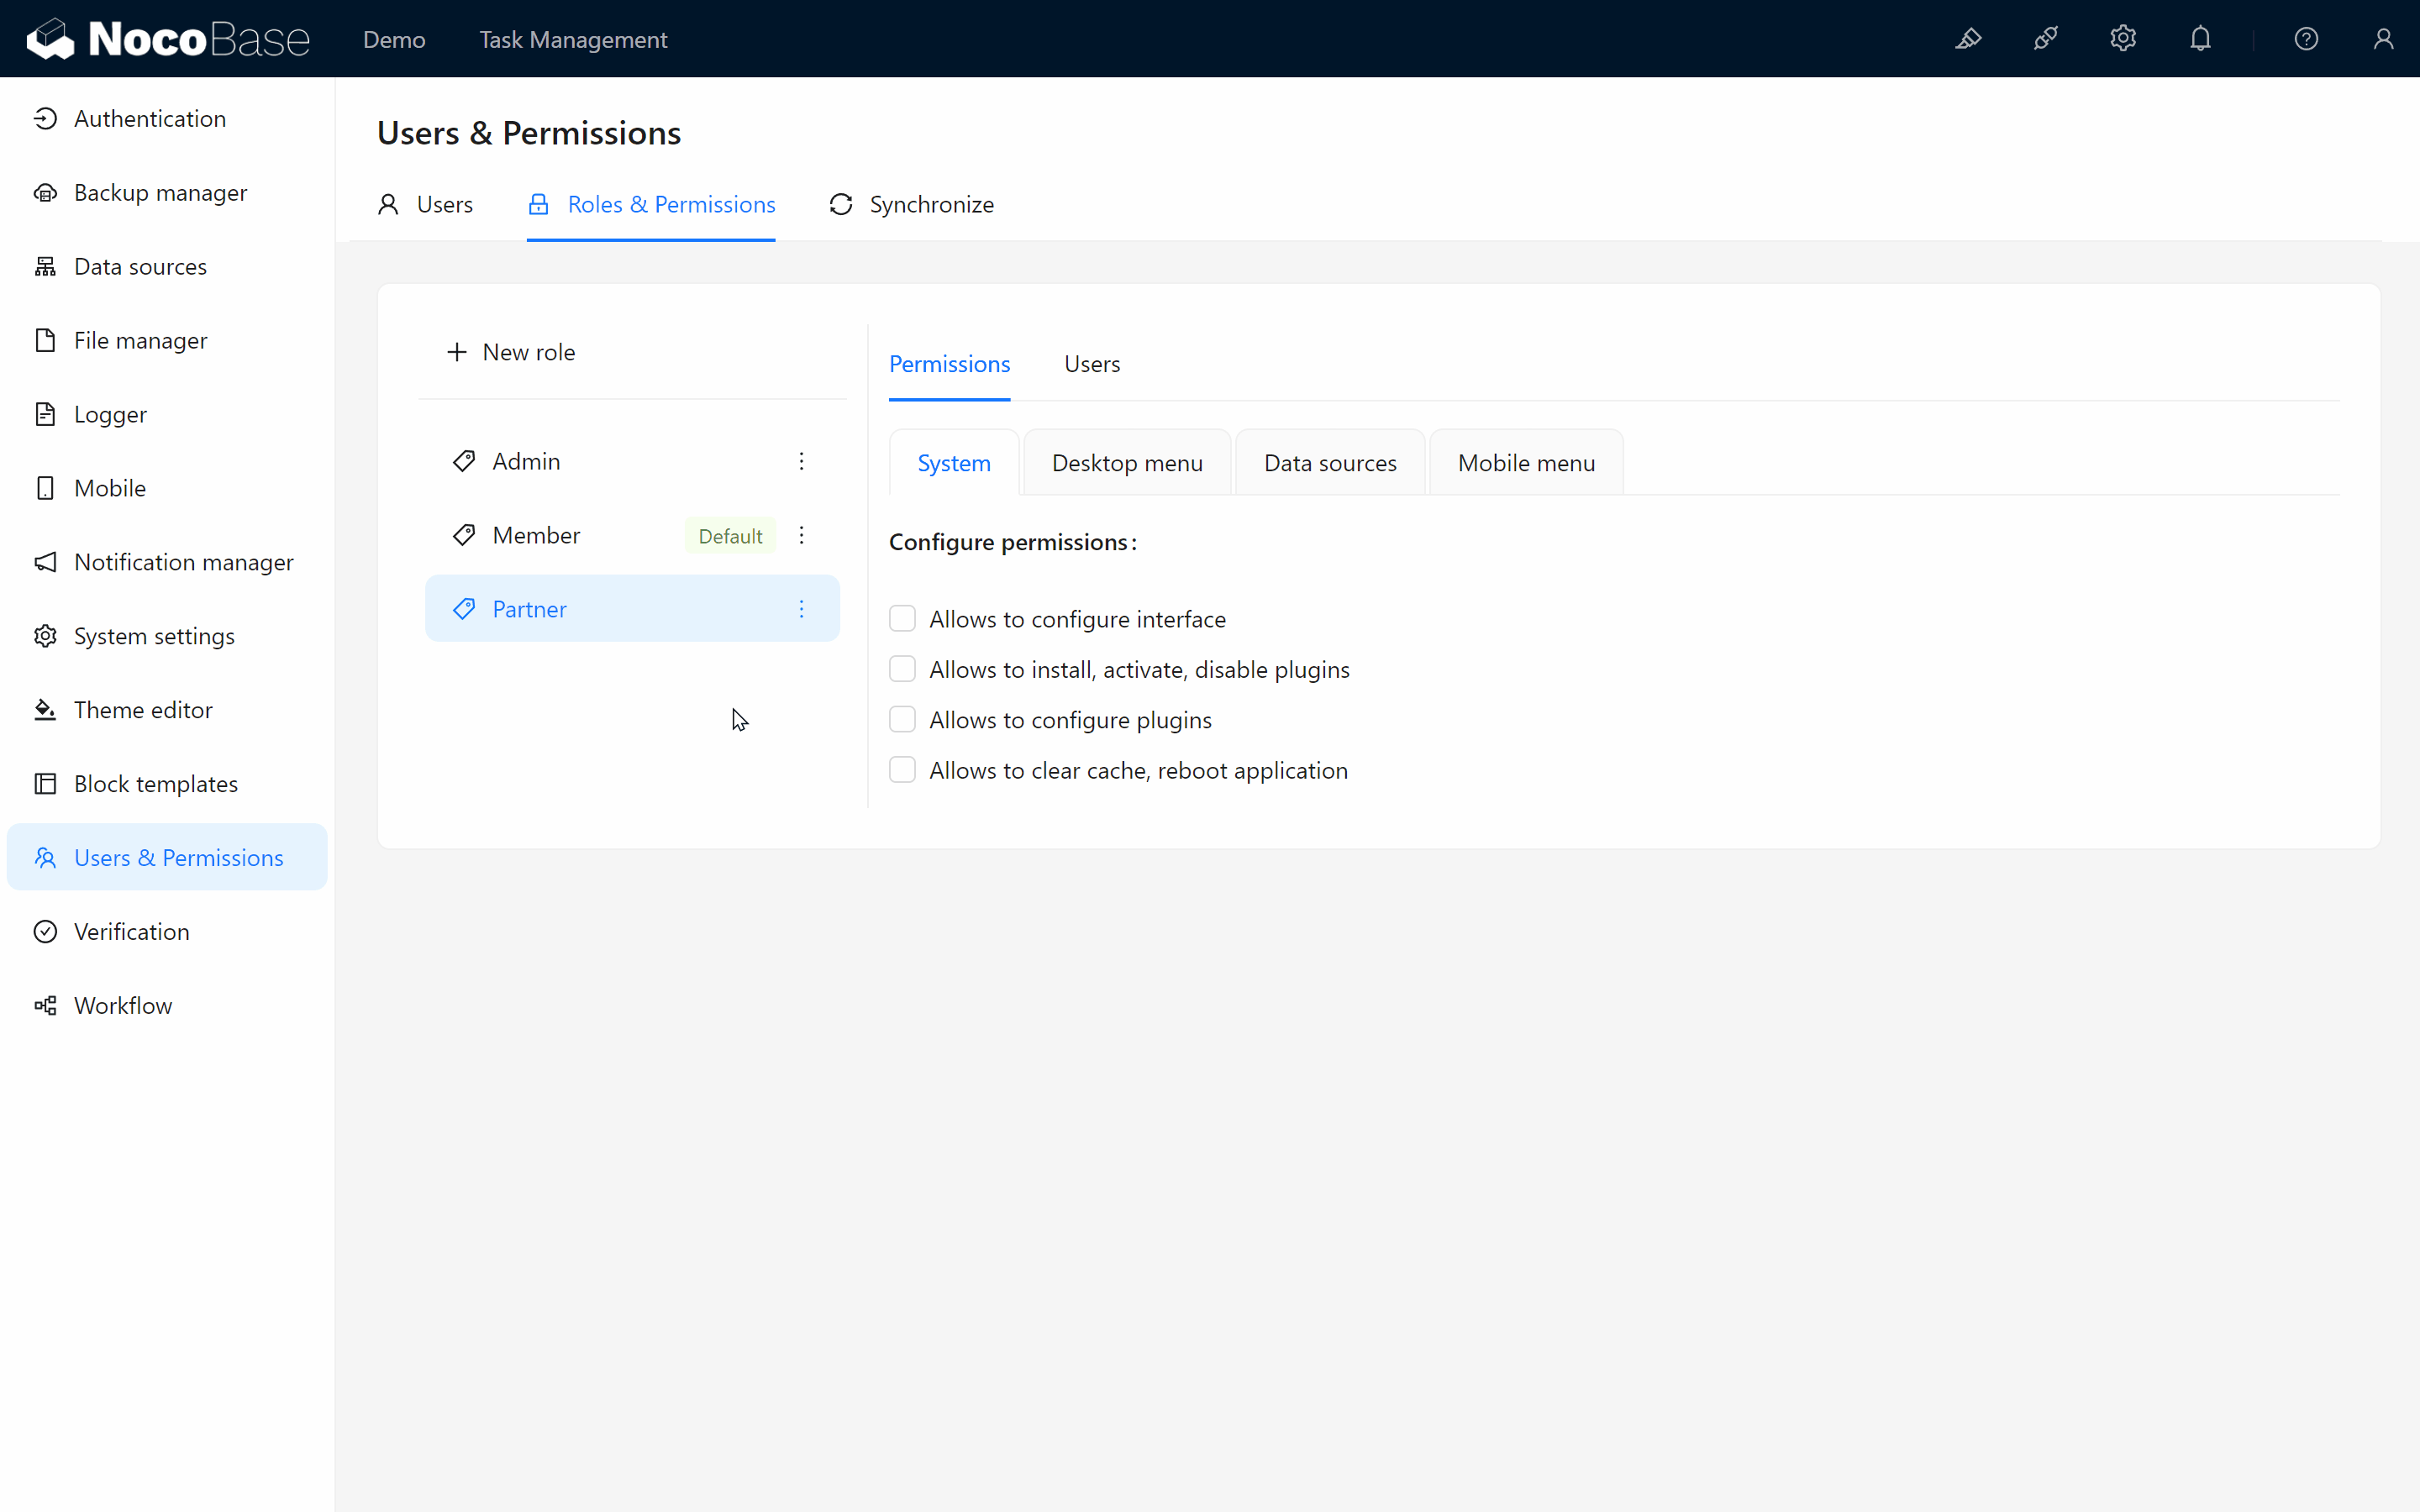
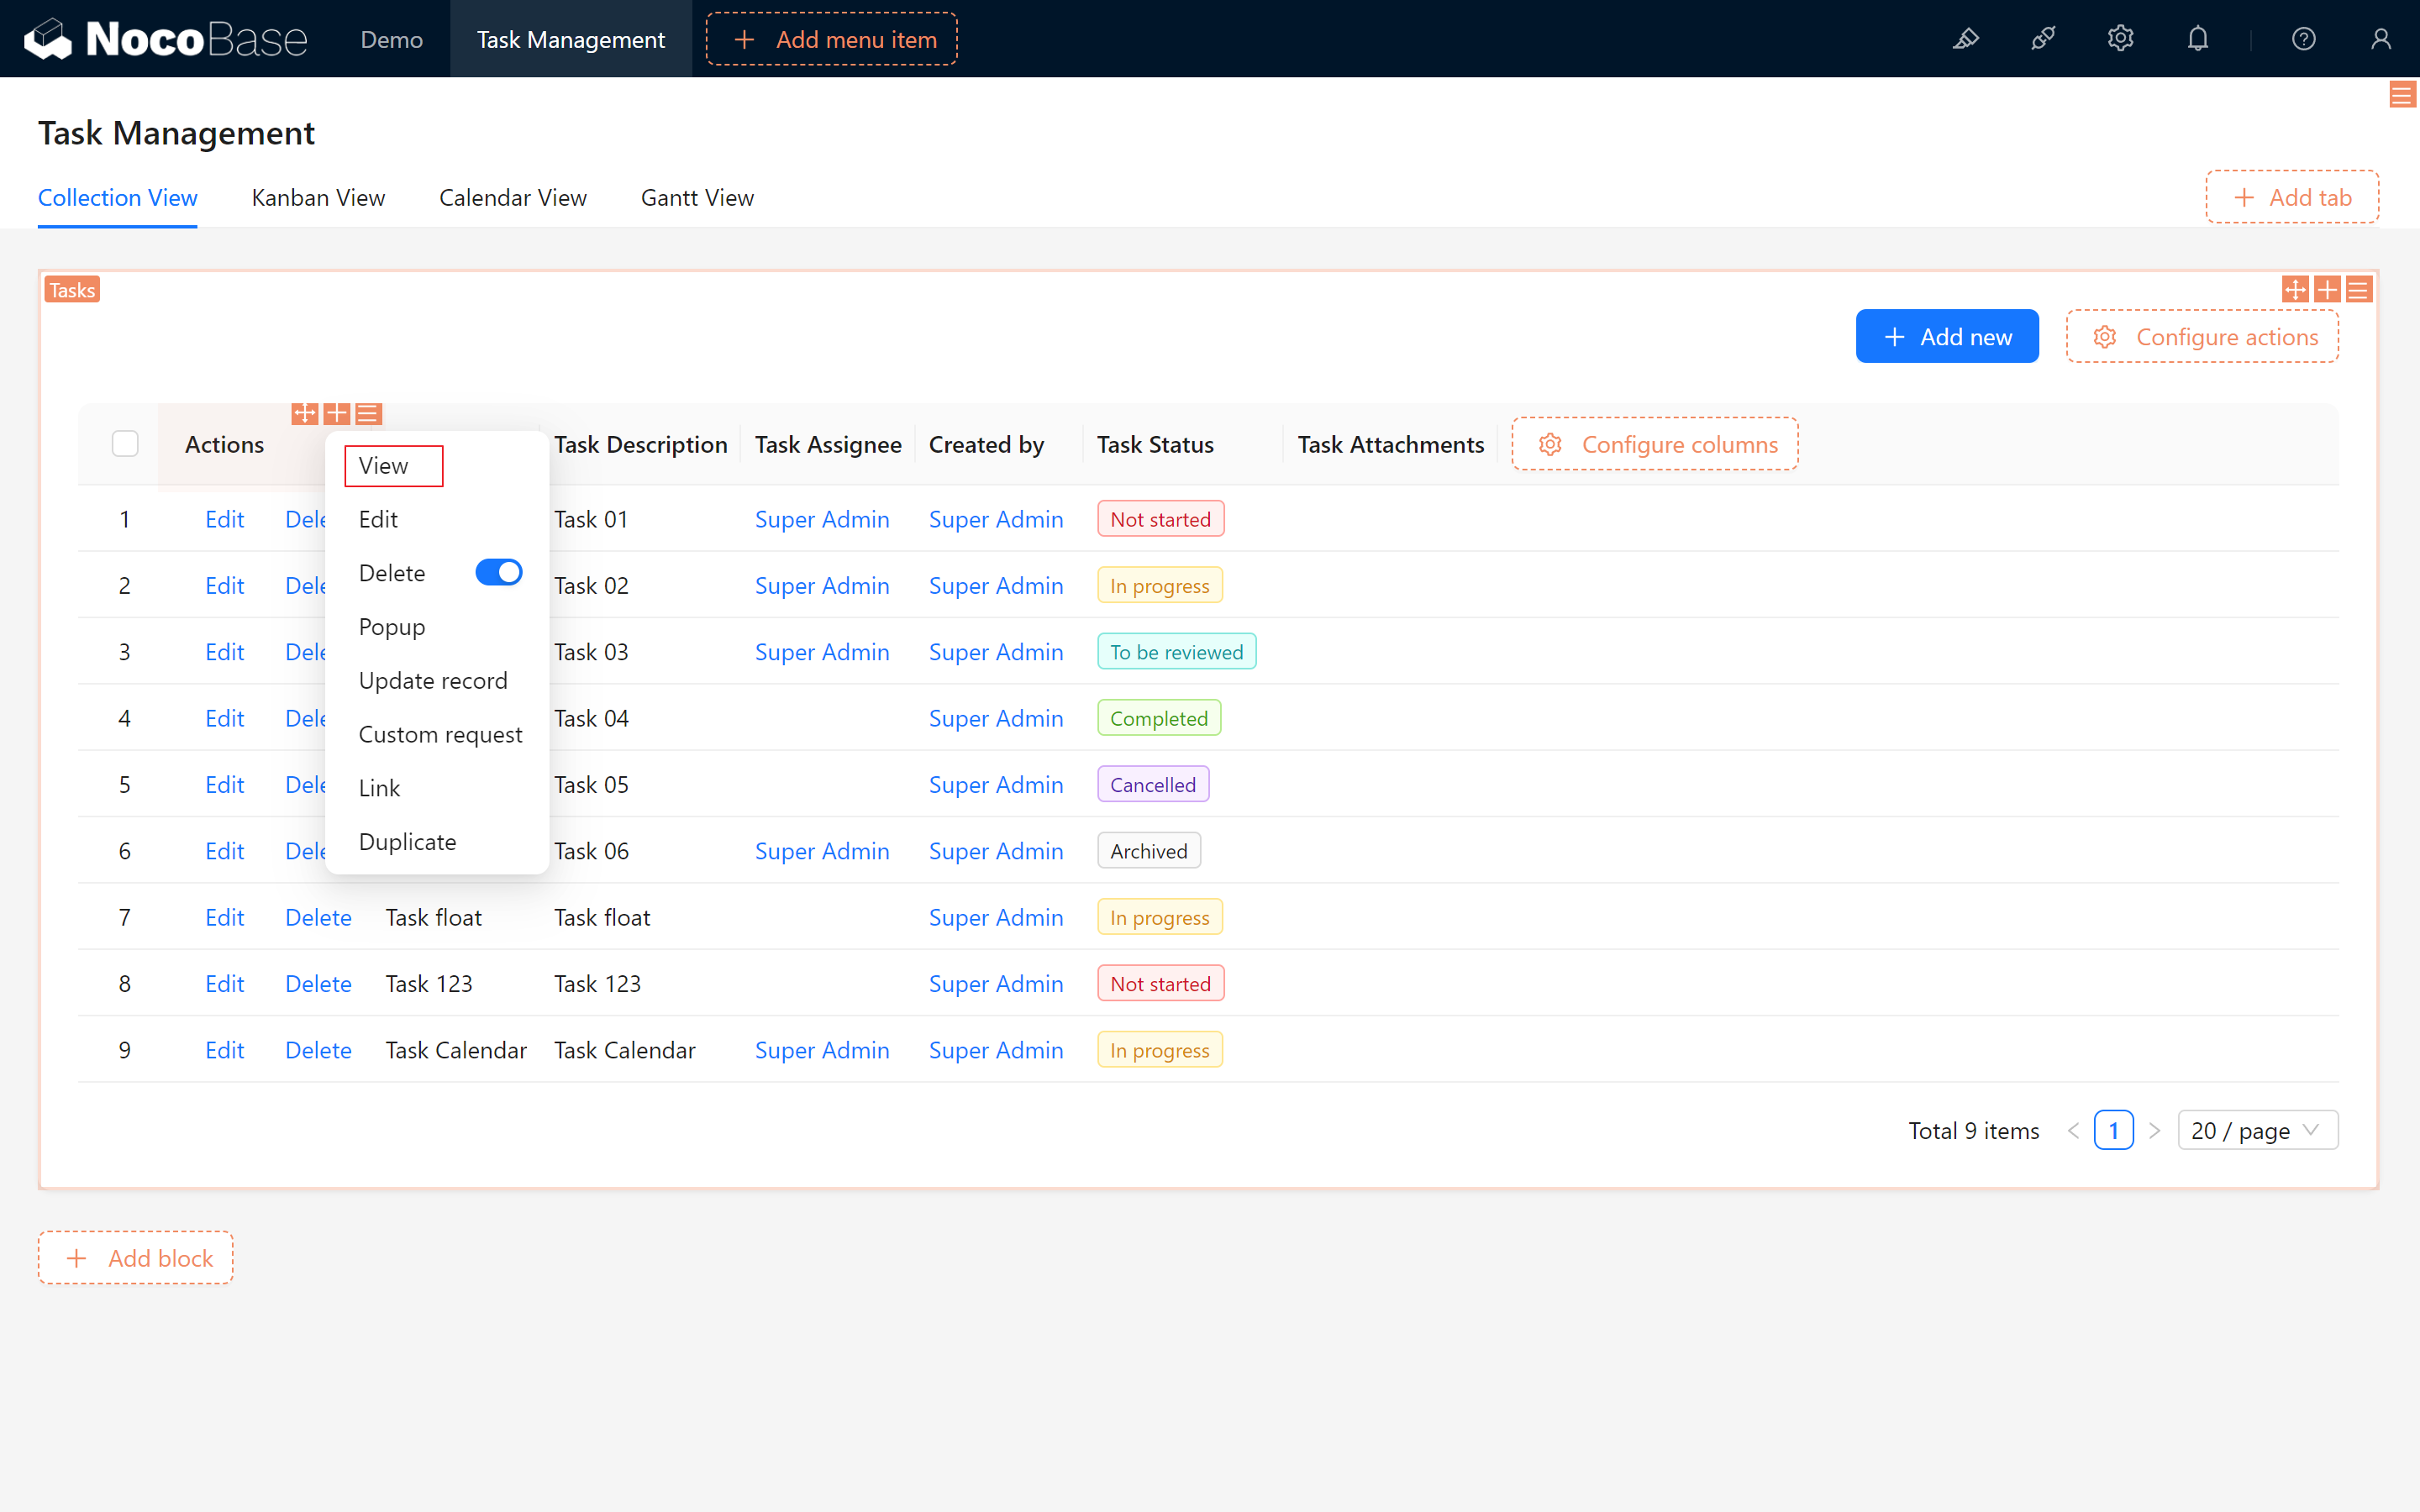
- Click on "Users and Permissions" in the top right of the interface, and select "Roles and Permissions". This is where we configure roles and manage permissions.
- Click on the "Create Role" button, and a dialog box will appear. Here, name the role Partner and confirm to save.
You have successfully created a new role! Next, we need to assign permissions to this role to ensure they can participate in task management.
6.1.2 Assigning the New Role to Yourself
To ensure that the role permissions are working as expected, we can first assign this role to our own account for testing. It’s straightforward:
- In the user management section, find your account, click to enter, select "Roles & Permissions," and choose "Partner."

Now you can use your account to simulate the "Partner" role experience. Next, let’s see how to switch roles.
6.1.3 Switching to the “Partner” Role
Since you’ve assigned yourself the "Partner" role, let's explore how to switch roles.
- Click on Personal Center in the upper right corner, then choose "Switch Role."
- You may notice that the "Partner" role does not immediately appear in the list. Don’t worry; just refresh the page/clear cache, and the role should appear.
6.2 Assigning Page Permissions to the Role
Once you switch to the "Partner" role, you may notice that there are no visible pages or menus. This is because we haven’t assigned permissions for the role to access specific pages yet. No problem—let’s configure access permissions for the "Partner" role.
6.2.1 Assigning Task Page Permissions to the “Partner” Role
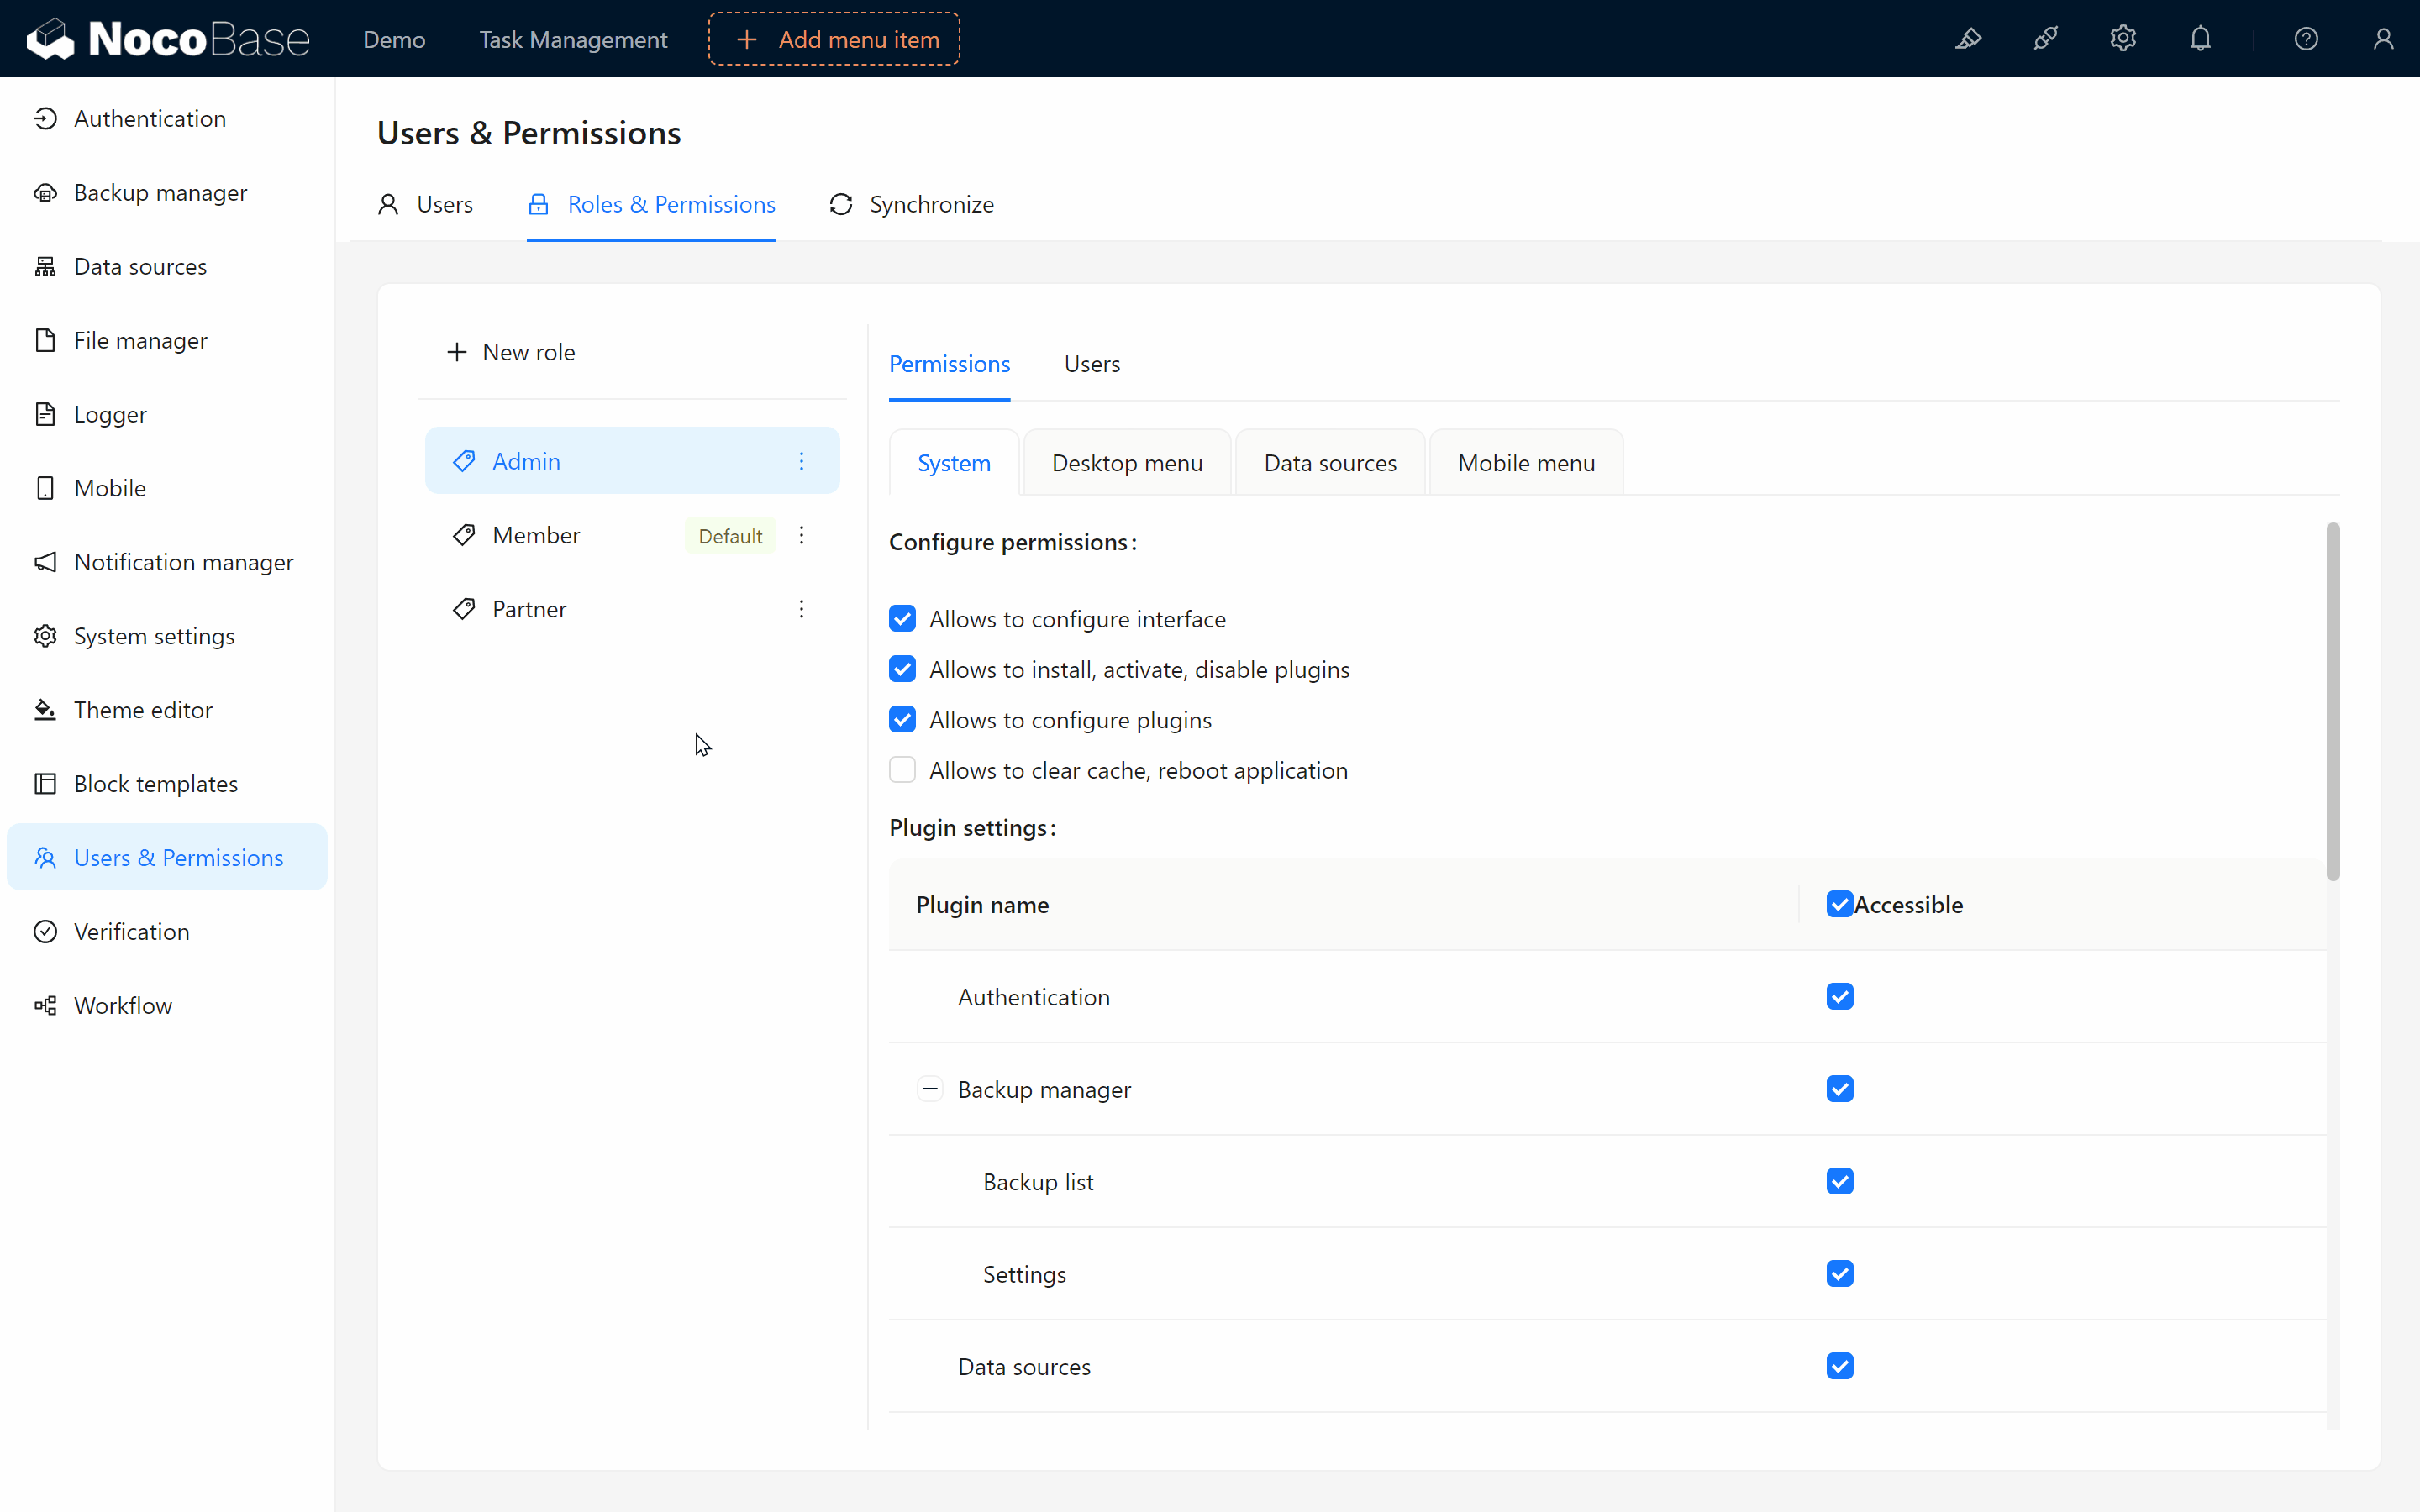
- First, switch back to the Root role (Super Administrator), and go to the "Roles &Permissions" page.
- Click on the "Partner" role to open the configuration page. Here, you will see a "Menu" tab, which represents all pages in the system.
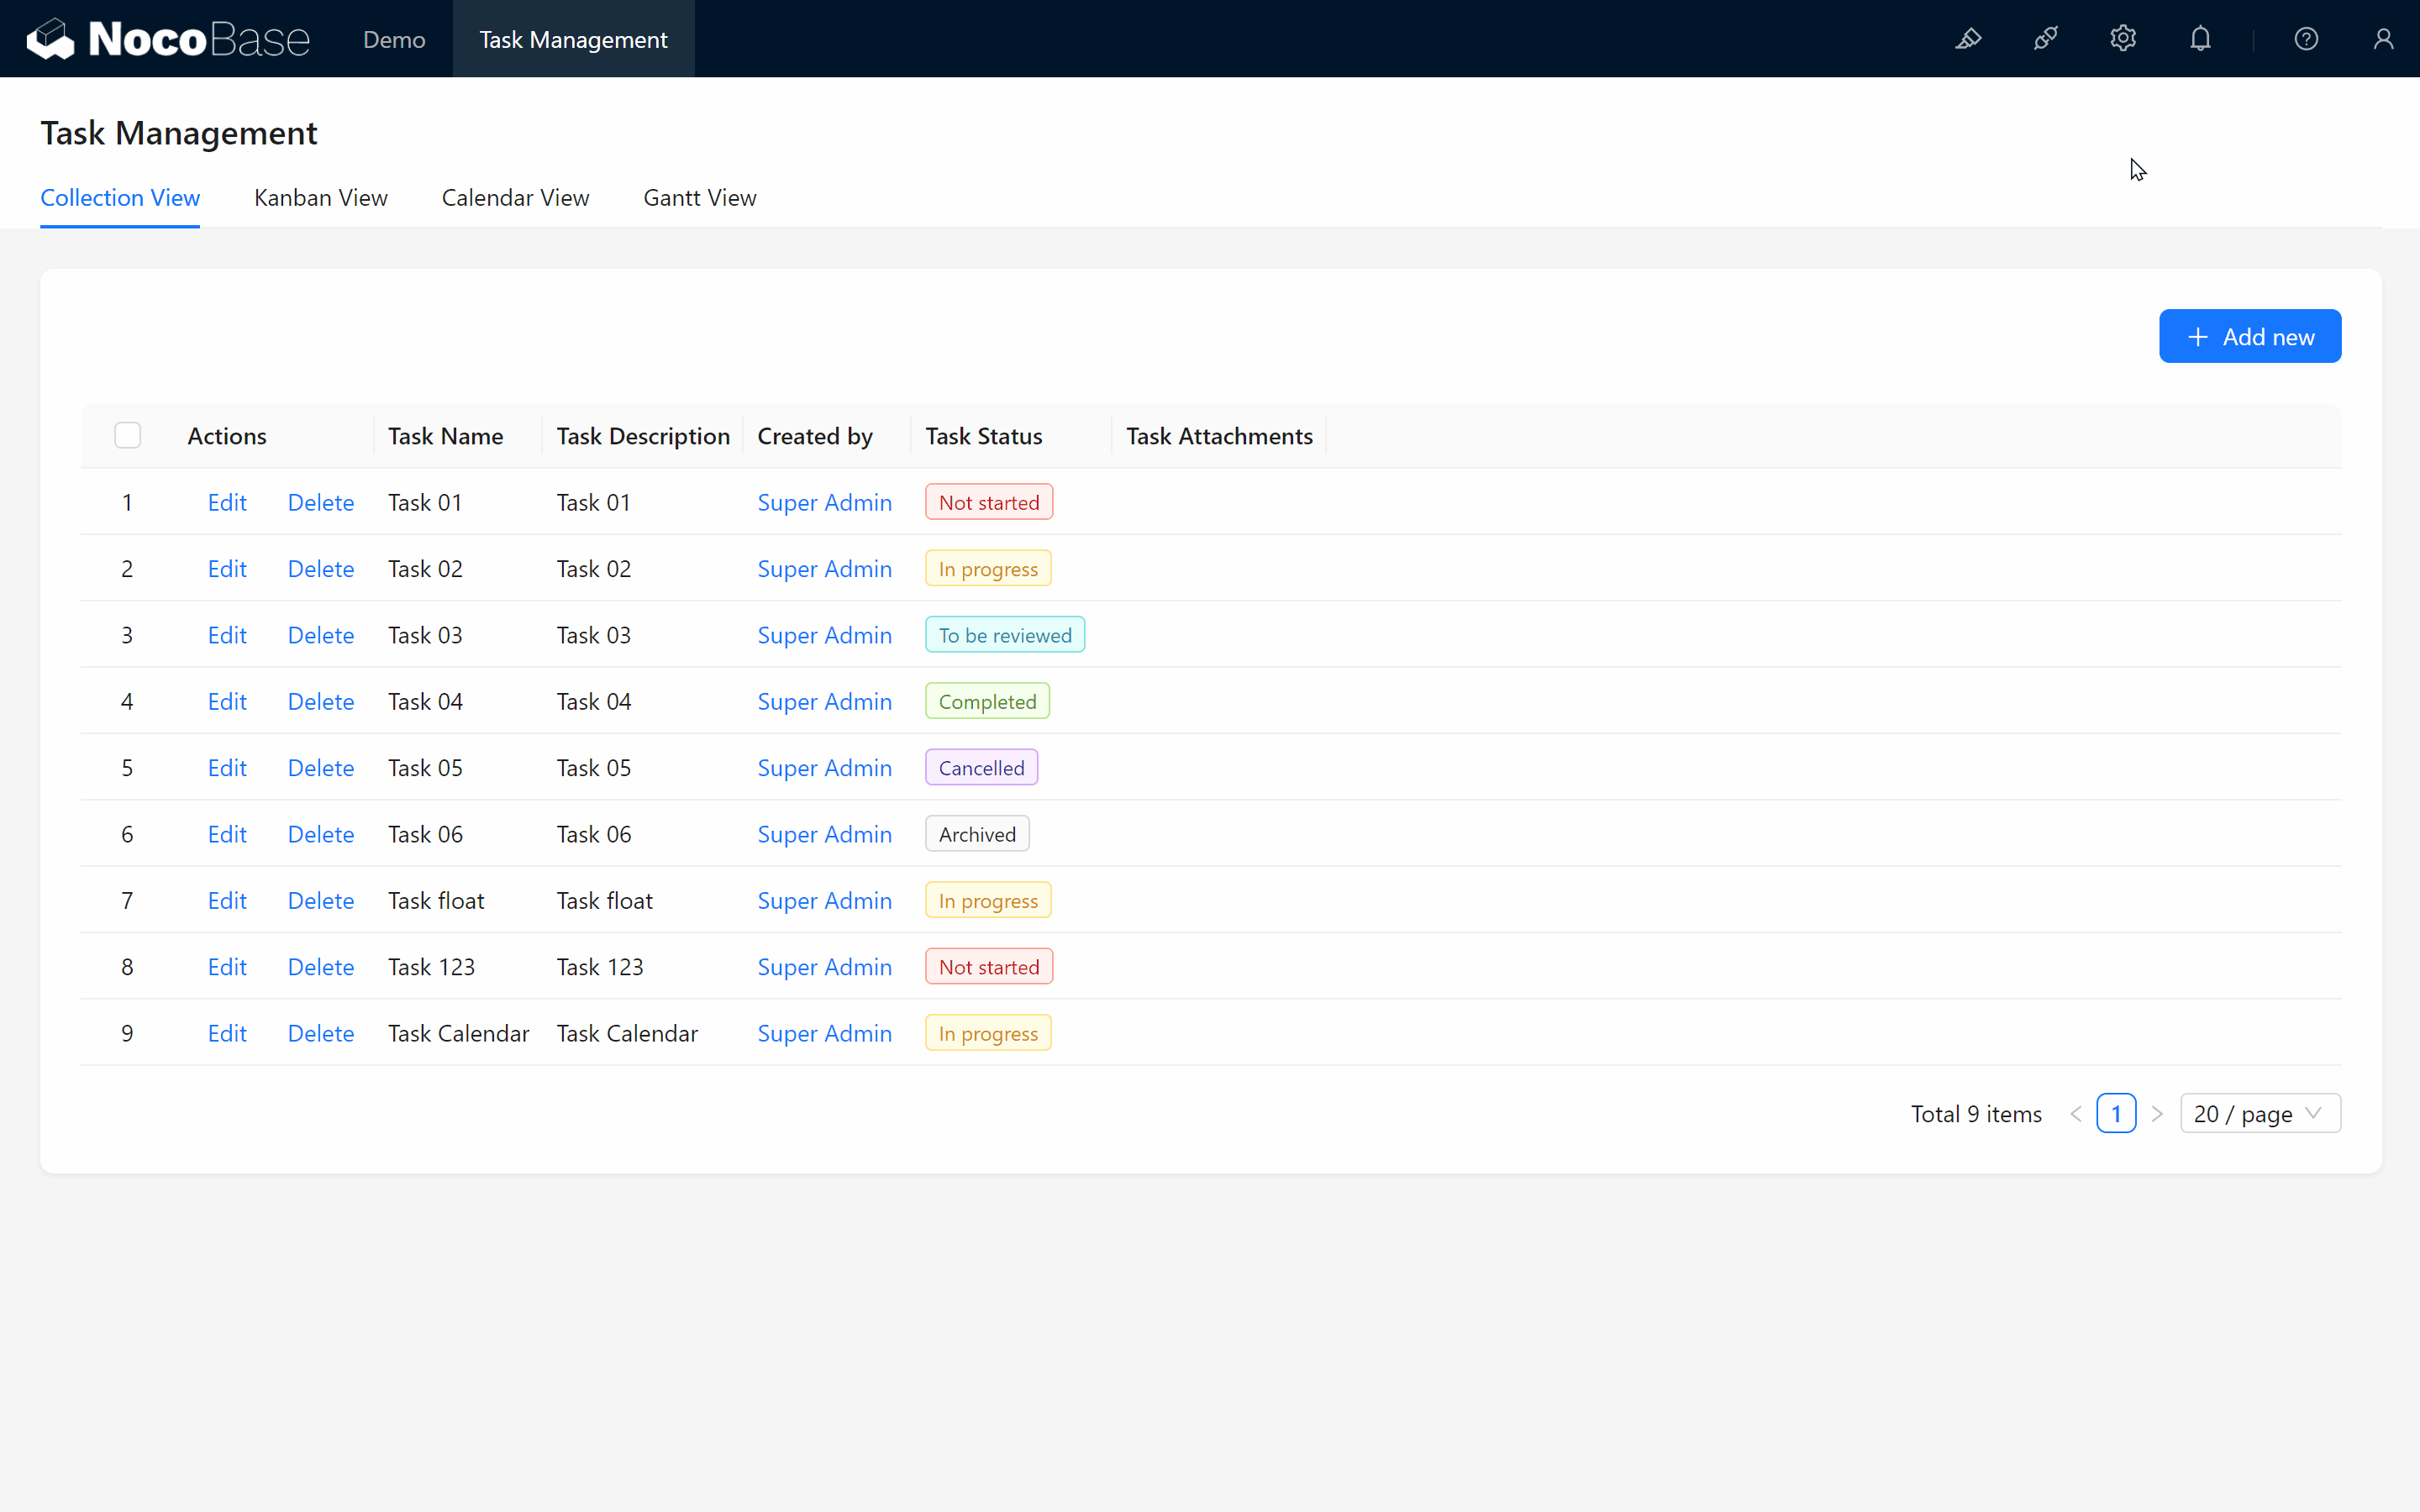
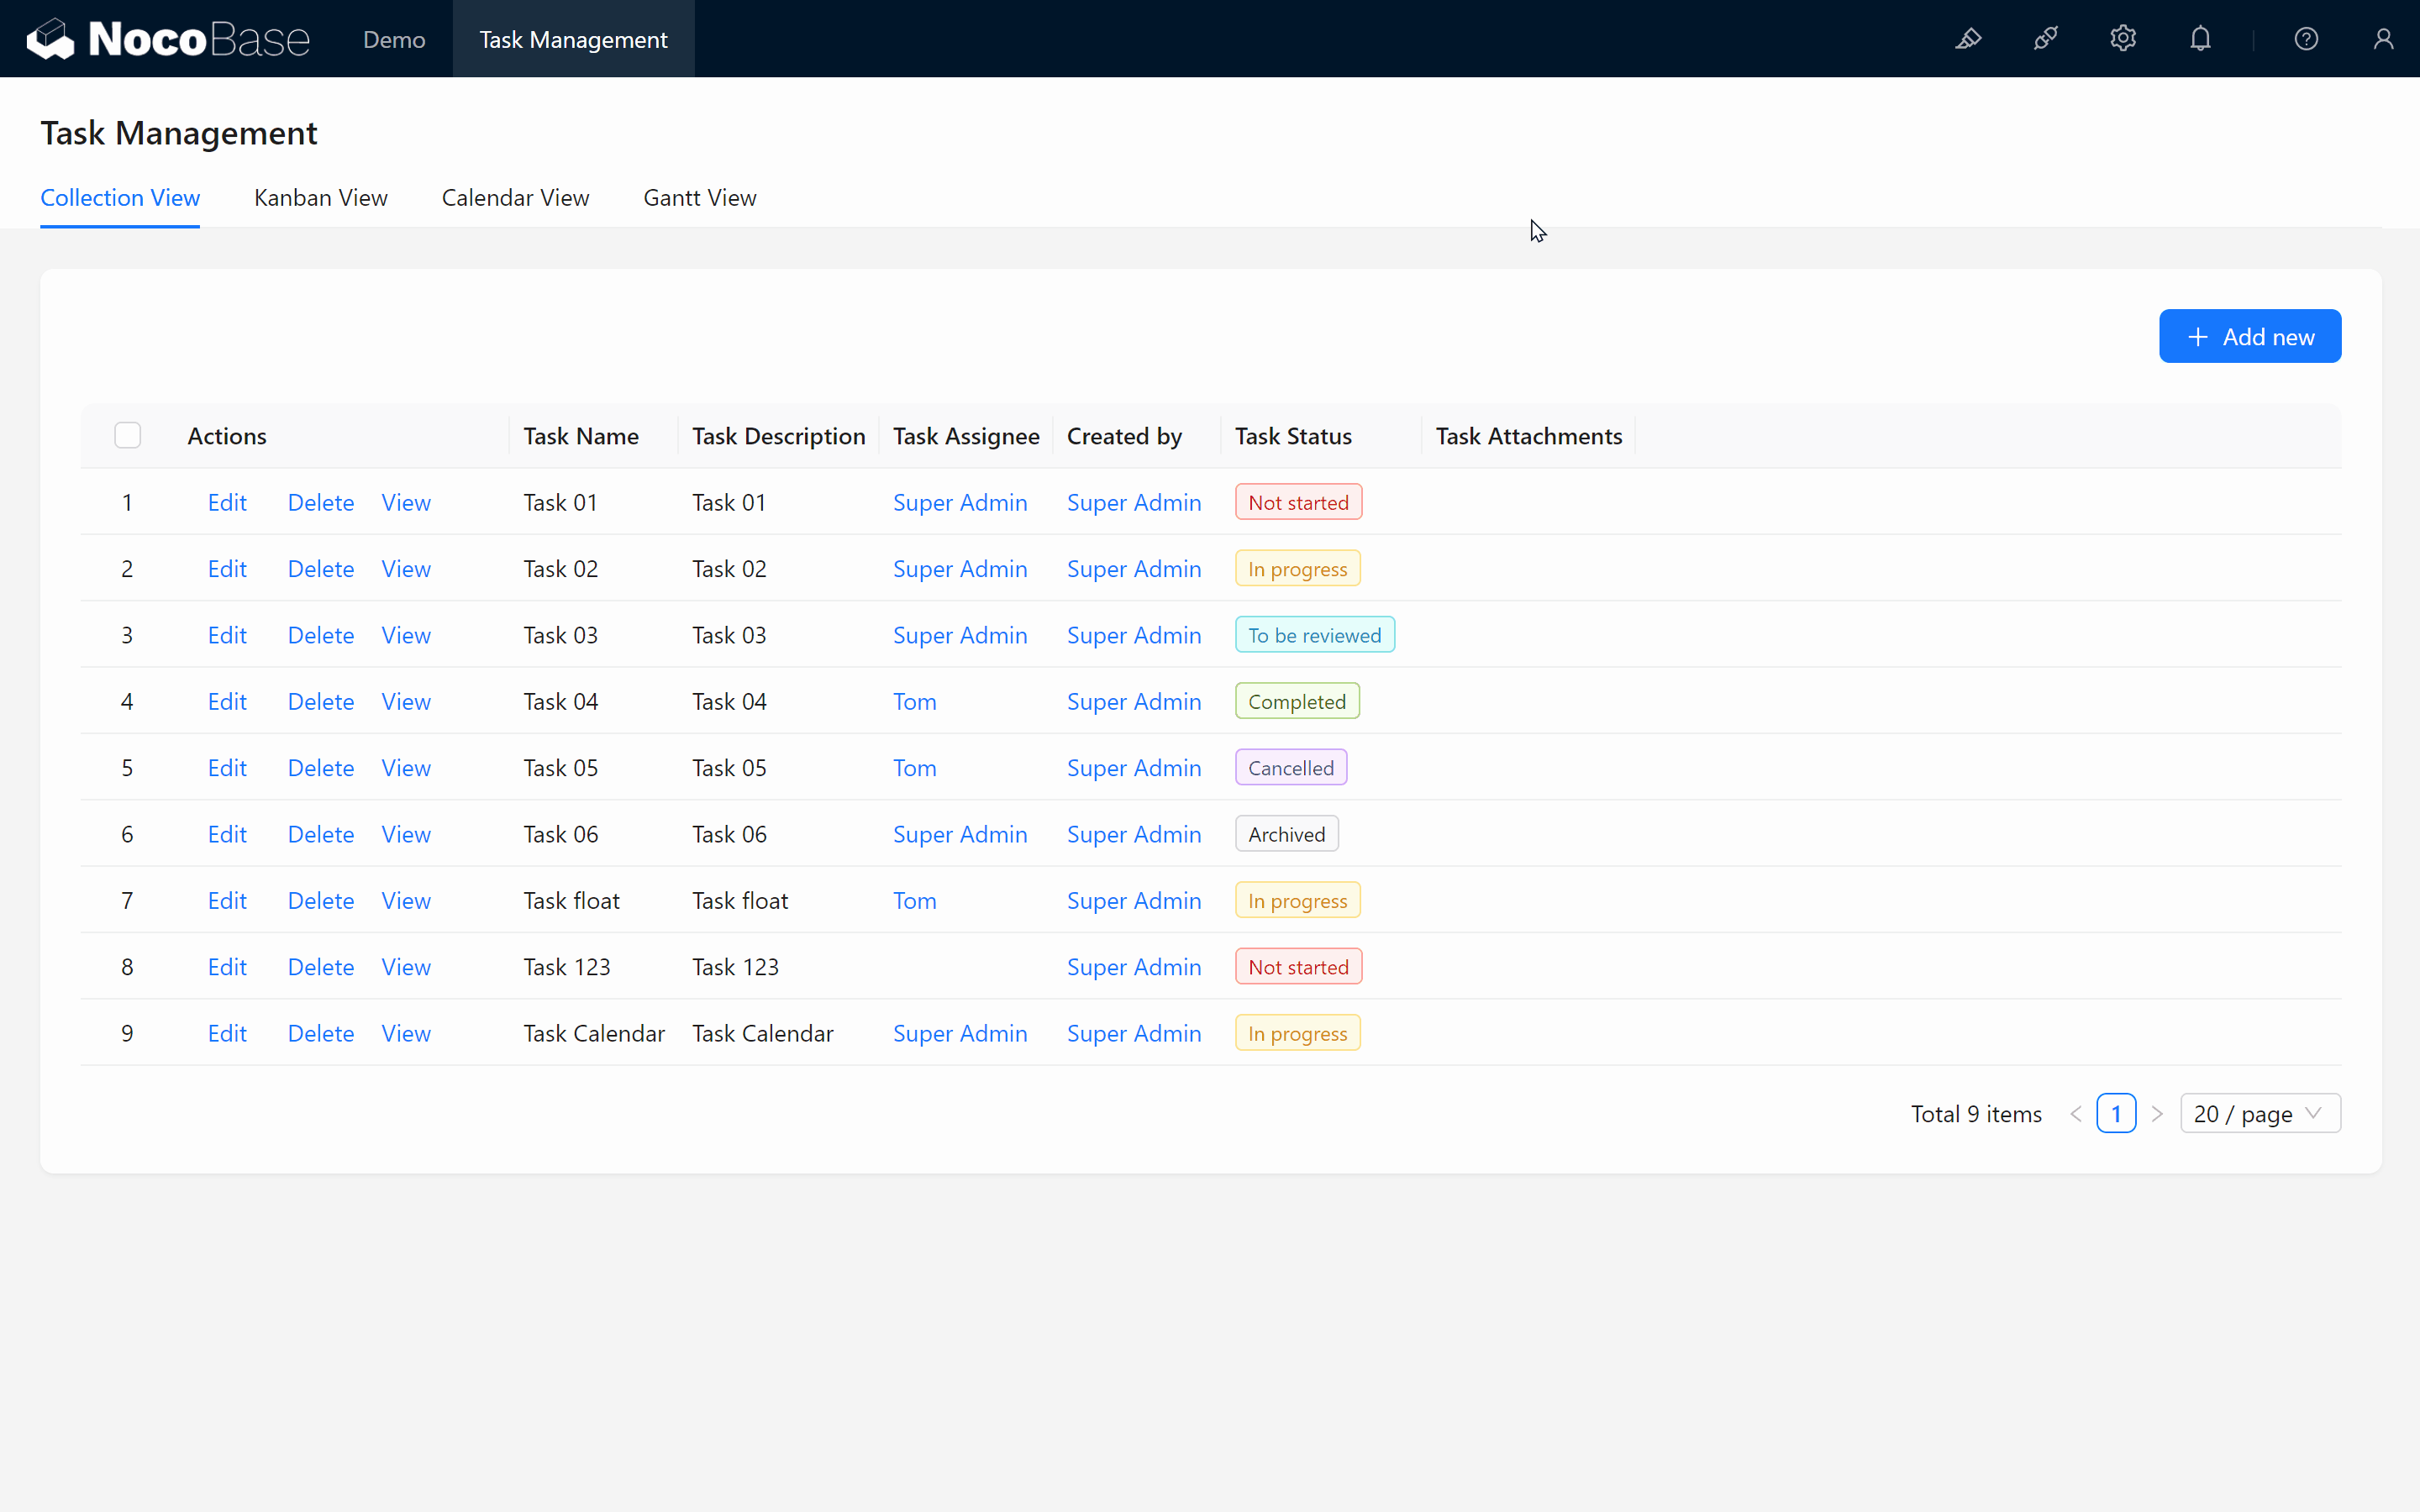
- Check the "Task Management" page permission to allow the "Partner" role to access the task management page.
Return to Personal Center, switch back to the "Partner" role, and you should now be able to see the task management menu page.
6.2.2 Setting Collection Action and Operation Permissions
Although the "Partner" role now has access to the task management page, we need to further restrict their operational permissions. We want the "Partner" to:
- View and edit tasks assigned to them,
- Update task progress,
- But not create or delete tasks.
To achieve this, we need to configure the permissions for the "Tasks." Let’s proceed!
6.2.2.1 Configuring Collection Action Permissions for the “Partner” Role
- Go to the "Roles and Permissions" page, click on the "Partner" role, and switch to the "Data Source" tab.
- Here, you will find settings for "Action permissions." Locate the "Tasks," and assign the "Partner" the “View” and “Edit” permissions.
- We won’t assign "Add" or "Delete" permissions to other roles, so no need to assign these from the start.
At this point, the Partner role has the permissions to view and edit the task data. Next, we need further controls to ensure they can only edit tasks assigned to them.
6.3 Adding a “Responsible Person” Field to Tasks
Now, we’ll assign a responsible person to each task. By designating a responsible person, we ensure that only the task’s responsible person can modify the task, while others can only view it. To achieve this, we’ll use a relationship field to link the task collection with the user collection.
6.3.1 Creating the “Responsible Person” Field
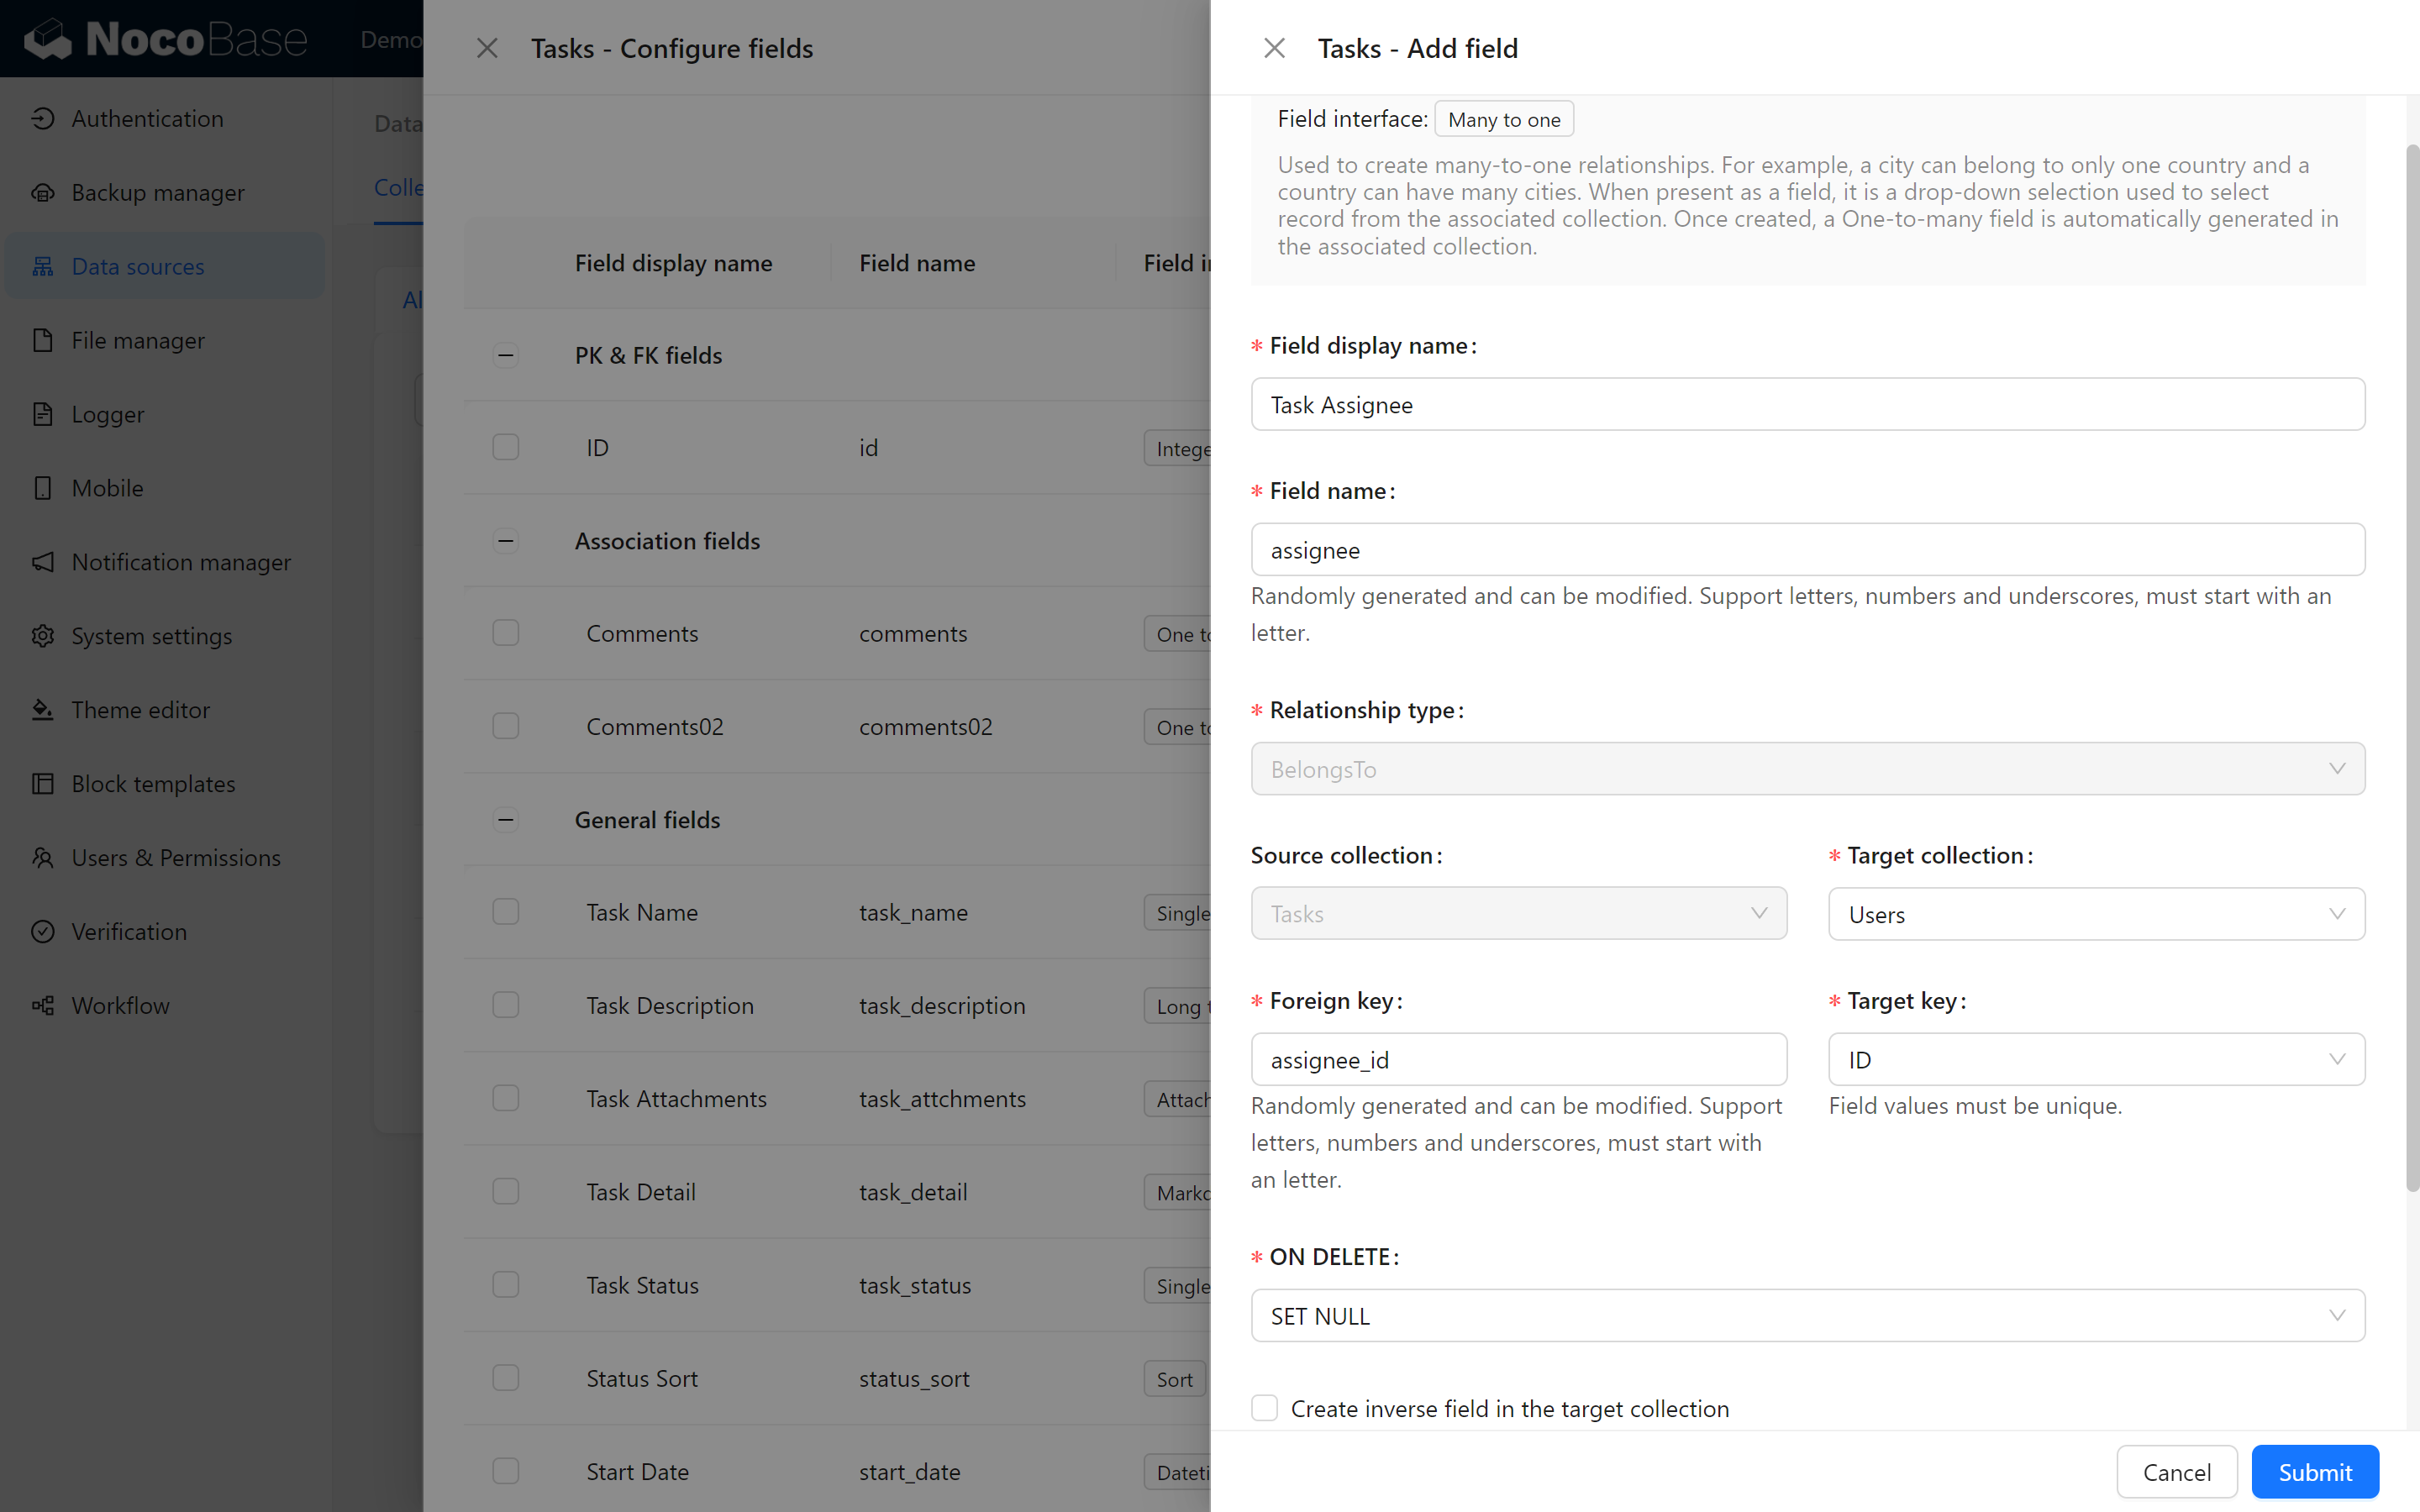
- Go to the "Task collection," click on "Add Field," and select "Relationship Field."
- Choose a "Many-to-One" relationship (since each task can have only one responsible person, but a user can be responsible for multiple tasks).
- Name the field “Responsible Person (Assignee)” . No need to select the reverse relationship for now.
6.3.2 Displaying the “Responsible Person” Field
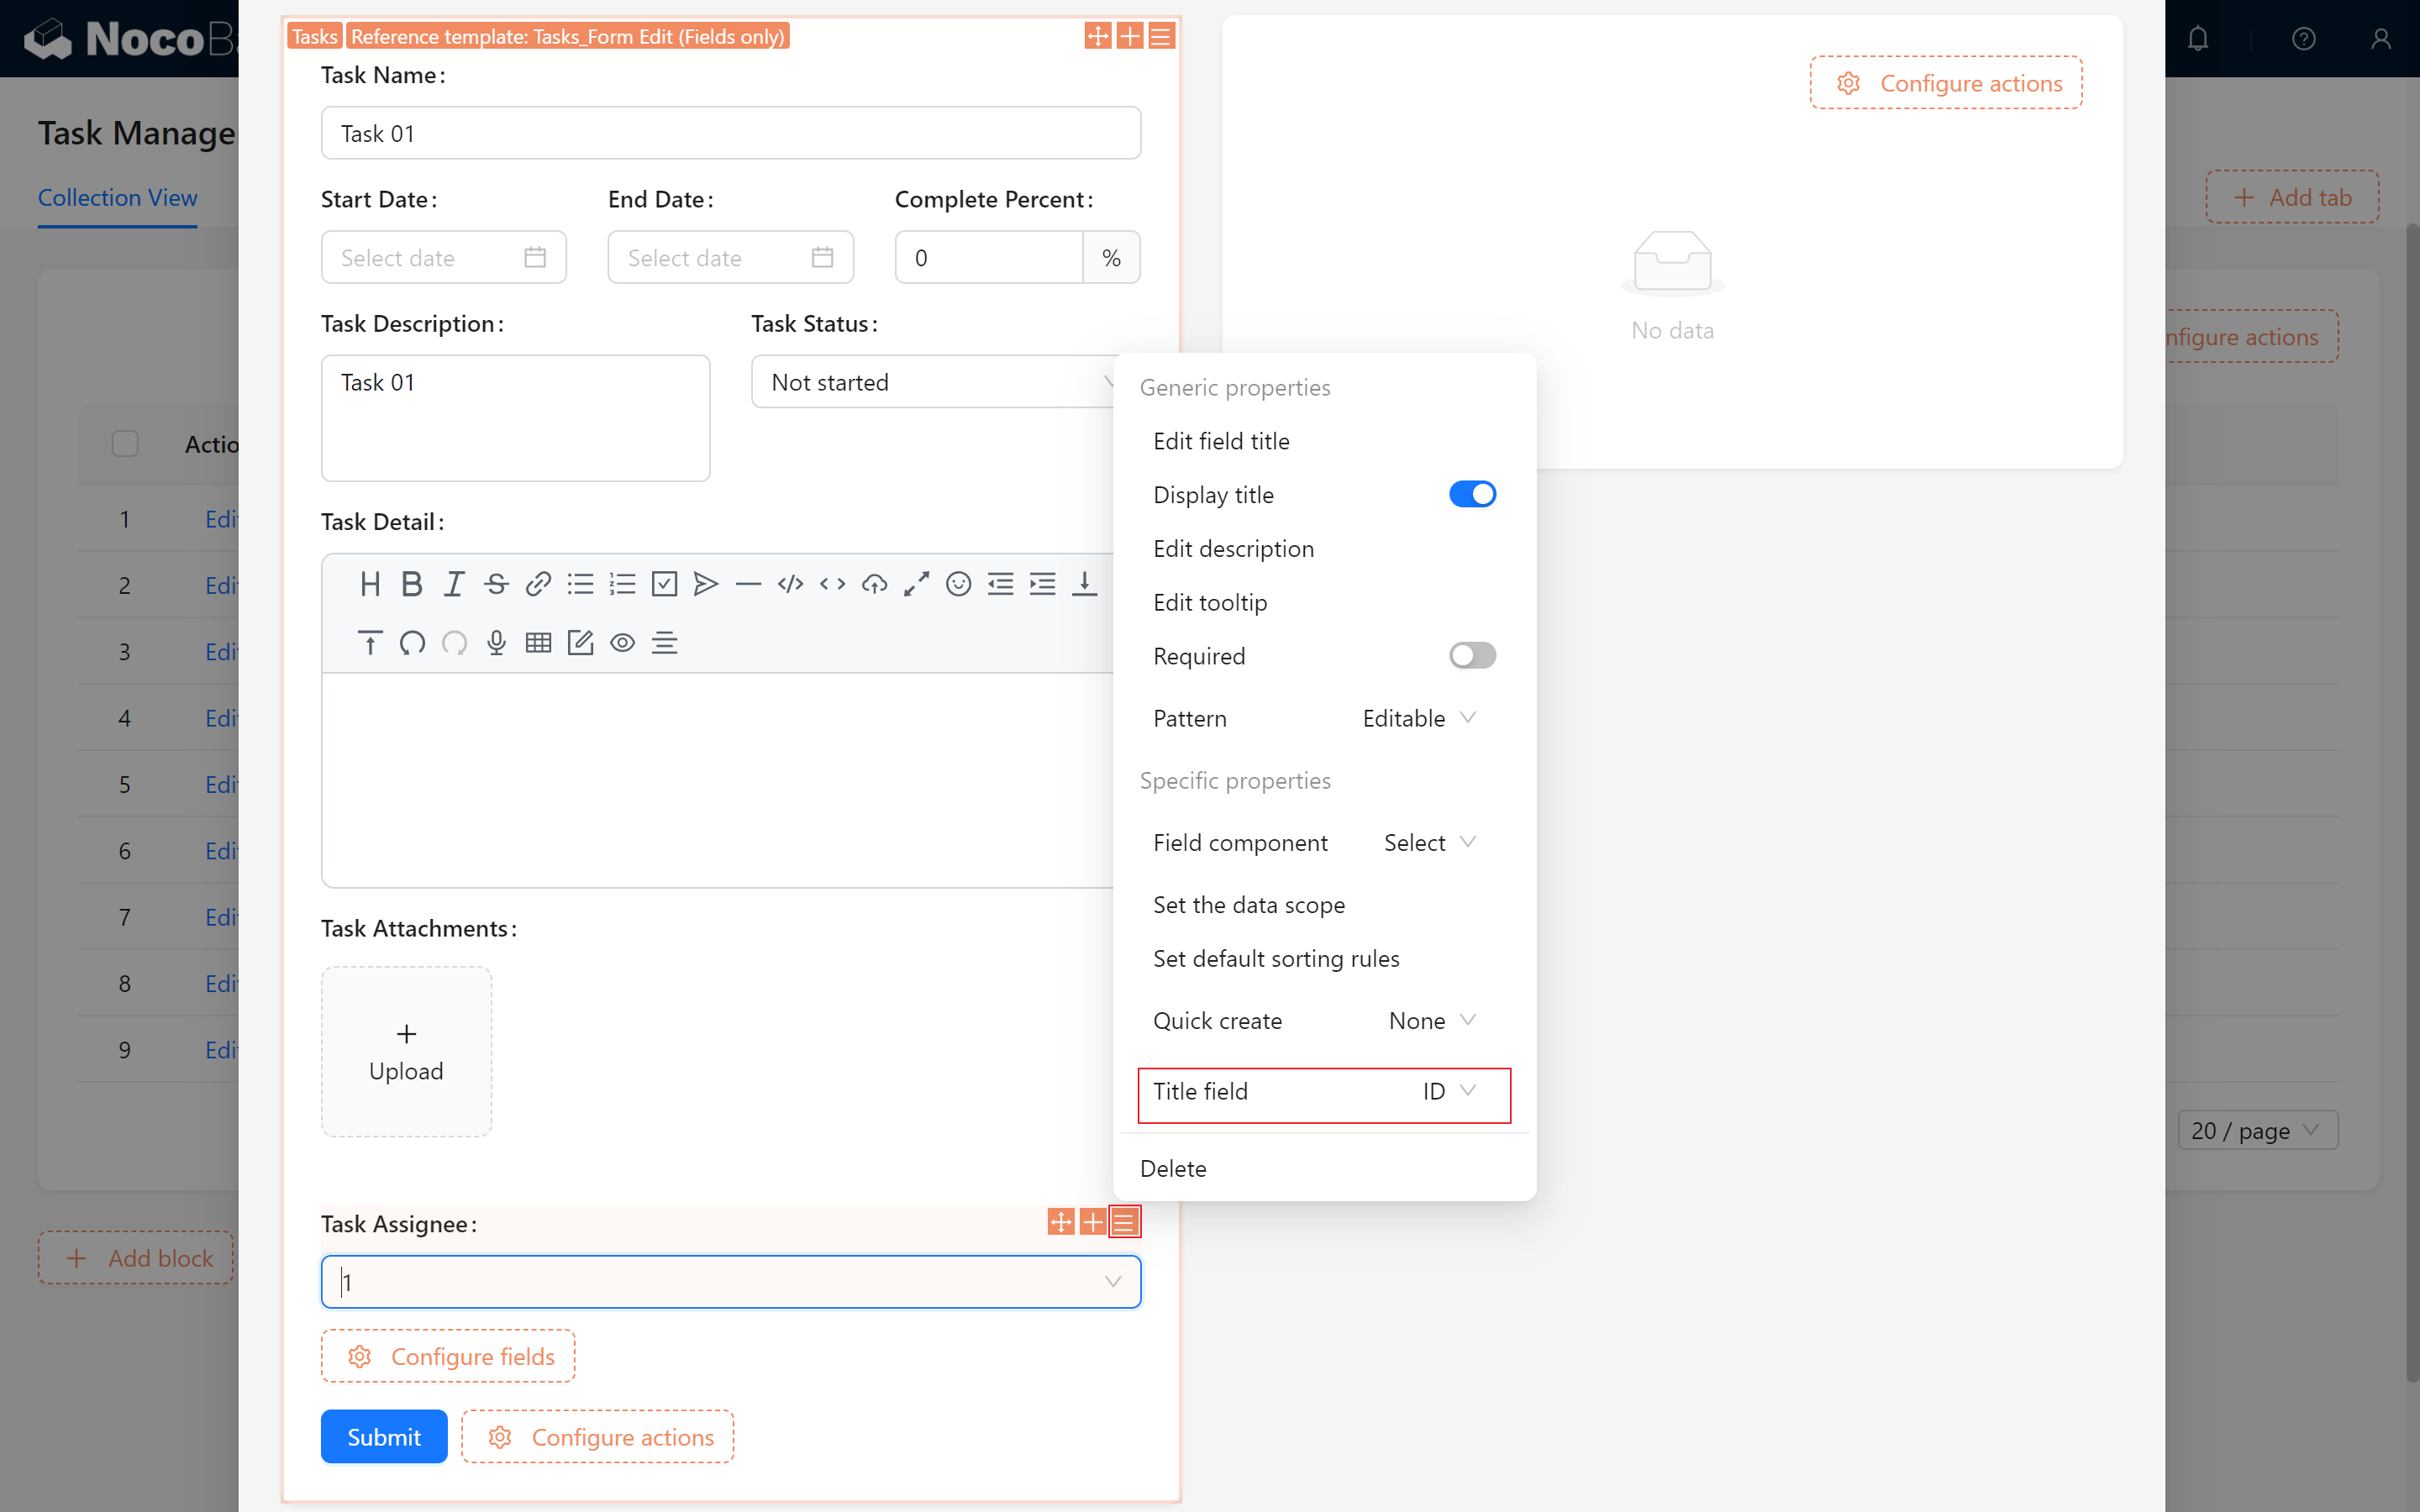
Next, we need to ensure the "Responsible Person" field is displayed in the task management page’s collection and form, making it easy to assign a responsible person to each task. (If the default display field is set to an ID, simply change the title field to “Nickname” to display names.)
6.4 Using User & Permissions Management to Control Access
Here comes the highlight! Now, we’ll use NocoBase’s Permission Management to implement a powerful feature: only the responsible person and creator of a task can edit it, while others can only view it. This is where NocoBase’s flexibility truly shines.
6.4.1 Simple Trial — Only the Responsible Person Can Edit the Form
We want only the task’s responsible person to be able to edit it, so we’ll set the following conditions:
- Return to the “Partner” role’s data collection permissions, open the configuration for the task collection, and click on “Data Scope” under “Edit Permission.”
- Create a custom rule called “Assignee Can Edit”: When "Assignee/ID" equals "Current User/ID," editing is permitted; This means that only the task’s responsible person can edit it, while others can only view it.
- Since we’re using the user collection for the responsible person field, and the logged-in user is also in the user collection, this rule perfectly meets our initial requirement.
Click Add, then Confirm.
Now let’s go back to the page to check:
Perfect! When we switch to the Partner role and revisit the page, only tasks for which we are the assignee will can edit tasks correctly.

6.4.2 Adding Conditions for Creators to Modify Forms
You may have noticed a new issue:
Since we are not the responsible person for most tasks, we can’t edit the form ourselves, and other colleagues also cannot see task details!
No worries—remember, we assigned the Partner role view permissions for all data earlier?
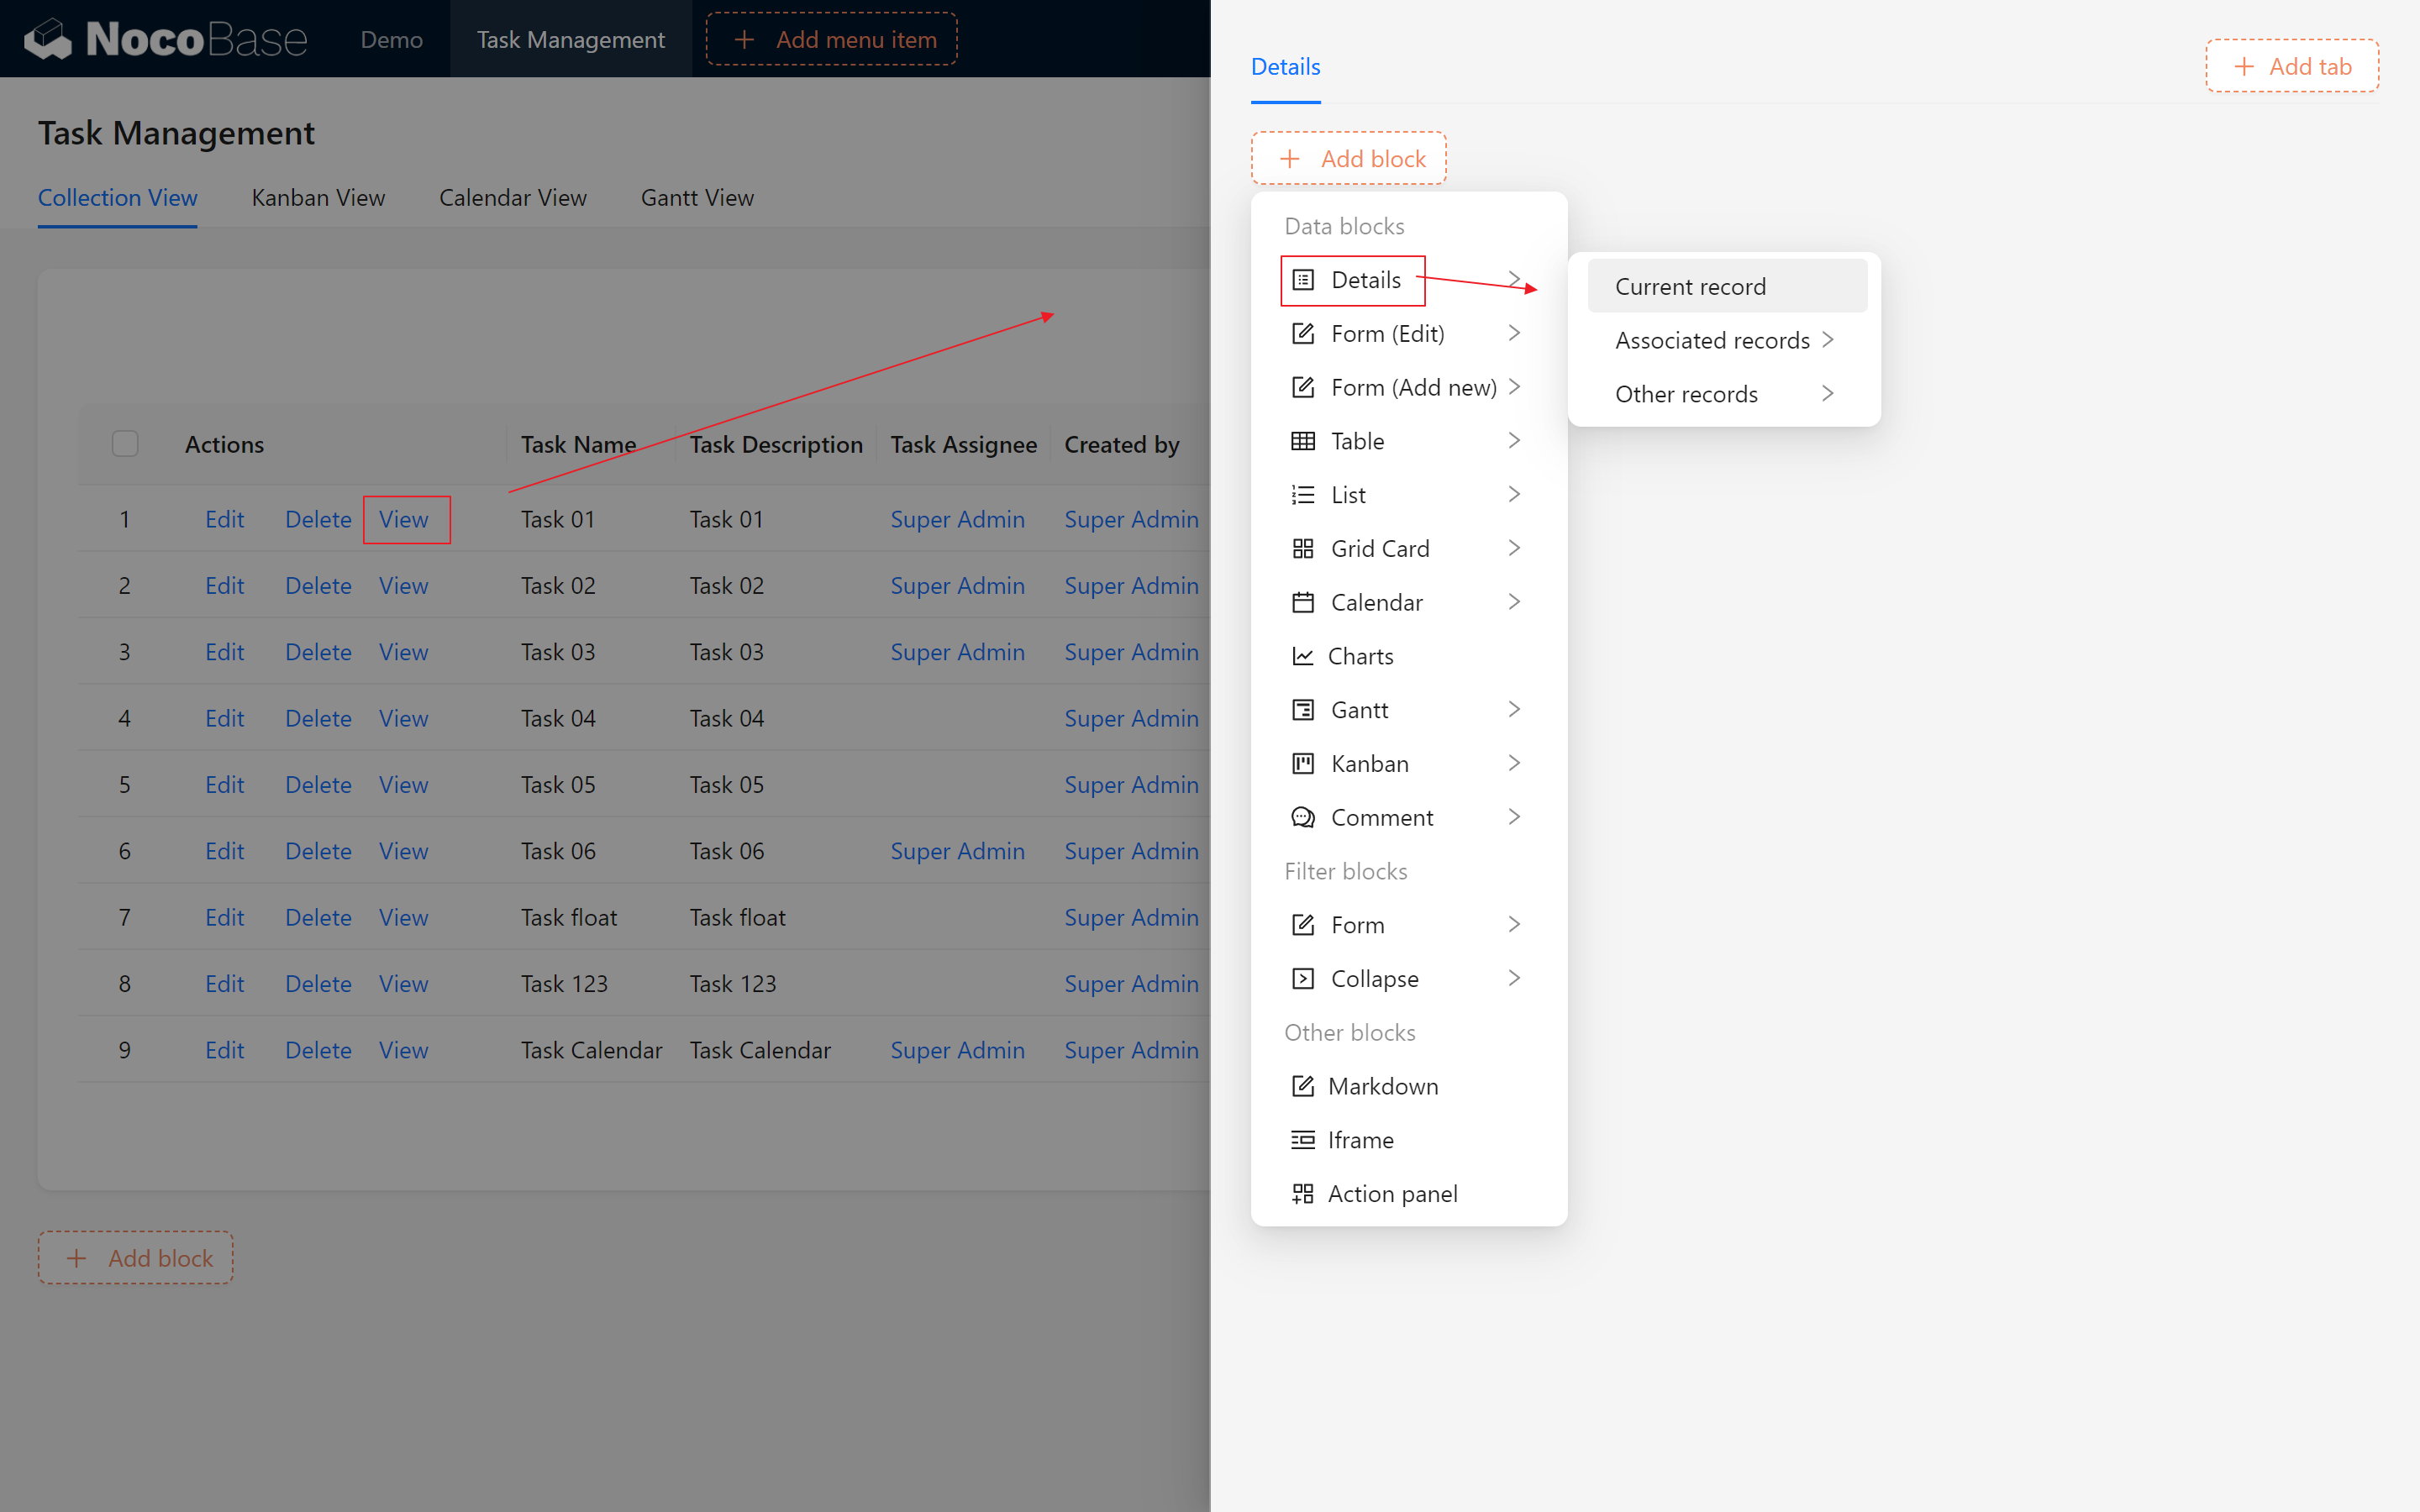
- Return to the page configuration, select “View” and add a view operation.
- Similar to the edit permissions dialog, create a view dialog, and make sure to choose the “Details” section.
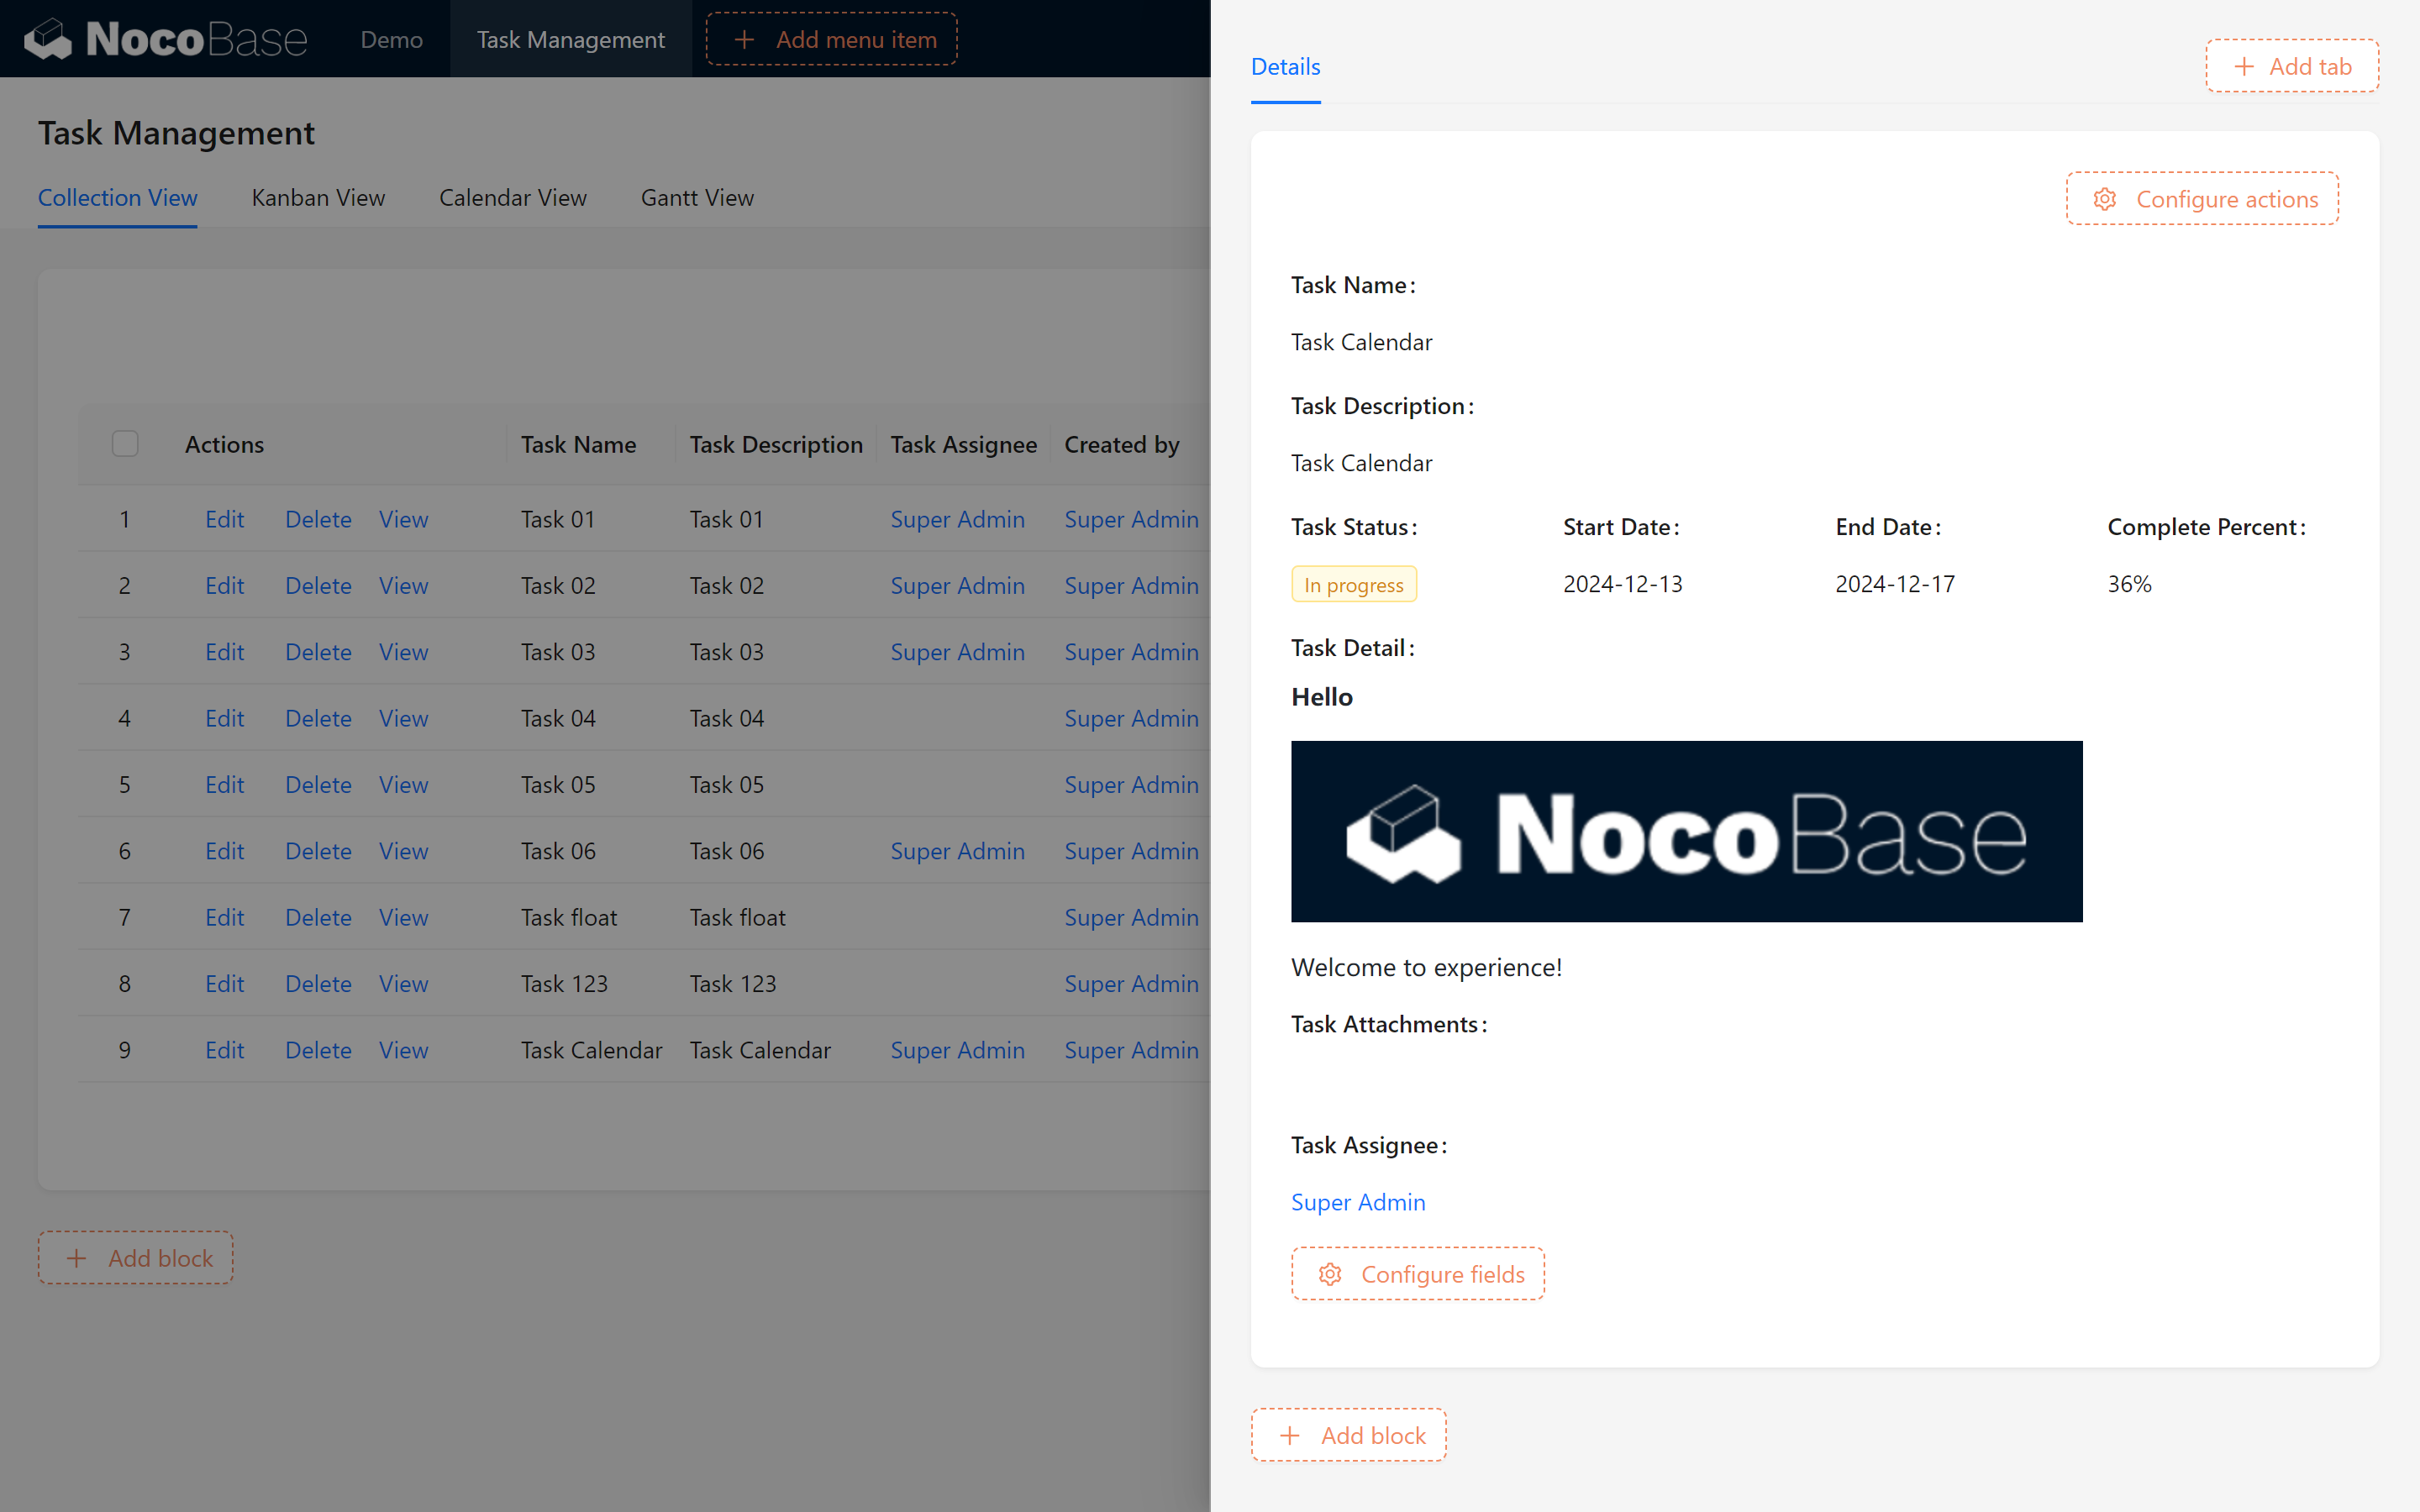
Done!
6.5 Verifying Permission Control
If you switch between different users to view the form, you’ll notice that the form sections automatically adjust to show only the operations permitted for each user. All tasks for which a user is responsible will display editing options, while tasks outside their responsibility will only show viewing options.
Switching back to the Root role restores full permissions. This is the powerful permission control system of NocoBase!
Next, you can freely assign task responsibilities, invite teammates to collaborate, and test the permissions we have set.
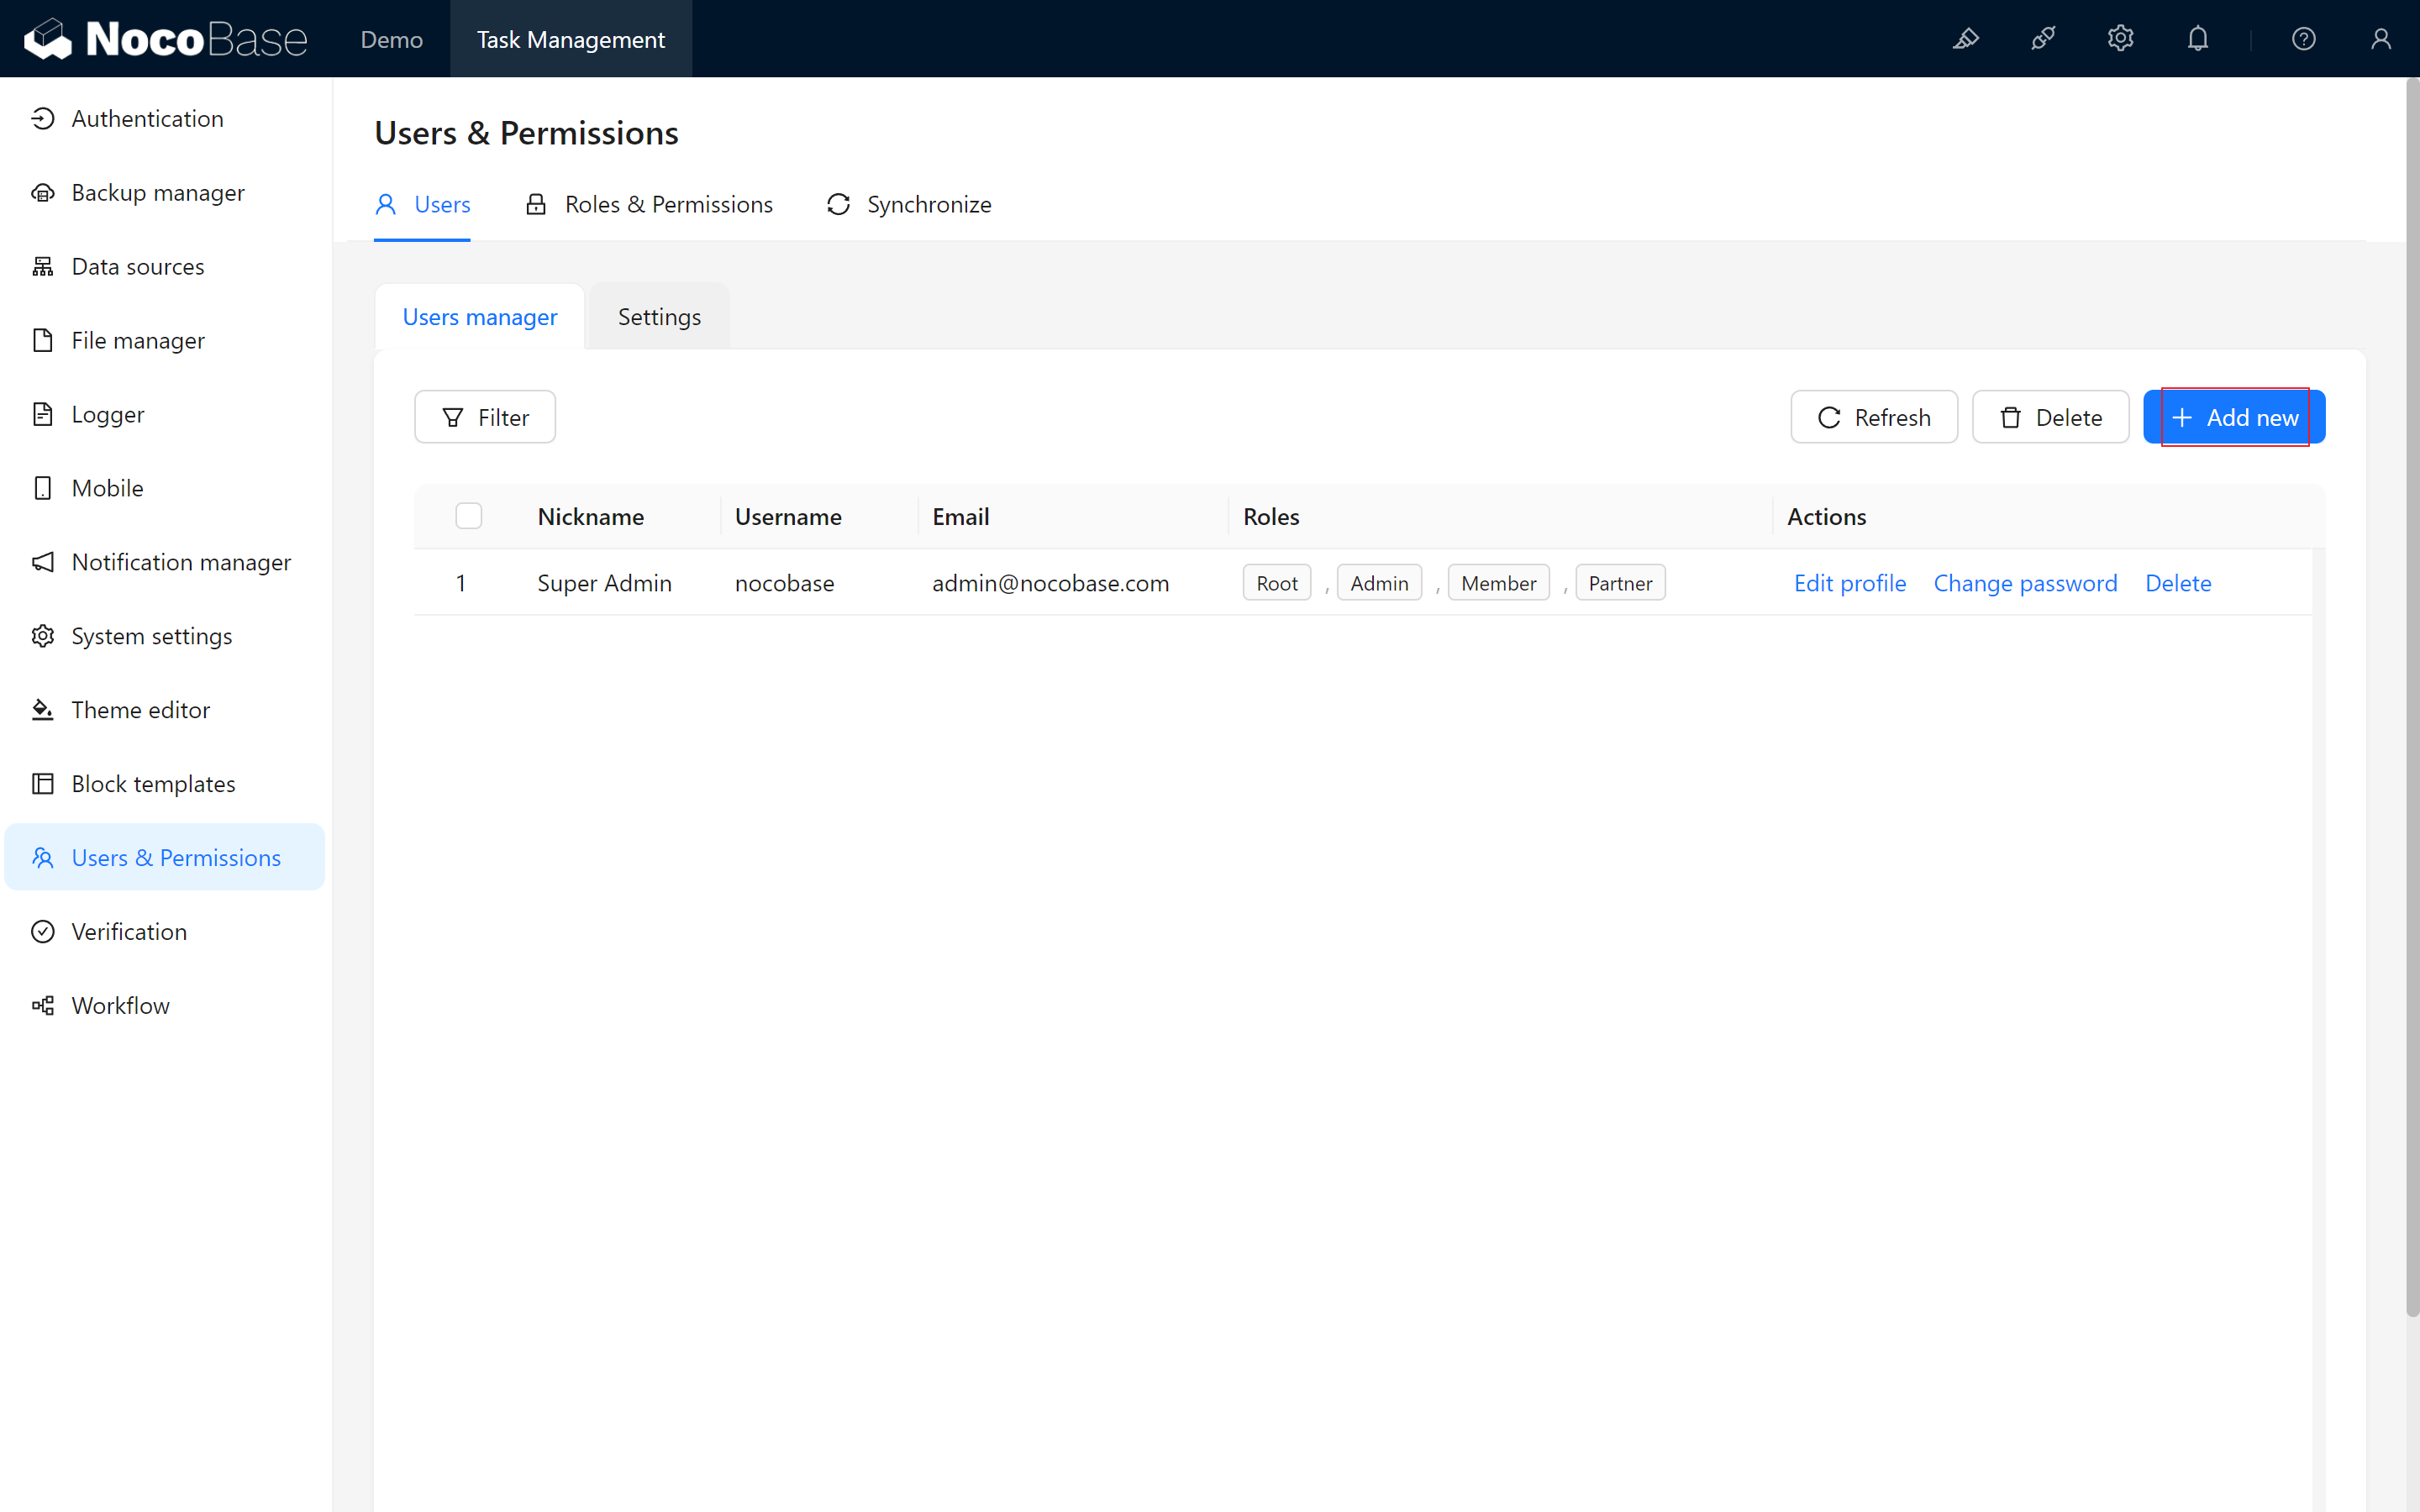
6.5.1 Creating a New User and Assigning a Role
- Create a new user, for example, Tom, and assign him the "Partner" role.

- In the task management page, assign a few tasks to Tom.
6.5.2 Login Testing
Have Tom log into the system to check if he can view and edit tasks assigned to him. Based on the permission rules, Tom should only be able to edit tasks he is responsible for, while all other tasks are read-only.
The edit form permissions have now been successfully synchronized across all pages!
Summary
Congratulations! By now, you’ve learned how to create roles, assign permissions, and set custom permissions in NocoBase, ensuring that team members can only edit tasks assigned to them. Through these steps, you have established a clear, organized permission management system for team collaboration.
Challenge Task
Currently, Tom can view and edit tasks assigned to him, but you may notice he cannot leave comments or engage in task discussions. So, how can we assign Tom permissions to freely comment and participate in discussions? This will be an interesting challenge!
Challenge Hint:
You can revisit the role permission settings and adjust the "Partner" role, especially the collection settings, to see how to allow Tom commenting privileges while ensuring his other task restrictions remain intact.
Give it a try! We’ll reveal the solution in the following section.
In the next chapter, we’ll implement the “Team Member Activity” feature and introduce another powerful module: Workflow. With Workflow, you can enable data flow, trigger various actions, and automate complex business processes in your system. Ready to continue exploring? See you in Chapter 7: Workflow
Explore further and unleash your creativity! If you encounter any issues, don’t forget to check the NocoBase Official Documentation or join the NocoBase Community for discussions.