

Chapter 6: Workflows — Let the System Do the Work
In the last chapter, we added permissions so different roles see different content. But all operations are still done manually — when a new ticket comes in, someone has to go check; when a status changes, nobody gets notified.
In this chapter, we'll make the system do things automatically.
6.1 What Is a Workflow?
A workflow is a set of automated "if... then..." rules.
Think of it like an alarm on your phone that goes off every morning at 8 AM. That alarm is the simplest workflow — when a condition is met (it's 8 AM), an action executes automatically (the alarm rings).
NocoBase workflows follow the same idea:
- Trigger: The entry point for the workflow. For example, "someone created a new ticket" or "a record was updated"
- Condition: An optional filtering step. For example, "only continue if the assignee is not empty"
- Action: The step that does the actual work. For example, "send a notification" or "update a field"
Actions can be chained with multiple nodes. Common node types include:
- Flow control: Condition, Parallel branch, Loop, Delay
- Data operations: Create record, Update record, Query record, Delete record
- Notifications & external: Notification, HTTP request, Calculation
This tutorial only covers a few of the most common ones — once you learn to combine them, you'll be able to handle most scenarios.
Trigger Types at a Glance
NocoBase offers several trigger types, which you select when creating a workflow:
| Trigger | Description | Typical Use Case |
|---|---|---|
| Collection event | Fires when a record is created, updated, or deleted | New ticket notification, status change logging |
| Schedule | Fires on a Cron expression or fixed time | Daily reports, periodic data cleanup |
| Post-action event | Fires after a user performs a UI action | Send notification after form submission |
| Approval | Initiates an approval flow with multi-level support | Leave requests, purchase approvals |
| Custom action | Bound to a custom button, fires on click | One-click archiving, batch operations |
| Pre-action event | Intercepts a user action synchronously before it completes | Pre-submit validation, auto-fill fields |
| AI Employee | Exposes the workflow as a tool for AI employees to call | AI-driven business operations |
This tutorial uses both Collection event and Post-action event triggers. The other types work similarly; once you've learned these, you can pick up the rest quickly.
NocoBase workflows are a built-in plugin — no extra installation needed, ready to use out of the box.
6.2 Scenario 1: Automatically Notify the Assignee on New Tickets
Requirement: When someone creates a new ticket and specifies an assignee, the system automatically sends an in-app message to the assignee, letting them know "there's work to do."
Step 1: Create a Workflow
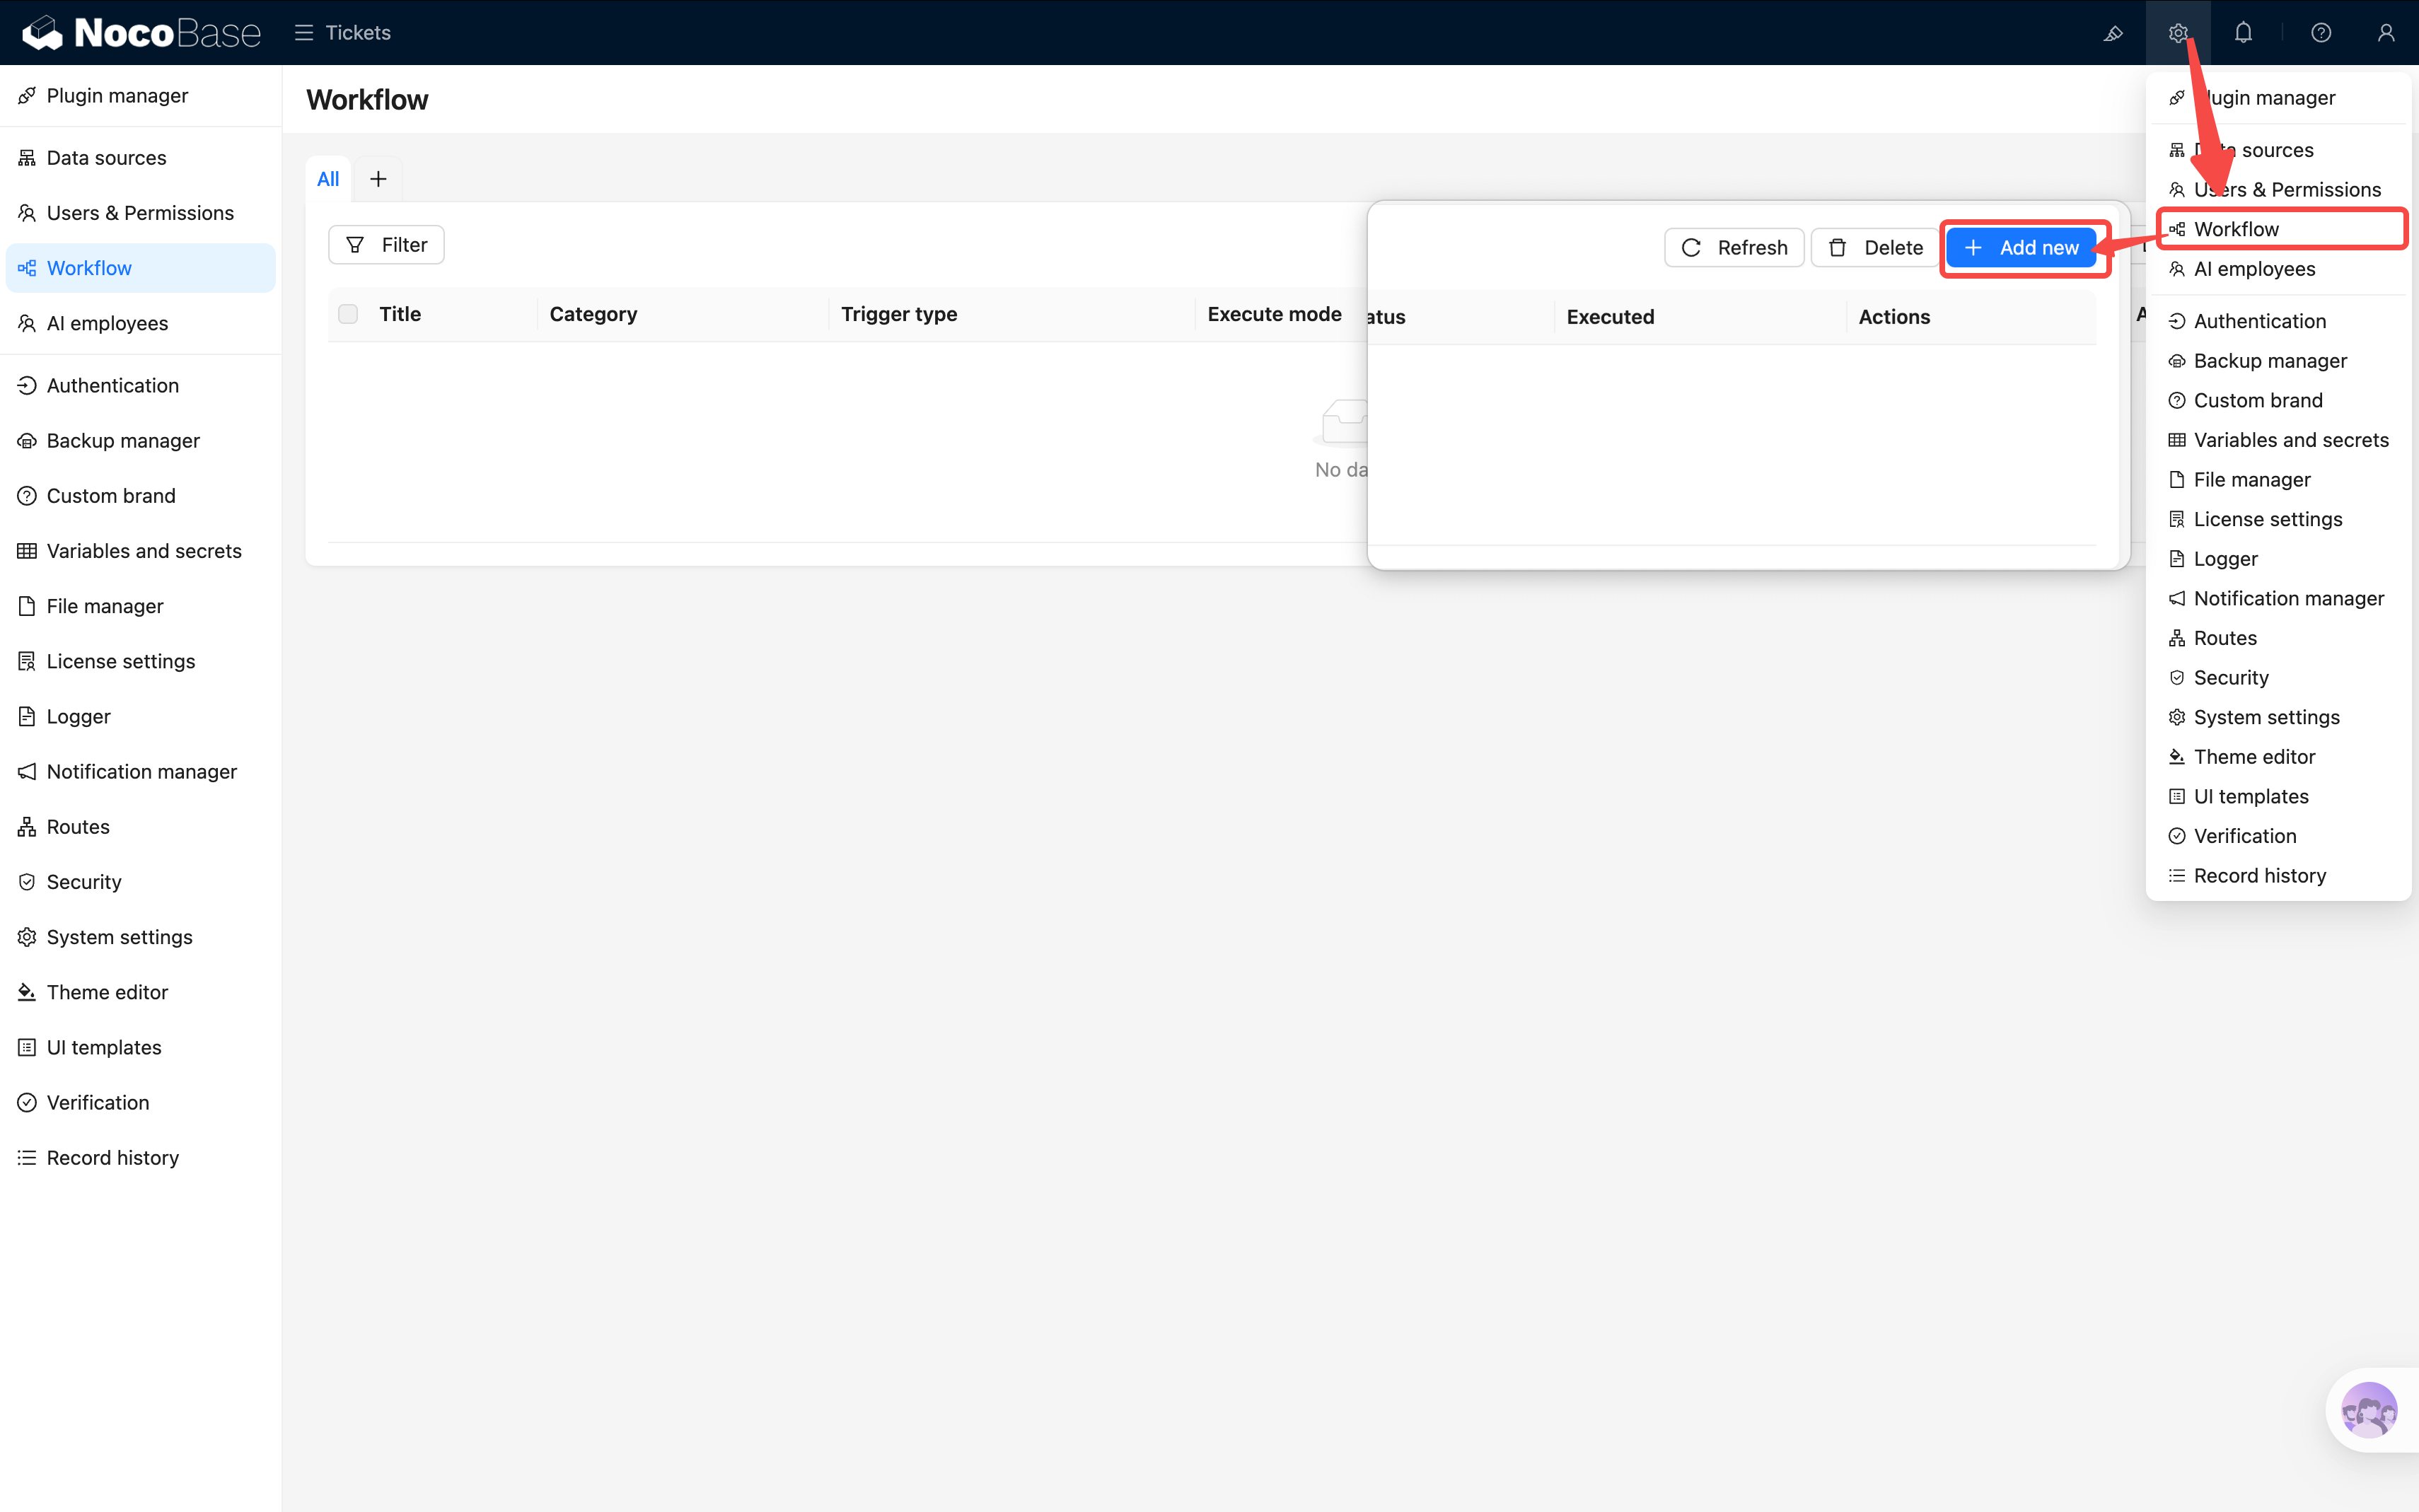
Open the plugin settings menu in the top-right corner and go to Workflow management.
Click New, and in the dialog that appears:
- Name: Enter "Notify assignee on new ticket"
- Trigger type: Select Collection event
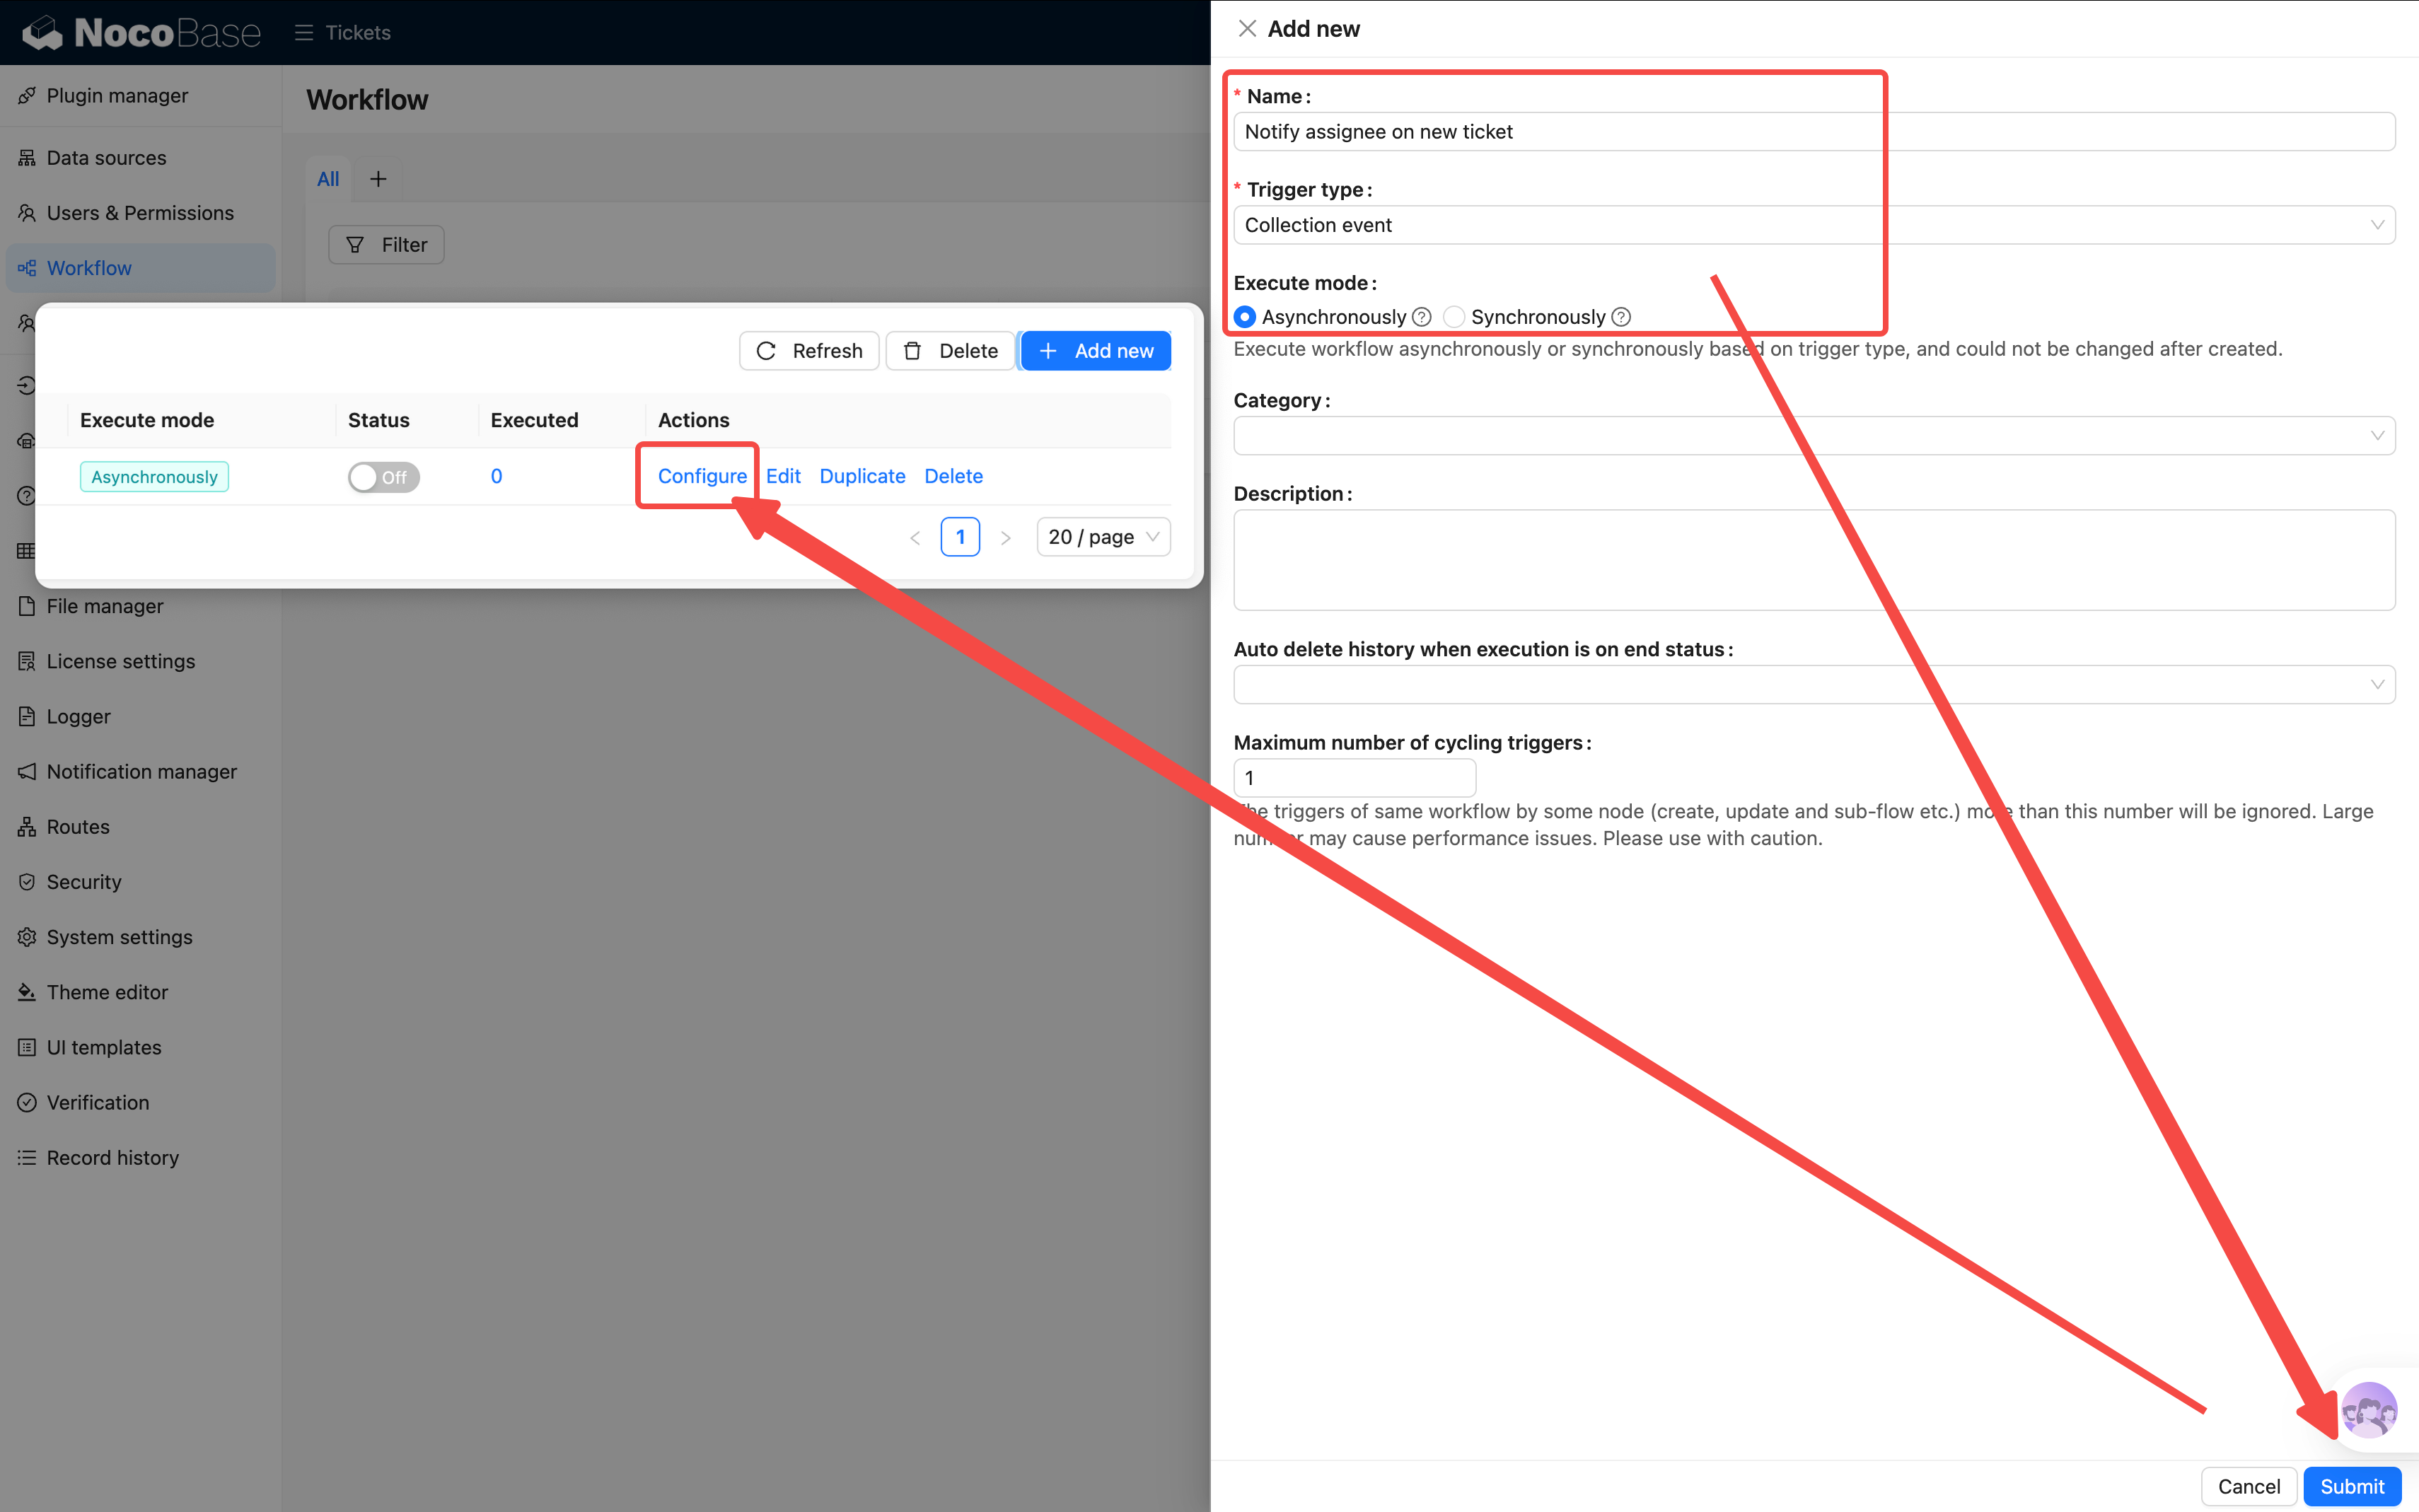
After submitting, click the Configure link in the list to enter the flow editor.
Step 2: Configure the Trigger
Click the trigger card at the top to open its configuration drawer:
-
Collection: Select Main datasource / "Tickets"
-
Trigger on: Select "After record created or updated"
-
Changed fields: Check "Assignee" — the workflow only triggers when the Assignee field changes, avoiding unnecessary notifications from other field updates (when creating a record, all fields are considered changed, so new tickets will also trigger)
-
Only triggers when conditions are met: Set the mode to "Match any condition in the group," then add two conditions:
assignee_idis not emptyAssignee / IDis not empty
Why two conditions? Because at trigger time, the form may only have the foreign key (assignee_id) without the associated object loaded, or vice versa. Using OR ensures the workflow triggers as long as an assignee is specified.
-
Preload associations: Check "Assignee" — the notification node needs the assignee's information, so it must be preloaded in the trigger
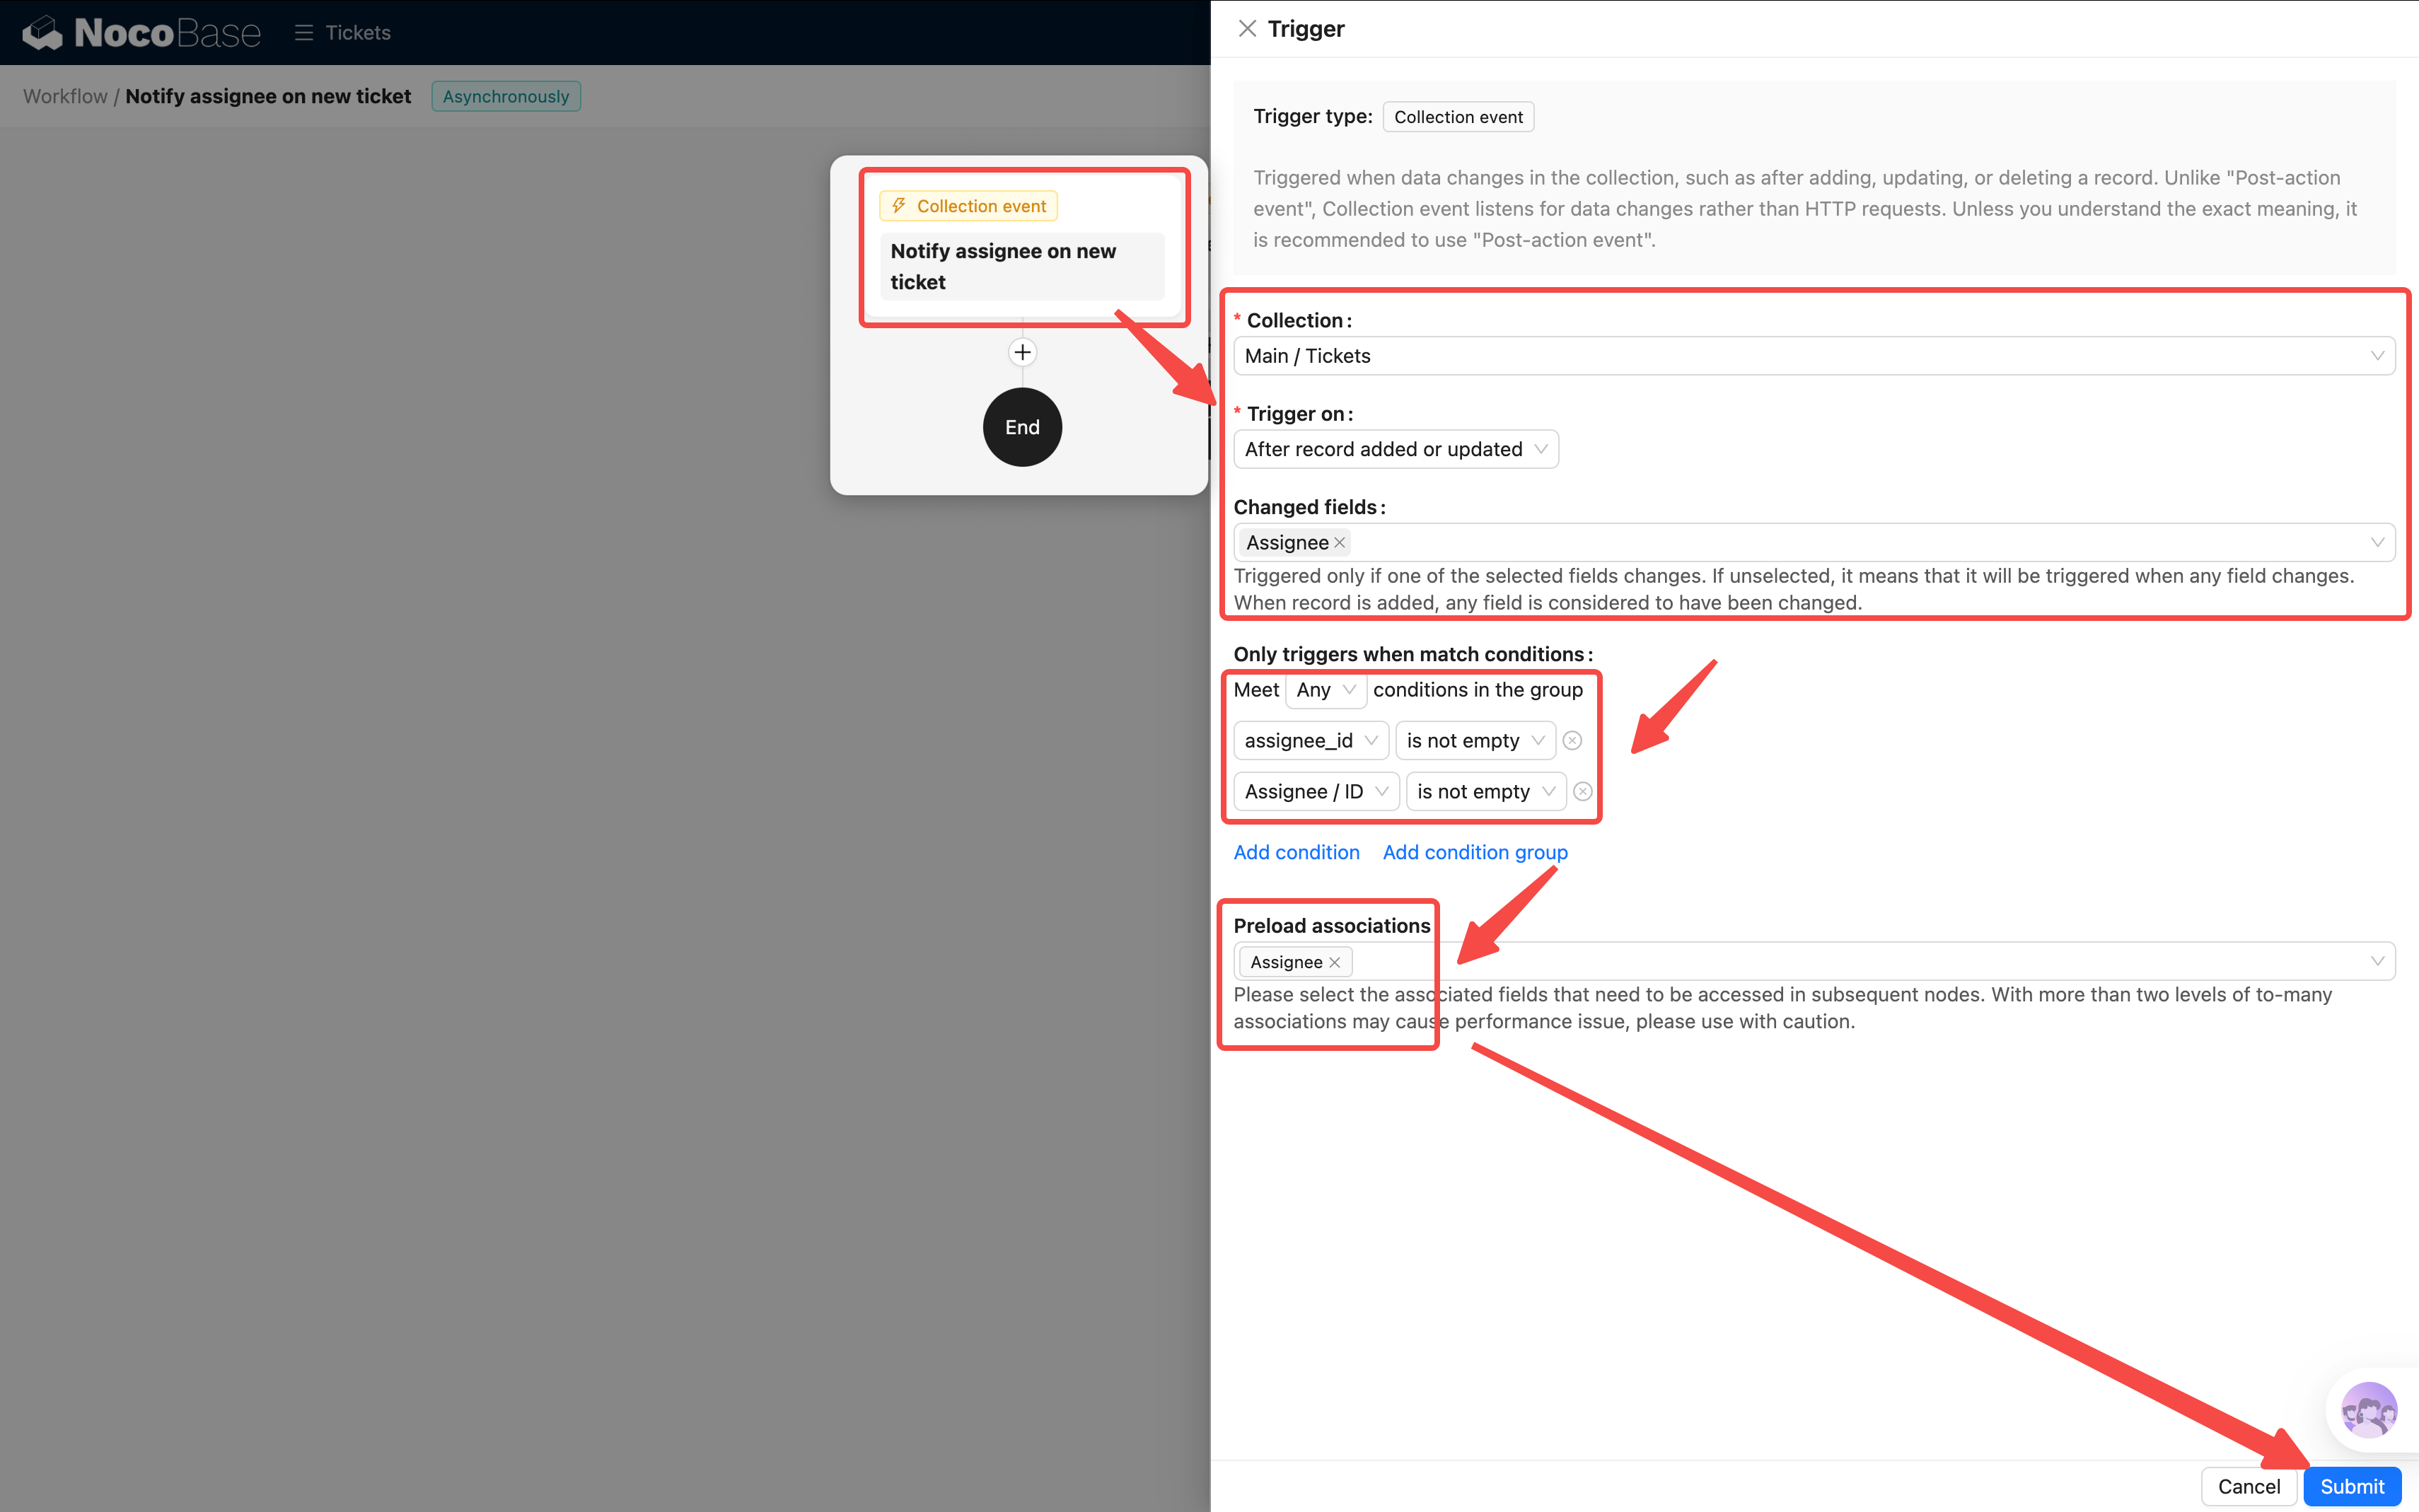
Click Save. The trigger itself now handles the condition filtering — it only fires when the Assignee is not empty, so there's no need for a separate condition node.
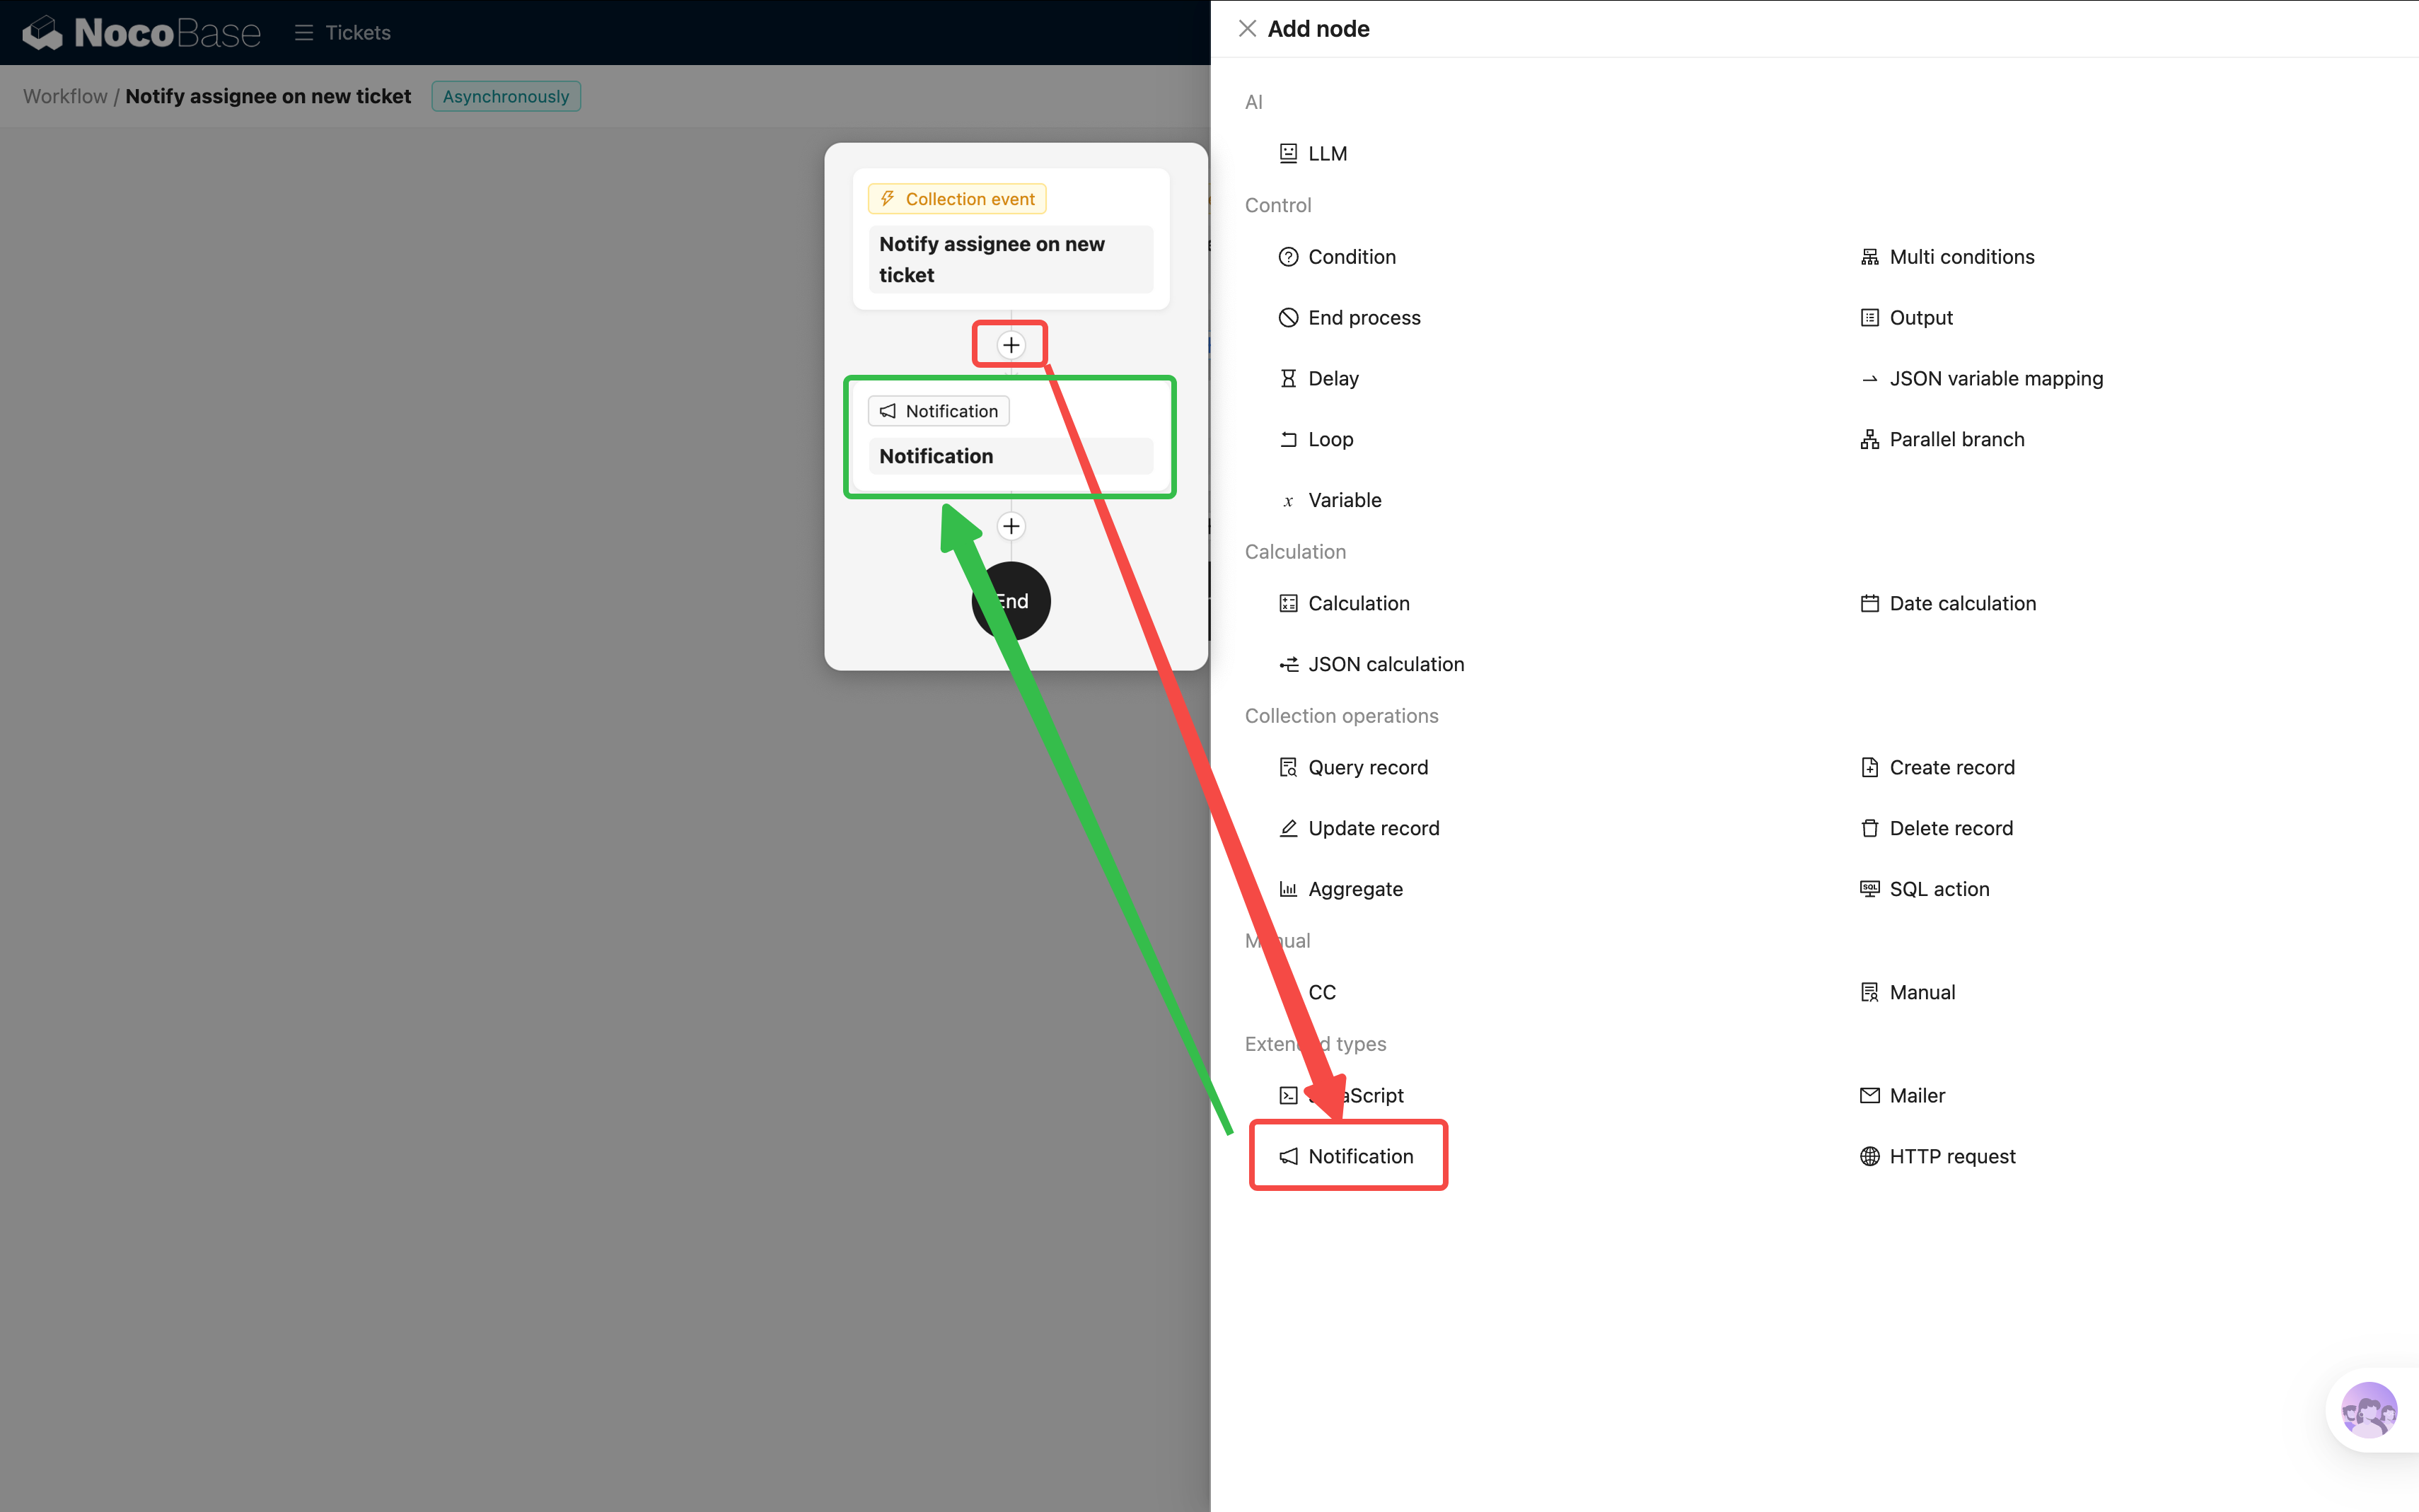
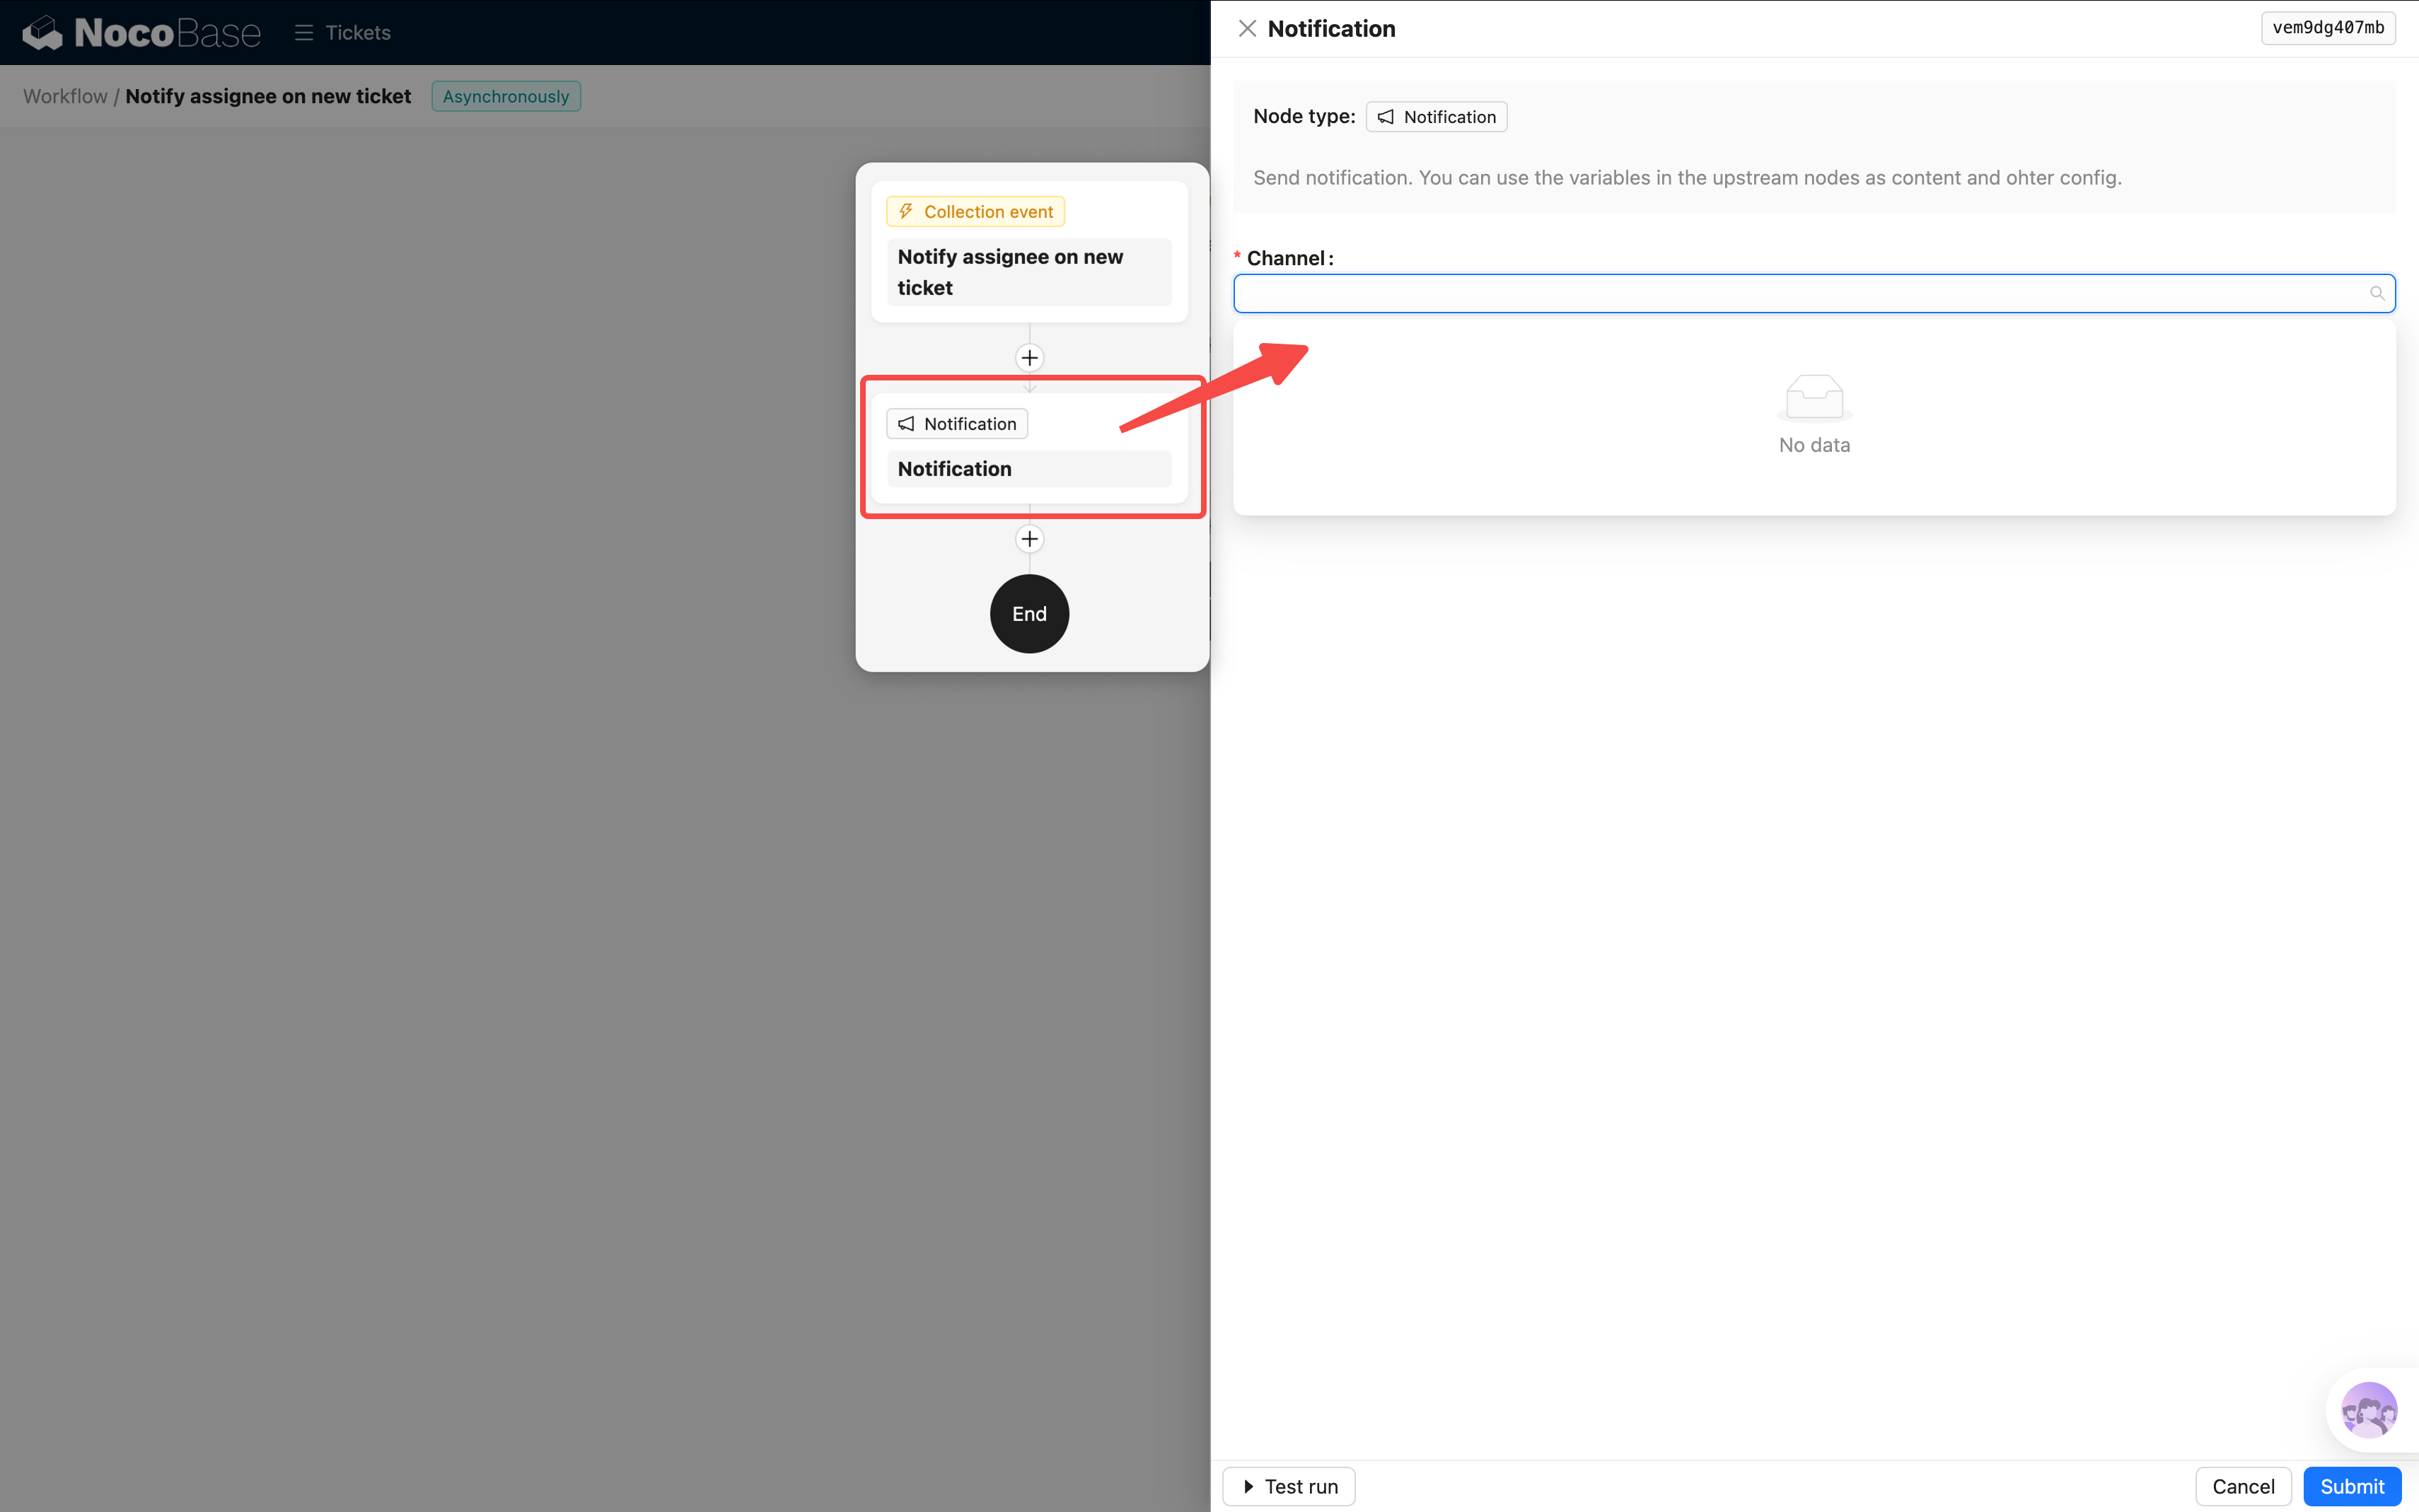
Step 3: Add a Notification Node
Click the + below the trigger and select a Notification node.
Open the notification node's configuration. The first option is to select a Notification channel — but we haven't created one yet, so the dropdown is empty. Let's go create one first.
Step 4: Create a Notification Channel
NocoBase supports multiple notification channel types:
| Channel Type | Description |
|---|---|
| In-app message | Browser notifications, pushed in real-time to the user's notification center |
| Sends via SMTP, requires email server configuration |
For this tutorial, we'll use the simplest option — In-app message:
- Open the plugin settings in the top-right corner and go to Notification management
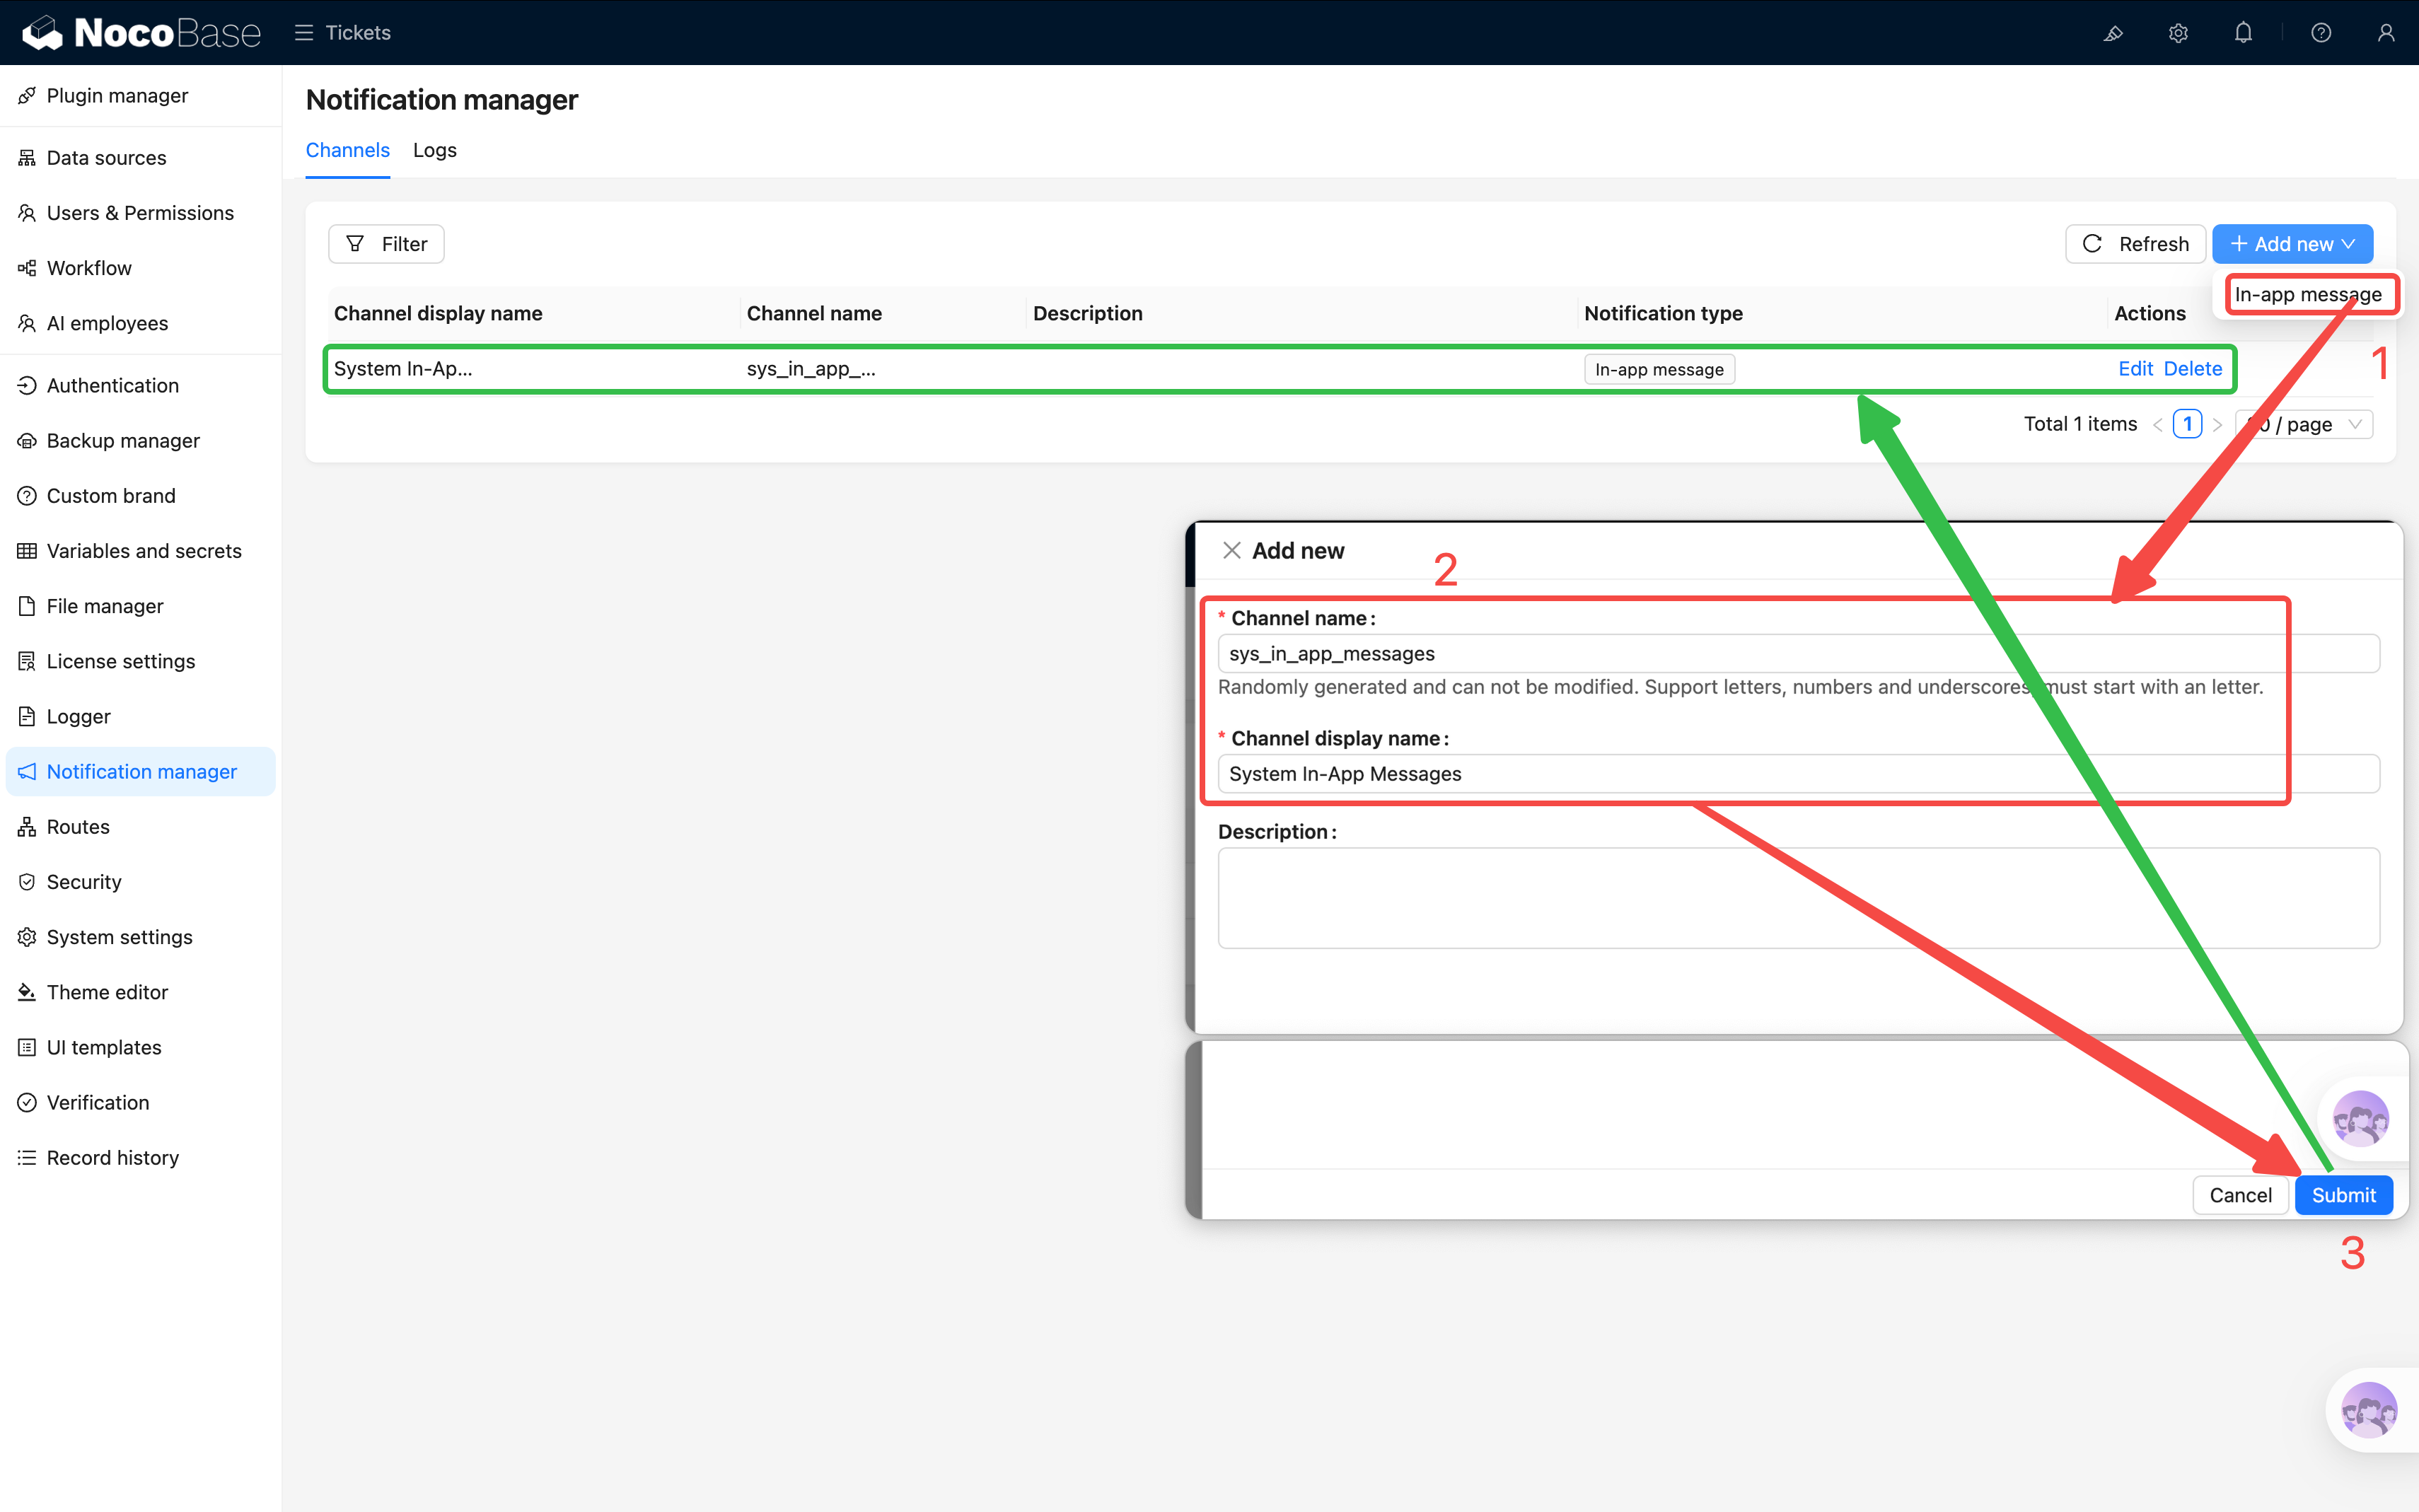
- Click Create channel
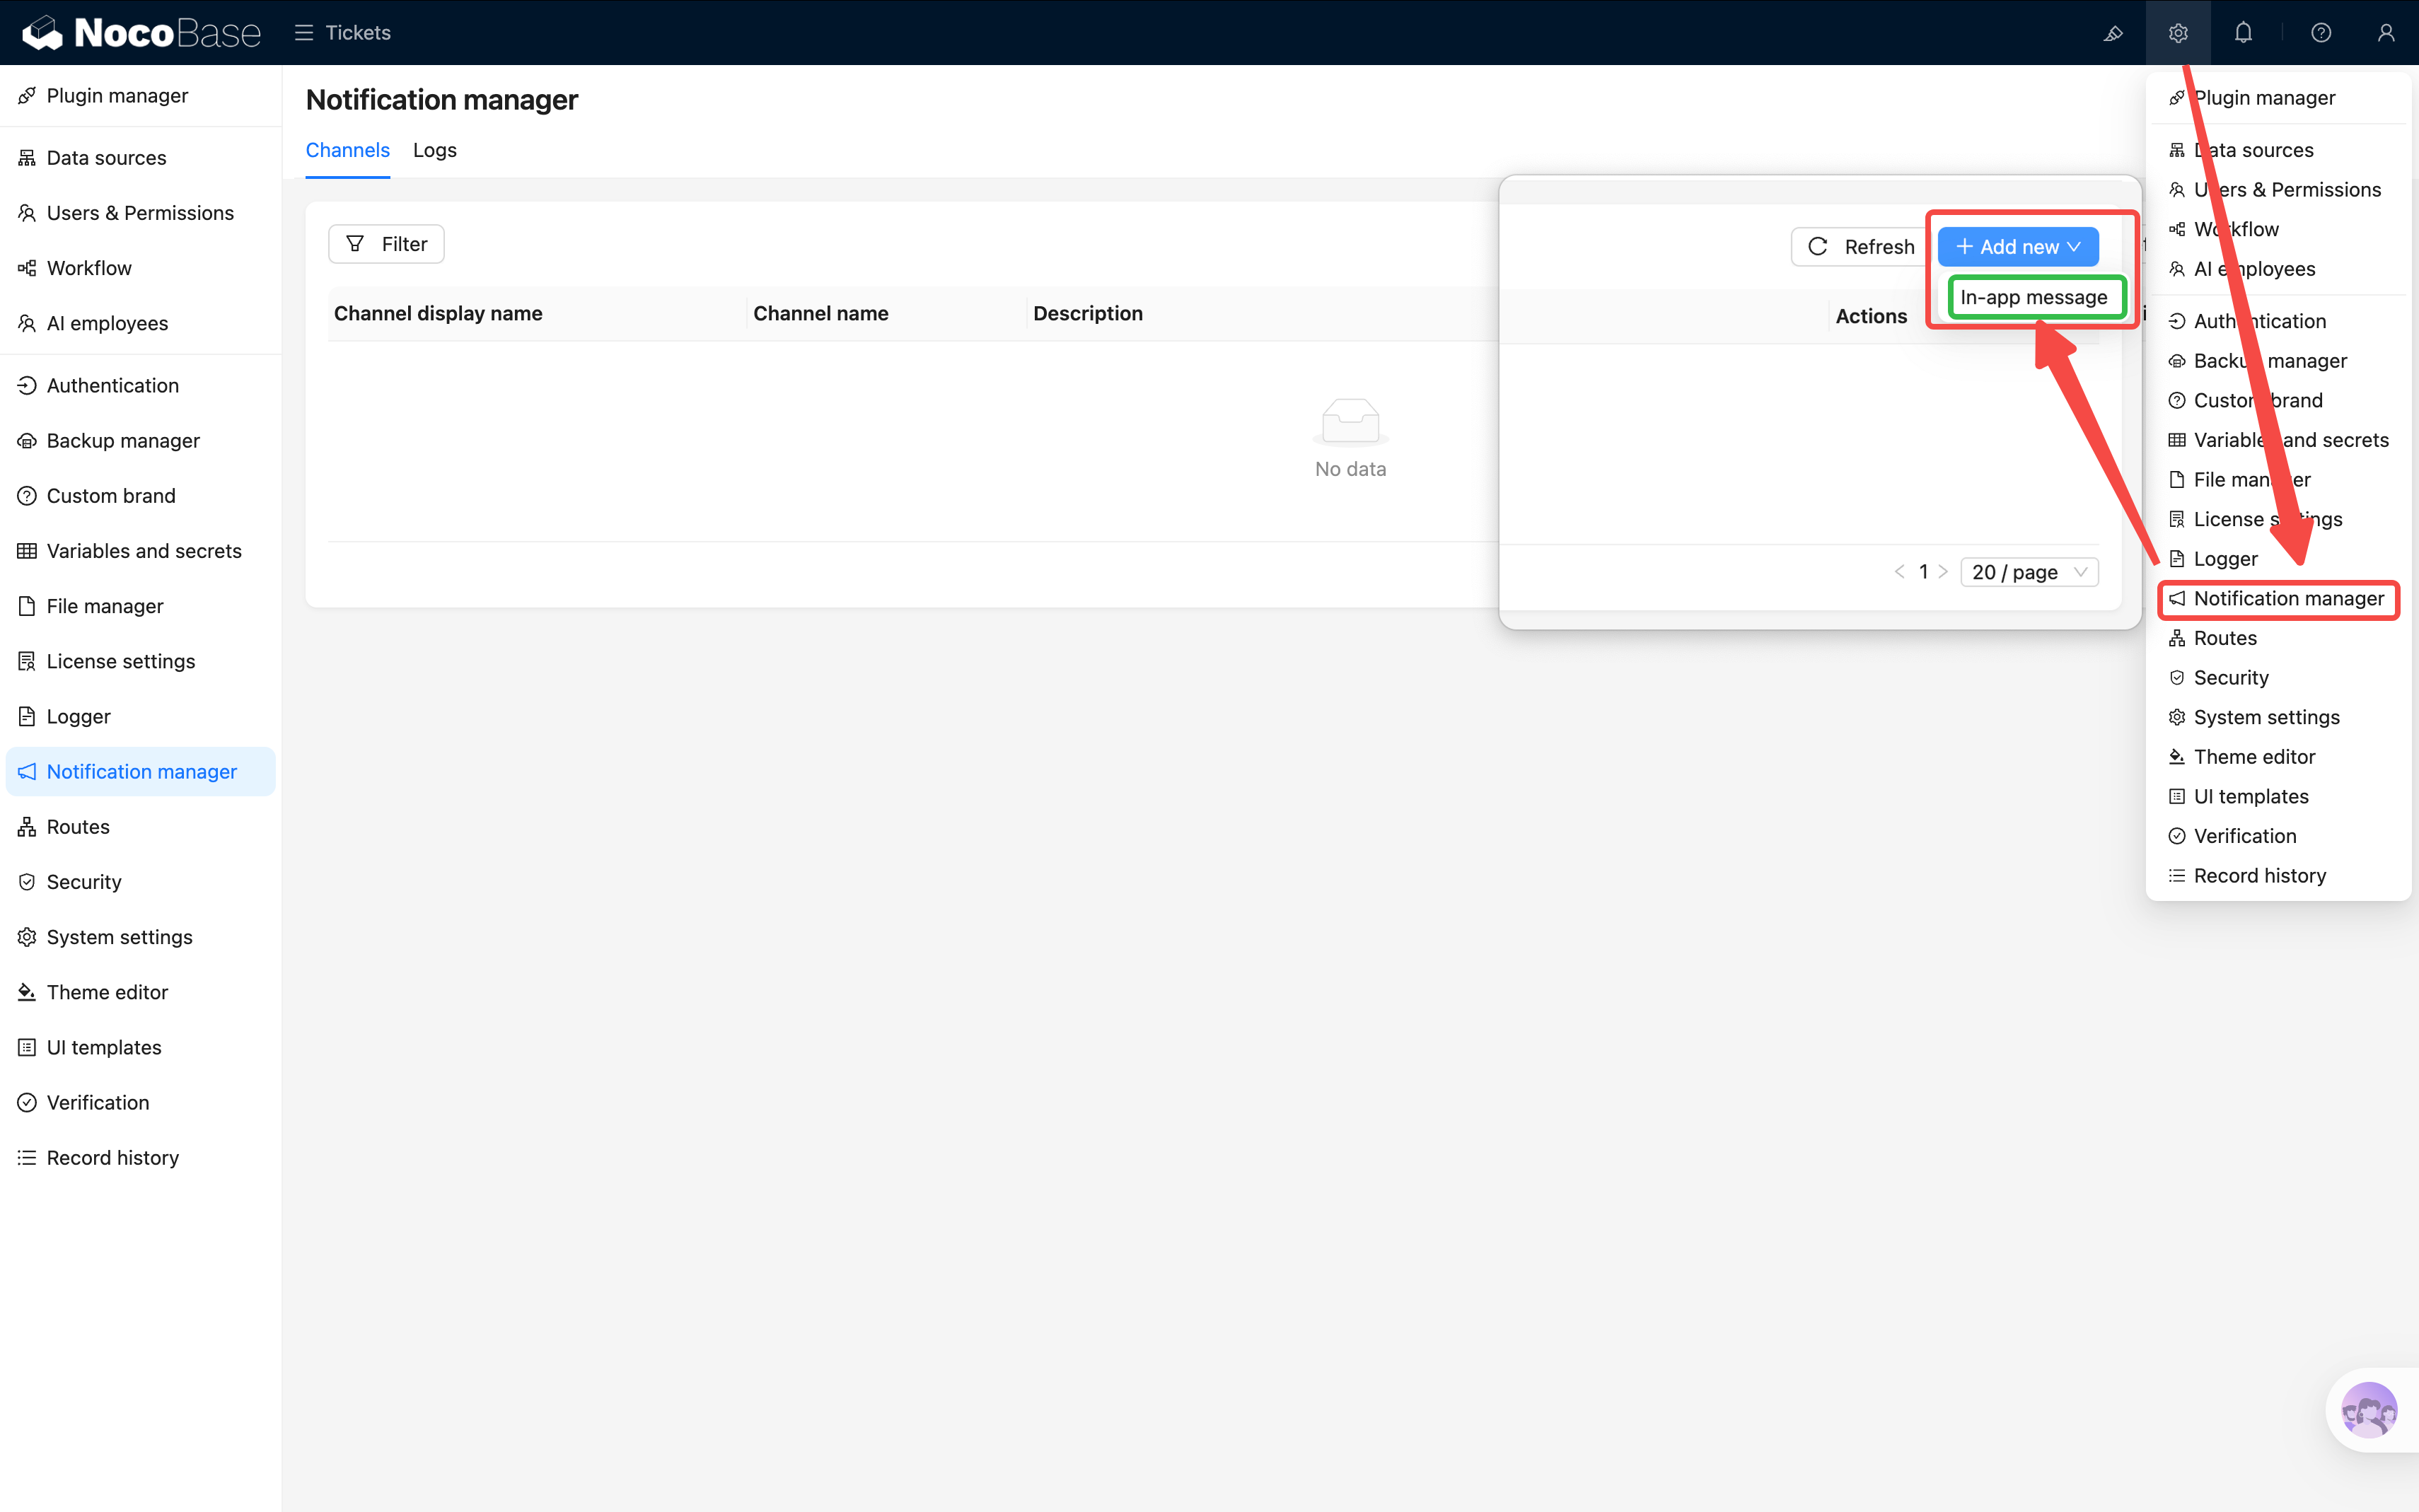
- Select In-app message as the channel type, and enter a name (e.g., "System In-App Messages")
- Save
Step 5: Configure the Notification Node
Go back to the workflow editor and open the notification node's configuration.
The notification node has the following configuration options:
- Notification channel: Select the "System In-App Messages" channel you just created
- Receivers: Click to select Query users → set
id = Trigger variable / Trigger data / Assignee / ID - Title: Enter a notification title, e.g., "You have a new ticket to handle." Supports variables — for example, include the ticket title:
New ticket: {{Trigger data / Title}} - Content: Enter the notification body. You can also insert variables to reference the ticket's priority, description, and other fields
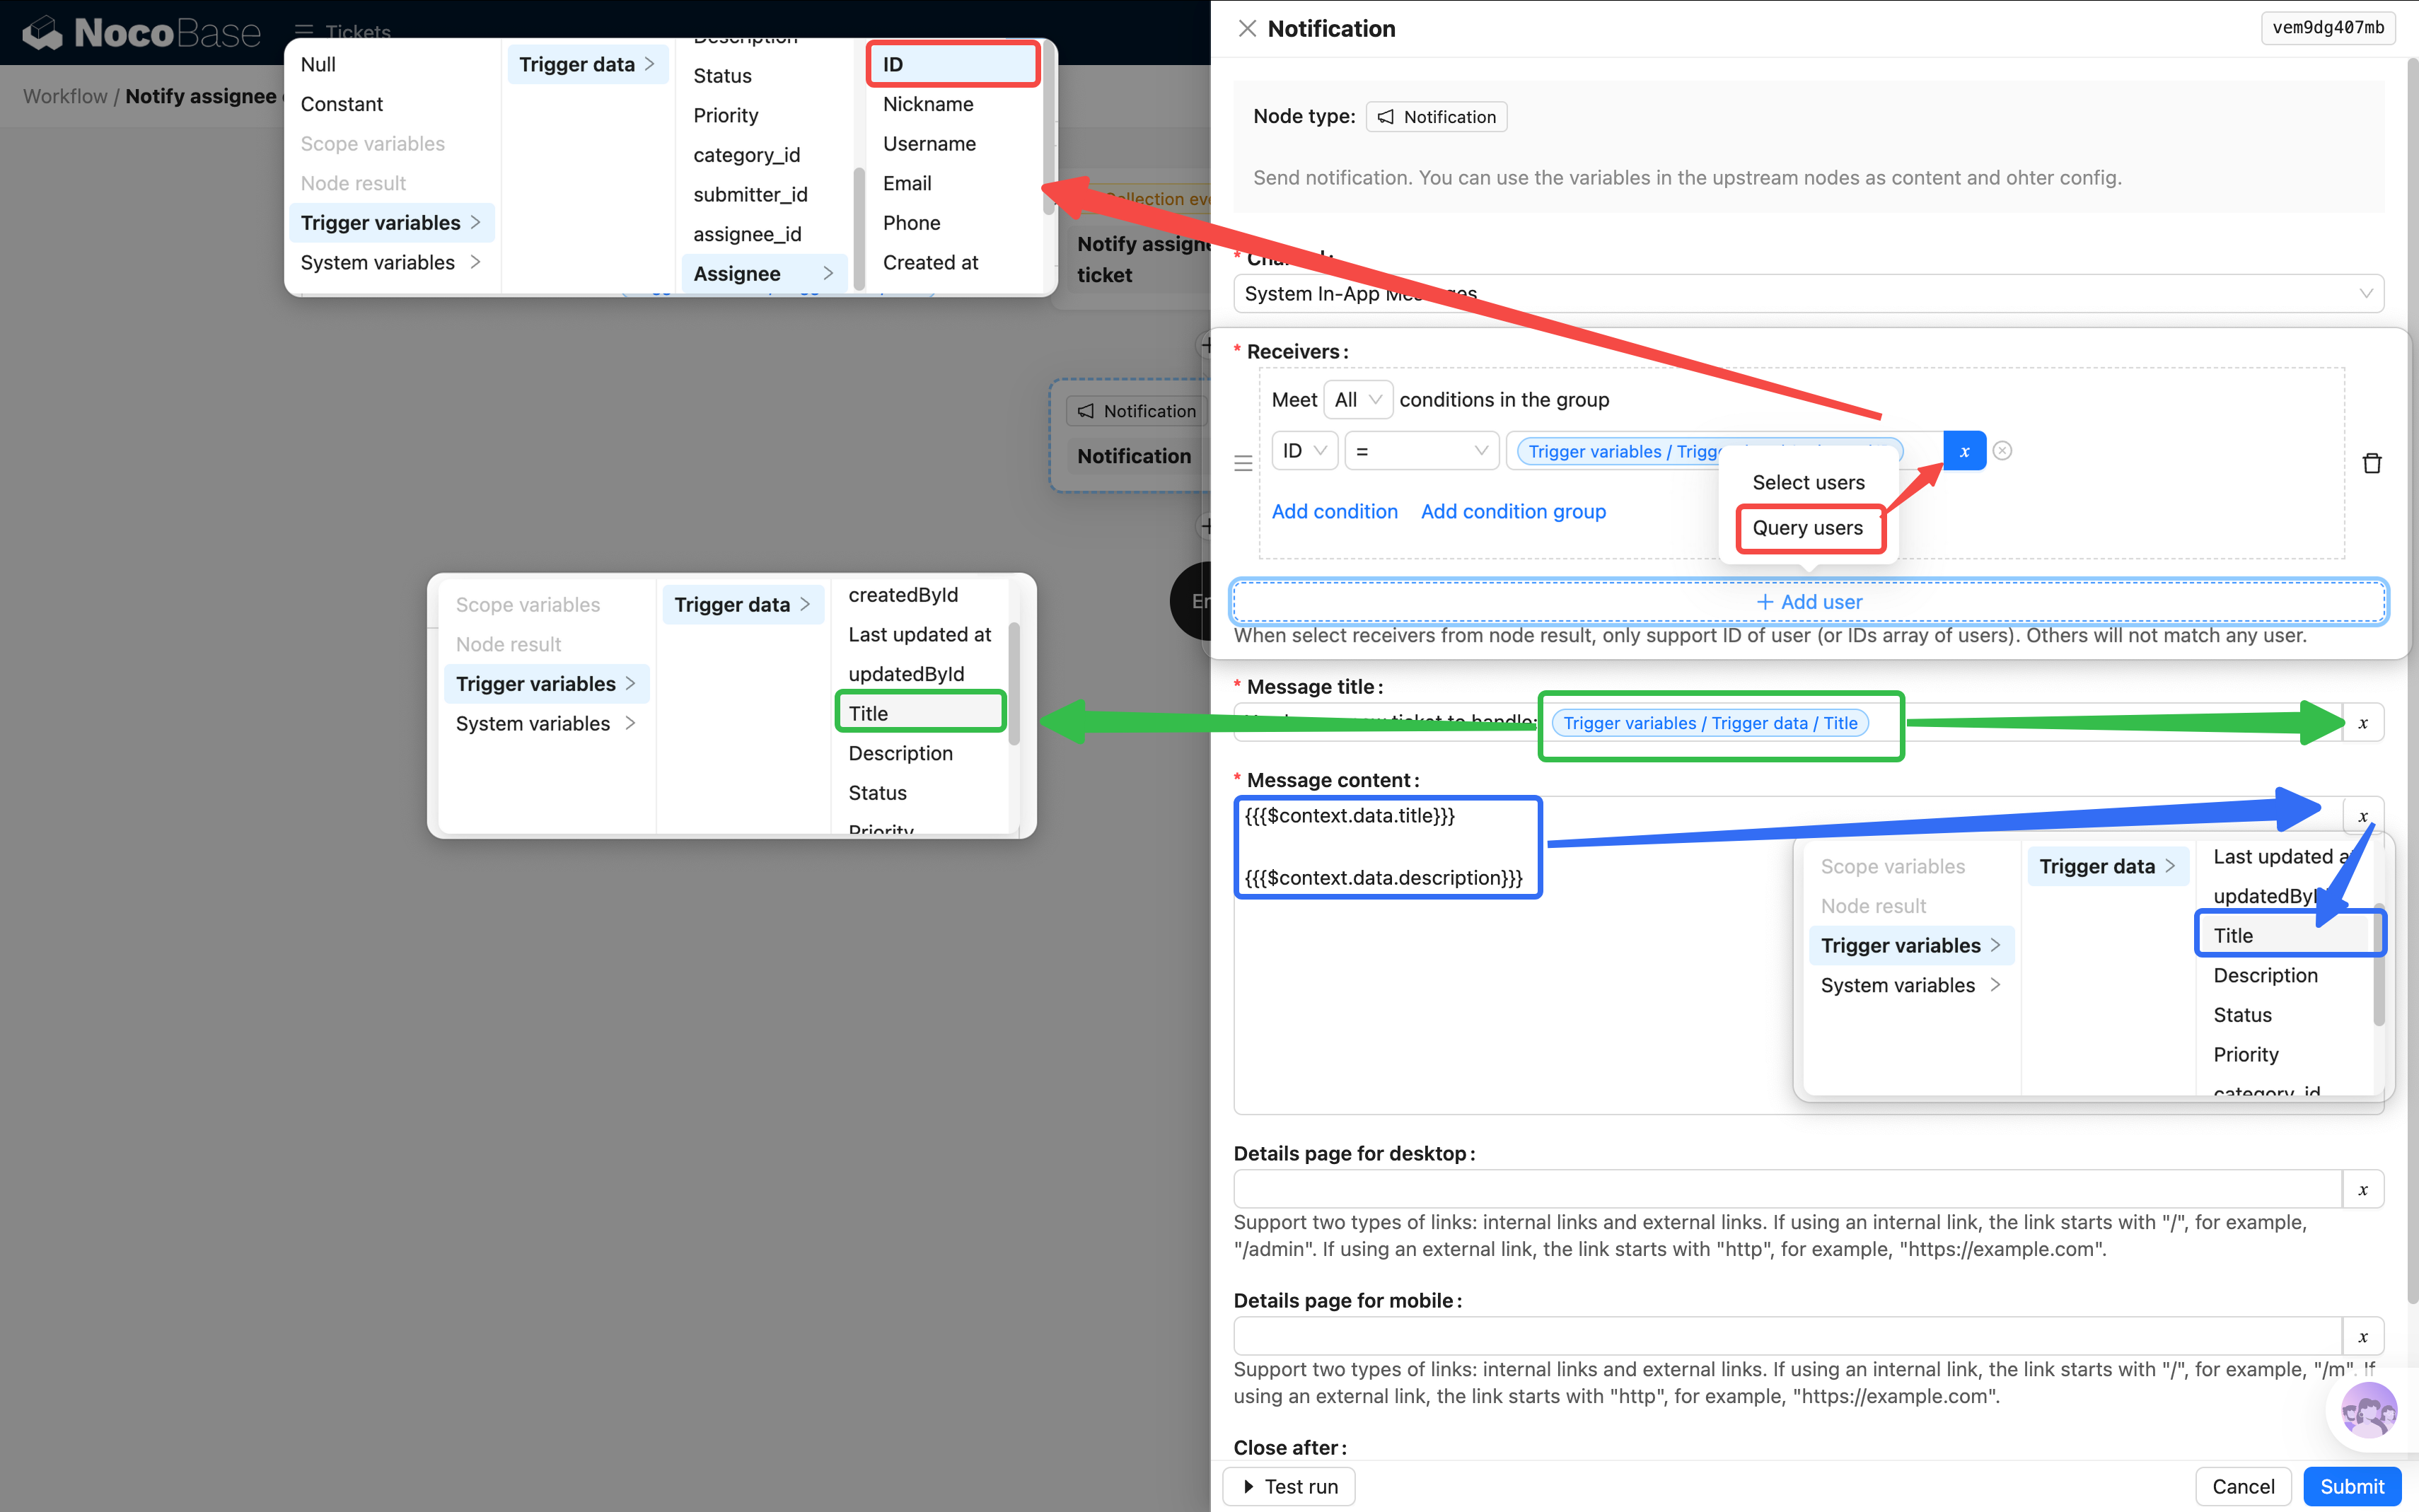
(Before leaving the popup for the next step, remember to save first!)
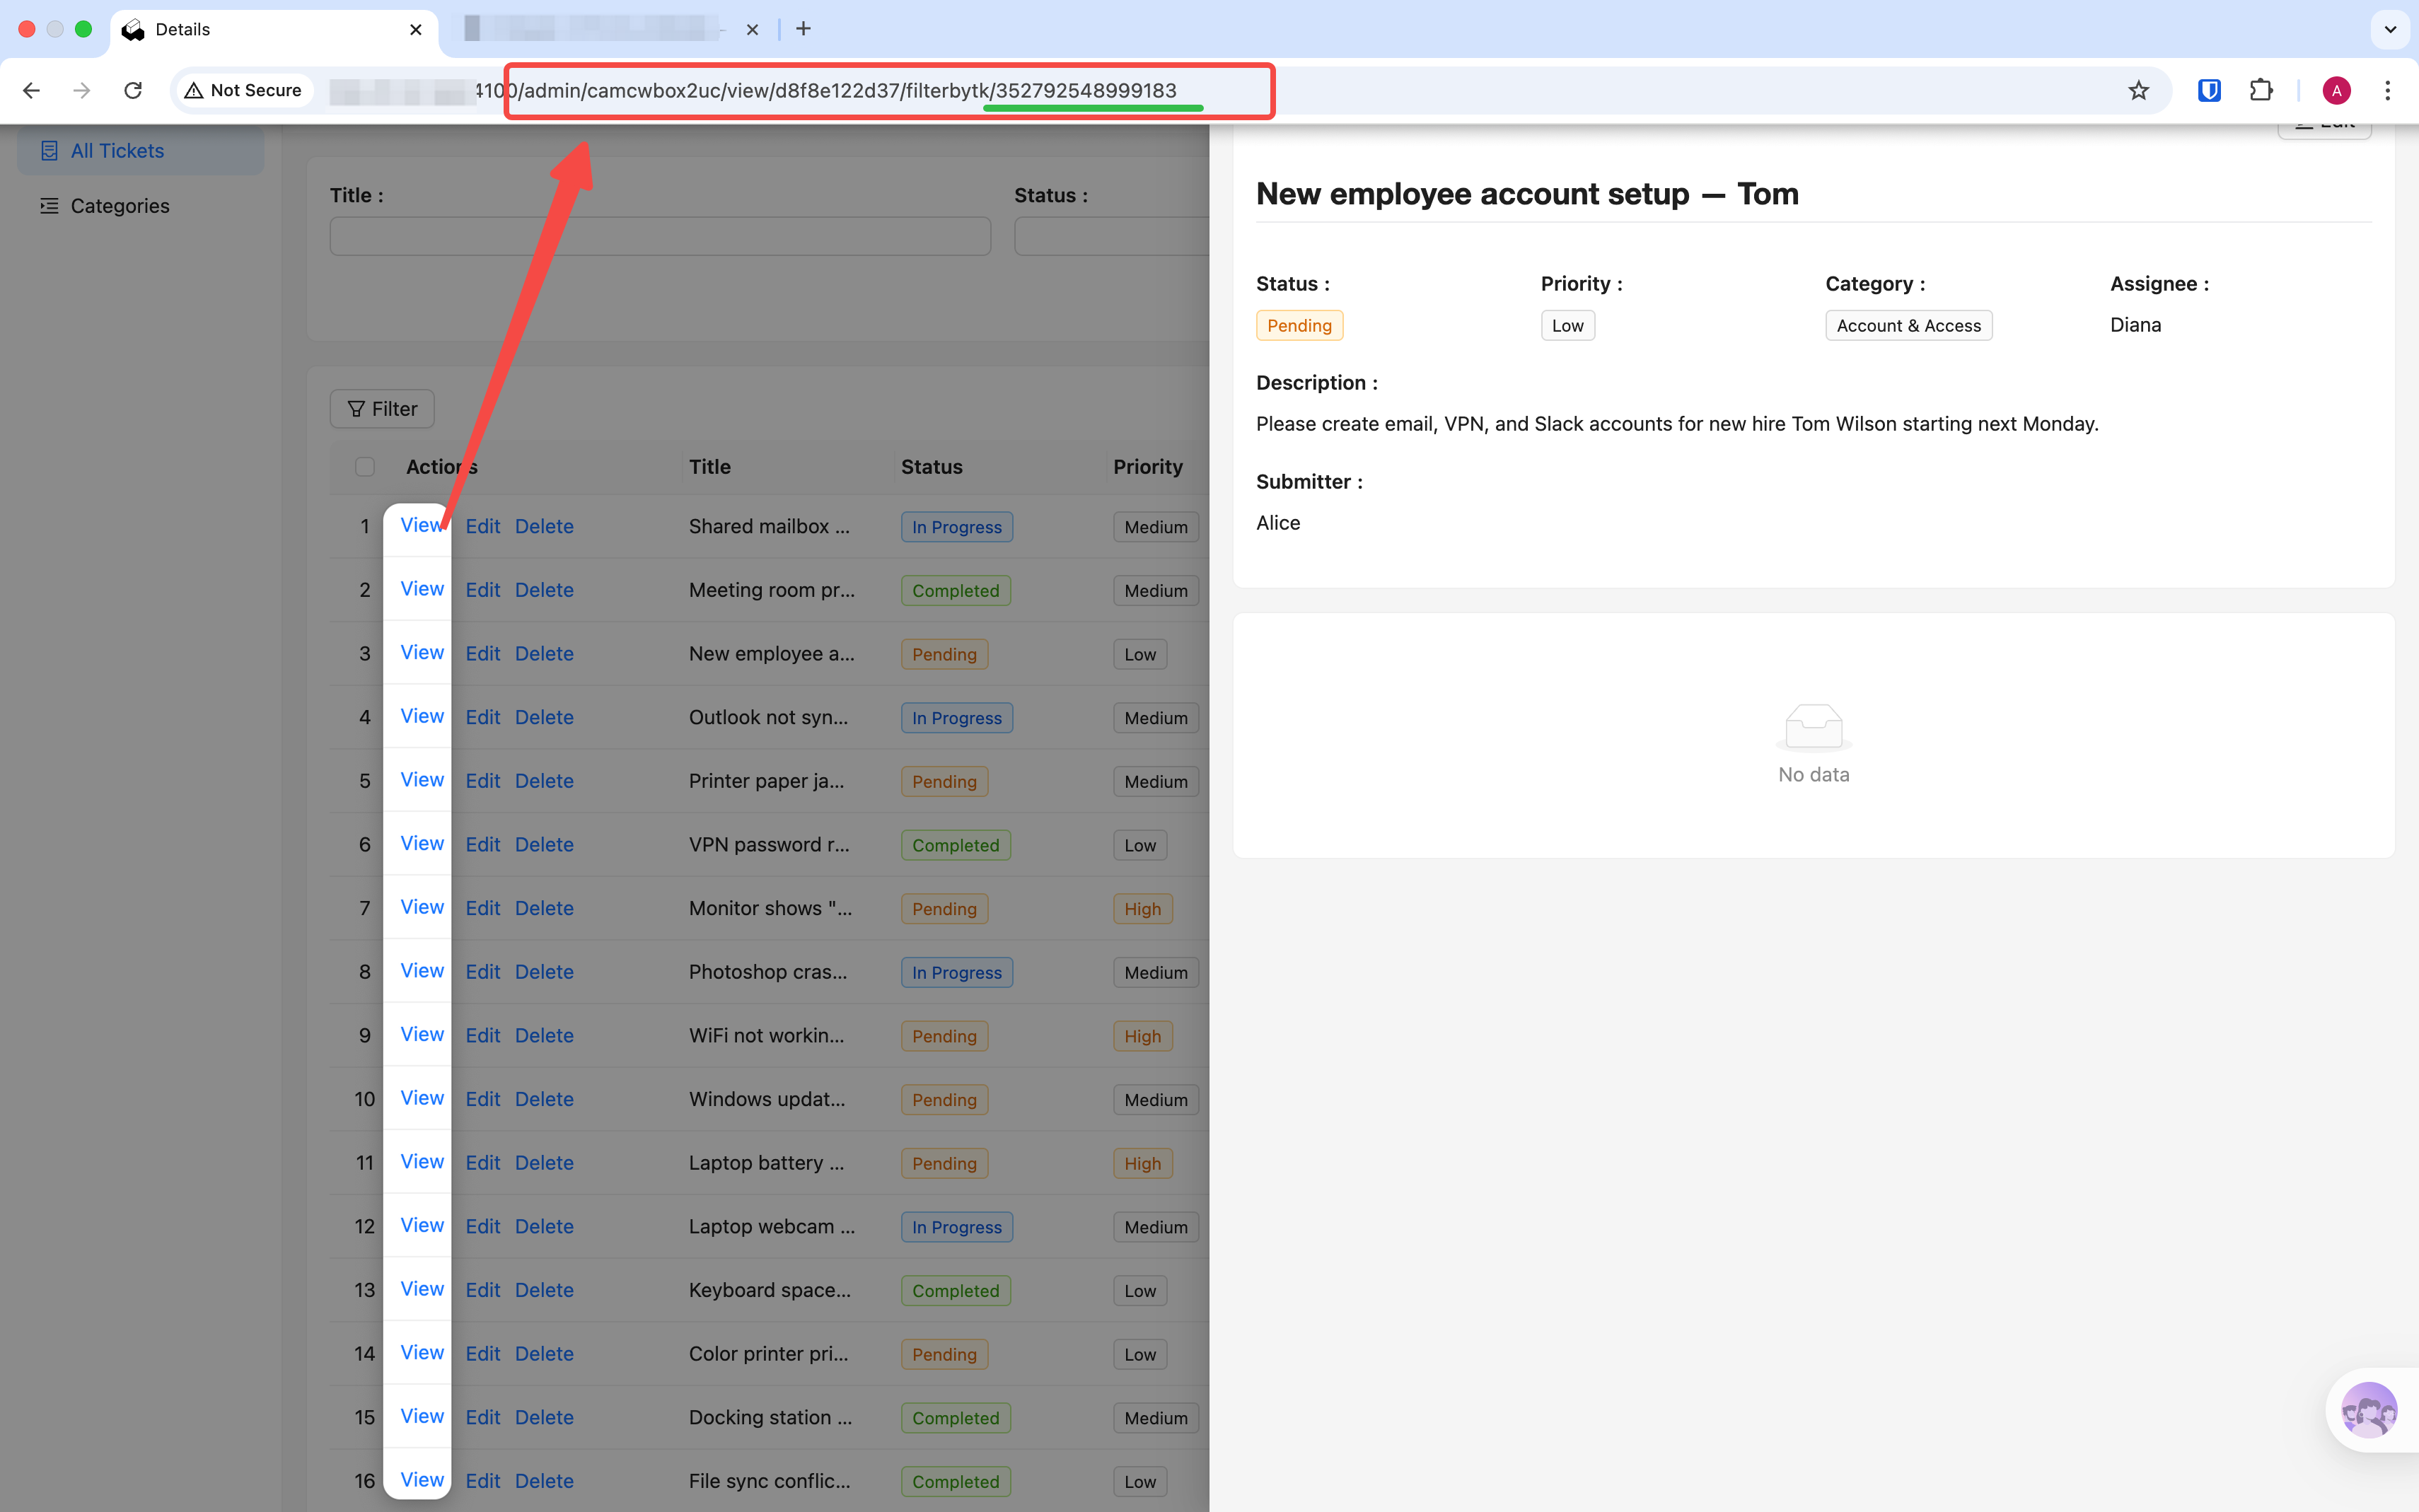
- Desktop detail page: Enter the URL path of the ticket detail page. To get it: open any ticket's detail popup in the frontend, then copy the path from the browser address bar — it looks like
/admin/camcwbox2uc/view/d8f8e122d37/filterbytk/353072988225540. Paste the path into the field, then replace the number afterfilterbytk/with the trigger data's ID variable (click the variable selector → Trigger data → ID). Once configured, clicking the notification in the list will navigate directly to that ticket's detail page and automatically mark it as read
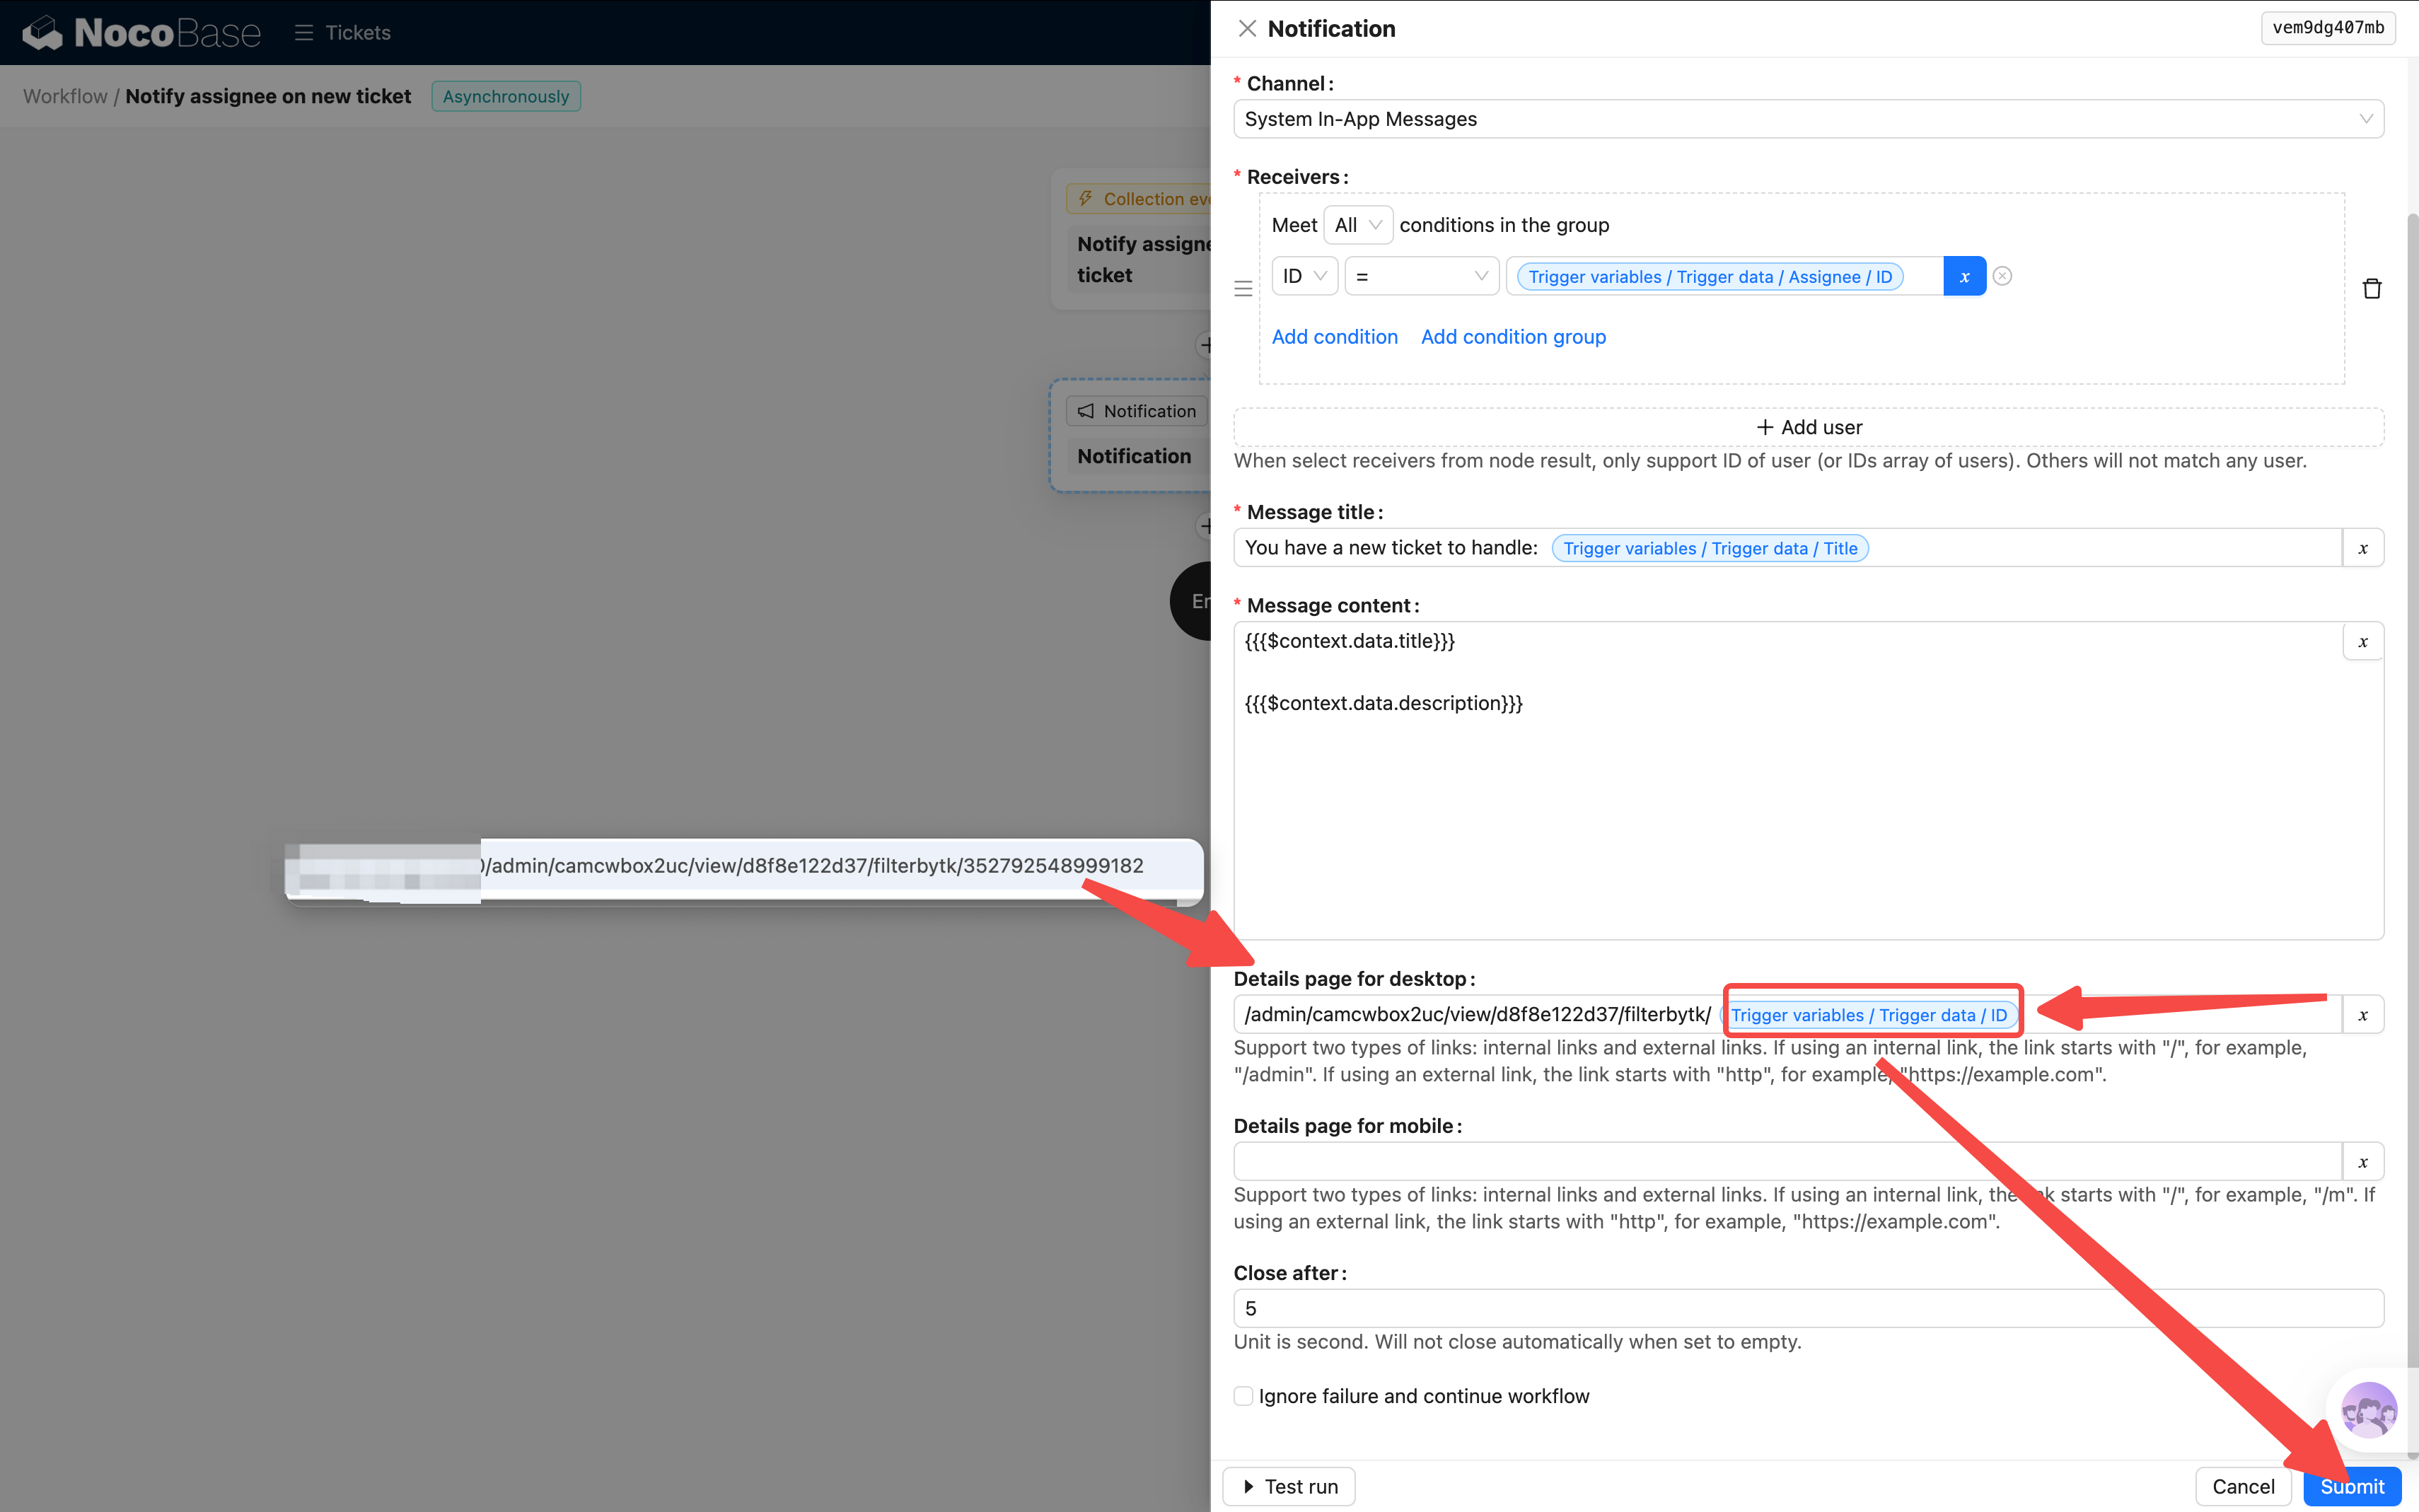
- Continue on failure: Optional. If checked, the workflow won't stop even if the notification fails to send
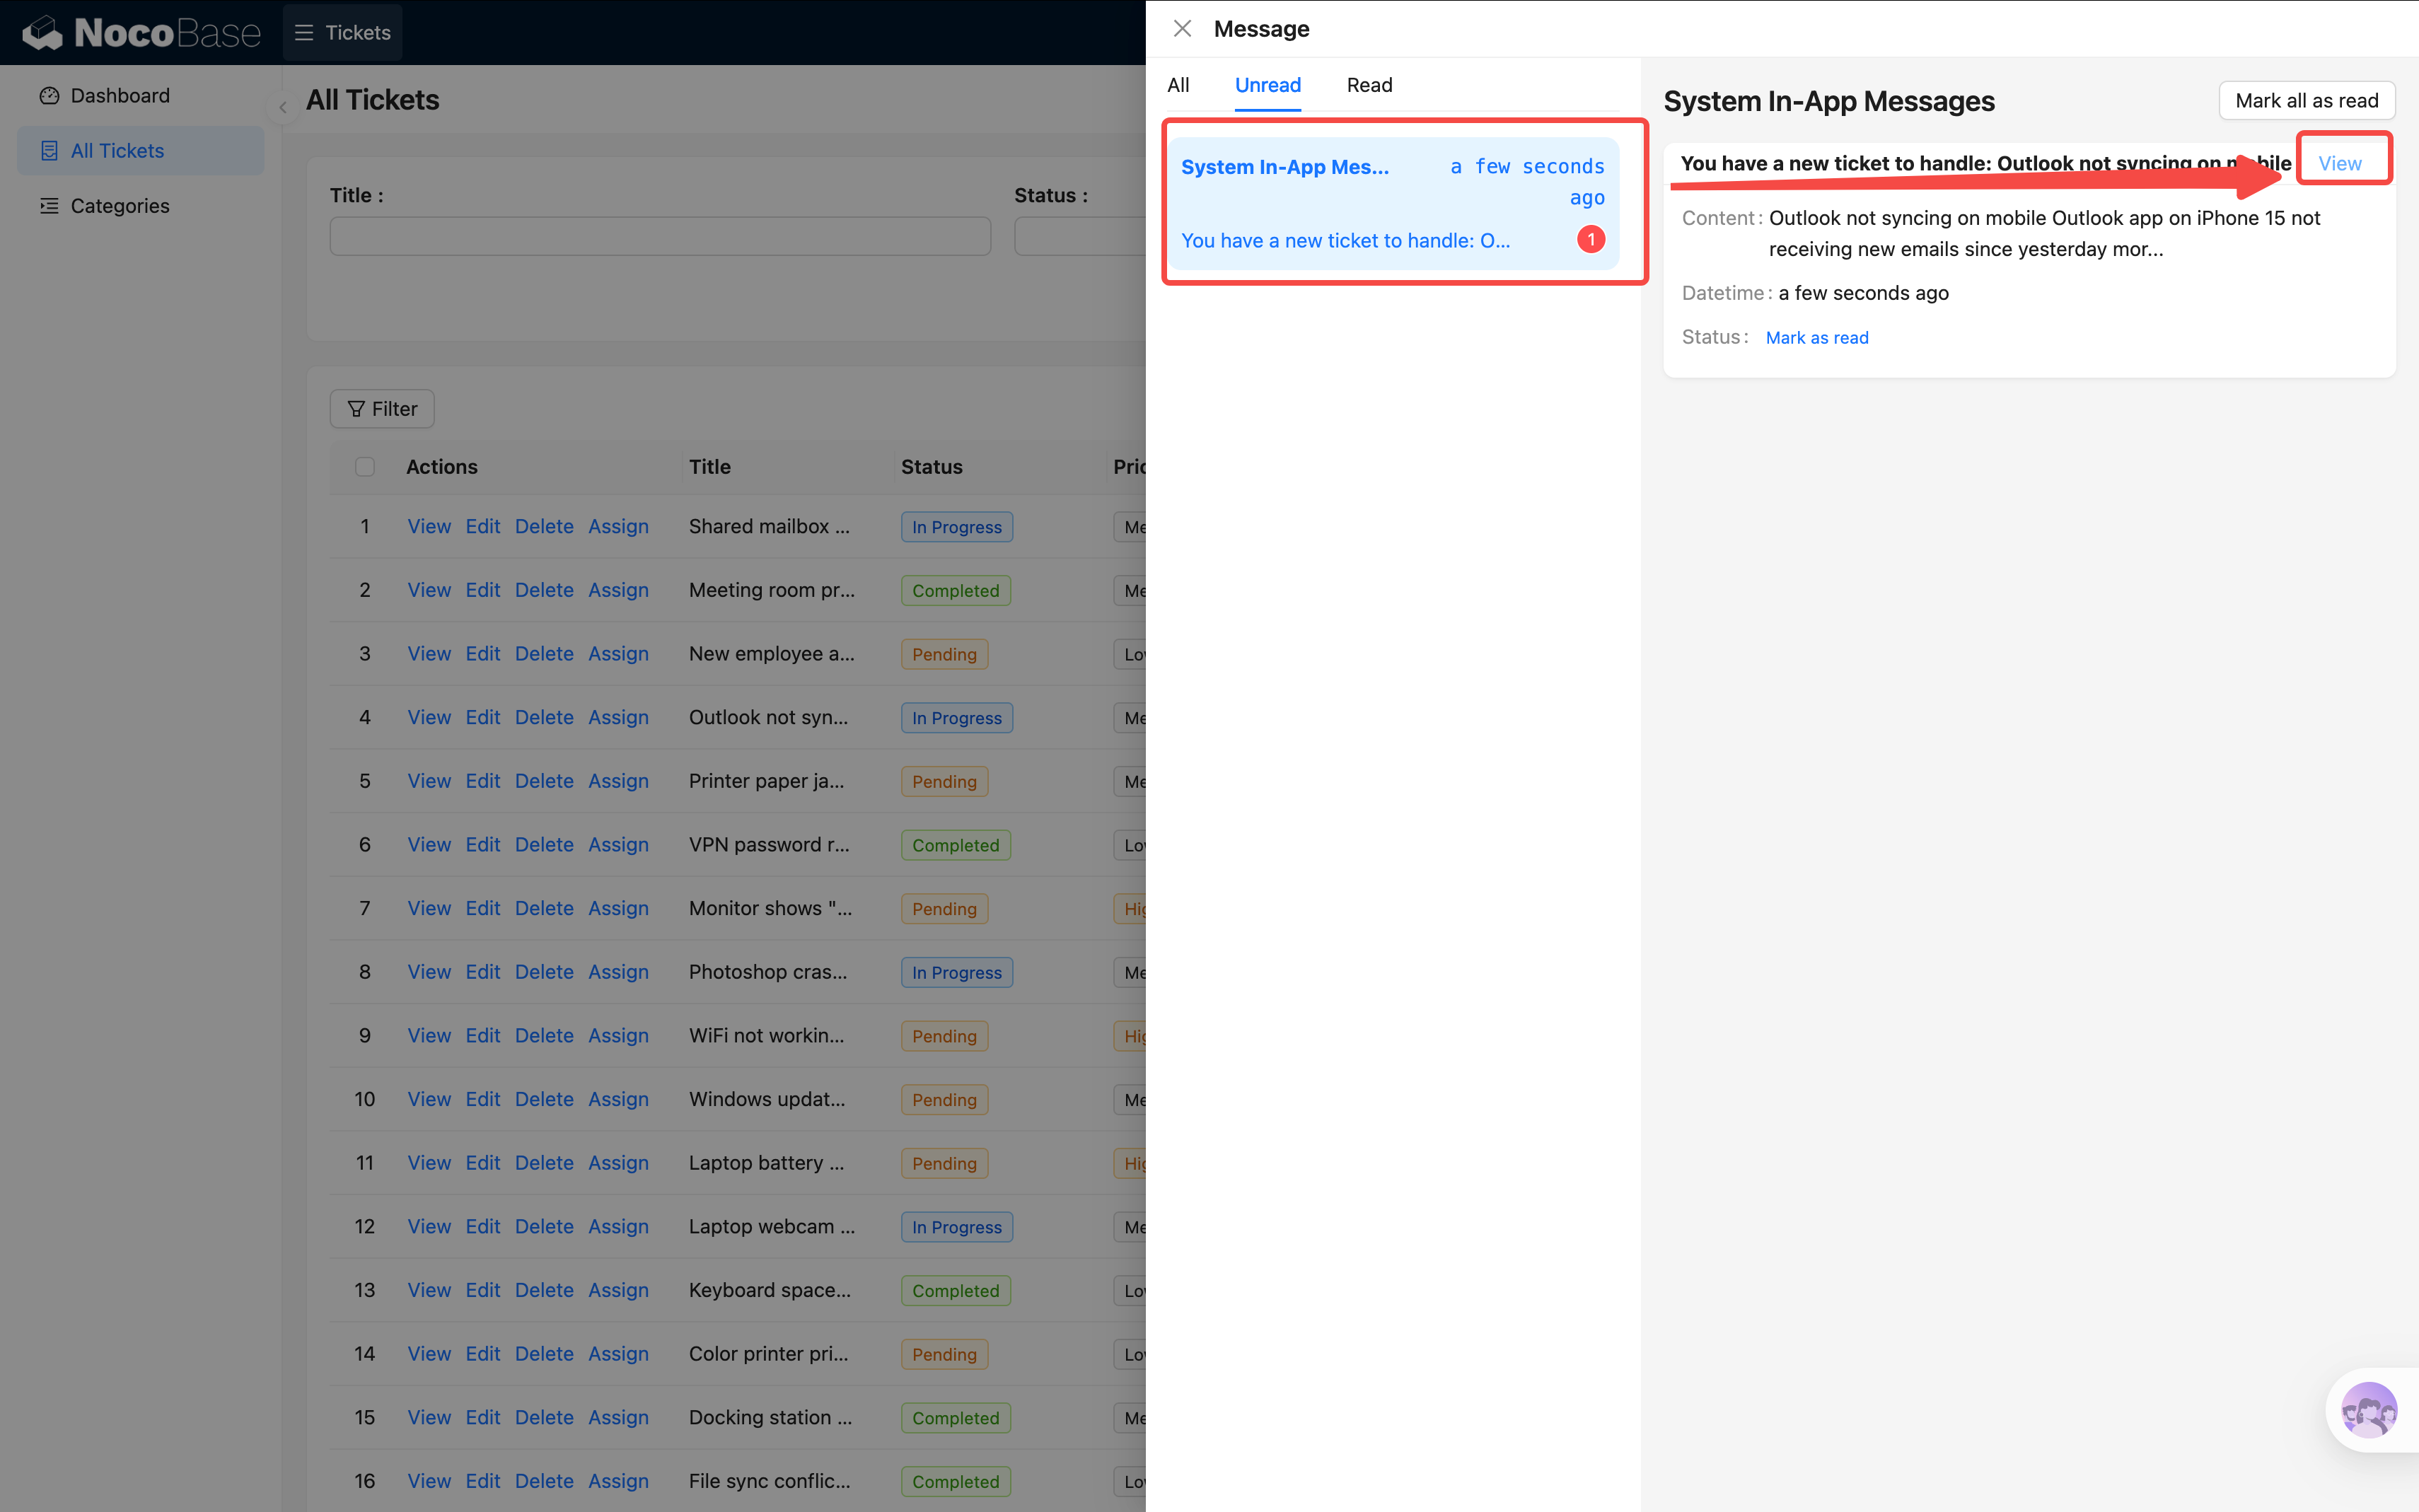
After the notification is sent, the assignee can see the message in the Notification center (top-right corner of the page). Unread items will show a red dot indicator. Clicking the notification takes you directly to the ticket detail page.
Step 6: Test and Enable
The complete flow for Scenario 1 has just two nodes: Trigger (with condition filtering) → Notification. Simple and direct.
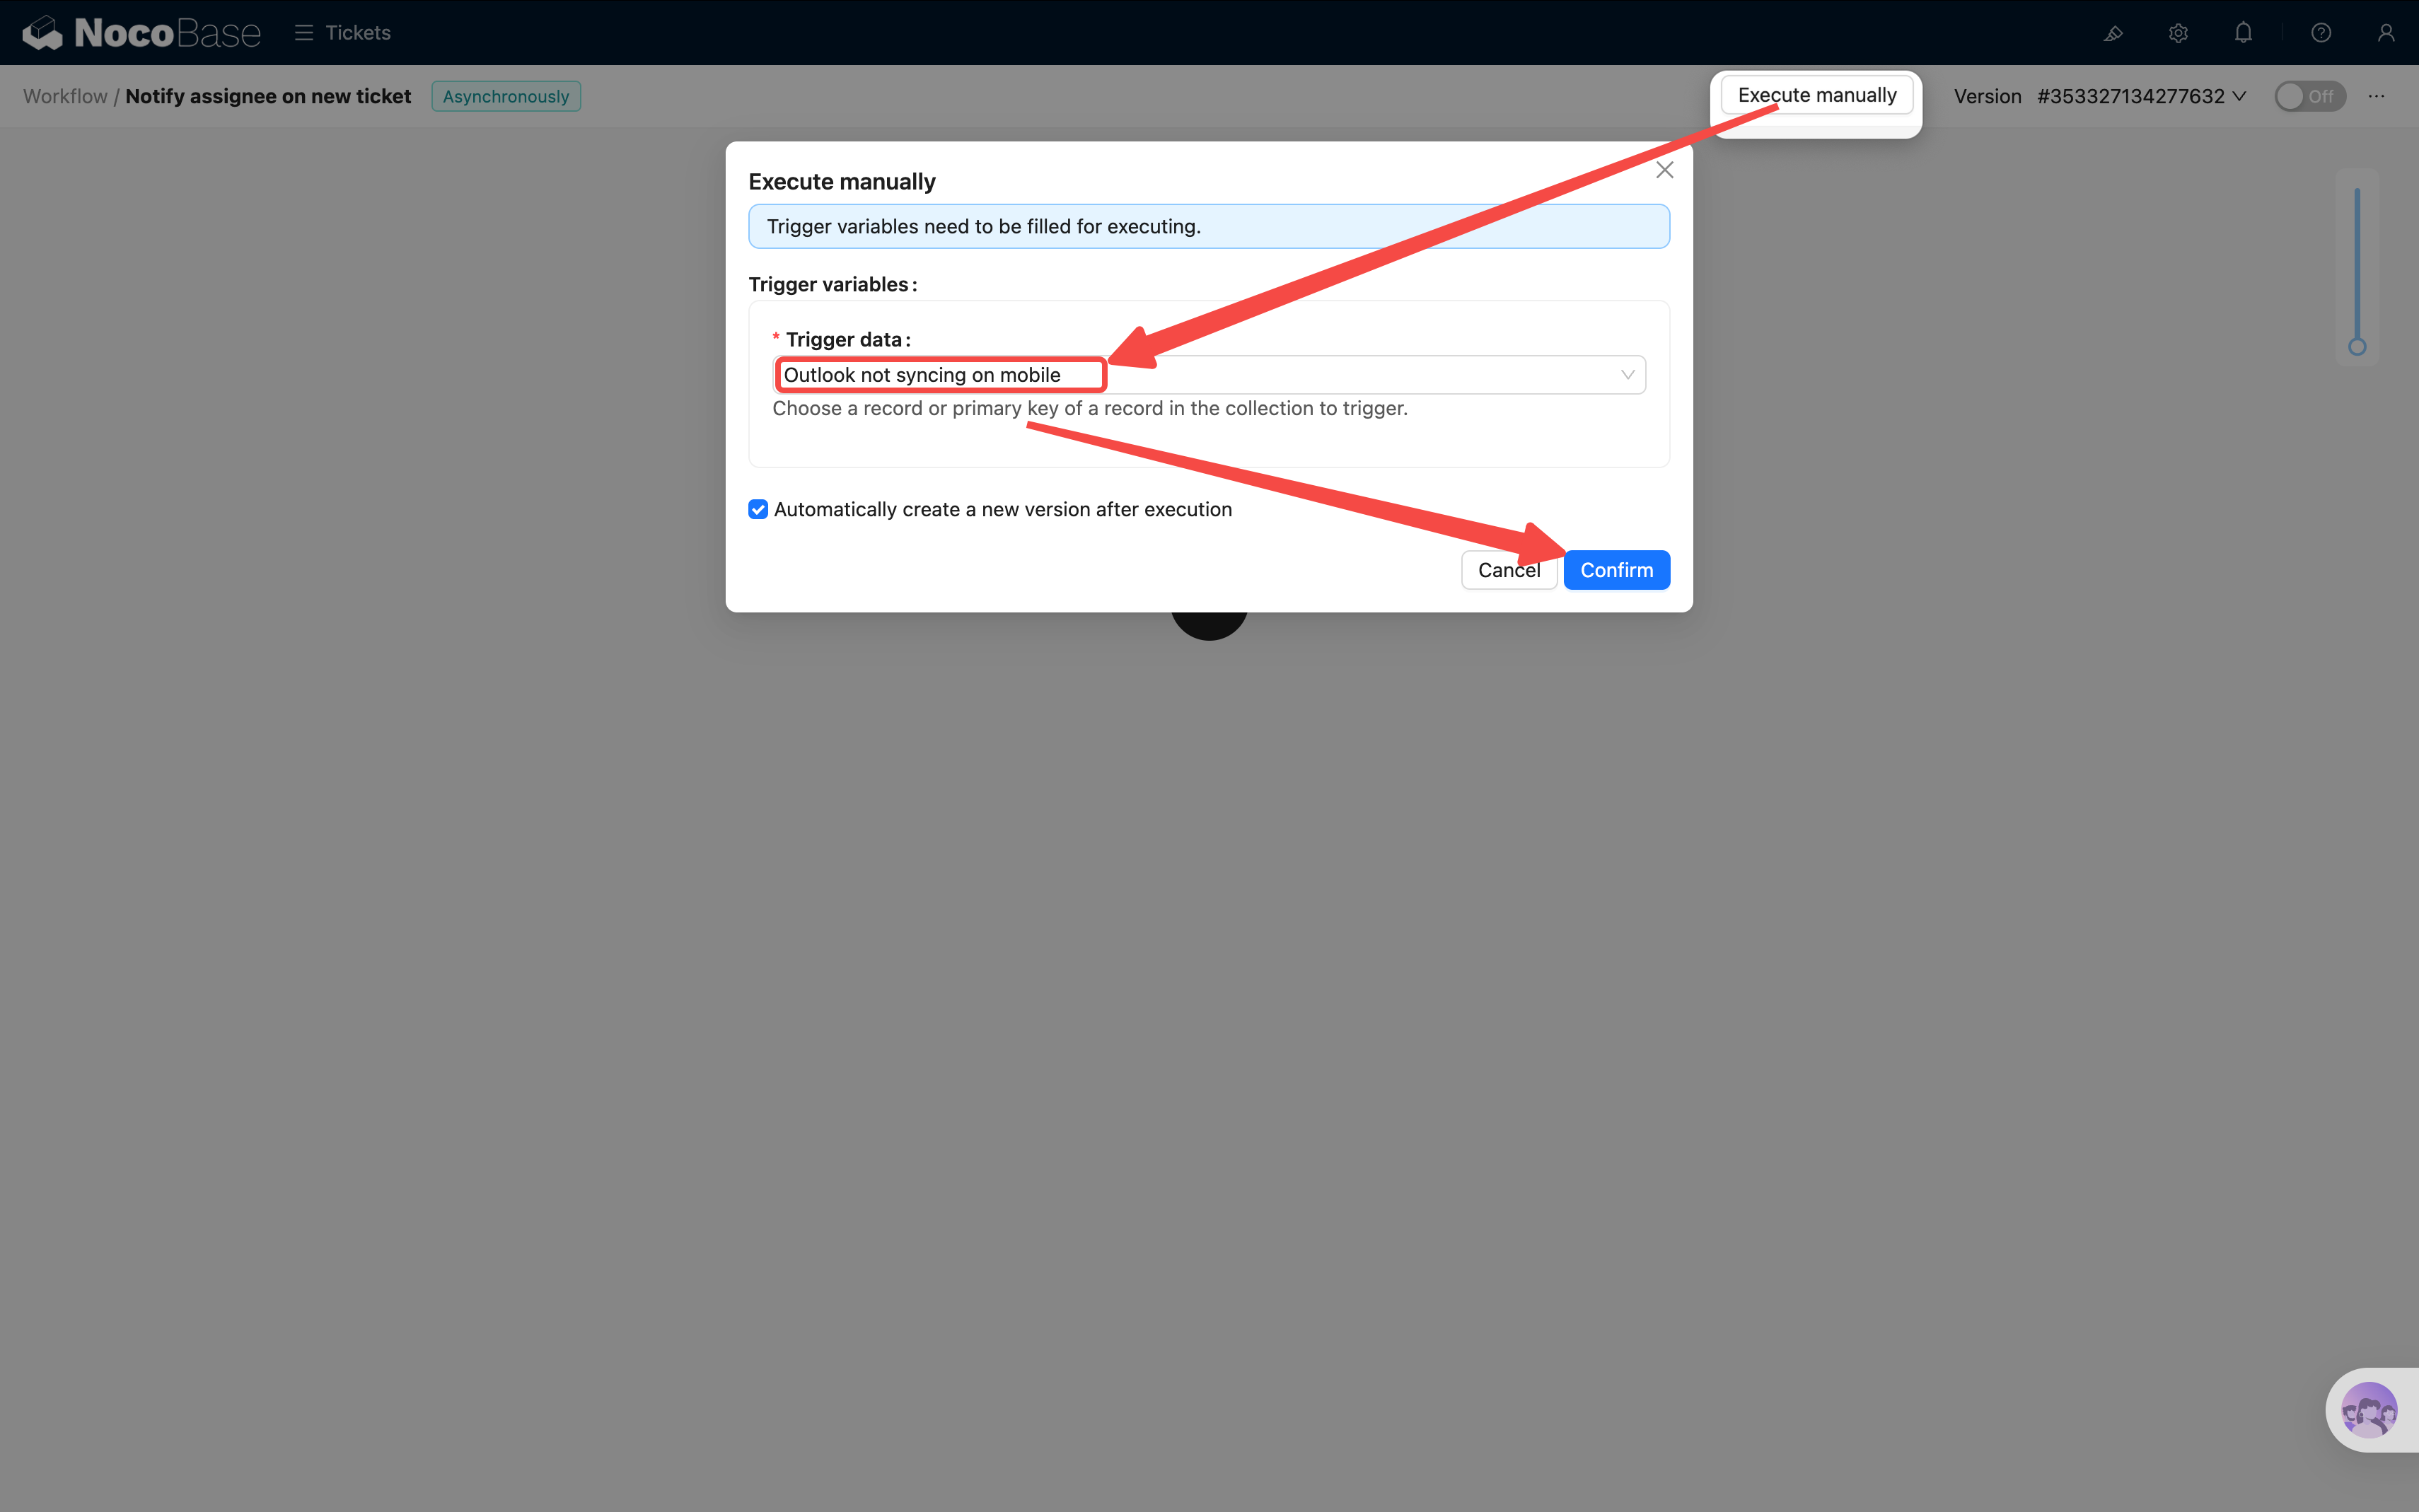
Don't rush to enable it — workflows provide a manual execution feature that lets you test the flow with specific data first:
-
Click the Execute button in the top-right corner (not the enable toggle)
-
Select an existing ticket record as the trigger data
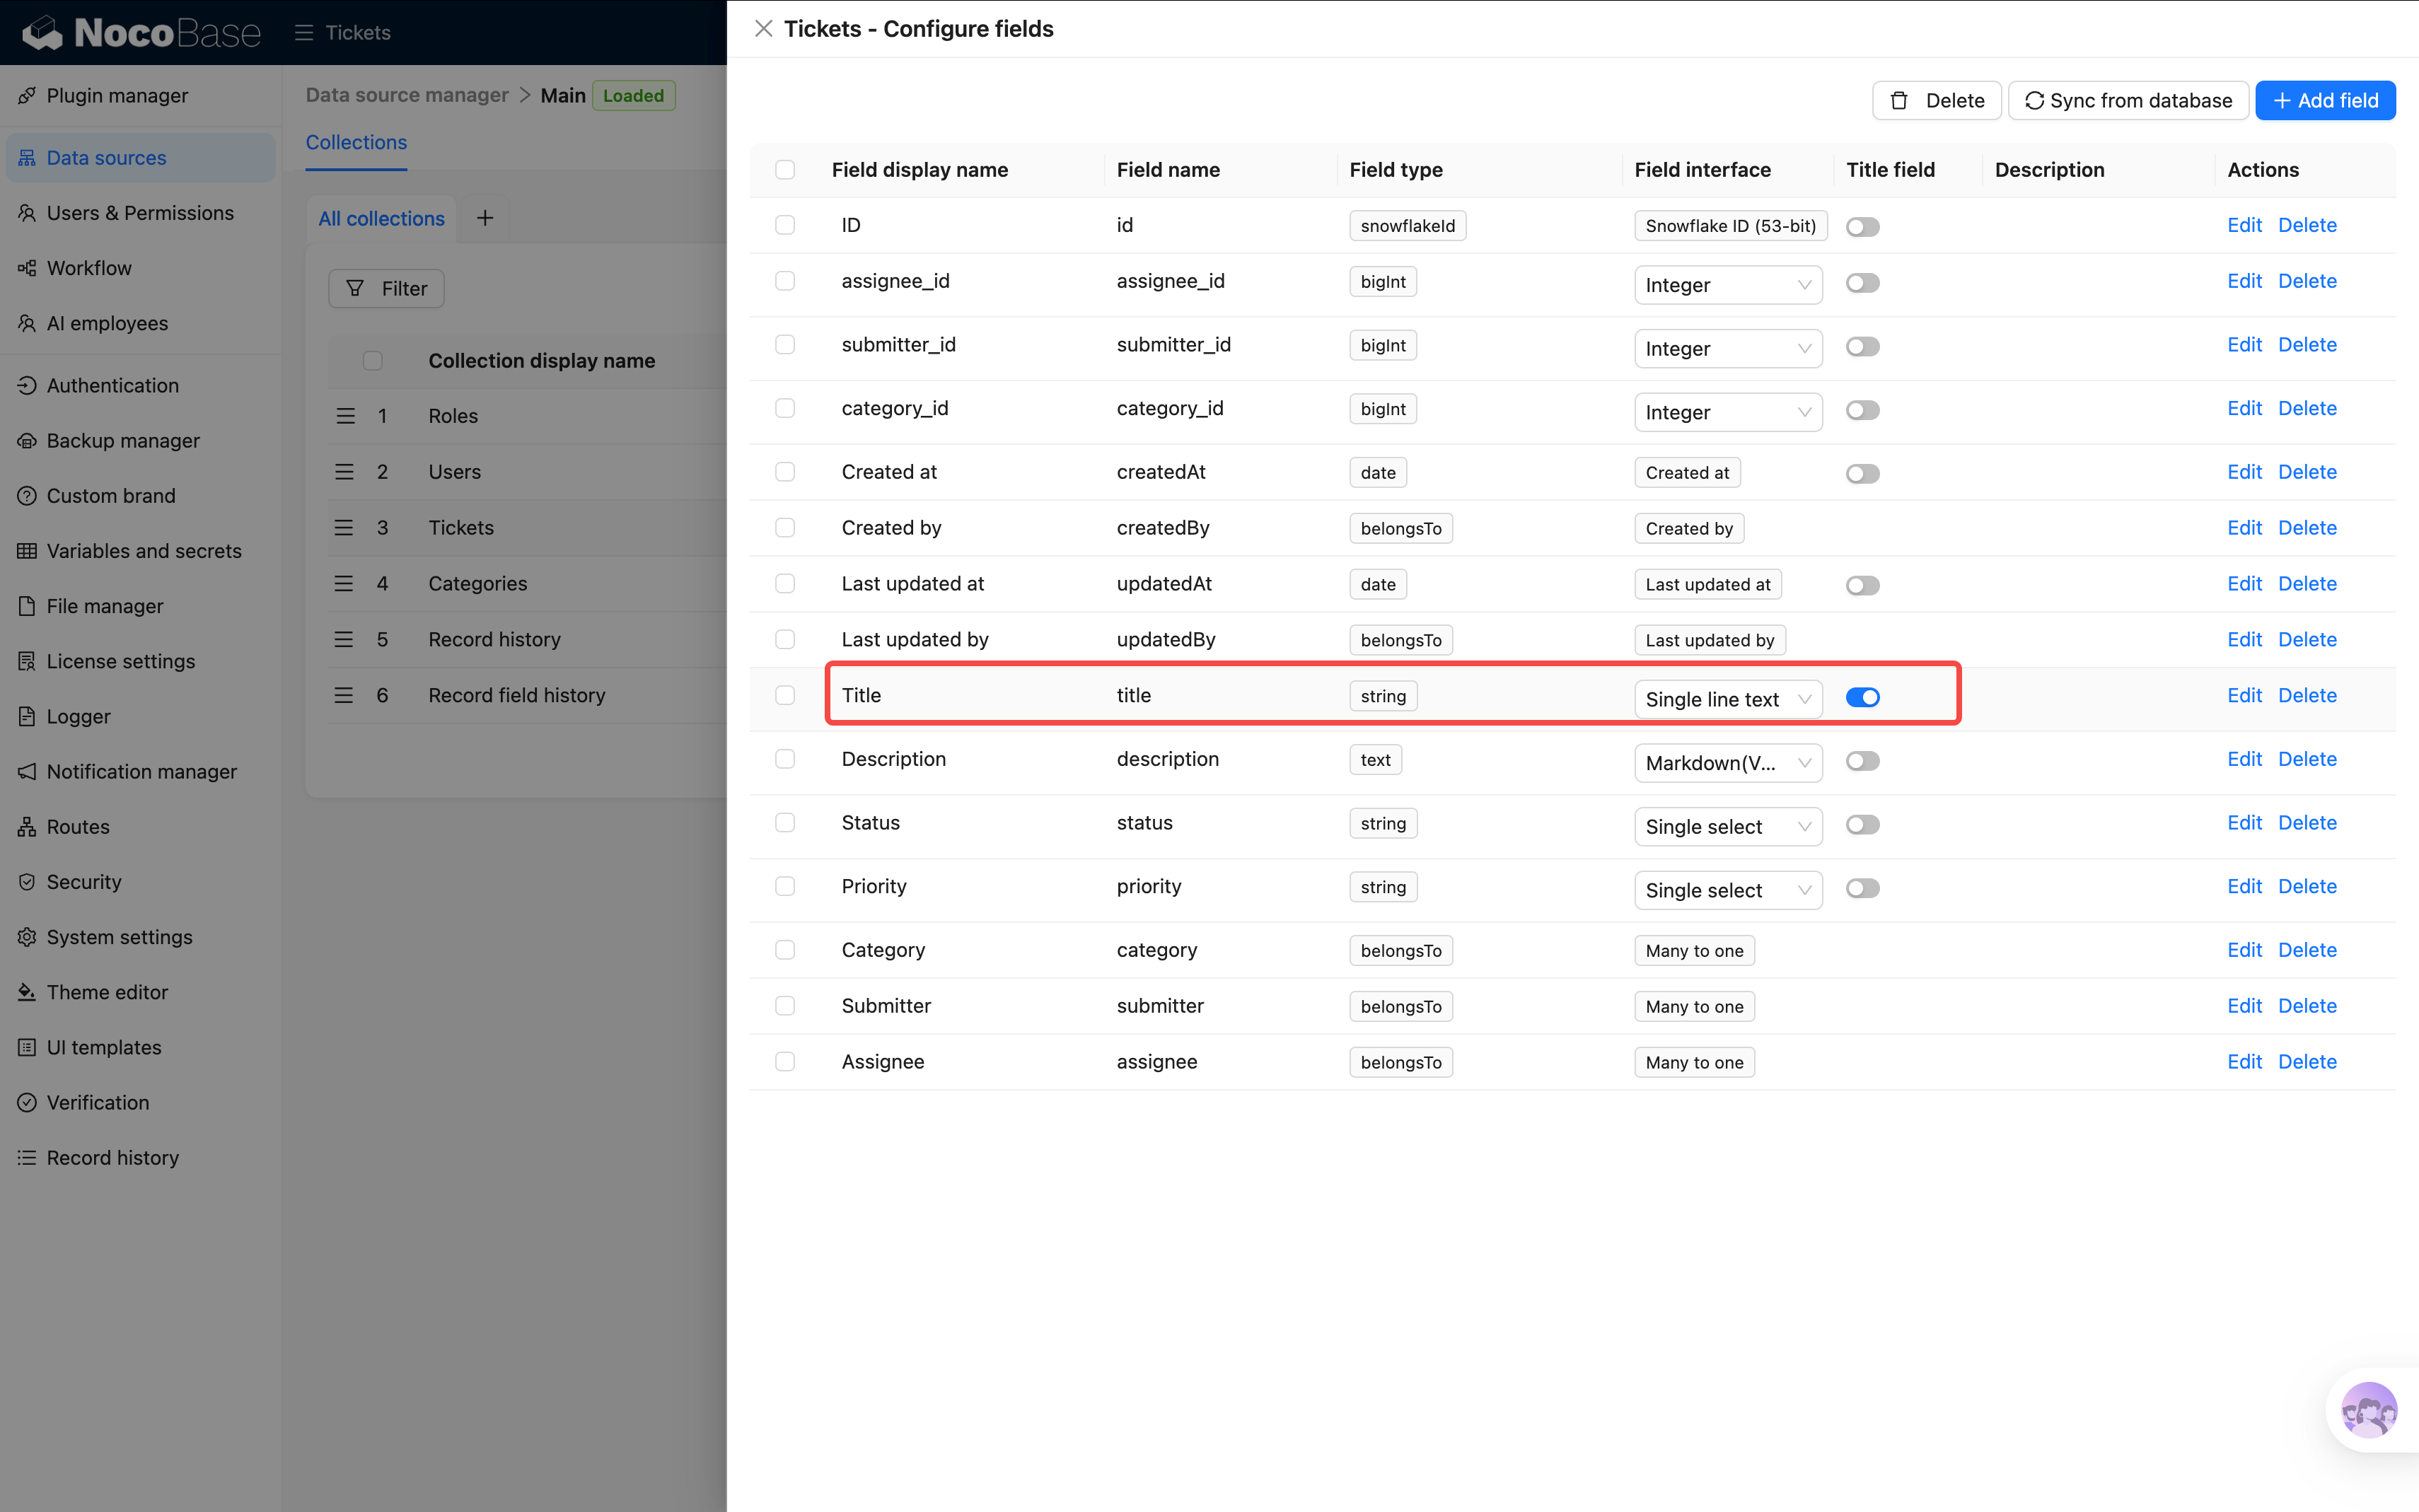
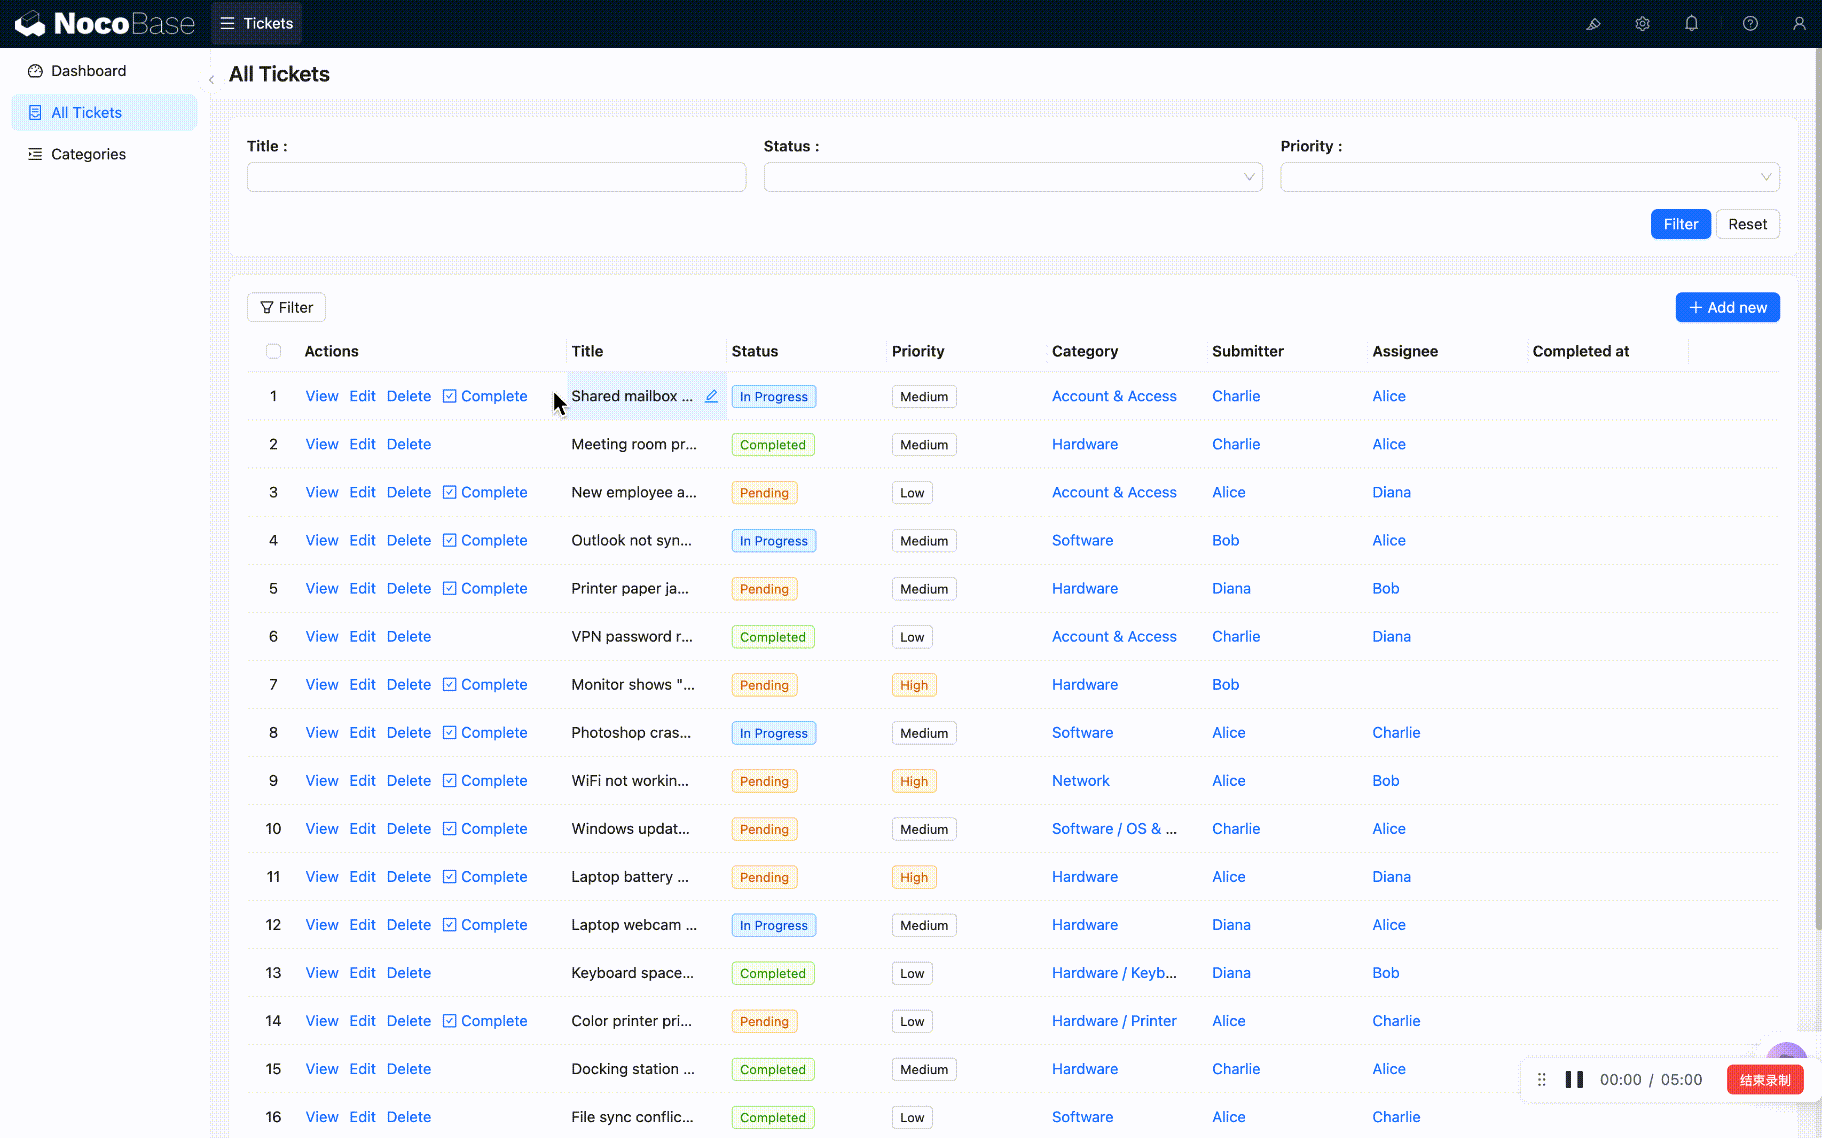
If the ticket selector shows IDs instead of titles, go to Data sources → Collections → Tickets and set the "Title" column as the title field.
-
Click execute. The workflow will run and automatically switch to a duplicated new version.
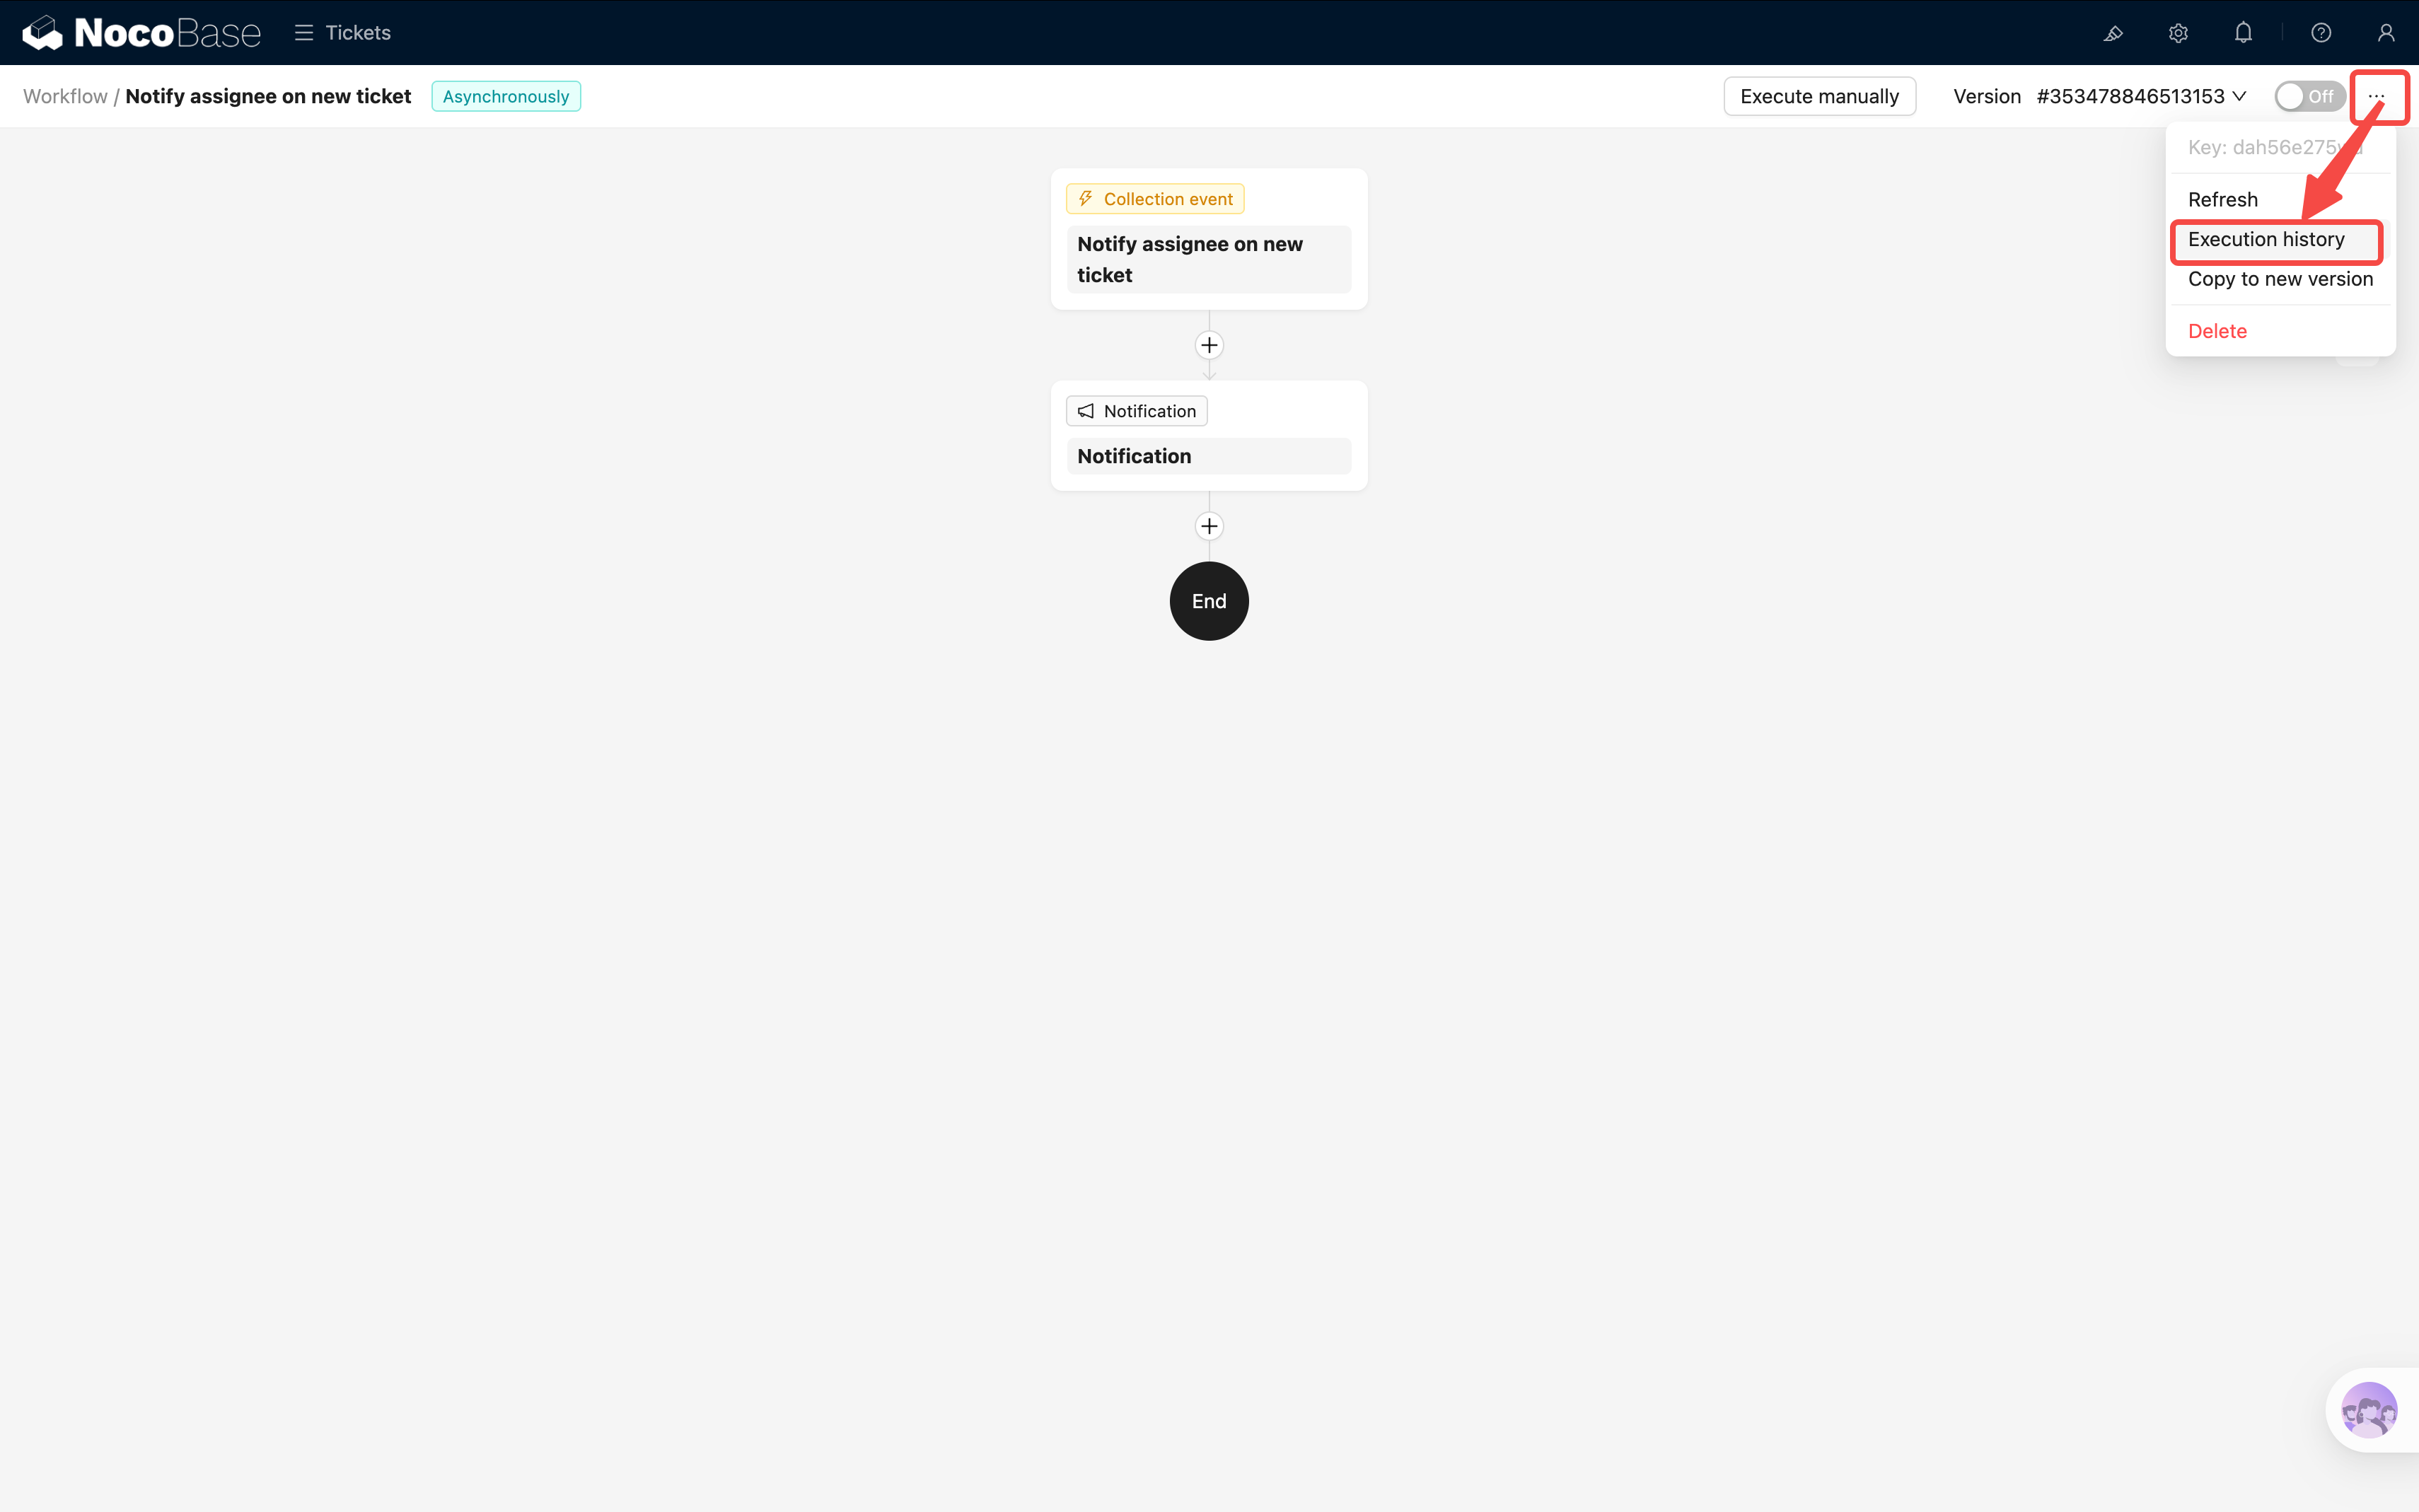
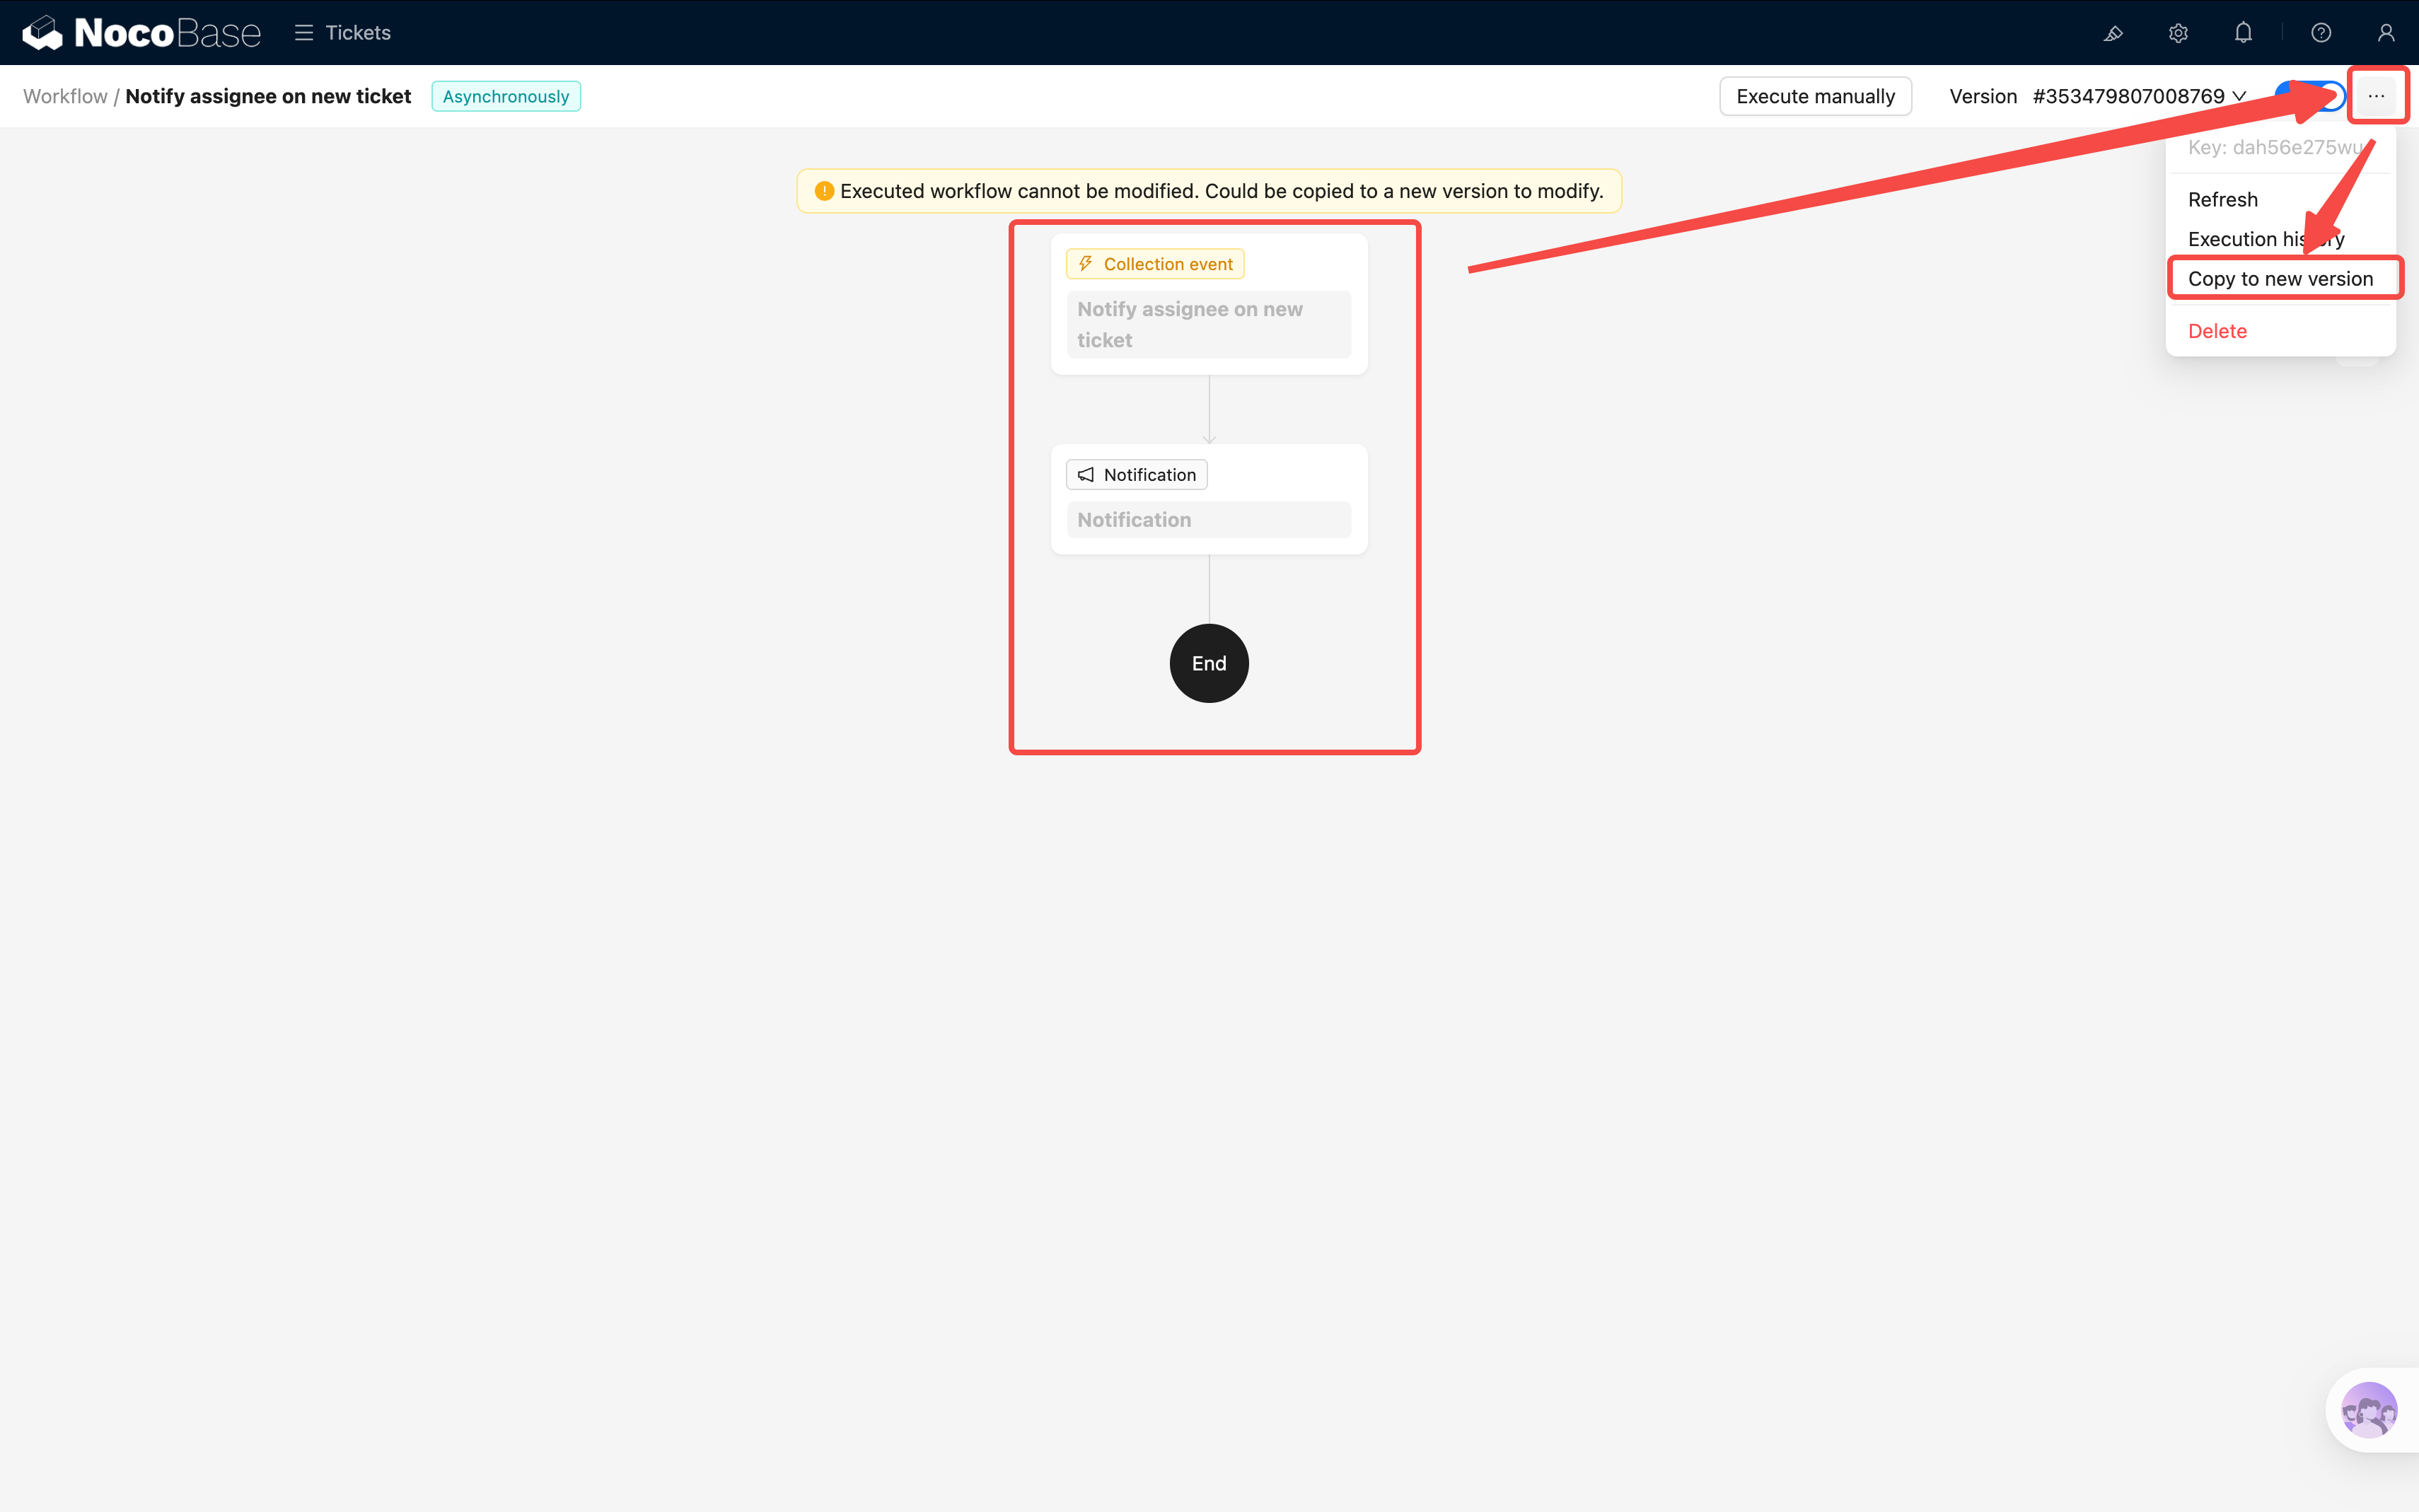
-
Click the three dots in the top-right corner and select Execution history. You should see the execution record we just created. Click to view the details — including trigger info, each node's execution details, and parameters.

- The ticket we just tested seems to be assigned to Alice. Let's switch to Alice's account — notification received!
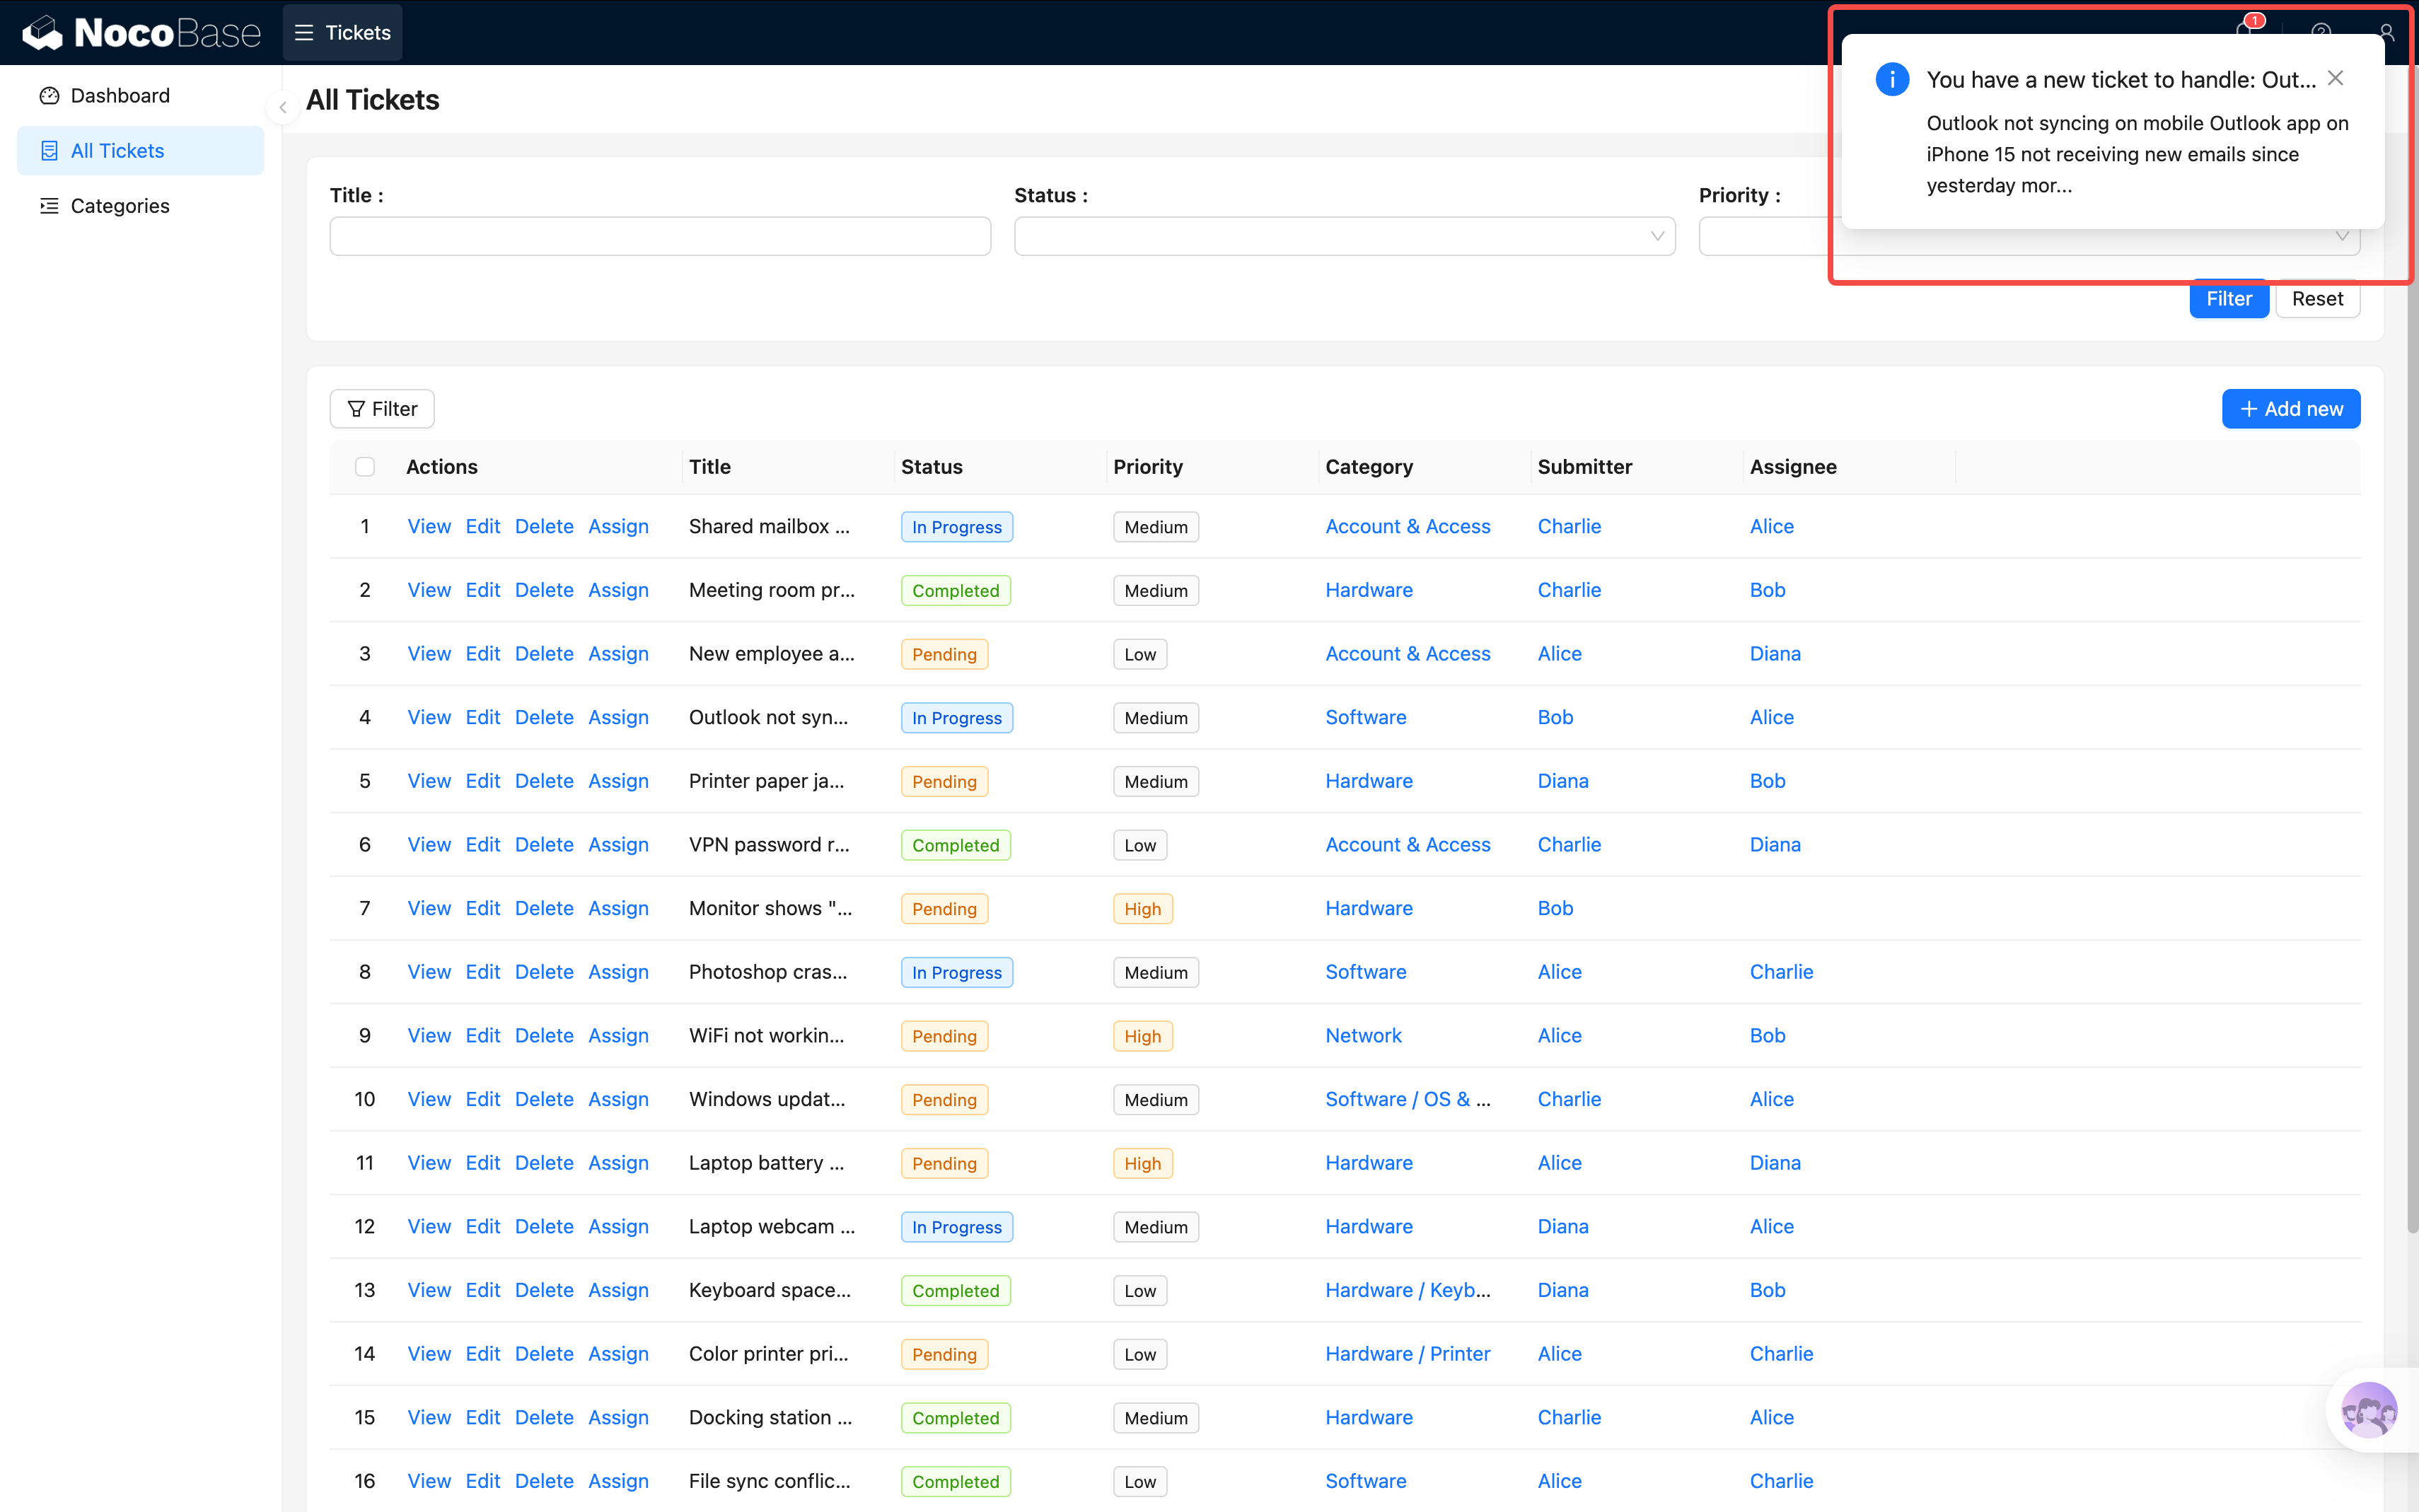
Click the notification to jump to the target ticket page. The notification is automatically marked as read.
Once confirmed, click the On/Off toggle in the top-right corner to enable the workflow.
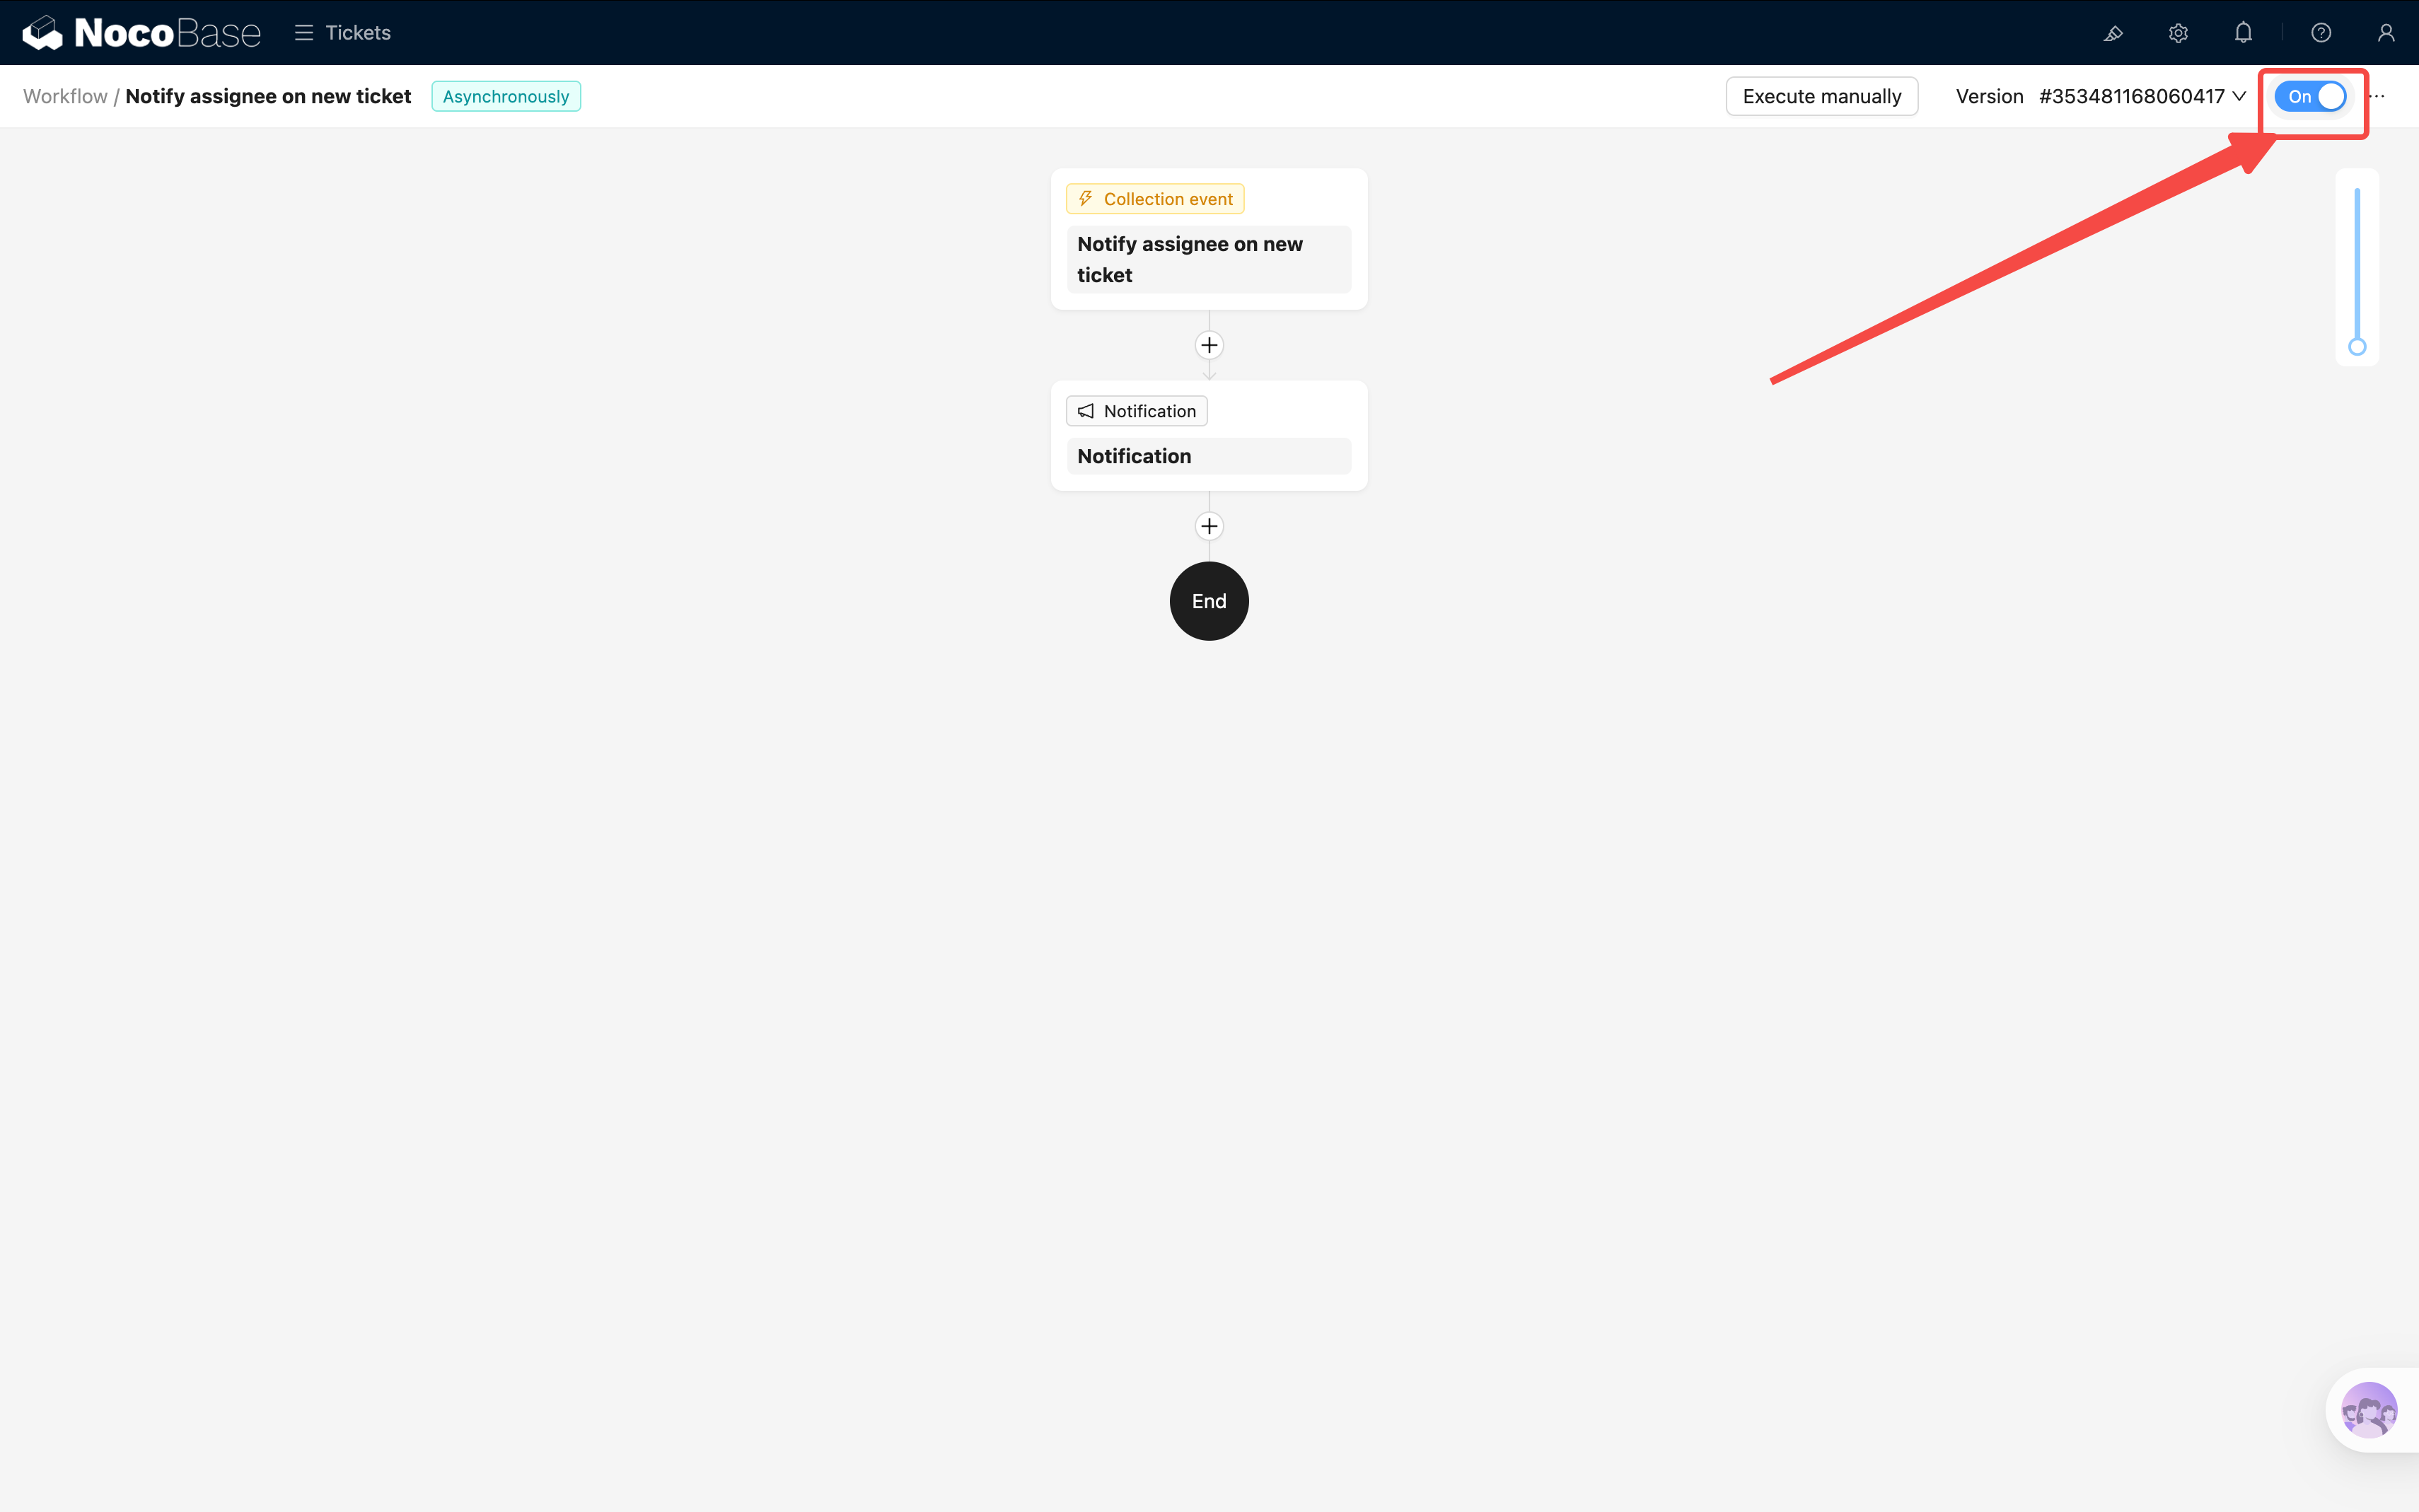
Note: Once a workflow has been executed (including manual execution), it becomes read-only (grayed out) and can no longer be edited. If you need to make changes, click "Duplicate to new version" in the top-right corner and continue editing the new version. The old version is automatically disabled.
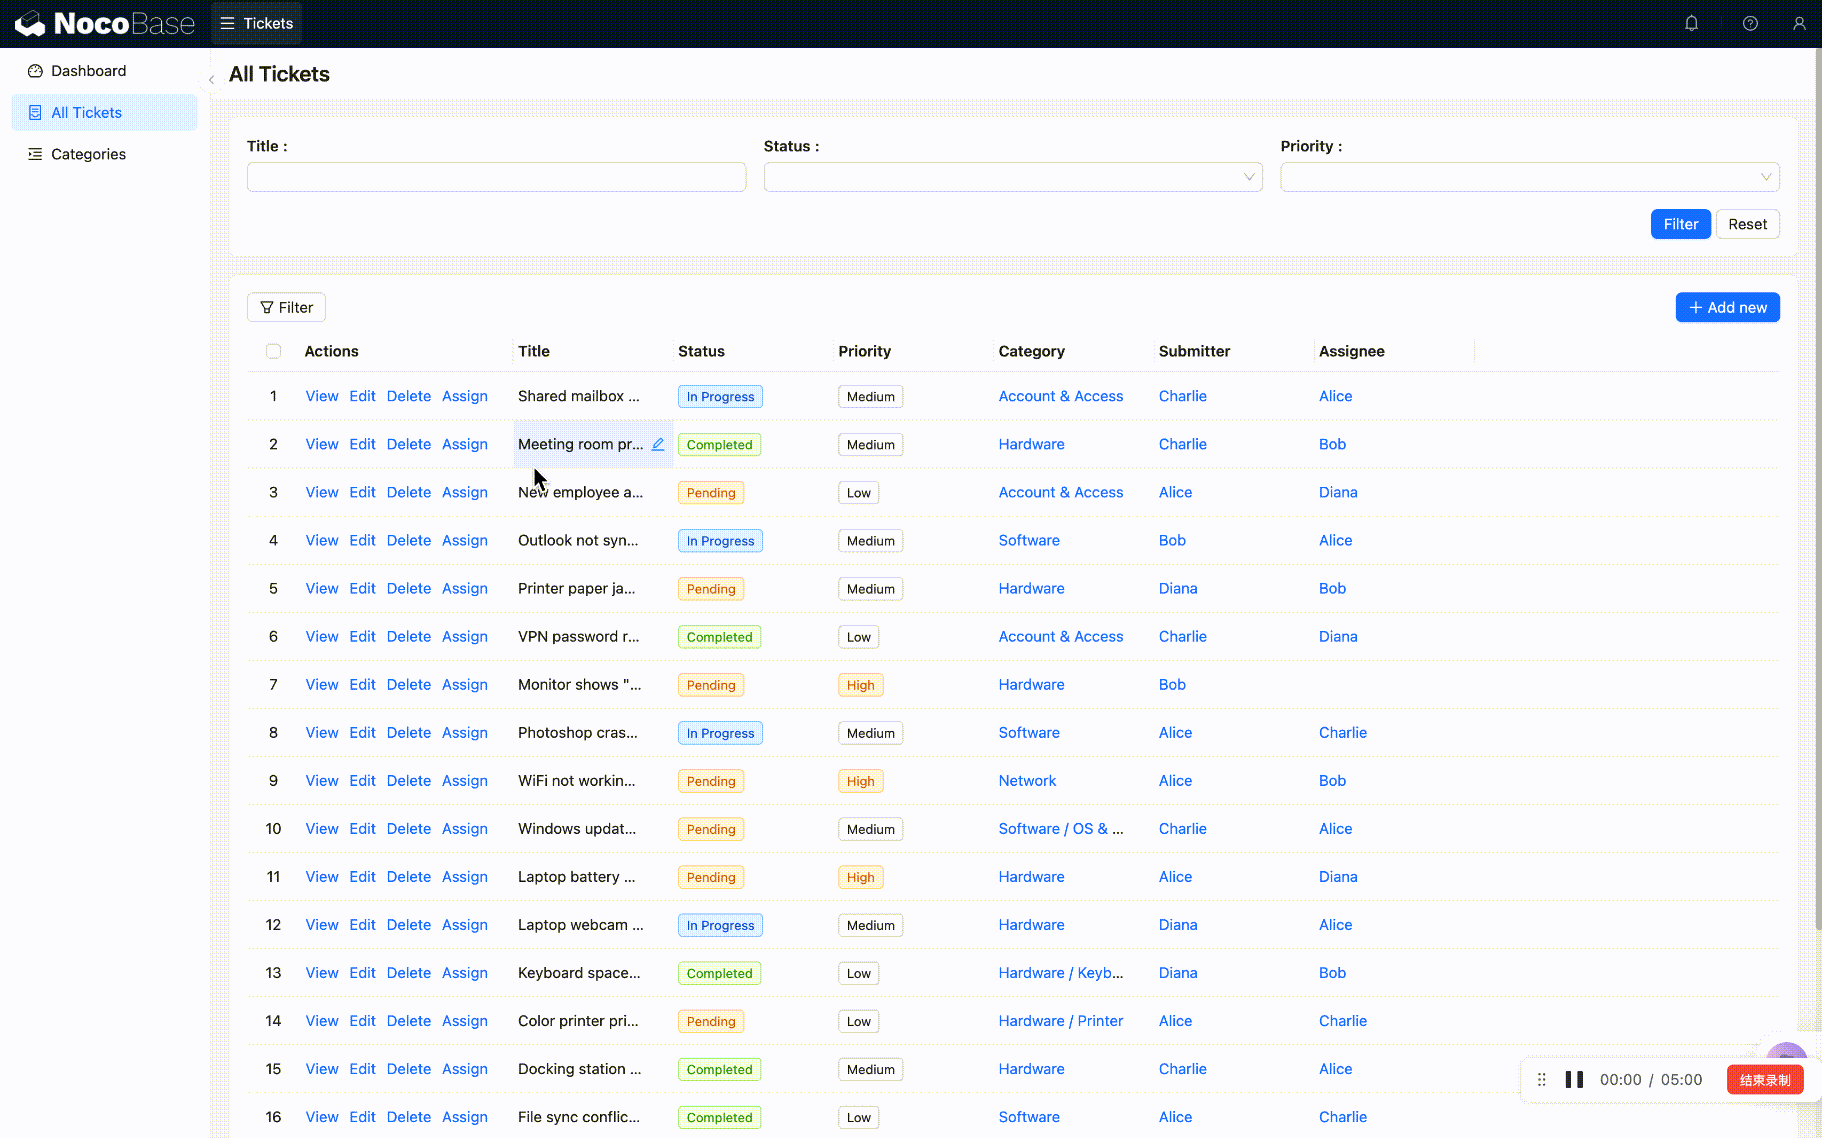
Go back to the tickets page and create a new ticket — make sure to select an assignee. Then switch to the assignee's account and check the notification center — you should see a new notification.
Congratulations, your first automation is up and running!
6.3 Scenario 2: Automatically Record Completion Time
Requirement: When a ticket is marked as "Completed," the system automatically fills in the "Completion time" field with the current time. No manual entry needed, and it never gets forgotten.
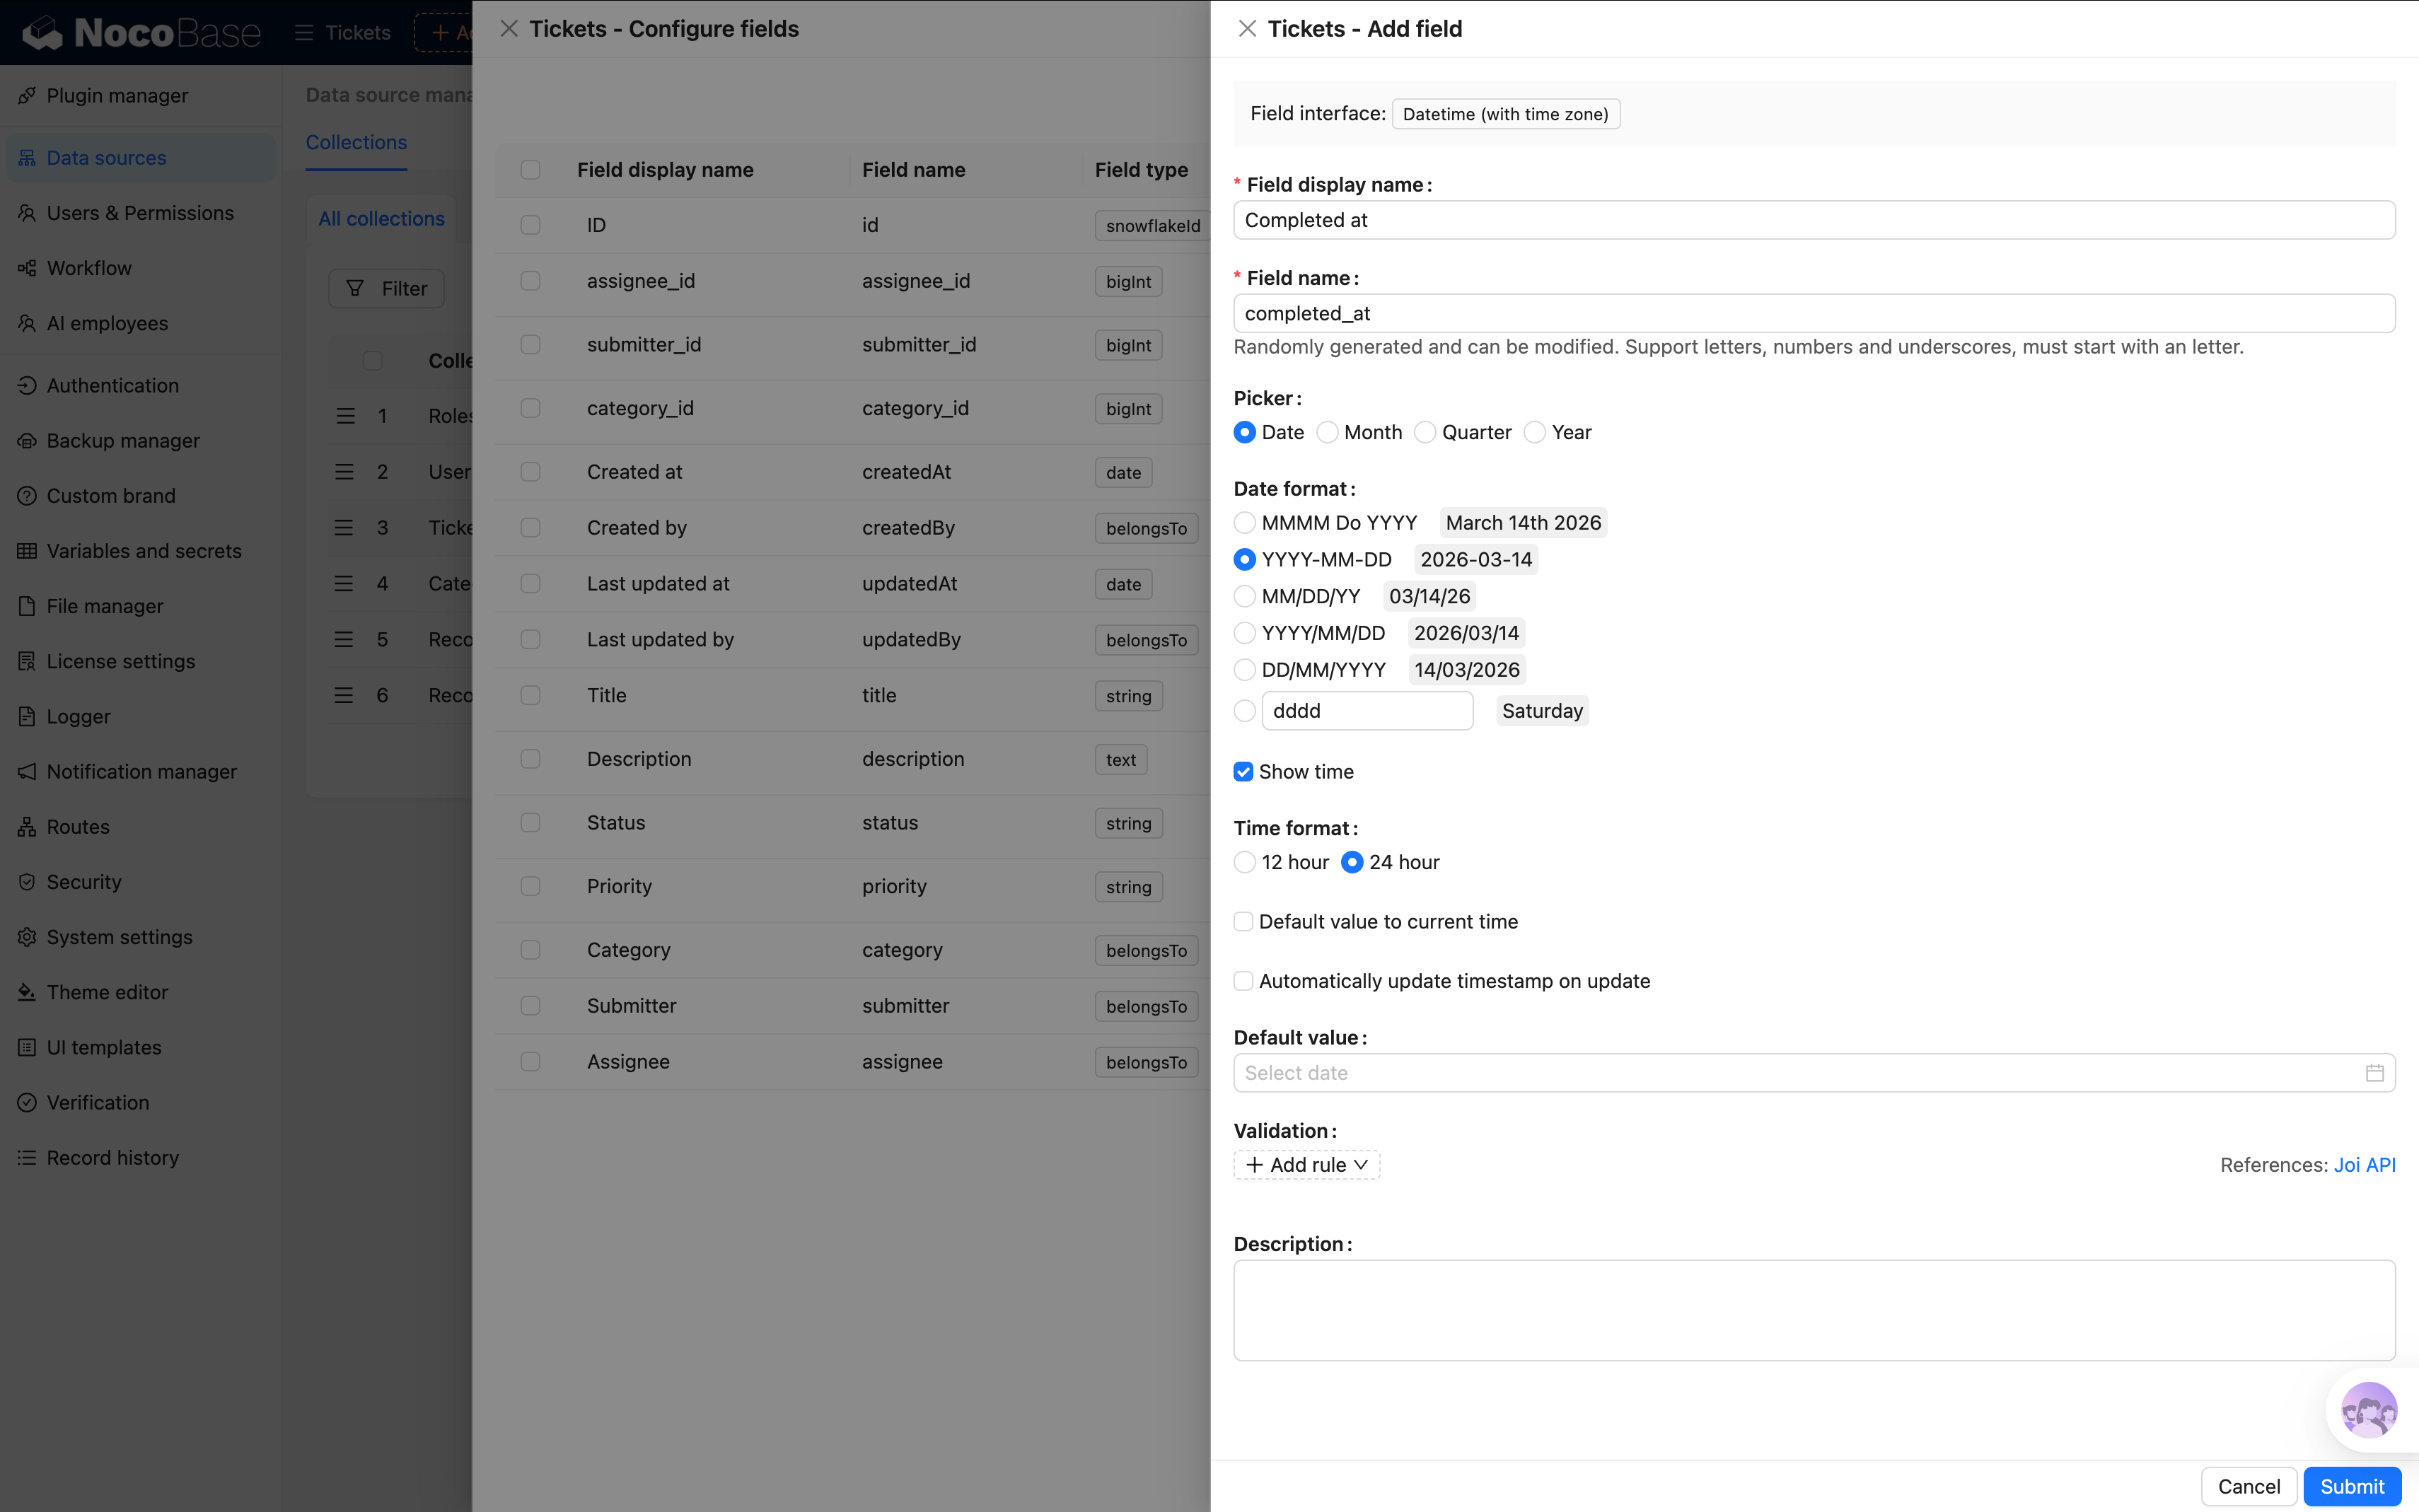
If you haven't created a "Completion time" field in the Tickets collection yet, go to Collection management → Tickets and add a Date type field named "Completion time." Refer to Chapter 2 for how to create fields — we won't repeat the steps here.
Step 1: Create a Workflow
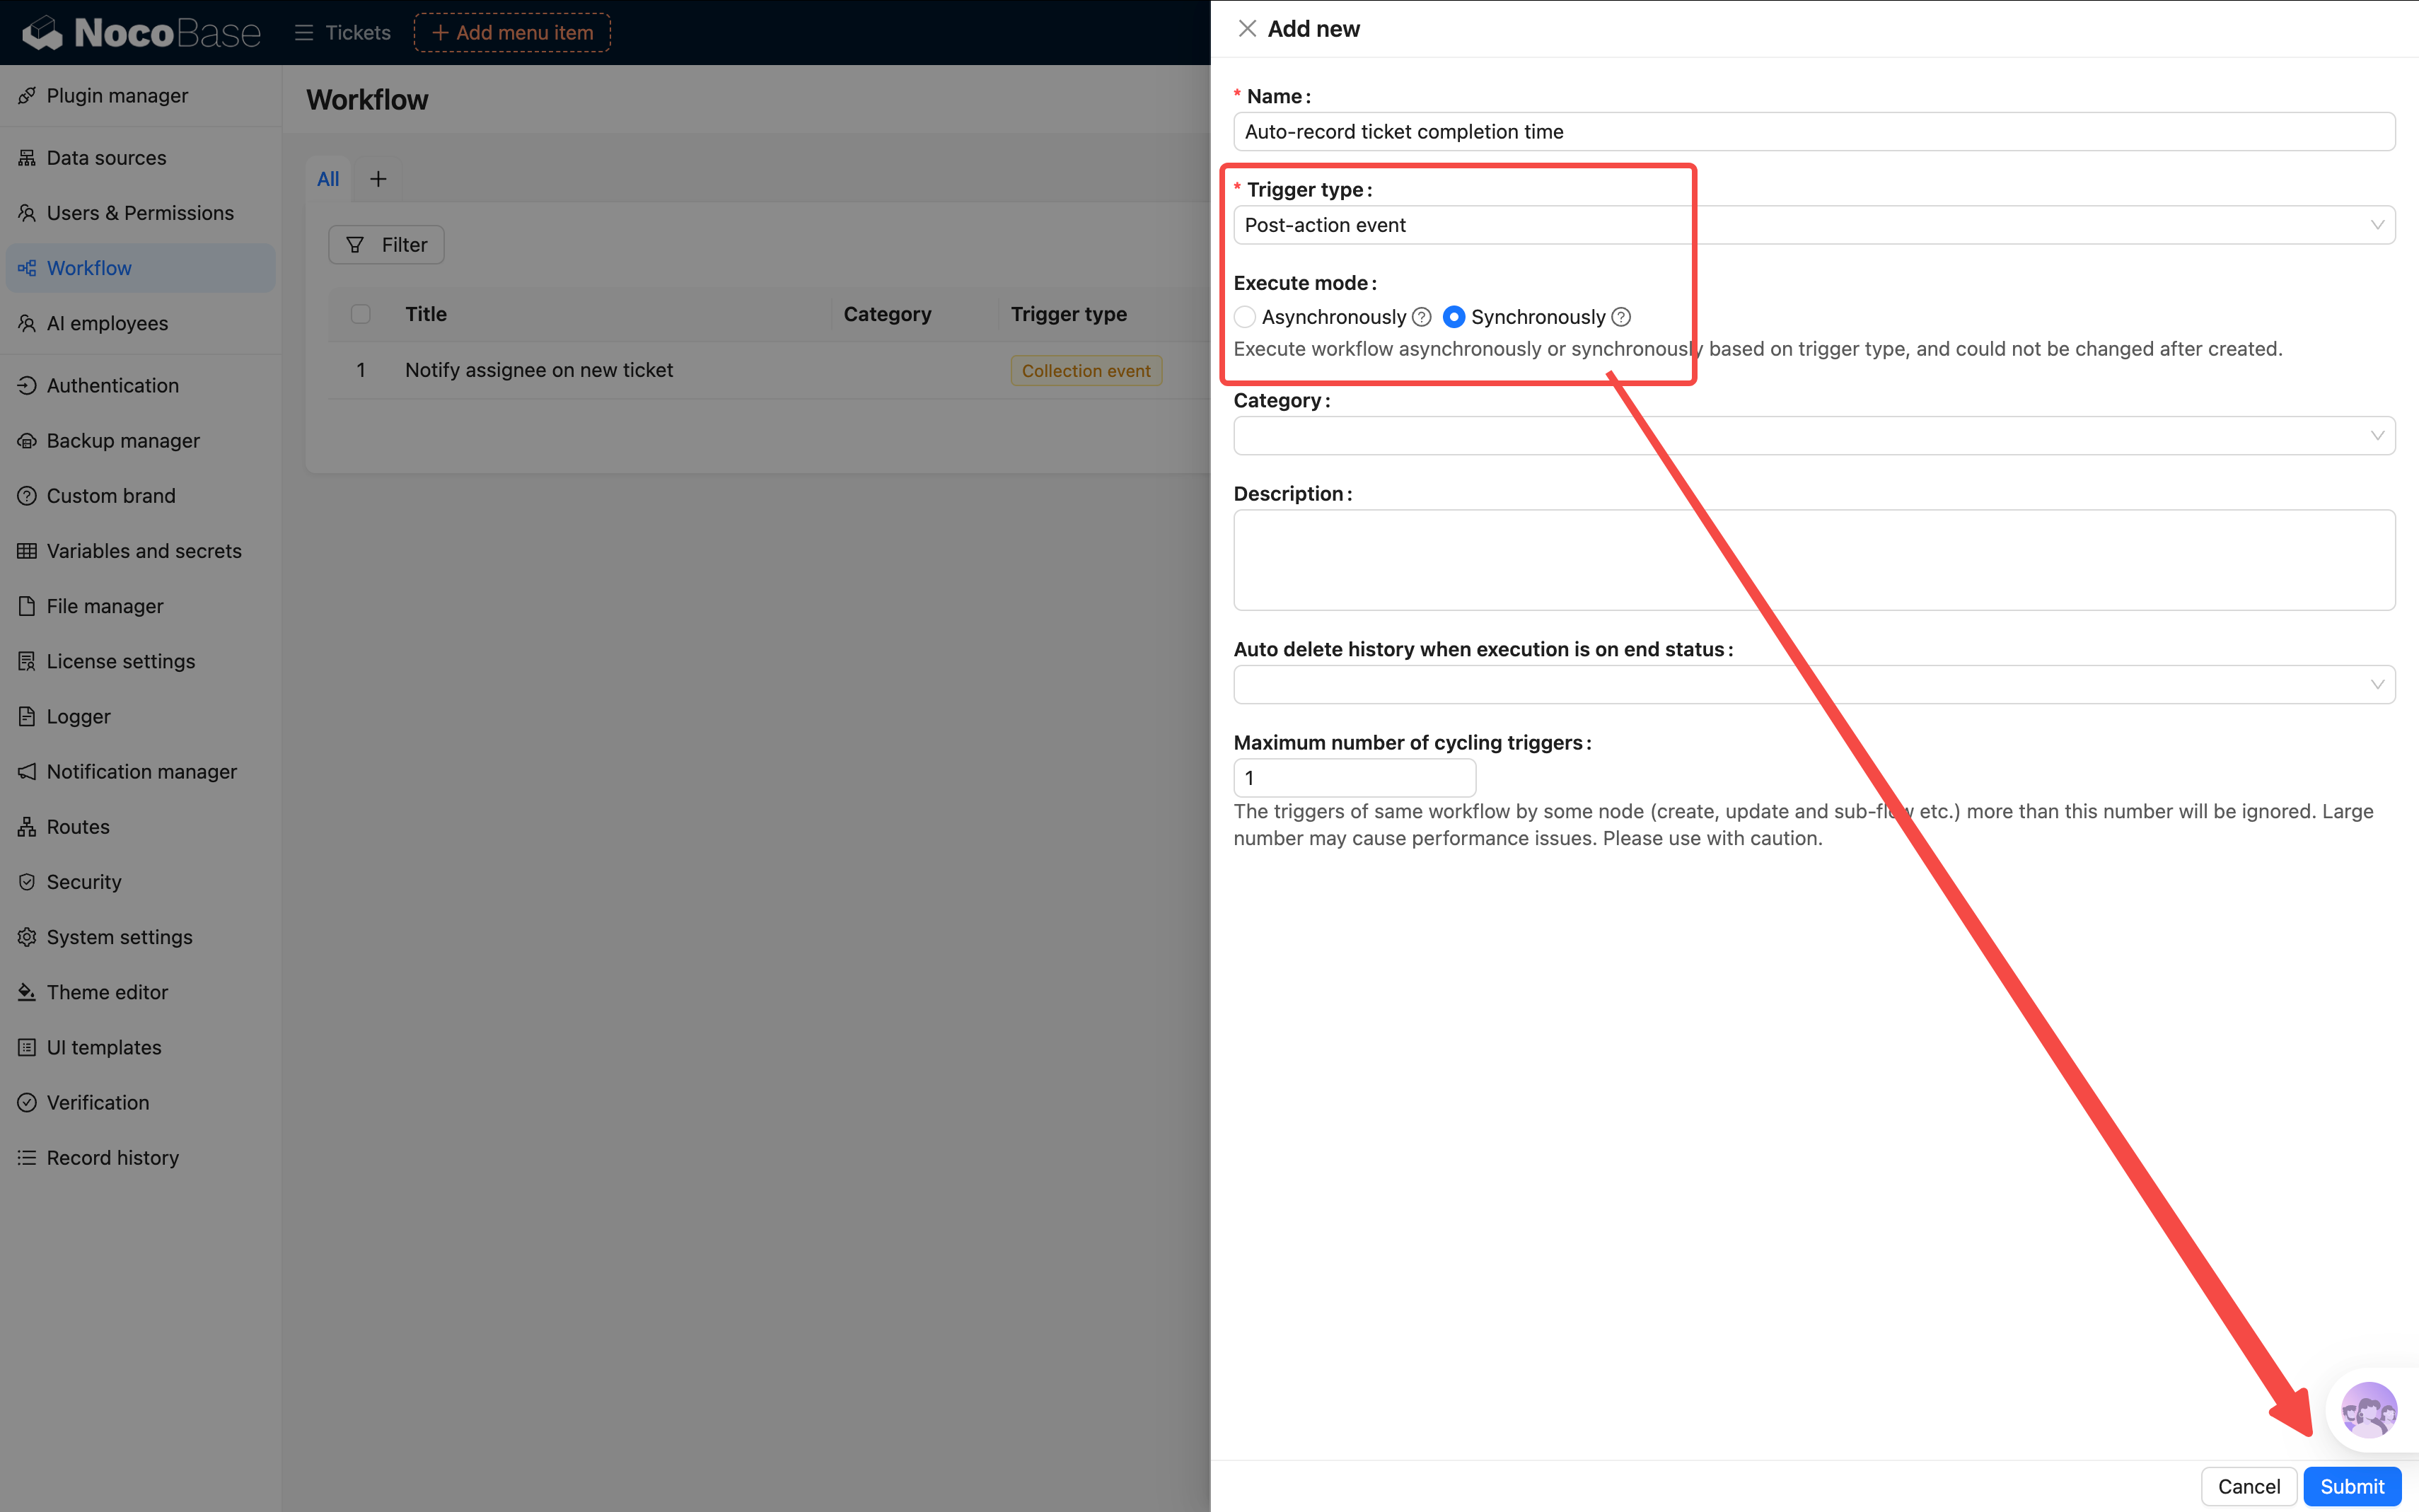
Go back to the workflow management page and click New:
- Name: Enter "Auto-record ticket completion time"
- Trigger type: This time let's try a different trigger — select Post-action event (fires after a specific action is performed)
- Execution mode: Synchronous
About synchronous vs asynchronous:
- Asynchronous: After the action, you can continue doing other things while the workflow runs in the background
- Synchronous: After the action, the UI waits for the workflow to finish before you can do anything else
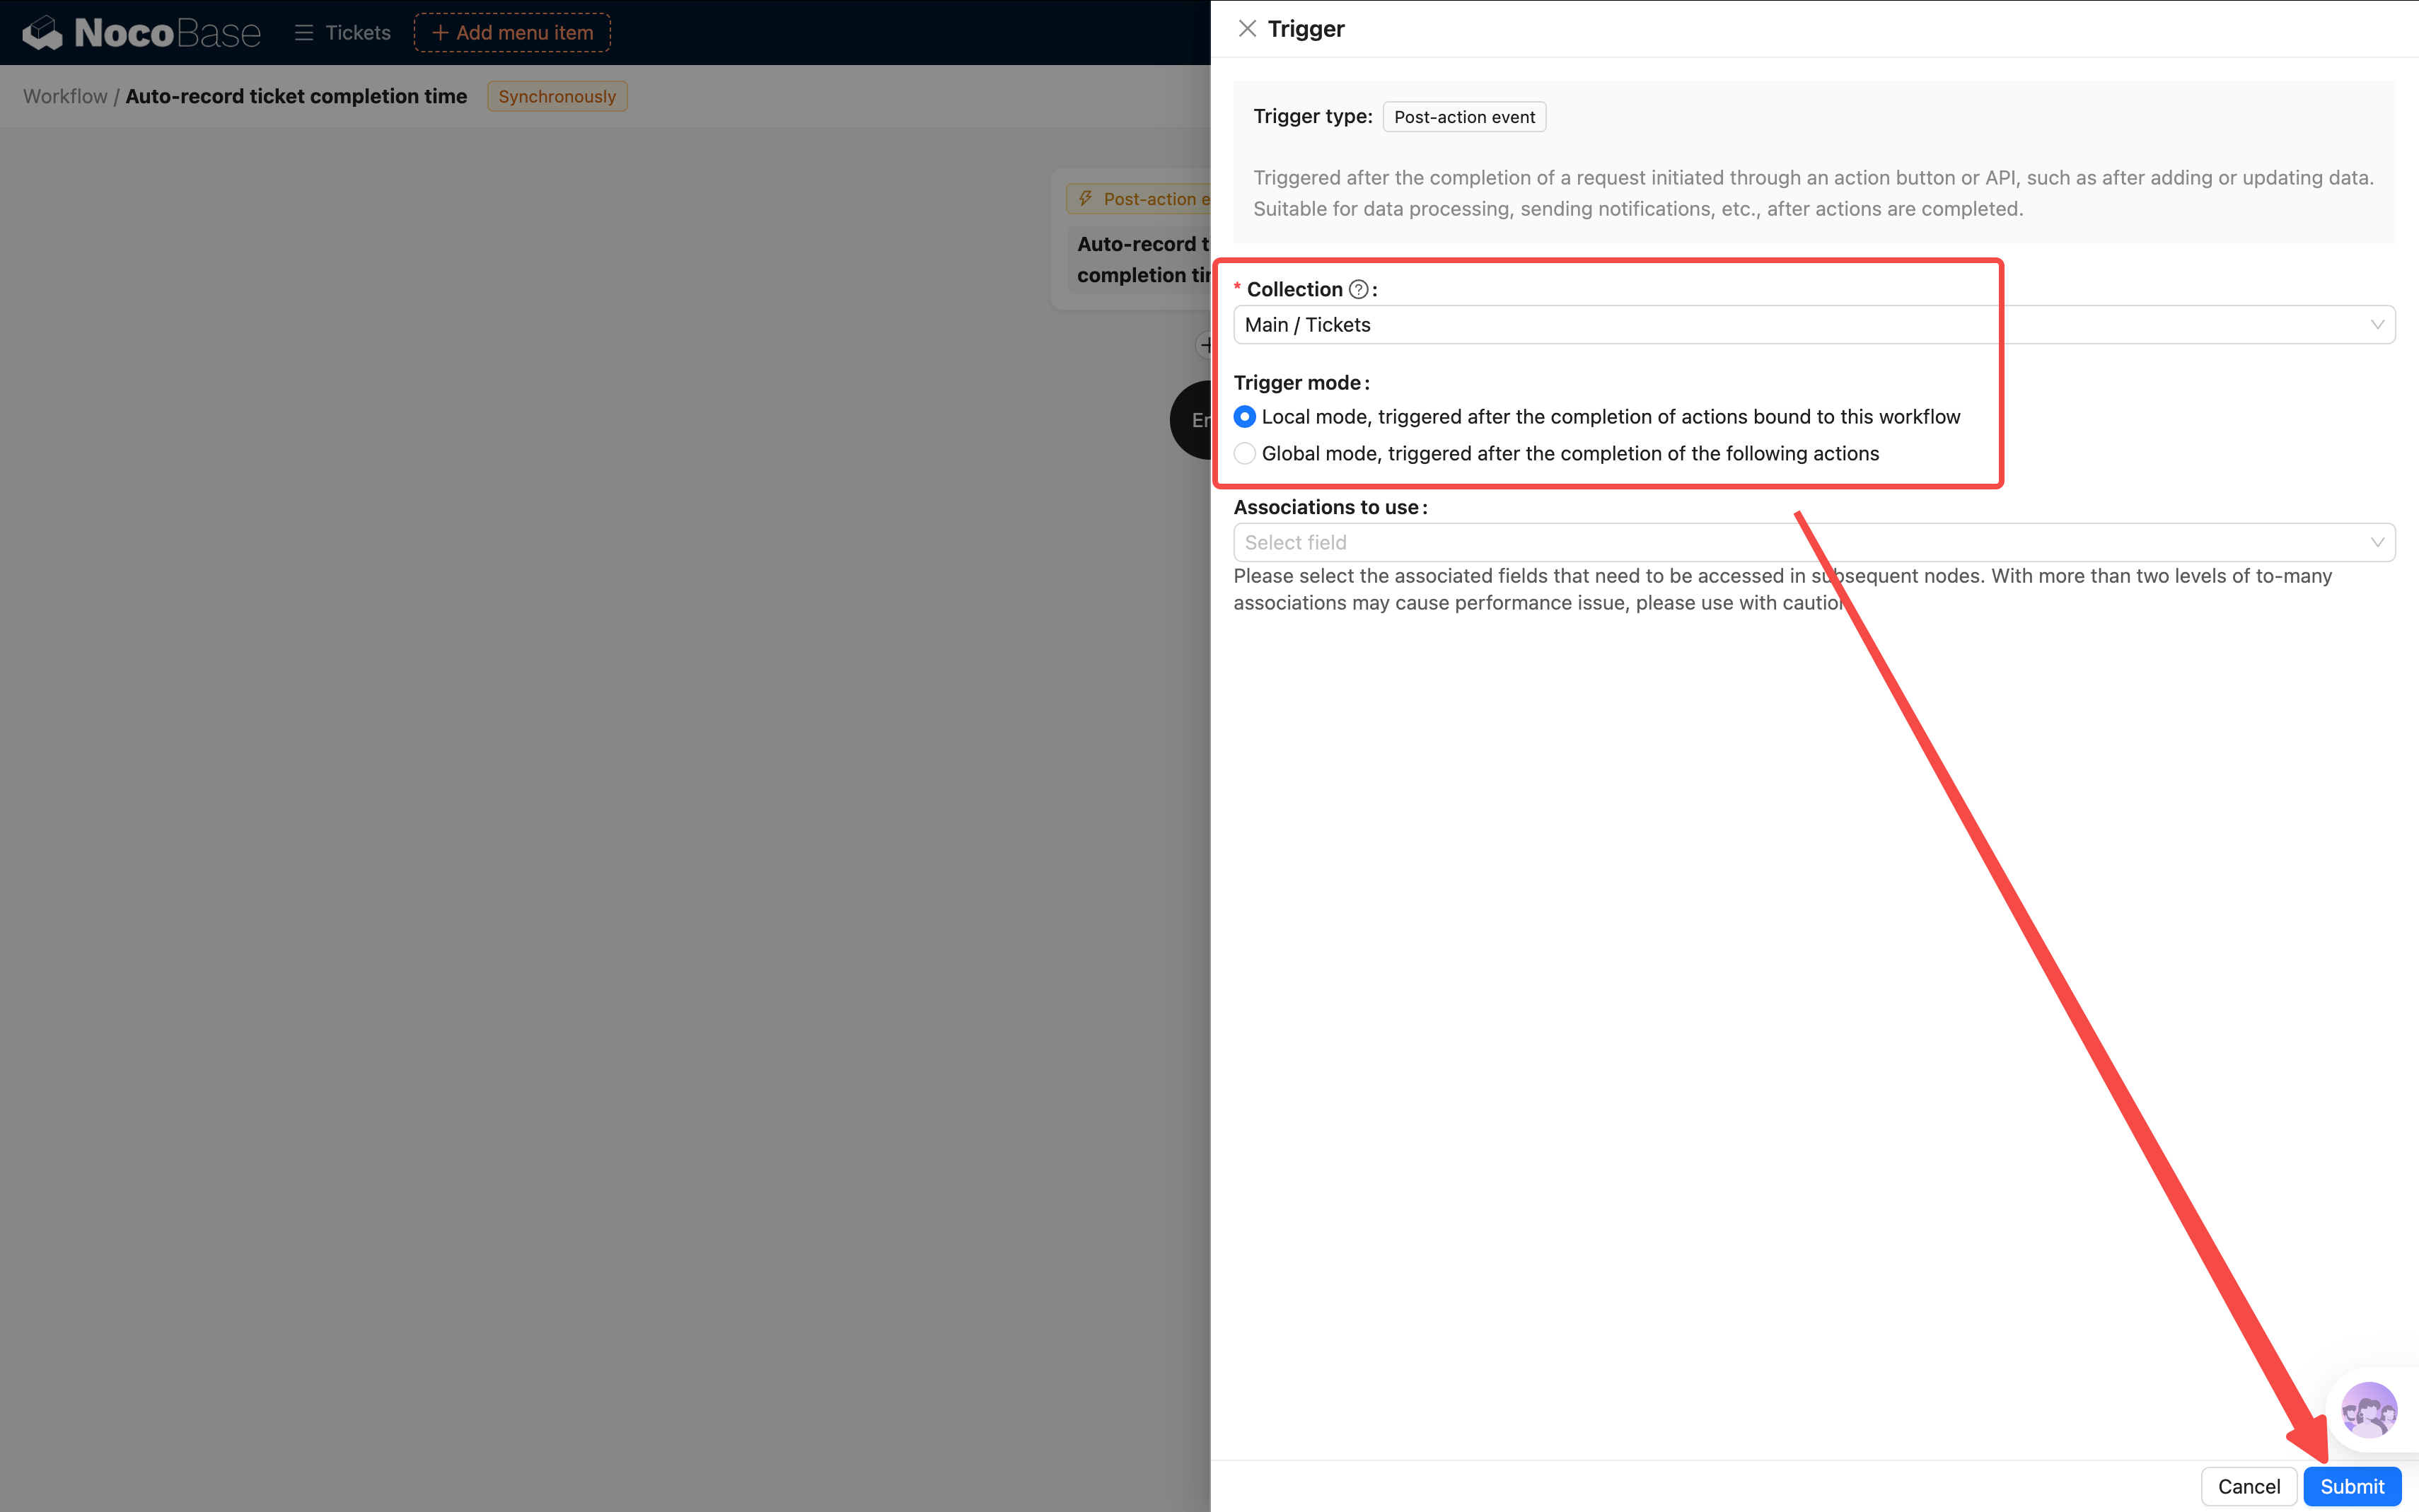
Step 2: Configure the Trigger
Open the trigger configuration:
- Collection: Select "Tickets"
- Trigger mode: Select "Local mode — triggers after the action bound to this workflow completes"
"Global mode" (checking both operations) is generally recommended. However, to familiarize ourselves with how triggers bind to specific actions, we'll use "Local mode" for this tutorial. Feel free to switch to global mode later!
Step 3: Add a Condition
Unlike the collection event trigger which has built-in conditions, we need to add a condition node ourselves:
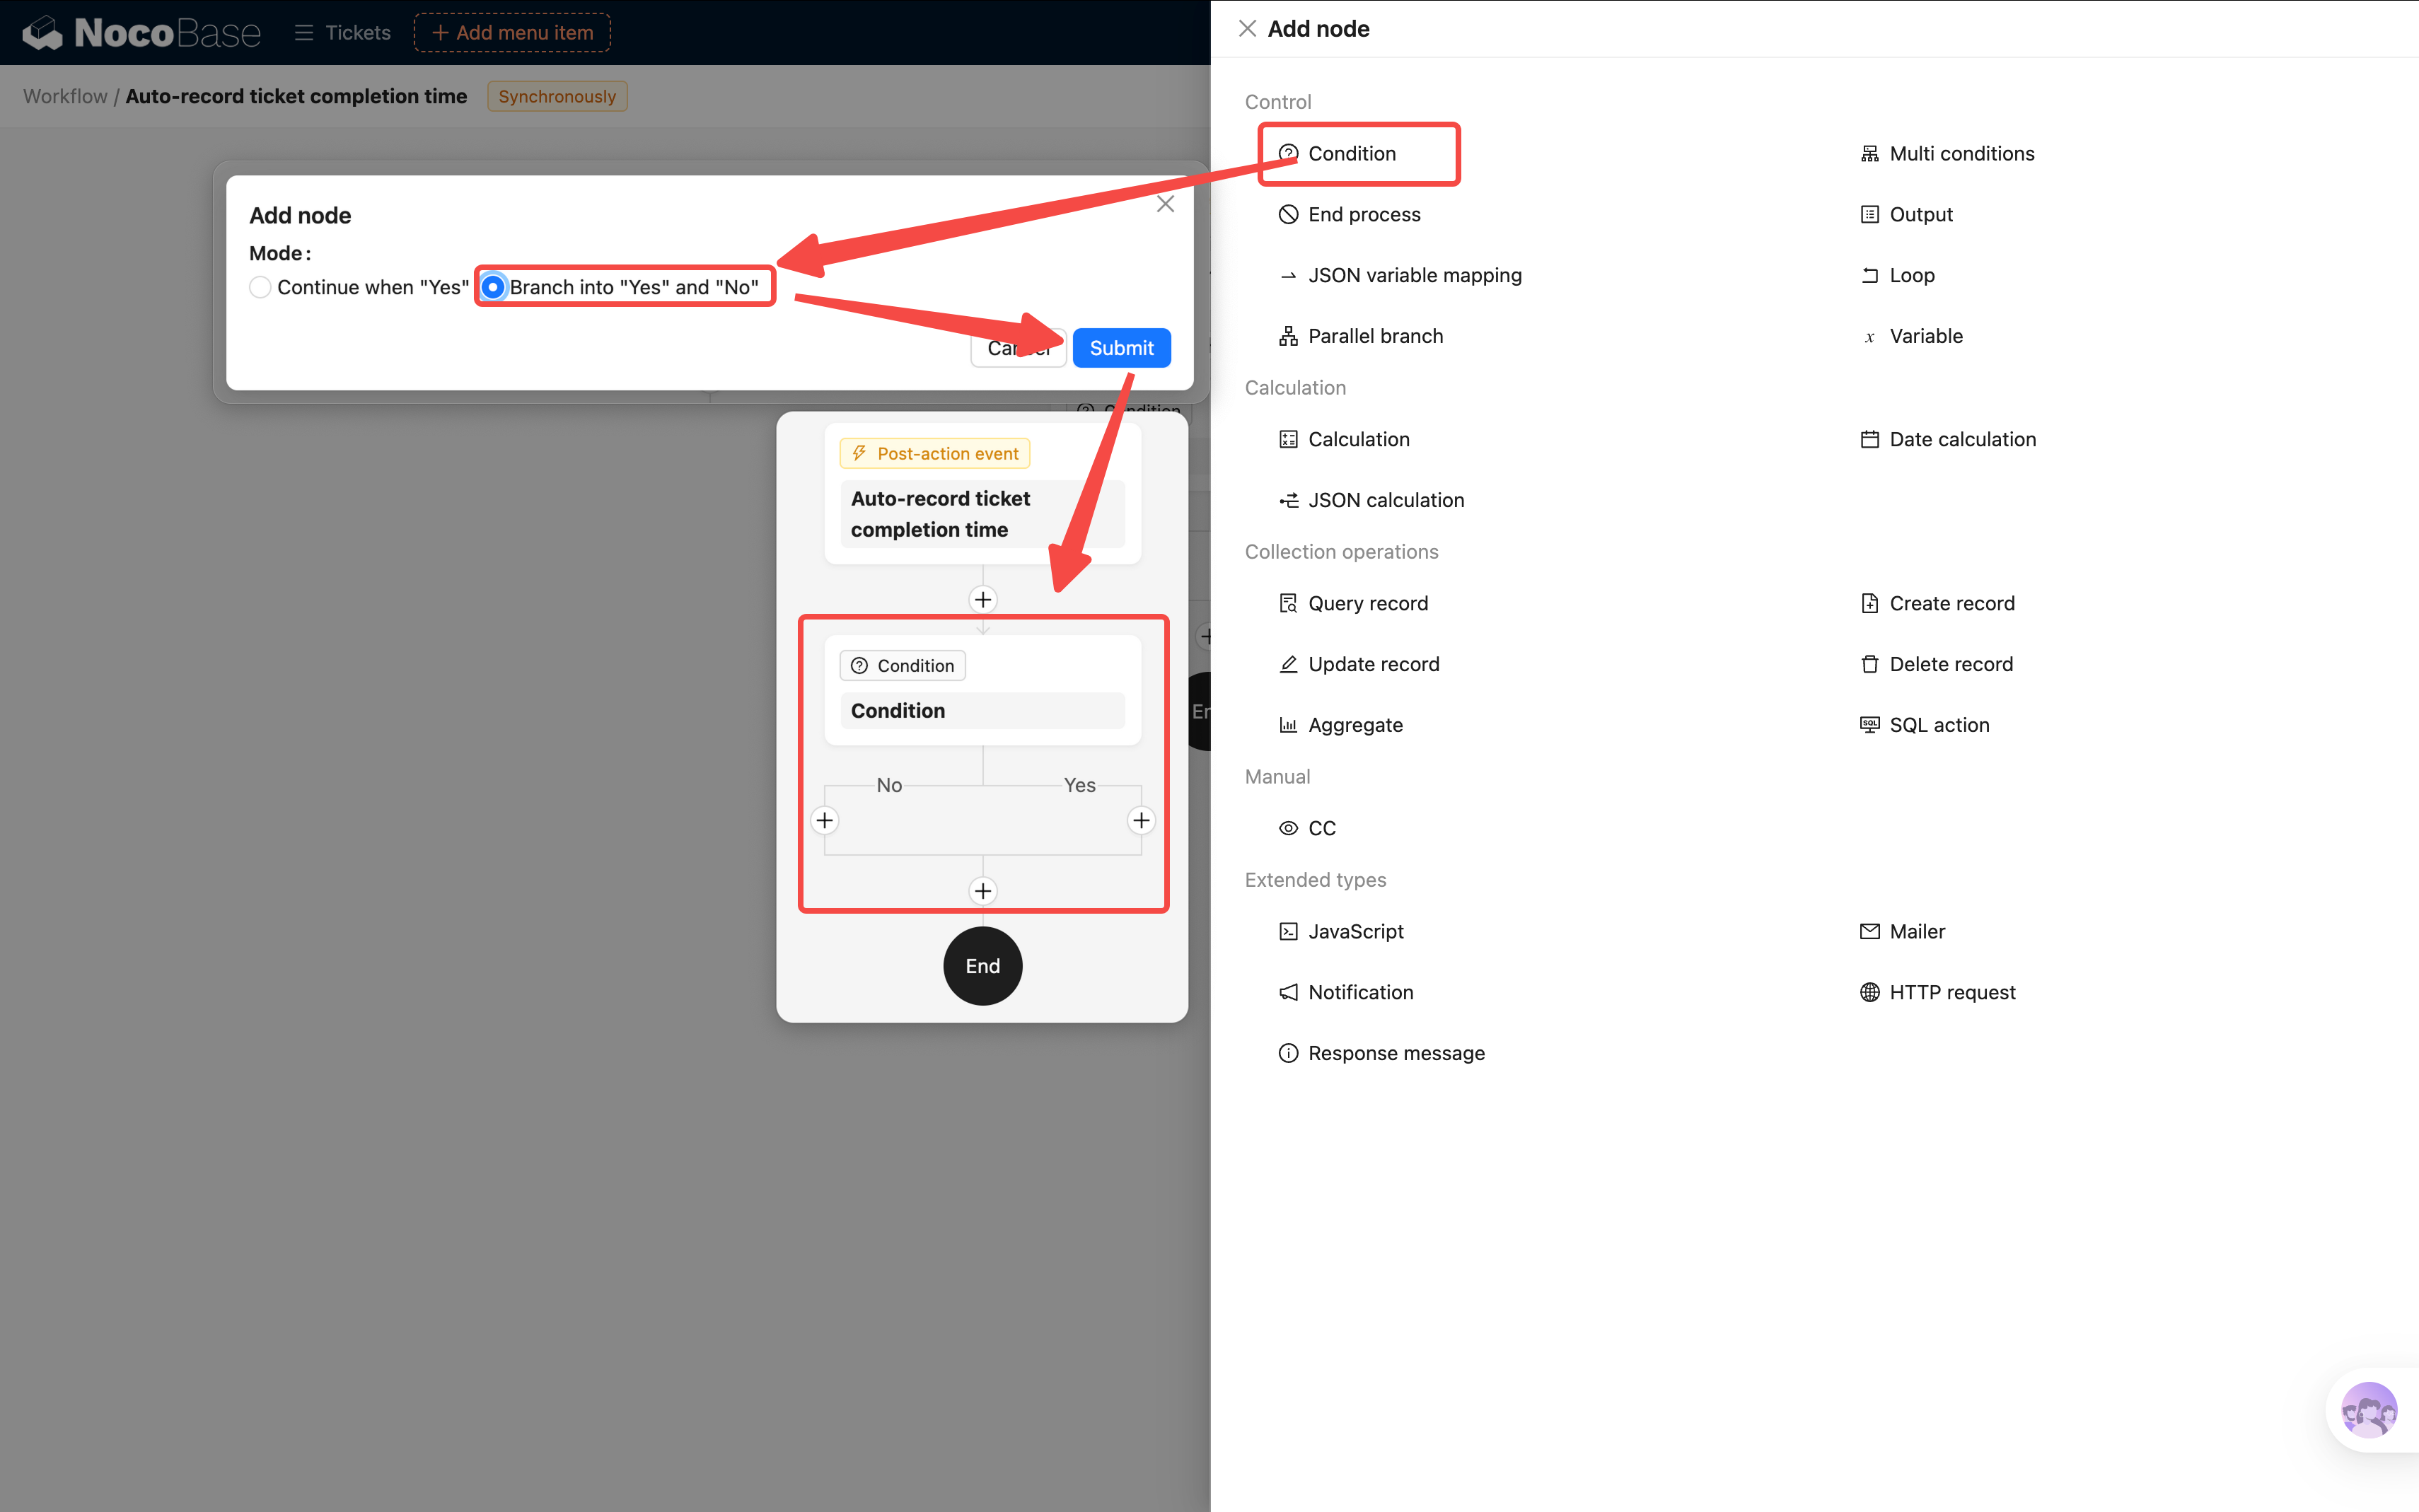
We recommend selecting "Continue on 'Yes' and 'No' separately" for easier future expansion.
- Condition: Trigger data → Status equals Completed. Note: you must copy the exact "option value" from the field configuration here, otherwise the condition check will fail.
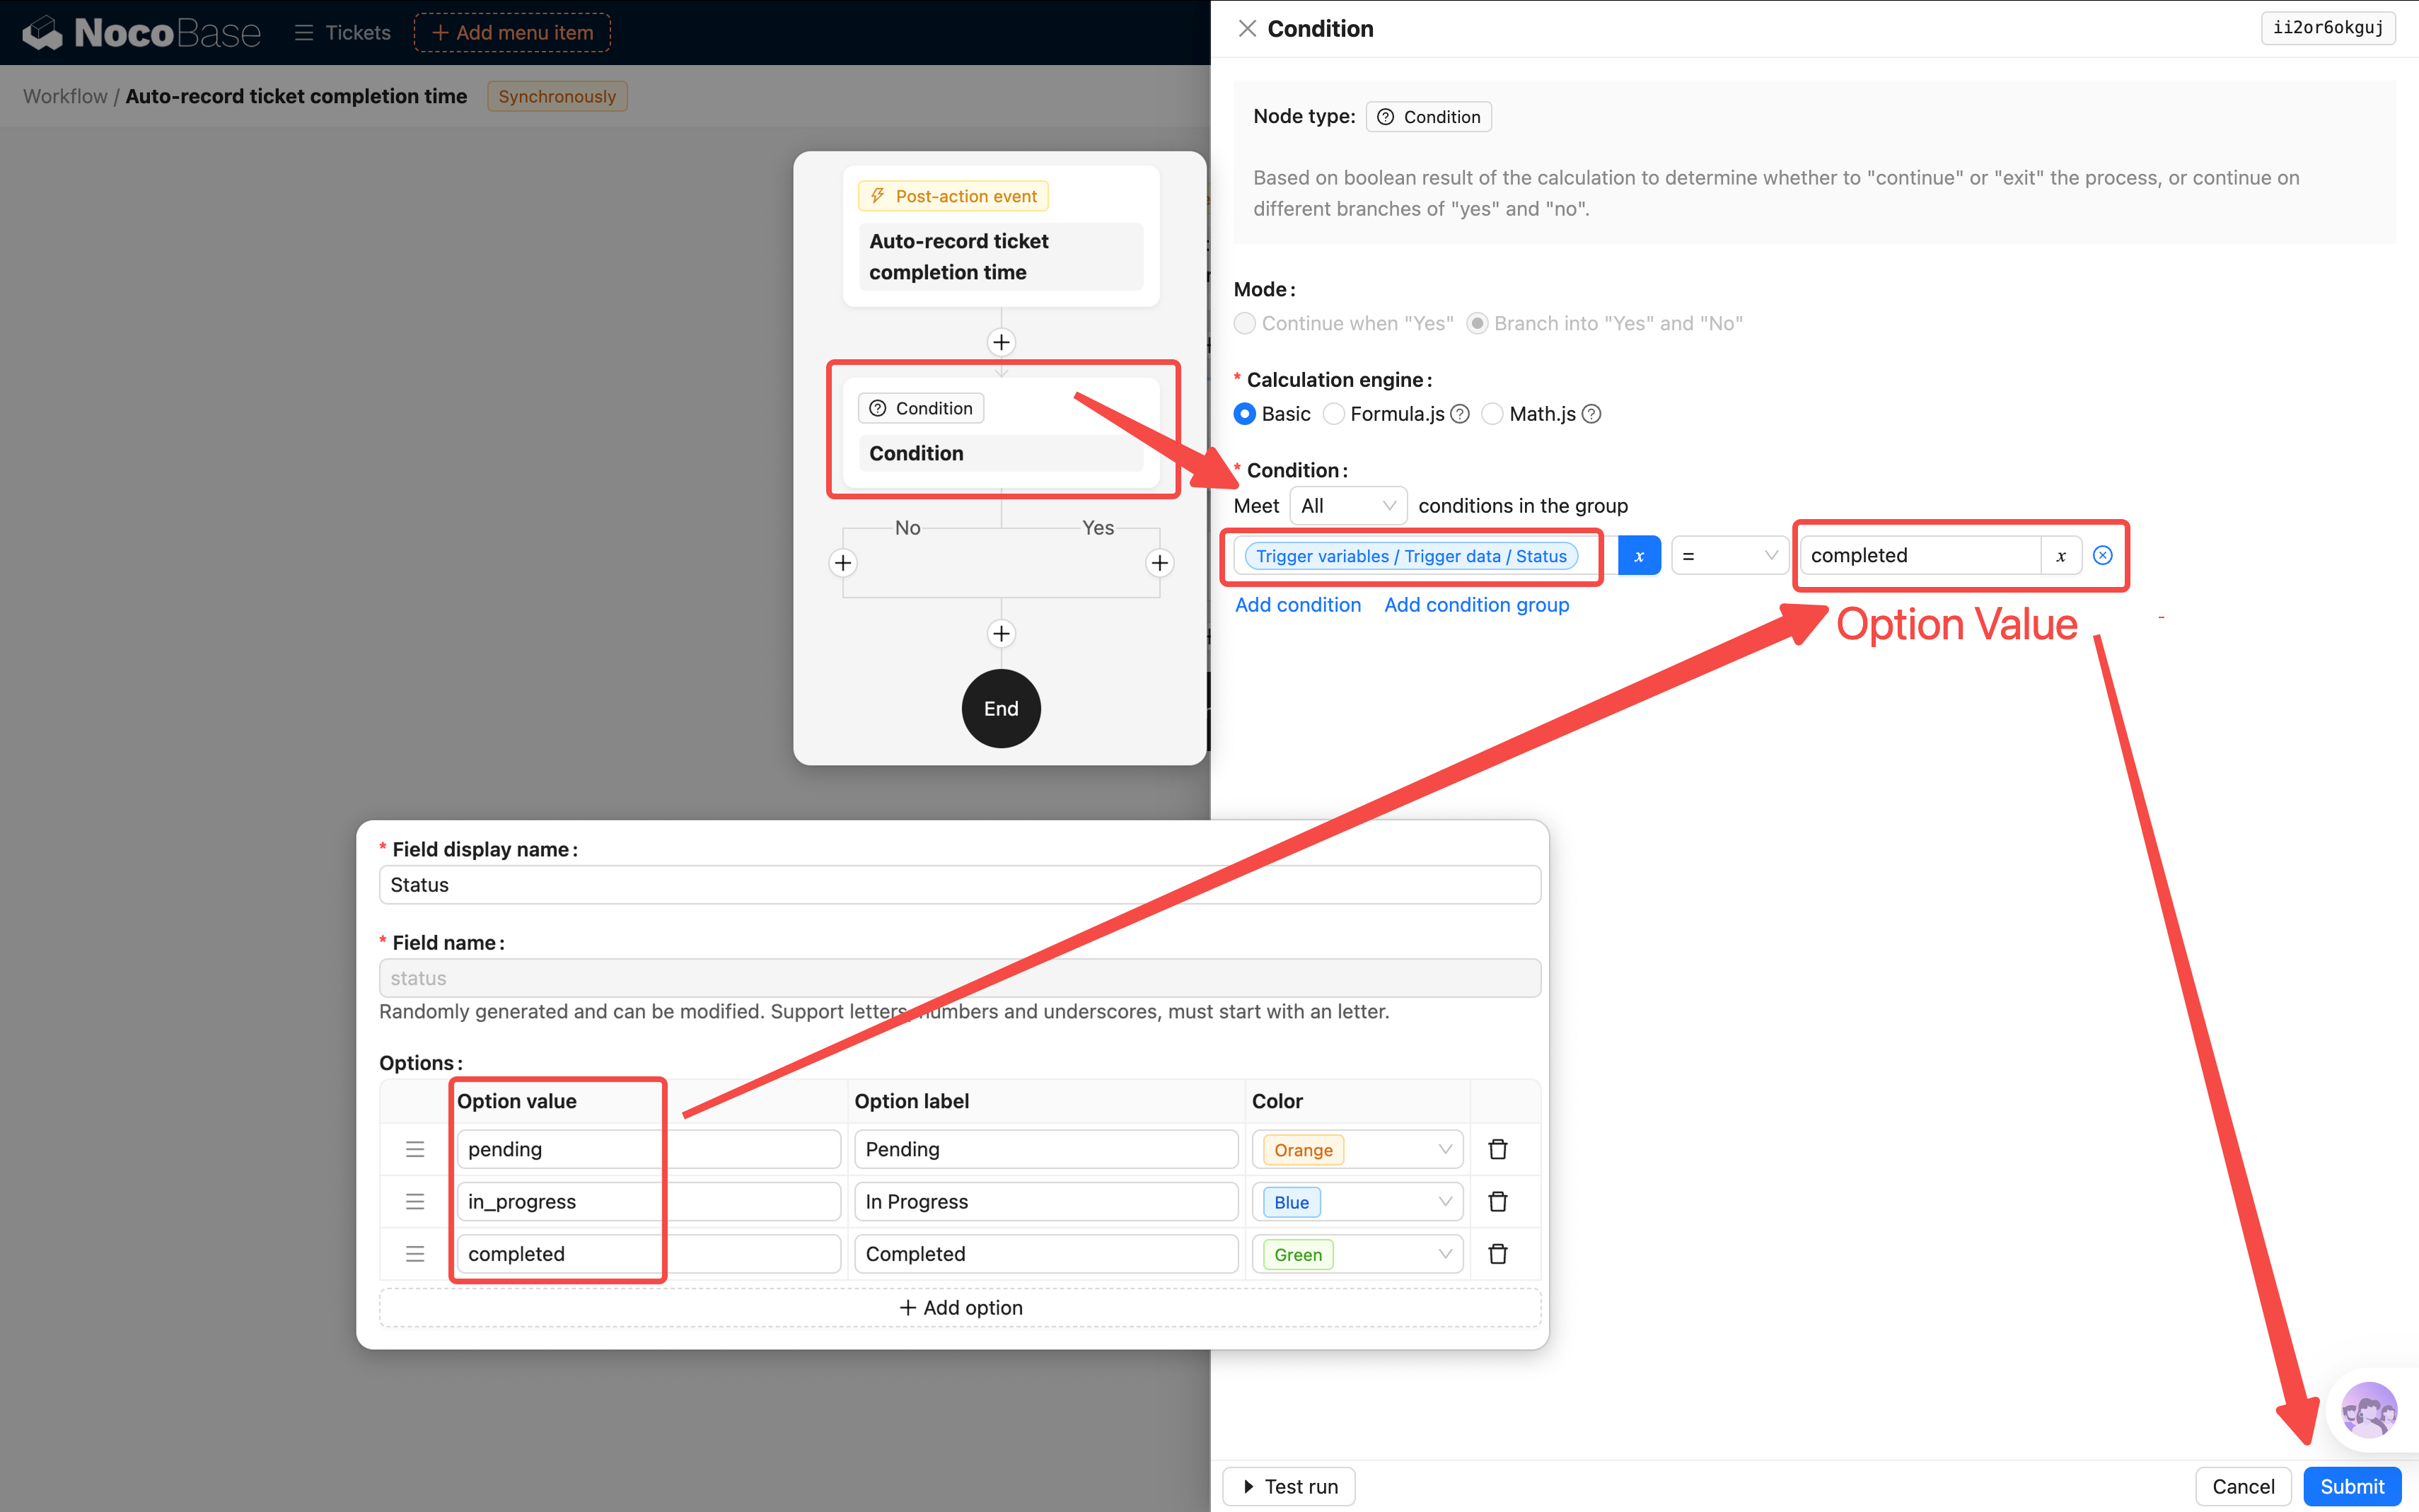
This way, only when the status is "Completed" will the subsequent actions execute. Other statuses (like "In Progress") won't trigger anything.
Step 4: Add an Update Record Node
Click + and select an Update record node:
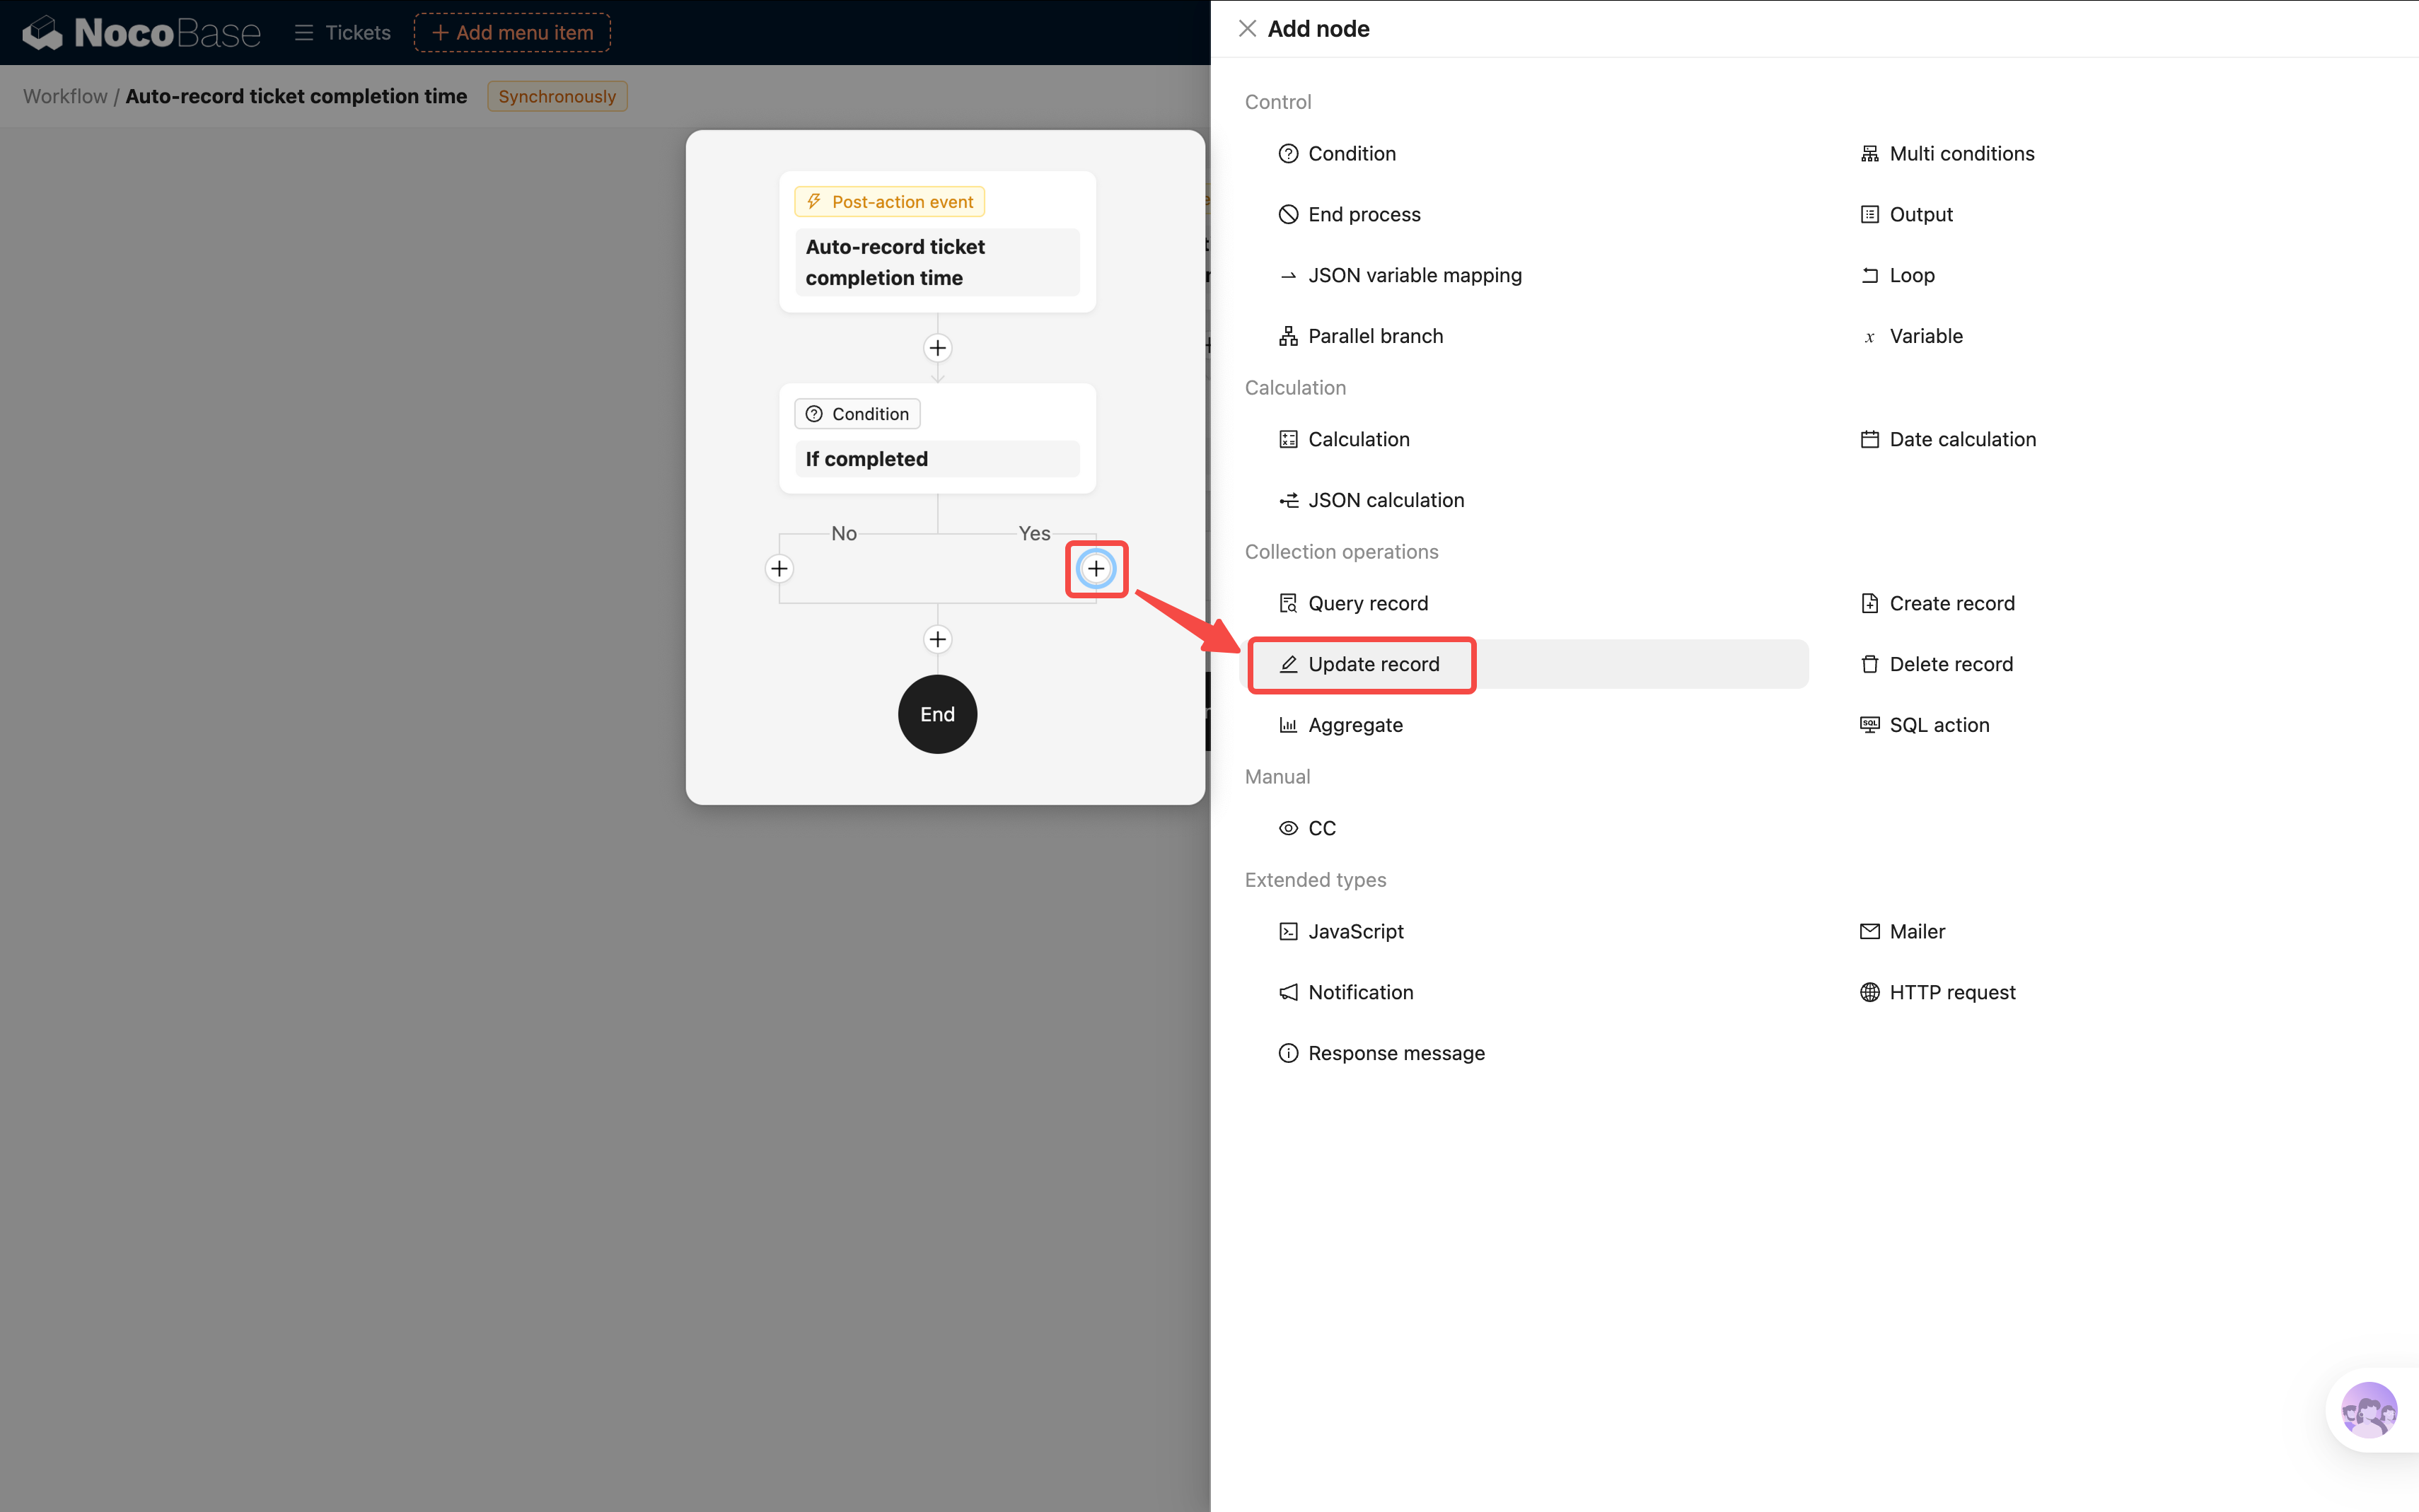
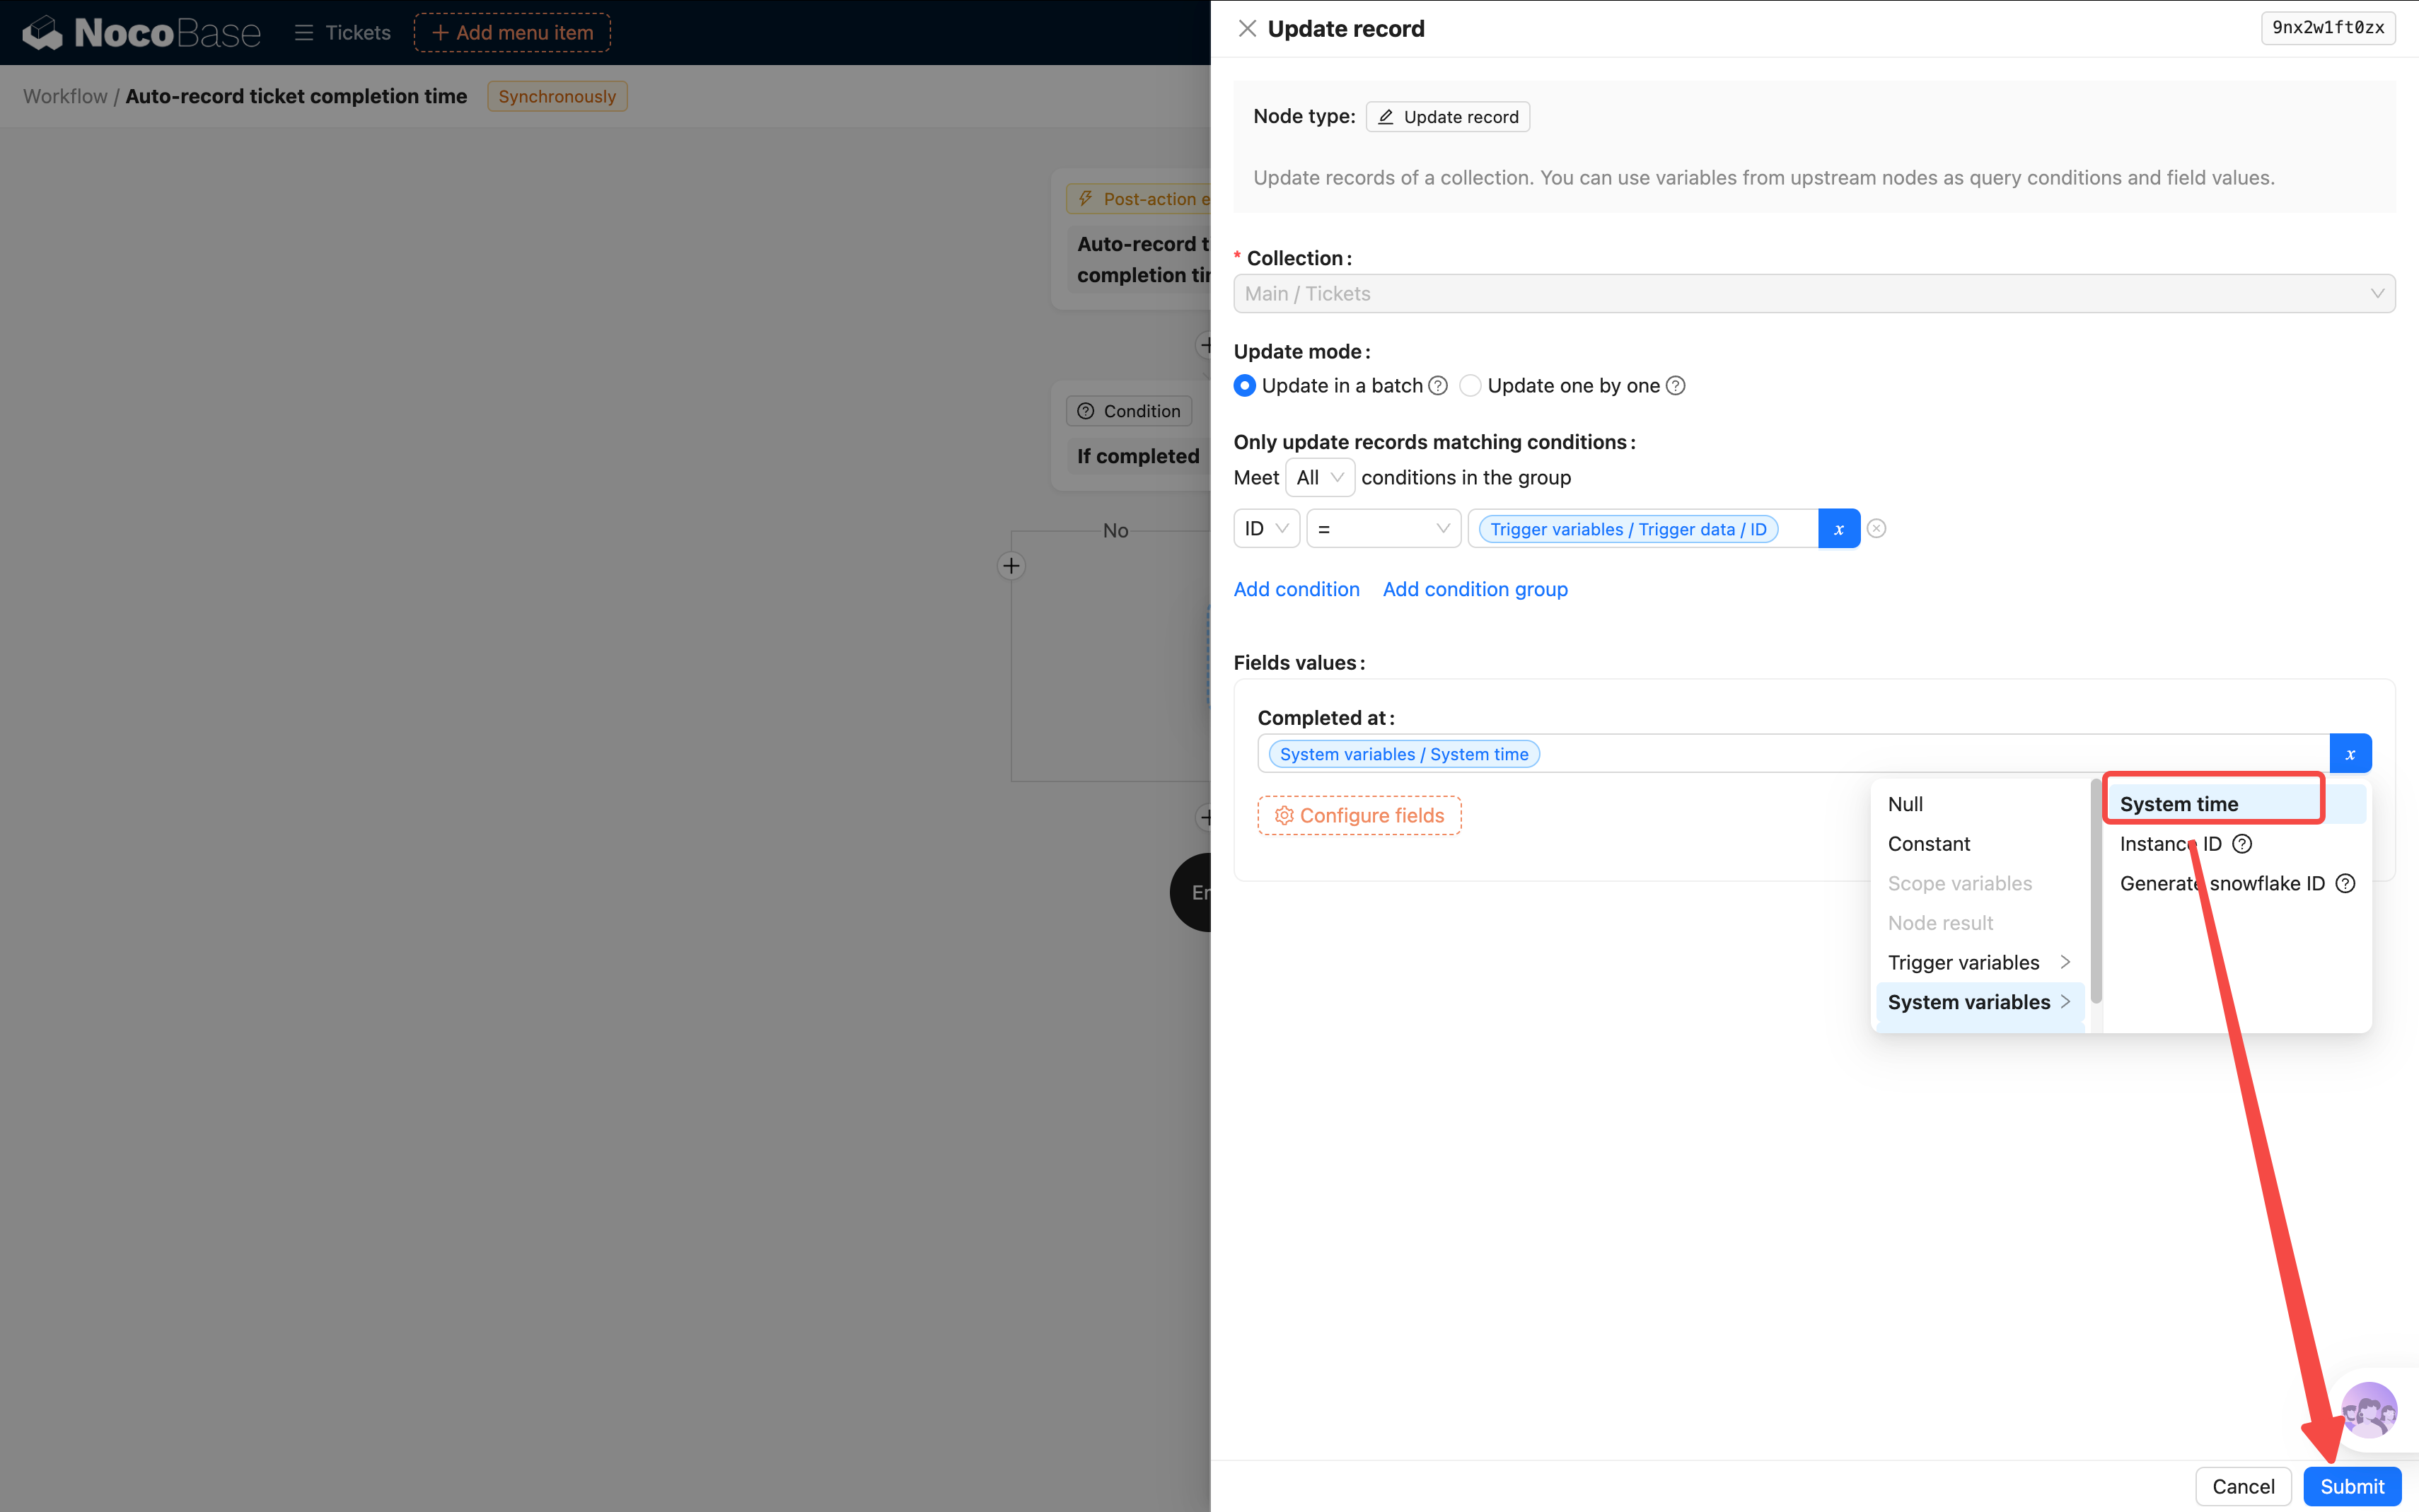
- Collection: Select "Tickets"
- Filter condition: ID equals Trigger data → ID (to ensure only the current ticket gets updated)
- Field values: Completion time = System variables / System time
Step 5: Create a "Complete" Action Button
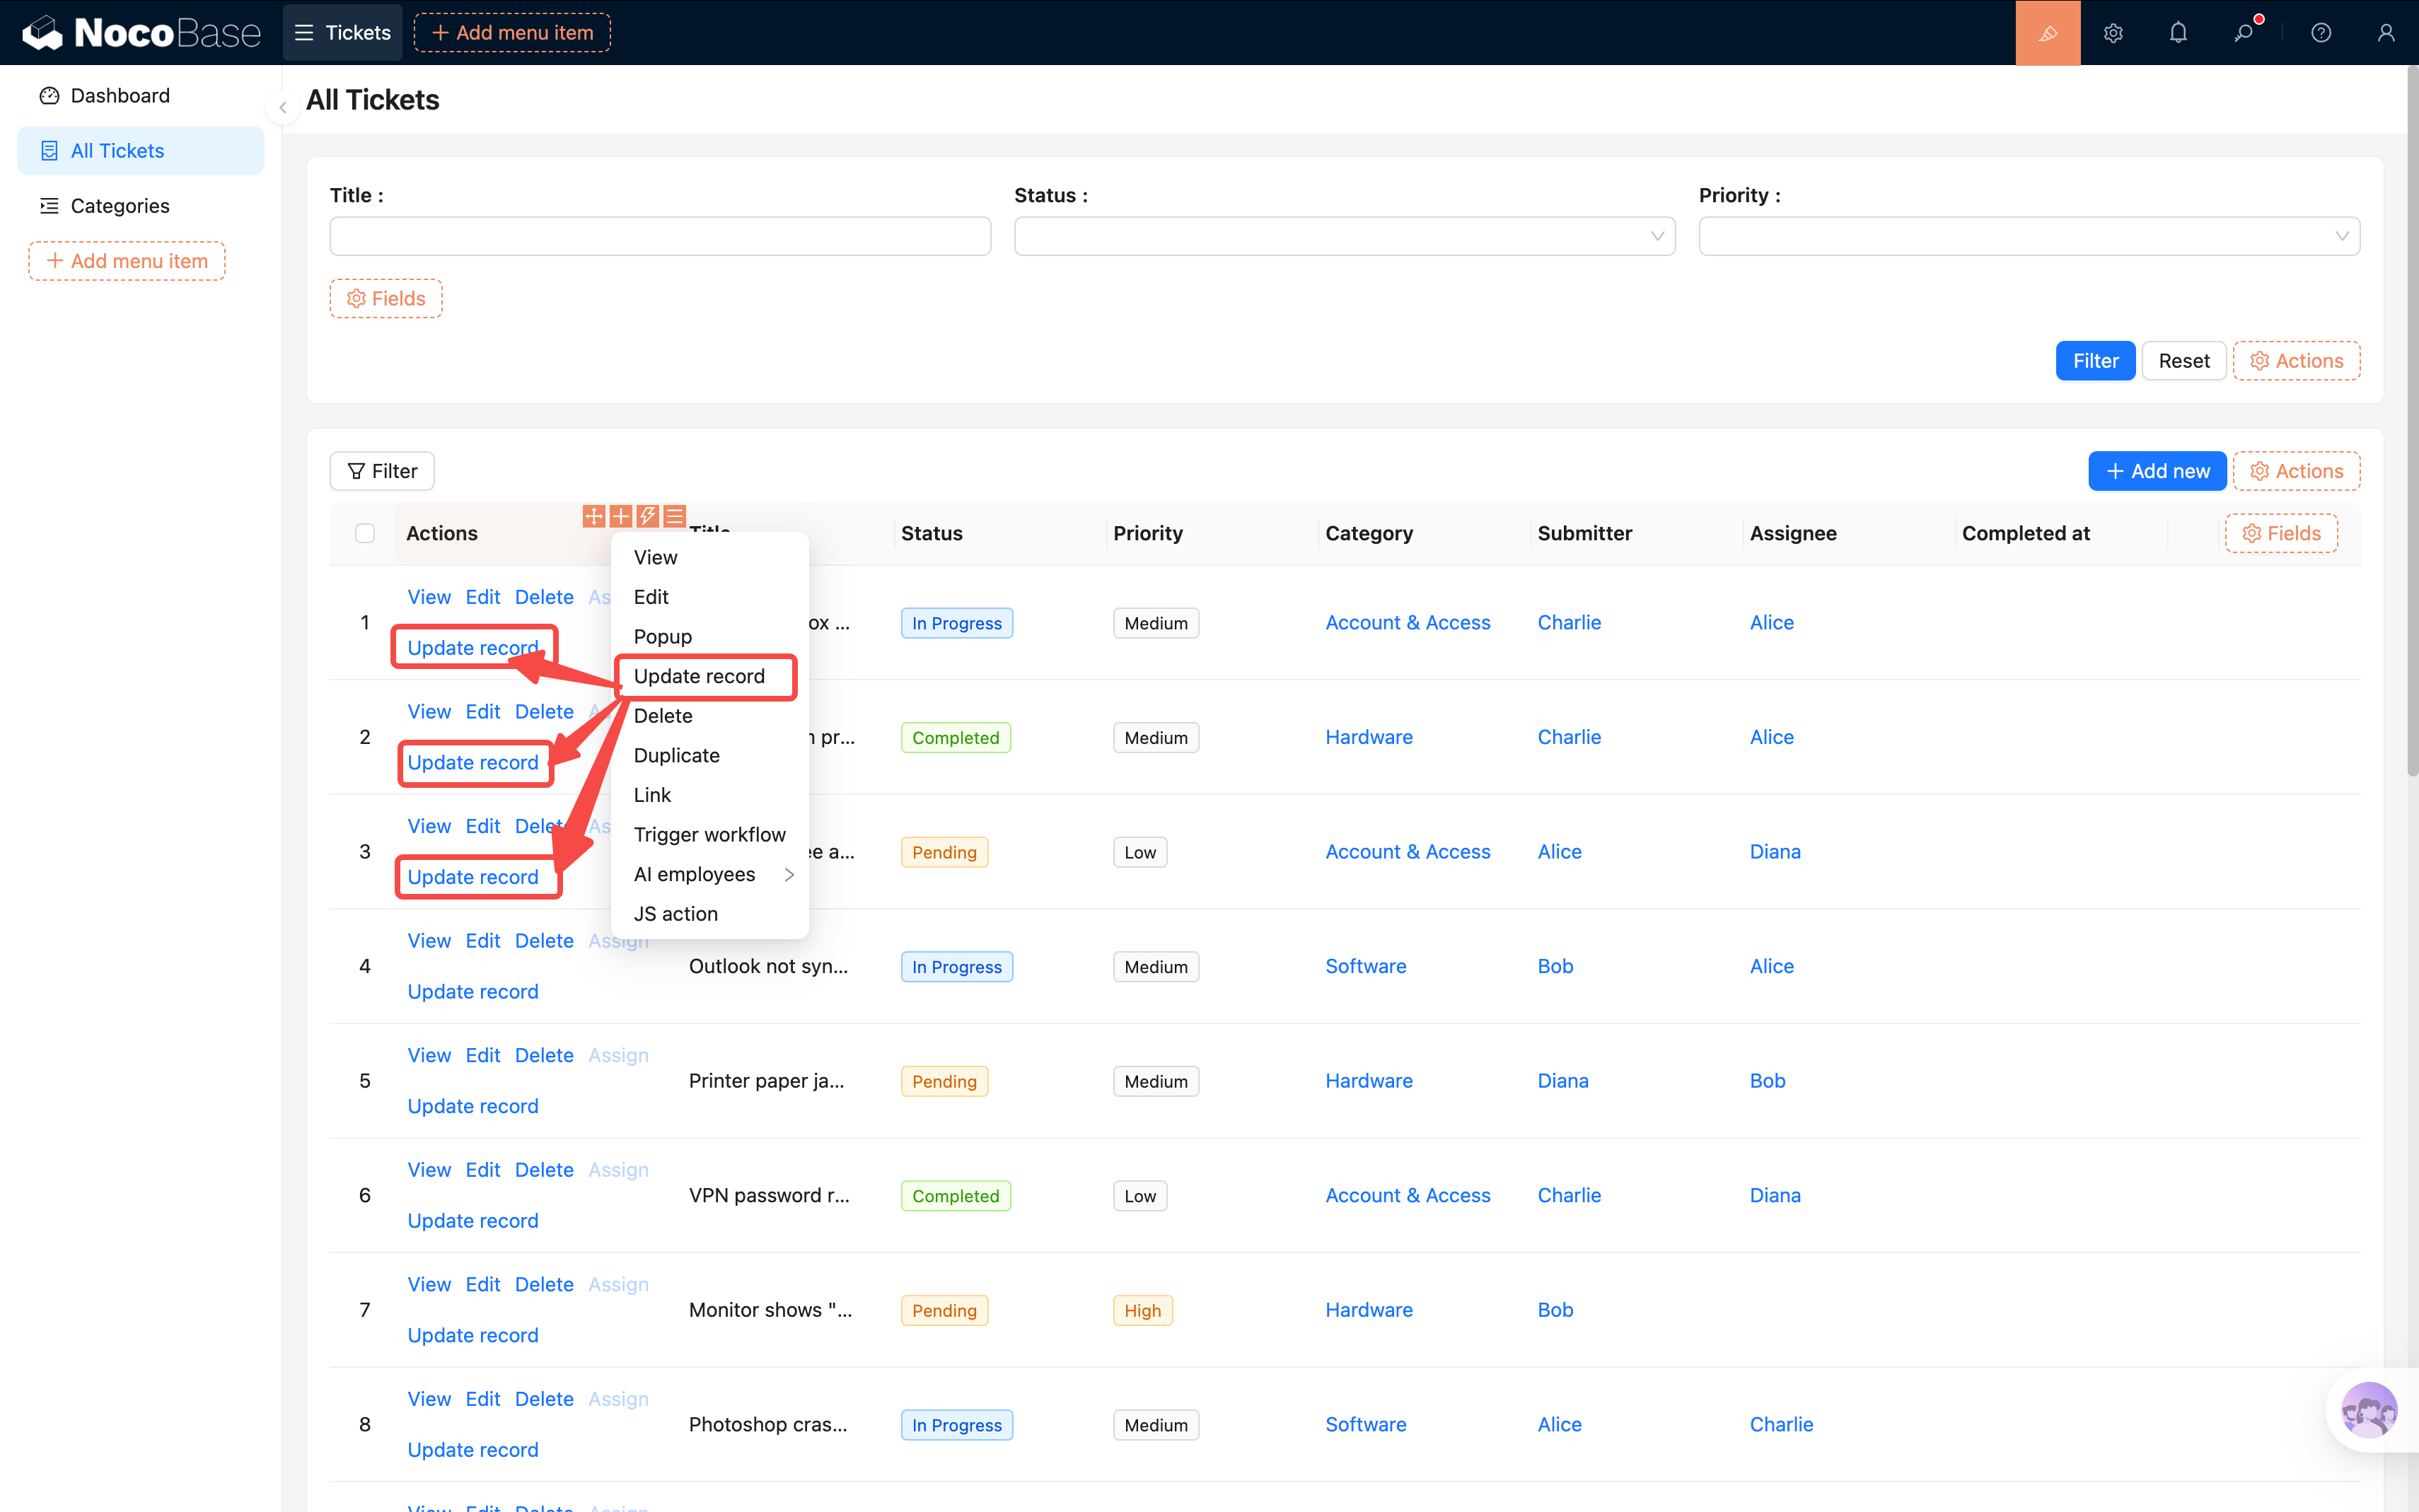
The workflow is configured, but a "Post-action event" needs to be bound to a specific action button to trigger. Let's create a dedicated "Complete" button in the ticket list's action column:
- Enter UI Editor mode. In the ticket table's action column, click "+" and select an "Update data" action button
- Click the button settings and change the title to "Complete", then select a completion-related icon (e.g., a checkmark icon)
- Configure "Field values" and set "Status = Completed". This way when the user clicks the button, the status update operation is triggered.

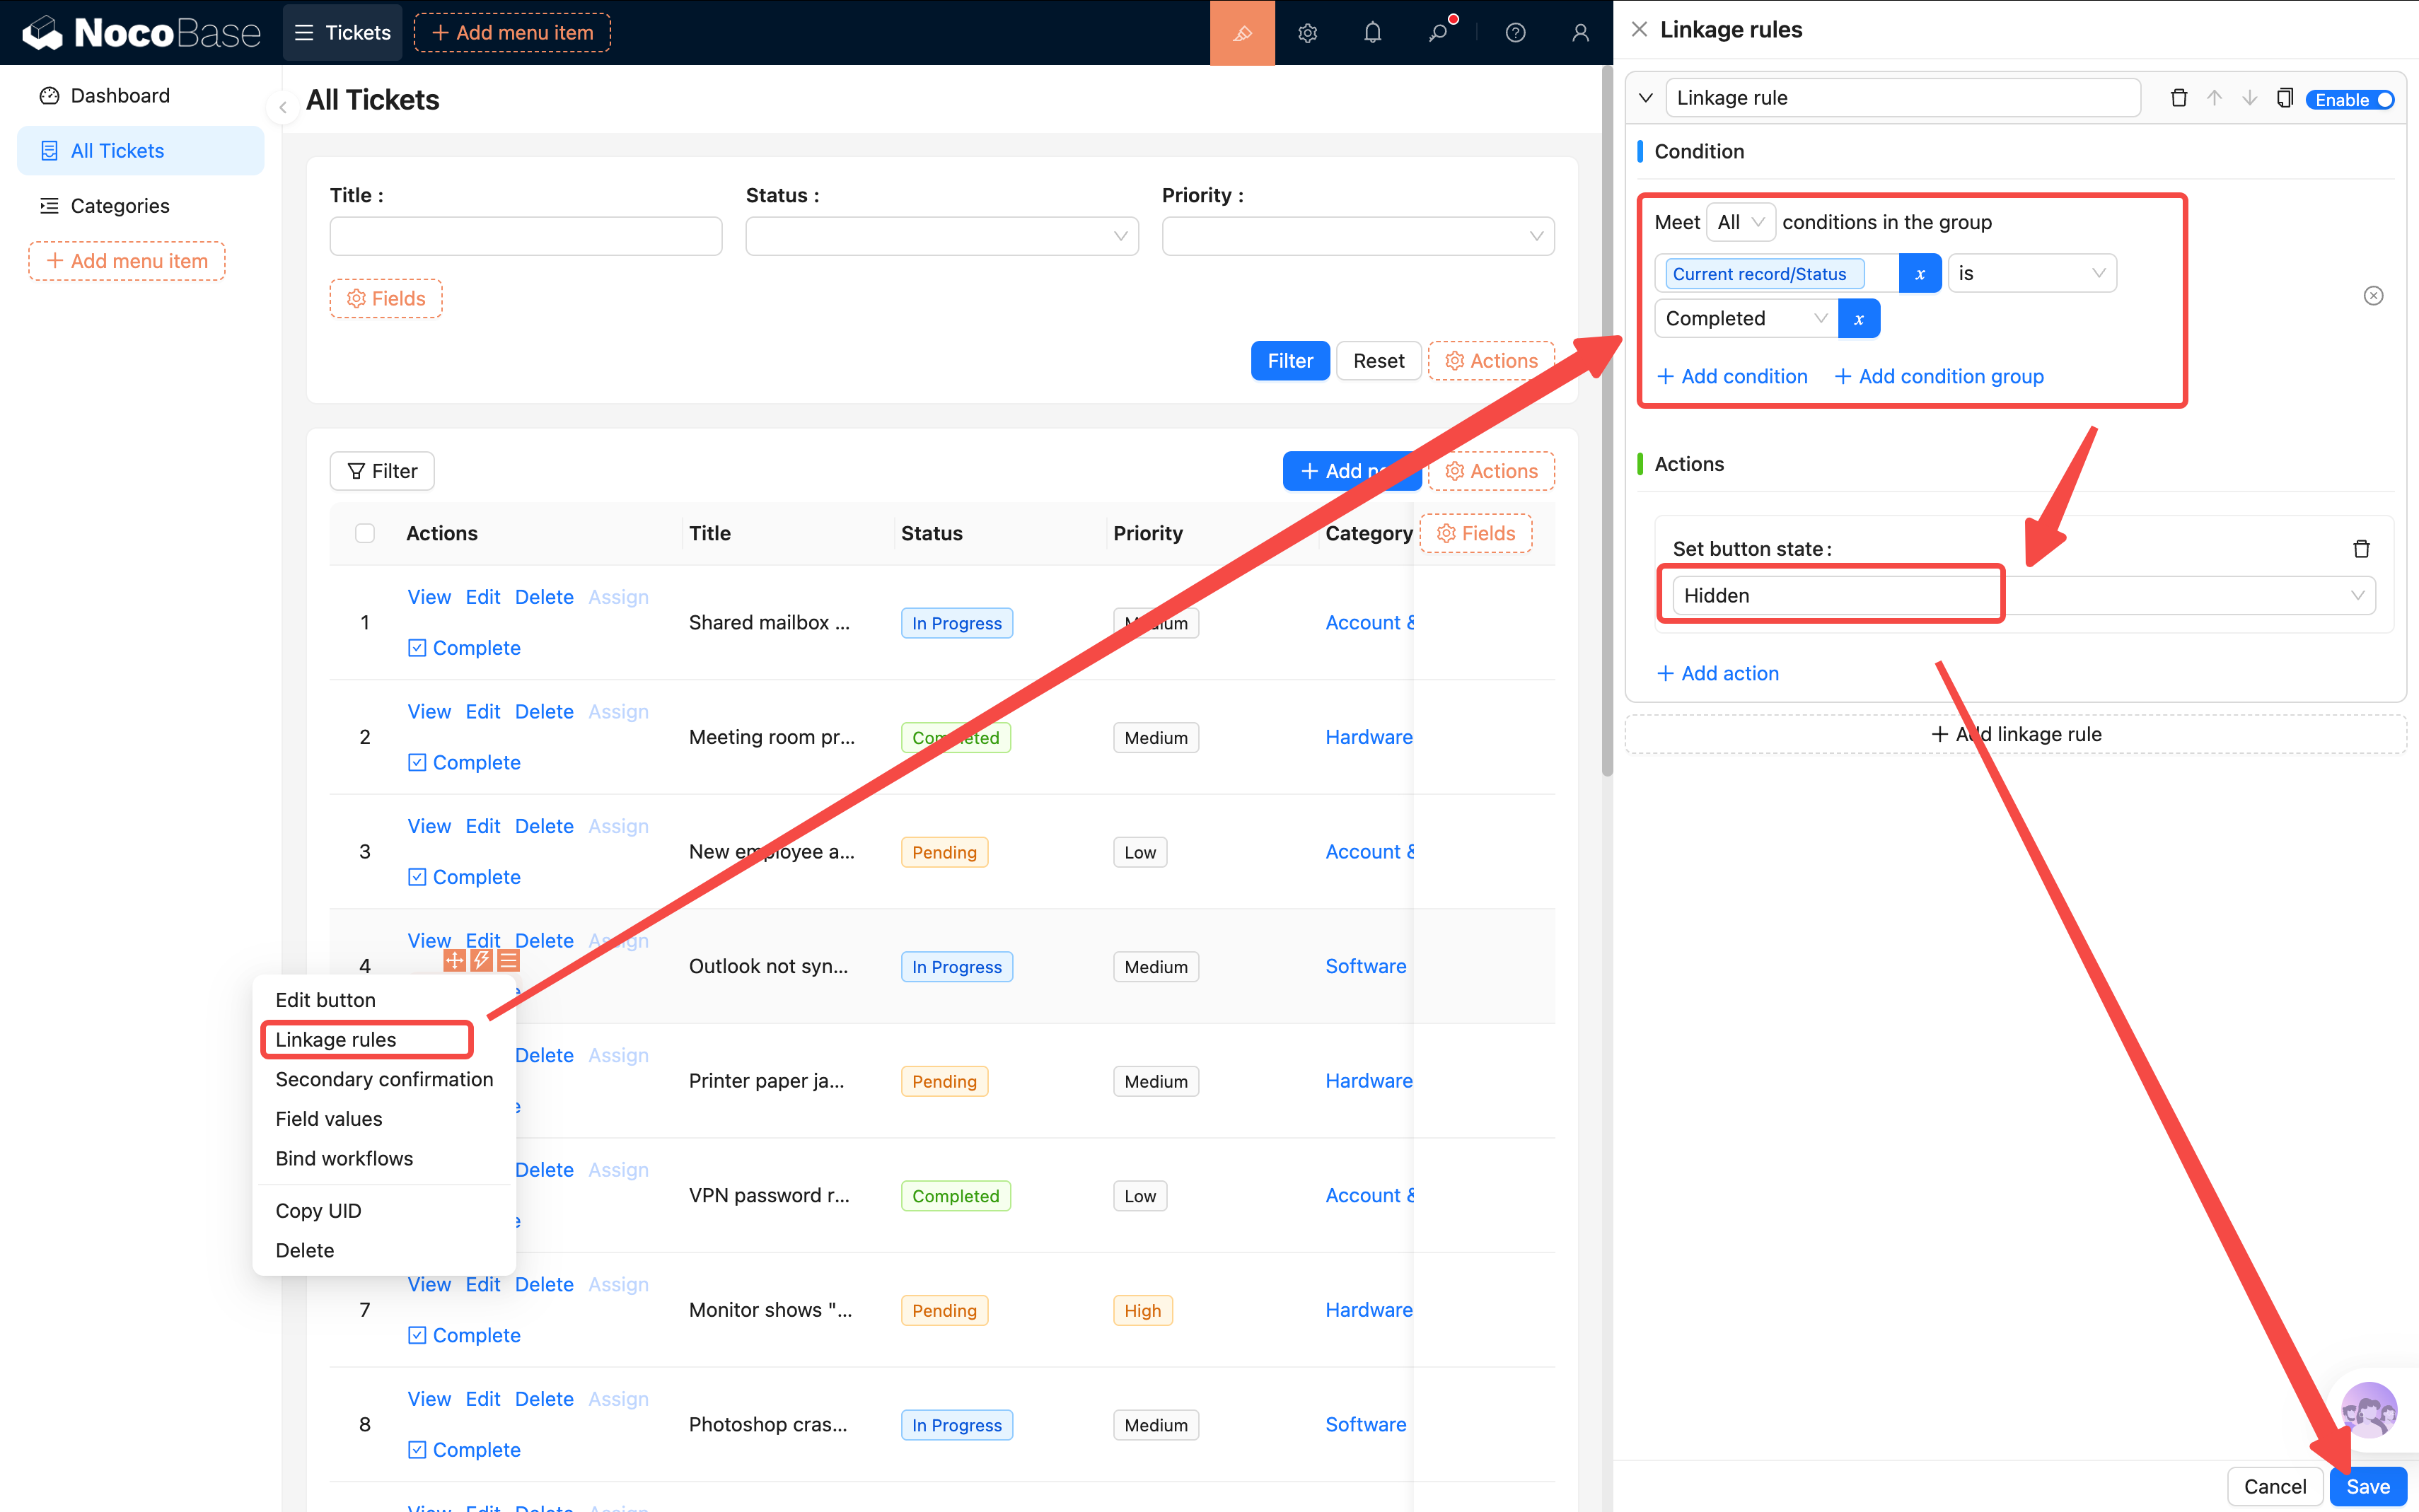
- Configure linkage rules for the button: hide it when the ticket status is already "Completed" (completed tickets don't need a "Complete" button)
- Condition: Current data → Status equals Completed
- Action: Hide
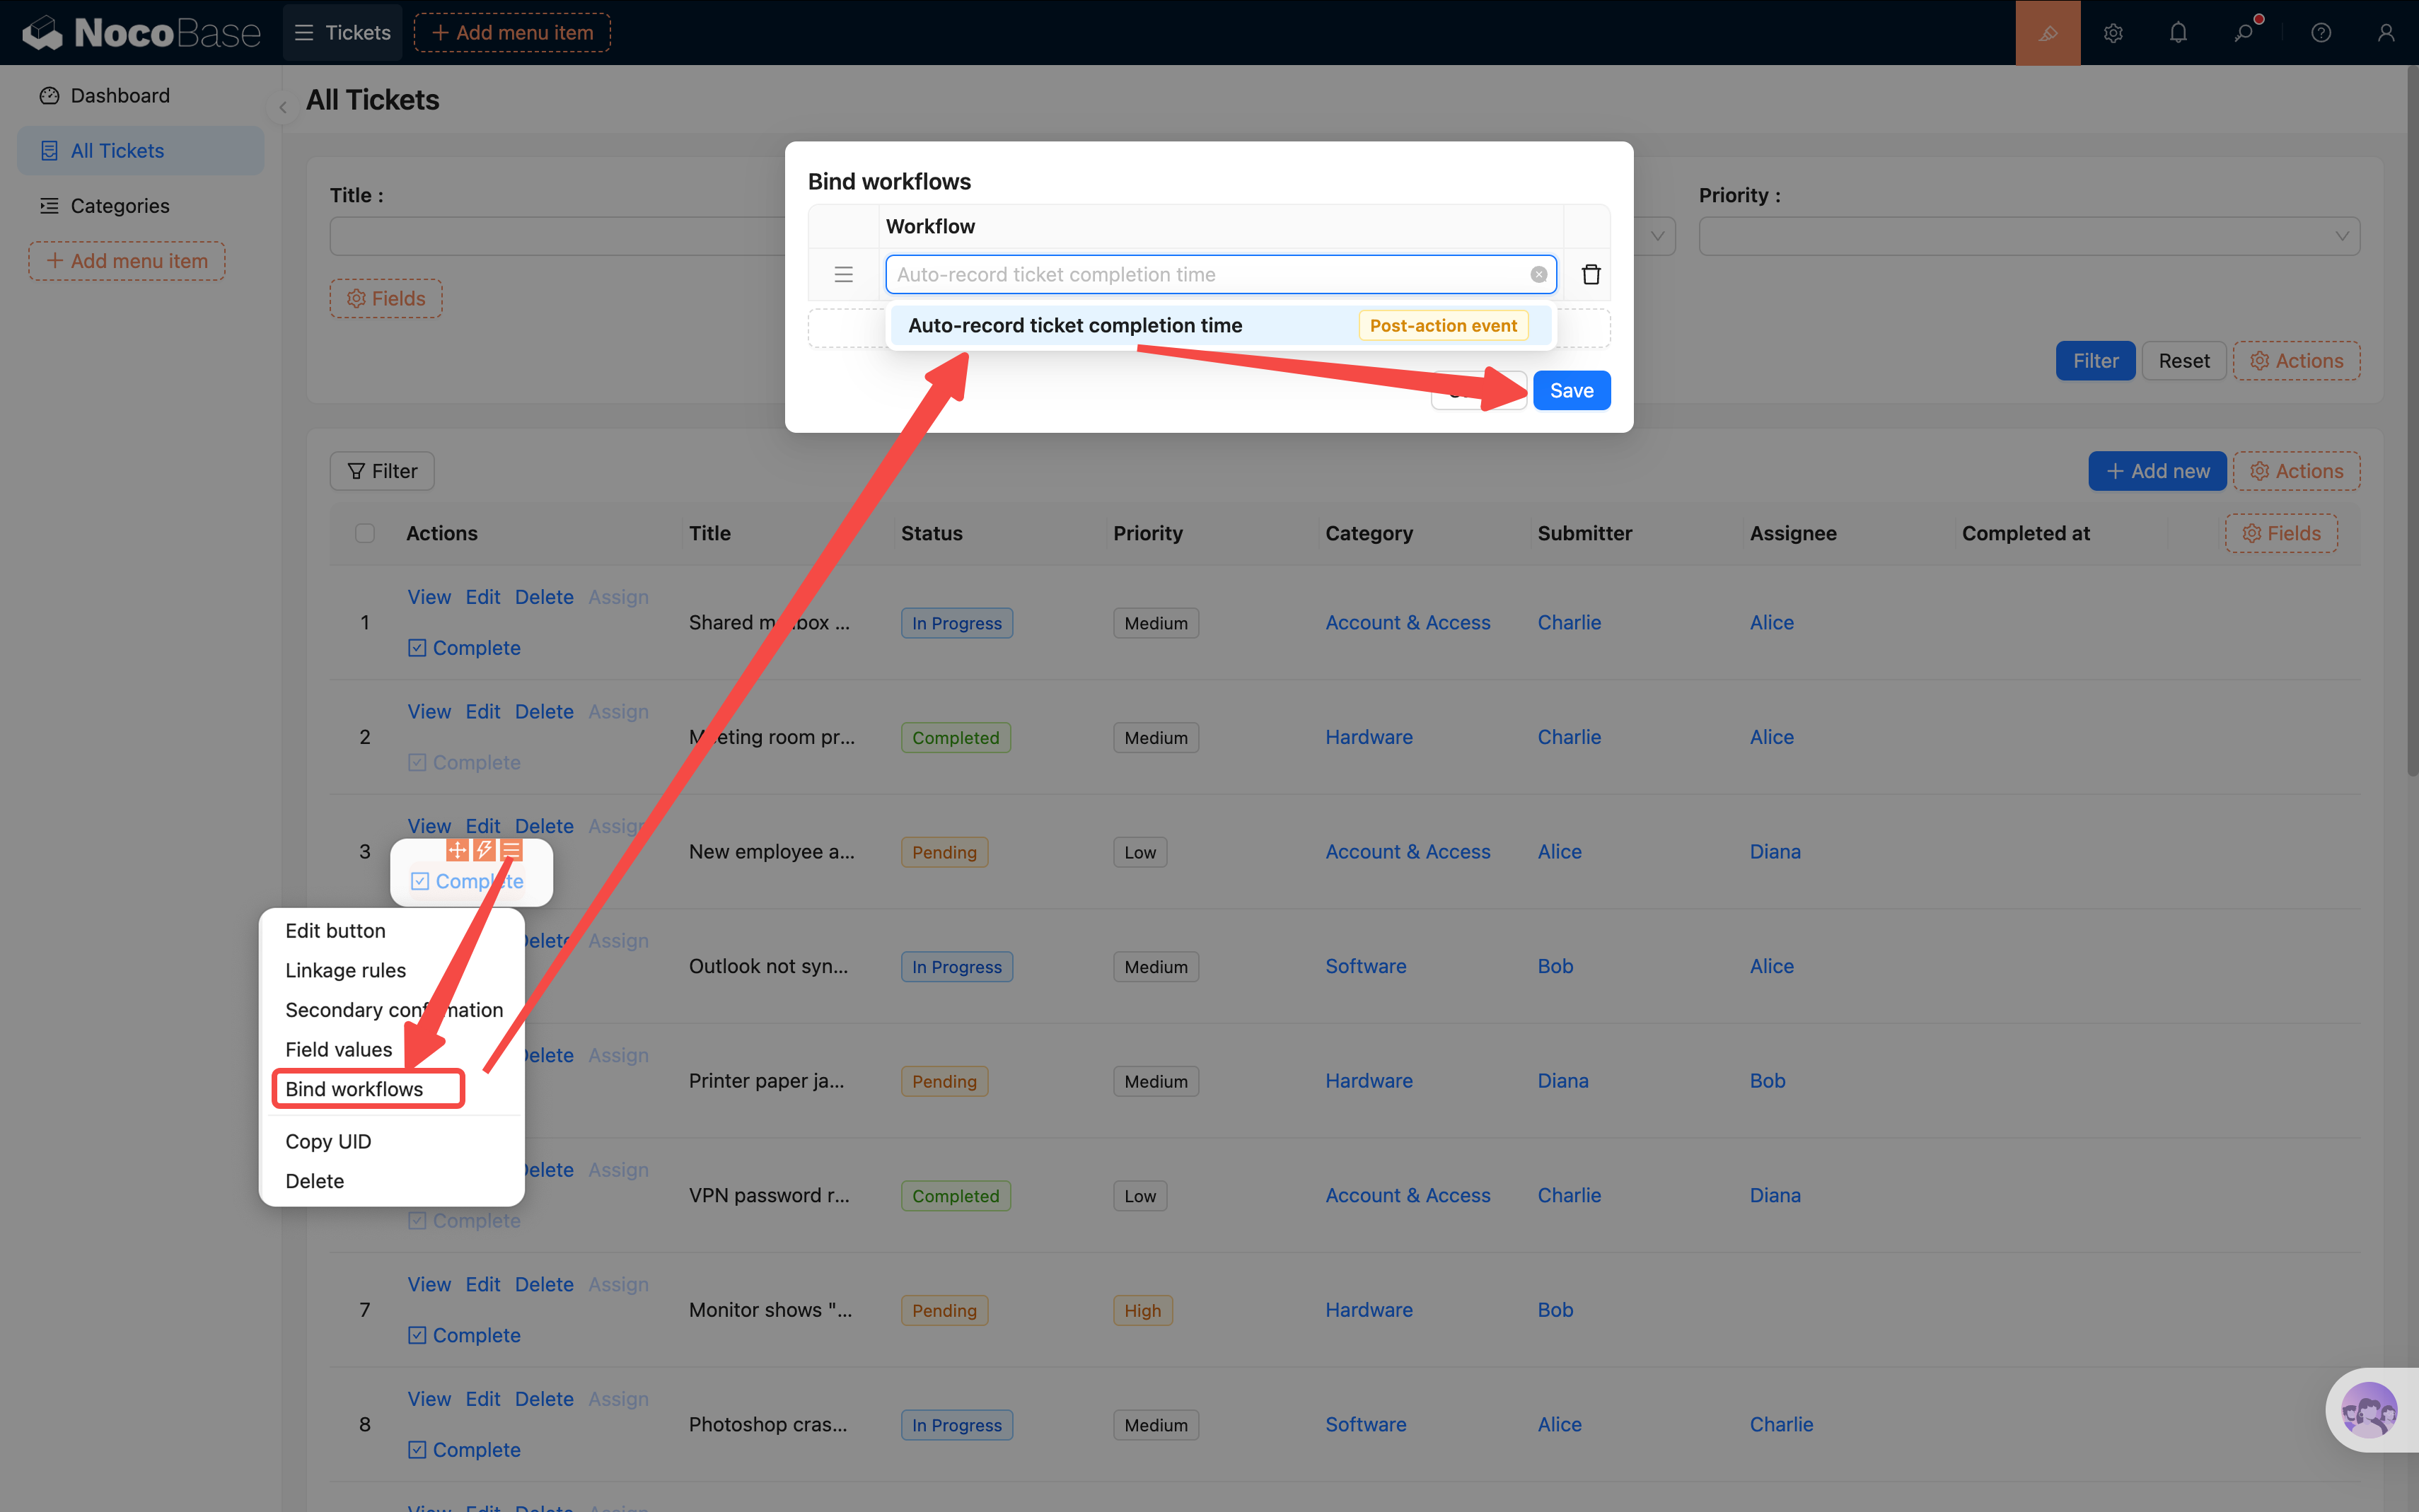
- Open "Bind workflows" in the button settings and select the "Auto-record ticket completion time" workflow we just created
Step 6: Enable and Test
Go back to the workflow management page and enable the "Auto-record ticket completion time" workflow.
Then open a ticket with "In Progress" status and click the "Complete" button in the action column. After refreshing the page, you should see:
- The ticket's "Completion time" field is automatically filled with the current time
- The "Complete" button has disappeared for this ticket (linkage rule in effect)
Convenient, right? This is the second common use case for workflows — automatically updating data. And by using the "Post-action event + Local mode + Button binding" approach, we've created a precise trigger mechanism: the workflow only runs when a specific button is clicked.
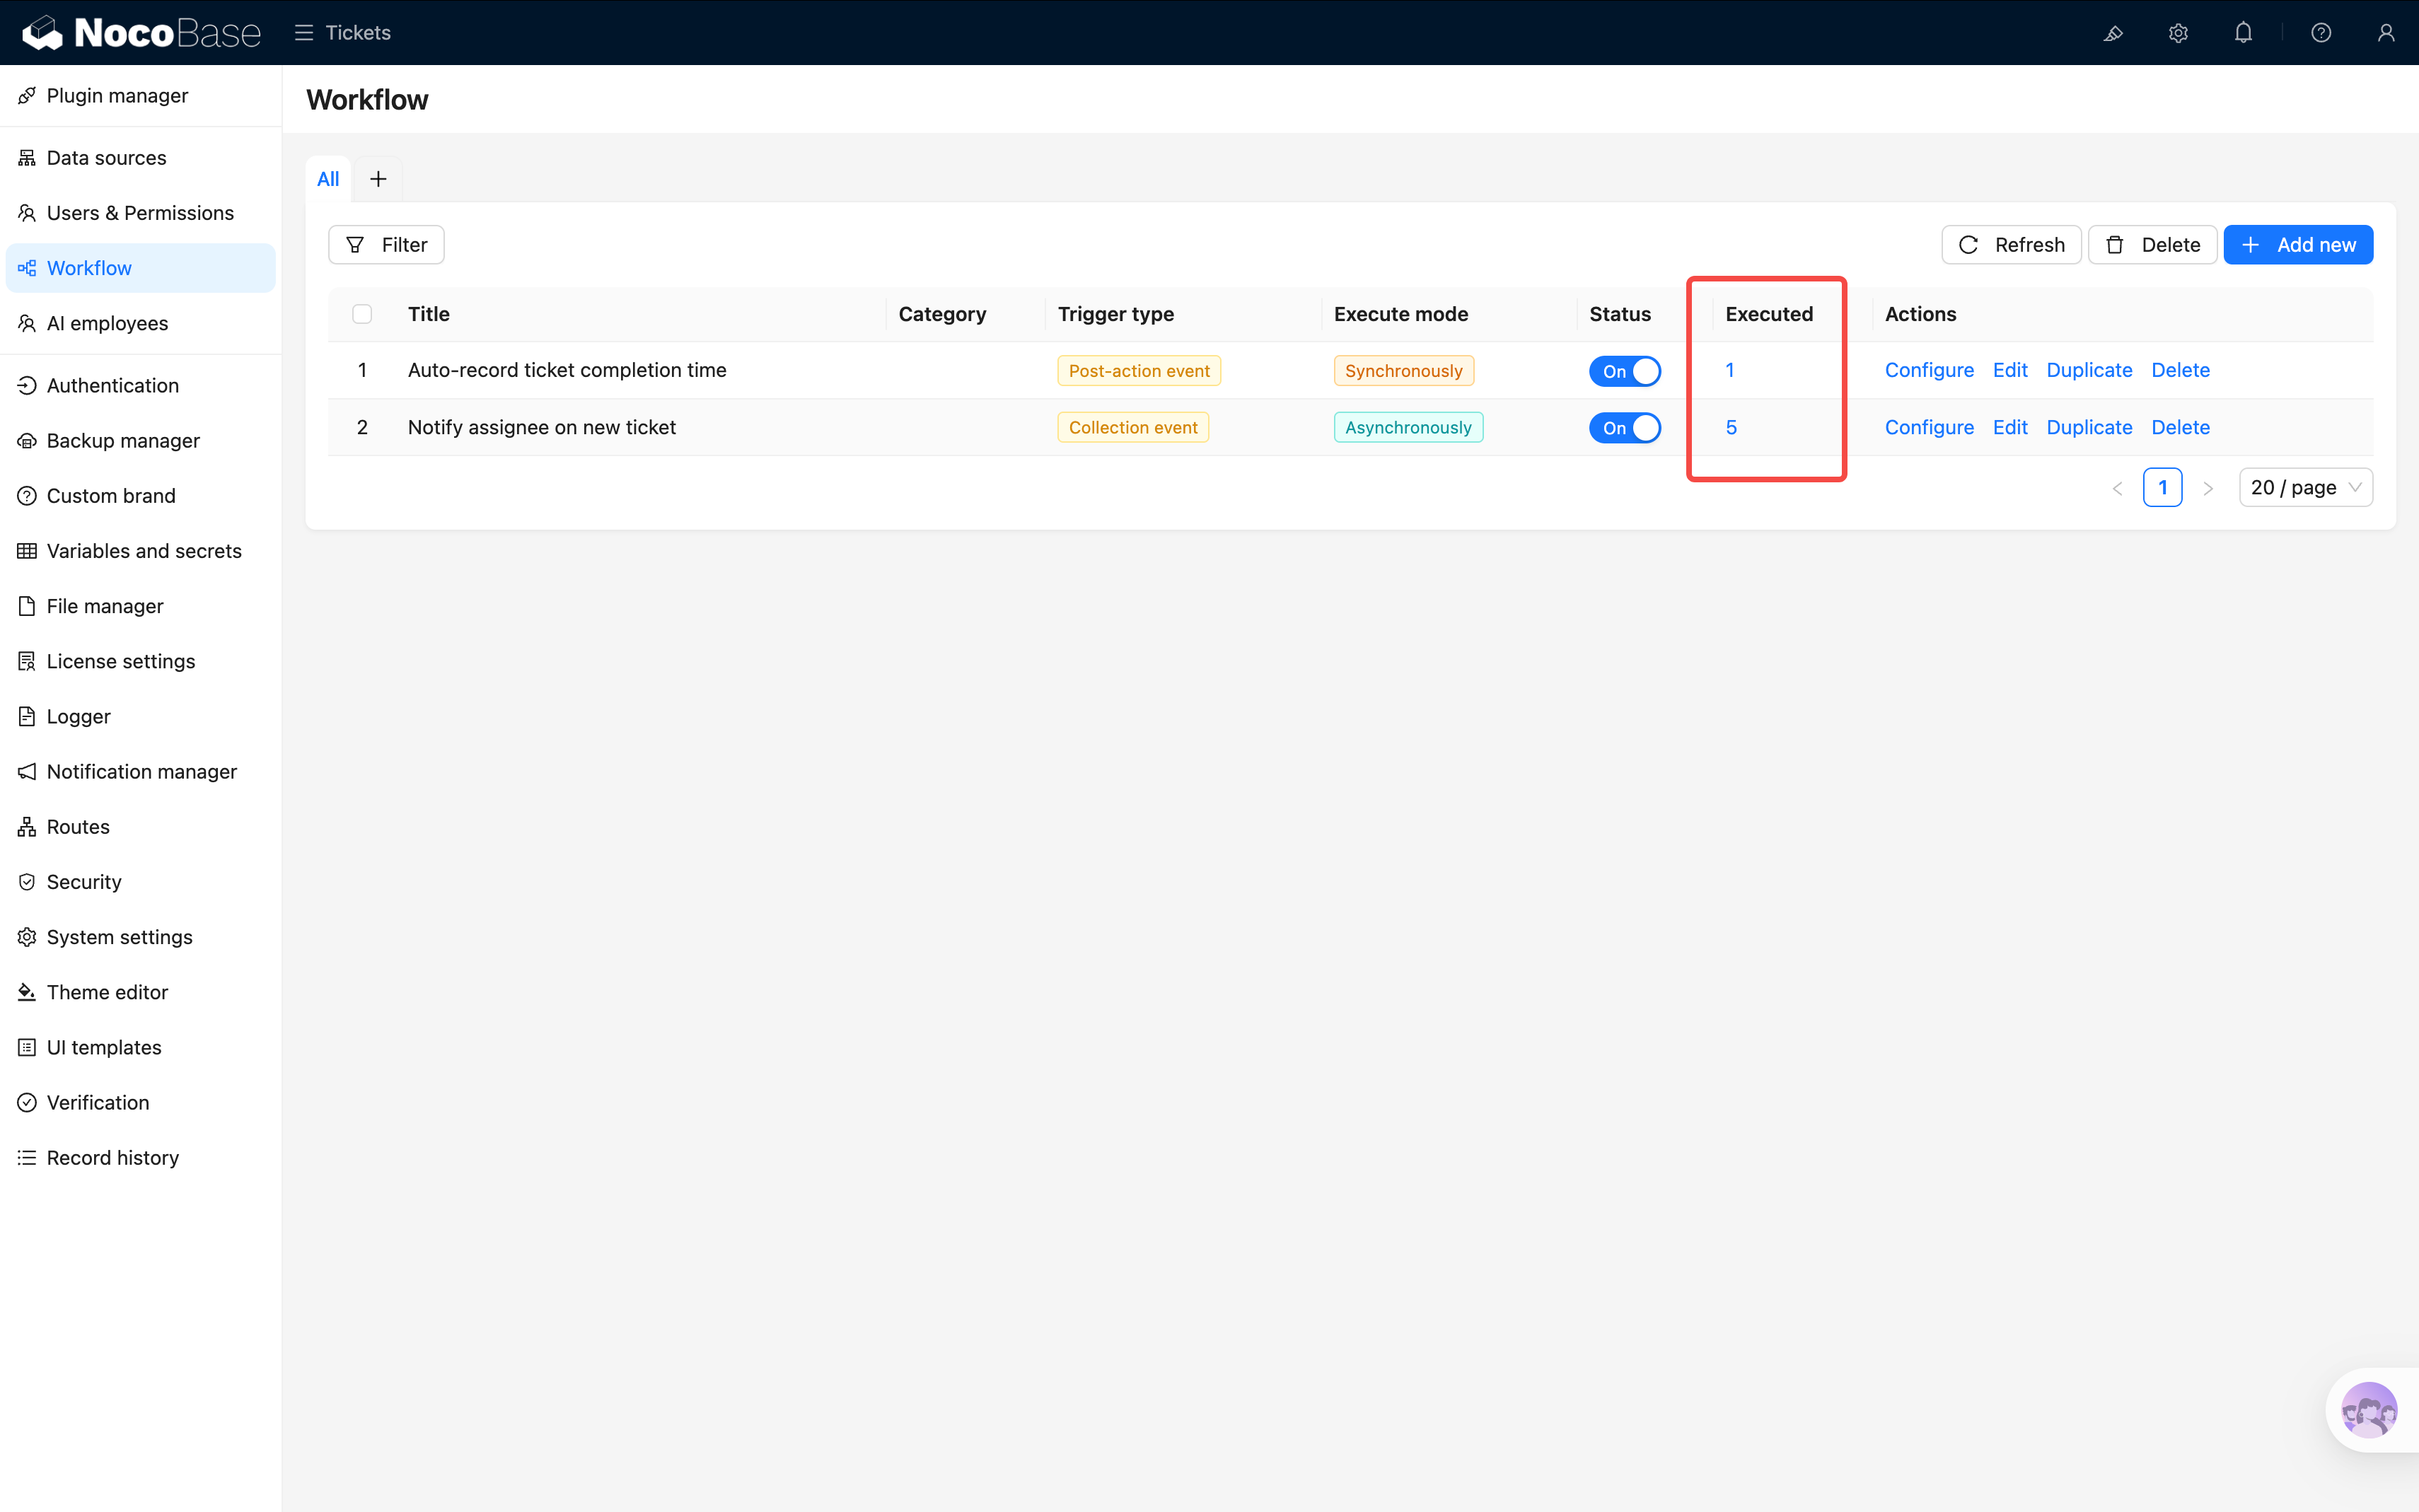
6.4 Viewing Execution History
How many times has the workflow run? Were there any errors? NocoBase keeps track of everything.
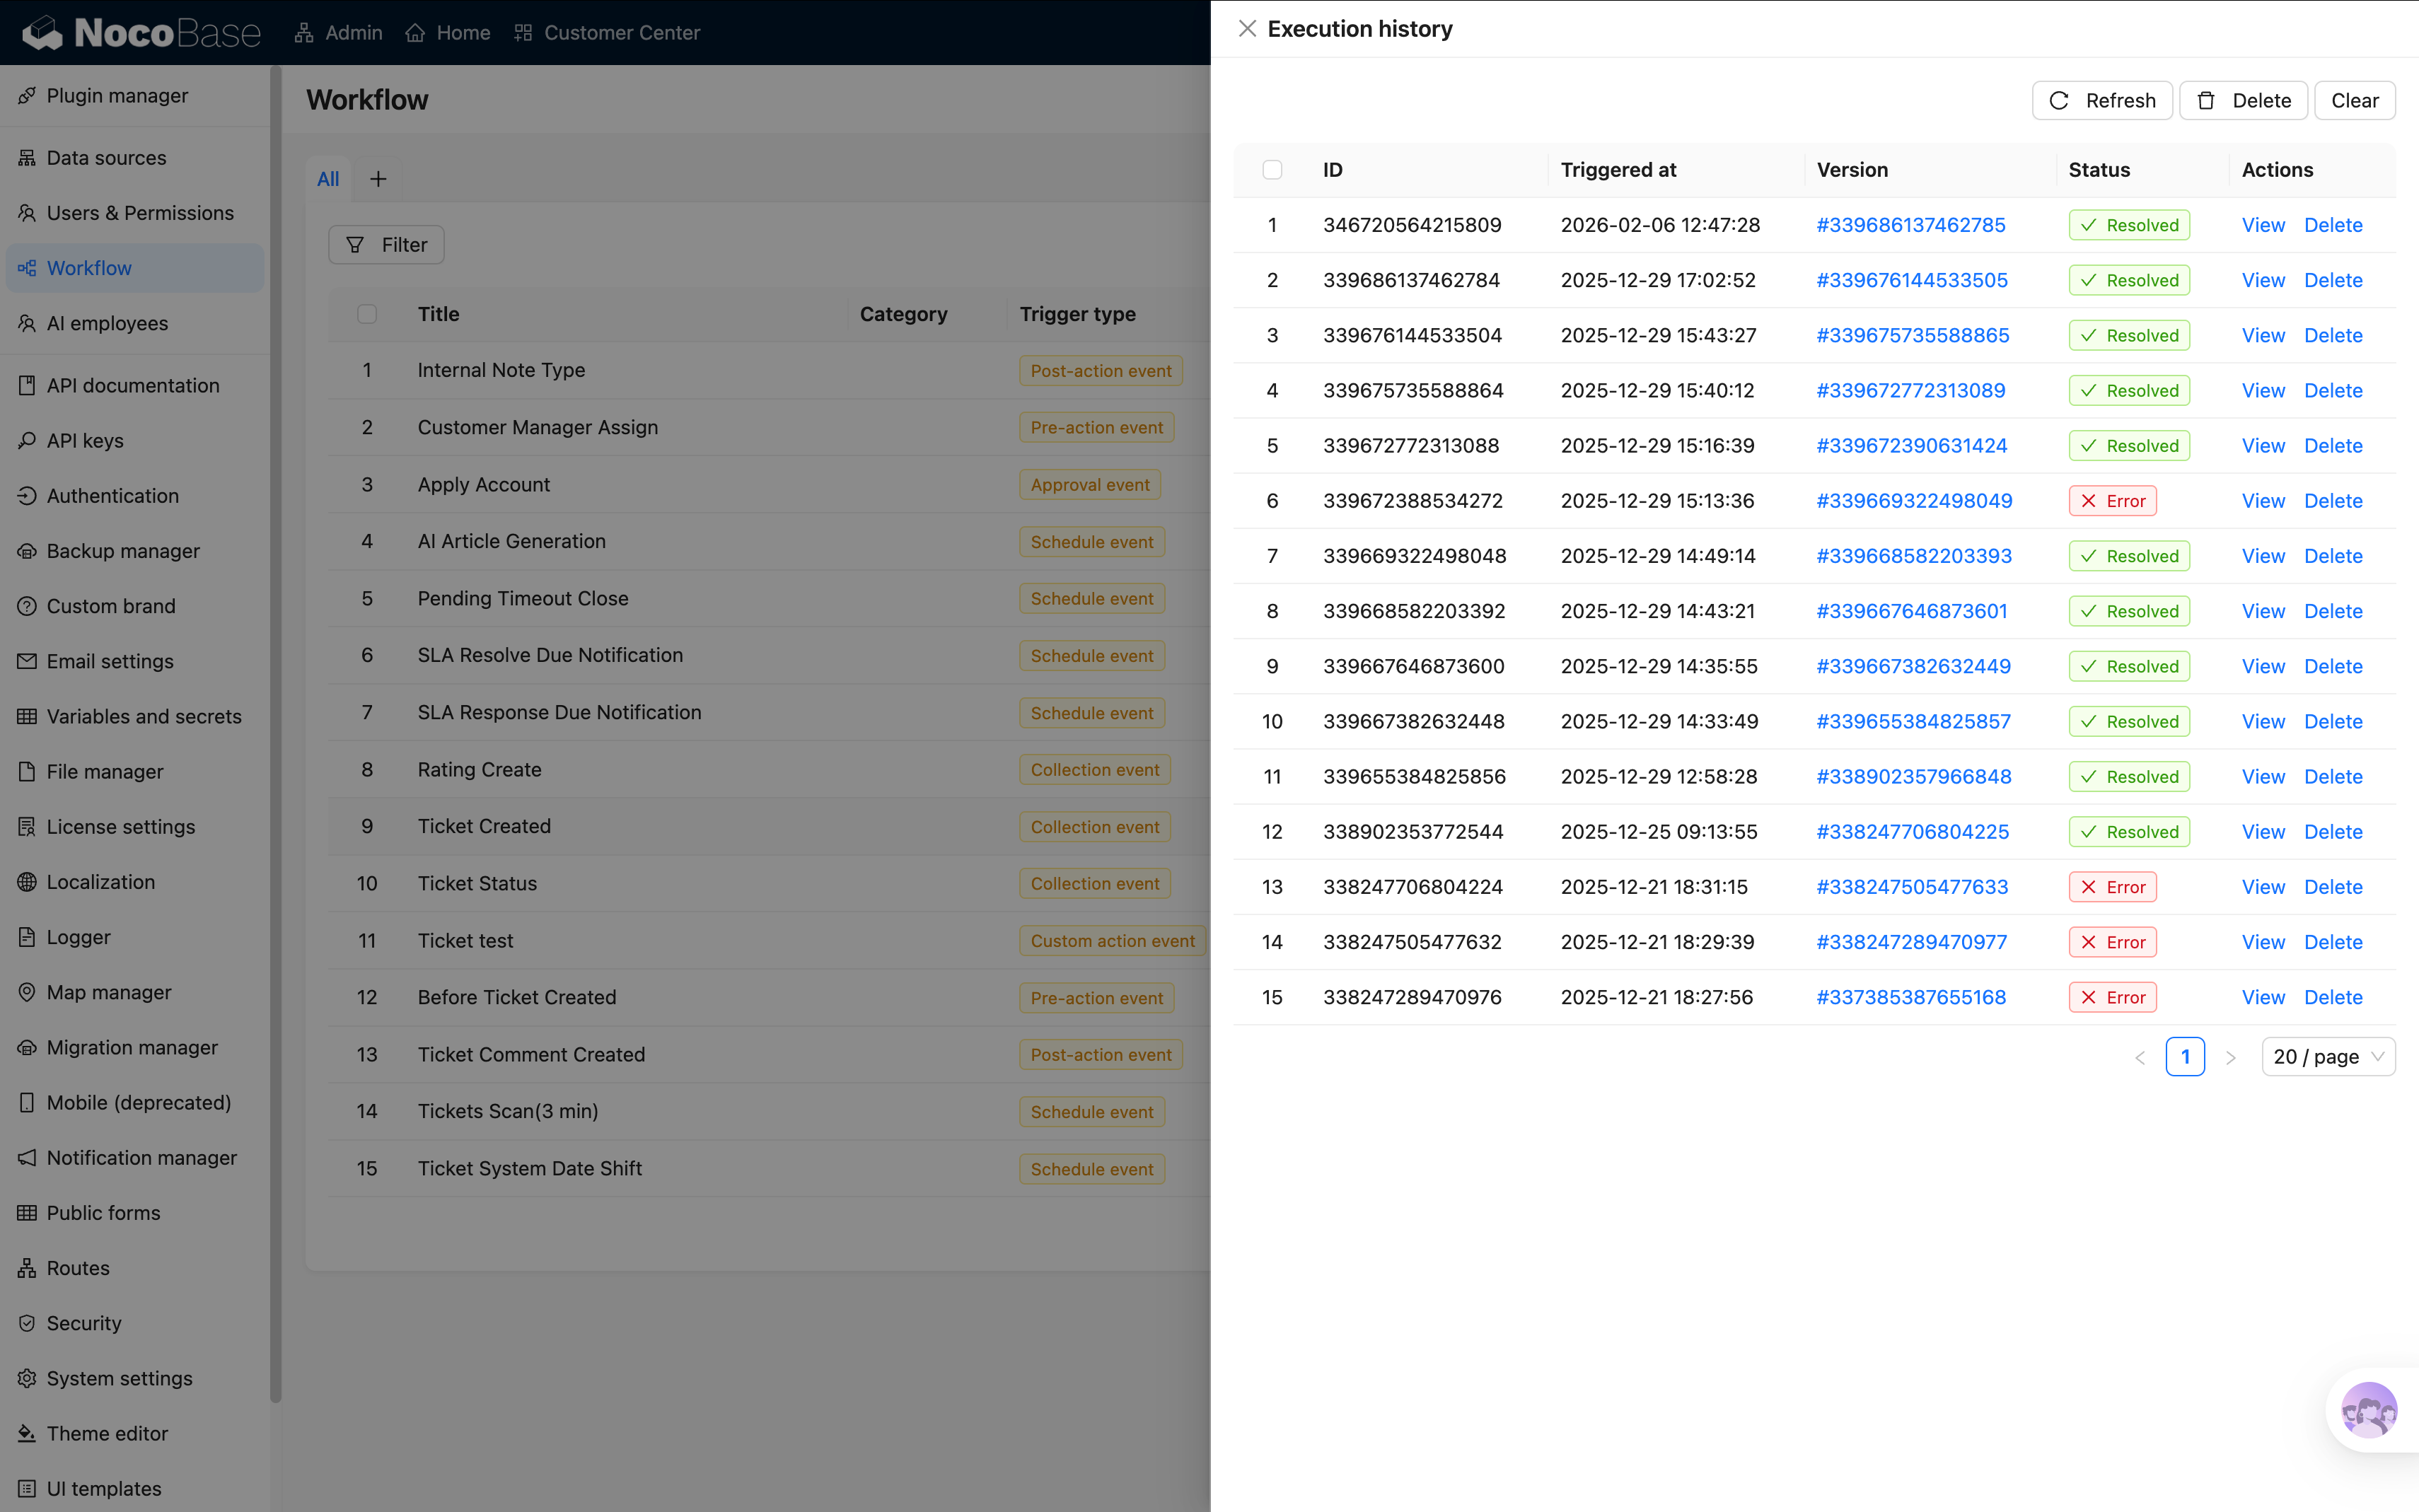
In the workflow management list, each workflow shows an Execution count link. Click it to see the detailed record of each execution:
- Execution status: Success (green) or failure (red) — easy to spot at a glance
- Trigger time: When was it triggered
- Node details: Click in to see the execution result of each node
If an execution failed, clicking into the details shows which node had the problem and the specific error message. This is the most important tool for debugging workflows.
Summary
In this chapter, we created two simple but practical workflows:
- New ticket notification (Collection event trigger): Automatically notifies the assignee when a ticket is created or reassigned — no more yelling across the office
- Auto-record completion time (Post-action event trigger): Click "Complete" and the timestamp is filled automatically — no more human oversight
These two workflows demonstrate two different trigger types, and together took less than 10 minutes to configure. The system can already do things automatically. NocoBase supports many more node types (HTTP requests, calculations, loops, etc.), but for getting started, mastering these combos is enough to handle most scenarios.
Next Chapter Preview
The system can do things automatically now, but we're still missing a "big picture view" — how many tickets are there in total? Which category has the most? How many new tickets per day? In the next chapter, we'll use chart blocks to build a data dashboard to see everything at a glance.