

Chapter 2: Data Modeling — Two Tables for a Complete Ticket System
In the last chapter, we installed NocoBase and got familiar with the interface. Now it's time to build the skeleton of our HelpDesk system — the data model.
The data model is the foundation: figure out what data you need to store and how it's related, then building pages and setting permissions becomes straightforward.
2.1 What Are Collections and Fields
If you've used Excel before, this will feel familiar:
| Excel Concept | NocoBase Concept | Description |
|---|---|---|
| Worksheet | Collection | A container for one type of data |
| Column header | Field | An attribute describing the data |
| Each row | Record | One specific piece of data |
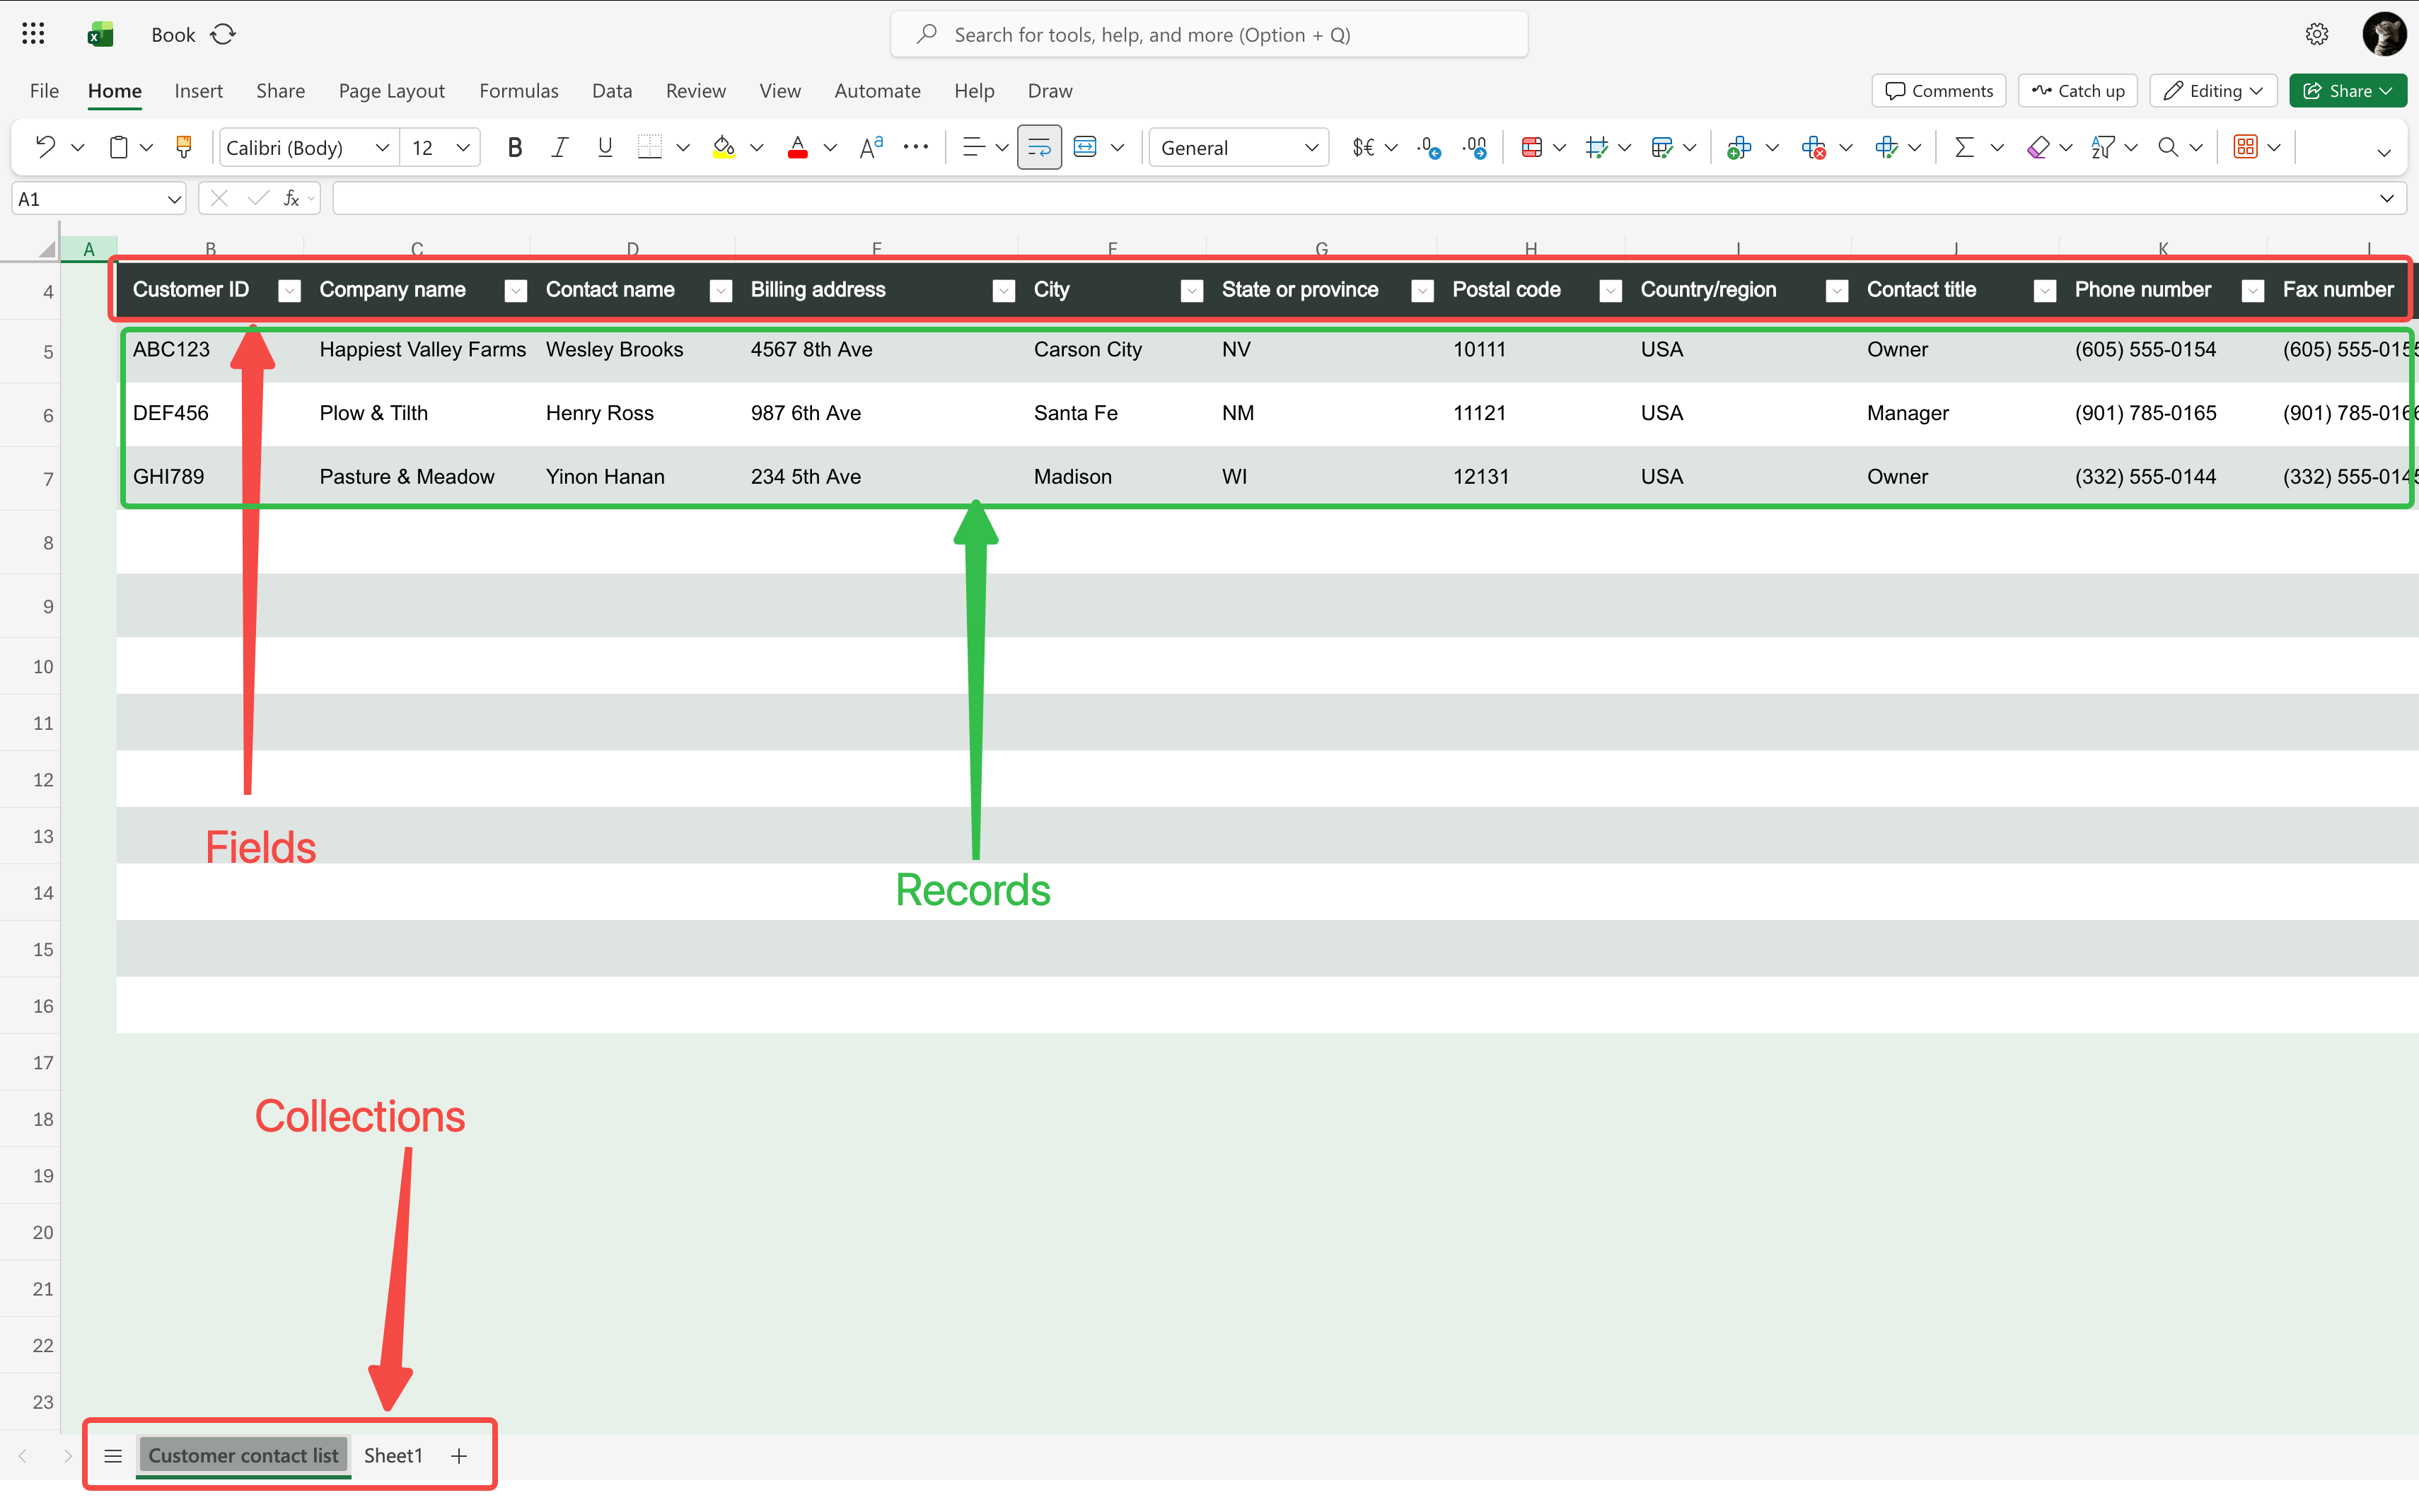
For example, our "Tickets" collection is like an Excel spreadsheet — each column is a field (Title, Status, Priority...), and each row is one ticket record.
But NocoBase is much more powerful than Excel. It supports multiple collection types, each with different built-in capabilities:
| Type | Best For | Examples |
|---|---|---|
| General | Most business data | Tickets, Orders, Customers |
| Tree | Hierarchical data | Category trees, Org charts |
| Calendar | Date-based events | Meetings, Schedules |
| File | Attachment management | Documents, Images |
Today we'll use General and Tree collections. We'll cover the others when needed.
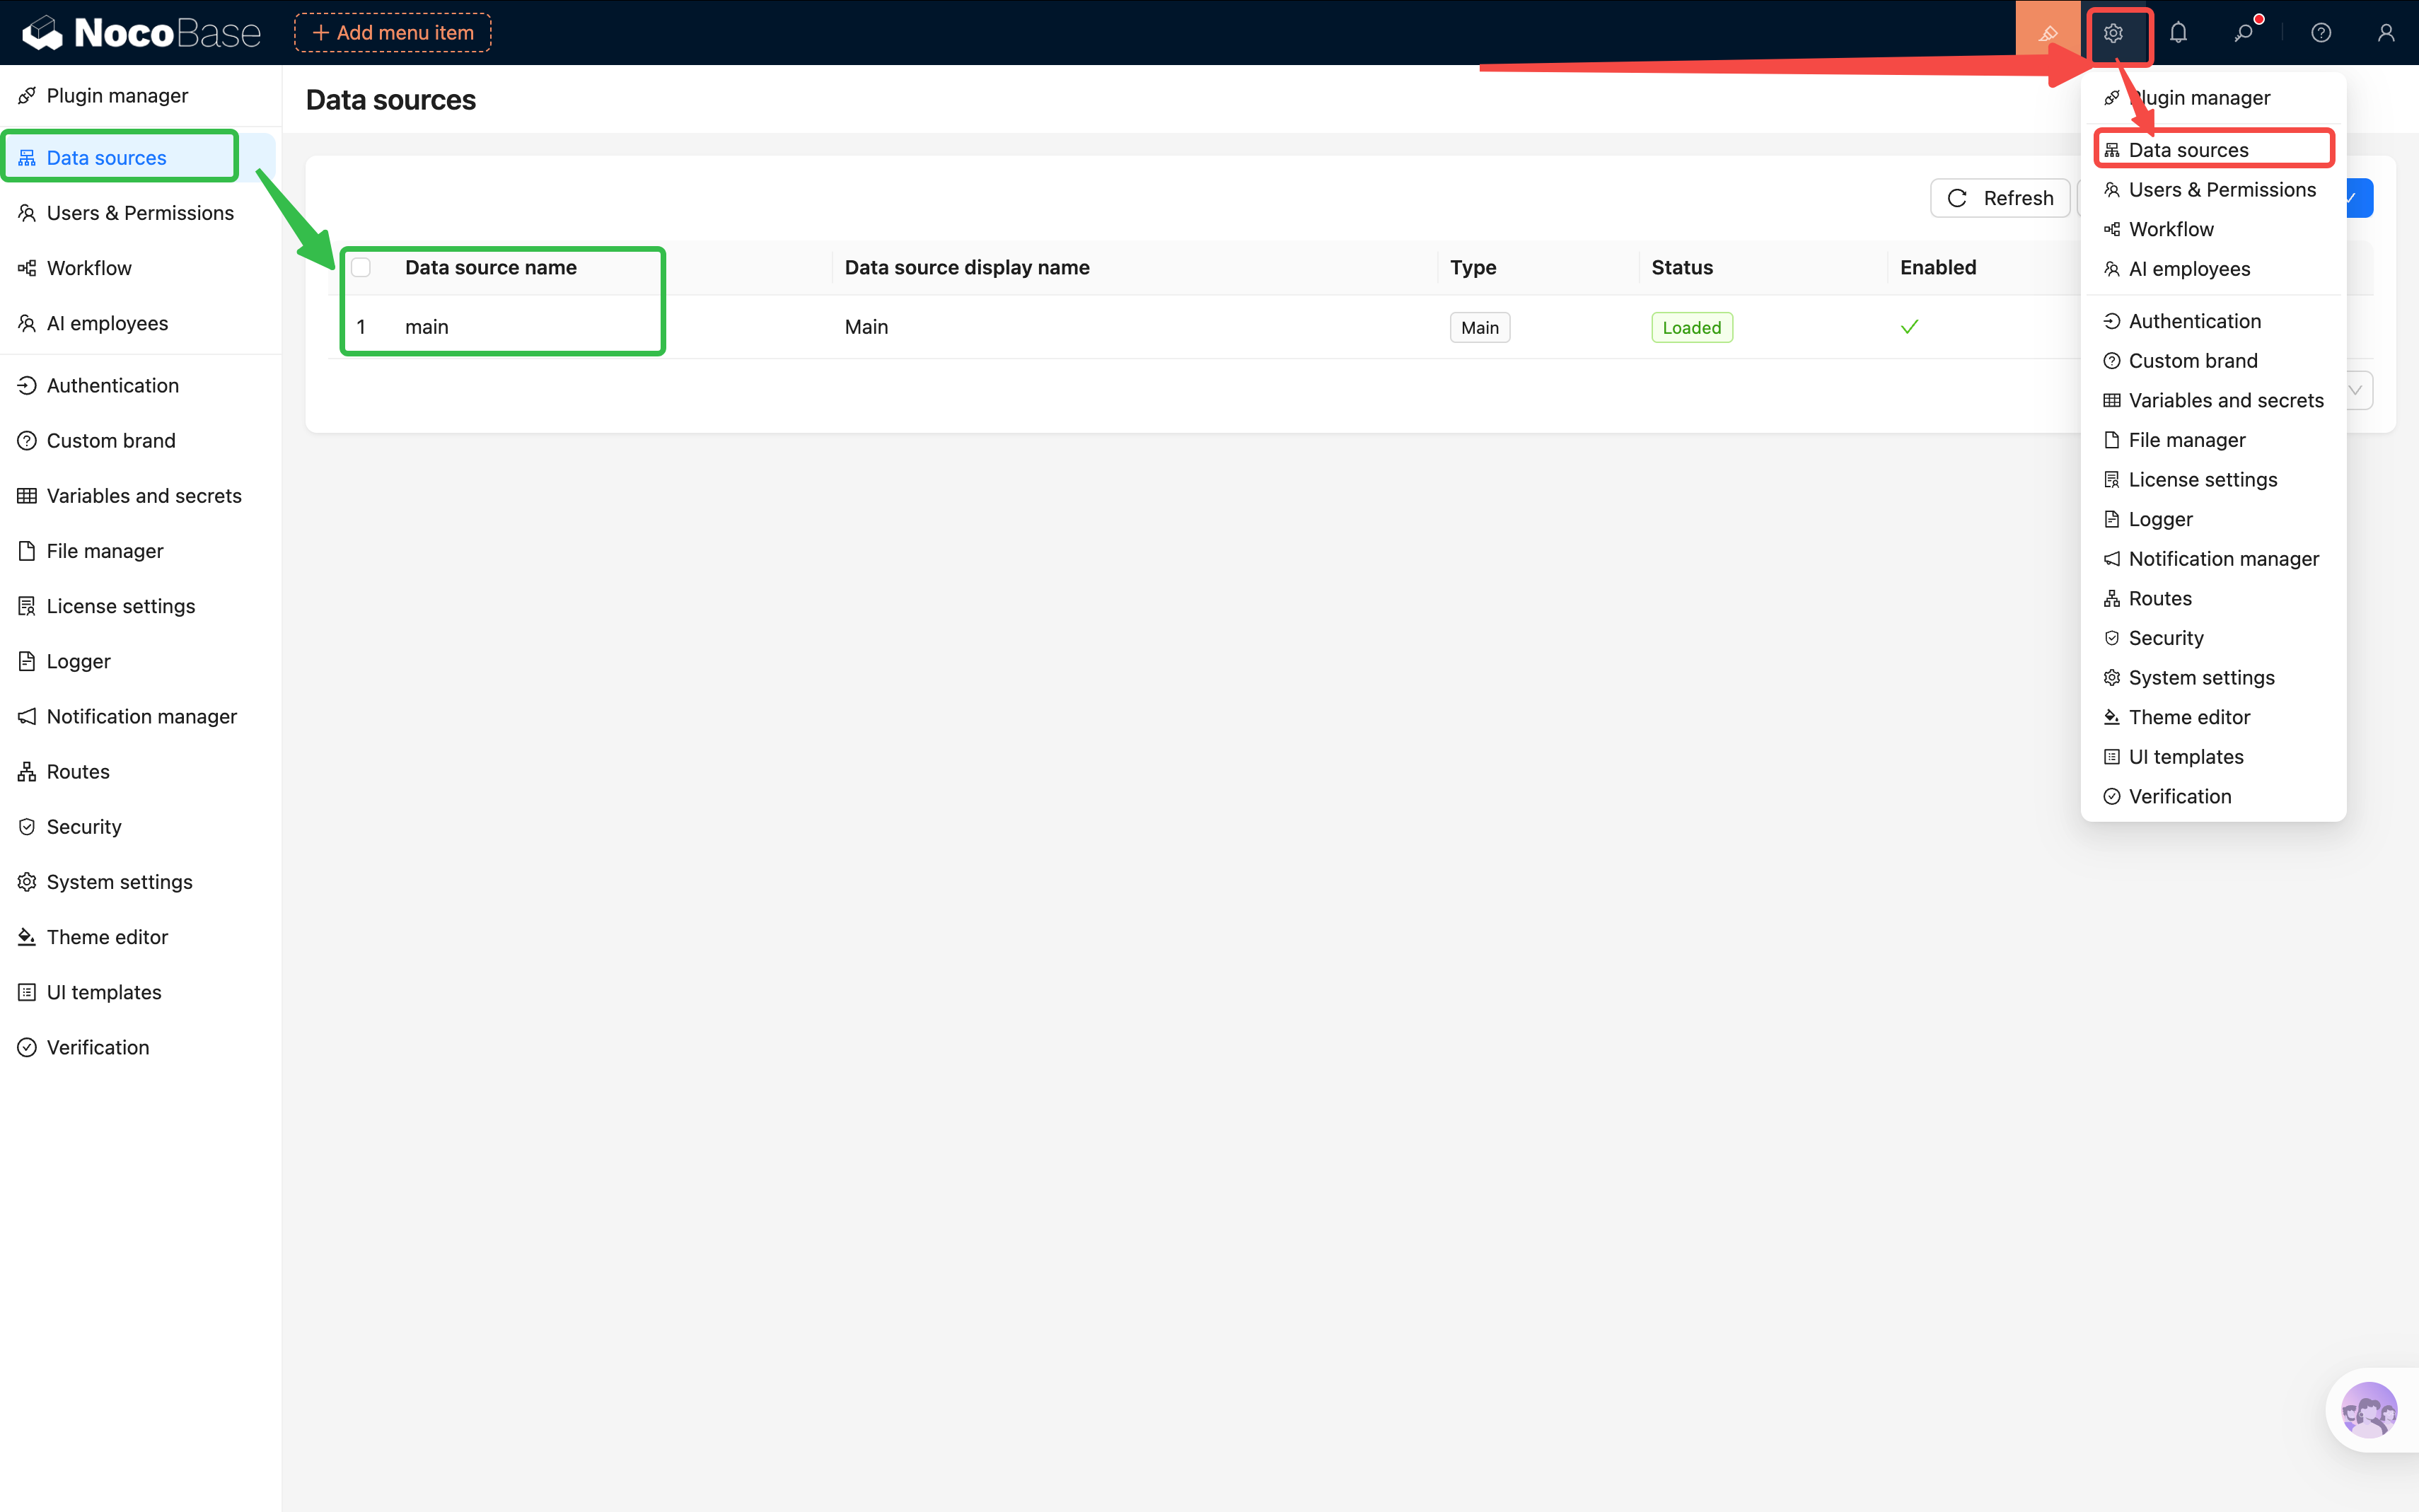
Enter Data Source Manager: Click the "Data Source Manager" icon in the bottom-left corner (the database icon next to the gear). You'll see the "Main data source" — this is where all our tables live.
2.2 Creating the Core Table: Tickets
Let's jump right in and create the heart of our system — the Tickets table.
Create the Table
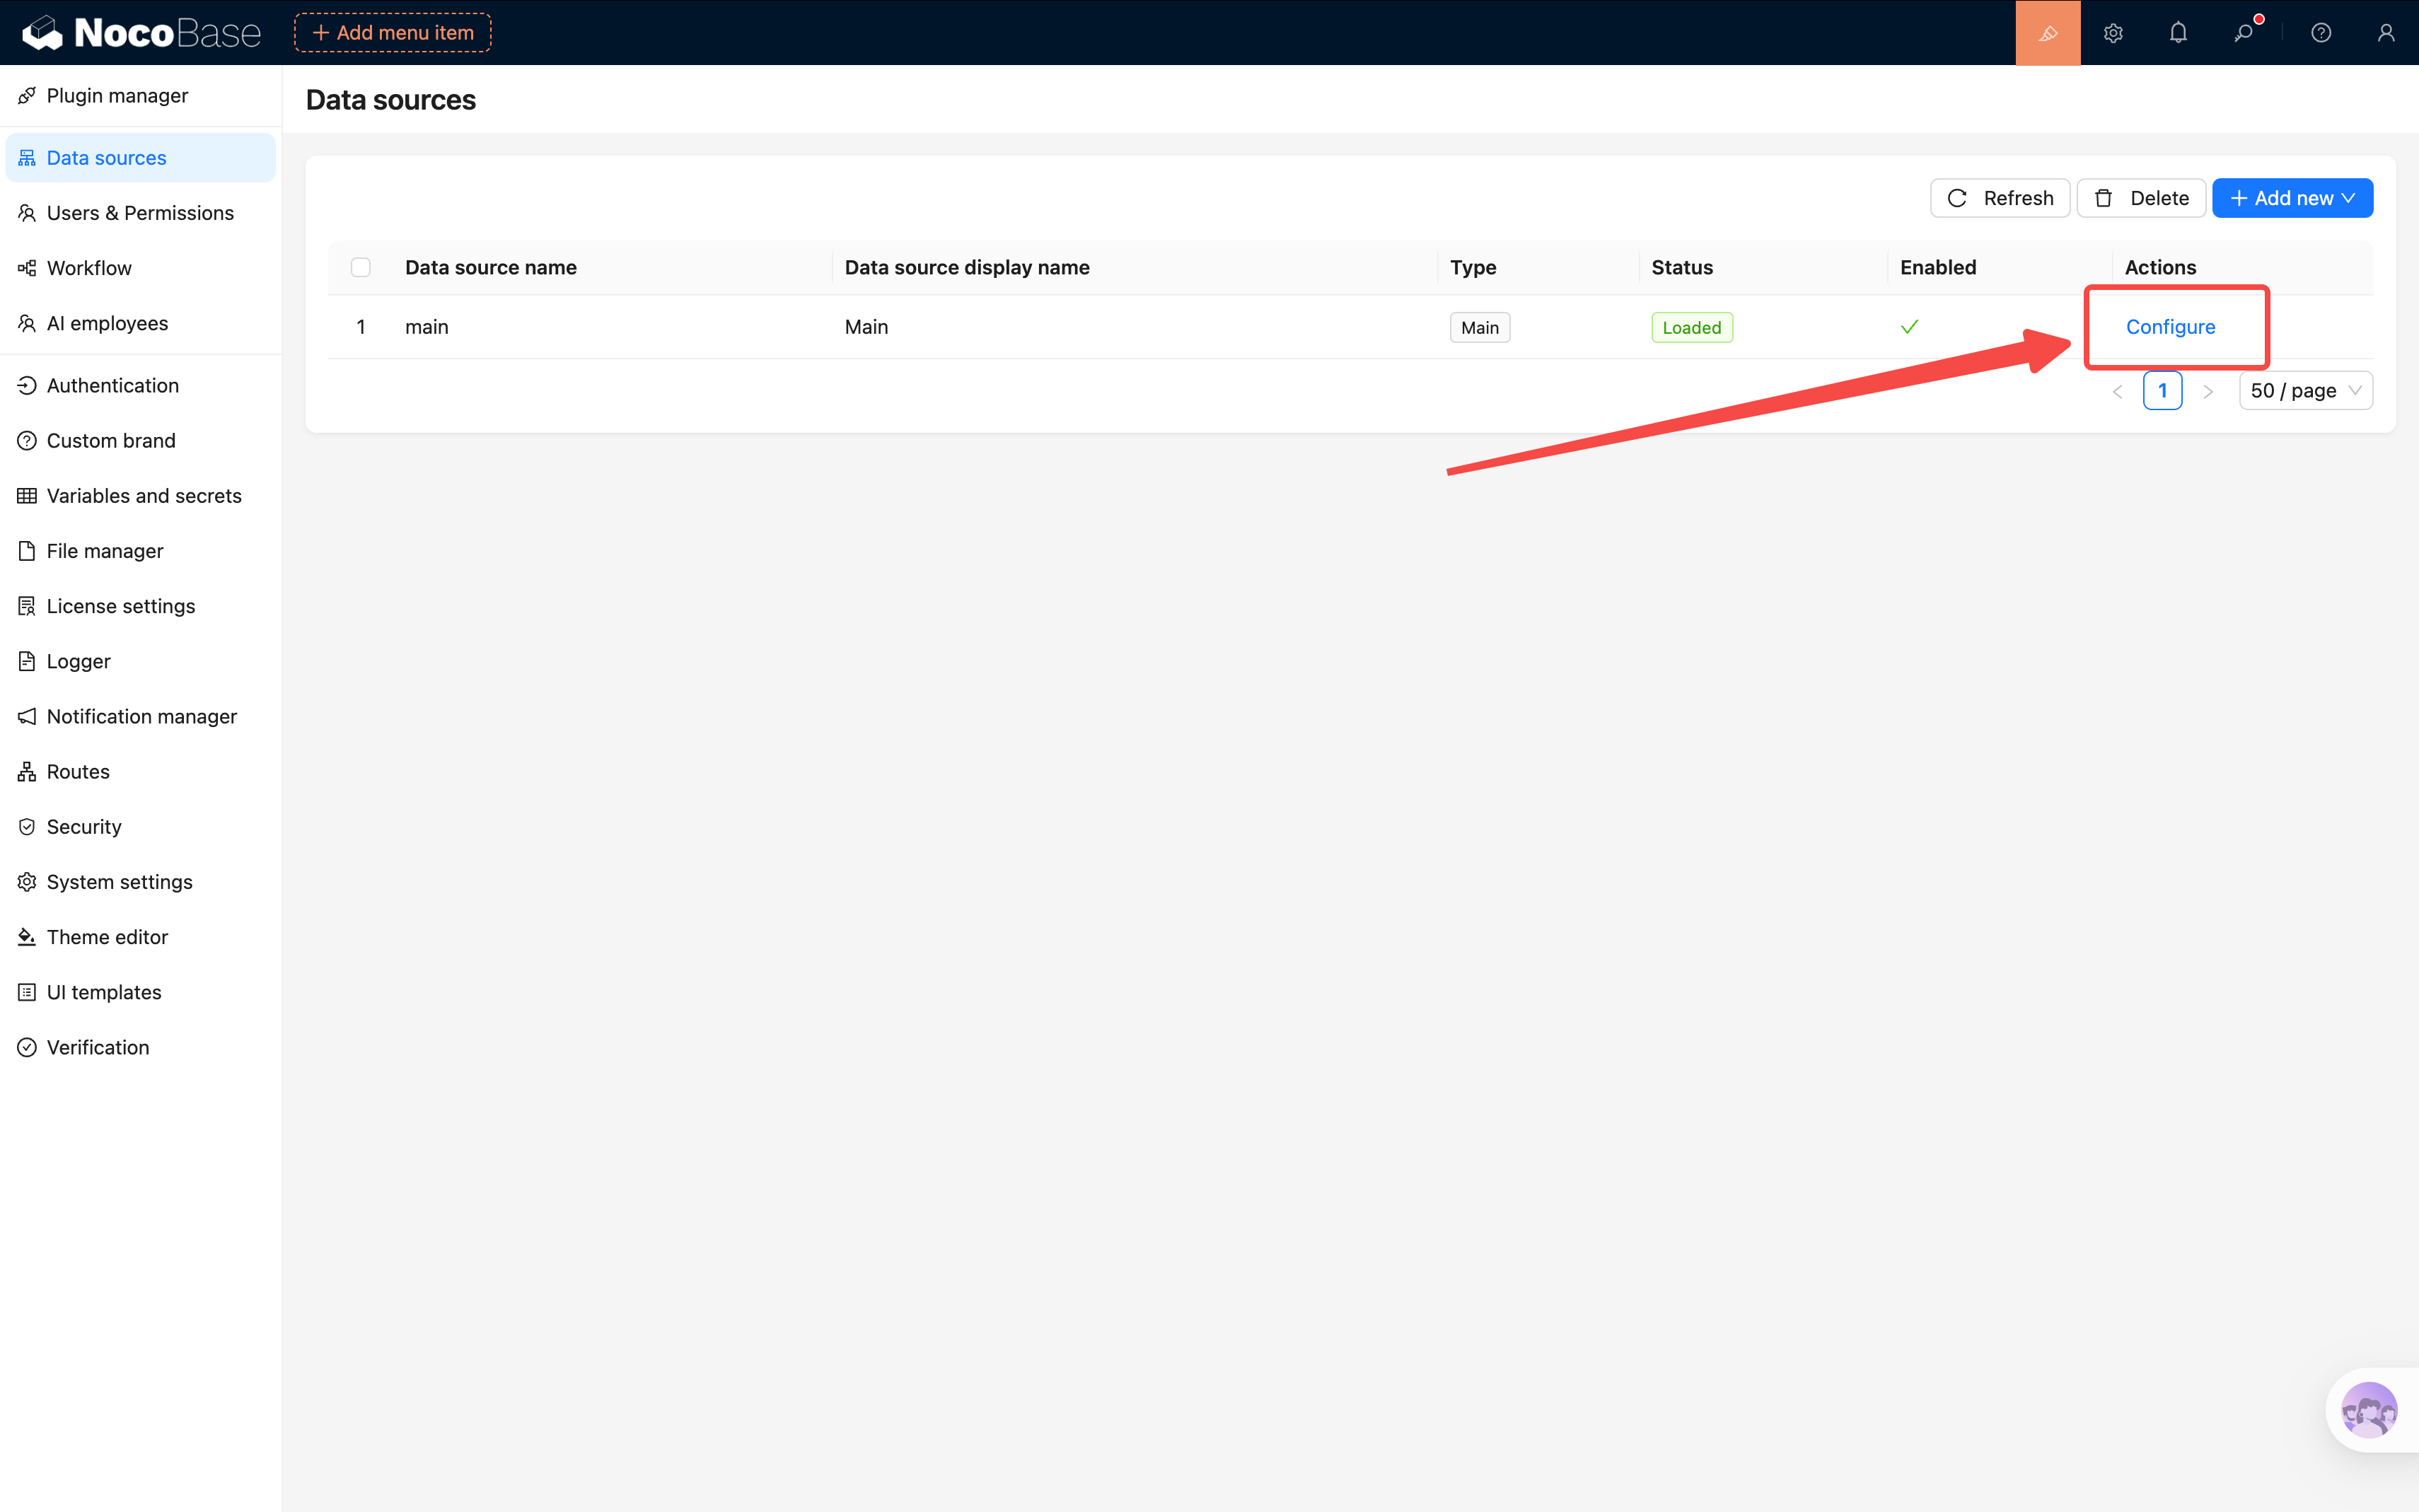
- On the Data Source Manager page, click "Main data source" to enter
- Click "Create collection", then select "General collection"
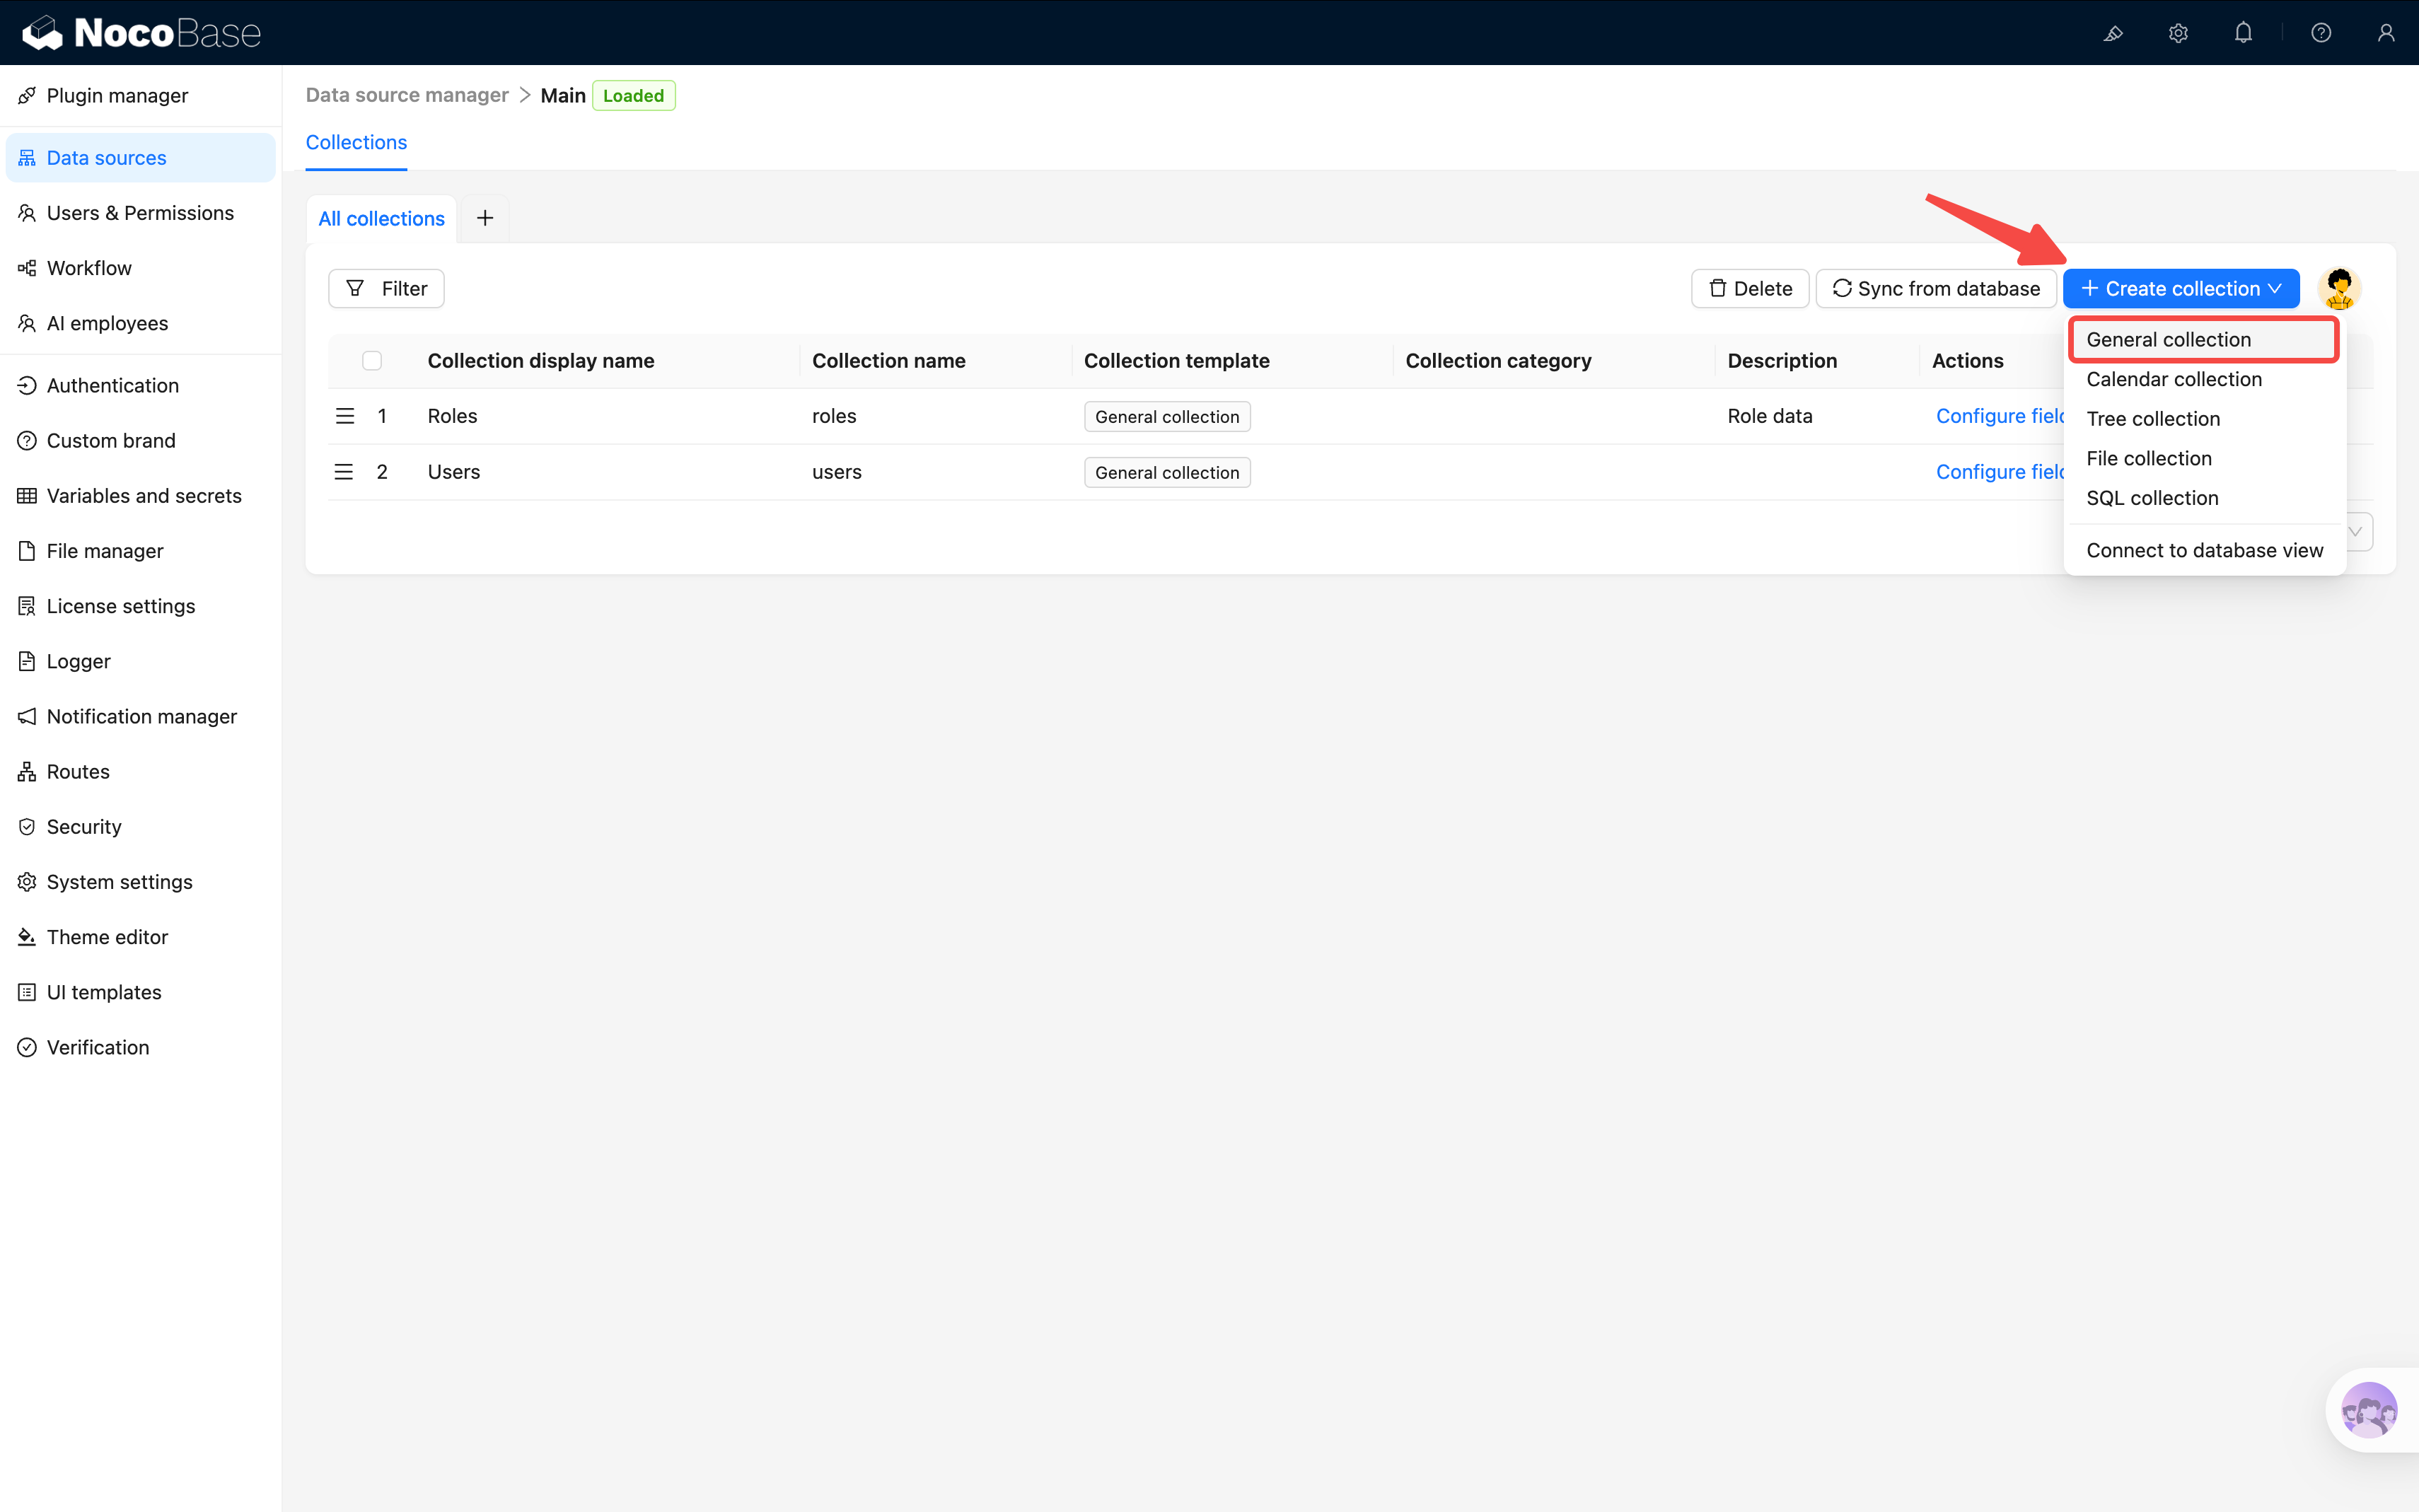
- Collection name:
tickets, Display name:Tickets
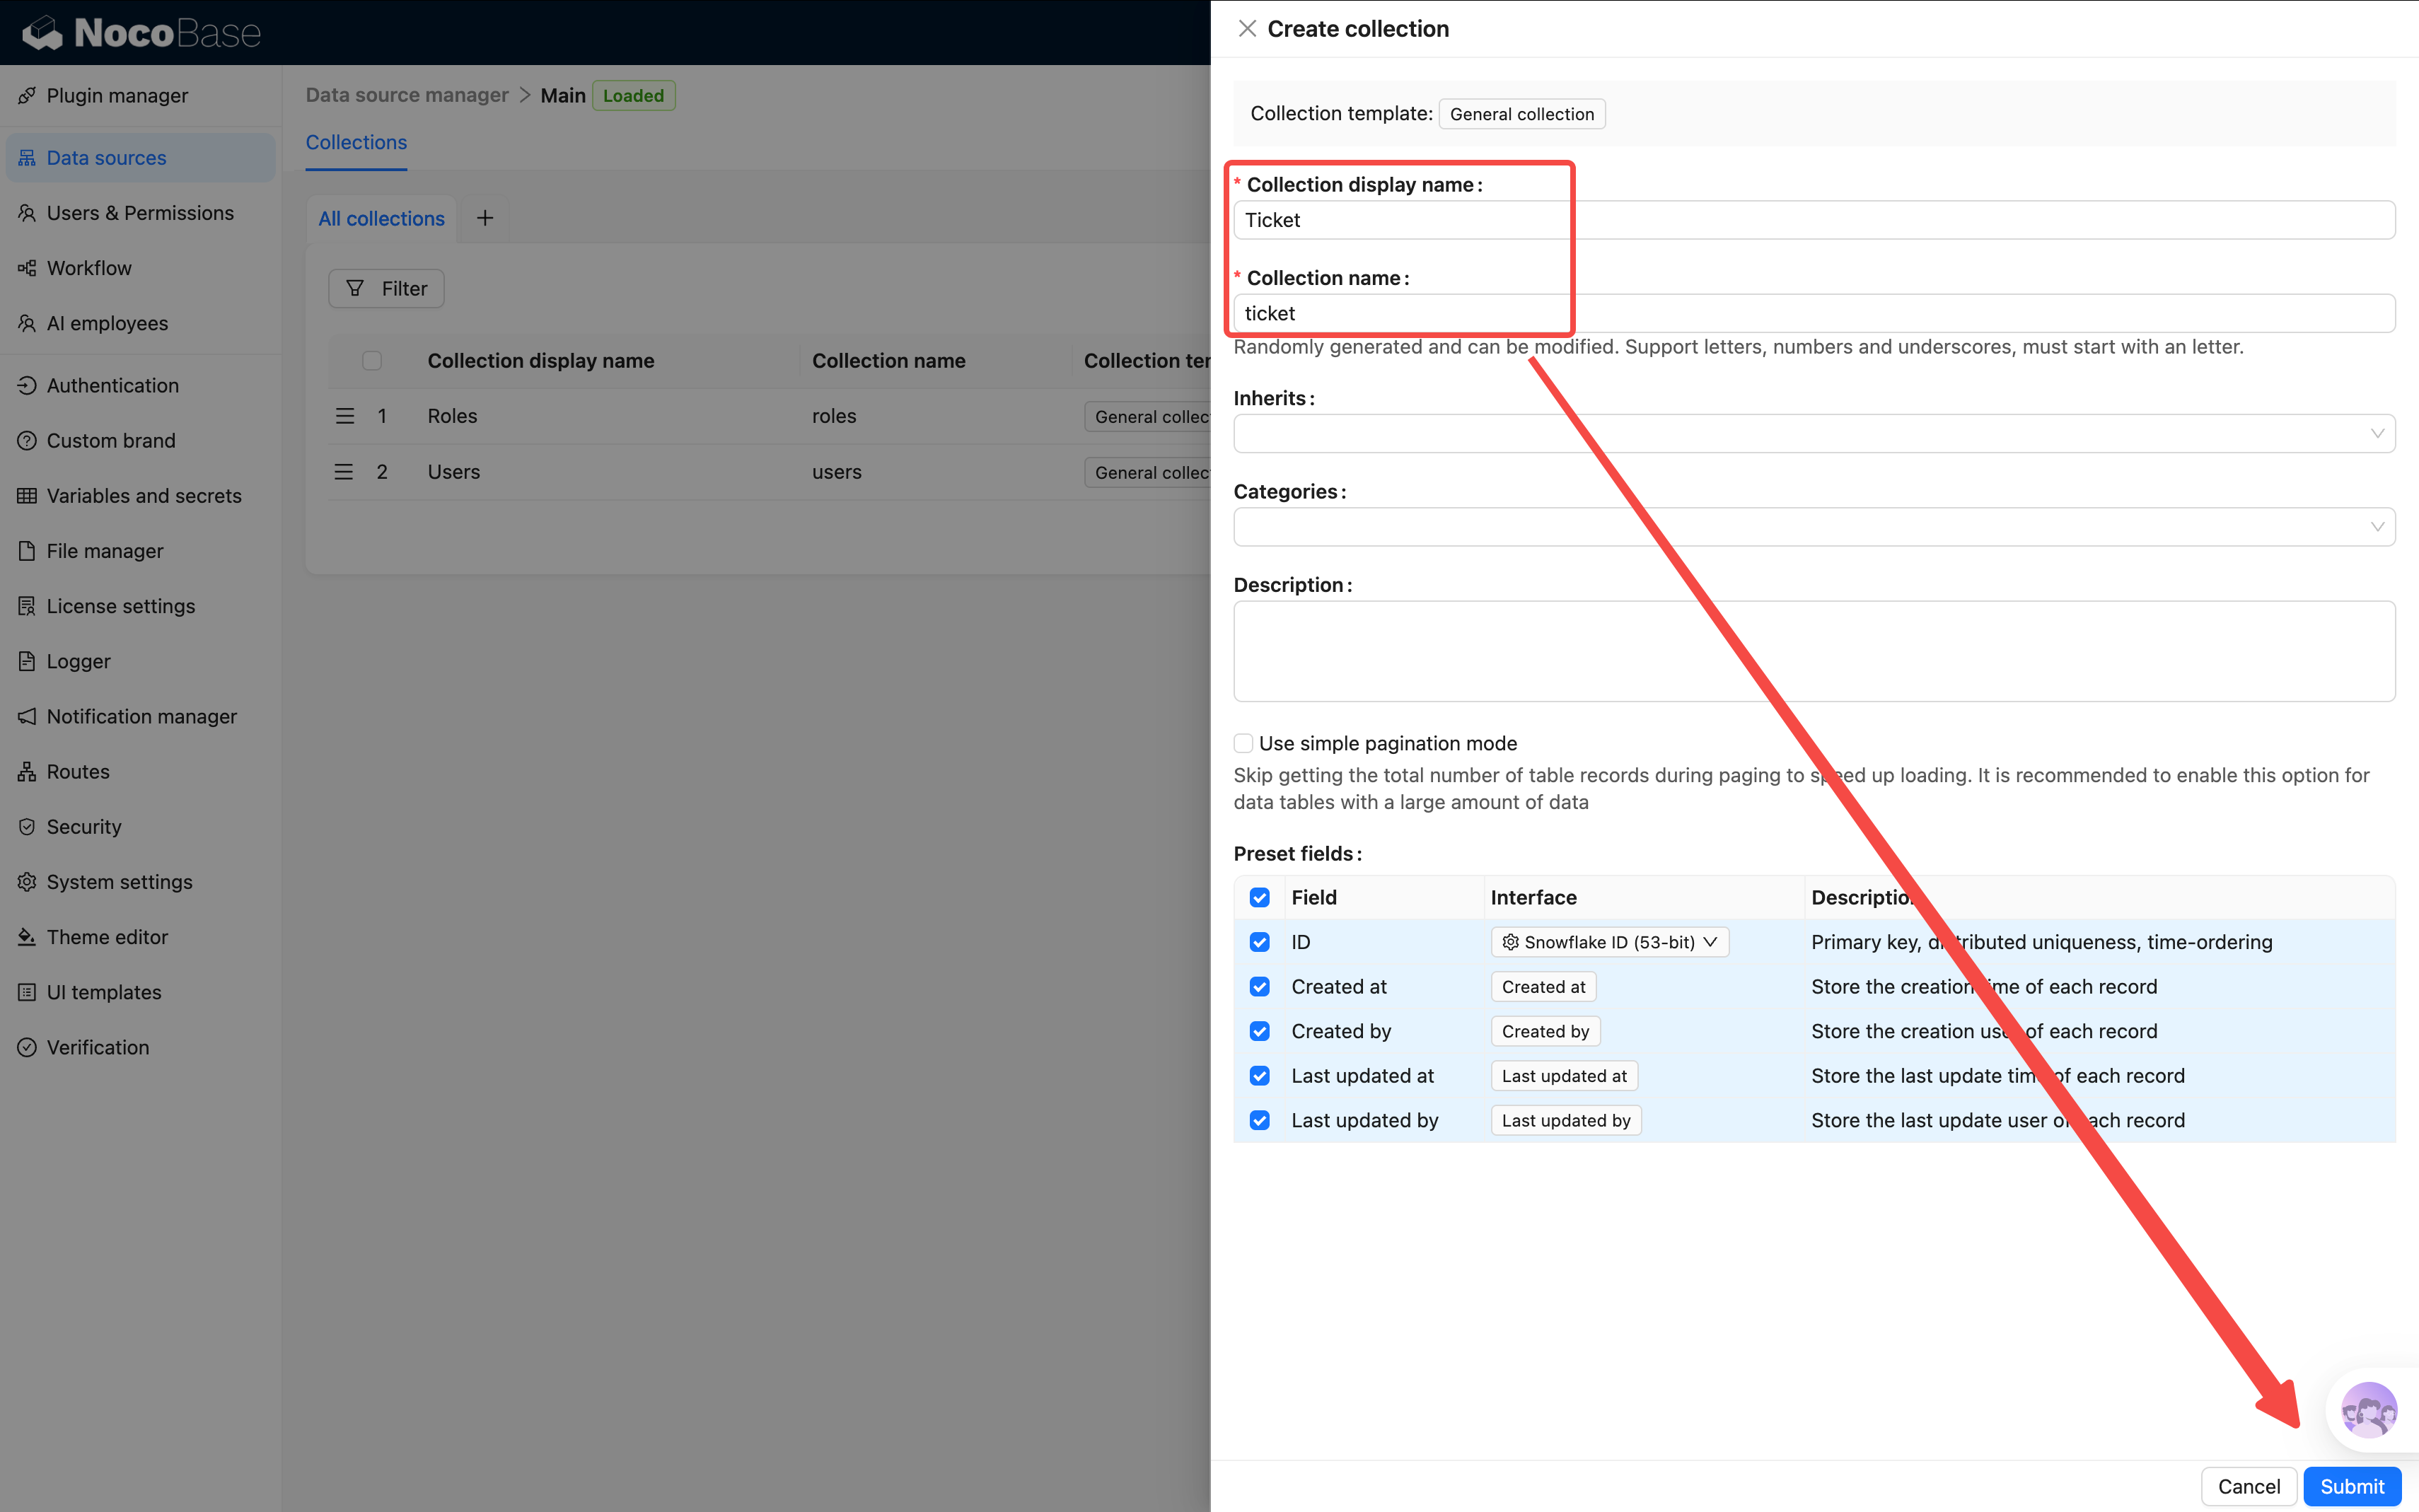
When creating a table, the system checks a set of system fields by default. These automatically track metadata for every record:
| Field | Description |
|---|---|
| ID | Primary key, unique identifier |
| Created at | When the record was created |
| Created by | Who created the record |
| Last updated at | When it was last modified |
| Last updated by | Who last modified it |
Keep these defaults as-is — no manual management needed. You can uncheck them if a specific scenario doesn't need them.
Adding Basic Fields
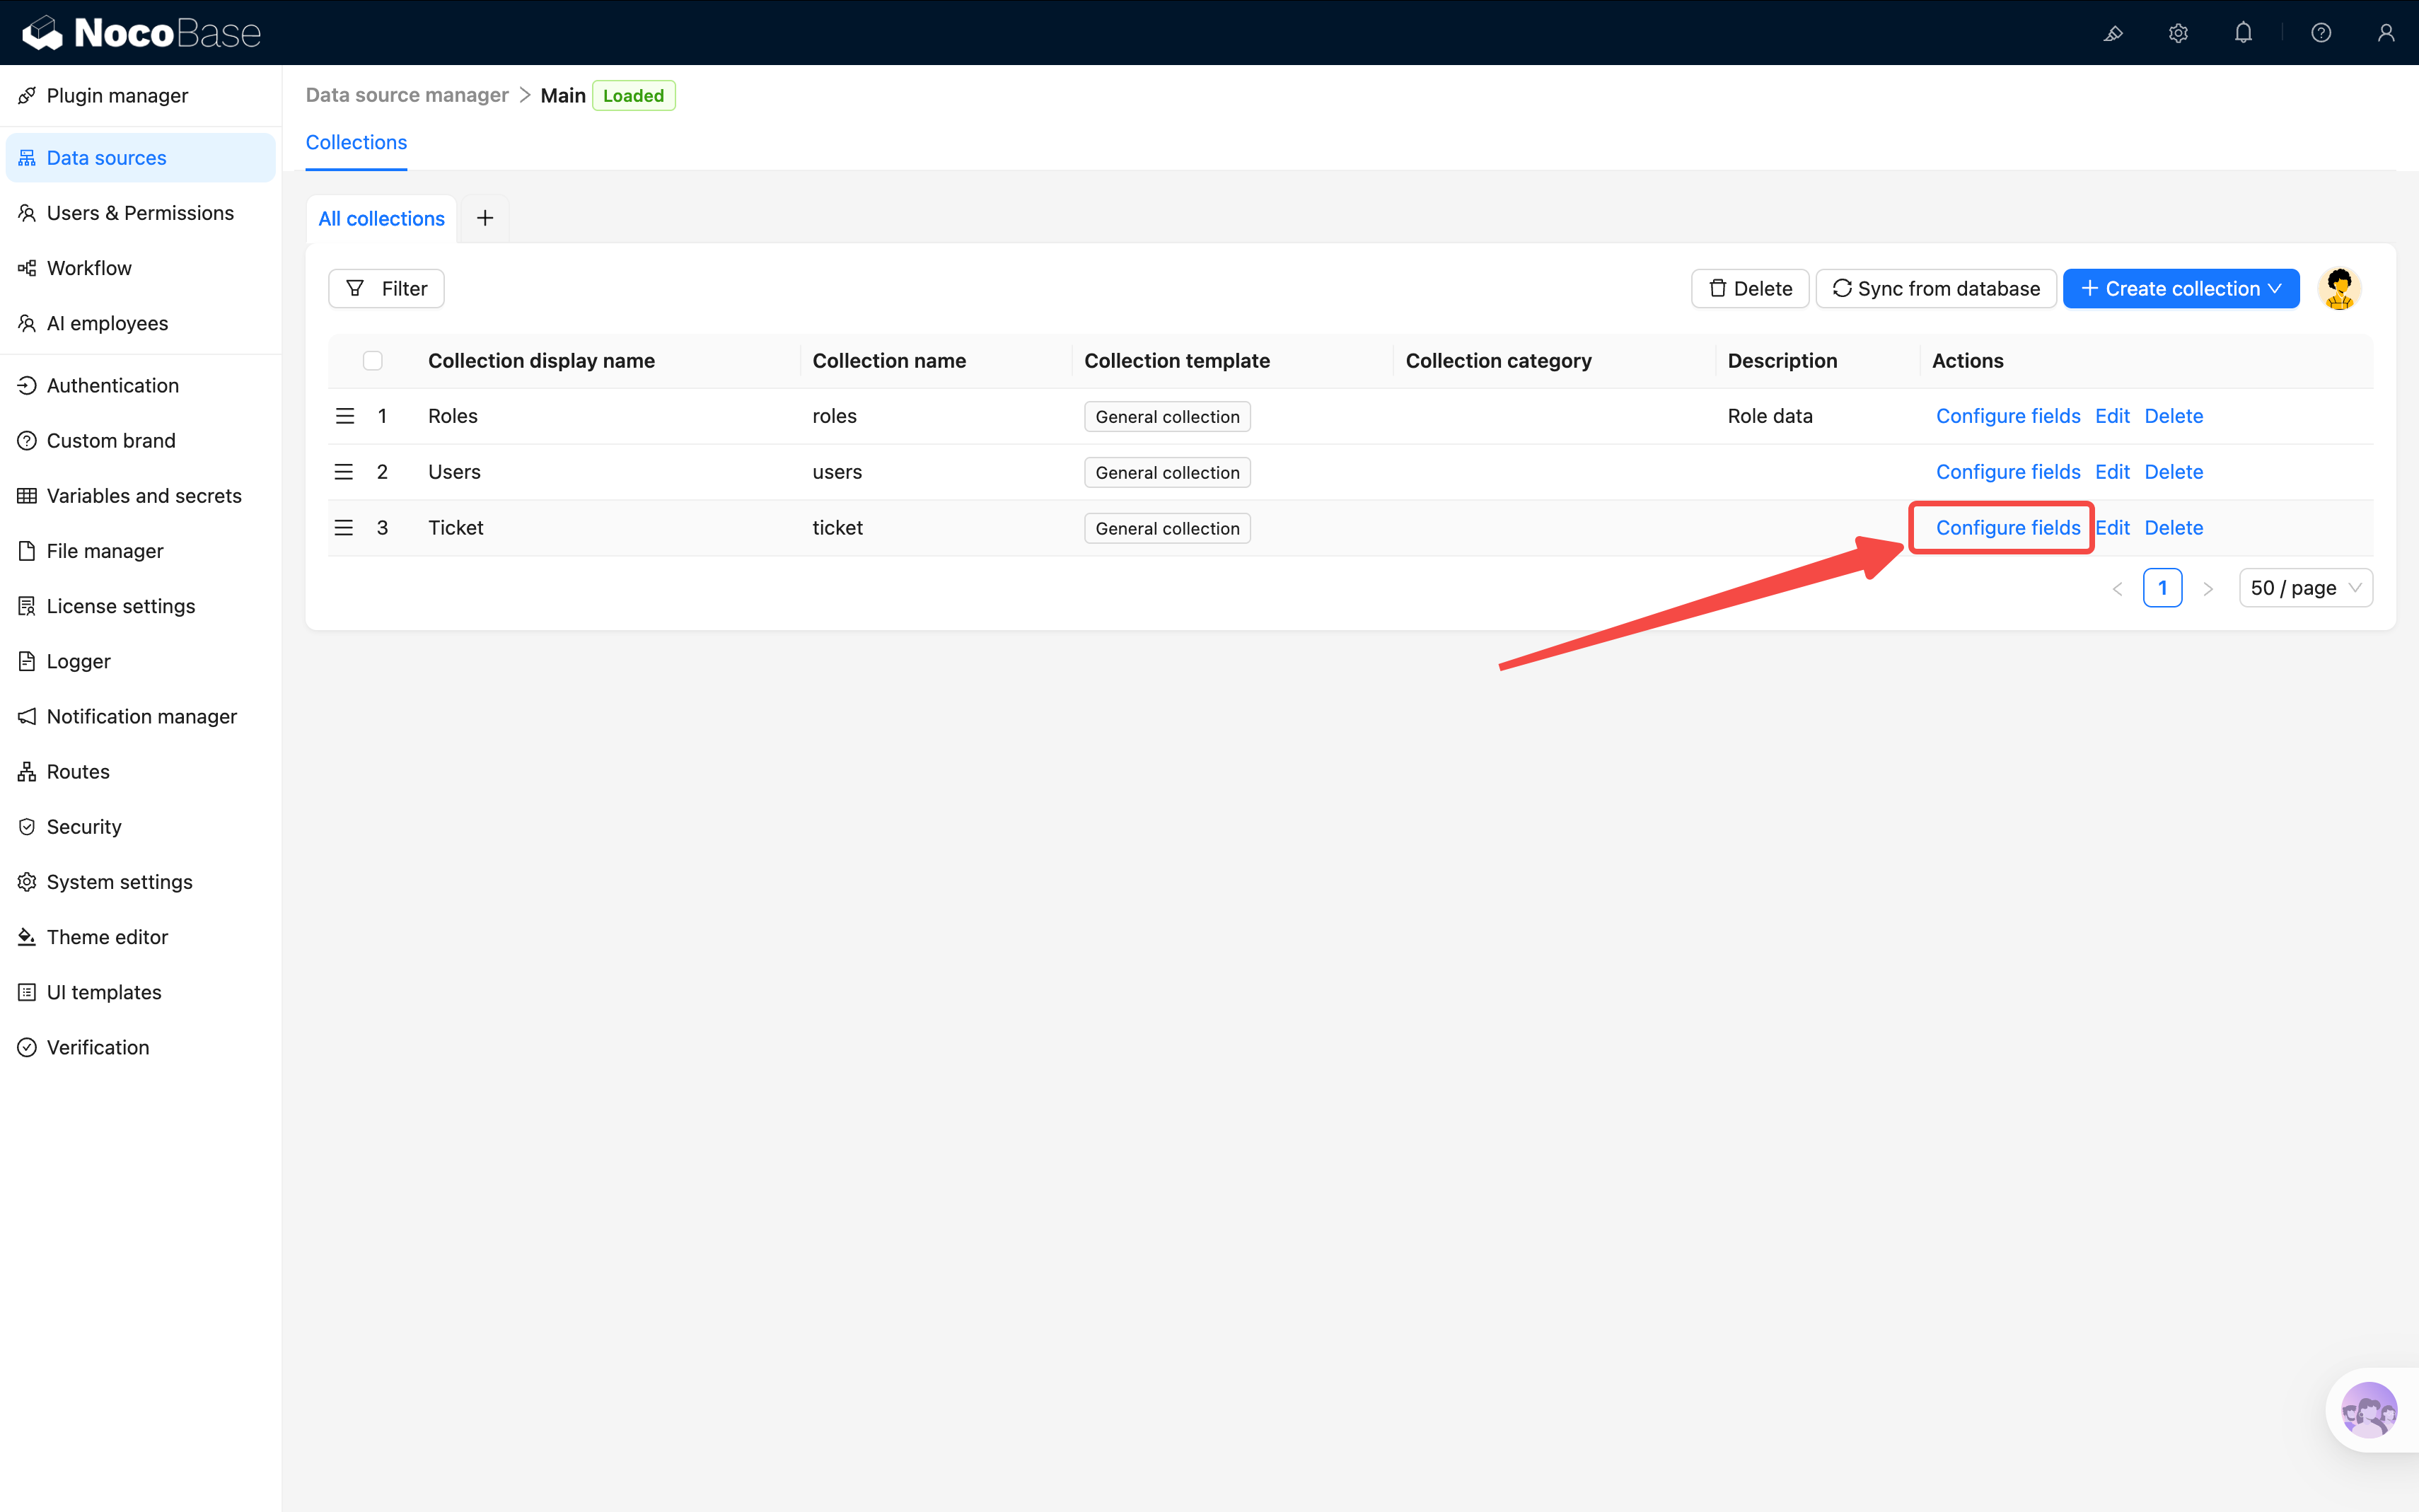
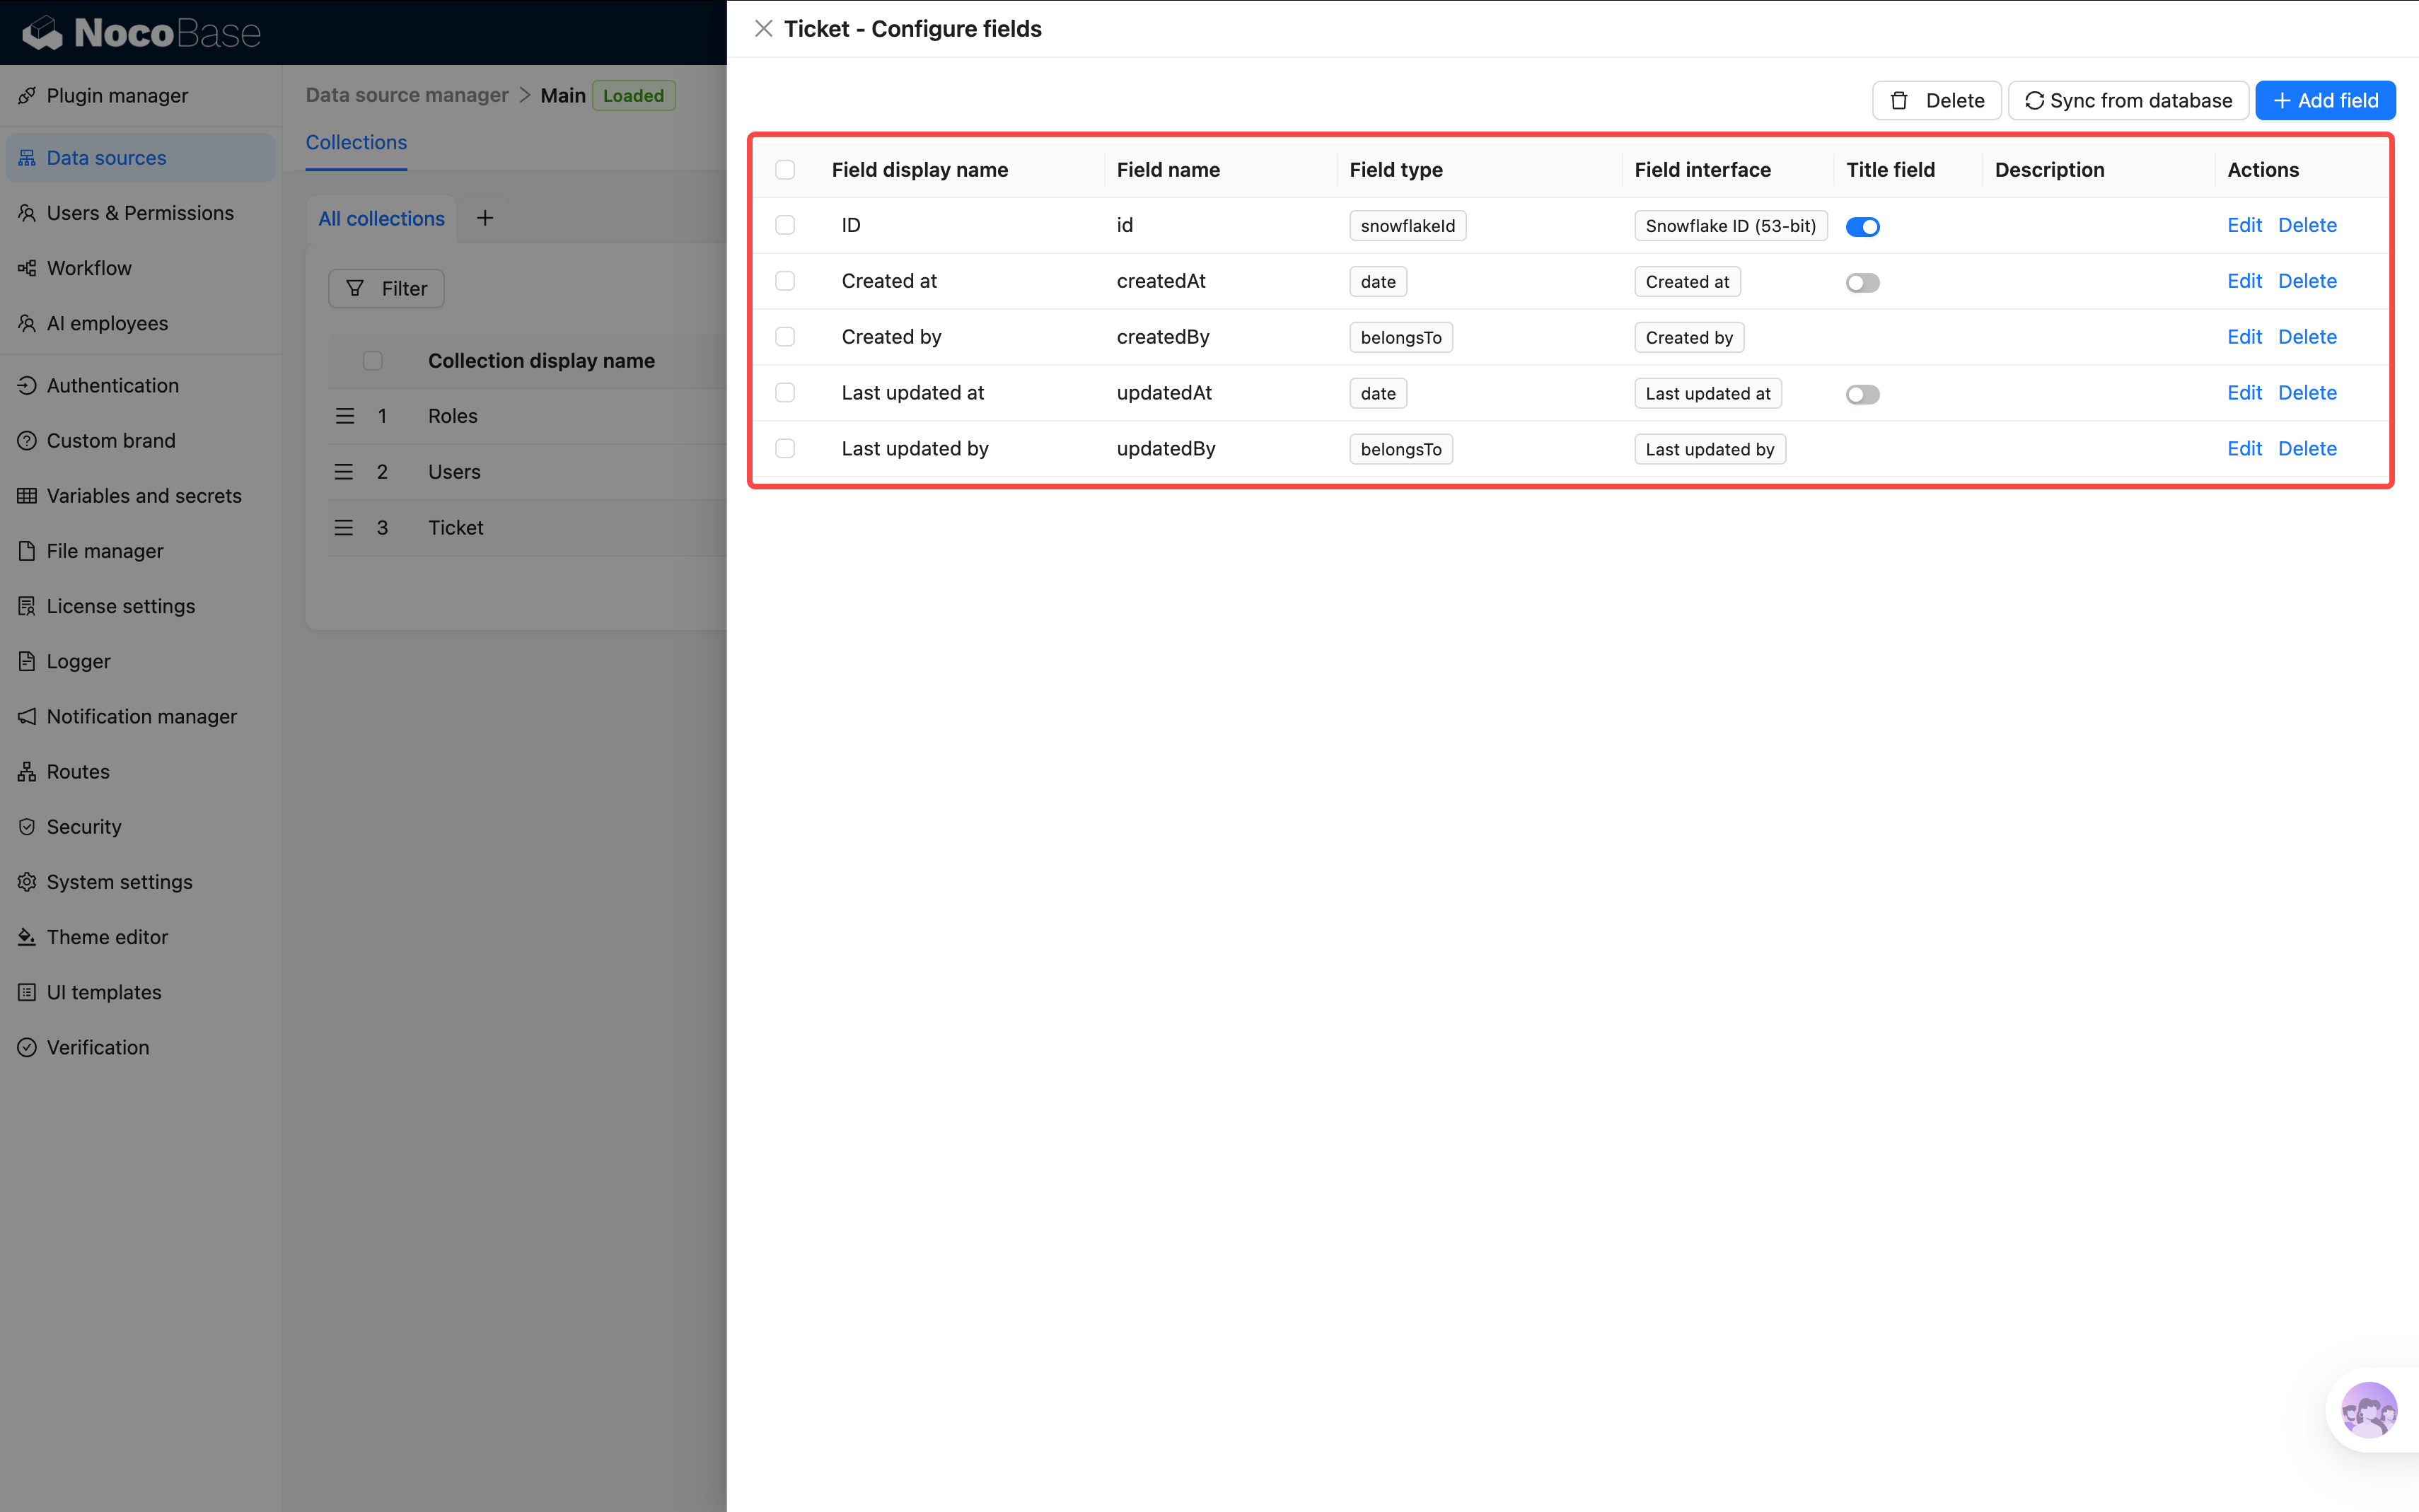
The table is created. Now let's add fields. Click "Configure fields" on the Tickets table, and you'll see the default system fields already listed.
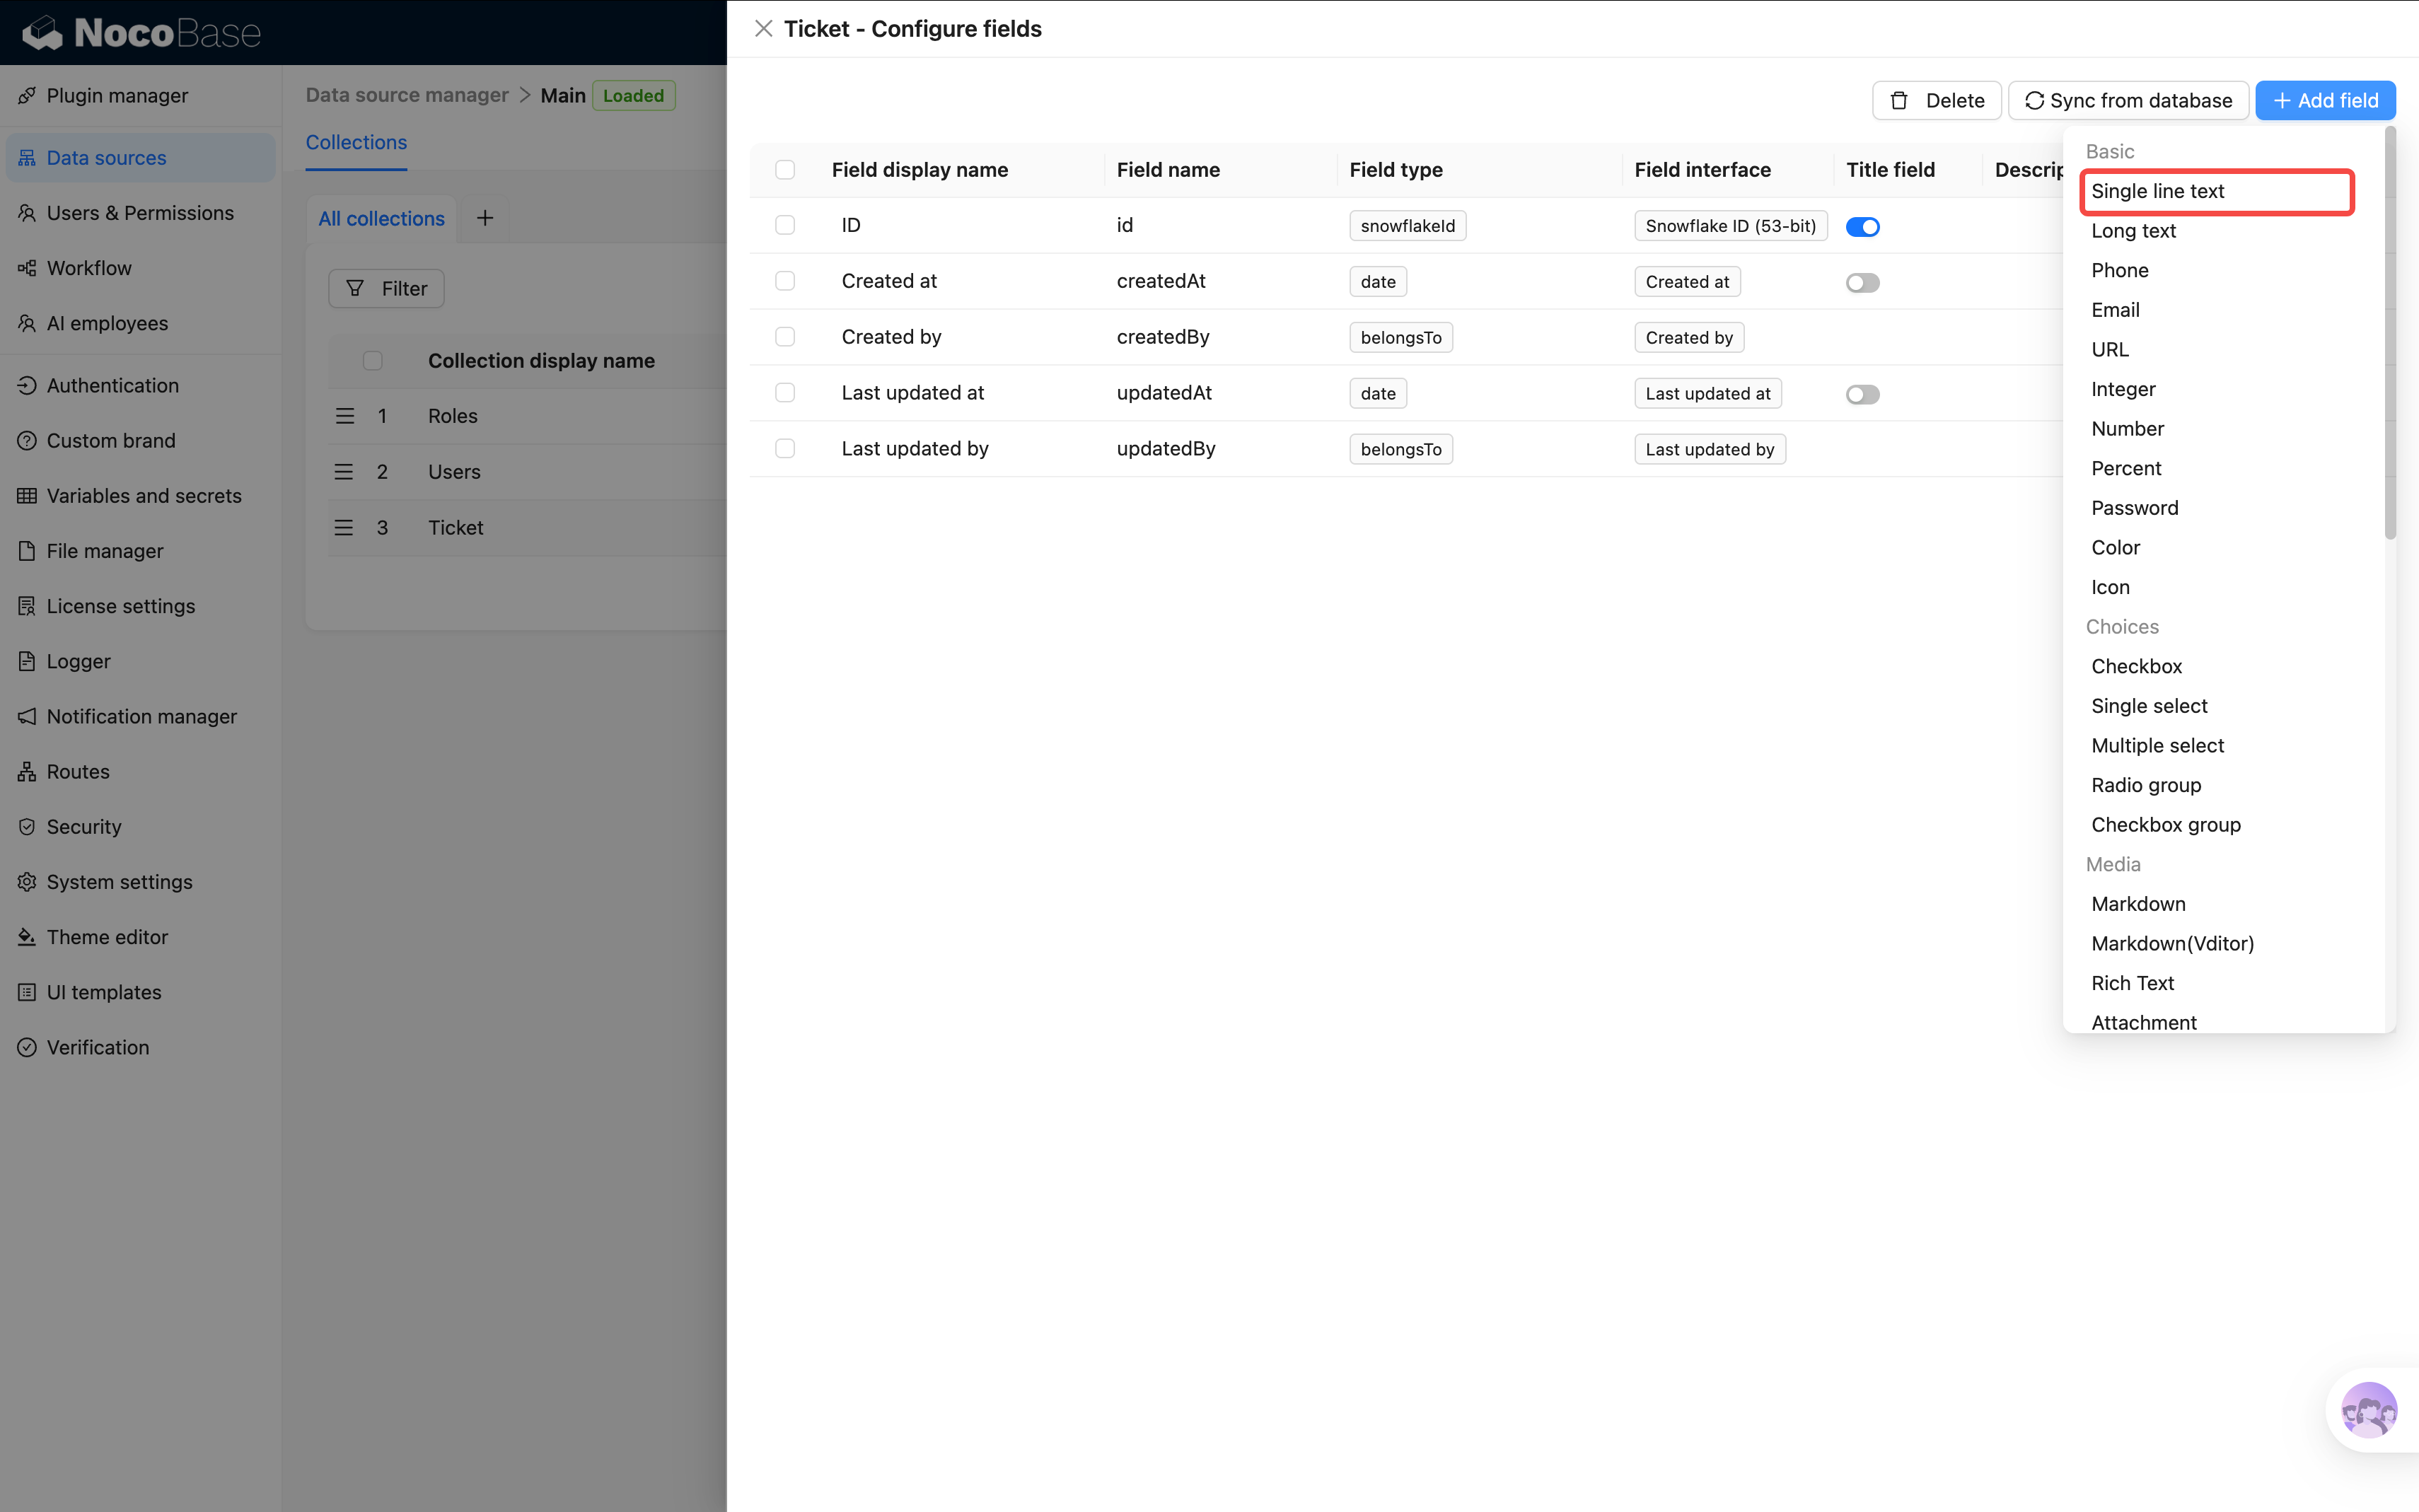
Click the "Add field" button in the top-right corner to expand a dropdown of field types — pick the one you want to add.
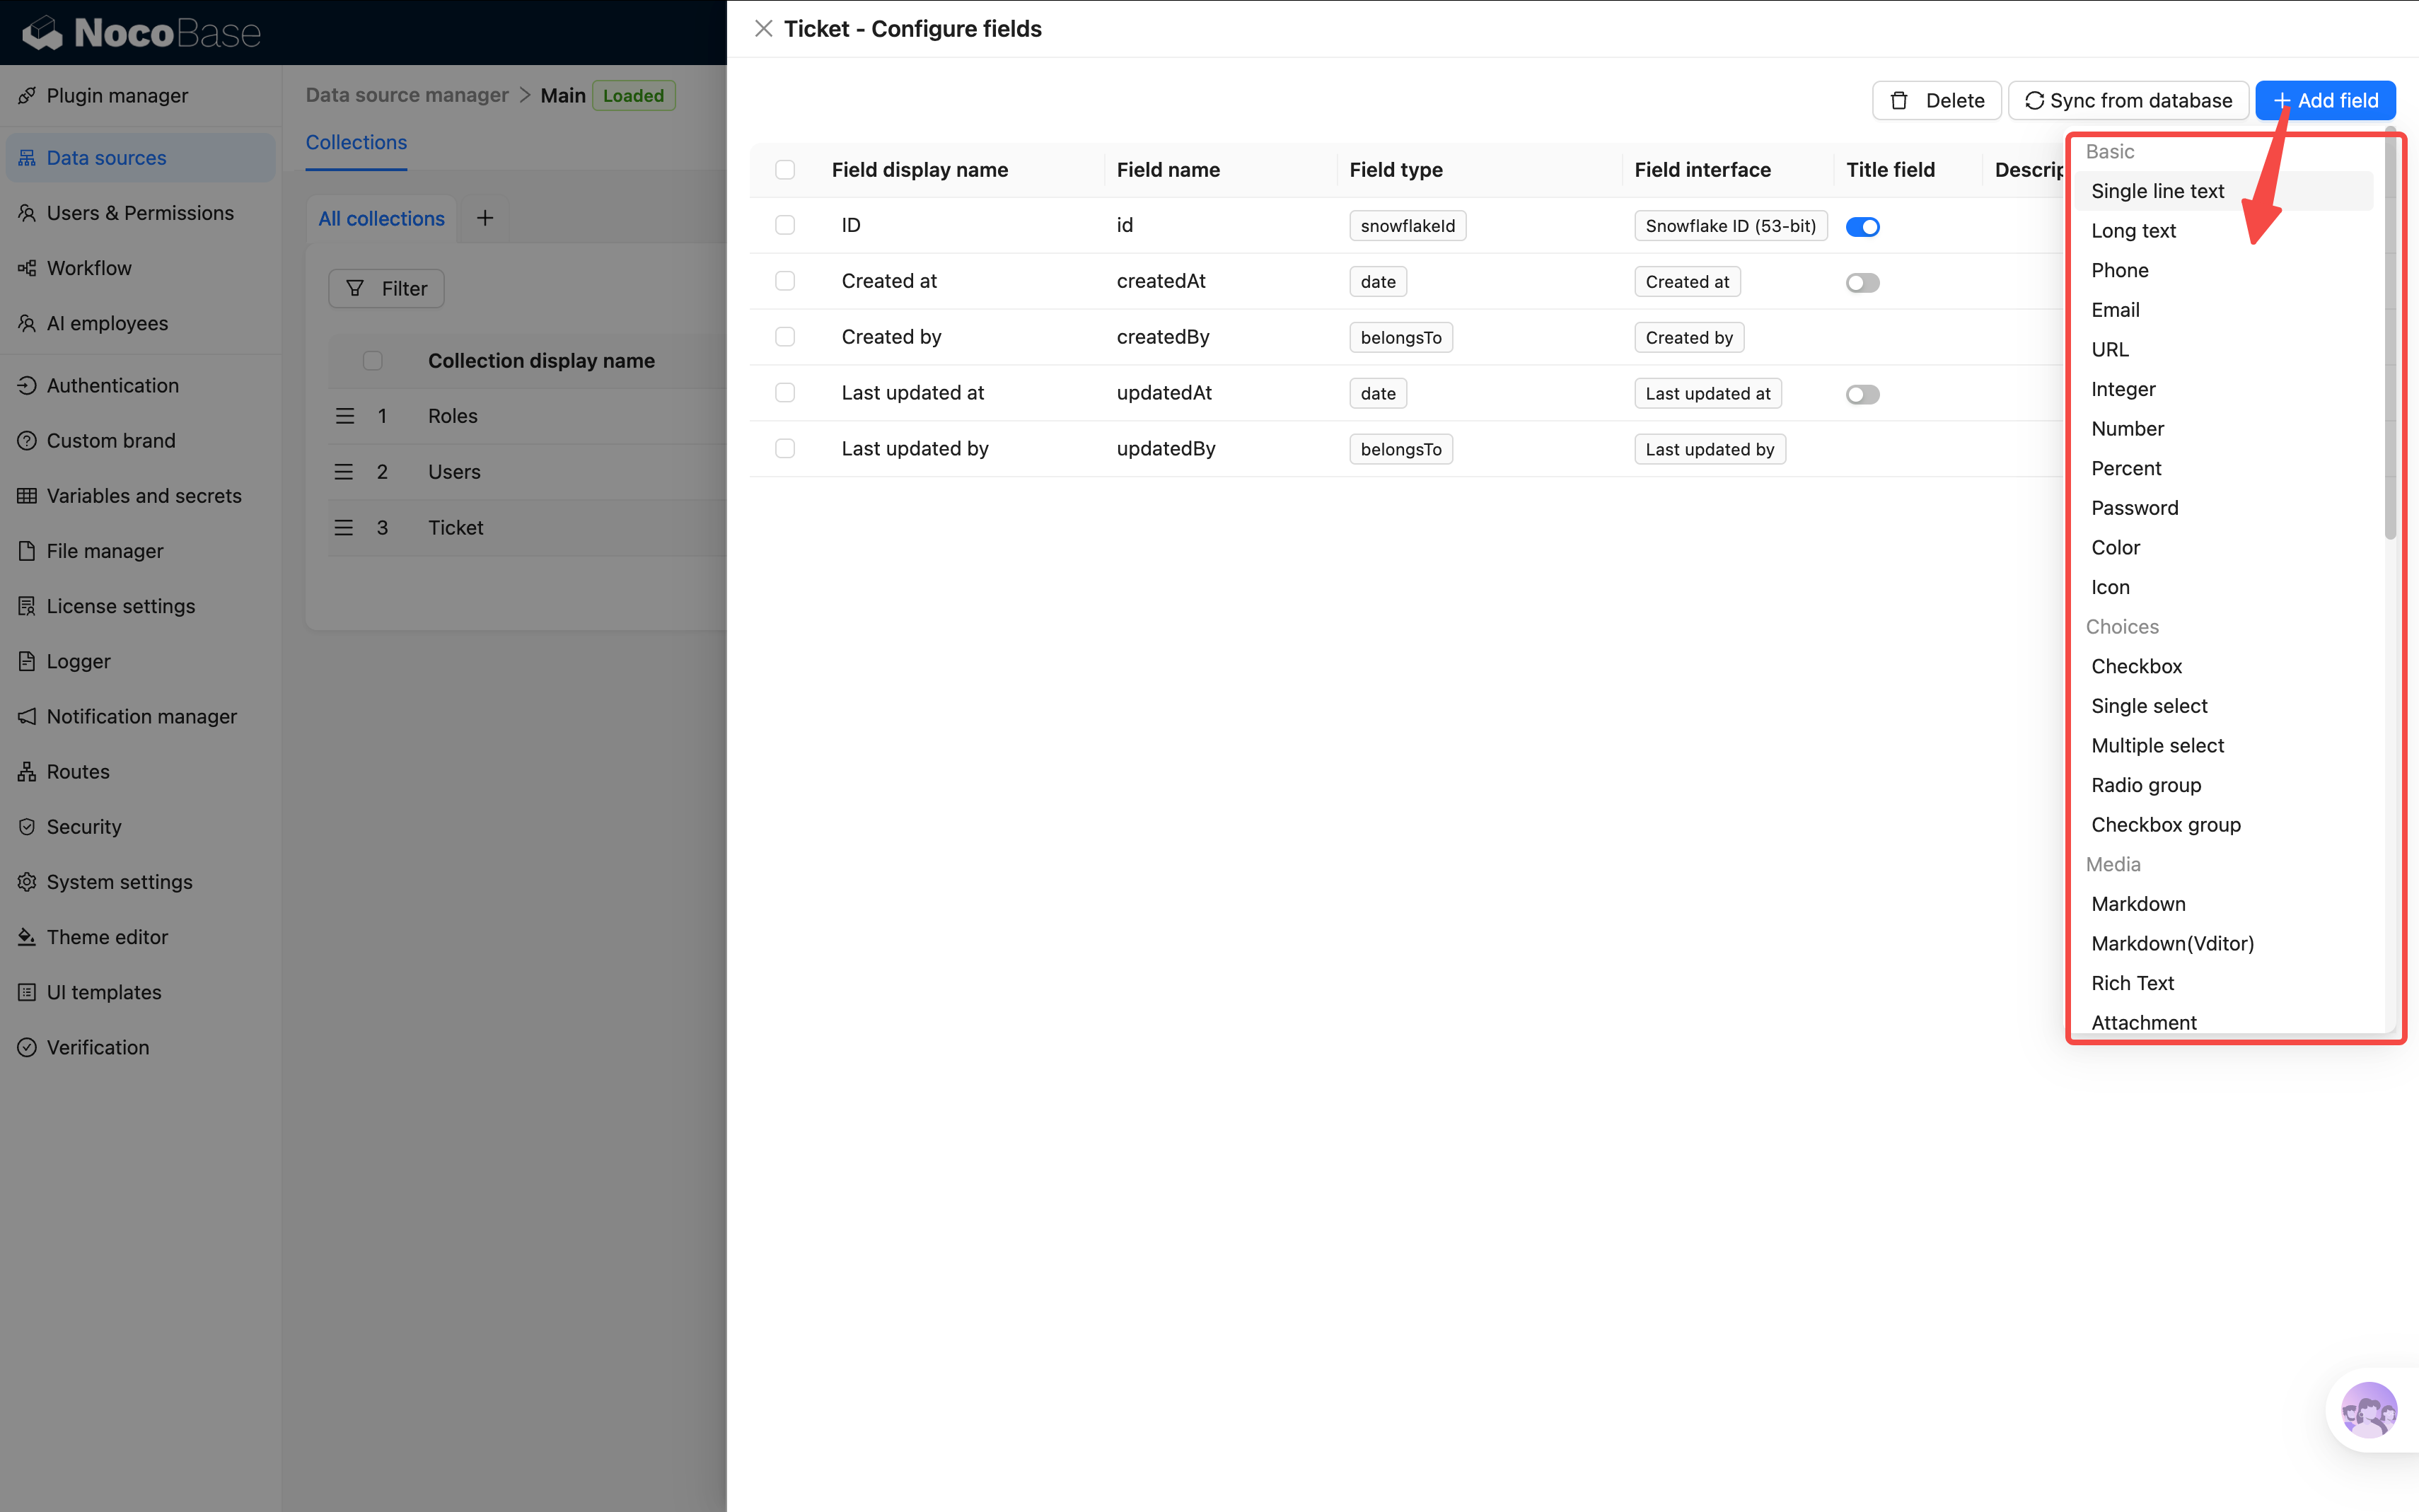
We'll add the ticket's own fields first; relation fields come later.
1. Title (Single line text)
Every ticket needs a short title to summarize the issue. Click "Add field" → select "Single line text":
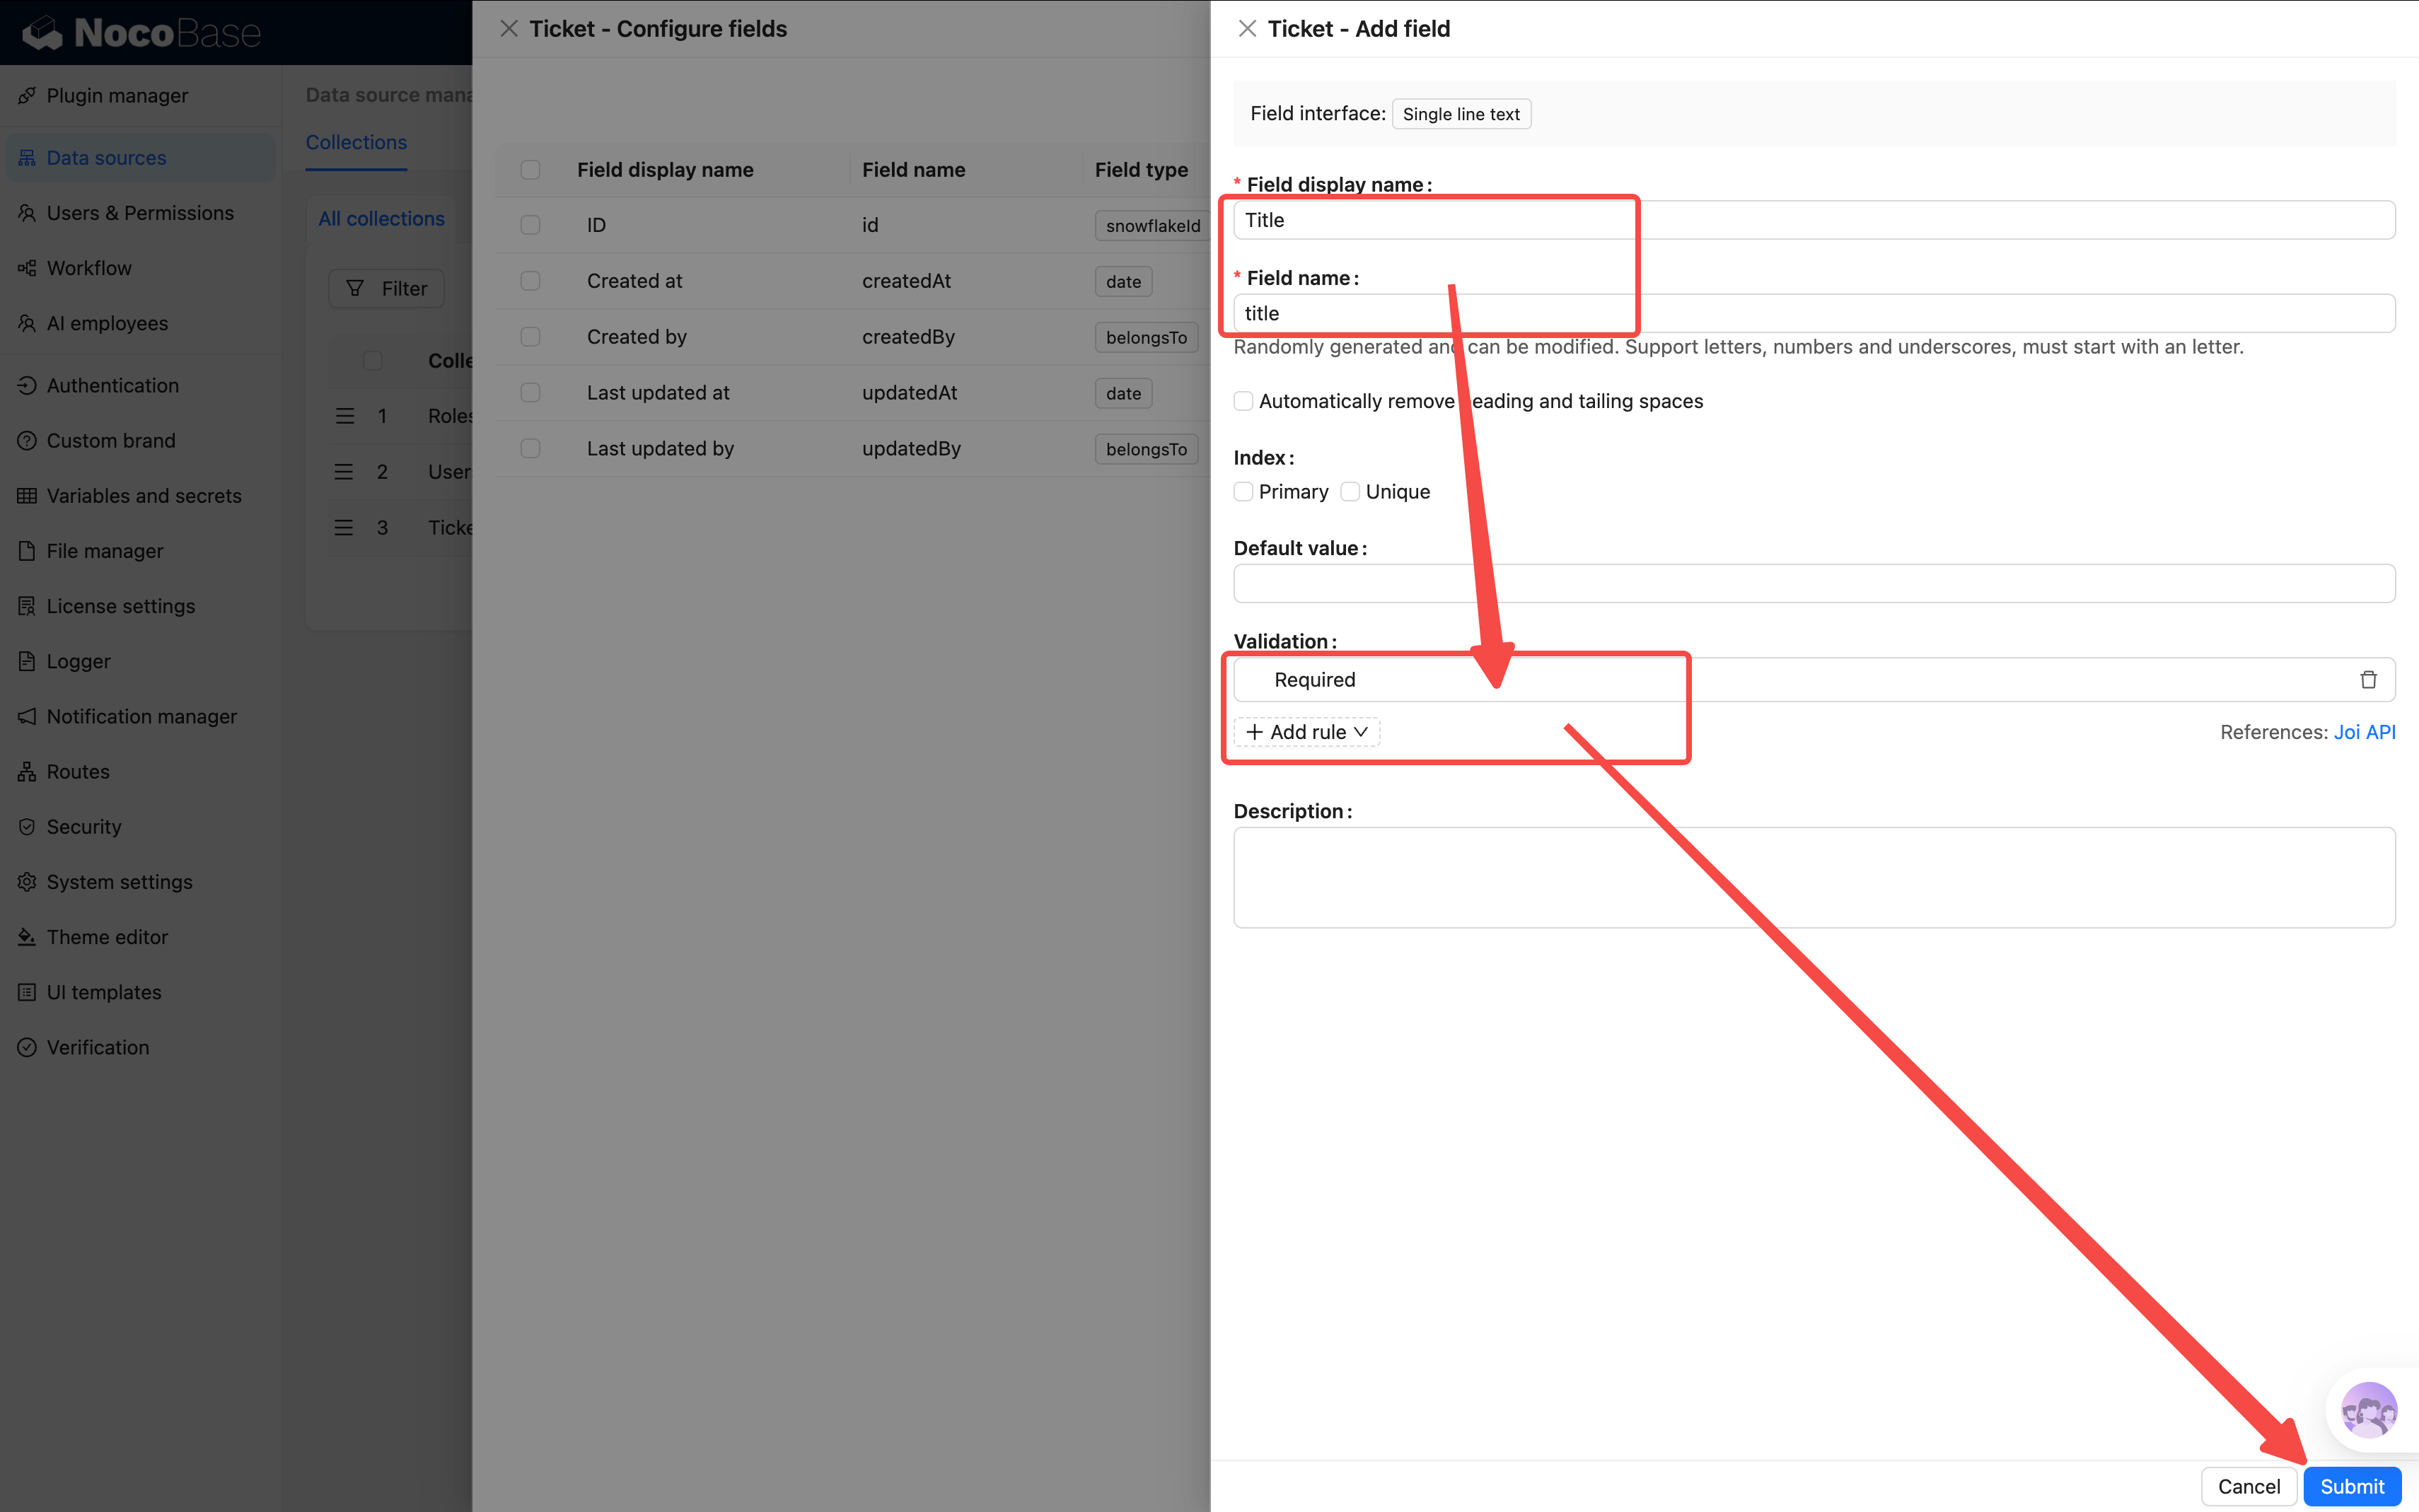
- Field name:
title, Display name:Title - Click "Set validation rules", add a "Required" rule
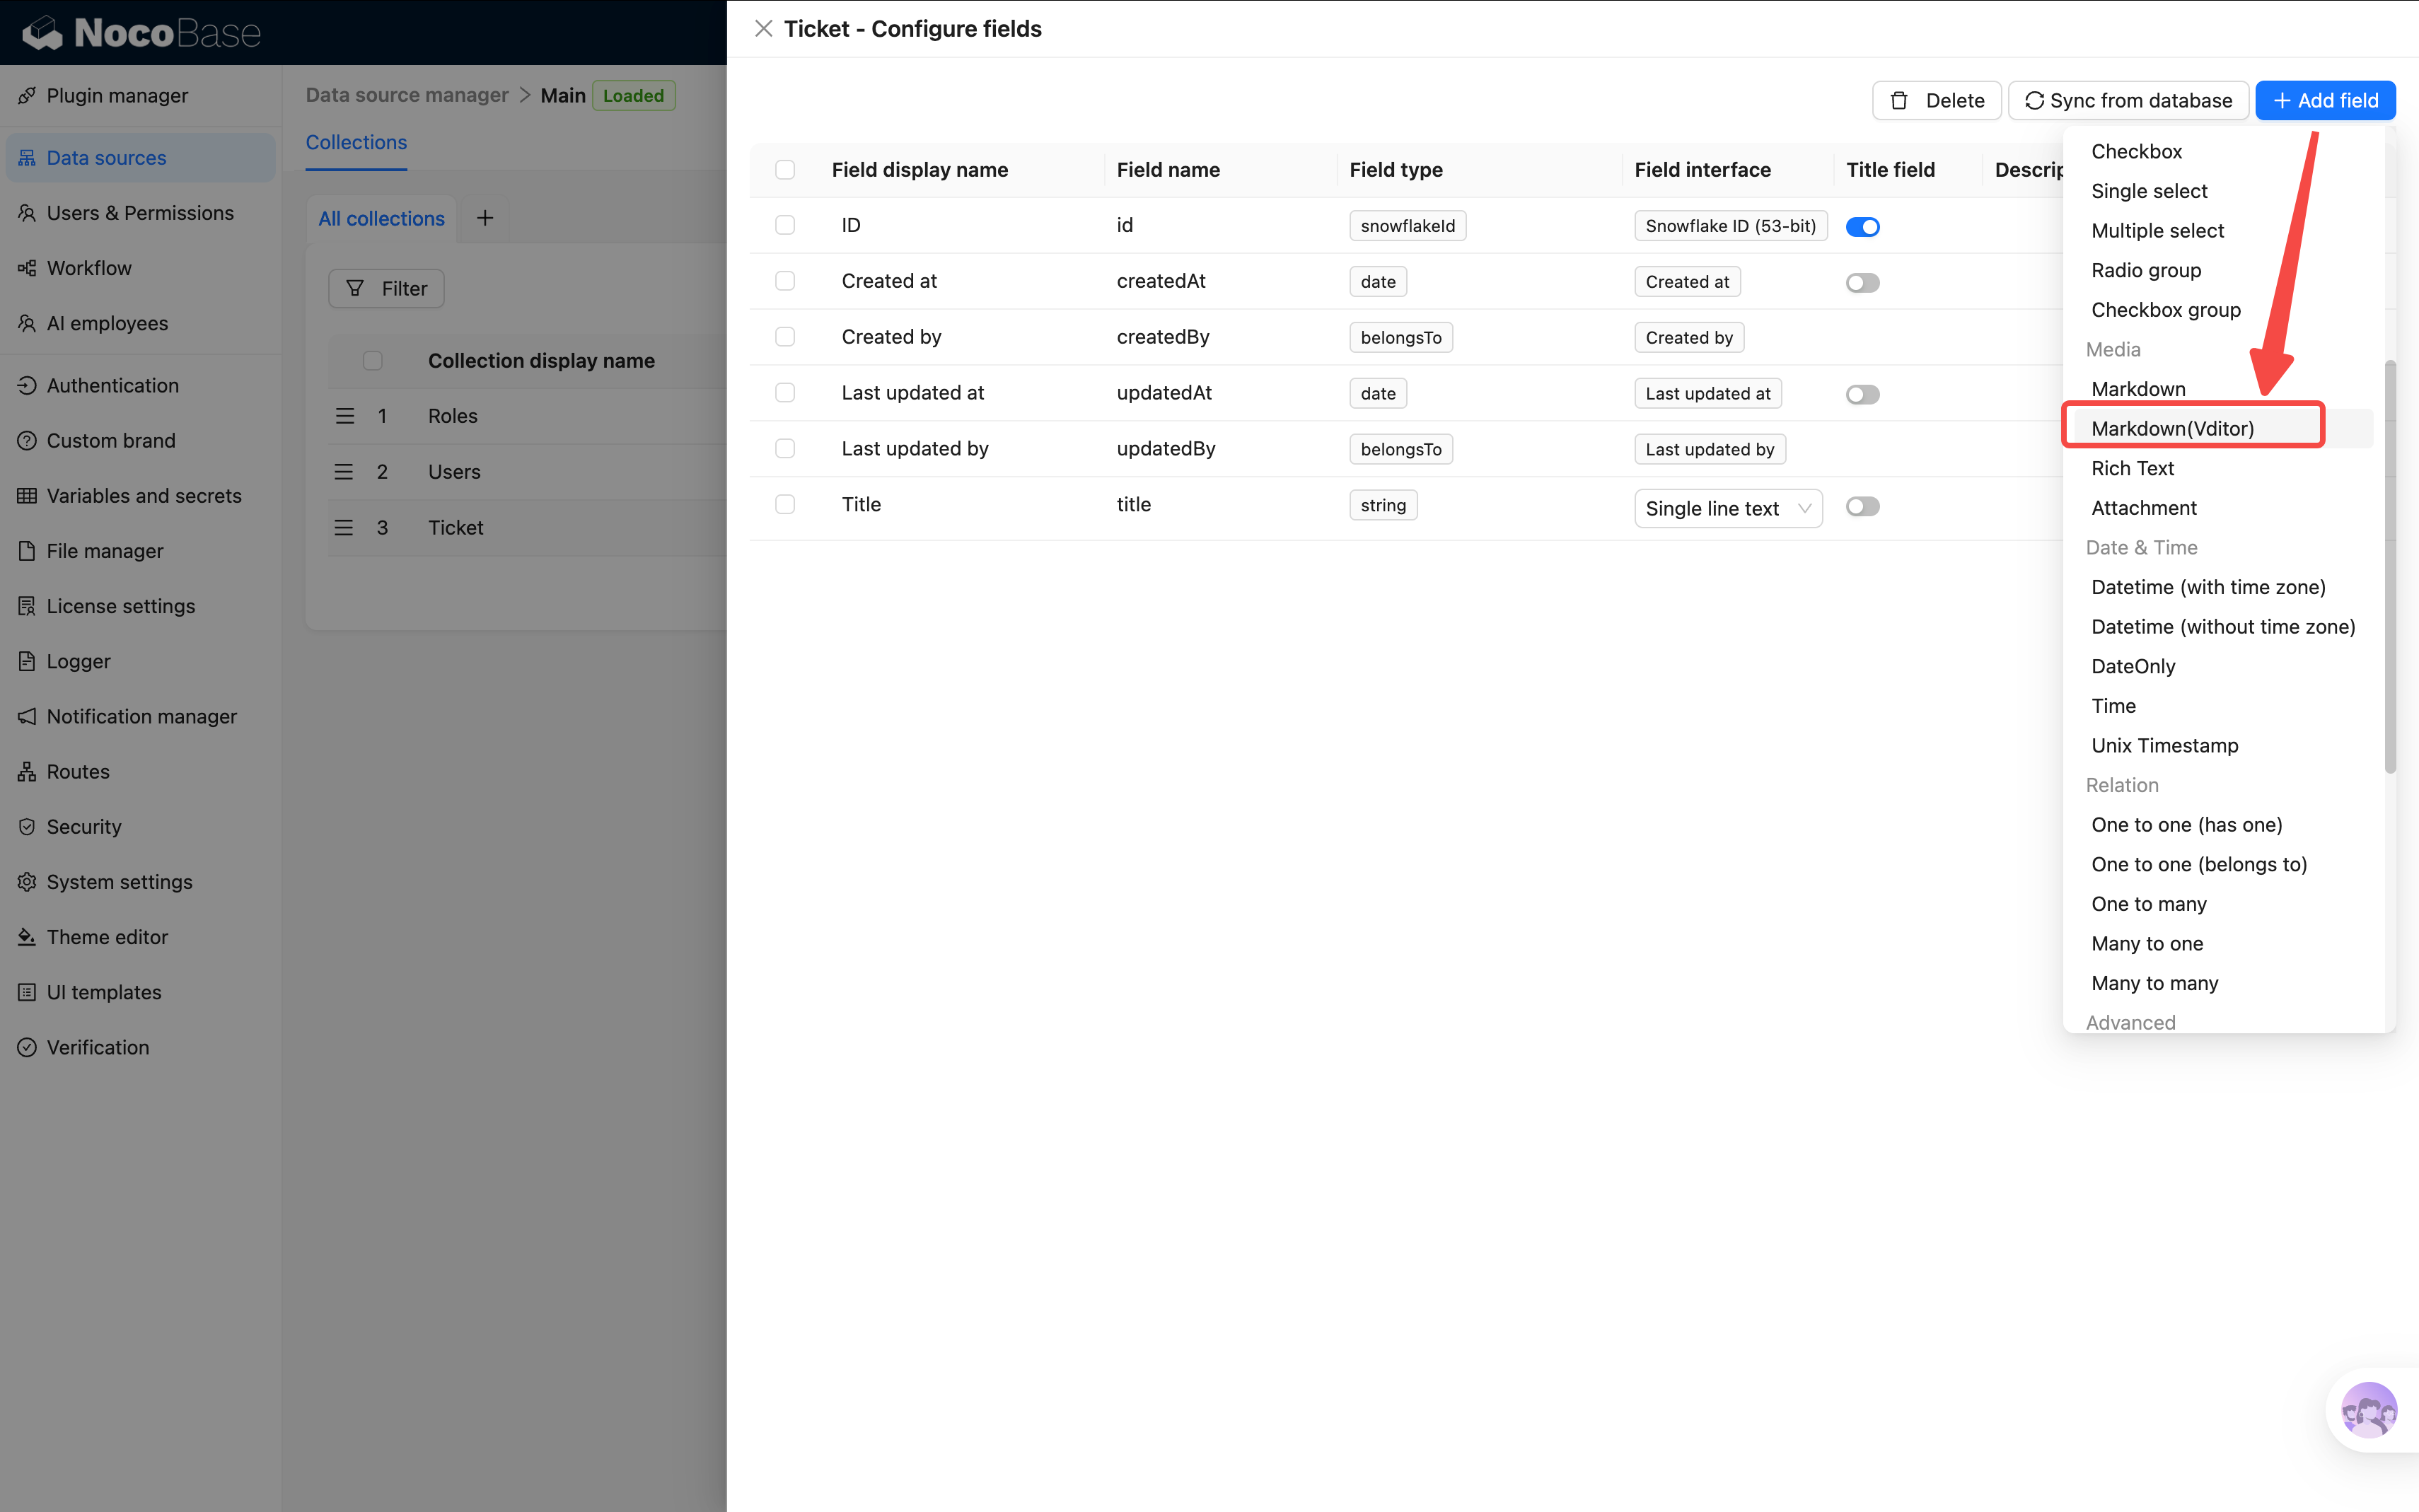
2. Description (Markdown(Vditor))
For detailed problem descriptions with rich formatting — images, code blocks, etc. Under "Add field" → "Media" category, you'll find three options:
| Field Type | Features |
|---|---|
| Markdown | Basic Markdown, simple styling |
| Rich Text | Rich text editor with attachment uploads |
| Markdown(Vditor) | Most feature-rich: WYSIWYG, instant rendering, and source code editing modes |
We'll go with Markdown(Vditor).
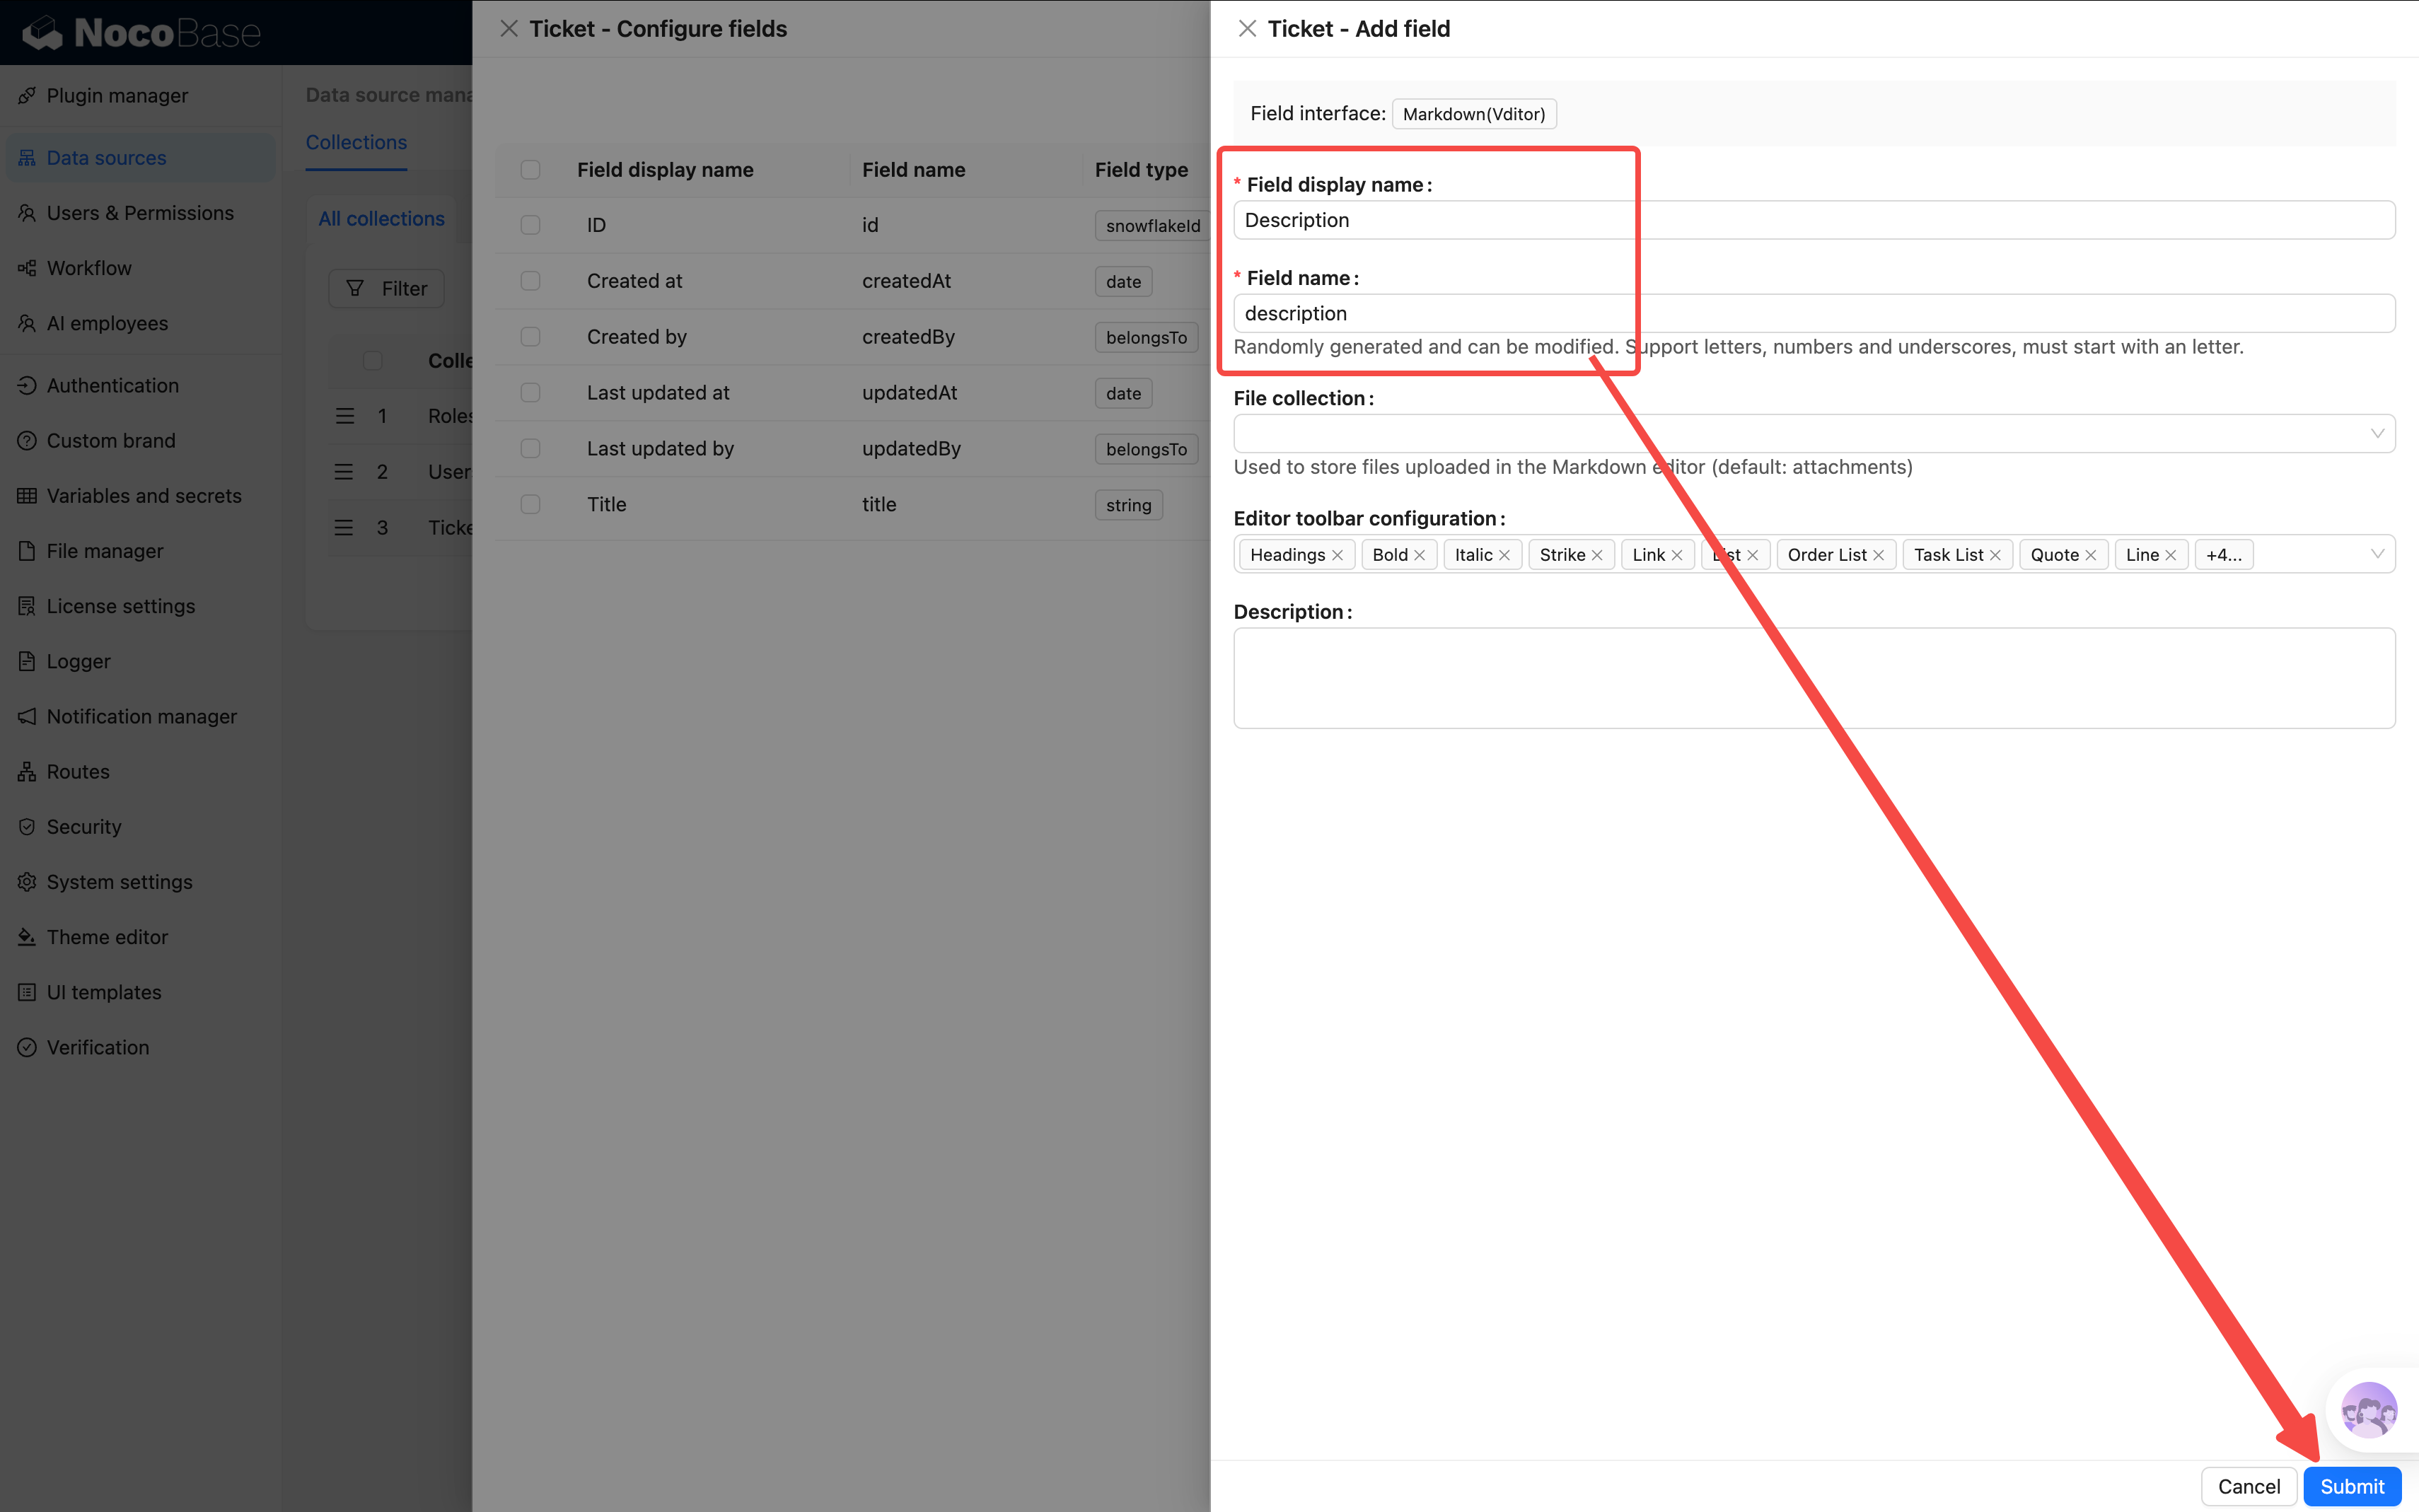
- Field name:
description, Display name:Description
3. Status (Single select)
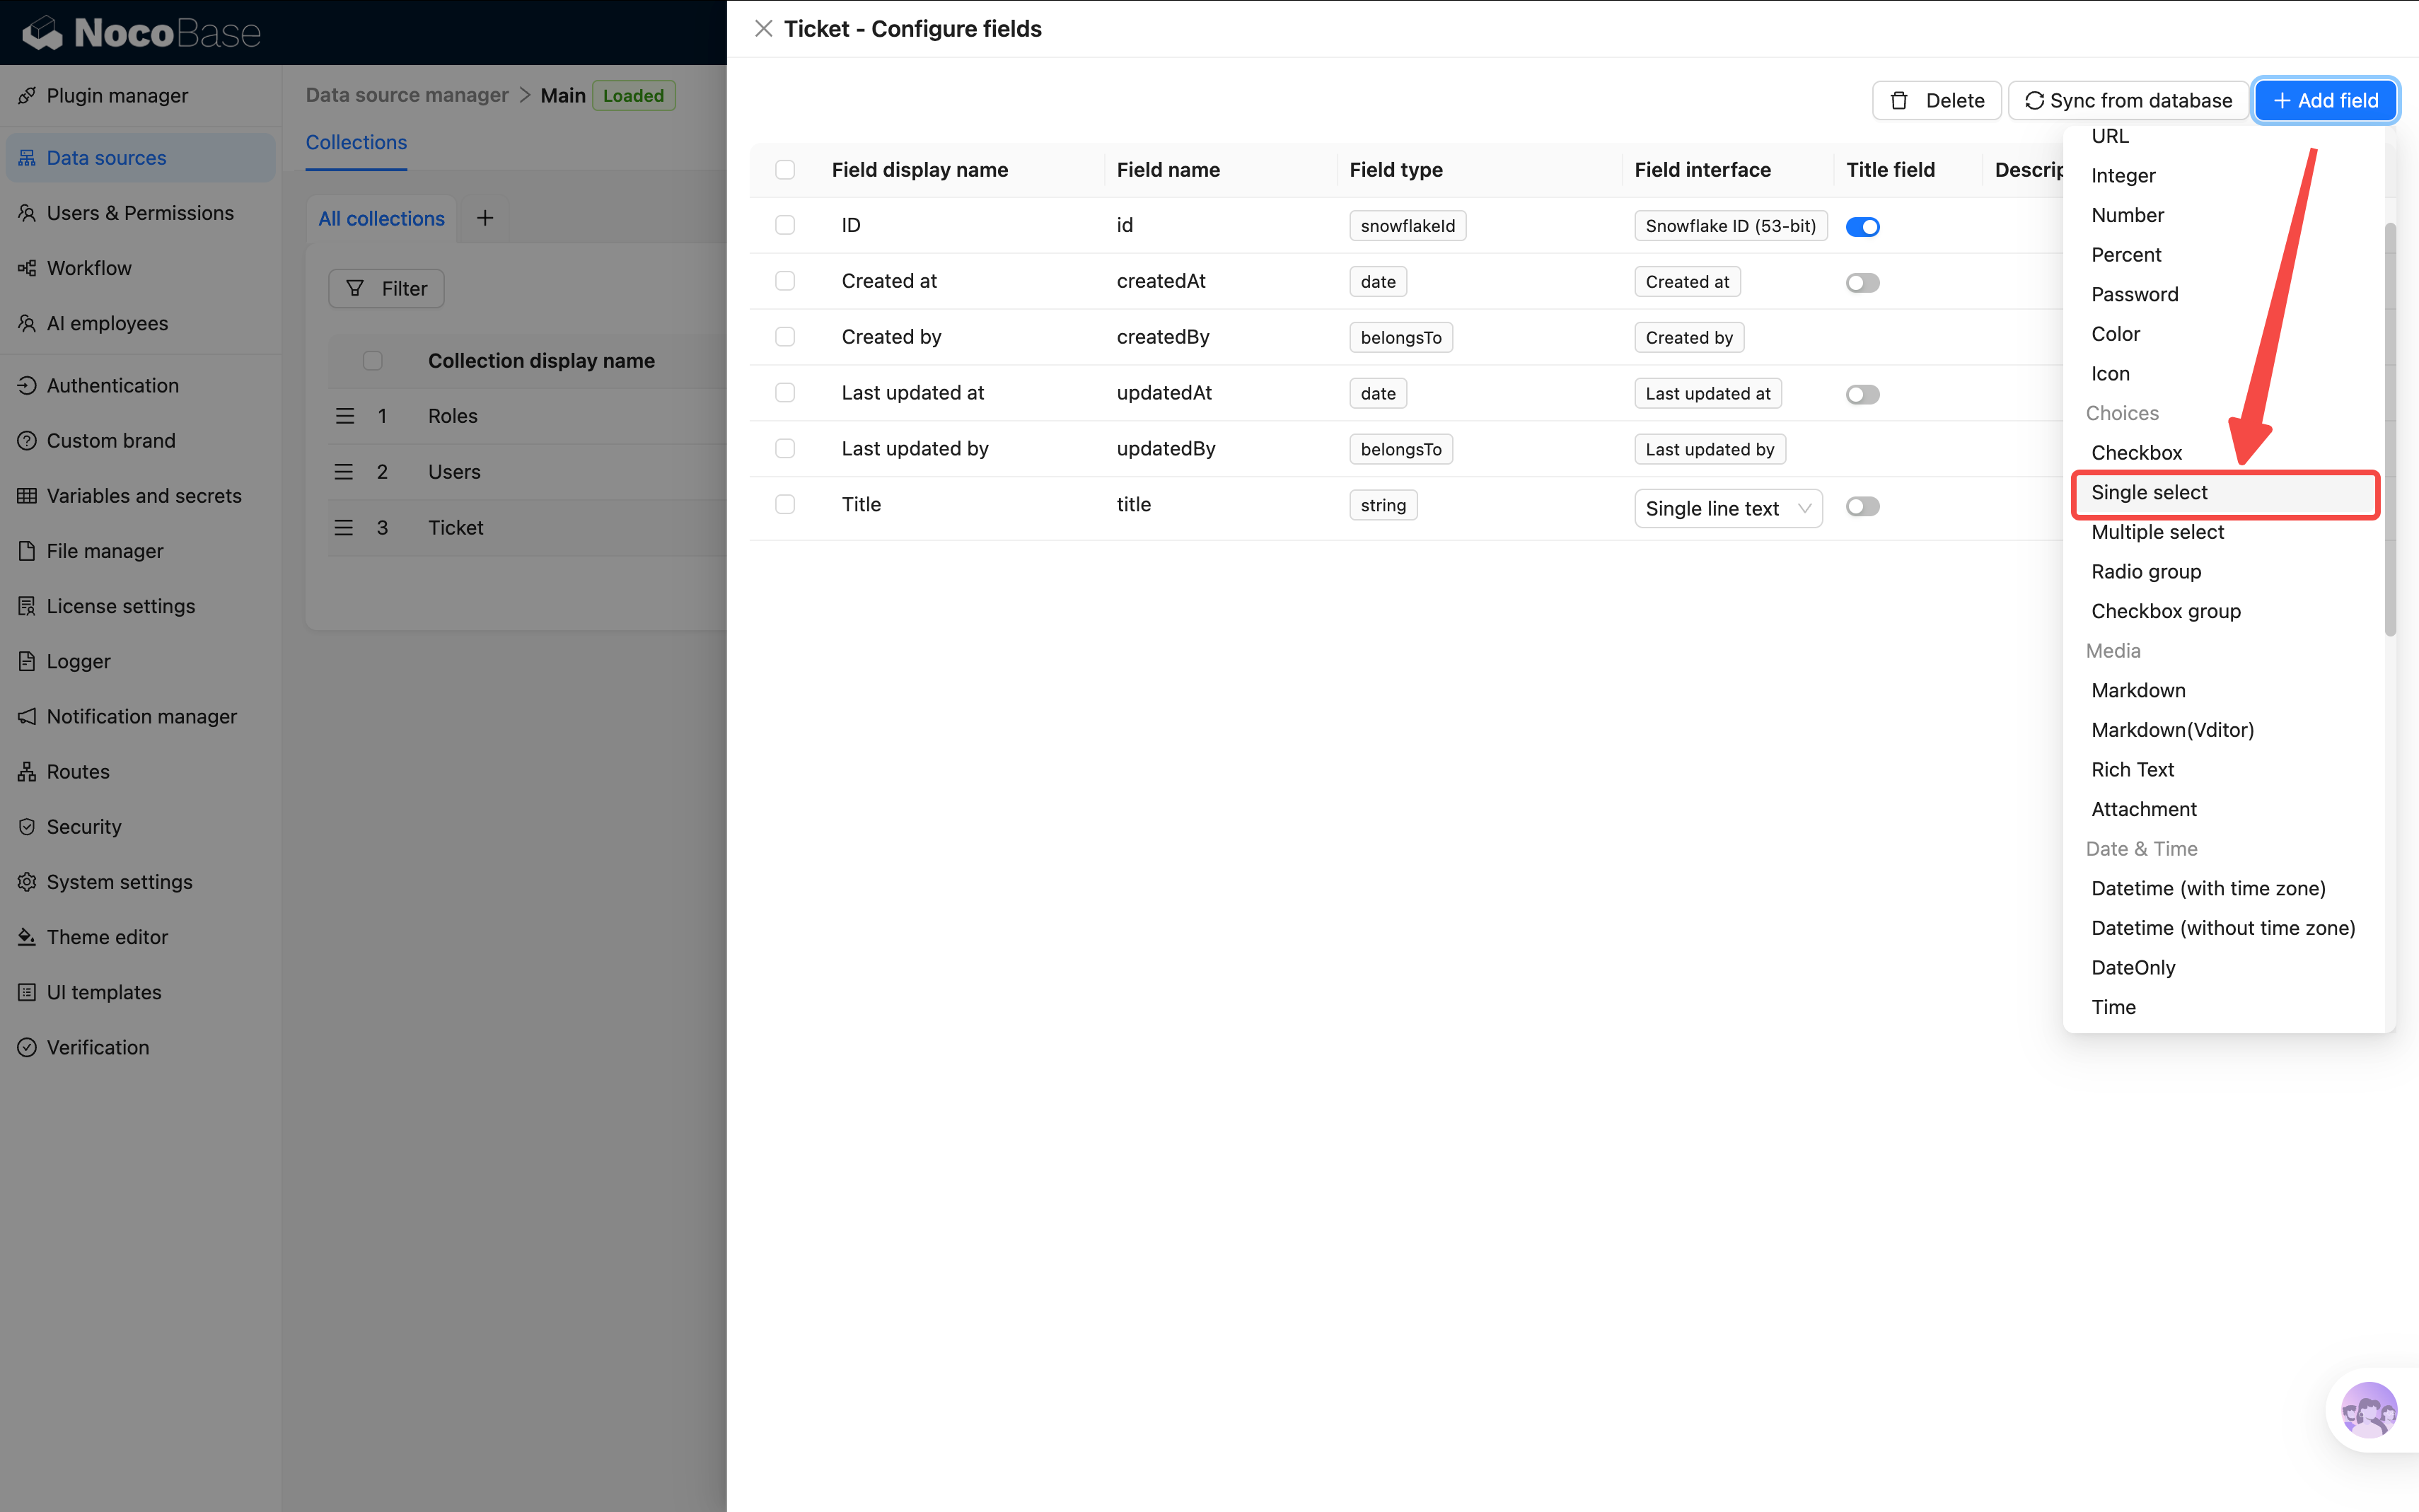
Tickets go through stages from submission to completion, so we need a status field to track progress.
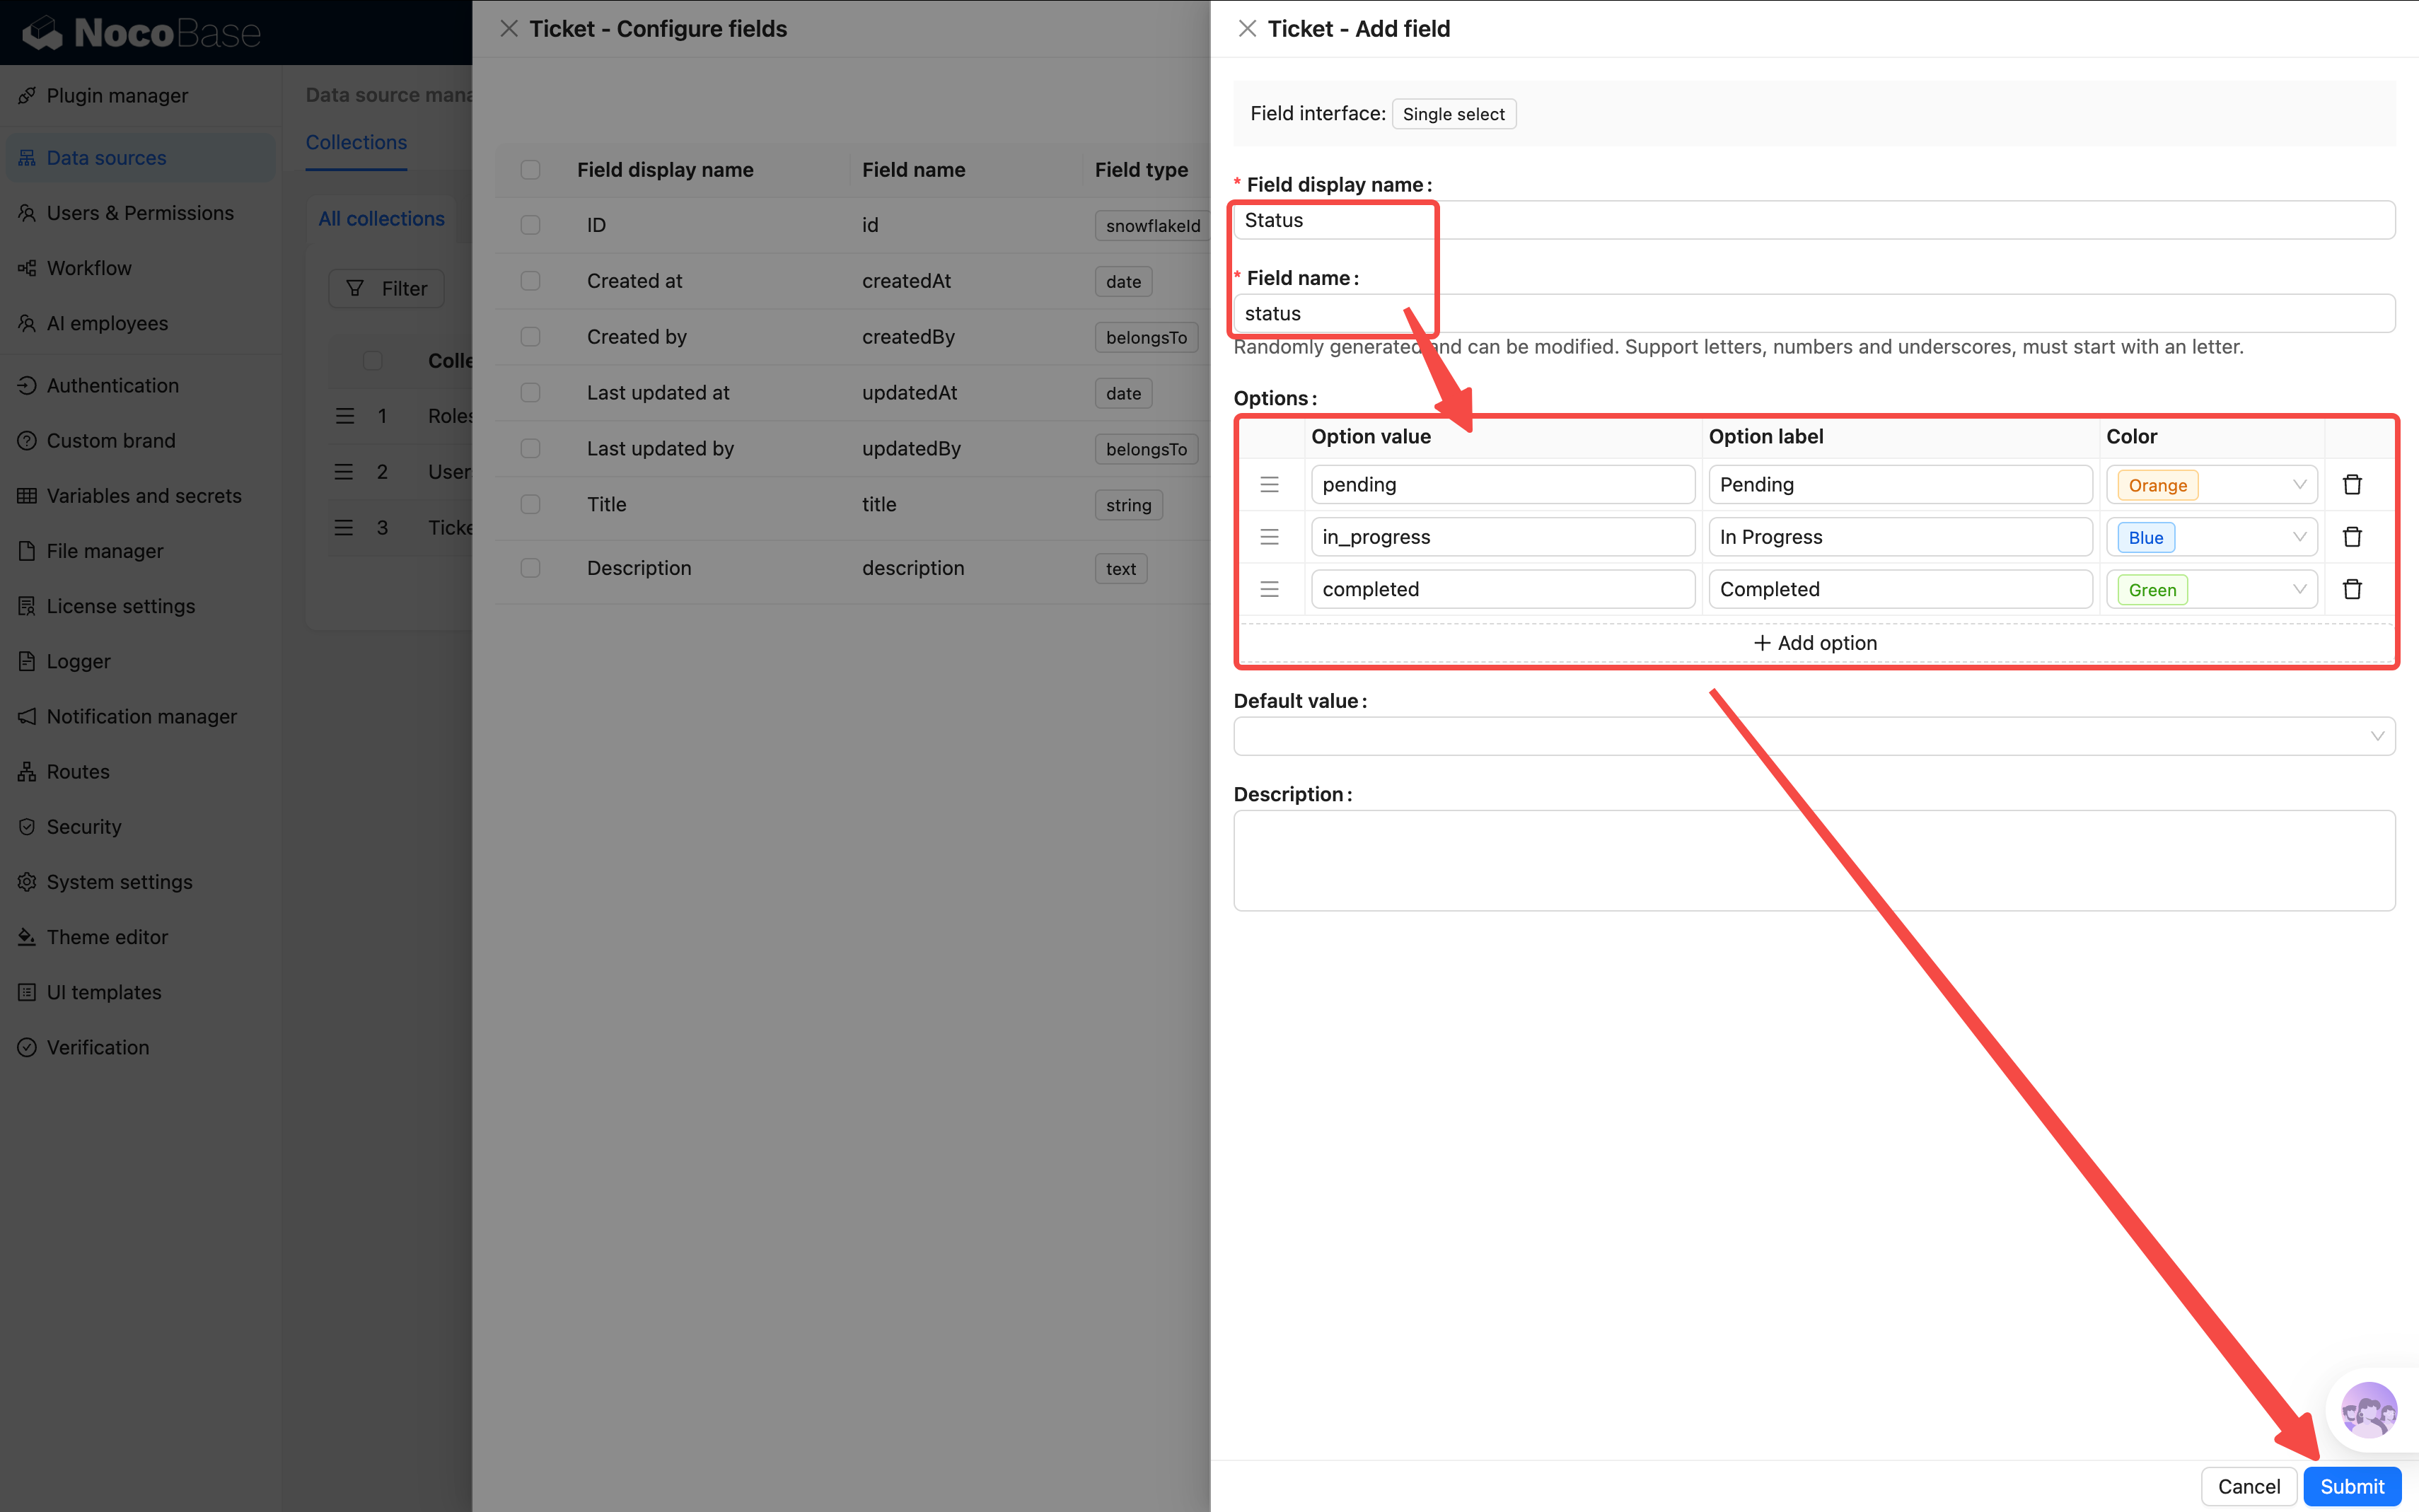
- Field name:
status, Display name:Status - Add option values (each option needs a "Value" and "Label"; color is optional):
| Value | Label | Color |
|---|---|---|
| pending | Pending | Orange |
| in_progress | In Progress | Blue |
| completed | Completed | Green |
Fill in the options and save first. Then click "Edit" on this field again — now you can set the "Default value" to "Pending".
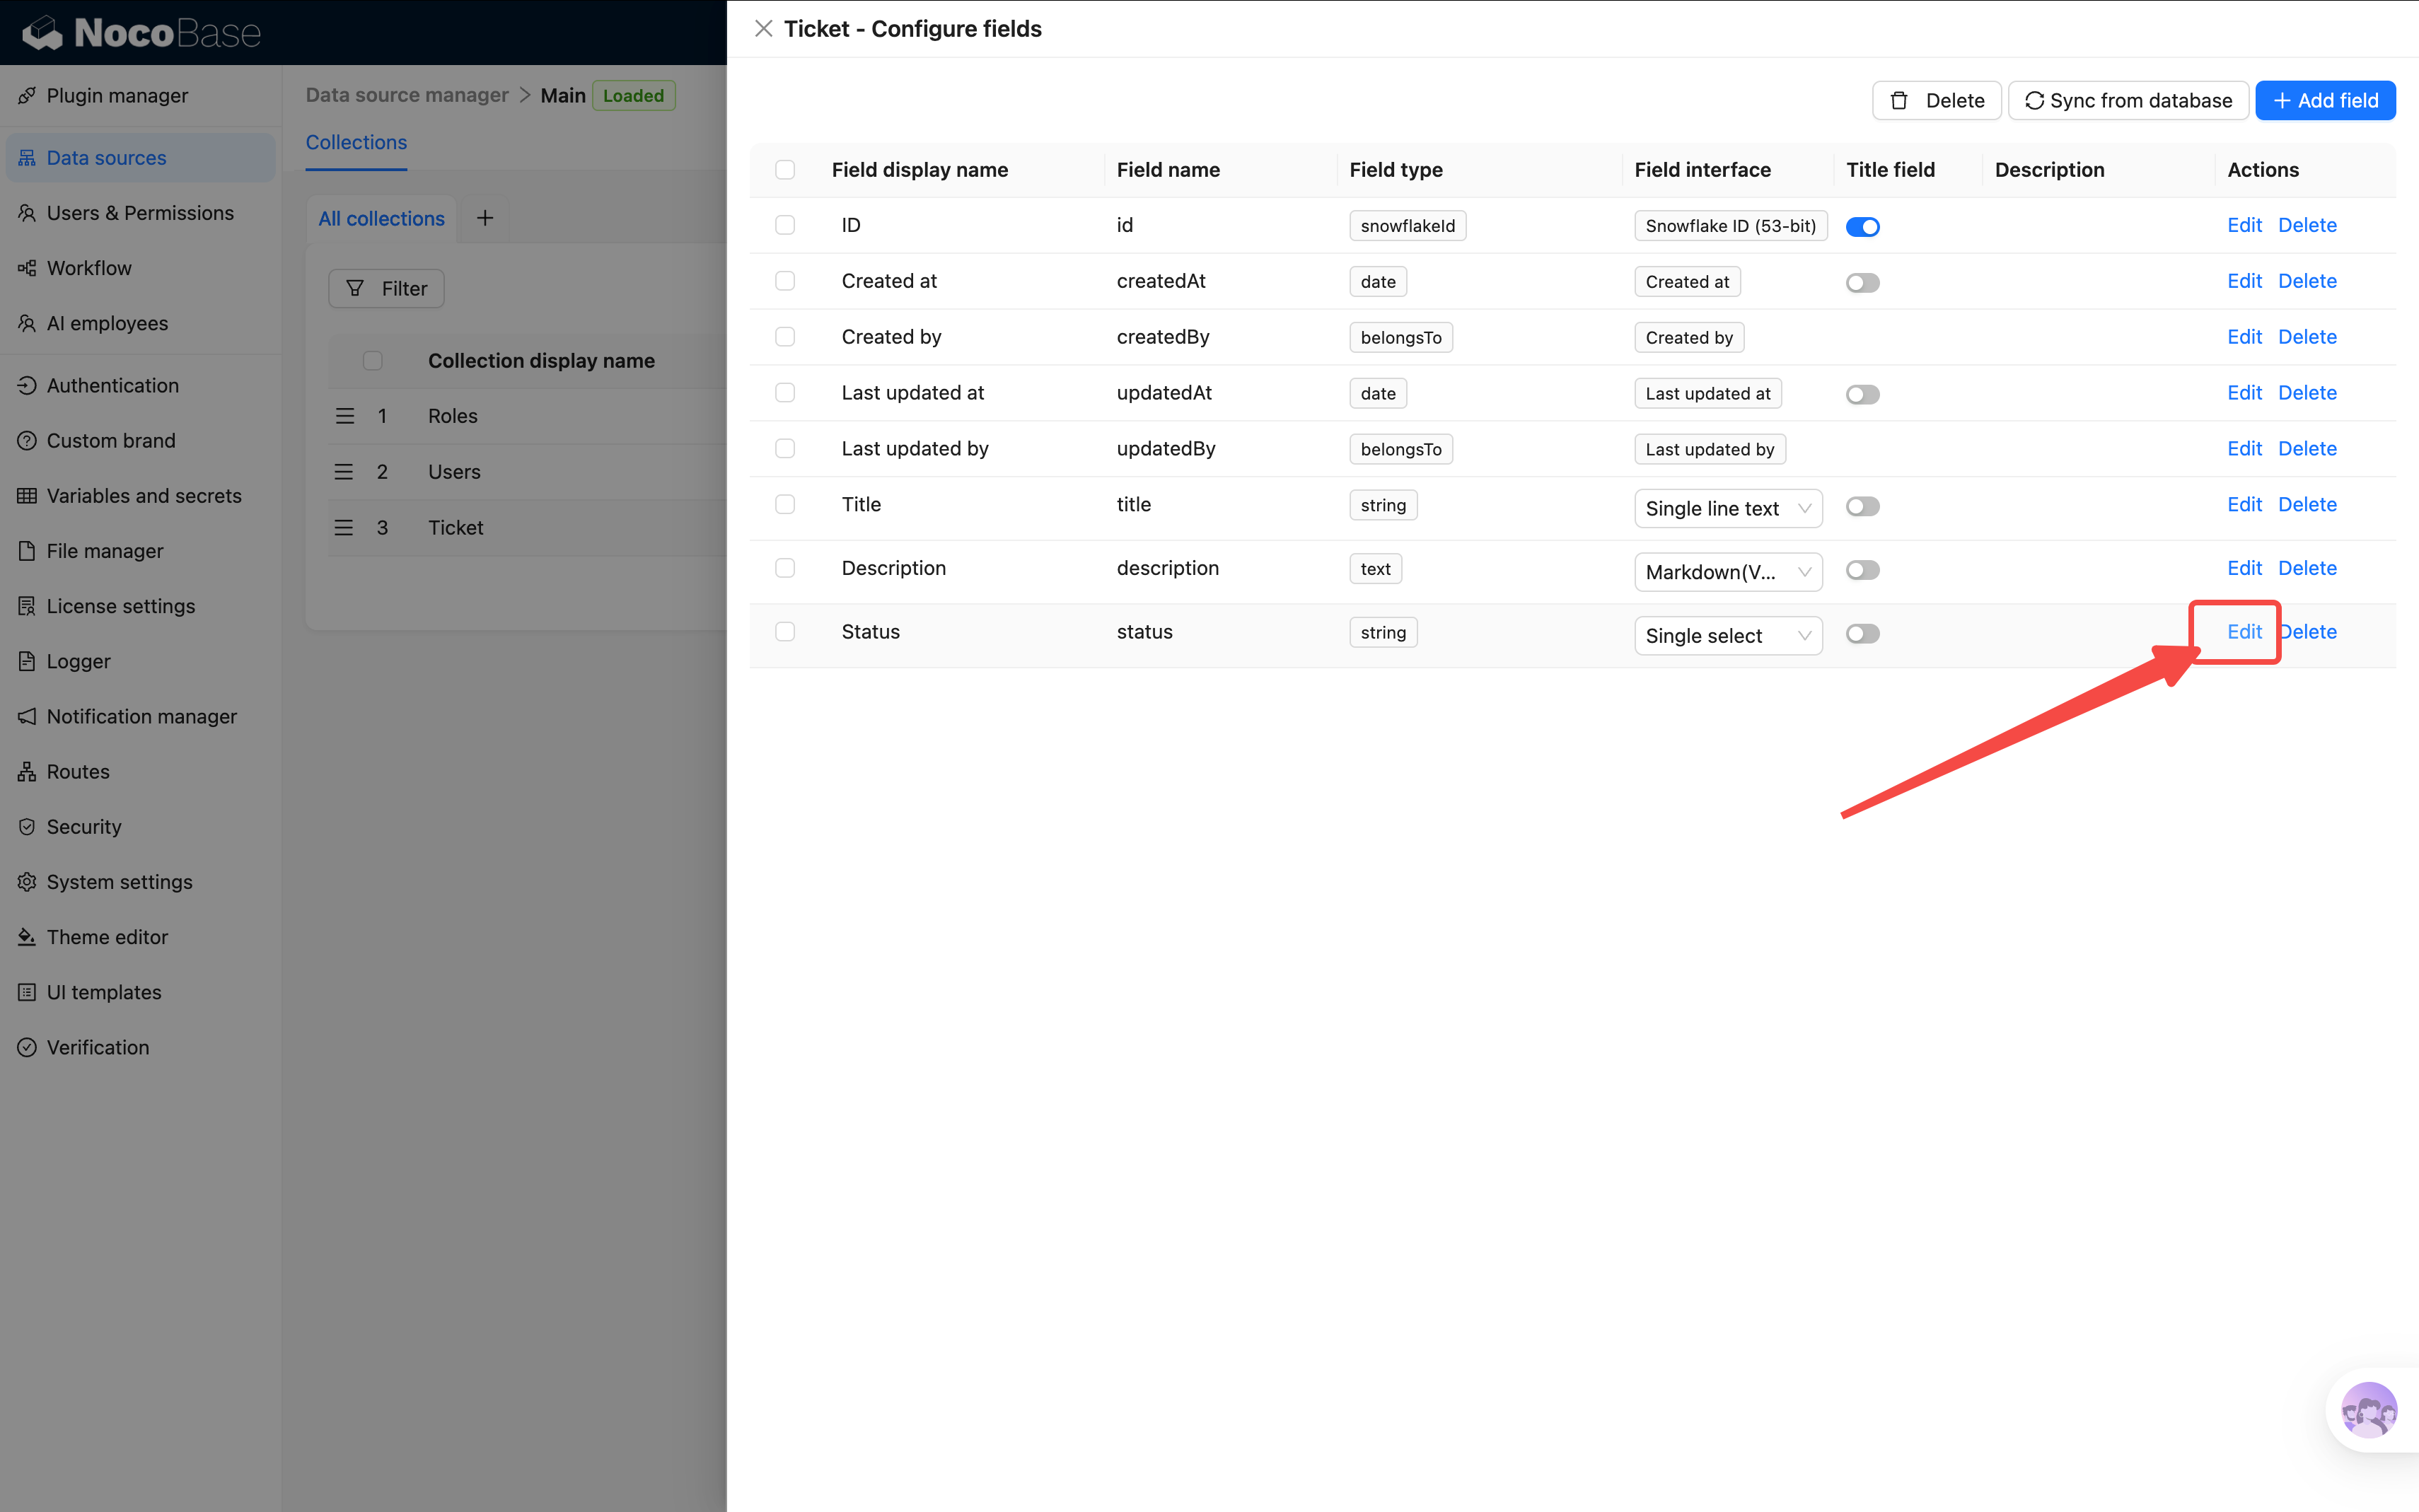

The first time you create the field, there are no options yet, so you can't pick a default value — you need to save first, then come back to set it.
Why a single select? Because status is a fixed set of values. A dropdown prevents users from entering arbitrary text, keeping data clean.
4. Priority (Single select)
Helps distinguish urgency so the team can sort and tackle tickets efficiently.
- Field name:
priority, Display name:Priority - Add option values:
| Value | Label | Color |
|---|---|---|
| low | Low | |
| medium | Medium | |
| high | High | Orange |
| urgent | Urgent | Red |
At this point, the Tickets table has 4 basic fields. But — shouldn't a ticket have a "category"? Like "Network Issue" or "Software Bug"?
We could make Category a dropdown, but you'd quickly run into a problem: categories can have sub-categories ("Hardware" → "Monitor", "Keyboard", "Printer"), and dropdowns can't handle that.
We need a separate table for categories. And NocoBase's Tree collection is perfect for this.
2.3 Creating the Categories Tree Table
What Is a Tree Collection
A tree collection is a special type of table with built-in parent-child relationships — every record can have a parent node. This is ideal for hierarchical data:
With a general collection, you'd have to manually create a "Parent Category" field to build this hierarchy. A tree collection handles it automatically and supports tree views, adding child records, and more.
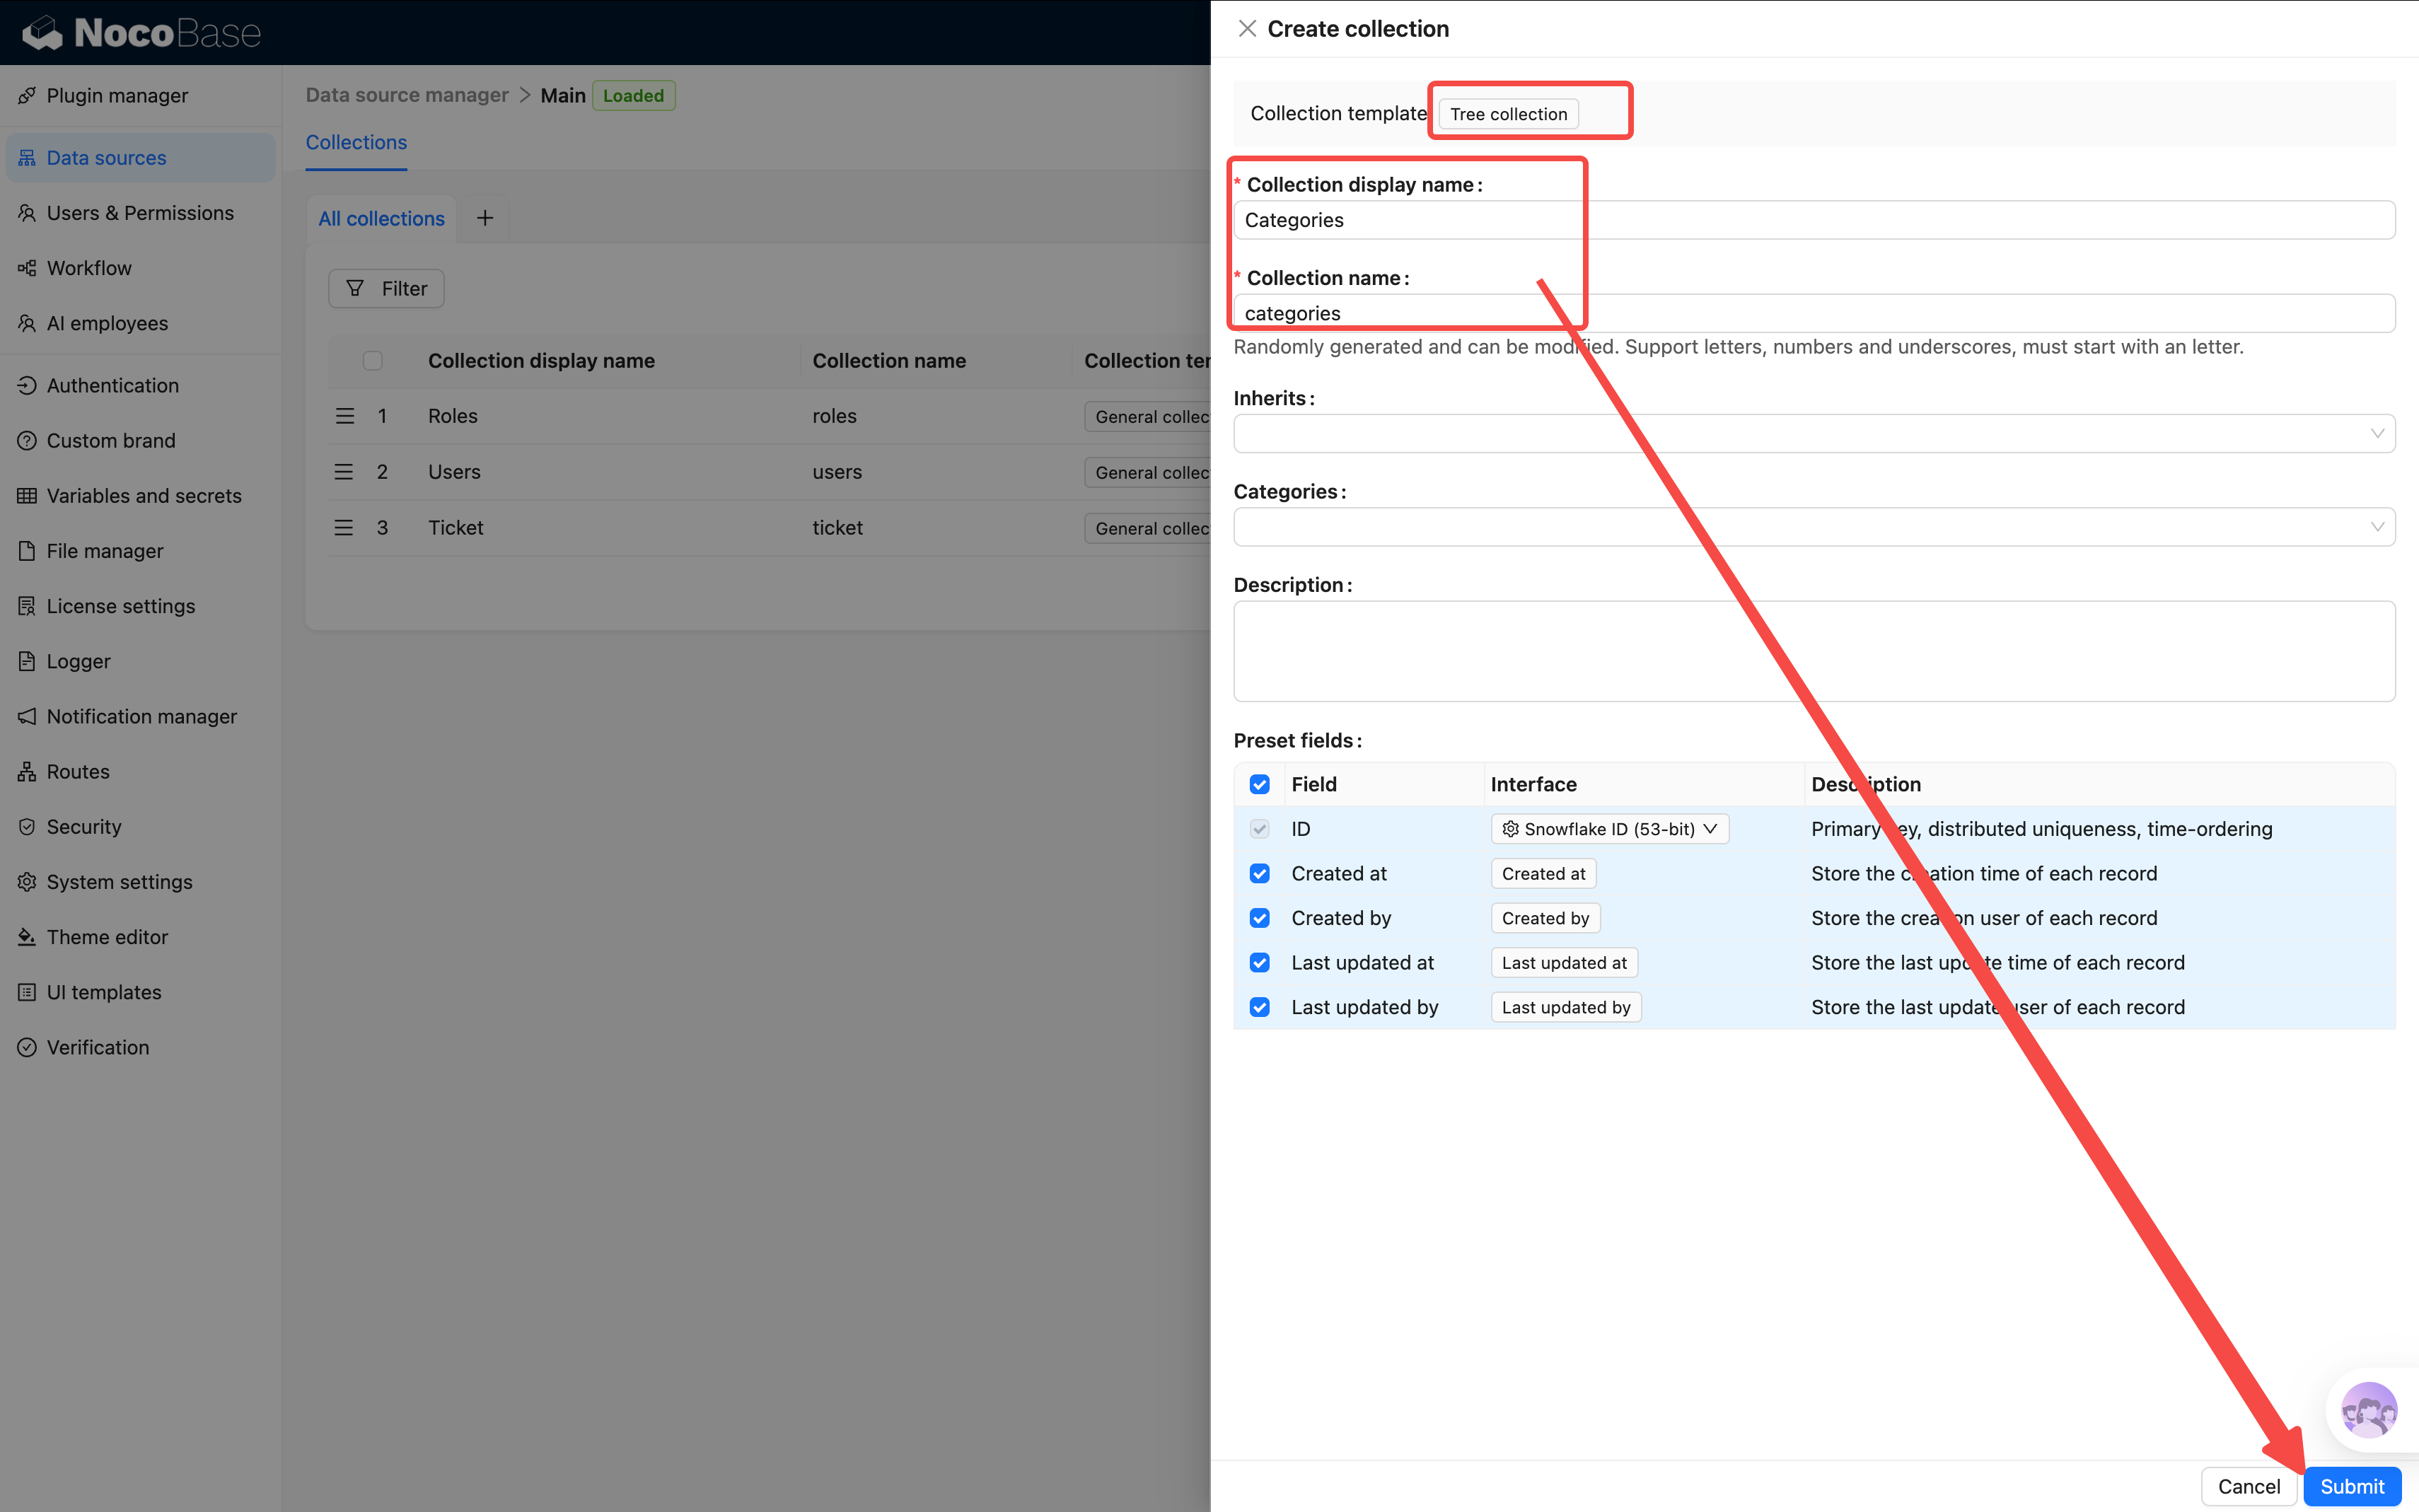
Create the Table
- Go back to Data Source Manager, click "Create collection"
- This time, select "Tree collection" (not General!)
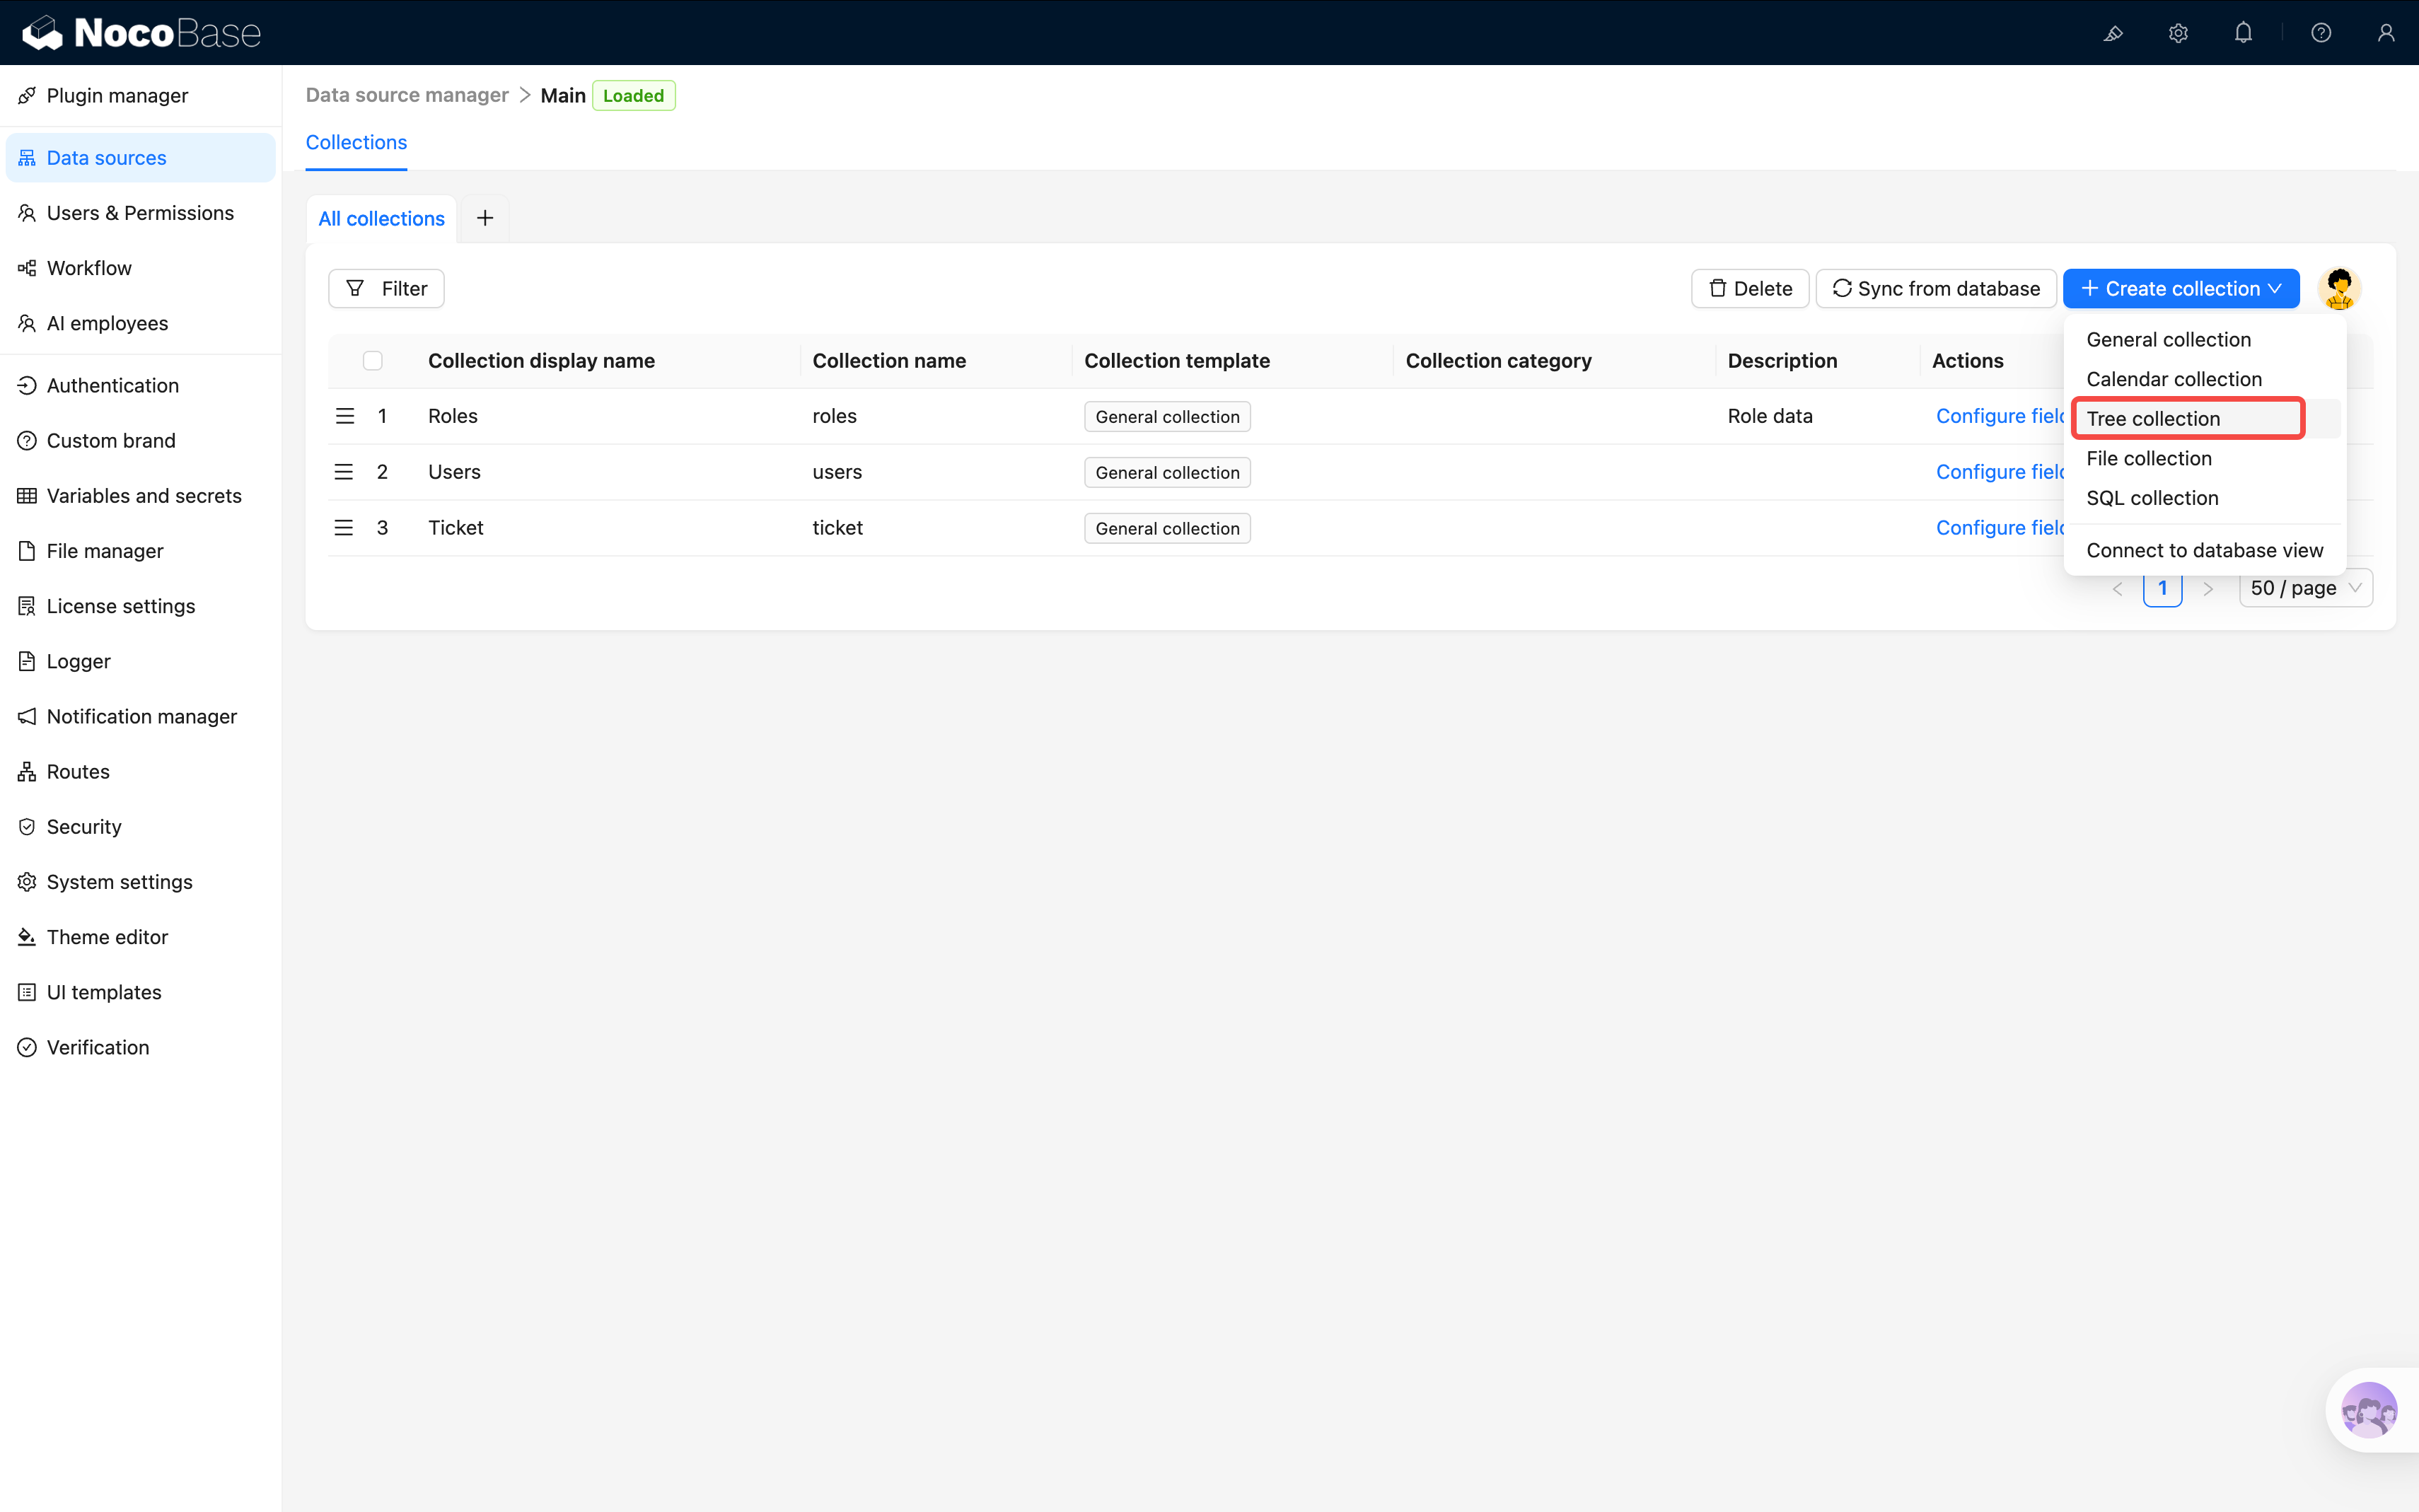
- Collection name:
categories, Display name:Categories
After creation, you'll notice the table has two extra relation fields — "Parent" and "Children" — beyond the standard system fields. This is the tree collection's special power. Use Parent to access the parent node and Children to access all child nodes, without any manual setup.
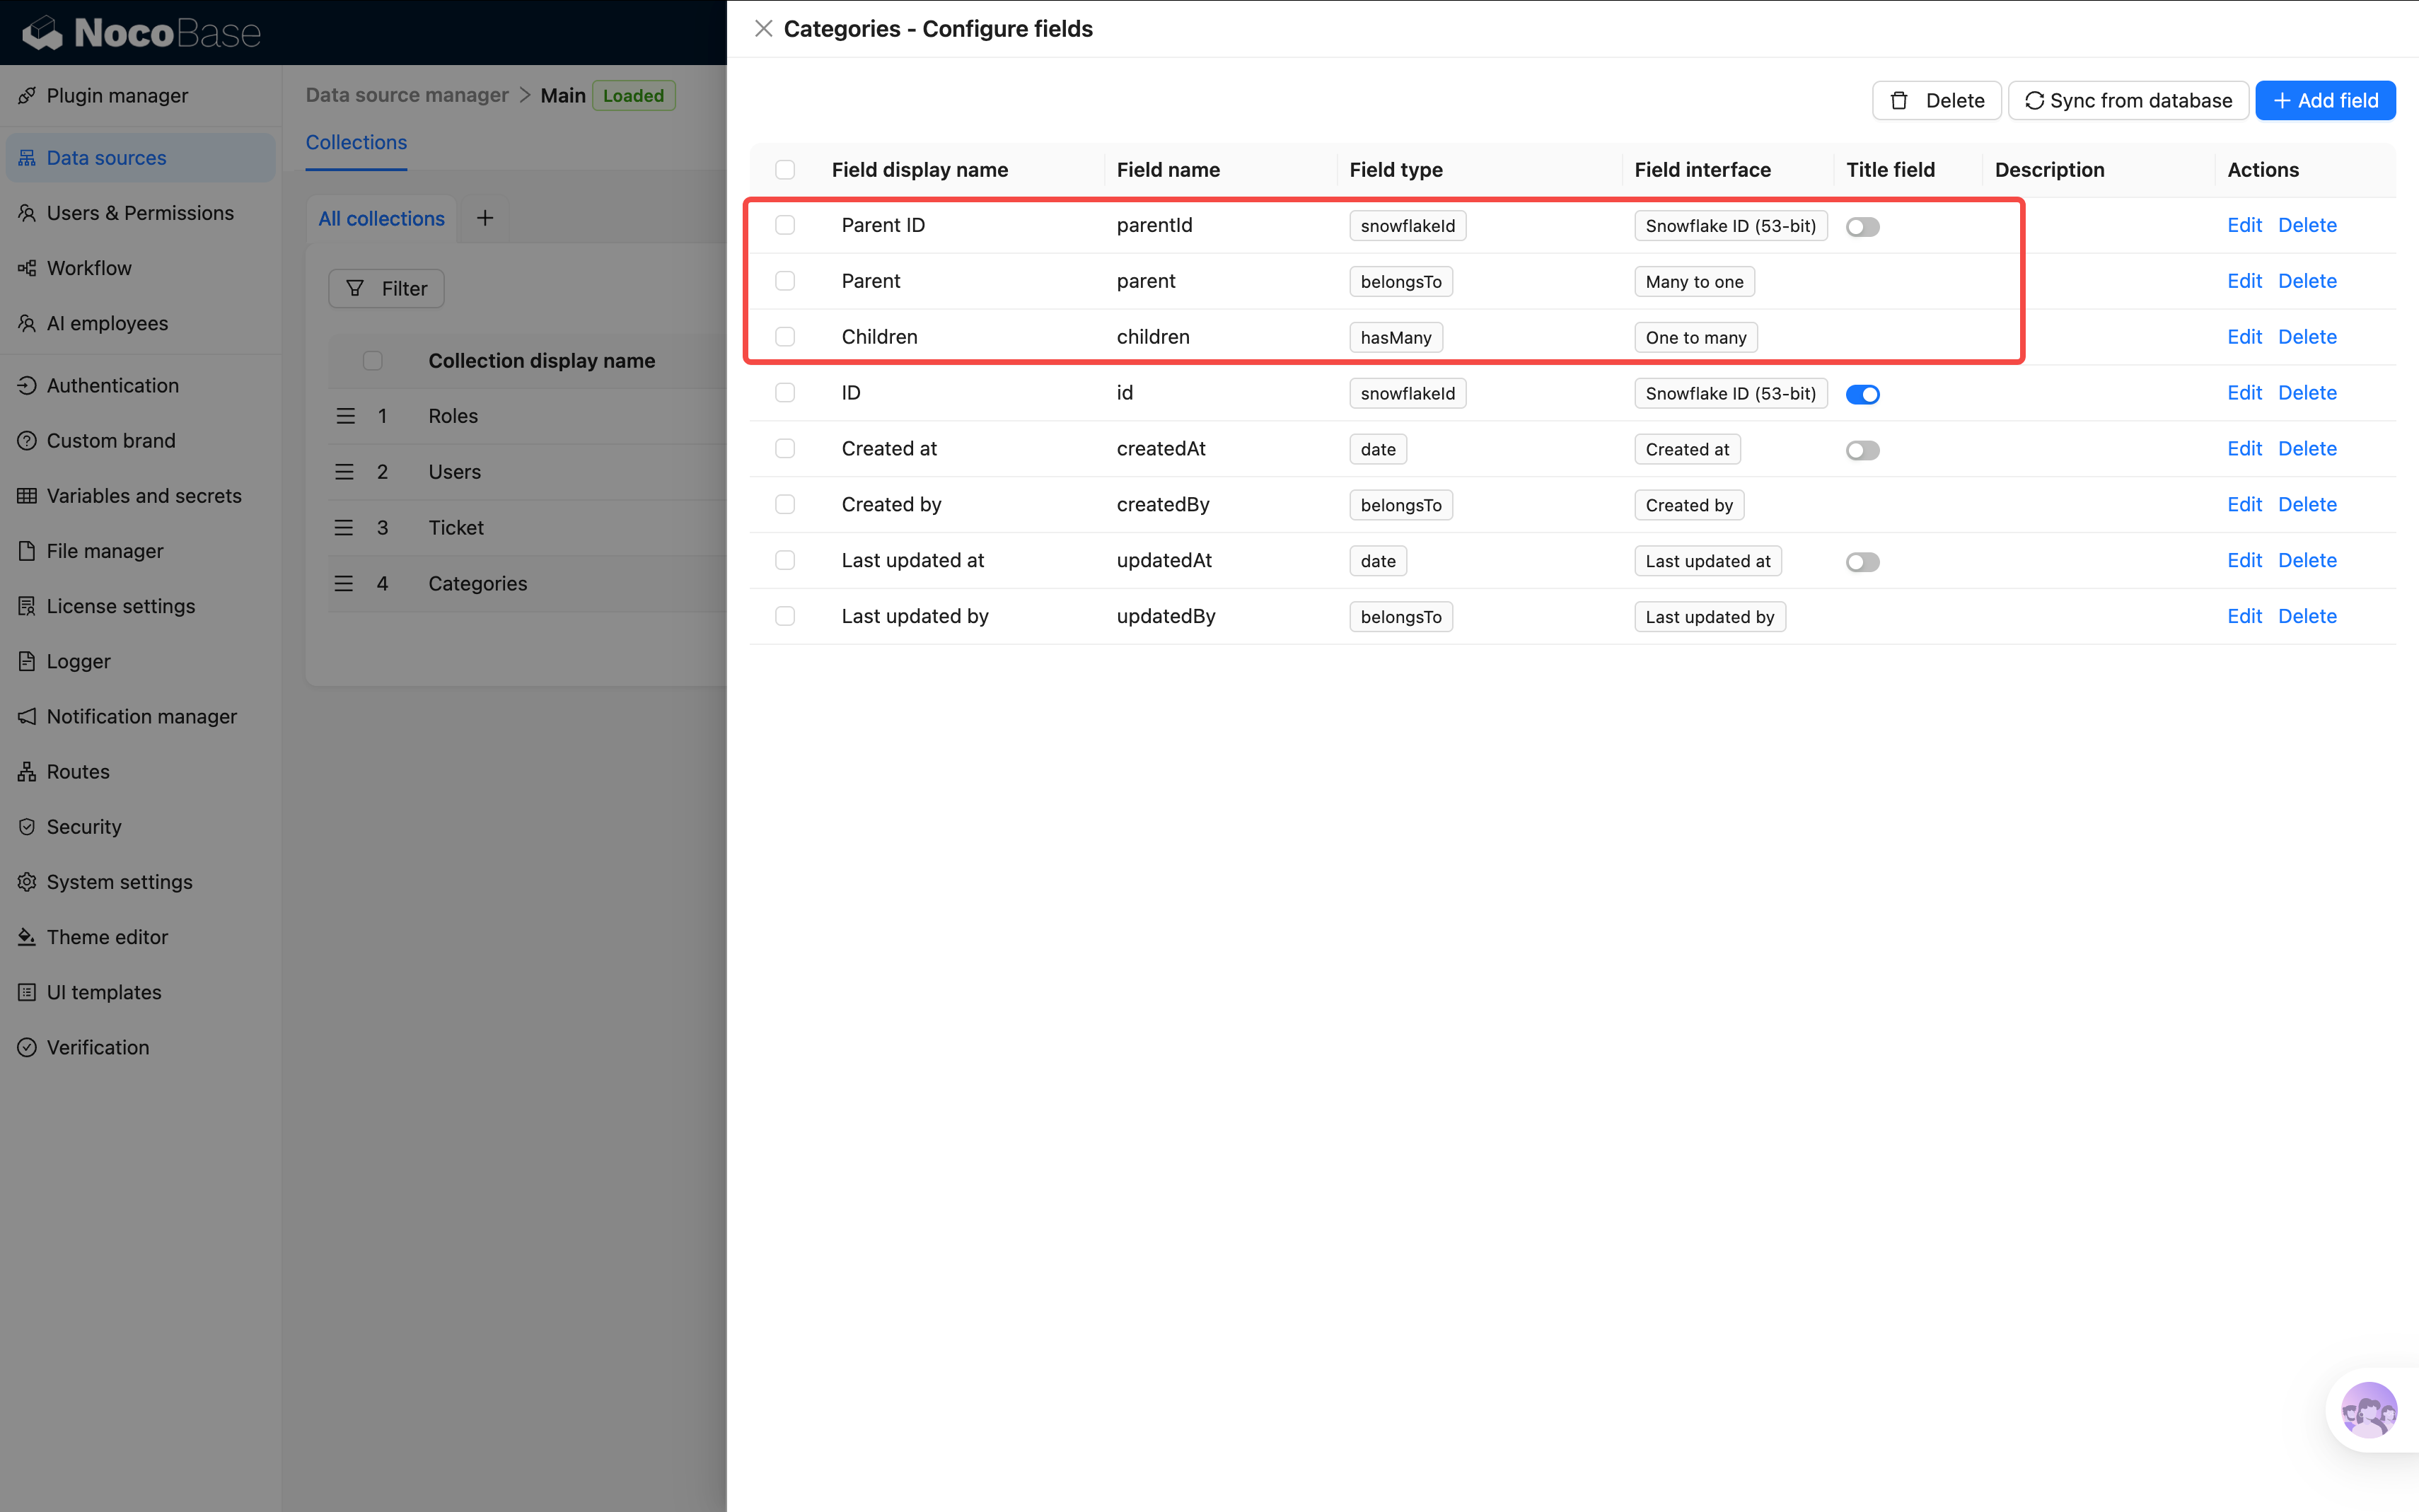
Add Fields
Click "Configure fields" to enter the field list. You'll see the system fields plus the auto-generated Parent and Children fields. Click "Add field" in the top-right:
Field 1: Category Name
- Select "Single line text"
- Field name:
name, Display name:Name - Click "Set validation rules", add a "Required" rule
Field 2: Color
- Select "Color"
- Field name:
color, Display name:Color
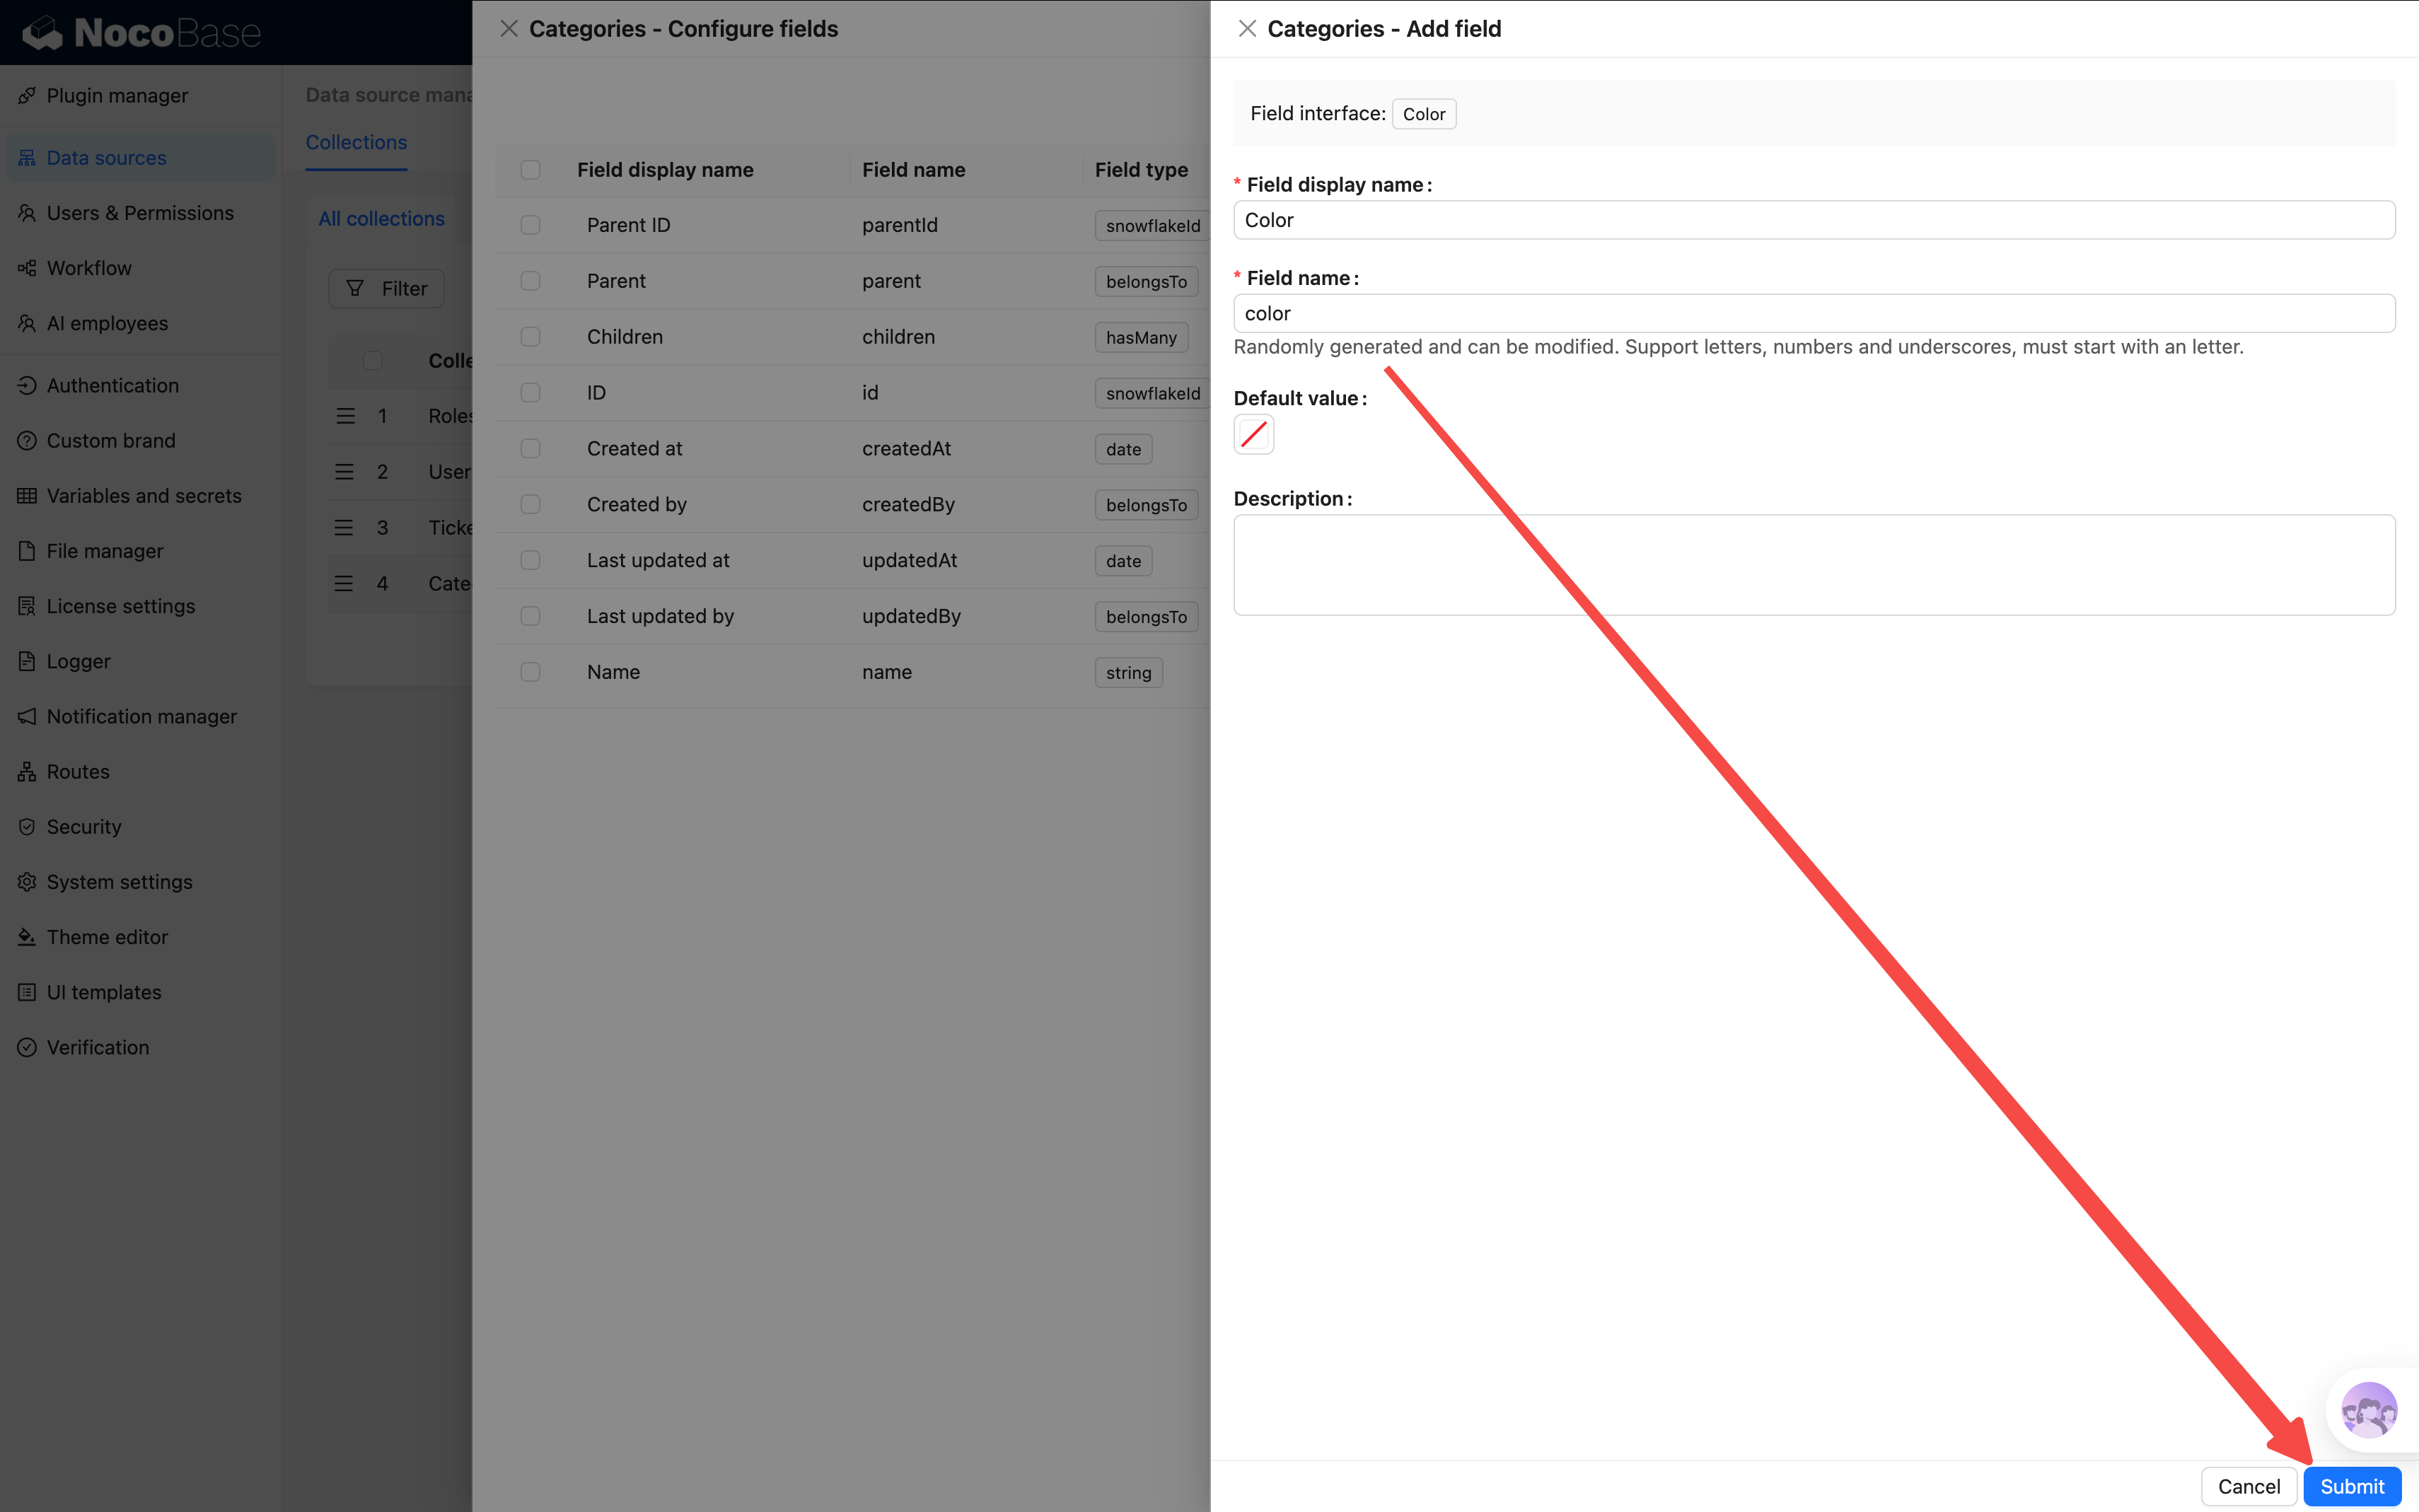
The Color field gives each category its own visual identity — it will make the interface much more intuitive later.
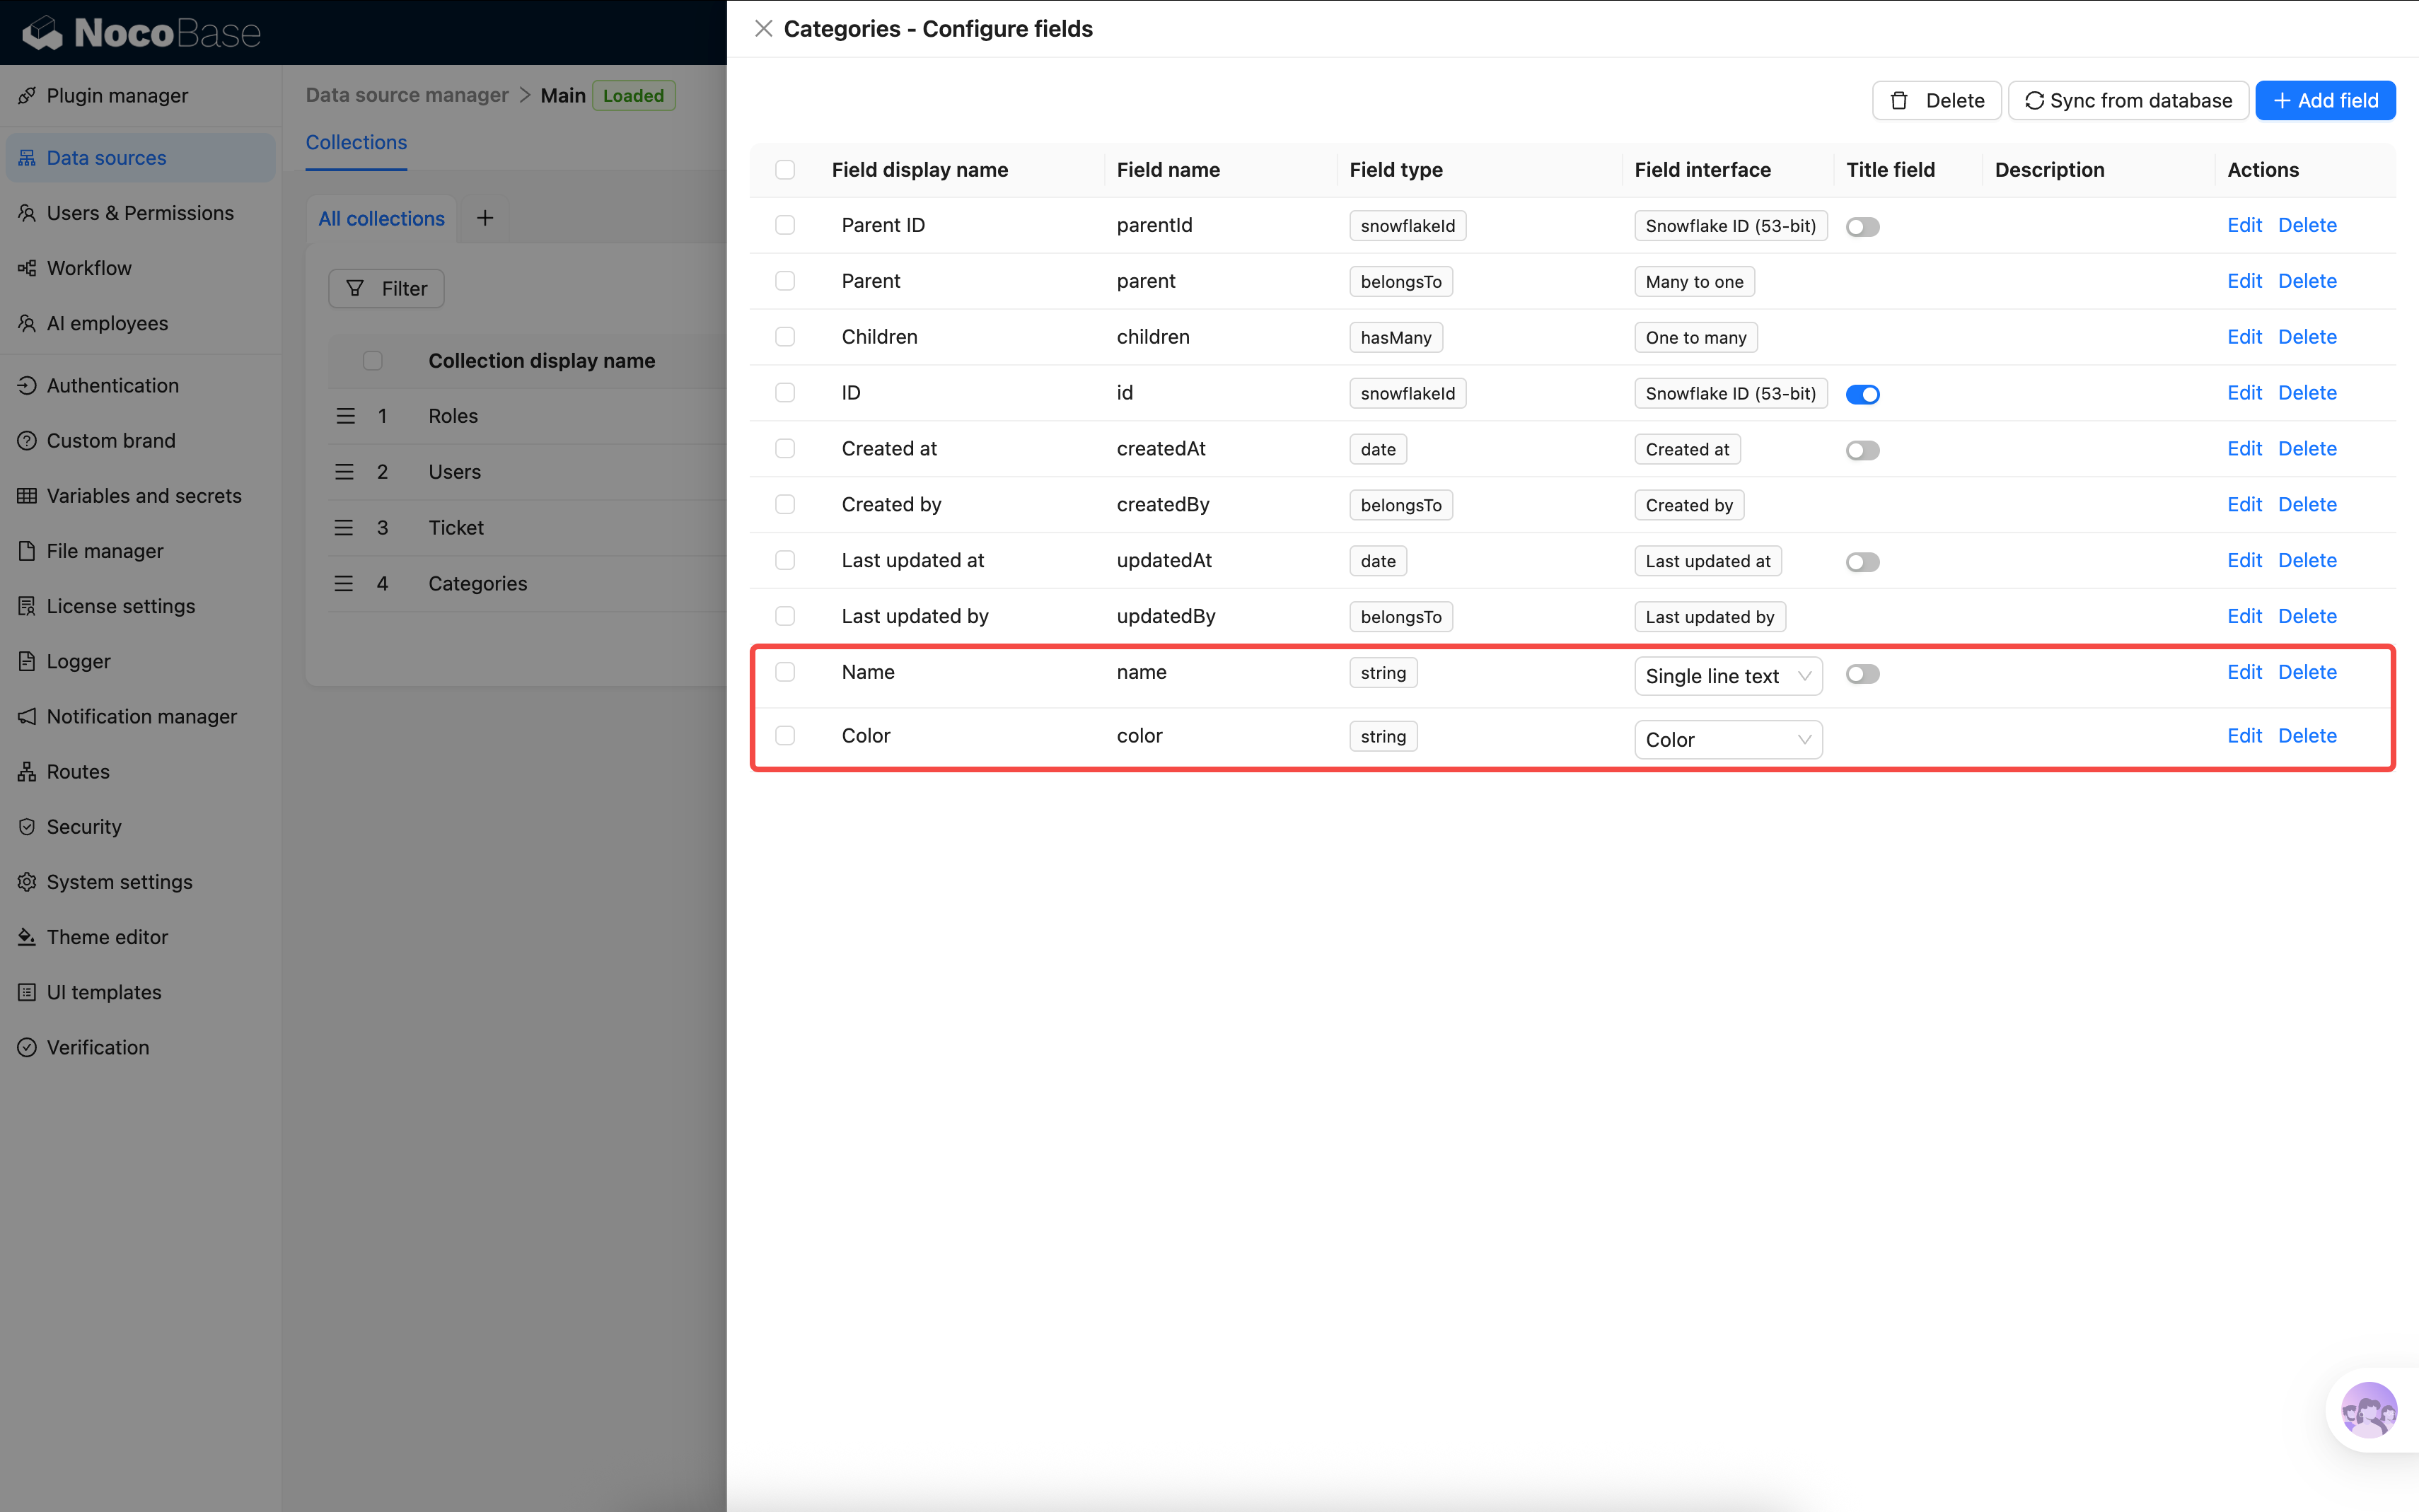
With that, both tables' basic fields are configured. Now let's link them together.
2.4 Back to Tickets: Adding Relation Fields
Relation fields can be a bit abstract at first. If it doesn't click right away, feel free to skip ahead to Chapter 3: Building Pages and see how data is displayed in practice, then come back here to add the relation fields.
Tickets need to be linked to a category, a submitter, and an assignee. These are called relation fields — instead of storing text directly (like "Title" does), they store the ID of a record in another table, and use that ID to look up the corresponding record.
Let's look at a specific ticket — on the left are the ticket's attributes. "Category" and "Submitter" don't store text; they store an ID. The system uses that ID to find the exact matching record from the tables on the right:
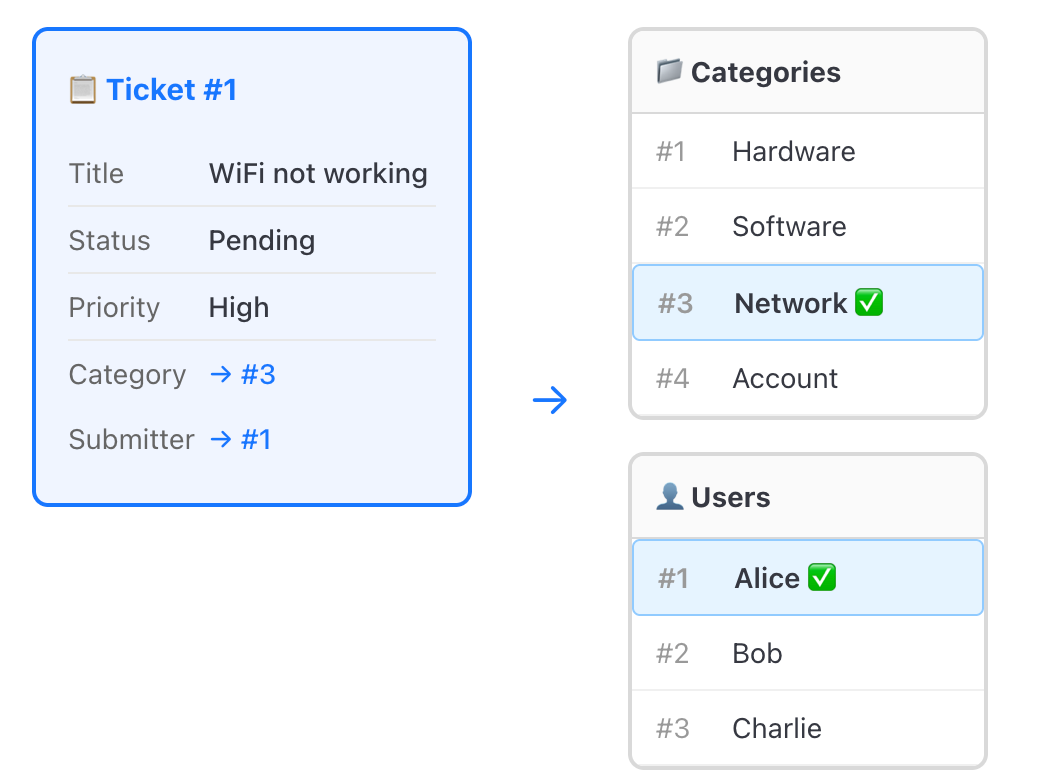
On the interface, you see names like "Network" and "Alice", but behind the scenes it's all connected by IDs. Multiple tickets can point to the same category or the same user — this relationship is called Many-to-one.
Adding Relation Fields
Go back to Tickets → "Configure fields" → "Add field", select "Many to one".
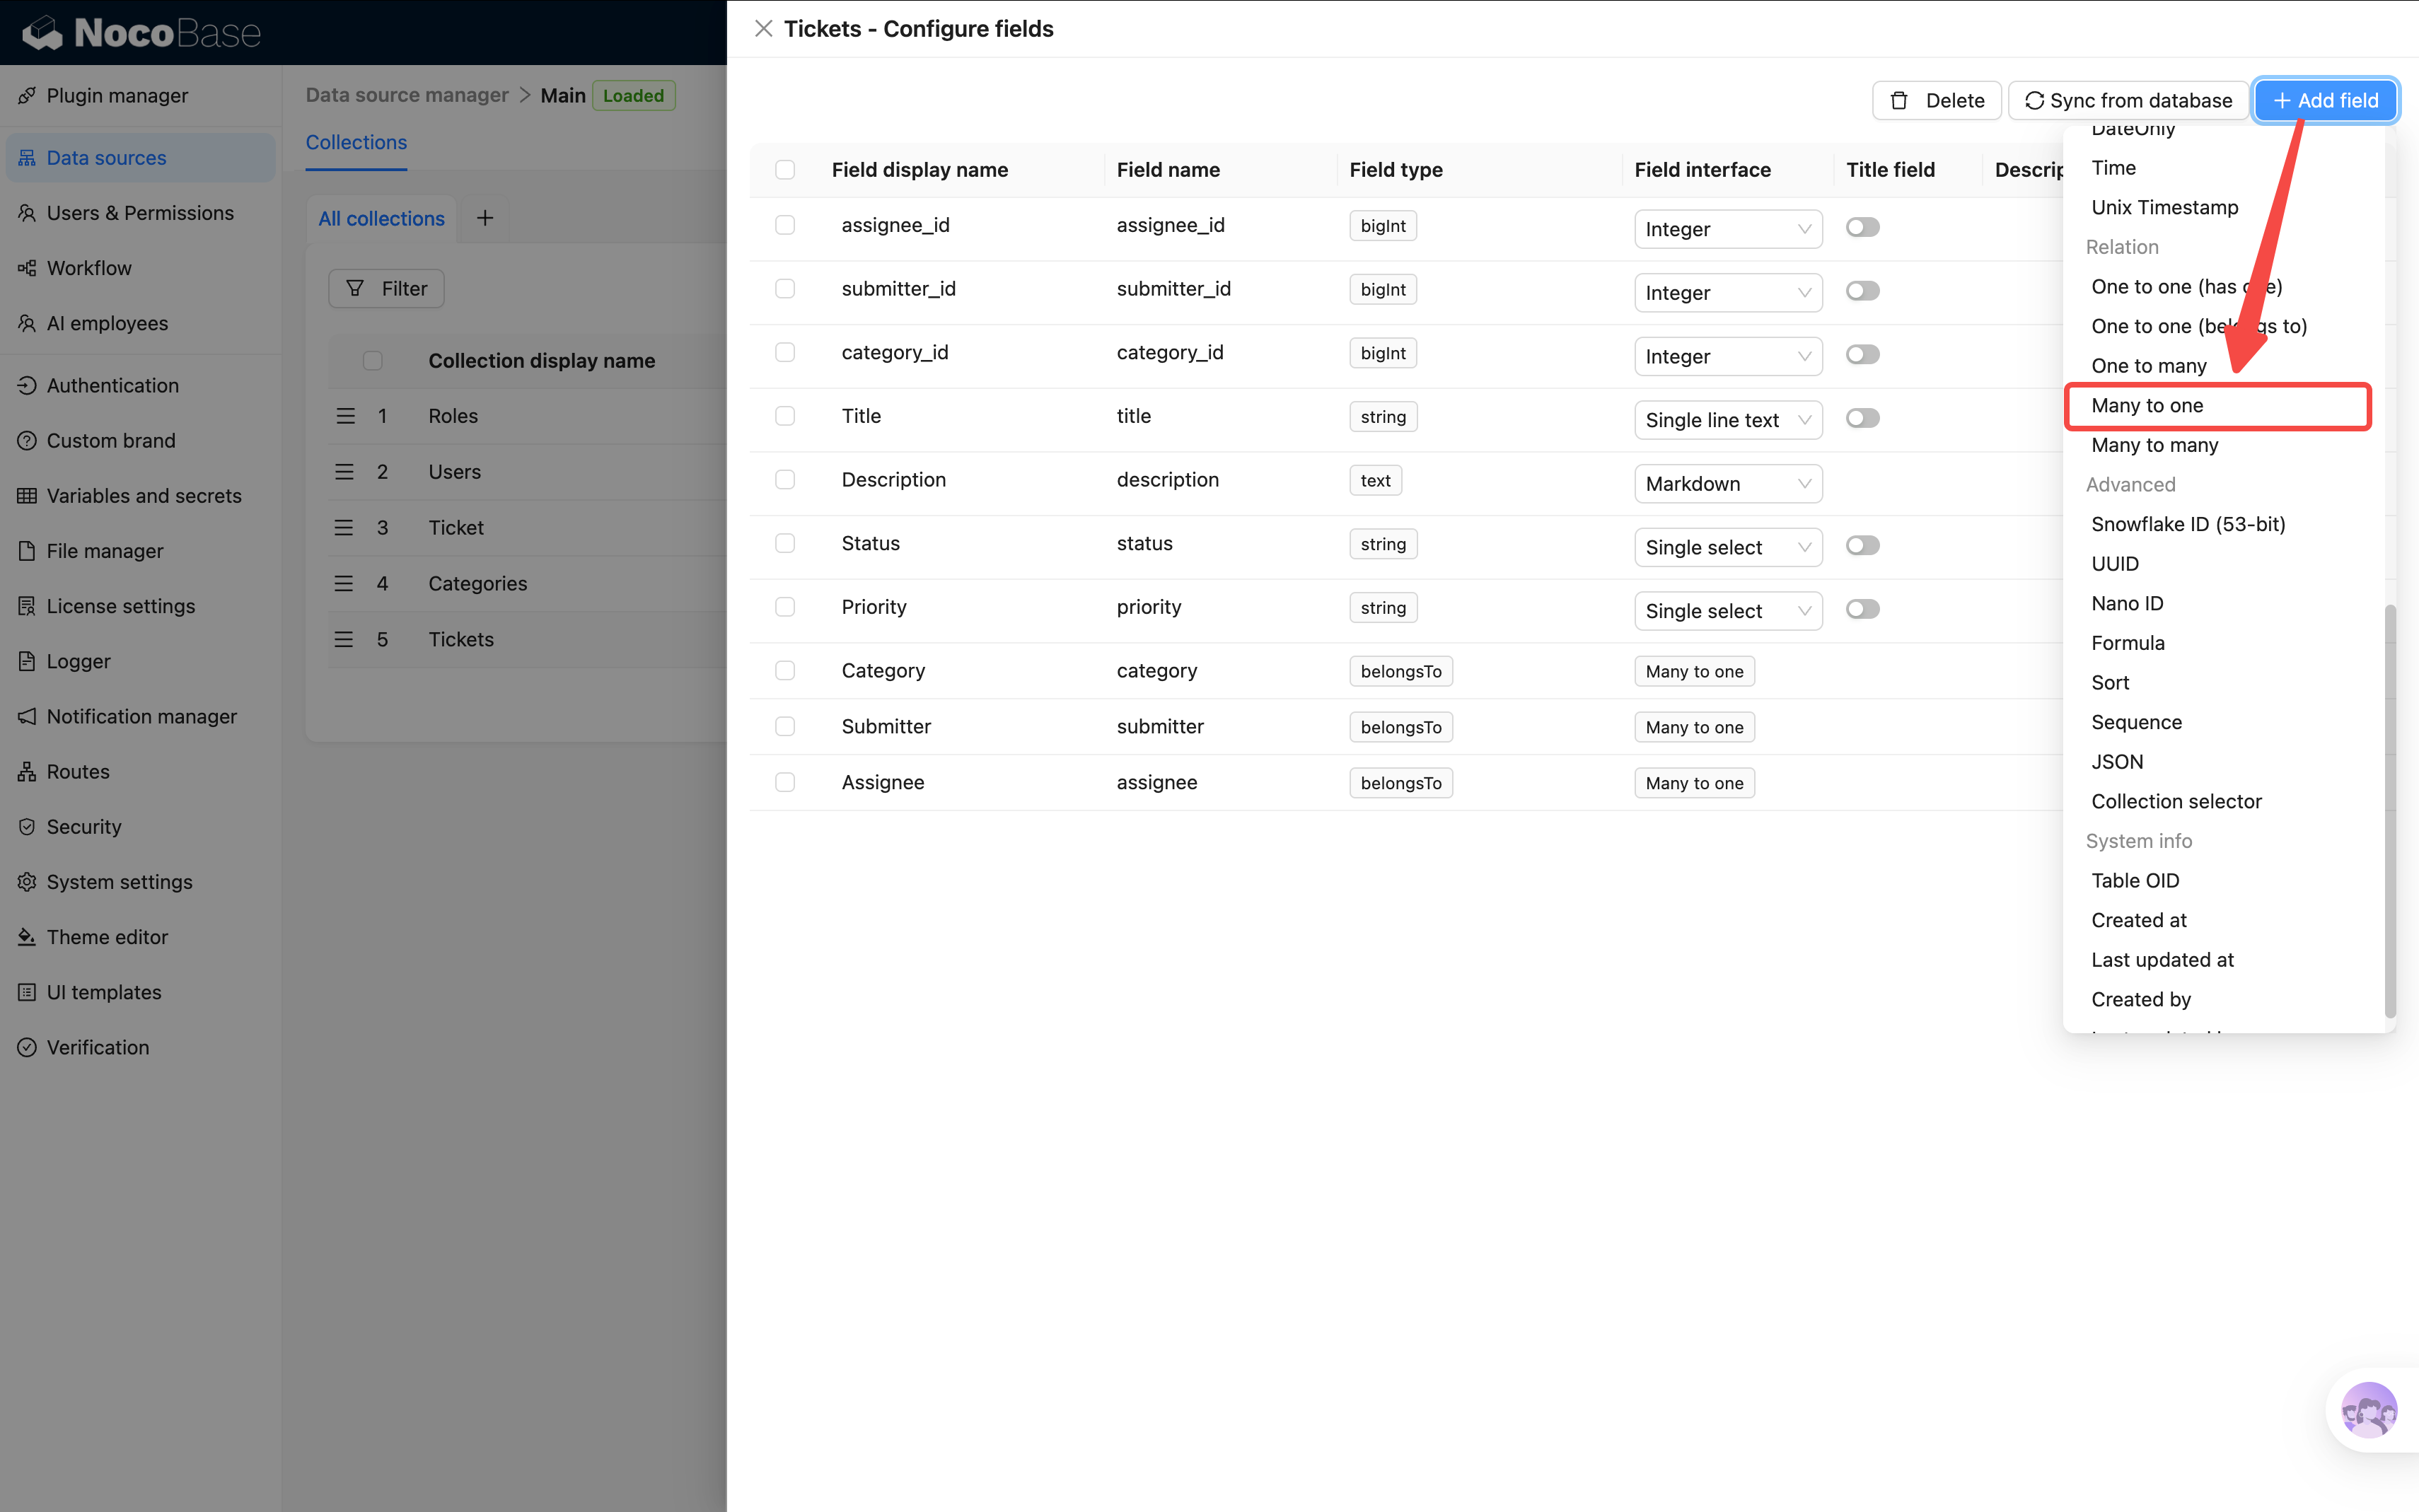
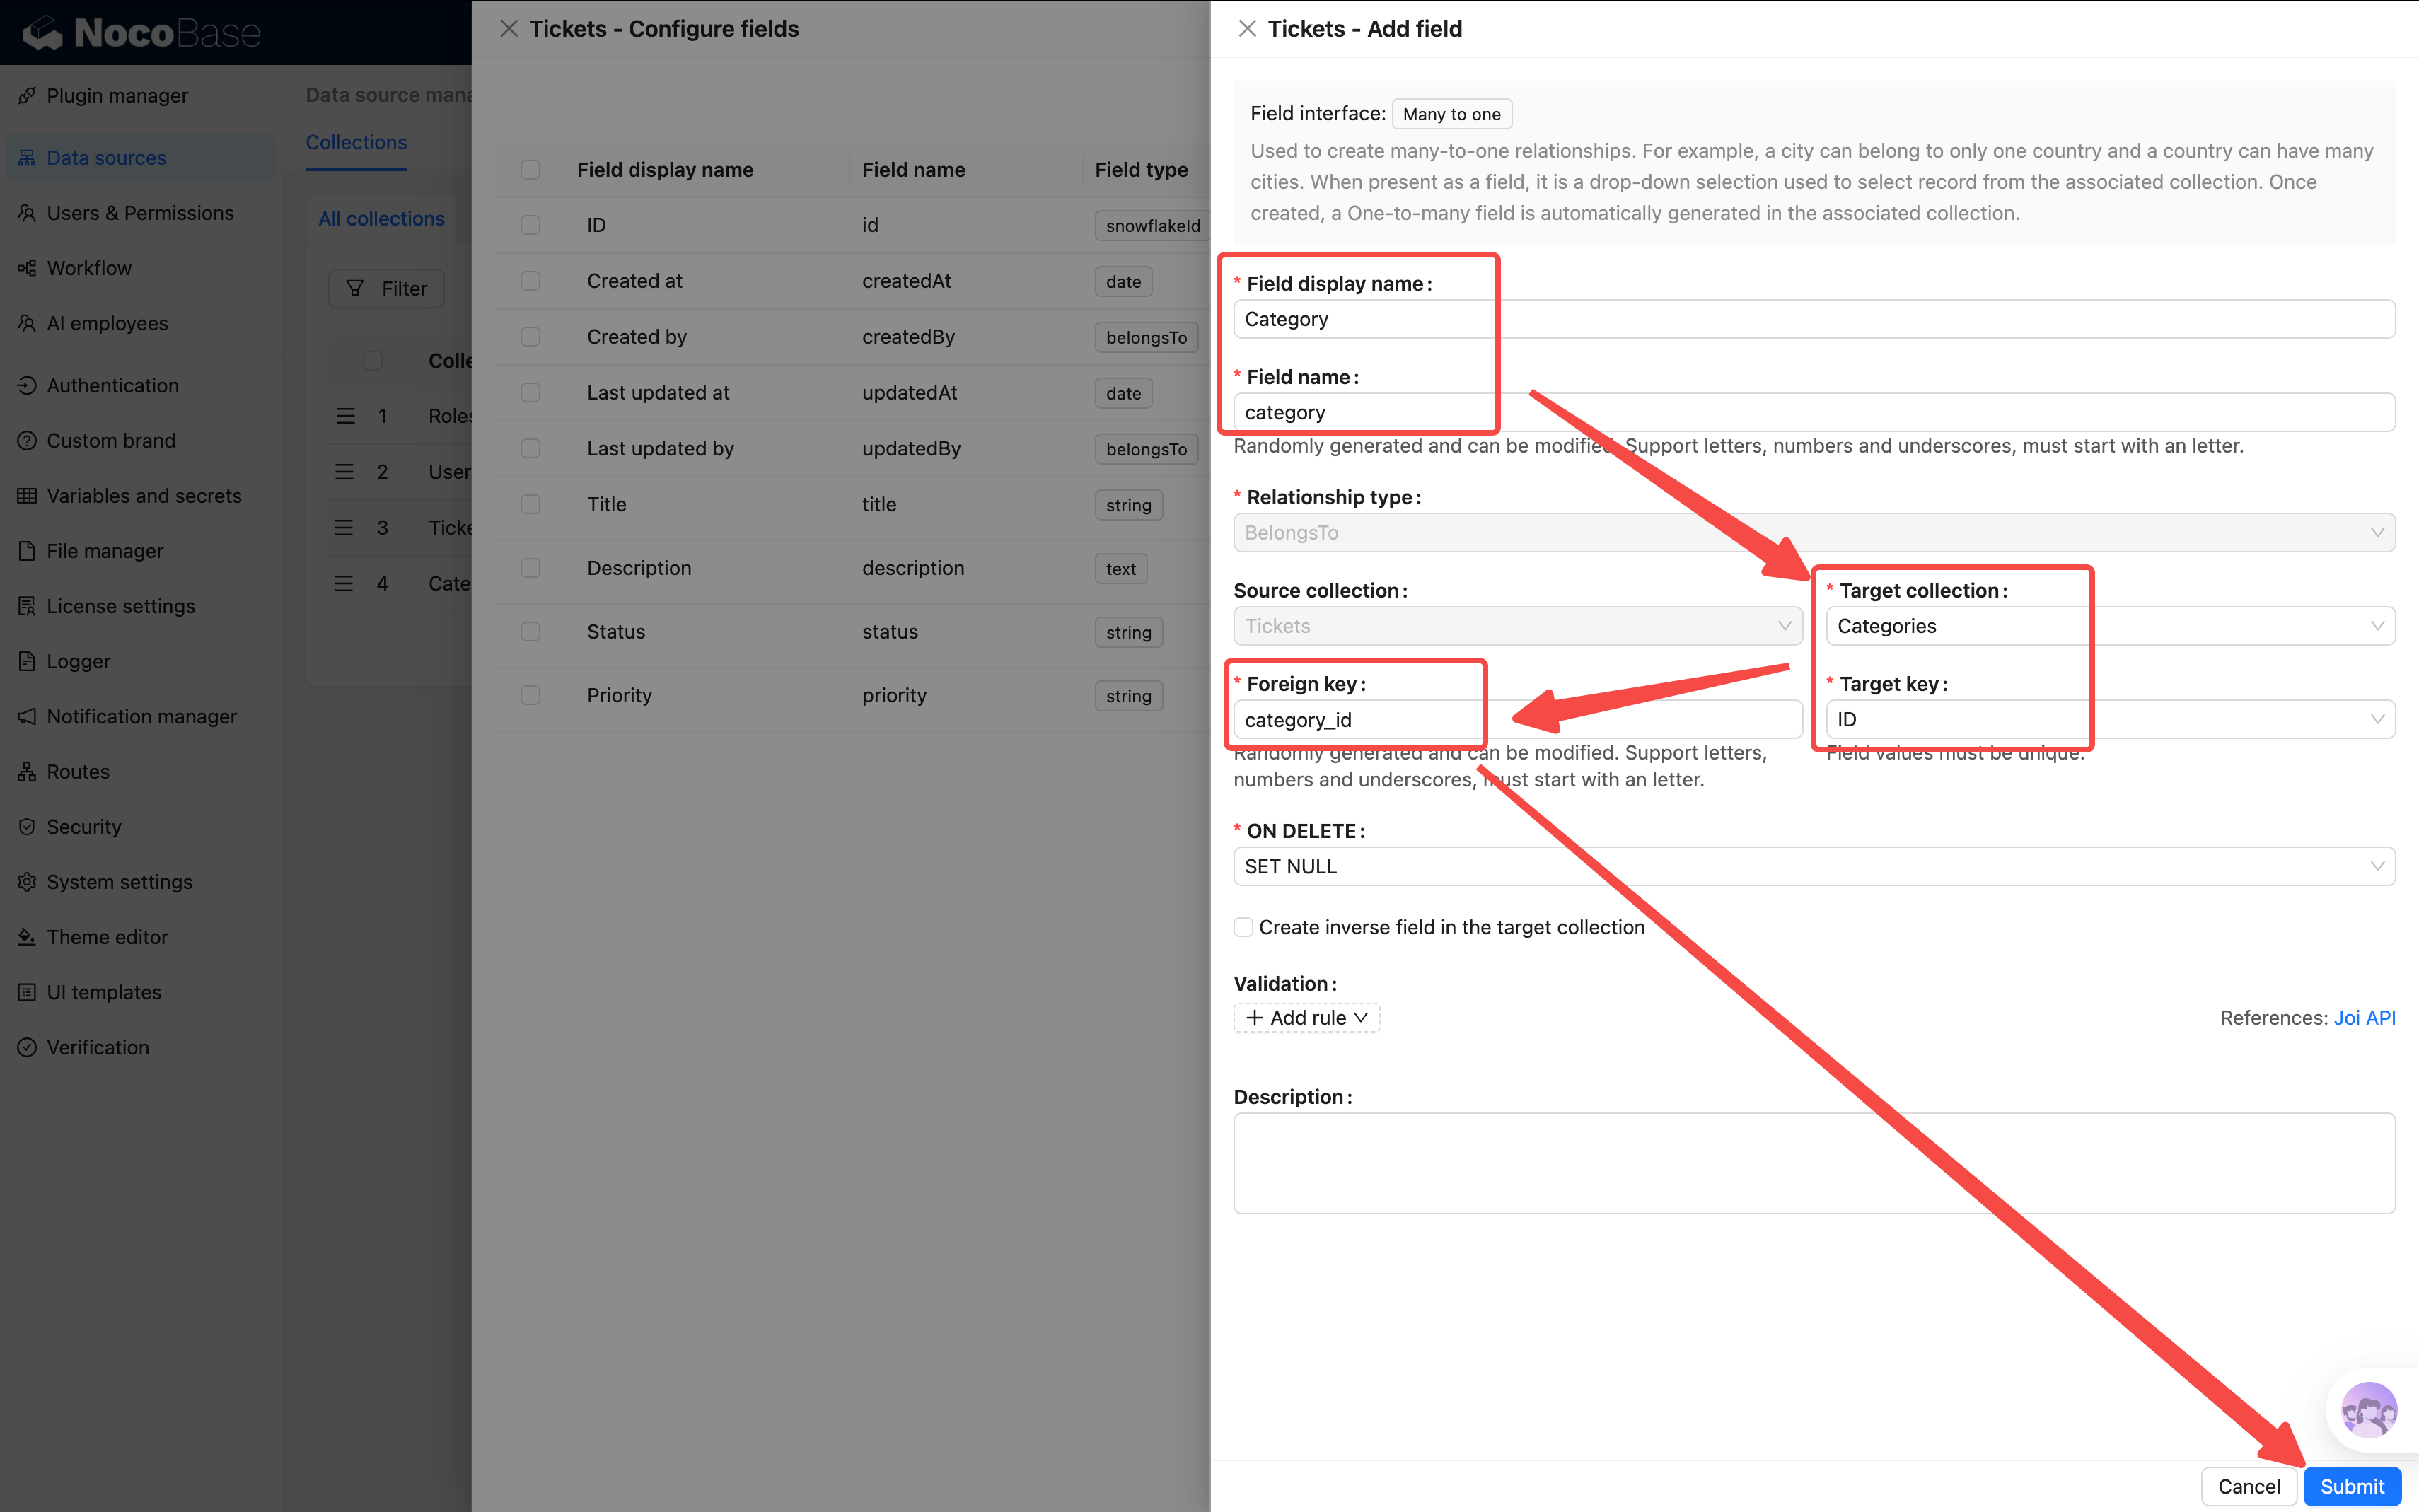
You'll see these configuration options:
| Option | Description | How to Fill |
|---|---|---|
| Source collection | Current table (auto-filled) | Don't change |
| Target collection | Which table to link to | Select the target |
| Foreign key | The linking column stored in the current table | Enter a meaningful name |
| Target collection key field | Defaults to id | Keep as-is |
| ON DELETE | What happens when the target record is deleted | Keep as-is |
The foreign key defaults to a random name like
f_xxxxx. We recommend changing it to something meaningful for easier maintenance. Use lowercase with underscores (e.g.,category_id) instead of camelCase.
Add the following three fields:
5. Category → Categories table
- Display name:
Category - Target collection: Select "Categories" (if not in the list, type the name and it will be auto-created)
- Foreign key:
category_id
6. Submitter → Users table
Records who submitted this ticket. NocoBase has a built-in Users table — just link to it.
- Display name:
Submitter - Target collection: Select "Users"
- Foreign key:
submitter_id

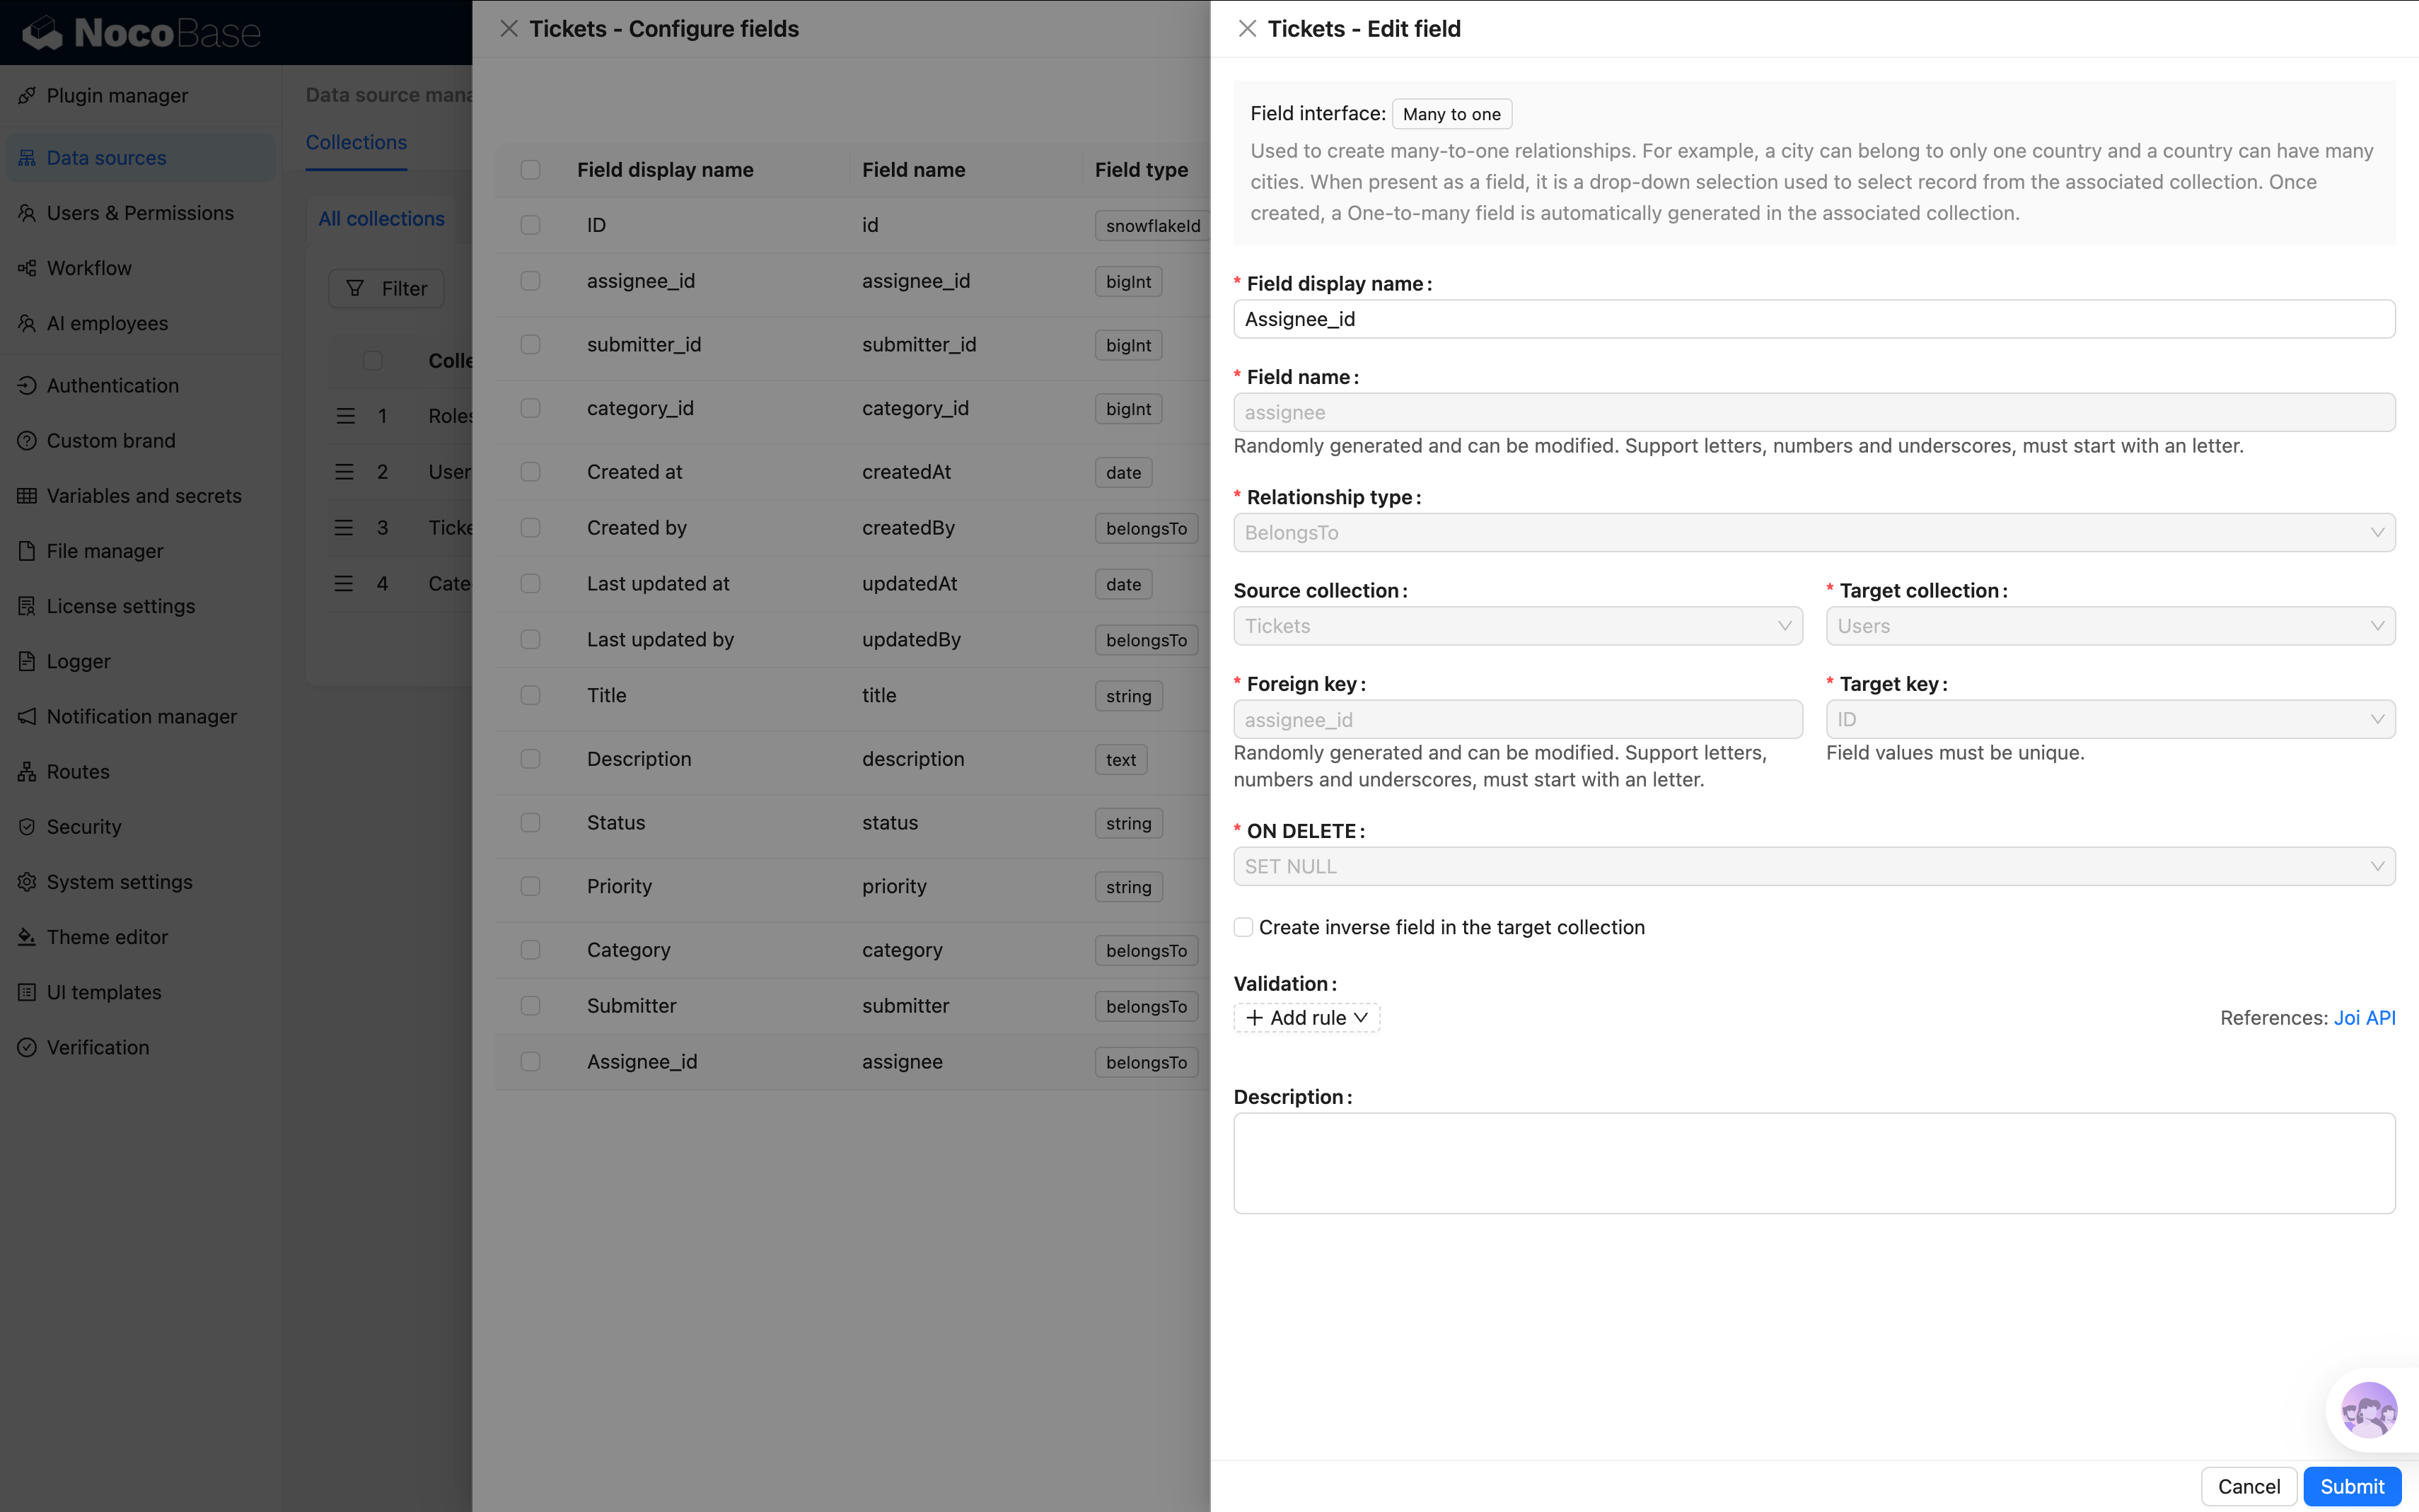
7. Assignee → Users table
Records who is responsible for handling this ticket.
- Display name:
Assignee - Target collection: Select "Users"
- Foreign key:
assignee_id
2.5 The Complete Data Model
Let's review the full data model we've built:
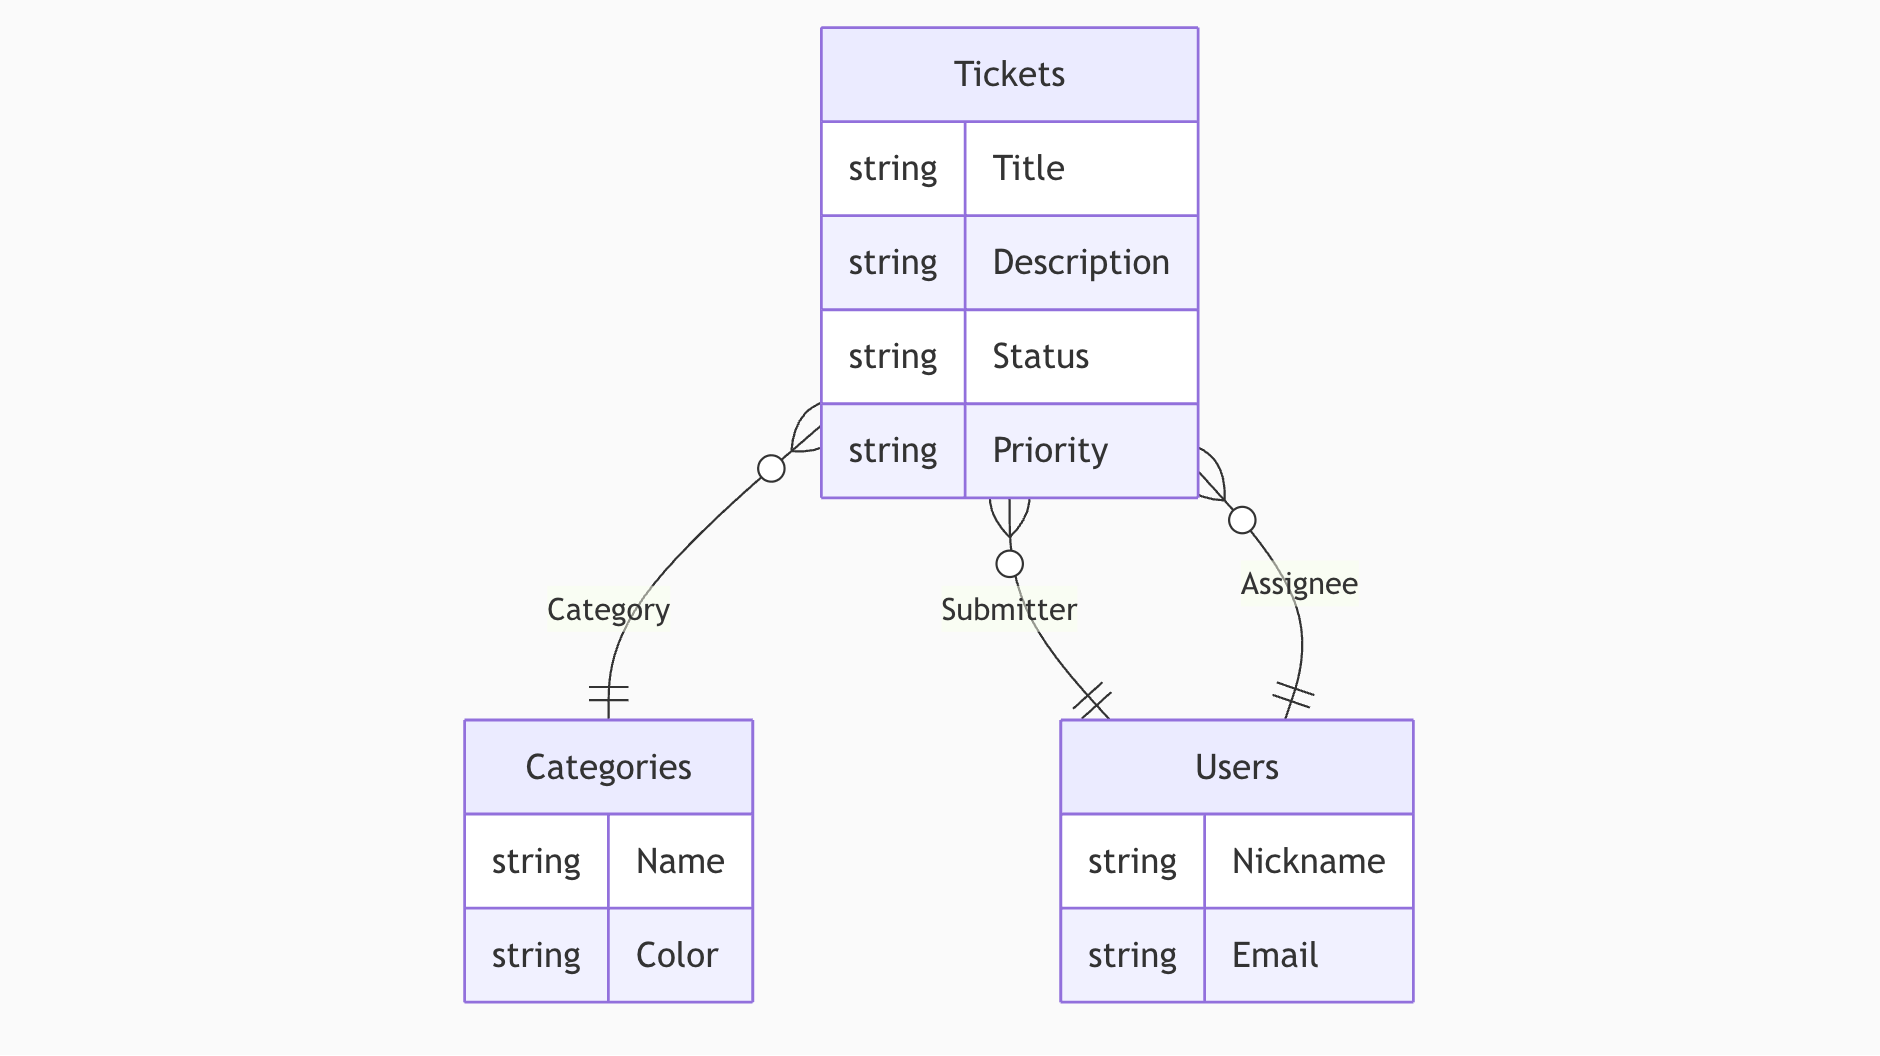
}o--|| represents a many-to-one relationship: "many" on the left, "one" on the right.
Summary
In this chapter we completed the data modeling — the entire skeleton of our HelpDesk system:
- Tickets (
tickets): 4 basic fields + 3 relation fields, created as a General collection - Categories (
categories): 2 custom fields + auto-generated Parent/Children fields, created as a Tree collection with built-in hierarchy support
Key concepts we learned:
- Collection = A container for one type of data
- Collection types = Different types for different scenarios (General, Tree, etc.)
- Field = A data attribute, created via "Configure fields" → "Add field"
- System fields = ID, Created at, Created by, etc. — auto-checked when creating a table
- Relation field (Many-to-one) = Points to a record in another table, linking tables together
You may notice that later screenshots already contain data — we pre-loaded test data for demonstration purposes. In NocoBase, all CRUD operations are done through the frontend pages. Chapter 3 covers building tables to display data, and Chapter 4 covers forms for data entry — stay tuned.
Next Chapter Preview
The skeleton is ready, but the tables are still empty. In the next chapter, we'll build pages to make the data visible.
See you in Chapter 3!