

Loop
This feature is provided by the plugin «Workflow: Loop node»Introduction
A loop is equivalent to syntax structures like for/while/forEach in programming languages. When you need to repeat some operations a certain number of times or for a data collection (array), you can use a loop node.
Installation
This is a built-in plugin and does not require installation.
Creating a Node
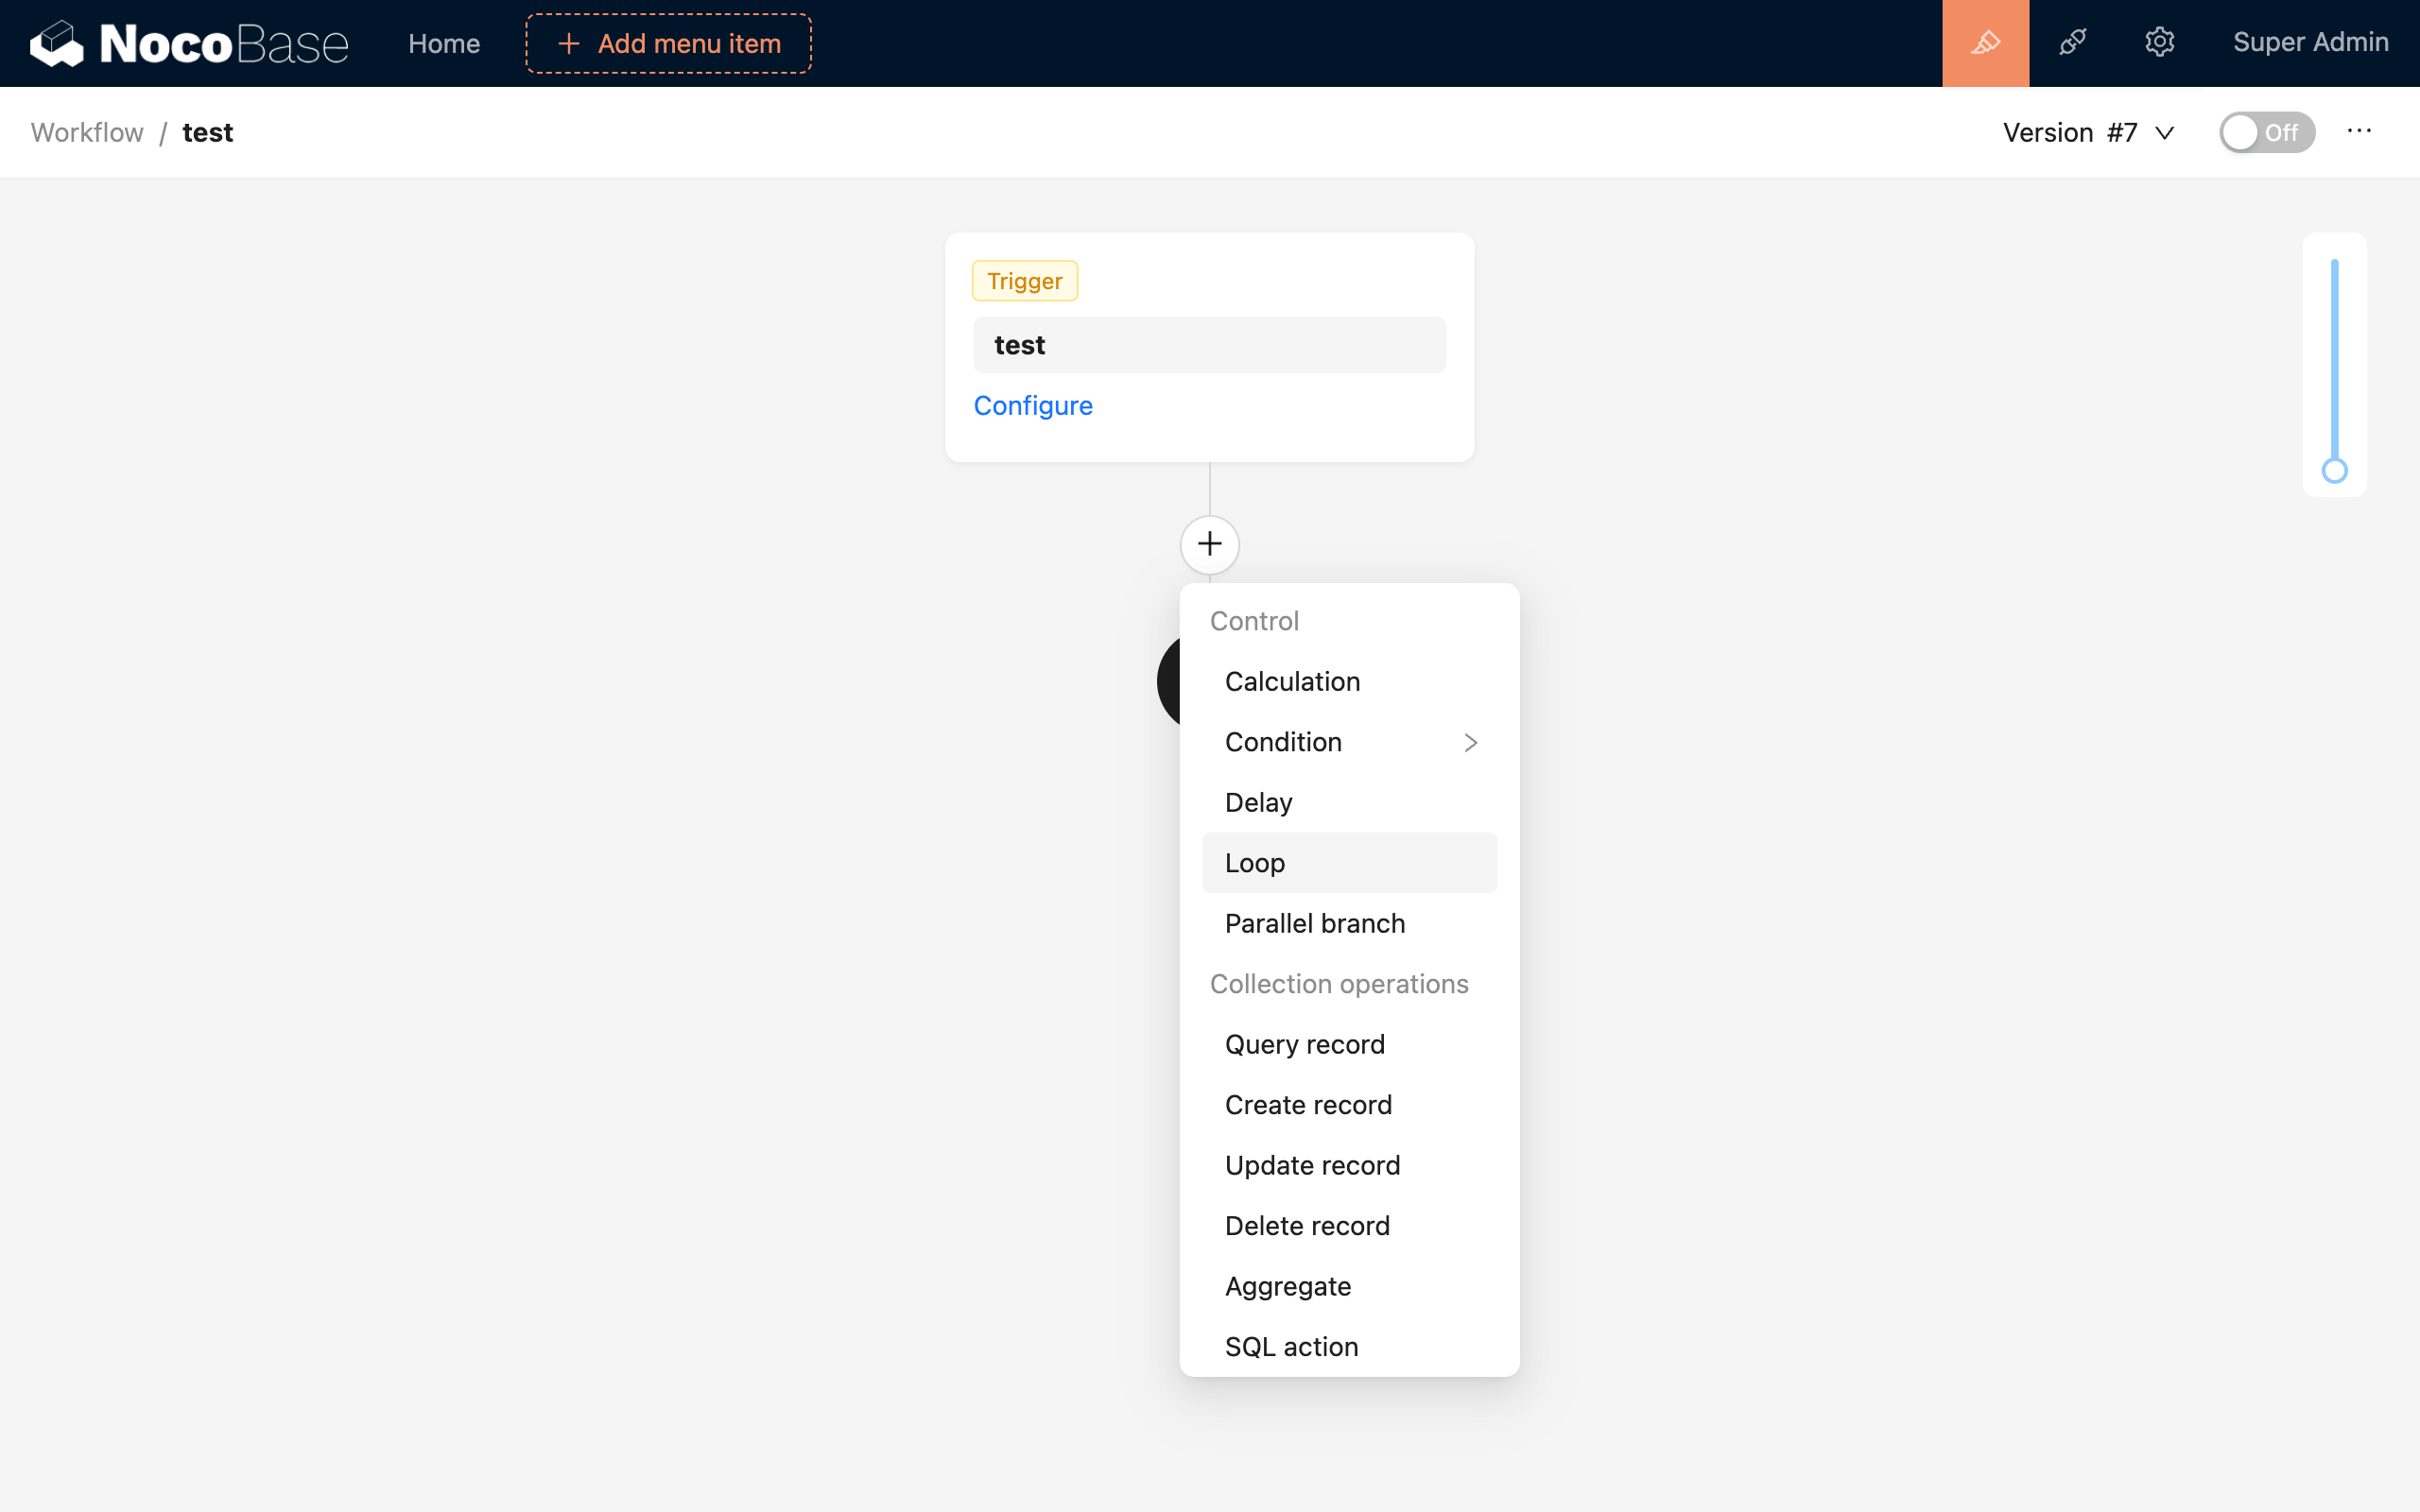
In the workflow configuration interface, click the plus ("+") button in the flow to add a "Loop" node:
After creating a loop node, a branch inside the loop will be generated. You can add any number of nodes within this branch. These nodes can use not only the variables from the workflow context but also local variables from the loop context, such as the data object being iterated over in the loop collection, or the index of the loop count (the index starts from 0). The scope of local variables is limited to within the loop. If there are nested loops, you can use the local variables of the specific loop at each level.
Node Configuration
Loop Object
The loop handles different data types of the loop object differently:
-
Array: This is the most common case. You can usually select a variable from the workflow context, such as the multiple data results from a query node, or preloaded one-to-many relationship data. If an array is selected, the loop node will iterate through each element in the array, assigning the current element to a local variable in the loop context for each iteration.
-
Number: When the selected variable is a number, it will be used as the number of iterations. The value must be a positive integer; negative numbers will not enter the loop, and the decimal part of a number will be ignored. The index of the loop count in the local variable is also the value of the loop object. This value starts from 0. For example, if the loop object number is 5, the object and index in each loop will be: 0, 1, 2, 3, 4.
-
String: When the selected variable is a string, its length will be used as the number of iterations, processing each character of the string by index.
-
Other: Other types of values (including object types) are treated as a single-item loop object and will only loop once. This situation usually does not require a loop.
Besides selecting a variable, you can also directly input constants for number and string types. For example, inputting 5 (number type) will cause the loop node to iterate 5 times. Inputting abc (string type) will cause the loop node to iterate 3 times, processing the characters a, b, and c respectively. In the variable selection tool, choose the desired type for the constant.
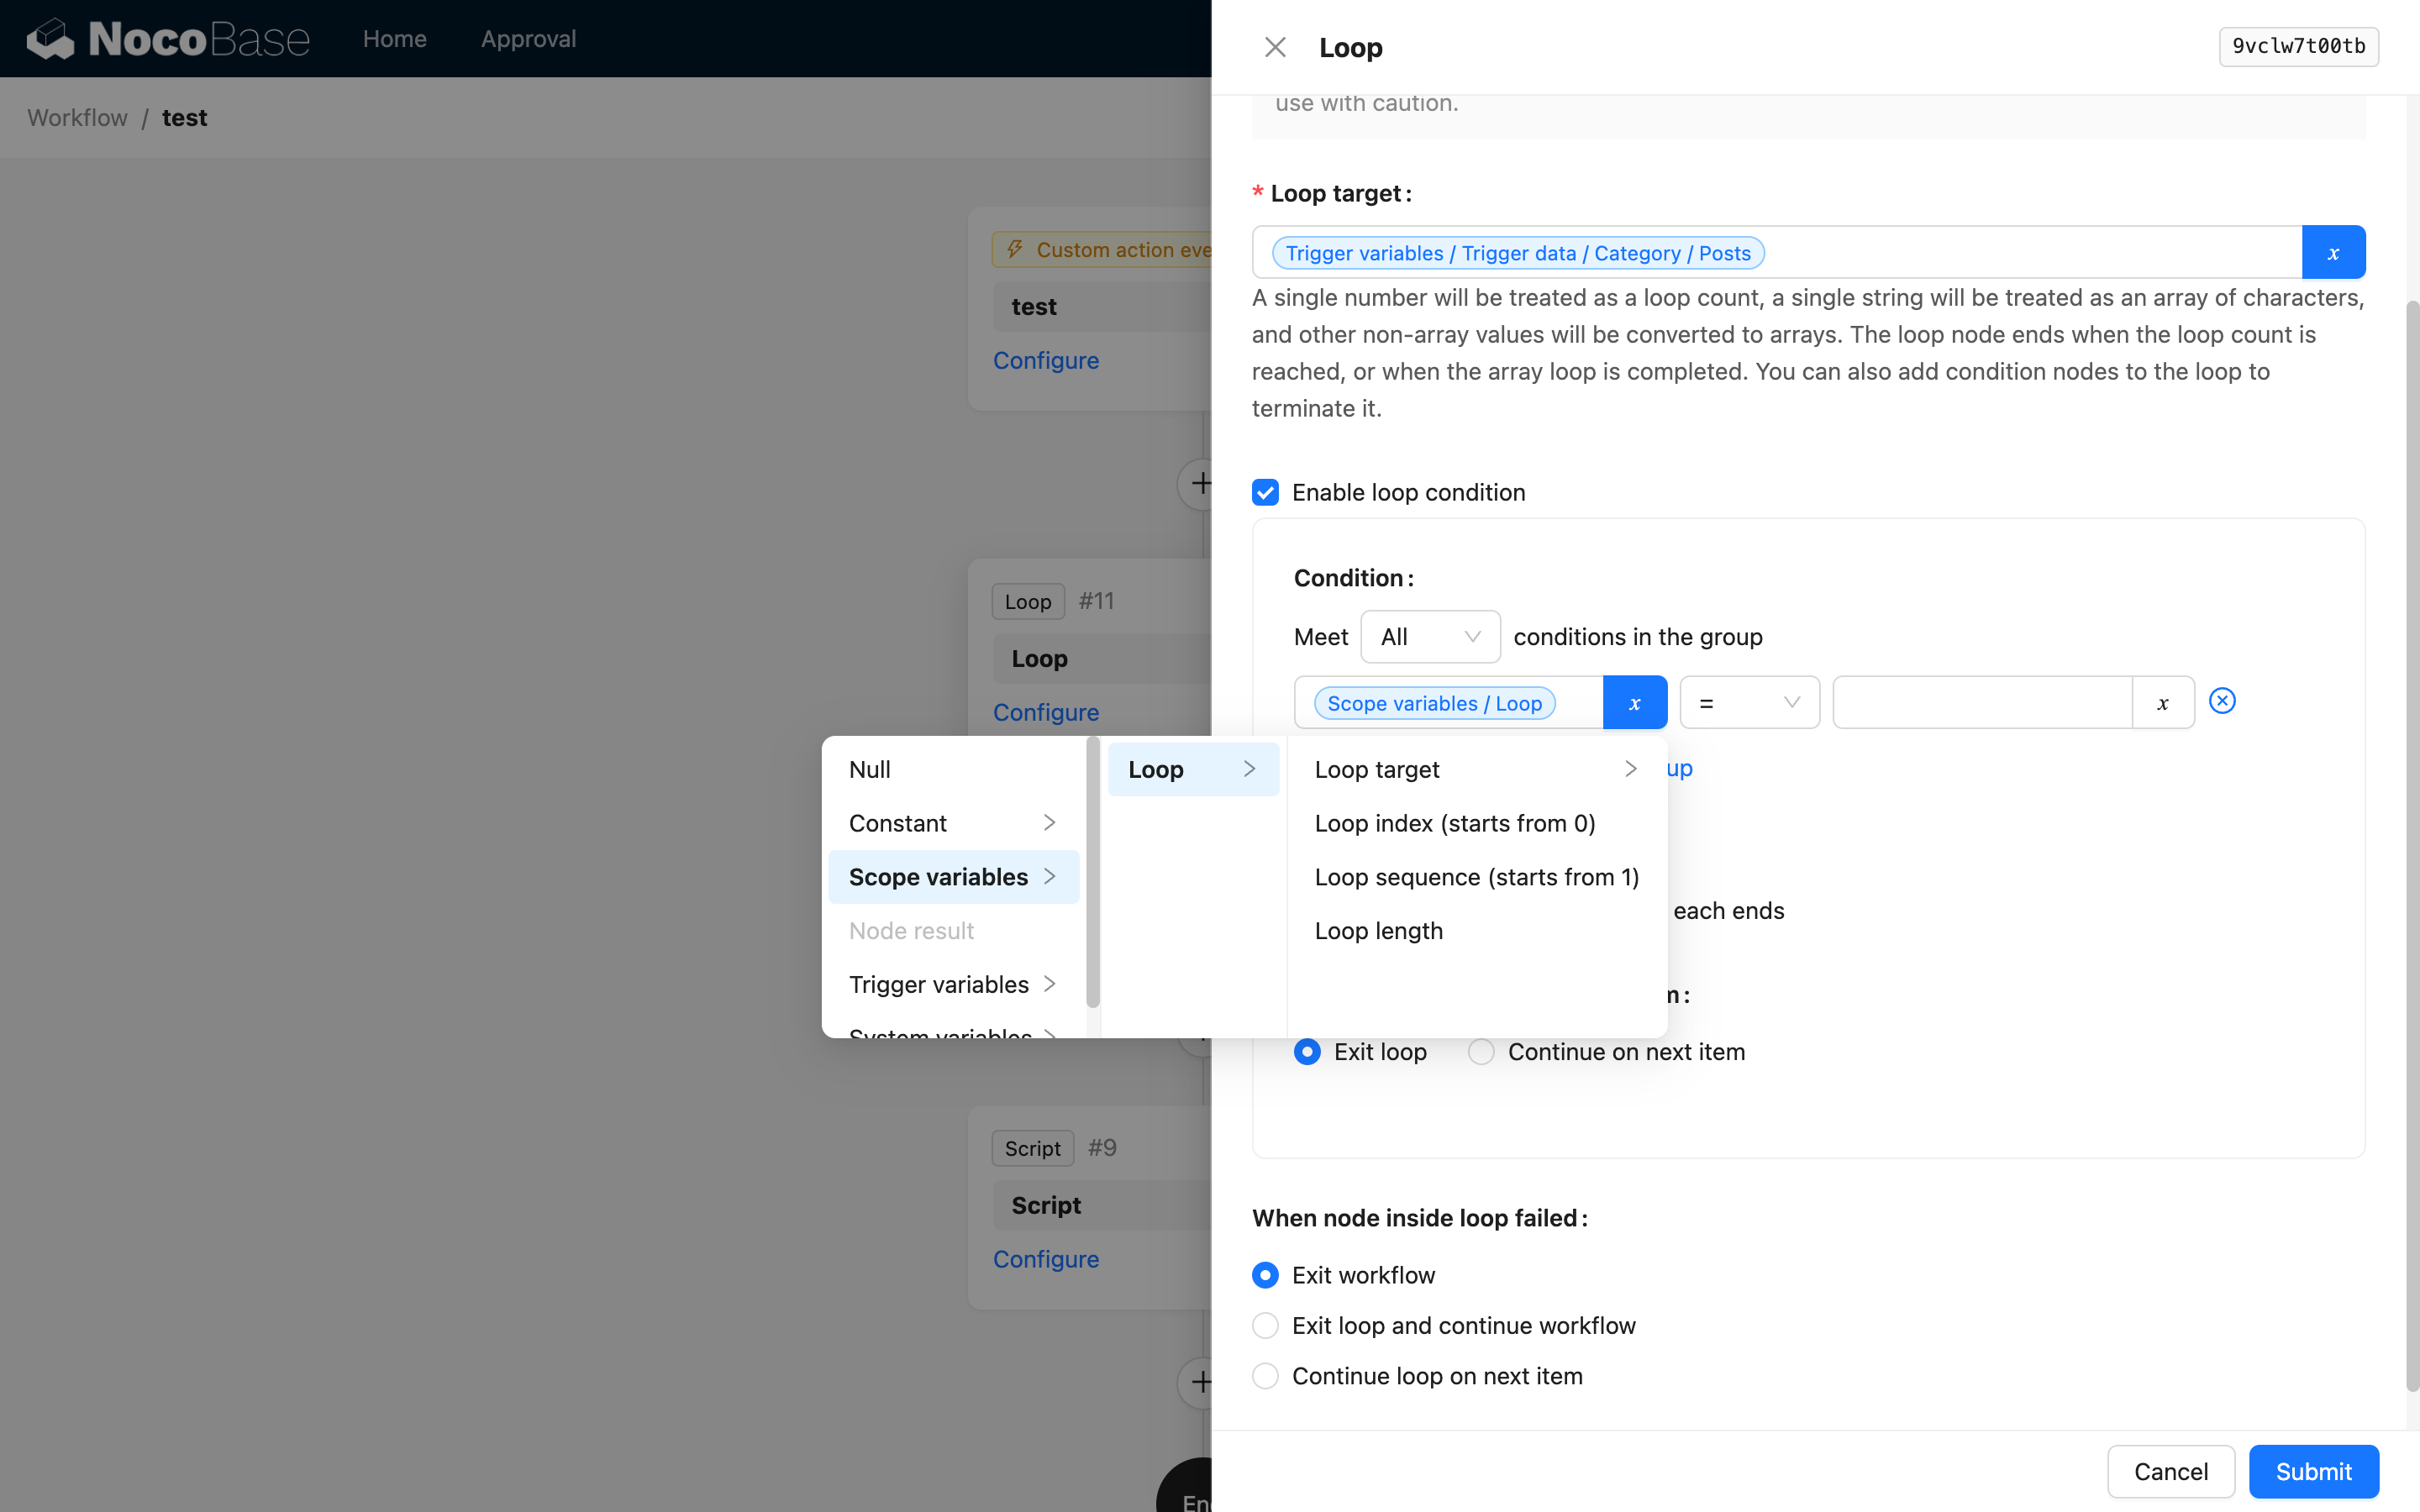
Loop Condition
Since version v1.4.0-beta, options related to loop conditions have been added. You can enable loop conditions in the node configuration.
Condition
Similar to the condition configuration in a condition node, you can combine configurations and use variables from the current loop, such as the loop object, loop index, etc.
Check Timing
Similar to the while and do/while constructs in programming languages, you can choose to evaluate the configured condition before each loop starts or after each loop ends. Post-condition evaluation allows the other nodes within the loop body to execute for one round before the condition is checked.
When Condition is Not Met
Similar to the break and continue statements in programming languages, you can choose to exit the loop or continue to the next iteration.
Handling Errors in Loop Nodes
Since version v1.4.0-beta, when a node inside the loop fails to execute (due to unmet conditions, errors, etc.), you can configure the subsequent flow. Three handling methods are supported:
- Exit workflow (like
throwin programming) - Exit loop and continue workflow (like
breakin programming) - Continue to the next loop object (like
continuein programming)
The default is "Exit workflow," which can be changed as needed.
Environment Variables
WORKFLOW_LOOP_LIMIT
Used to limit the maximum number of iterations for loop nodes by operations roles, preventing infinite loops caused by configuration errors. The default is unlimited, and this limit can be adjusted by configuring this environment variable.
If a limit value is set, when the loop node executes and exceeds this number, it will directly report an error and exit the process. The node result will include the exceeded information with a value of true.
Example
For example, when an order is placed, you need to check the stock for each product in the order. If the stock is sufficient, deduct the stock; otherwise, update the product in the order detail as invalid.
-
Create three collections: Products <-(1:m)-- Order Details --(m:1)-> Orders. The data model is as follows:
Orders Collection
Field Name Field Type Order Details One-to-Many (Order Details) Order Total Price Number Order Details Collection
Field Name Field Type Product Many-to-One (Product) Quantity Number Products Collection
Field Name Field Type Product Name Single Line Text Price Number Stock Integer -
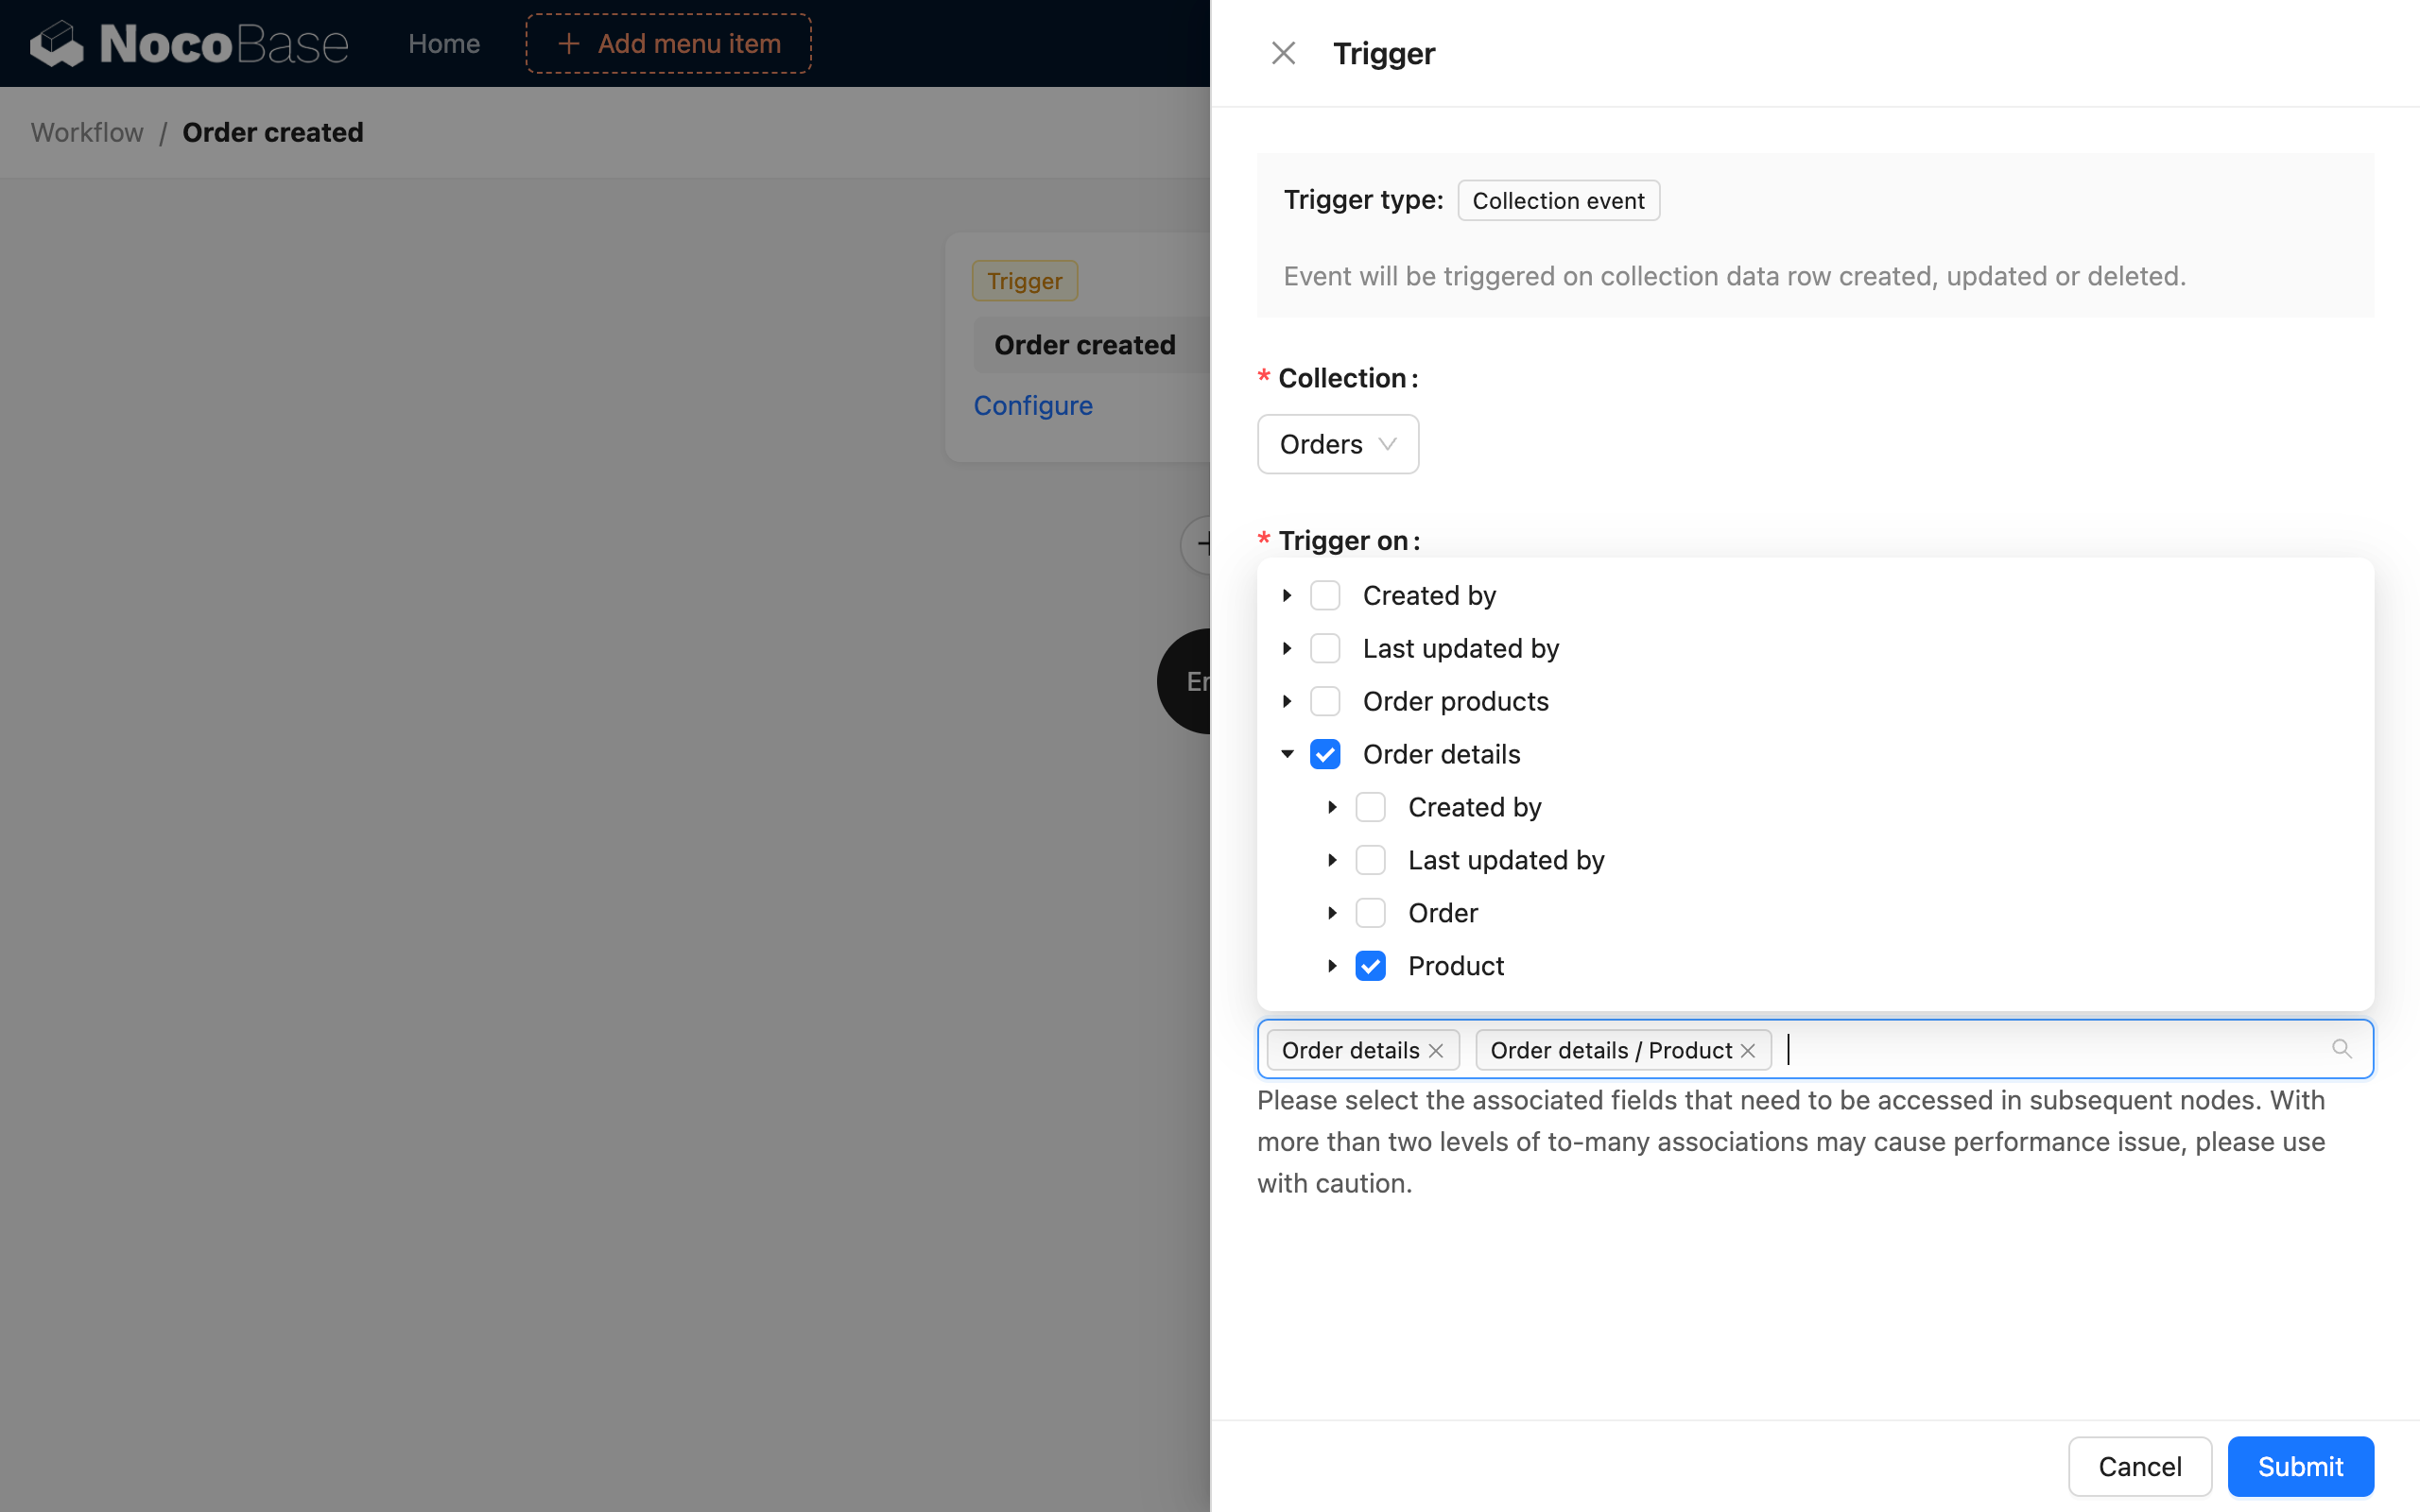
Create a workflow. For the trigger, select "Collection Event," and choose the "Orders" collection to trigger "After record added." You also need to configure it to preload the relationship data of the "Order Details" collection and the Products collection under the details:
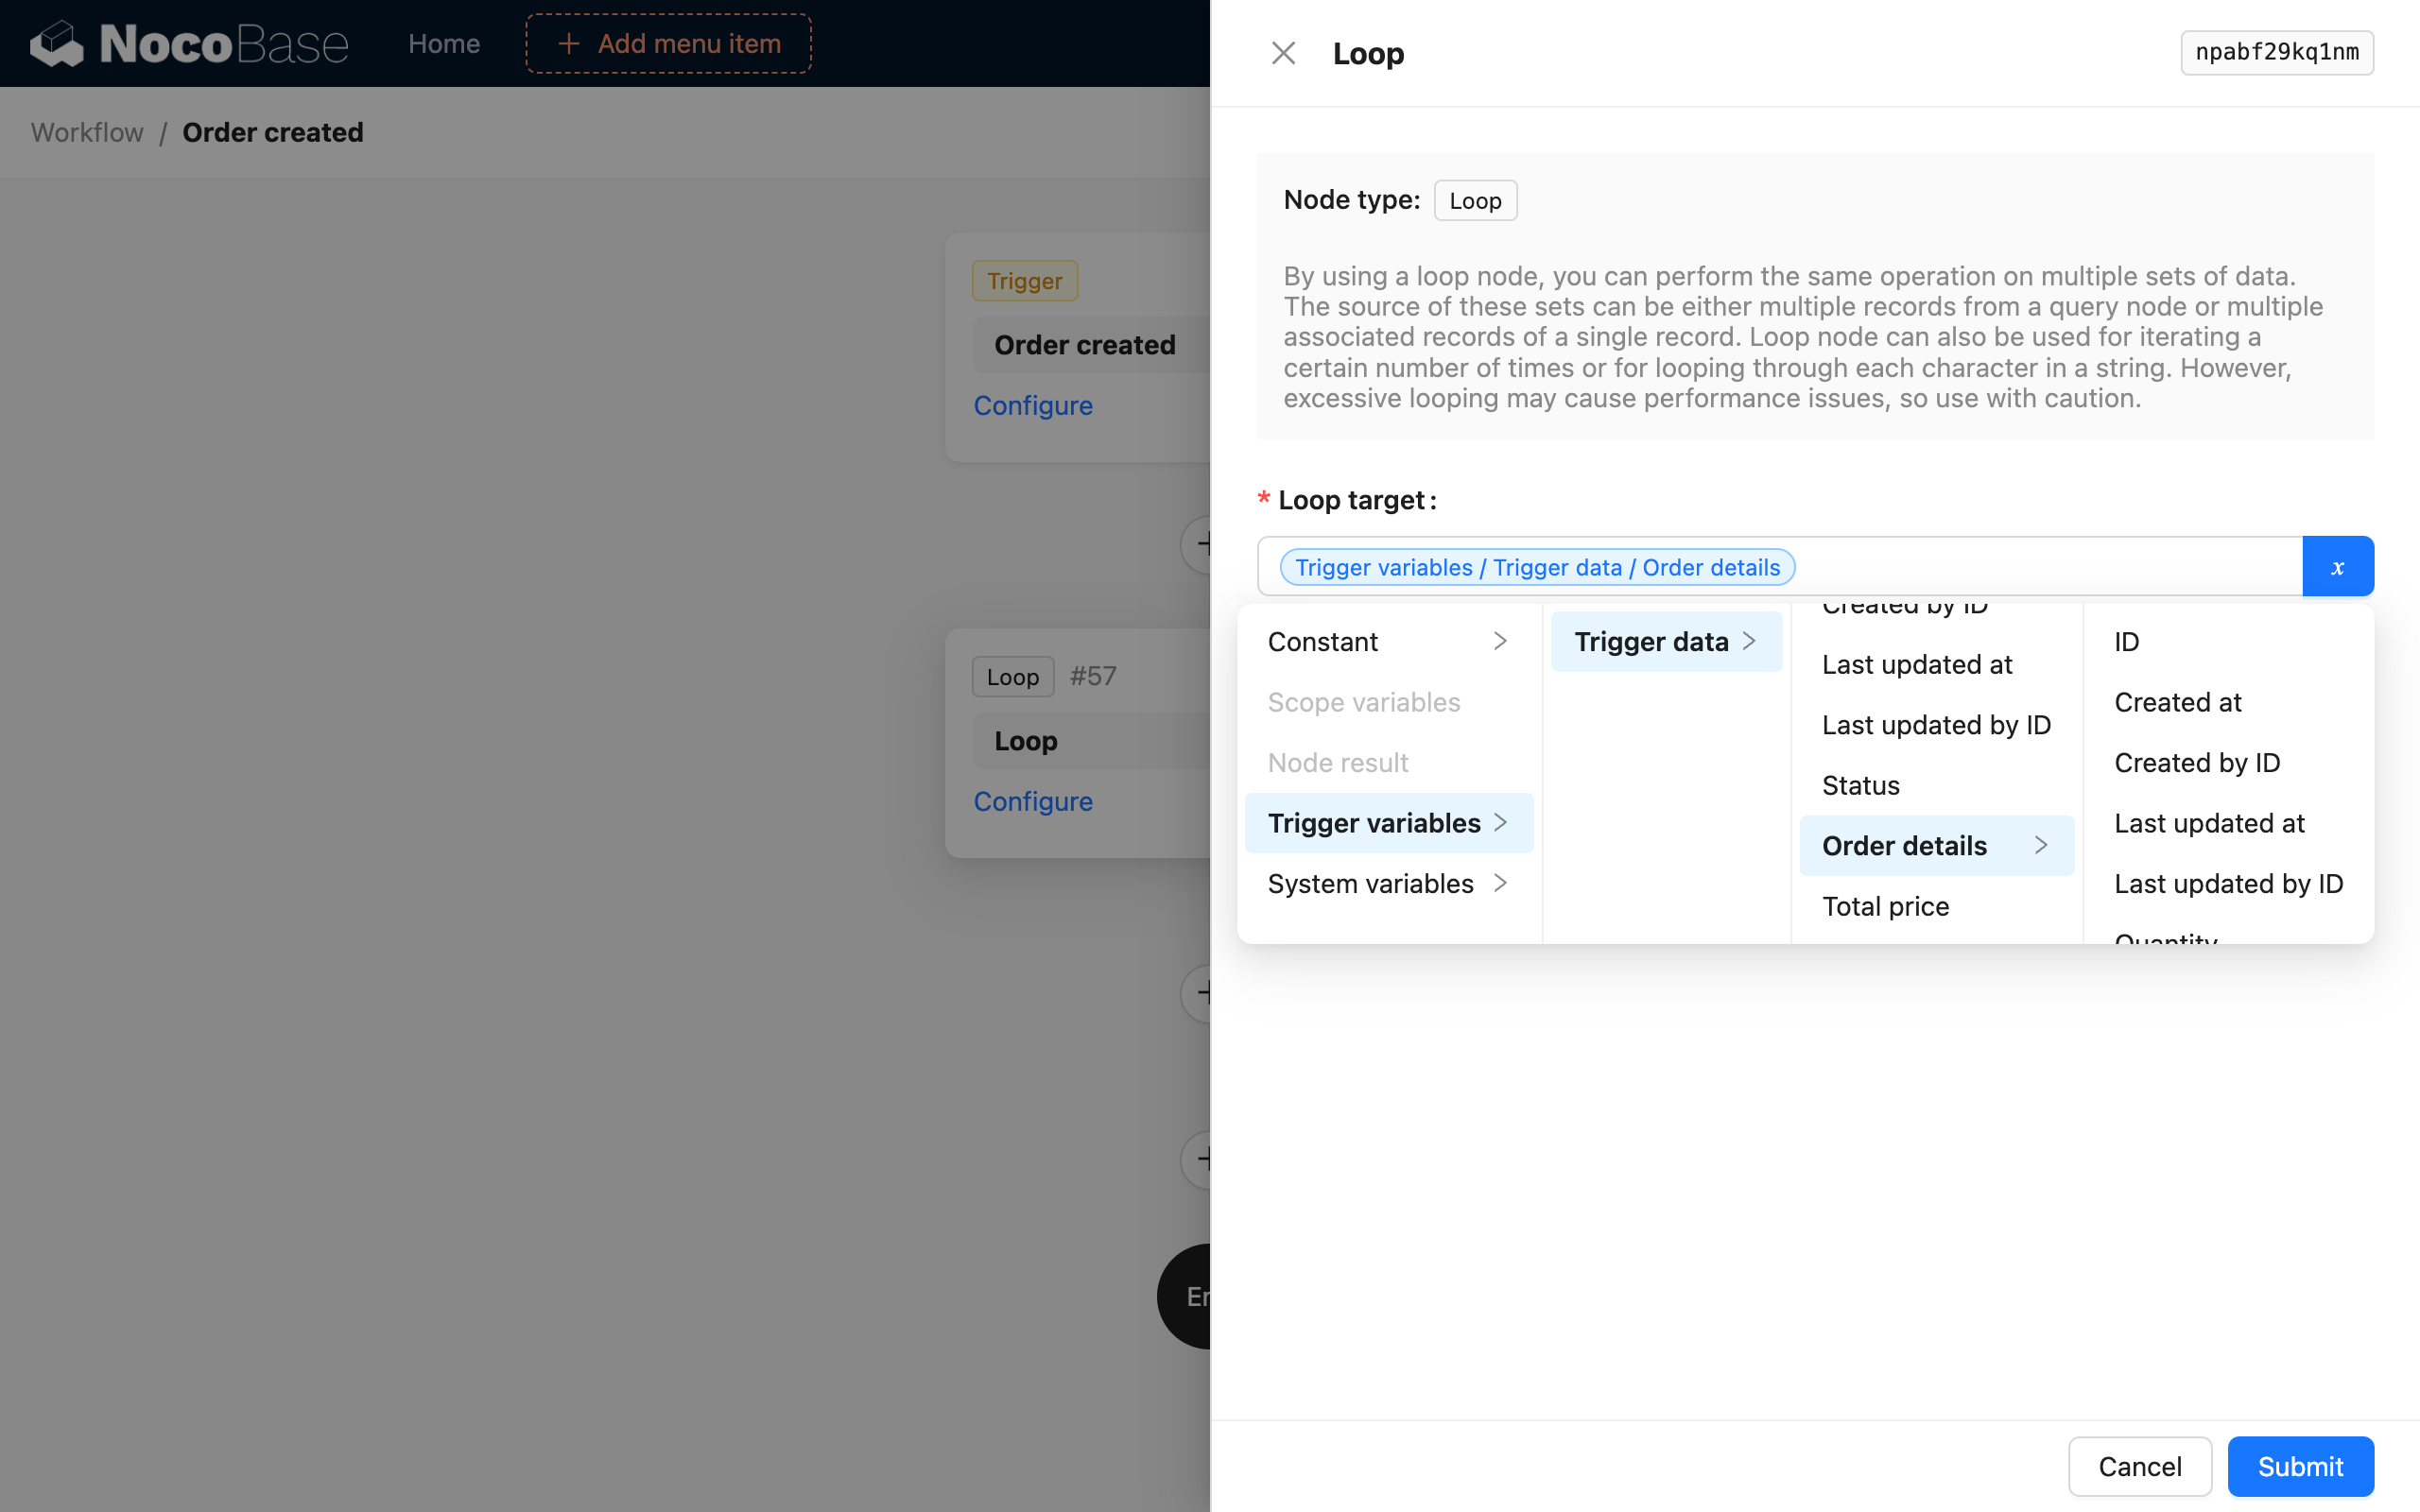
- Create a loop node and select the loop object as "Trigger data / Order Details," which means it will process each record in the Order Details collection:
- Inside the loop node, create a "Condition" node to check if the product's stock is sufficient:
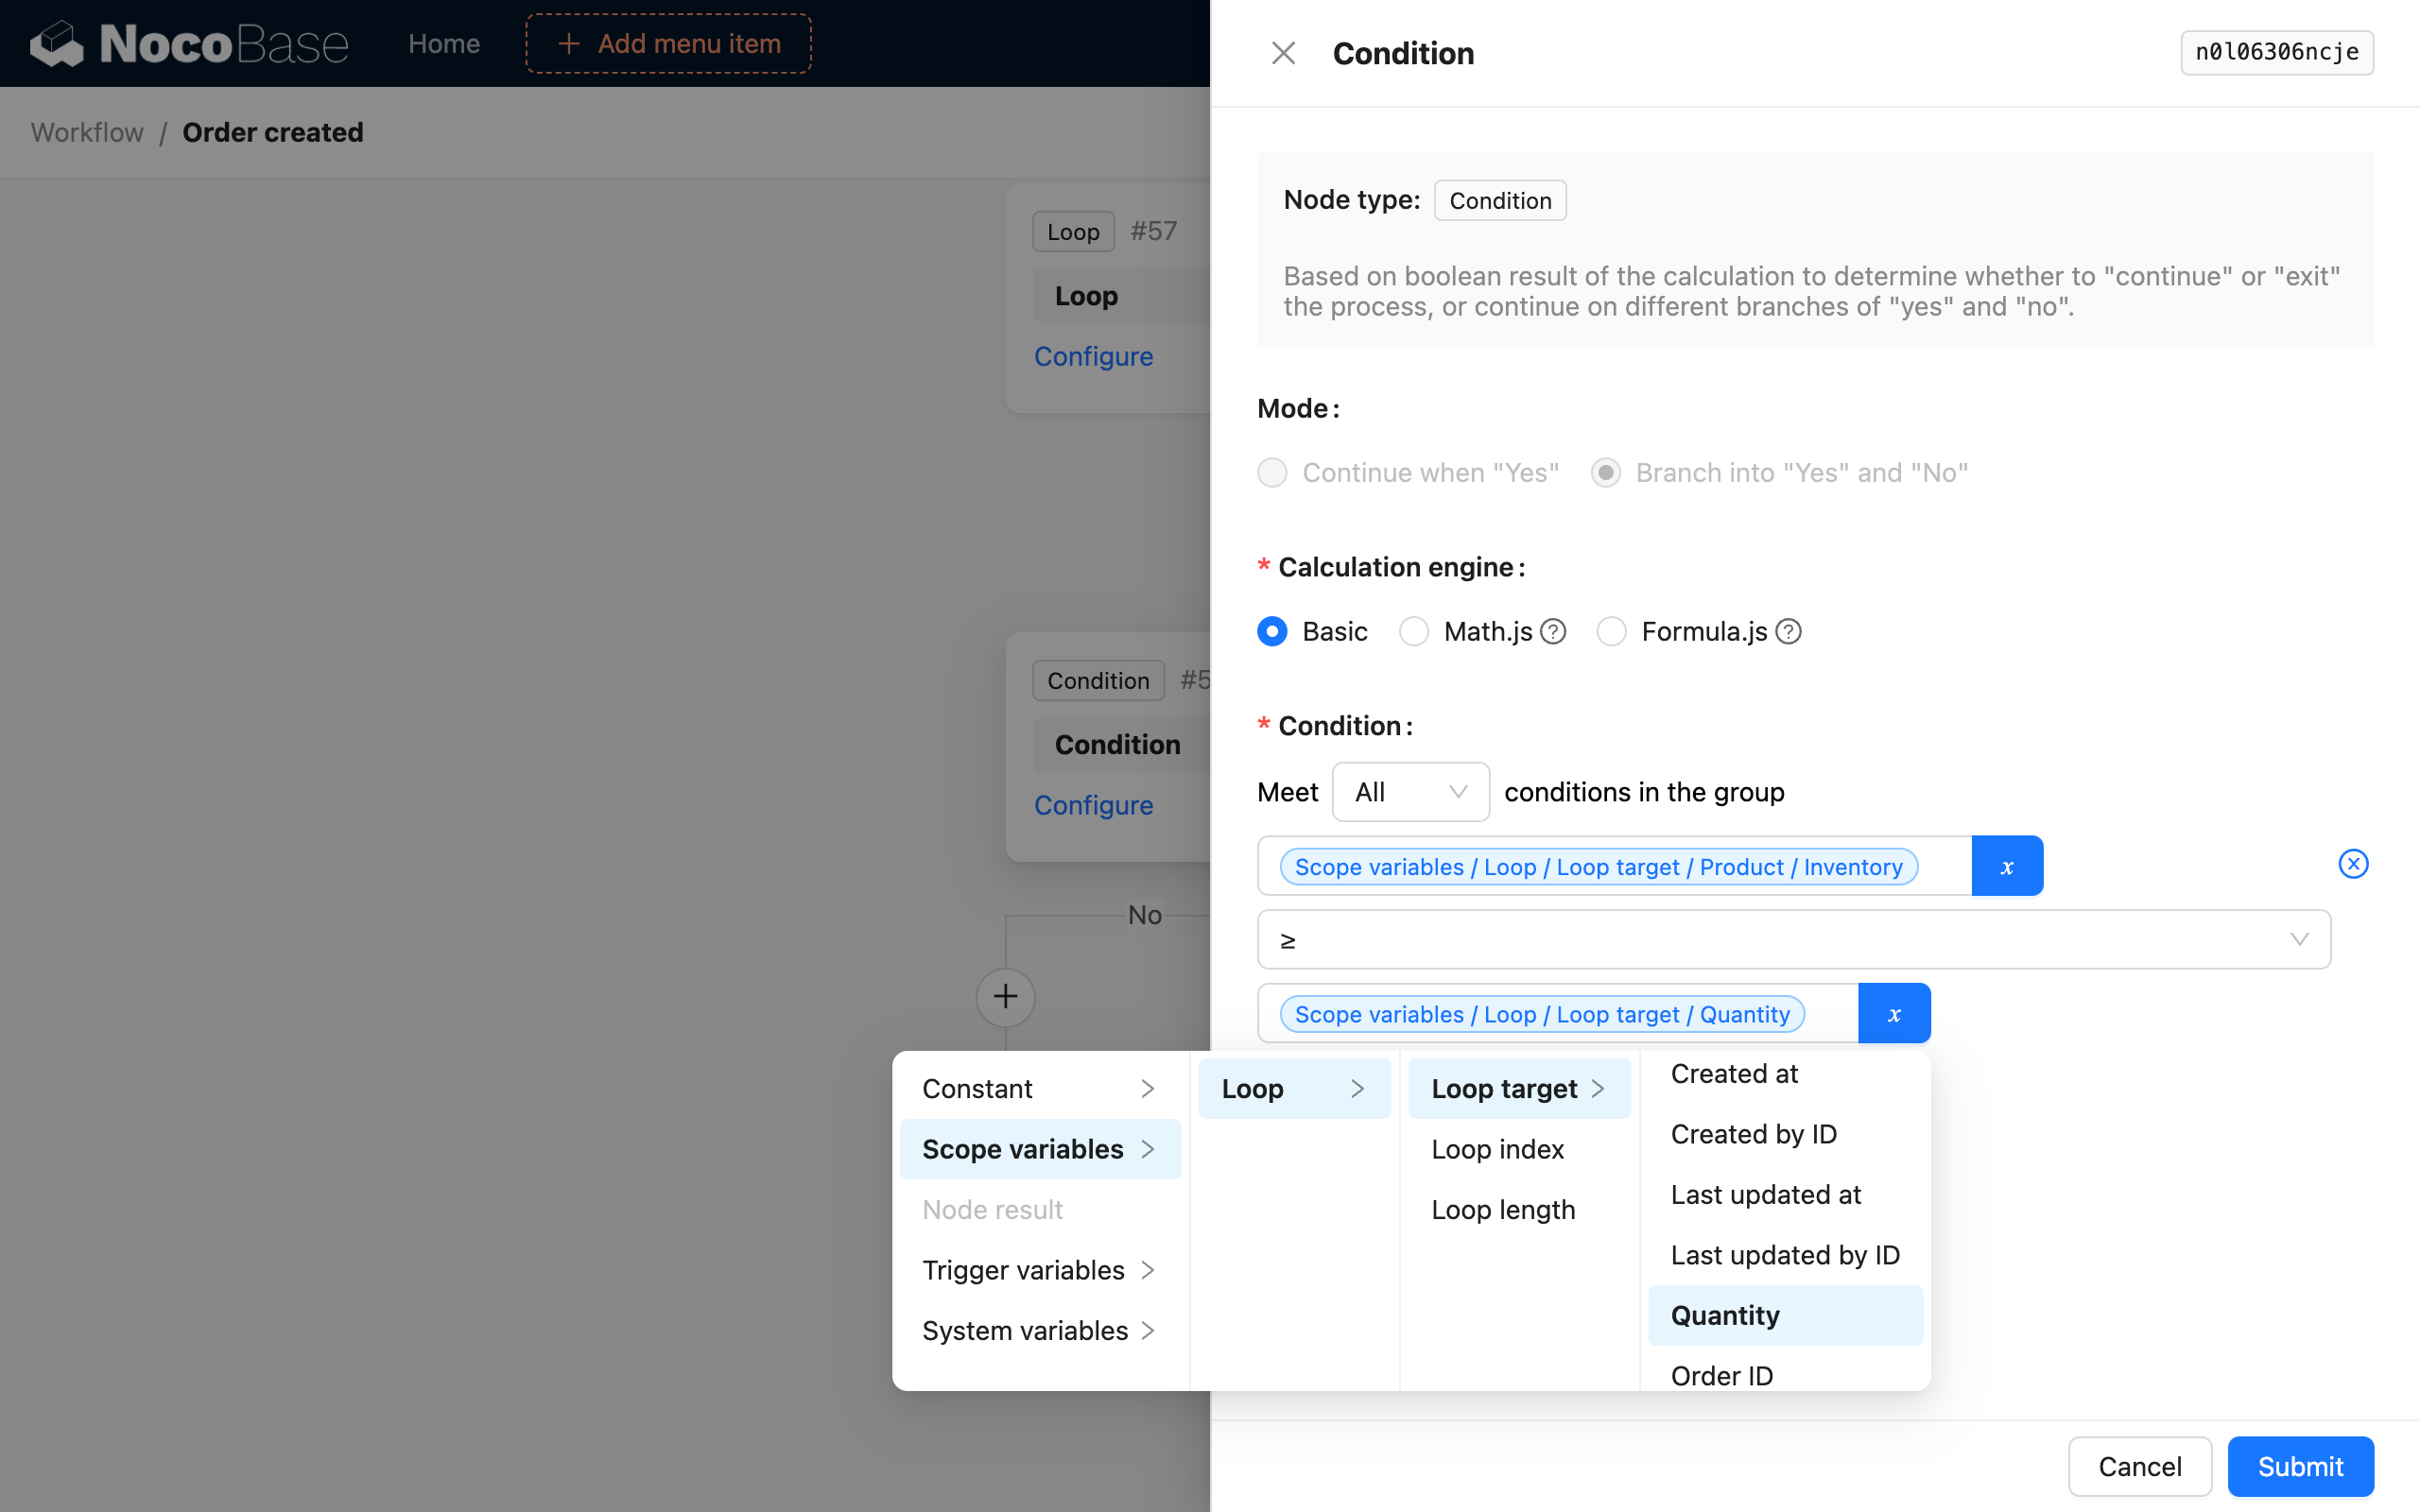
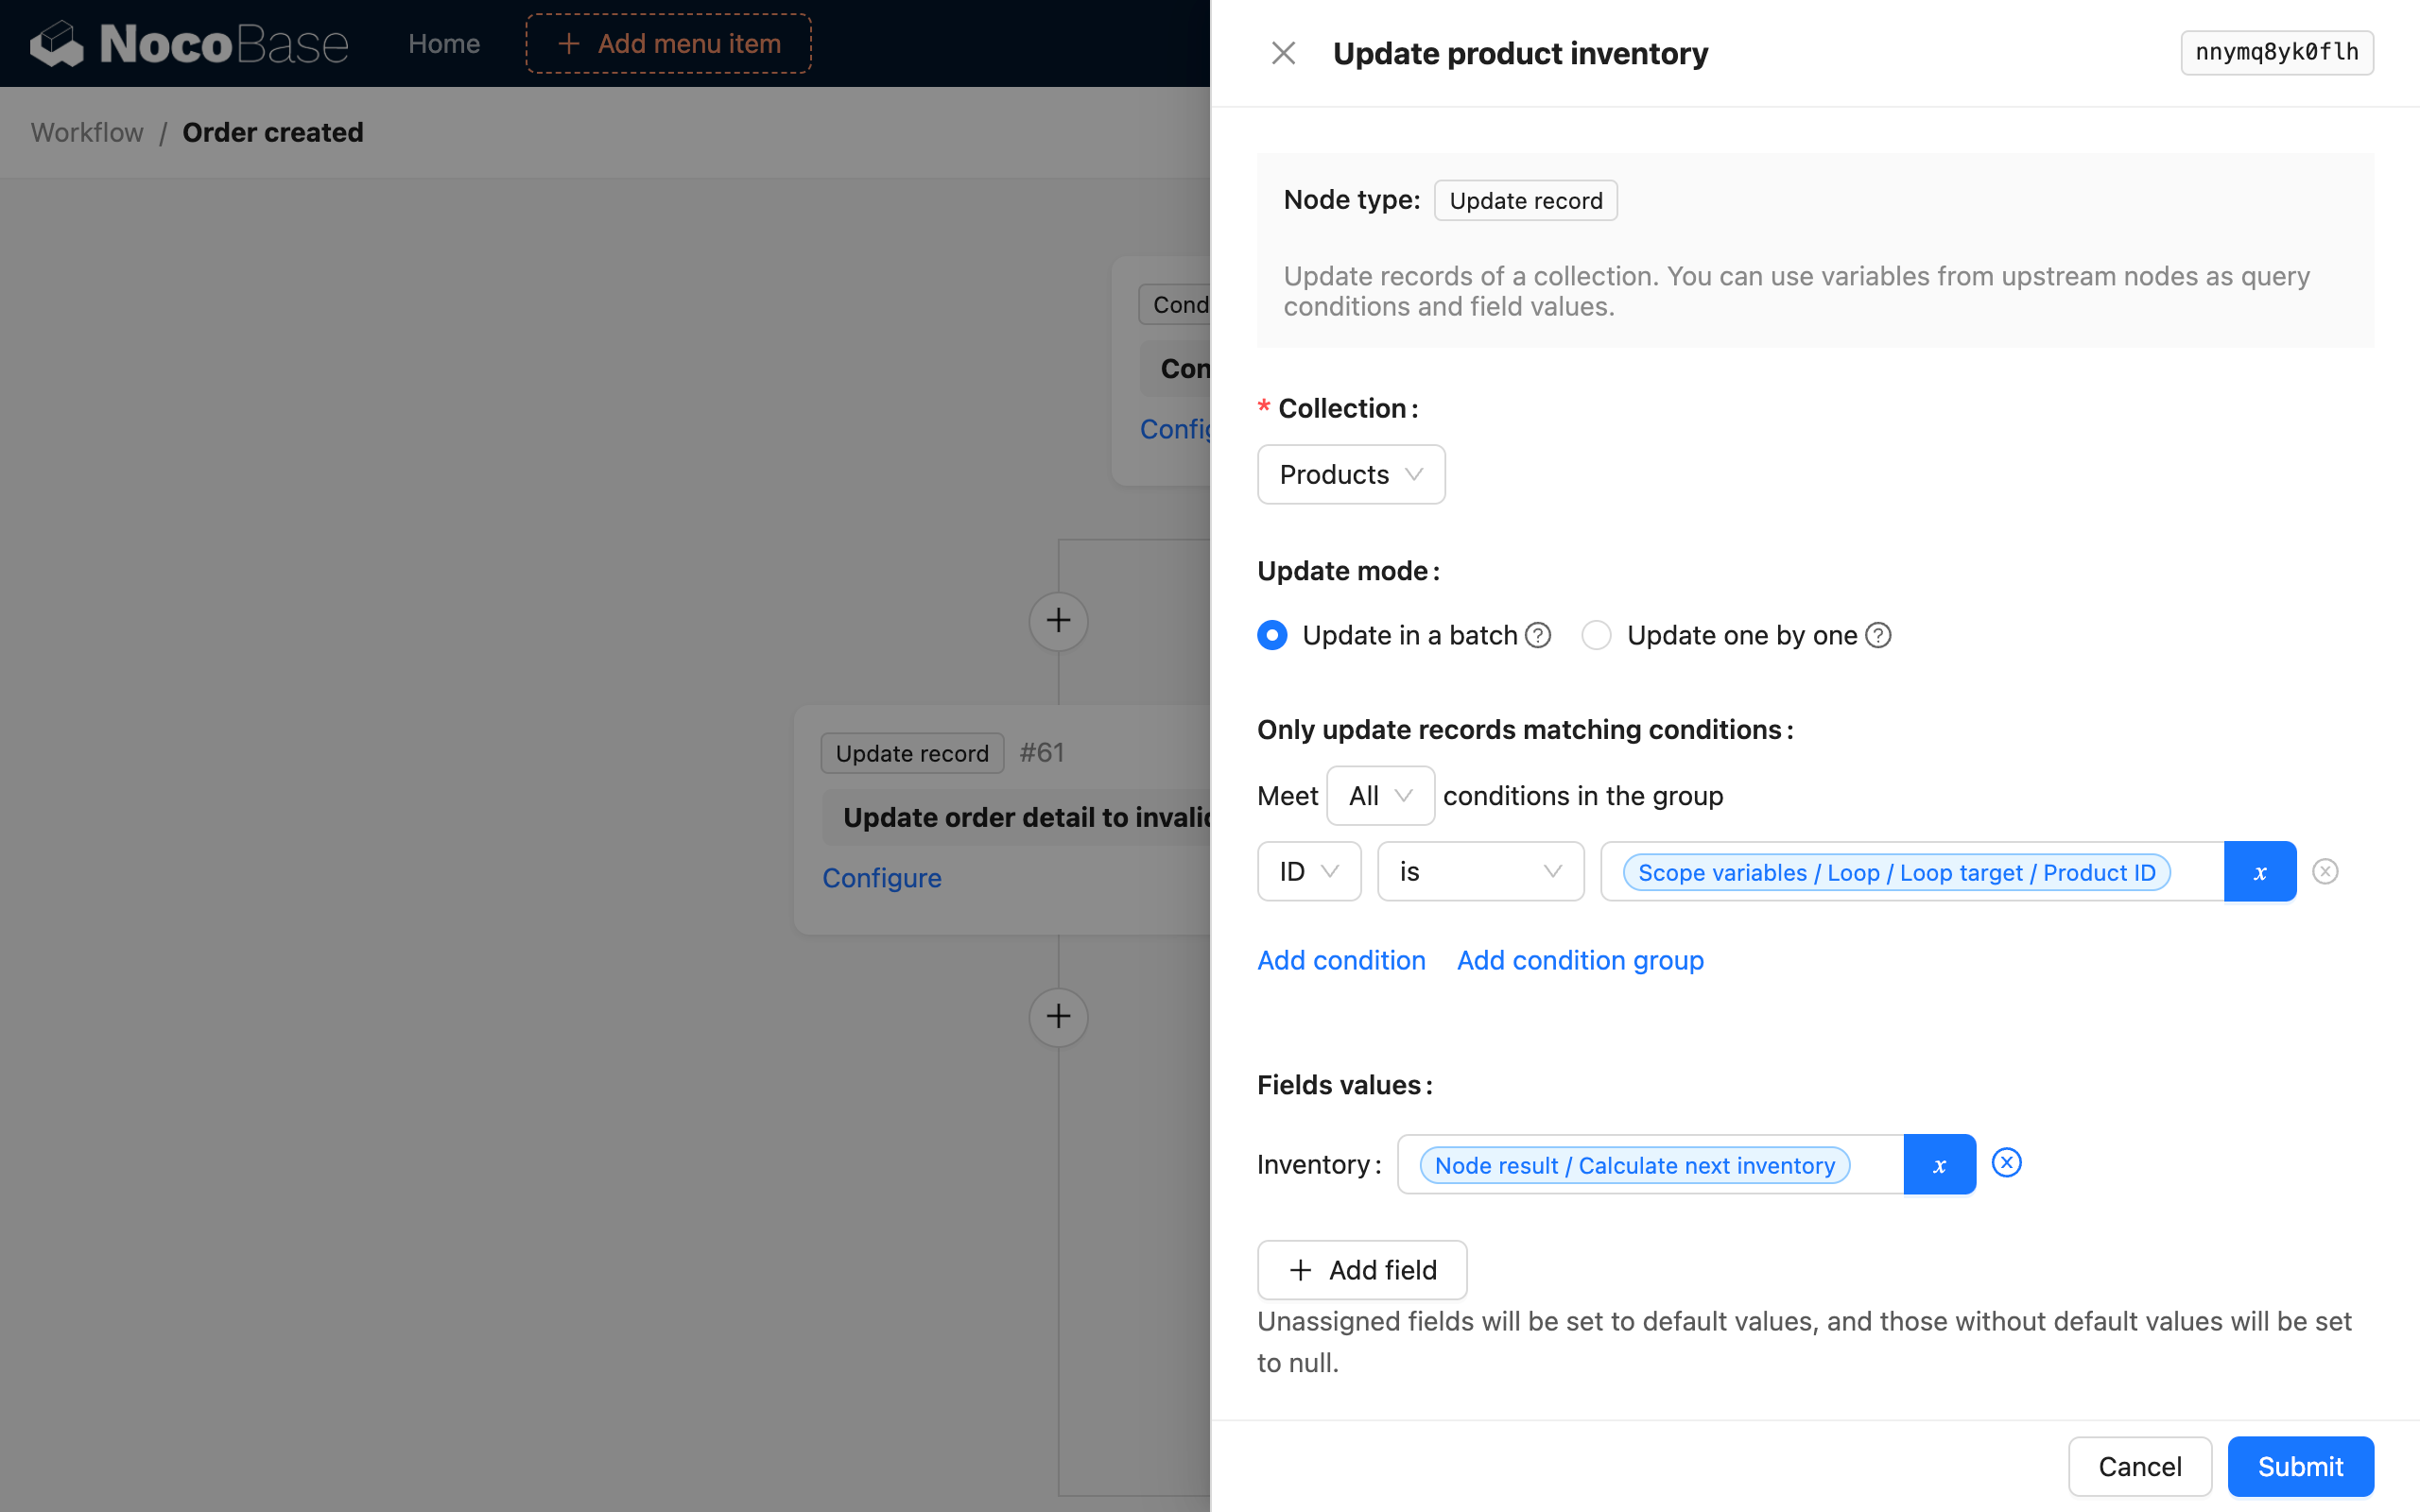
- If it is sufficient, create a "Calculation node" and an "Update record" node in the "Yes" branch to update the corresponding product record with the calculated deducted stock:

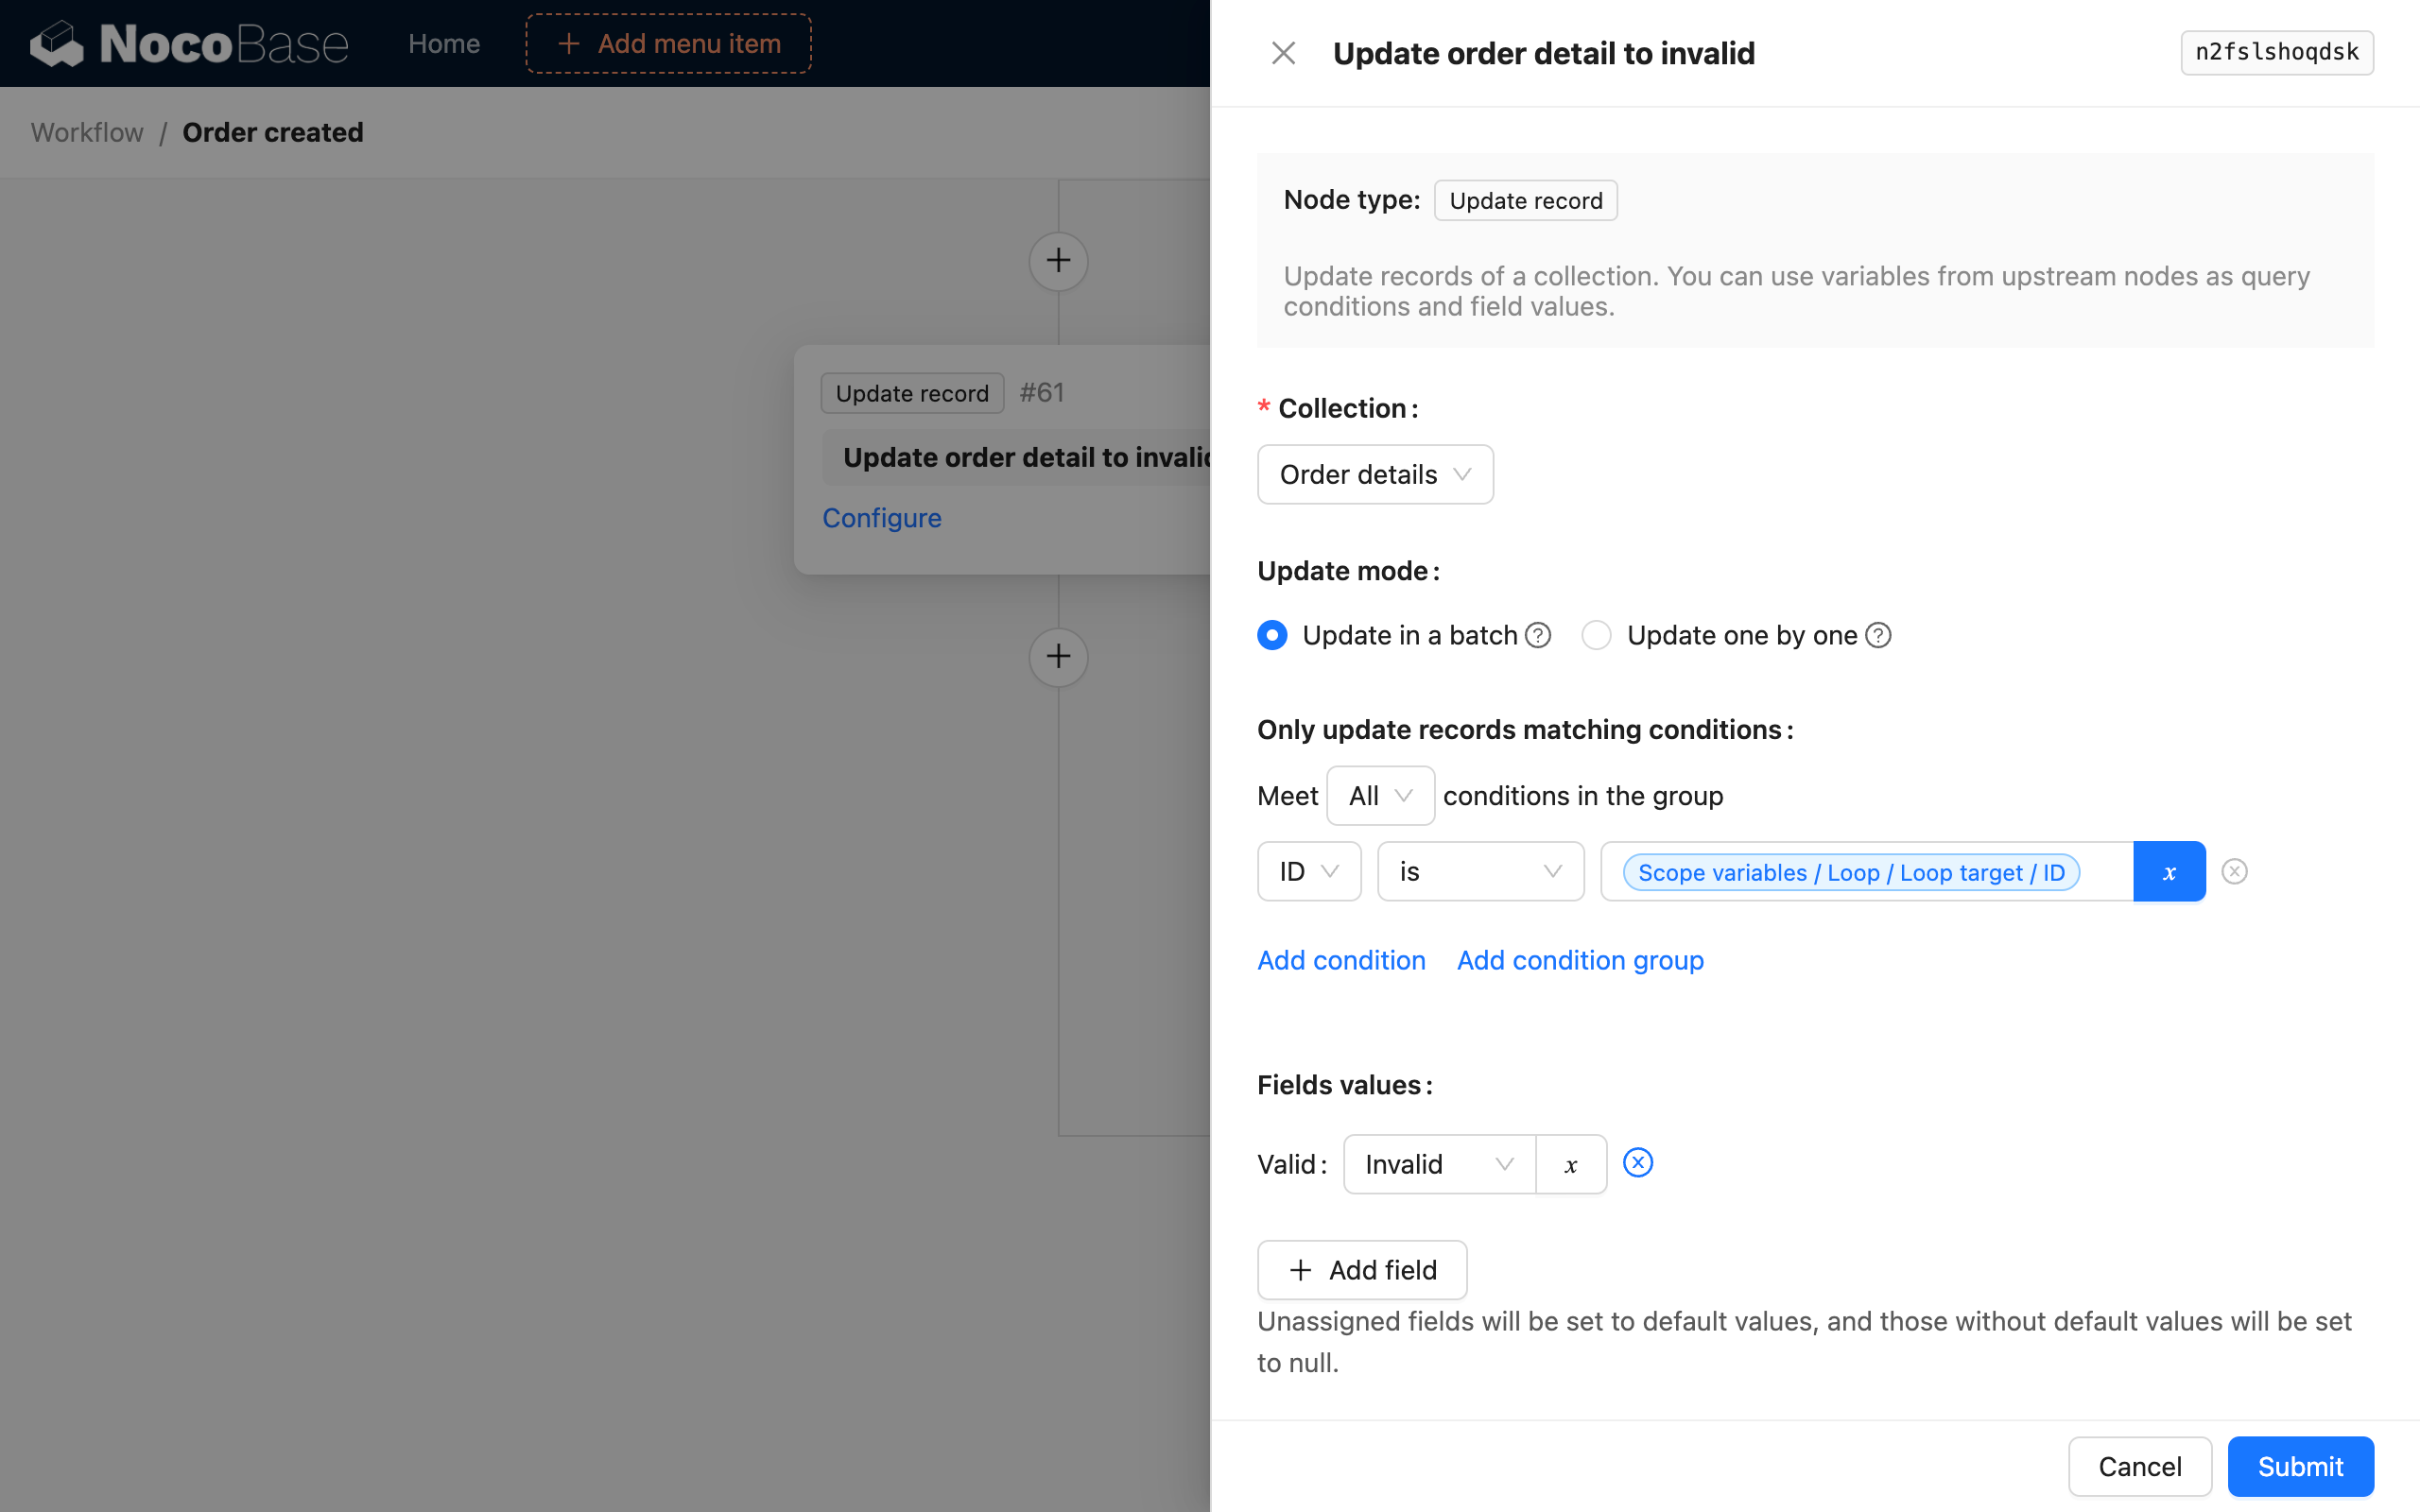
- Otherwise, in the "No" branch, create an "Update record" node to update the status of the order detail to "invalid":
The overall workflow structure is as follows:
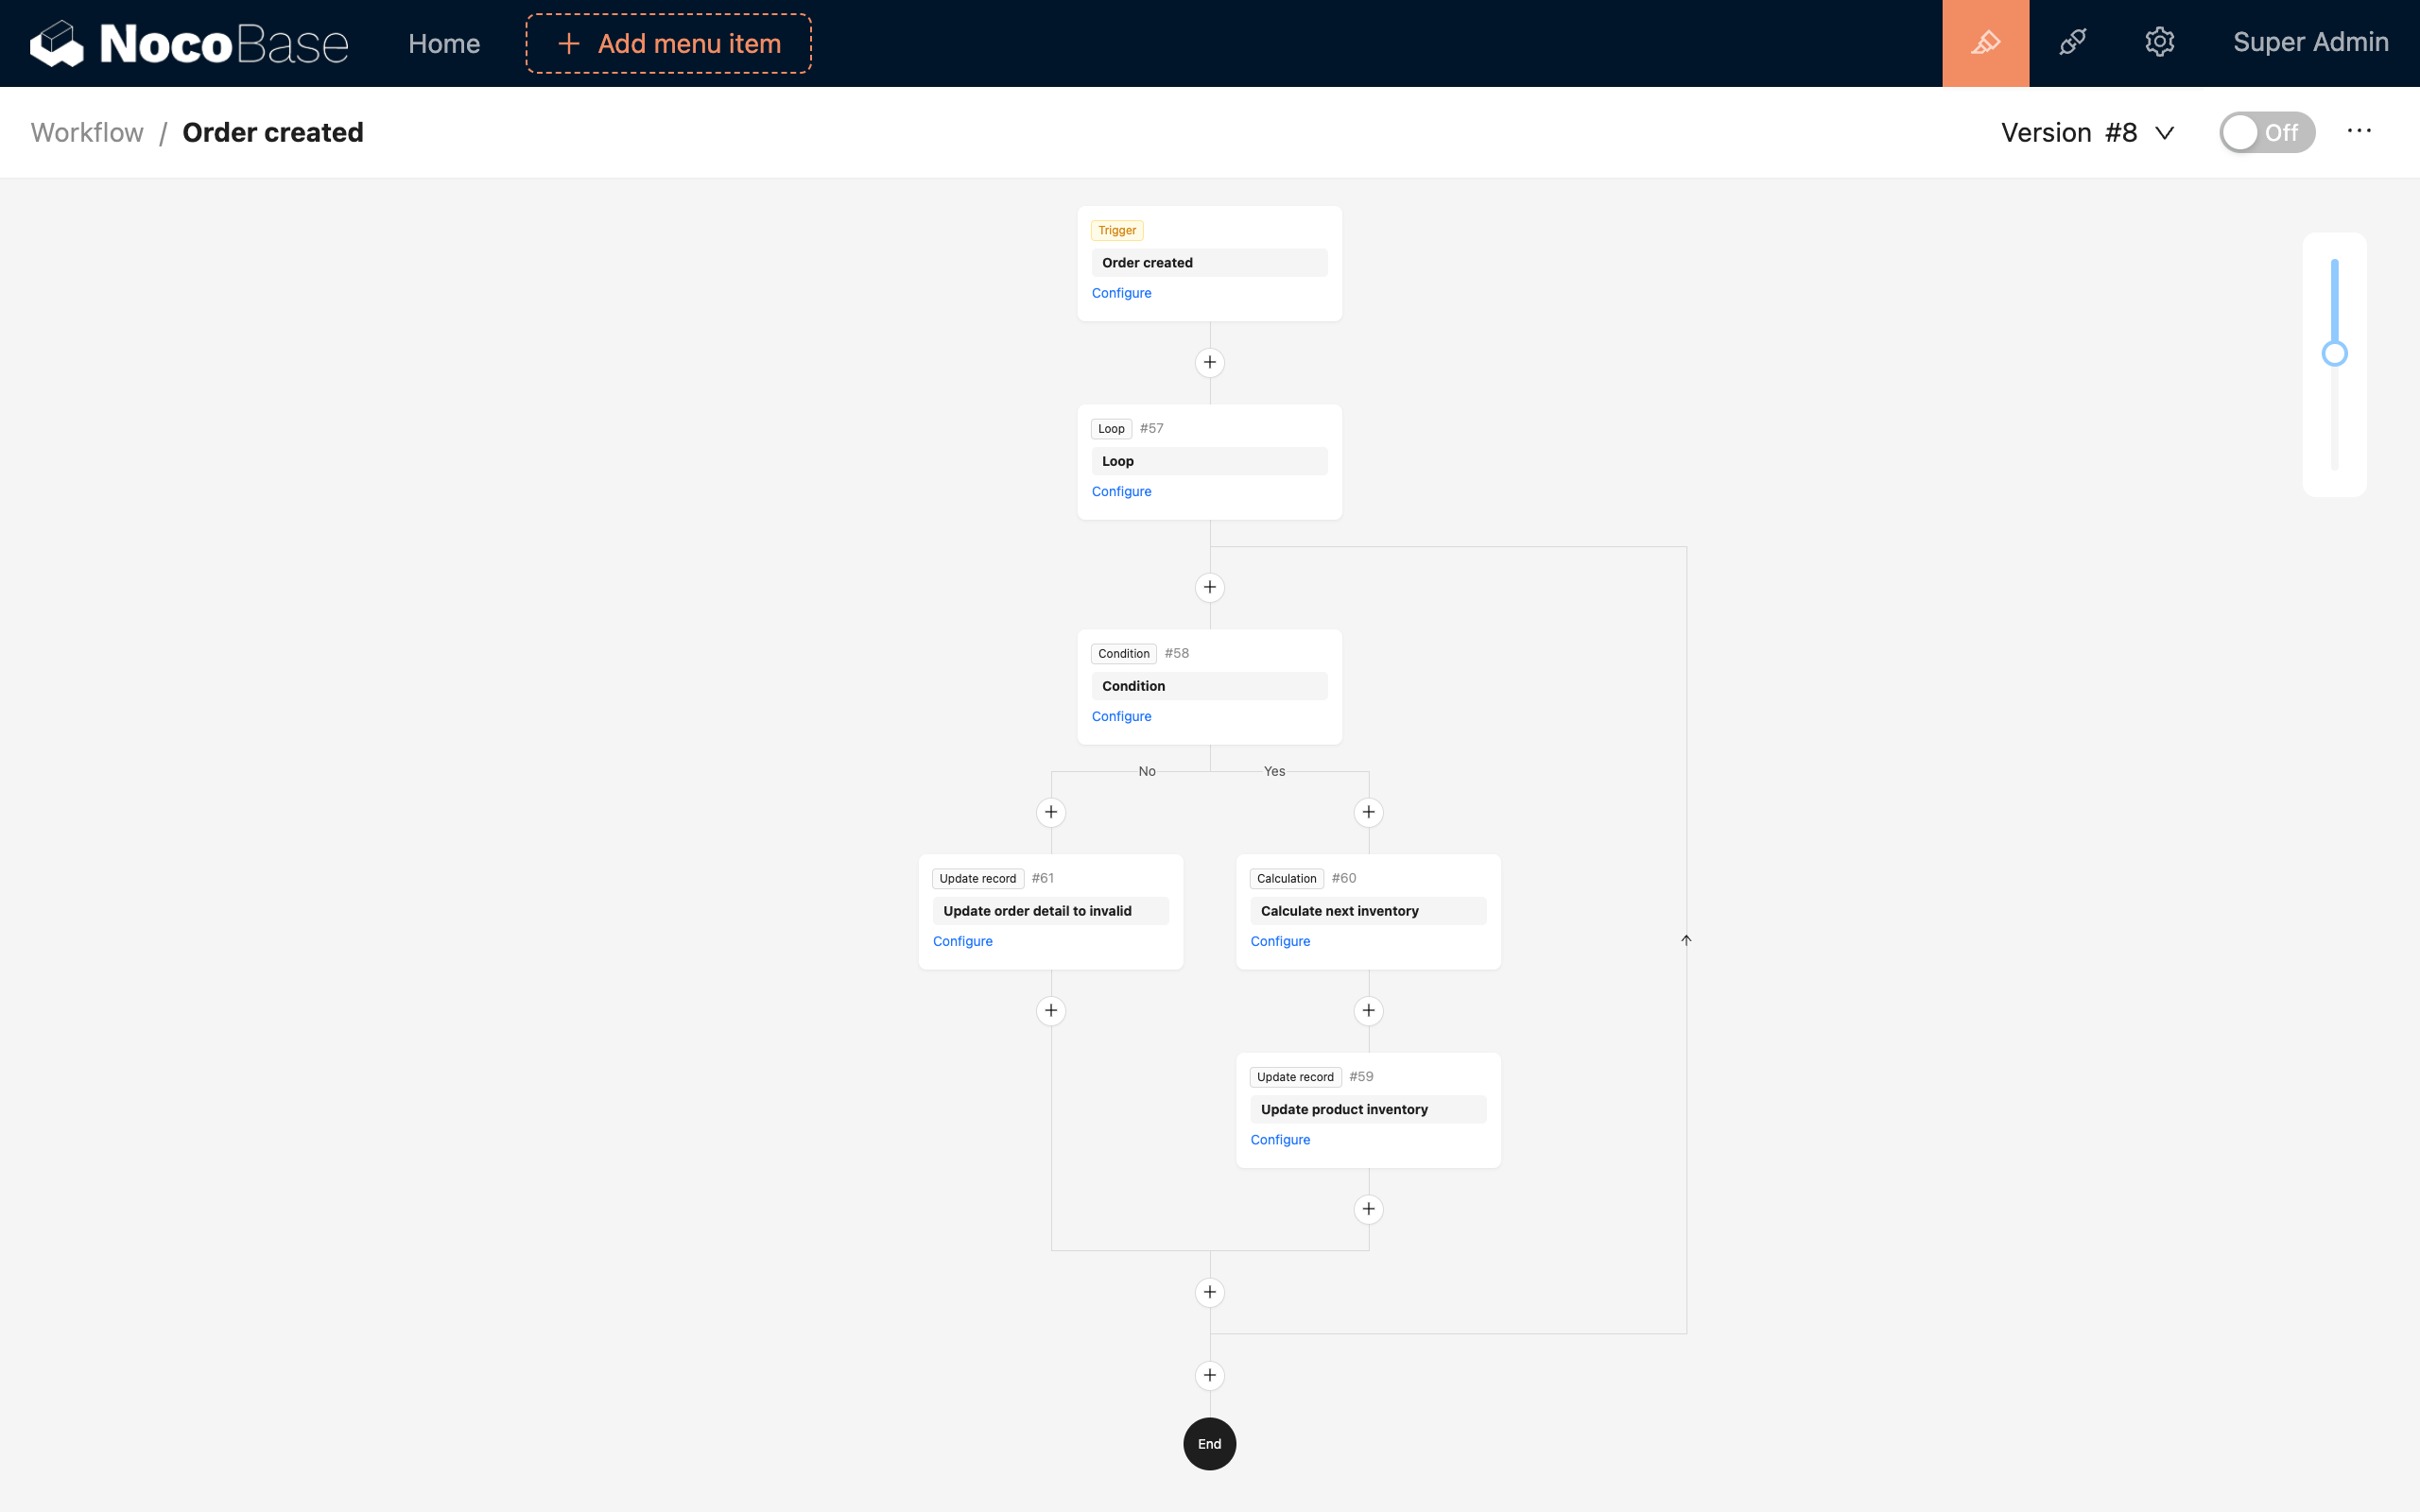
After configuring and activating this workflow, when a new order is created, it will automatically check the stock of the products in the order details. If the stock is sufficient, it will be deducted; otherwise, the product in the order detail will be updated to invalid (so that a valid order total can be calculated).