

Custom Action Event
This feature is provided by the commercial plugin «Workflow: Custom action event», please purchase to useIntroduction
NocoBase has built-in common data actions (add, delete, update, view, etc.). When these actions cannot meet complex business needs, you can use custom action events in a workflow. By binding this event to a "Trigger Workflow" button in a page block, a custom action workflow will be triggered when a user clicks it.
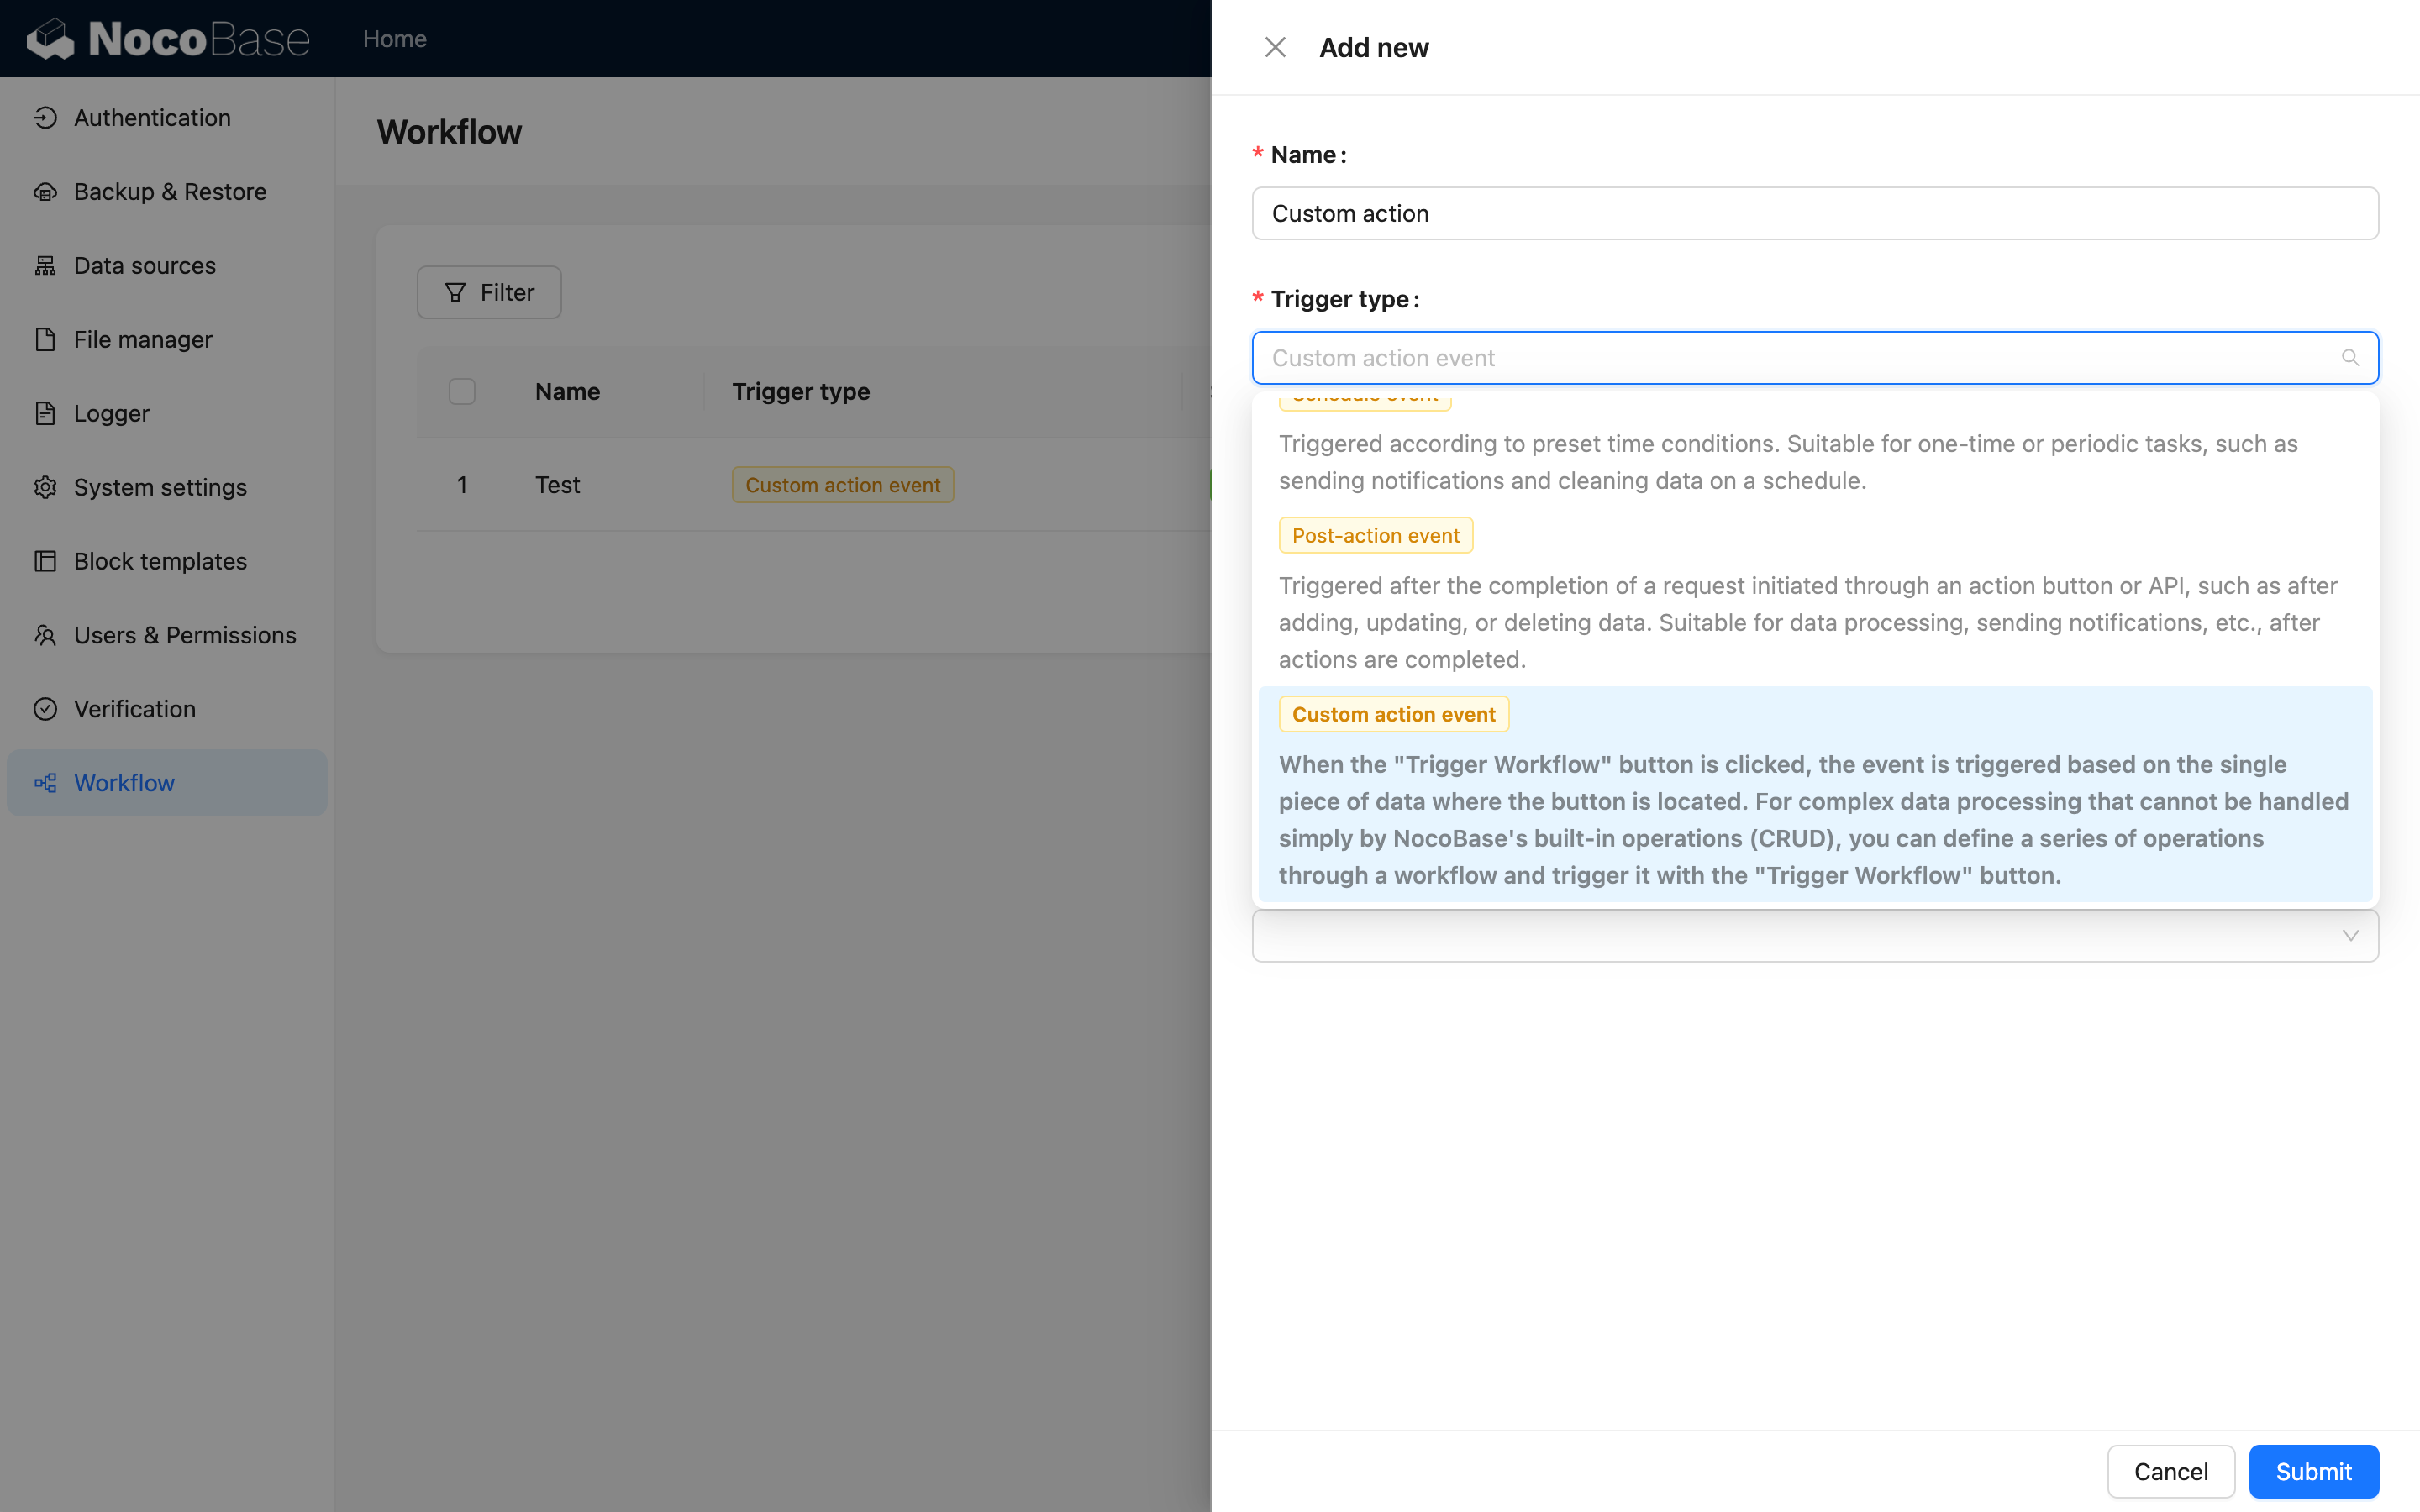
Create a Workflow
When creating a workflow, select "Custom Action Event":
Trigger Configuration
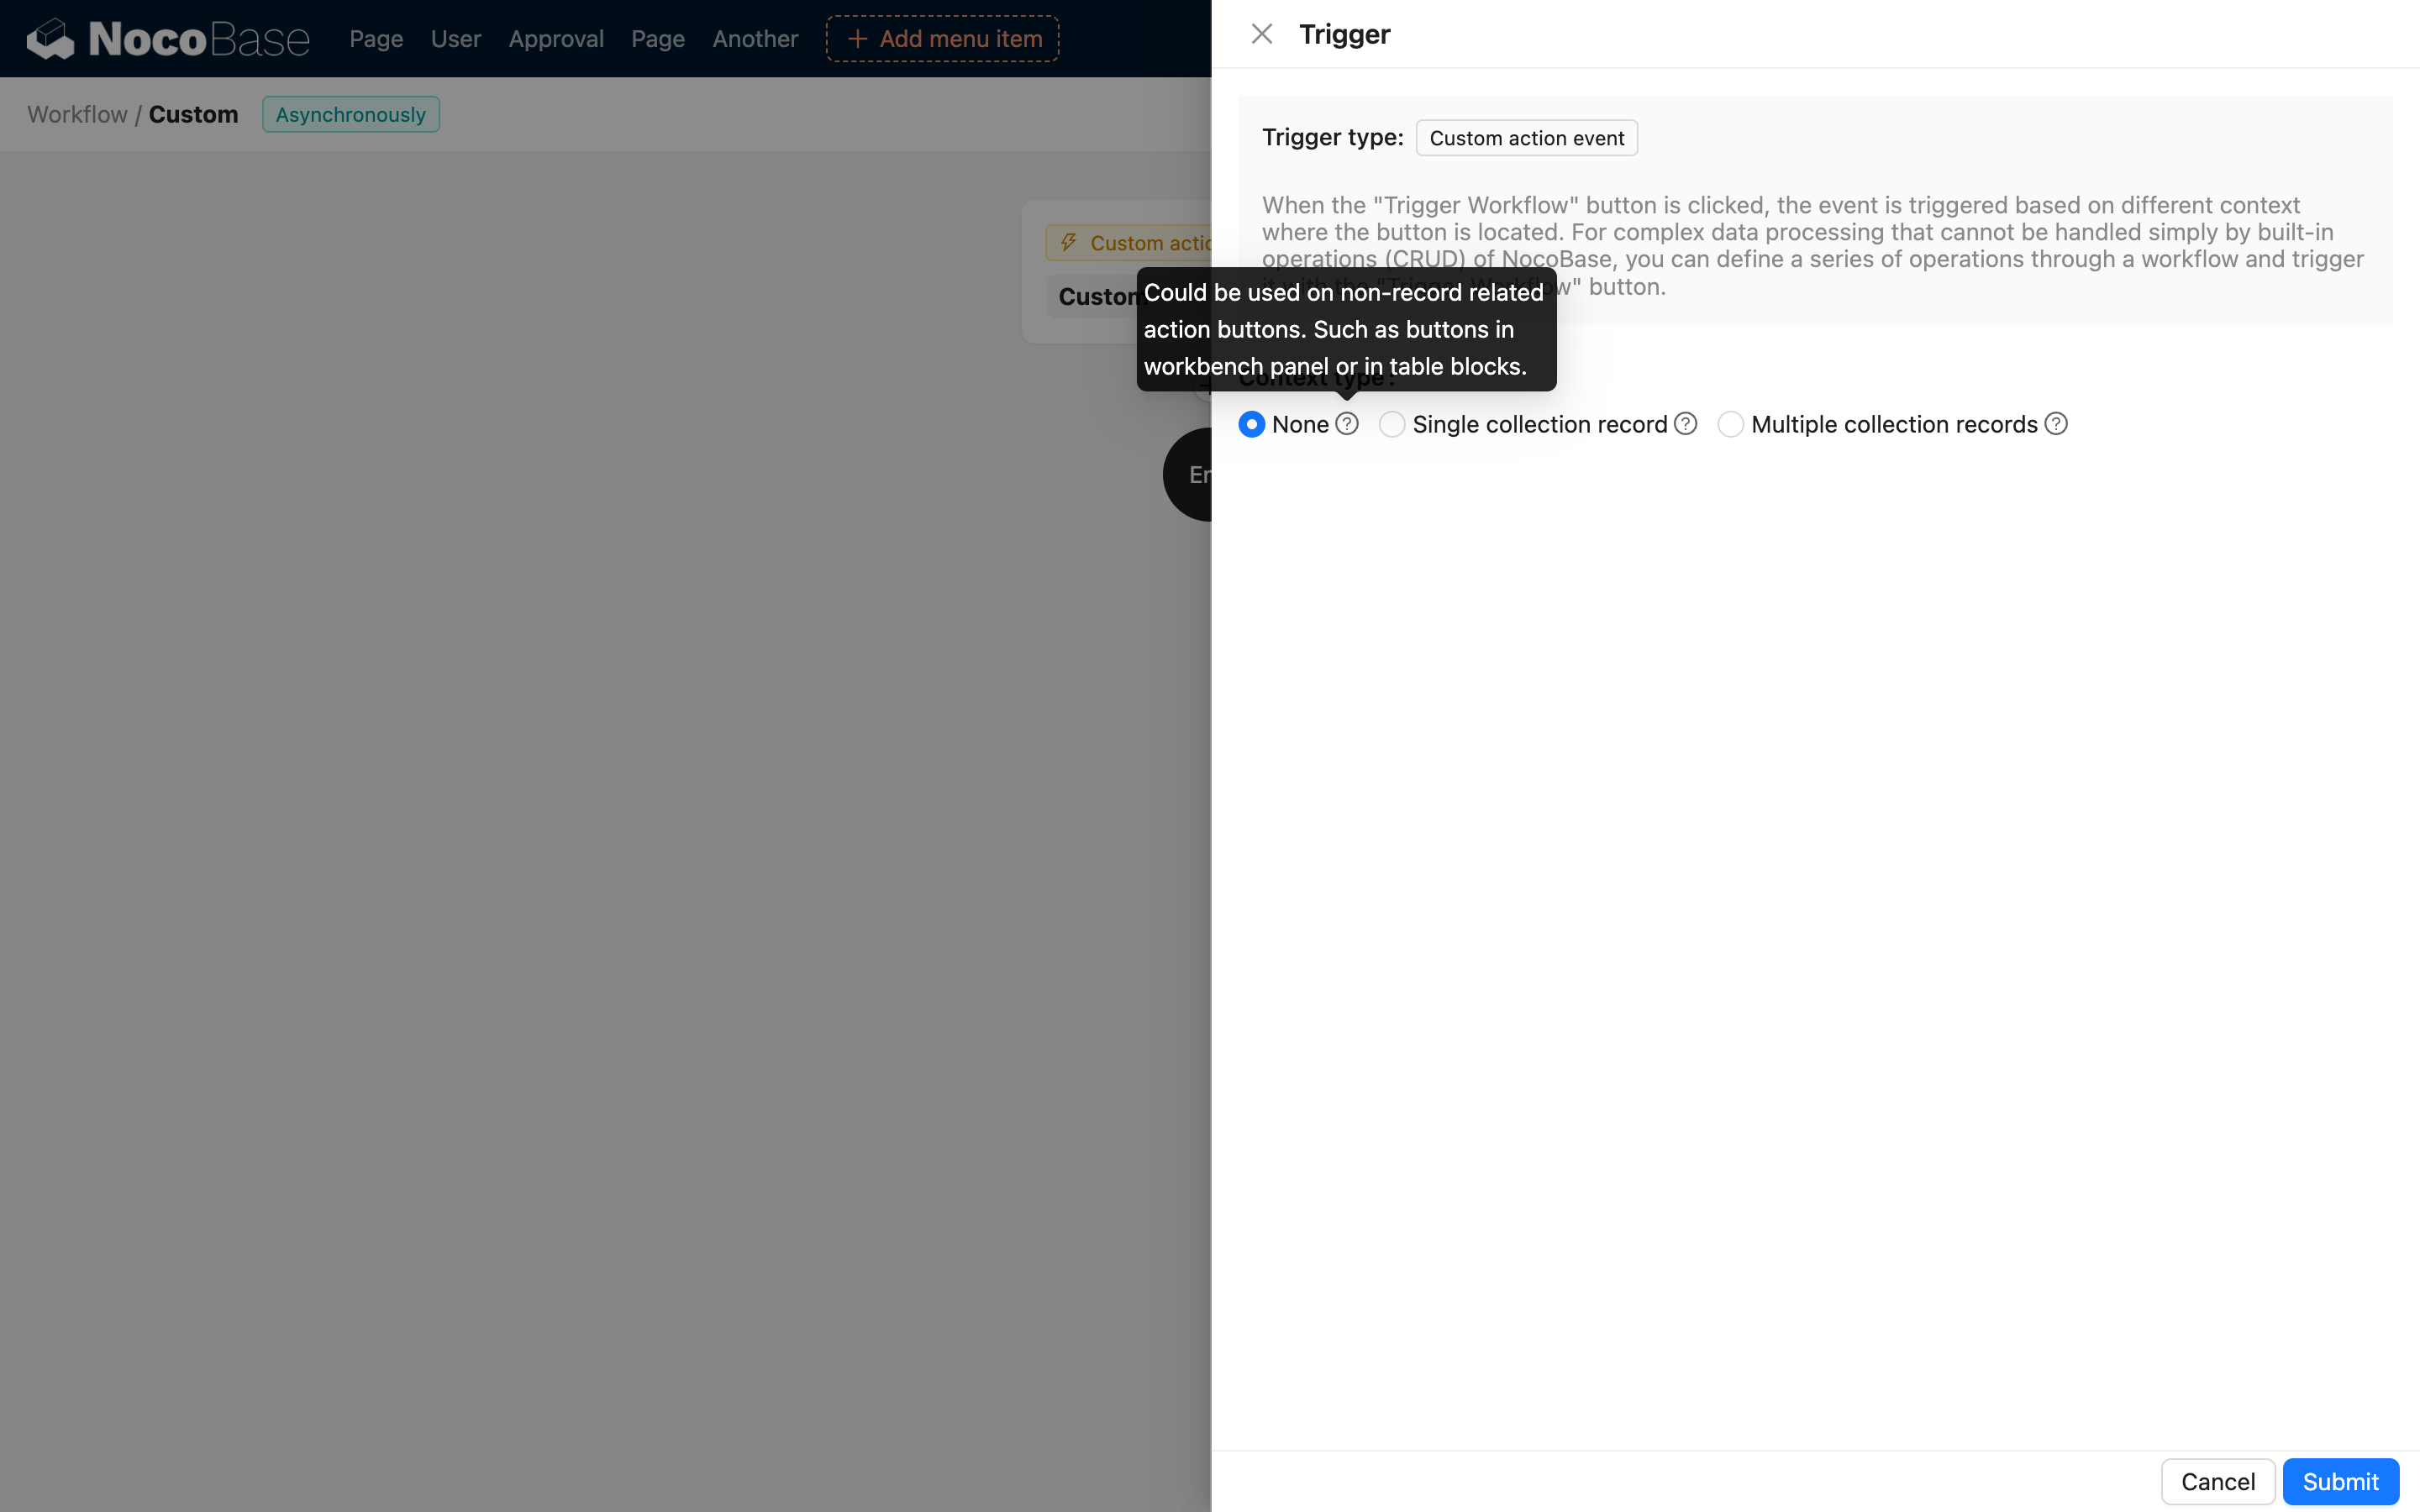
Context Type
v1.6.0+
The context type determines which block buttons the workflow can be bound to:
- No Context: A global event that can be bound to action buttons in the Action Bar and data blocks.
- Single Record: Can be bound to action buttons in data blocks such as table rows, forms, and details.
- Multiple Records: Can be bound to bulk action buttons in a table.
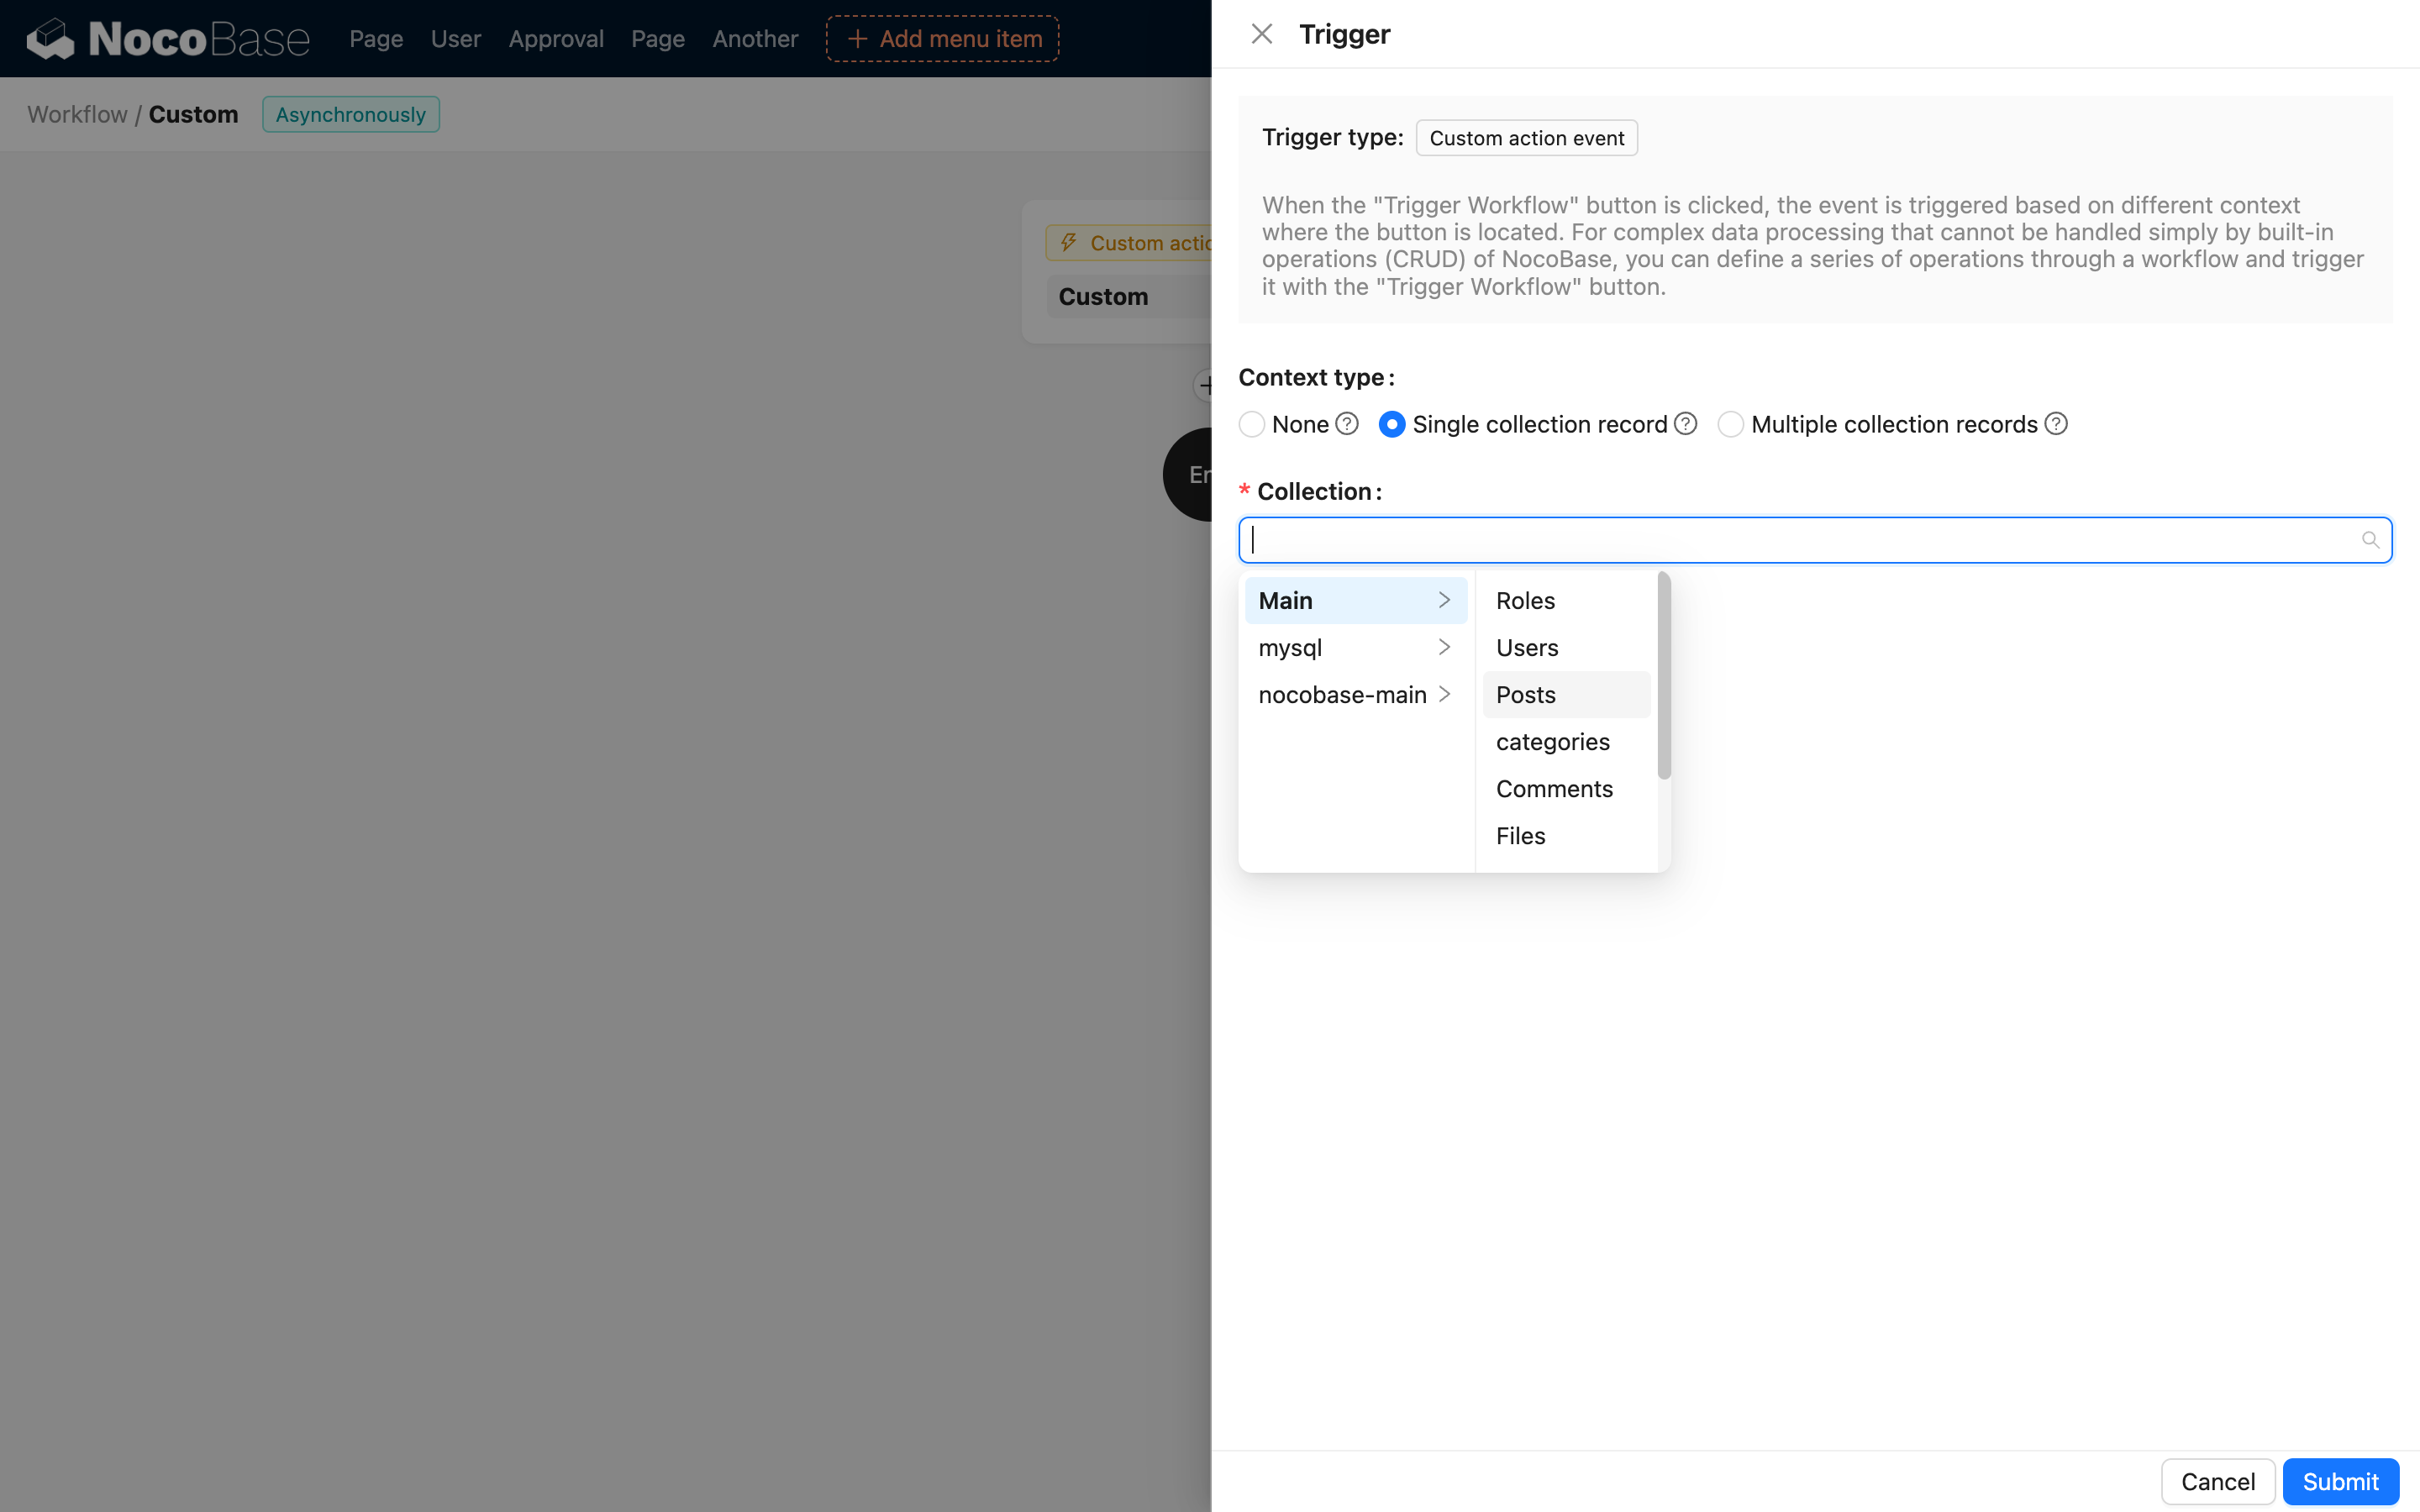
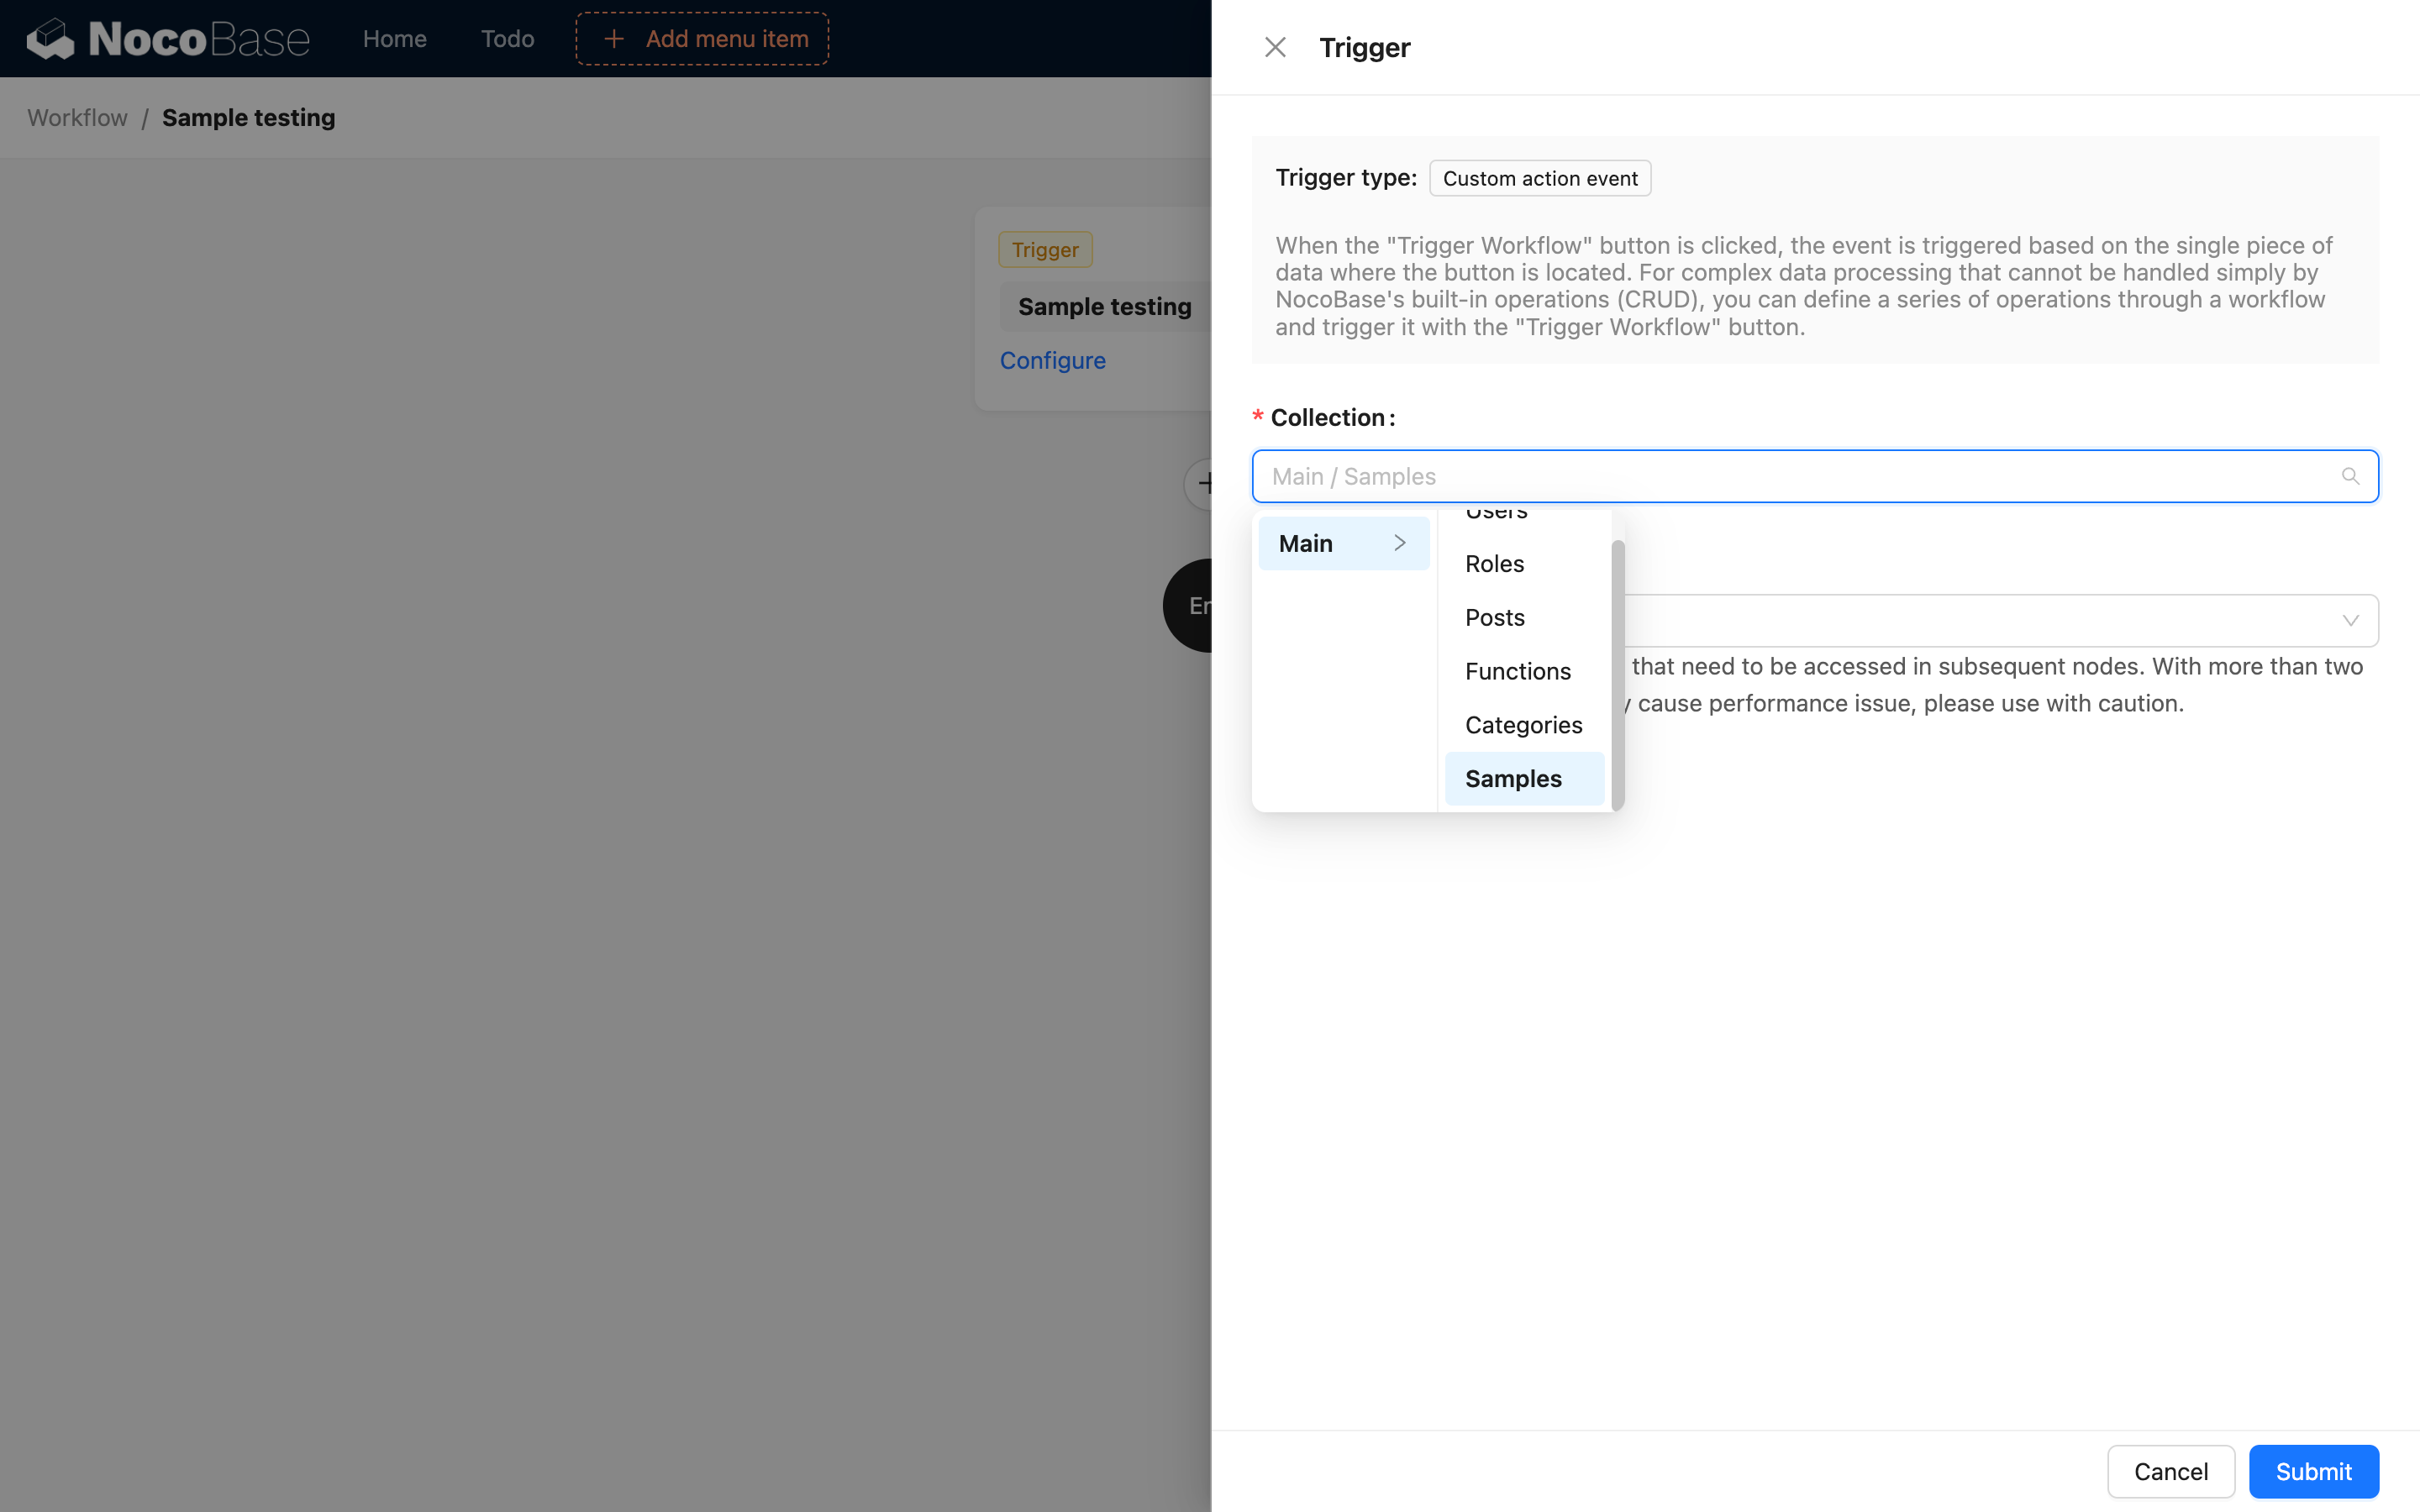
Collection
When the context type is Single Record or Multiple Records, you need to select the collection to bind the data model to:
Association Data to be Used
If you need to use the association data of the triggering data row in the workflow, you can select deep association fields here:
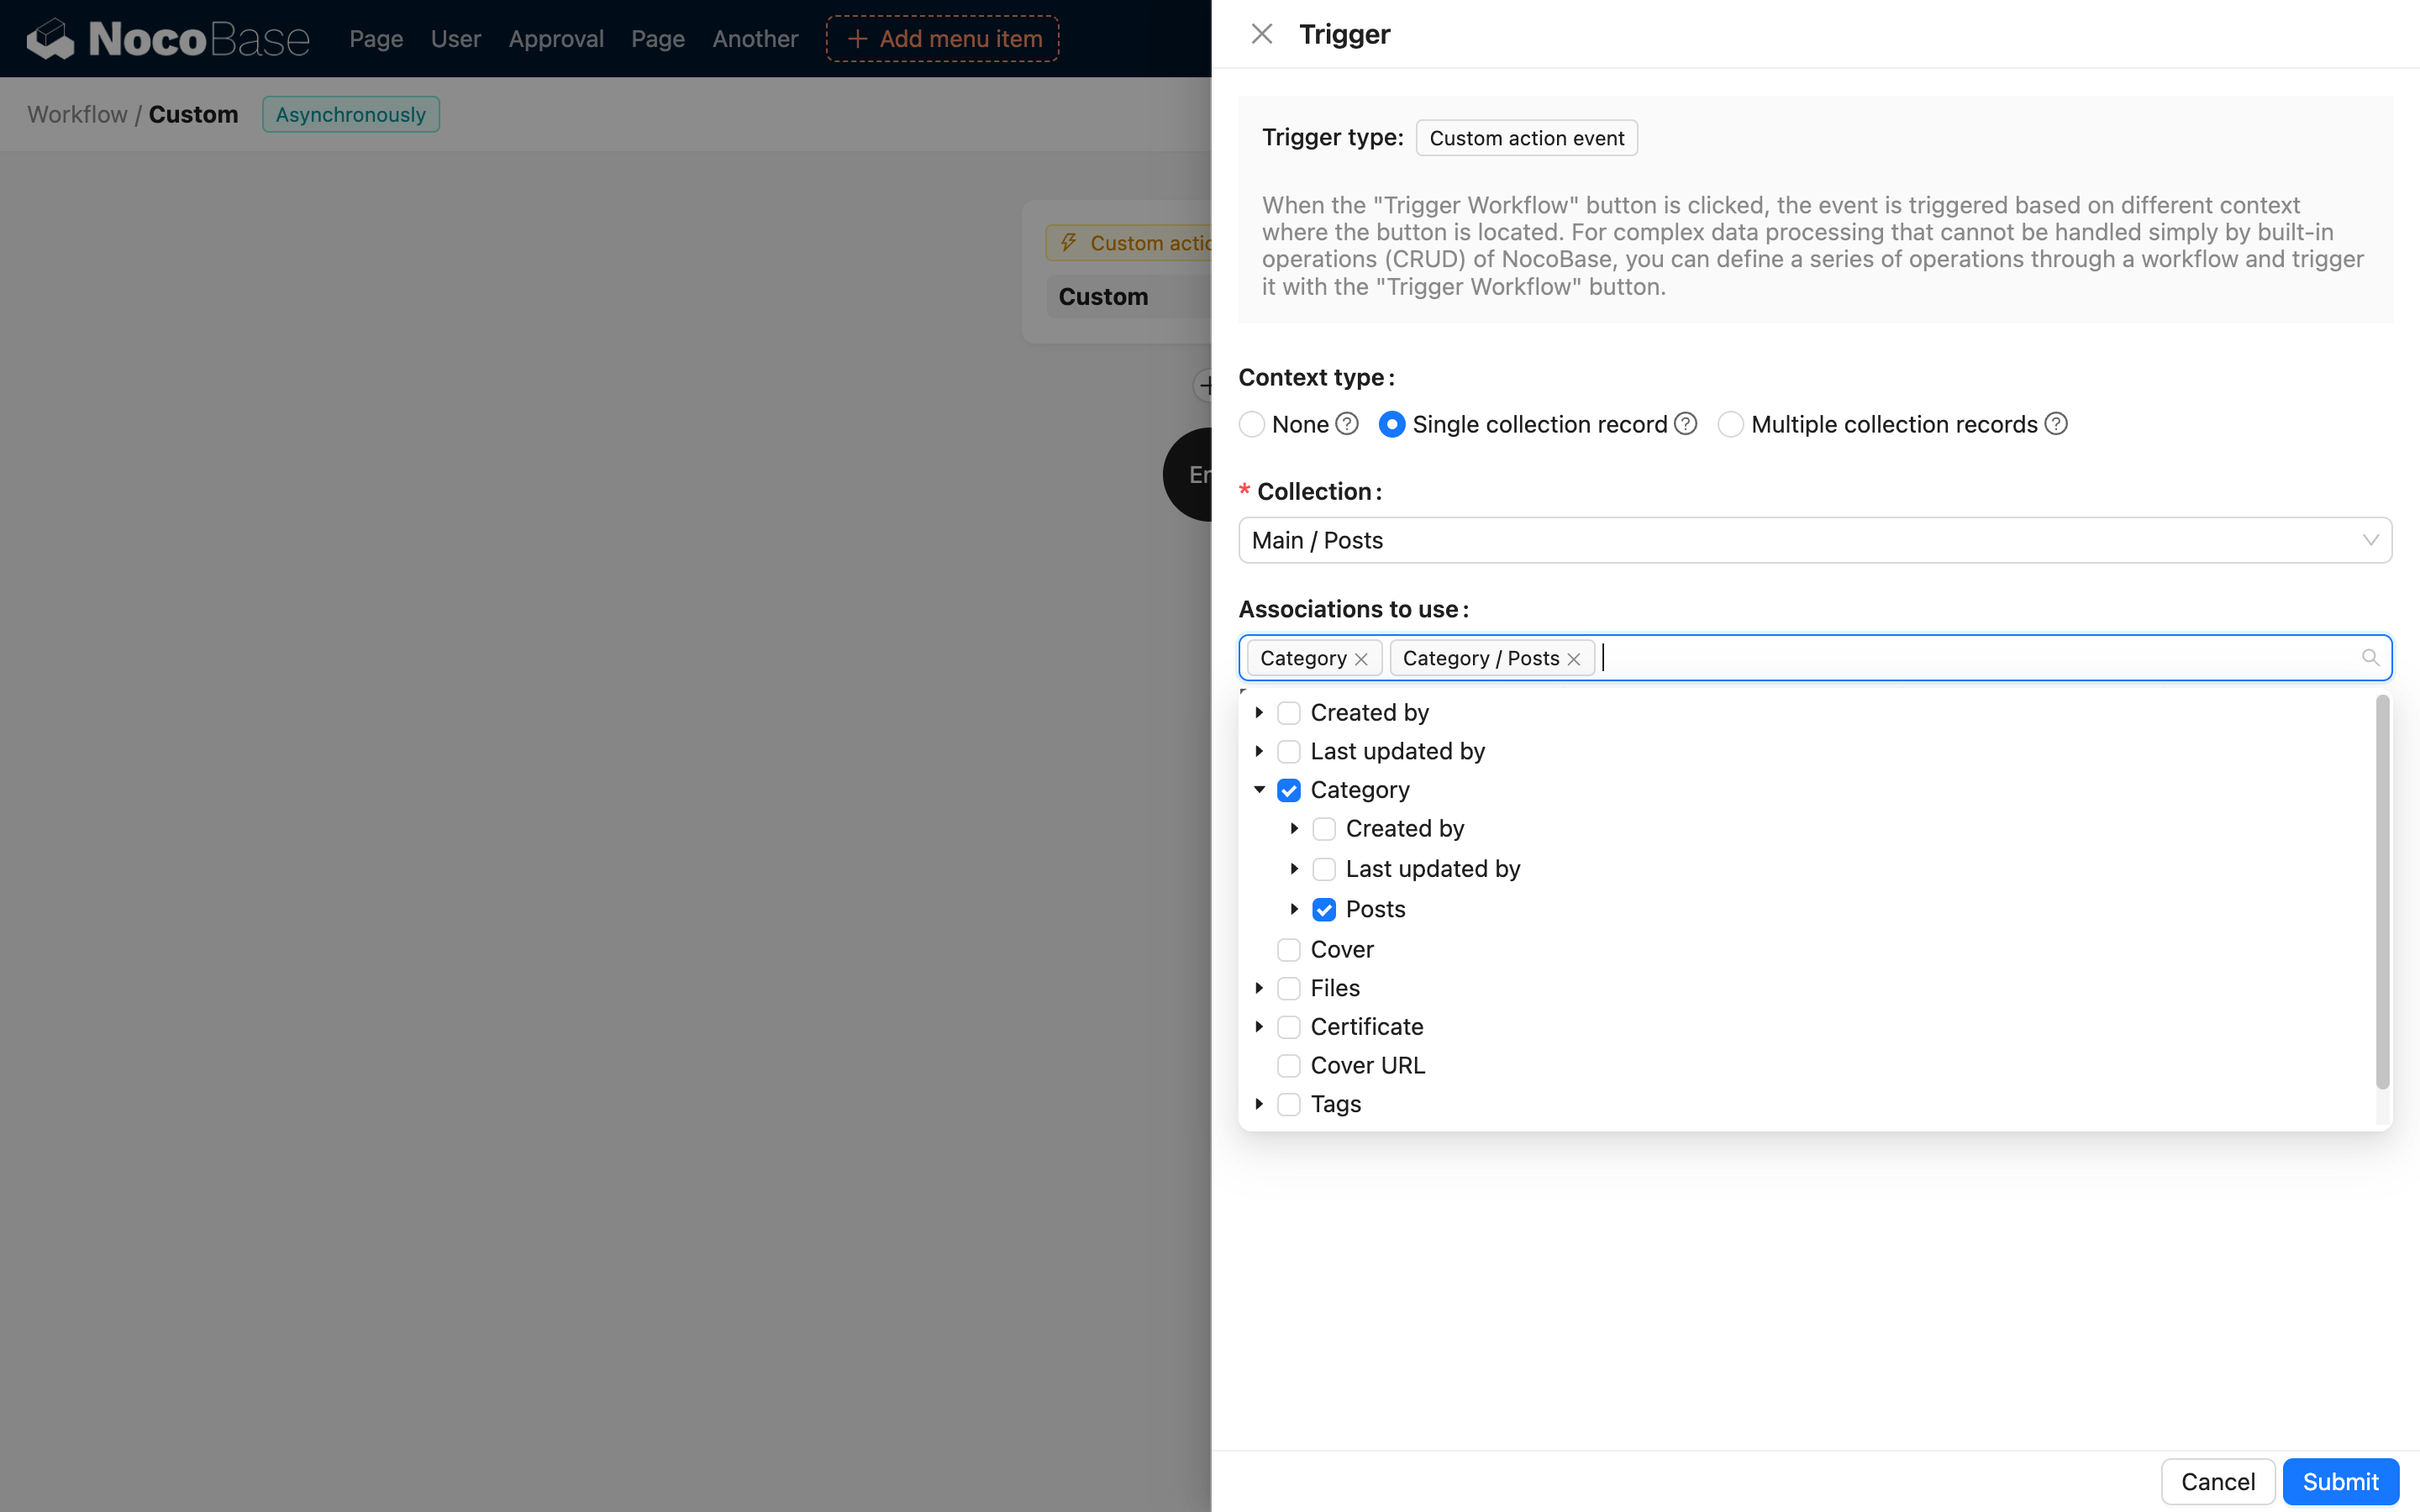
These fields will be automatically preloaded into the workflow context after the event is triggered, making them available for use in the workflow.
Action Configuration
The configuration of action buttons in different blocks varies depending on the context type configured in the workflow.
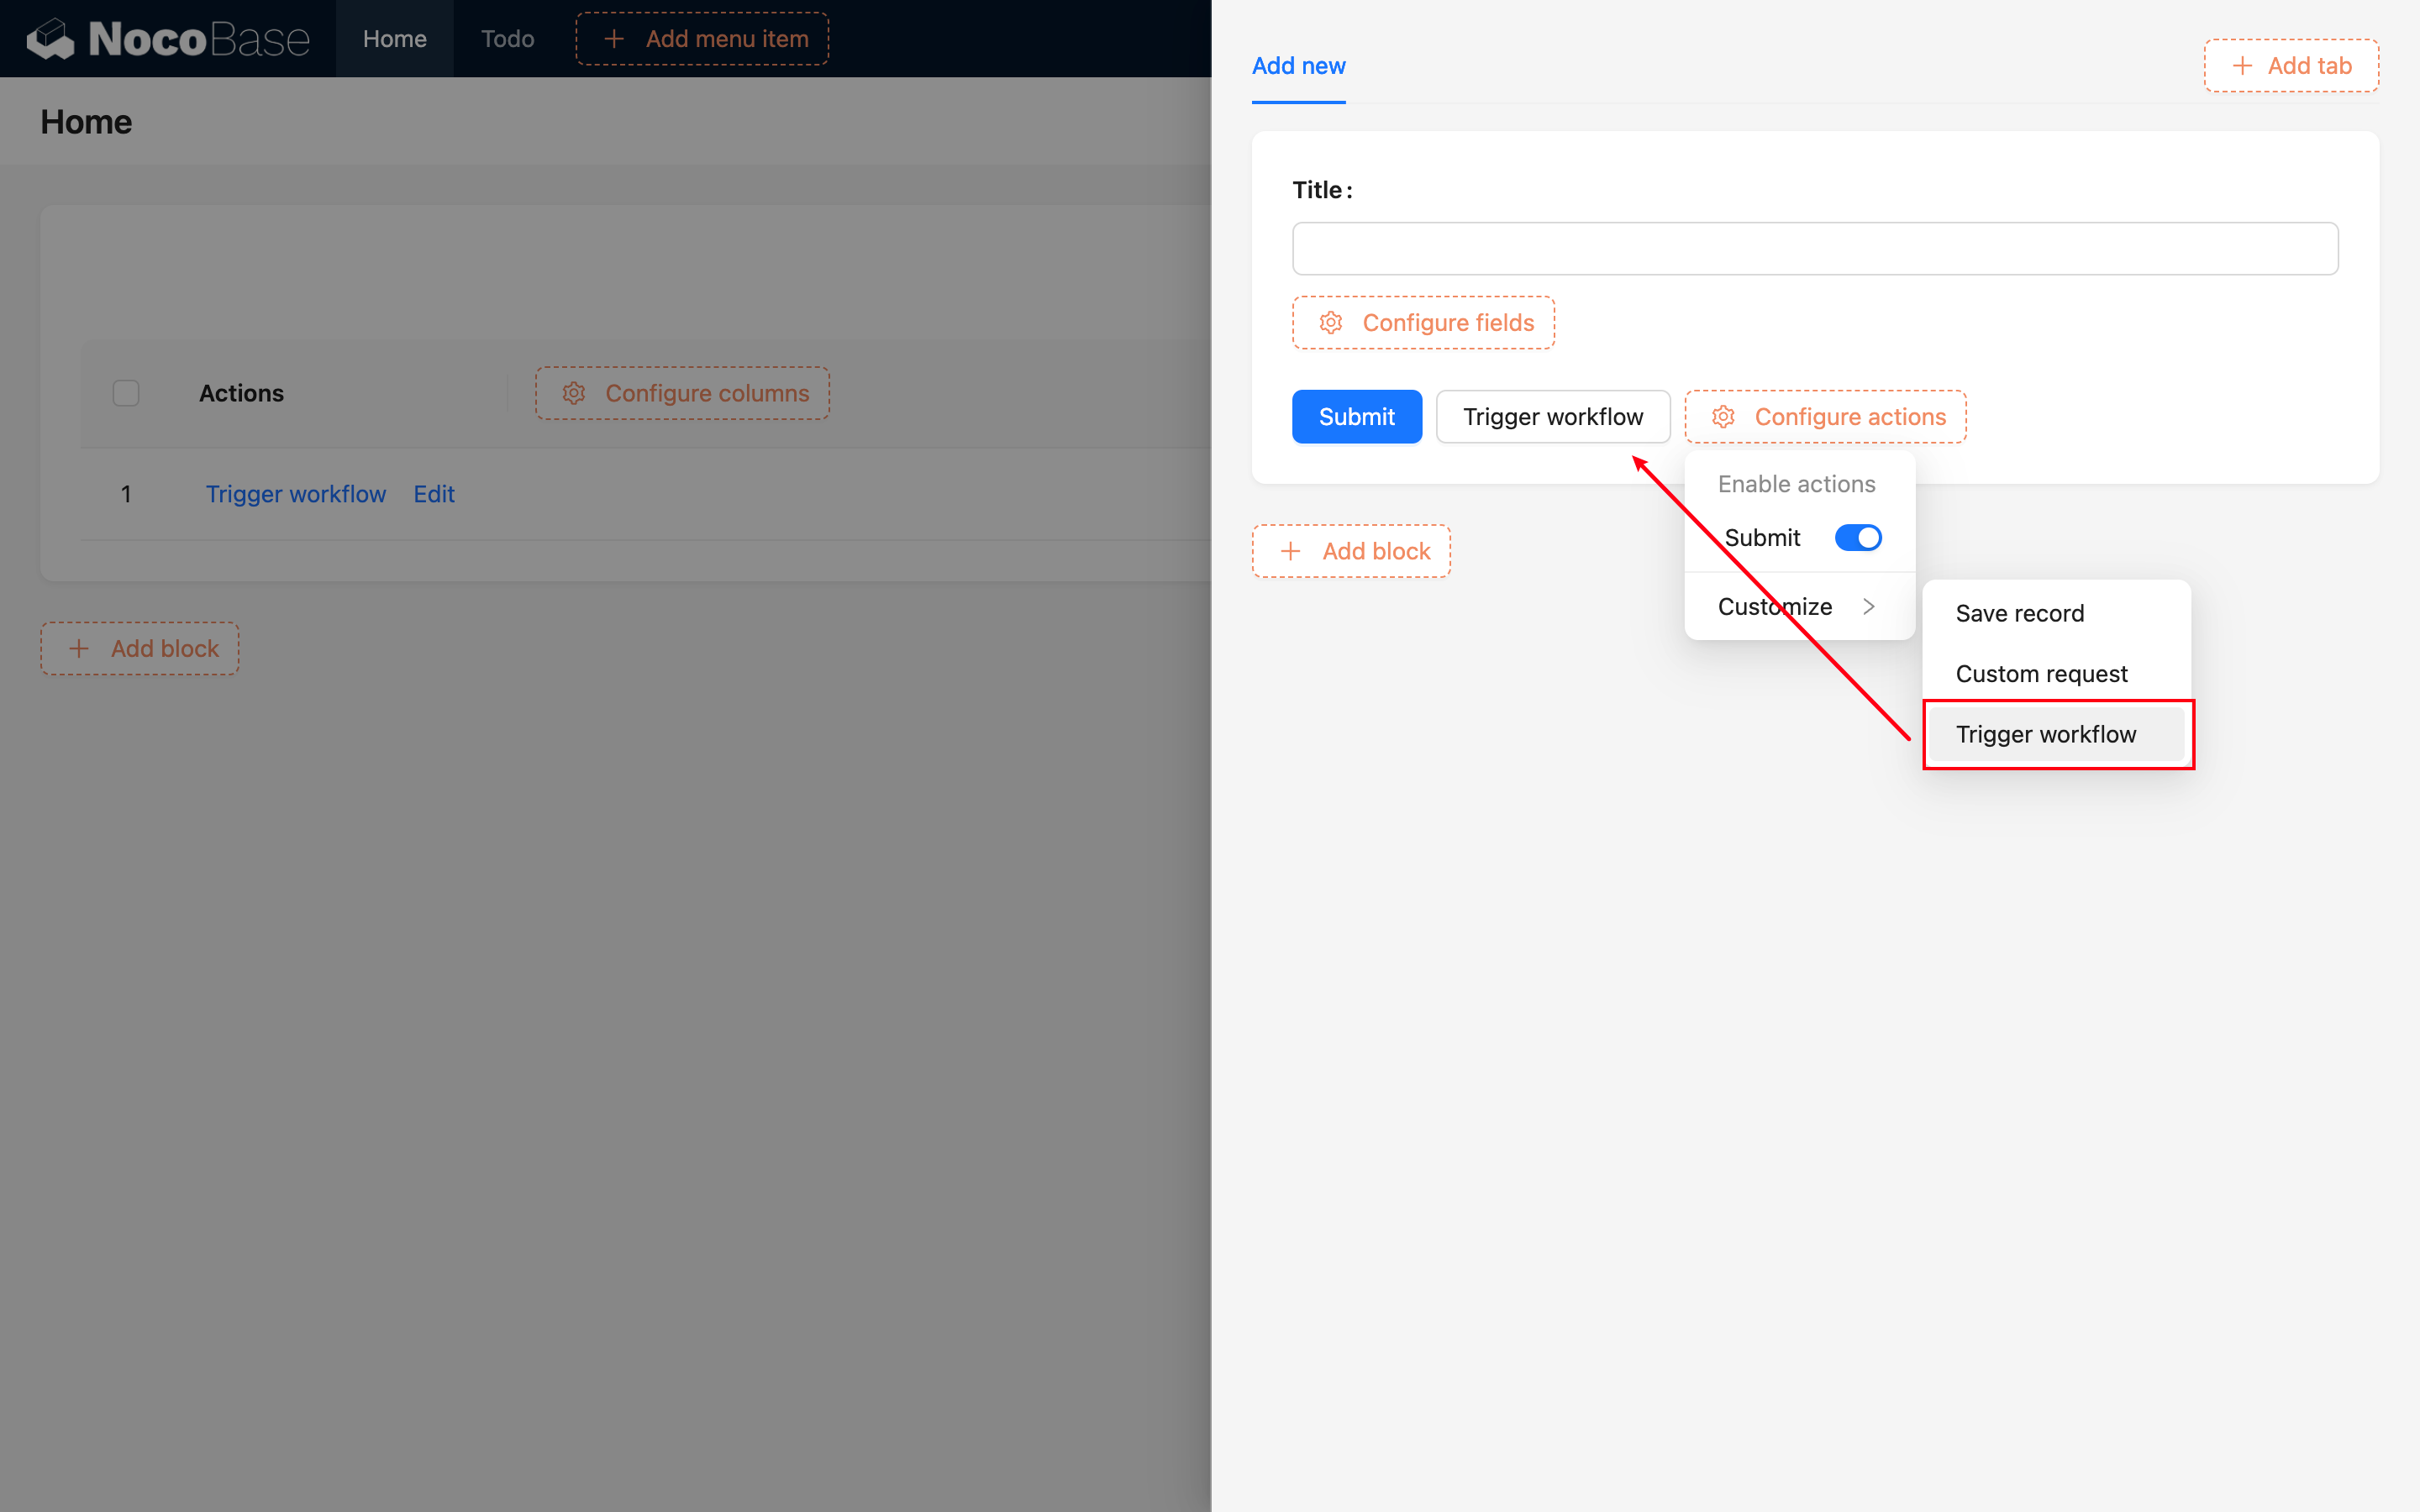
No Context
v1.6.0+
In the Action Bar and other data blocks, you can add a "Trigger Workflow" button:
After adding the button, bind the previously created no-context workflow. Here is an example using a button in the Action Bar:
Single Record
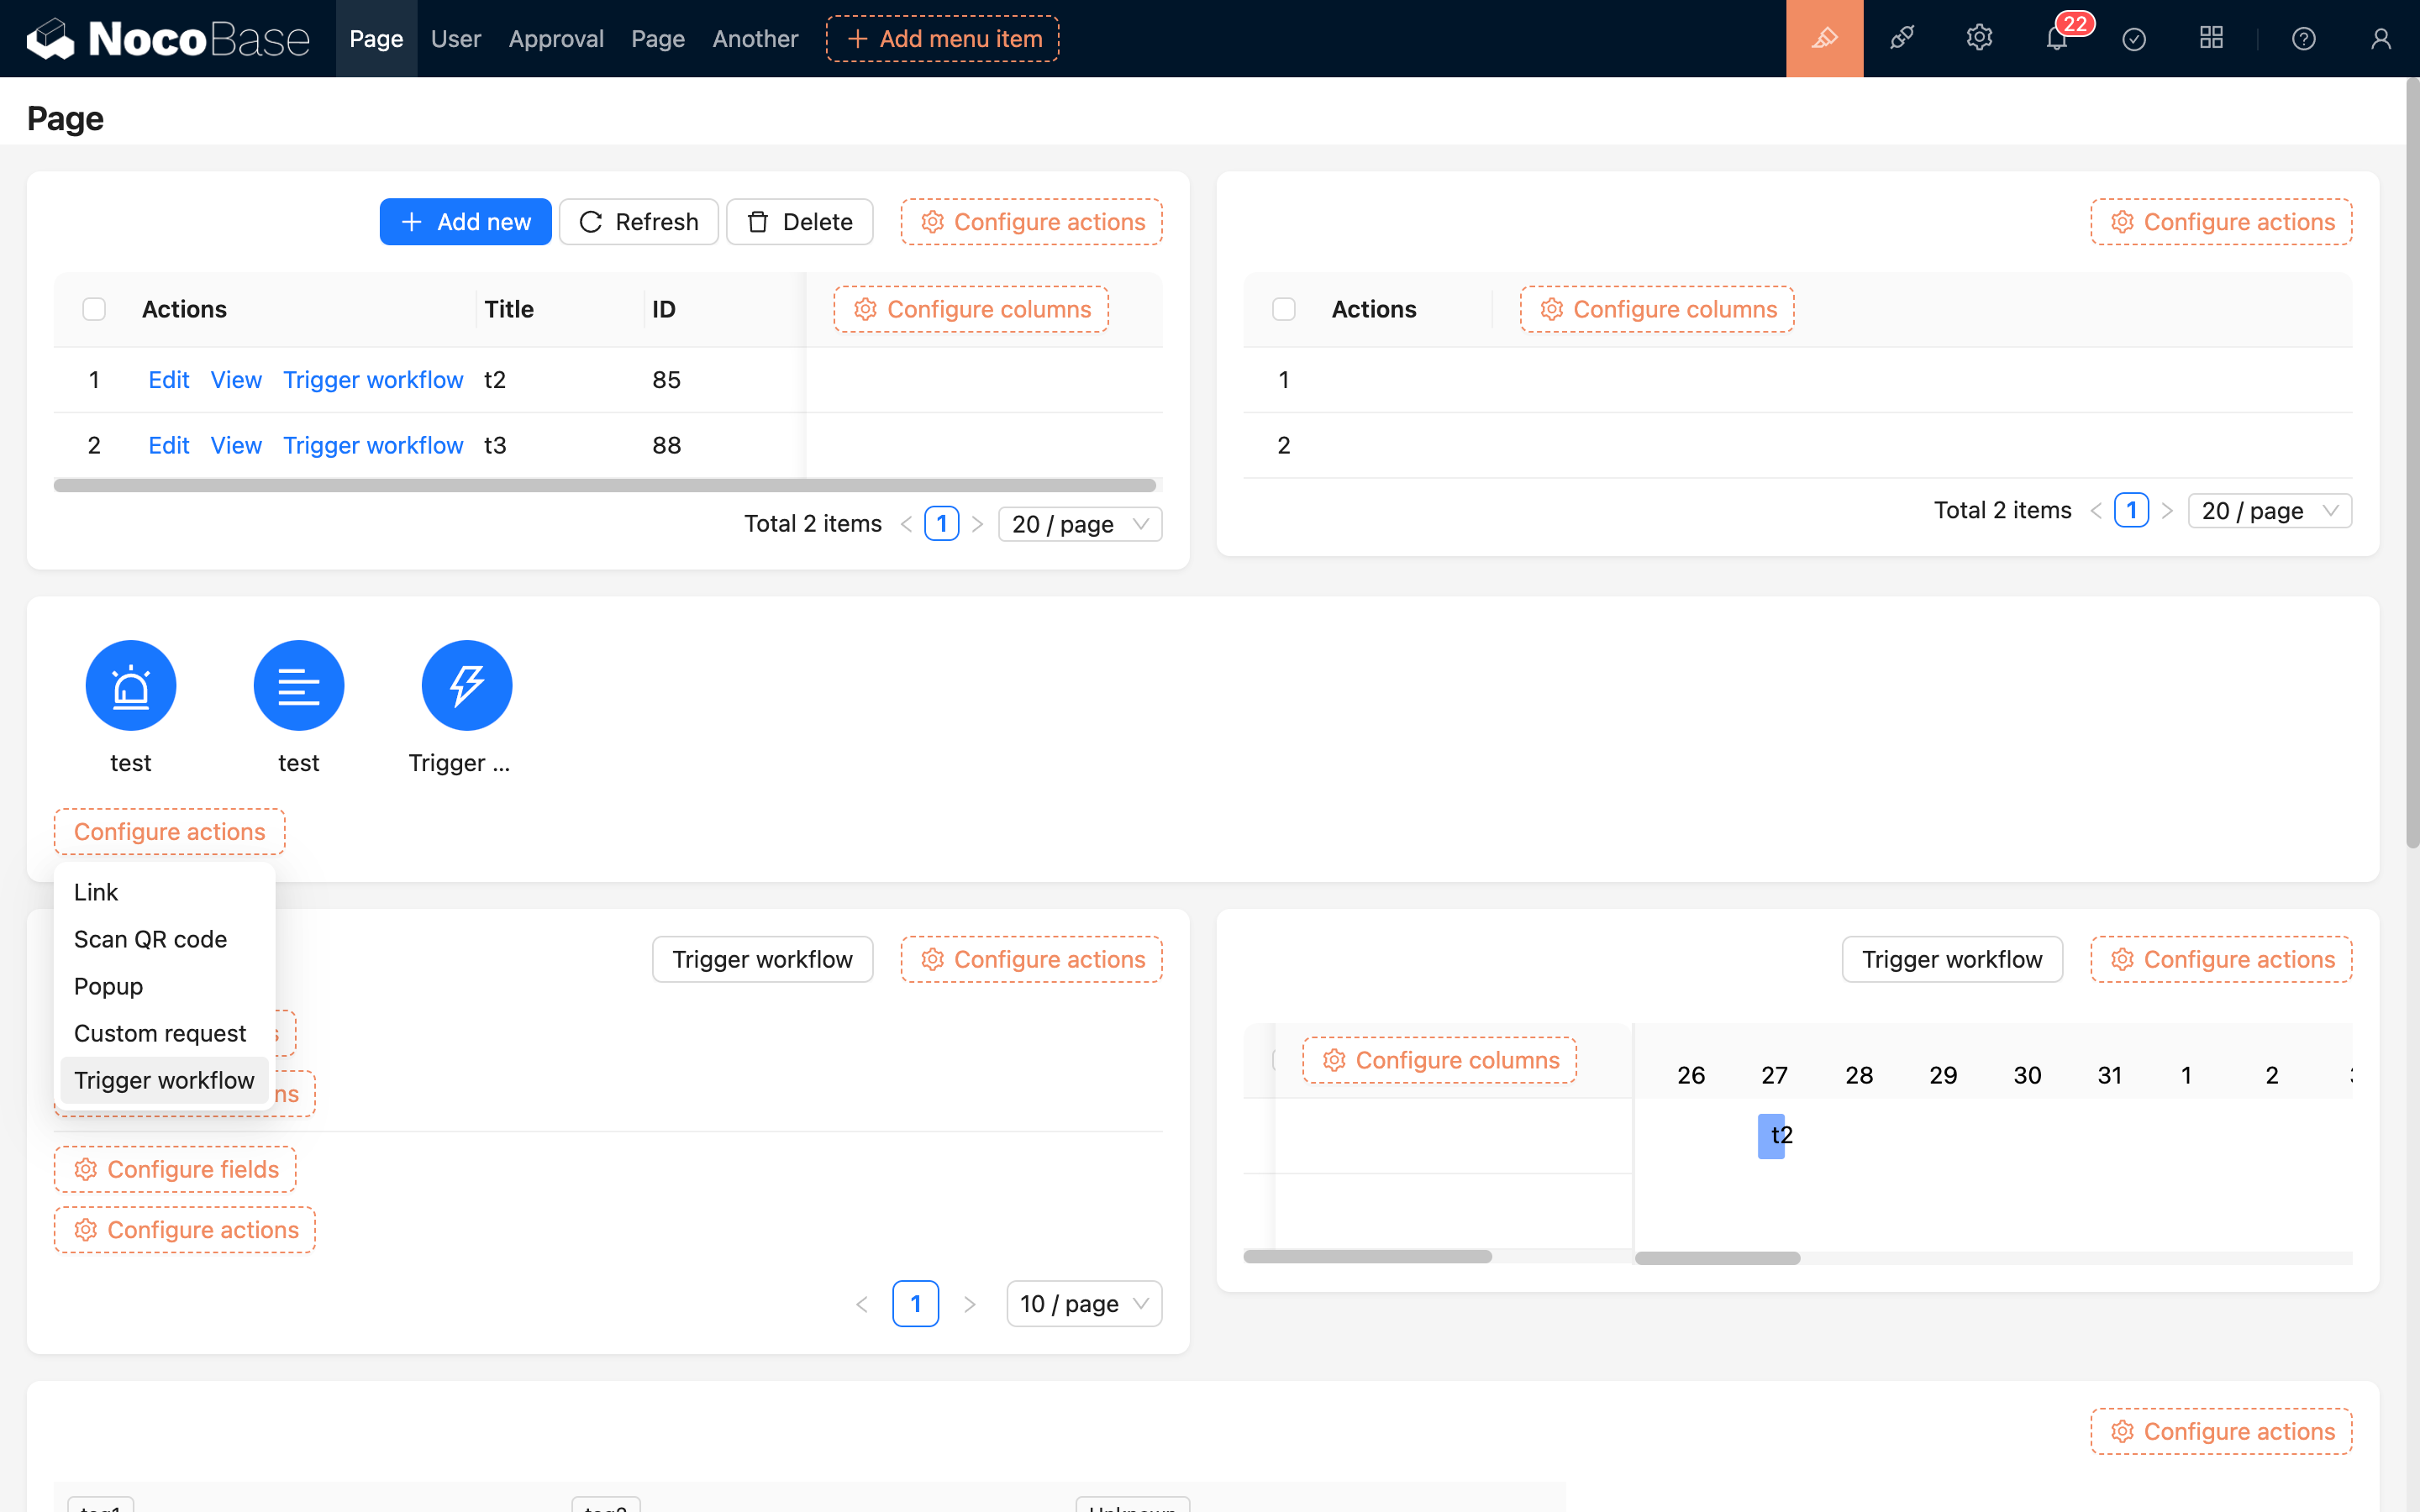
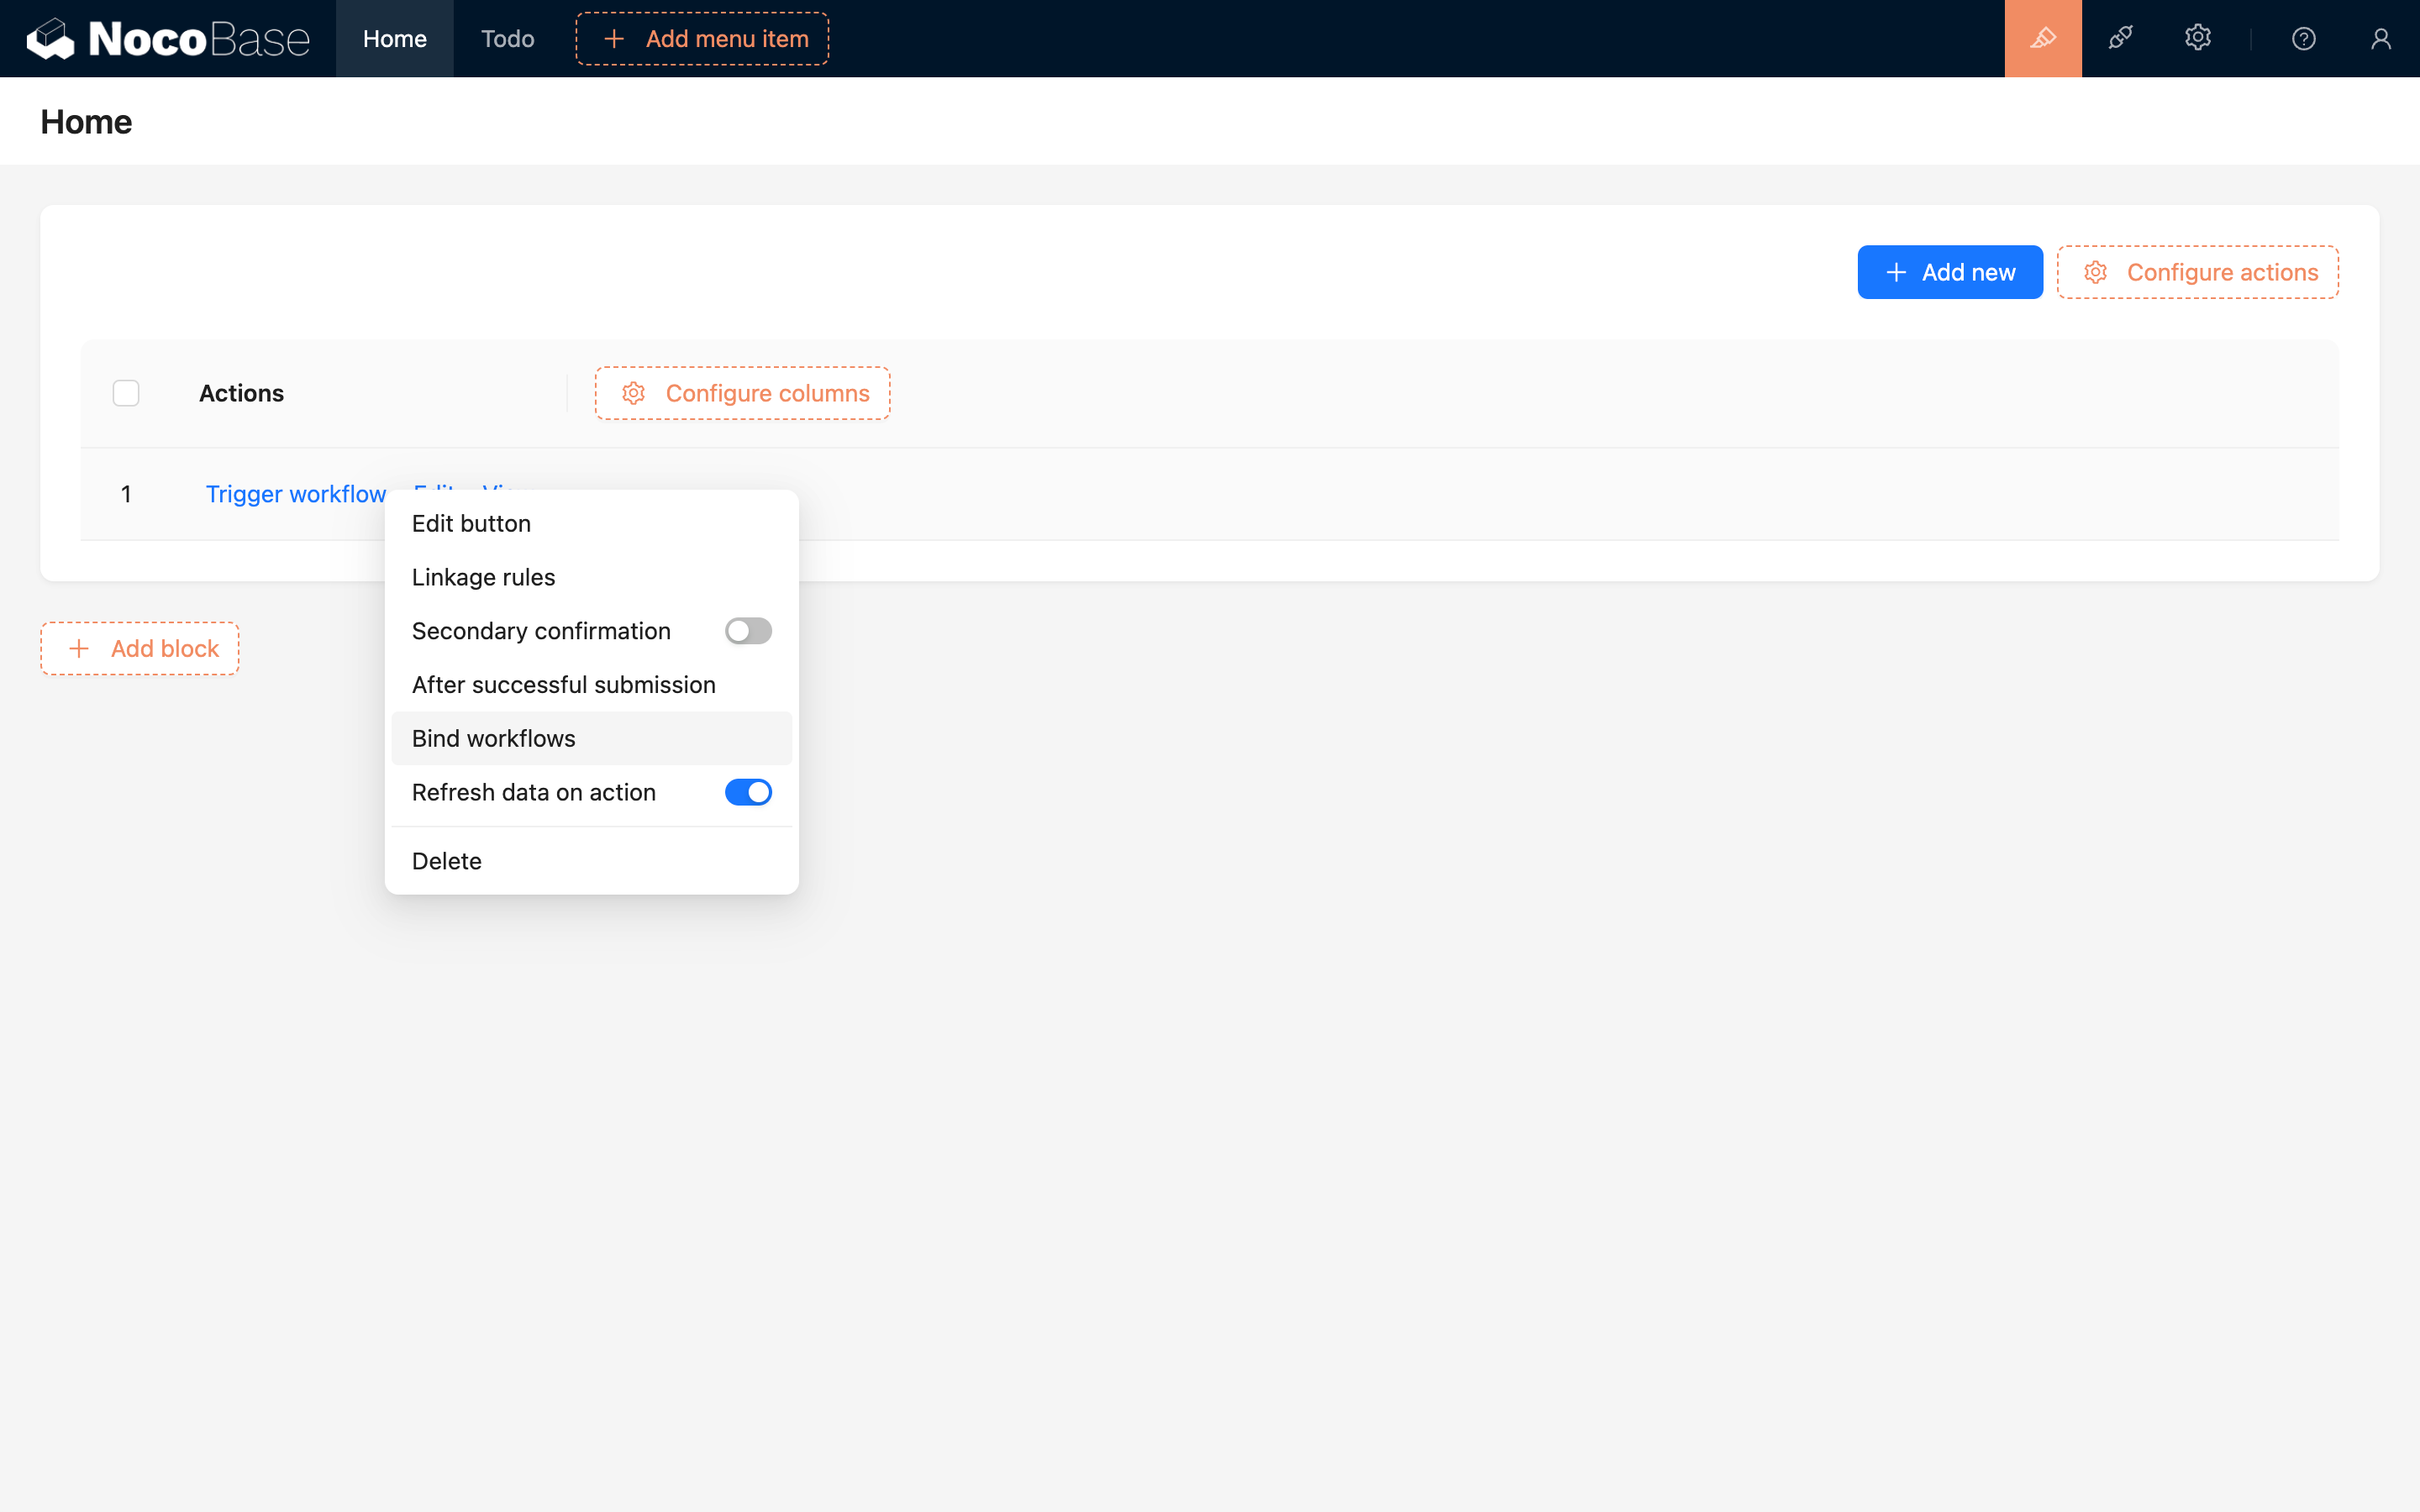
In any data block, a "Trigger Workflow" button can be added to the action bar for a single record, such as in forms, table rows, details, etc.:
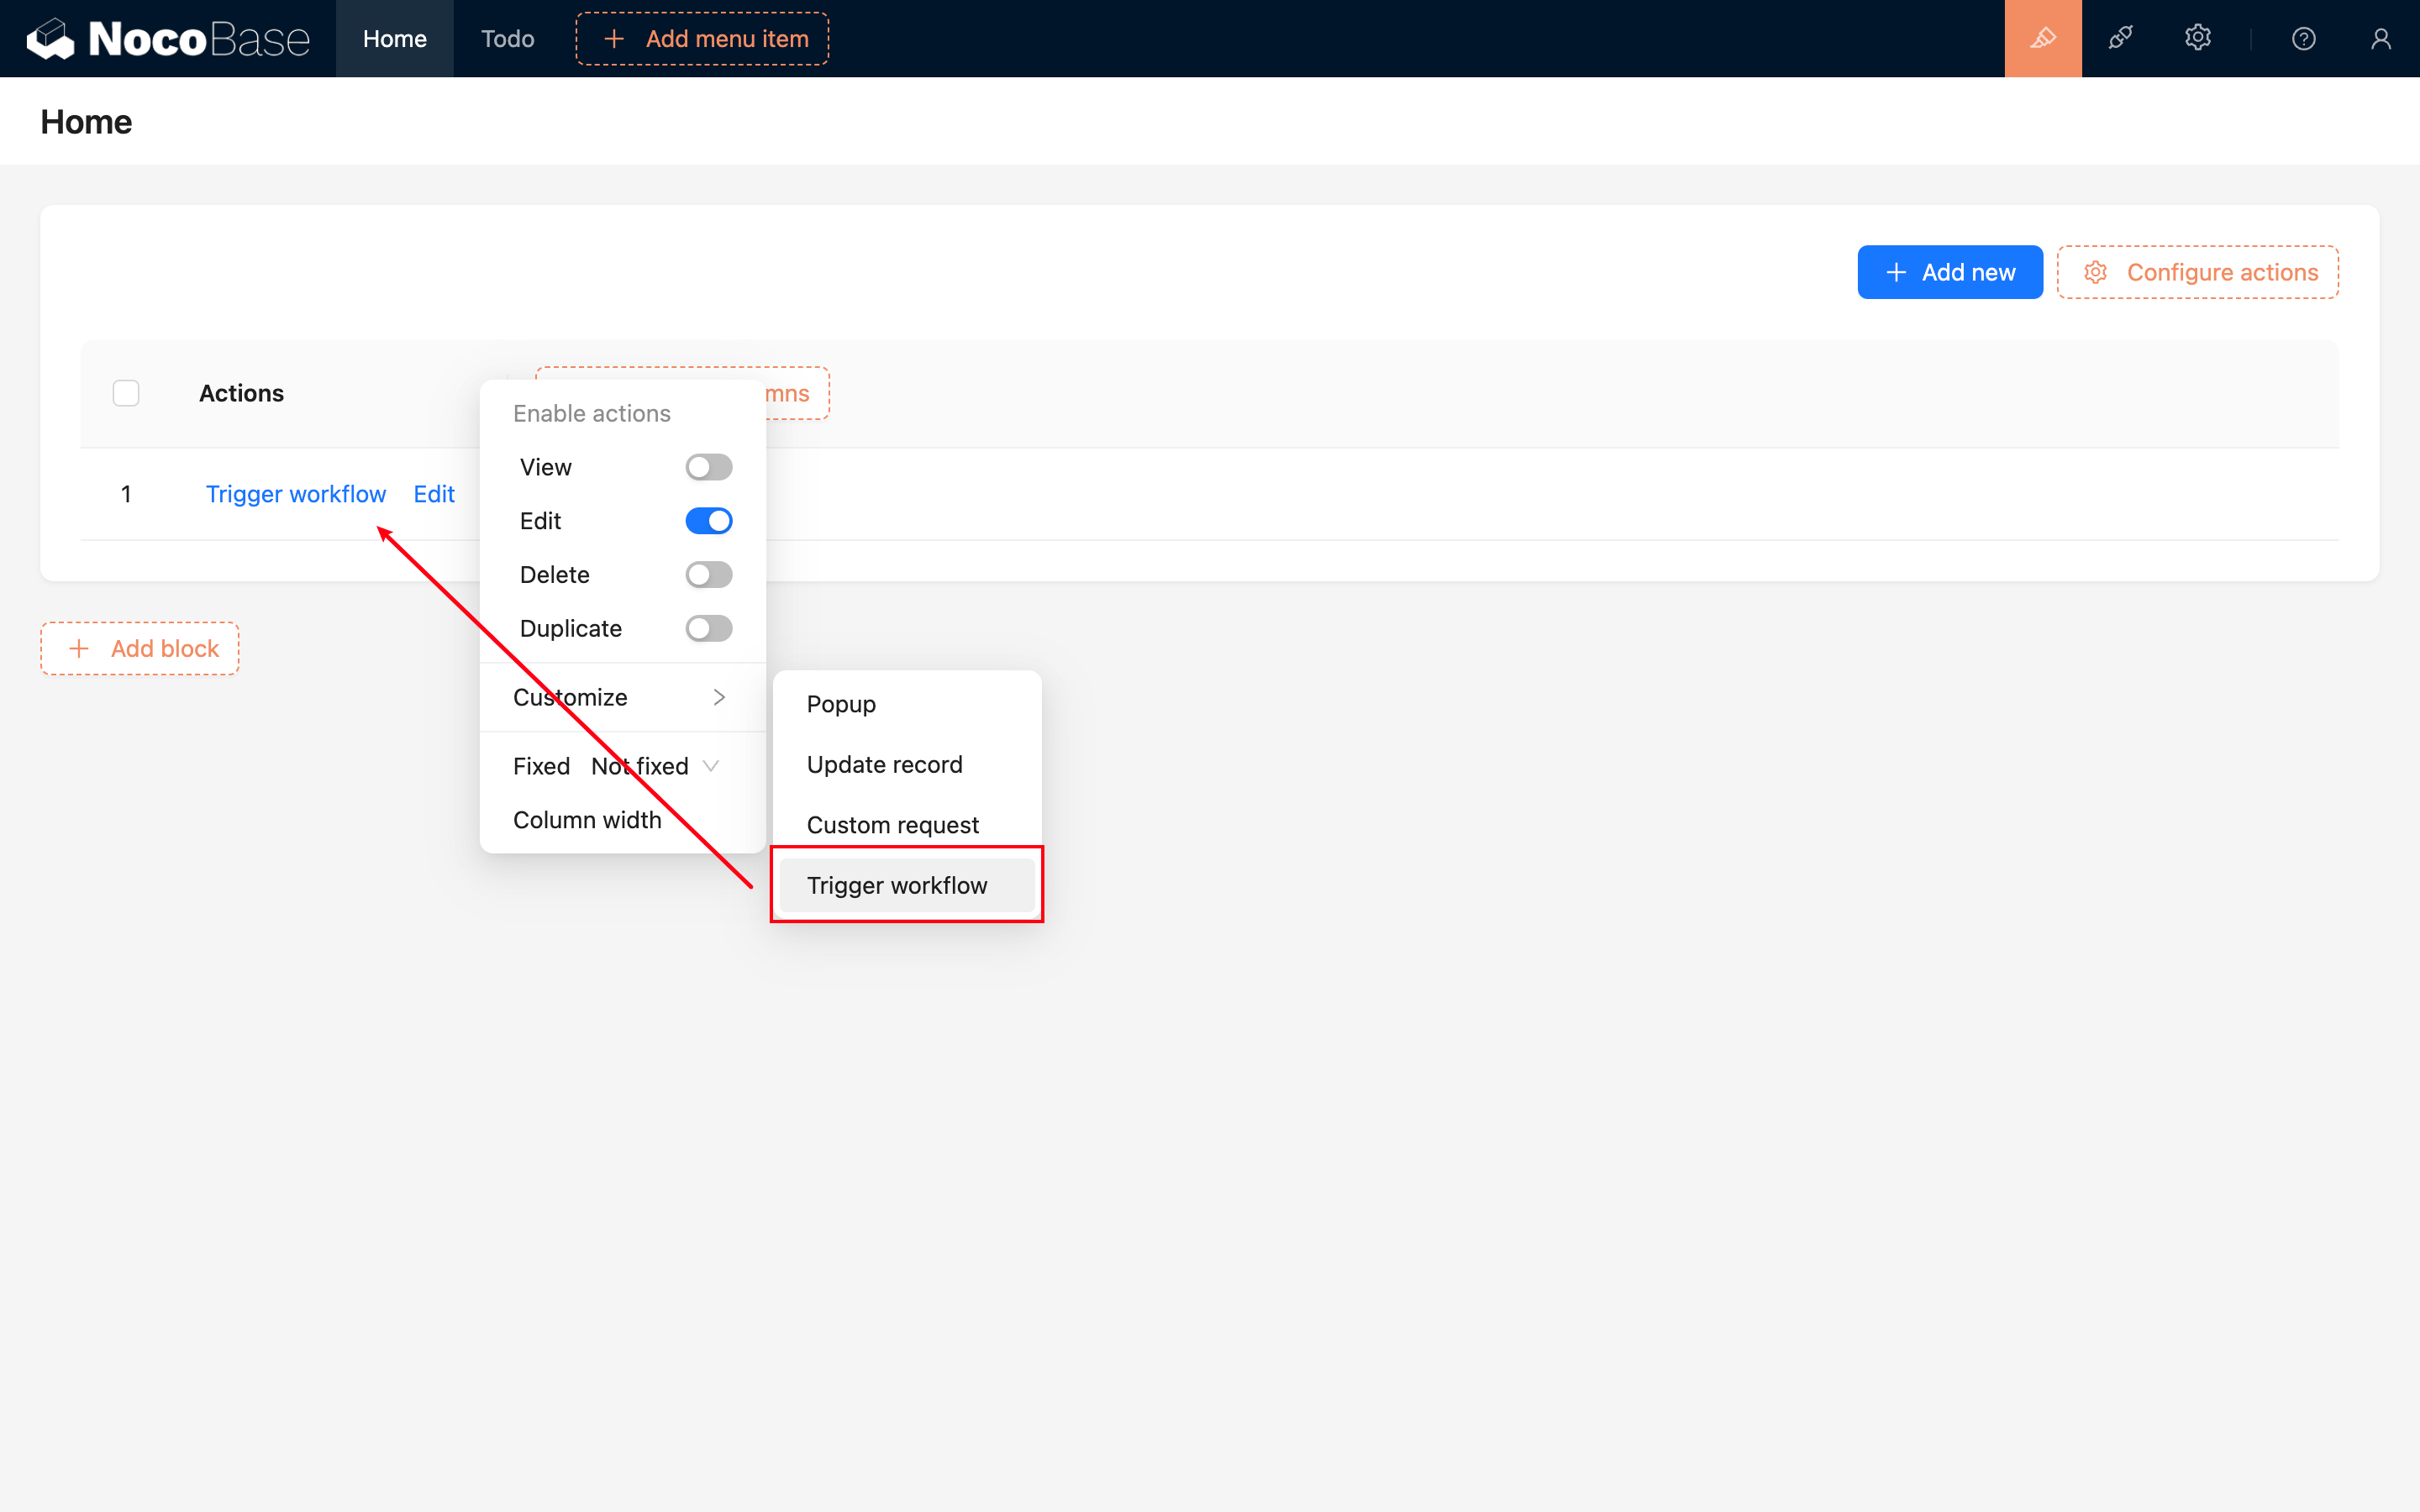
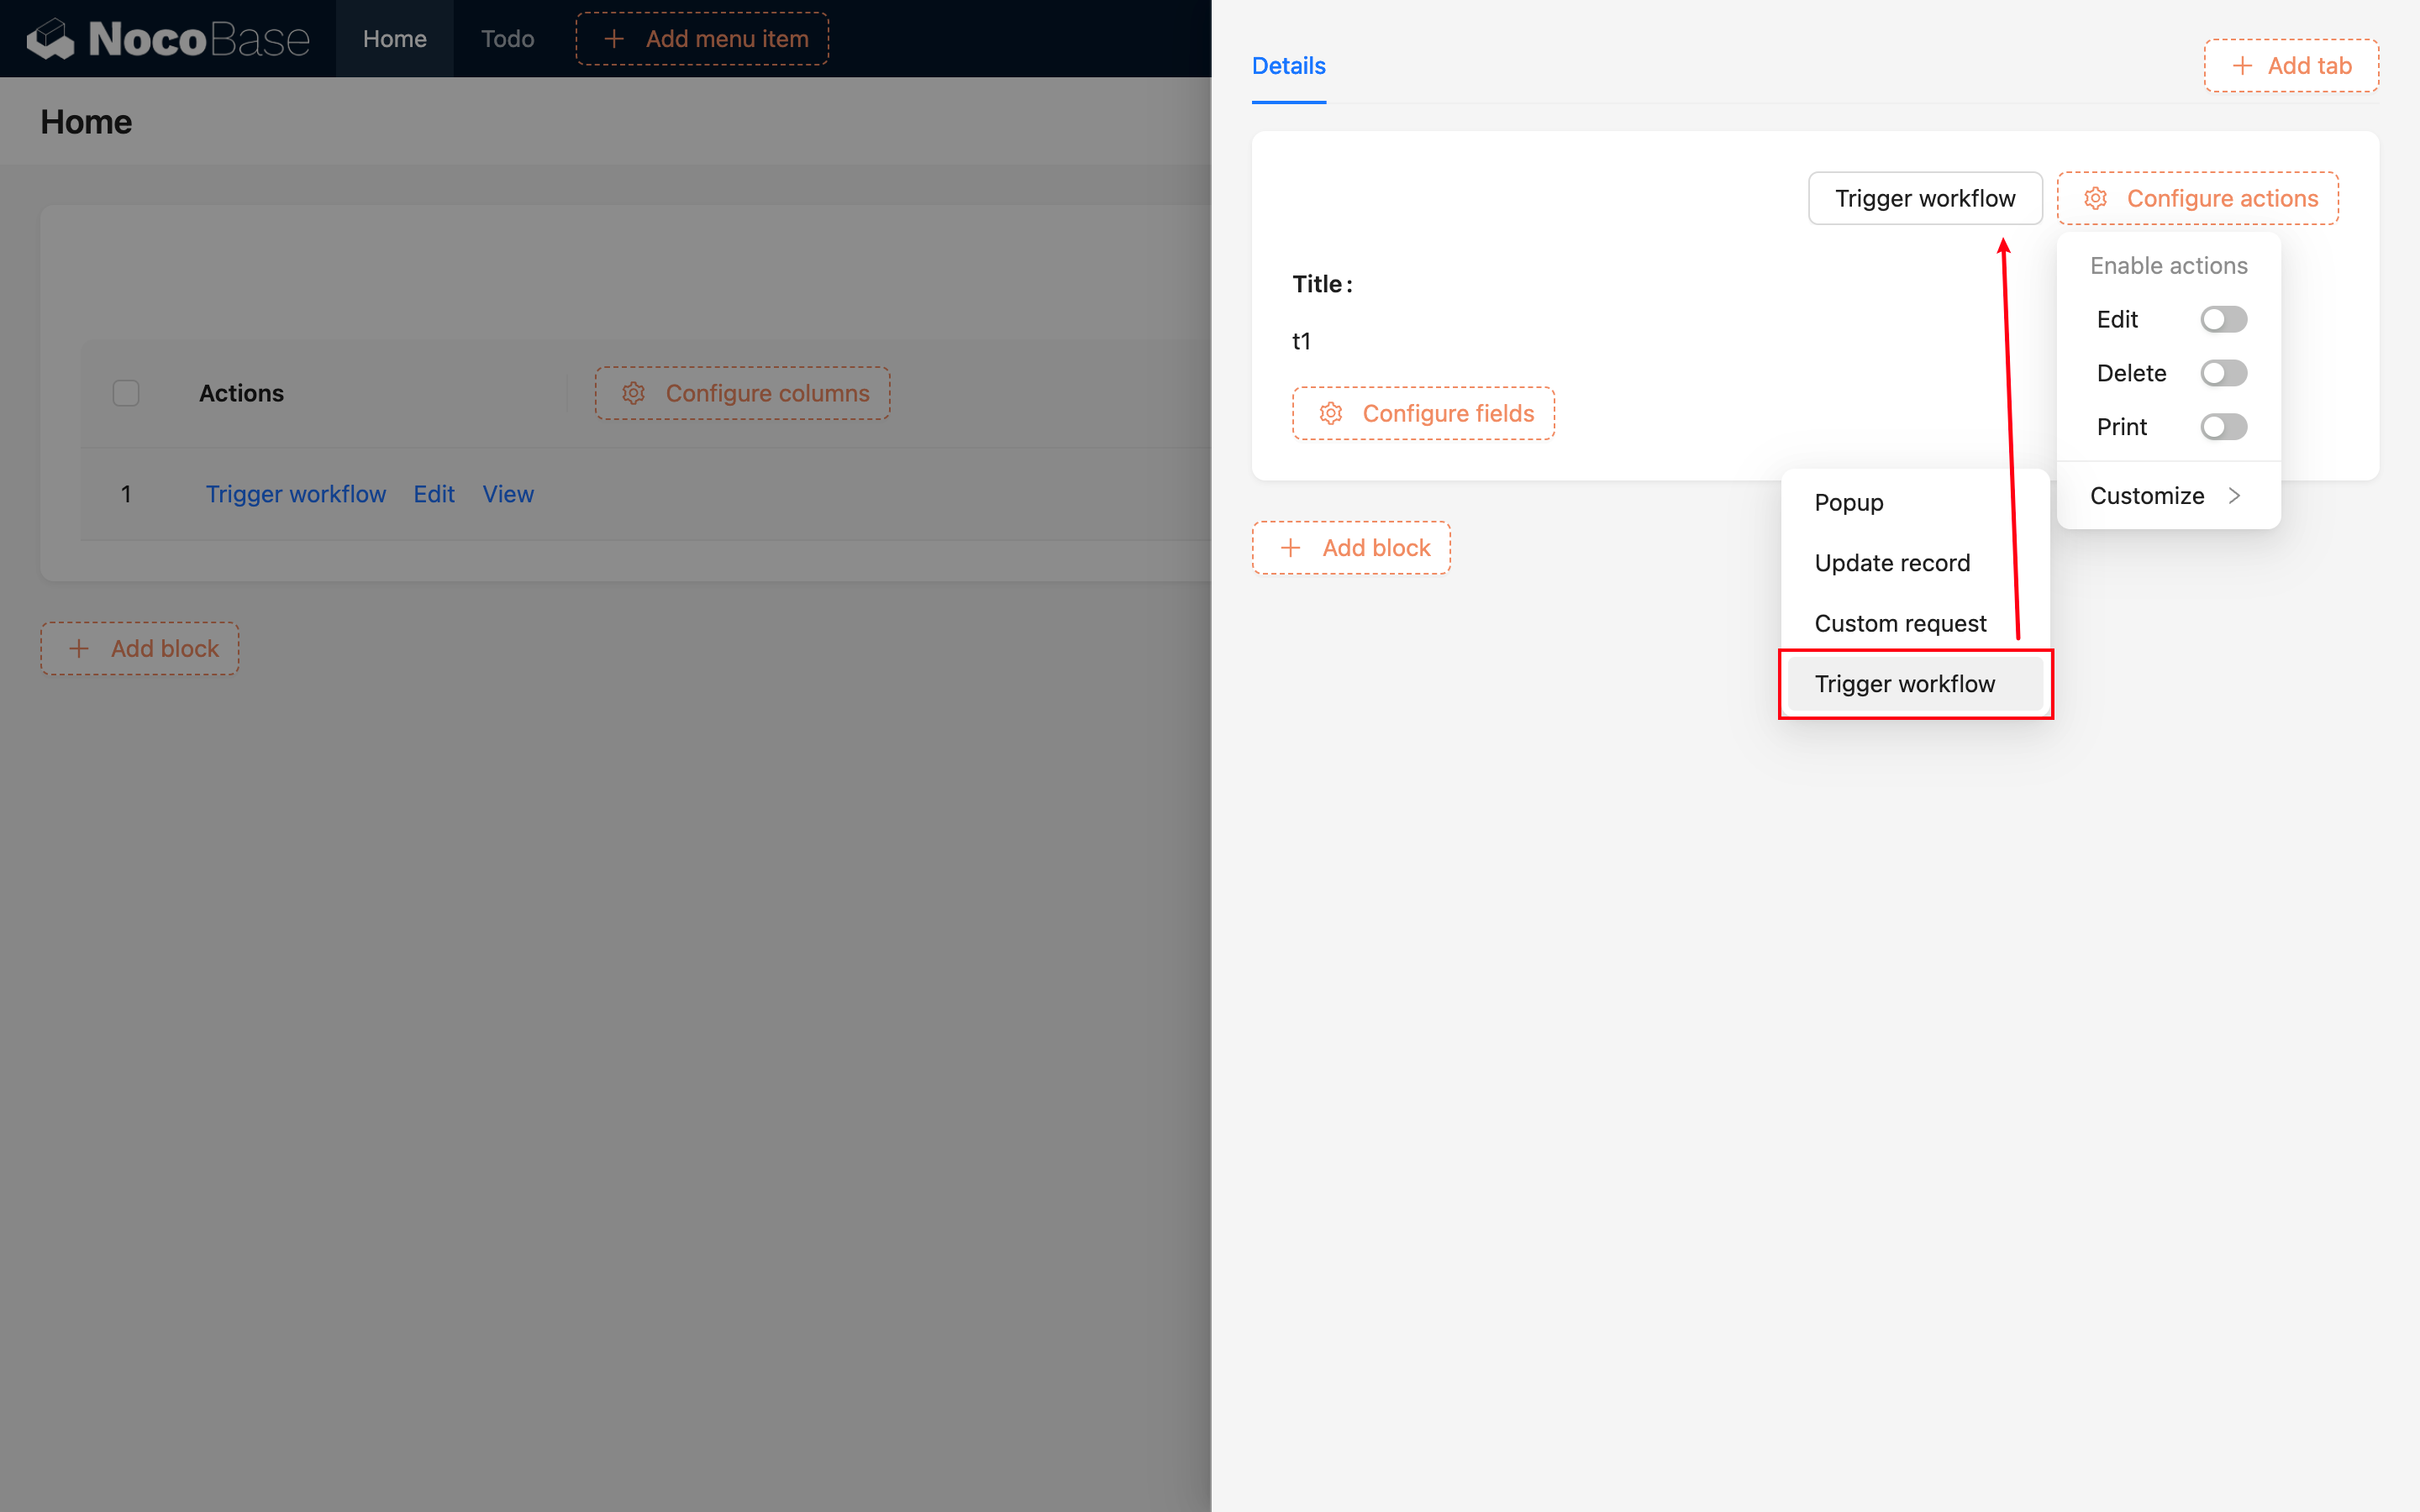
After adding the button, bind the previously created workflow:
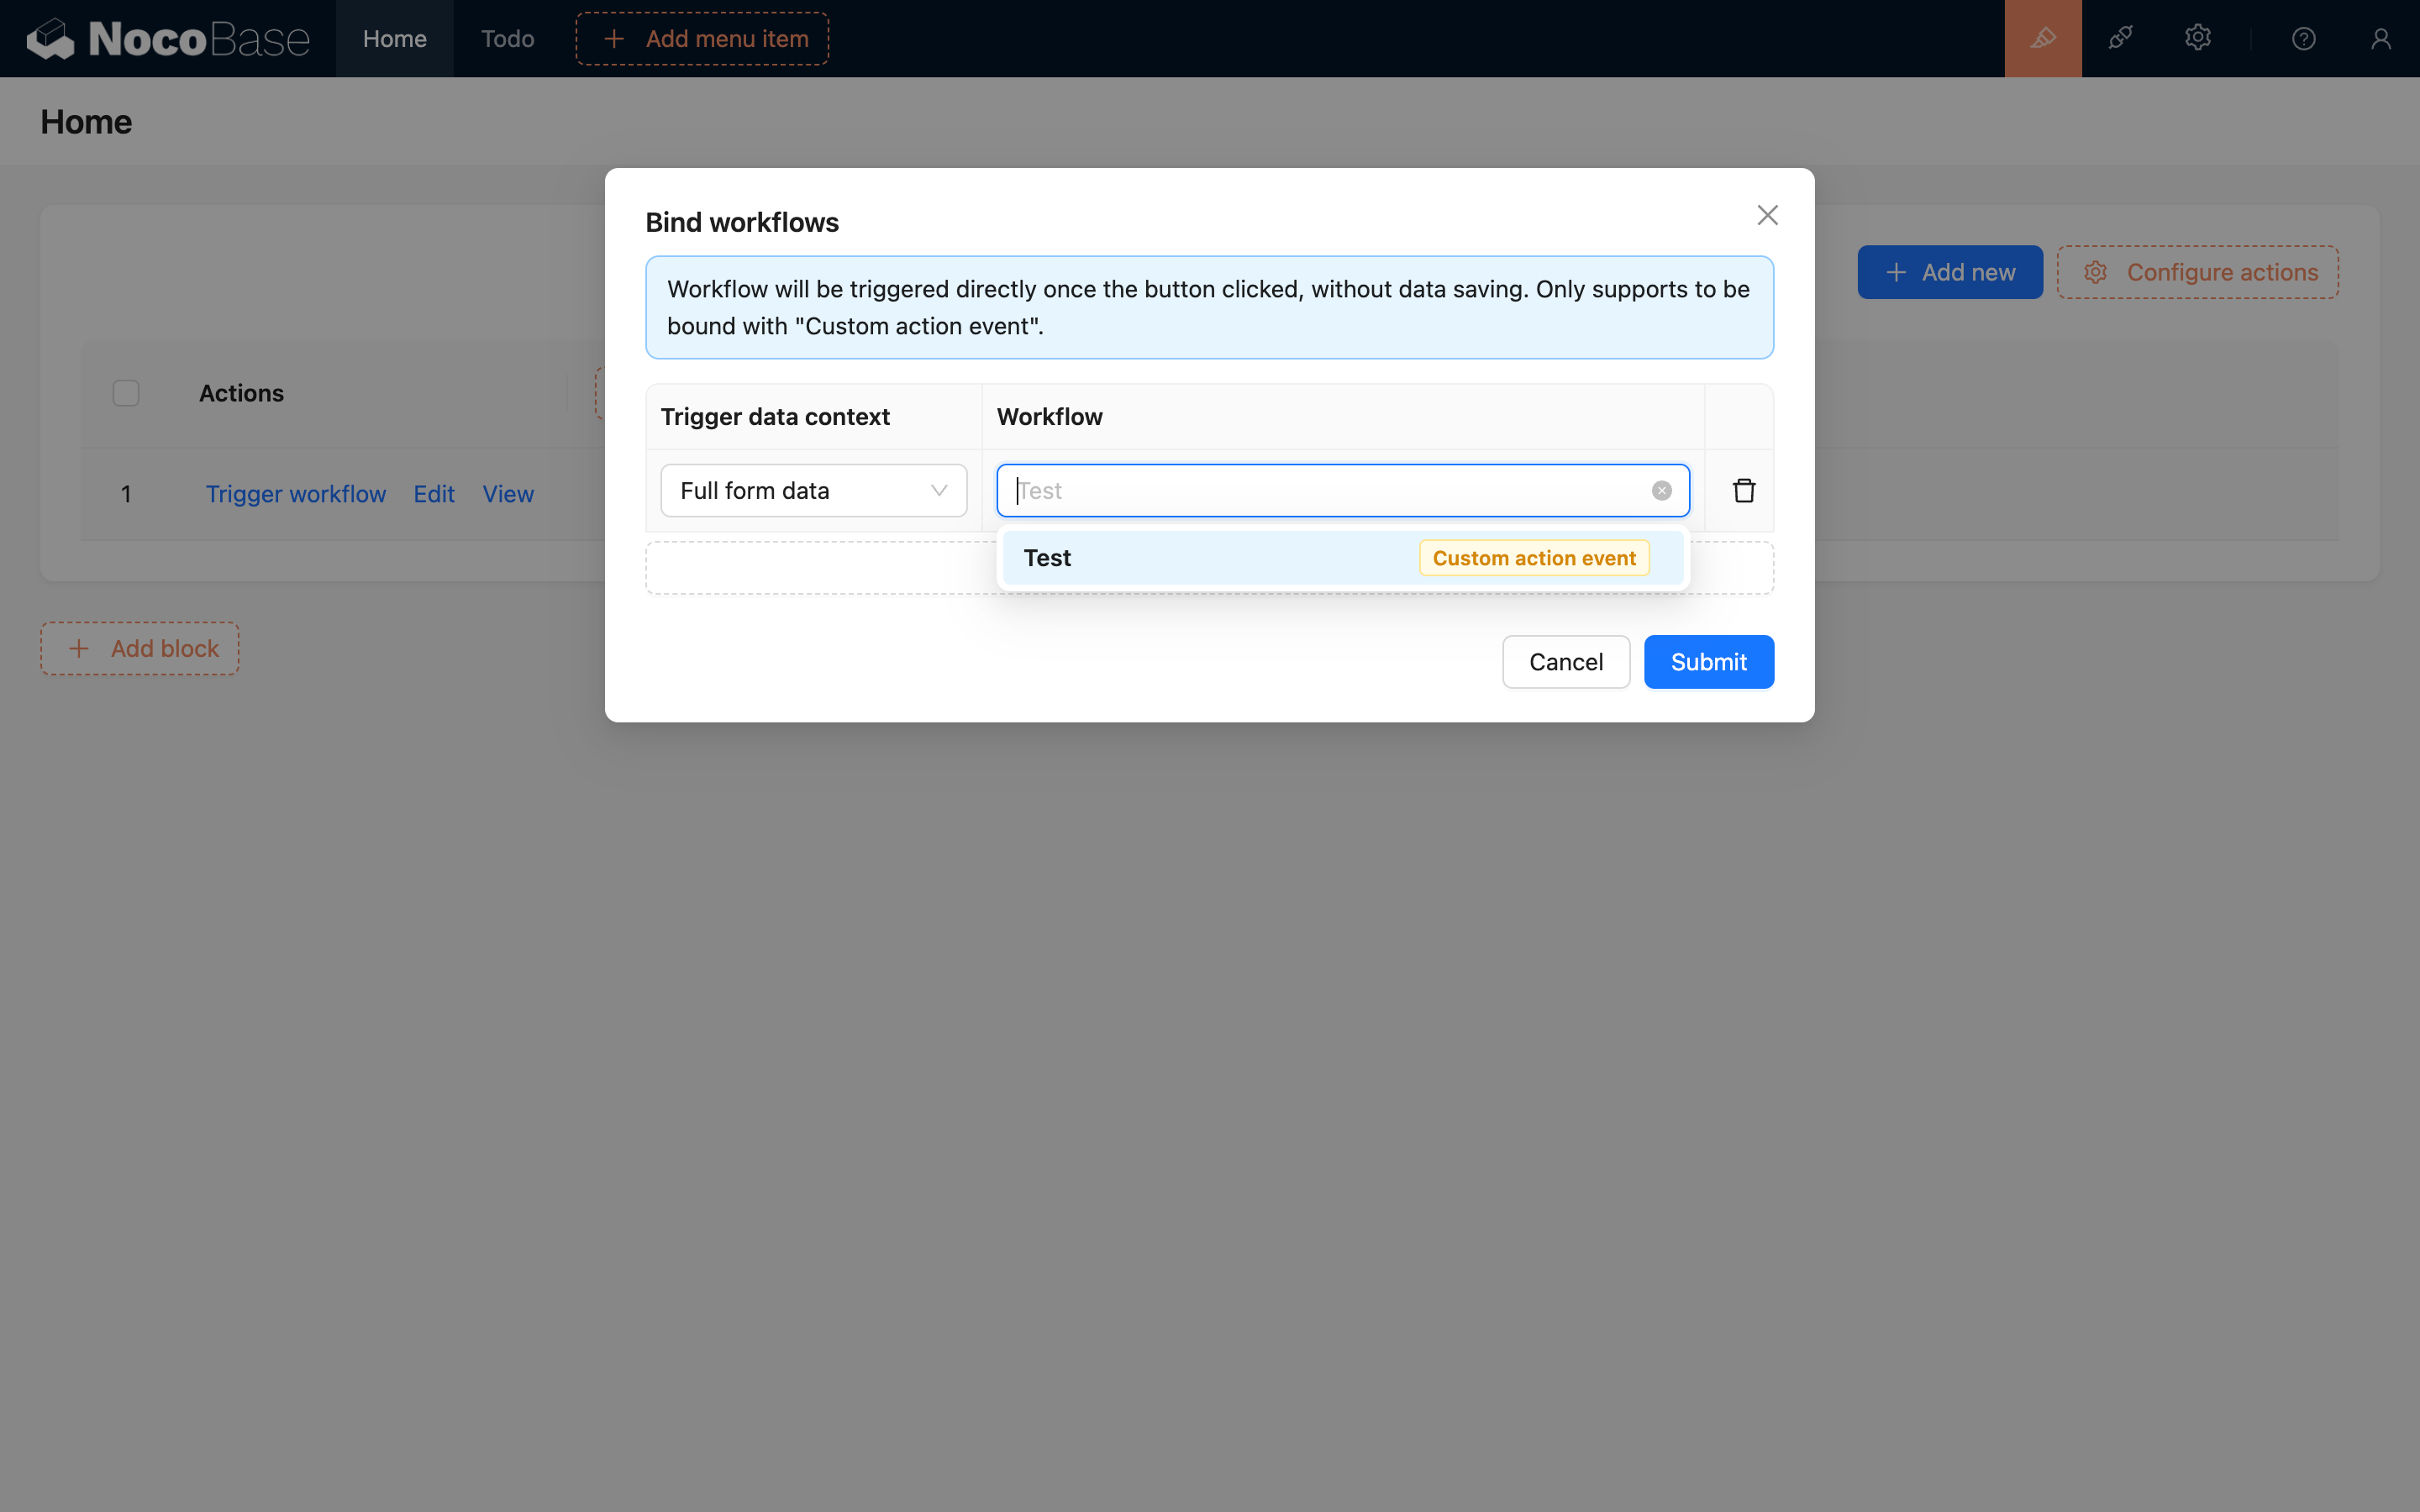
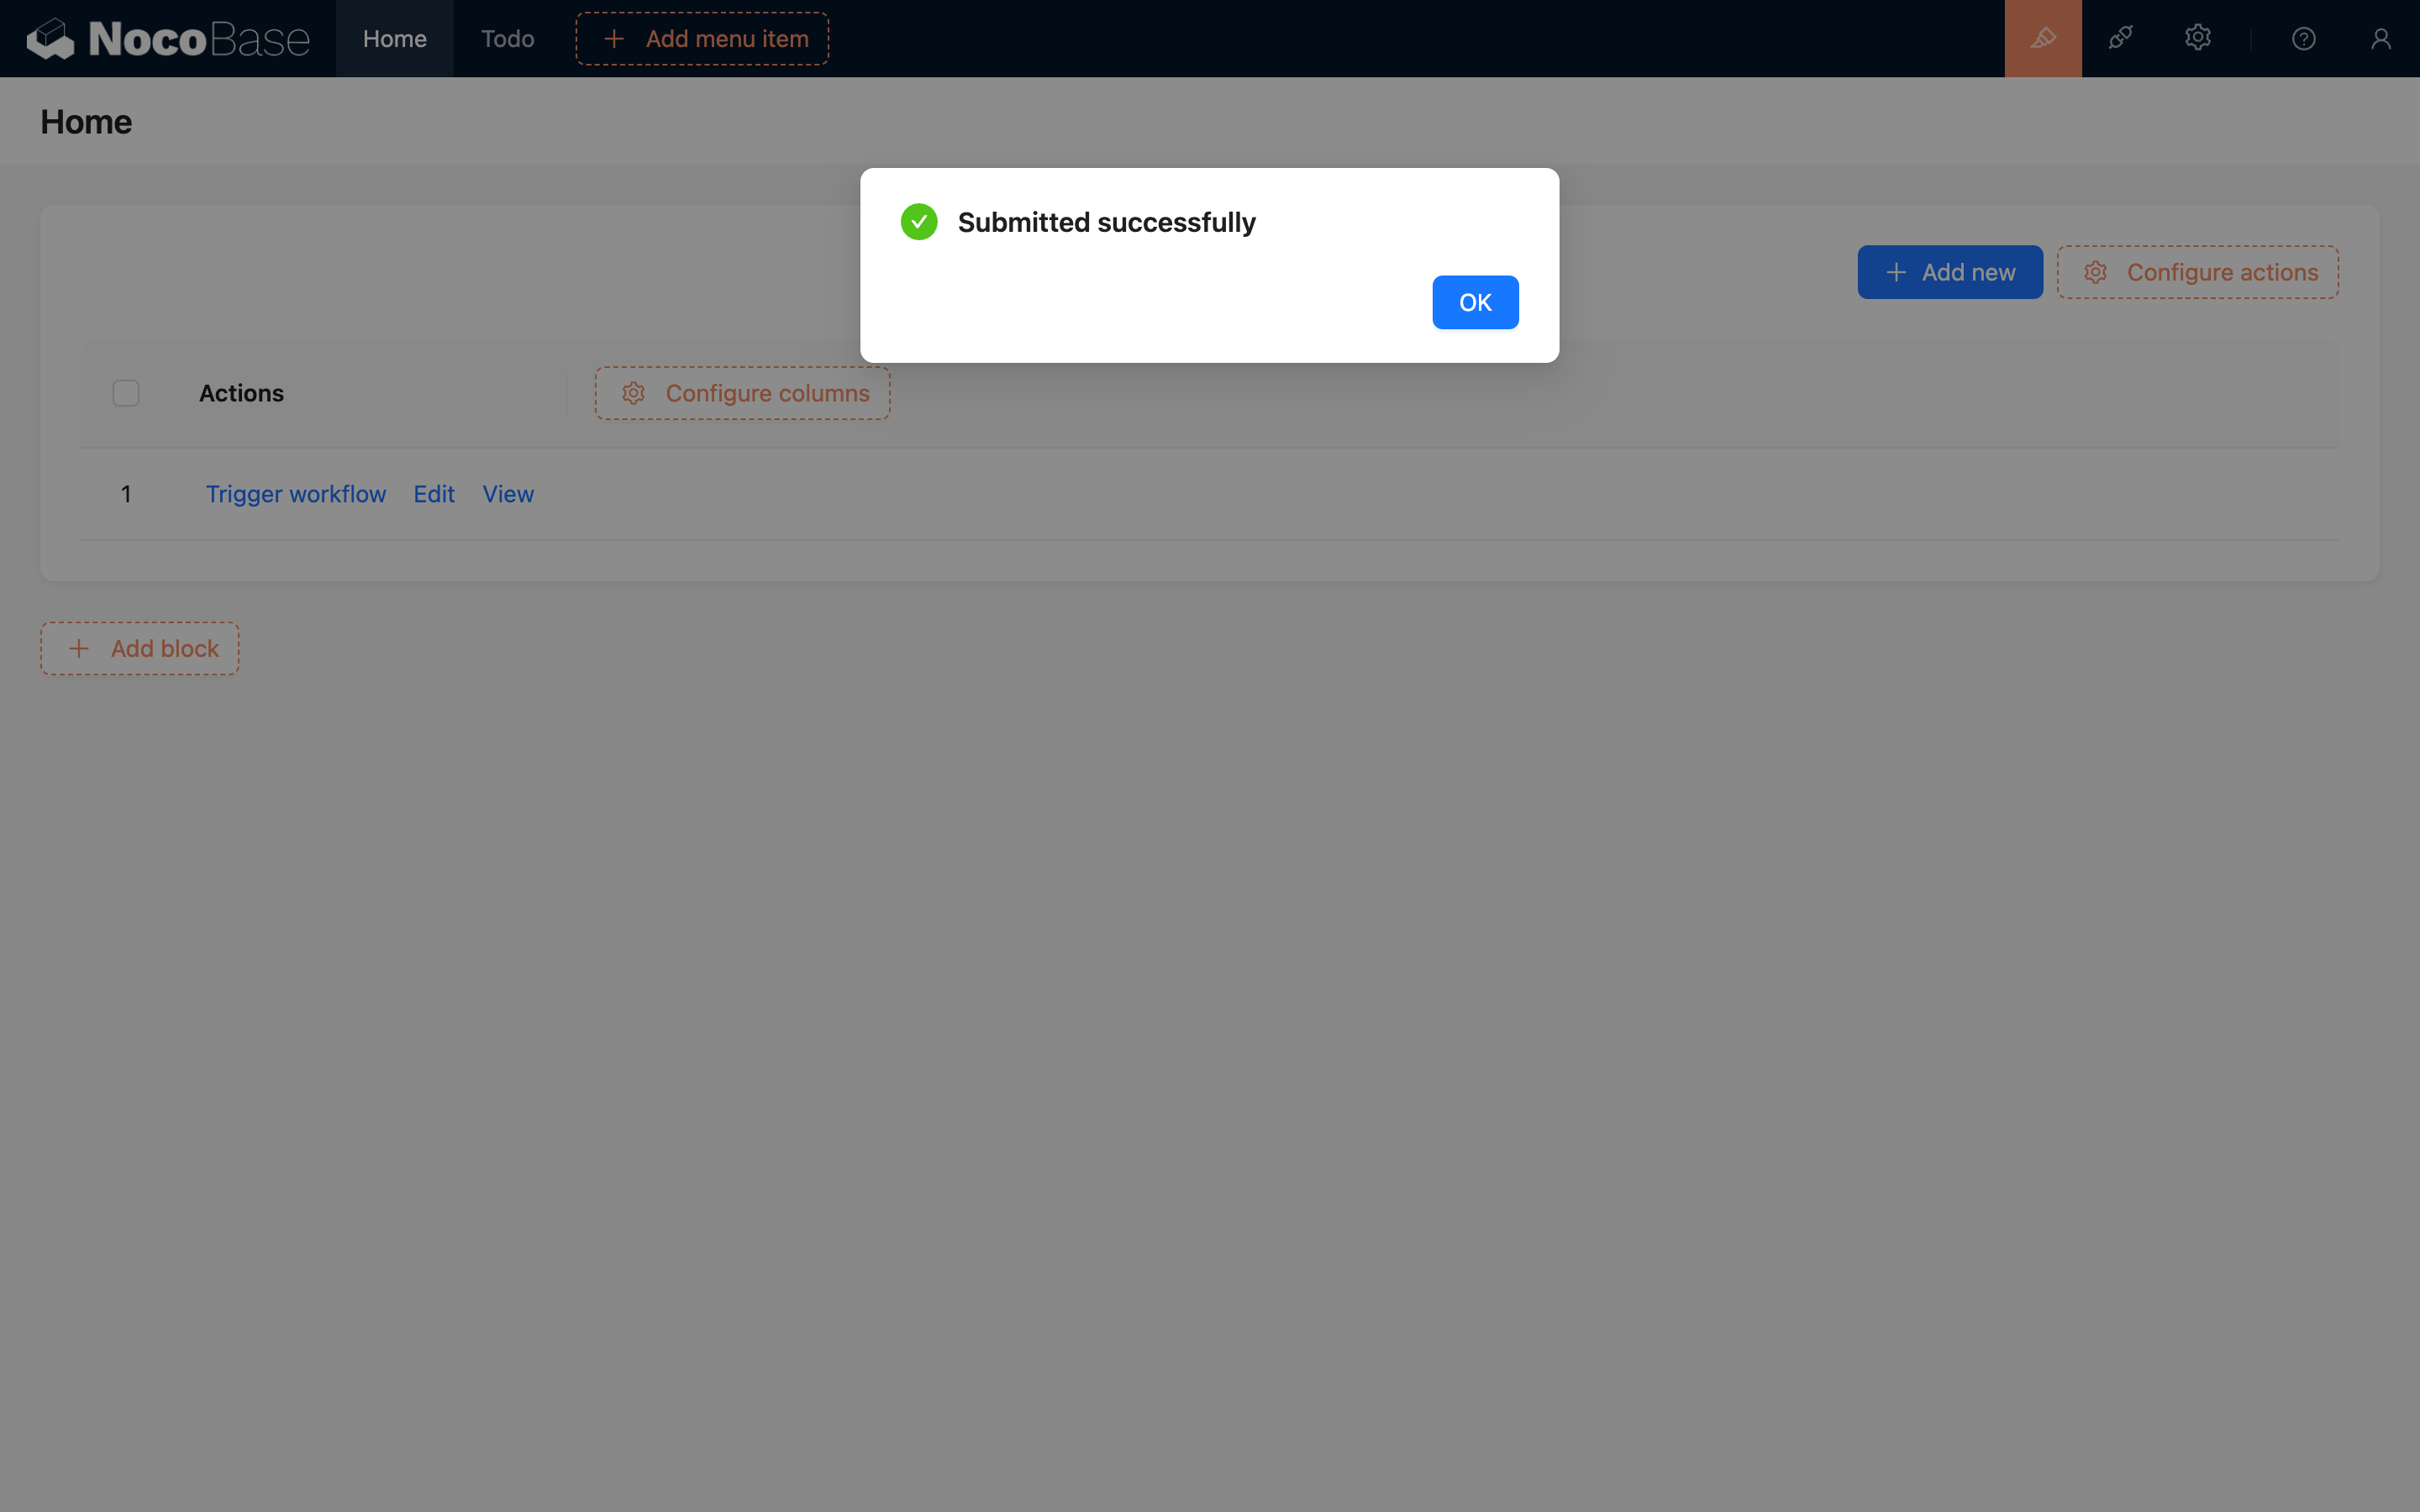
Afterward, clicking this button will trigger the custom action event:
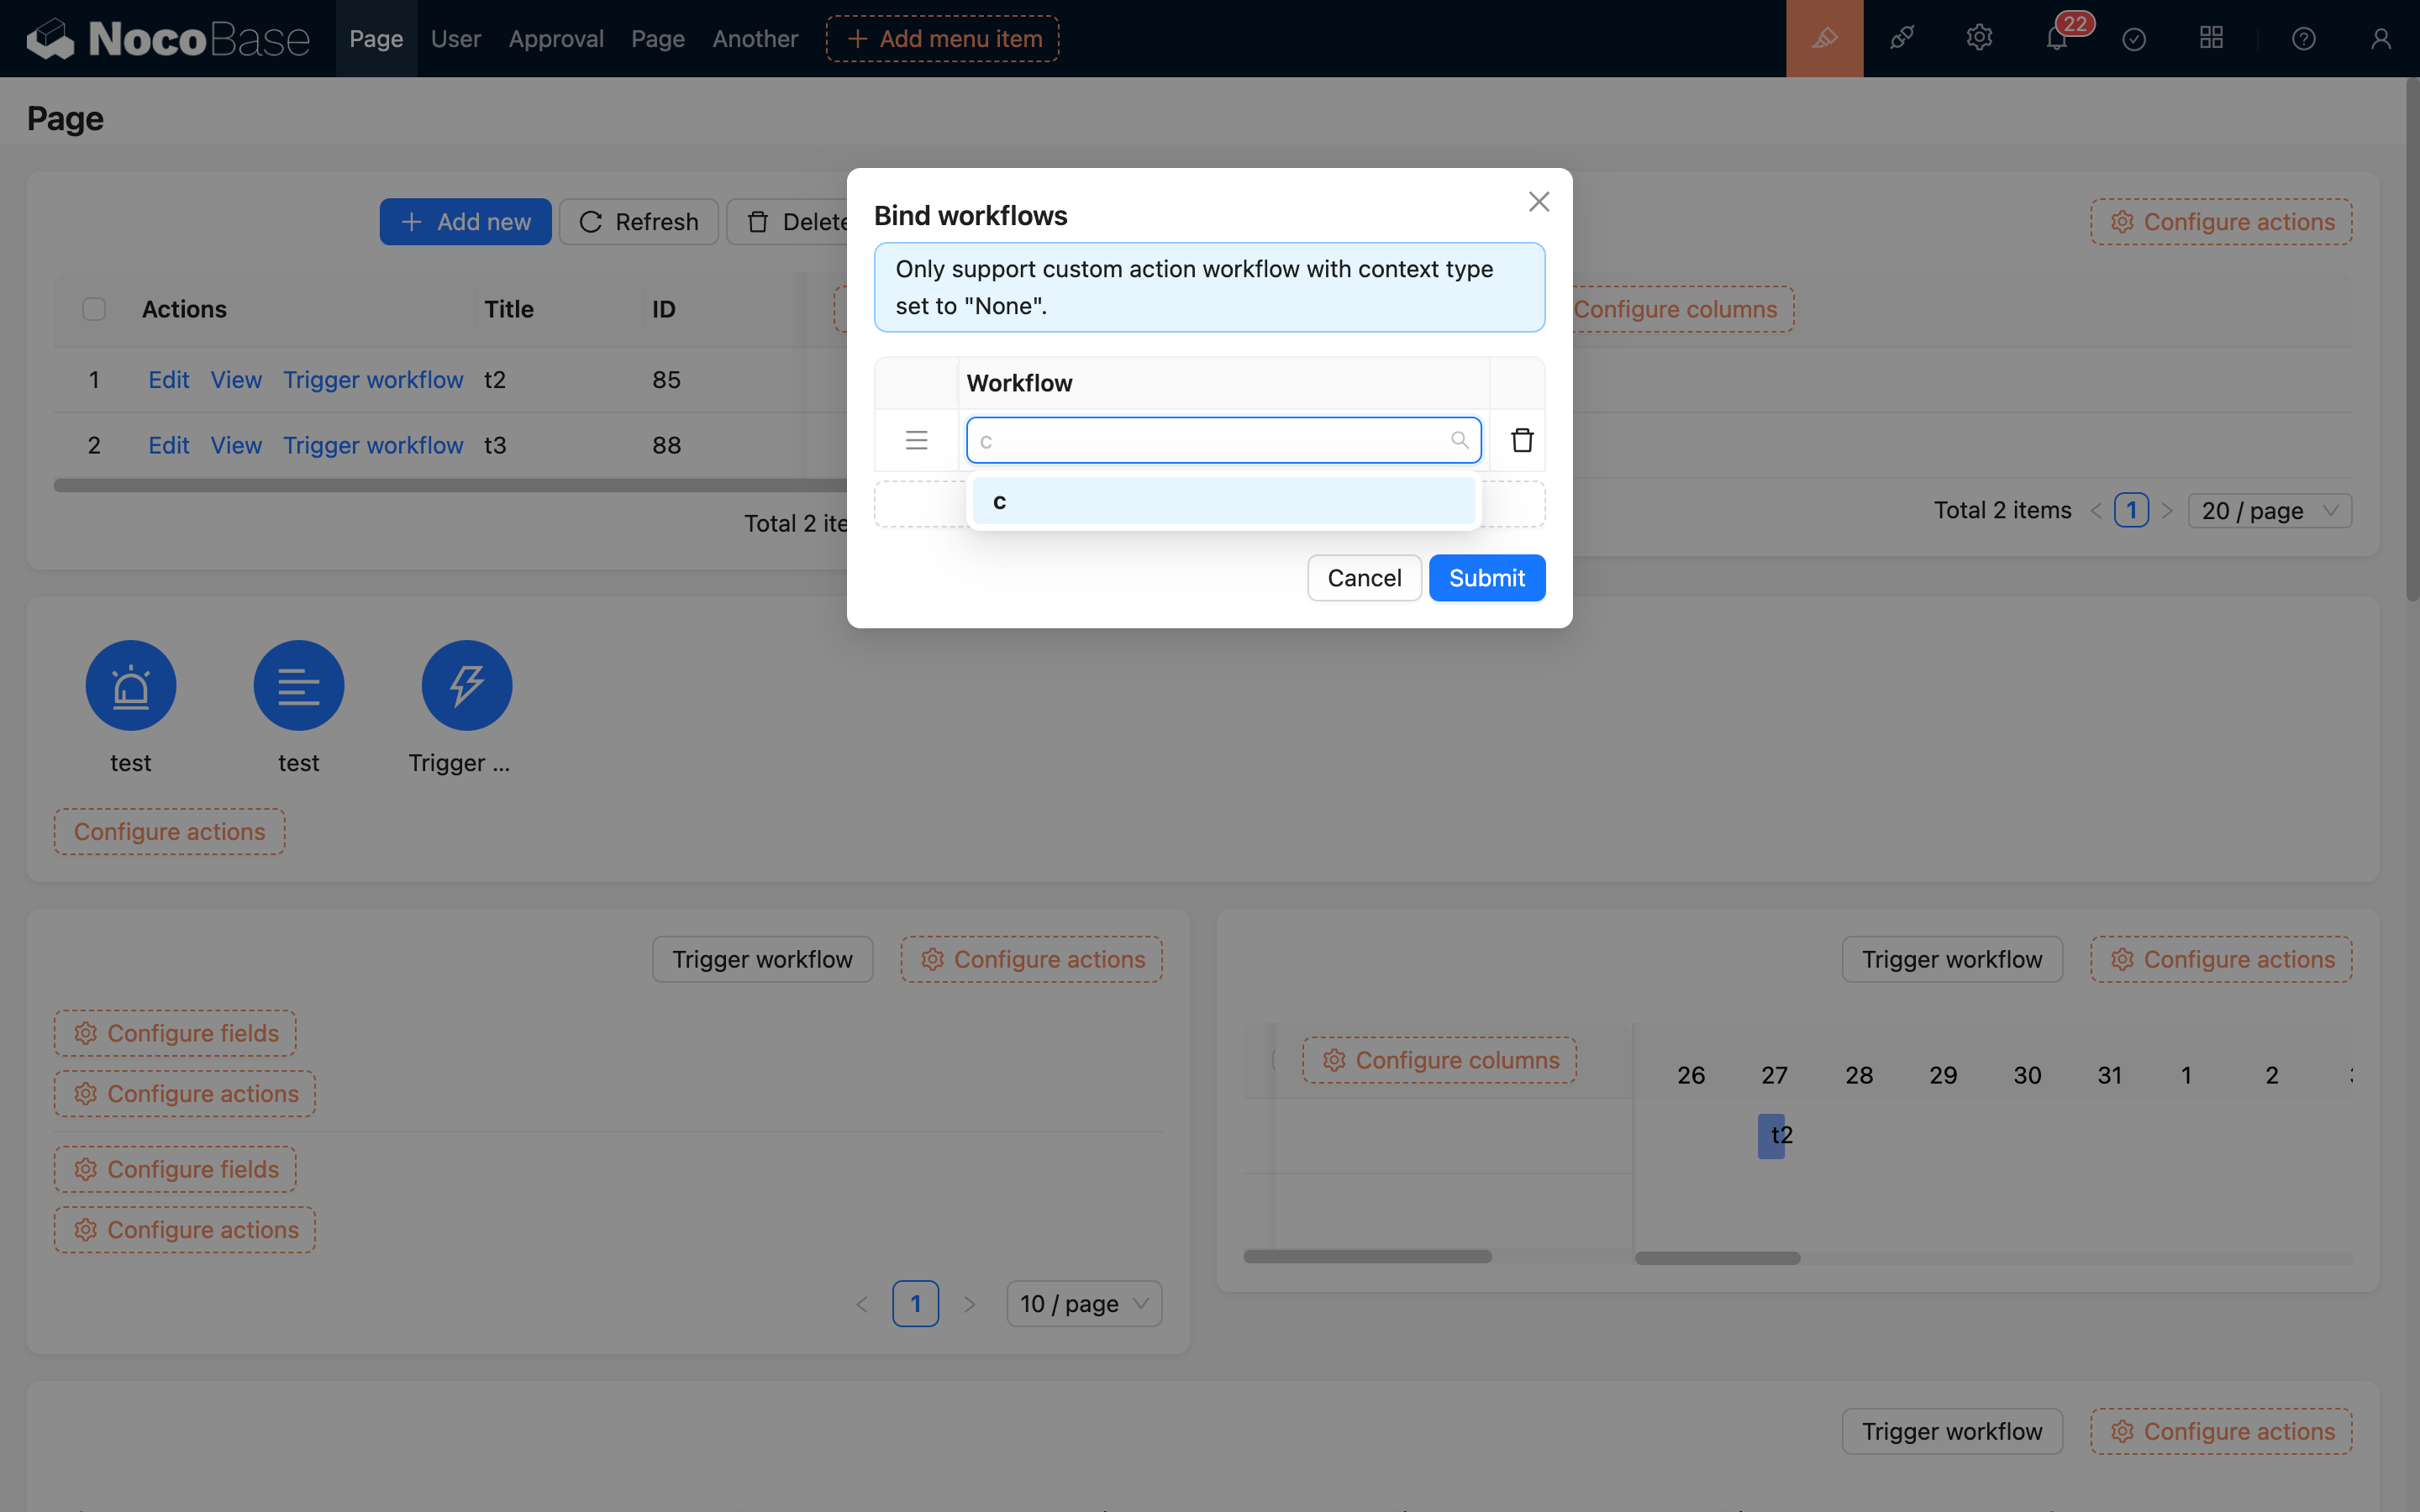
Multiple Records
v1.6.0+
In the action bar of a table block, when adding a "Trigger Workflow" button, there is an additional option to select the context type: "No Context" or "Multiple Records":
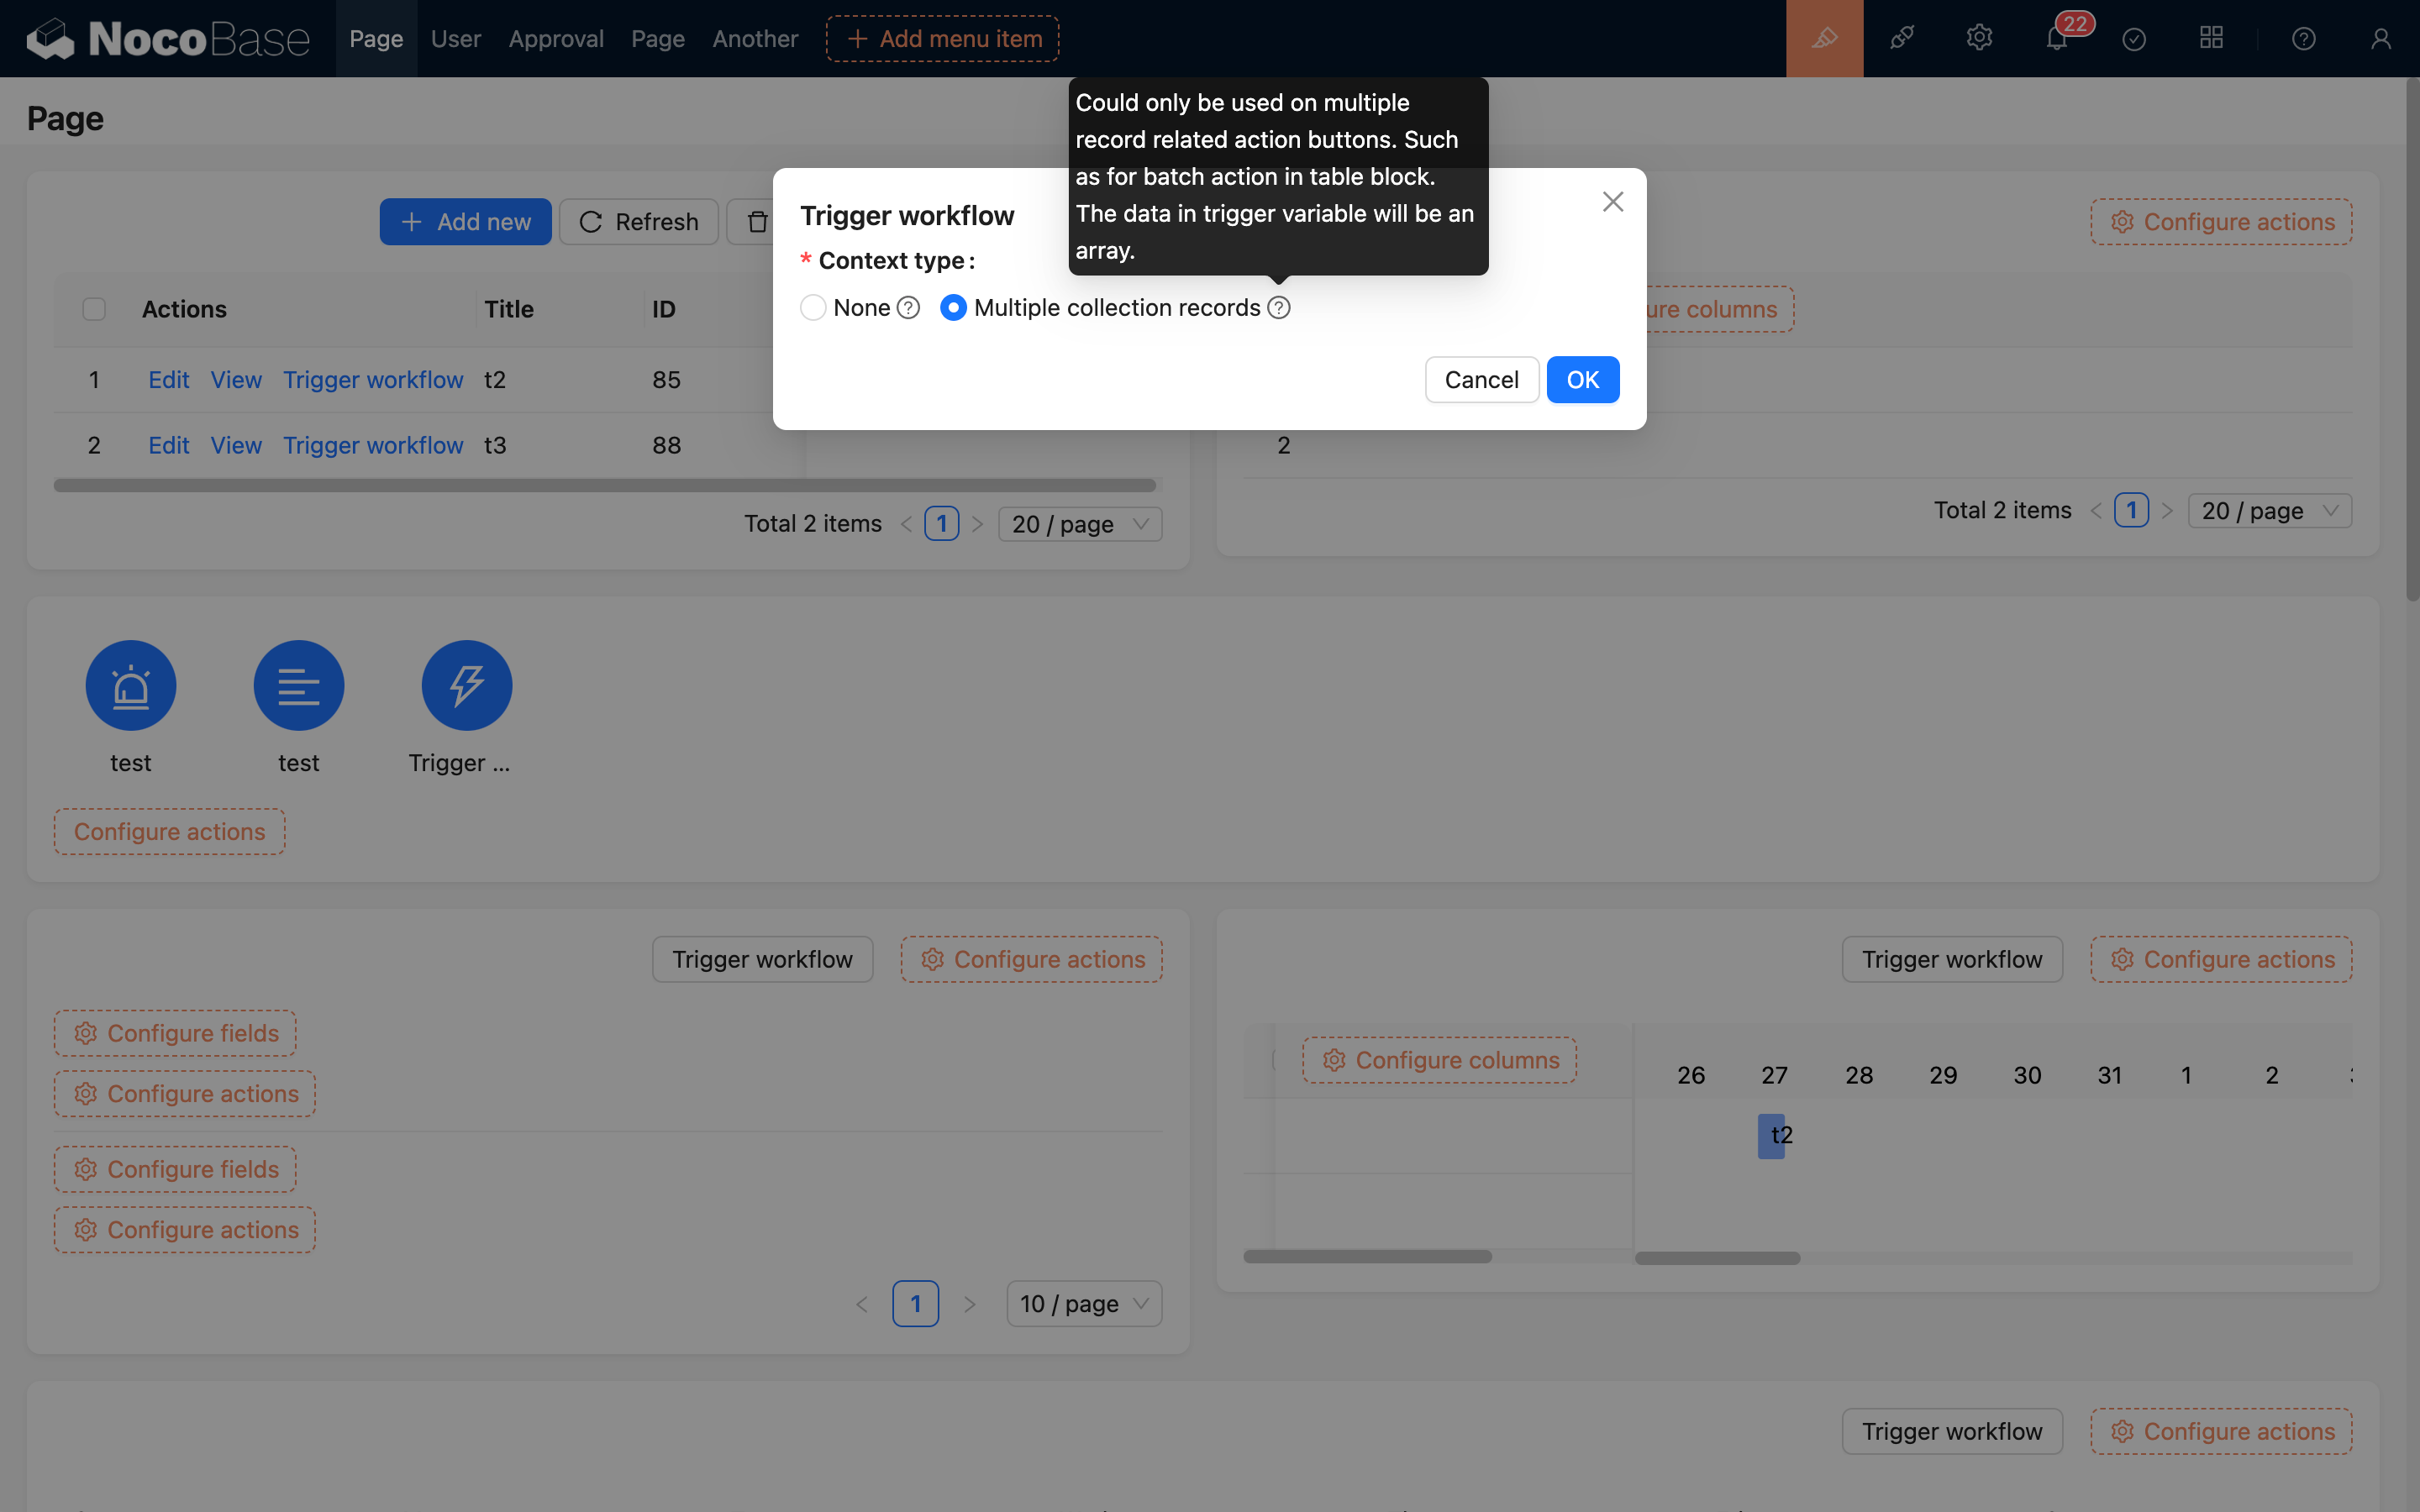
When "No Context" is selected, it is a global event and can only be bound to no-context workflows.
When "Multiple Records" is selected, you can bind a multiple-records workflow, which can be used for bulk actions after selecting multiple records (currently only supported by tables). The available workflows are limited to those configured to match the collection of the current data block:
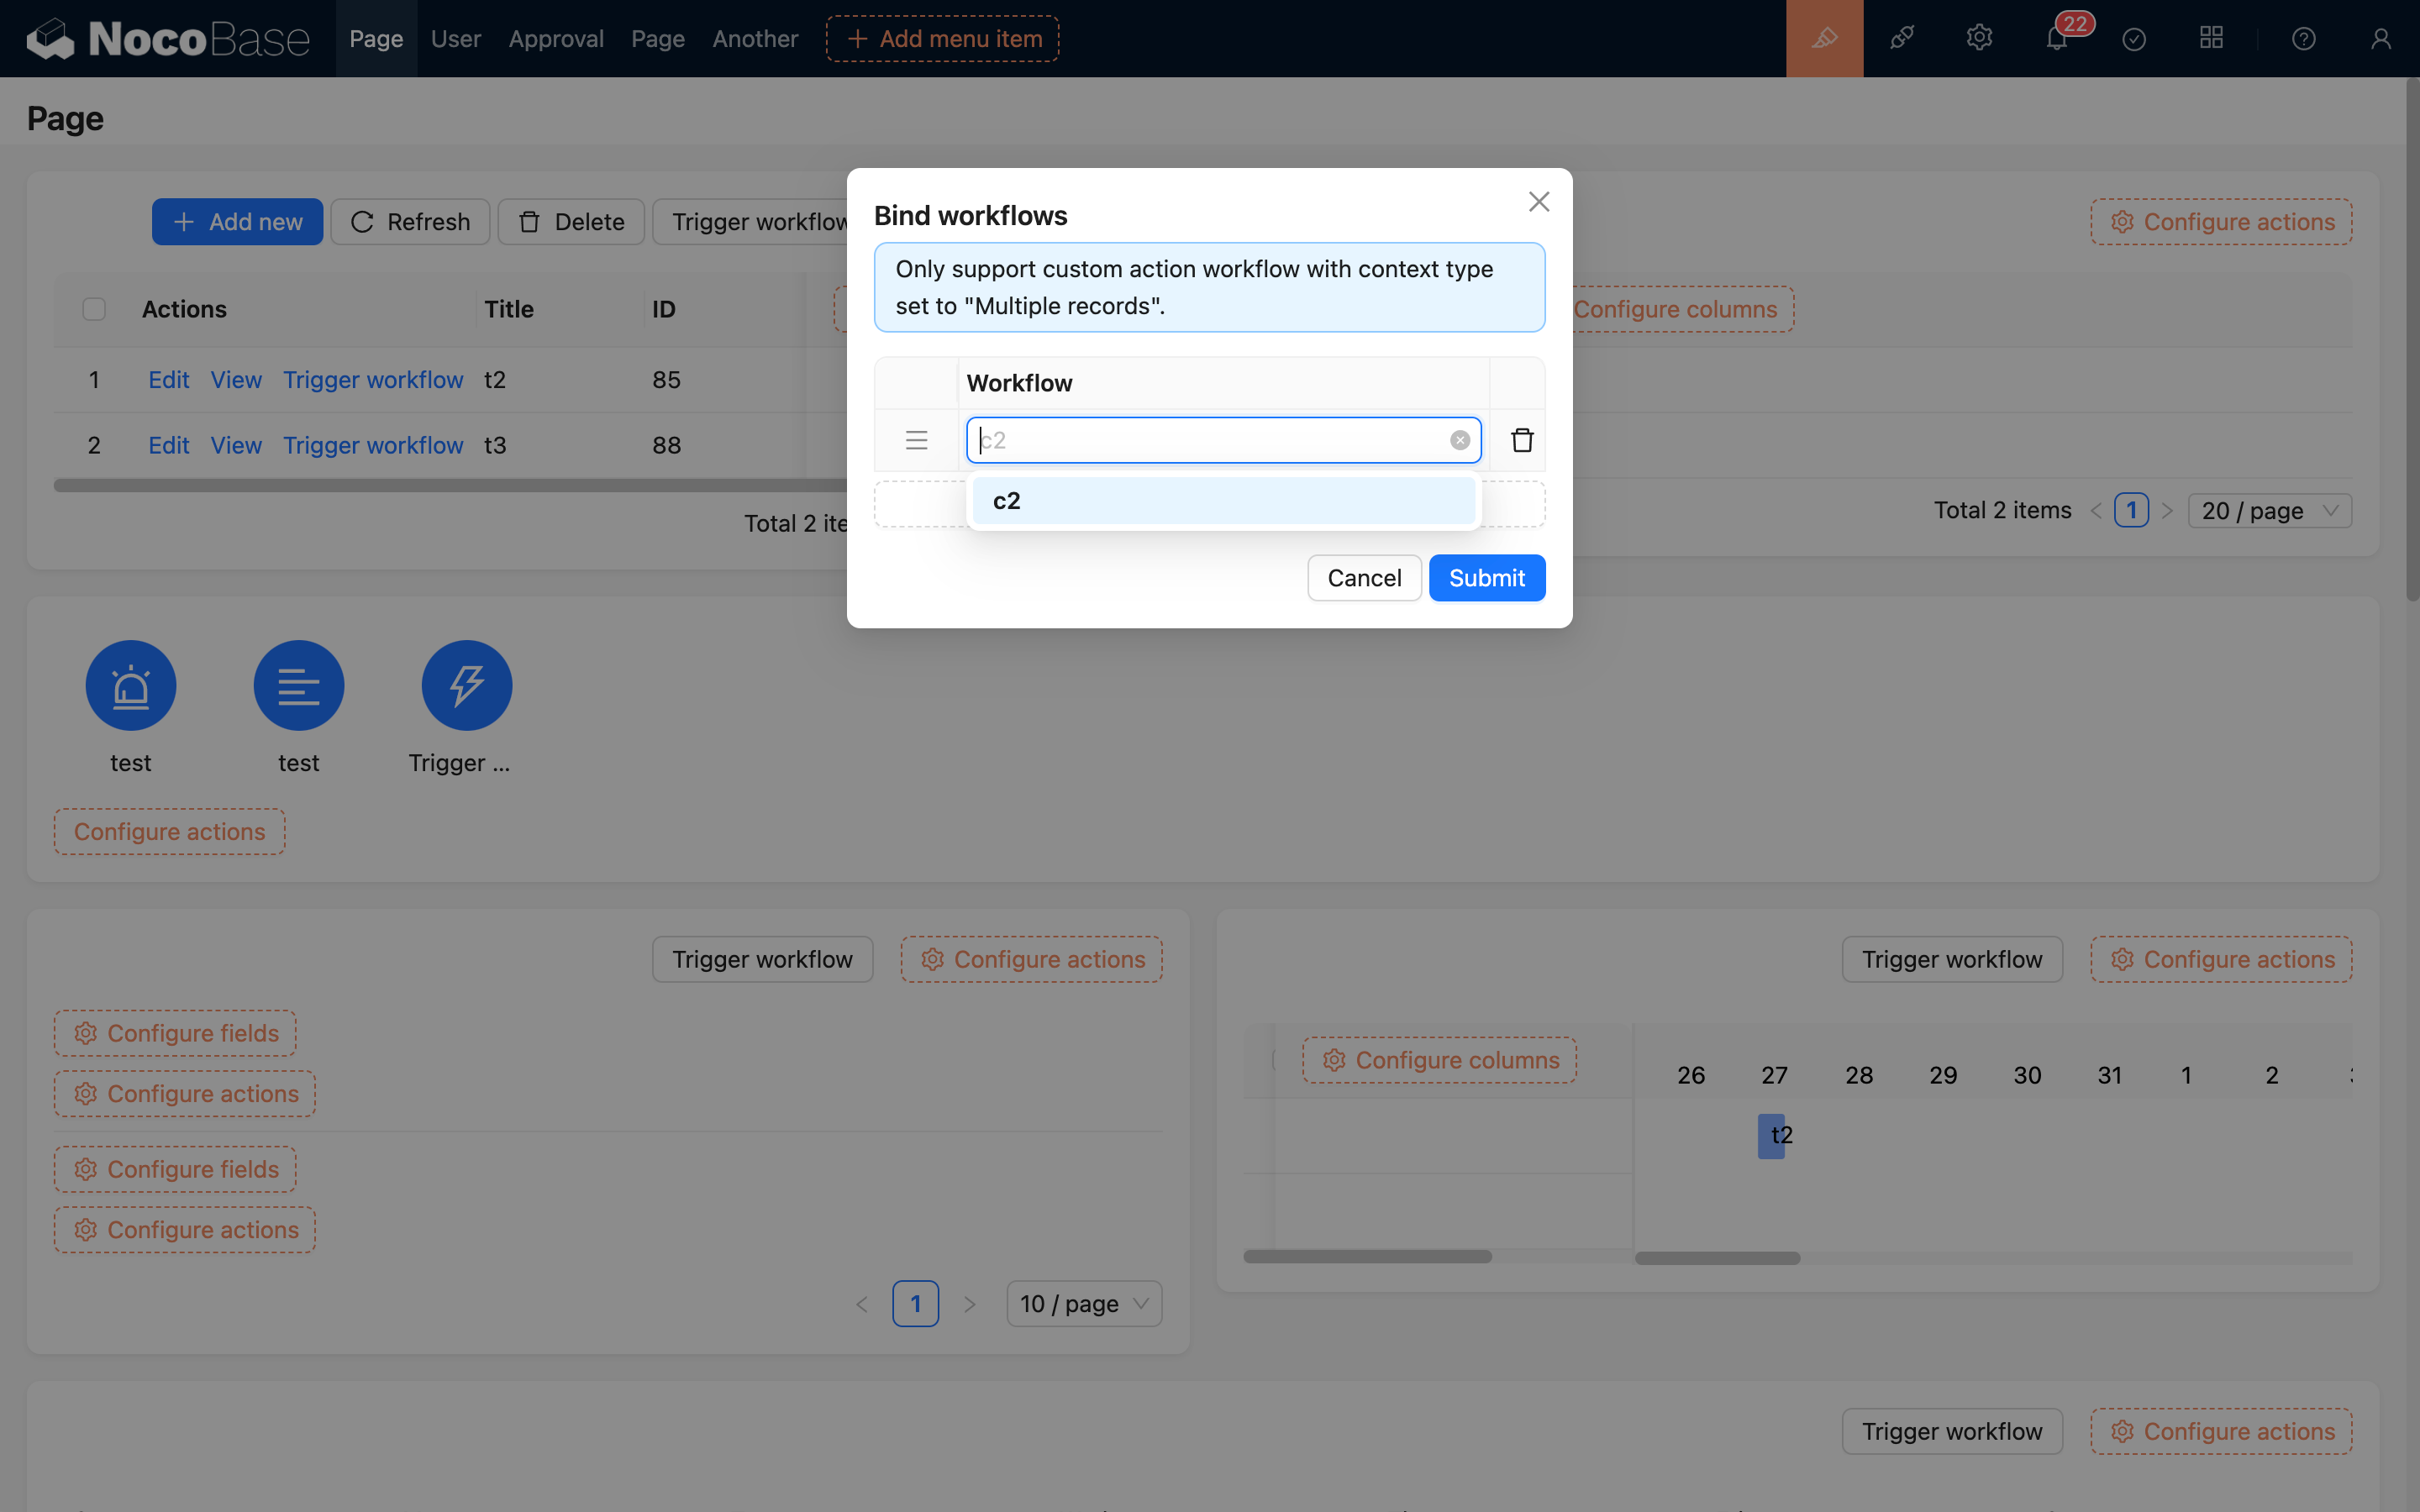
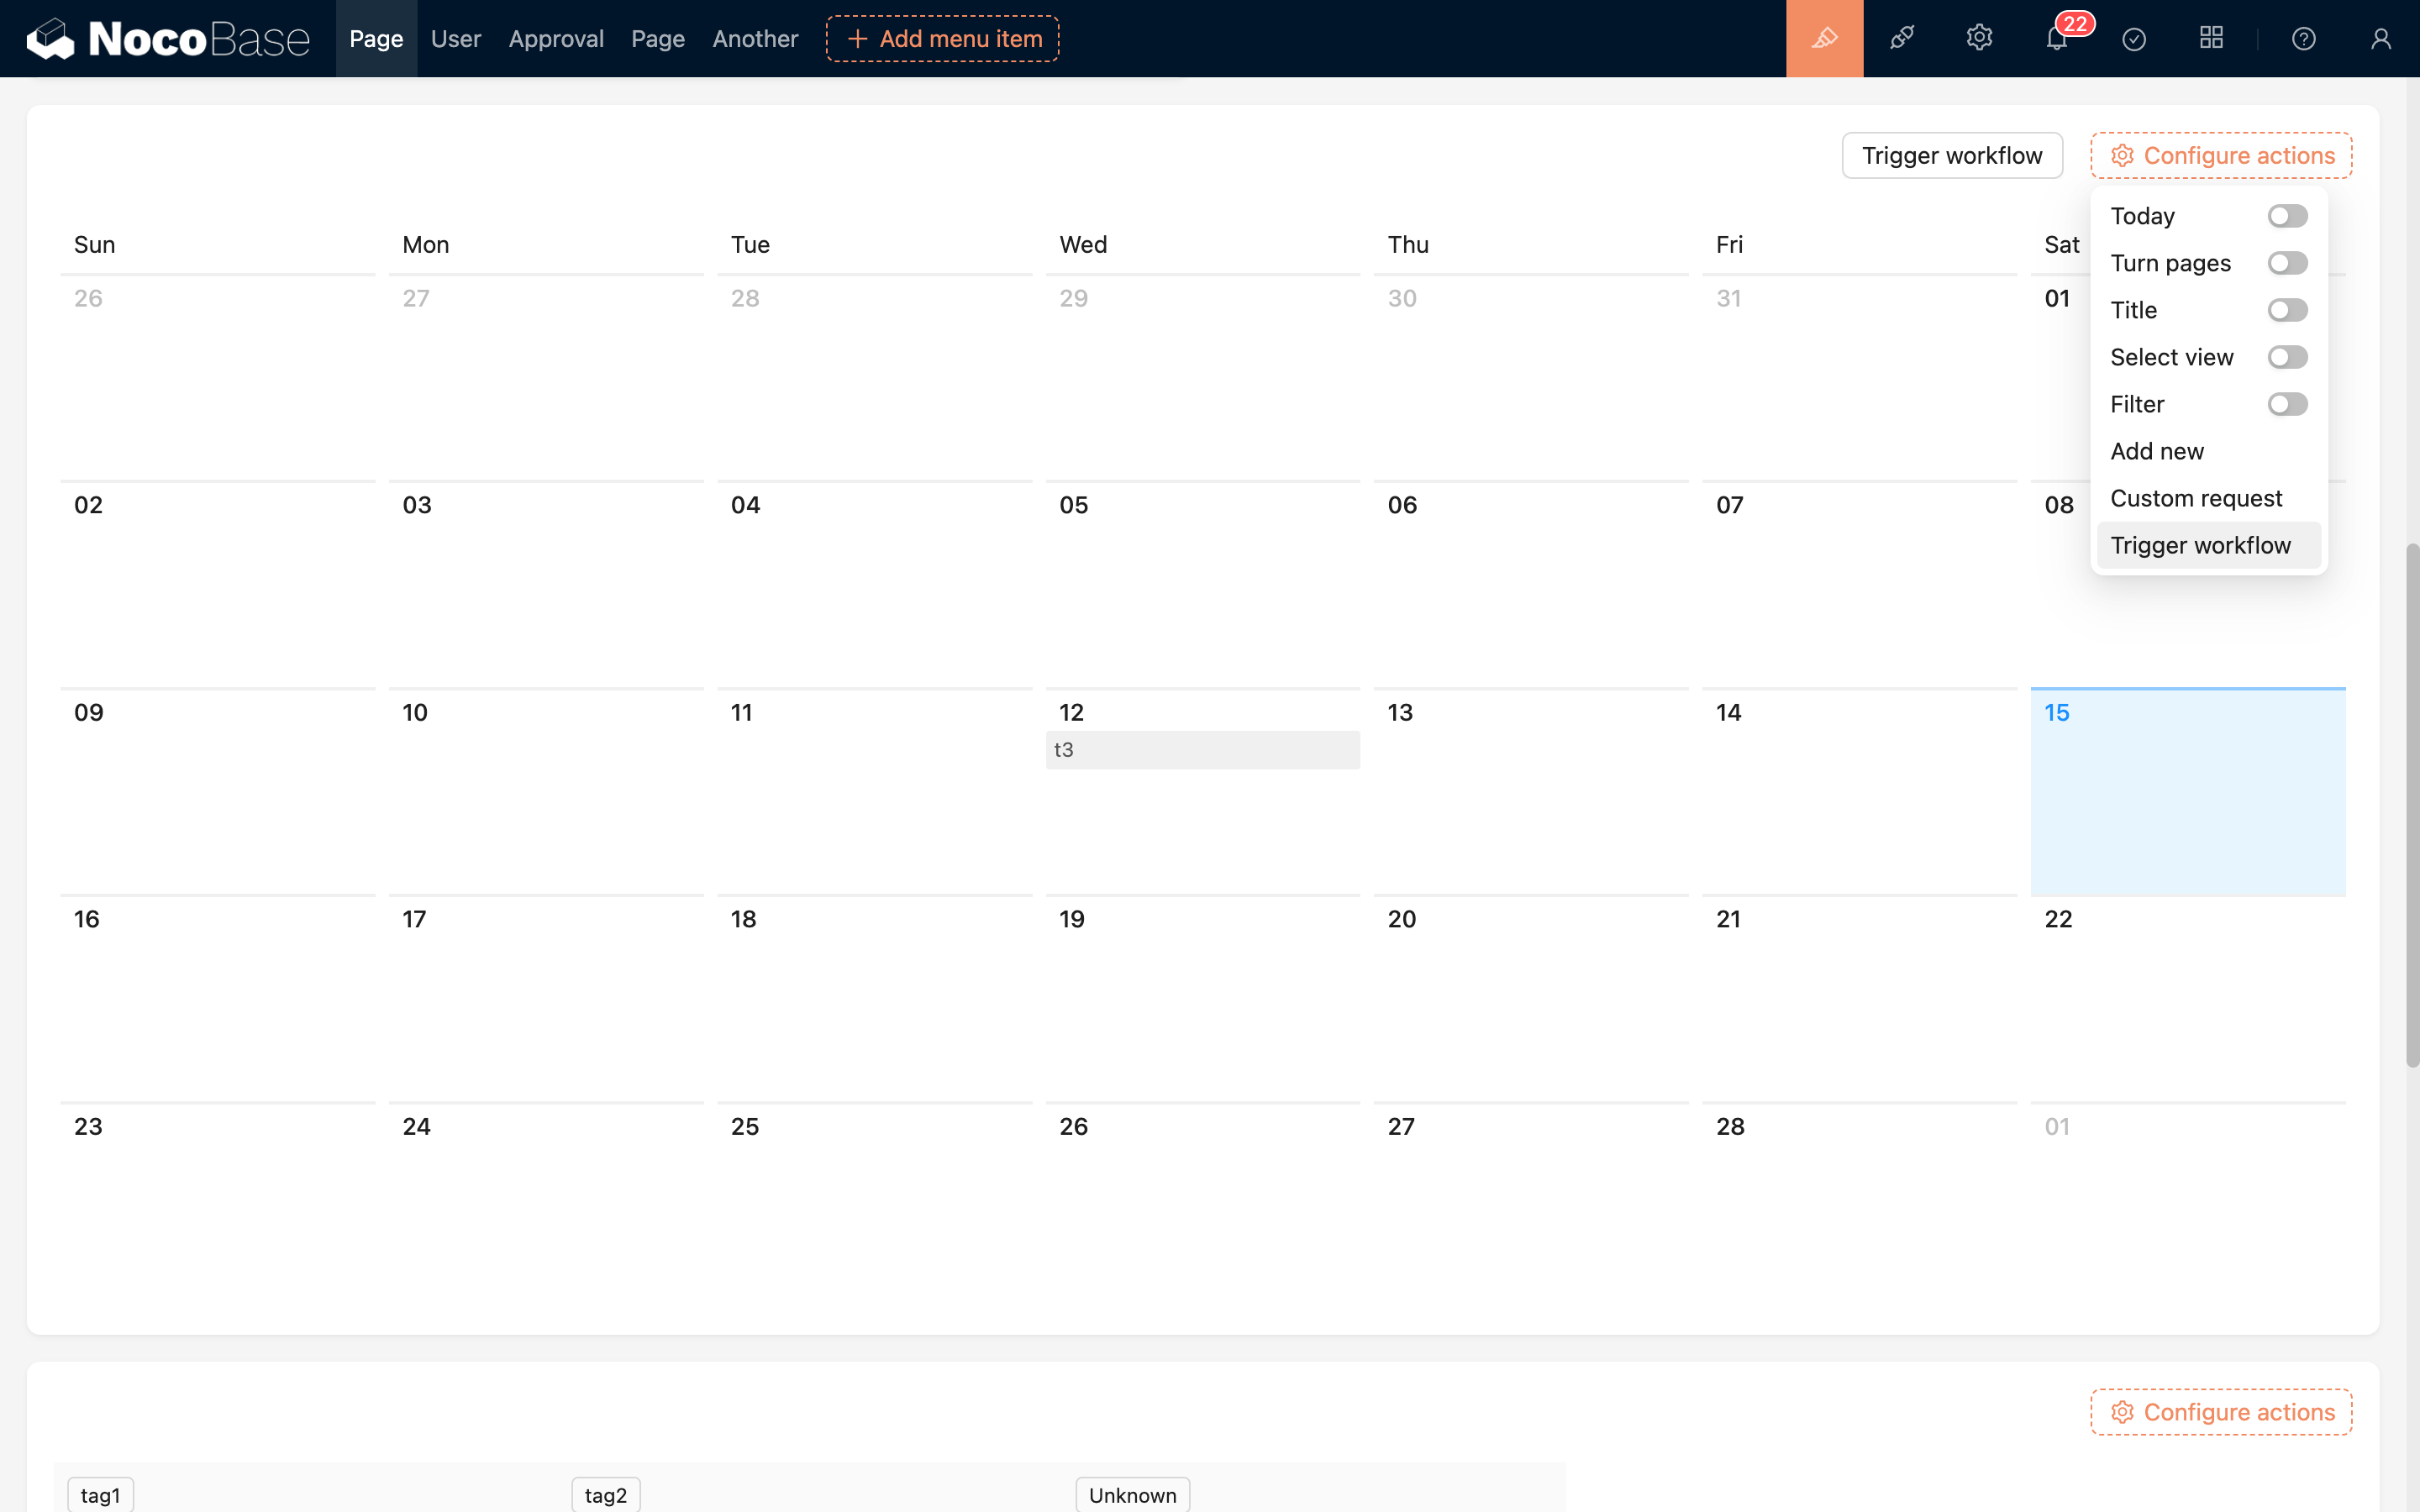
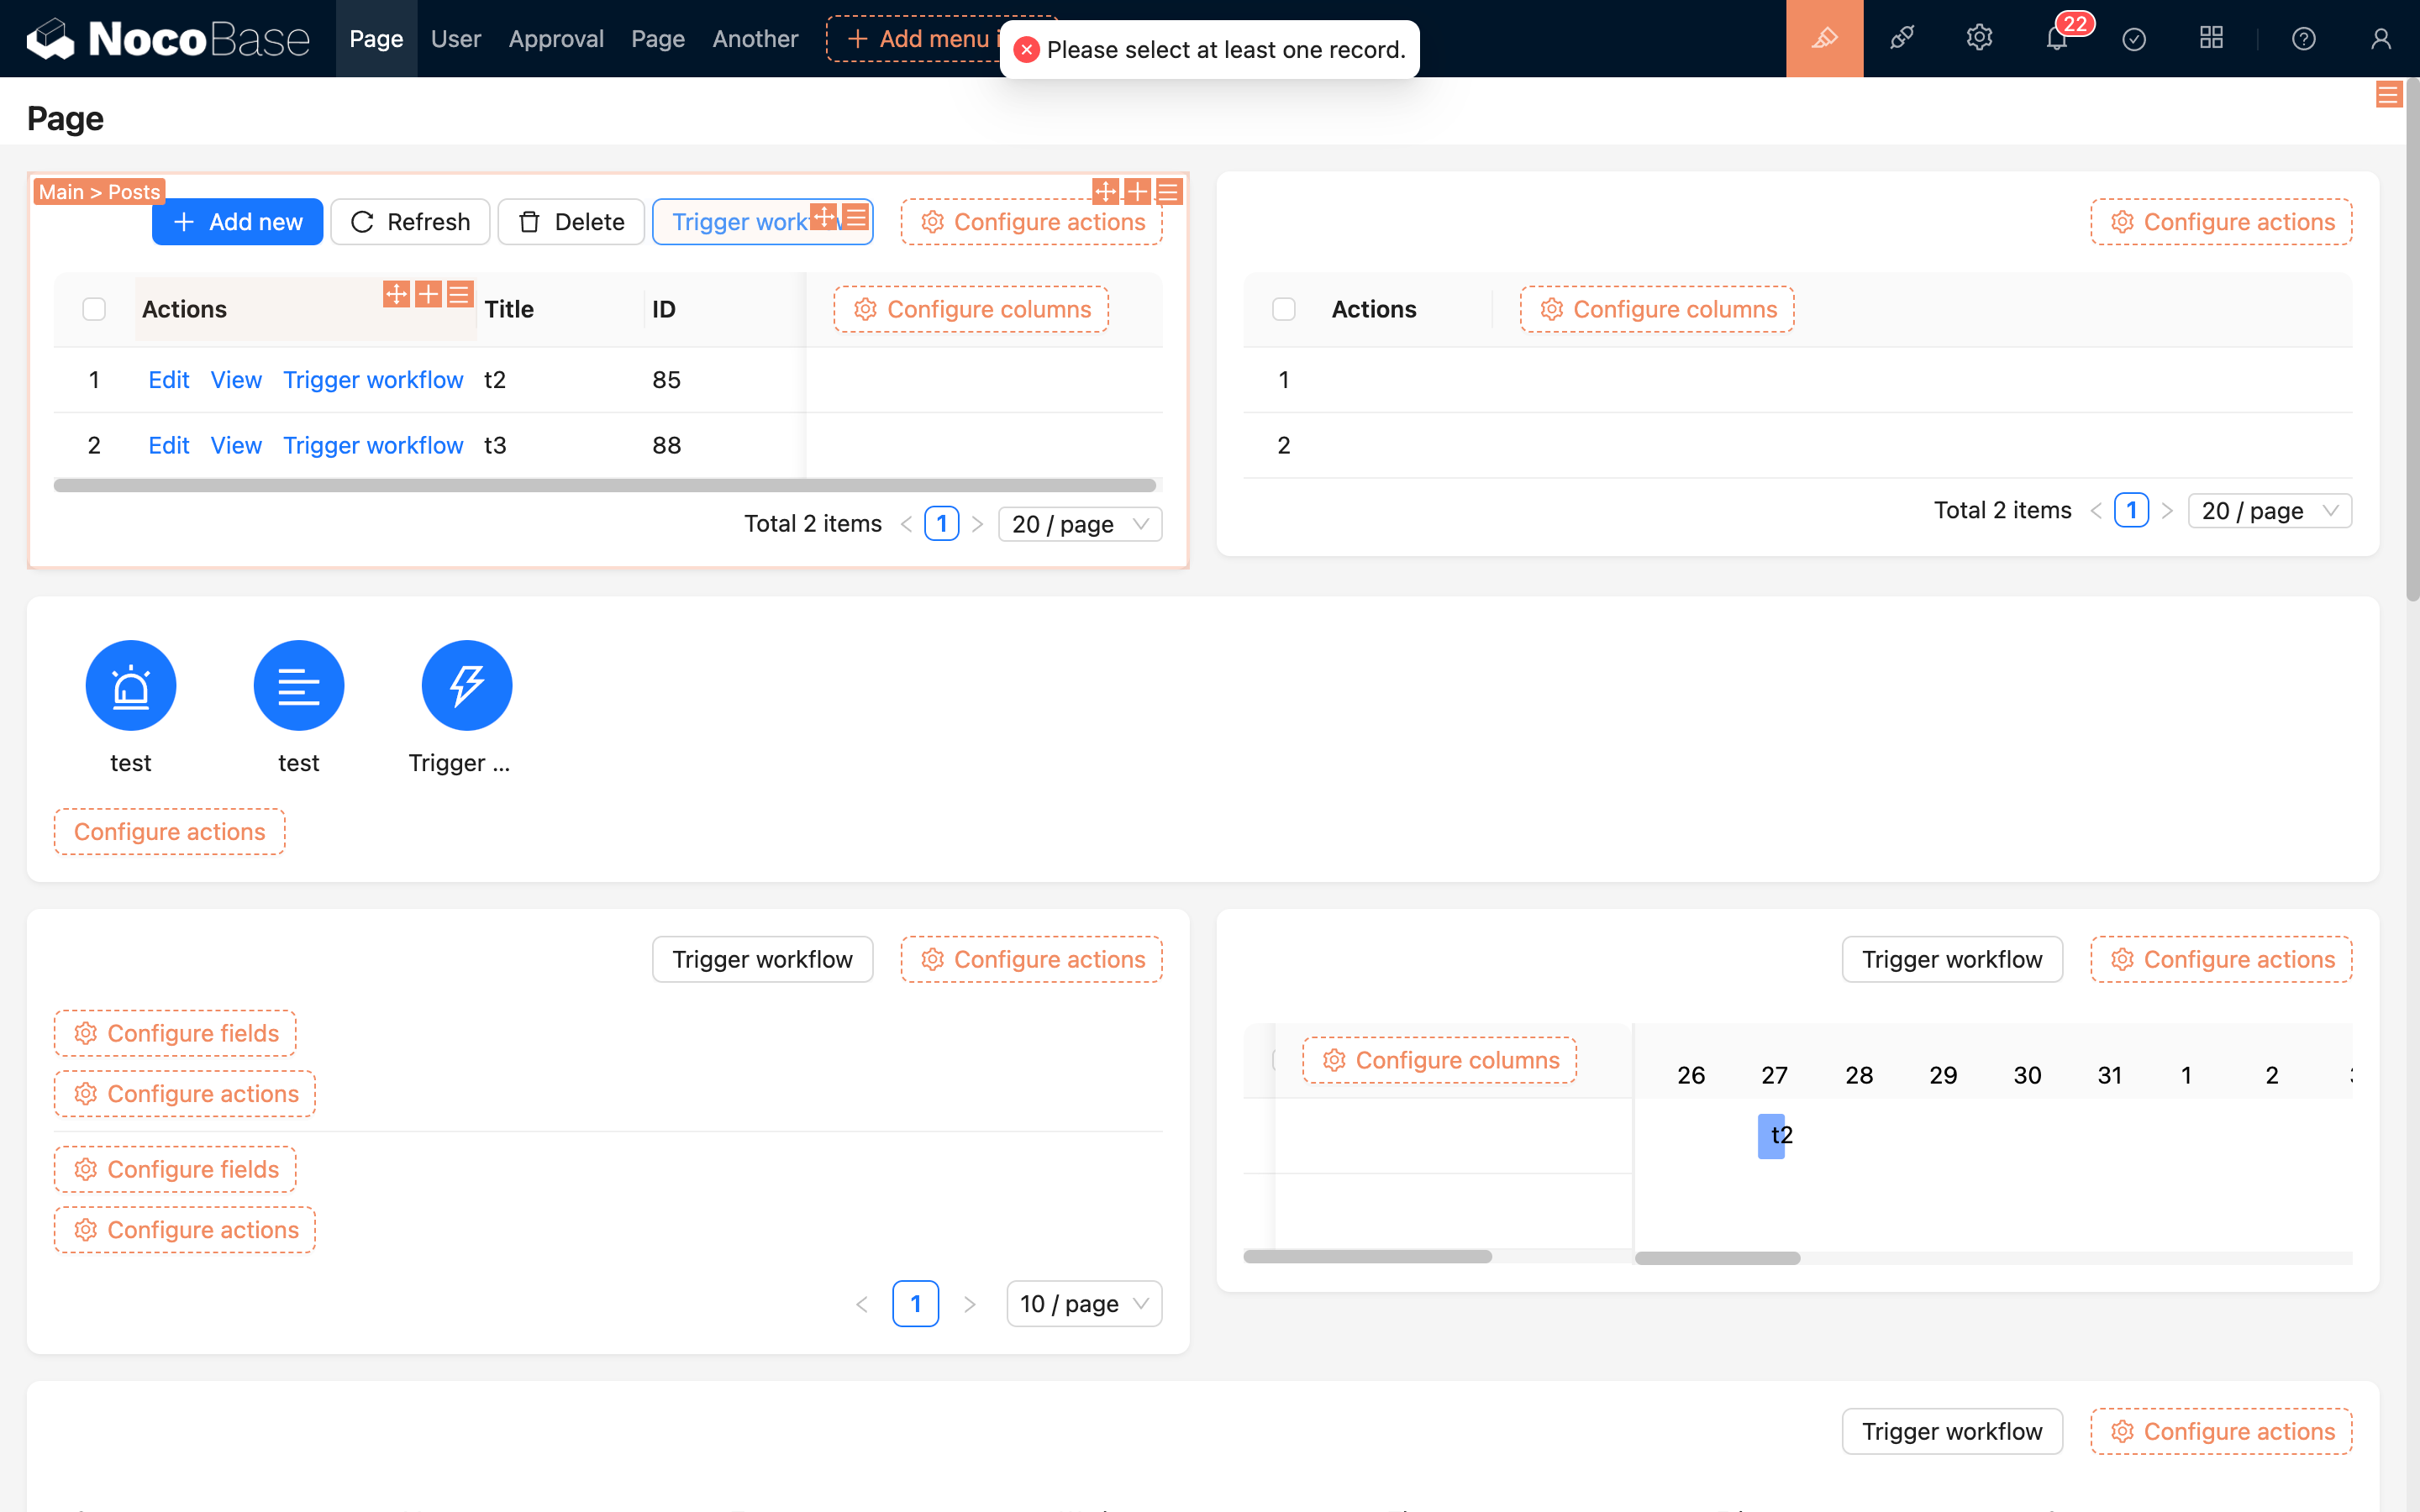
When clicking the button to trigger, some data rows in the table must be checked; otherwise, the workflow will not be triggered:
Example
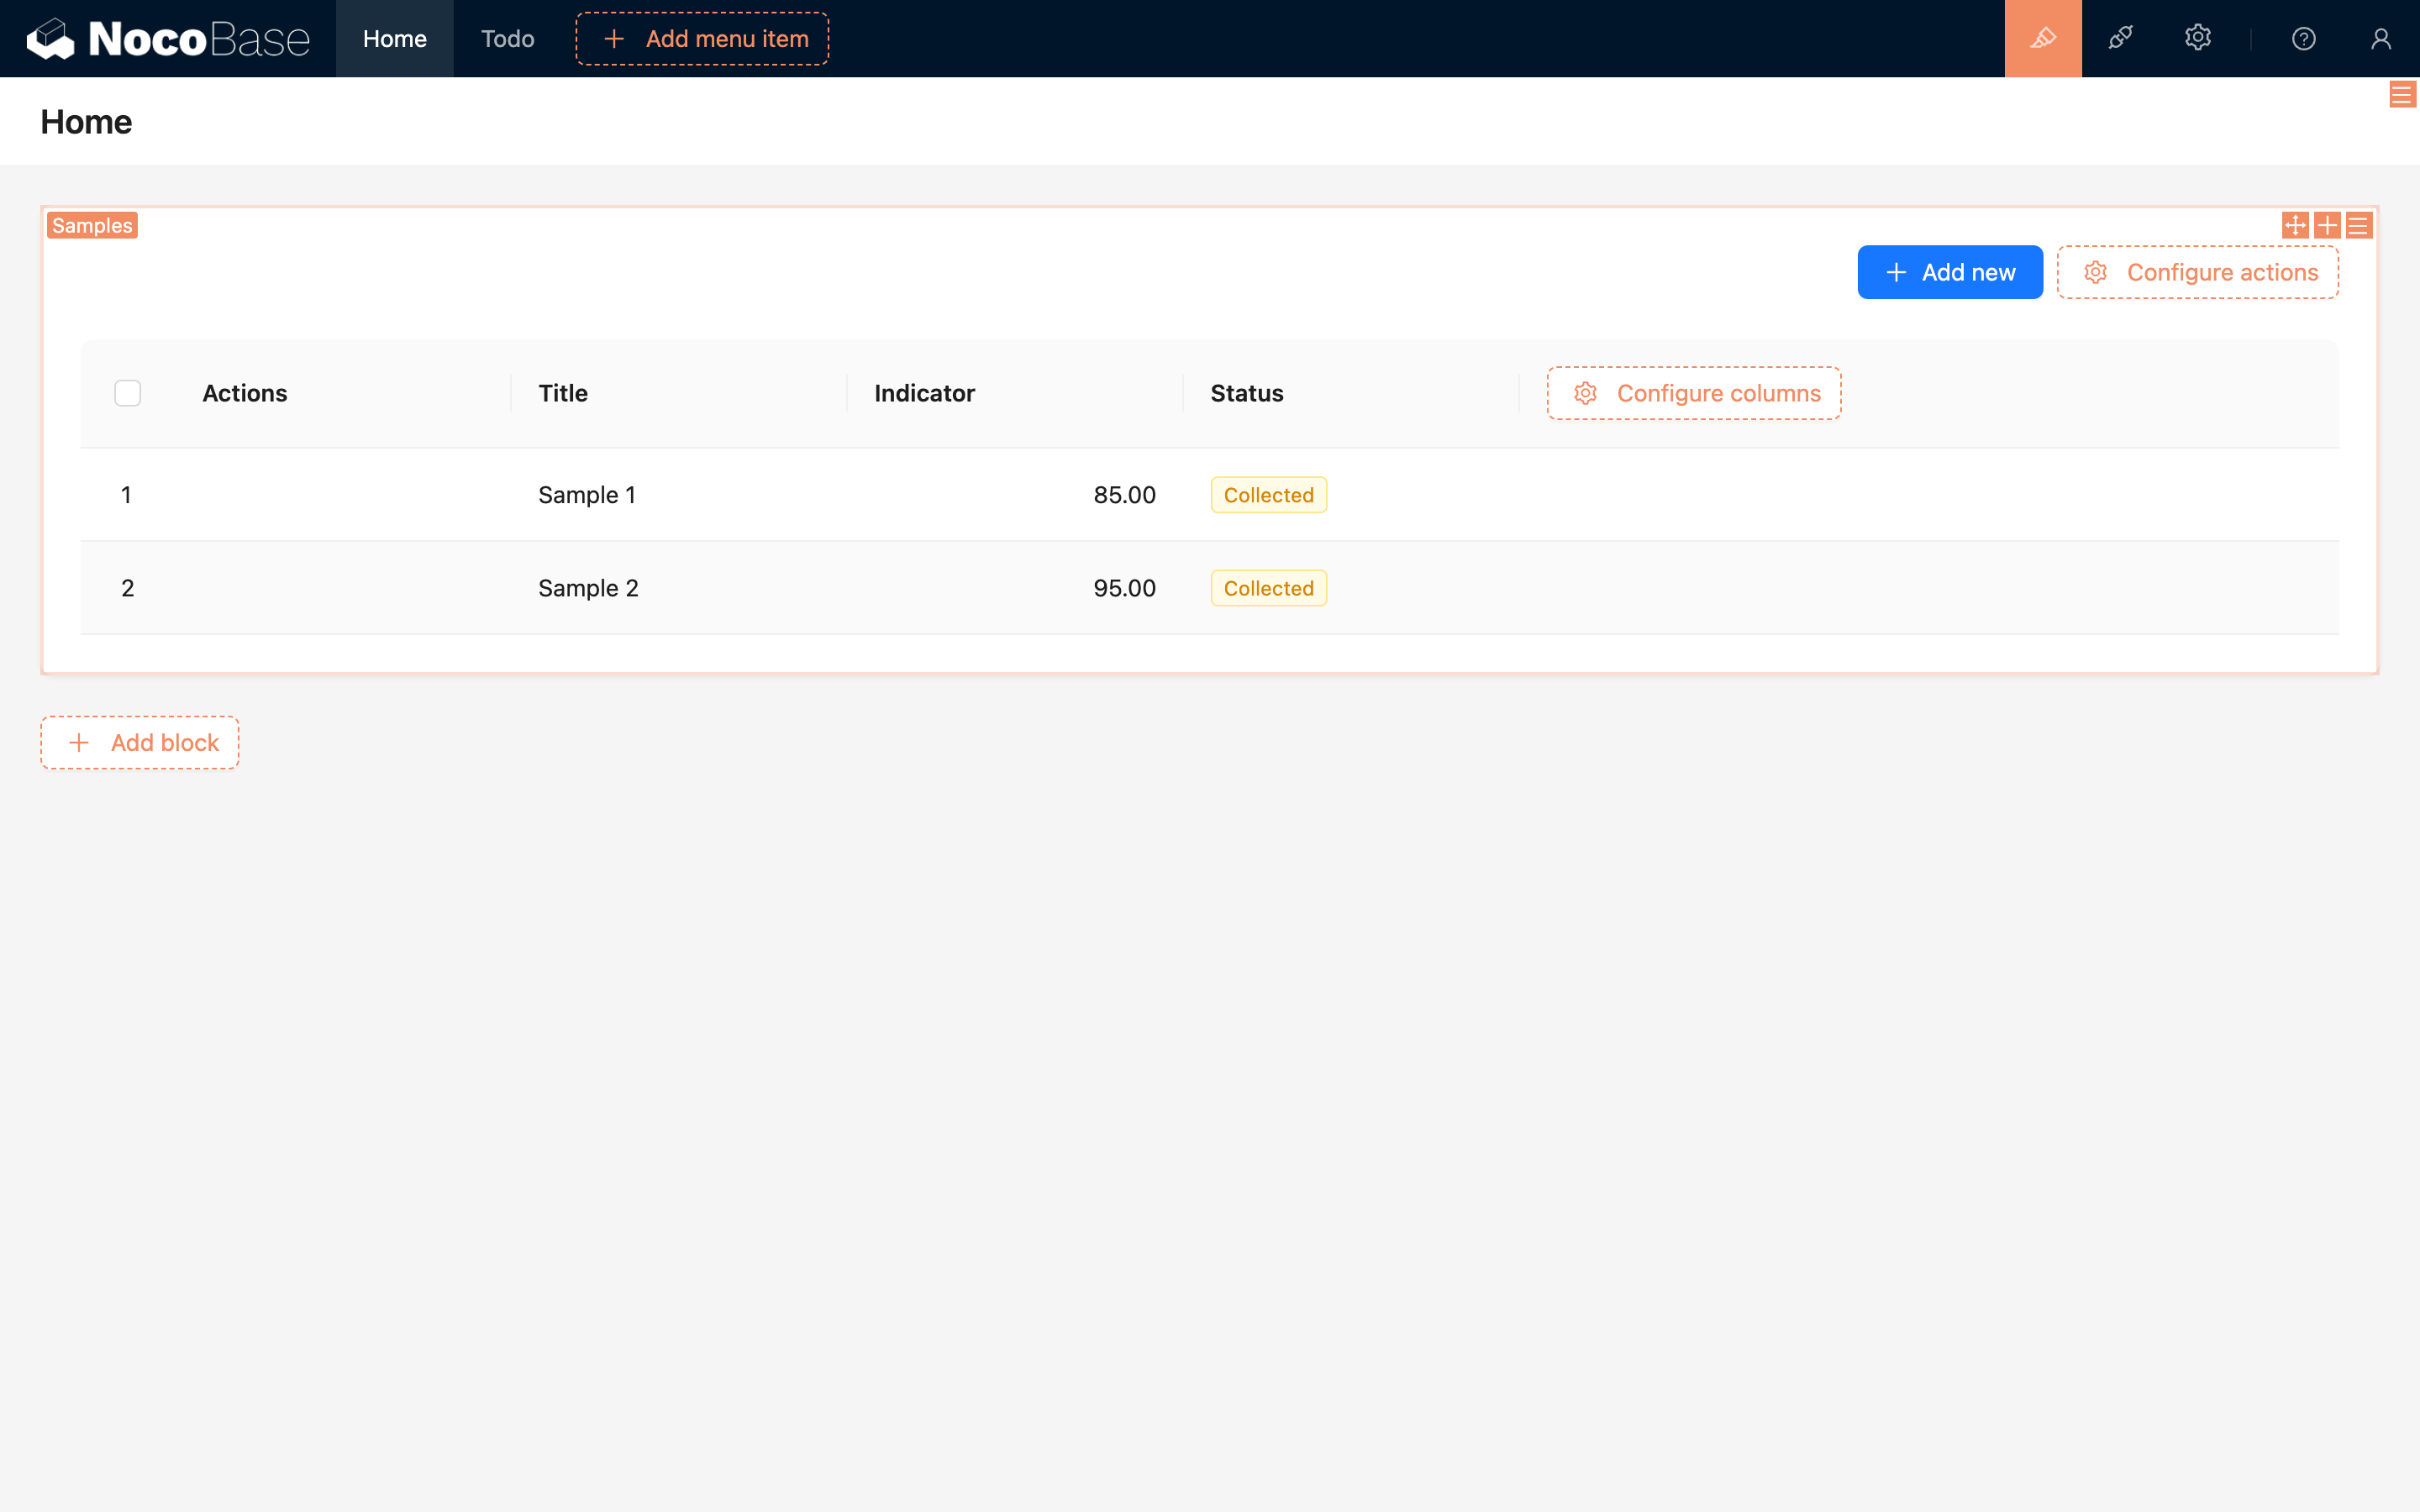
For example, we have a "Samples" collection. For samples with a status of "Collected", we need to provide a "Submit for Inspection" action. This action will first check the basic information of the sample, then generate a "Inspection Record", and finally change the sample's status to "Submitted". This series of processes cannot be completed with simple "add, delete, update, view" button clicks, so a custom action event can be used to implement it.
First, create a "Samples" collection and an "Inspection Records" collection, and enter some basic test data into the Samples collection:
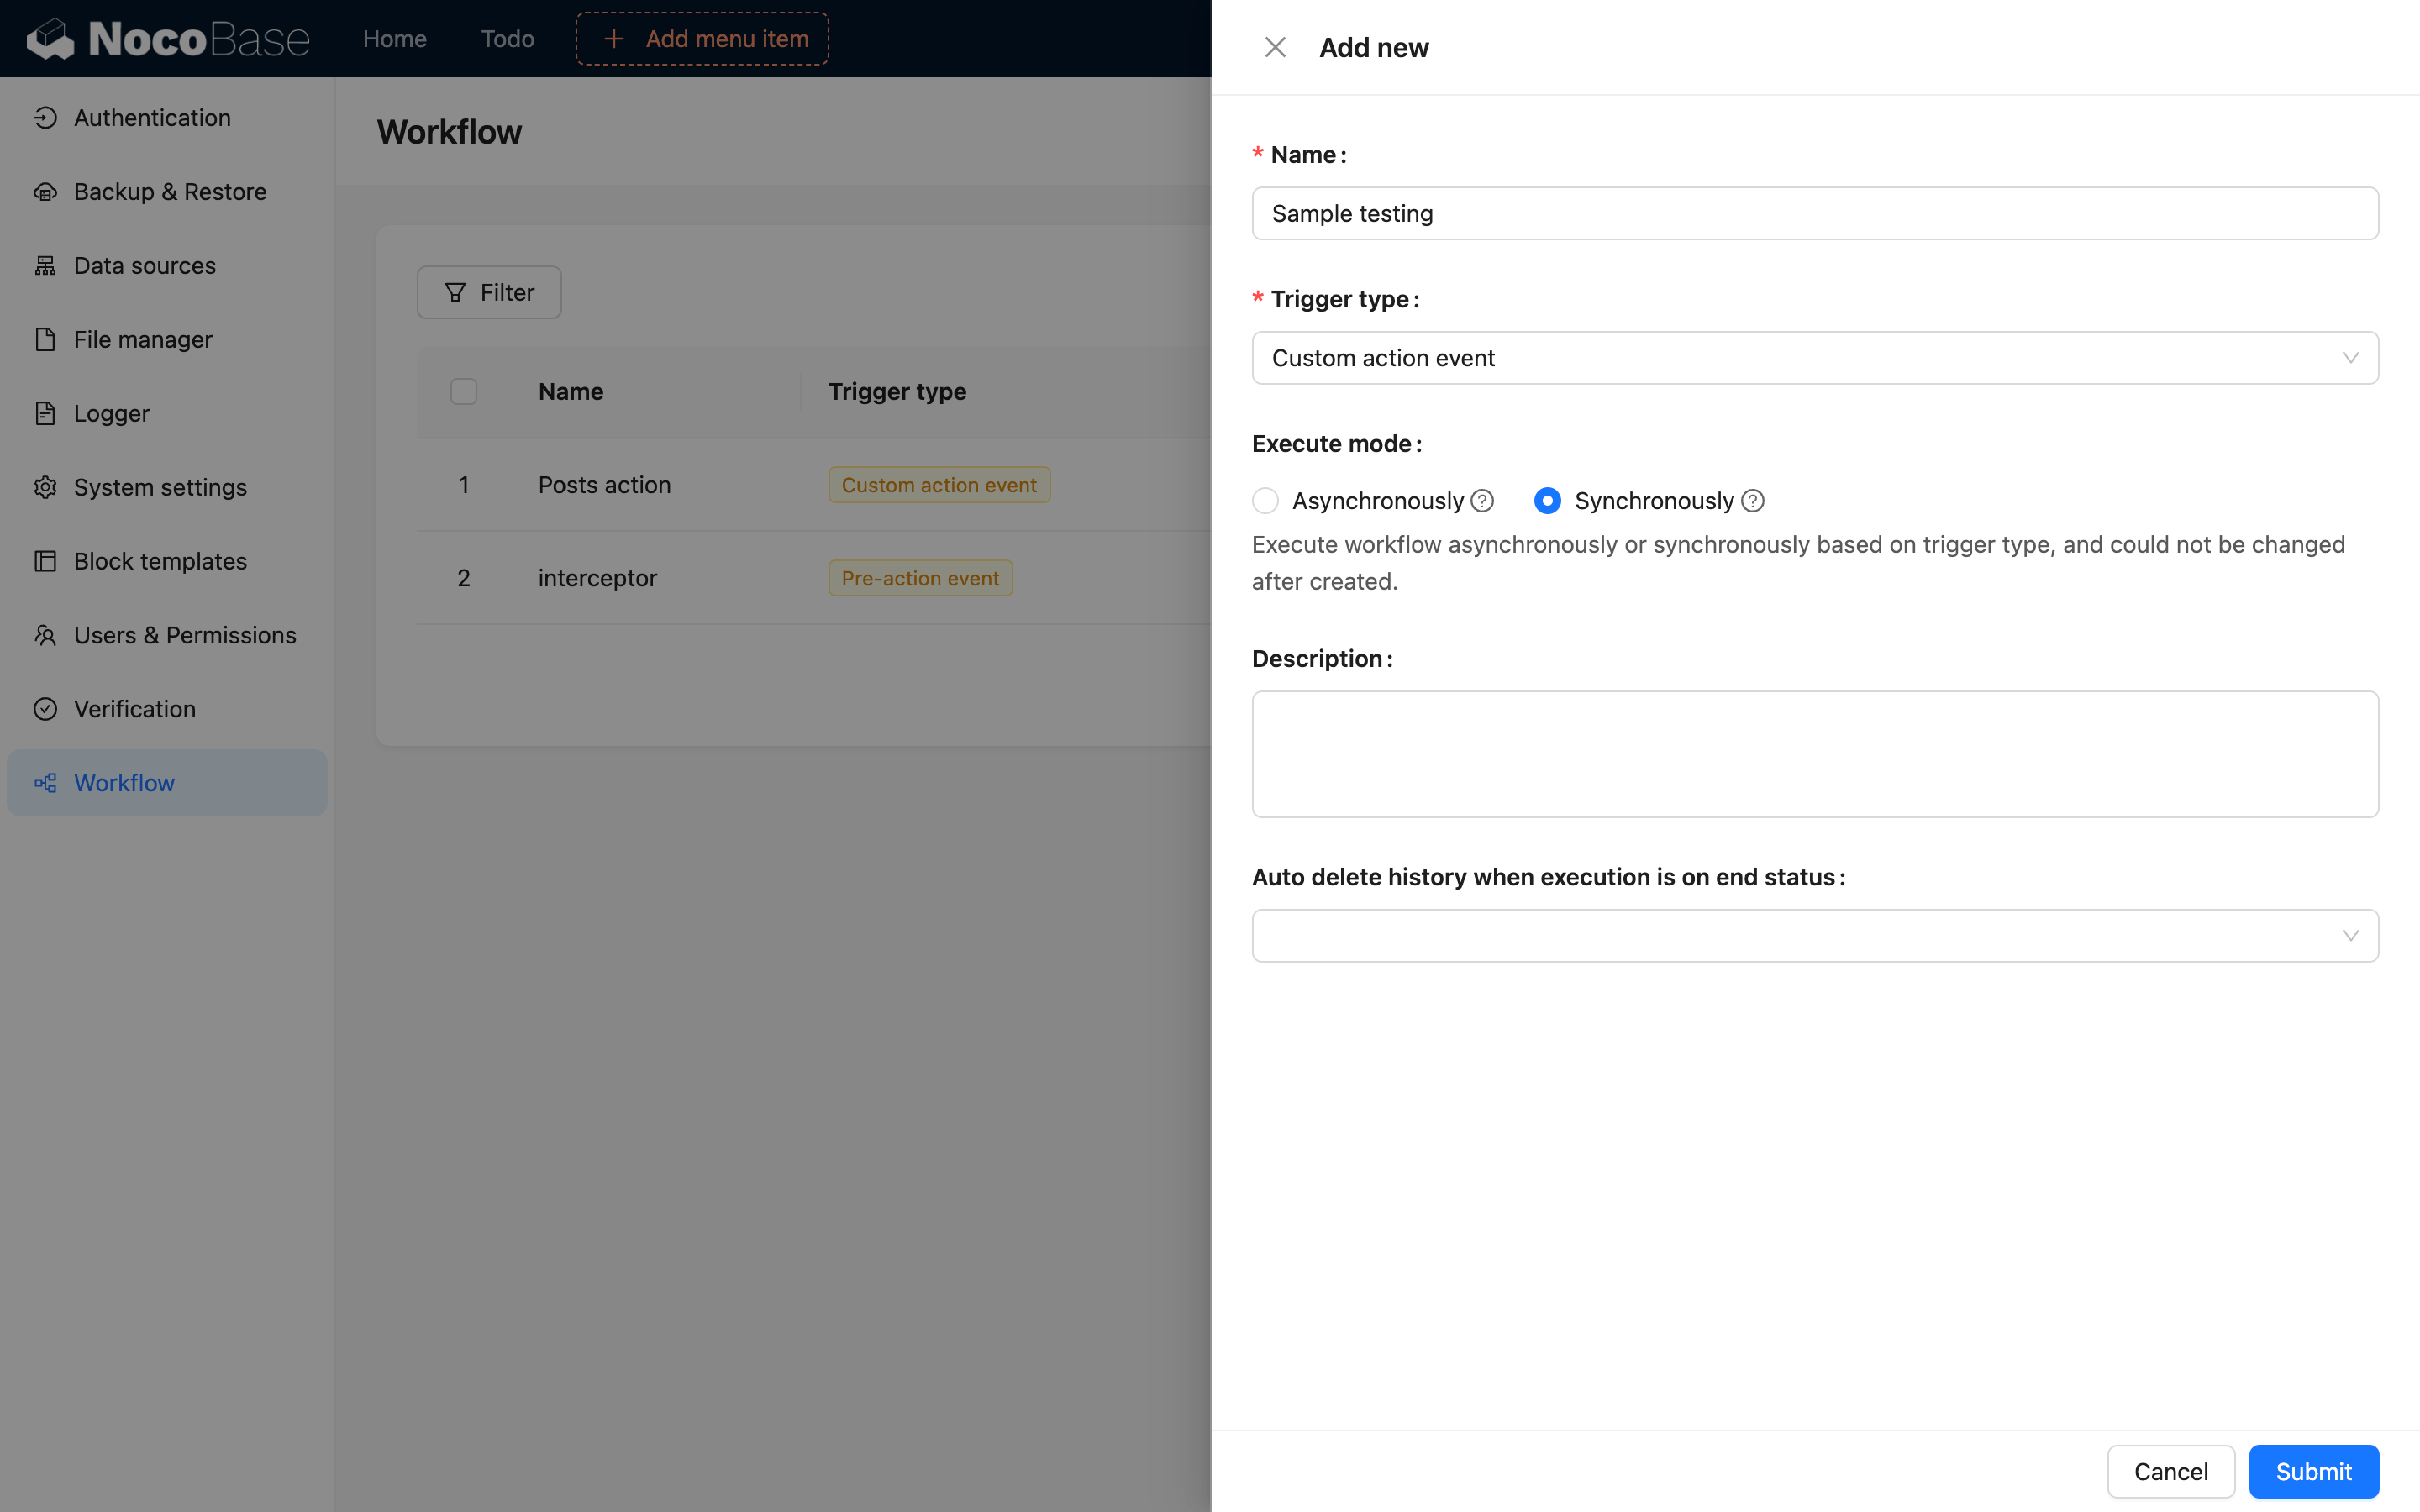
Then, create a "Custom Action Event" workflow. If you need timely feedback from the operation process, you can choose synchronous mode (in synchronous mode, you cannot use asynchronous nodes like manual processing):
In the trigger configuration, select "Samples" for the collection:
Arrange the logic in the process according to business requirements. For example, allow submission for inspection only when the indicator parameter is greater than 90; otherwise, display a relevant message:
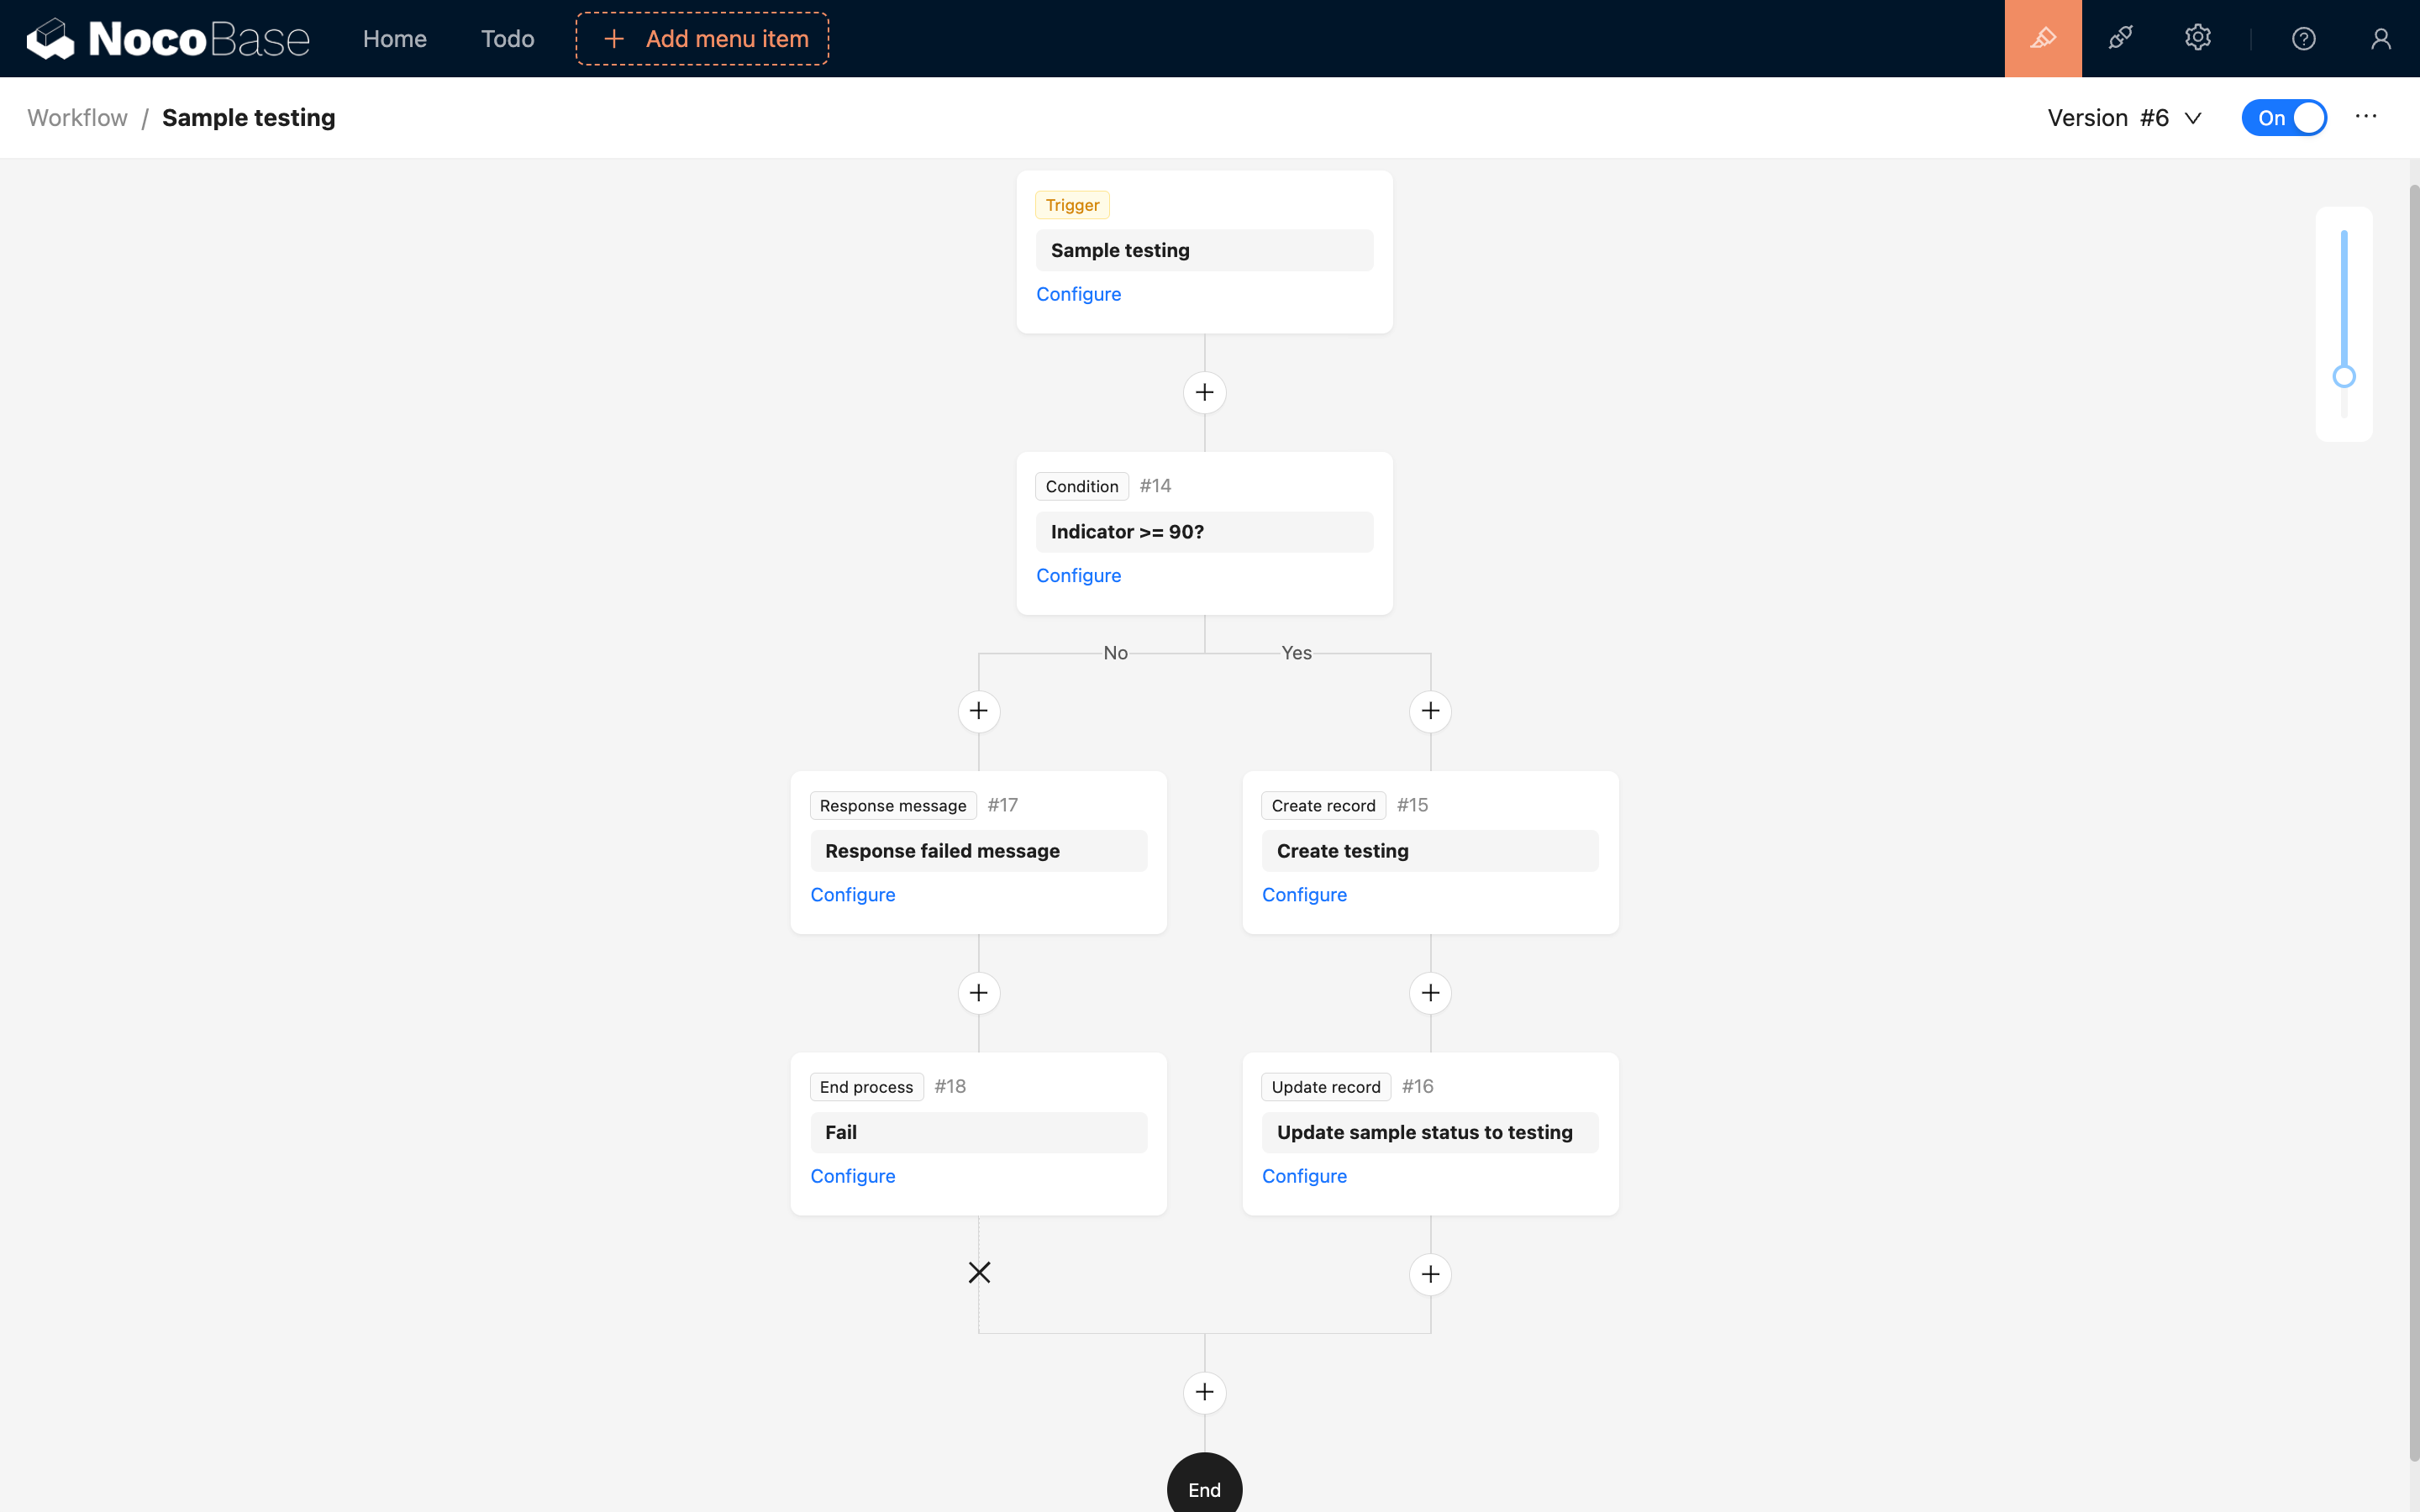
The "Response Message" node can be used in synchronous custom action events to return a prompt message to the client. It cannot be used in asynchronous mode.
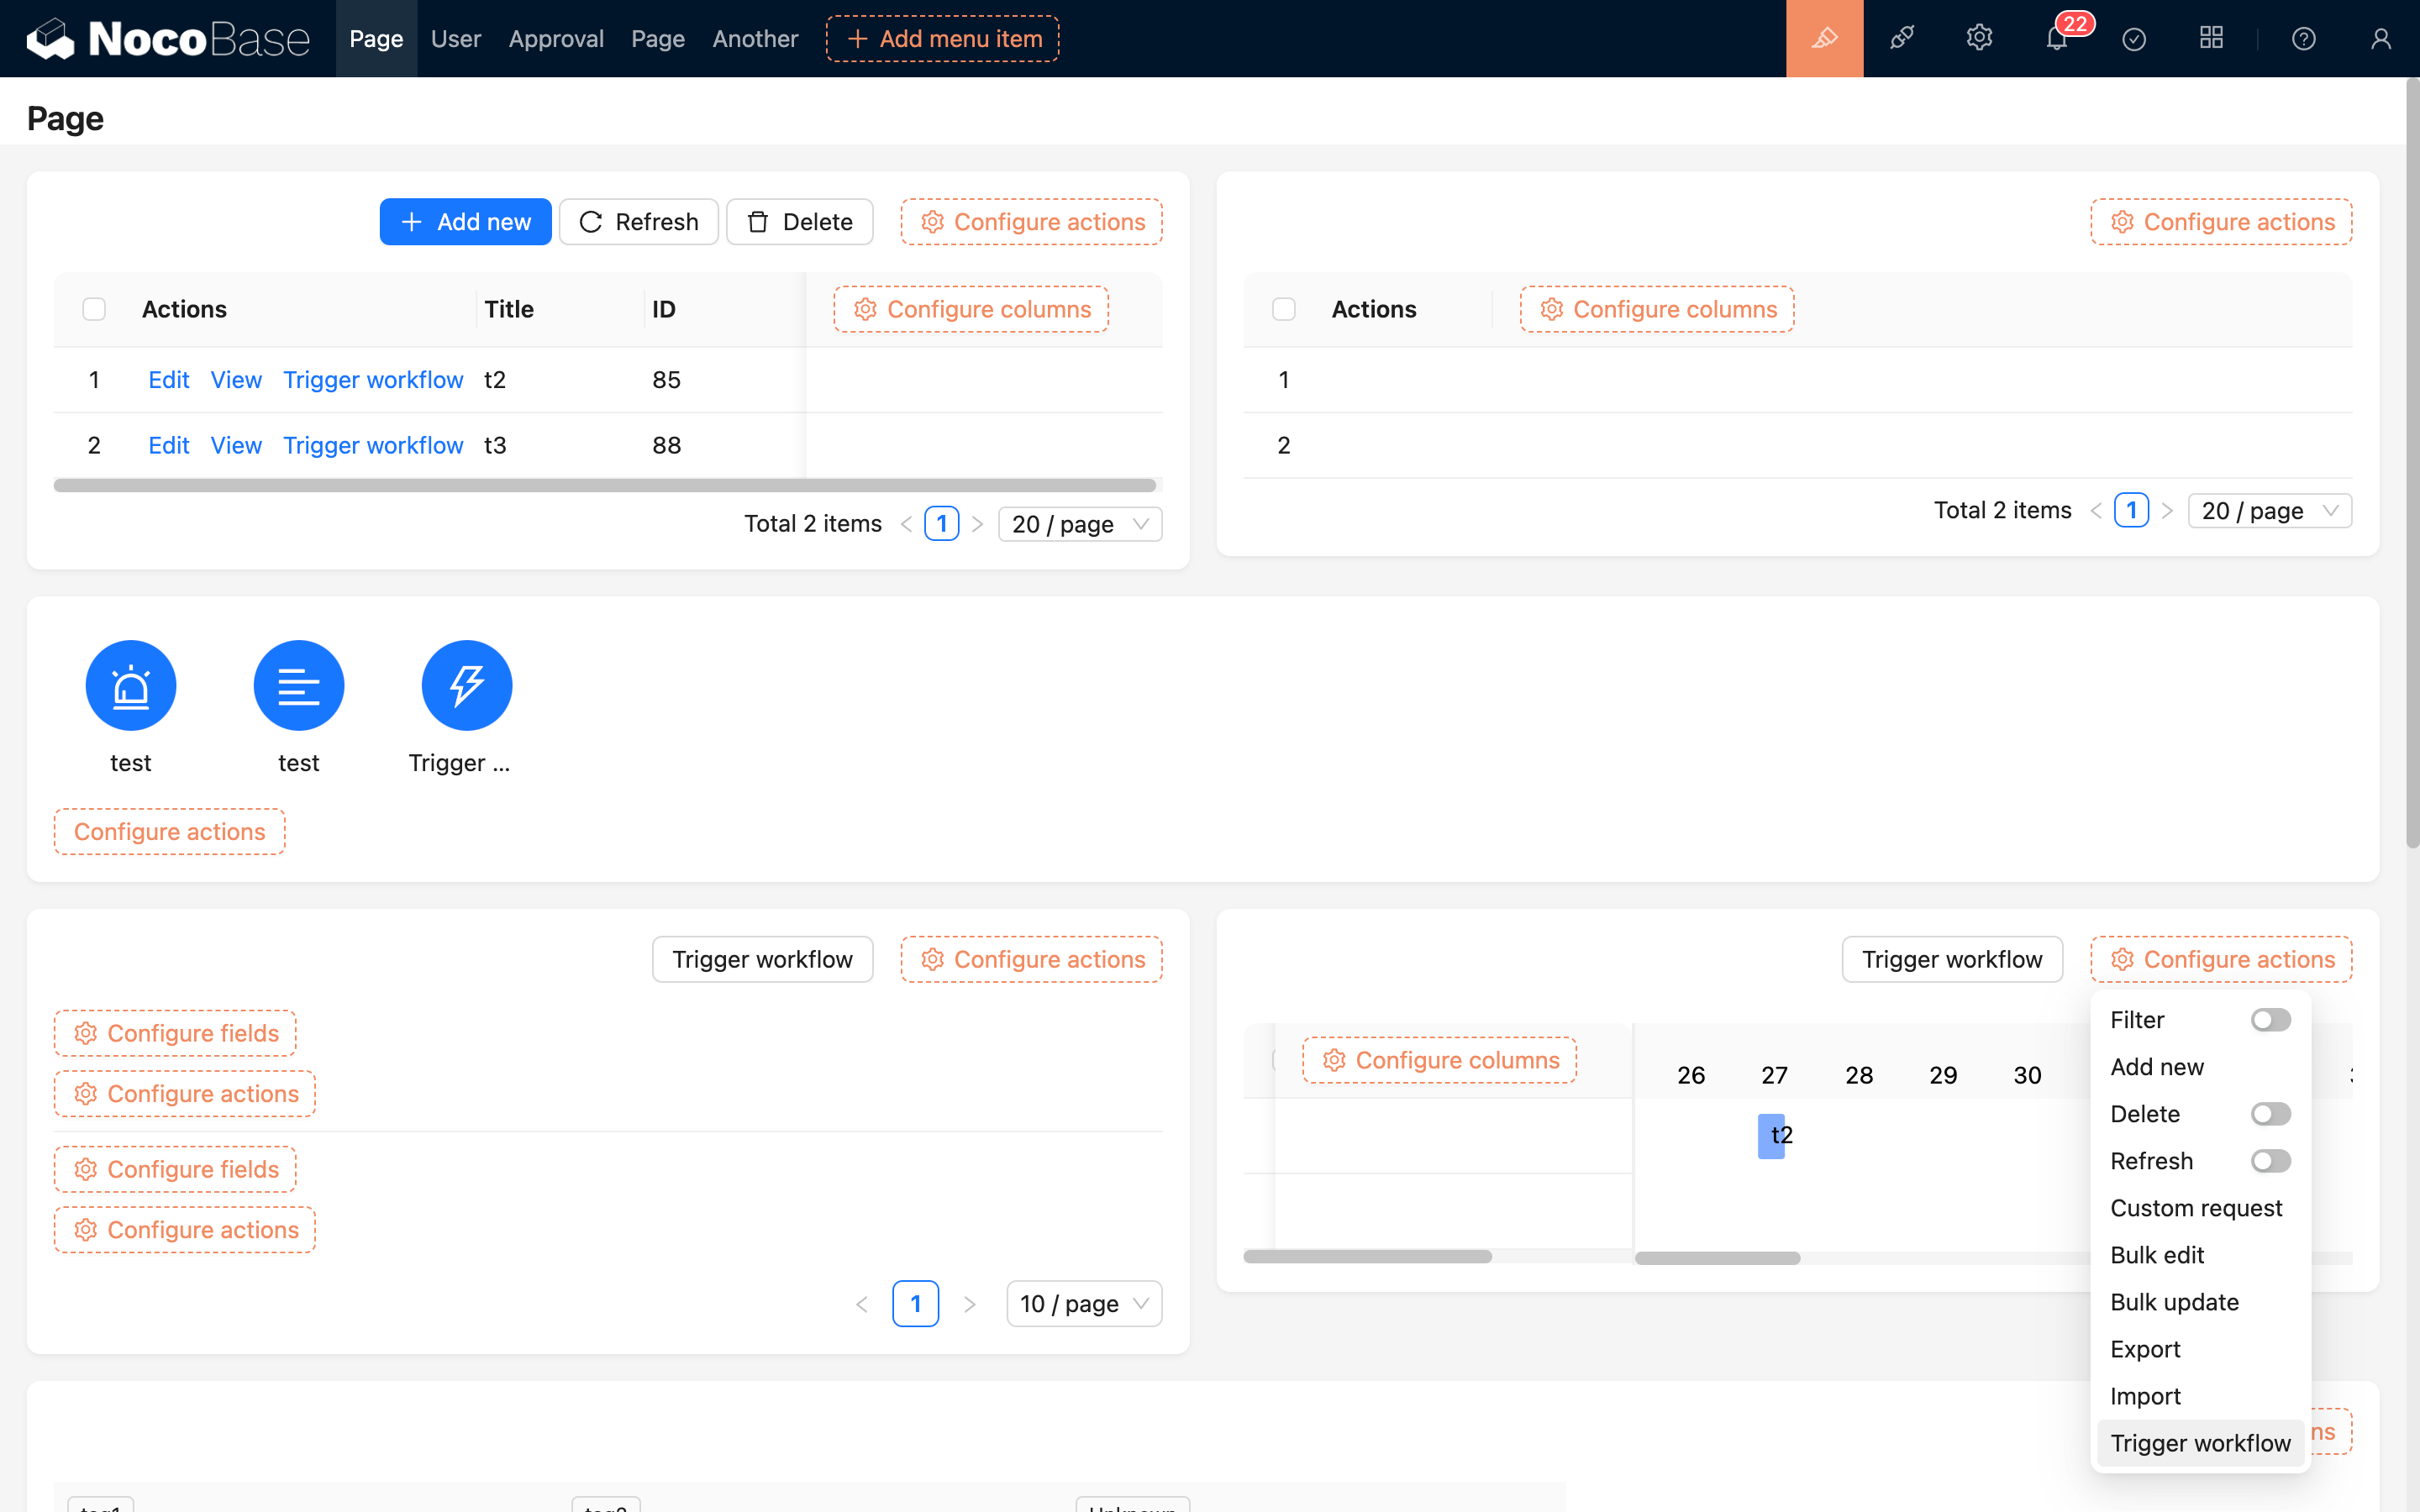
After configuring and enabling the workflow, return to the table interface and add a "Trigger Workflow" button in the action column of the table:
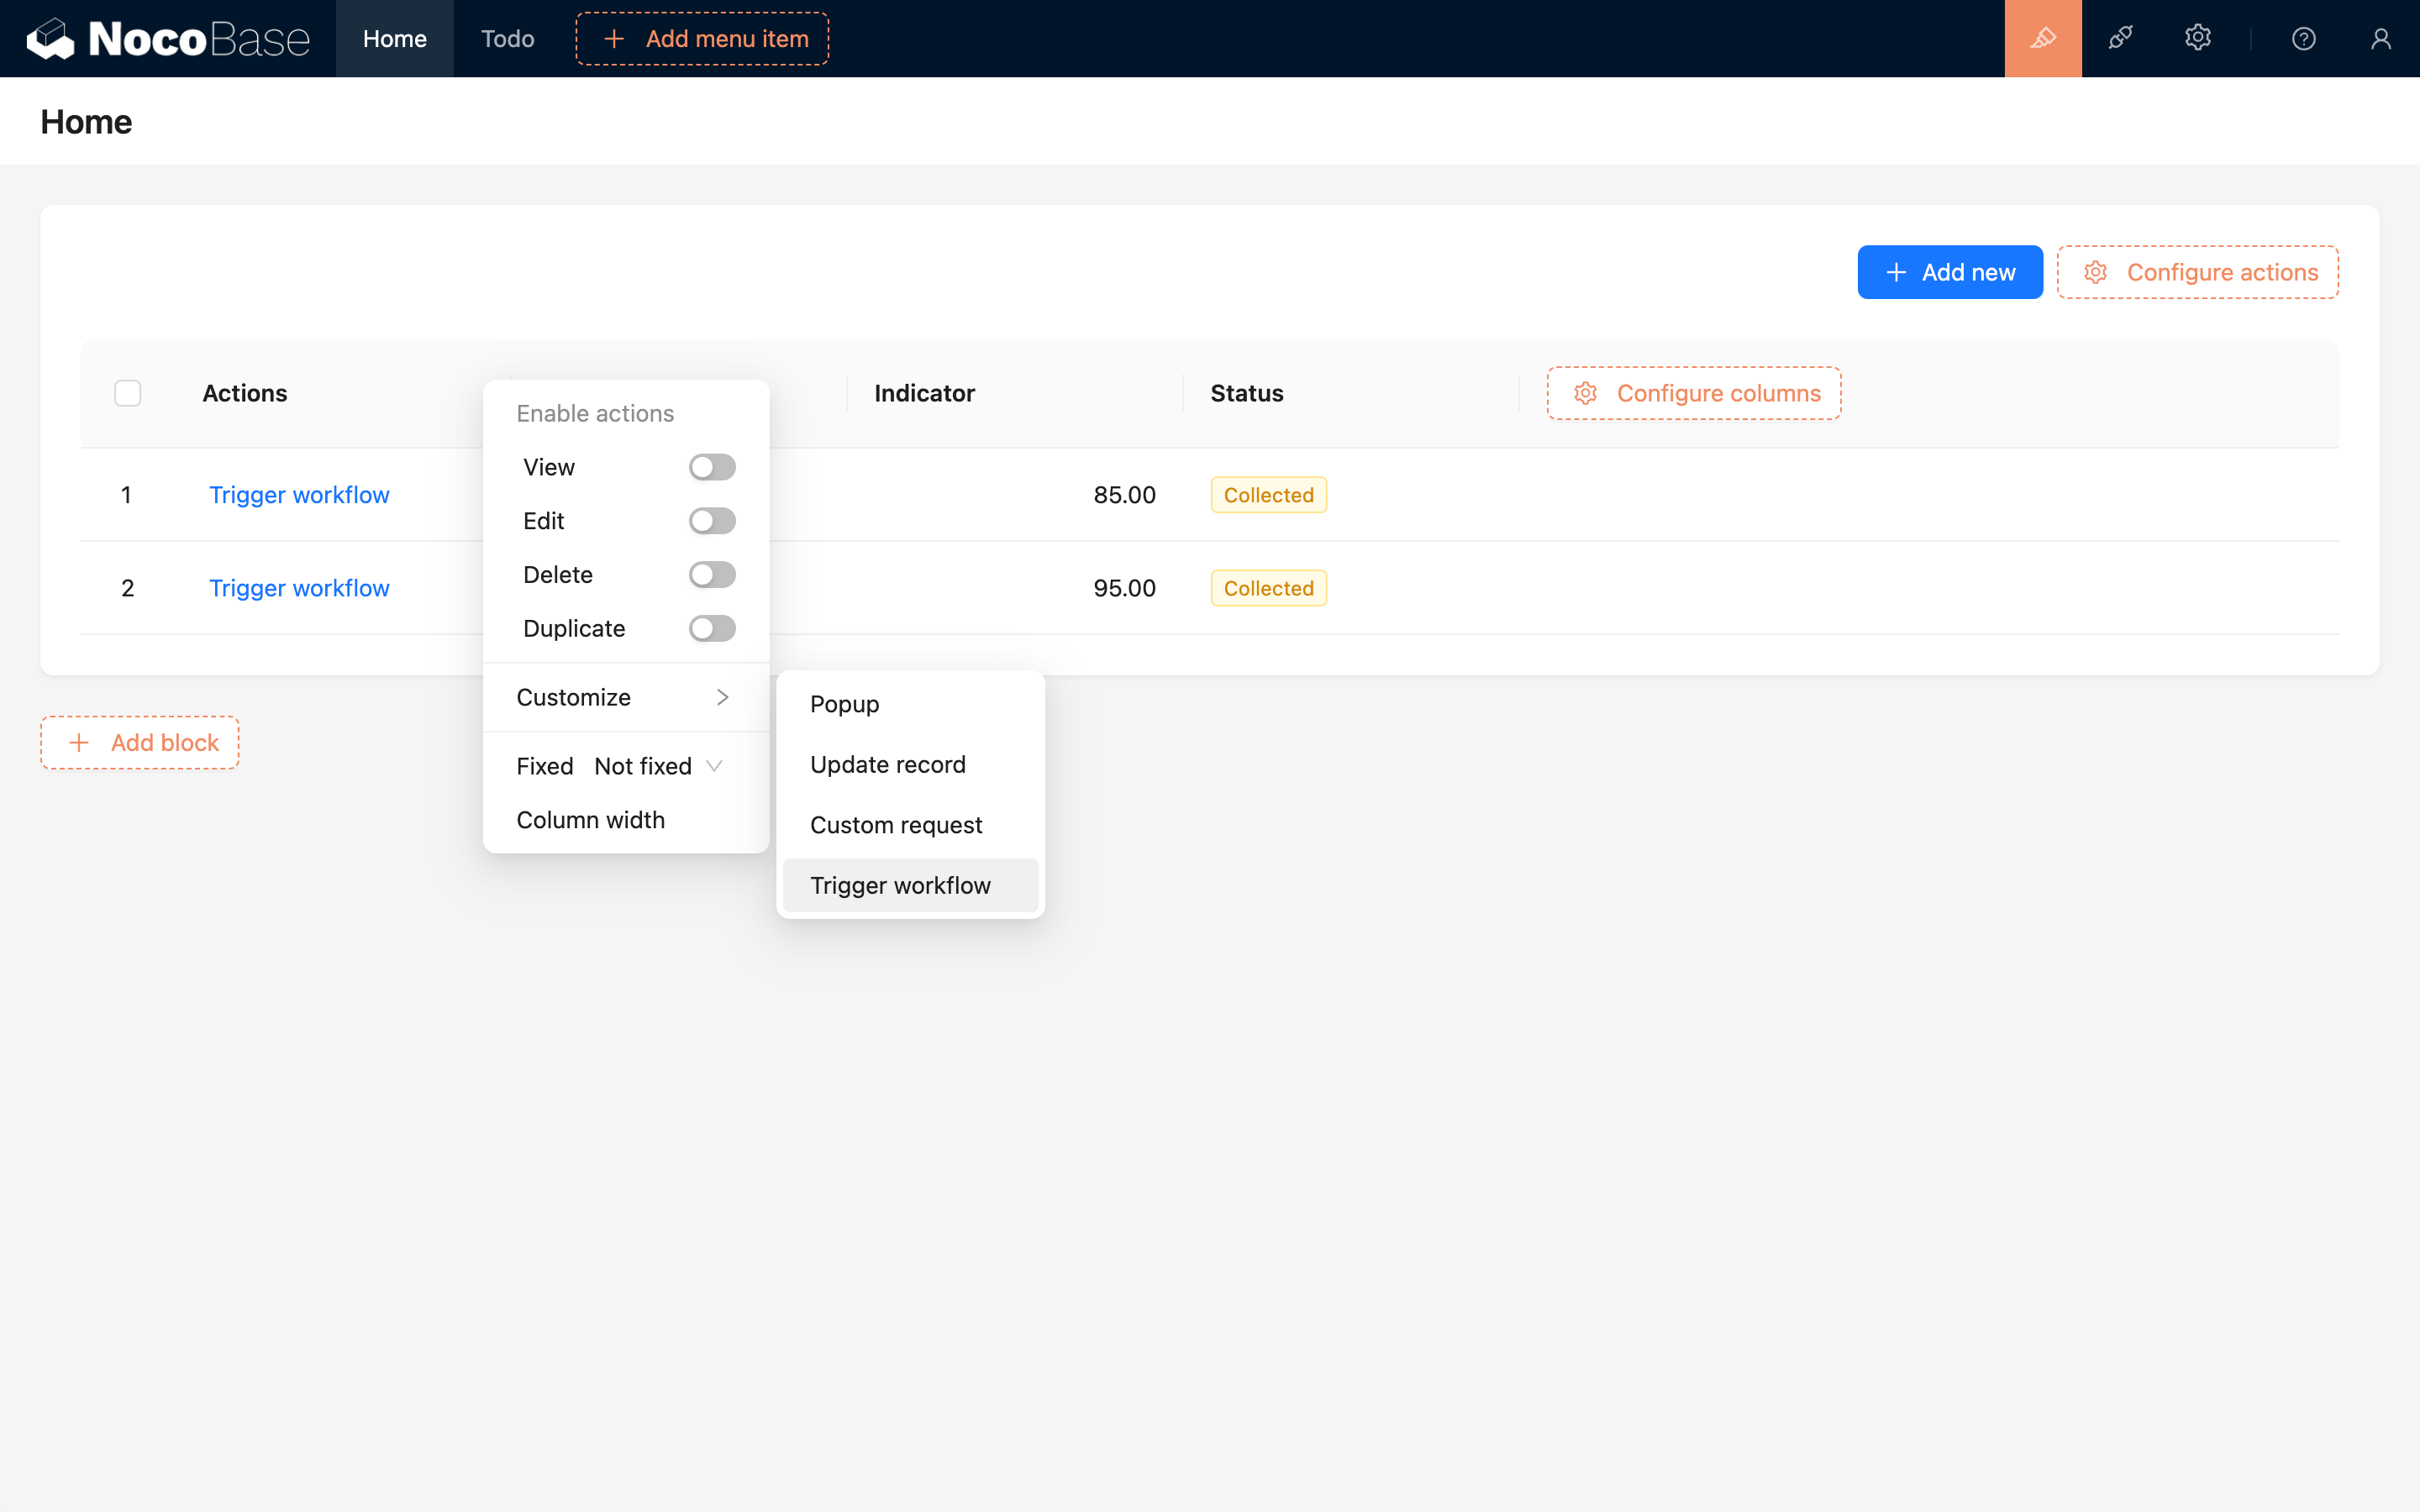
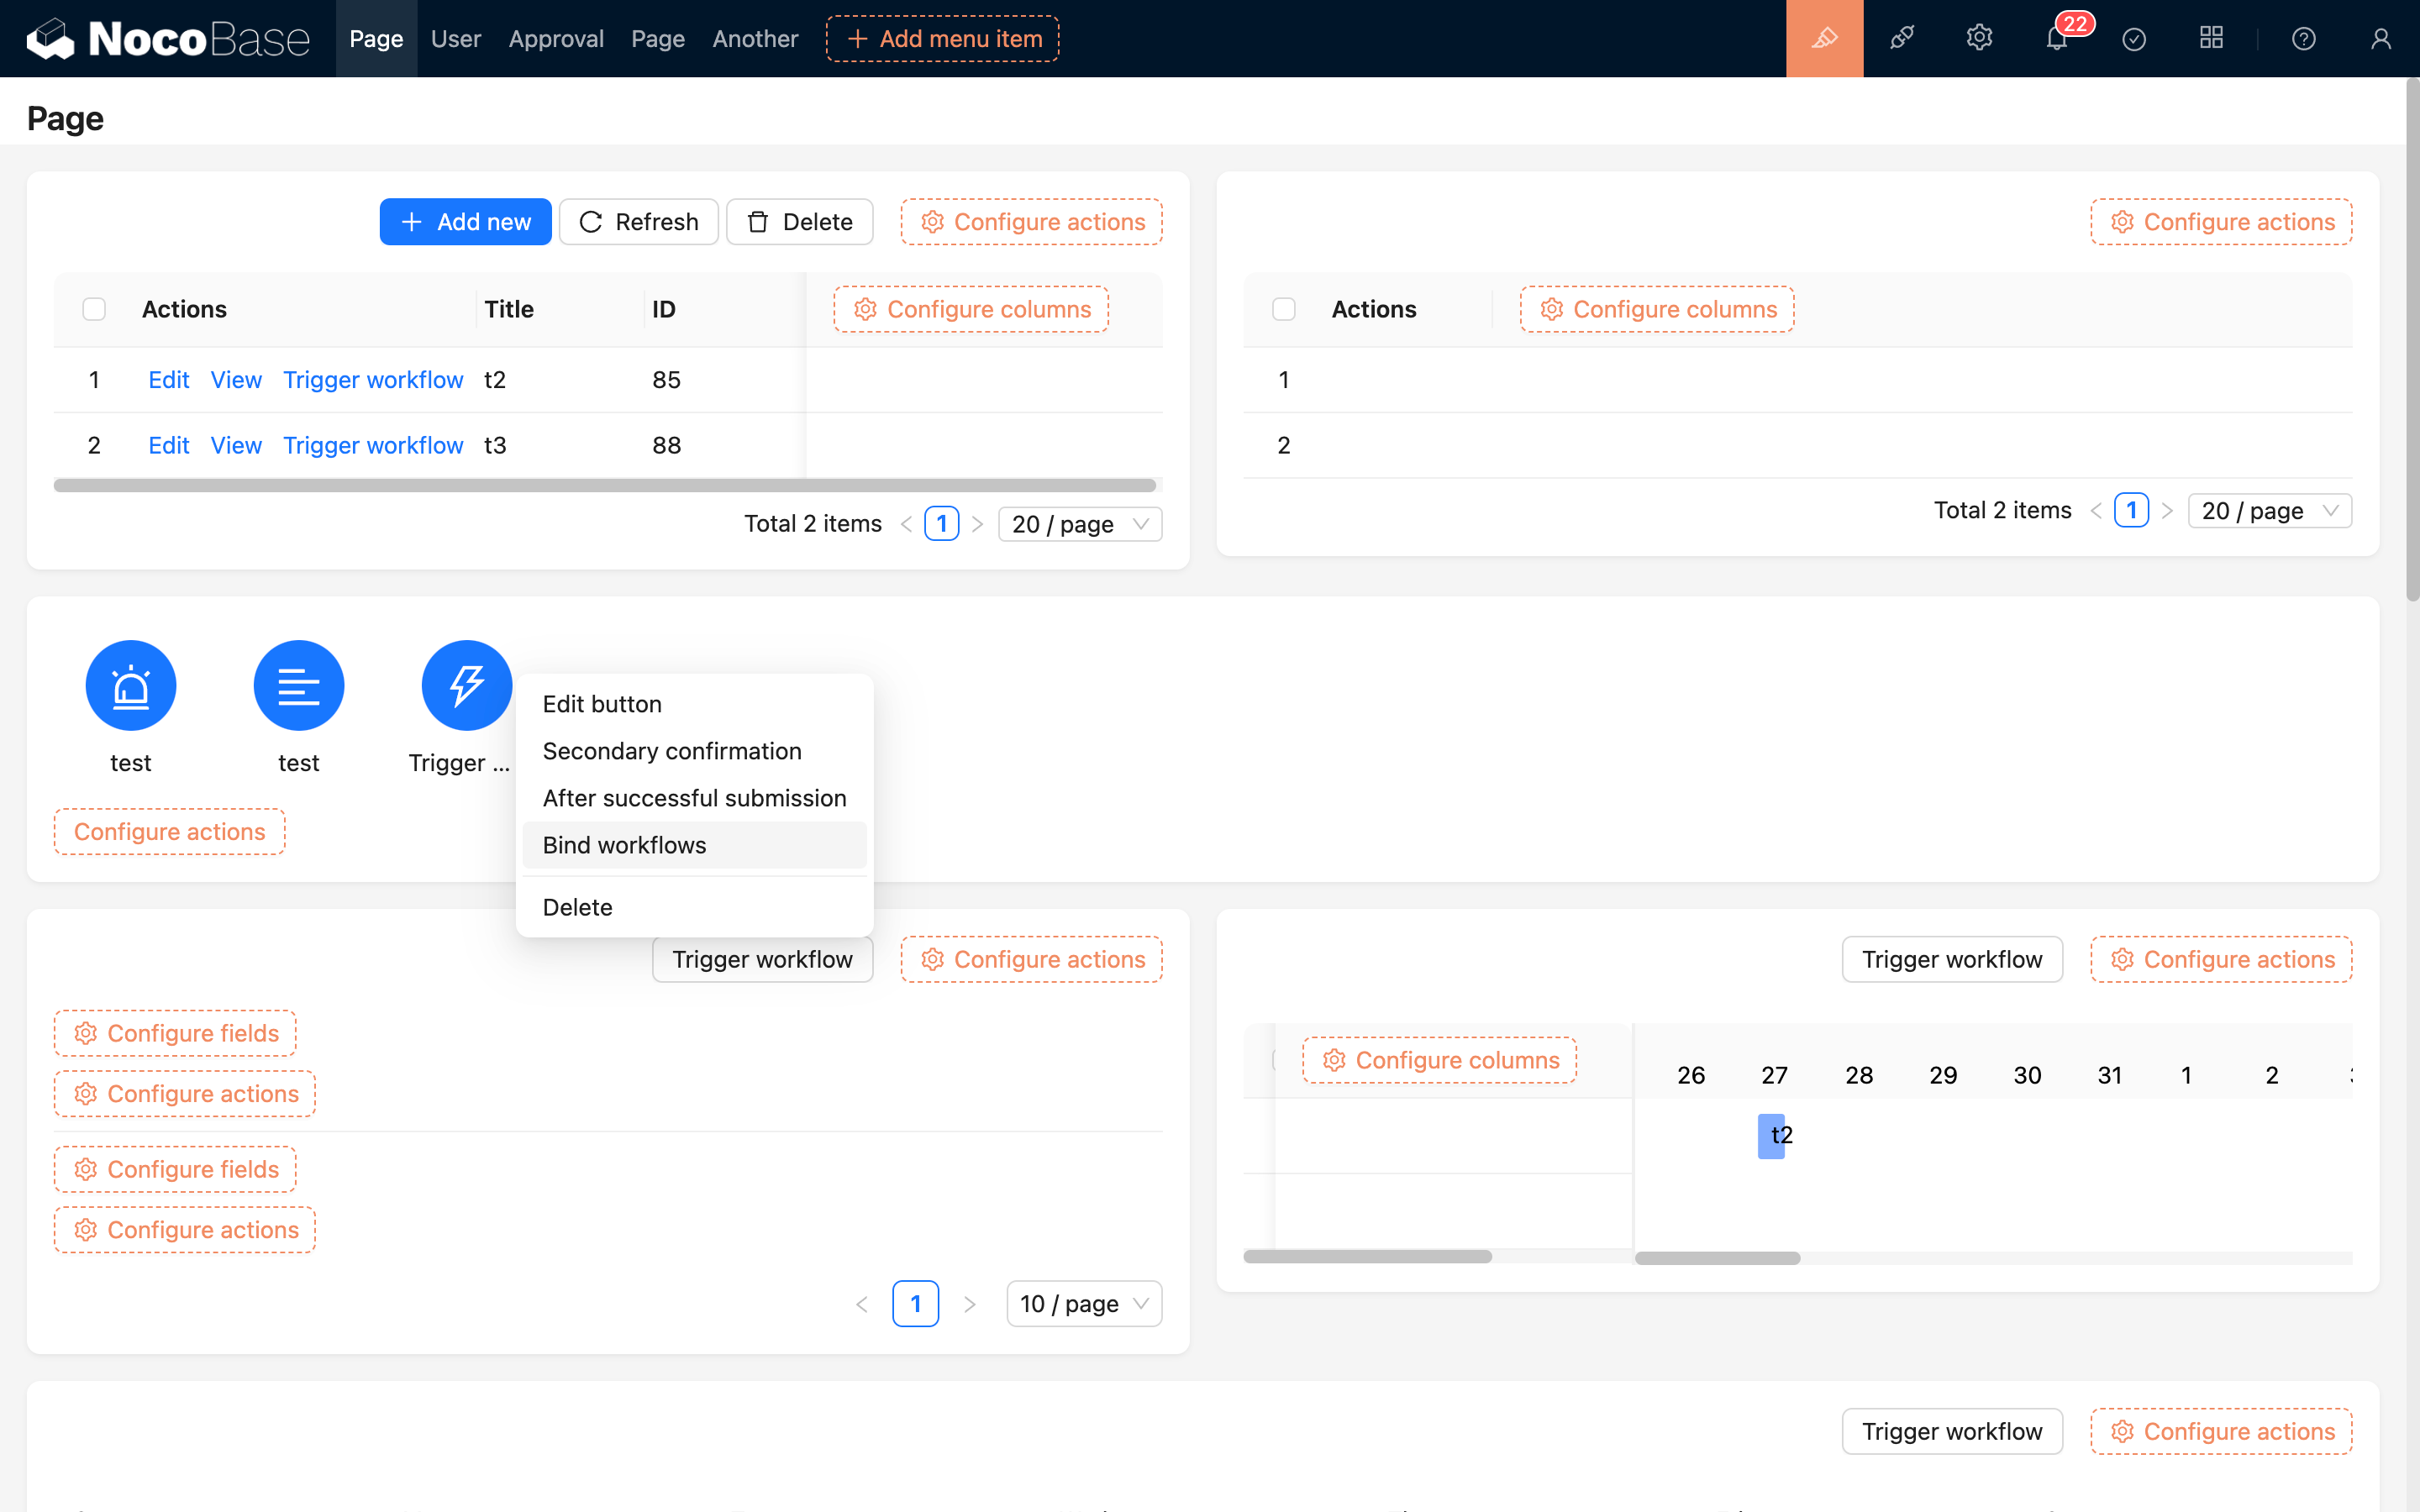
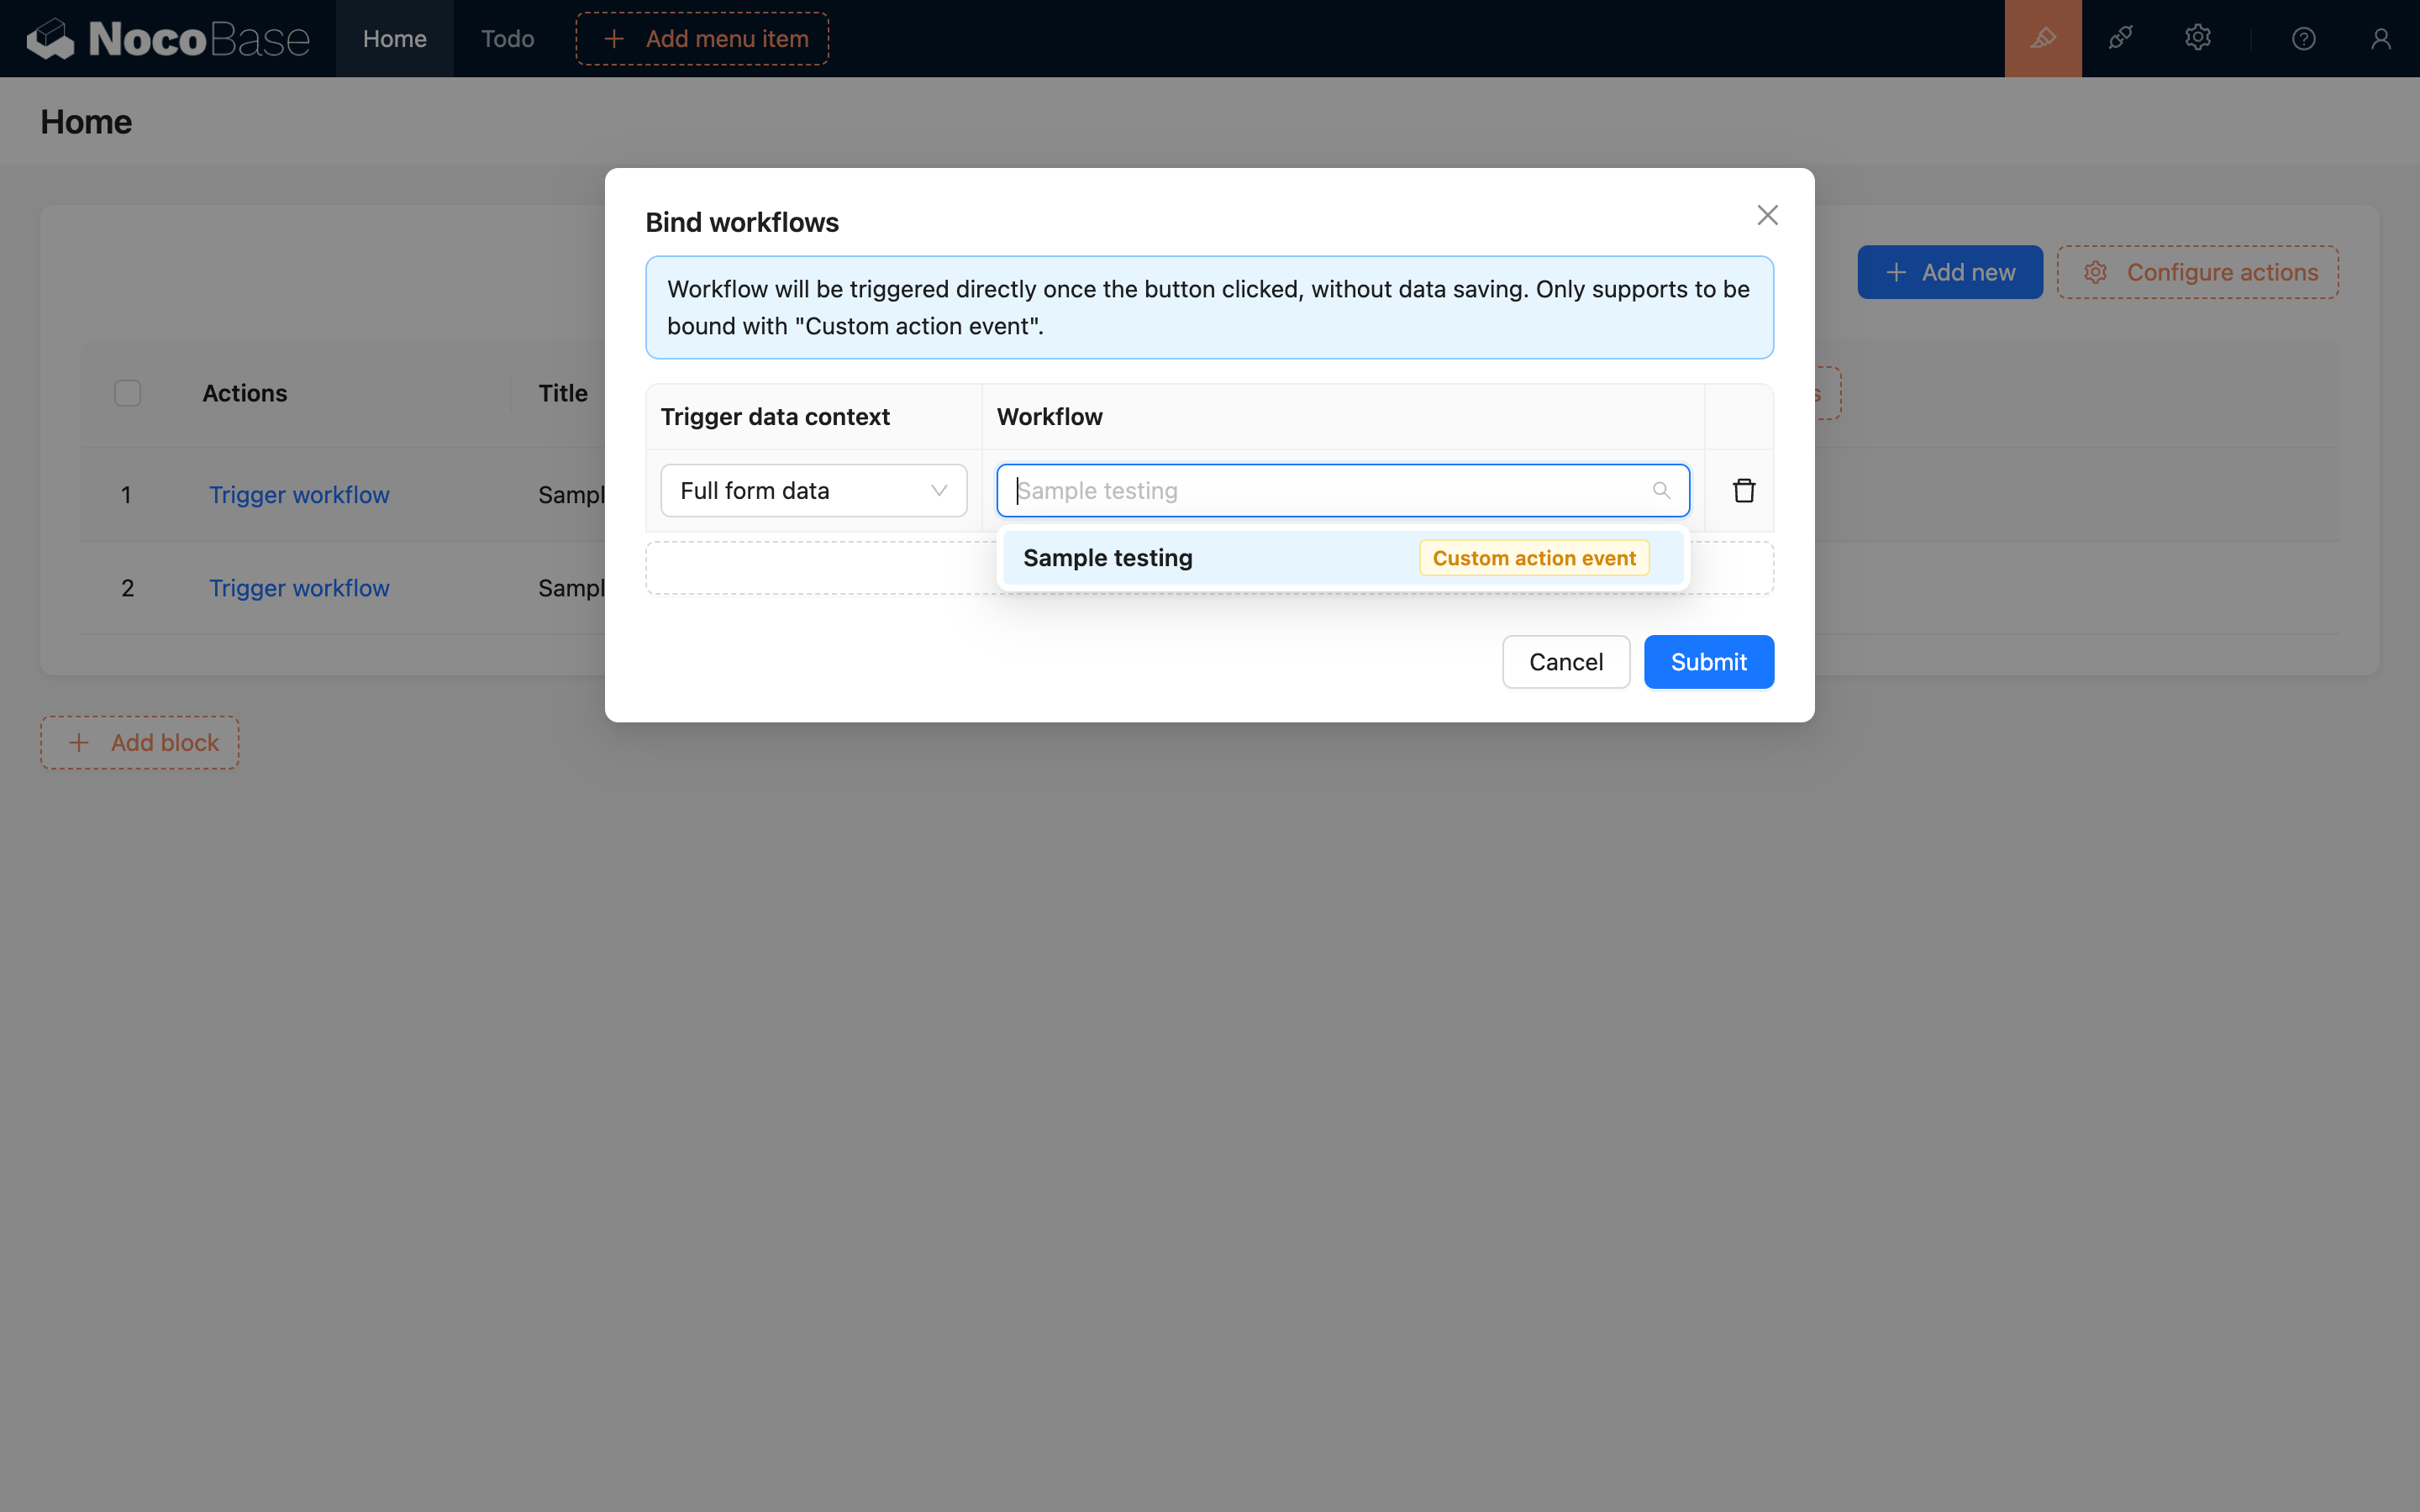
Then, in the button's configuration menu, choose to bind a workflow and open the configuration pop-up:
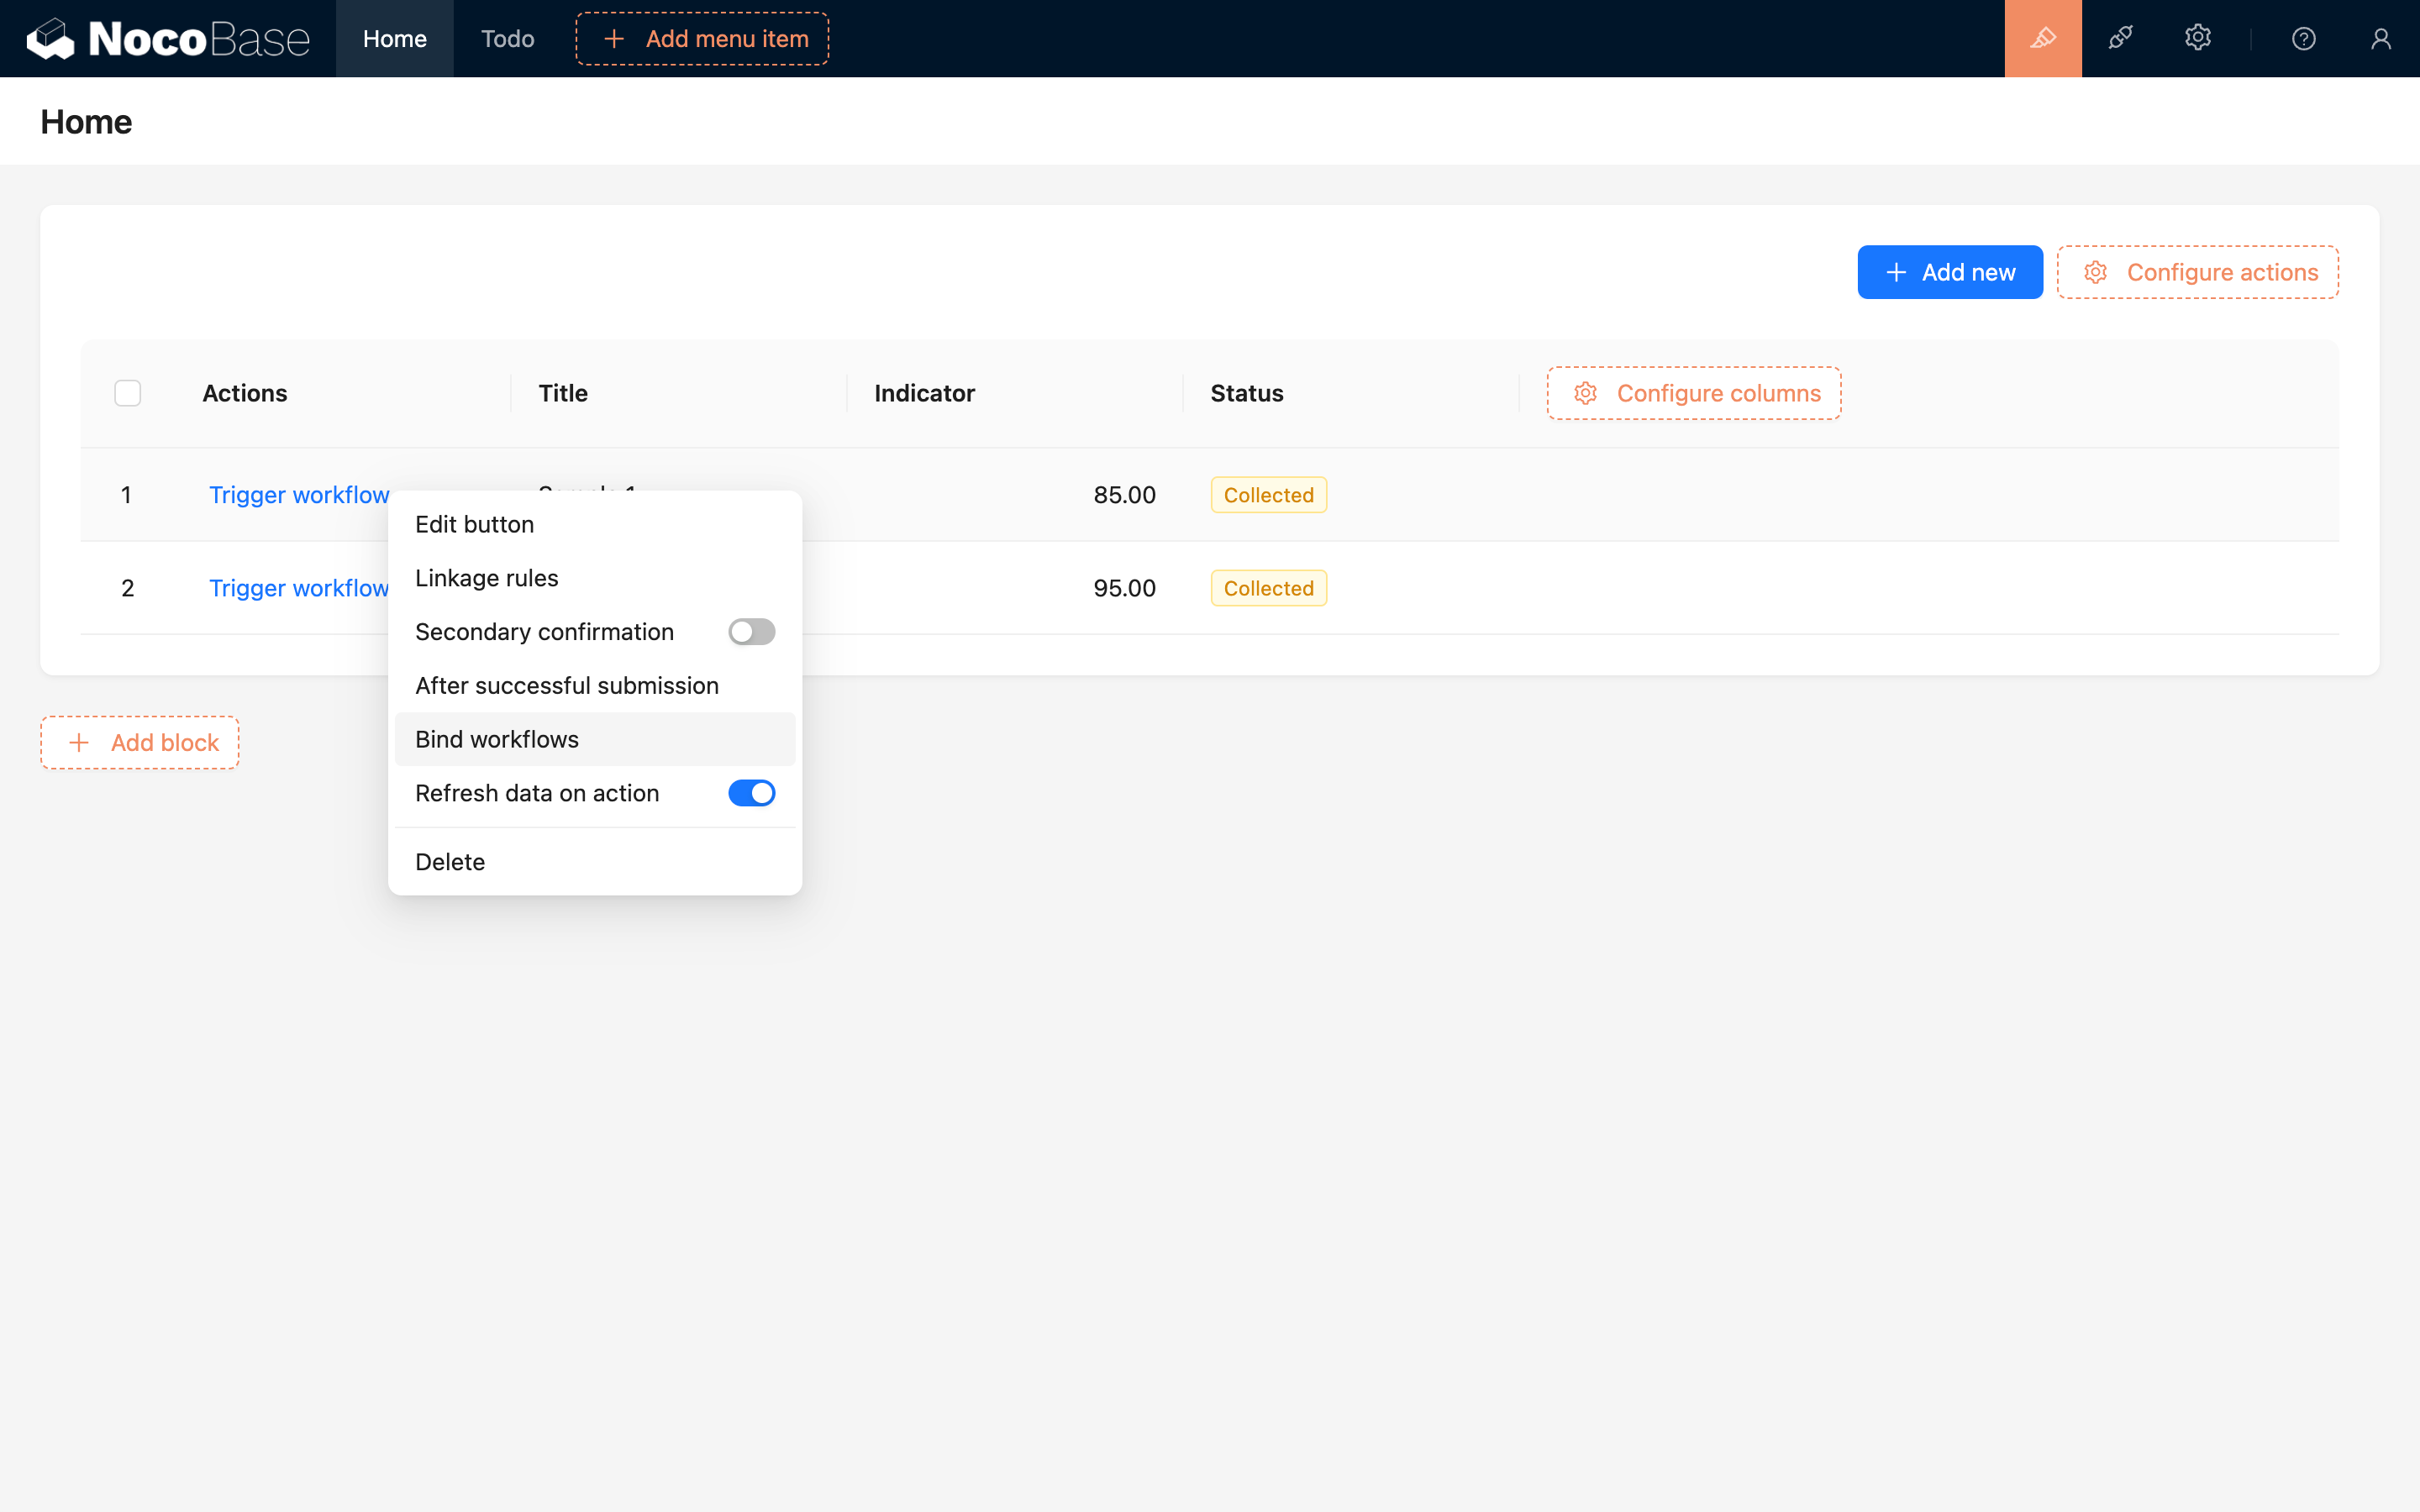
Add the previously enabled workflow:
After submitting, change the button text to the action name, such as "Submit for Inspection". The configuration process is now complete.
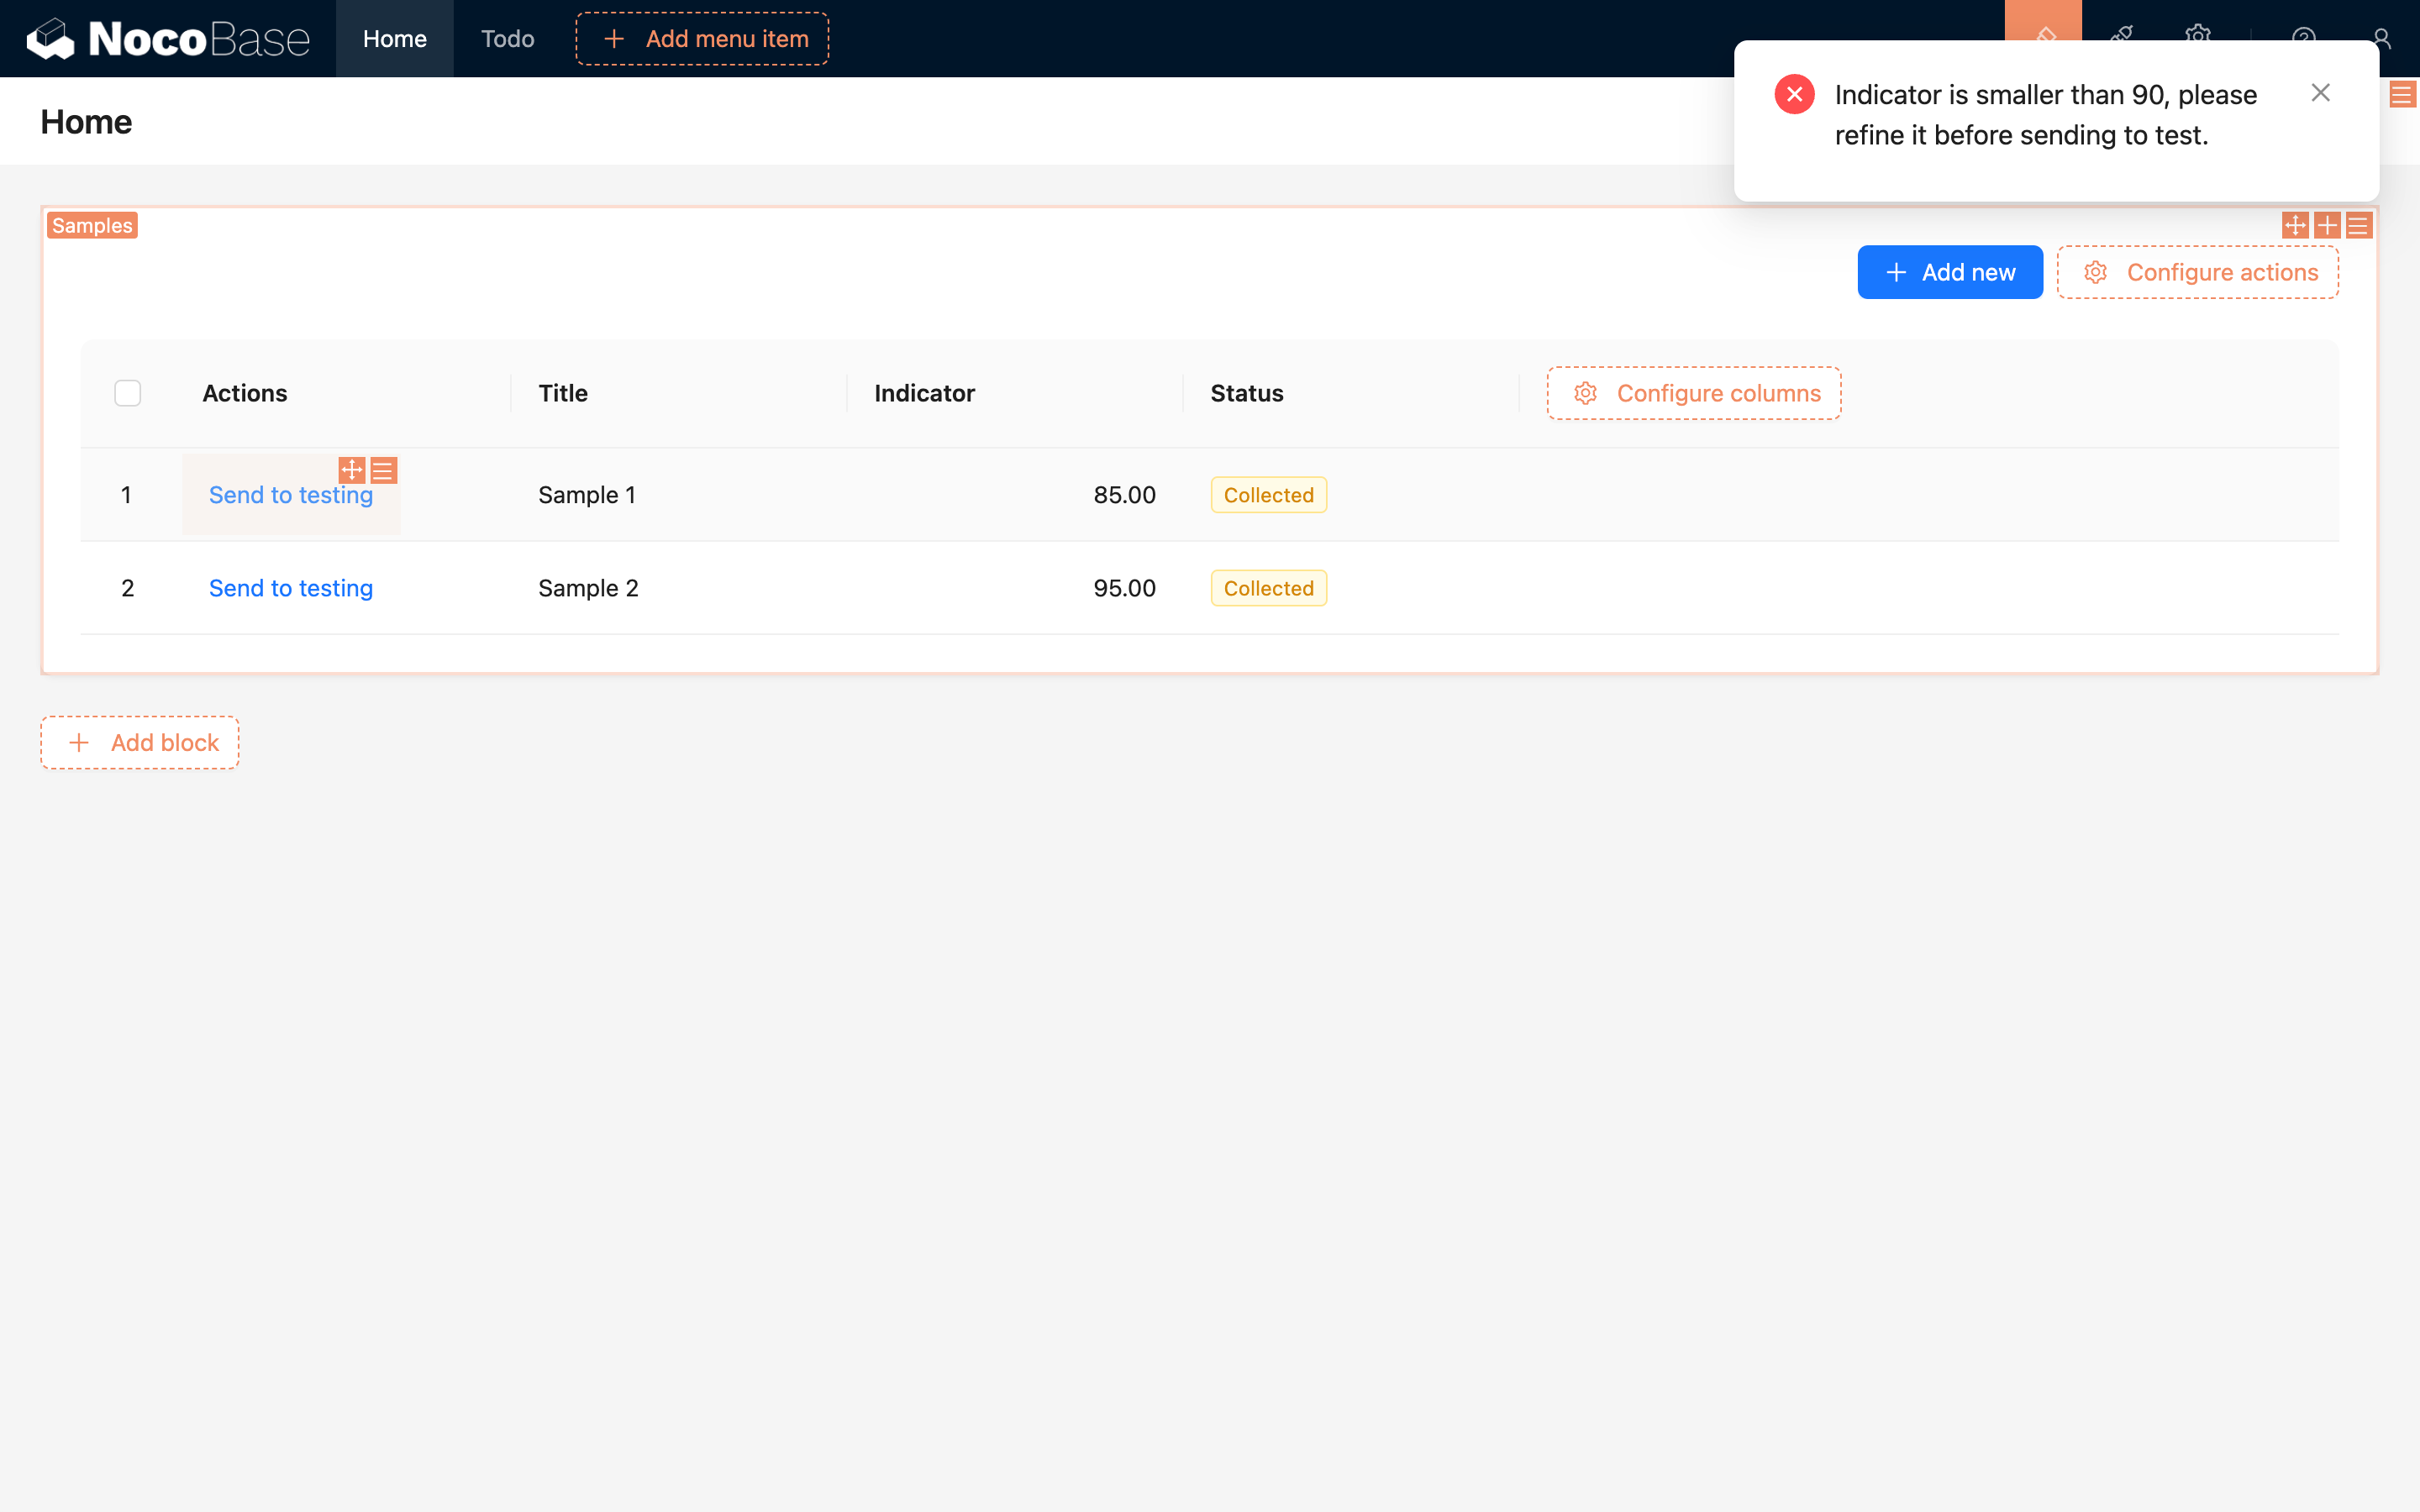
To use it, select any sample data in the table and click the "Submit for Inspection" button to trigger the custom action event. As per the logic arranged earlier, if the sample's indicator parameter is less than 90, the following prompt will be displayed after clicking:
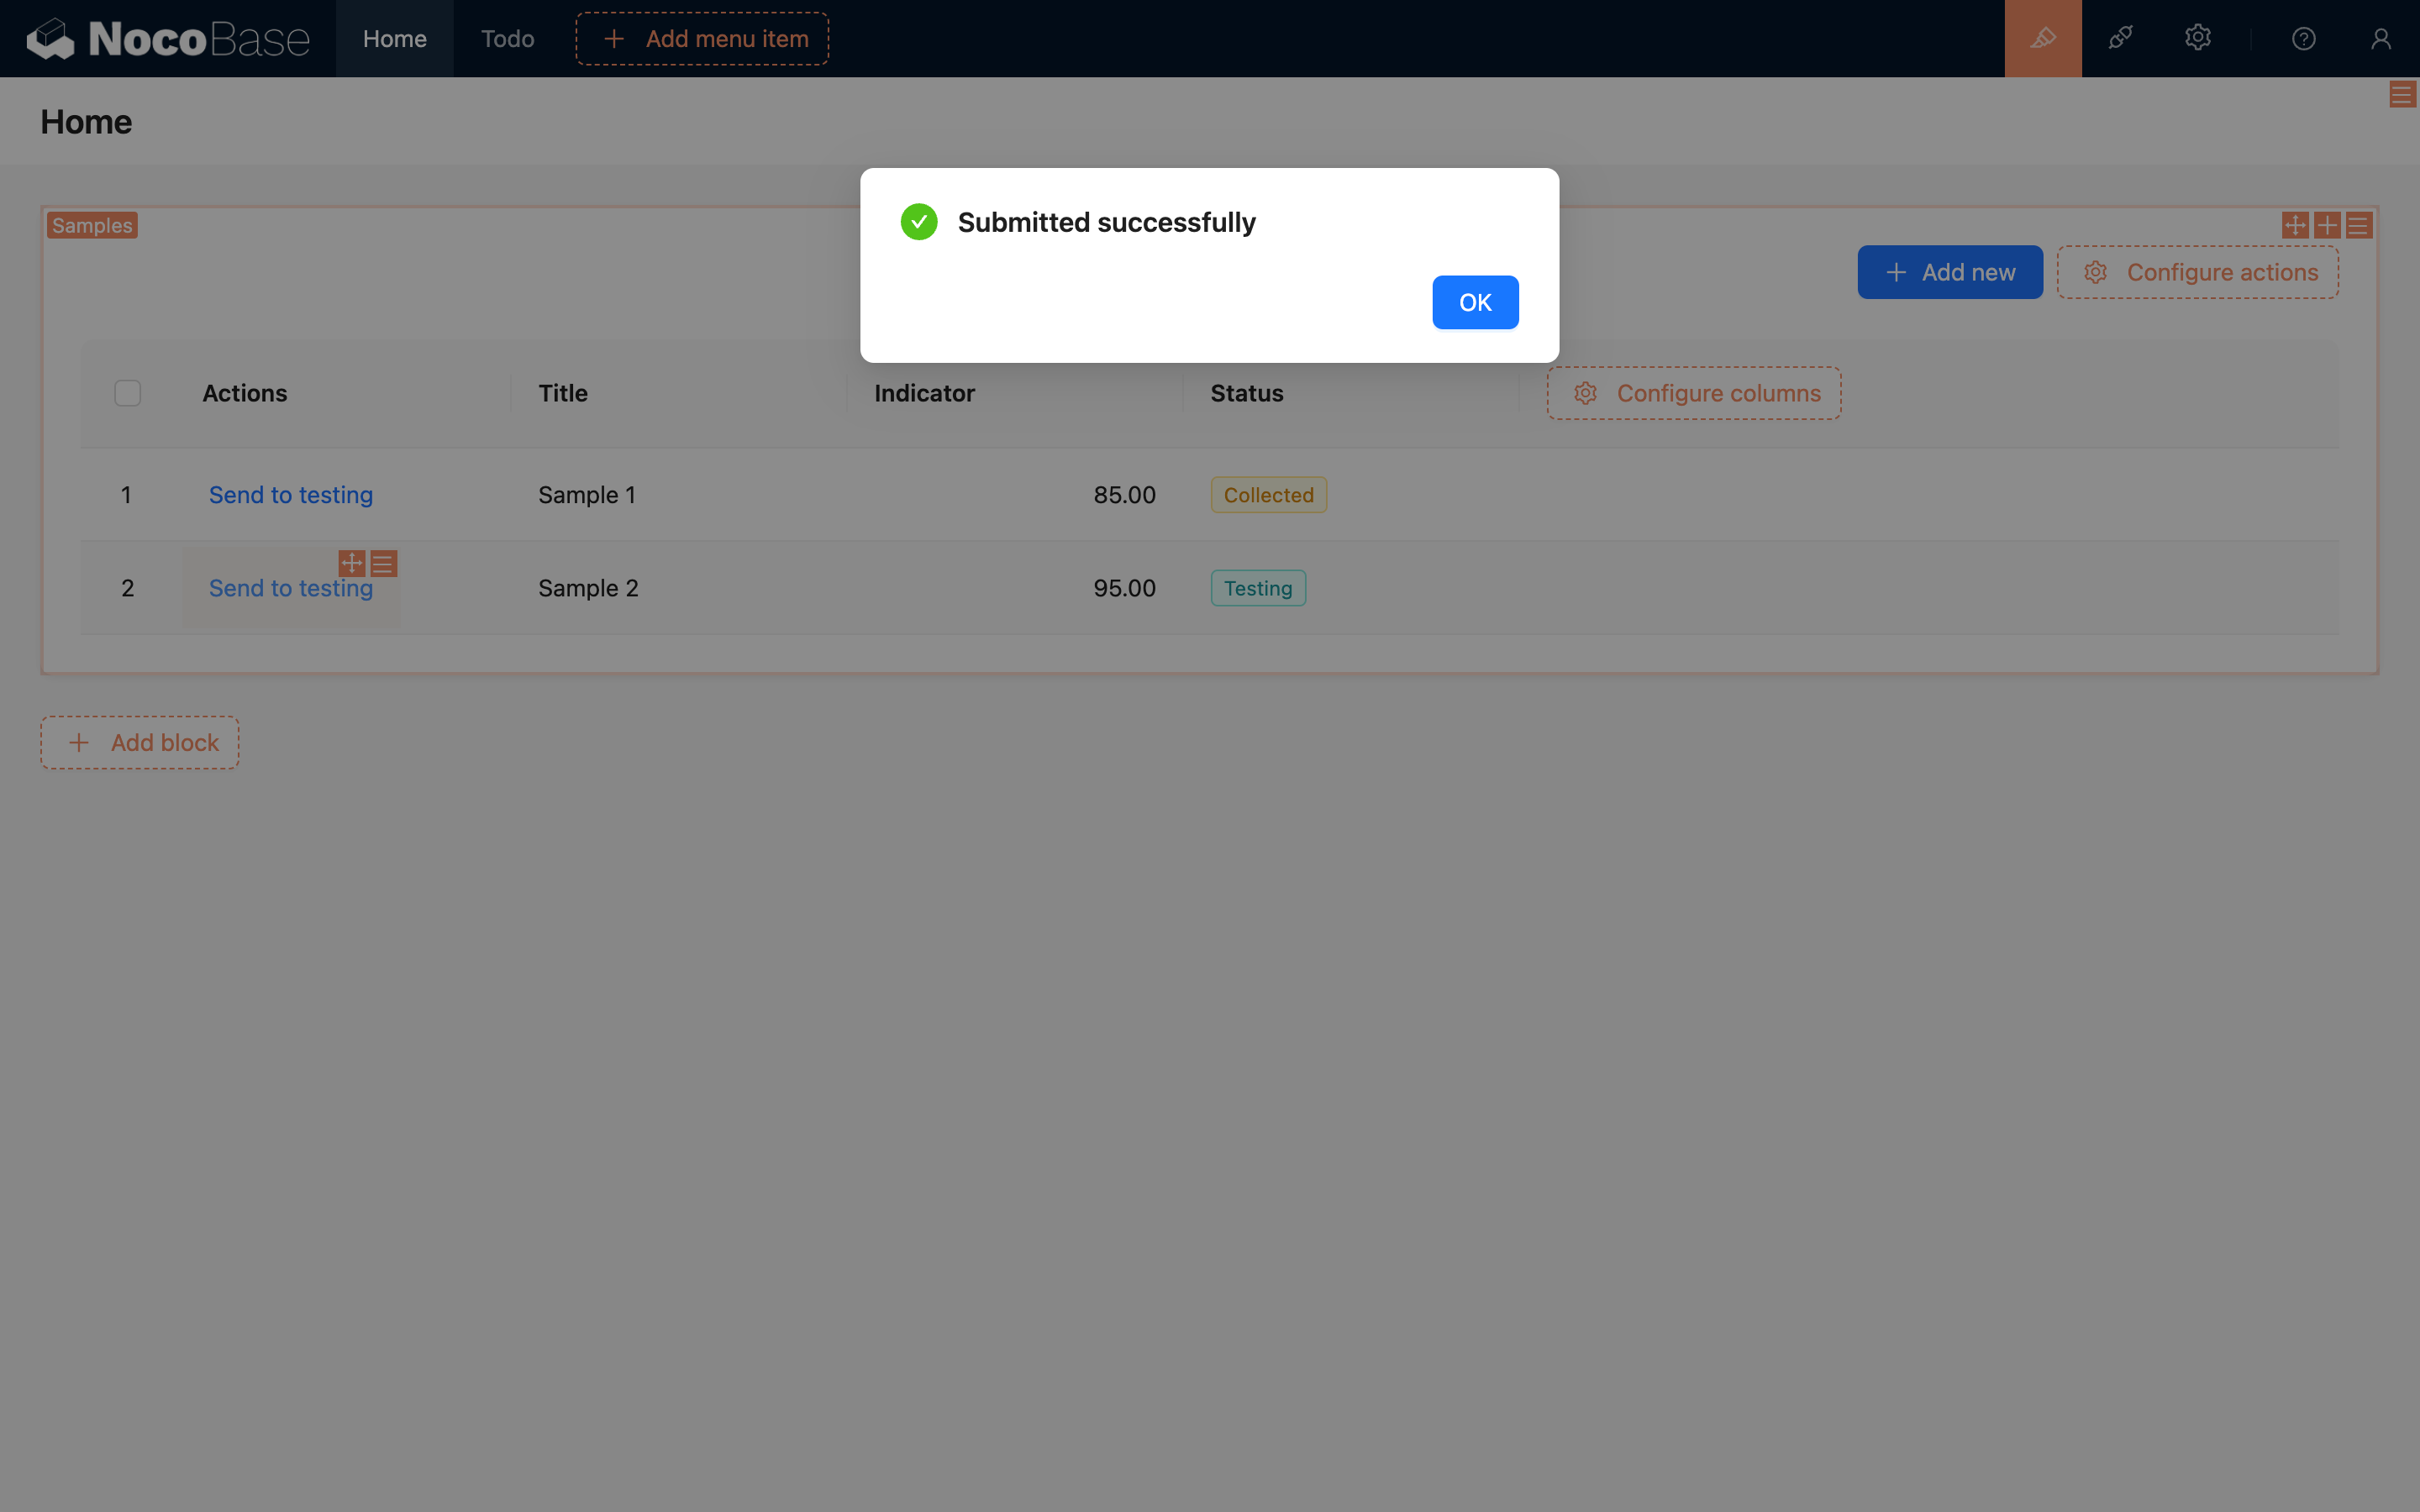
If the indicator parameter is greater than 90, the process will execute normally, generating an "Inspection Record" and changing the sample's status to "Submitted":
At this point, a simple custom action event is complete. Similarly, for businesses with complex operations like order processing or report submission, custom action events can be used for implementation.
External Call
The triggering of custom action events is not limited to user interface actions; it can also be triggered via HTTP API calls. Specifically, custom action events provide a new action type for all collection actions to trigger workflows: trigger, which can be called using NocoBase's standard action API.
Since external calls also need to be based on user identity, when calling via HTTP API, just like requests sent from the regular interface, you need to provide authentication information. This includes the Authorization request header or token parameter (the token obtained upon login), and the X-Role request header (the user's current role name).
No Context
No-context workflows need to be triggered on the workflows resource:
Single Record
A workflow triggered by a button, as in the example, can be called like this:
Since this action is for a single record, when calling it on existing data, you need to specify the ID of the data row, replacing the <:id> part in the URL.
If it's called for a form (such as for creating or updating), you can omit the ID for a form that creates new data, but you must pass the submitted data as the execution context:
For an update form, you need to pass both the ID of the data row and the updated data:
If both an ID and data are passed, the data row corresponding to the ID will be loaded first, and then the properties from the passed data object will be used to overwrite the original data row to get the final trigger data context.
If association data is passed, it will also be overwritten. Be especially cautious when handling incoming data if preloading of association data items is configured, to avoid unexpected overwrites of association data.
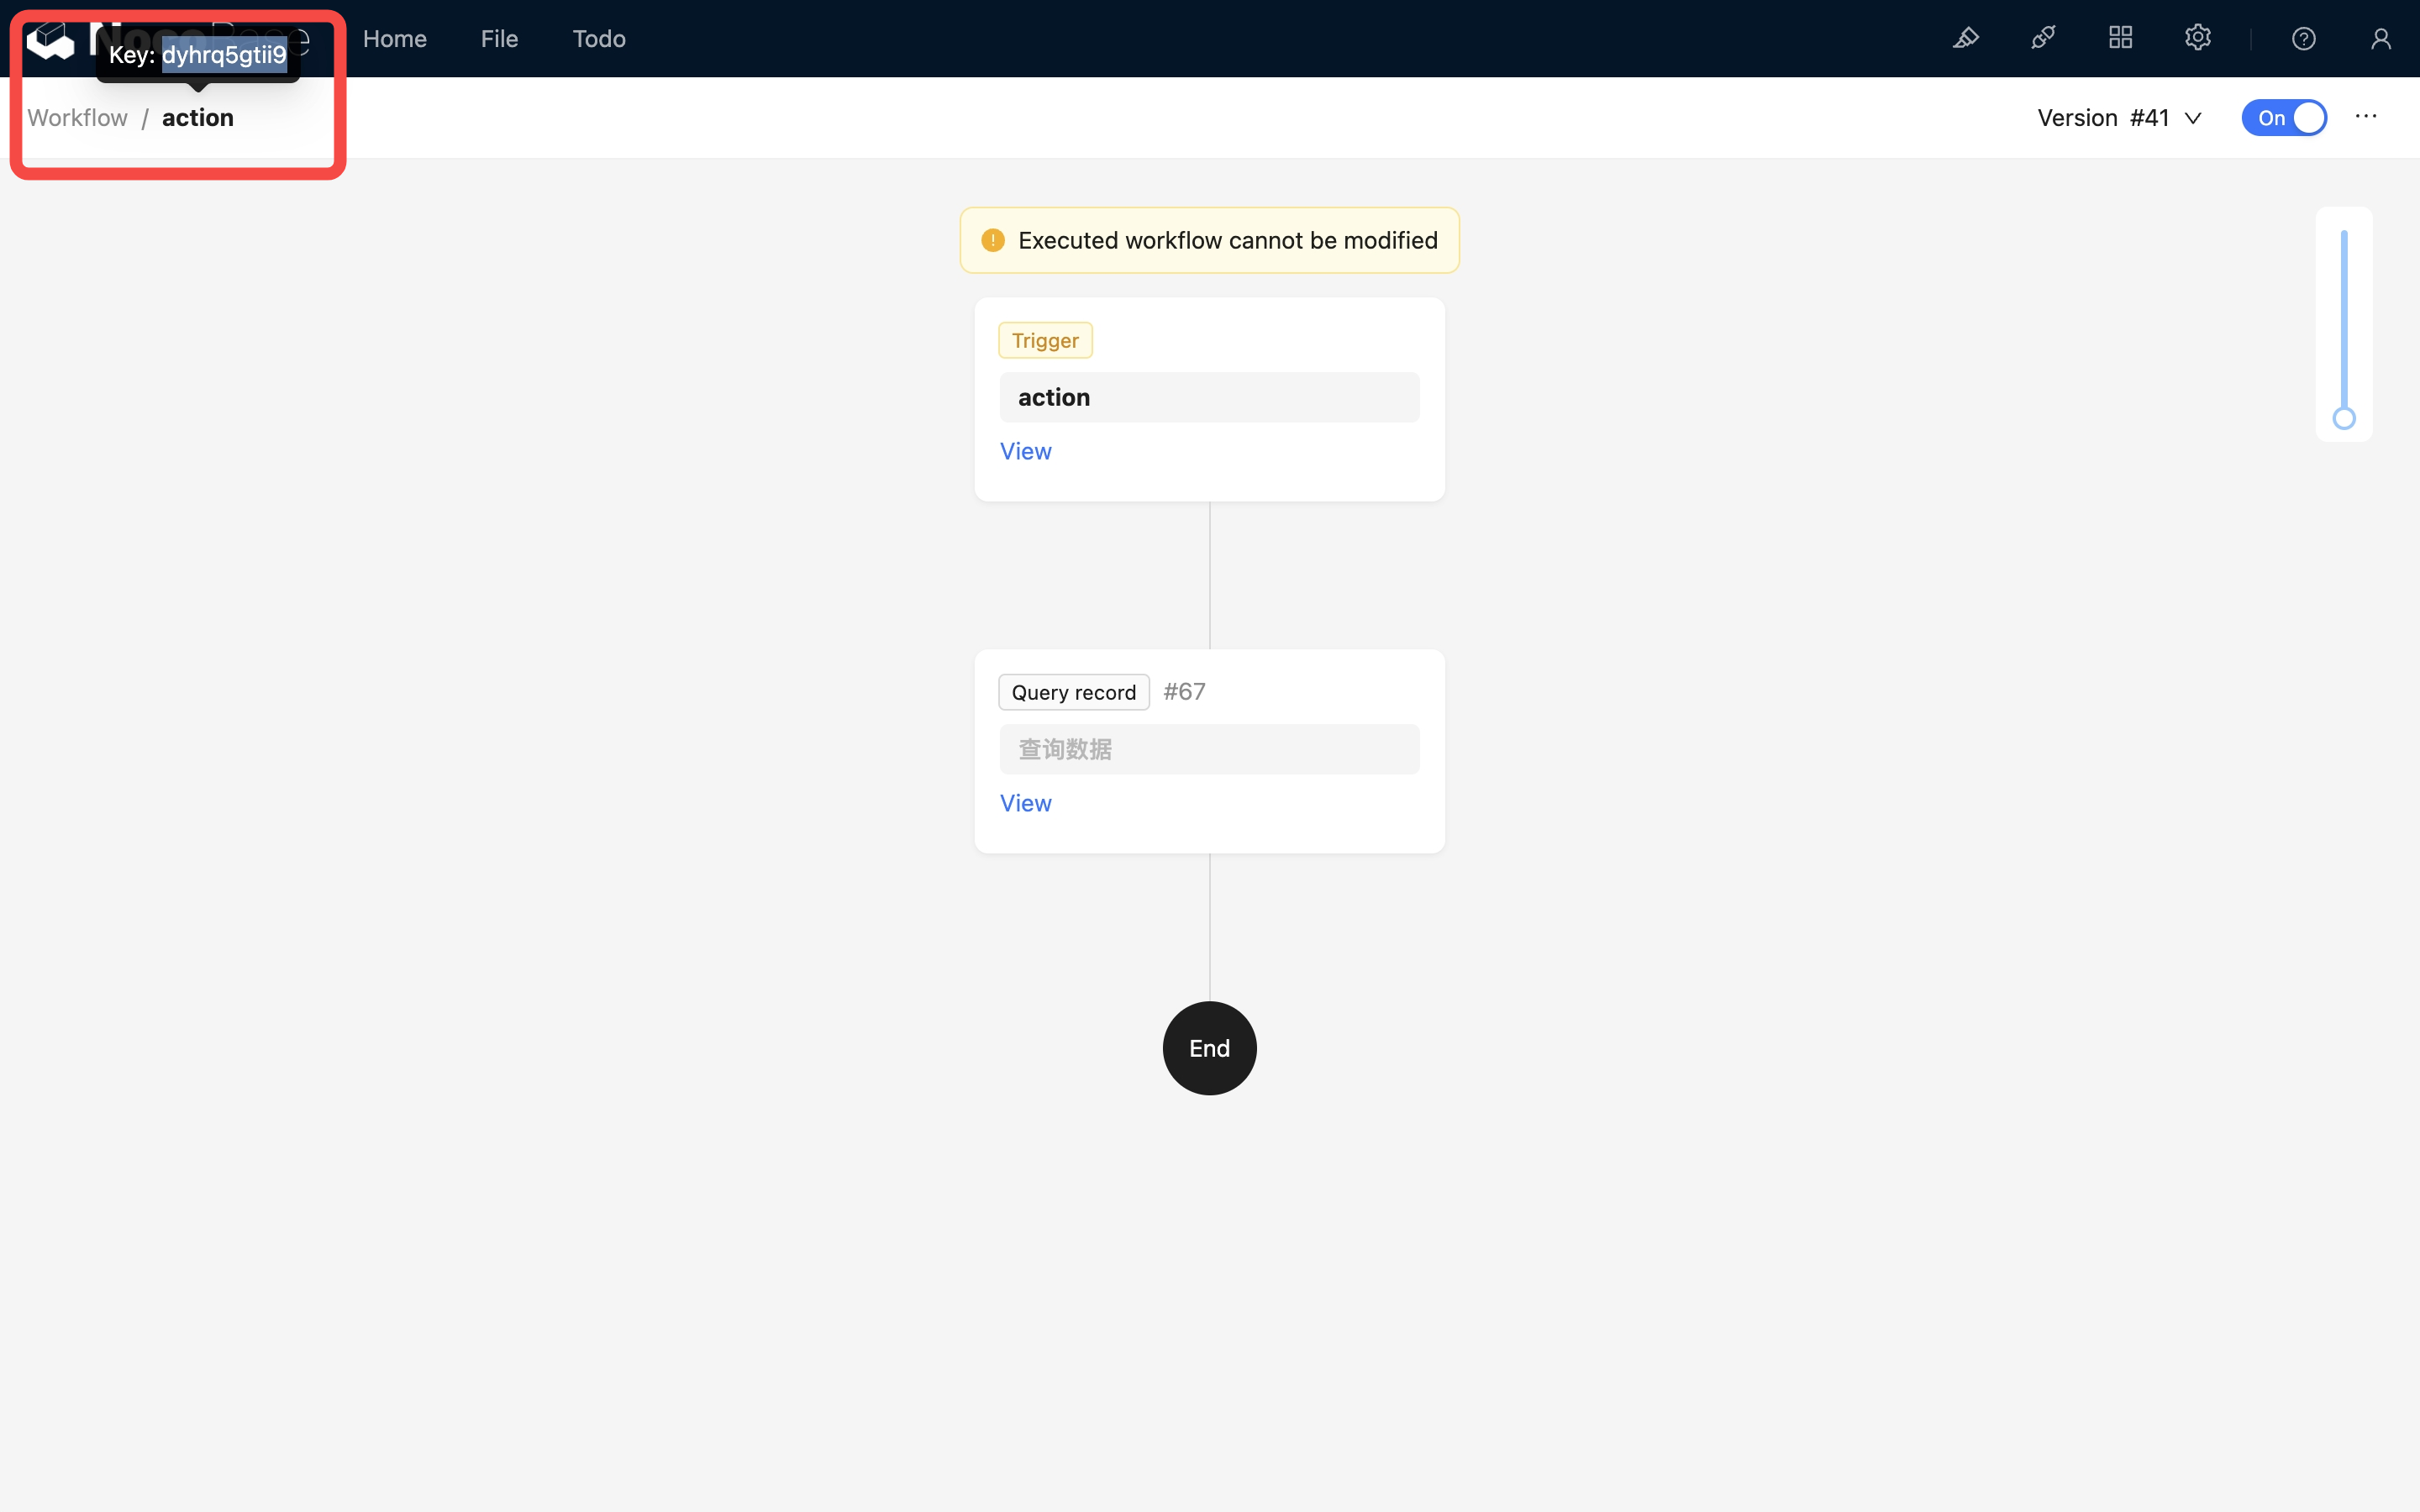
Additionally, the URL parameter triggerWorkflows is the workflow's key; multiple workflow keys are separated by commas. This key can be obtained by hovering the mouse over the workflow name at the top of the workflow canvas:
After a successful call, the custom action event for the corresponding samples collection will be triggered.
When triggering an action event via an HTTP API call, you also need to pay attention to the workflow's enabled status and whether the collection configuration matches; otherwise, the call may not succeed or may result in an error.