

Webhook
This feature is provided by the commercial plugin «Workflow: Webhook», please purchase to useIntroduction
The Webhook trigger provides a URL that can be called by third-party systems via HTTP requests. When a third-party event occurs, it sends an HTTP request to this URL to trigger the workflow execution. It is suitable for notifications initiated by external systems, such as payment callbacks, messages, etc.
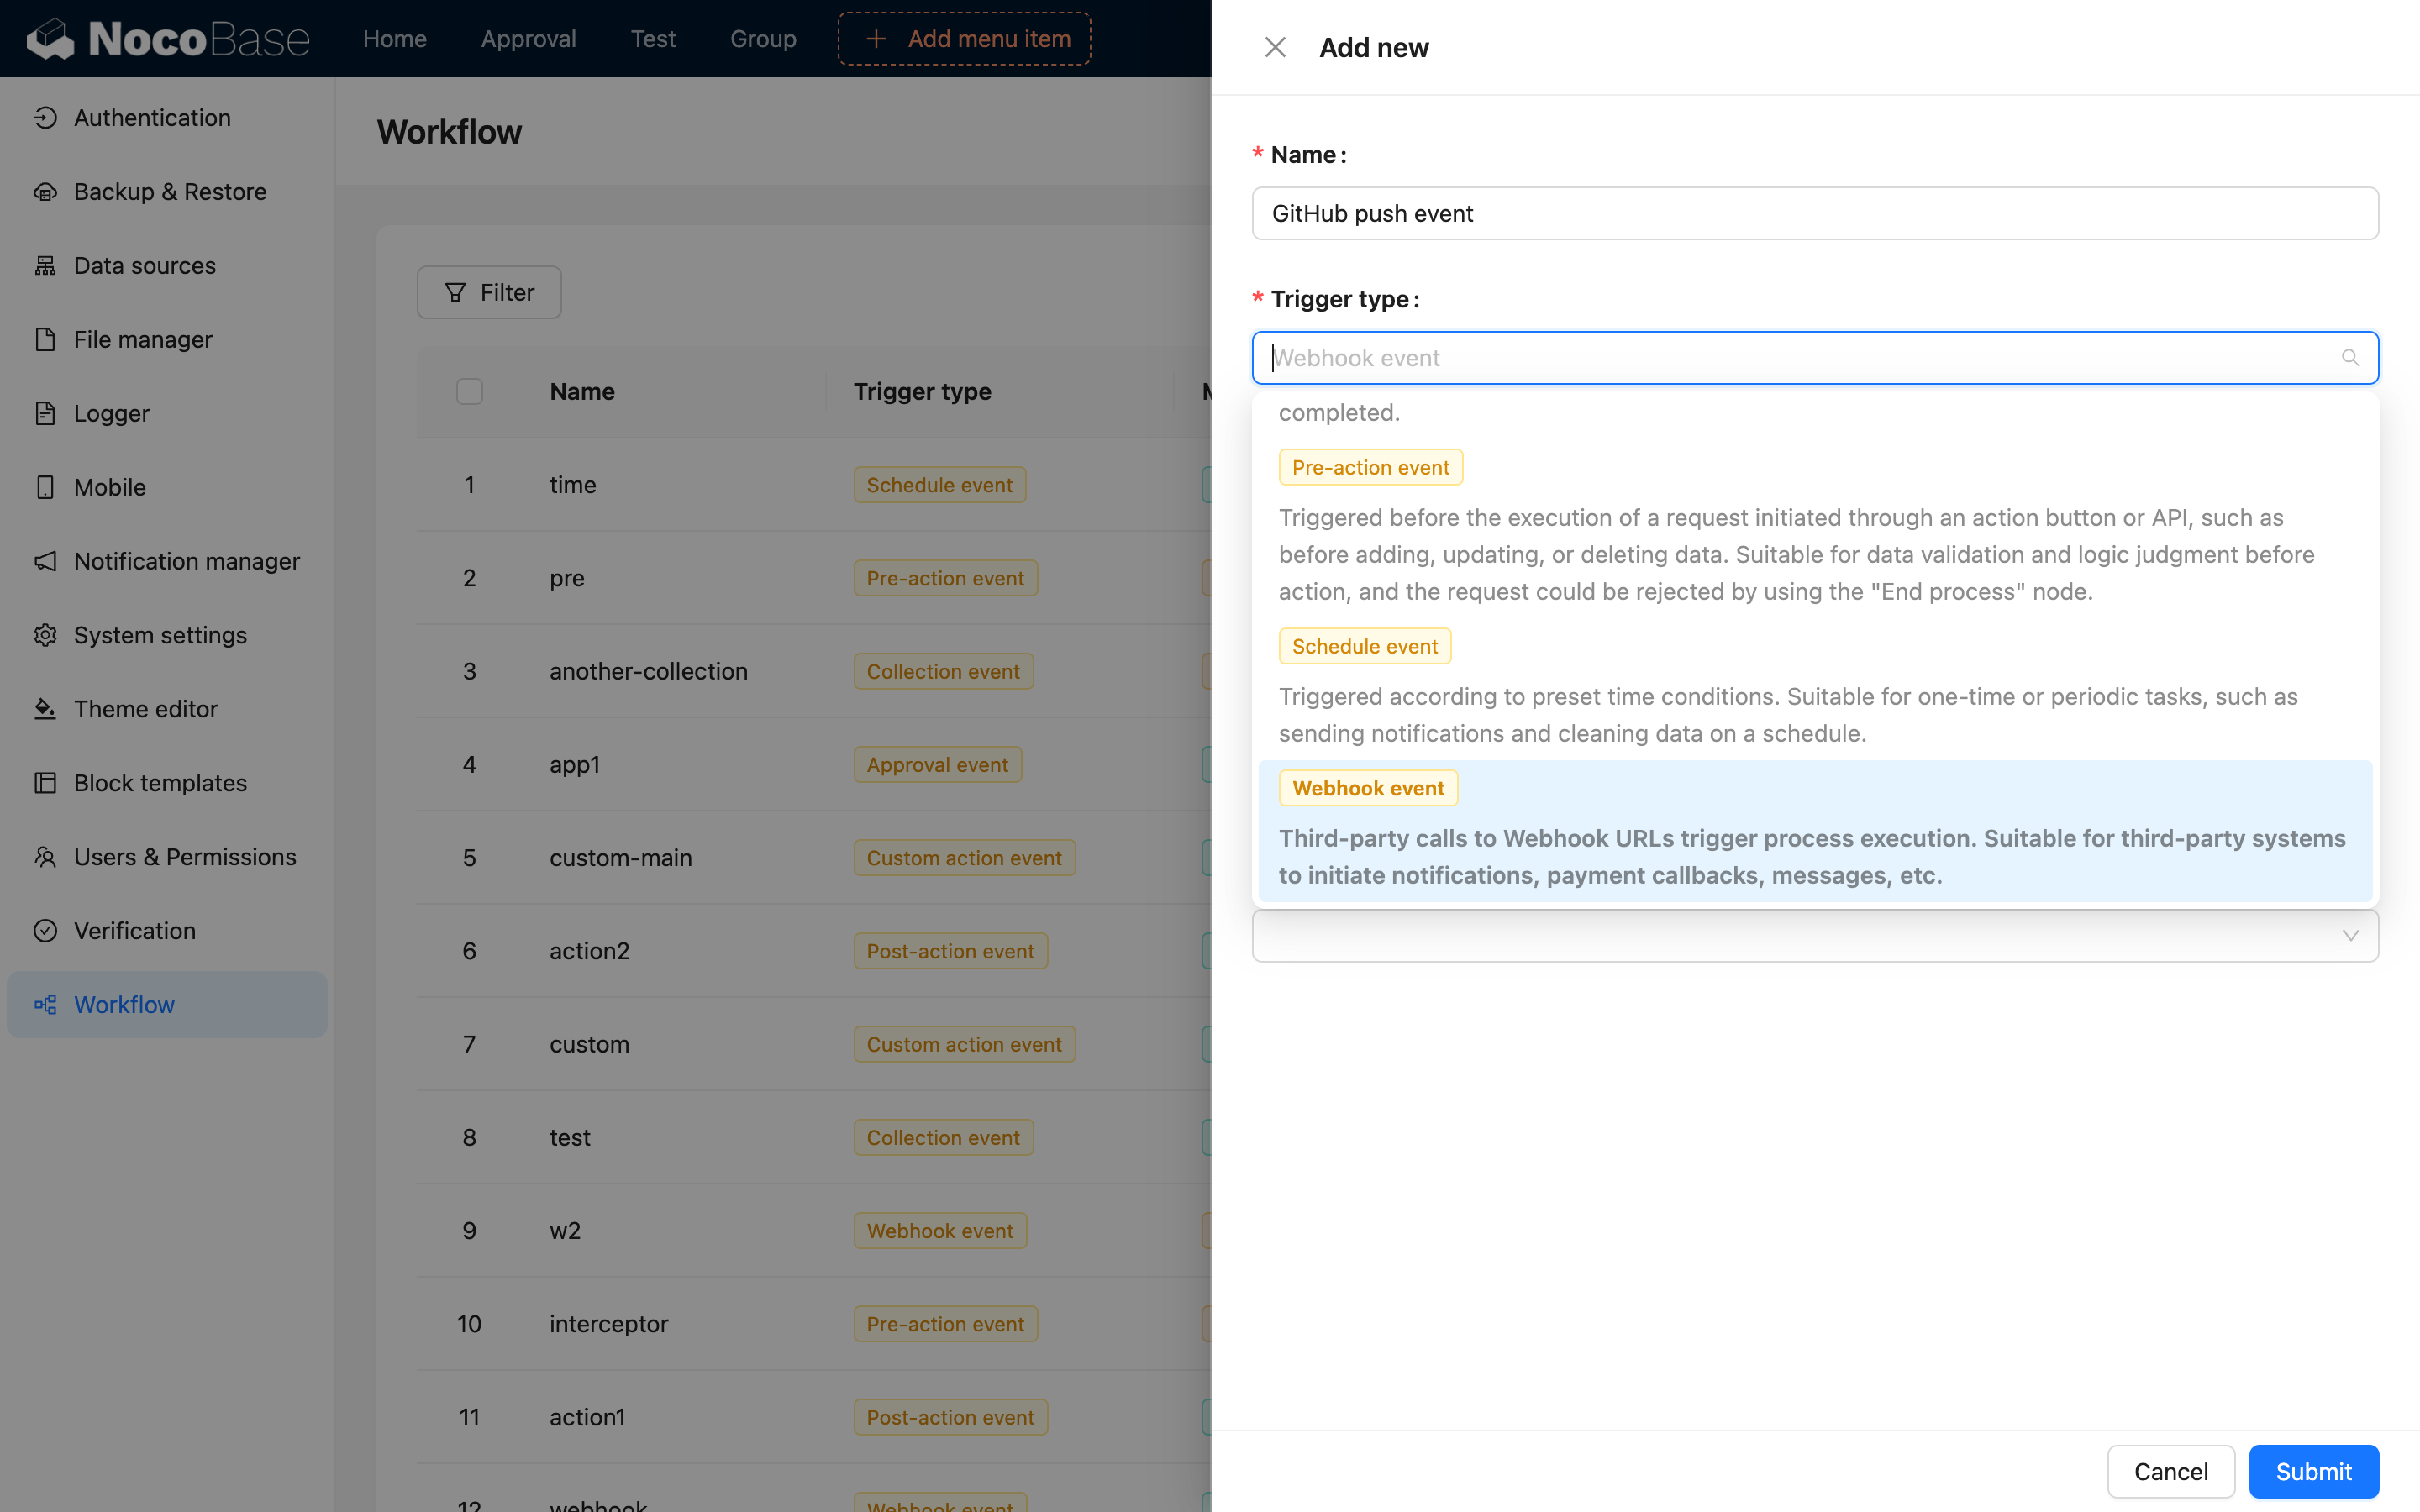
Creating a Workflow
When creating a workflow, select the type "Webhook event":
The difference between "synchronous" and "asynchronous" workflows is that a synchronous workflow waits for the workflow to complete before returning a response, while an asynchronous workflow immediately returns the response configured in the trigger and queues the execution in the background.
Trigger Configuration
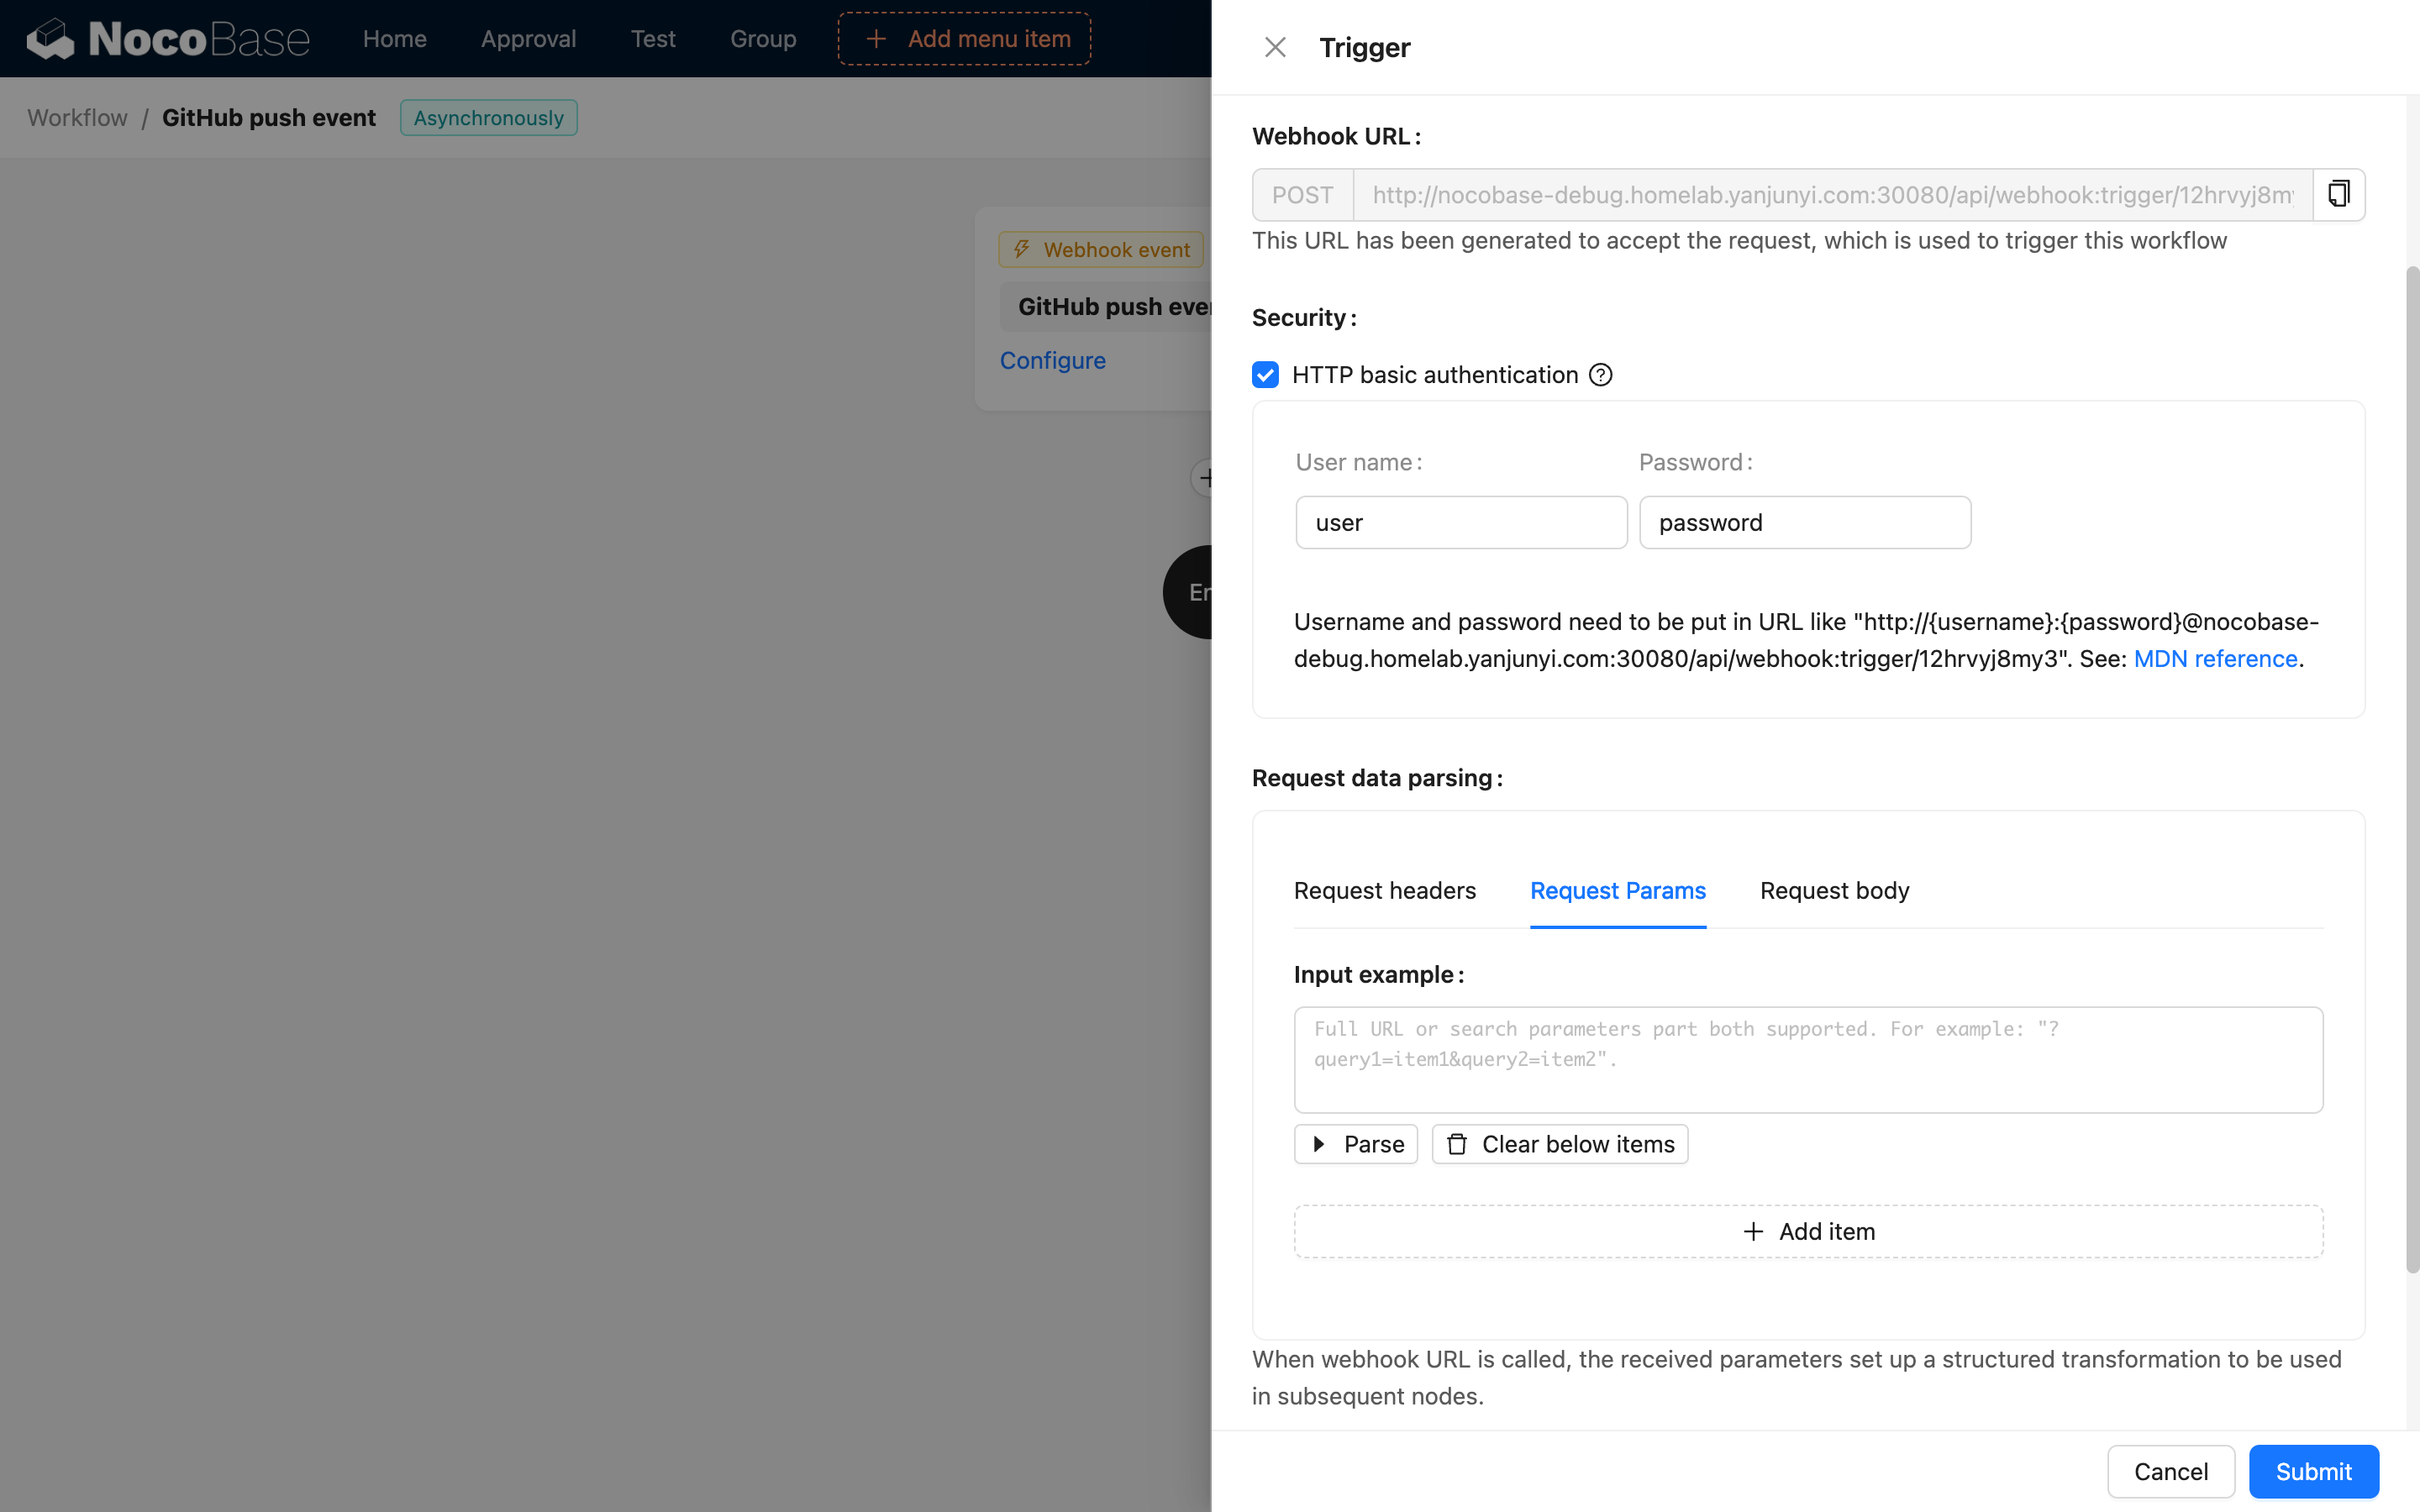
Webhook URL
The URL for the Webhook trigger is automatically generated by the system and bound to this workflow. You can click the button on the right to copy it and paste it into the third-party system.
Only the POST HTTP method is supported; other methods will return a 405 error.
Security
HTTP Basic Authentication is currently supported. You can enable this option and set a username and password. Include the username and password in the Webhook URL in the third-party system to implement security authentication for the Webhook (for details on the standard, see: MDN: HTTP authentication).
When a username and password are set, the system will verify if the username and password in the request match. If they are not provided or do not match, a 401 error will be returned.
Parse Request Data
When a third party calls the Webhook, the data carried in the request needs to be parsed before it can be used in the workflow. After parsing, it becomes a trigger variable that can be referenced in subsequent nodes.
The parsing of the HTTP request is divided into three parts:
-
Request Headers
Request headers are usually simple key-value pairs of string type. The header fields you need to use can be configured directly, such as
Date,X-Request-Id, etc. -
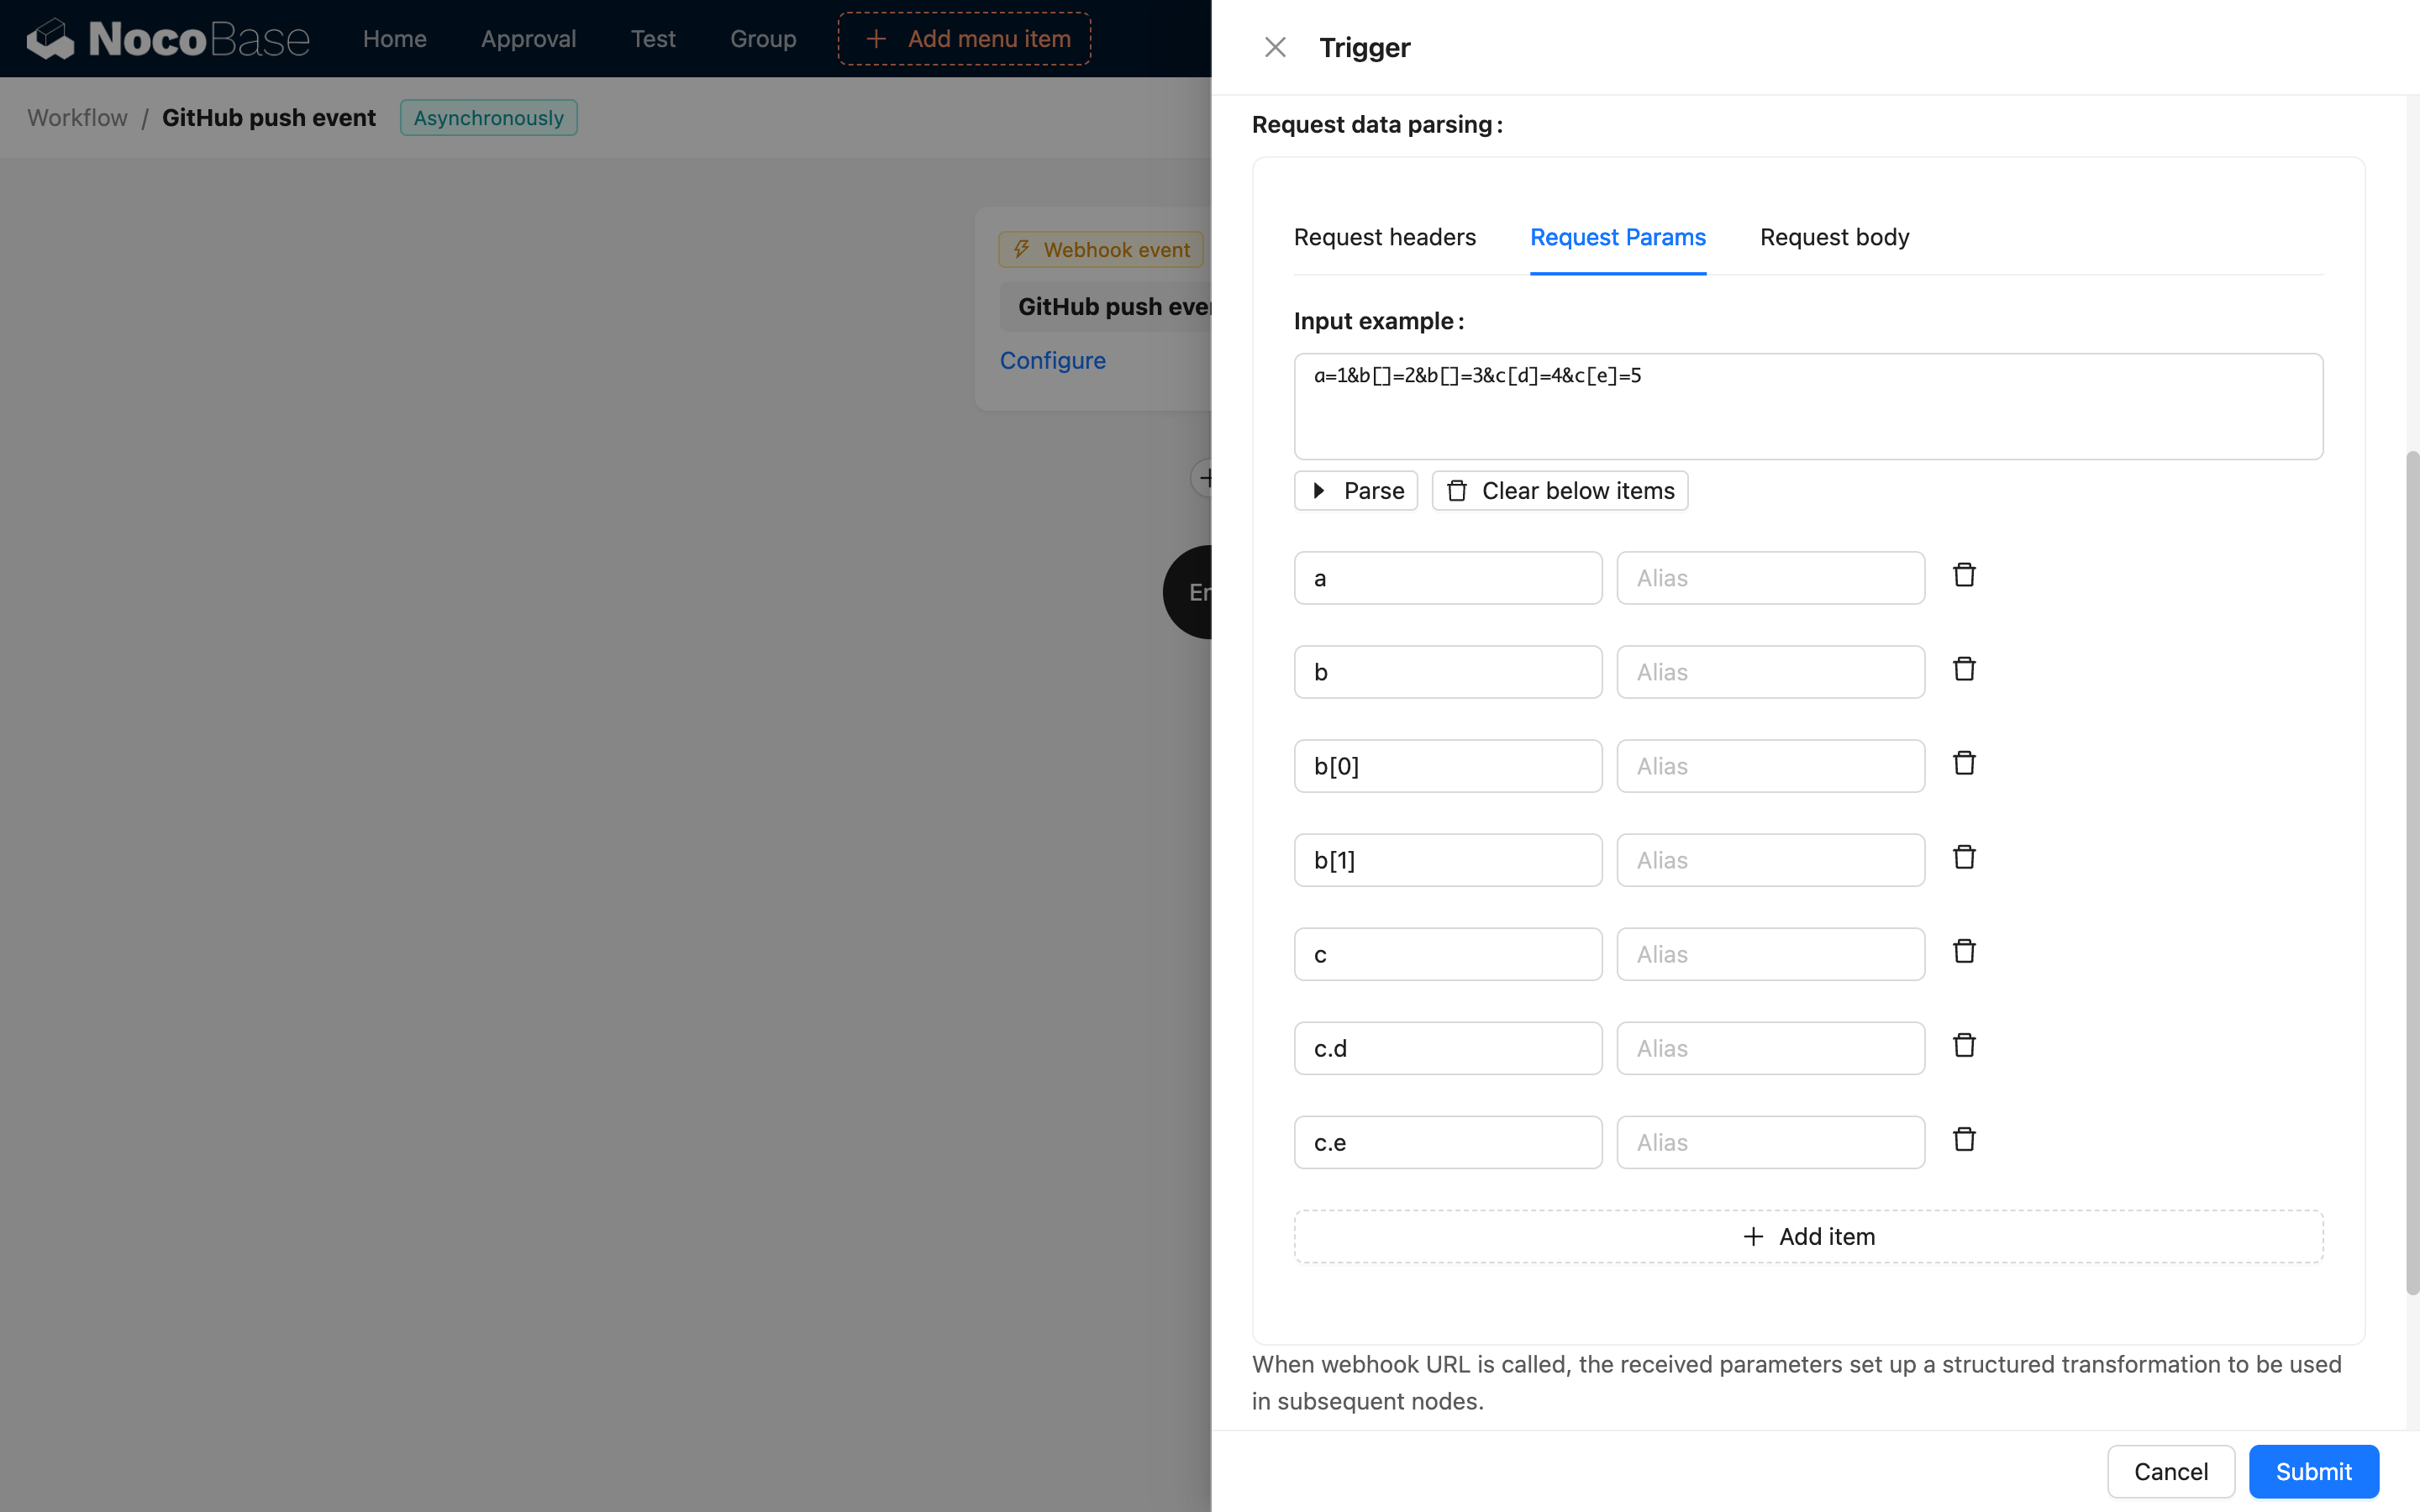
Request Parameters
Request parameters are the query parameters in the URL, such as the
queryparameter inhttp://localhost:13000/api/webhook:trigger/1hfmkioou0d?query=1. You can paste a full sample URL or just the query parameter part and click the parse button to automatically parse the key-value pairs.
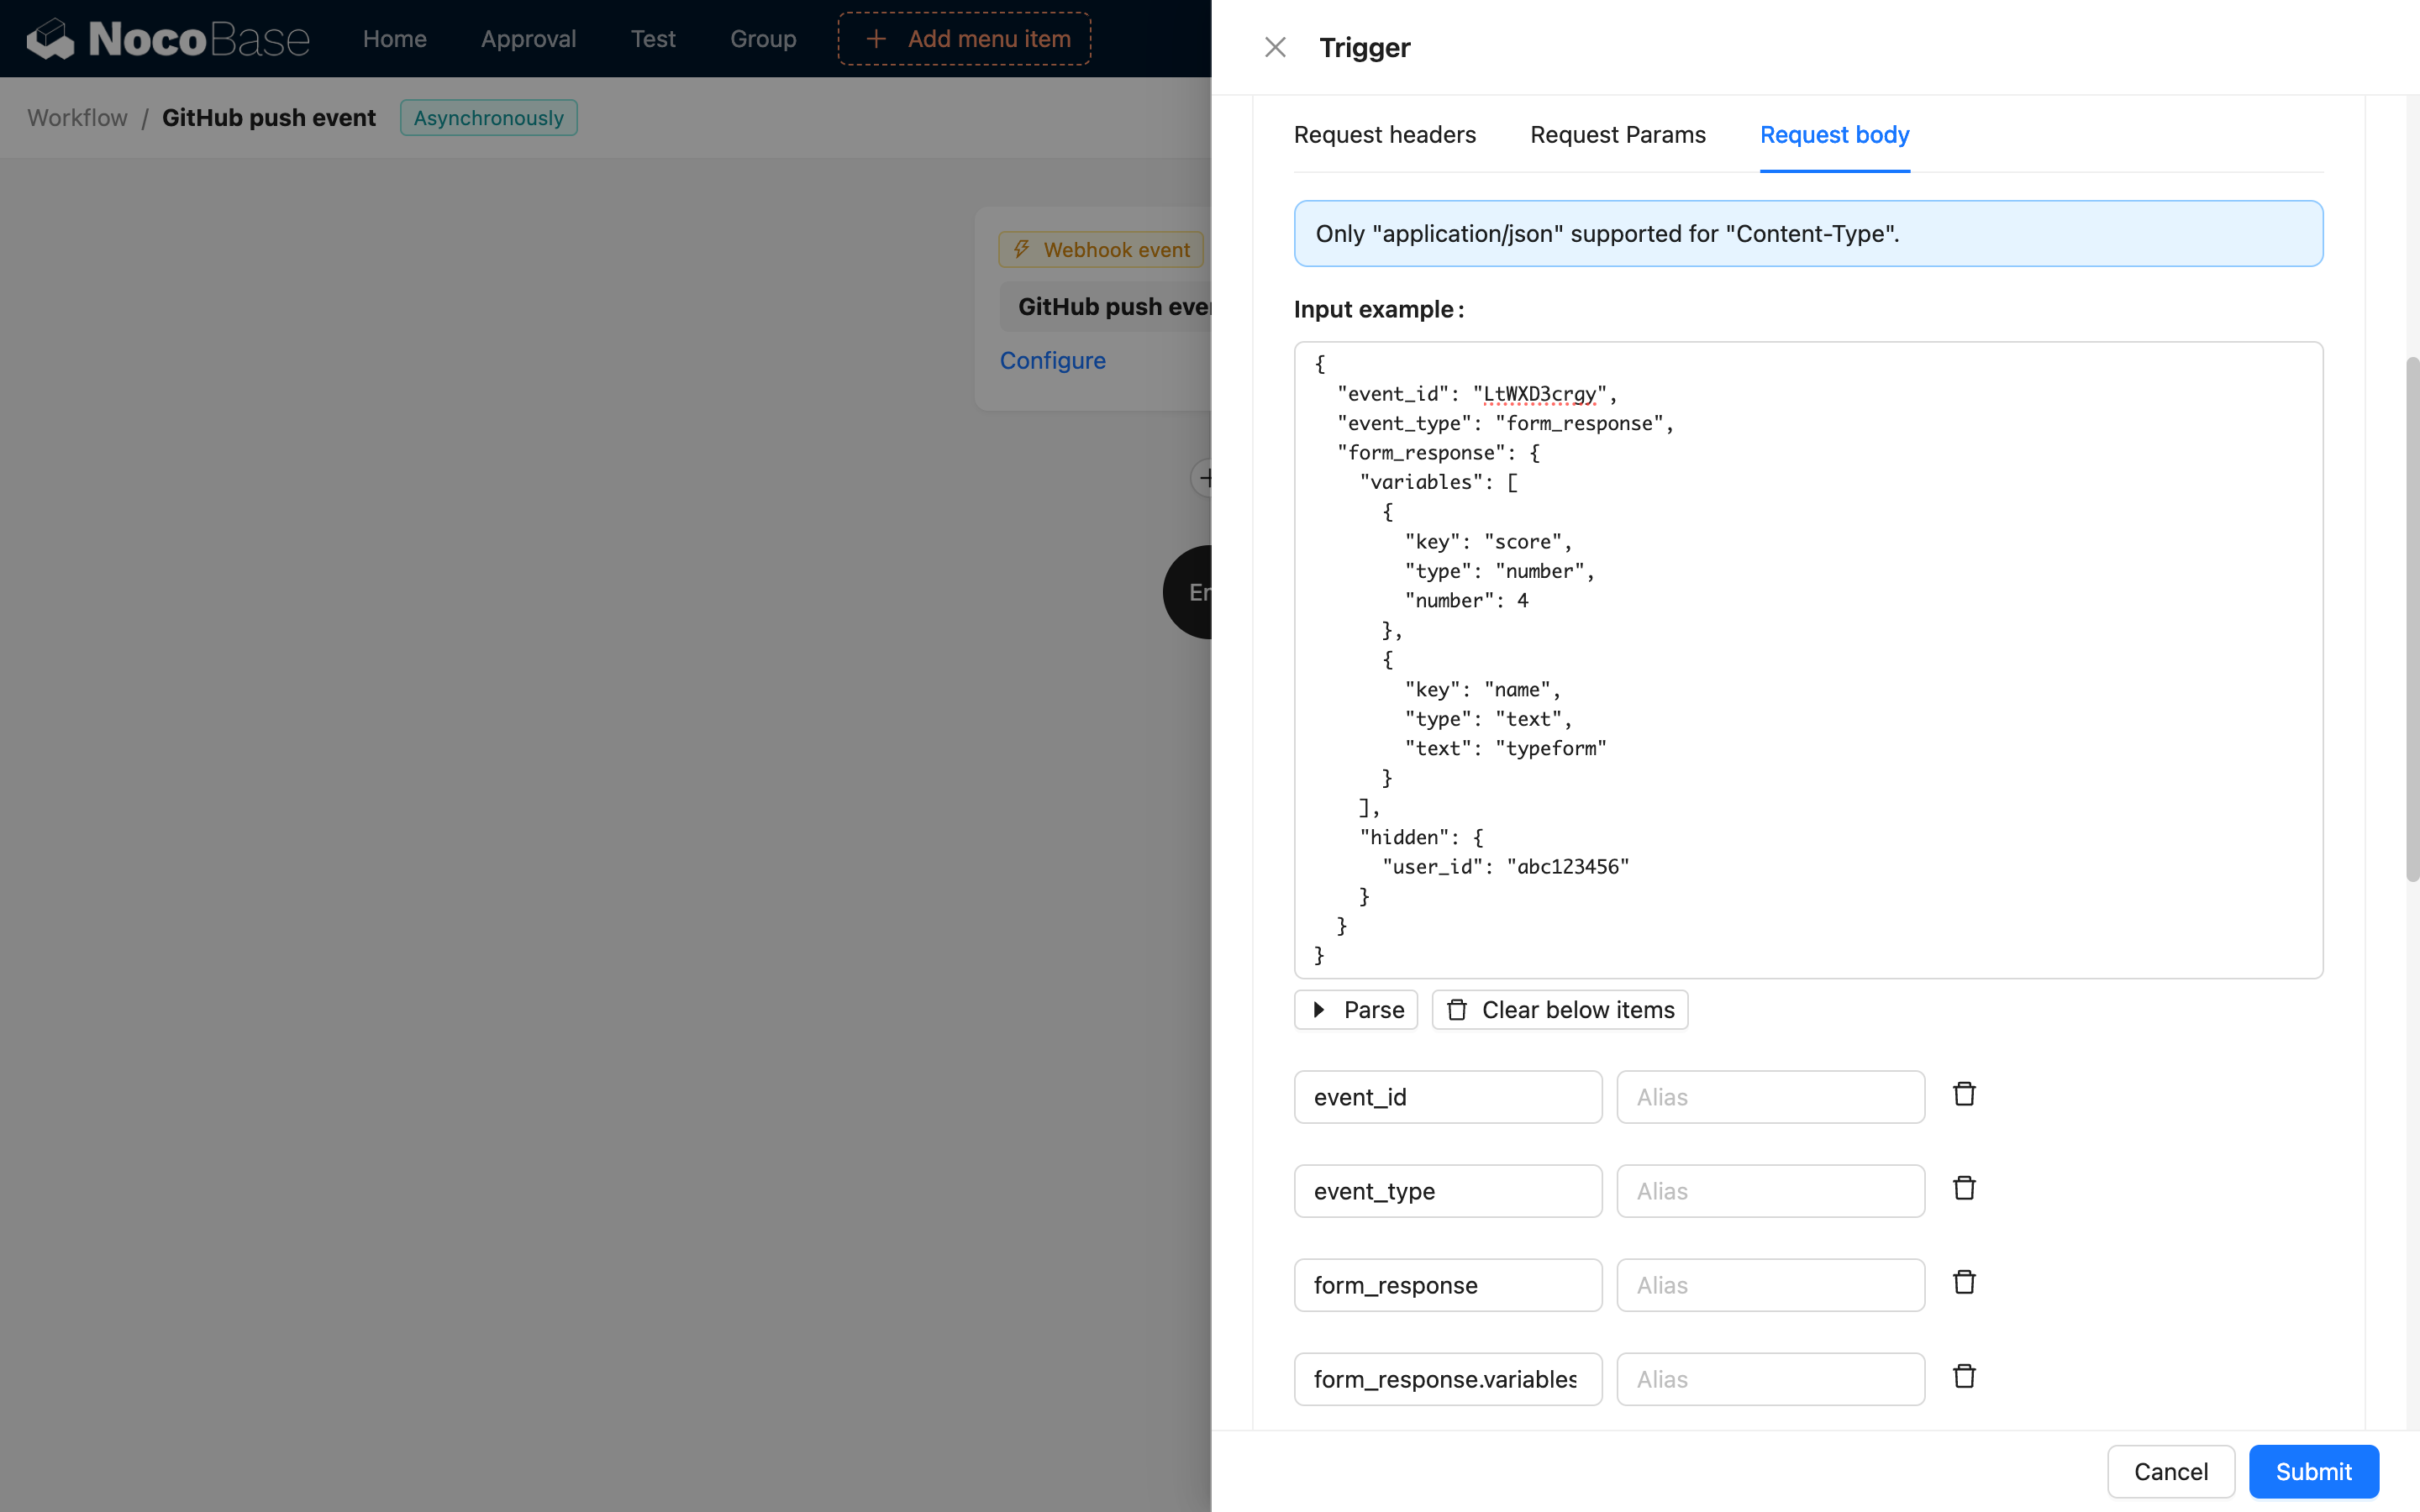
3. Request Body
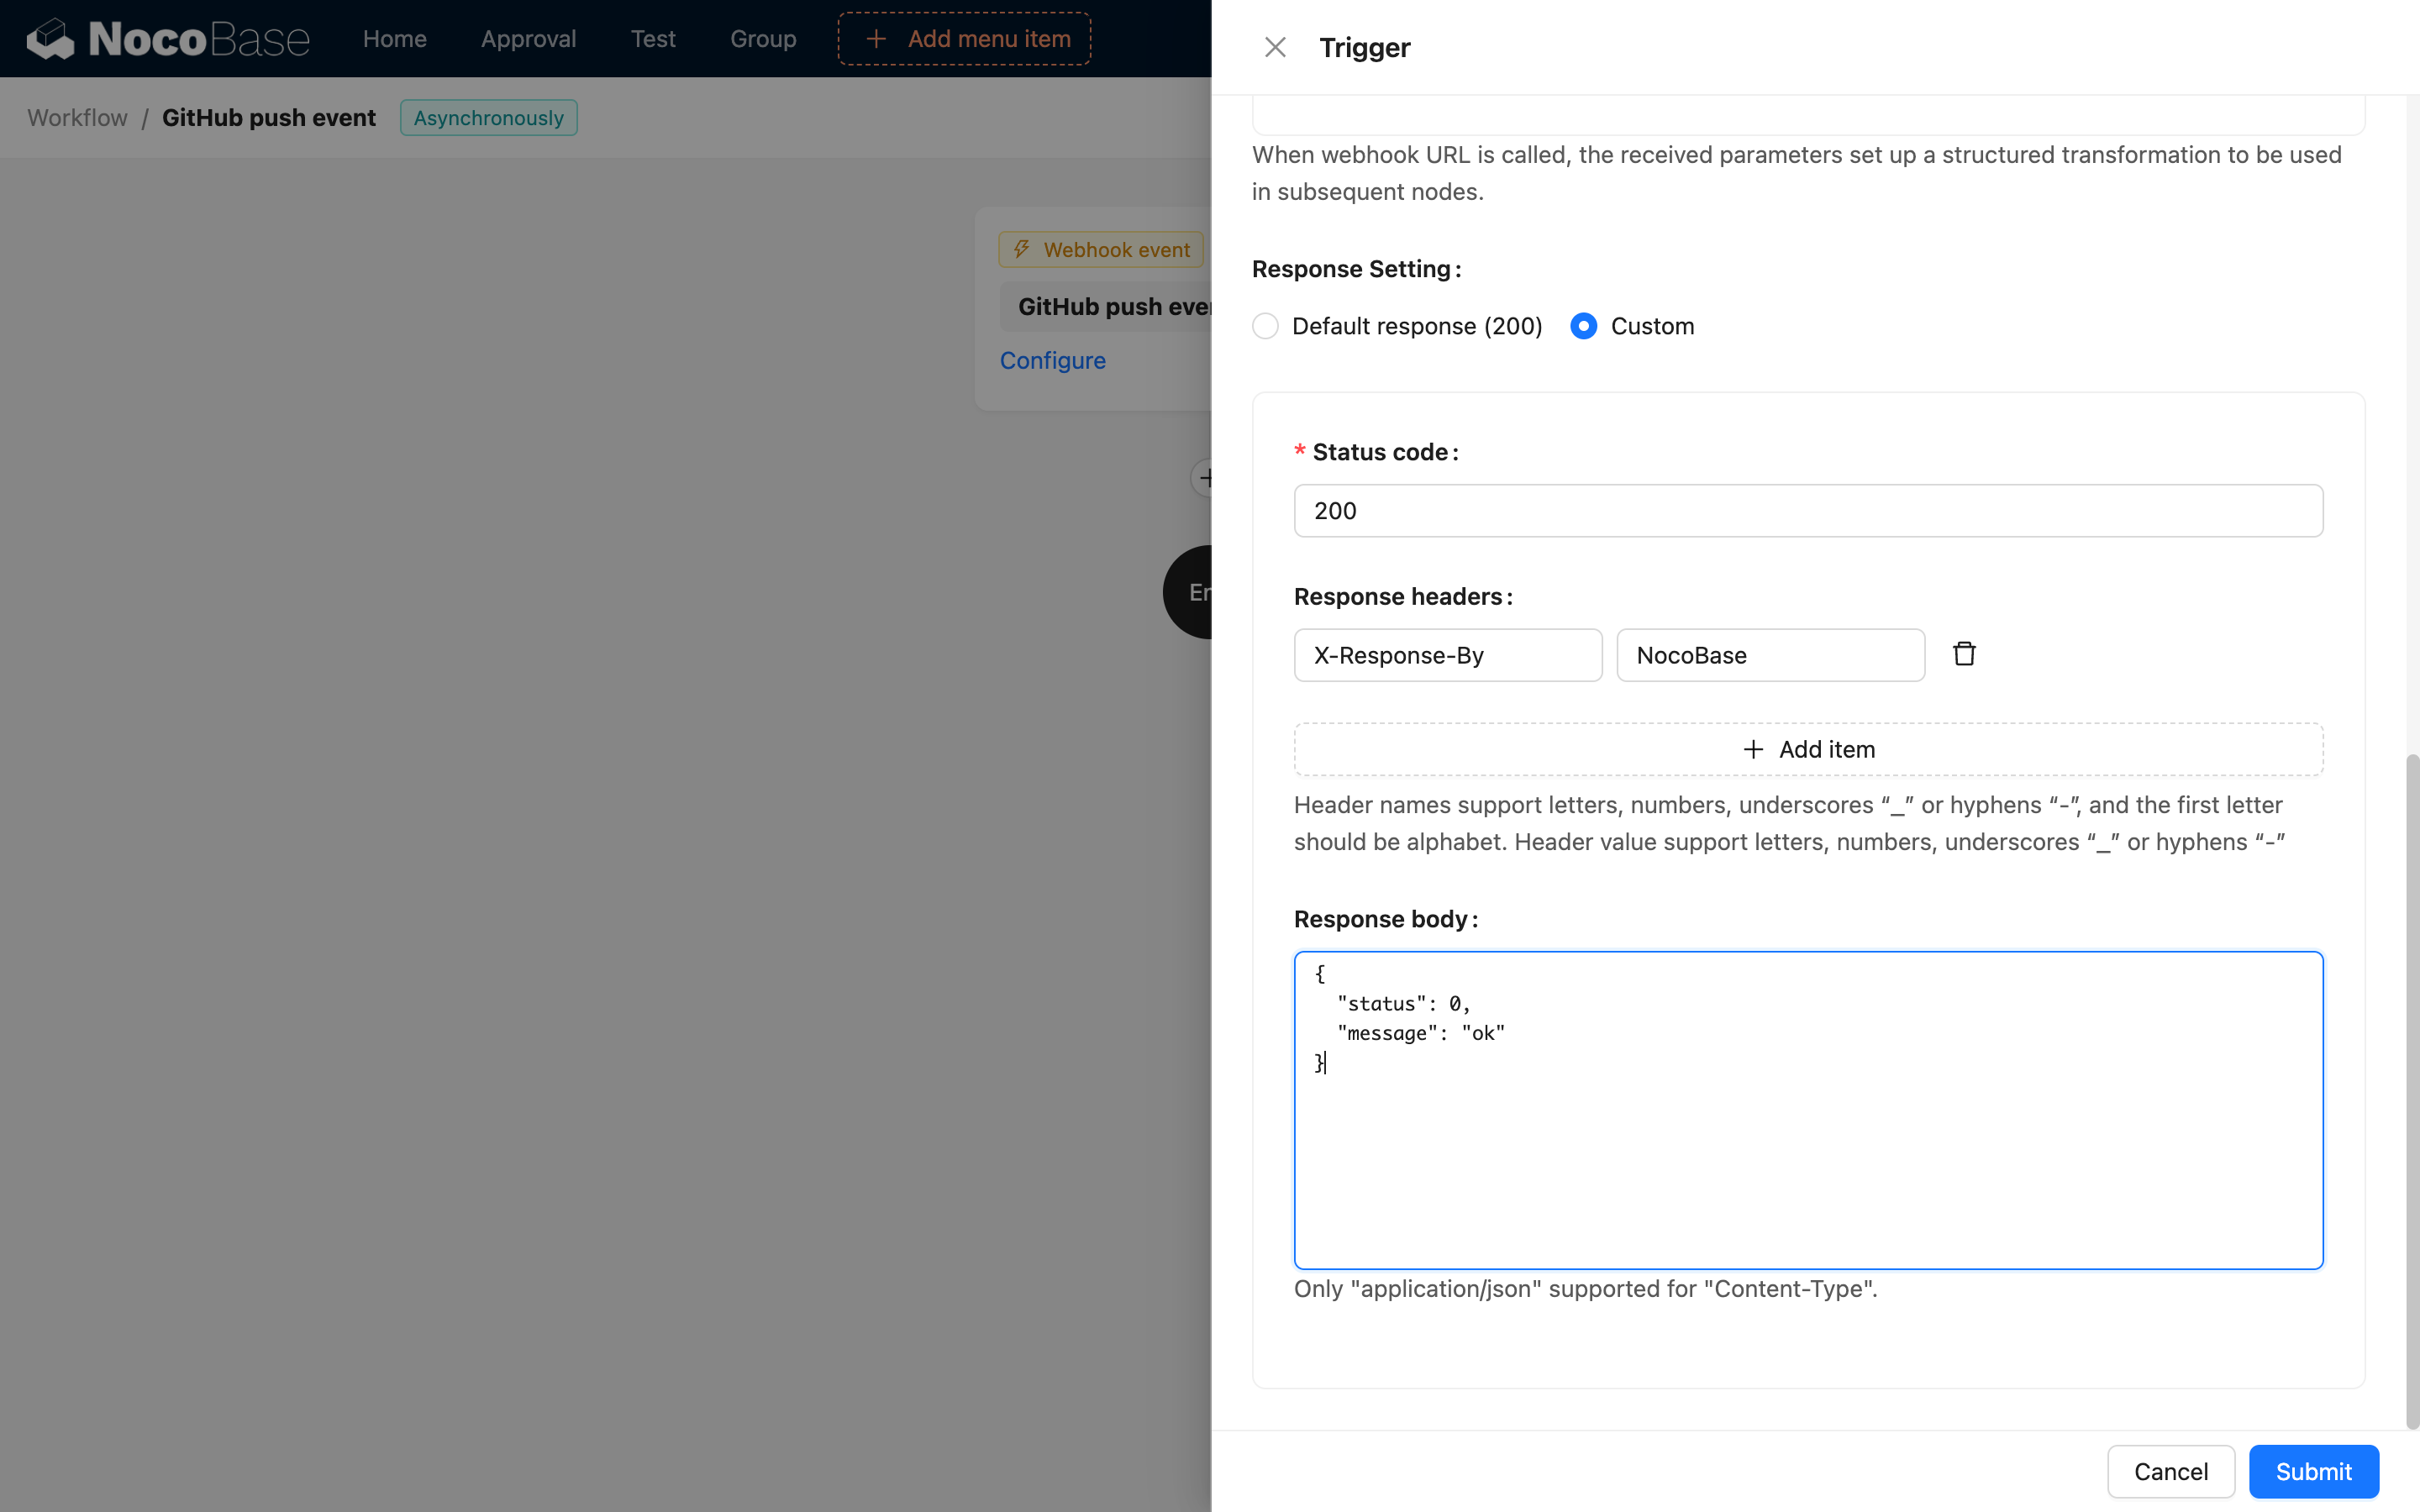
Response Settings
The configuration of the Webhook response differs between synchronous and asynchronous workflows. For asynchronous workflows, the response is configured directly in the trigger. Upon receiving a Webhook request, it immediately returns the configured response to the third-party system and then executes the workflow. For synchronous workflows, you need to add a response node within the flow to handle it according to business requirements (for details, see: Response Node).
Typically, the response for an asynchronously triggered Webhook event has a status code of 200 and a response body of ok. You can also customize the response status code, headers, and body as needed.
Response Node
Reference: Response Node
Example
In a Webhook workflow, you can return different responses based on different business conditions, as shown in the figure below:
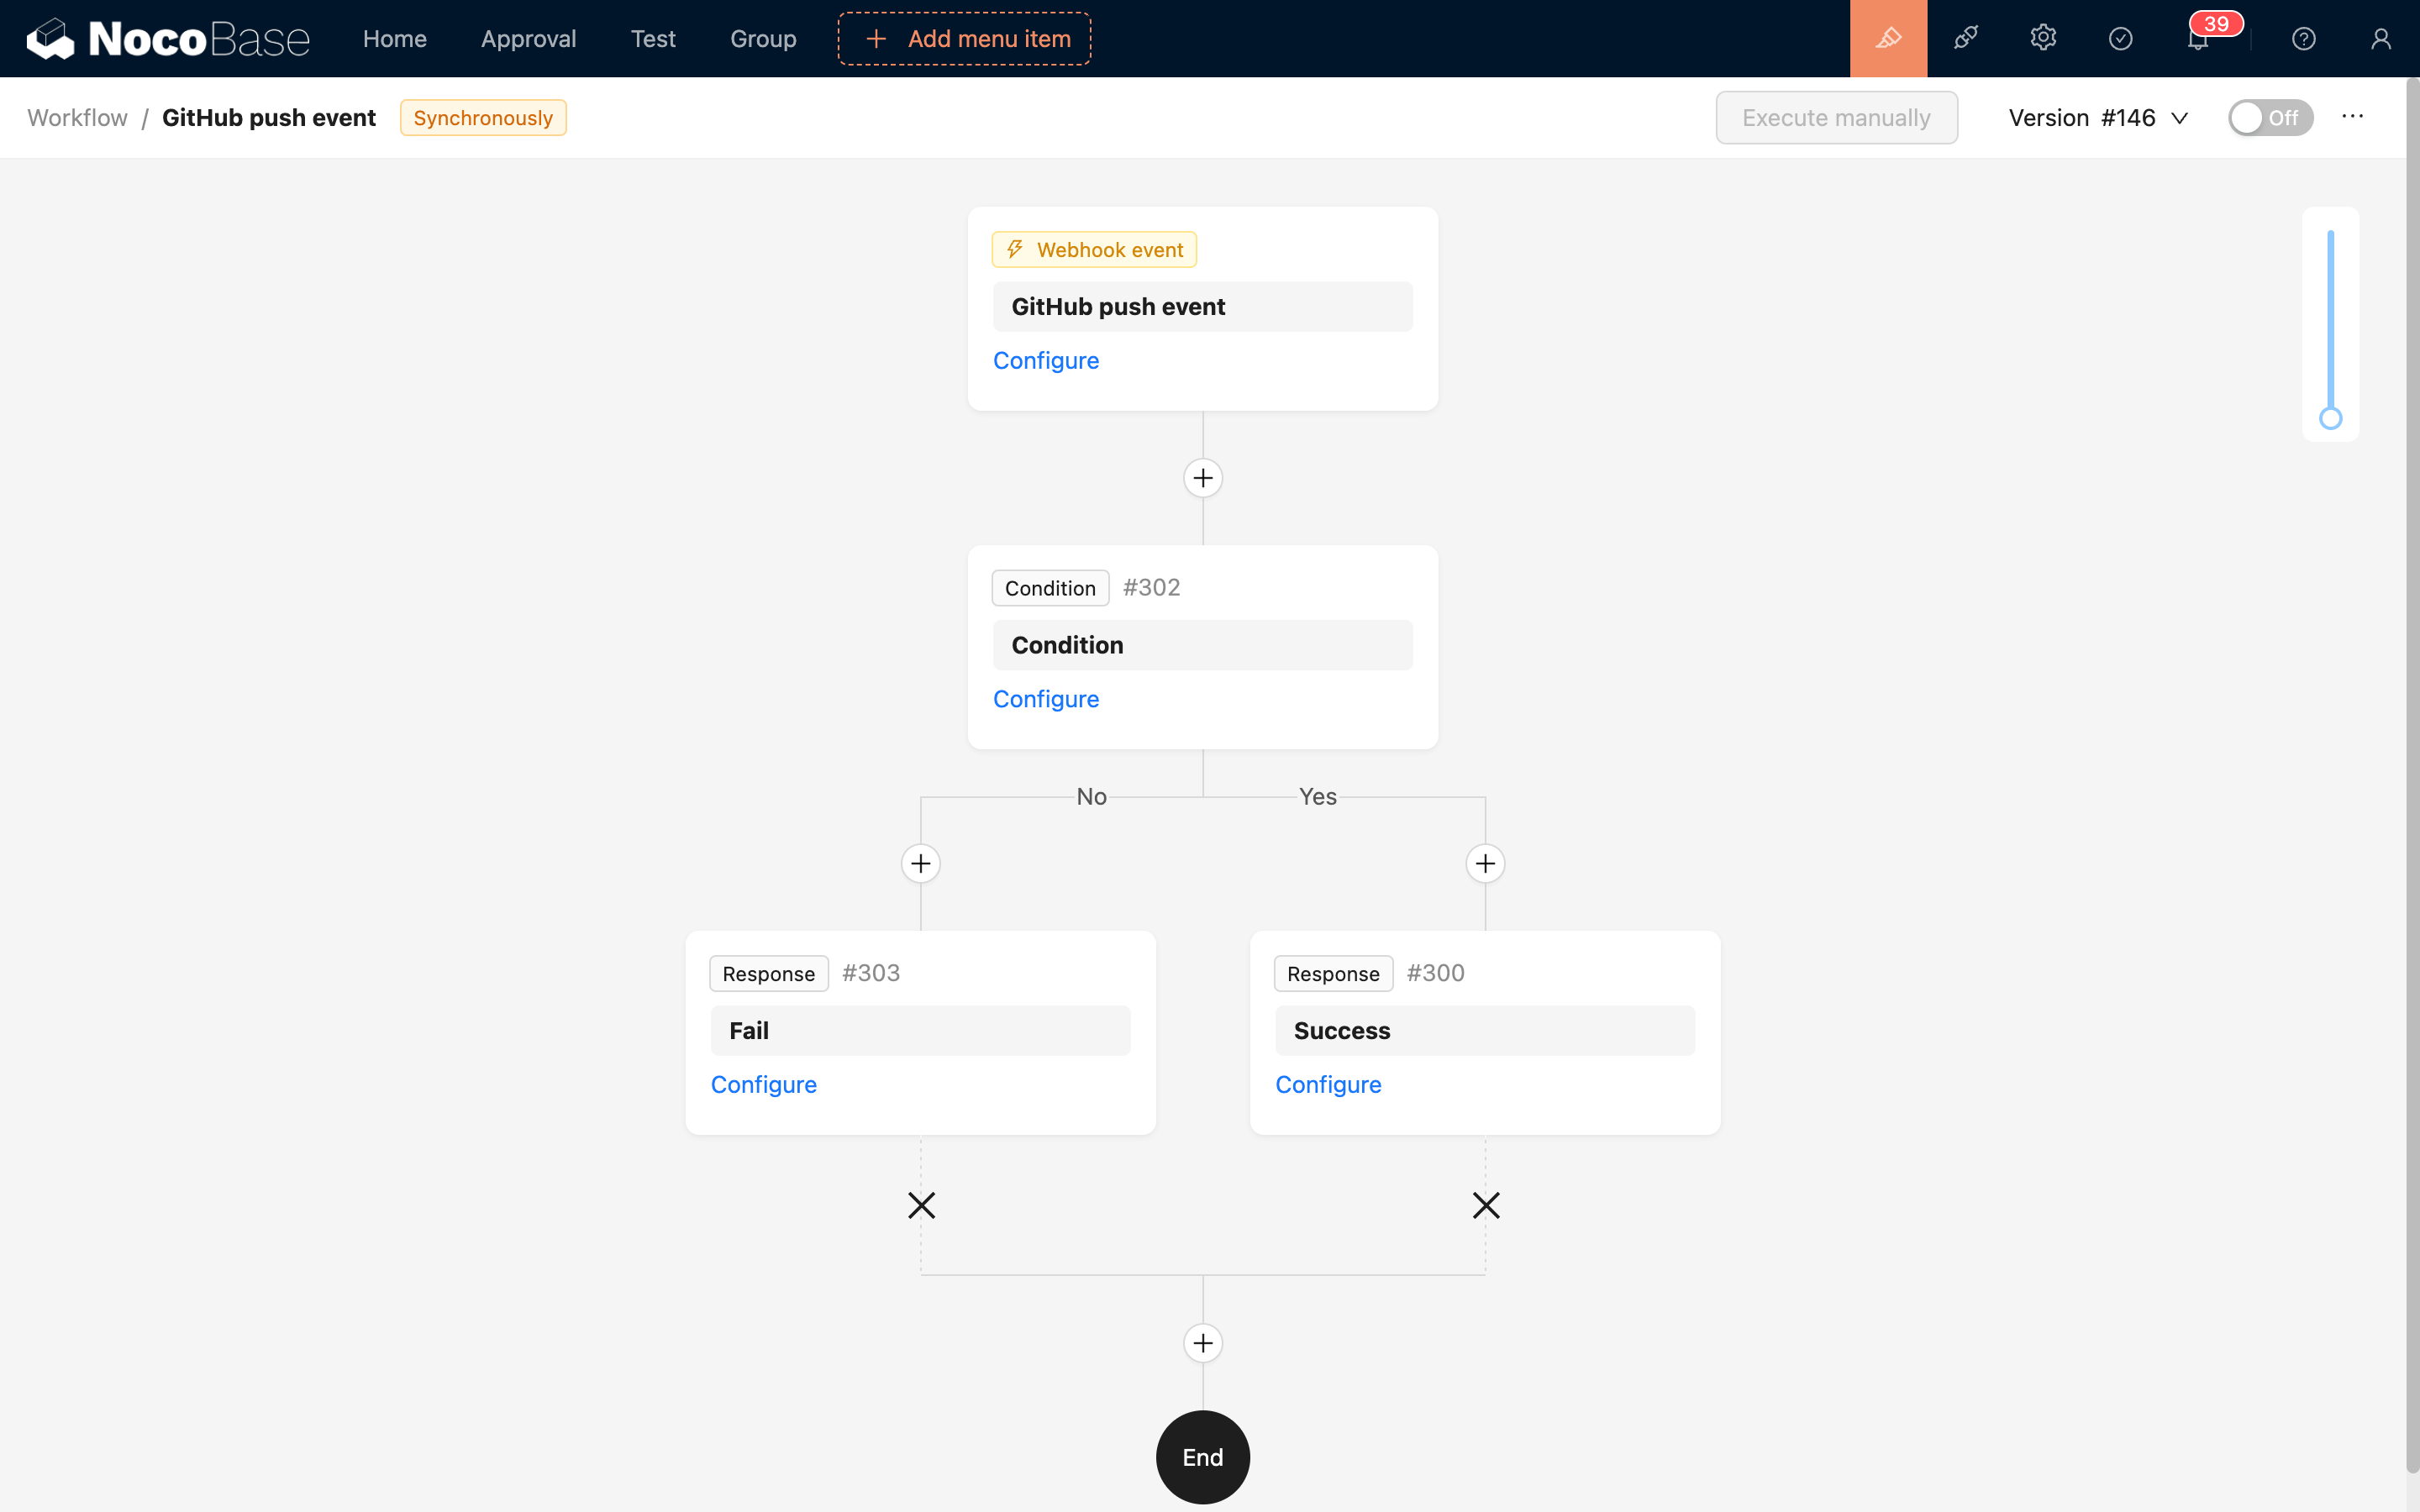
Use a conditional branch node to determine if a certain business status is met. If it is, return a success response; otherwise, return a failure response.