

Post-Action Event
This feature is provided by the plugin «Workflow: Post-action event»Introduction
All data changes made by users in the system are typically accomplished through an action, usually in the form of clicking a button. This button could be a submit button in a form or an action button in a data block. The post-action event is used to bind related workflows to the actions of these buttons, so that a specific process is triggered after the user's action is successfully completed.
For example, when adding or updating data, users can configure the "Bind workflow" option for a button. After the action is completed, the bound workflow will be triggered.
At the implementation level, since post-action event handling is at the middleware layer (Koa's middleware), HTTP API calls to NocoBase can also trigger defined post-action events.
Installation
This is a built-in plugin, no installation is required.
Trigger Configuration
Create Workflow
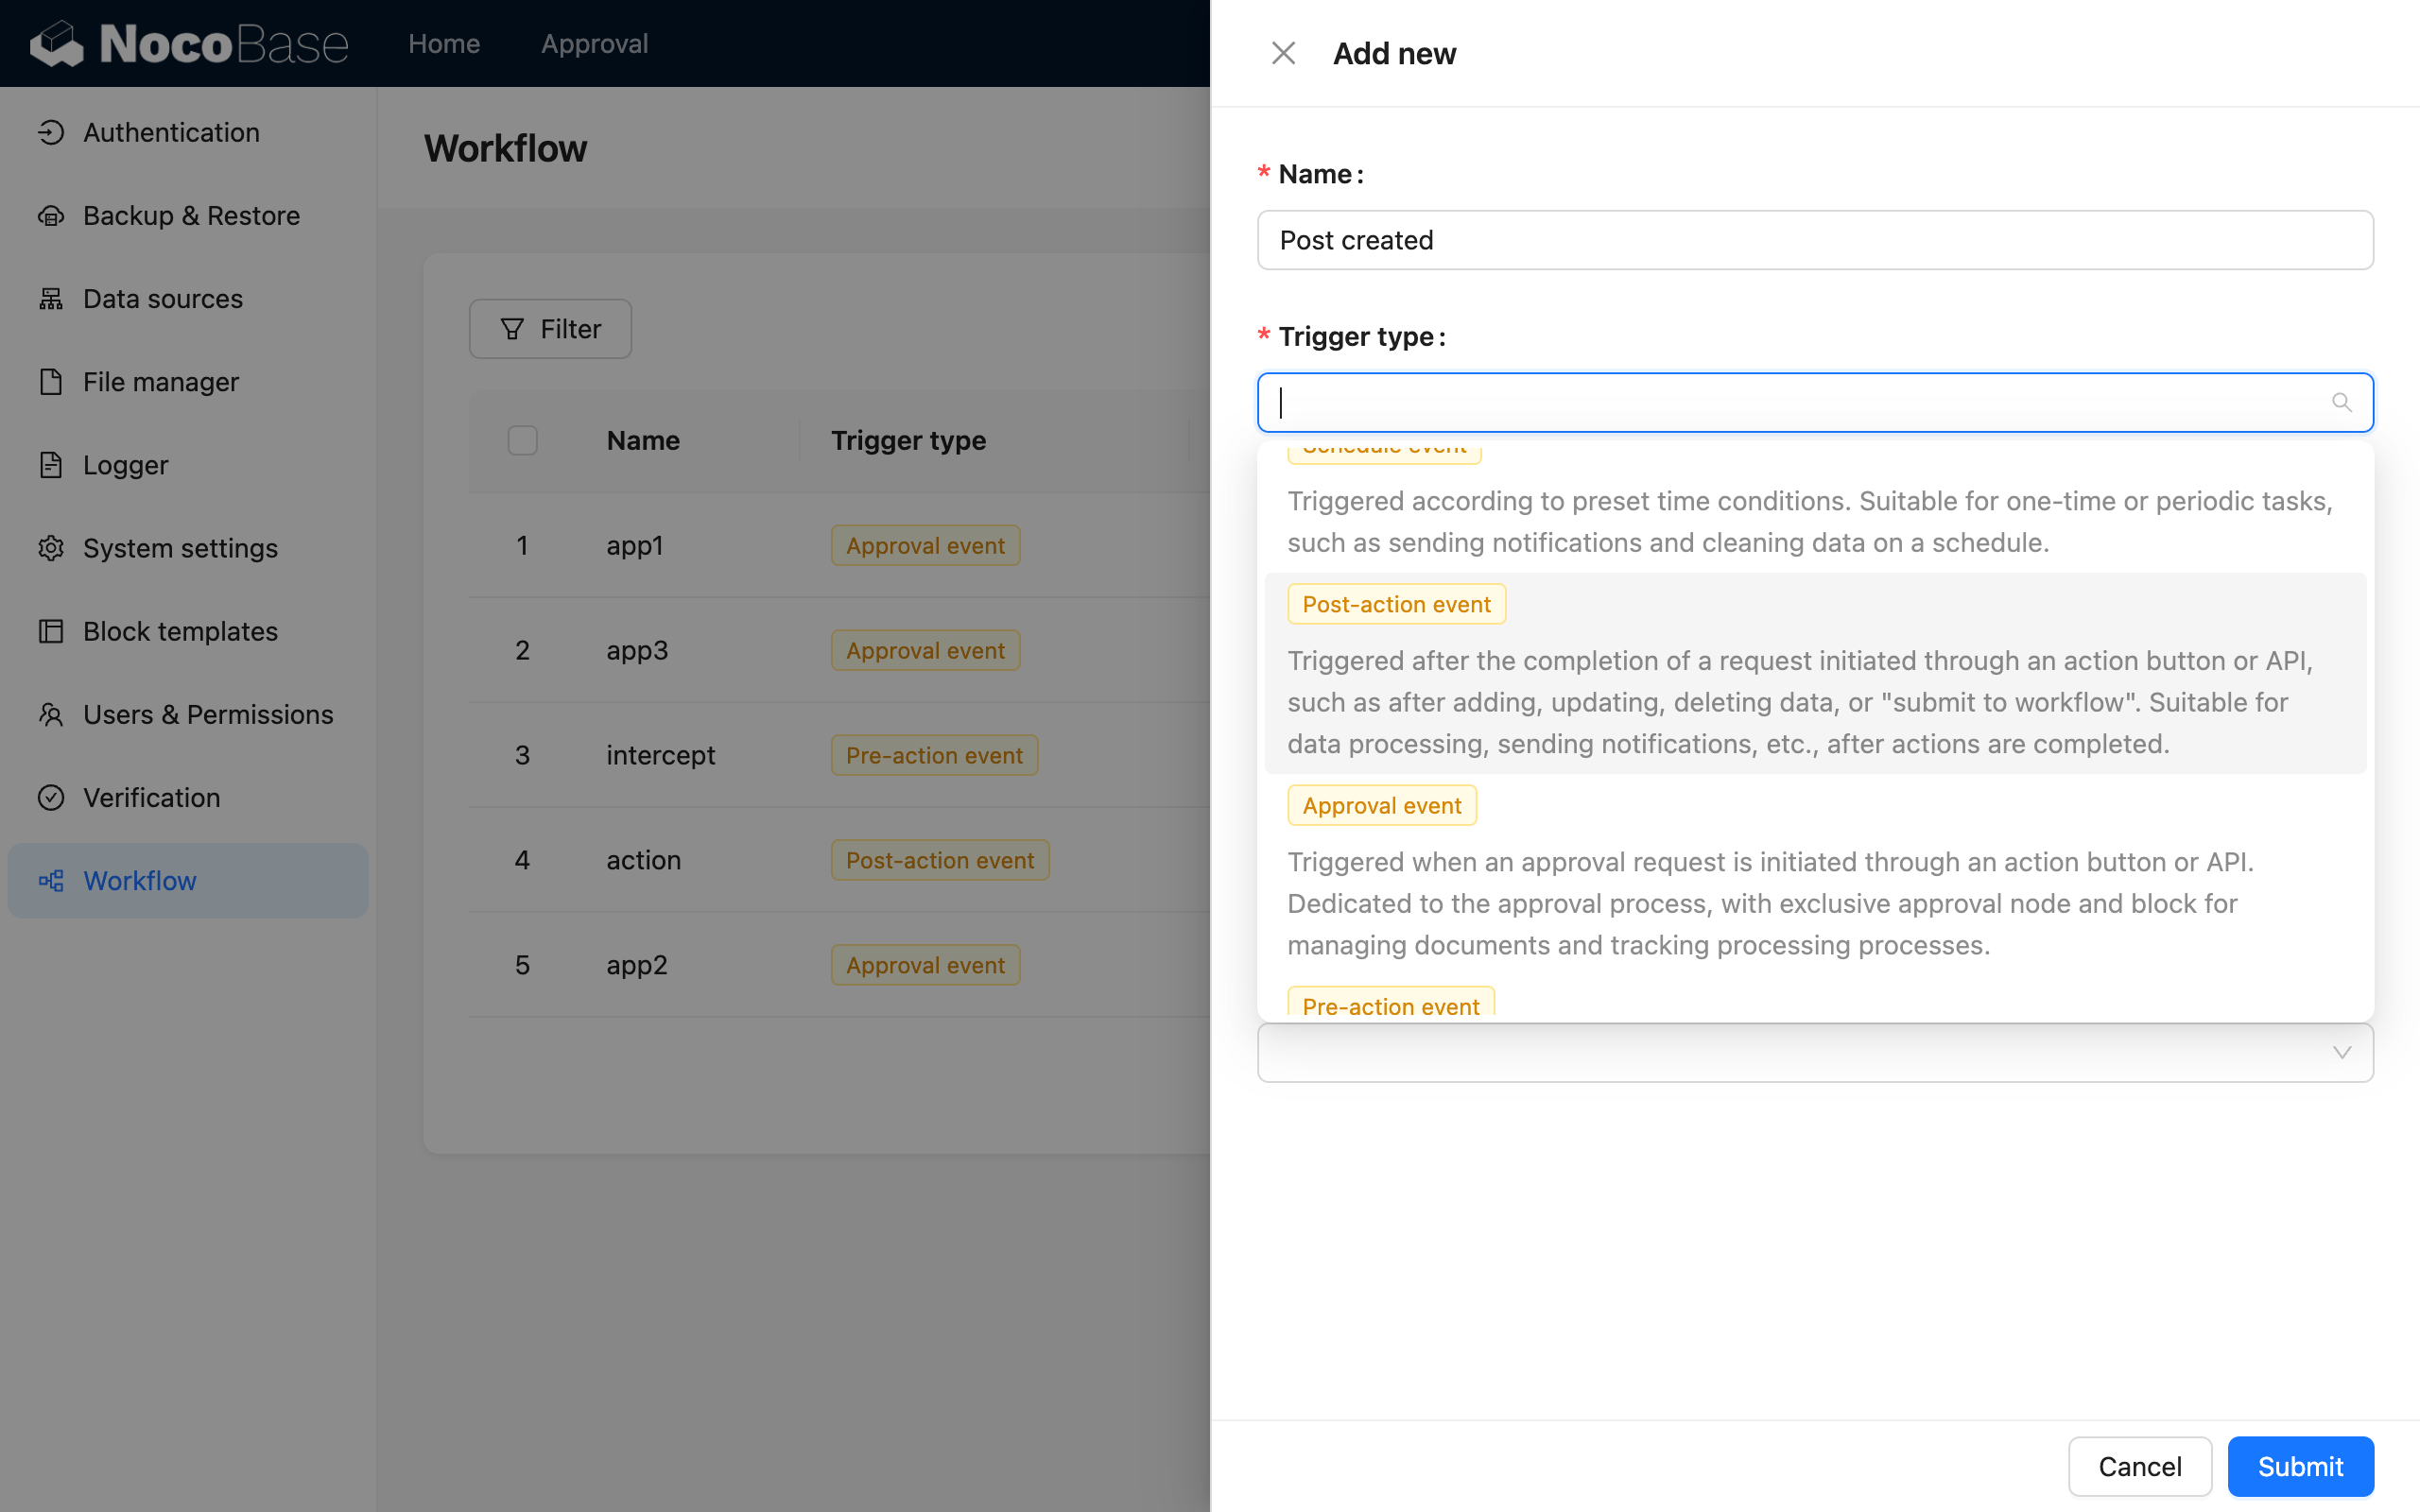
When creating a workflow, select "Post-Action Event" as the type:
Execution Mode
For post-action events, you can also choose the execution mode as "Synchronous" or "Asynchronous" when creating it:
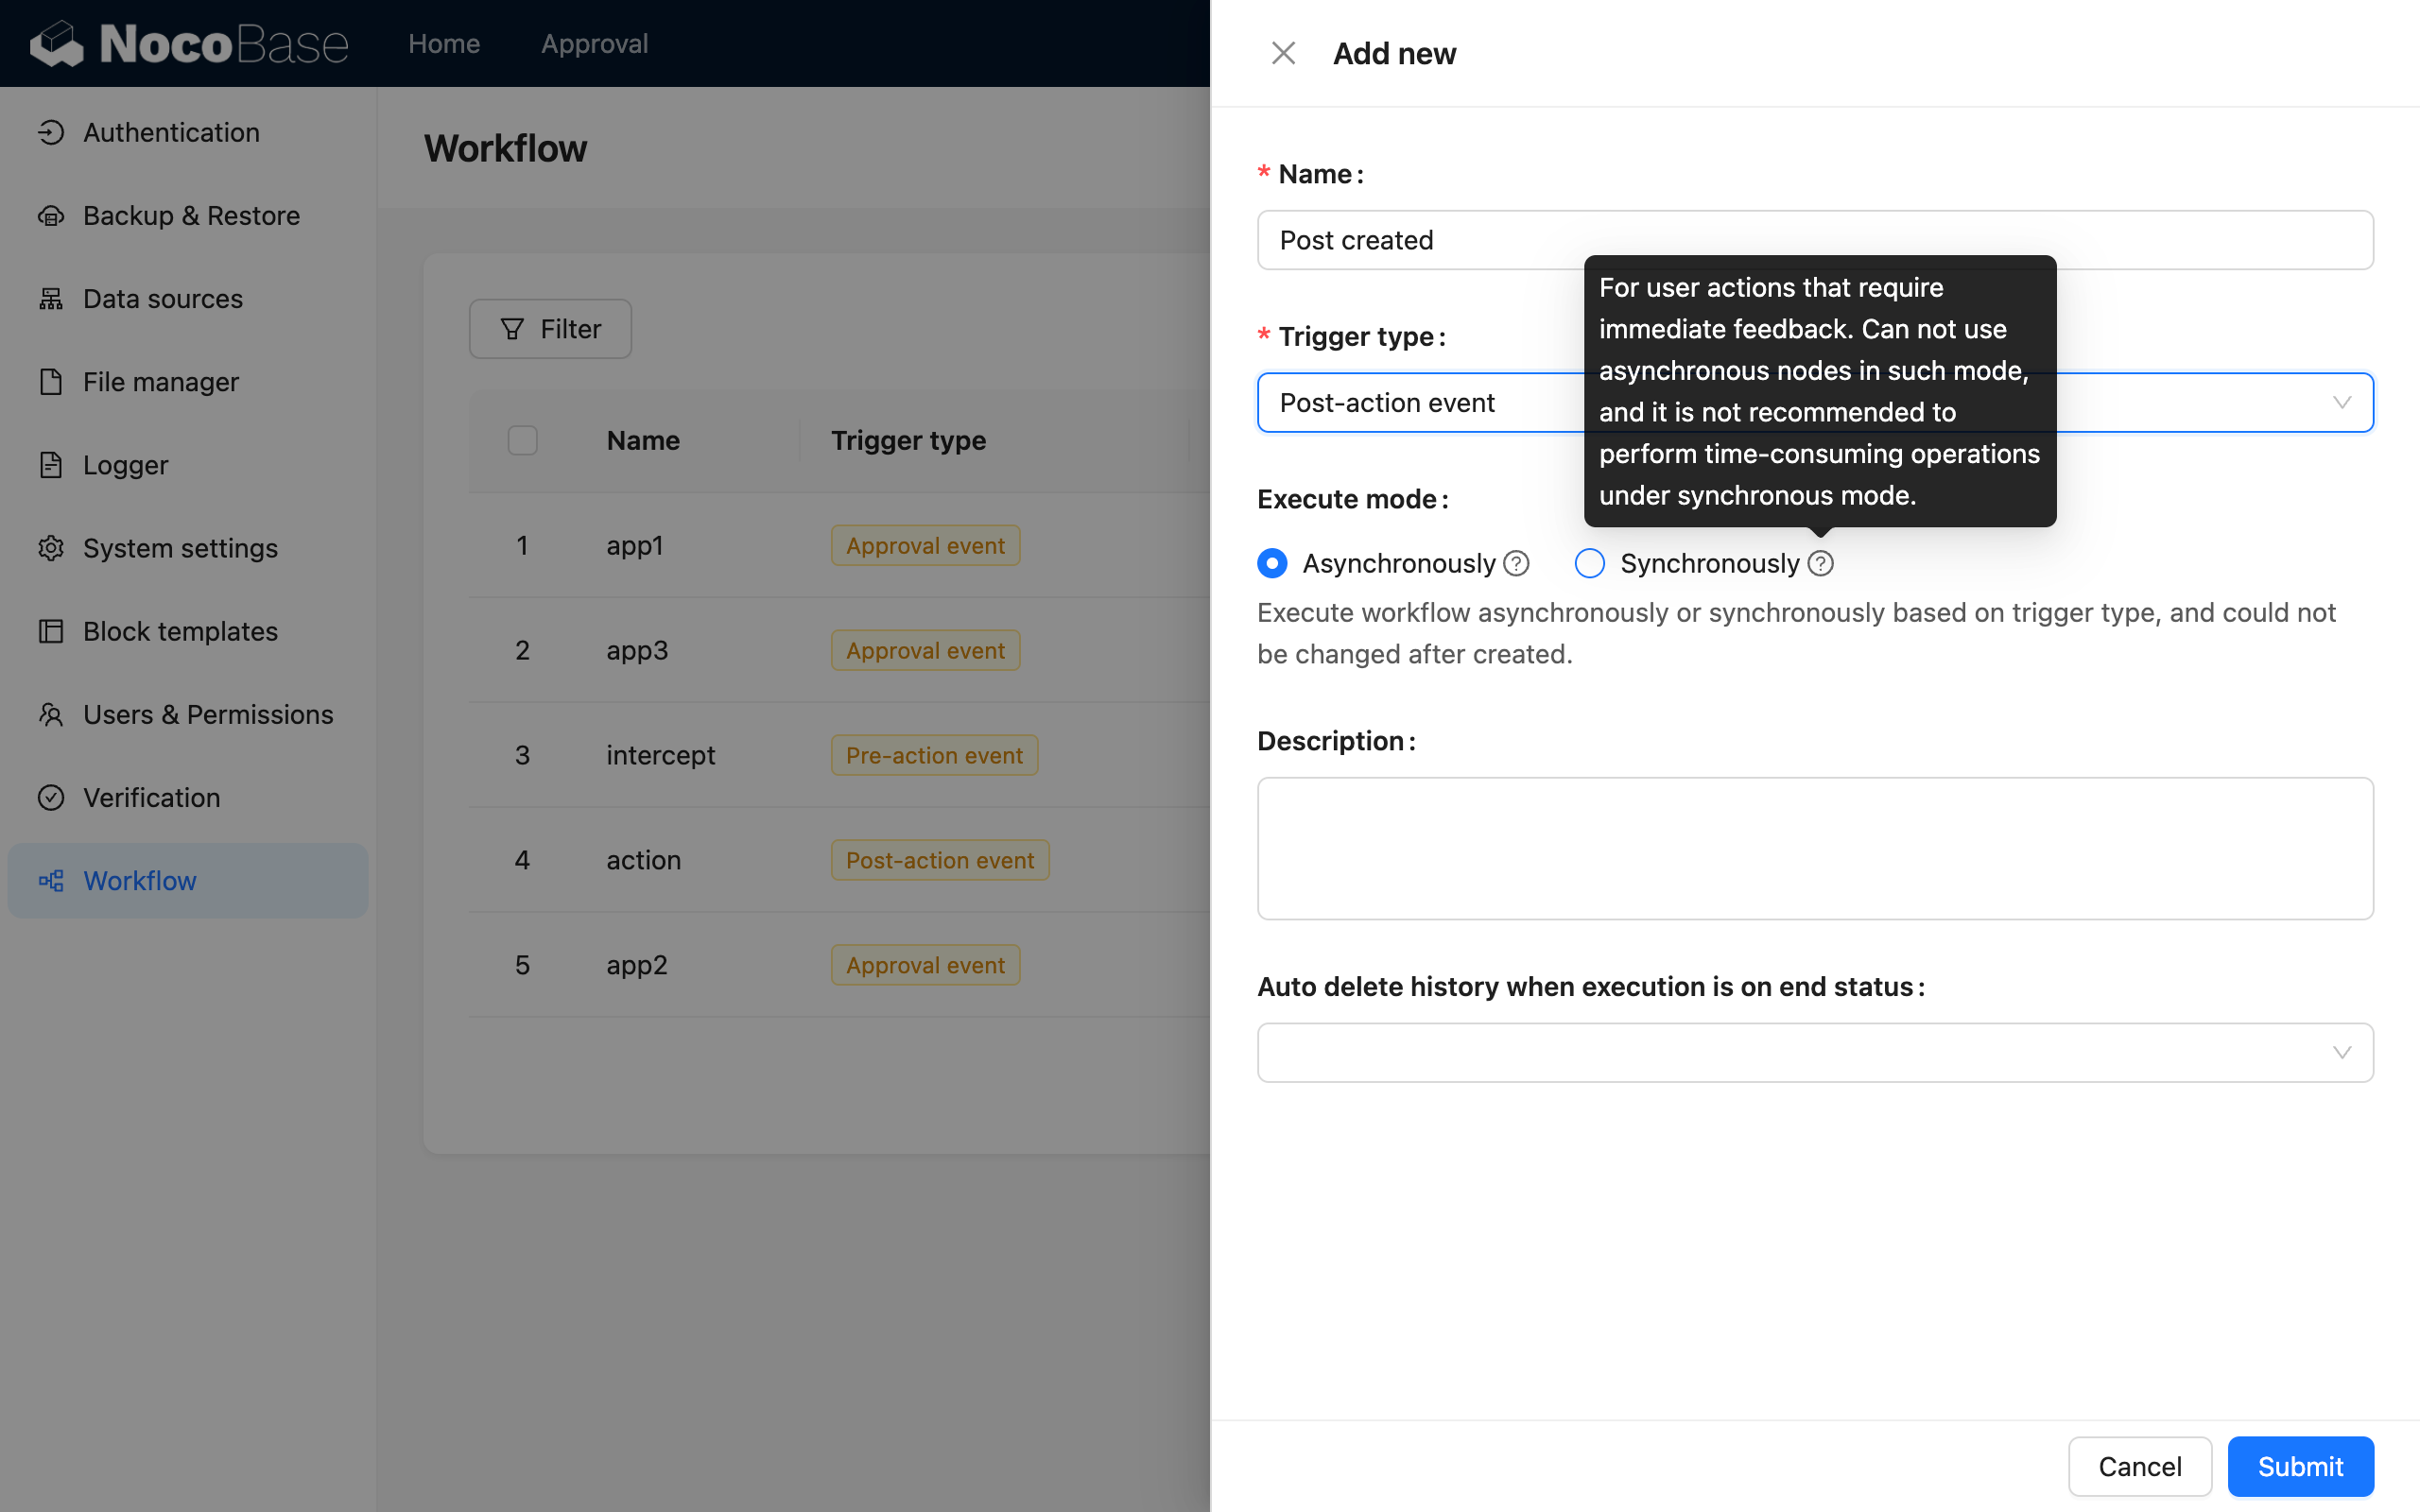
If the process needs to be executed and returned immediately after the user's action, you can use synchronous mode; otherwise, the default is asynchronous mode. In asynchronous mode, the action is completed immediately after the workflow is triggered, and the workflow will be executed sequentially in the application's background queue.
Configure Collection
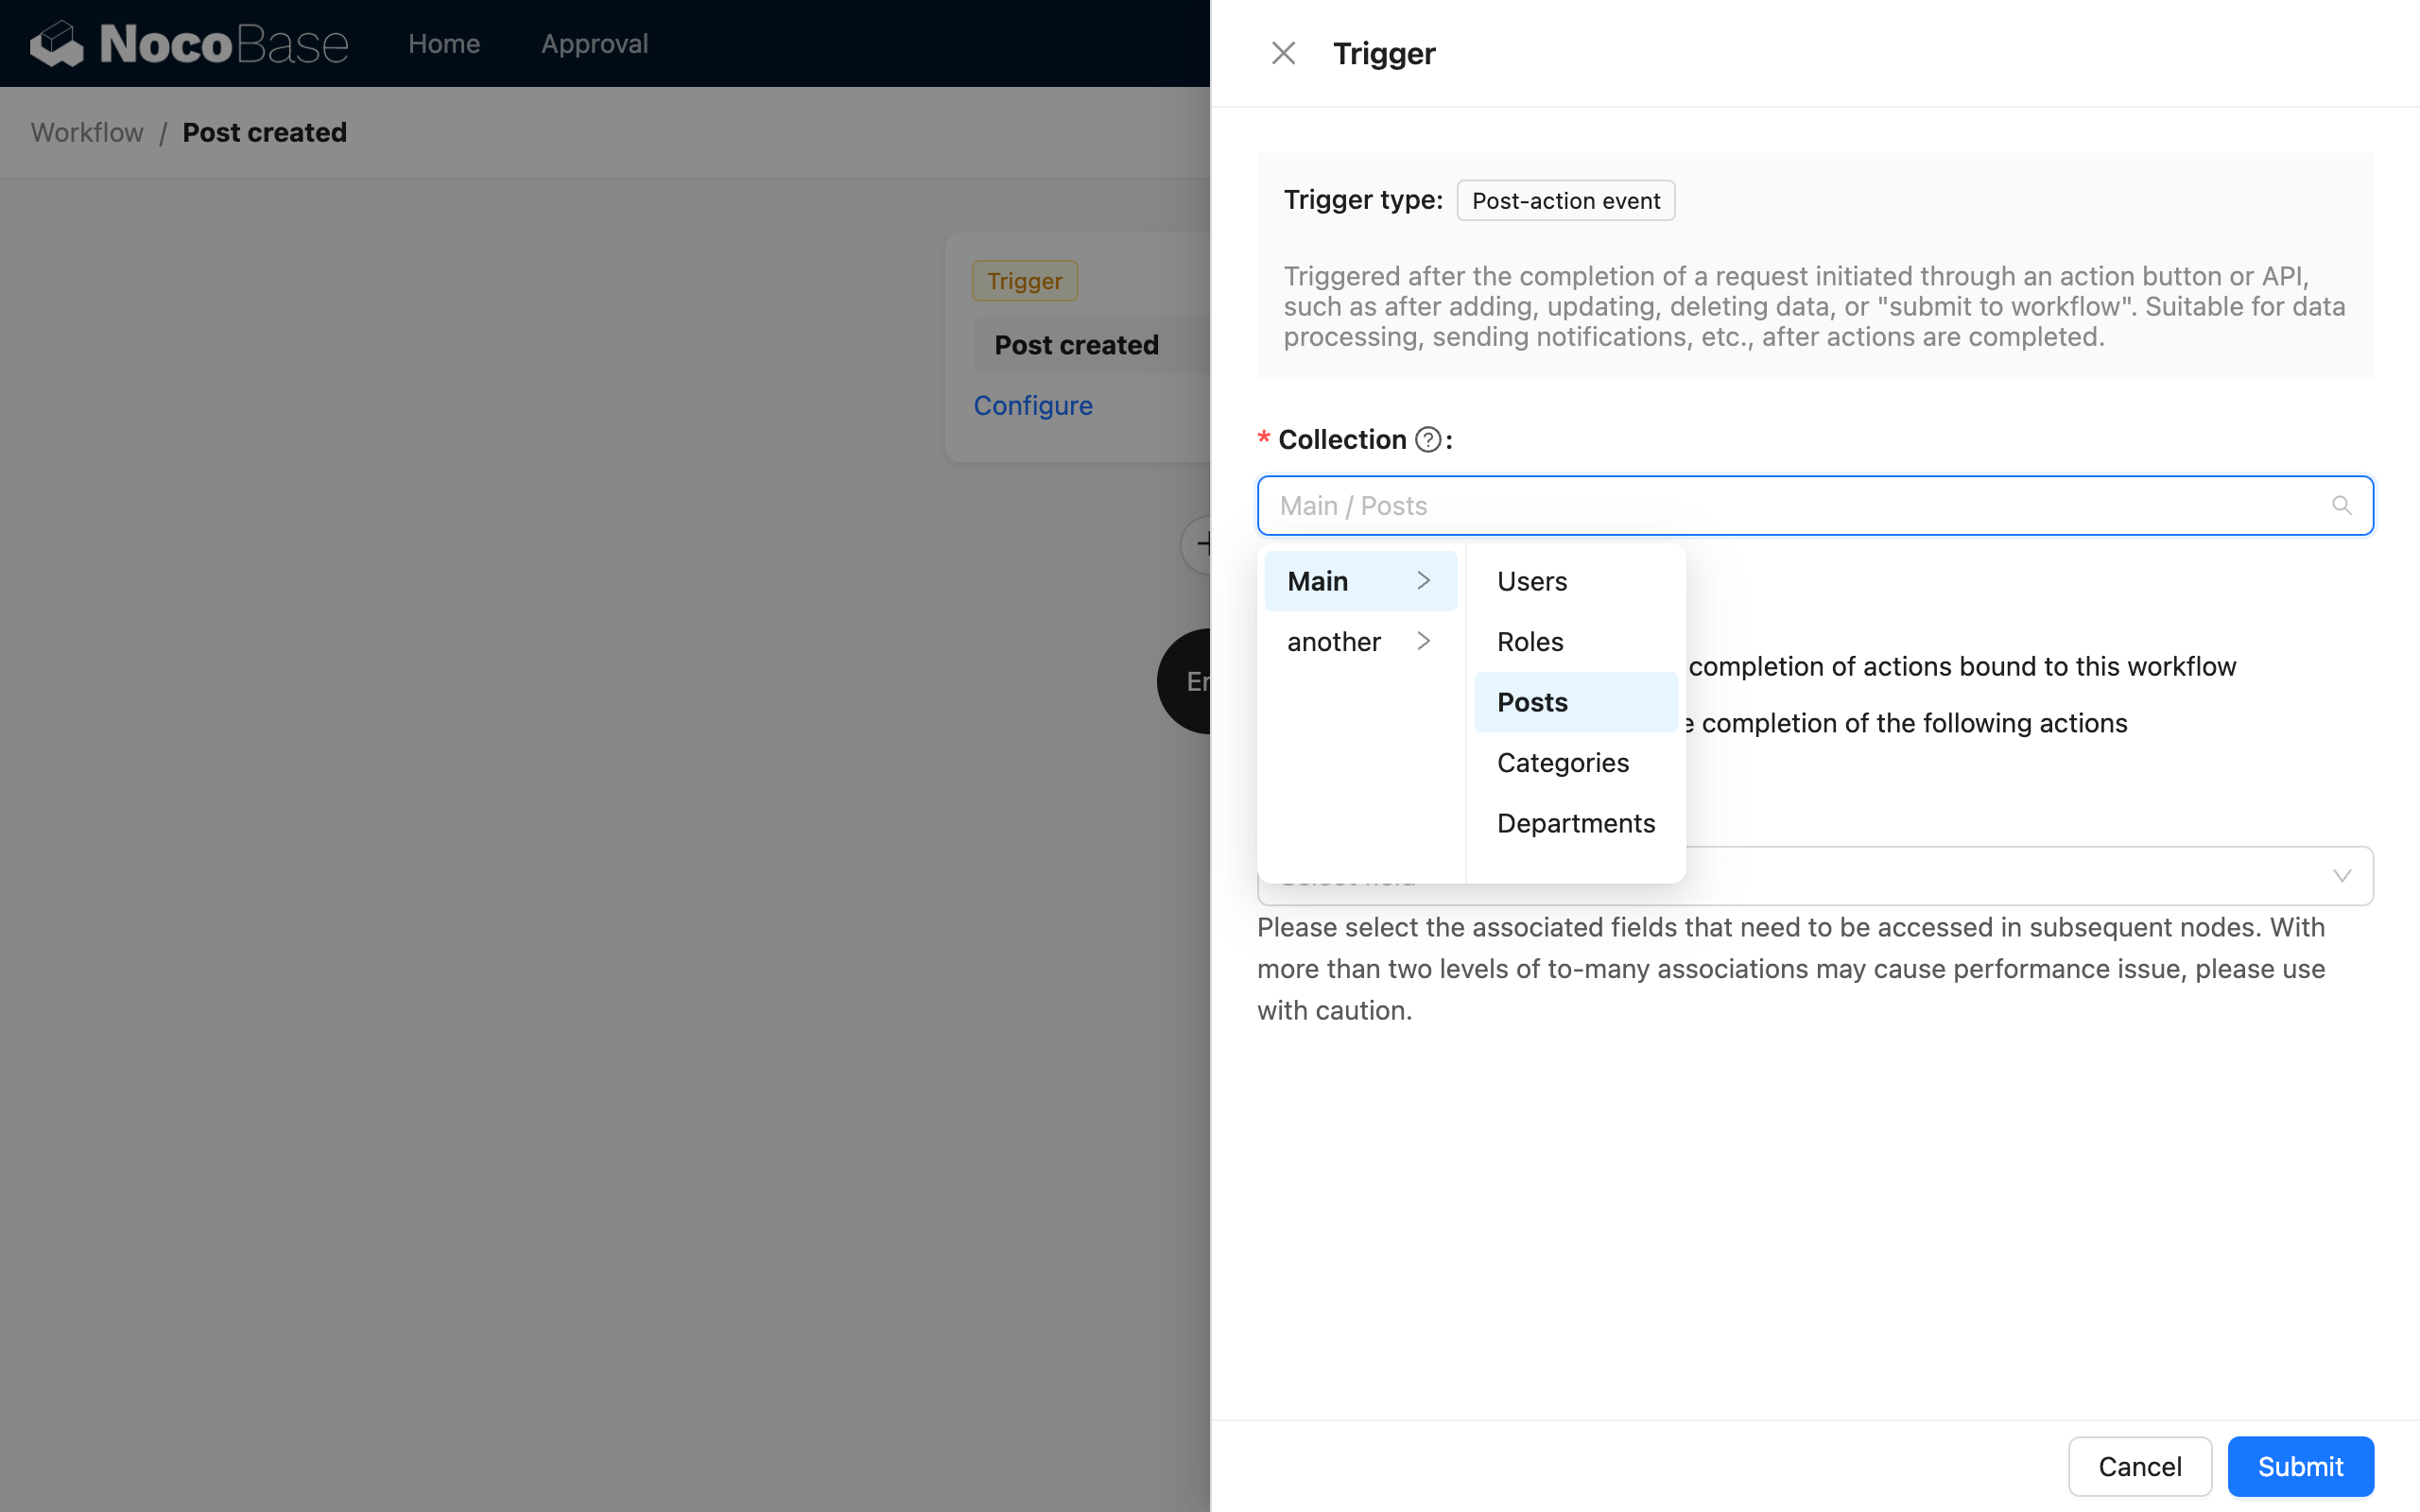
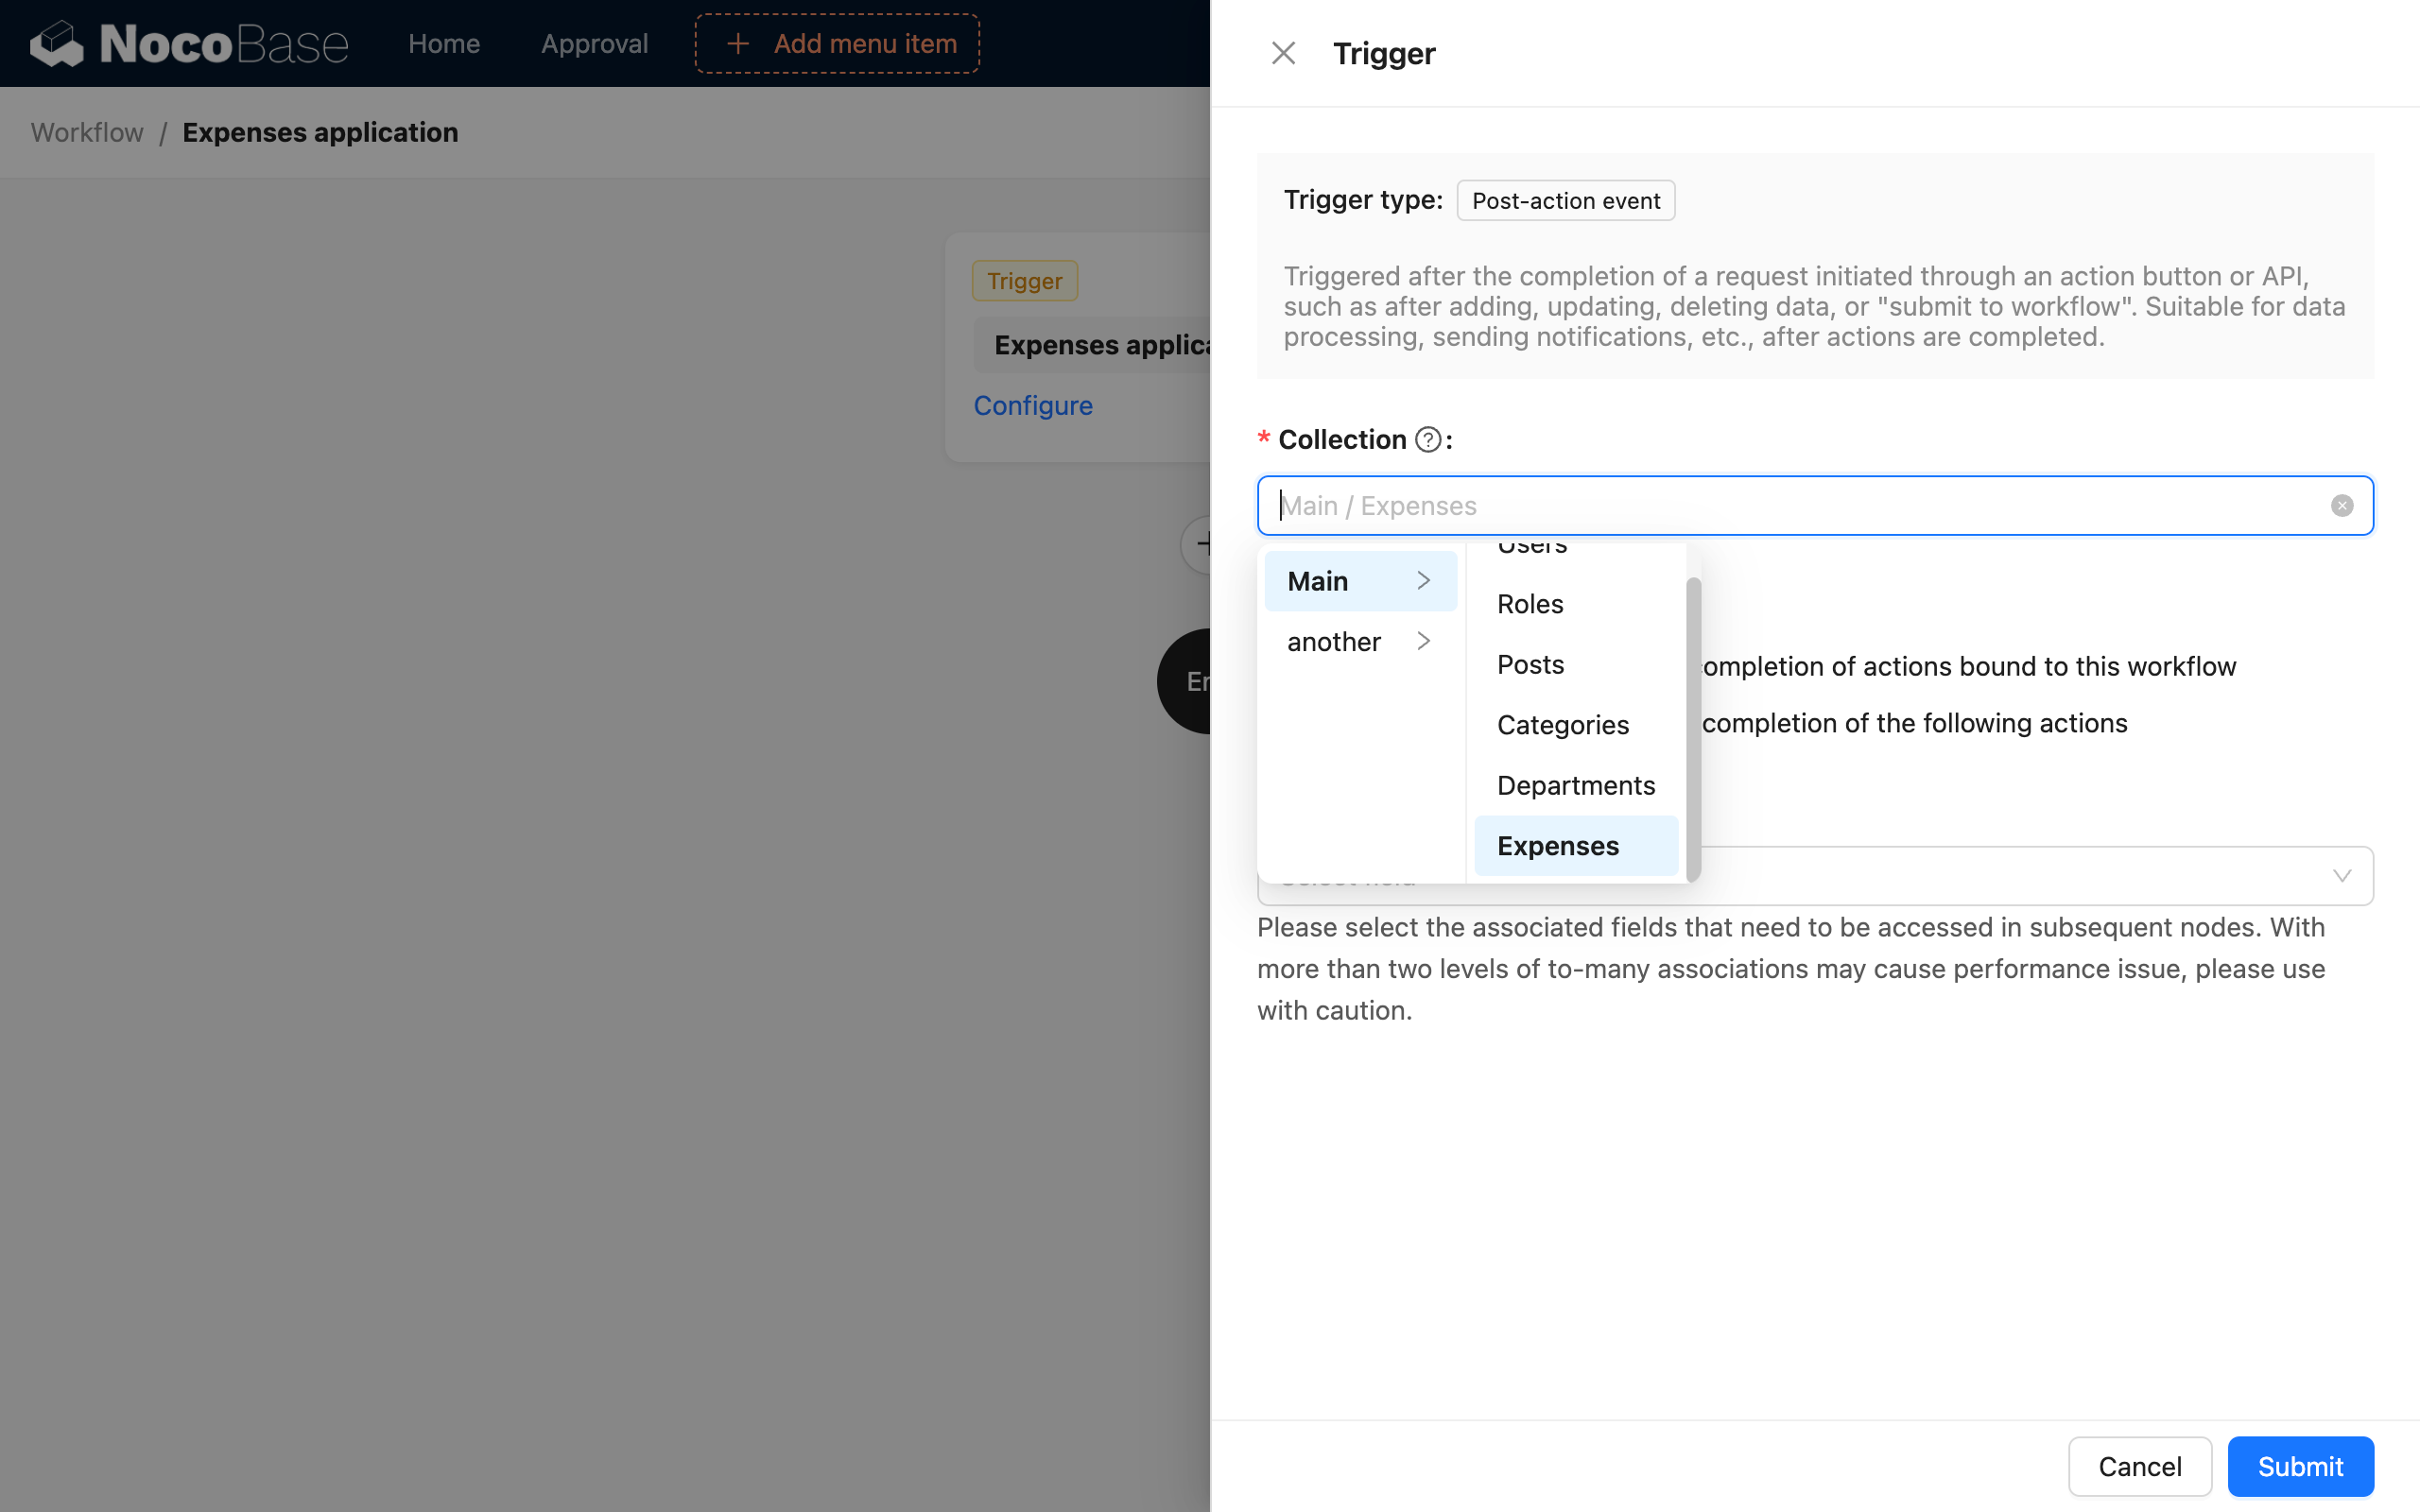
Enter the workflow canvas, click the trigger to open the configuration popup, and first select the collection to bind:
Select Trigger Mode
Then select the trigger mode, which can be either local or global:
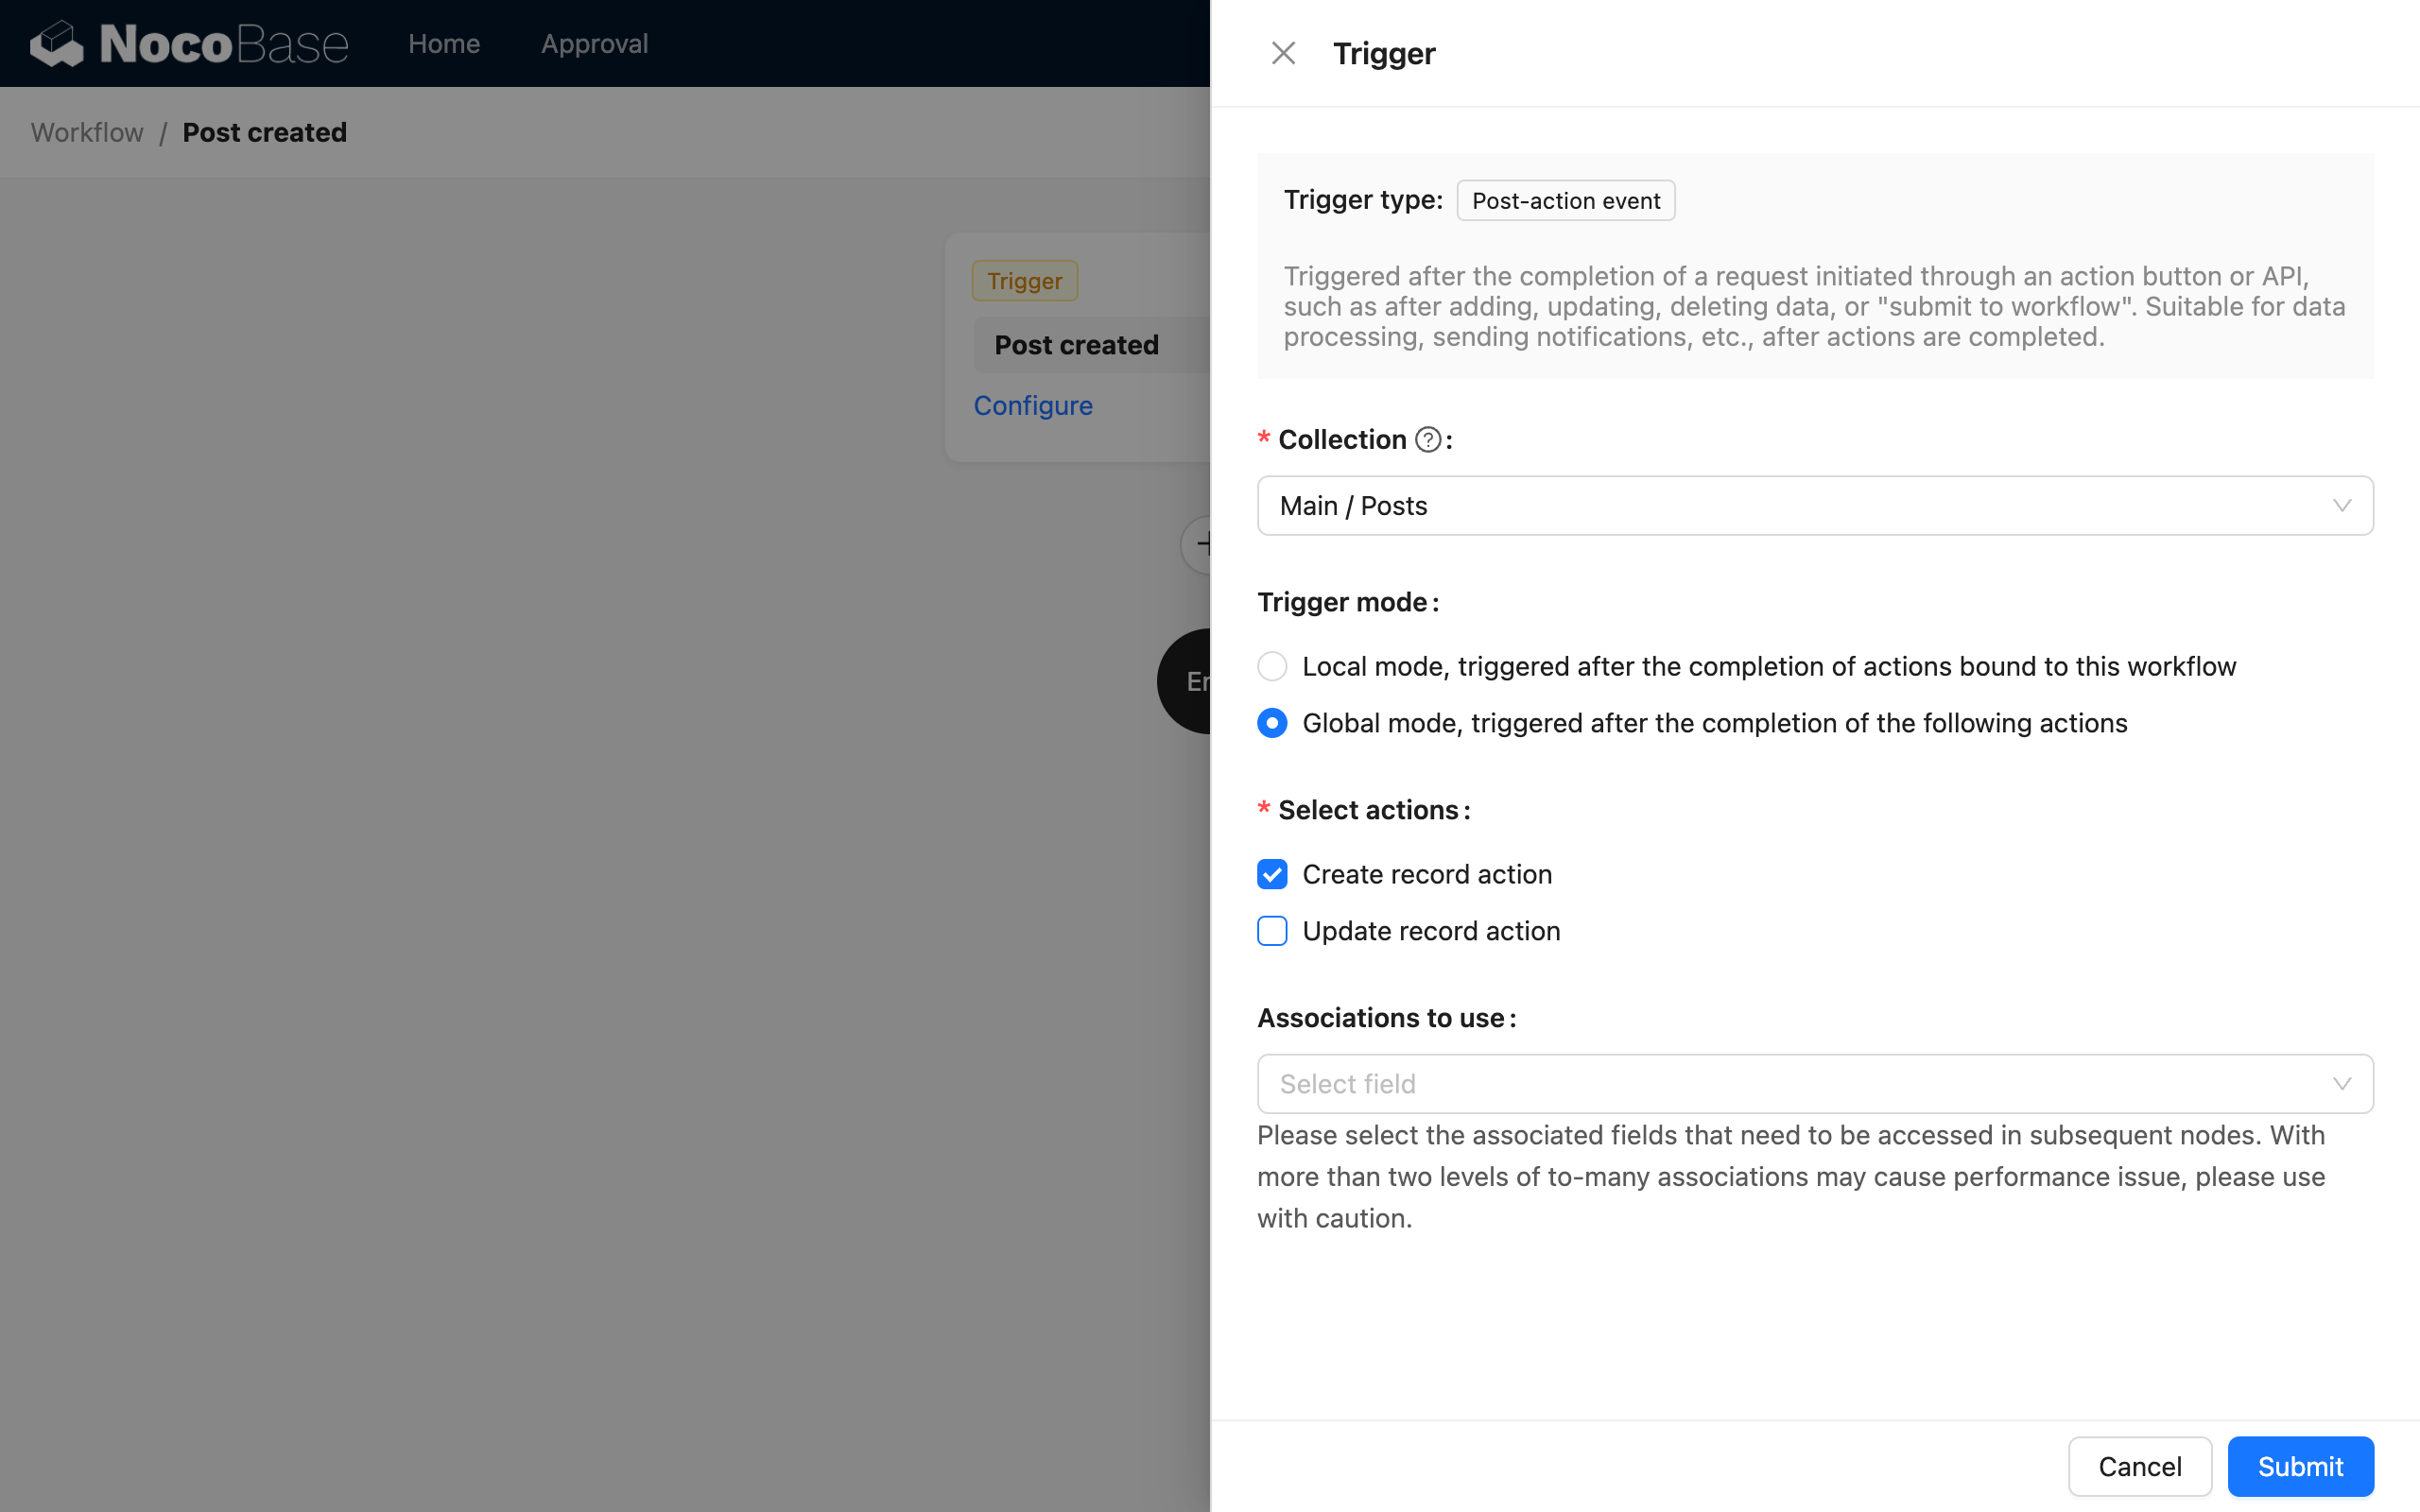
Where:
- Local mode is only triggered on action buttons that have this workflow bound. Clicking buttons without this workflow bound will not trigger it. You can decide whether to bind this workflow based on whether forms with different purposes should trigger the same process.
- Global mode is triggered on all configured action buttons of the collection, regardless of which form they come from, and there is no need to bind the corresponding workflow.
In local mode, the action buttons that currently support binding are as follows:
- "Submit" and "Save" buttons in the add form.
- "Submit" and "Save" buttons in the update form.
- "Update data" button in data rows (table, list, kanban, etc.).
Select Action Type
If you choose global mode, you also need to select the action type. Currently, "Create data action" and "Update data action" are supported. Both actions trigger the workflow after the action is successful.
Select Preloaded Association Data
If you need to use the associated data of the triggering data in subsequent processes, you can select the association fields to be preloaded:
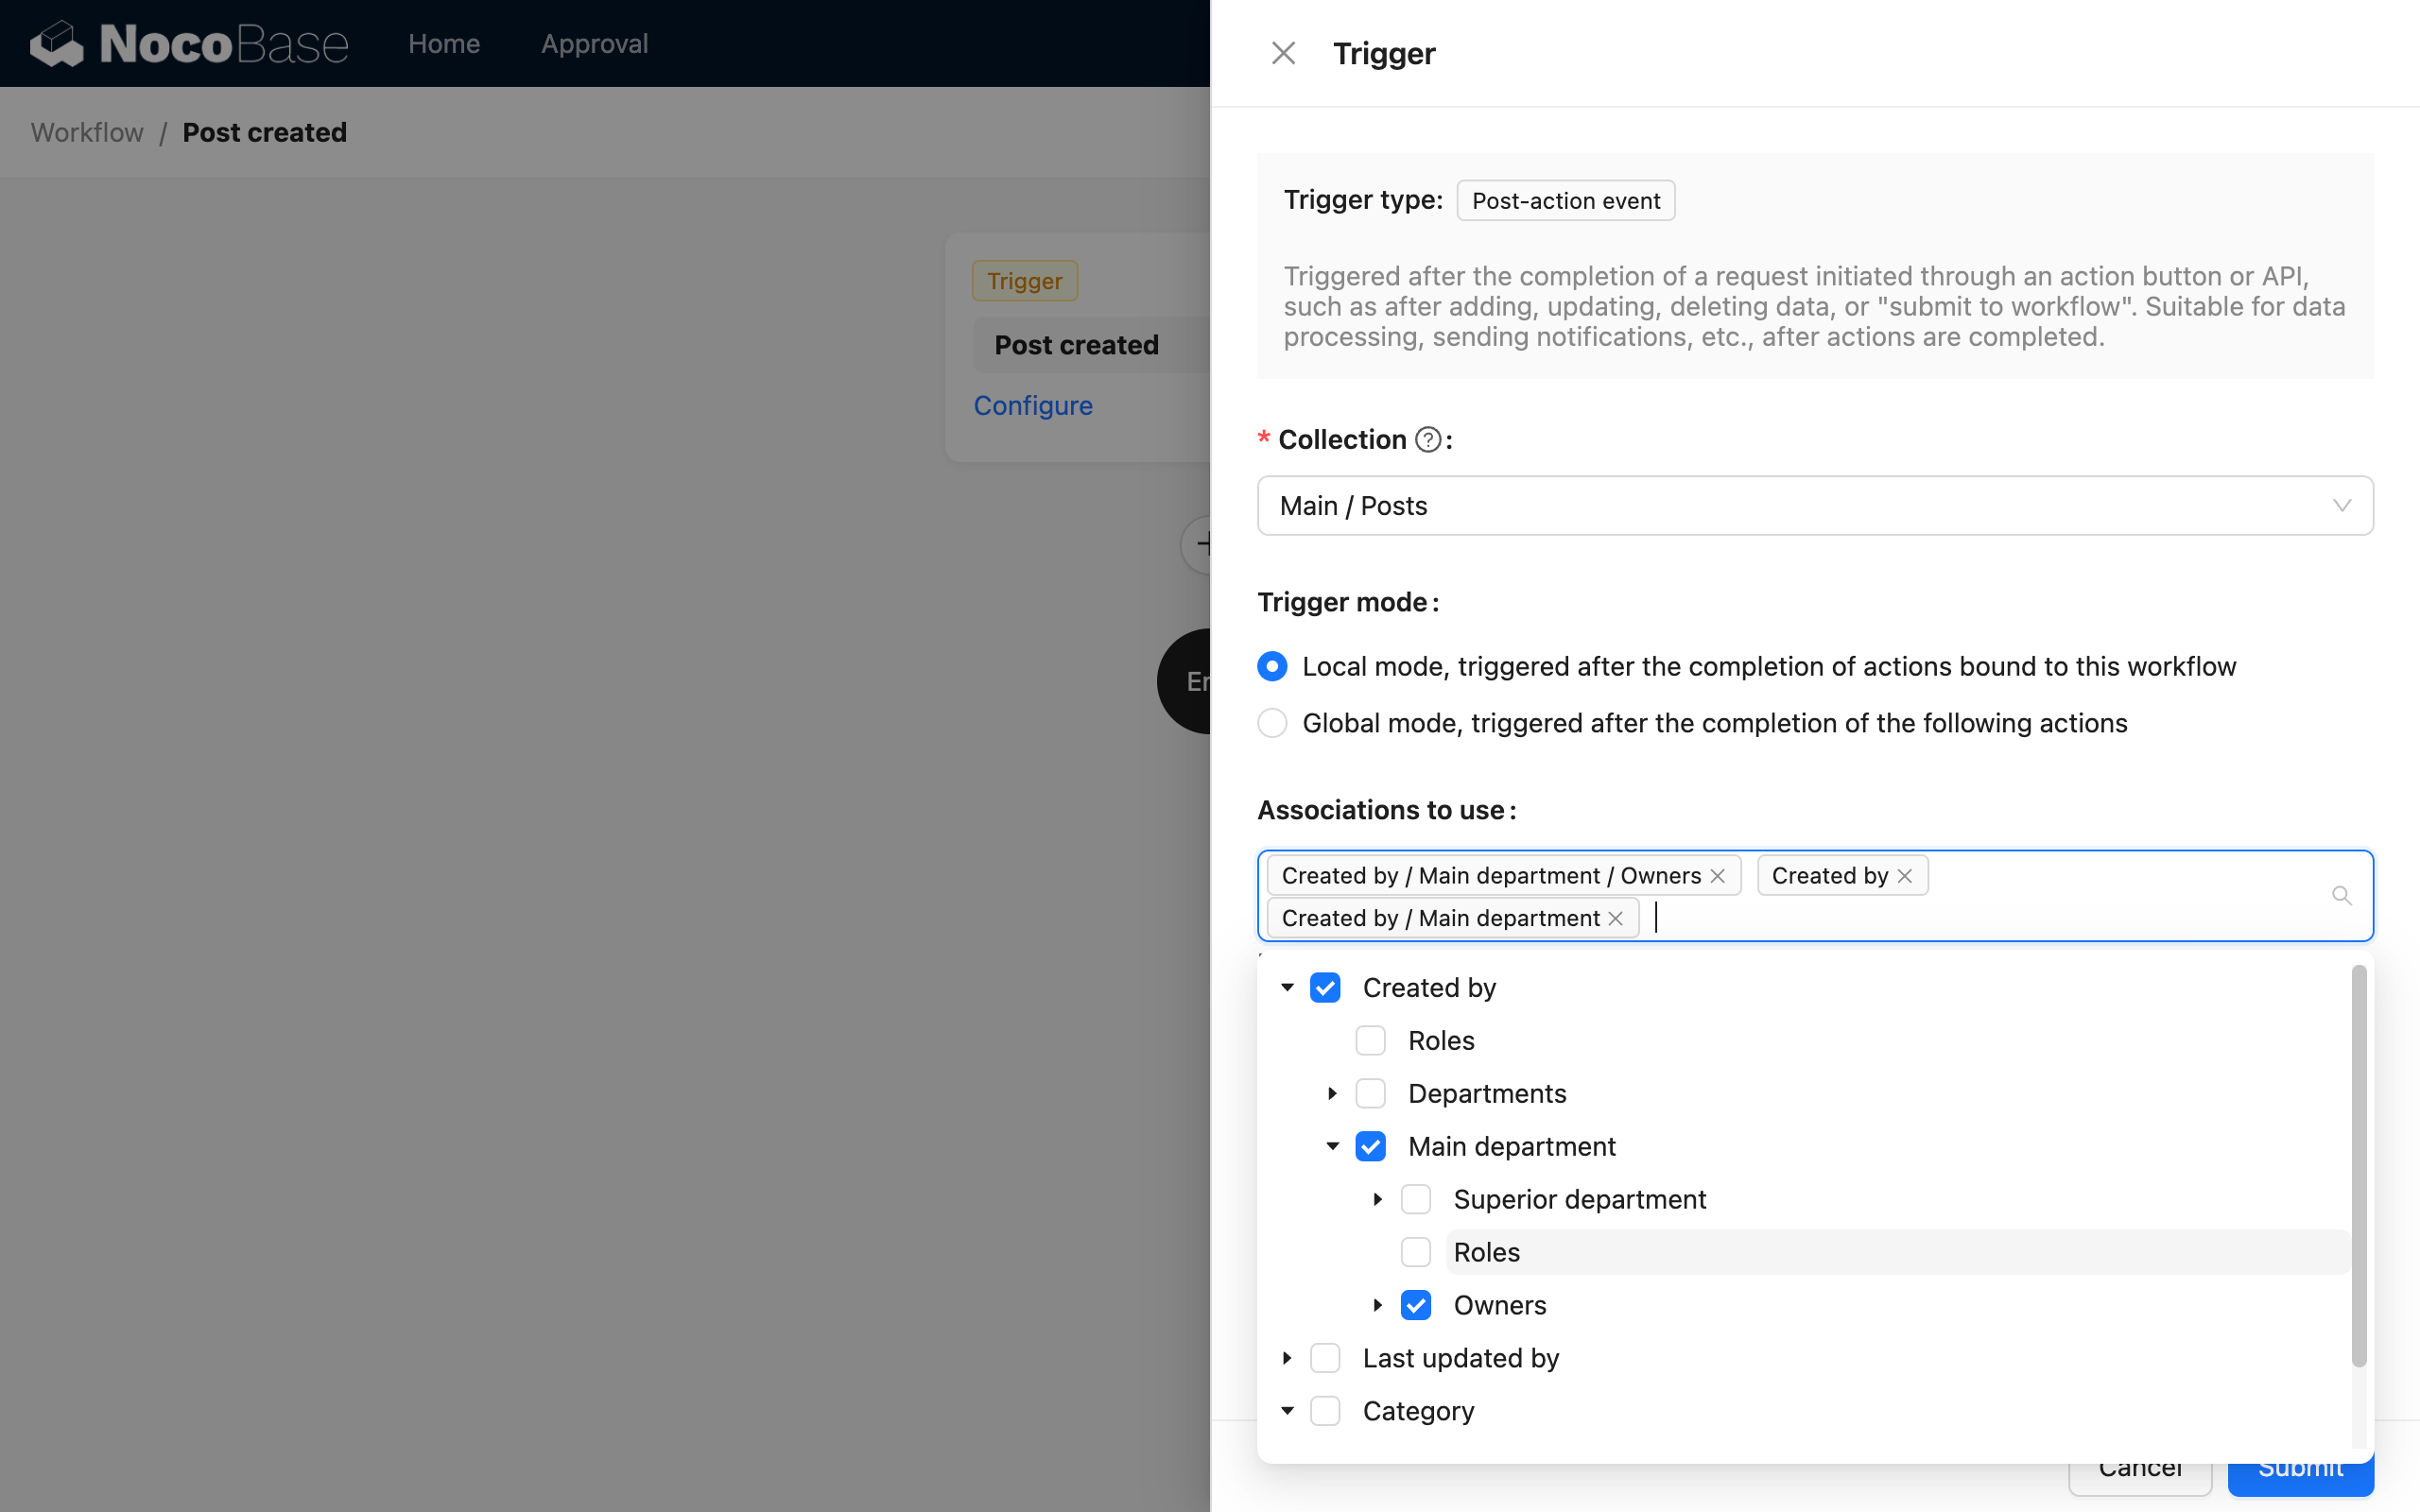
After triggering, you can directly use this associated data in the process.
Action Configuration
For actions in local trigger mode, after the workflow is configured, you need to return to the user interface and bind the workflow to the form action button of the corresponding data block.
Workflows configured for the "Submit" button (including the "Save data" button) will be triggered after the user submits the corresponding form and the data action is completed.
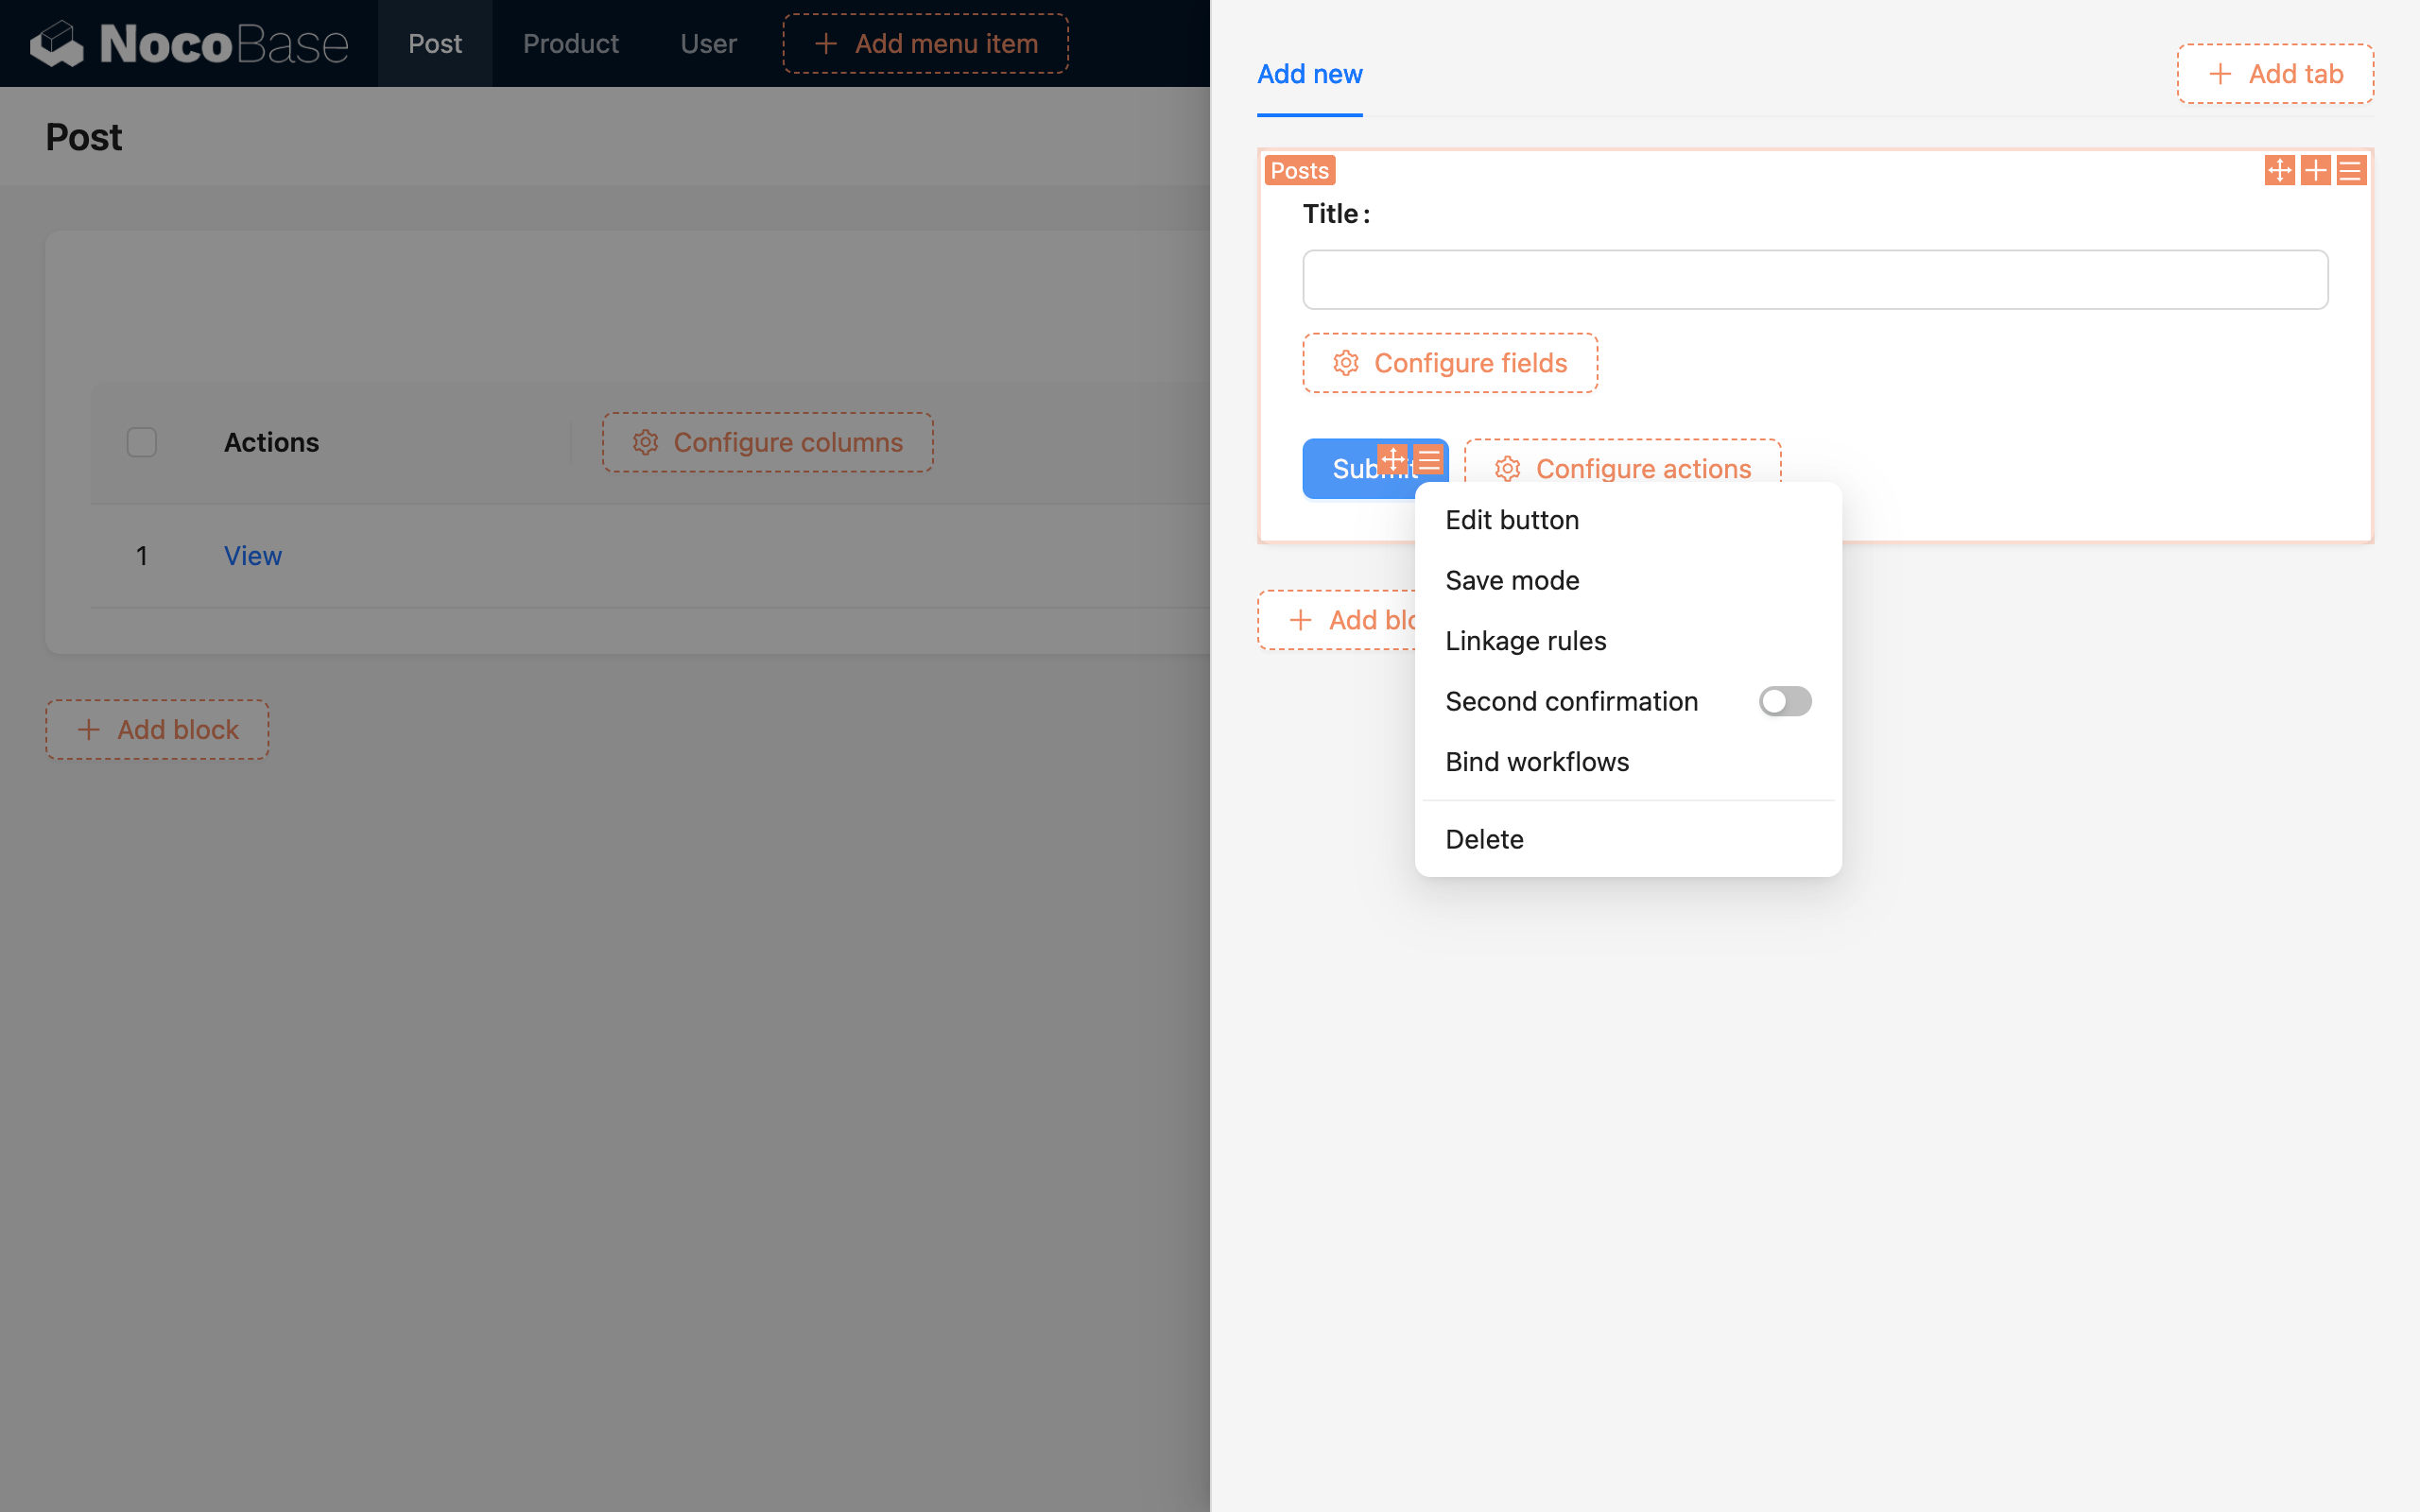
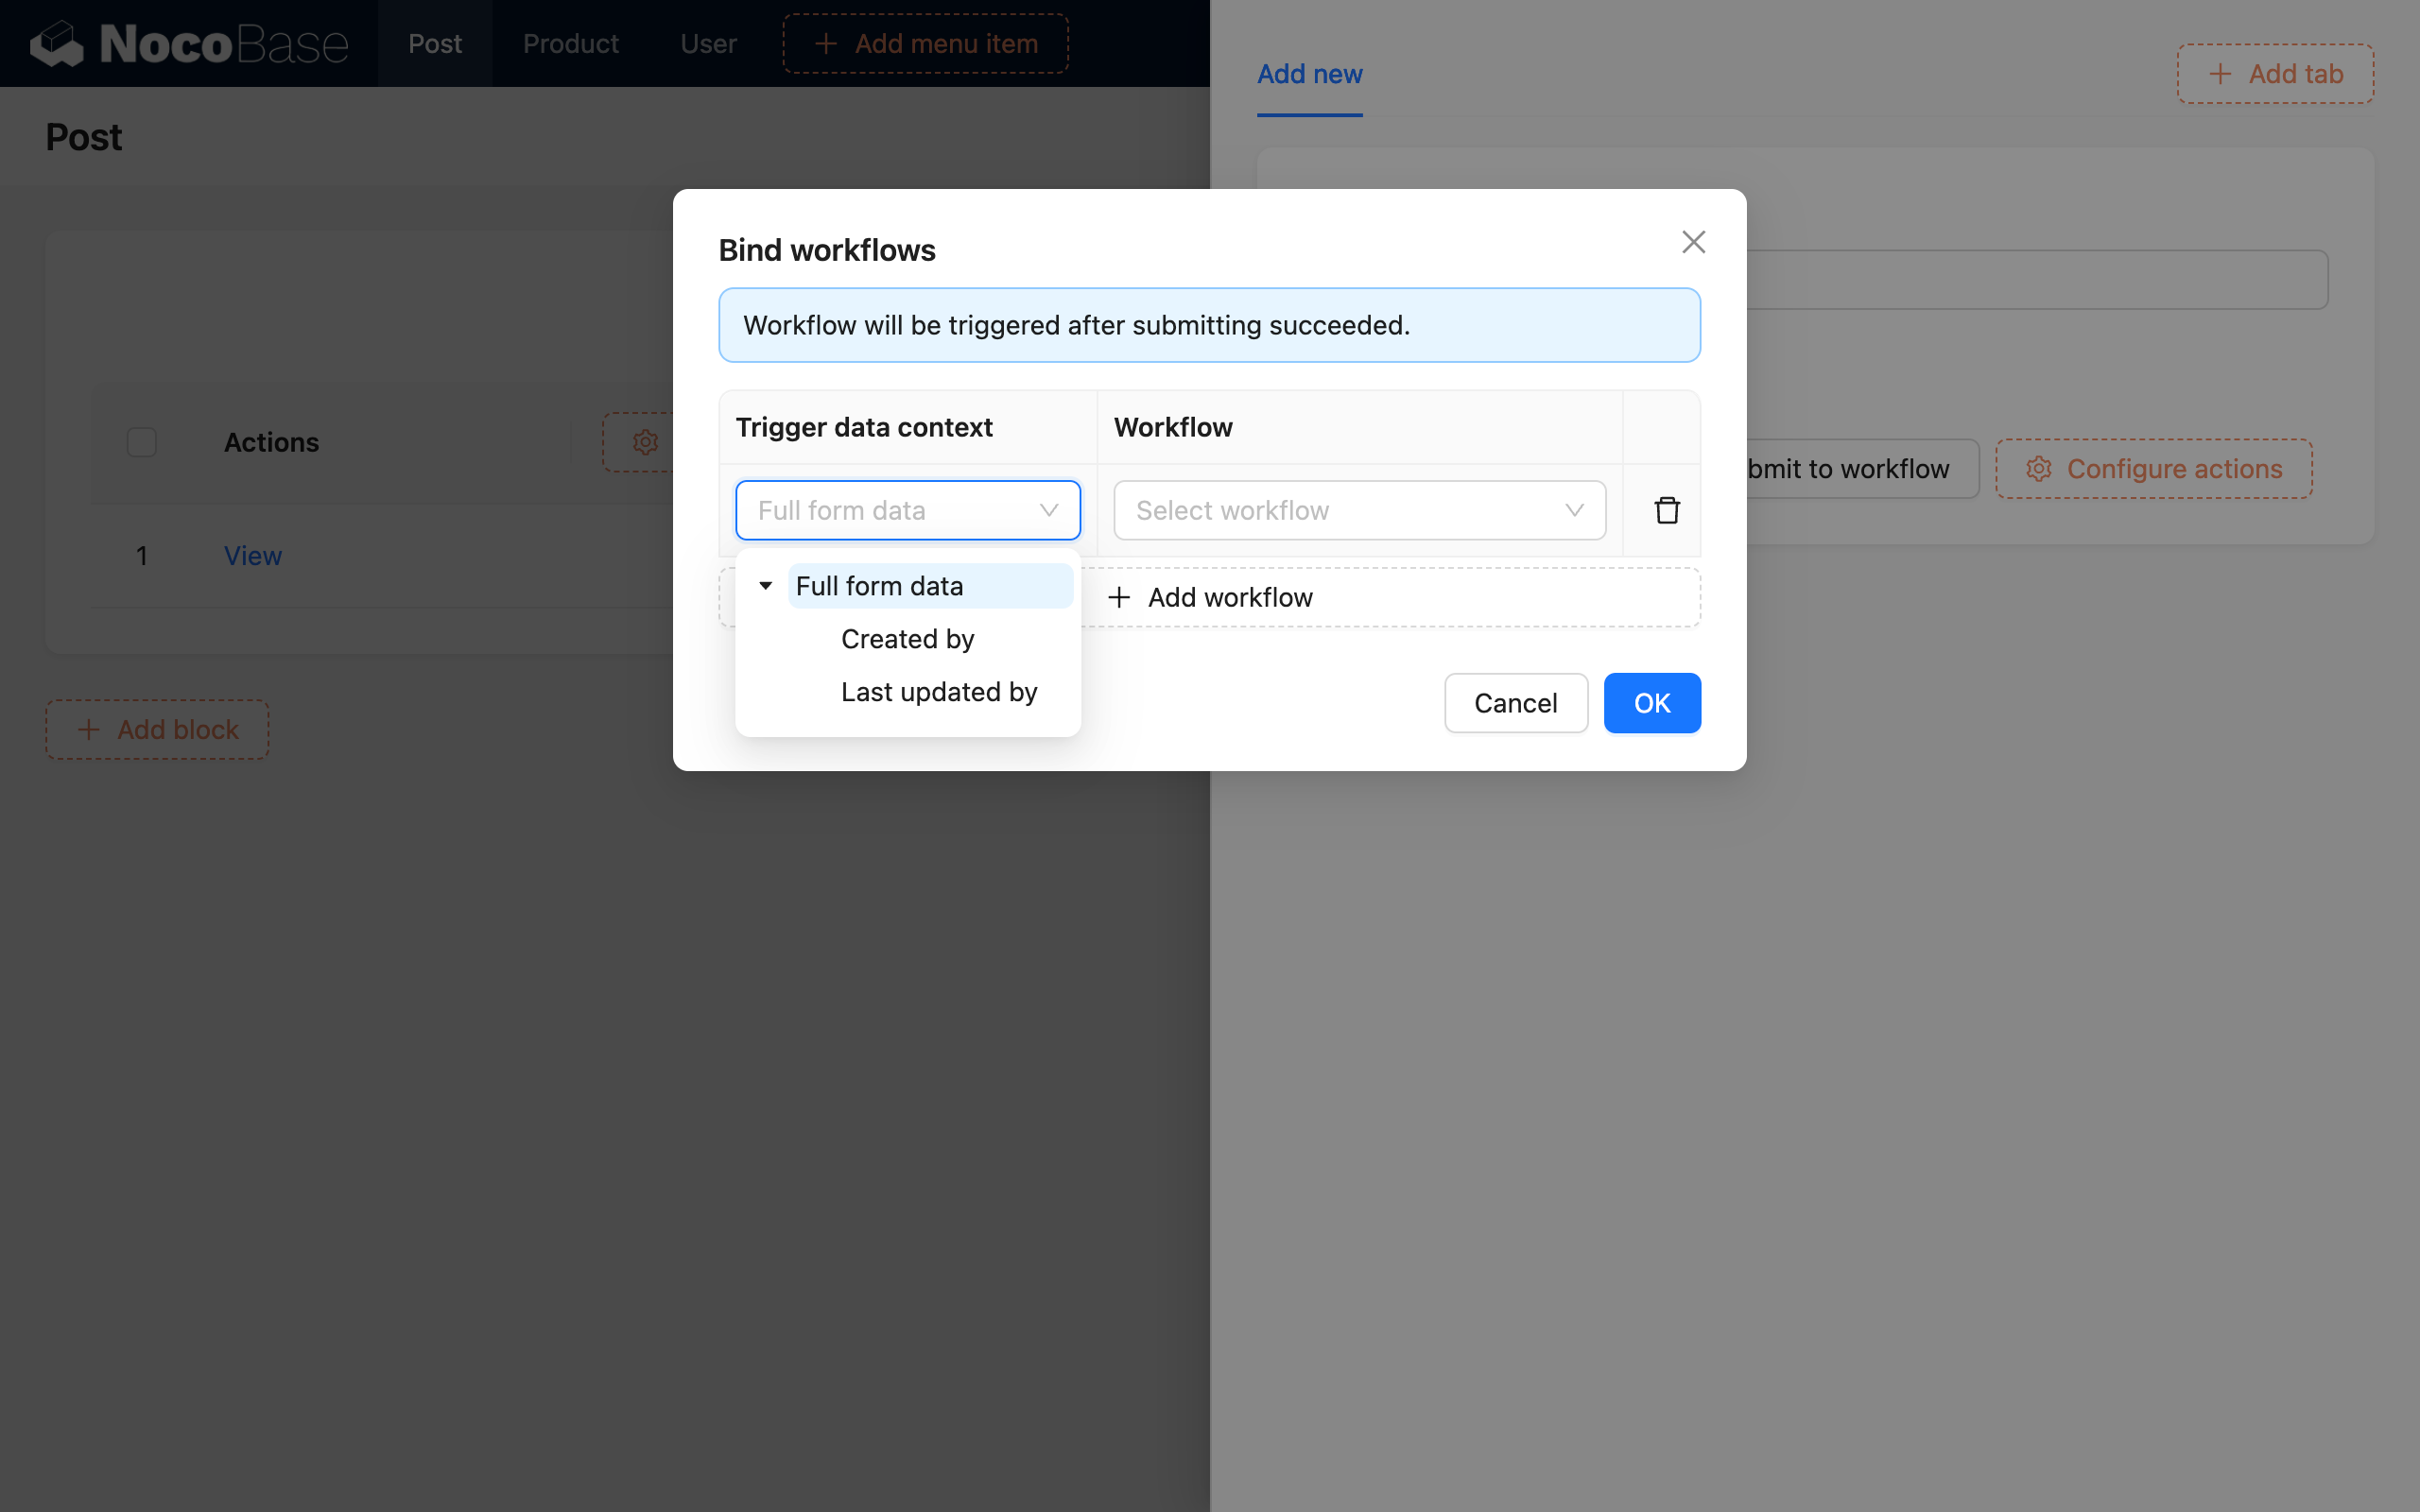
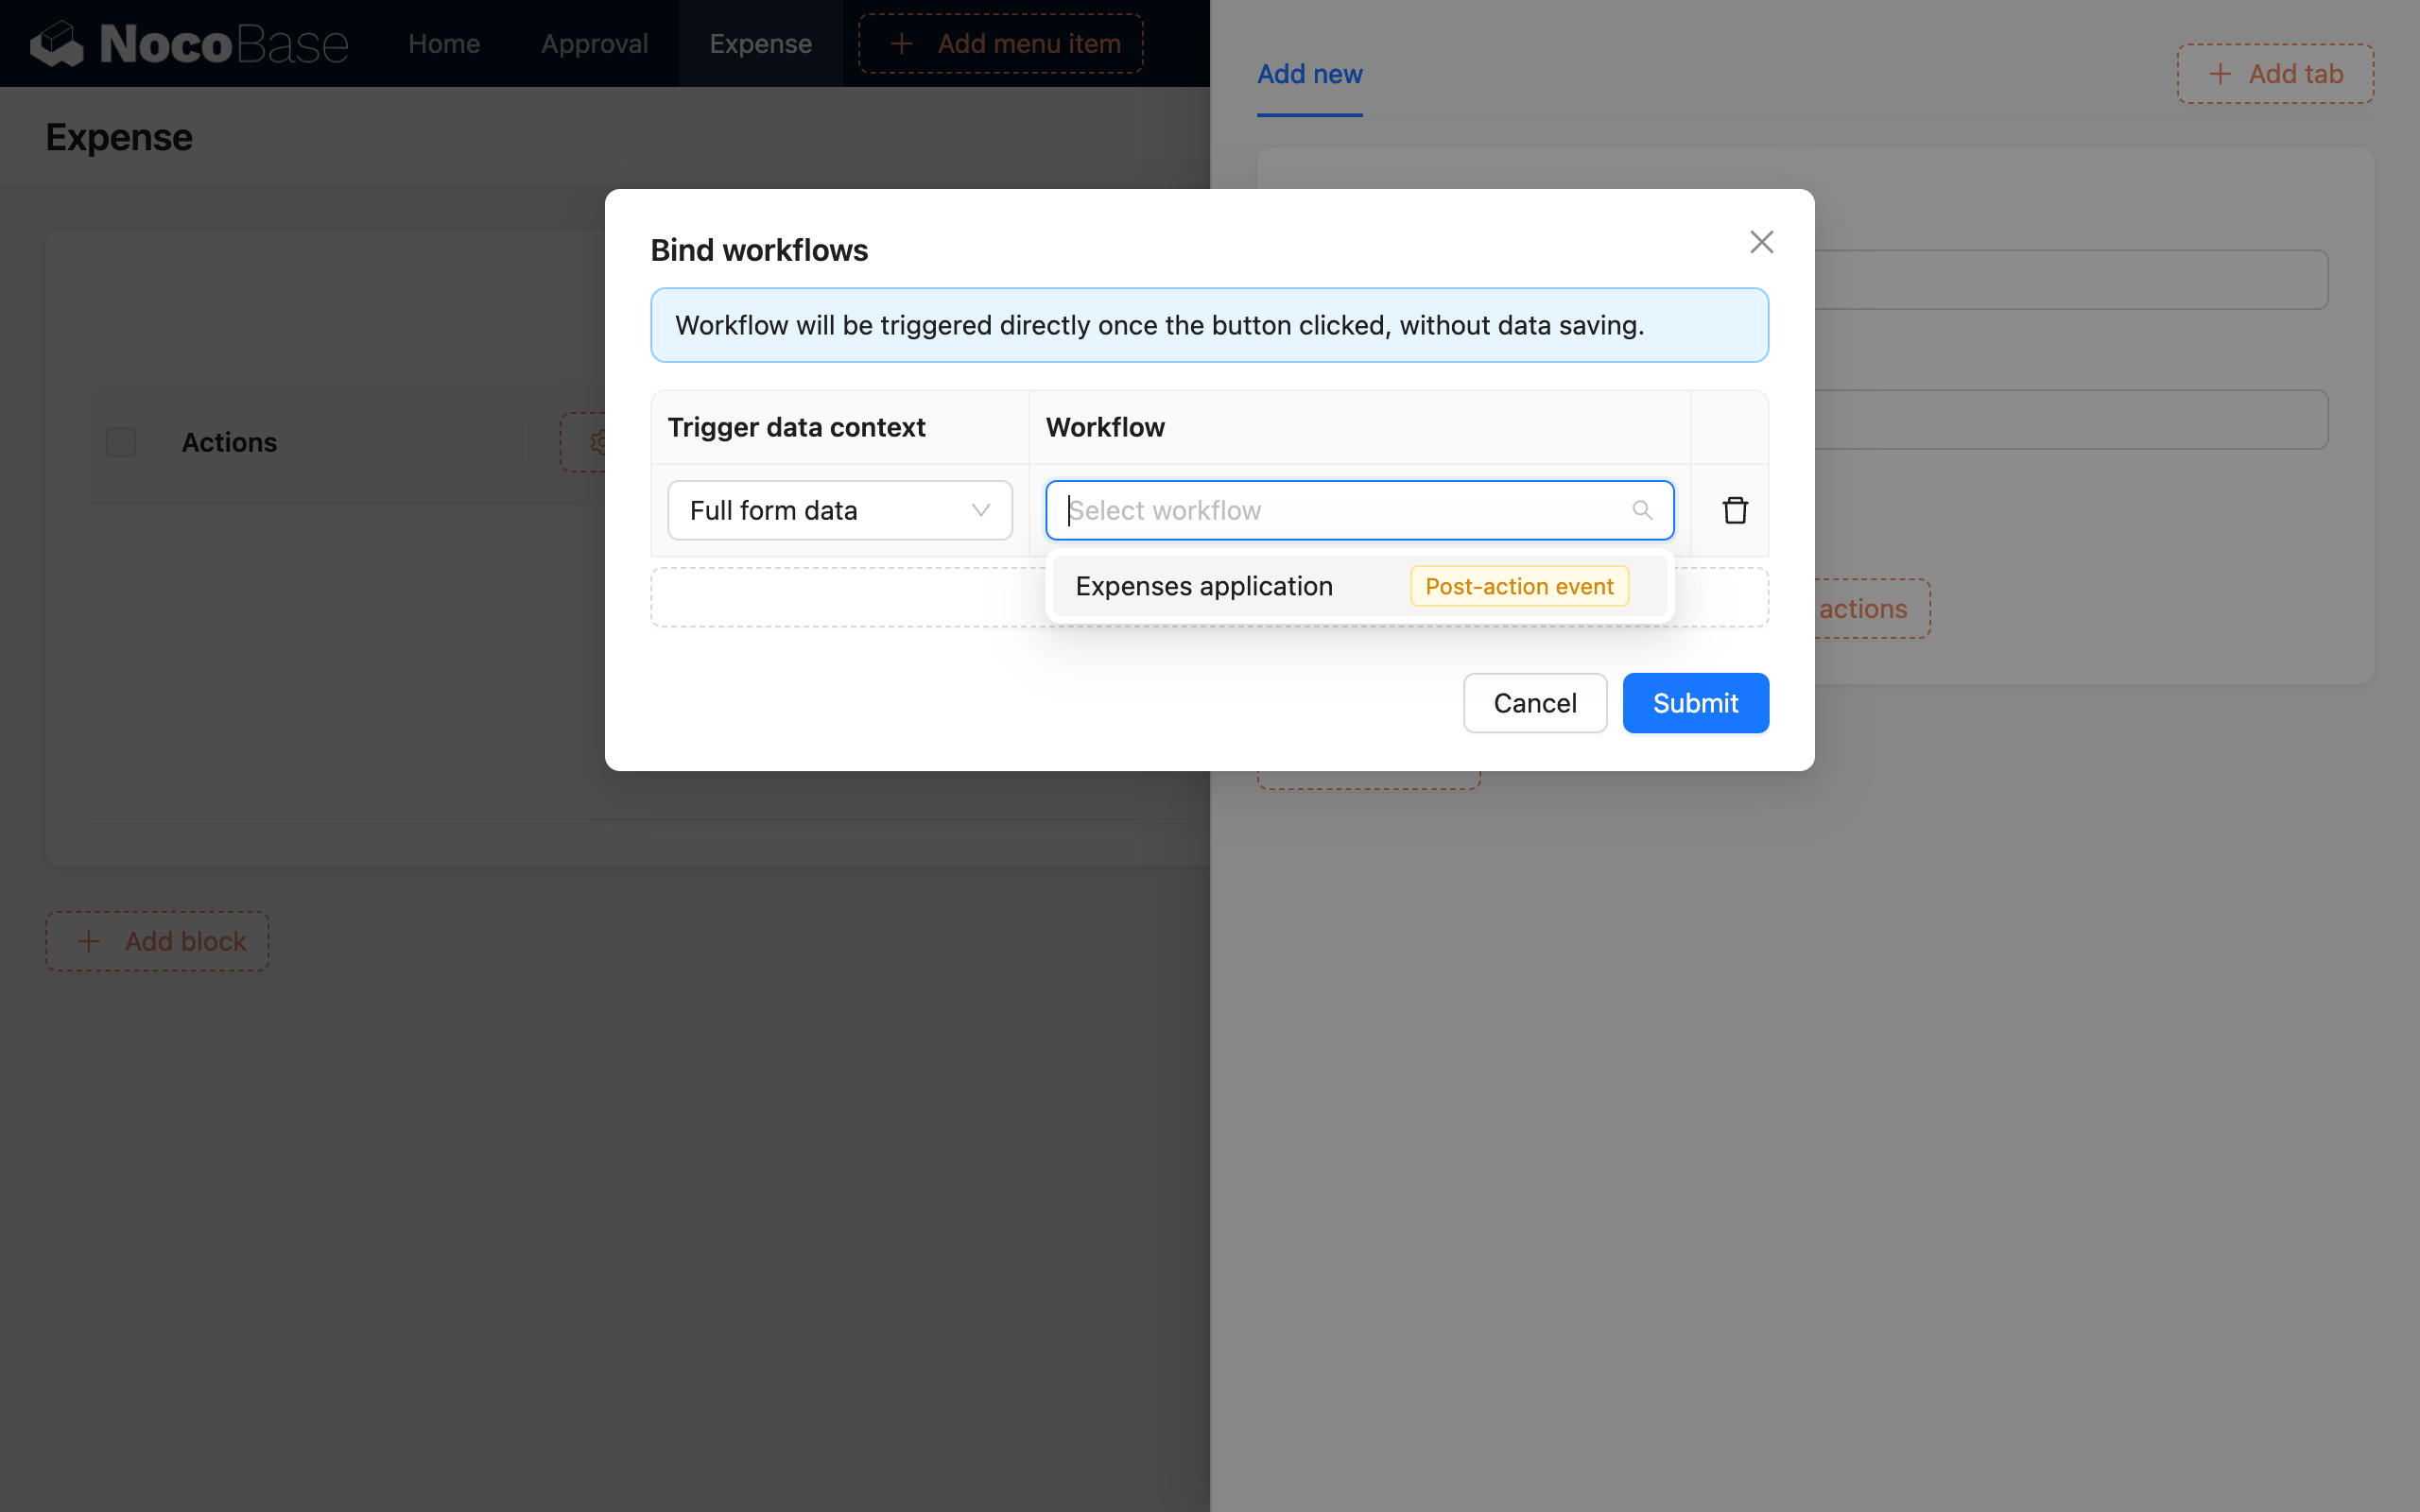
Select "Bind workflow" from the button configuration menu to open the binding configuration popup. In the popup, you can configure any number of workflows to be triggered. If none are configured, it means no trigger is needed. For each workflow, you first need to specify whether the trigger data is the data of the entire form or the data of a certain association field in the form. Then, based on the collection corresponding to the selected data model, select the form workflow that has been configured to match that collection model.
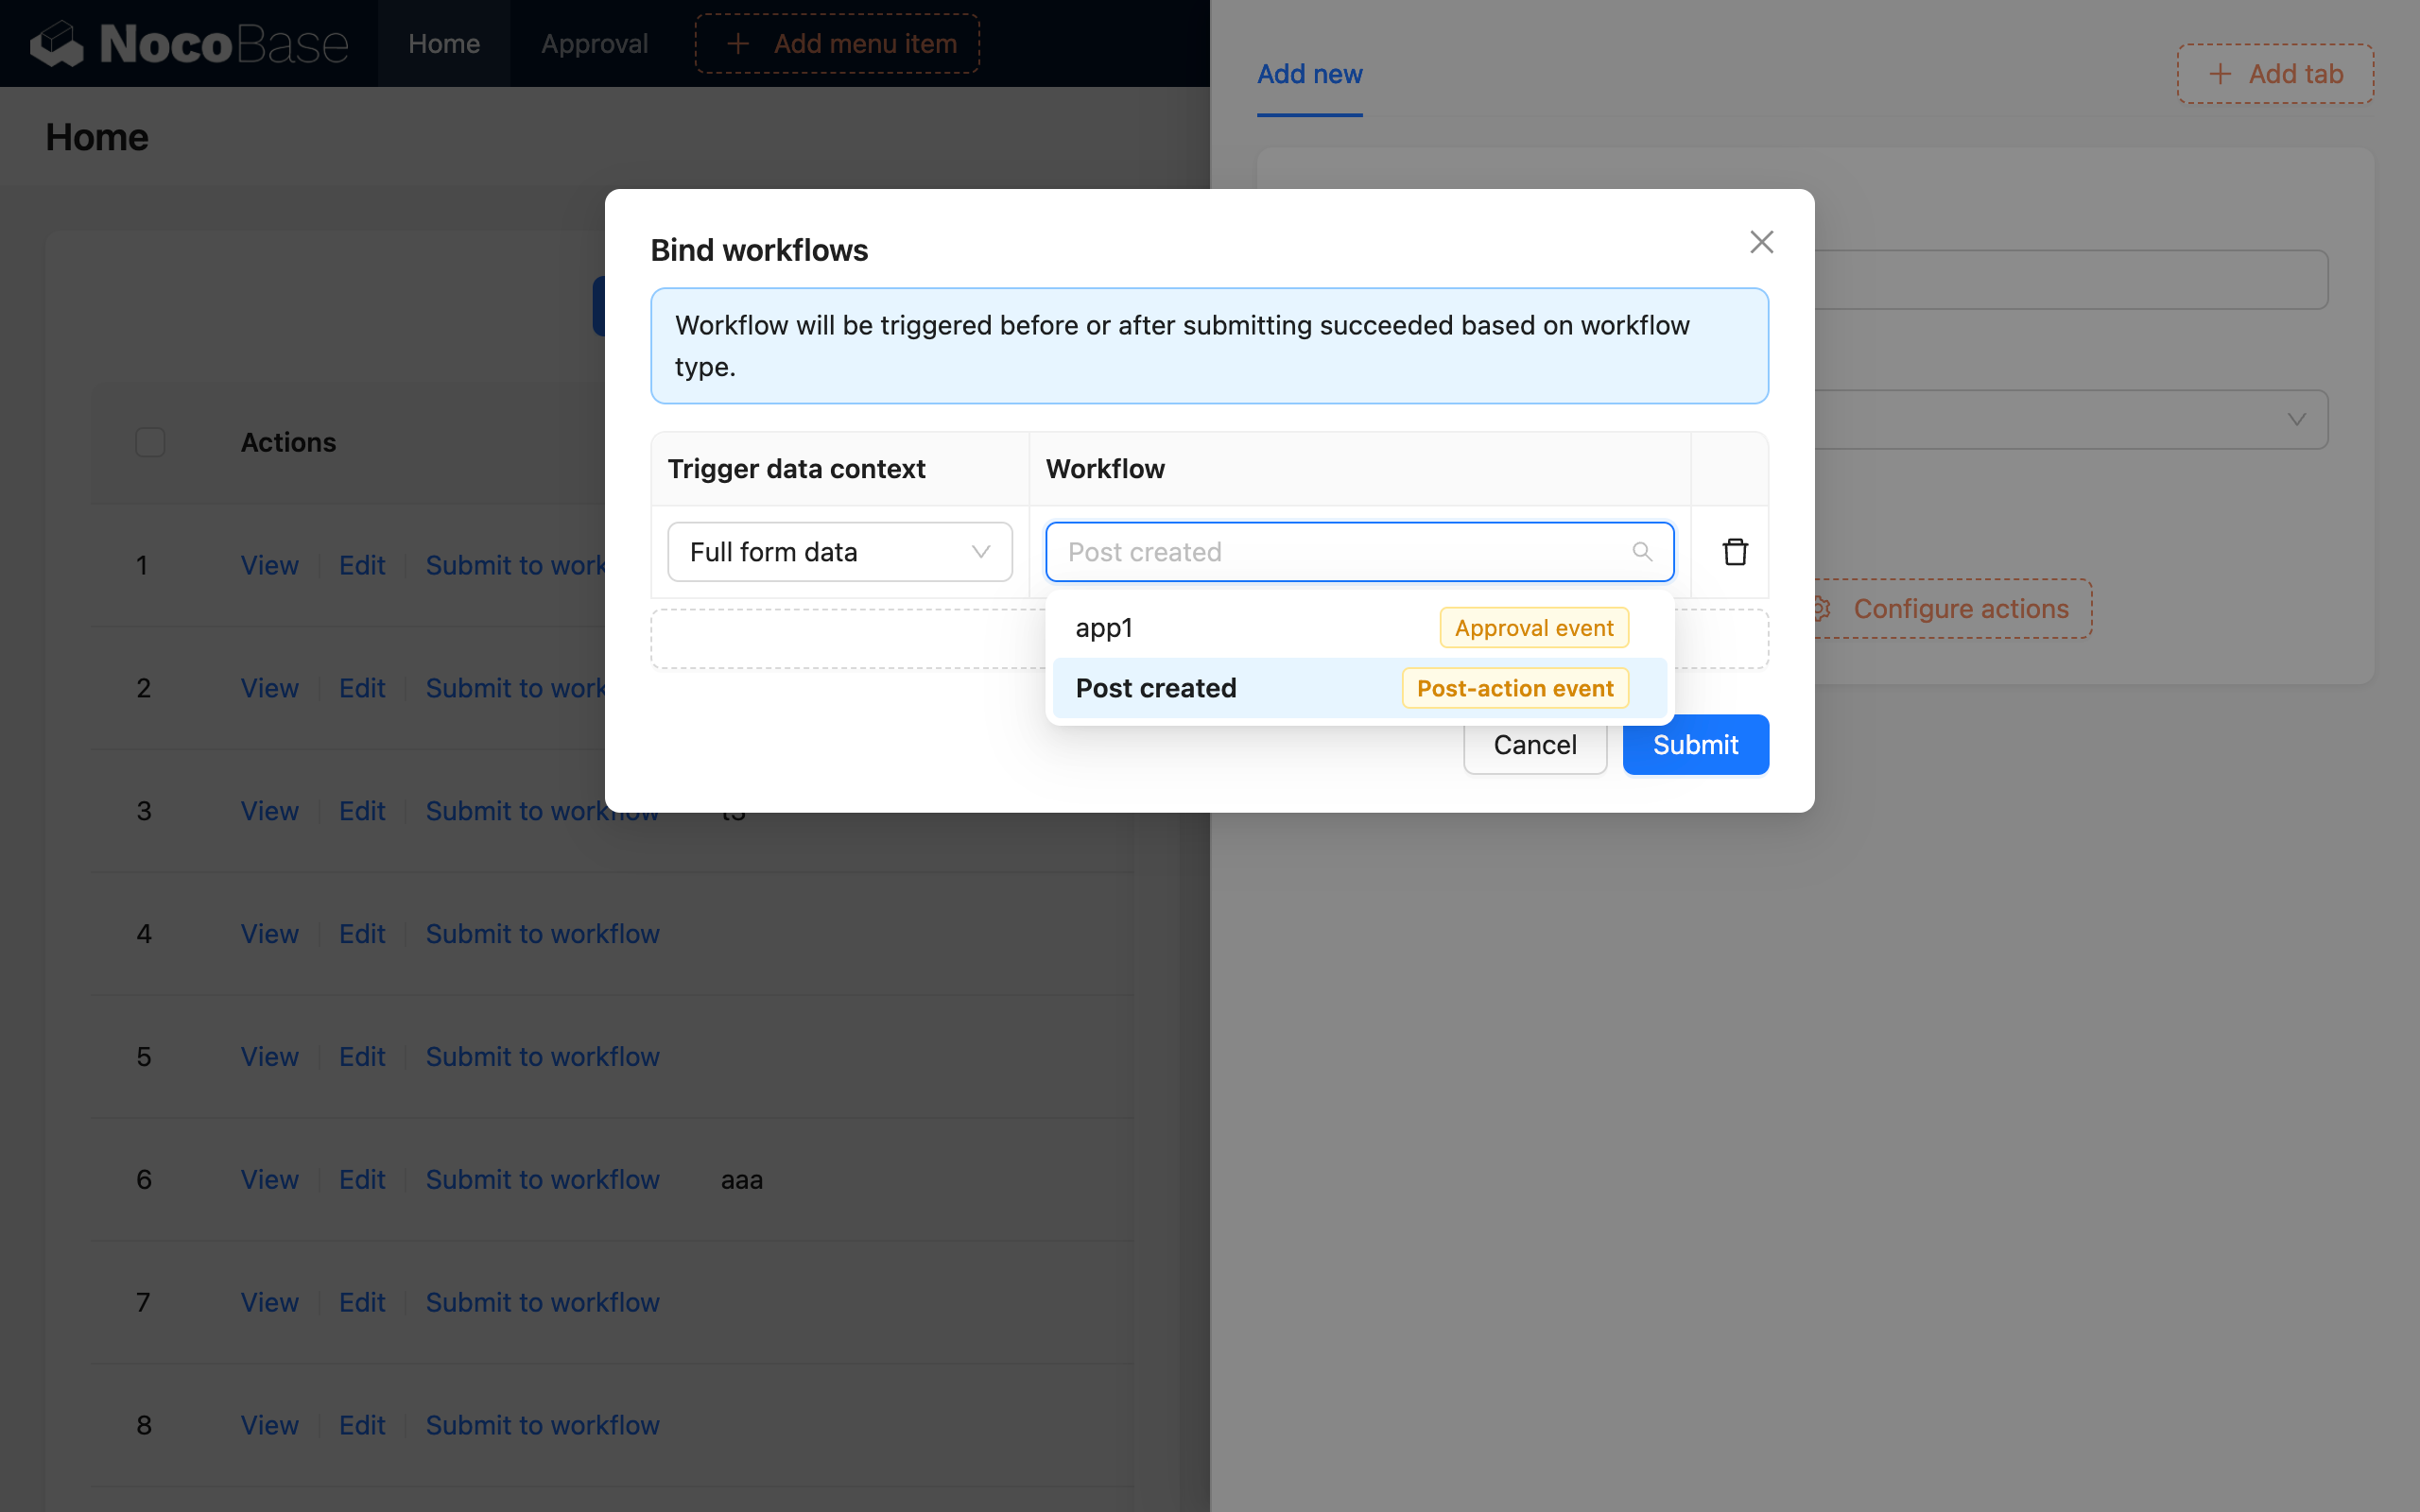
The workflow must be enabled before it can be selected in the interface above.
Example
Here is a demonstration using the create action.
Suppose there is a "Reimbursement Application" scenario. We need to perform an automatic review of the amount and a manual review for amounts exceeding the limit after an employee submits a reimbursement request. Only applications that pass the review are approved and then handed over to the finance department for processing.
First, we can create a "Reimbursement" collection with the following fields:
- Project Name: Single Line Text
- Applicant: Many-to-One (User)
- Amount: Number
- Status: Single Select ("Approved", "Processed")
Then, create a "Post-Action Event" type workflow and configure the collection model in the trigger to be the "Reimbursement" collection:
Set the workflow to the enabled state, and we will come back to configure the specific processing nodes of the process later.
Then, we create a table block for the "Reimbursement" collection on the interface, add an "Add" button to the toolbar, and configure the corresponding form fields. In the configuration options of the form's "Submit" action button, open the "Bind workflow" configuration dialog, select the entire form data as the context, and select the workflow we created earlier:
After the form configuration is complete, return to the workflow's logic orchestration. For example, we require a manual review by an administrator when the amount is greater than 500, otherwise it is directly approved. After approval, a reimbursement record is created and further processed by the finance department (omitted).
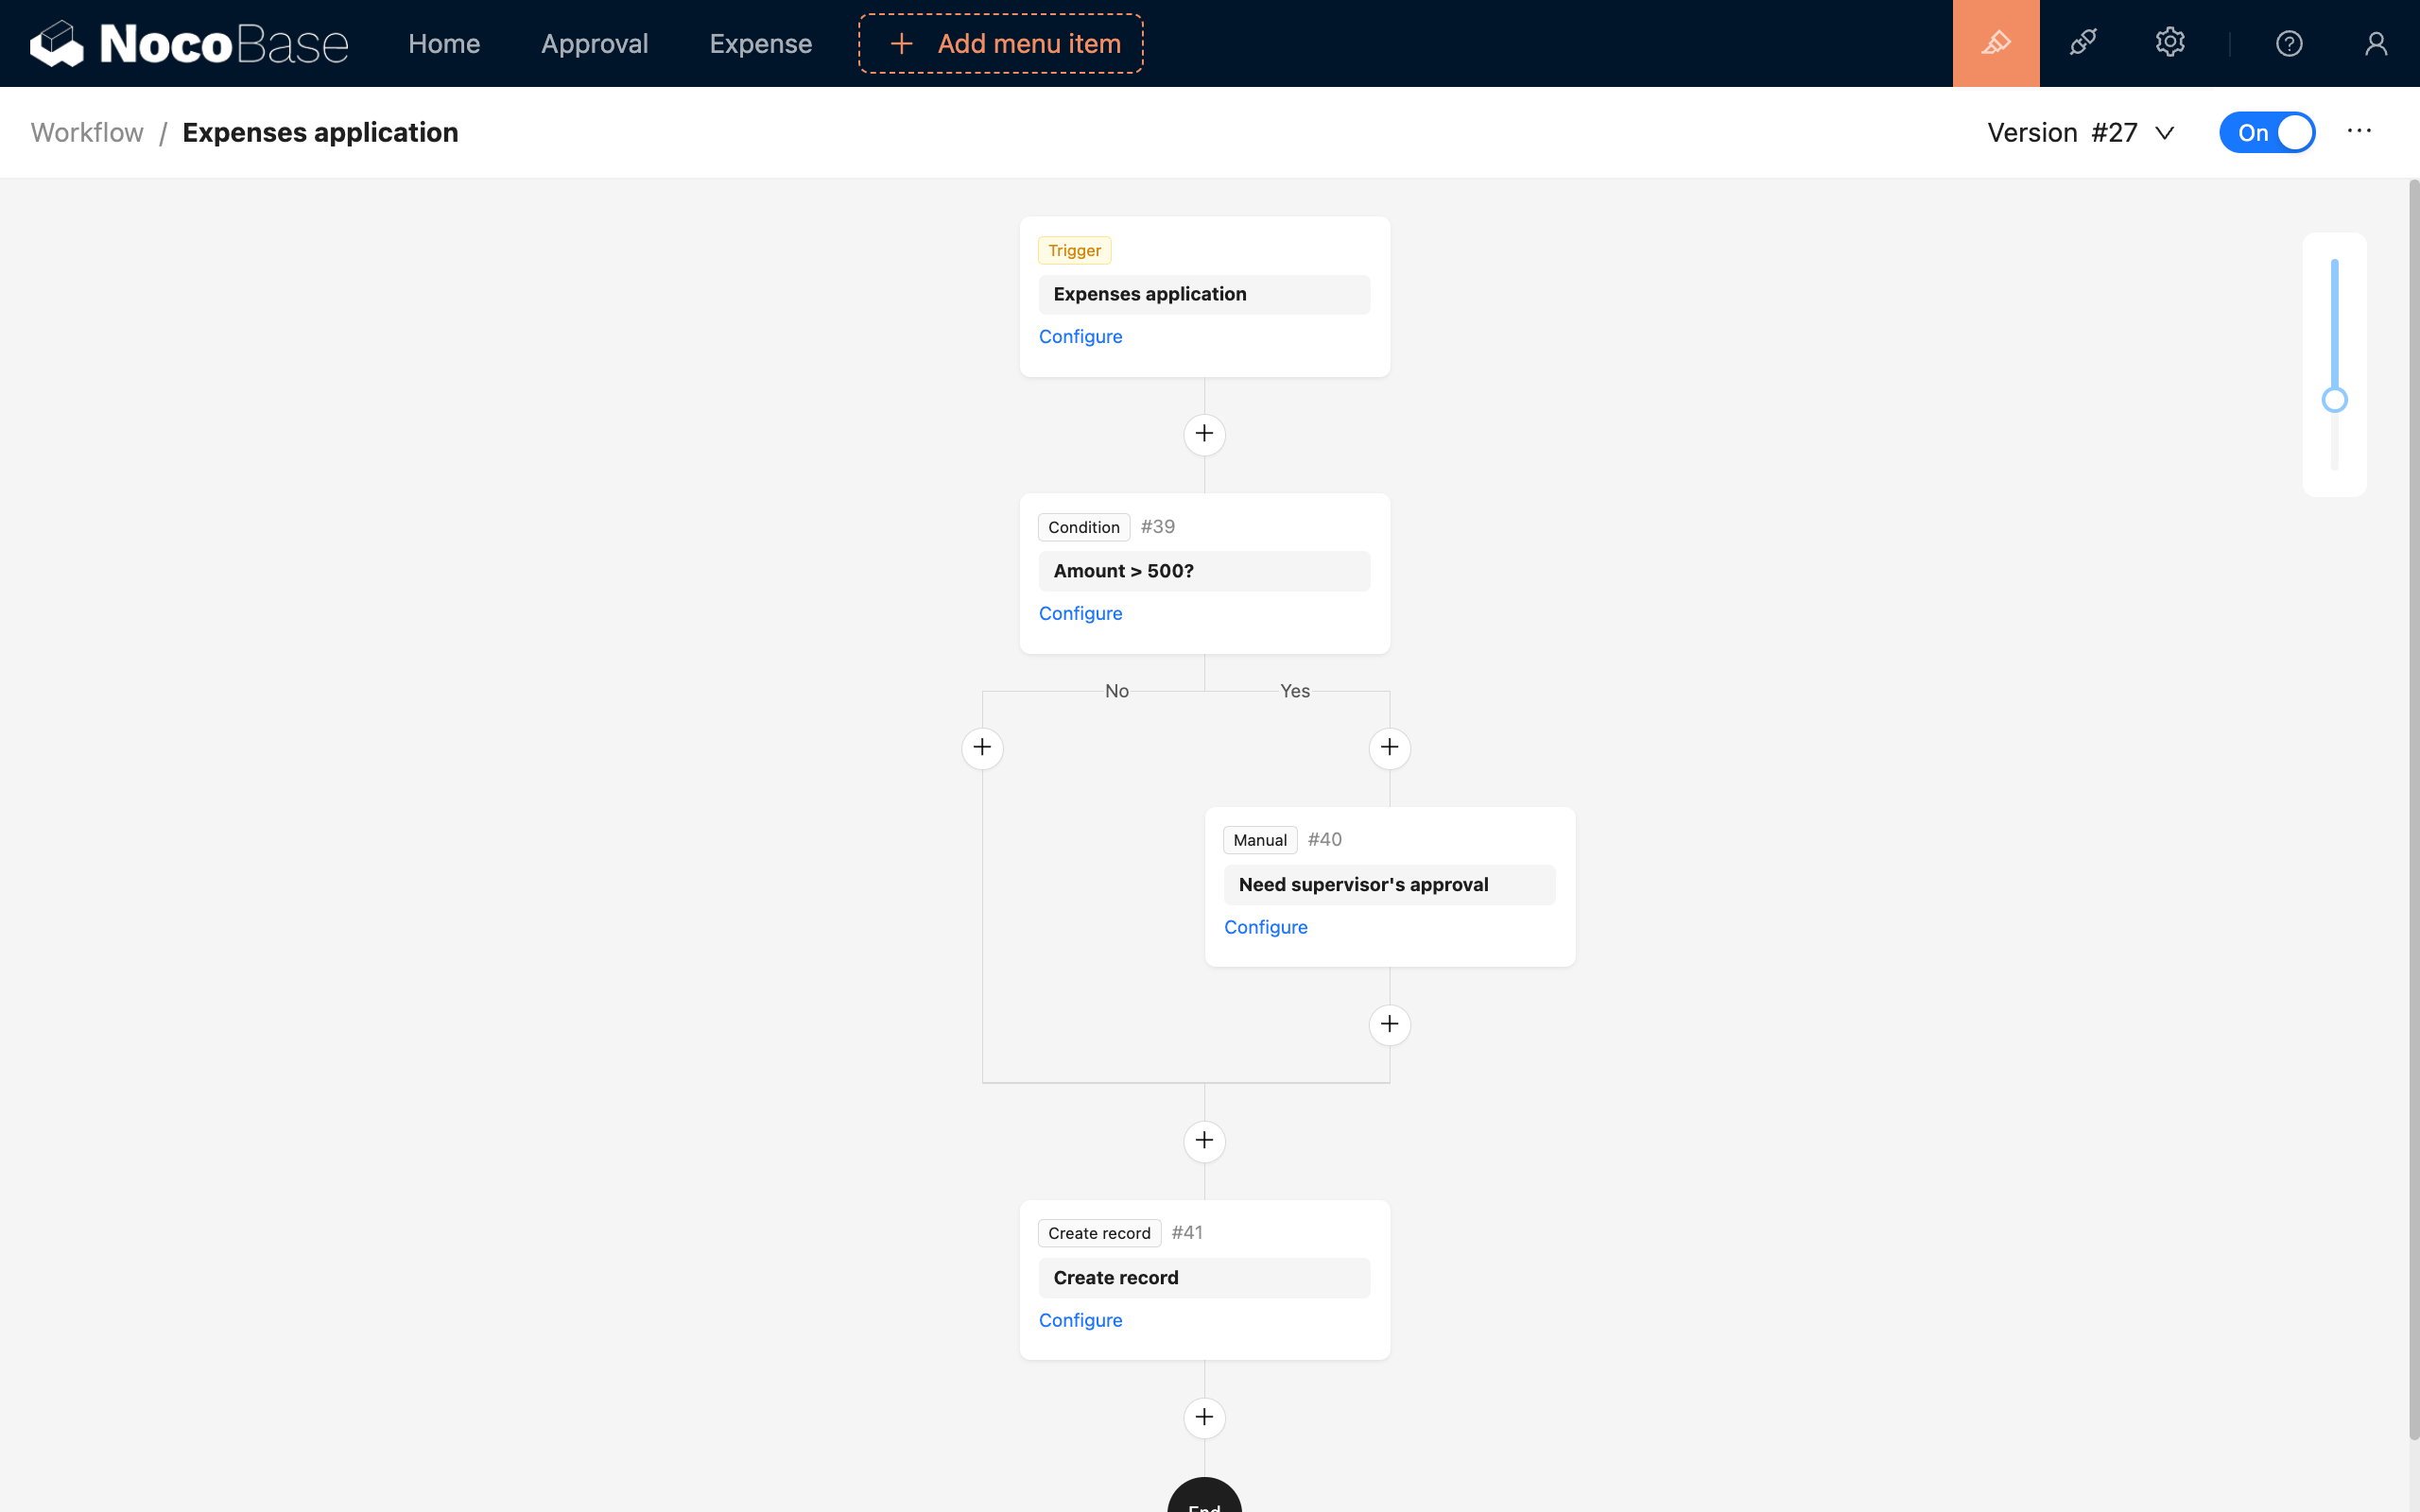
Ignoring the subsequent processing by the finance department, the configuration of the reimbursement application process is now complete. When an employee fills out and submits a reimbursement application, the corresponding workflow will be triggered. If the expense amount is less than 500, a record will be automatically created and await further processing by finance. Otherwise, it will be reviewed by a supervisor, and after approval, a record will also be created and handed over to finance.
The process in this example can also be configured on a regular "Submit" button. You can decide whether to create a record first before executing subsequent processes based on the specific business scenario.
External Call
The triggering of post-action events is not limited to user interface operations; it can also be triggered through HTTP API calls.
When triggering a post-action event via an HTTP API call, you also need to pay attention to the enabled state of the workflow and whether the collection configuration matches, otherwise the call may not succeed or an error may occur.
For workflows locally bound to an action button, you can call it like this (using the create button of the posts collection as an example):
Where the URL parameter triggerWorkflows is the key of the workflow, with multiple workflows separated by commas. This key can be obtained by hovering the mouse over the workflow name at the top of the workflow canvas:
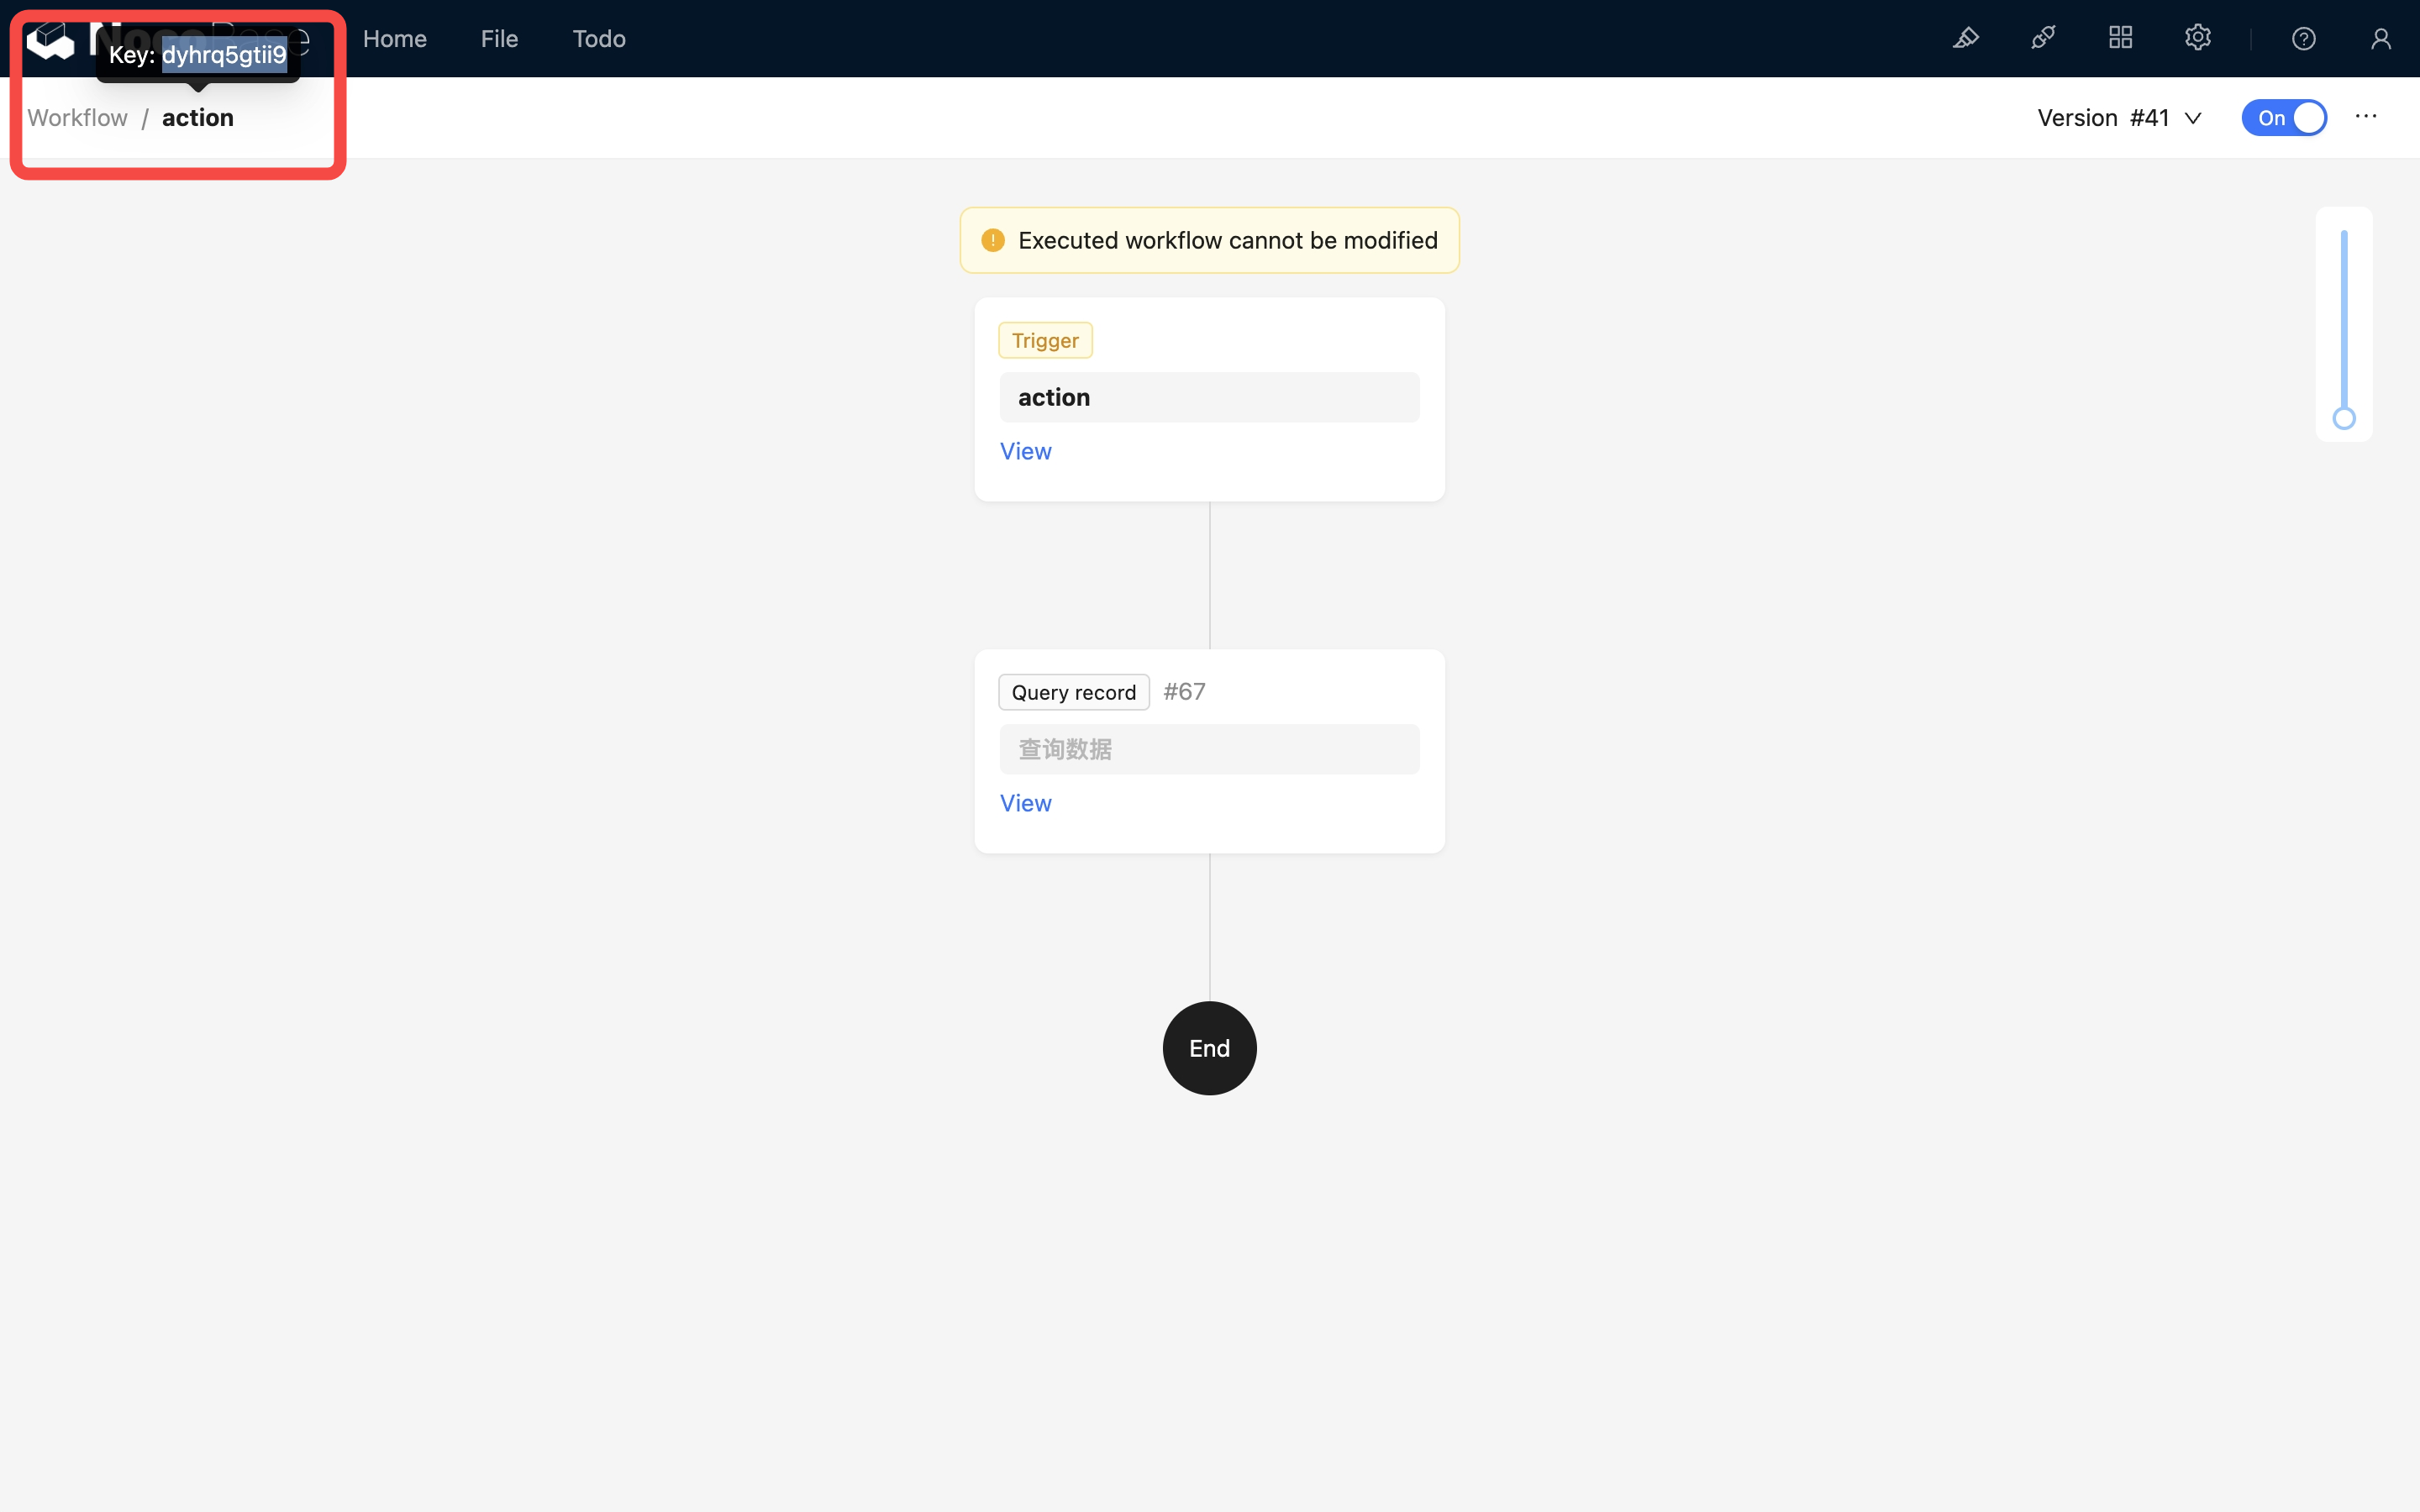
After the above call is successful, the post-action event of the corresponding posts collection will be triggered.
Since external calls also need to be based on user identity, when calling via HTTP API, just like requests sent from the normal interface, authentication information must be provided, including the Authorization request header or token parameter (the token obtained upon login), and the X-Role request header (the user's current role name).
If you need to trigger an event for a to-one relationship data in this action (to-many is not yet supported), you can use ! in the parameter to specify the trigger data of the association field:
After the above call is successful, the post-action event of the corresponding categories collection will be triggered.
If the event is configured in global mode, you do not need to use the URL parameter triggerWorkflows to specify the corresponding workflow. Simply calling the corresponding collection action will trigger it.
FAQ
Difference from Pre-Action Event
- Pre-Action Event: Triggered before an action (such as add, update, etc.) is executed. Before the action is executed, the requested data can be validated or processed in the workflow. If the workflow is terminated (the request is intercepted), the action (add, update, etc.) will not be executed.
- Post-Action Event: Triggered after a user's action is successful. At this point, the data has been successfully submitted and saved to the database, and related processes can continue to be processed based on the successful result.
As shown in the figure below:

Difference from Collection Event
Post-action events and collection events are similar in that they are both processes triggered after data changes. However, their implementation levels are different. Post-action events are at the API level, while collection events are for data changes in the collection.
Collection events are closer to the system's underlying layer. In some cases, a data change caused by one event may trigger another event, creating a chain reaction. Especially when data in some associated collections also changes during the operation of the current collection, events related to the associated collection can also be triggered.
The triggering of collection events does not include user-related information. In contrast, post-action events are closer to the user end and are the result of user actions. The context of the workflow will also contain user-related information, making it suitable for handling processes related to user actions. In NocoBase's future design, more post-action events that can be used for triggering may be expanded, so it is more recommended to use post-action events to handle processes where data changes are caused by user actions.
Another difference is that post-action events can be locally bound to specific form buttons. If there are multiple forms, some form submissions can trigger the event while others do not. Collection events, on the other hand, are for data changes in the entire collection and cannot be locally bound.