

Before Action Event
This feature is provided by the commercial plugin «Workflow: Pre-action event», please purchase to useIntroduction
The Before Action Event plugin provides an interception mechanism for actions, which can be triggered after a request for create, update, or delete action is submitted but before it is processed.
If an "End workflow" node is executed in the triggered workflow, or if any other node fails to execute (due to an error or other incompletion), the form action will be intercepted. Otherwise, the intended action will be executed normally.
Using it with the "Response message" node allows you to configure a response message to be returned to the client, providing appropriate prompts. Before action events can be used for business validation or logic checks to approve or intercept create, update, and delete action requests submitted by the client.
Trigger Configuration
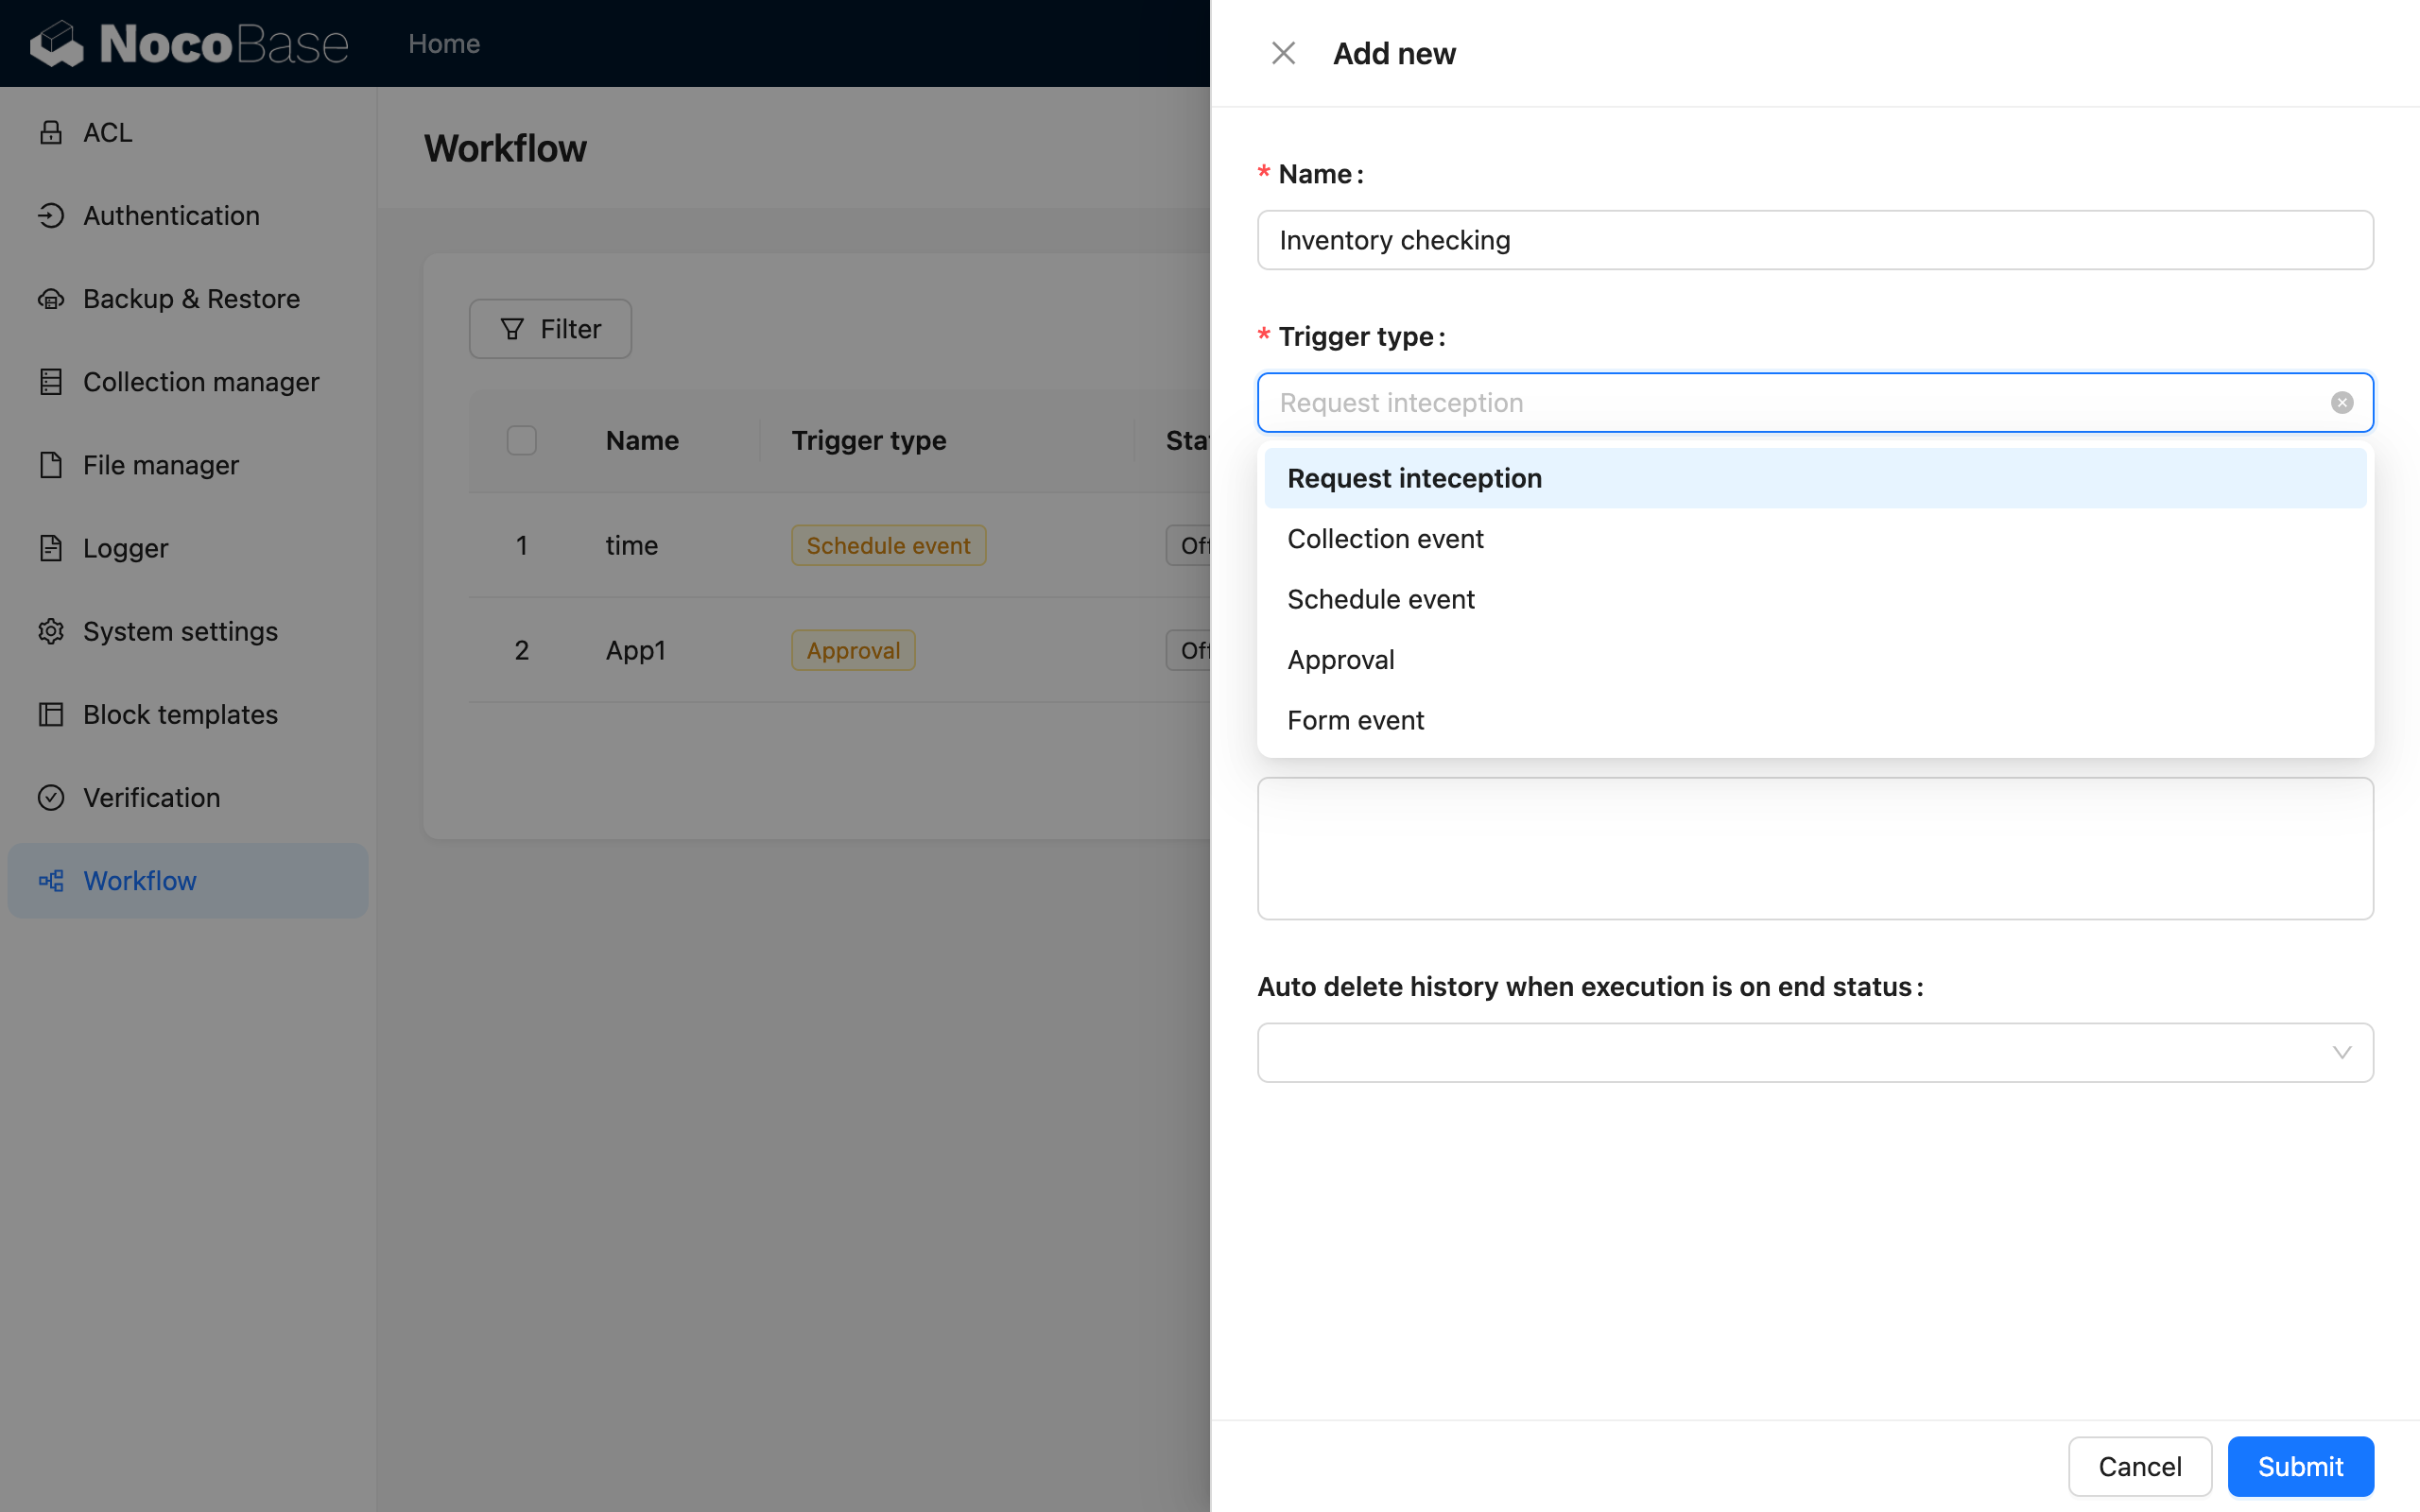
Create Trigger
When creating a workflow, select the type "Before action event":
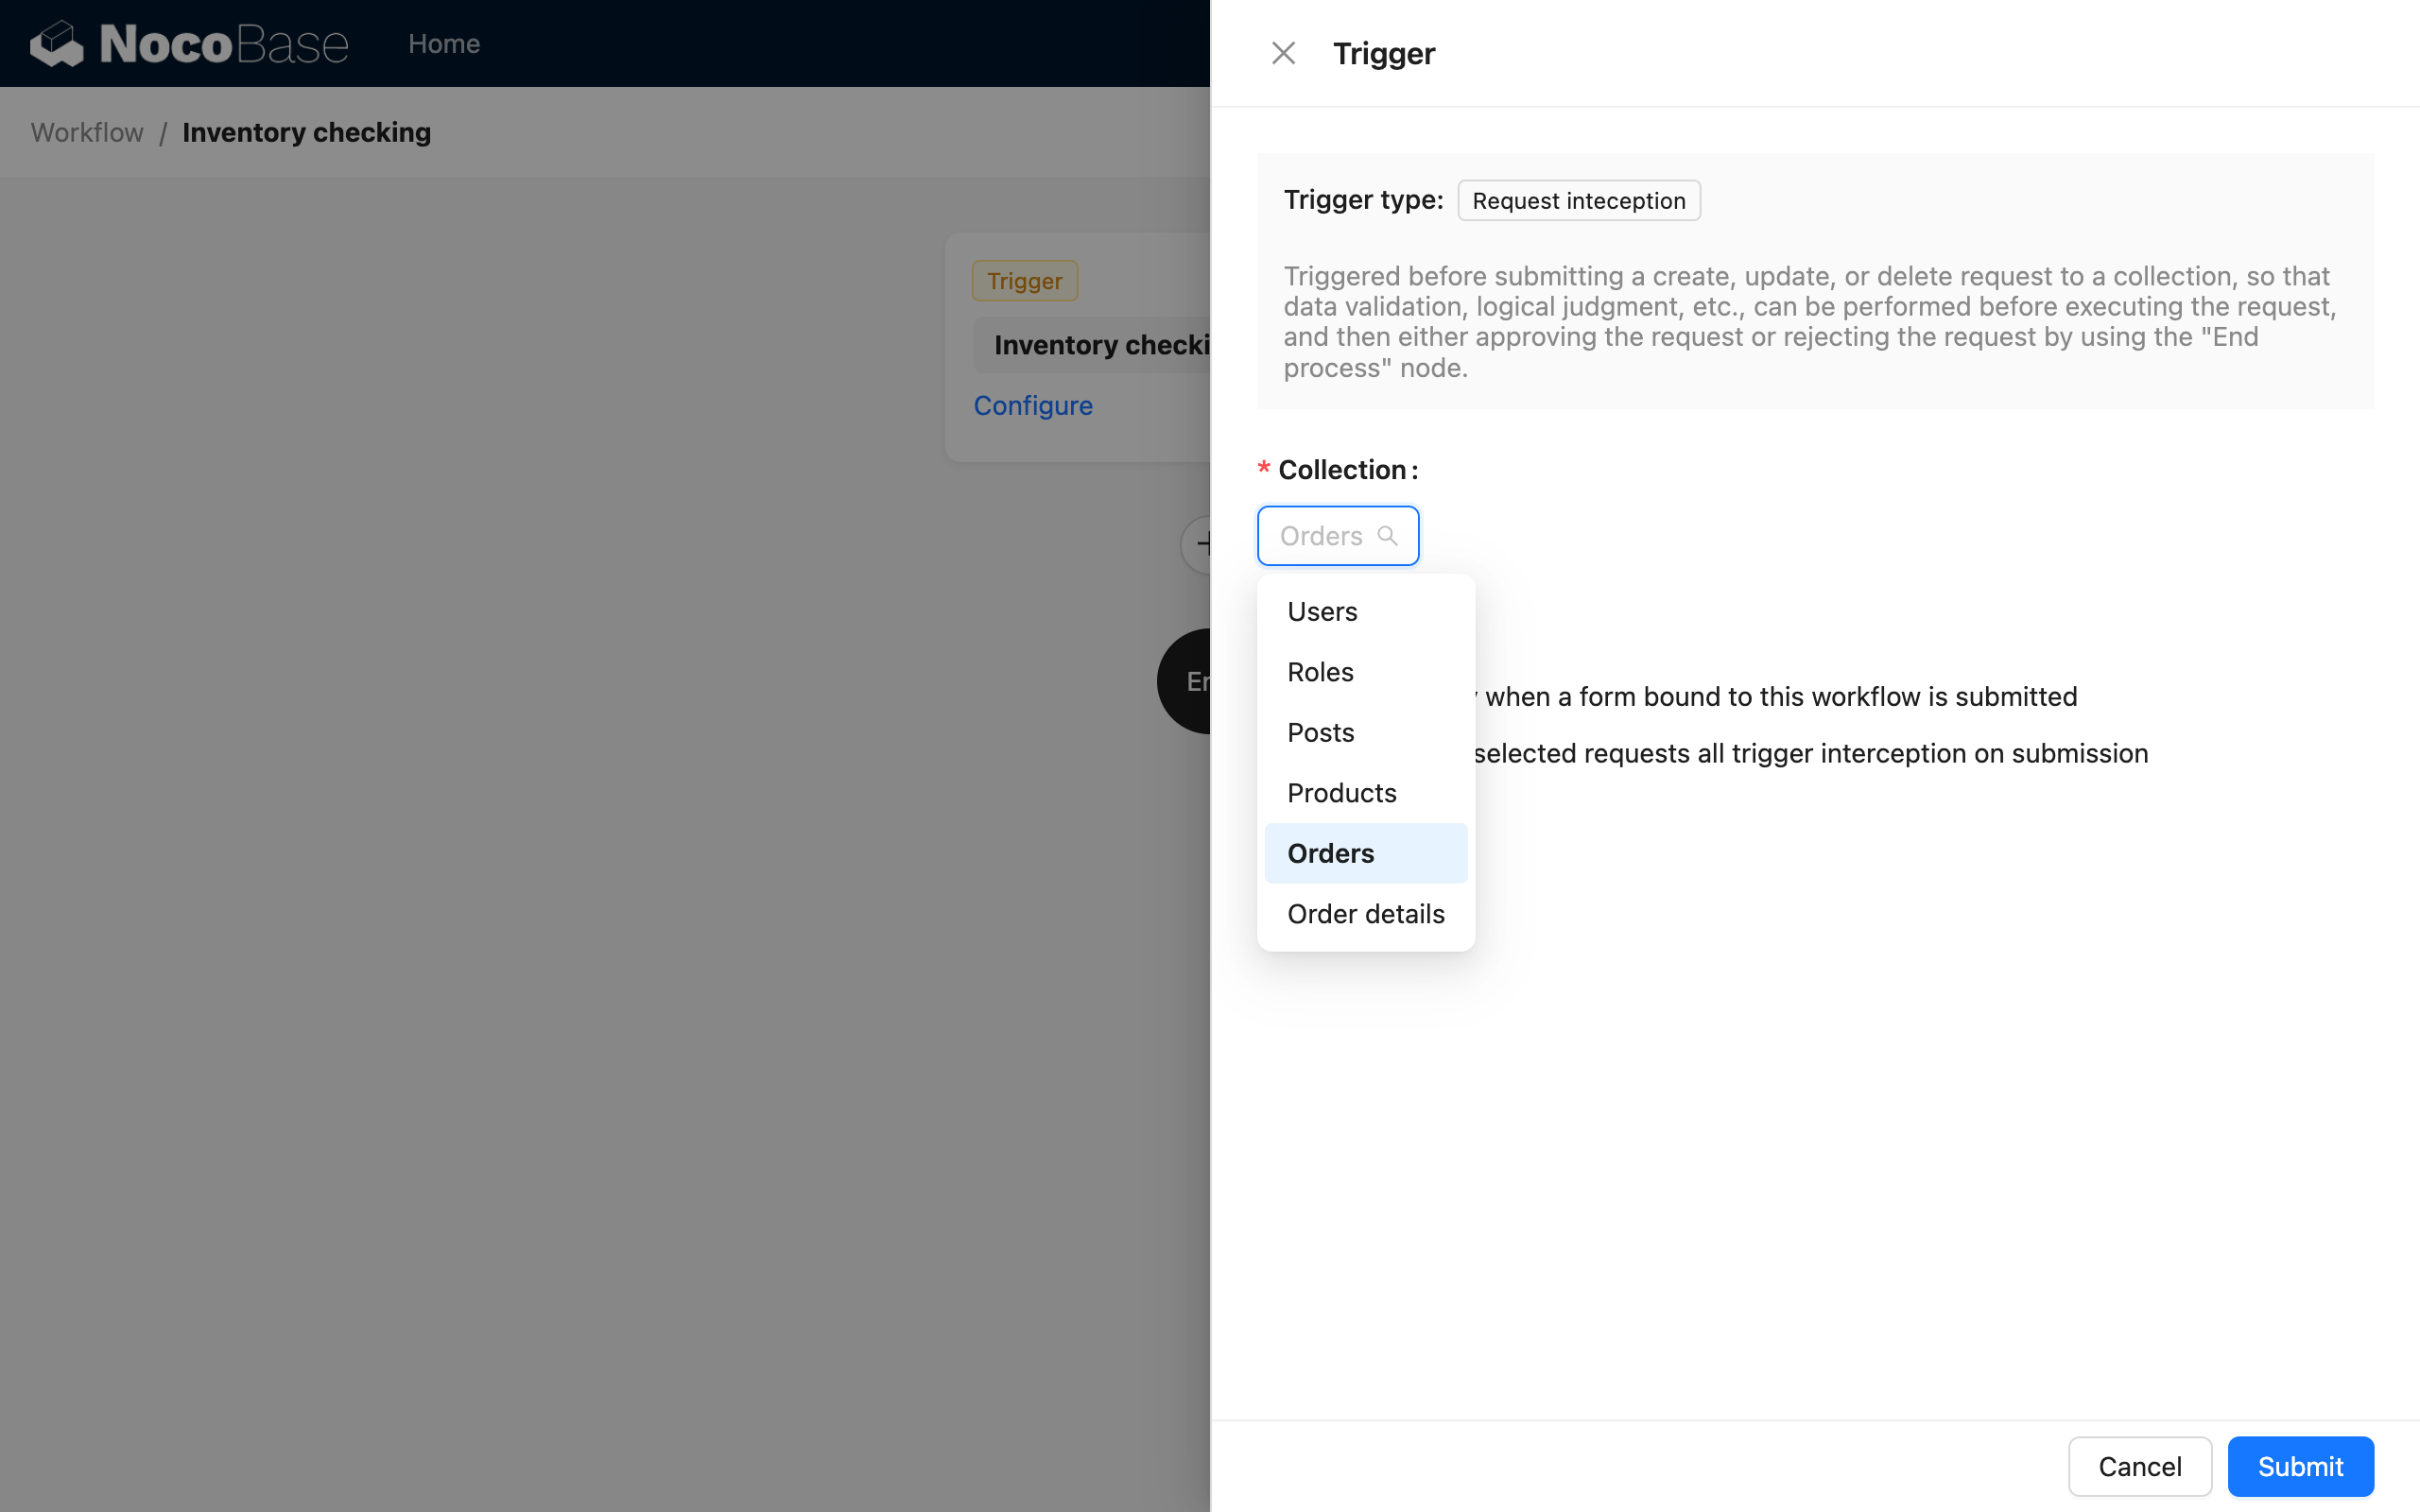
Select Collection
In the trigger of an interception workflow, the first thing to configure is the collection corresponding to the action:
Then select the interception mode. You can choose to intercept only the action button bound to this workflow, or to intercept all selected actions for this collection (regardless of which form it comes from, and without needing to bind the corresponding workflow):
Interception Mode
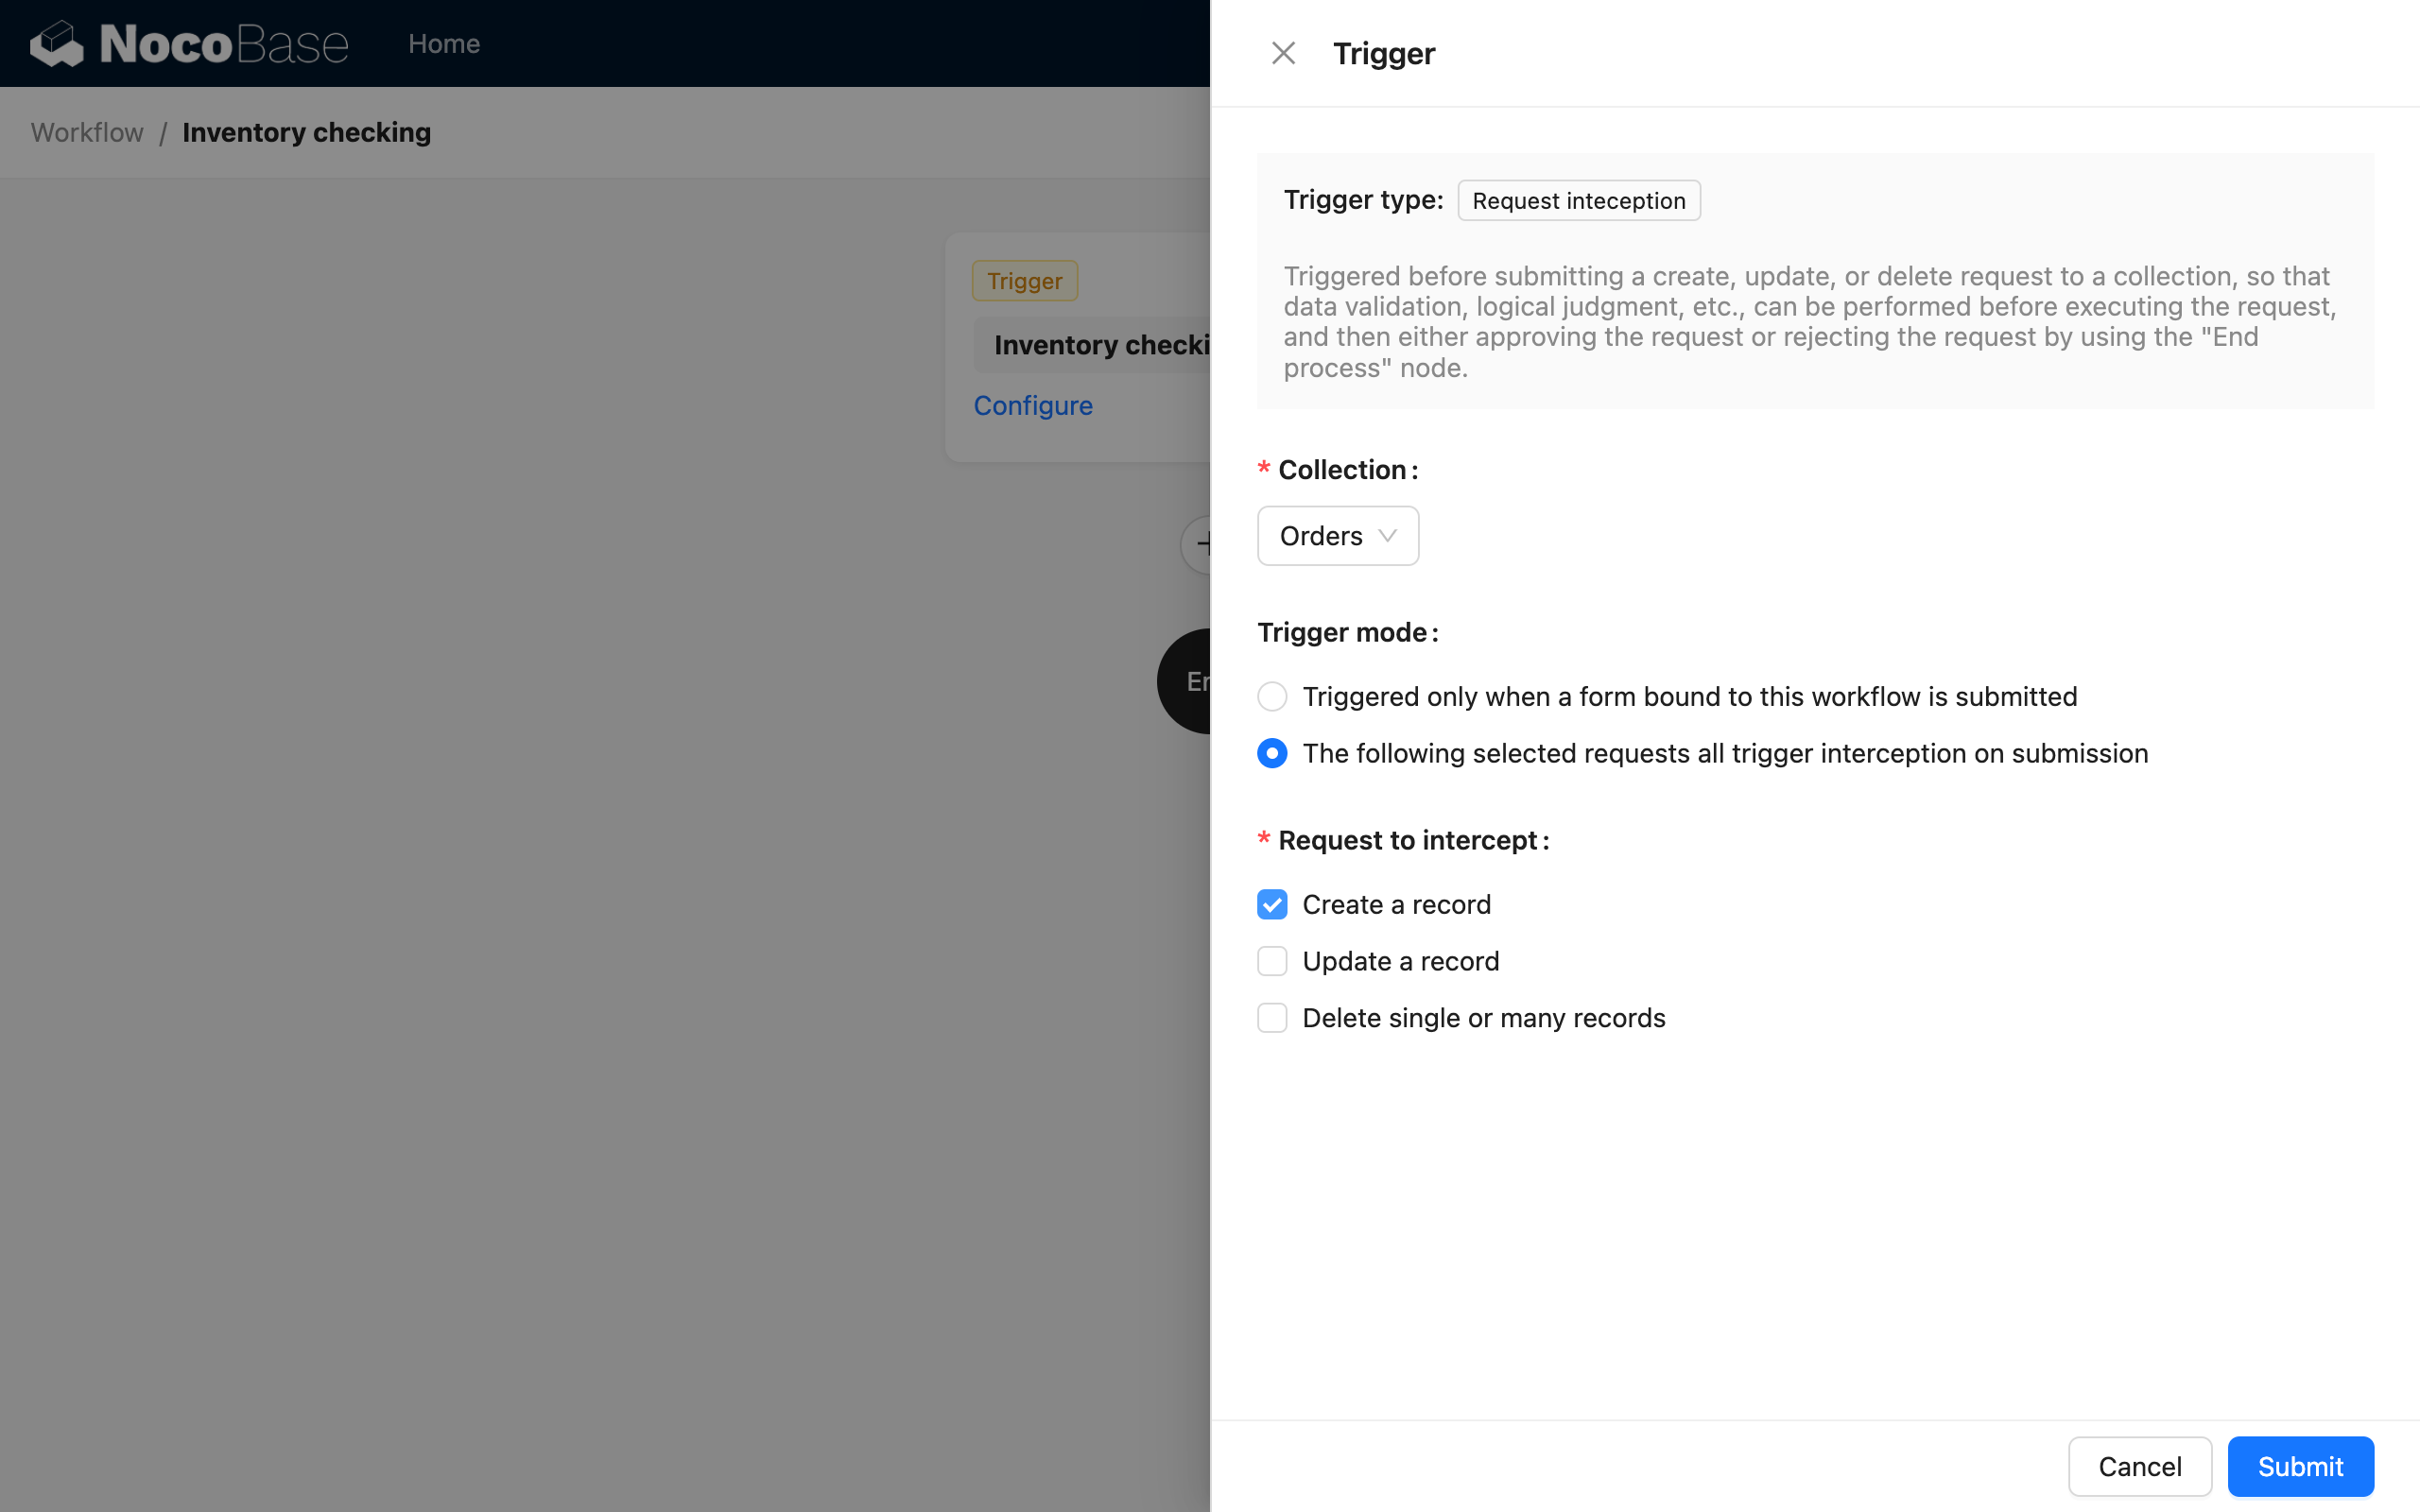
Currently supported action types are "Create", "Update", and "Delete". Multiple action types can be selected simultaneously.
Action Configuration
If the "Trigger interception only when a form bound to this workflow is submitted" mode is selected in the trigger configuration, you also need to go back to the form interface and bind this workflow to the corresponding action button:
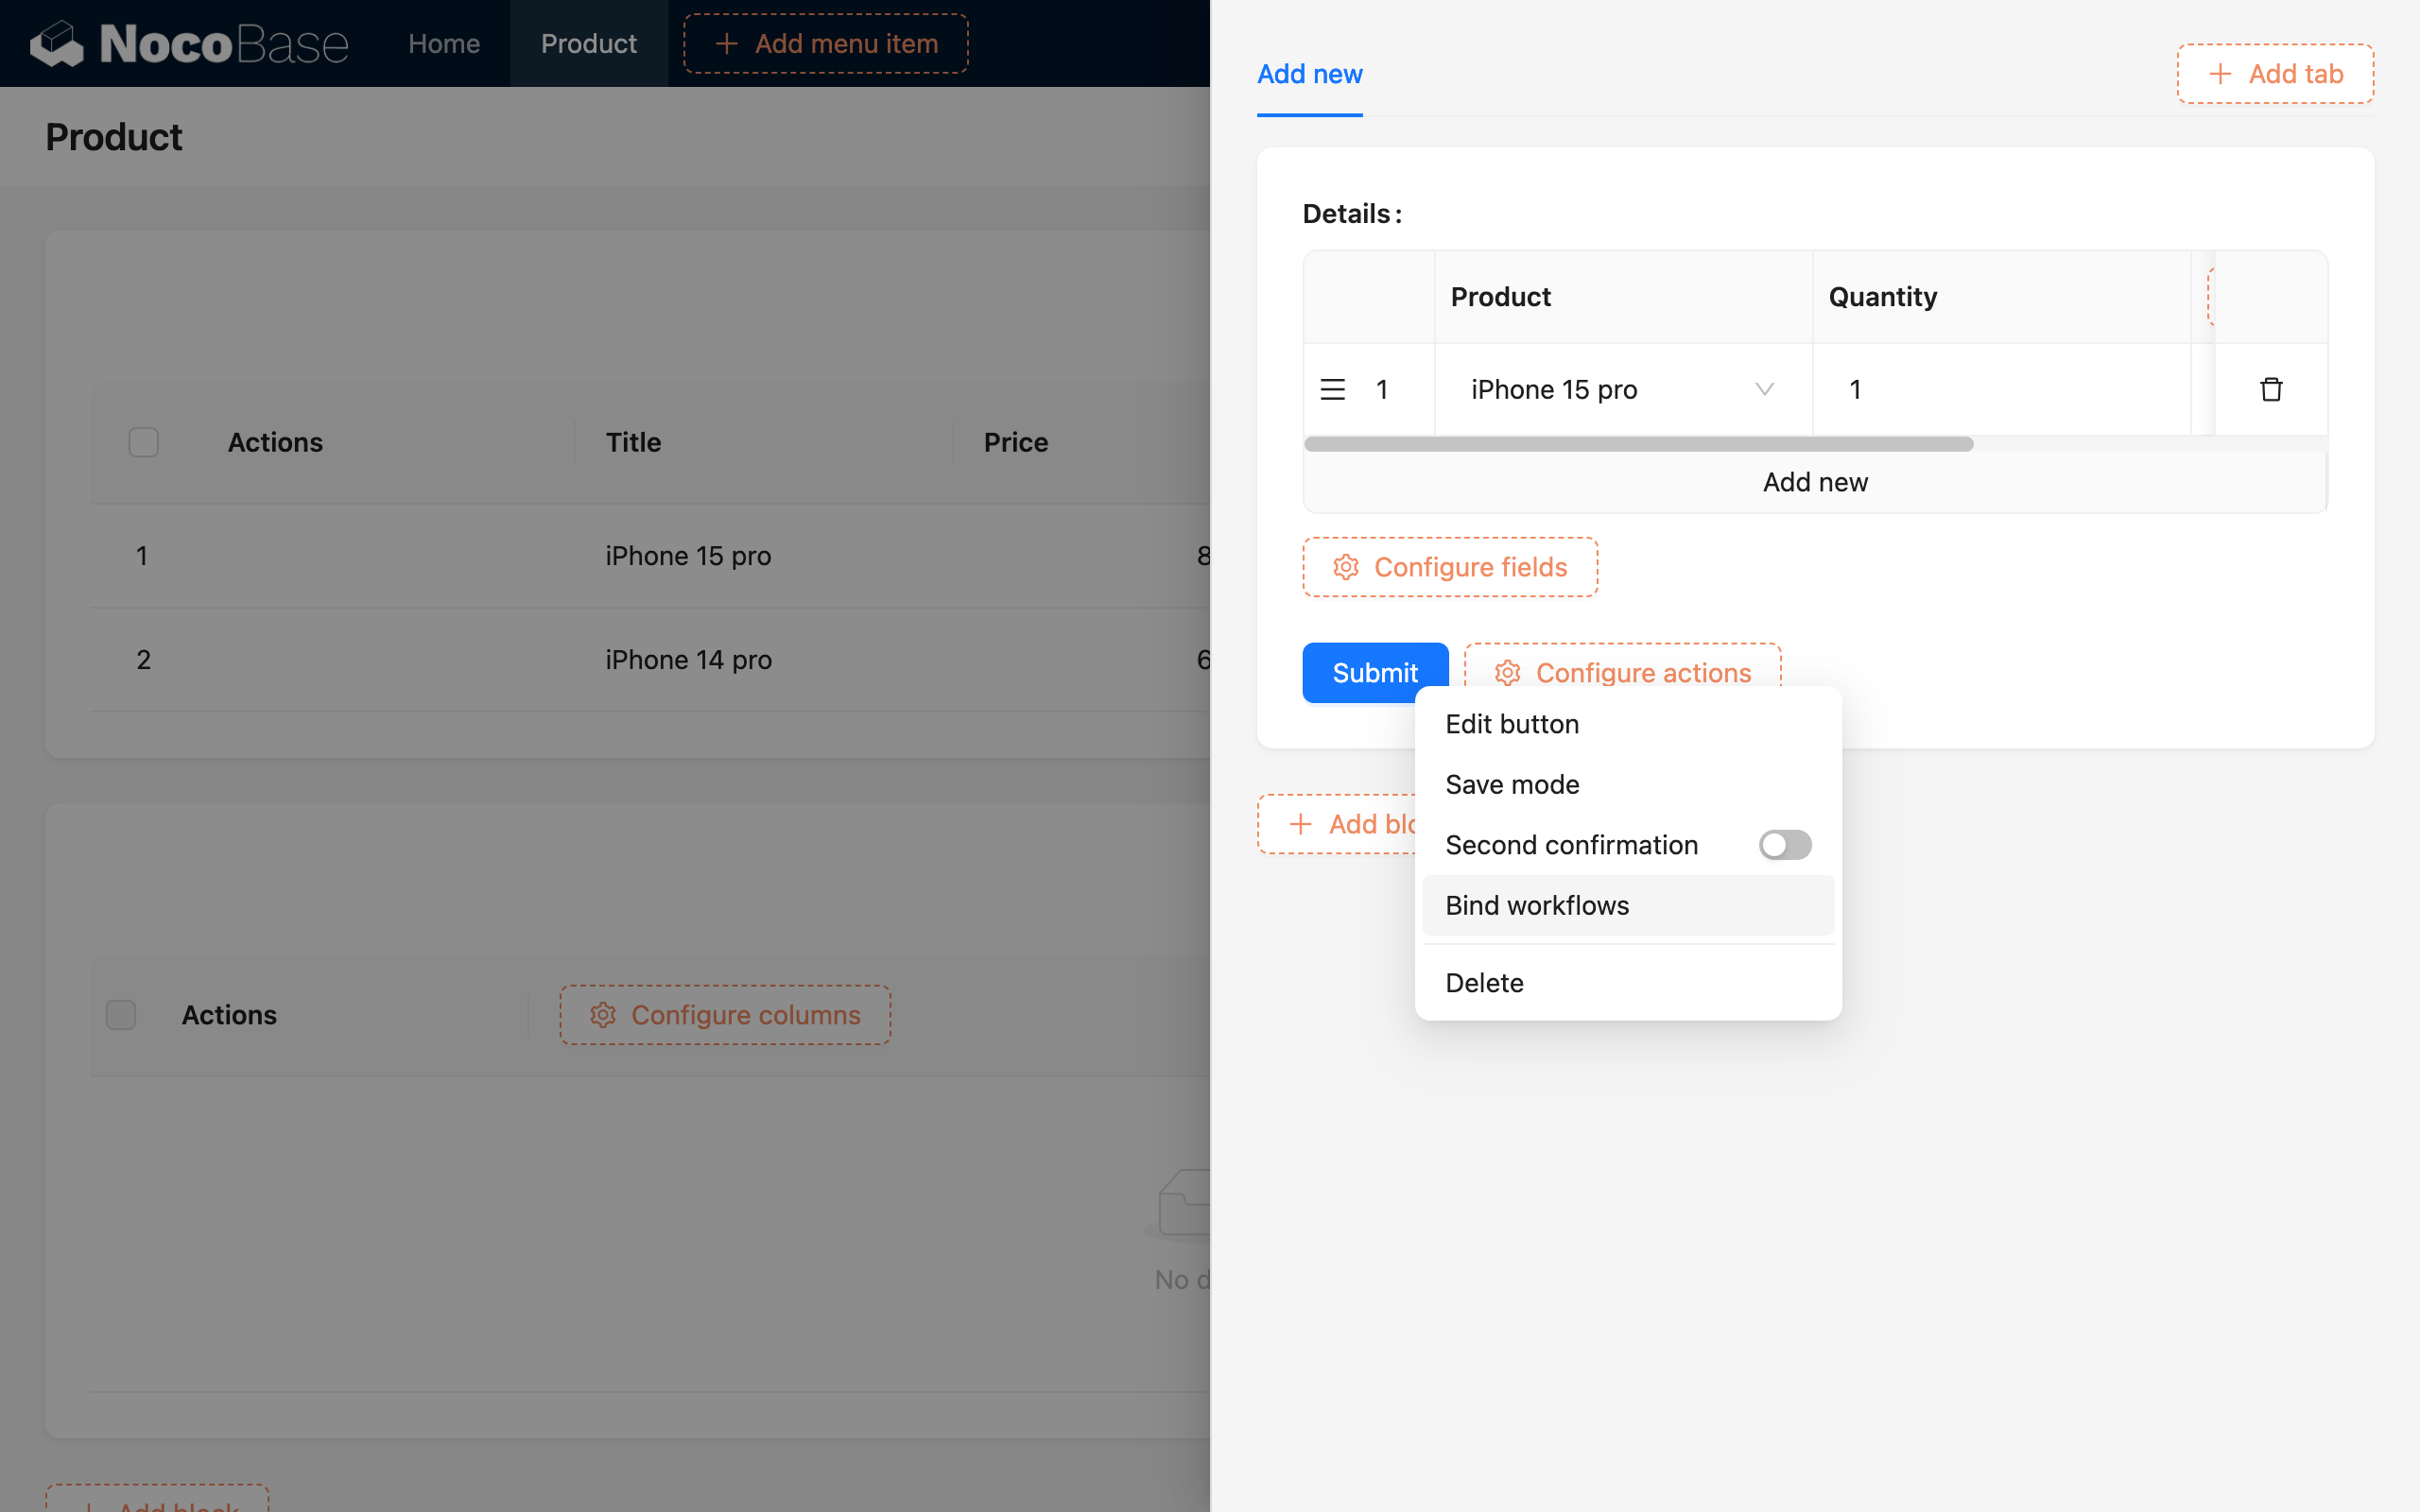
In the bind workflow configuration, select the corresponding workflow. Usually, the default context for triggering data, "Entire form data", is sufficient:
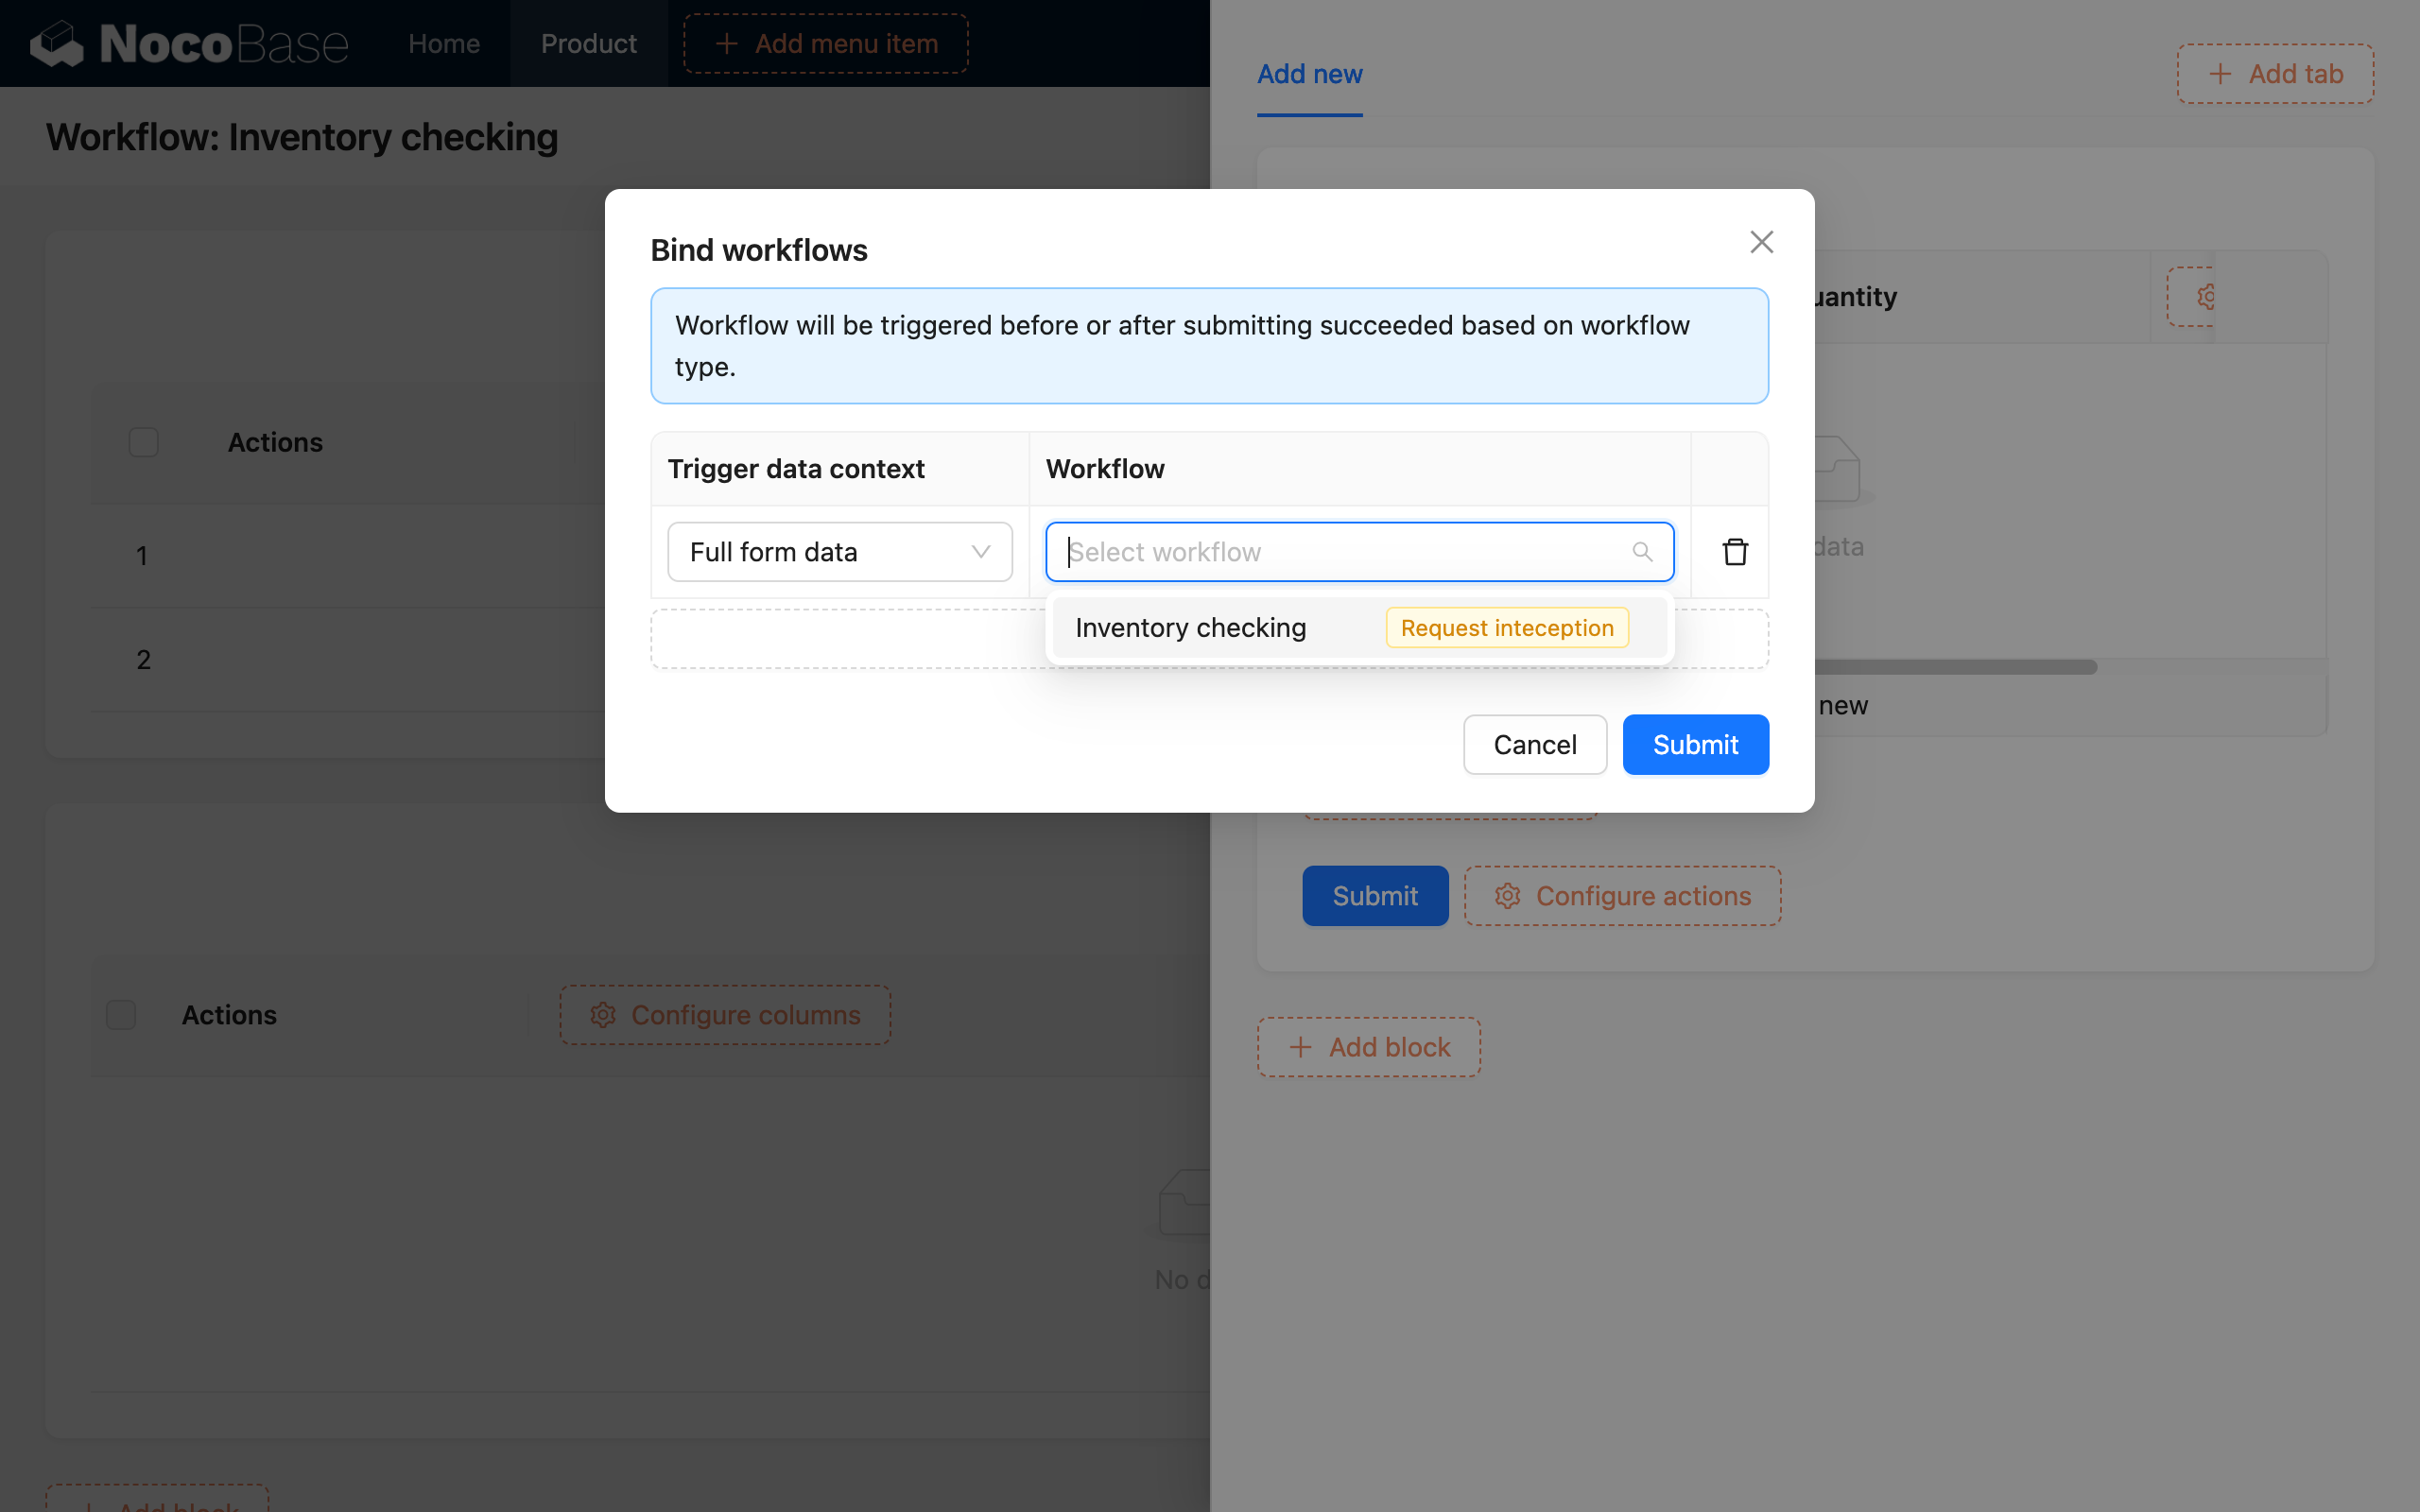
The buttons that can be bound to a Before Action Event currently only support "Submit" (or "Save"), "Update data", and "Delete" buttons in create or update forms. The "Trigger workflow" button is not supported (it can only be bound to an "After action event").
Conditions for Interception
In a "Before action event", there are two conditions that will cause the corresponding action to be intercepted:
- The workflow executes to any "End workflow" node. Similar to the previous instructions, when the data that triggered the workflow does not meet the preset conditions in a "Condition" node, it will enter the "No" branch and execute the "End workflow" node. At this point, the workflow will end, and the requested action will be intercepted.
- Any node in the workflow fails to execute, including execution errors or other exceptions. In this case, the workflow will end with a corresponding status, and the requested action will also be intercepted. For example, if the workflow calls external data via an "HTTP request" and the request fails, the workflow will end with a failed status and will also intercept the corresponding action request.
After the interception conditions are met, the corresponding action will no longer be executed. For example, if an order submission is intercepted, the corresponding order data will not be created.
Related Parameters for the Corresponding Action
In a "Before action event" type workflow, different data from the trigger can be used as variables in the workflow for different actions:
| Action Type \ Variable | "Operator" | "Operator role identifier" | Action parameter: "ID" | Action parameter: "Submitted data object" |
|---|---|---|---|---|
| Create a record | ✓ | ✓ | - | ✓ |
| Update a record | ✓ | ✓ | ✓ | ✓ |
| Delete single or multiple records | ✓ | ✓ | ✓ | - |
The "Trigger data / Action parameters / Submitted data object" variable in a Before Action Event is not the actual data from the database, but rather the parameters submitted with the action. If you need the actual data from the database, you must query for it using a "Query data" node within the workflow.
Additionally, for a delete action, the "ID" in the action parameters is a single value when targeting a single record, but it is an array when targeting multiple records.
Output Response Message
After configuring the trigger, you can customize the relevant judgment logic in the workflow. Typically, you will use the branch mode of the "Condition" node to decide whether to "End workflow" and return a preset "Response message" based on the results of specific business conditions:
At this point, the configuration of the corresponding workflow is complete. You can now try to submit data that does not meet the conditions configured in the workflow's condition node to trigger the interception logic. You will then see the returned response message:
Response Message Status
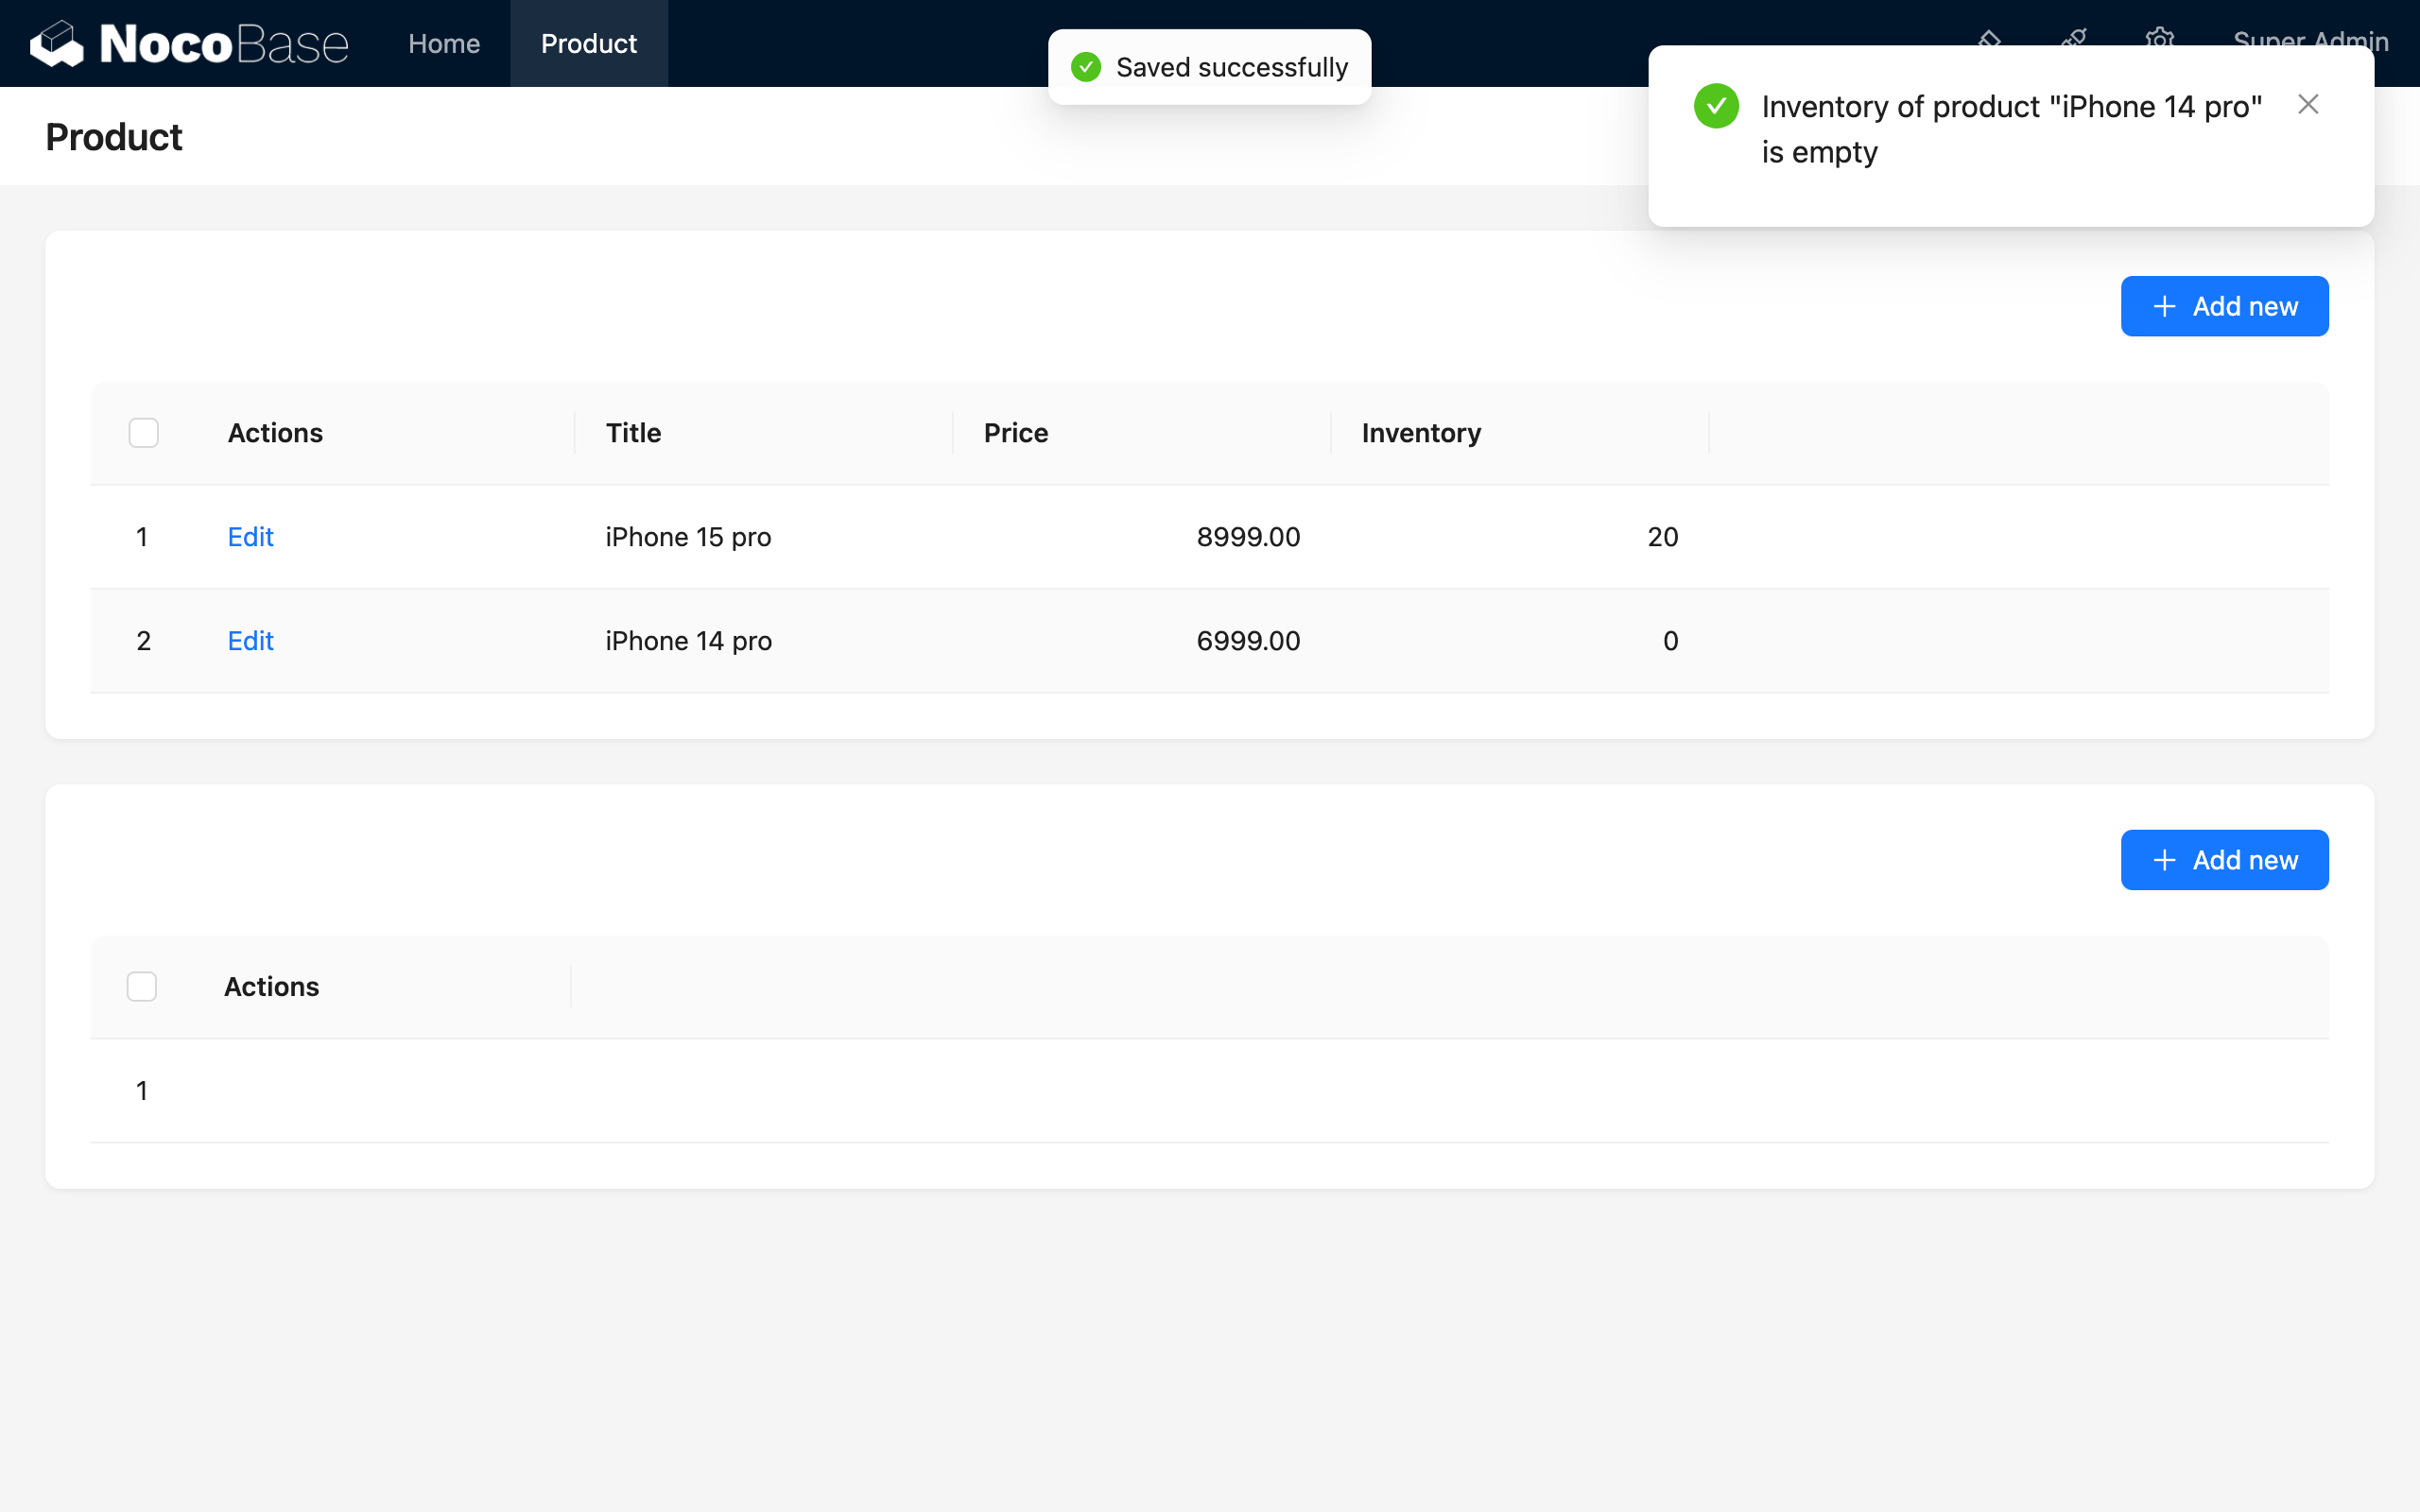
If the "End workflow" node is configured to exit with a "Success" status, the action request will still be intercepted when this node is executed, but the returned response message will be displayed with a "Success" status (instead of "Error"):
Example
Combining the basic instructions above, let's take an "Order Submission" scenario as an example. Suppose we need to check the inventory of all products selected by the user when they submit an order. If the inventory of any selected product is insufficient, the order submission is intercepted, and a corresponding prompt message is returned. The workflow will loop through and check each product until the inventory for all products is sufficient, at which point it will proceed and create the order data for the user.
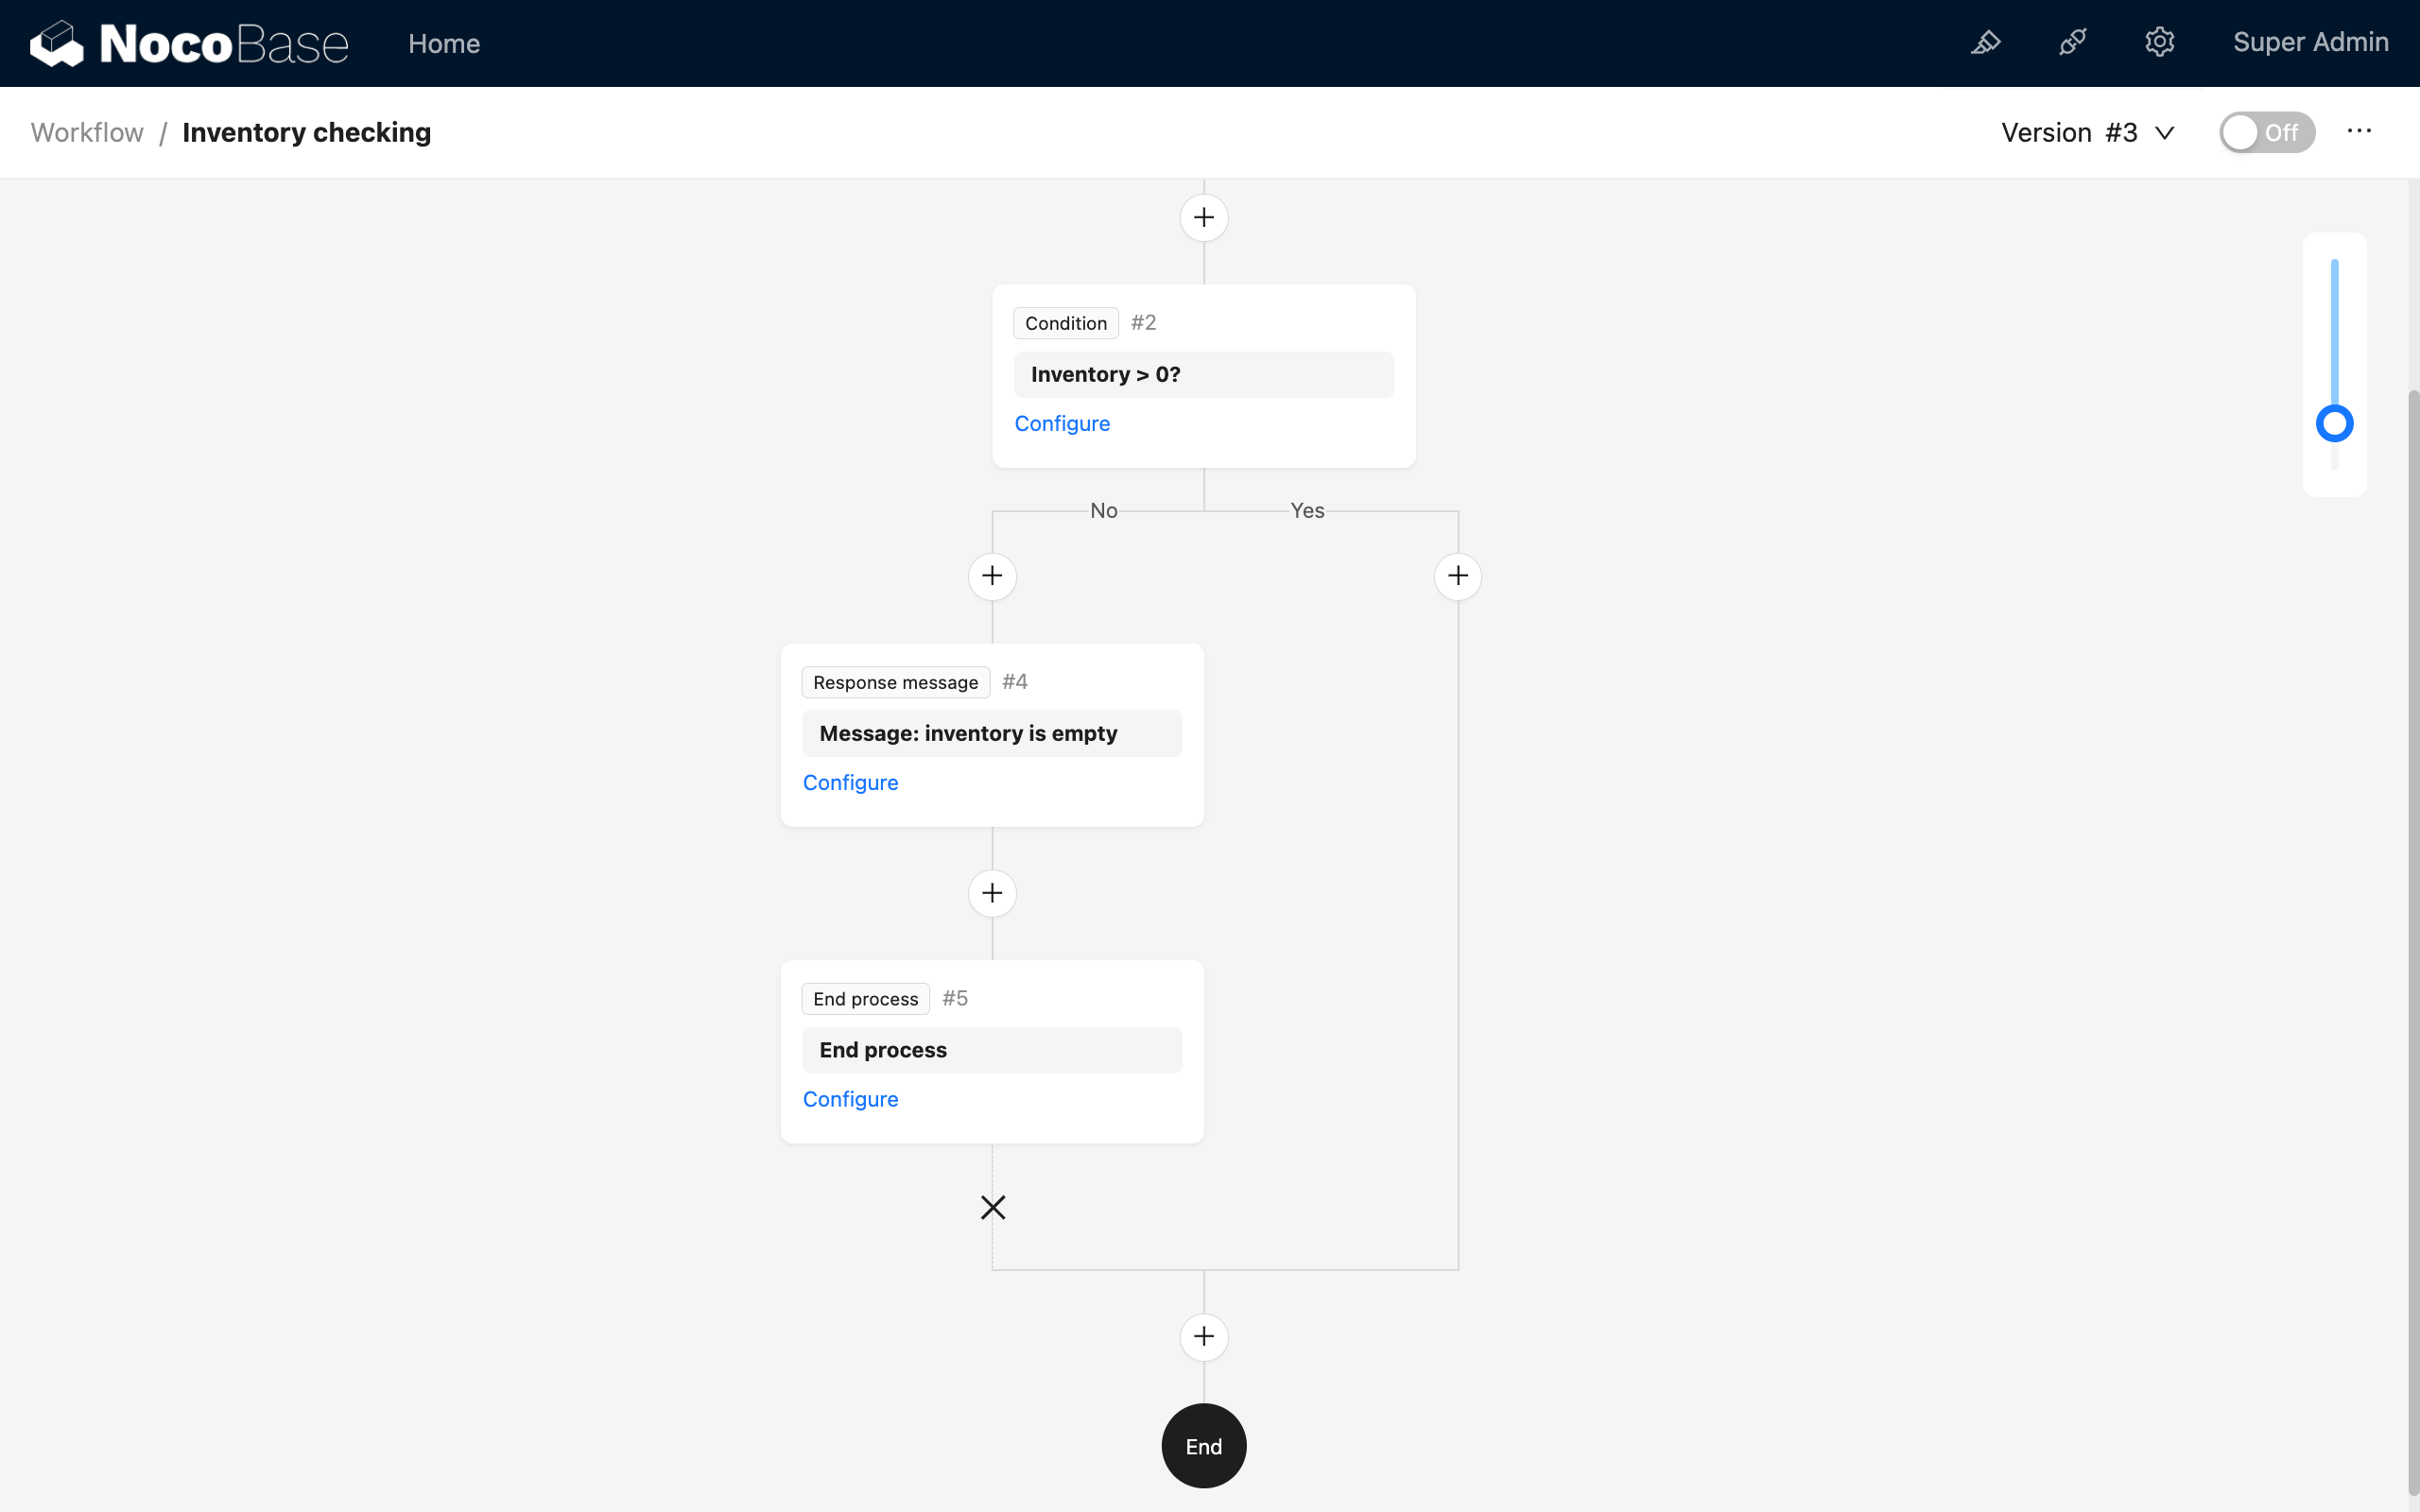
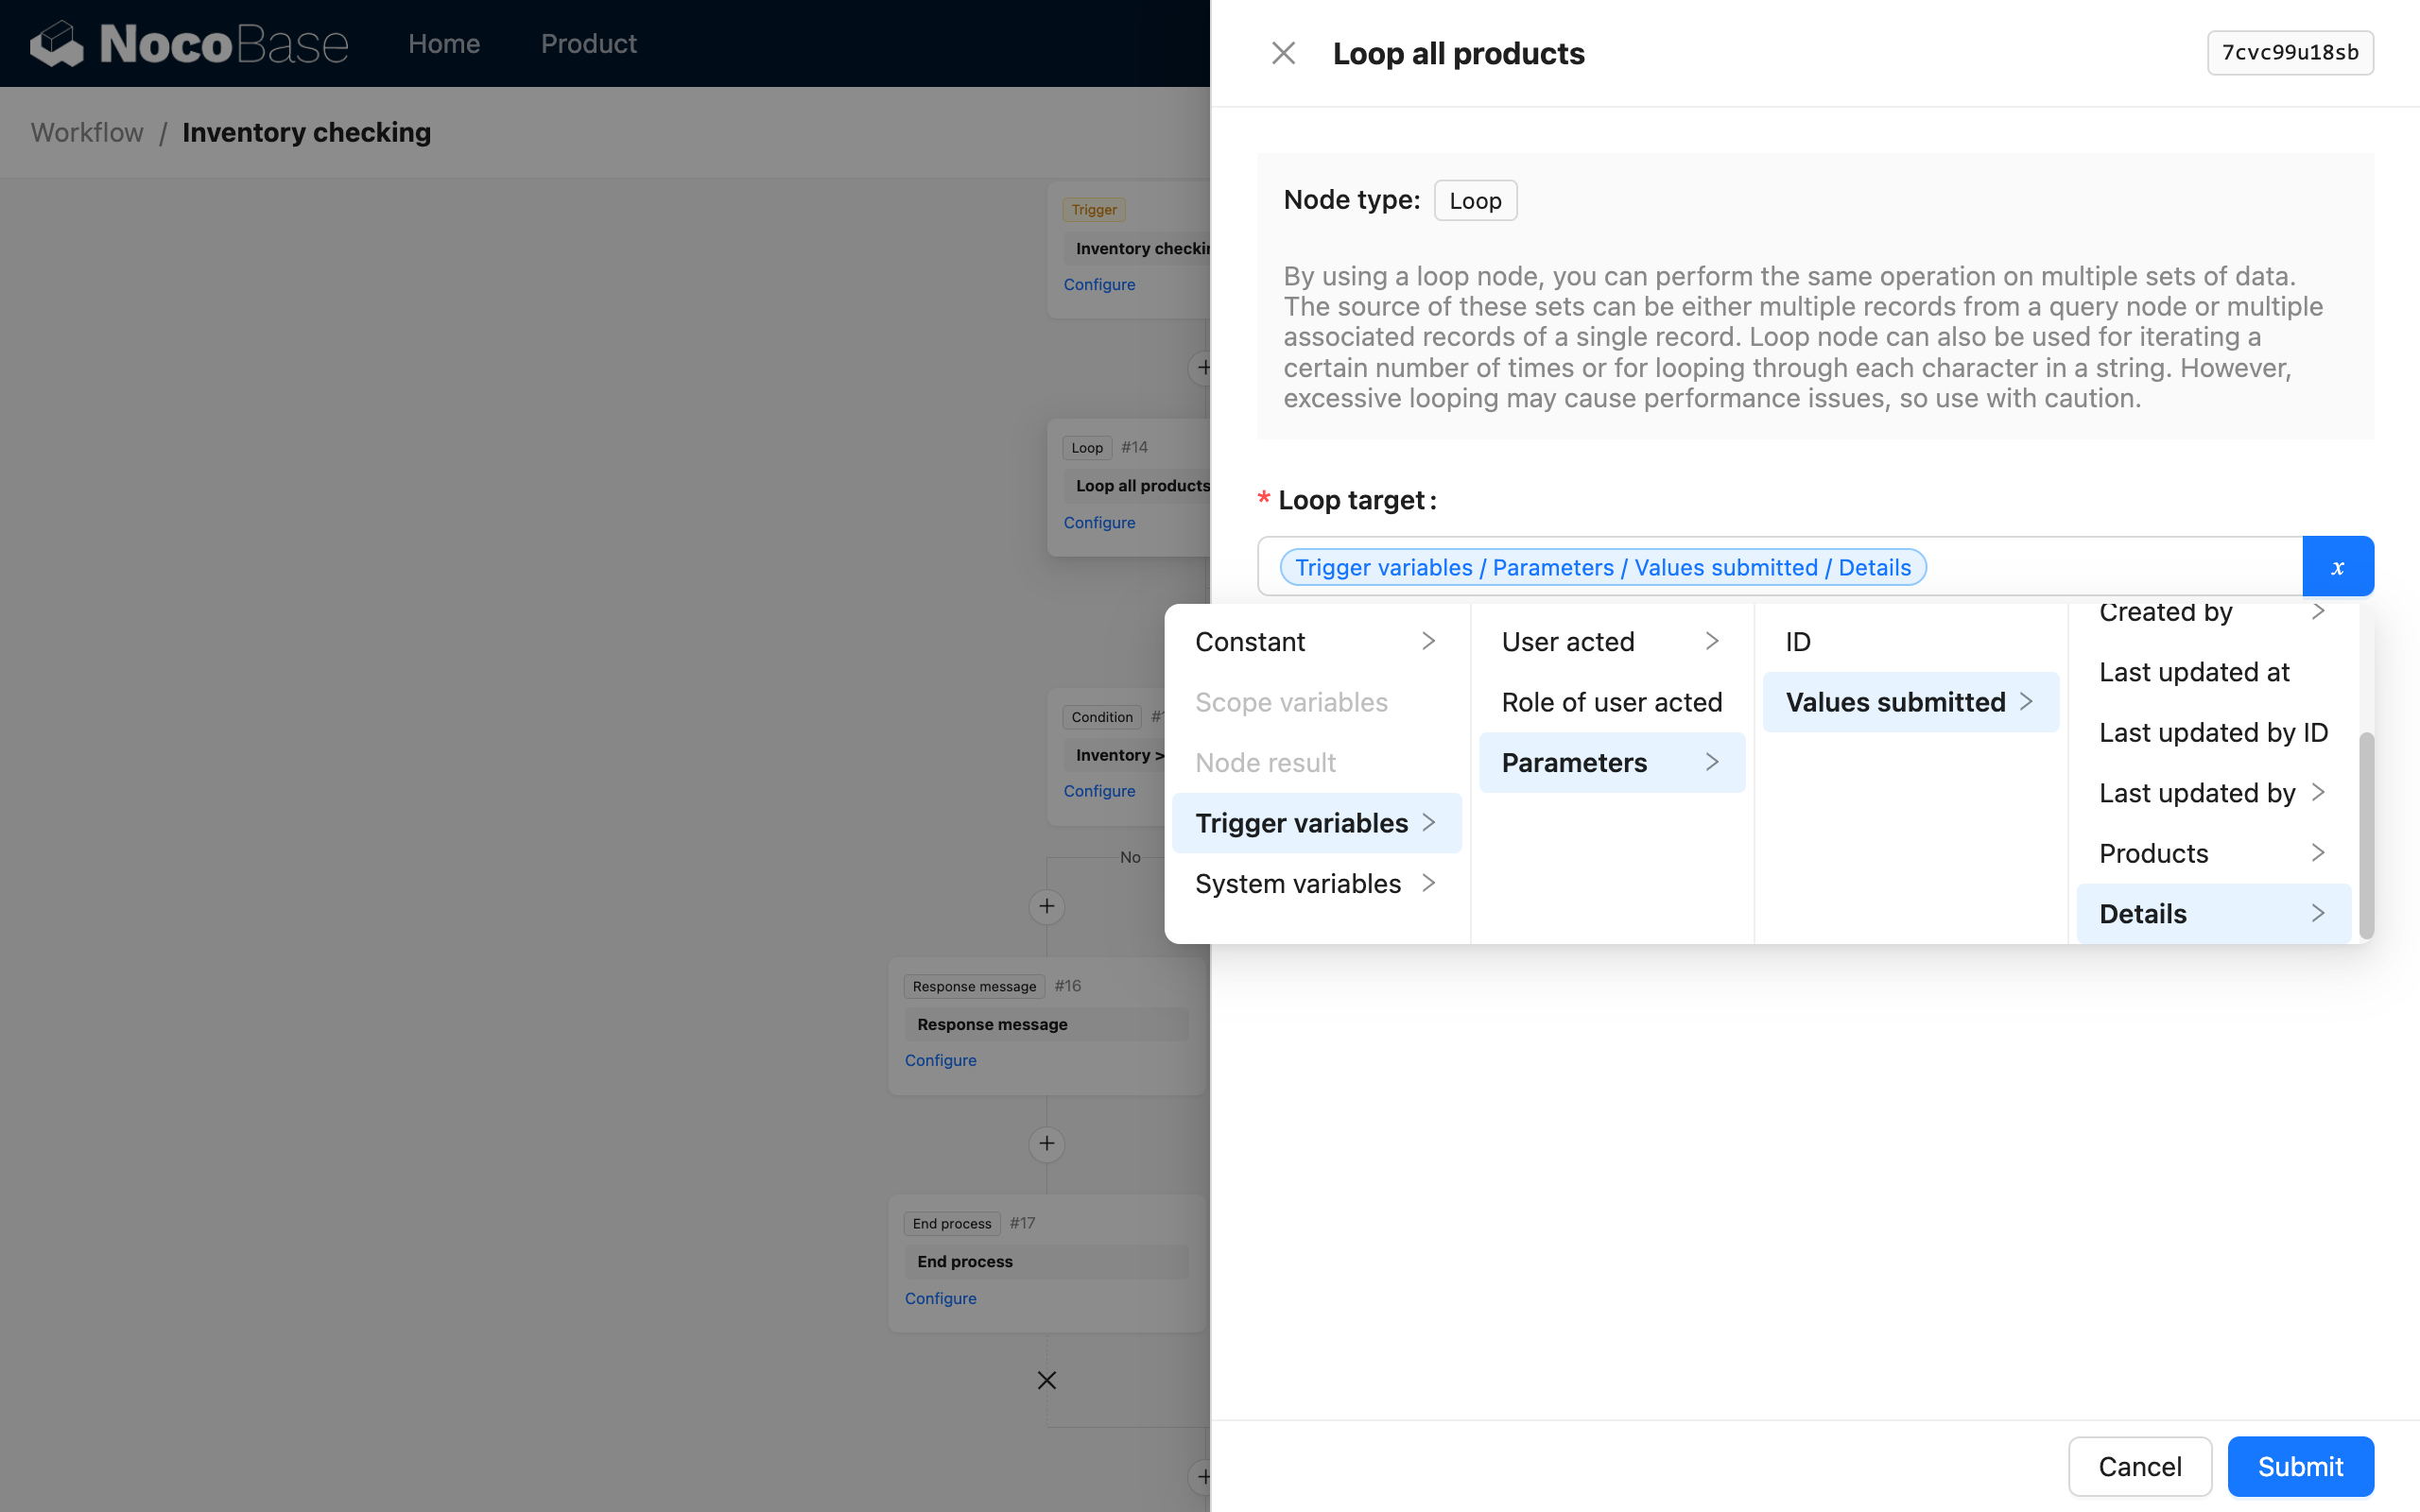
Other steps are the same as in the instructions. However, since an order involves multiple products, in addition to adding a many-to-many relationship "Order" <-- M:1 -- "Order Item" -- 1:M --> "Product" in the data model, you also need to add a "Loop" node in the "Before action event" workflow to iteratively check if the inventory of each product is sufficient:
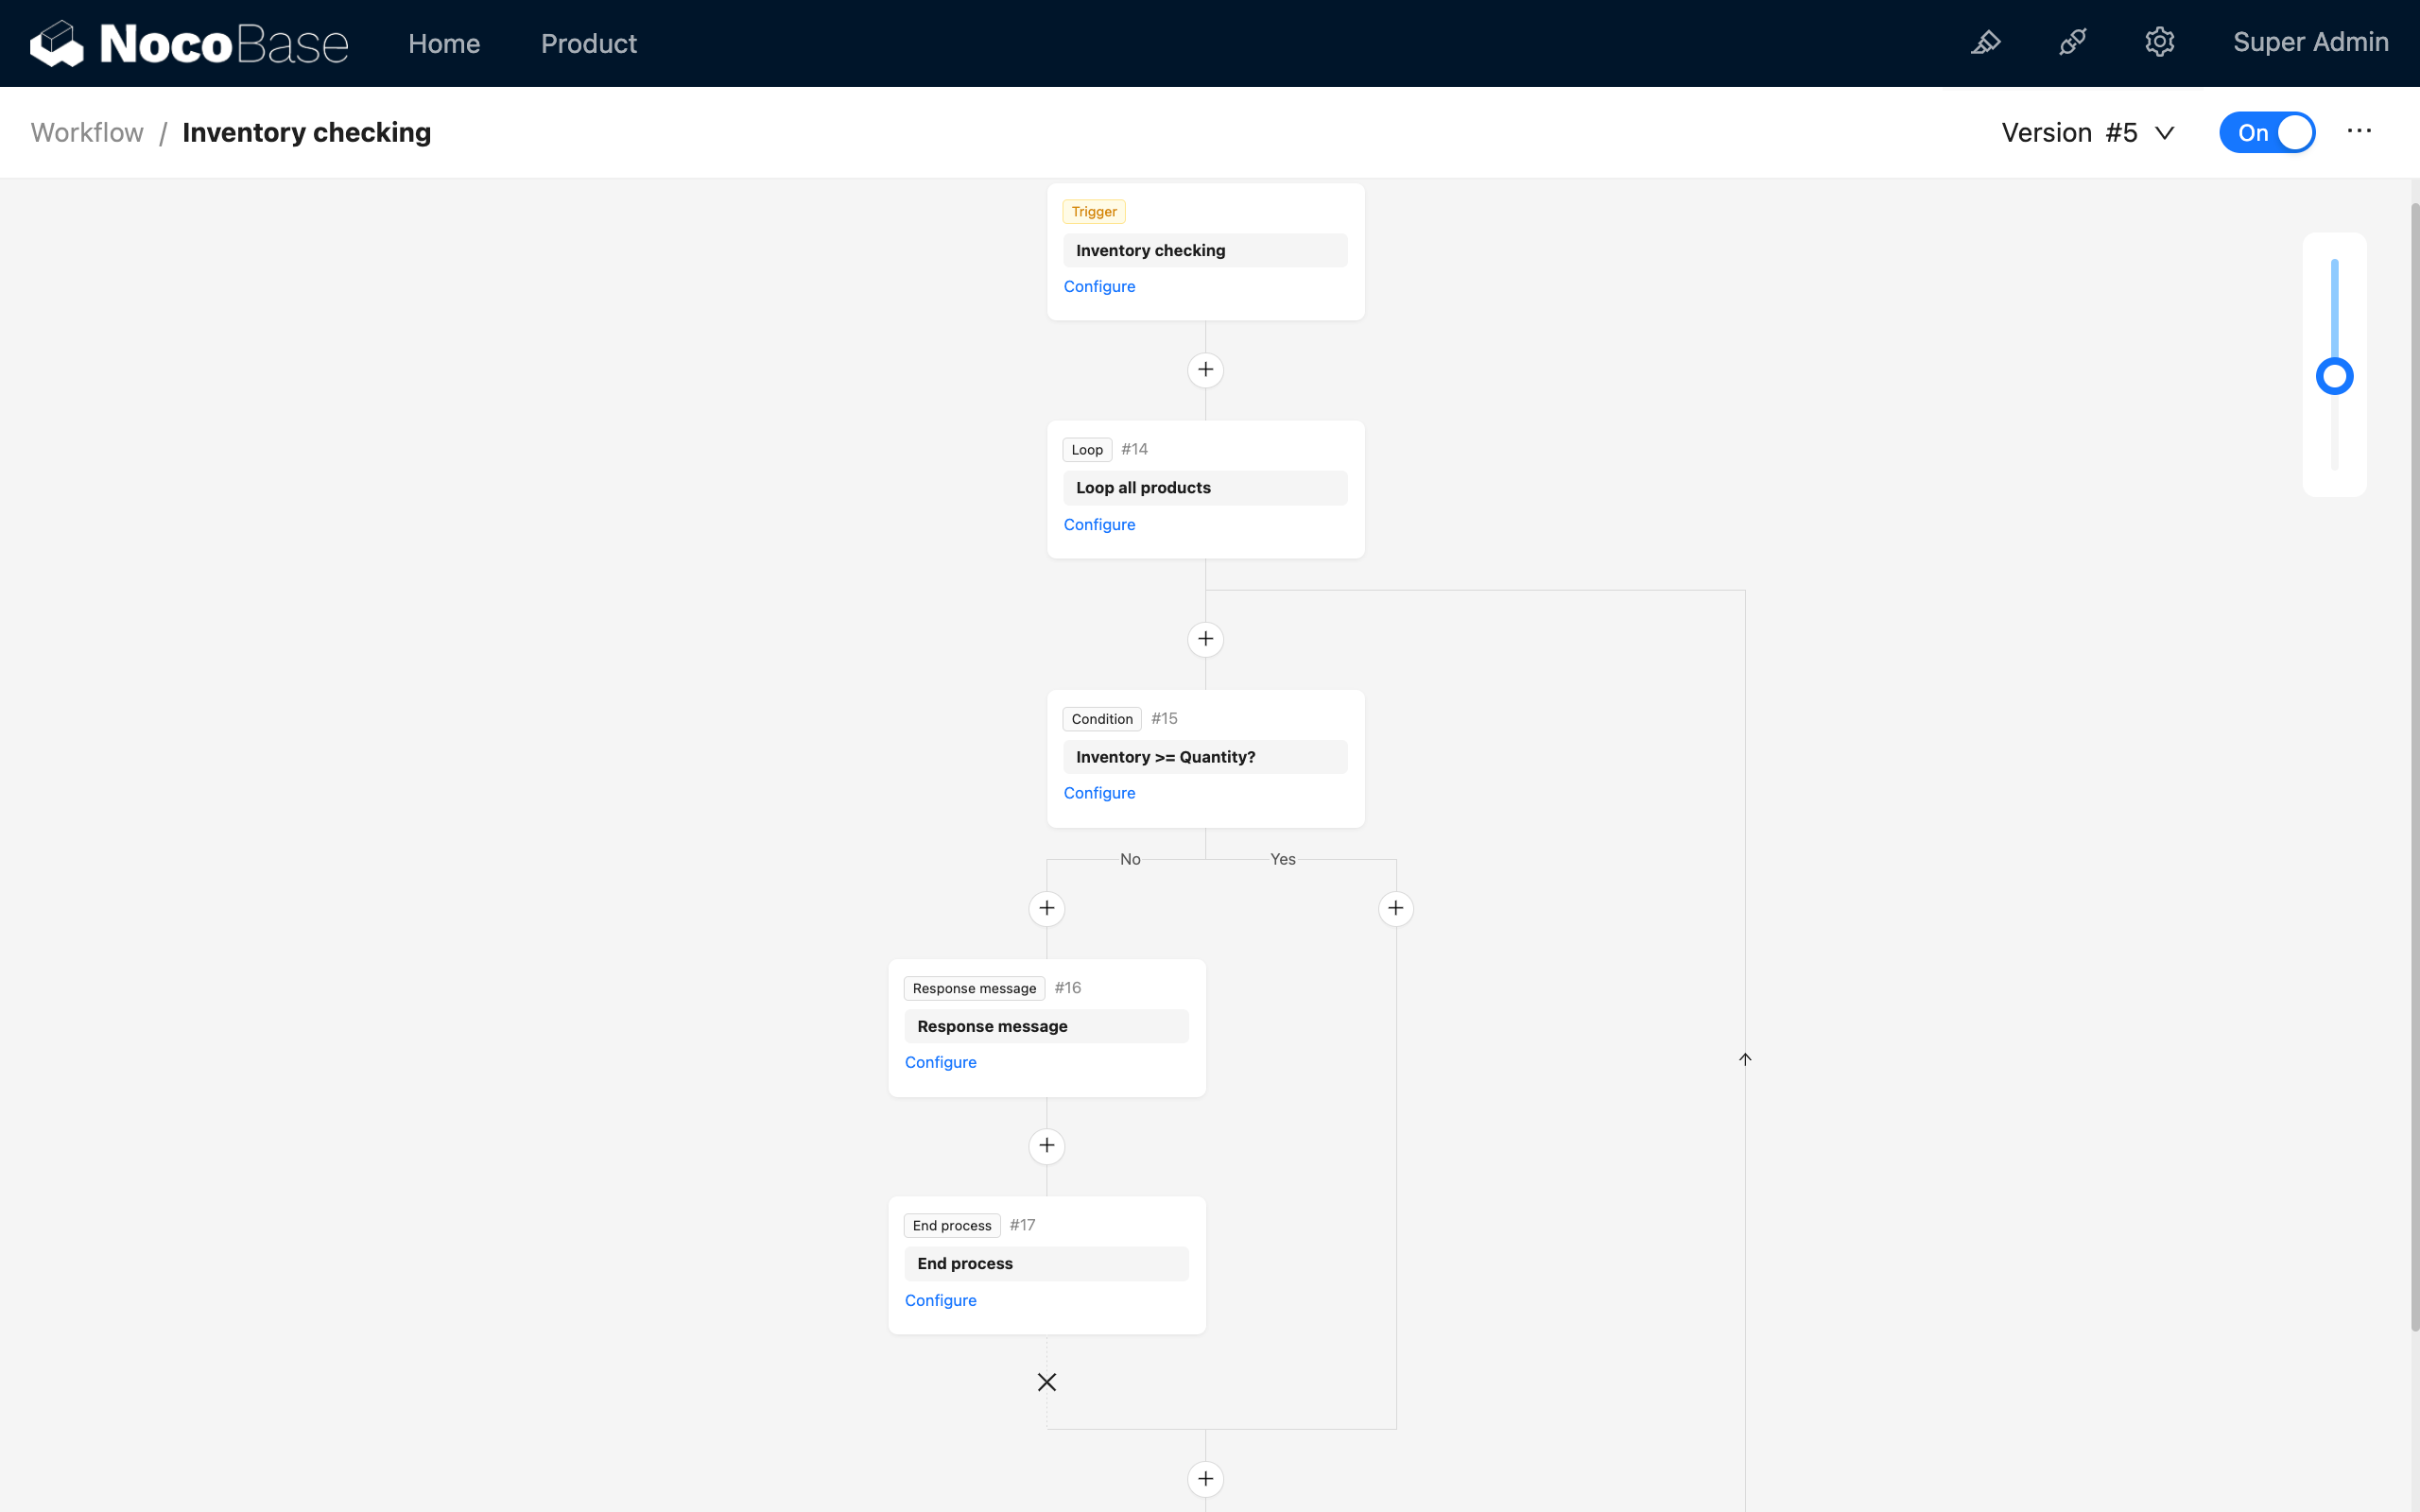
The object for the loop is selected as the "Order Item" array from the submitted order data:
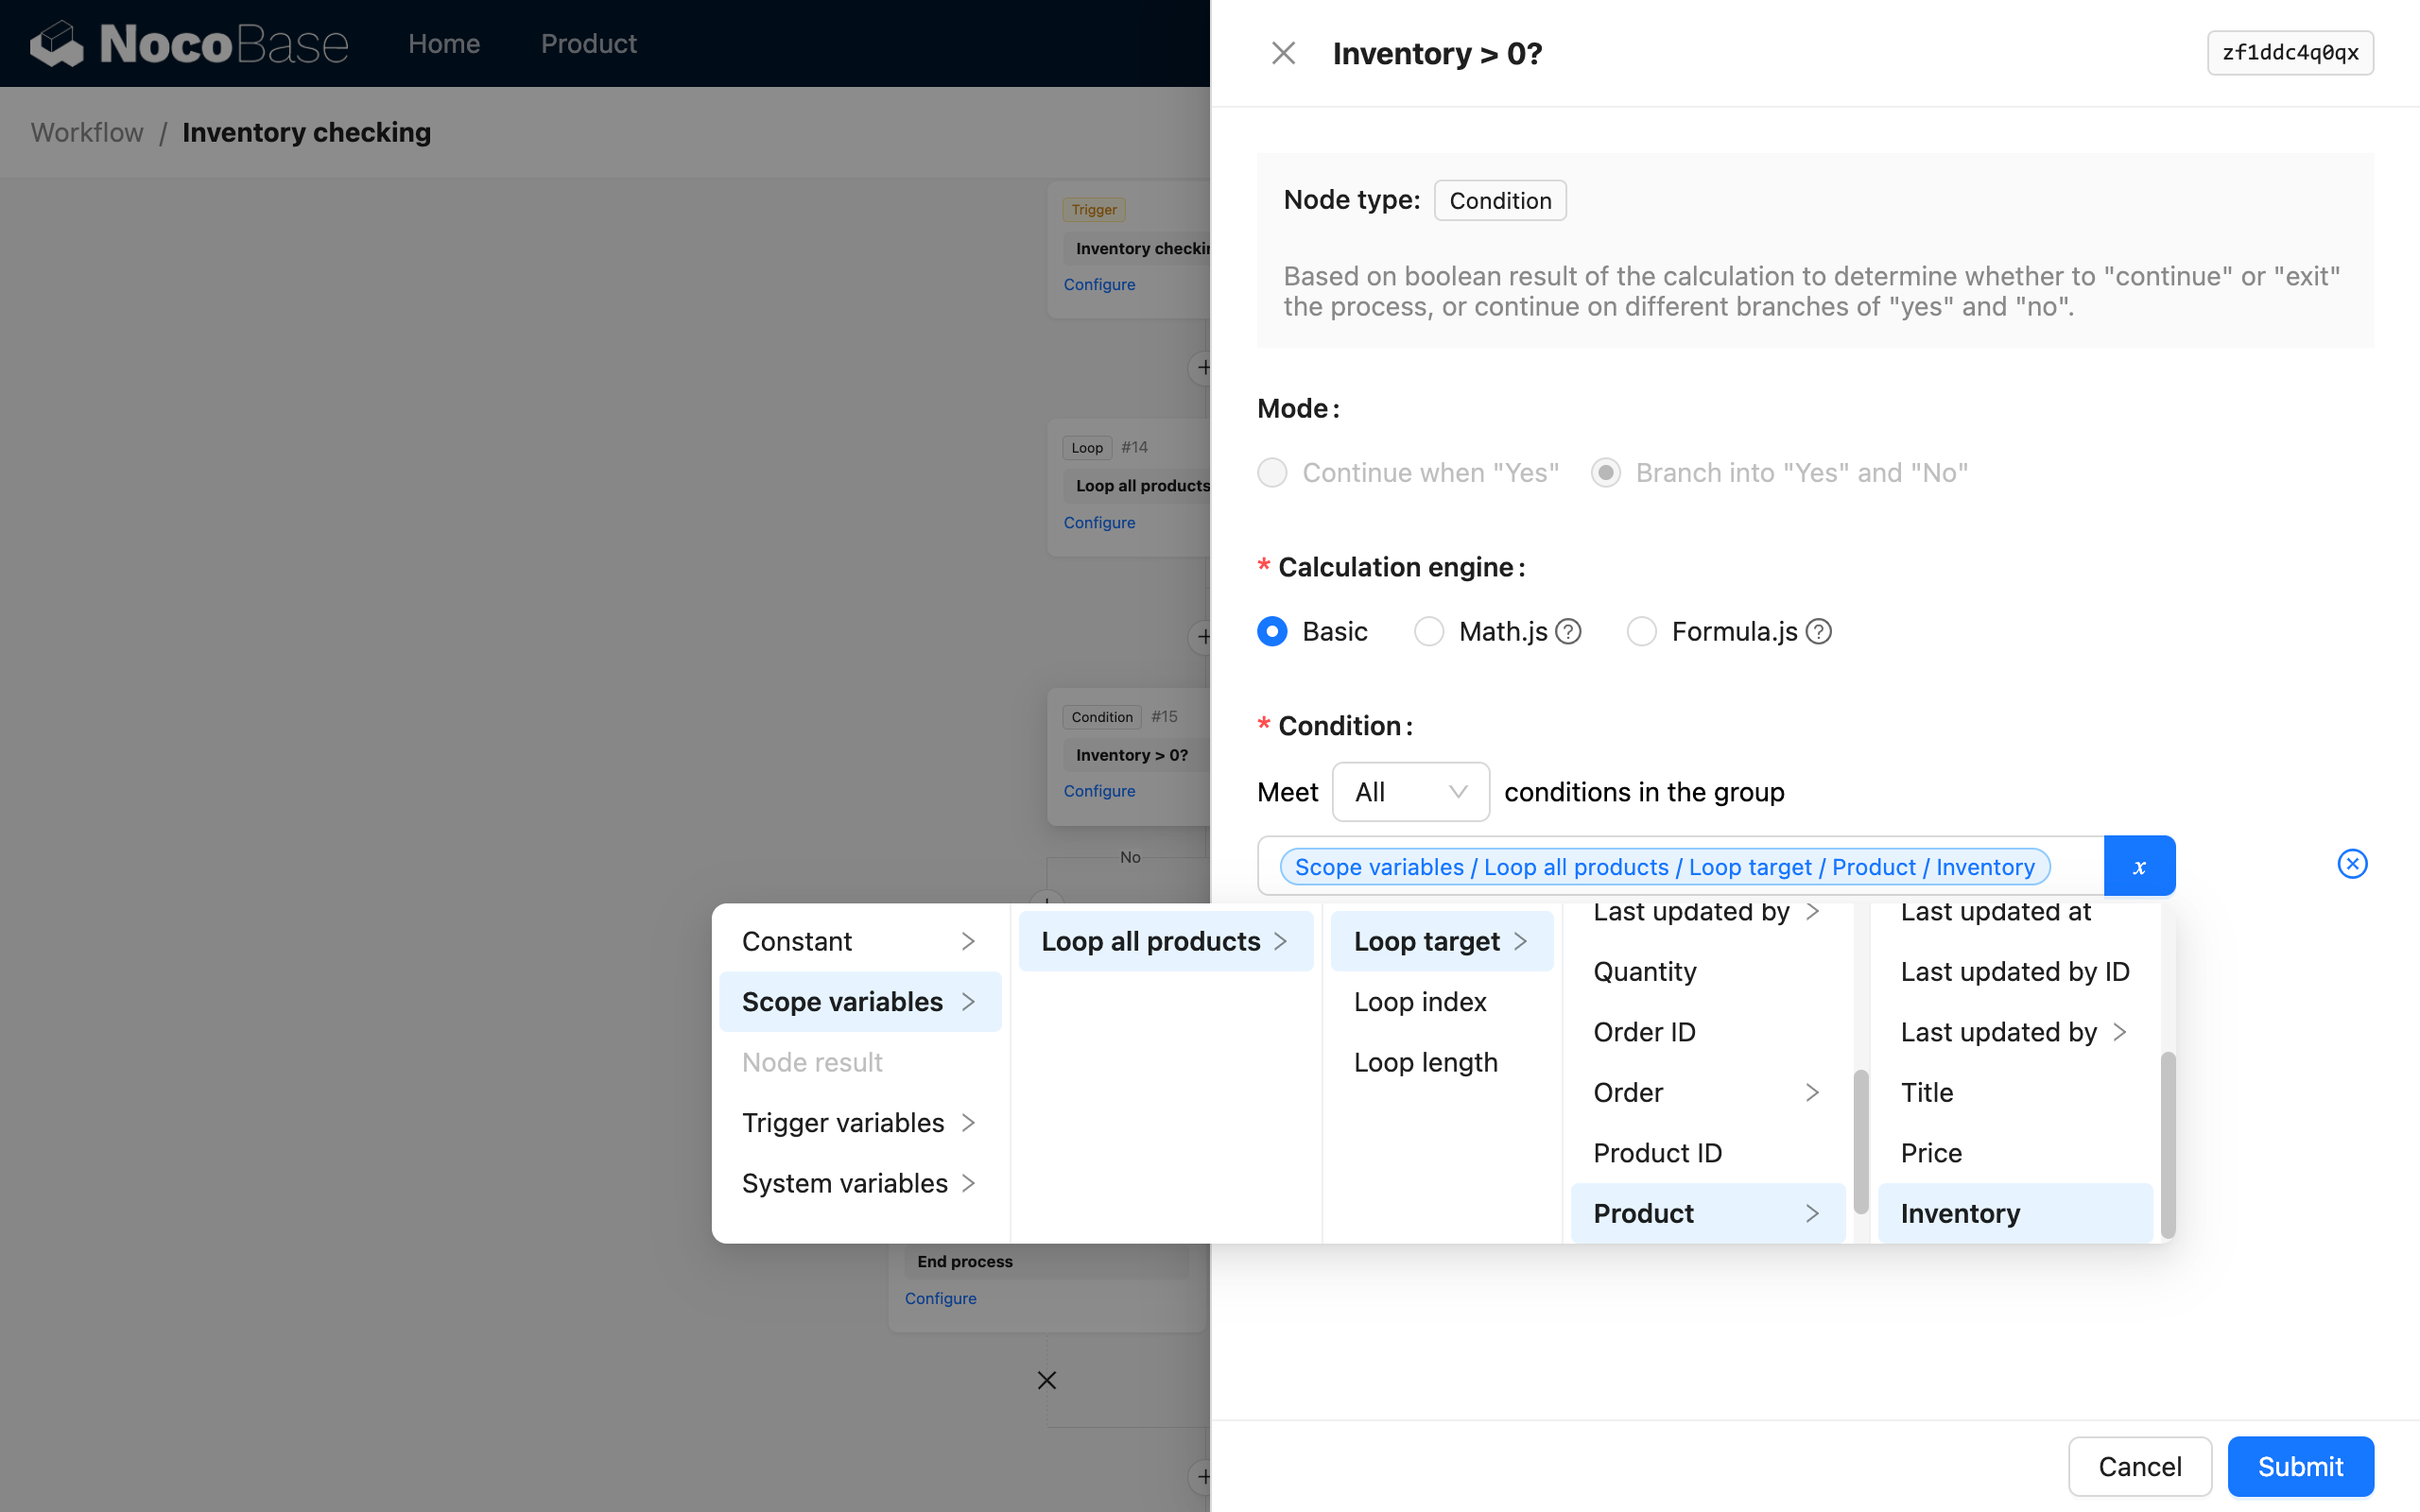
The condition node within the loop is used to determine if the inventory of the current product object in the loop is sufficient:
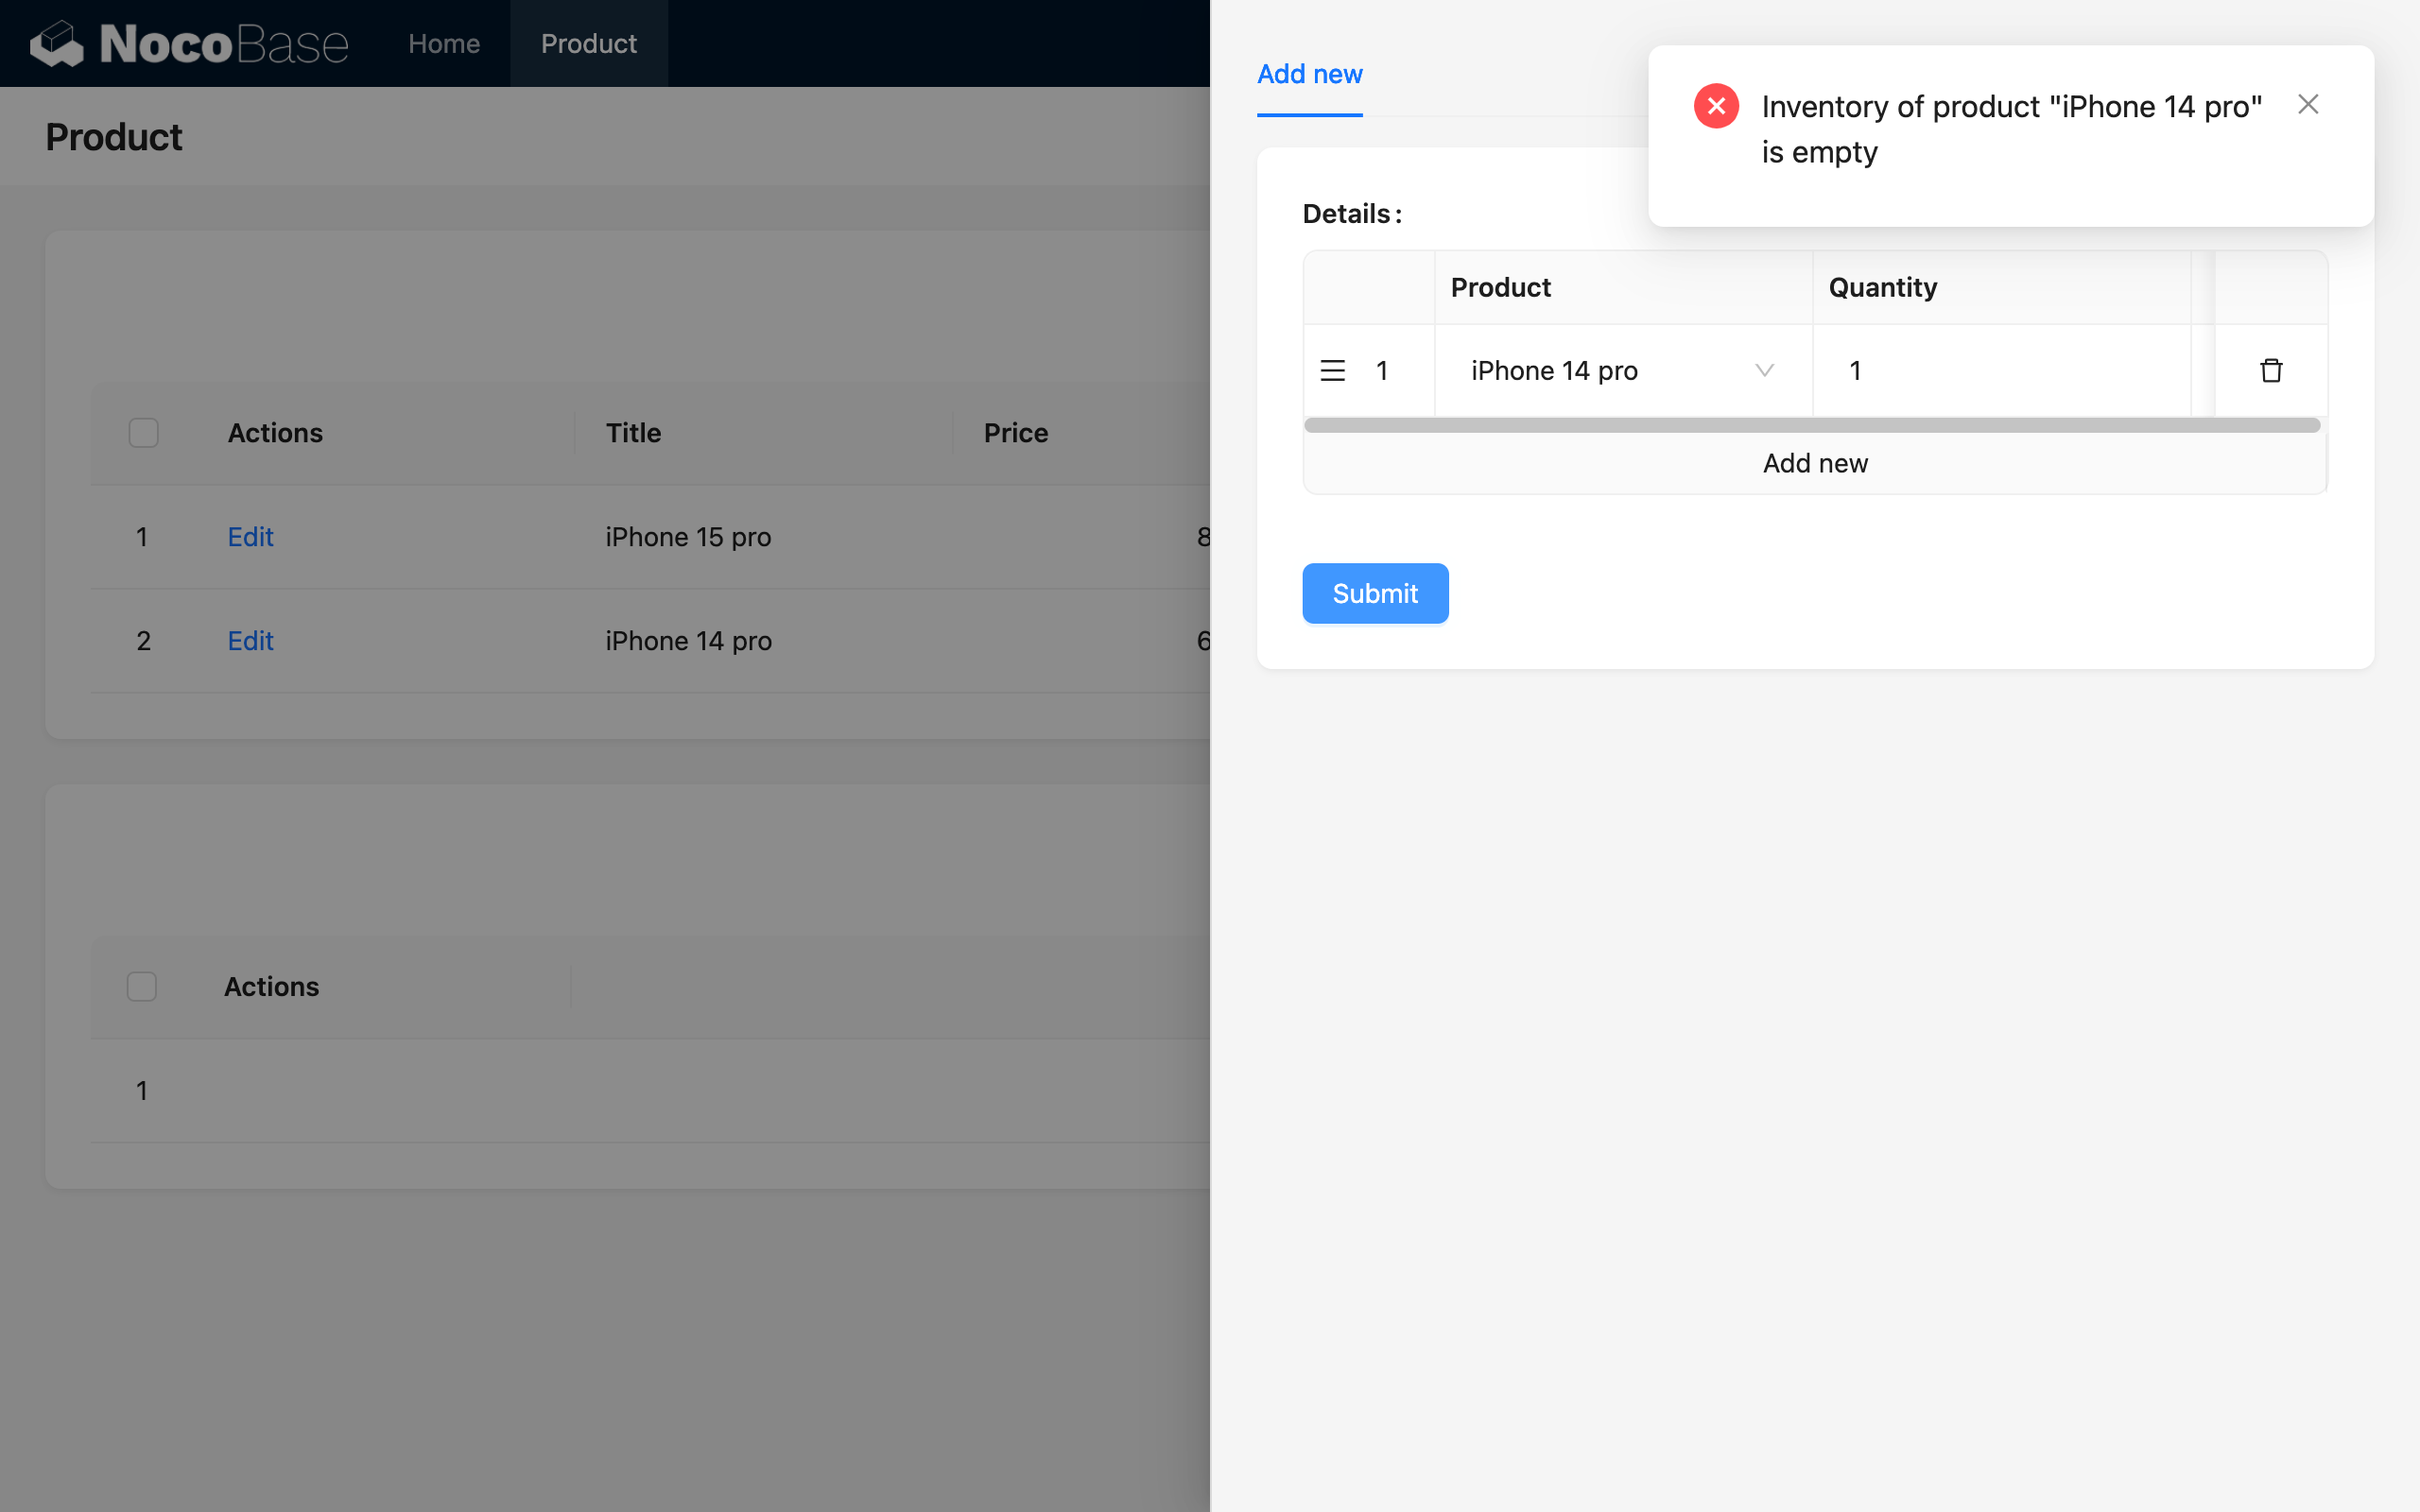
Other configurations are the same as in the basic usage. When the order is finally submitted, if any product has insufficient inventory, the order submission will be intercepted, and a corresponding prompt message will be returned. During testing, try submitting an order with multiple products, where one has insufficient inventory and another has sufficient inventory. You can see the returned response message:
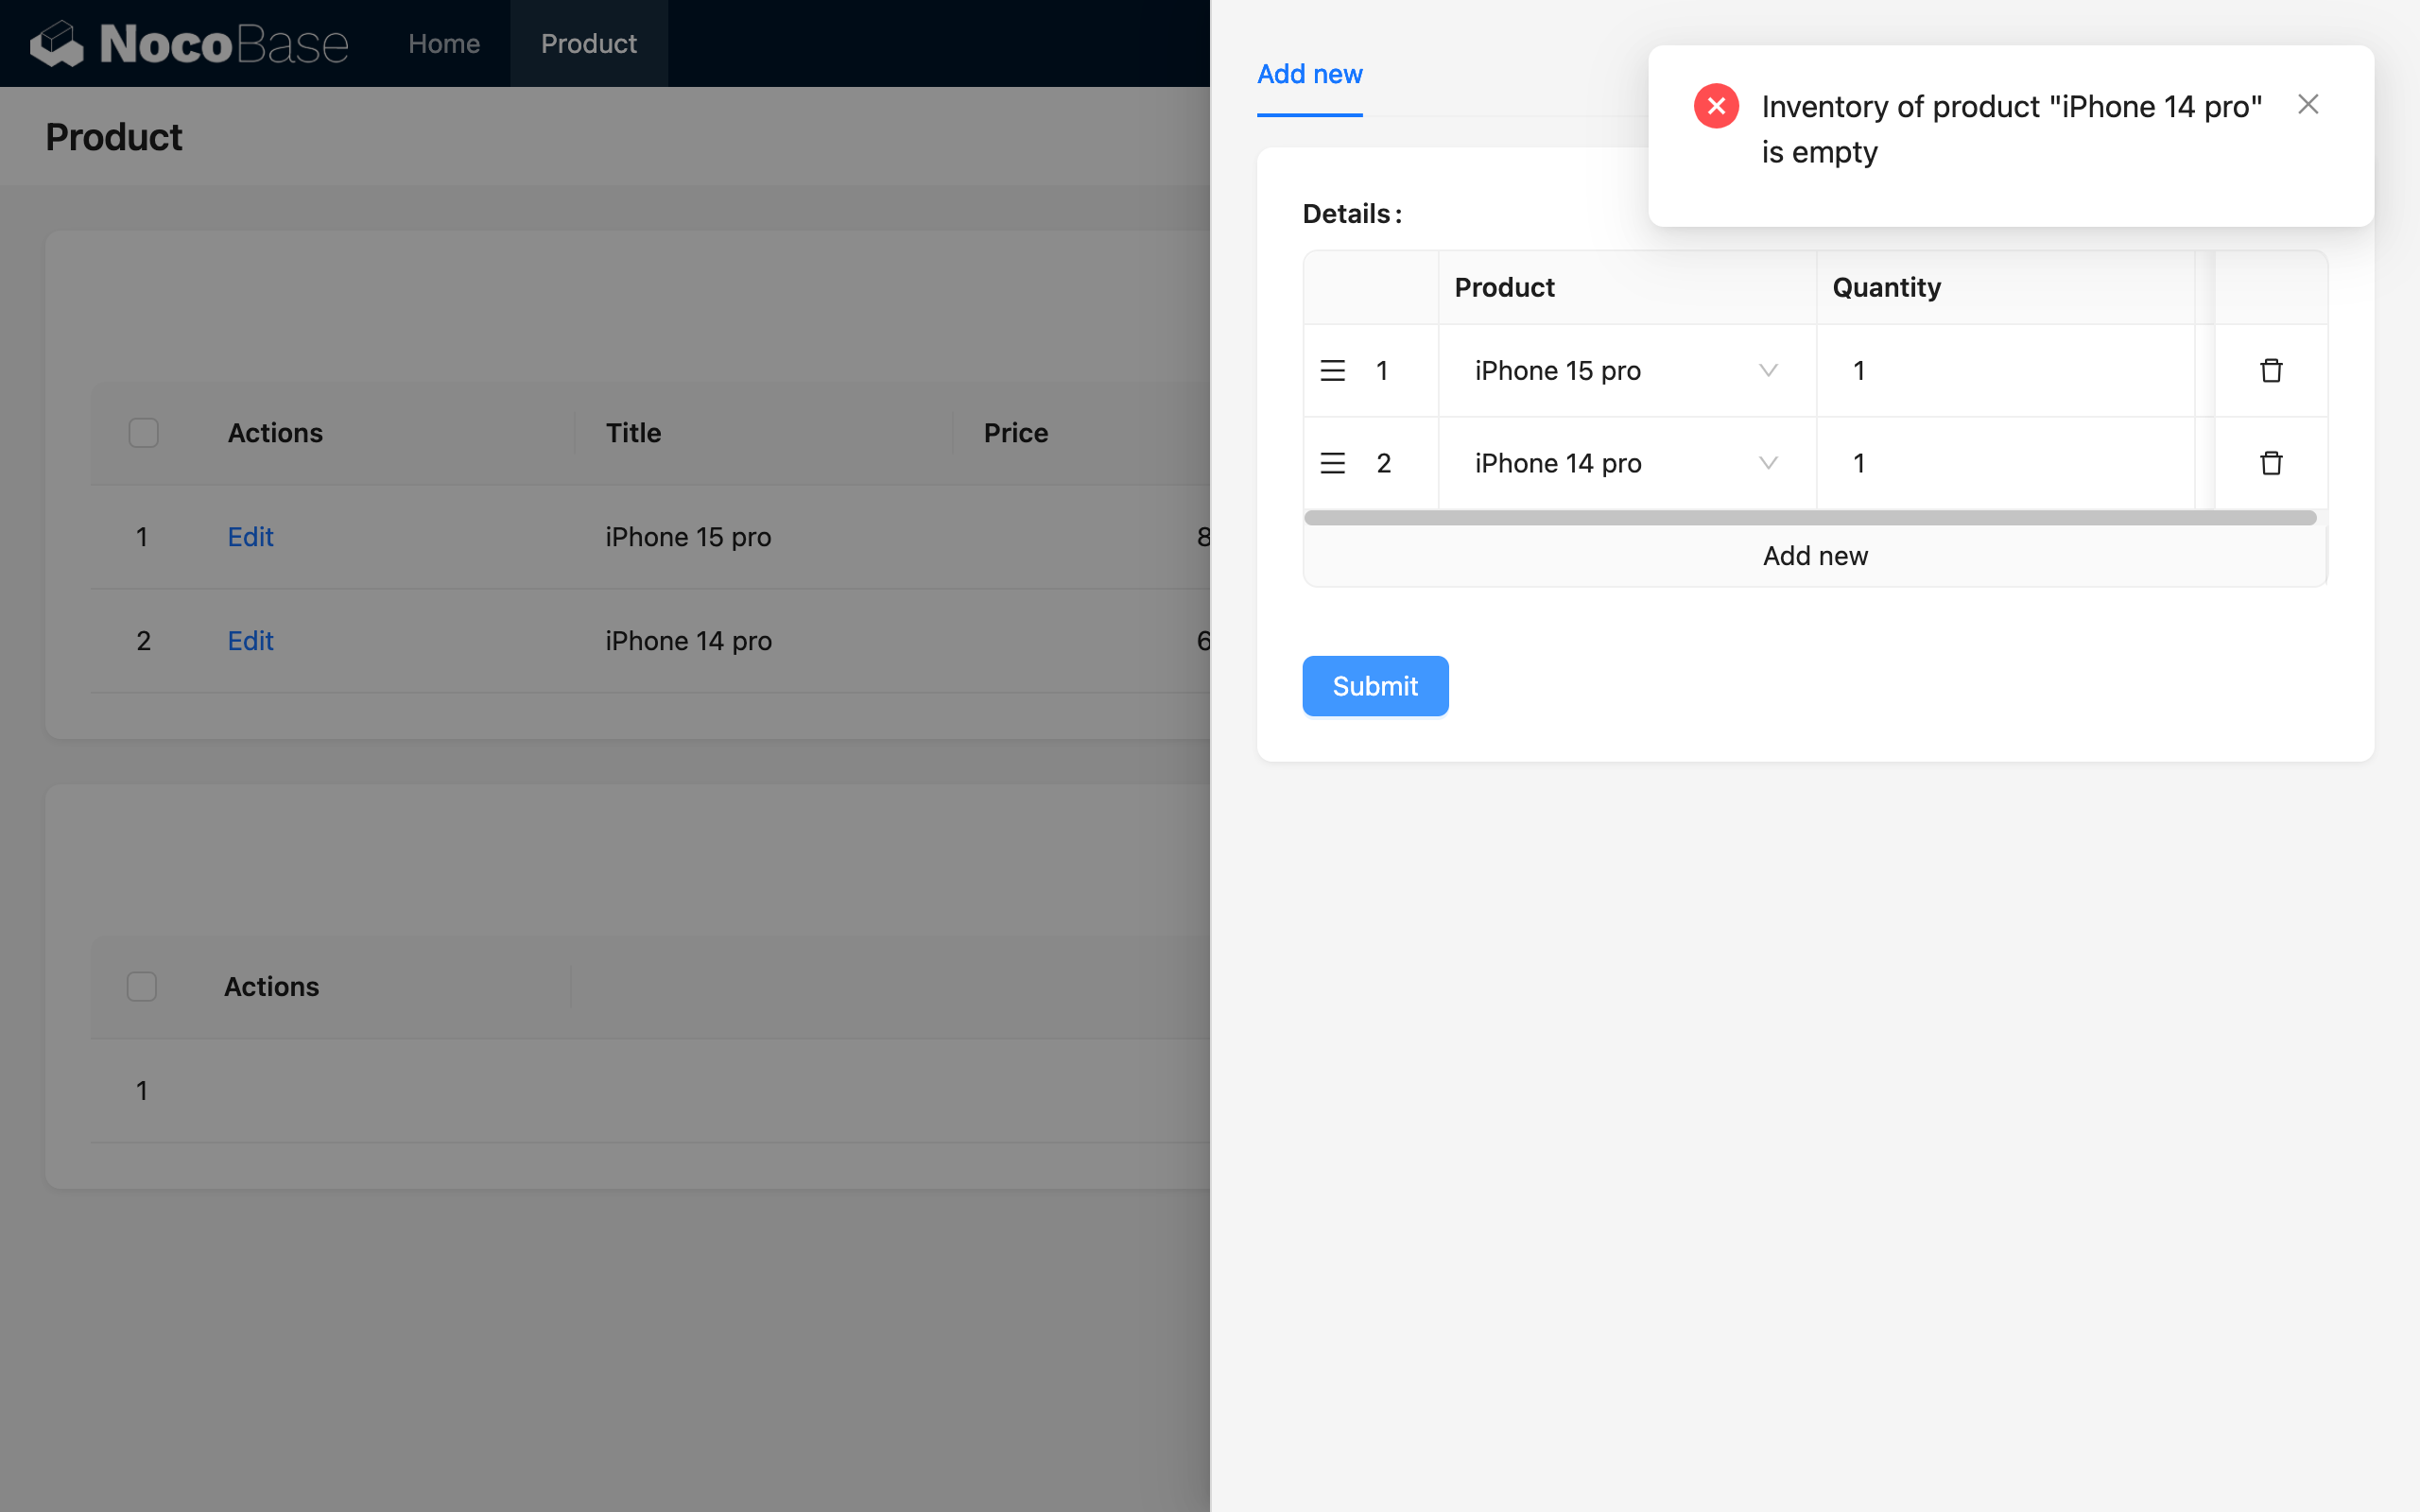
As you can see, the response message does not indicate that the first product, "iPhone 15 pro," is out of stock, but only that the second product, "iPhone 14 pro," is. This is because in the loop, the first product has sufficient inventory, so it is not intercepted, while the second product has insufficient inventory, which intercepts the order submission.
External Invocation
The Before Action Event itself is injected during the request processing phase, so it also supports being triggered via HTTP API calls.
For workflows that are locally bound to an action button, you can call them like this (using the create button of the posts collection as an example):
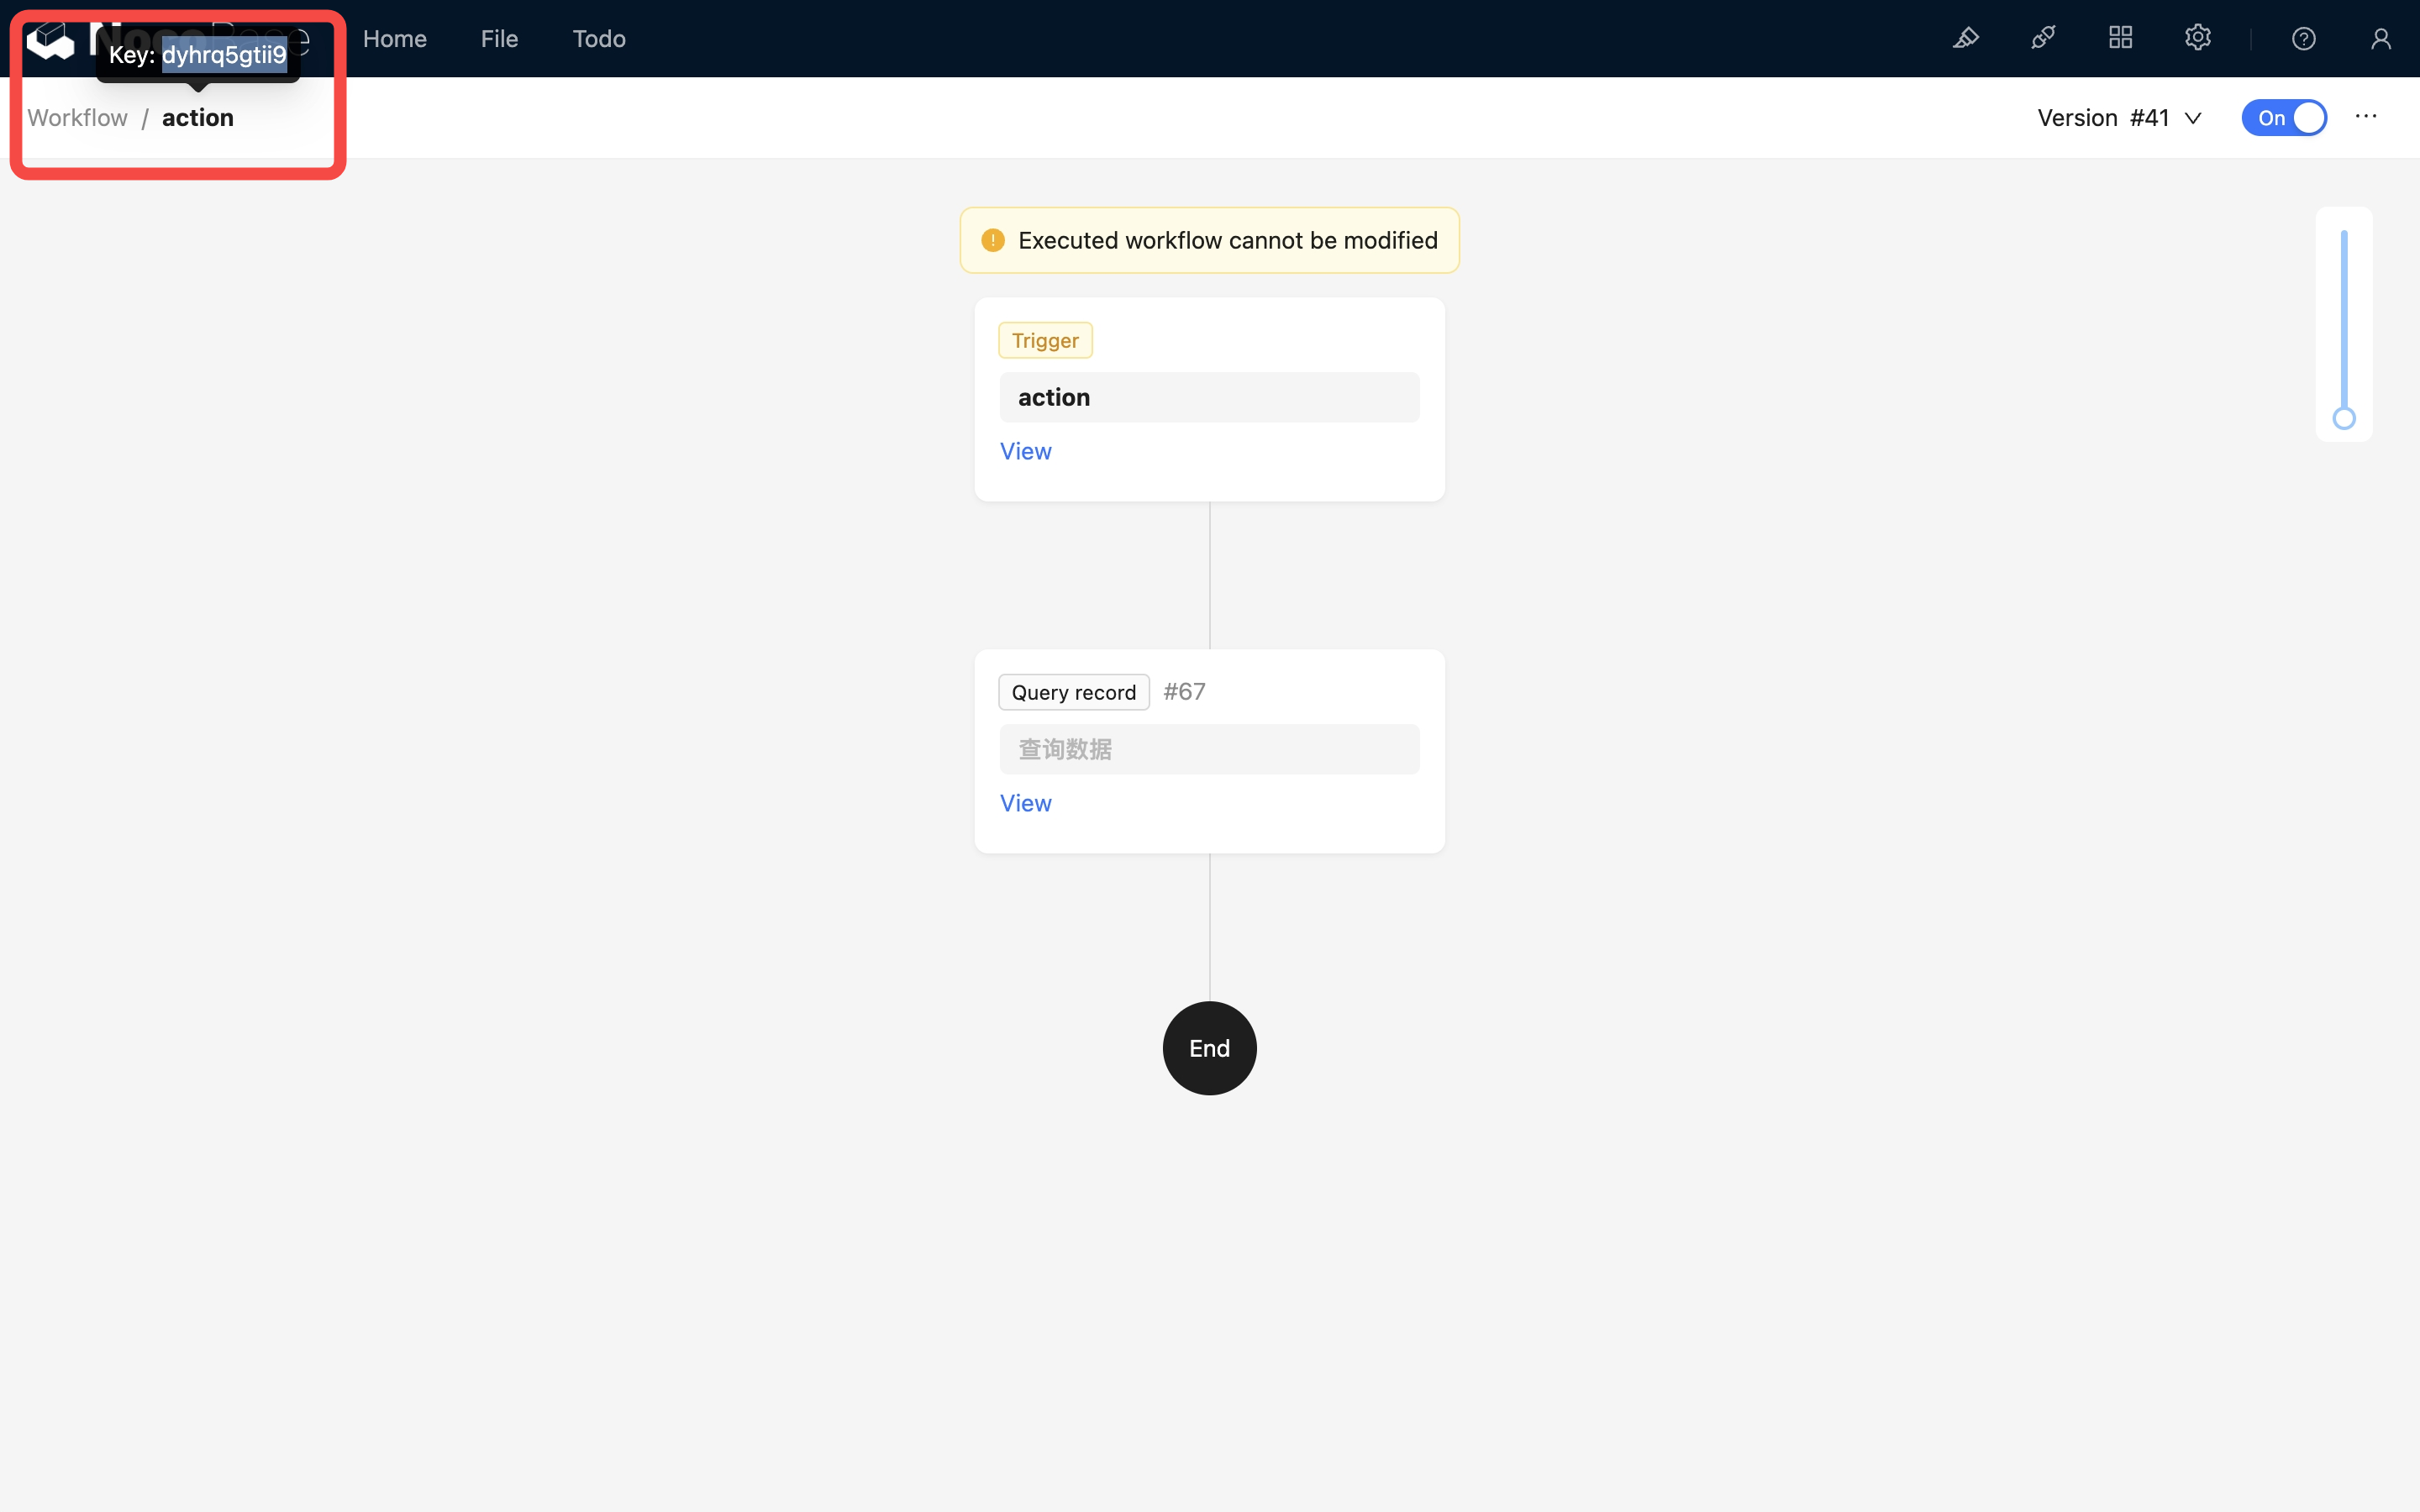
The URL parameter triggerWorkflows is the key of the workflow; multiple workflow keys are separated by commas. This key can be obtained by hovering the mouse over the workflow name at the top of the workflow canvas:
After the above call is made, the Before Action Event for the corresponding posts collection will be triggered. After the corresponding workflow is processed synchronously, the data will be created and returned normally.
If the configured workflow reaches an "End node", the logic is the same as with an interface action: the request will be intercepted, and no data will be created. If the end node's status is configured as failed, the returned response status code will be 400; if successful, it will be 200.
If a "Response message" node is also configured before the end node, the generated message will also be returned in the response result. The structure for an error is:
The message structure when the "End node" is configured for success is:
Since multiple "Response message" nodes can be added in a workflow, the returned message data structure is an array.
If the Before Action Event is configured in global mode, you do not need to use the triggerWorkflows URL parameter to specify the corresponding workflow when calling the HTTP API. Simply calling the corresponding collection action will trigger it.
When triggering a before action event via an HTTP API call, you also need to pay attention to the enabled status of the workflow and whether the collection configuration matches, otherwise the call may not succeed or may result in an error.