Delay
Introduction
The Delay node can add a delay to the workflow. After the delay ends, it can either continue to execute the subsequent nodes or terminate the workflow in advance, depending on the configuration.
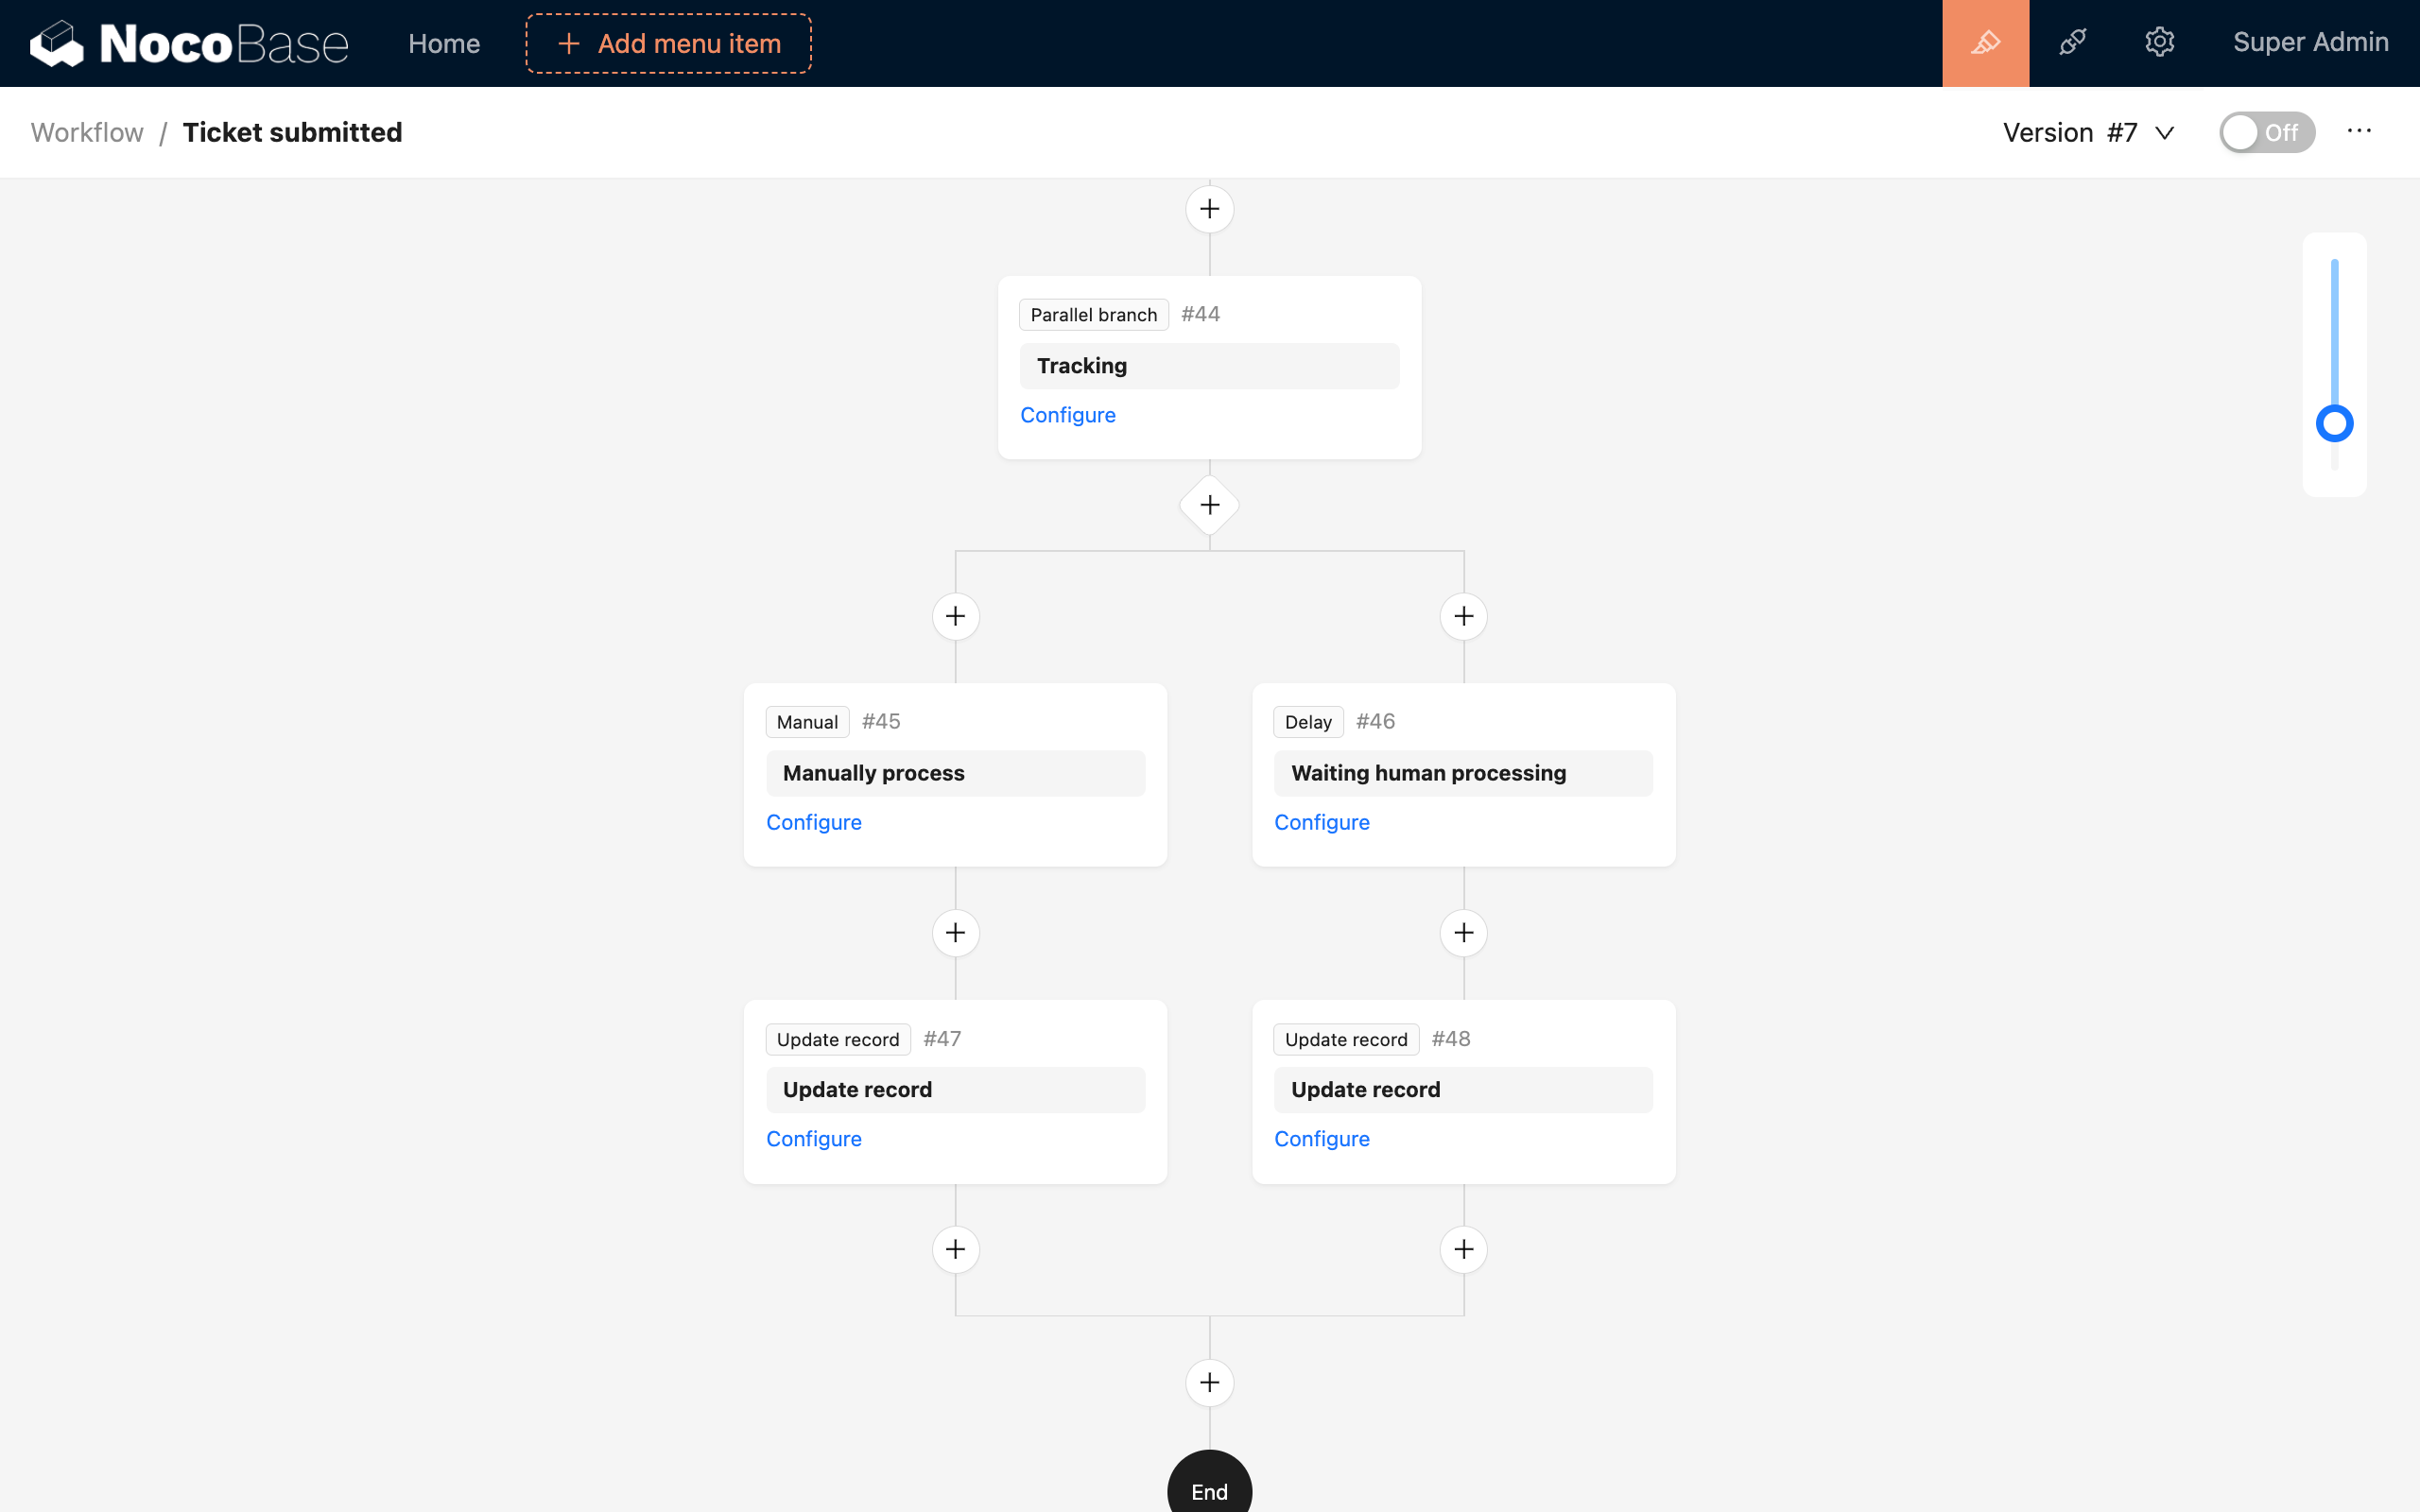
It is often used with the Parallel Branch node. A Delay node can be added to one of the branches to handle post-timeout processing. For example, in a parallel branch, one branch contains manual processing and the other contains a Delay node. When the manual processing times out, setting it to fail on timeout requires the manual processing to be completed within the limited time. Setting it to continue on timeout allows the manual processing to be ignored after the time is up.
Installation
Built-in plugin, no installation required.
Create Node
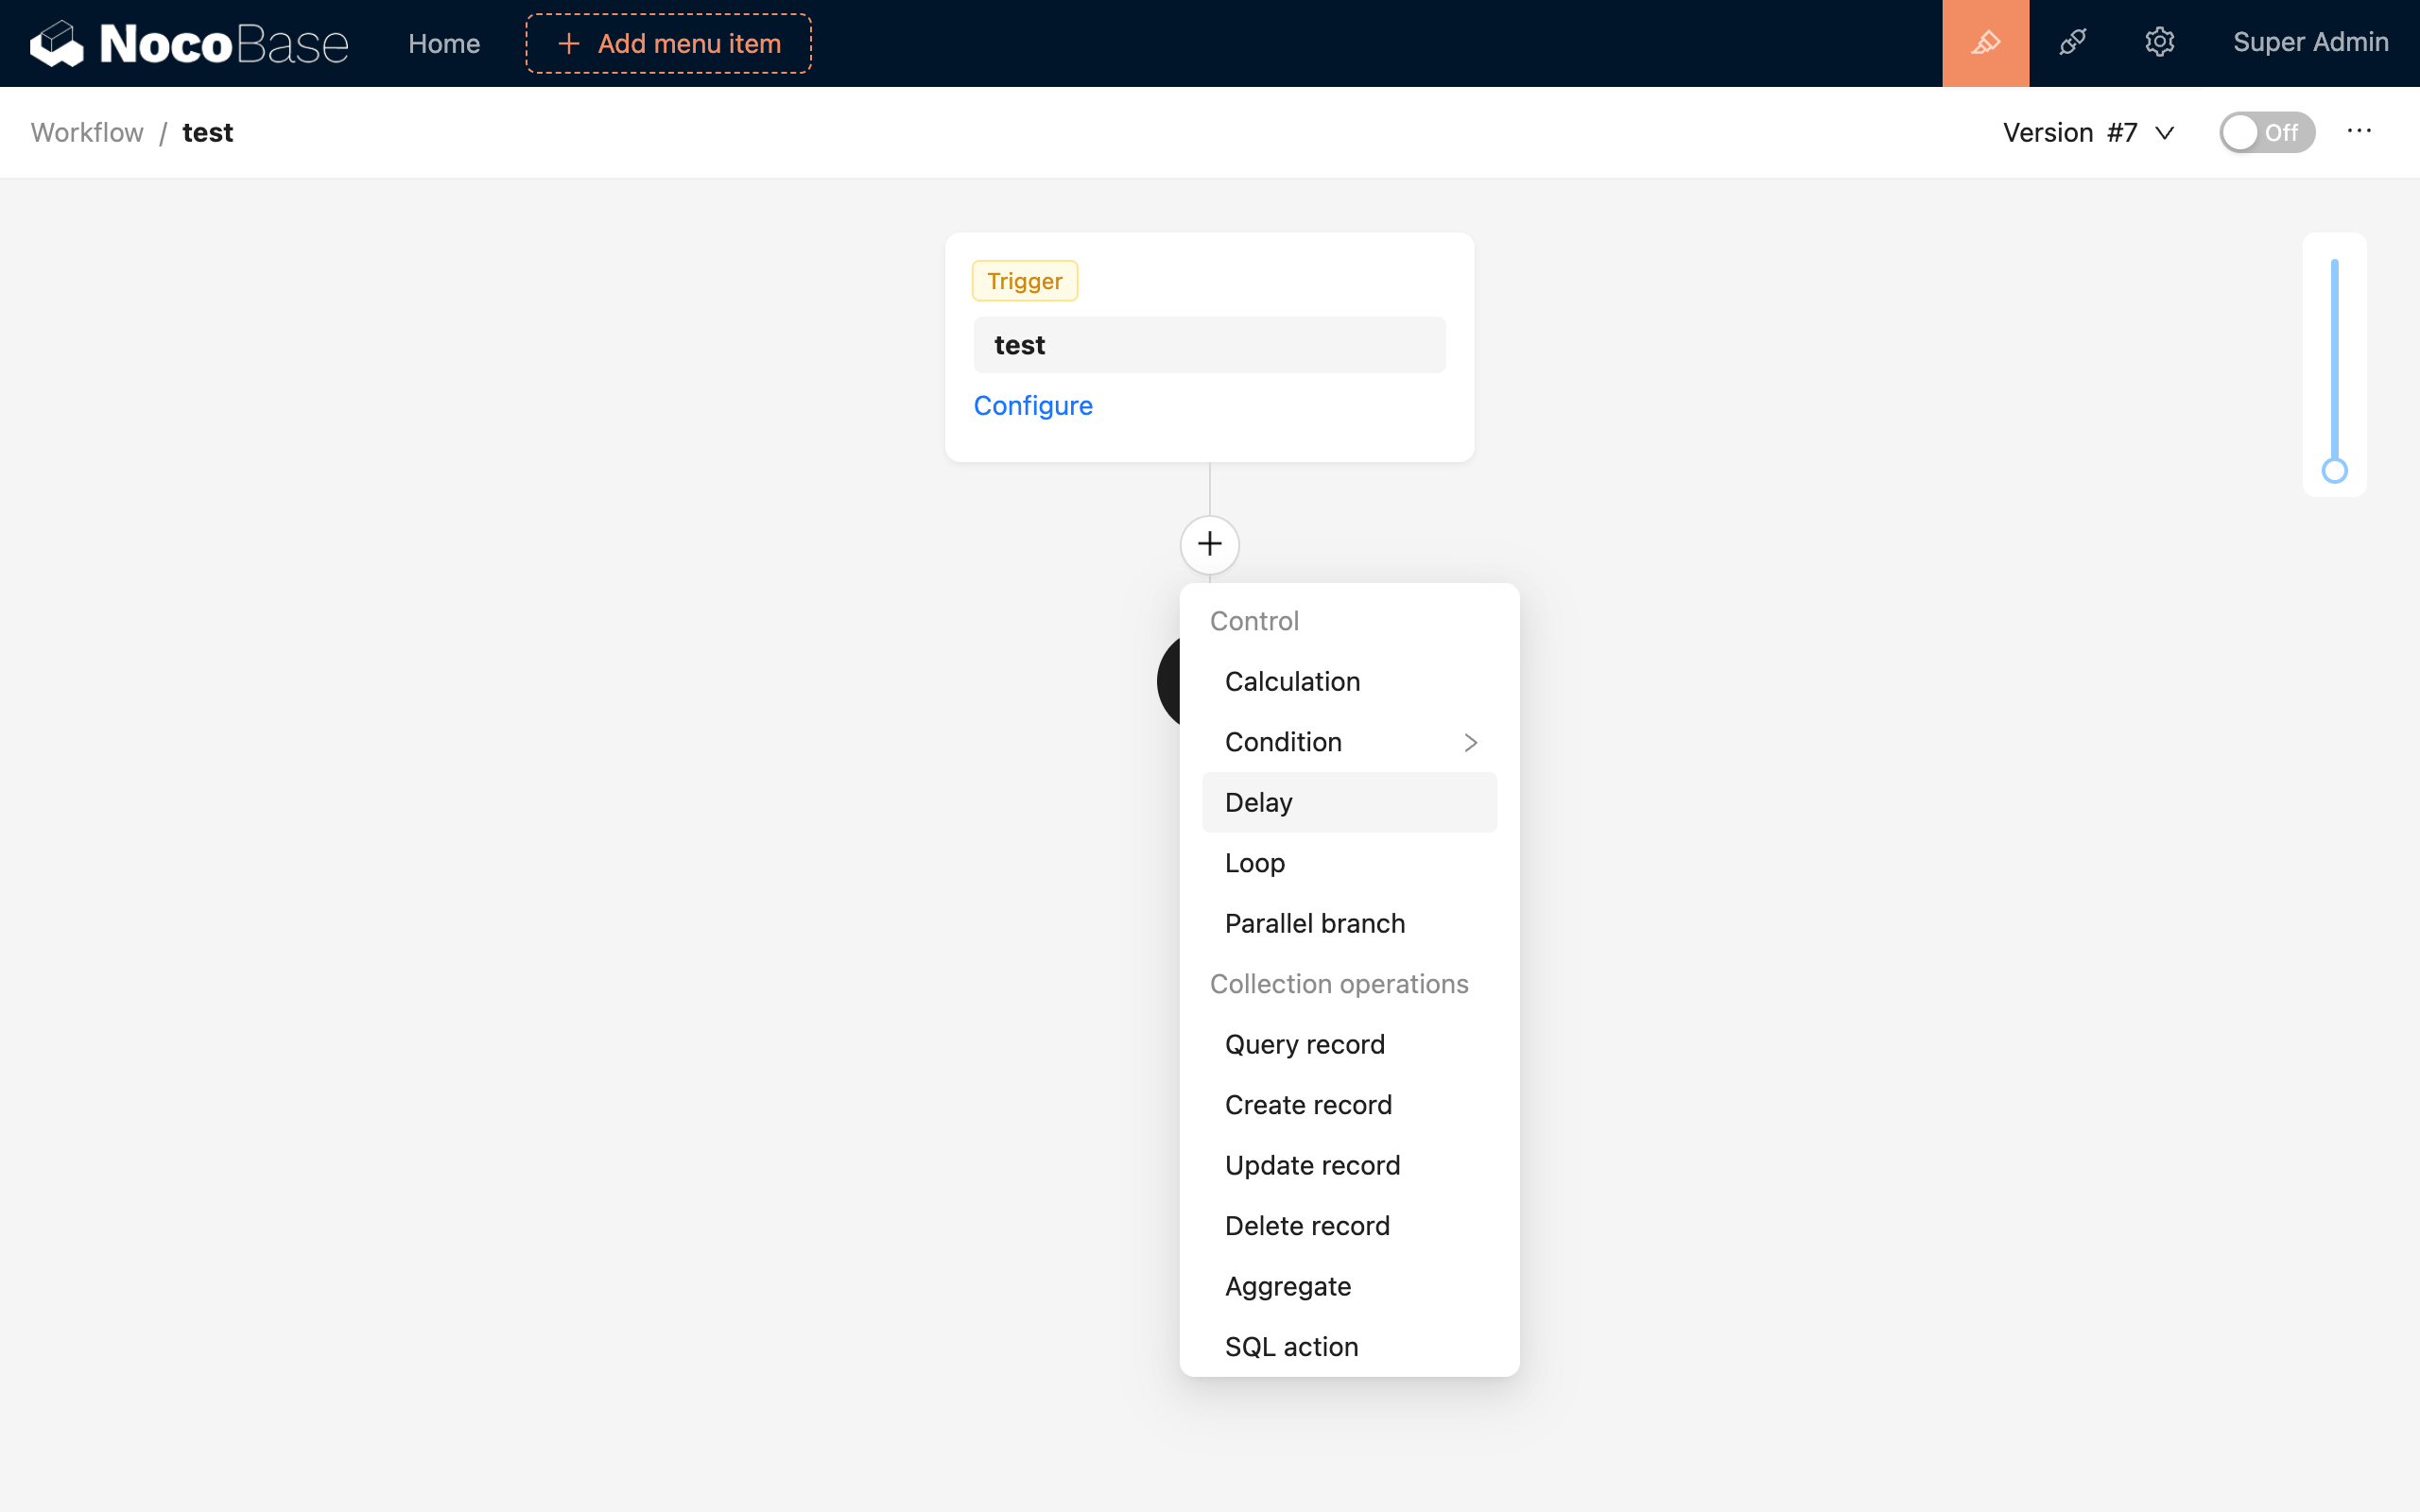
In the workflow configuration interface, click the plus ("+") button in the flow to add a "Delay" node:
Node Configuration
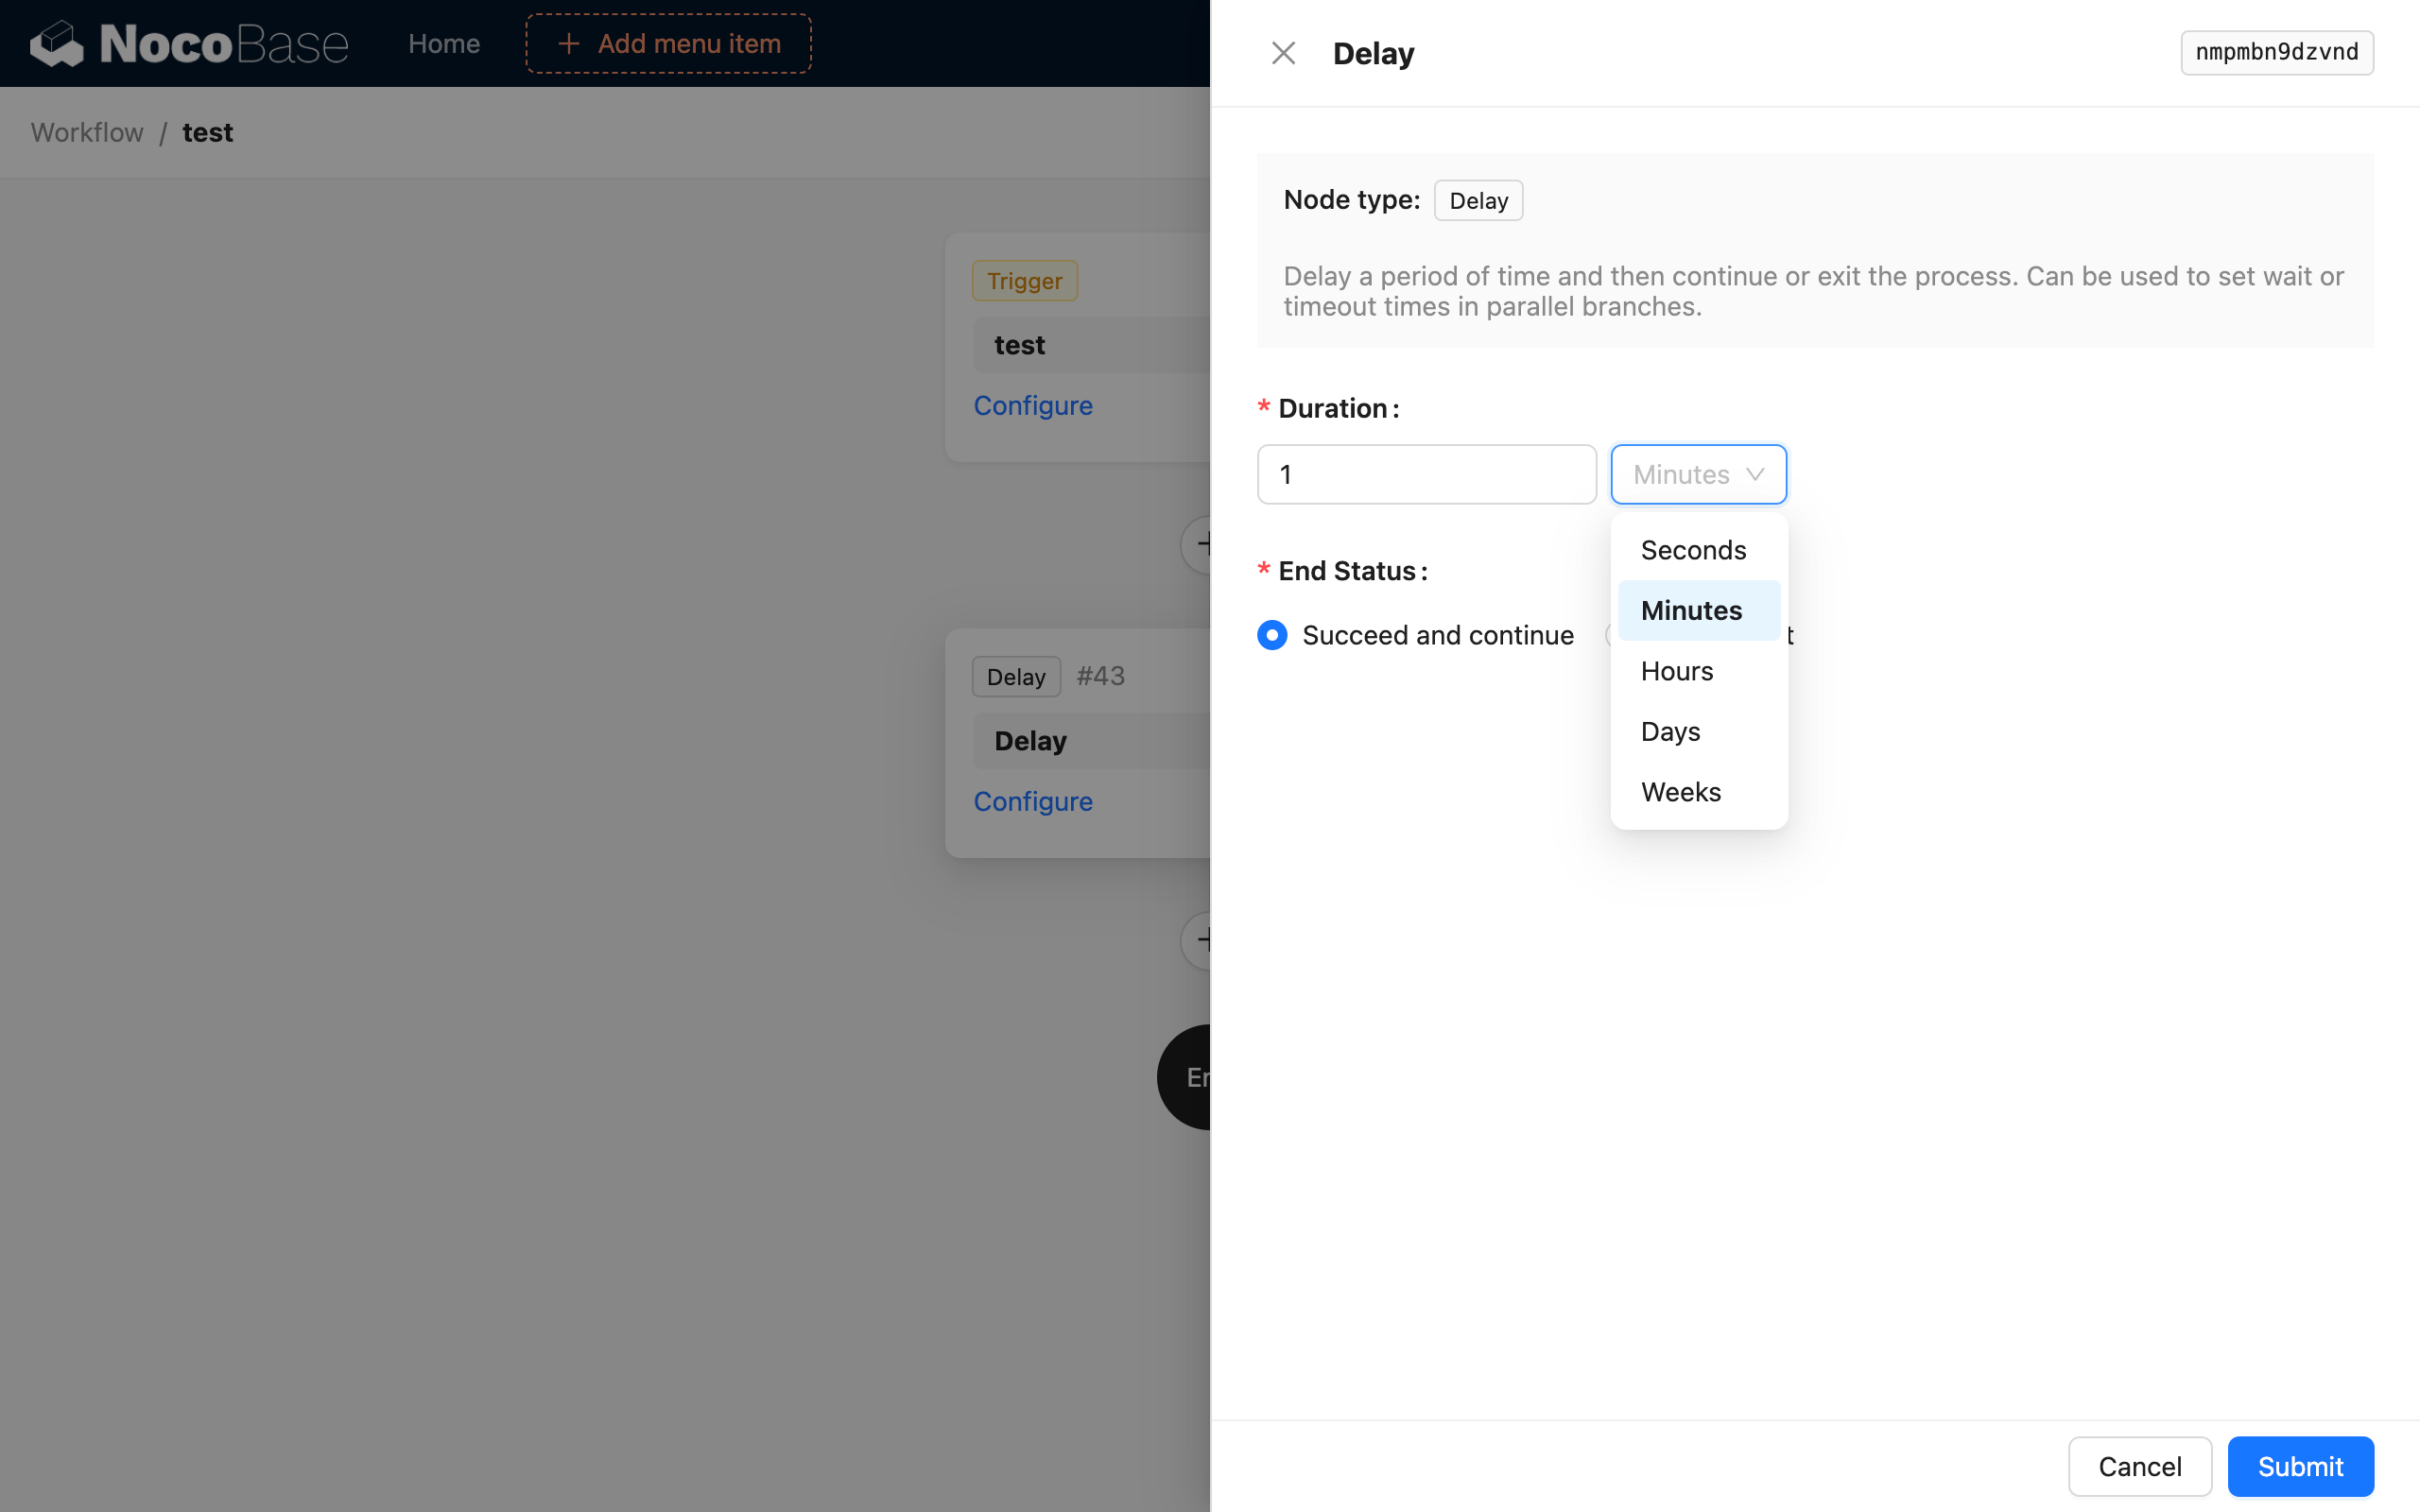
Delay Time
For the delay time, you can enter a number and select a time unit. Supported time units are: seconds, minutes, hours, days, and weeks.
On Timeout Status
For the on timeout status, you can choose "Pass and continue" or "Fail and exit". The former means that after the delay ends, the workflow will continue to execute the subsequent nodes. The latter means that after the delay ends, the workflow will terminate prematurely with a failed status.
Example
Take the scenario where a work order needs a reply within a limited time after being initiated. We need to add a manual node in one of two parallel branches and a Delay node in the other. If the manual processing is not replied to within 10 minutes, the work order status is updated to "timed out and unprocessed".