

Approval
This feature is provided by the commercial plugin «Workflow: Approval», please purchase to useIntroduction
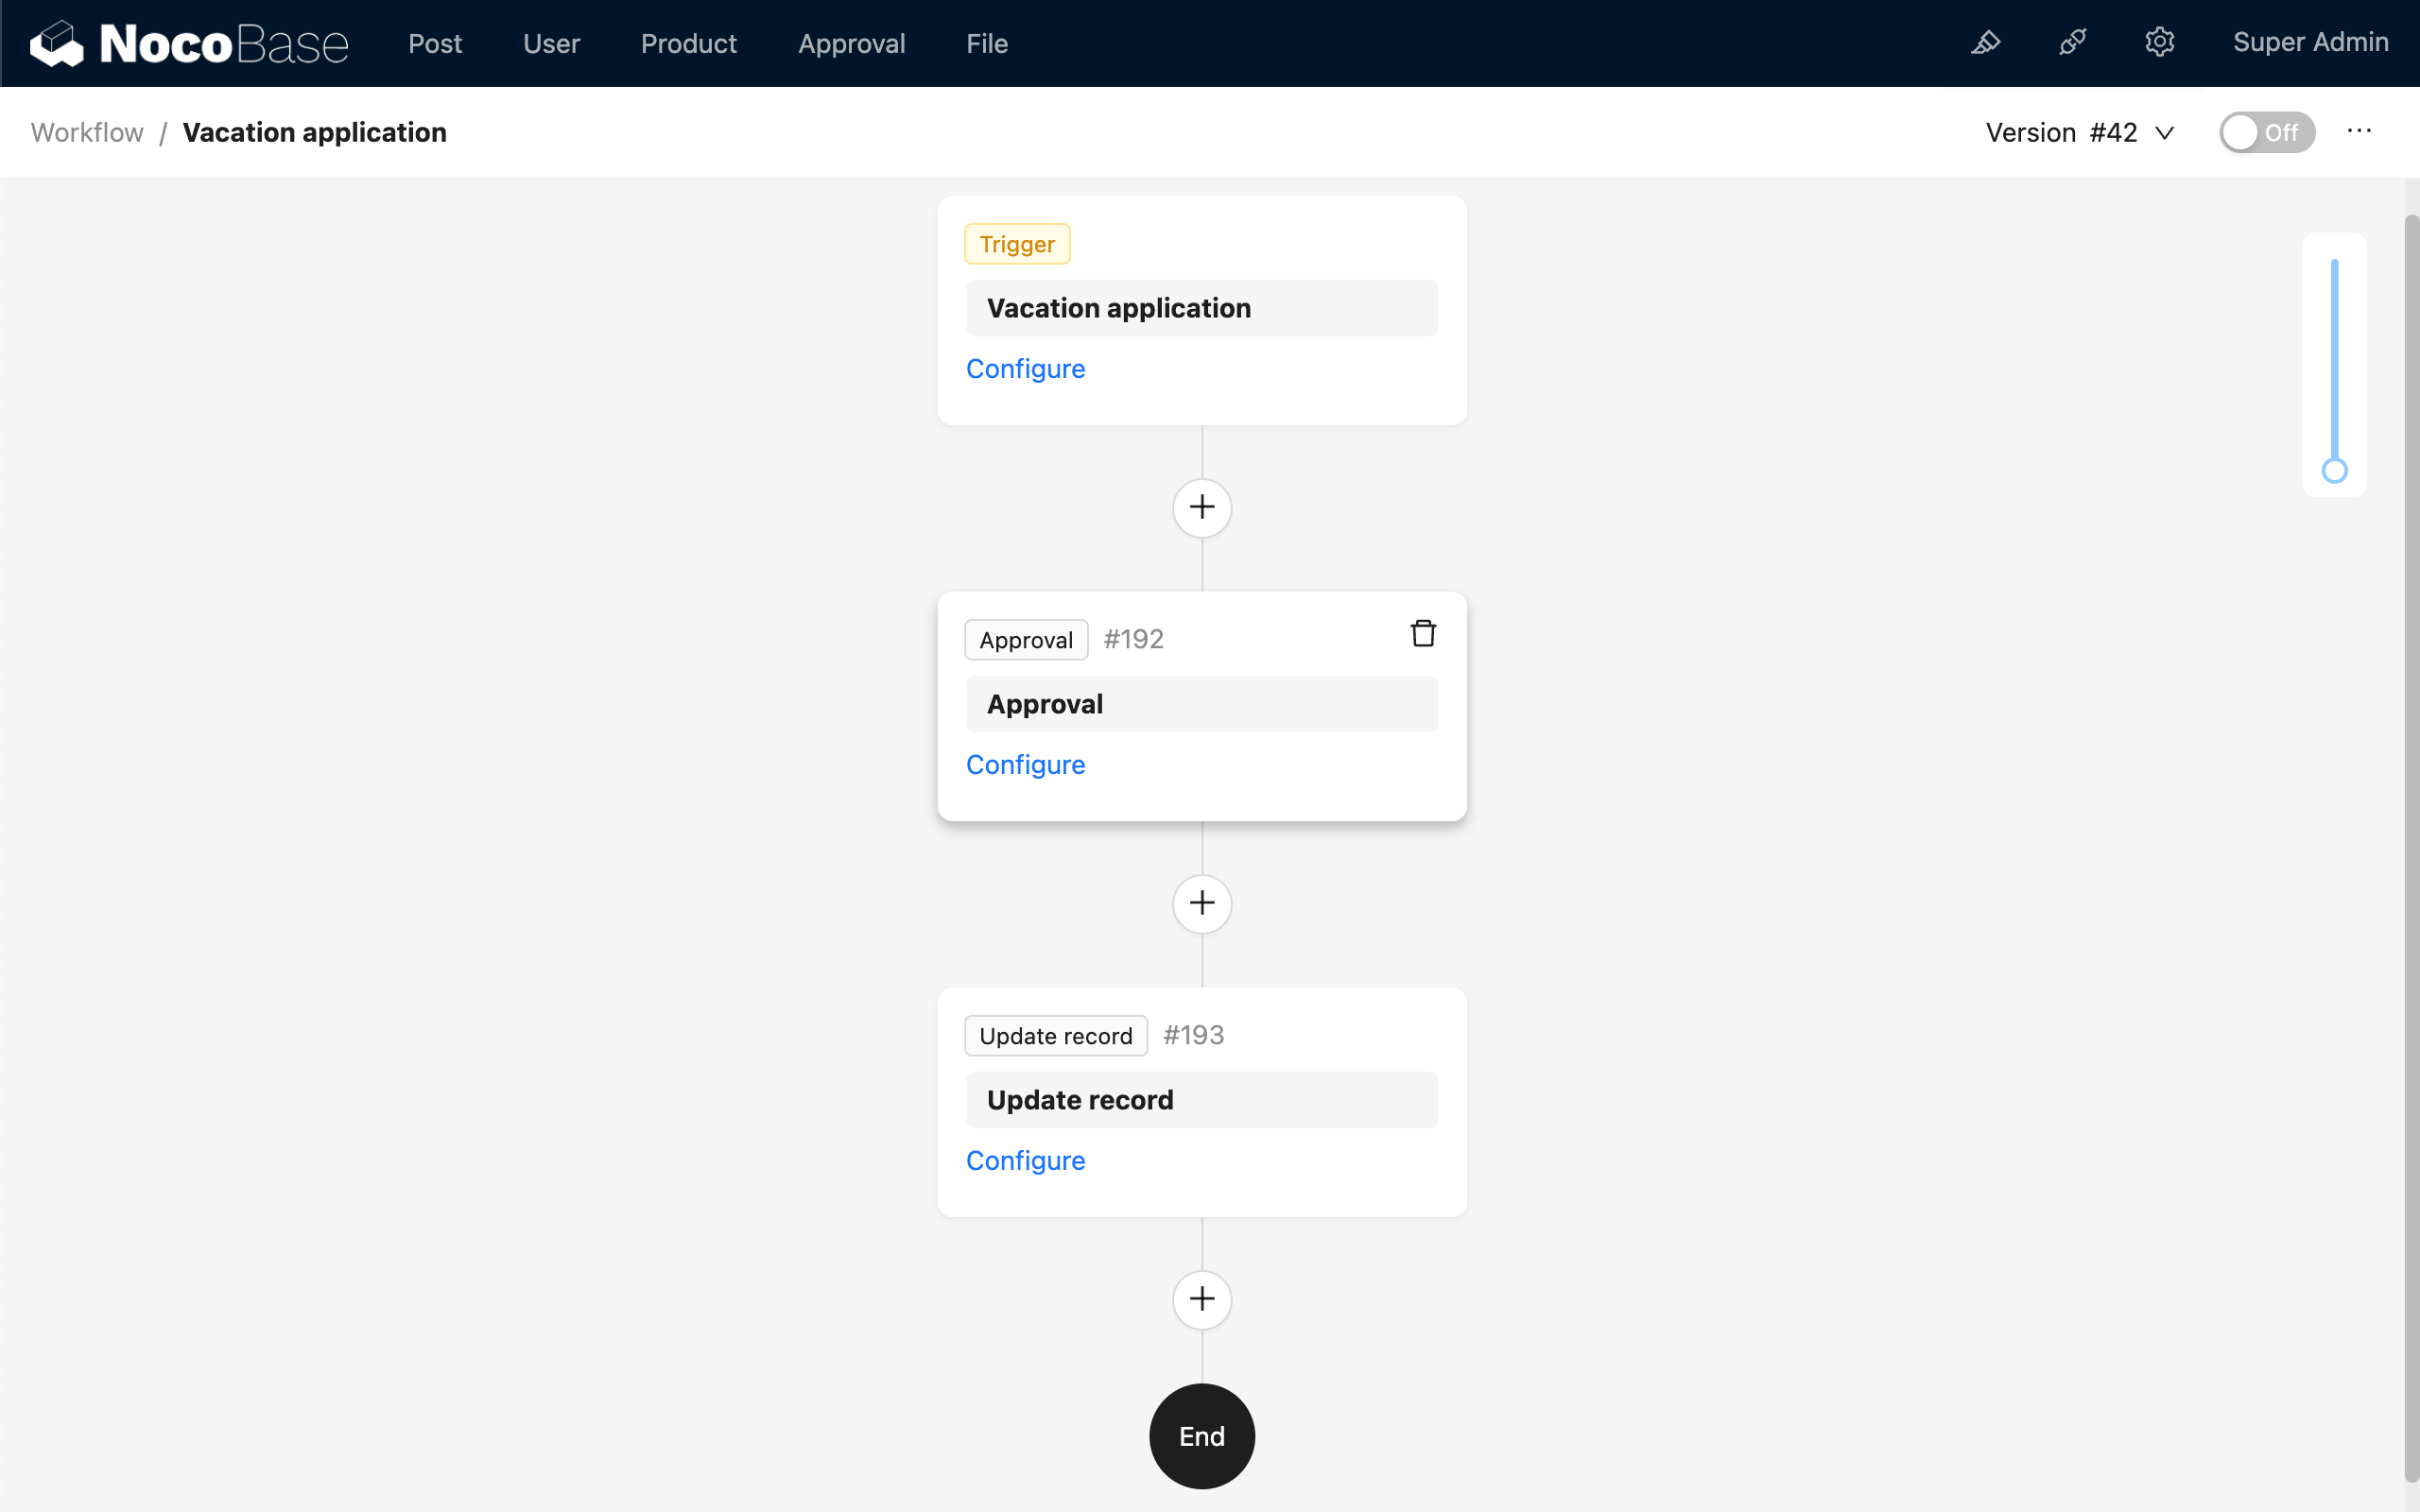
In an approval workflow, a dedicated 'Approval' node is required to configure the operational logic for approvers to process (pass, reject, or return) the initiated approval. The 'Approval' node can only be used in approval processes.
Difference from the regular 'Manual' node: The regular 'Manual' node is for more general scenarios, such as manual data input or manual decisions on whether to continue the process in various types of workflows. The 'Approval node' is a specialized processing node exclusively for approval processes, handling only the data of the initiated approval, and cannot be used in other workflows.
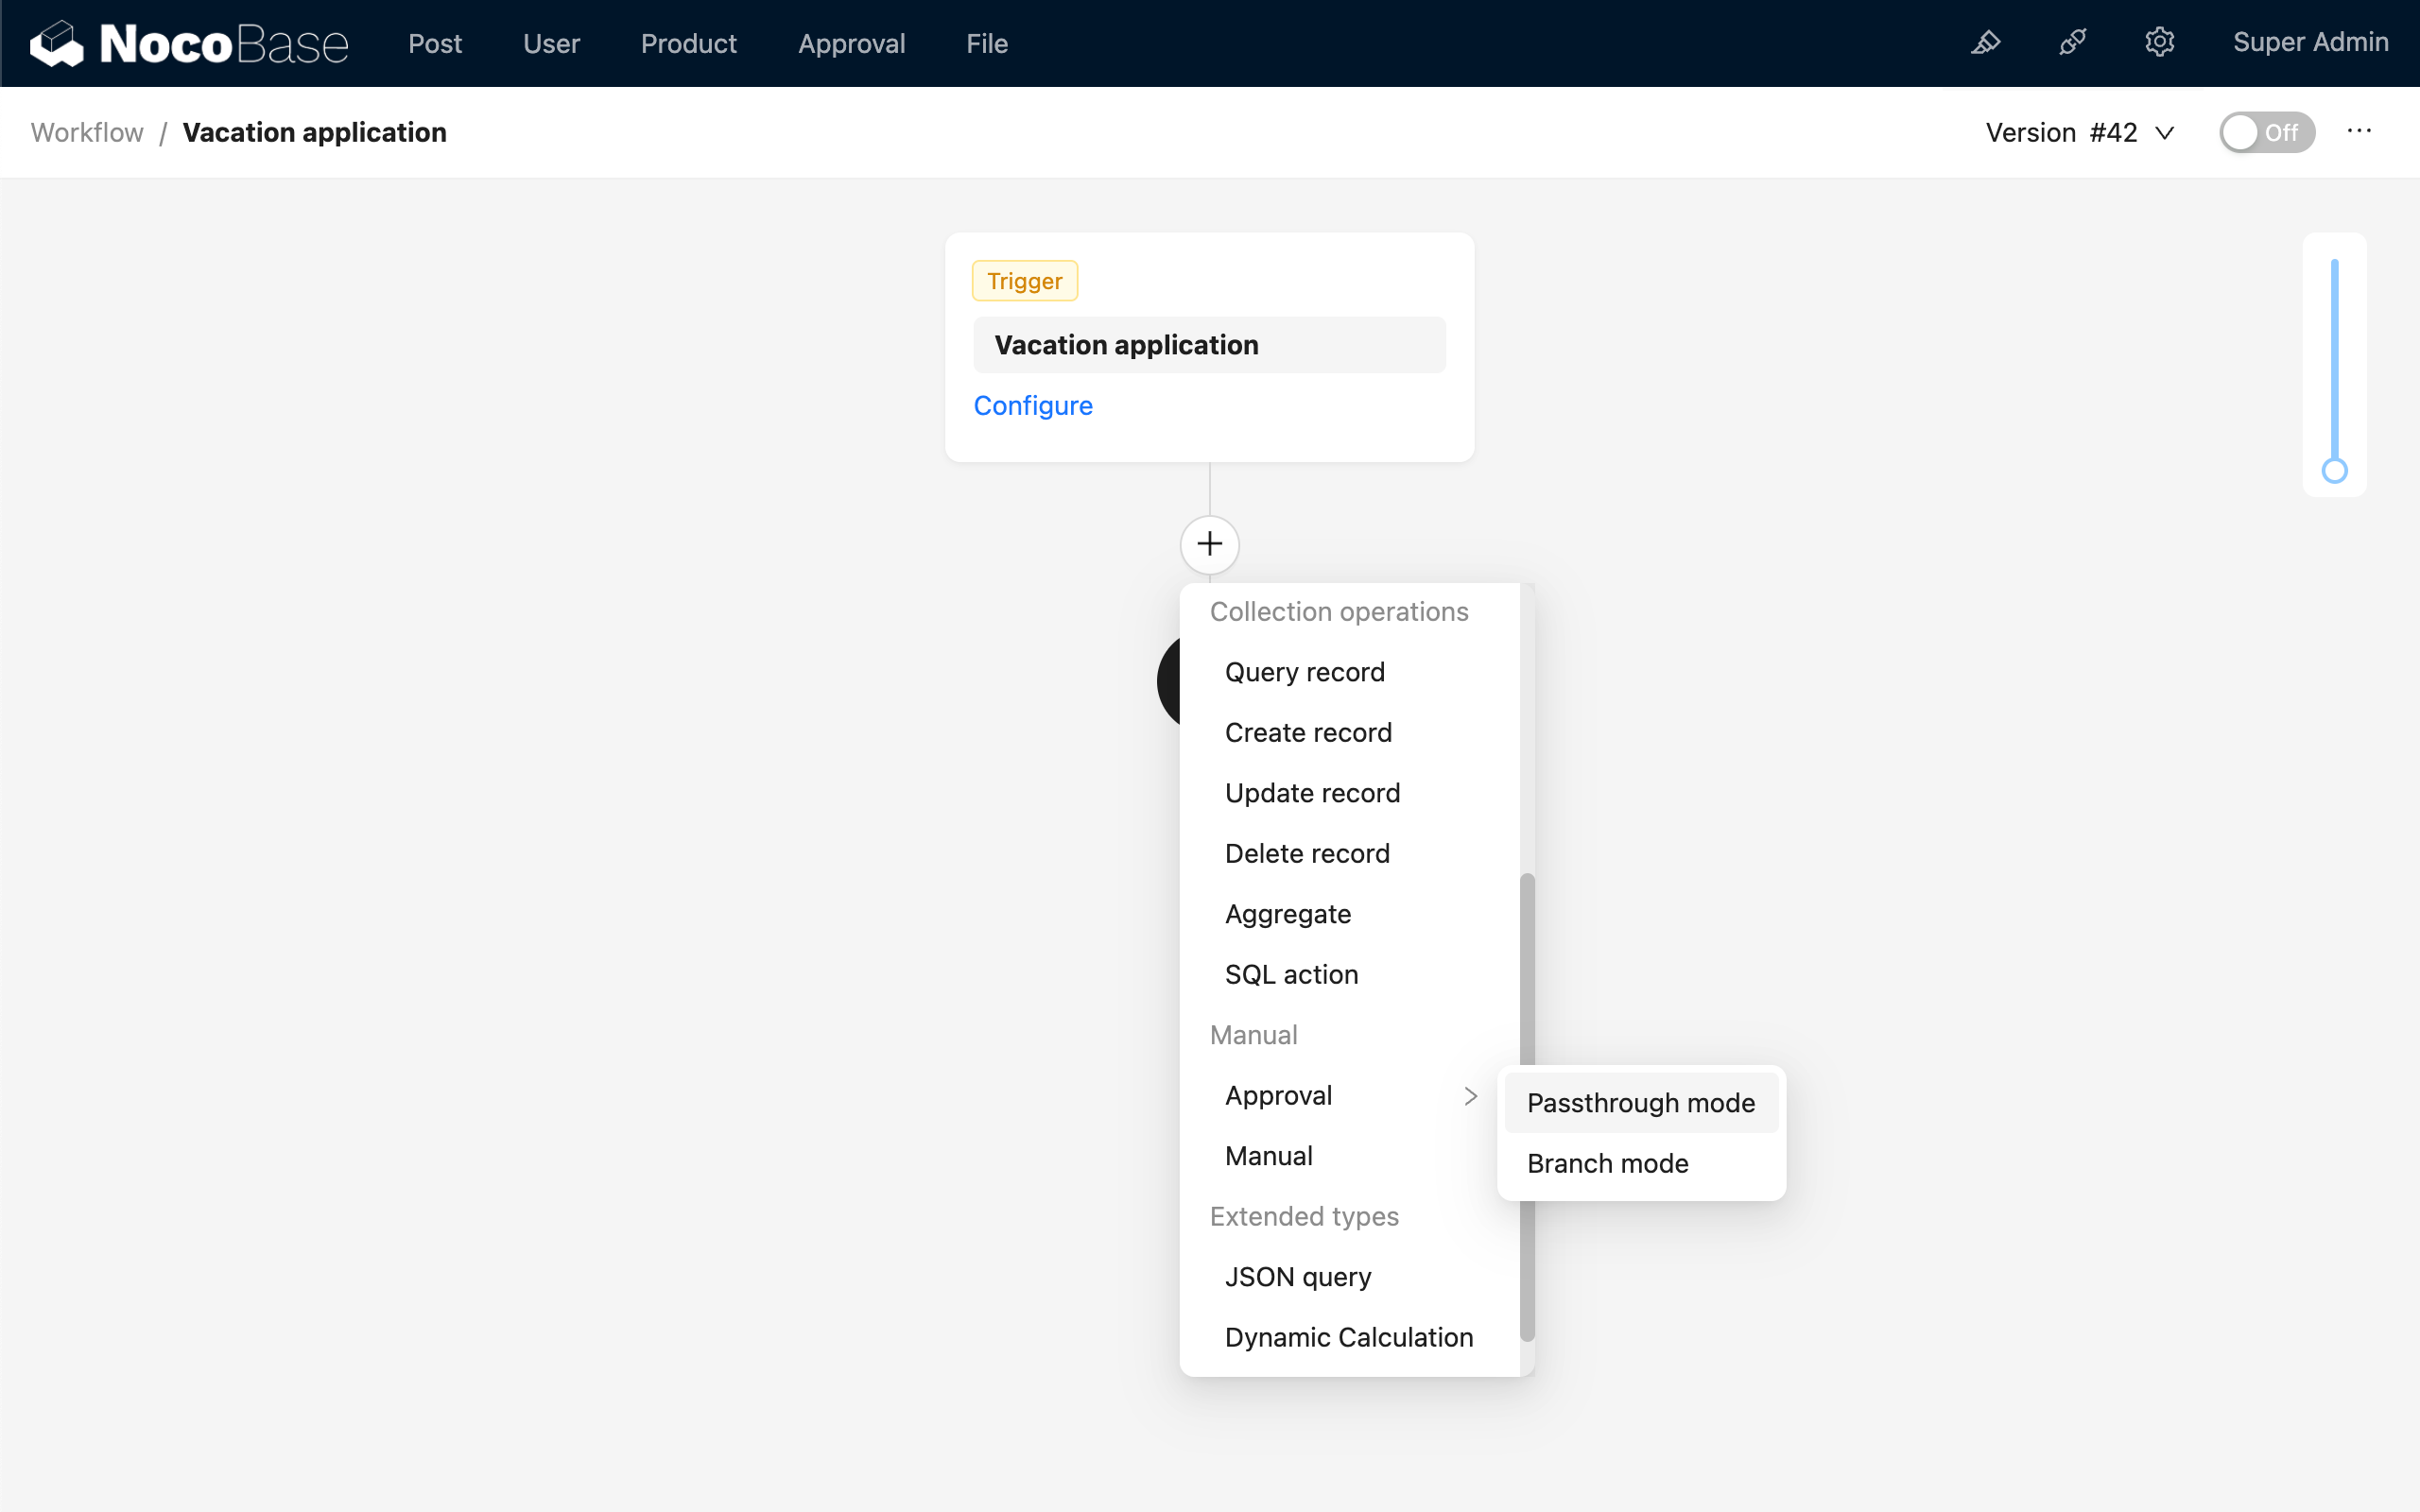
Create Node
Click the plus ('+') button in the process, add an 'Approval' node, and then select one of the pass modes to create the approval node:
Node Configuration
Pass Mode
There are two pass modes:
- Pass-through mode: Typically used for simpler processes. Whether the approval node passes or not only determines if the process ends. If it doesn't pass, the process exits directly.
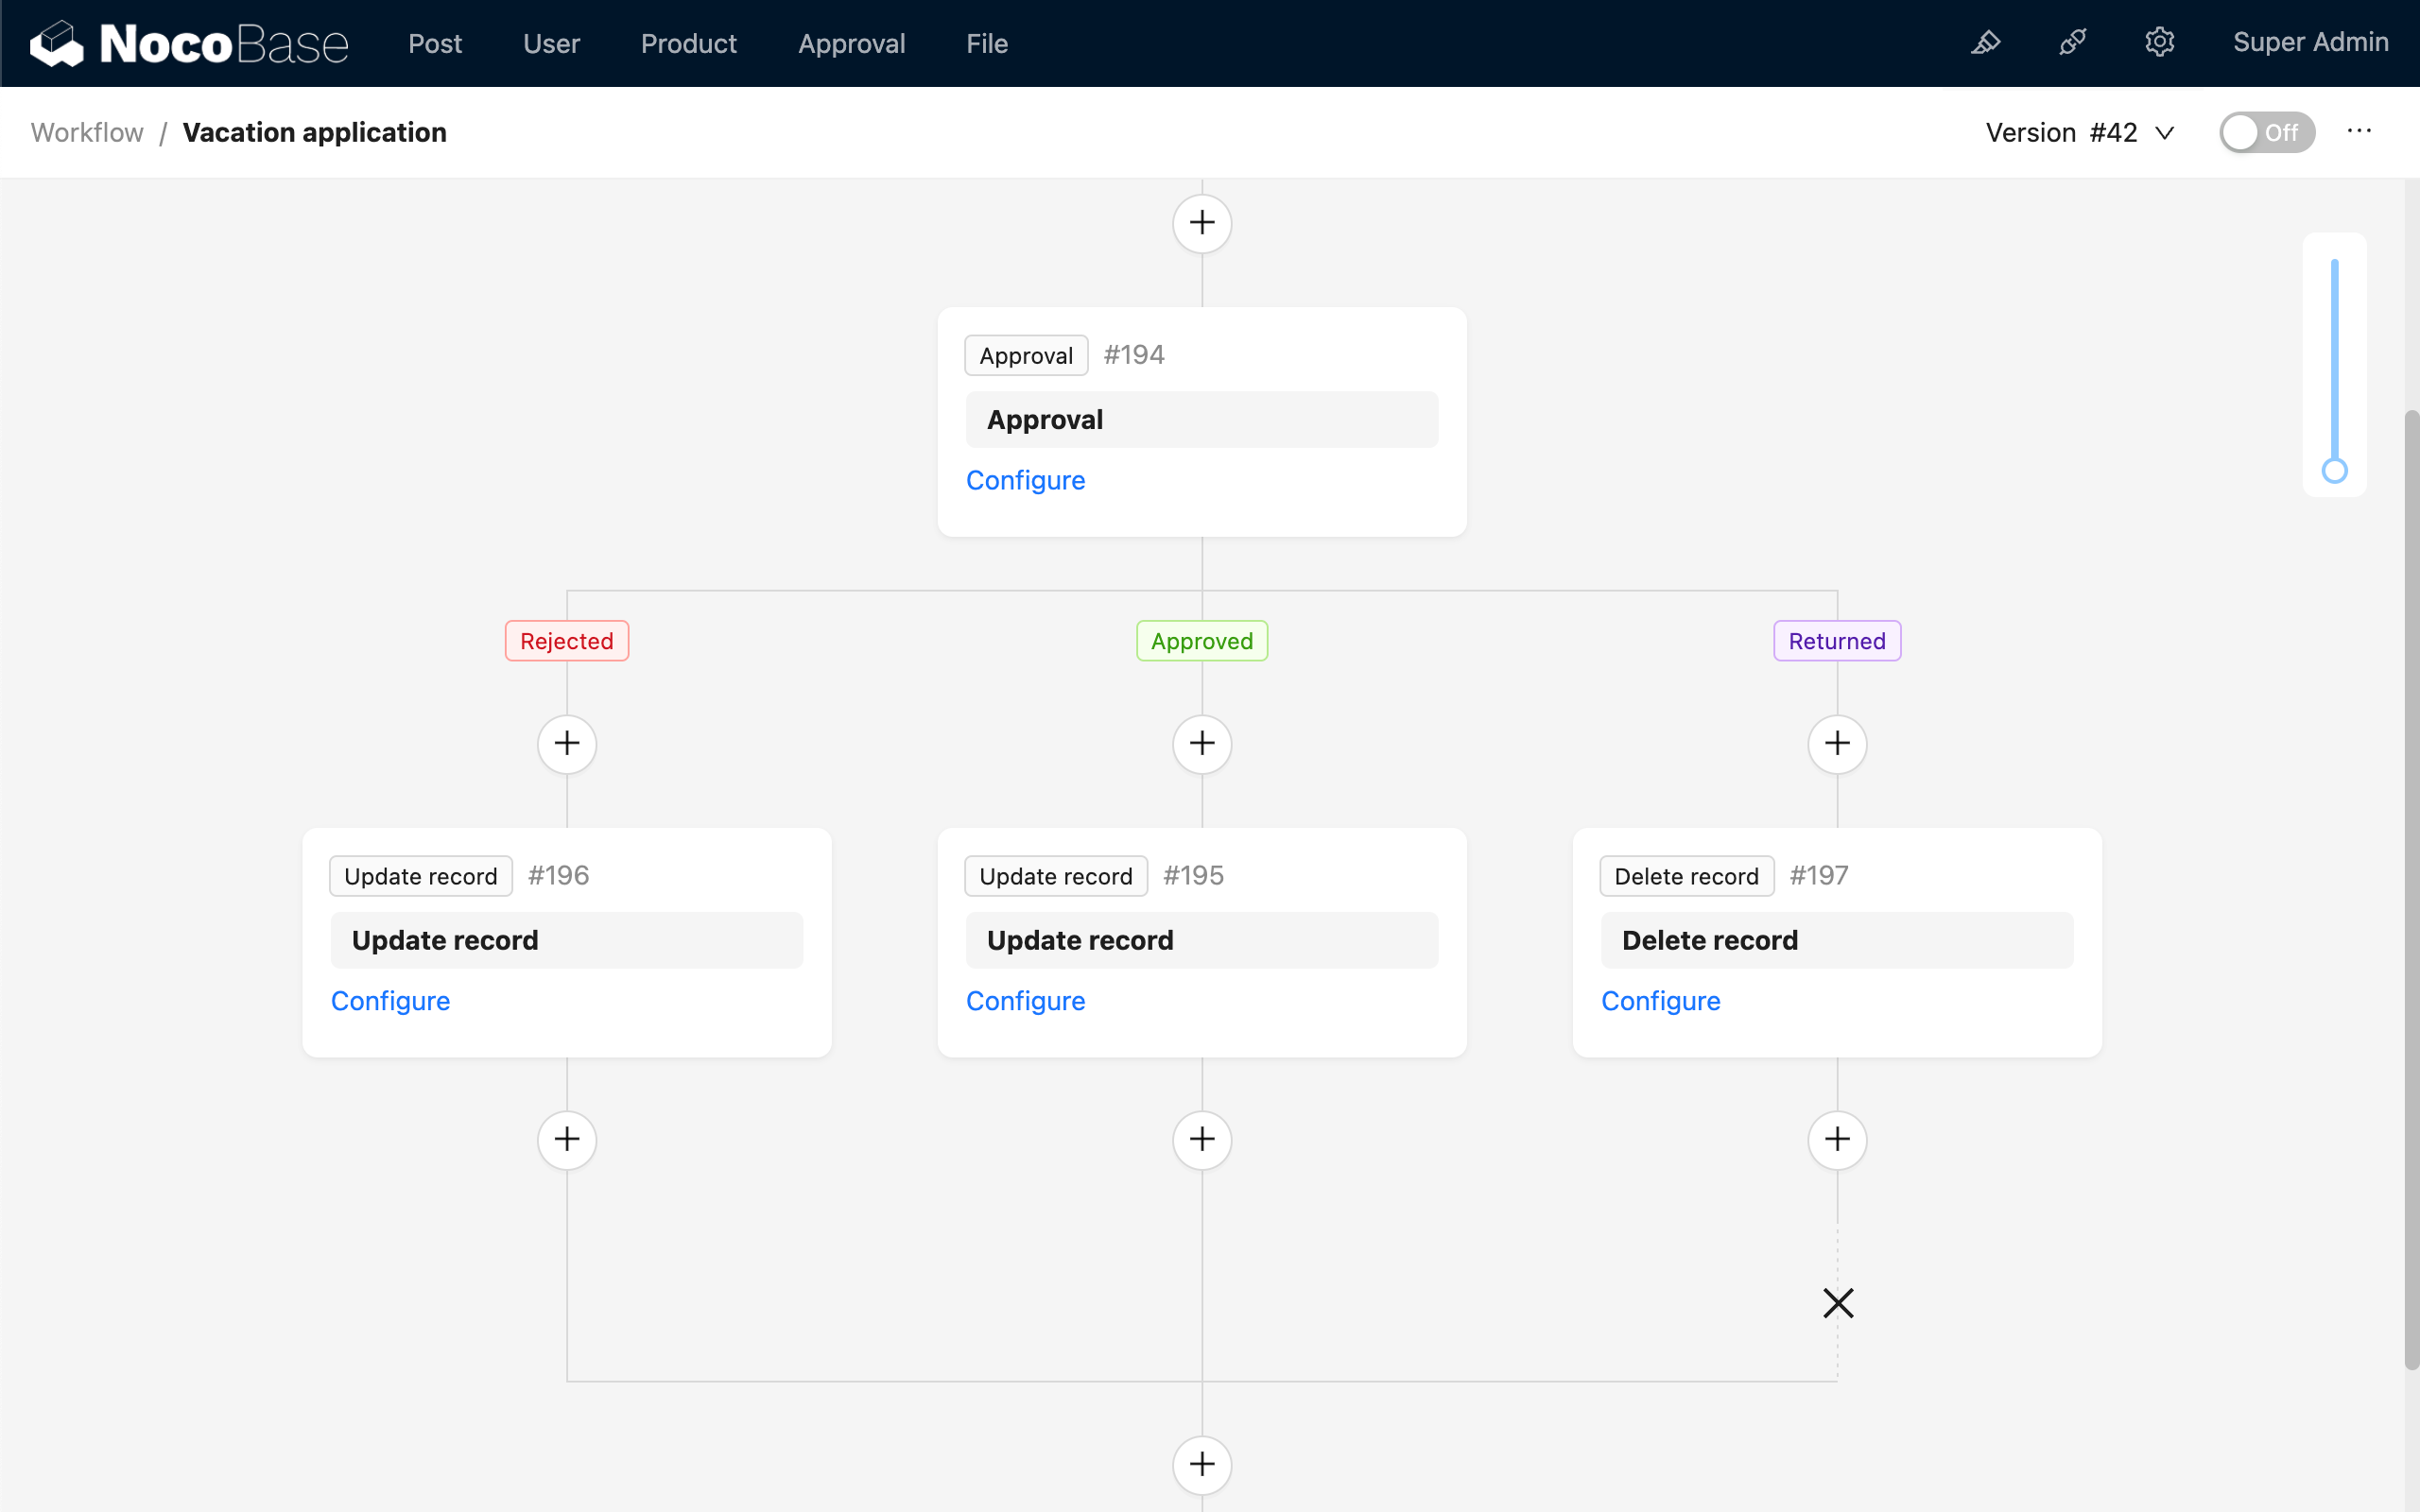
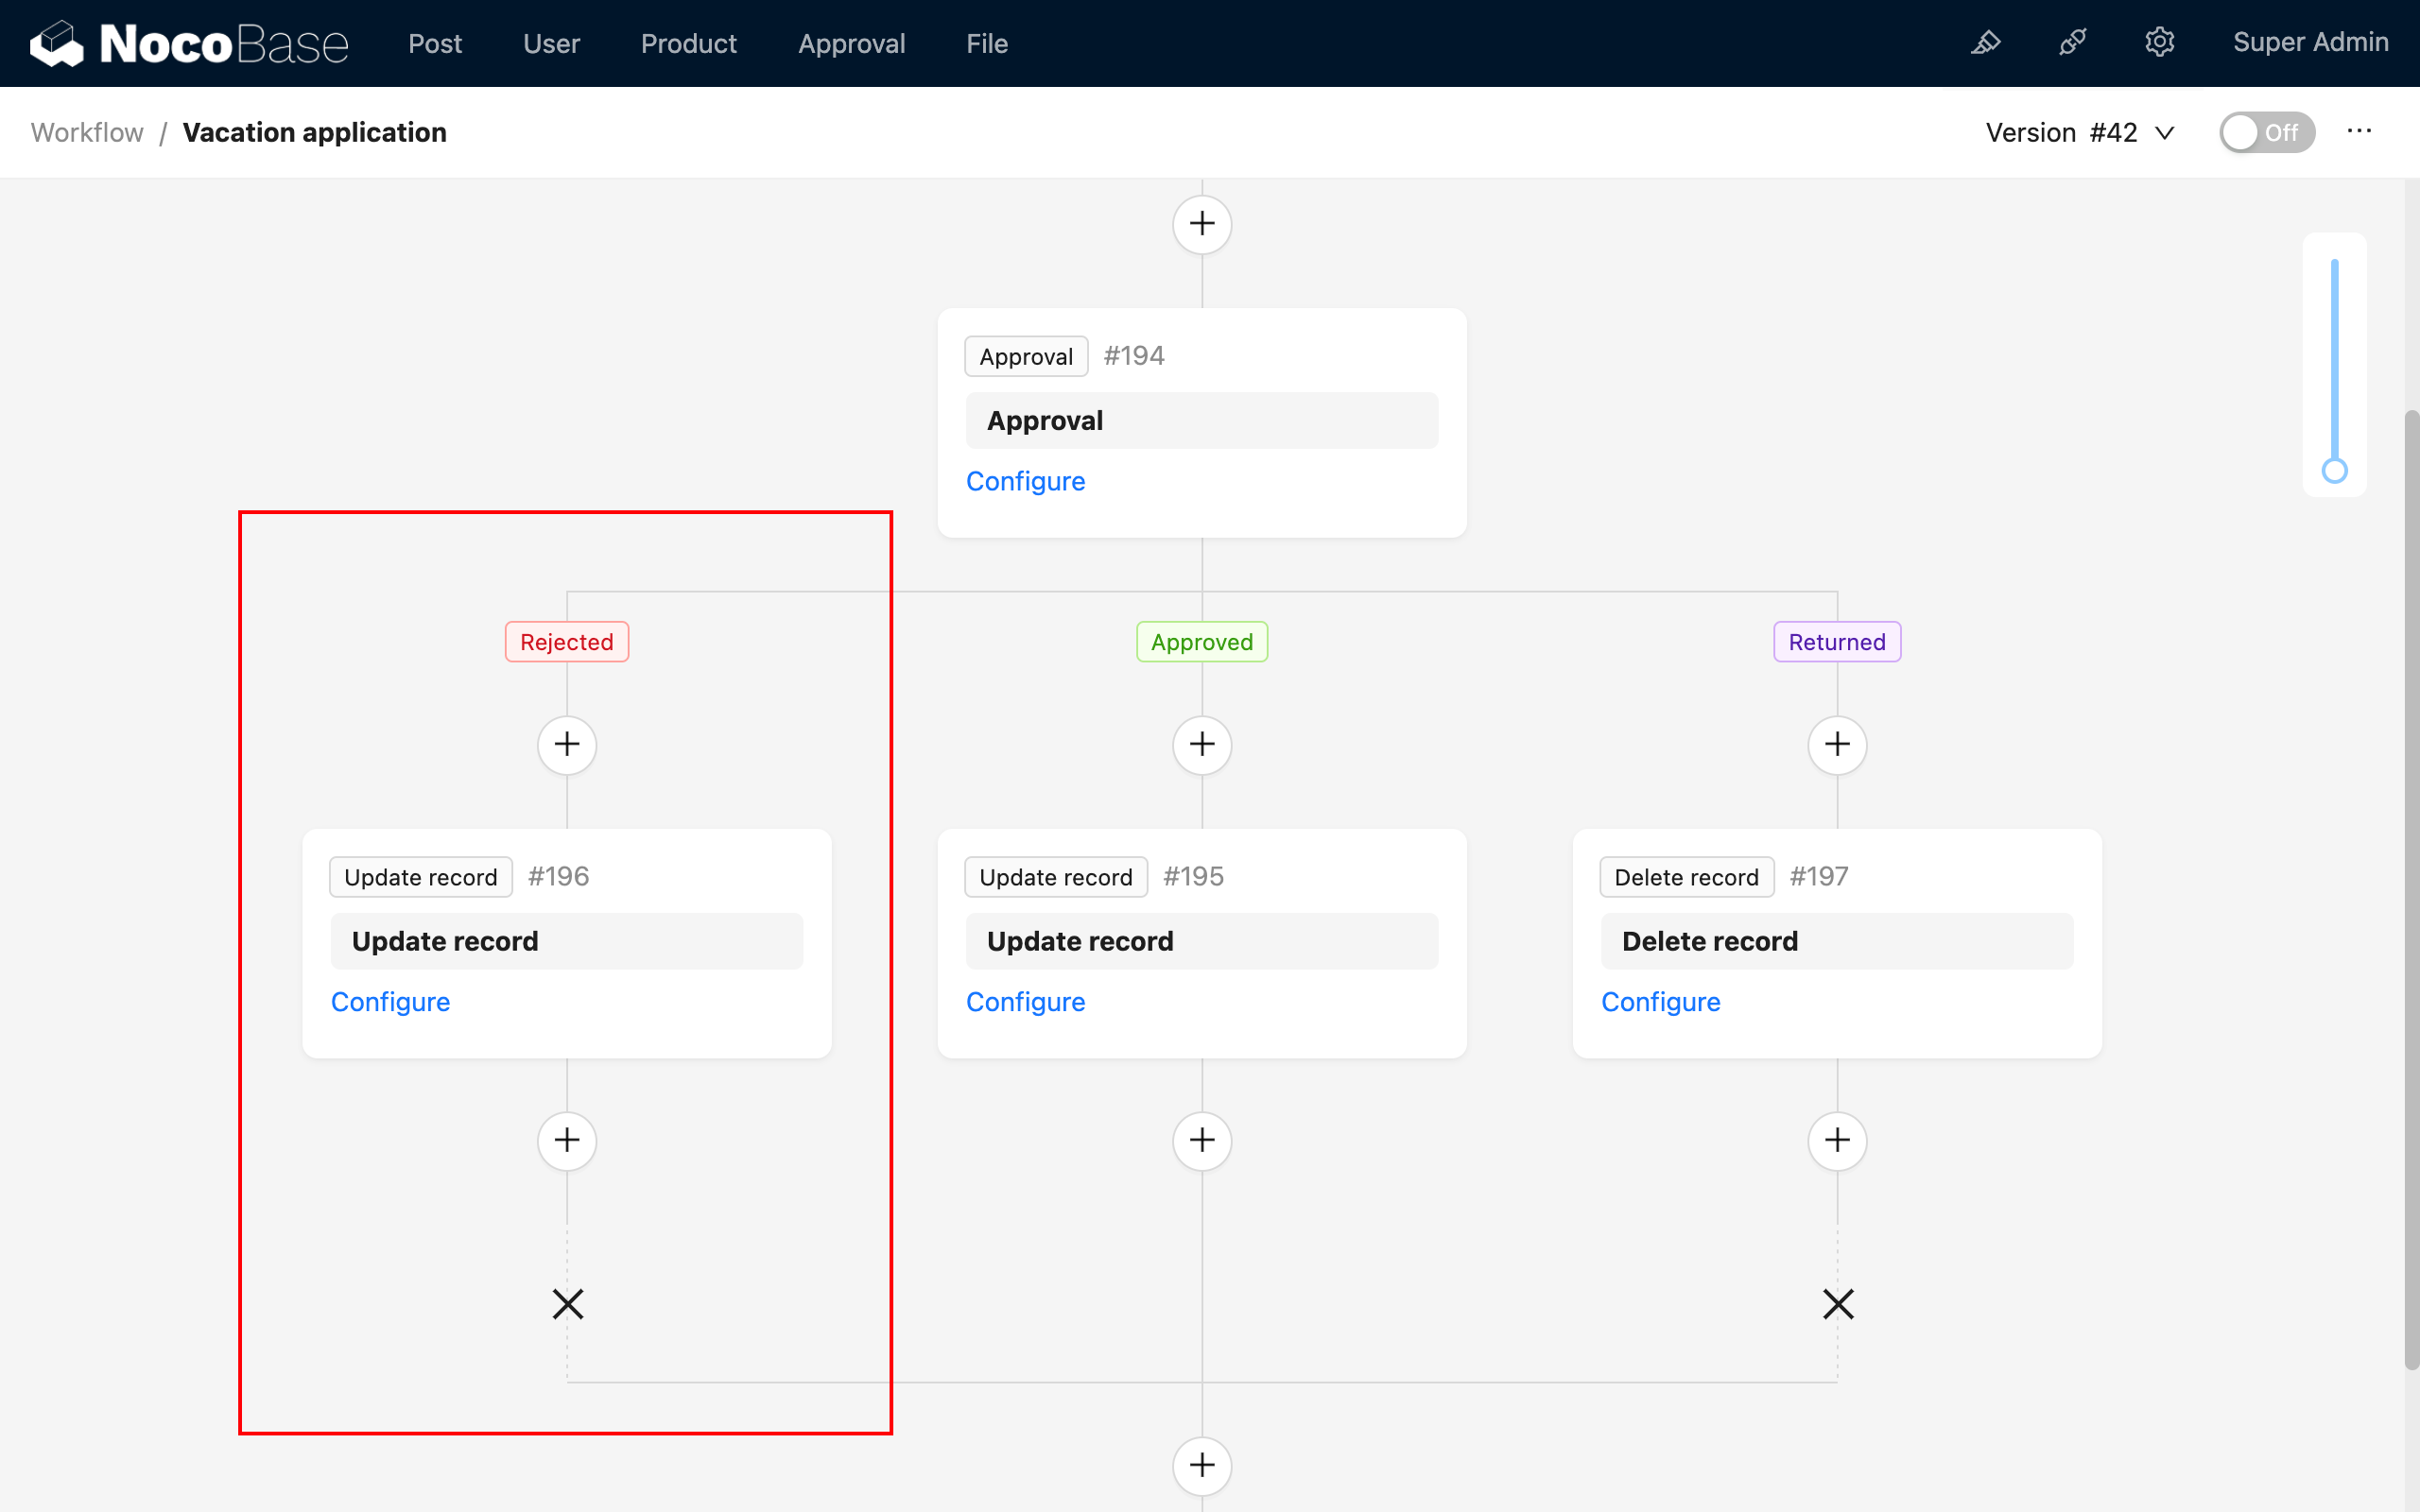
- Branch mode: Typically used for more complex data logic. After the approval node produces any result, other nodes can continue to be executed within its result branch.
The pass mode cannot be modified after the node is created.
Approver
The approver is the set of users responsible for the approval action of this node. It can be one or more users. The source can be a static value selected from the user list, or a dynamic value specified by a variable.
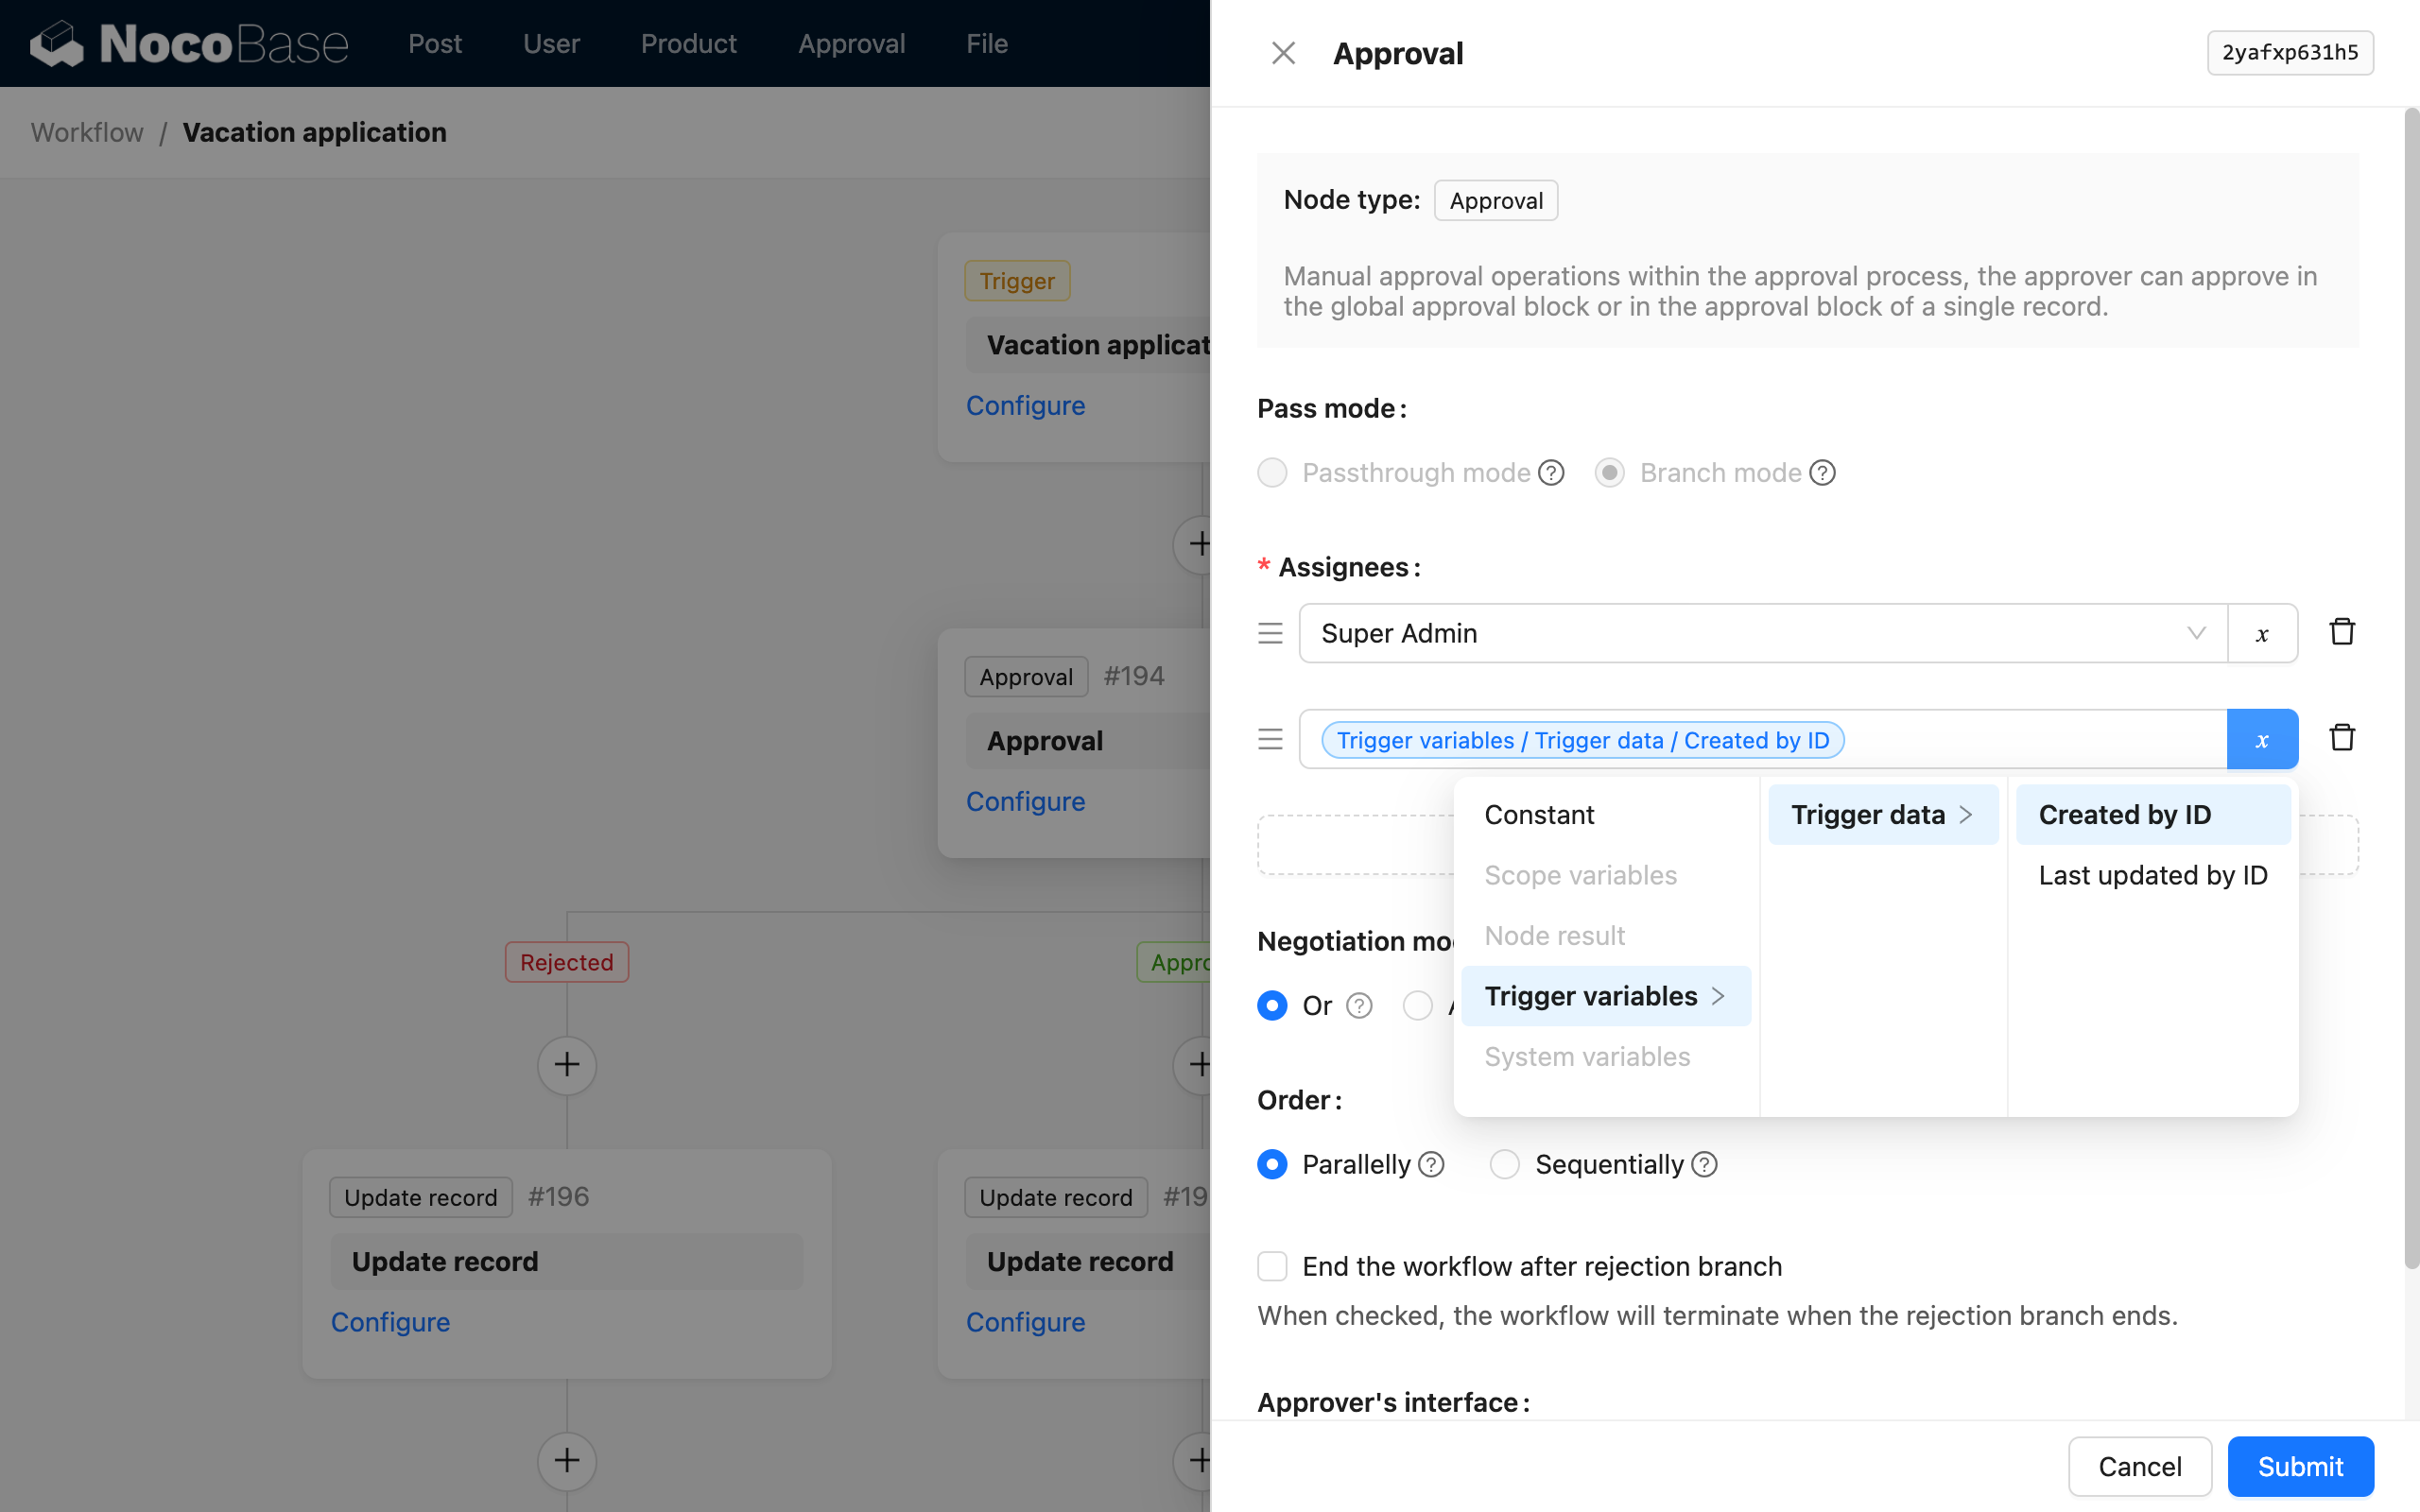
When selecting a variable, you can only choose the primary key or foreign key of user data from the context and node results. If the selected variable is an array during execution (a to-many relationship), each user in the array will be merged into the entire approver set.
Agreement Mode
If there is only one approver at the time of final execution (including the case after deduplicating multiple variables), regardless of the agreement mode selected, only that user will perform the approval action, and the result will be determined solely by that user.
When there are multiple users in the approver set, selecting different agreement modes represents different processing methods:
- Anyone: If any one person passes, the node passes. The node is rejected only if everyone rejects.
- Countersign: Everyone must pass for the node to pass. If any one person rejects, the node is rejected.
- Vote: The number of people who pass must exceed a set ratio for the node to pass; otherwise, the node is rejected.
For the return action, in any mode, if any user in the approver set processes it as a return, the node will directly exit the process.
Processing Order
Similarly, when there are multiple users in the approver set, selecting different processing orders represents different processing methods:
- Parallel: All approvers can process in any order; the sequence of processing does not matter.
- Sequential: Approvers process sequentially according to the order in the approver set. The next approver can only process after the previous one has submitted.
Regardless of whether it is set to 'Sequential' processing, the result produced according to the actual processing order will also follow the rules in the 'Agreement Mode' mentioned above. The node completes its execution once the corresponding conditions are met.
Exit workflow after the reject branch ends
When 'Pass Mode' is set to 'Branch mode', you can choose to exit the workflow after the reject branch ends. After checking this option, a '✗' will be displayed at the end of the reject branch, indicating that subsequent nodes will not continue after this branch ends:
Approver Interface Configuration
The approver interface configuration is used to provide an operation interface for the approver when the approval workflow executes to this node. Click the configure button to open the pop-up window:
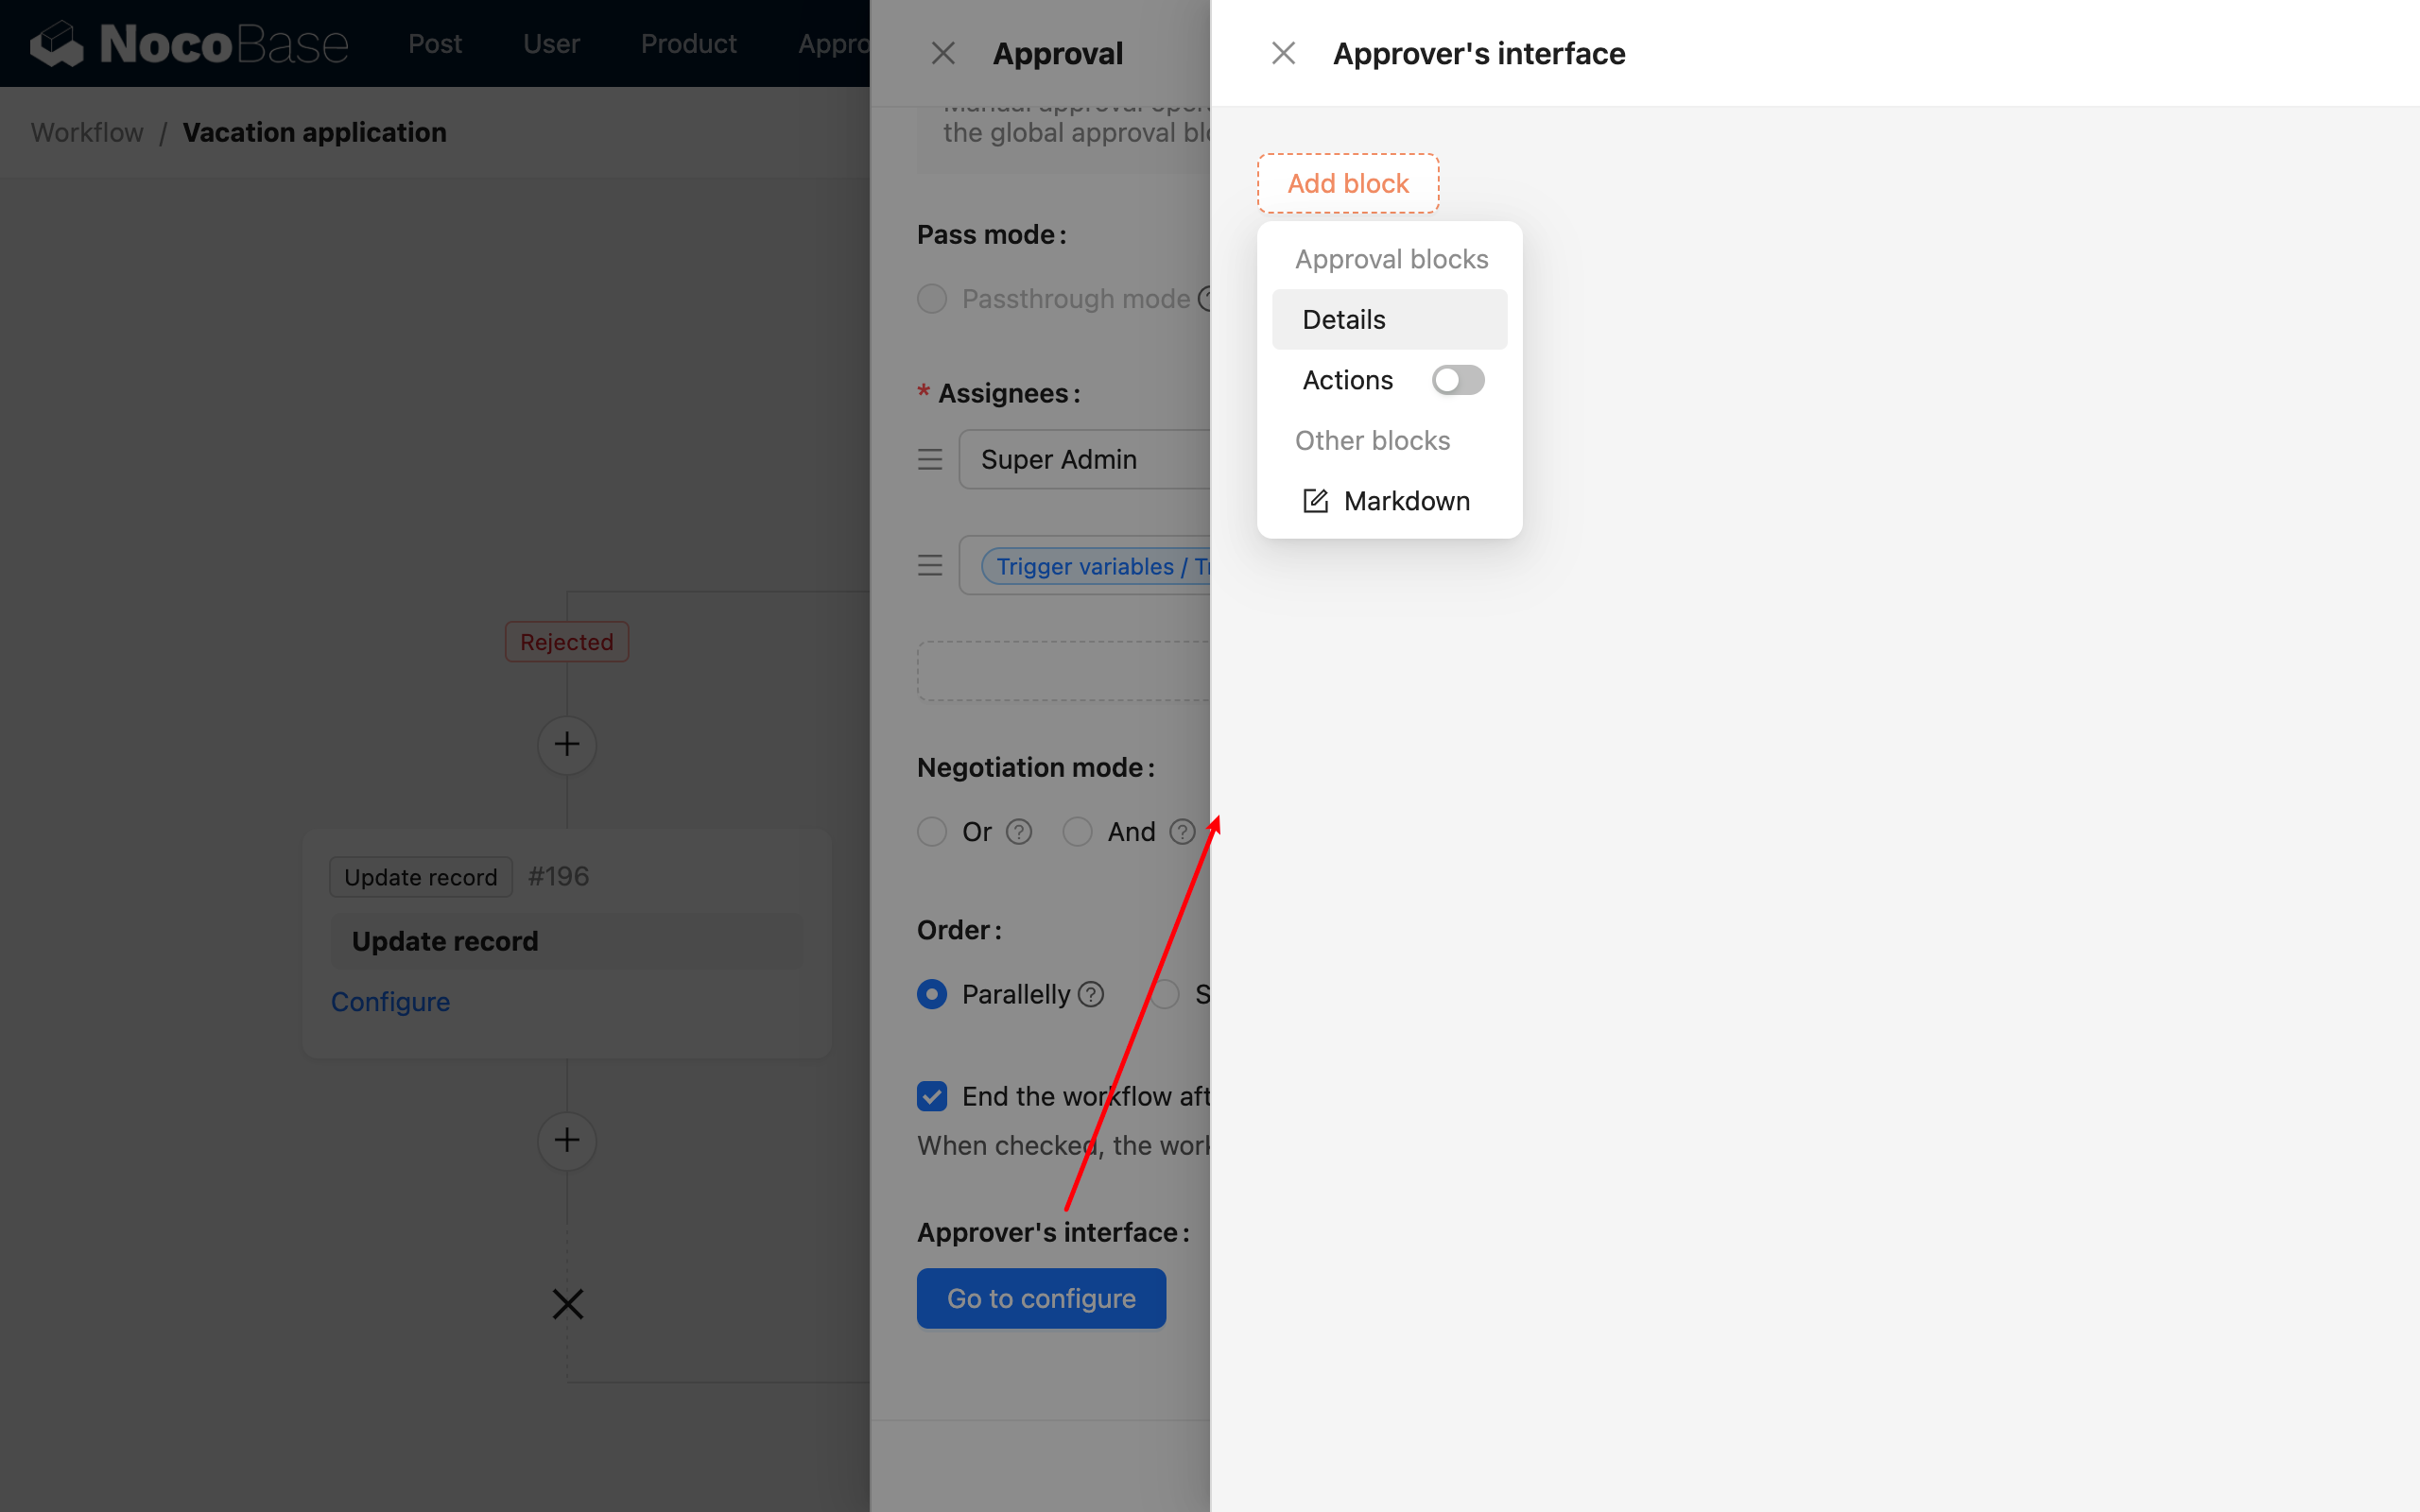
In the configuration pop-up, you can add blocks such as submission details, an action bar, and custom prompt text:
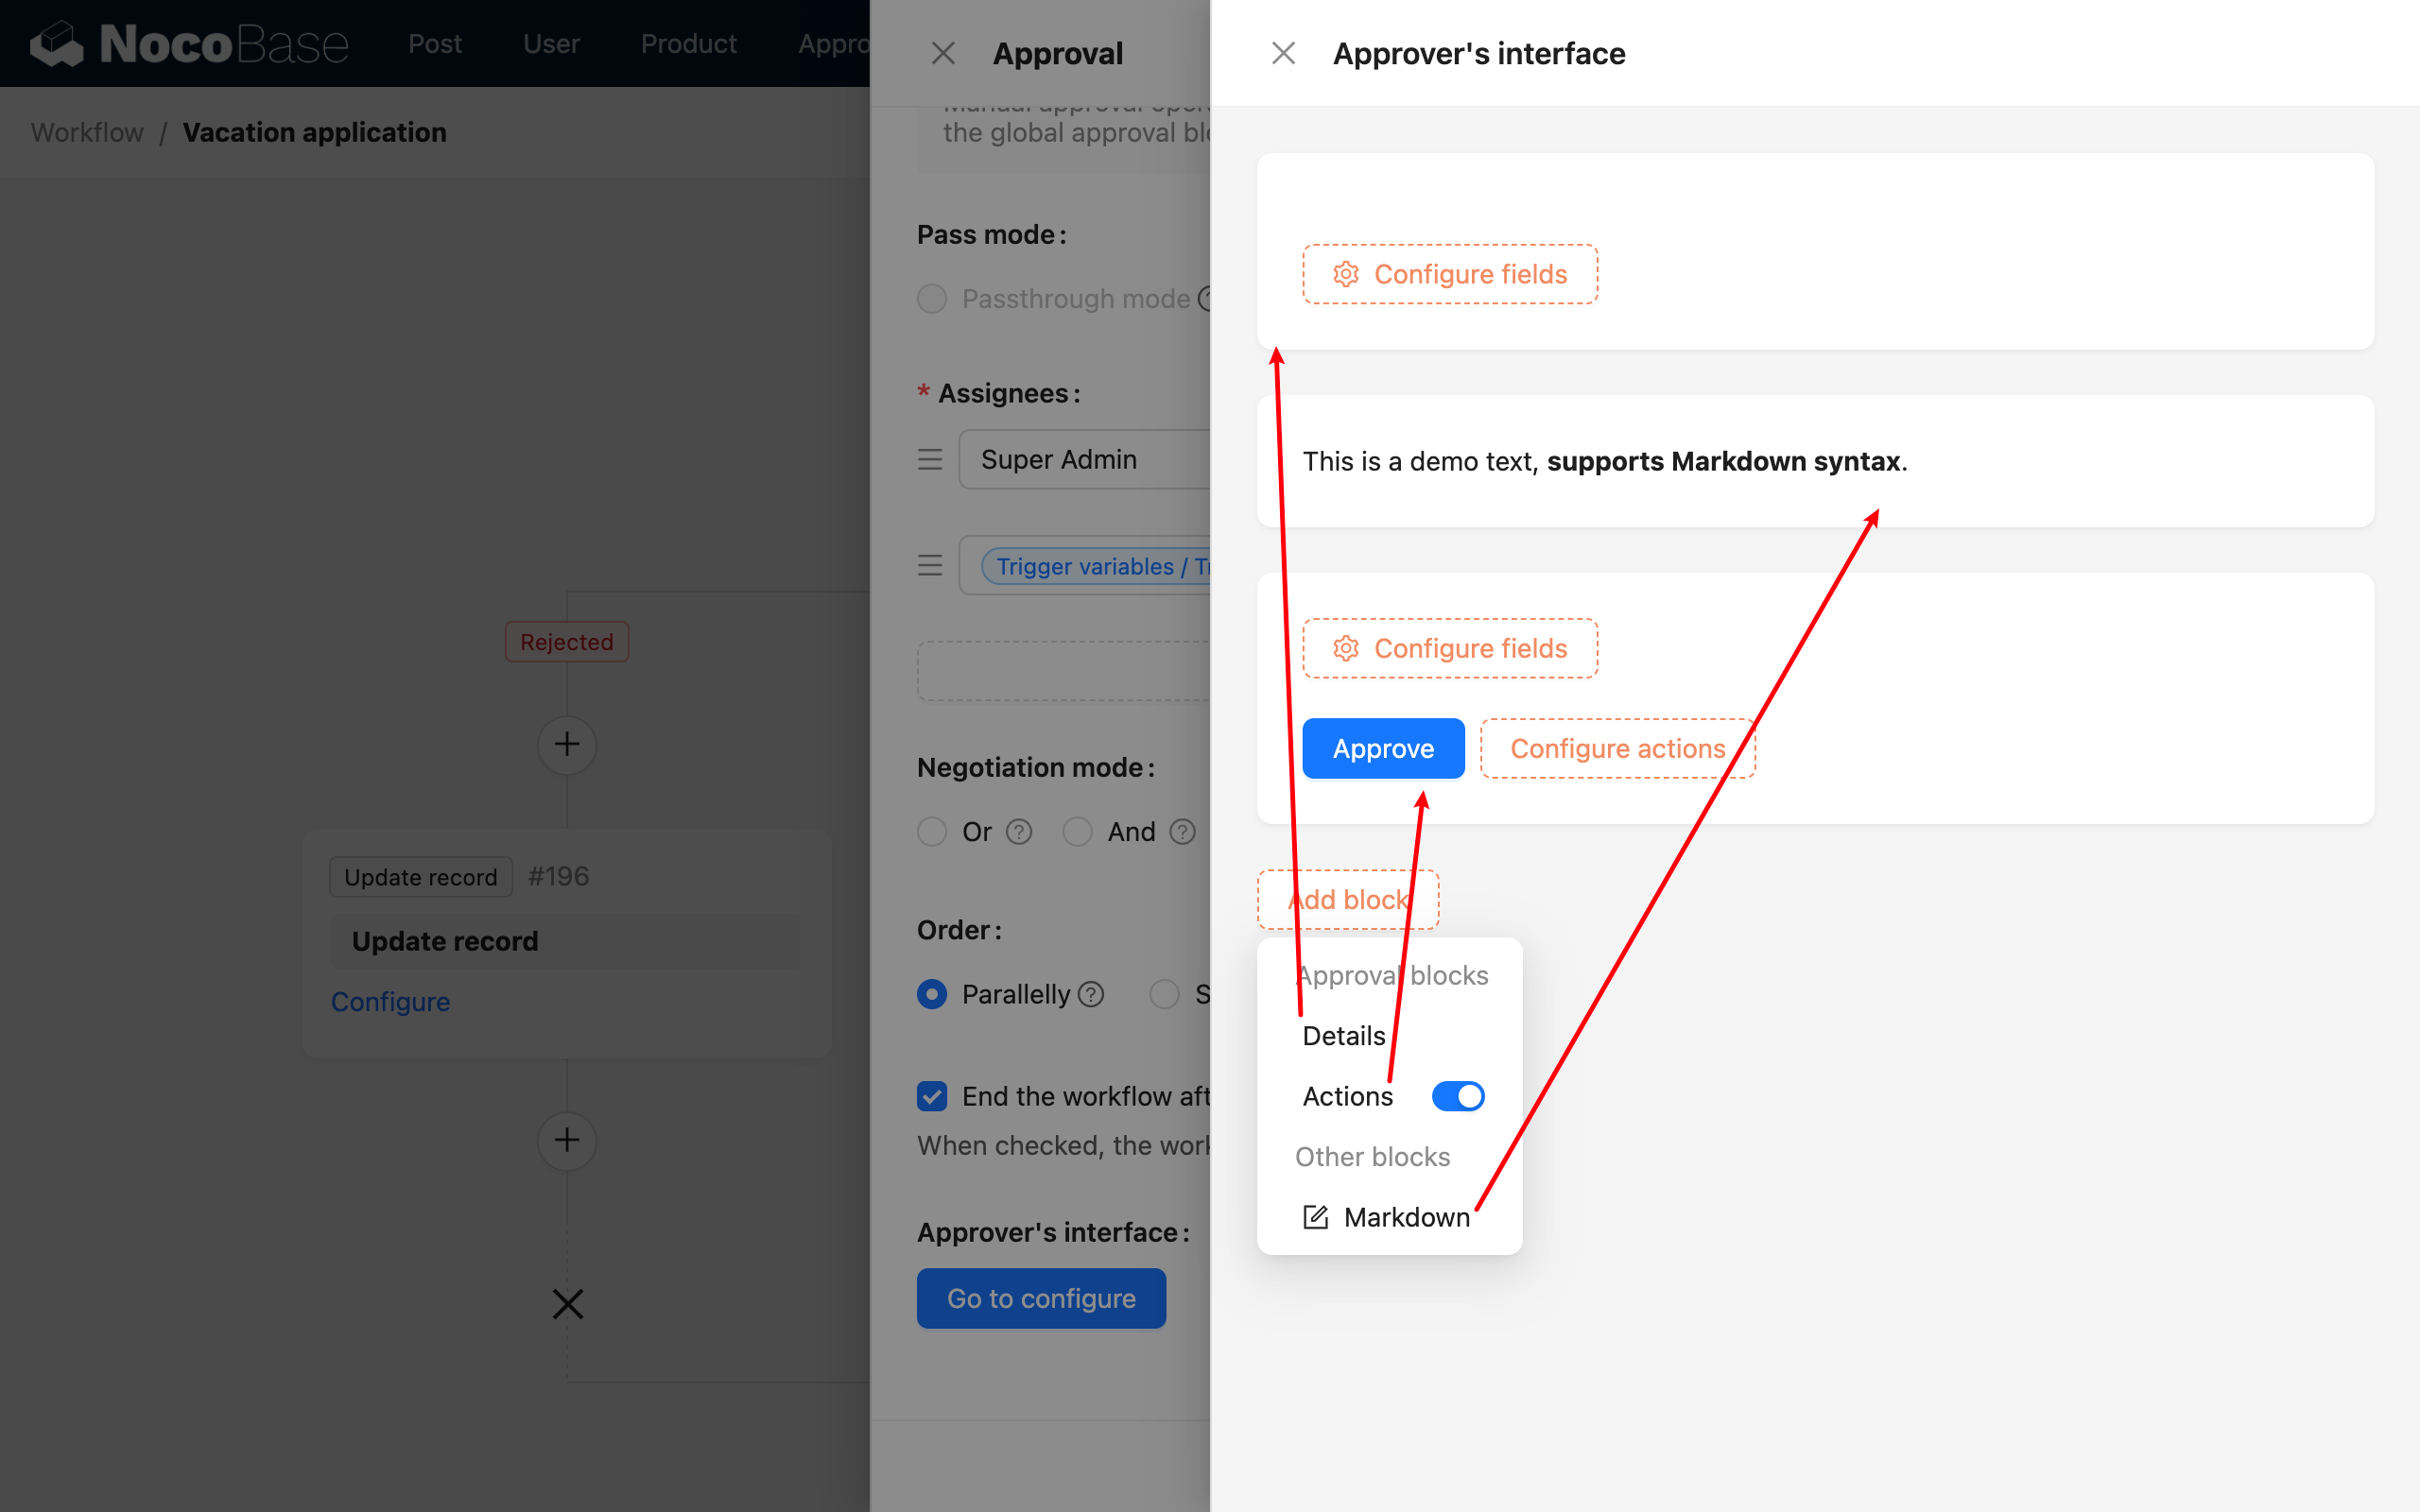
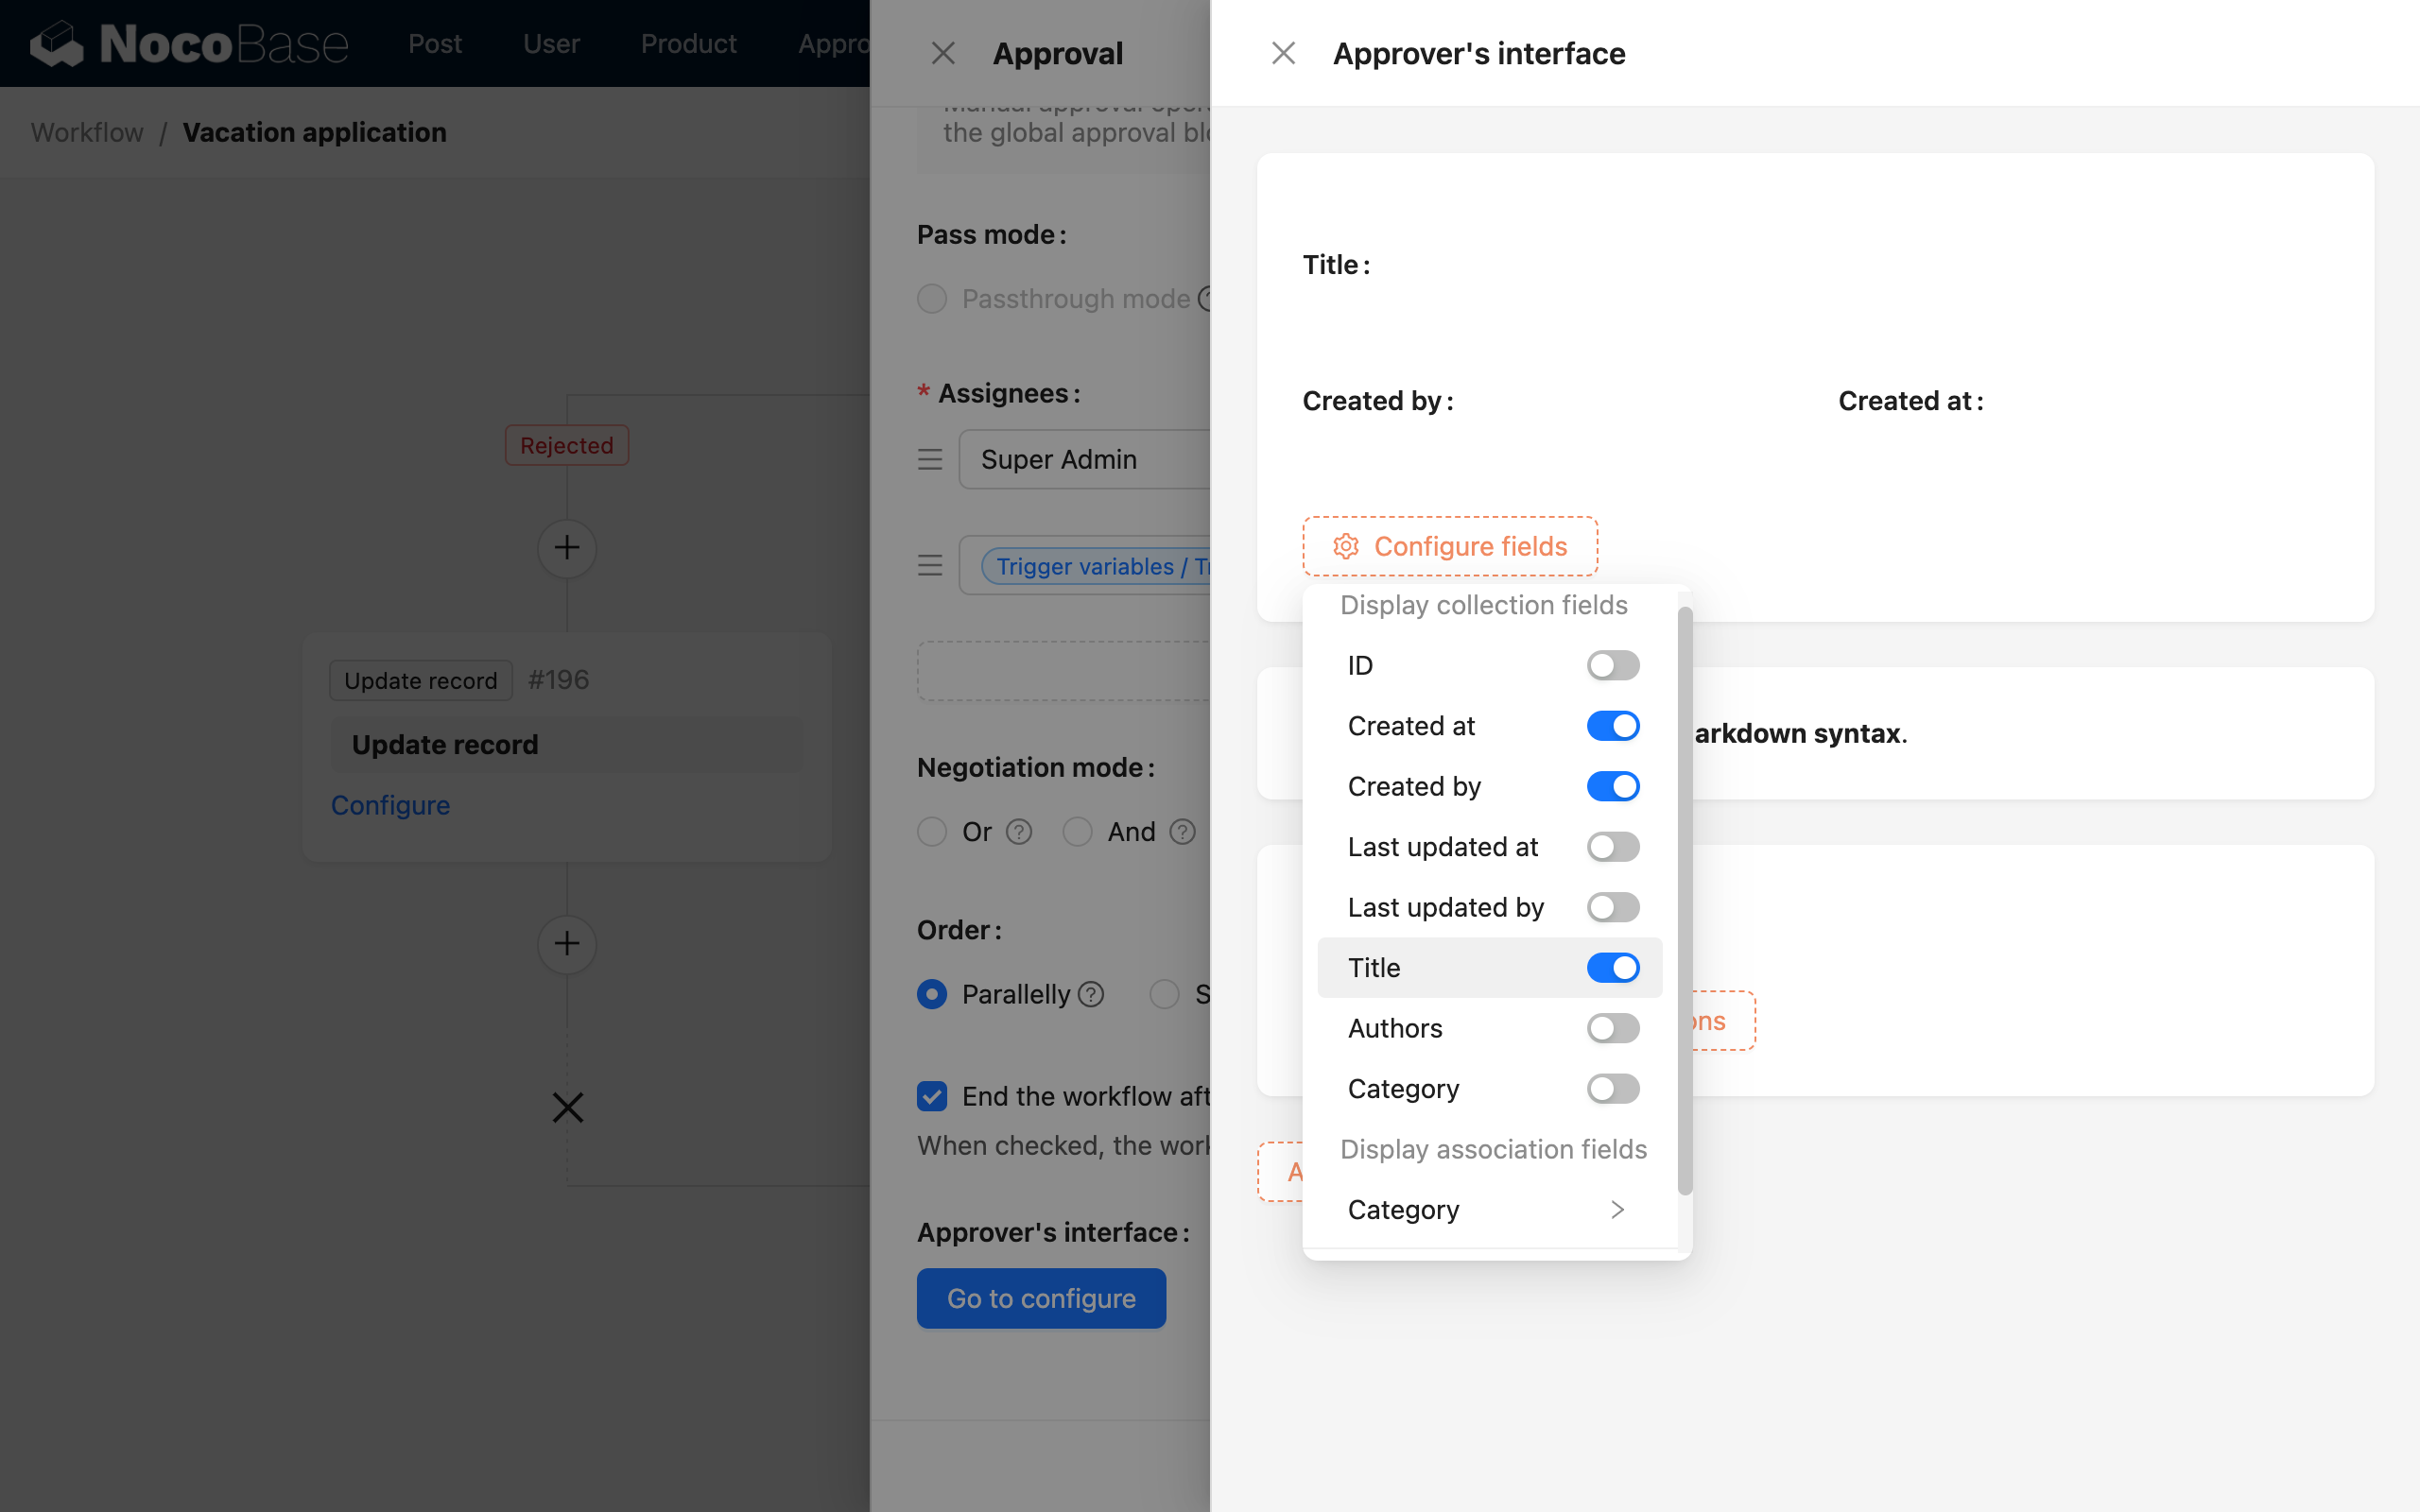
Details Block
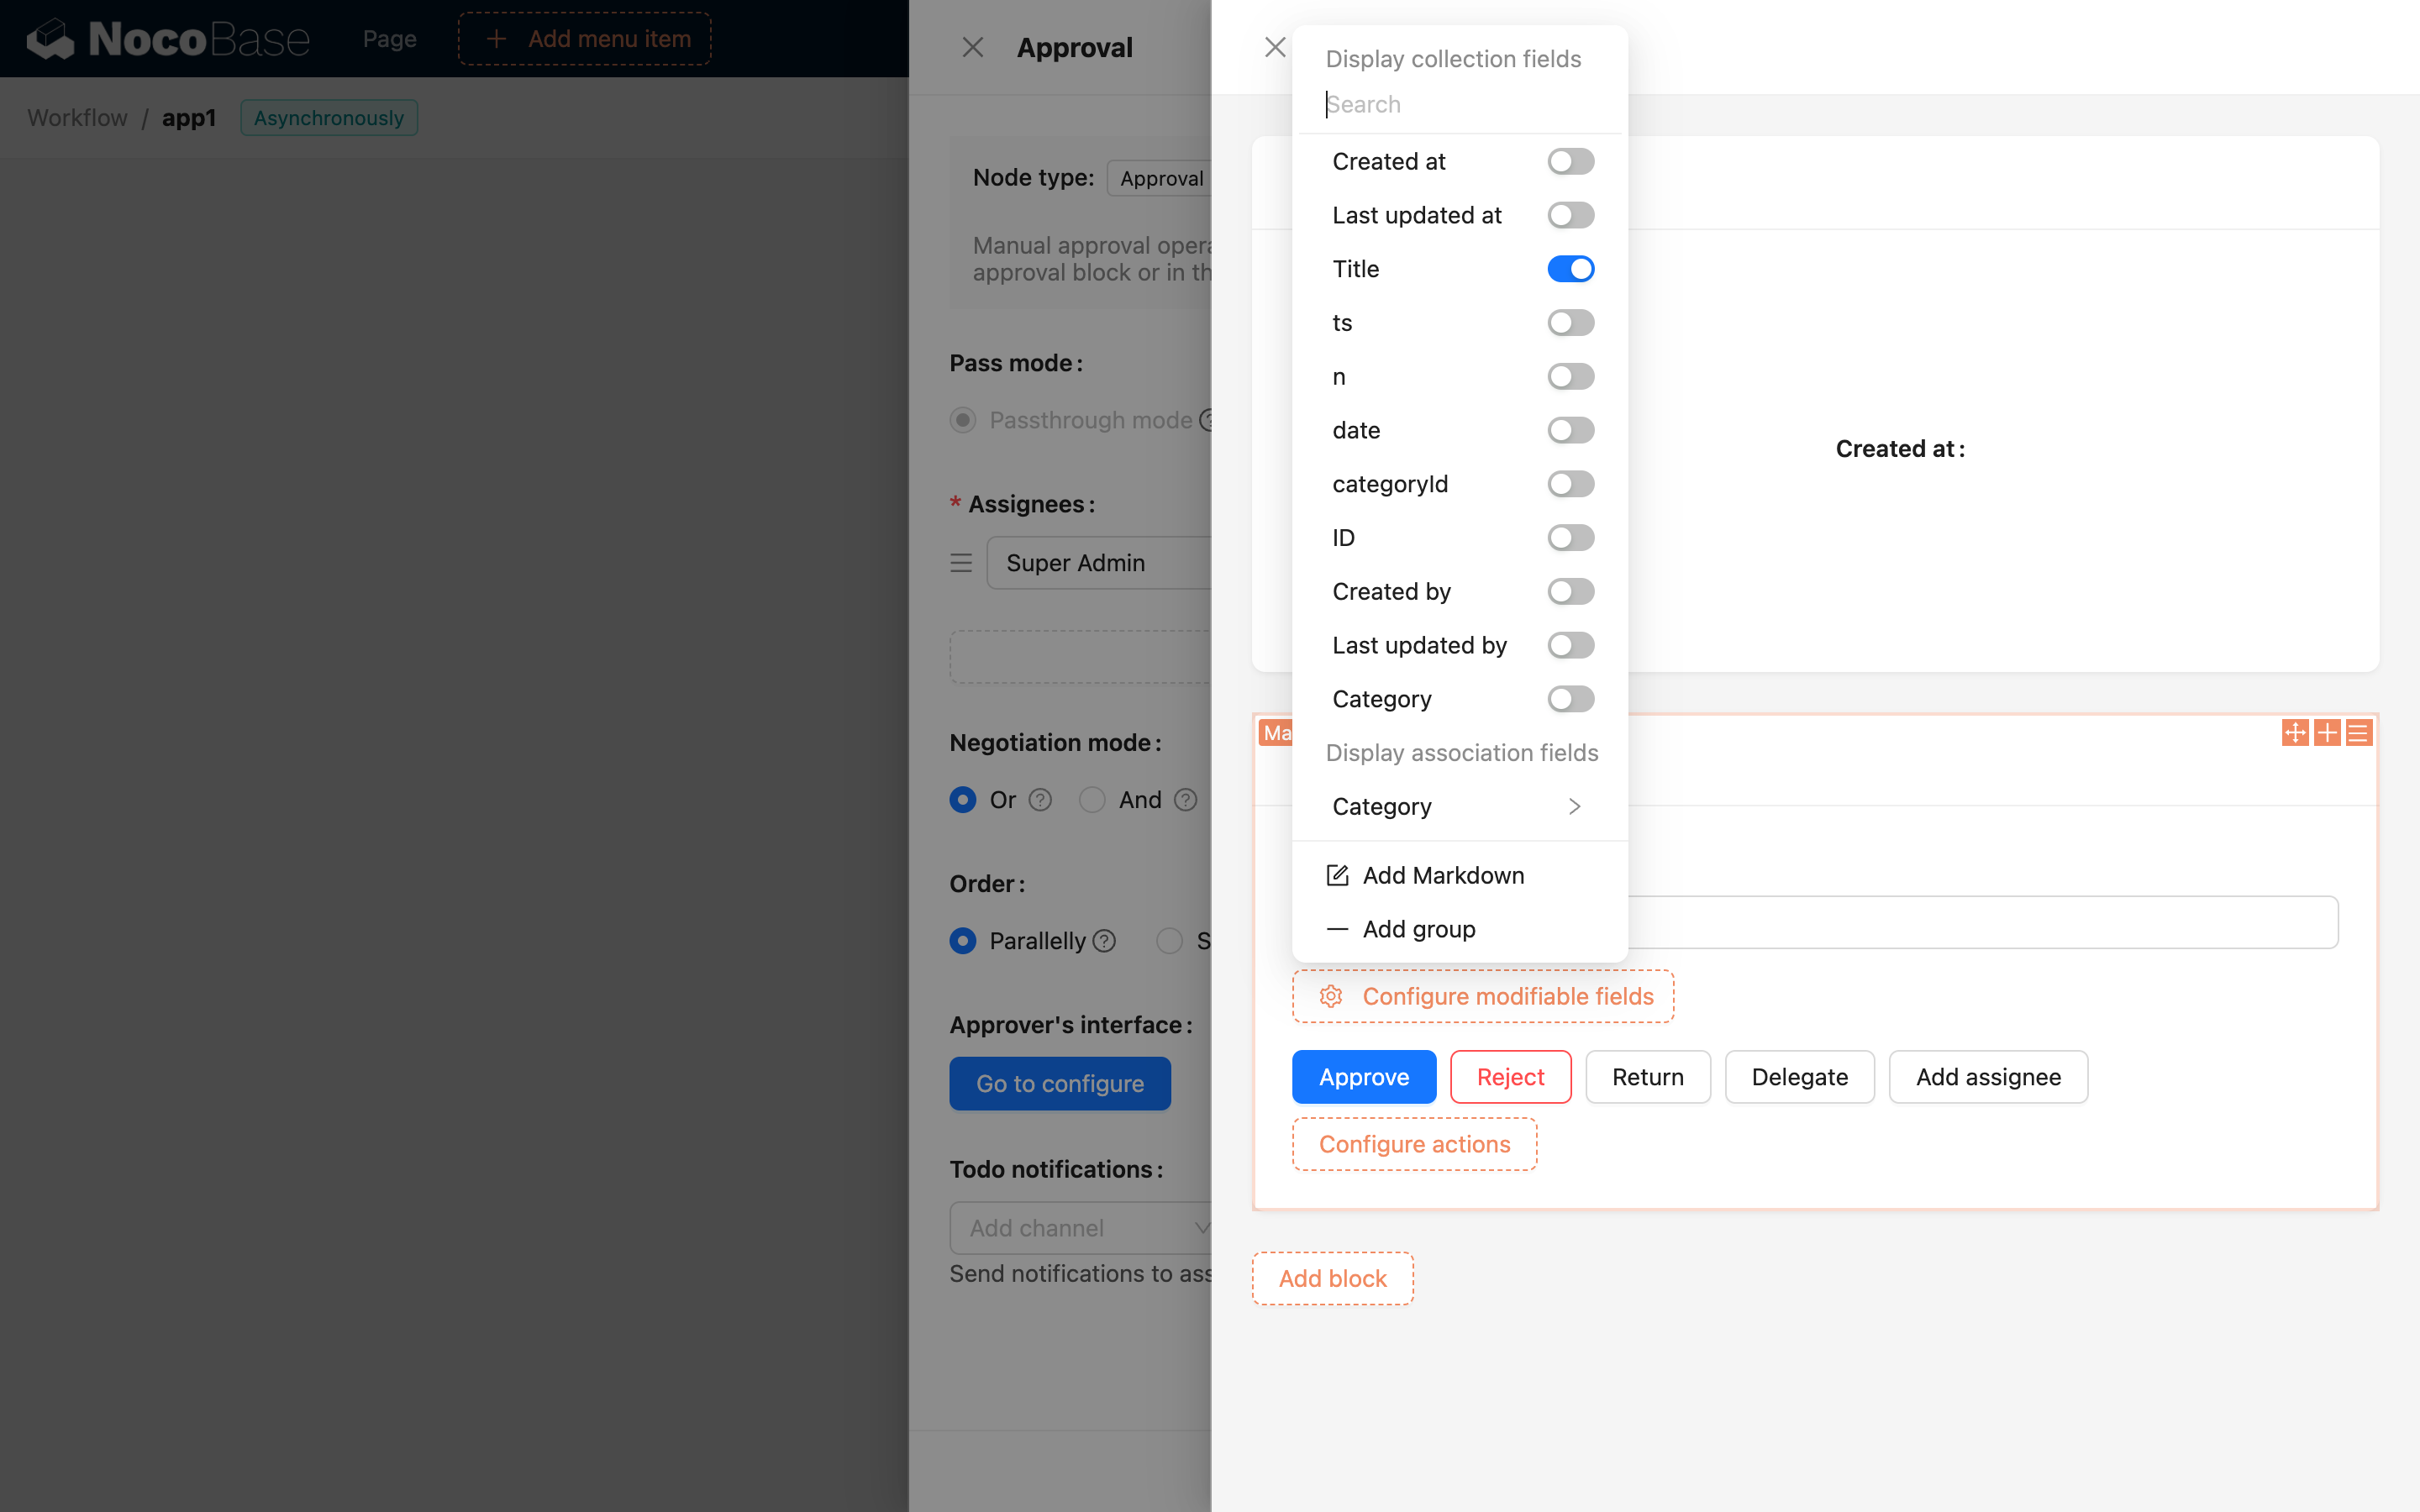
The approval content details block is the data block submitted by the initiator. Similar to a regular data block, you can add field components from the collection and arrange them freely to organize the content that the approver needs to view:
Form Block
In the action form block, you can add action buttons supported by this node, including 'Pass', 'Reject', 'Return', 'Reassign', and 'Add Signer':
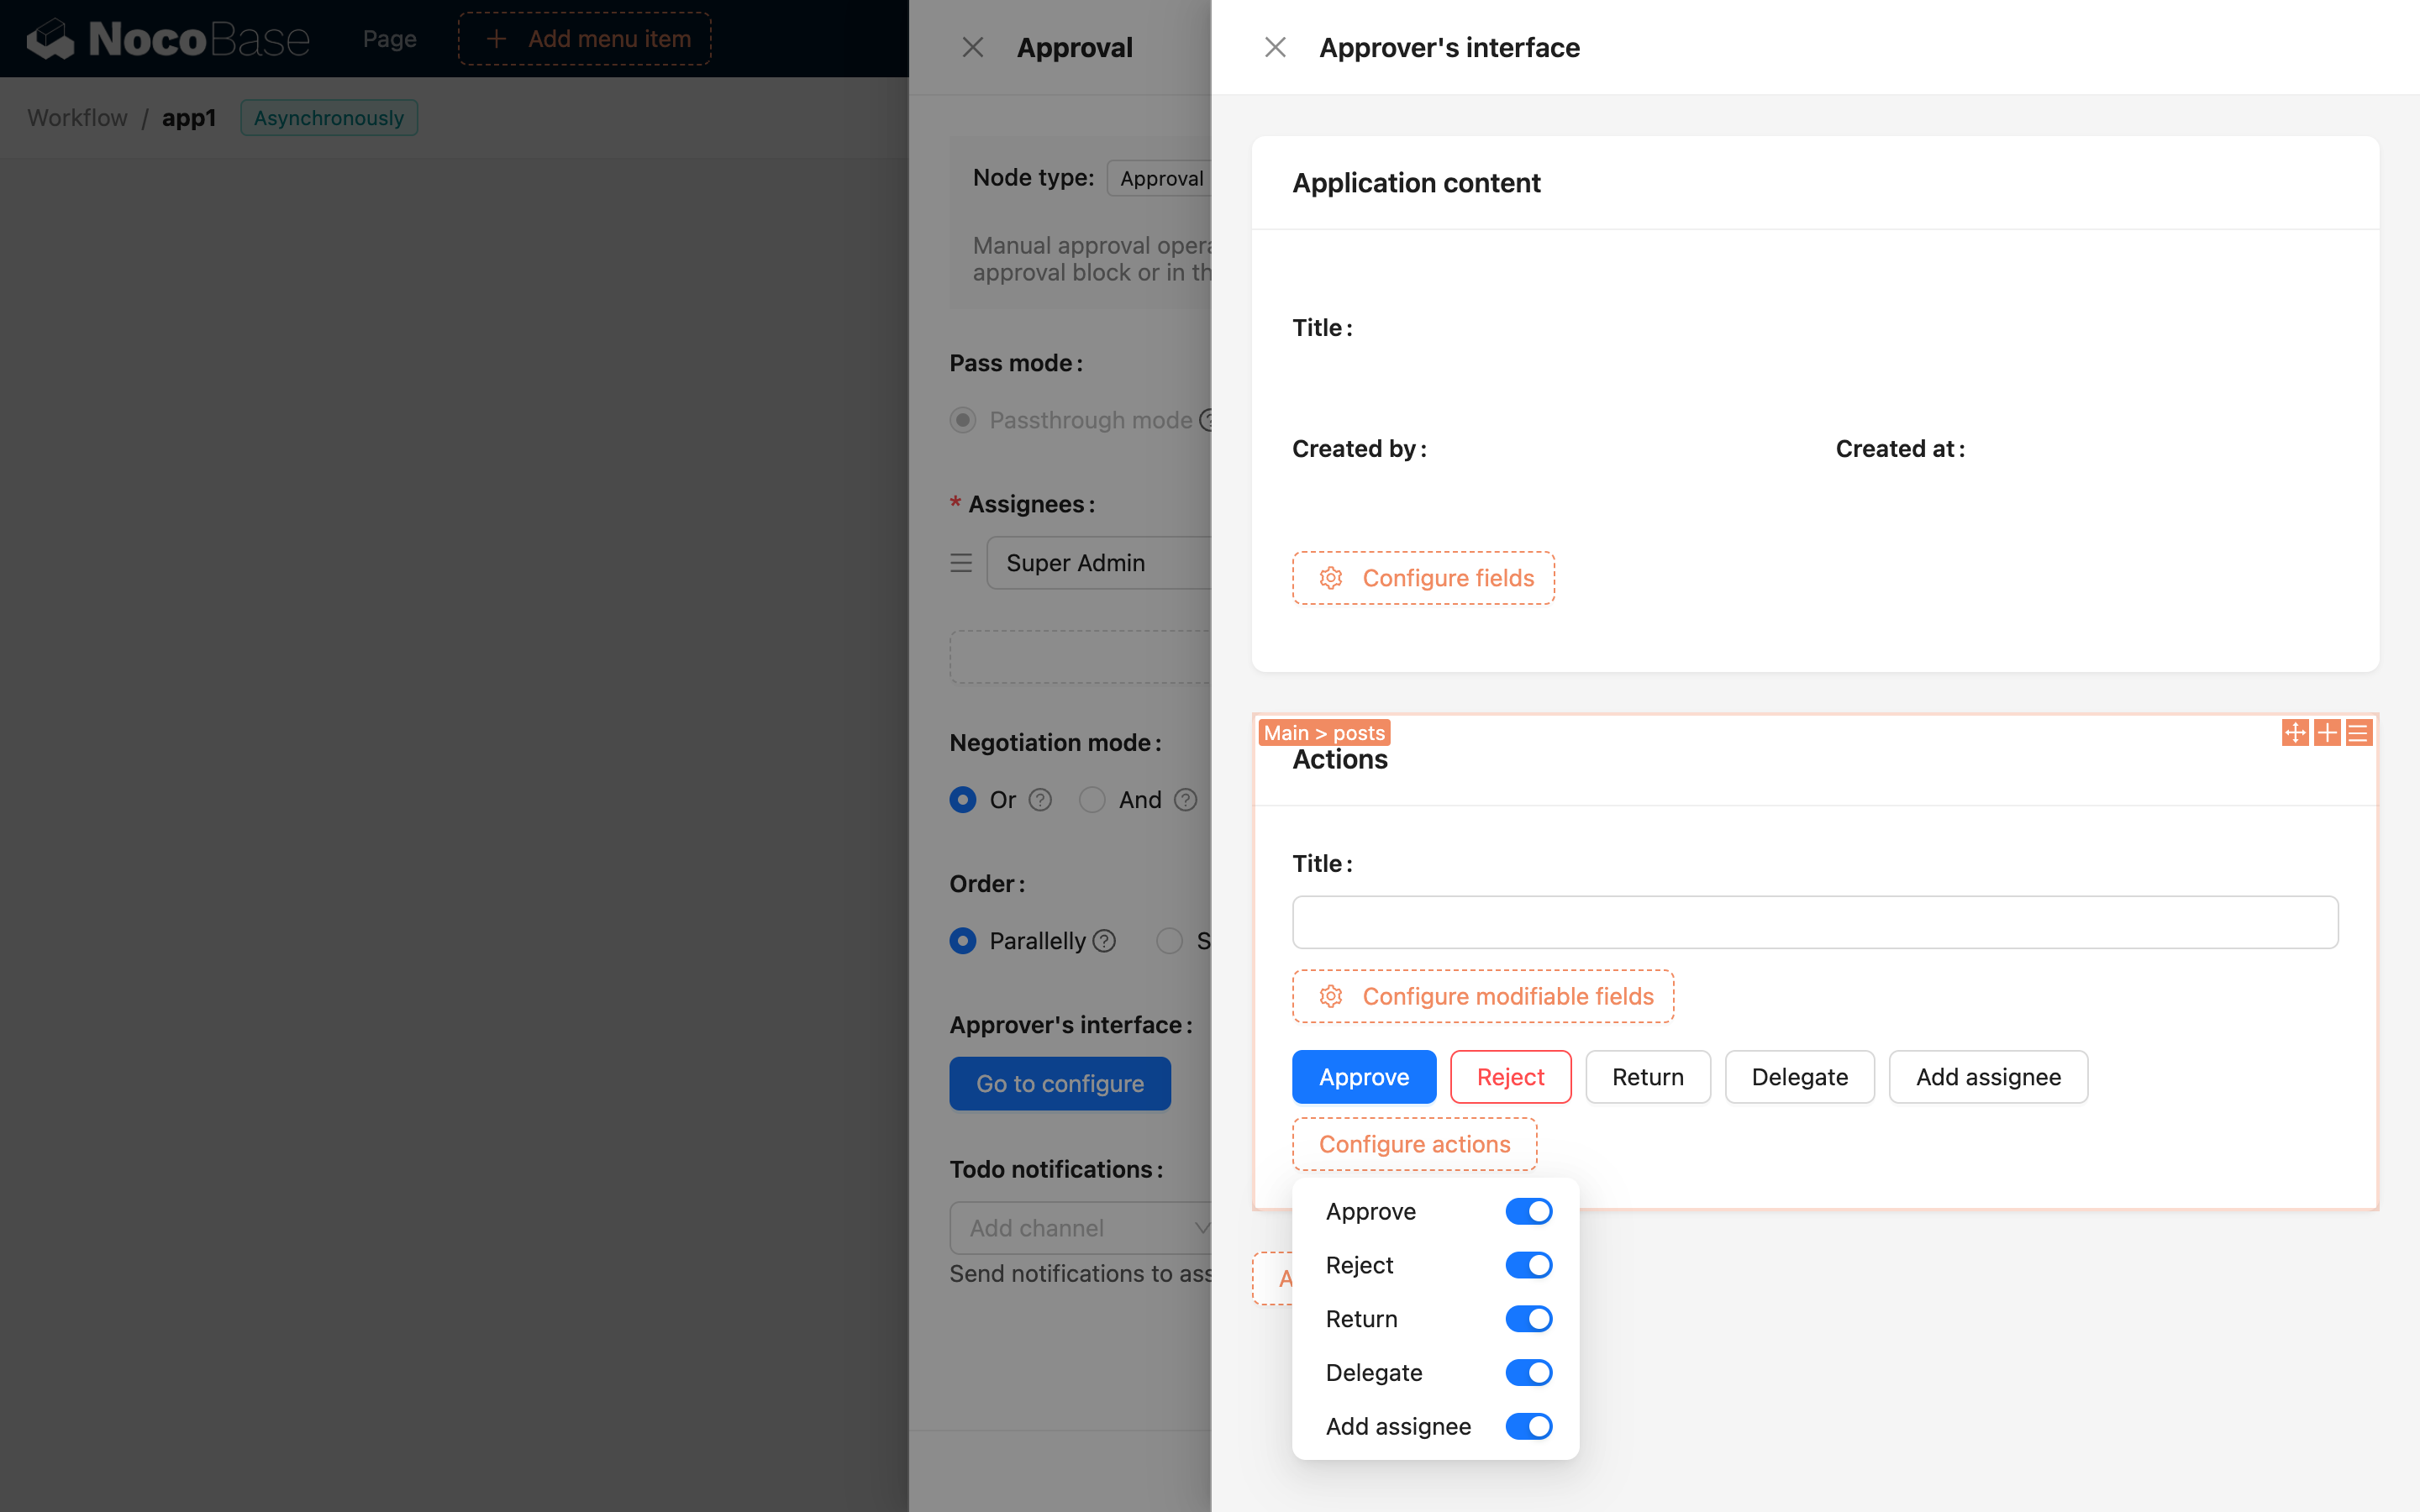
Additionally, fields that can be modified by the approver can also be added to the action form. These fields will be displayed in the action form when the approver is processing the approval. The approver can modify the values of these fields, and upon submission, both the data for approval and the snapshot of the corresponding data in the approval process will be updated simultaneously.
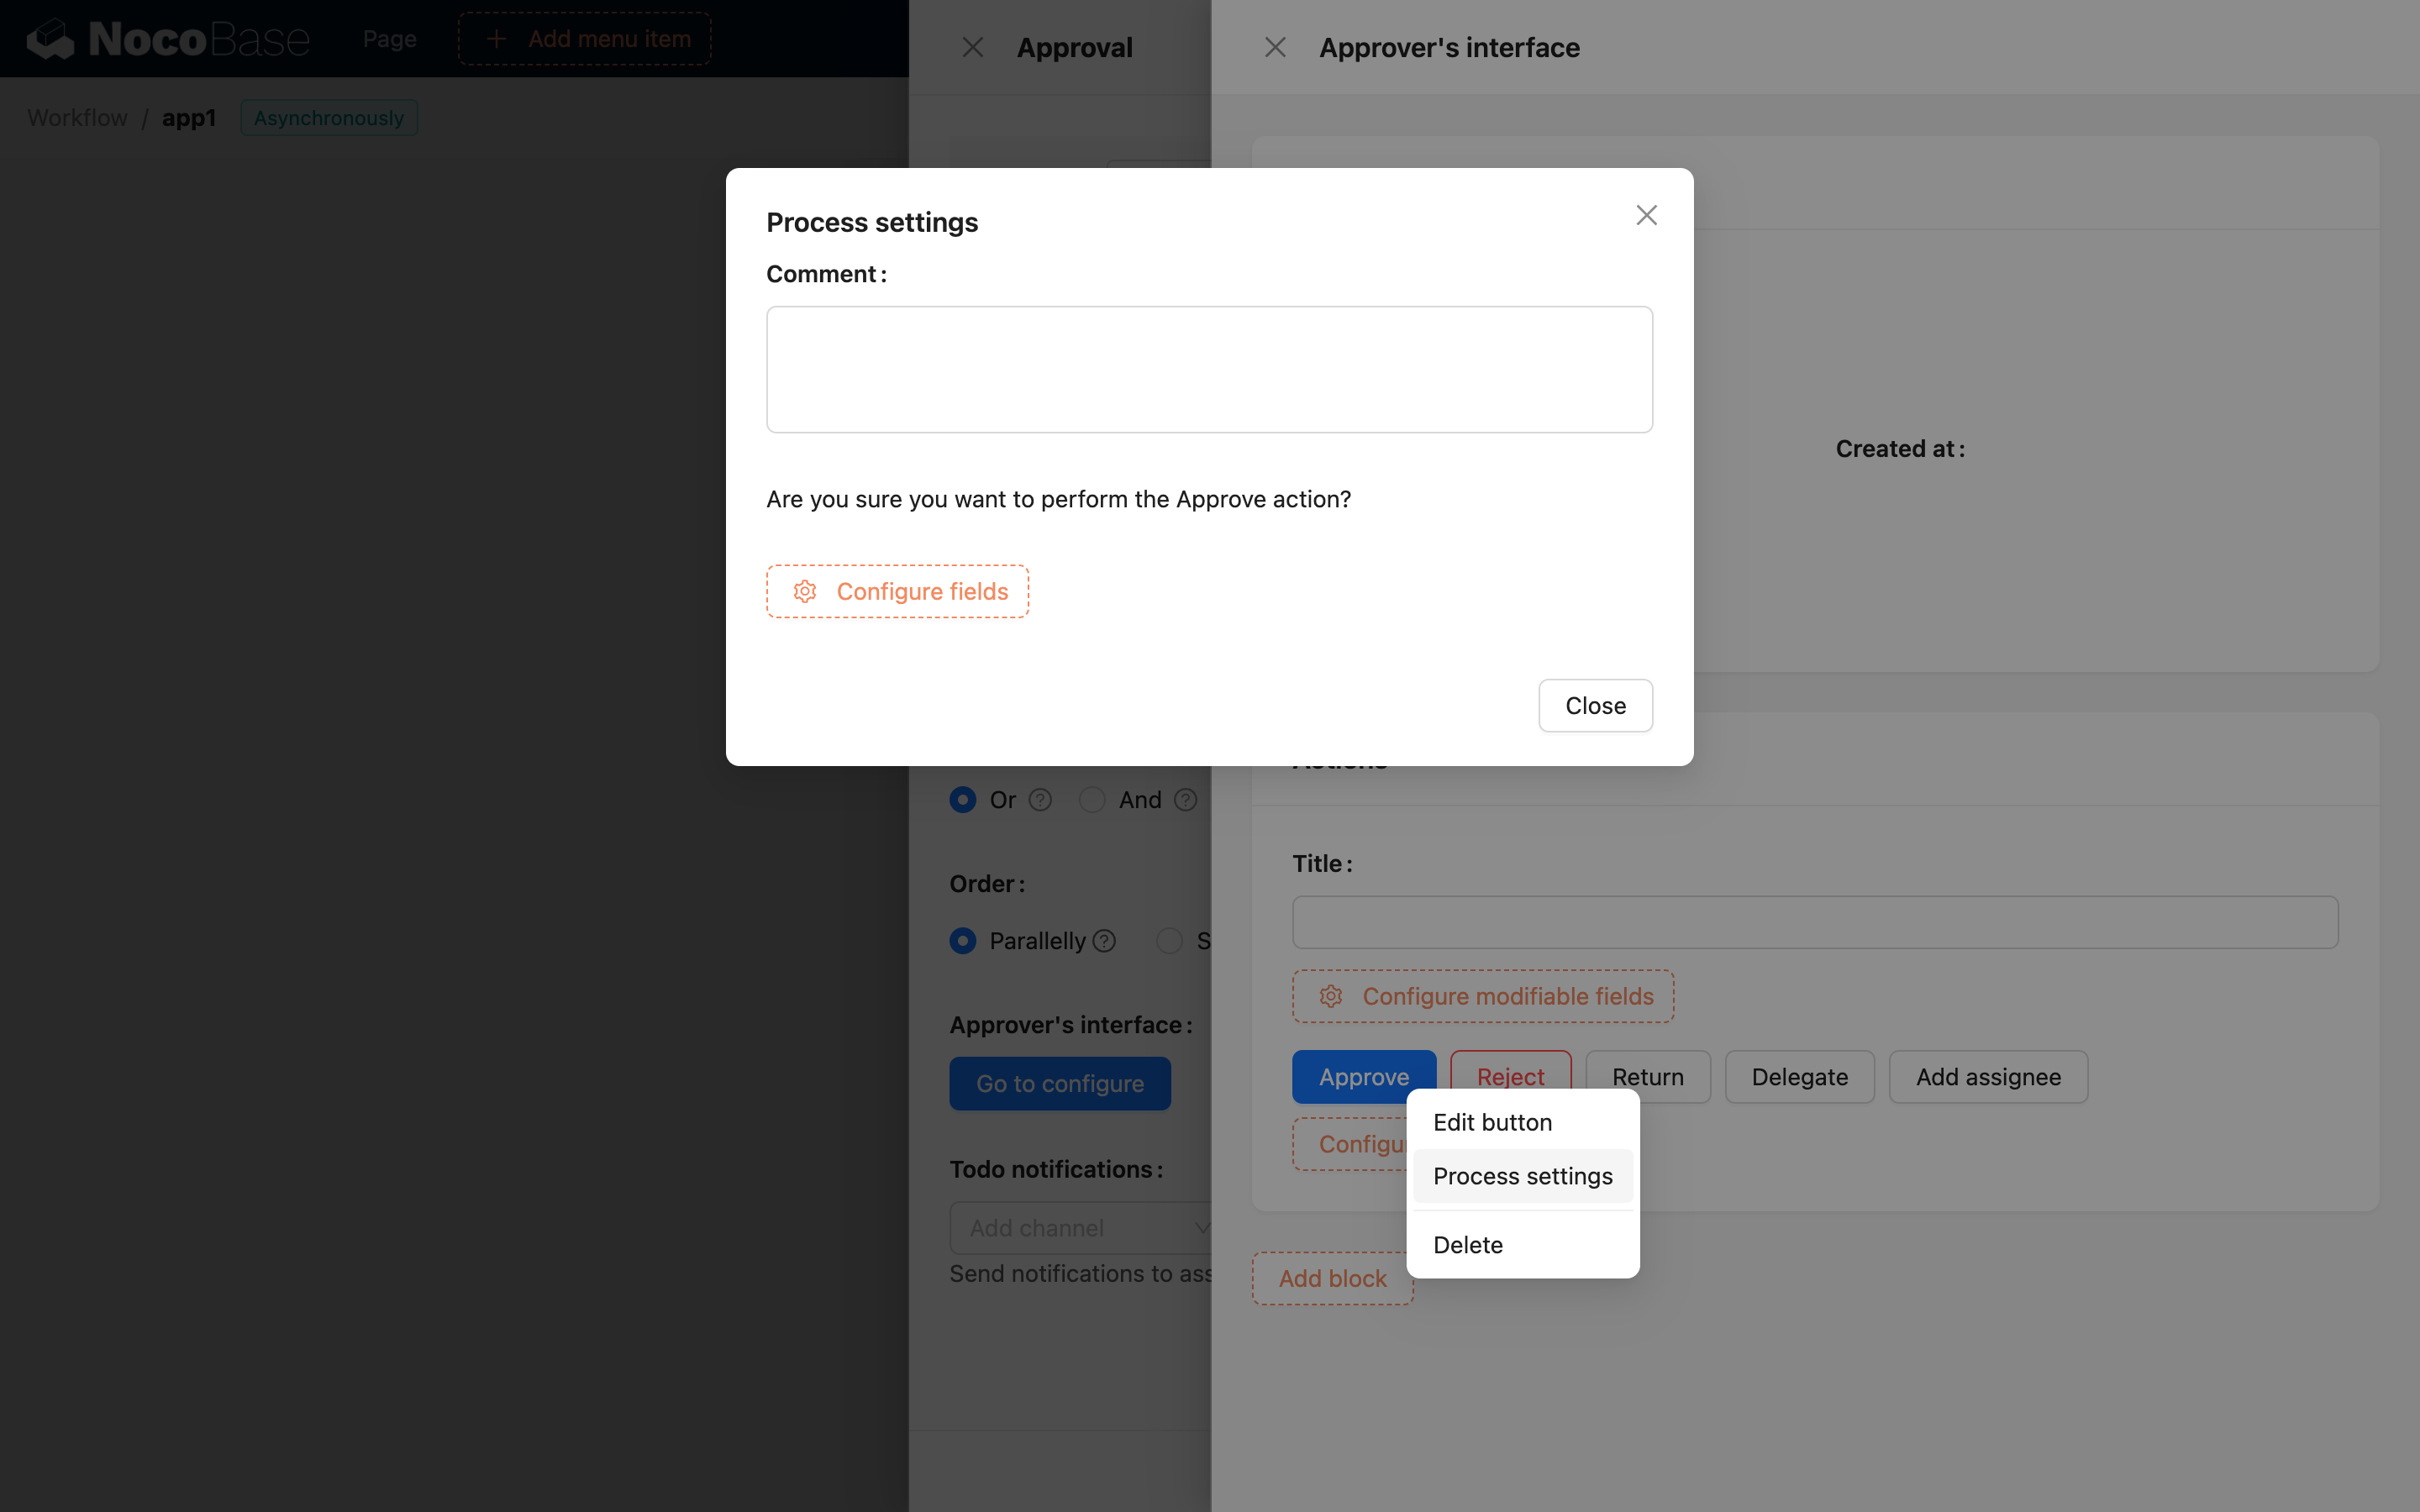
'Pass', 'Reject', and 'Return'
Among the approval action buttons, 'Pass', 'Reject', and 'Return' are decisive actions. After submission, the approver's processing for this node is complete. Additional fields that need to be filled out upon submission, such as 'Comment', can be added in the 'Processing Configuration' pop-up for the action button.
'Reassign' and 'Add Signer'
'Reassign' and 'Add Signer' are non-decisive actions used to dynamically adjust the approvers in the approval process. 'Reassign' is to hand over the current user's approval task to another user for processing. 'Add Signer' is to add an approver before or after the current approver, and the new approver will continue the approval process together.
After enabling the 'Reassign' or 'Add Signer' action buttons, you need to select the 'Assignment Scope' in the button's configuration menu to set the range of users who can be assigned as new approvers:
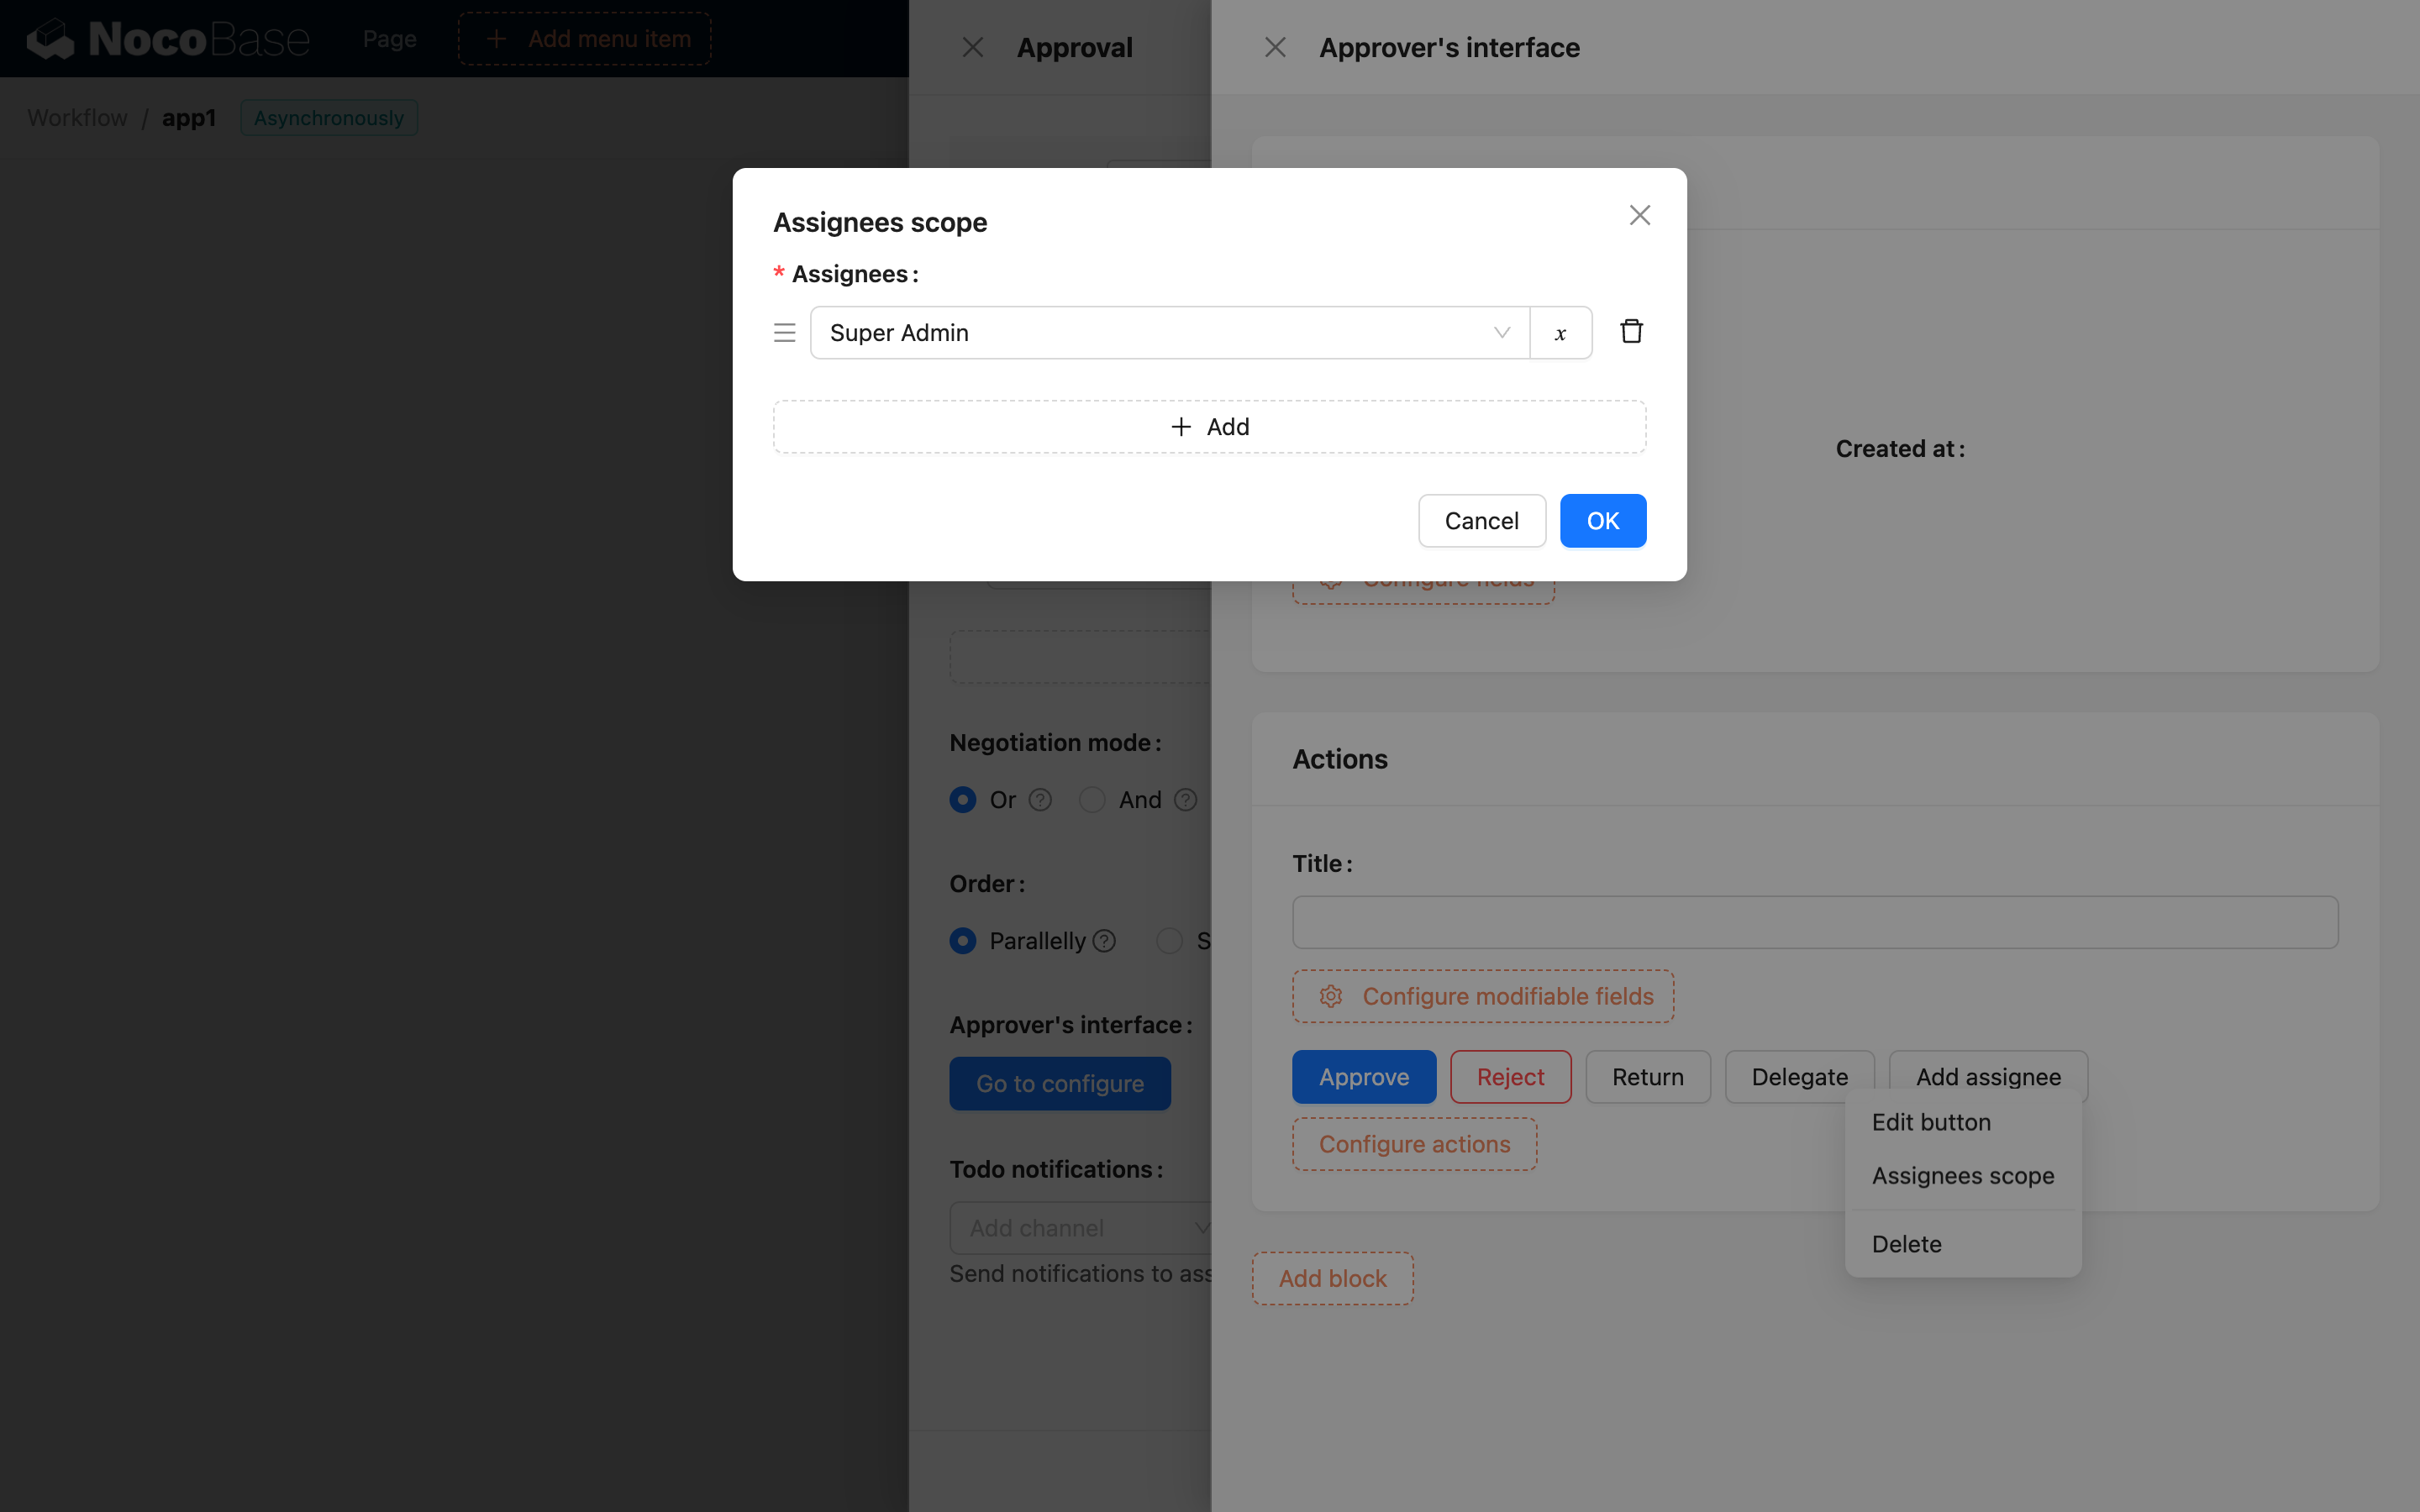
Same as the original approver configuration of the node, the assignment scope can also be directly selected approvers or based on query conditions of the user collection. It will eventually be merged into a set and will not include users already in the approver set.
If an action button is enabled or disabled, or the assignment scope is modified, you must save the node's configuration after closing the action interface configuration pop-up. Otherwise, the changes to the action button will not take effect.
Node Result
After the approval is completed, the relevant status and data will be recorded in the node result and can be used as variables by subsequent nodes.
Node Approval Status
Represents the processing status of the current approval node. The result is an enumerated value.
Data After Approval
If the approver modifies the approval content in the action form, the modified data will be recorded in the node result for use by subsequent nodes. To use association fields, you need to configure preloading for the association fields in the trigger.
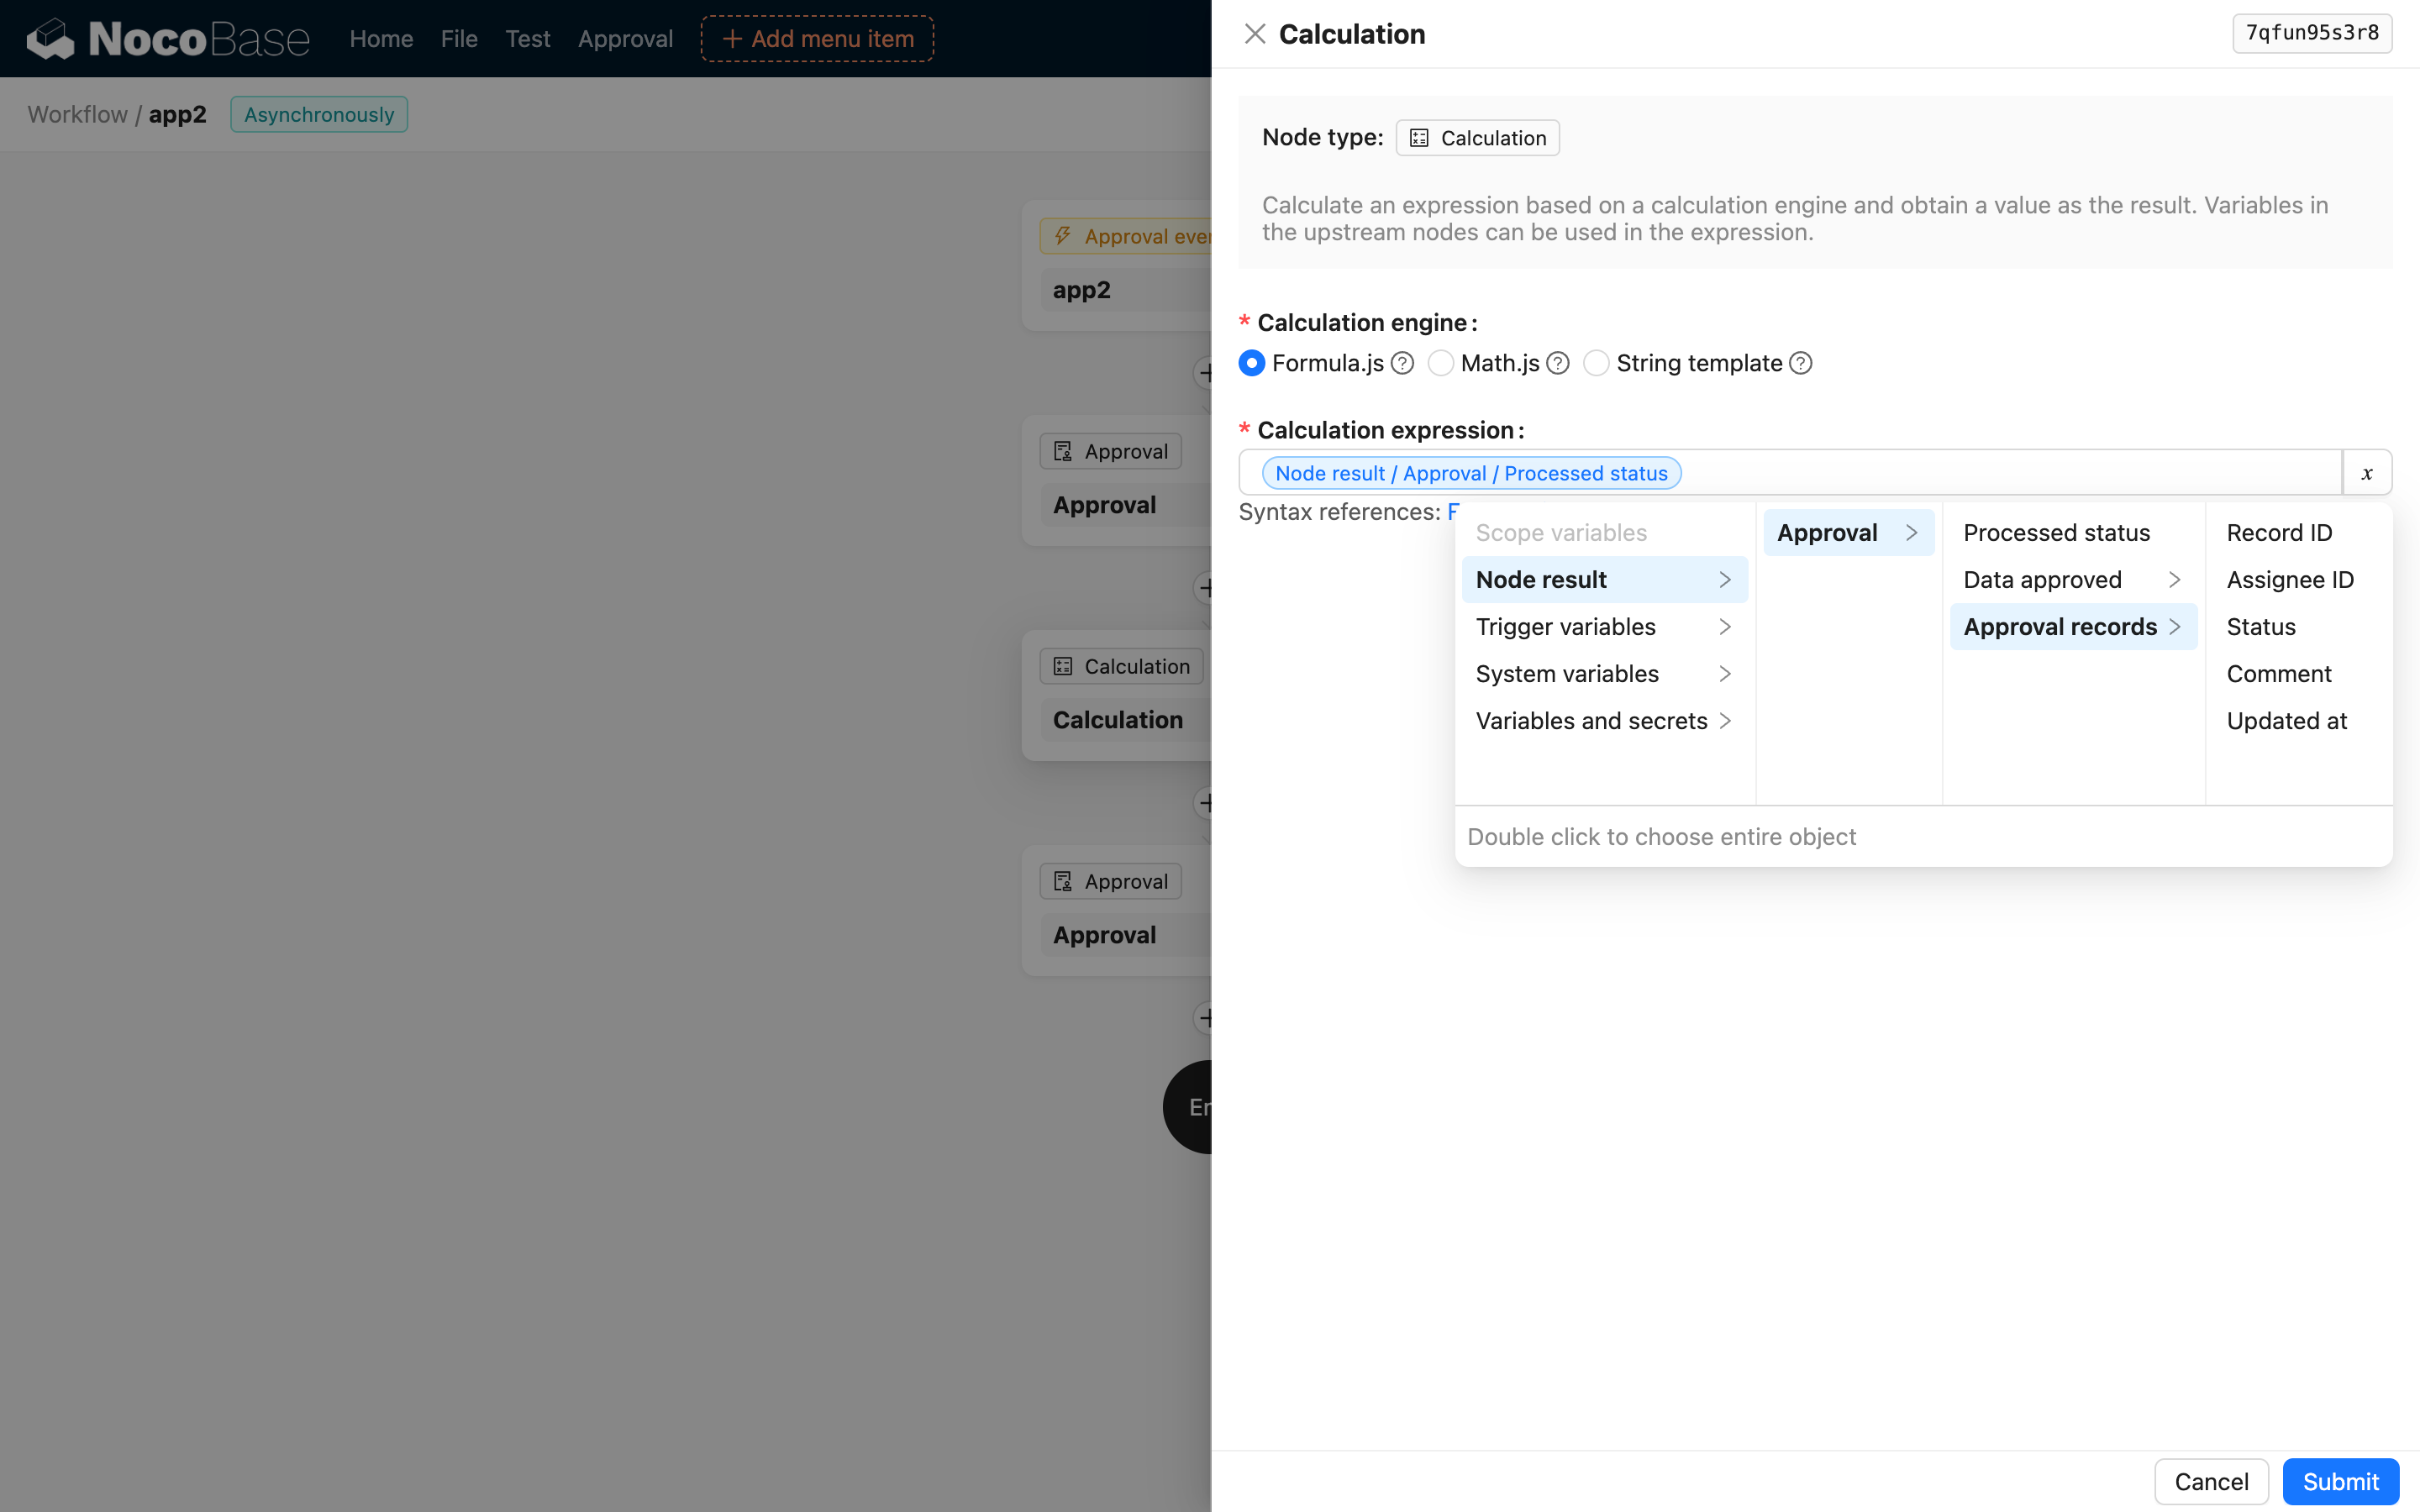
Approval Records
v1.8.0+
The approval processing record is an array that contains the processing records of all approvers in this node. Each processing record includes the following fields:
| Field | Type | Description |
|---|---|---|
| id | number | Unique identifier for the processing record |
| userId | number | User ID who processed this record |
| status | number | Processing status |
| comment | string | Comment at the time of processing |
| updatedAt | string | Update time of the processing record |
You can use these fields as variables in subsequent nodes as needed.