

HTTP Request
This feature is provided by the plugin «Workflow: HTTP request node»Introduction
When you need to interact with another web system, you can use the HTTP Request node. When executed, this node sends an HTTP request to the specified address according to its configuration. It can carry data in JSON or application/x-www-form-urlencoded format to interact with external systems.
If you are familiar with request sending tools like Postman, you can quickly master the usage of the HTTP Request node. Unlike these tools, all parameters in the HTTP Request node can use context variables from the current workflow, allowing for organic integration with the system's business processes.
Installation
Built-in plugin, no installation required.
Creating a Node
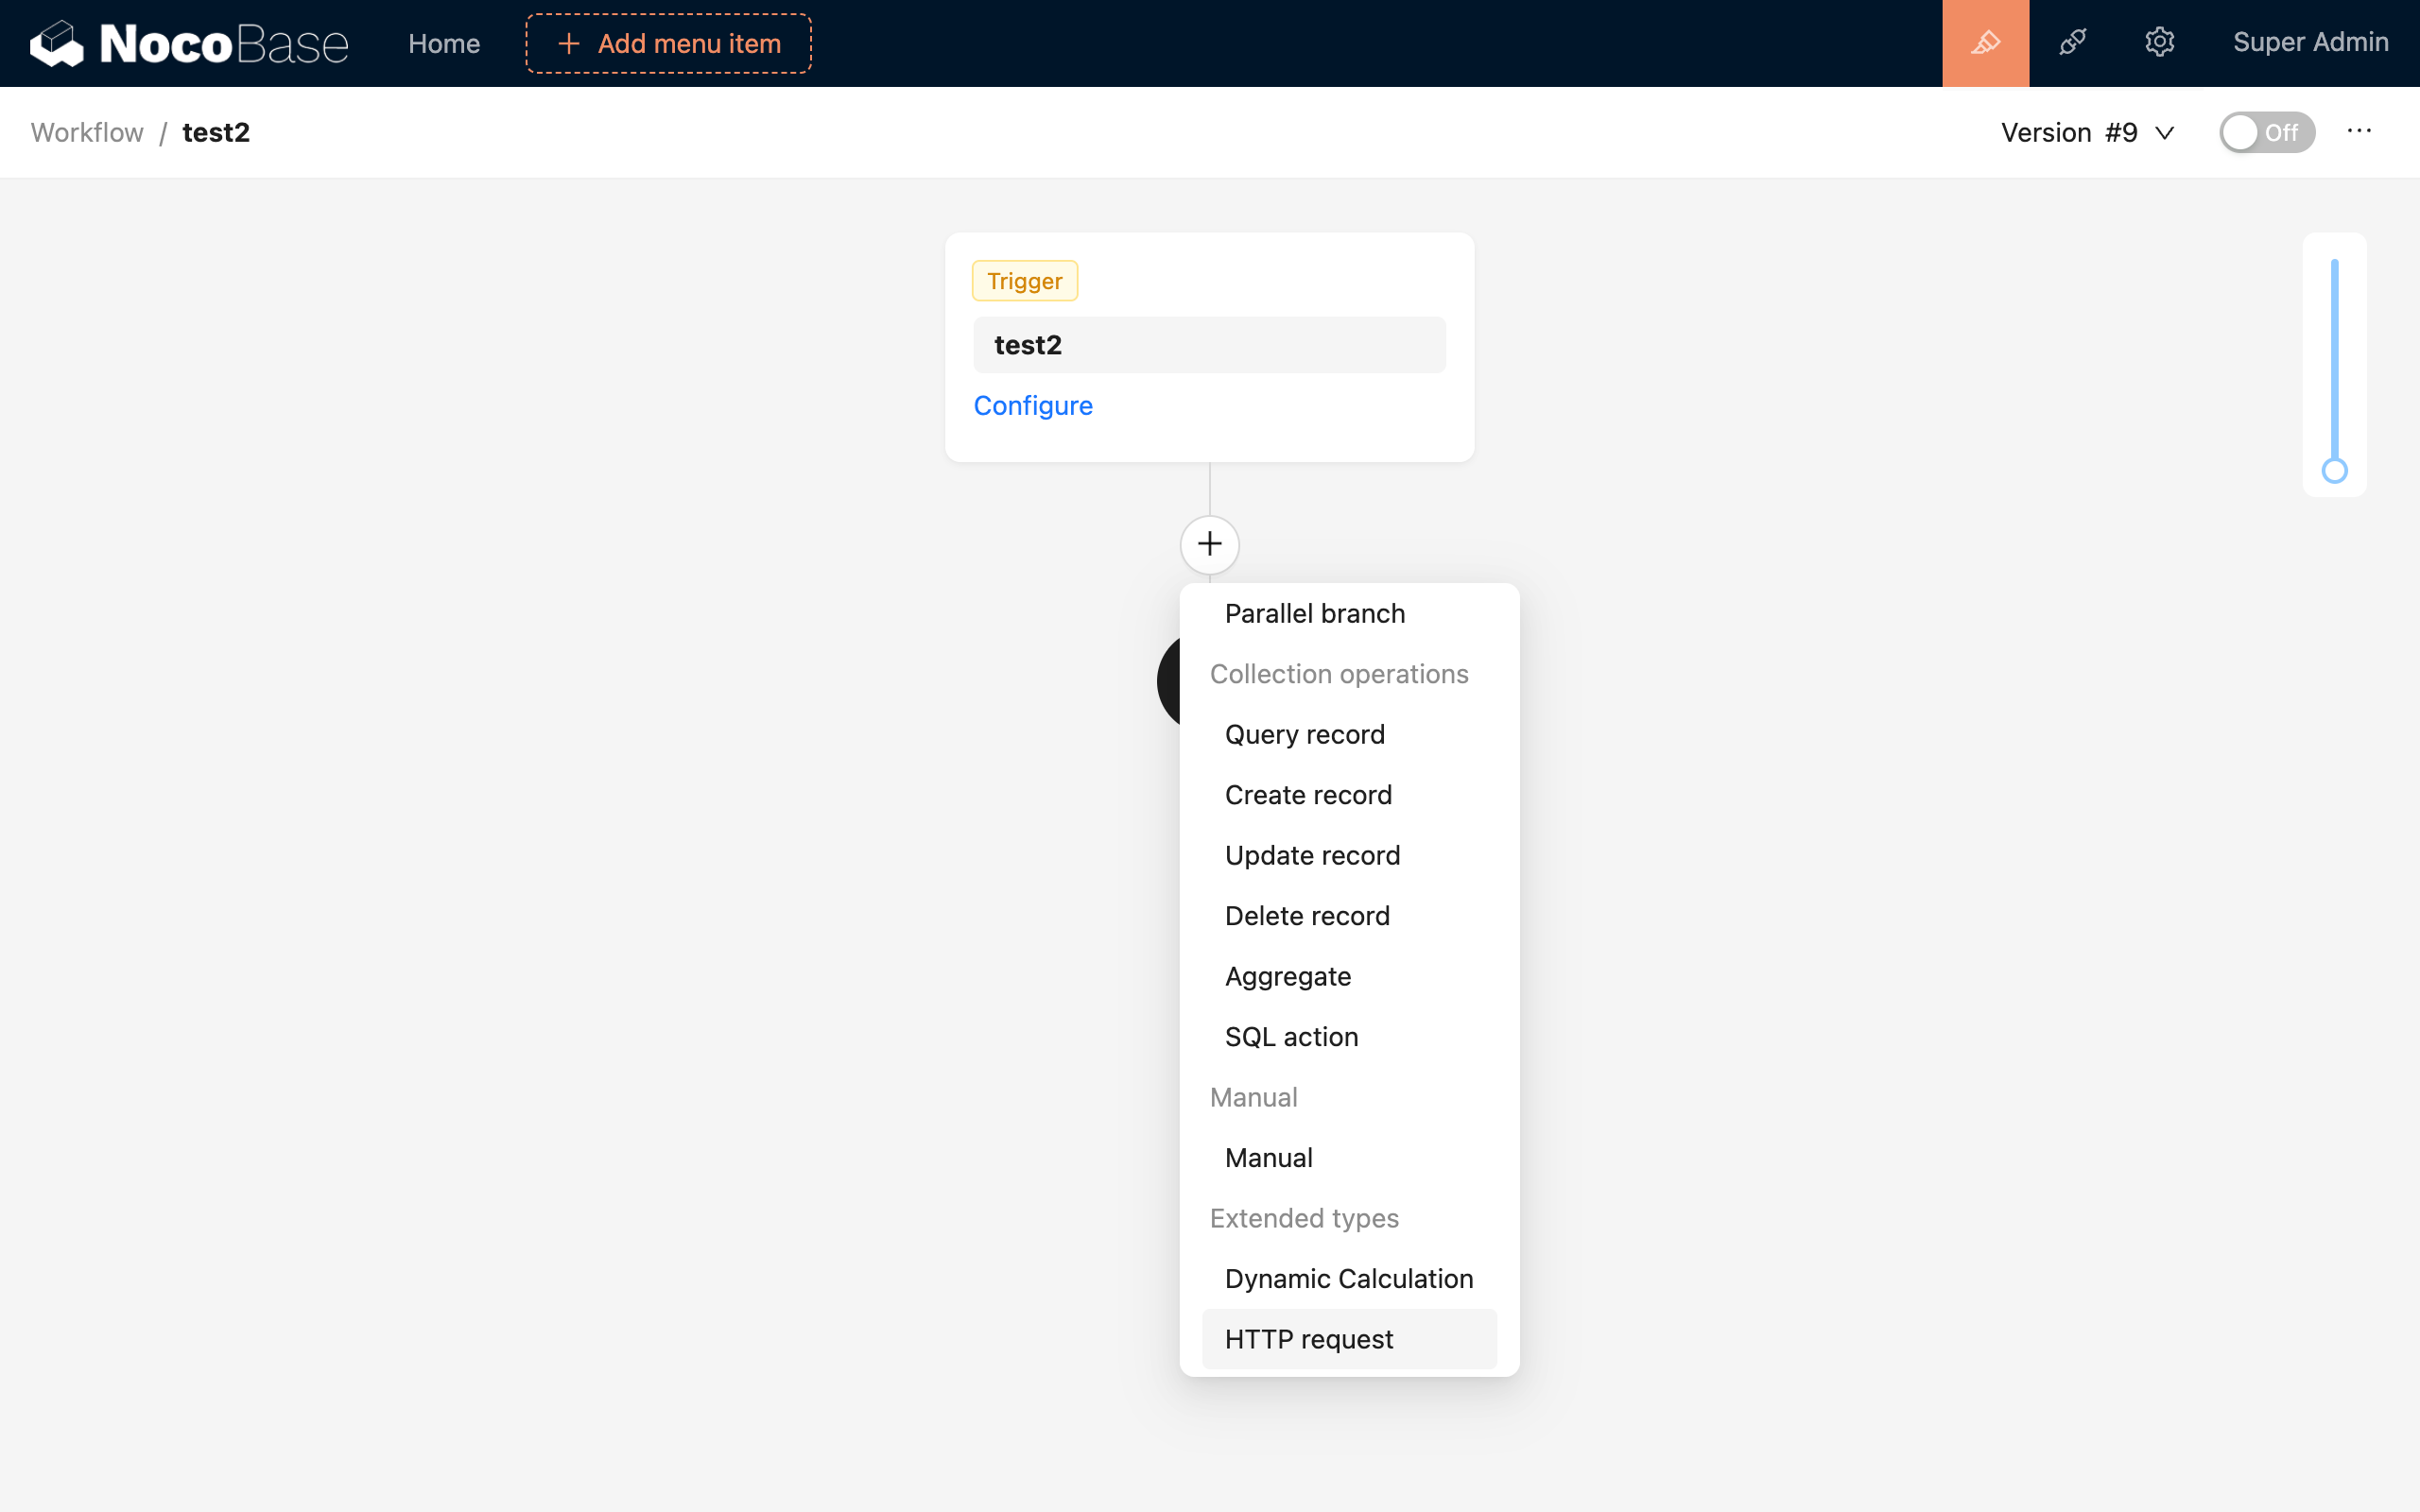
In the workflow configuration interface, click the plus ("+") button in the flow to add an "HTTP Request" node:
Node Configuration
Request Method
Optional HTTP request methods: GET, POST, PUT, PATCH, and DELETE.
Request URL
The URL of the HTTP service, which must include the protocol part (http:// or https://). Using https:// is recommended.
Request Data Format
This is the Content-Type in the request header. For supported formats, see the "Request Body" section.
Request Header Configuration
Key-value pairs for the request Header section. The values can use variables from the workflow context.
The Content-Type request header is configured via the request data format. There is no need to fill it in here, and any override will be ineffective.
Request Parameters
Key-value pairs for the request query section. The values can use variables from the workflow context.
Request Body
The Body part of the request. Different formats are supported depending on the selected Content-Type.
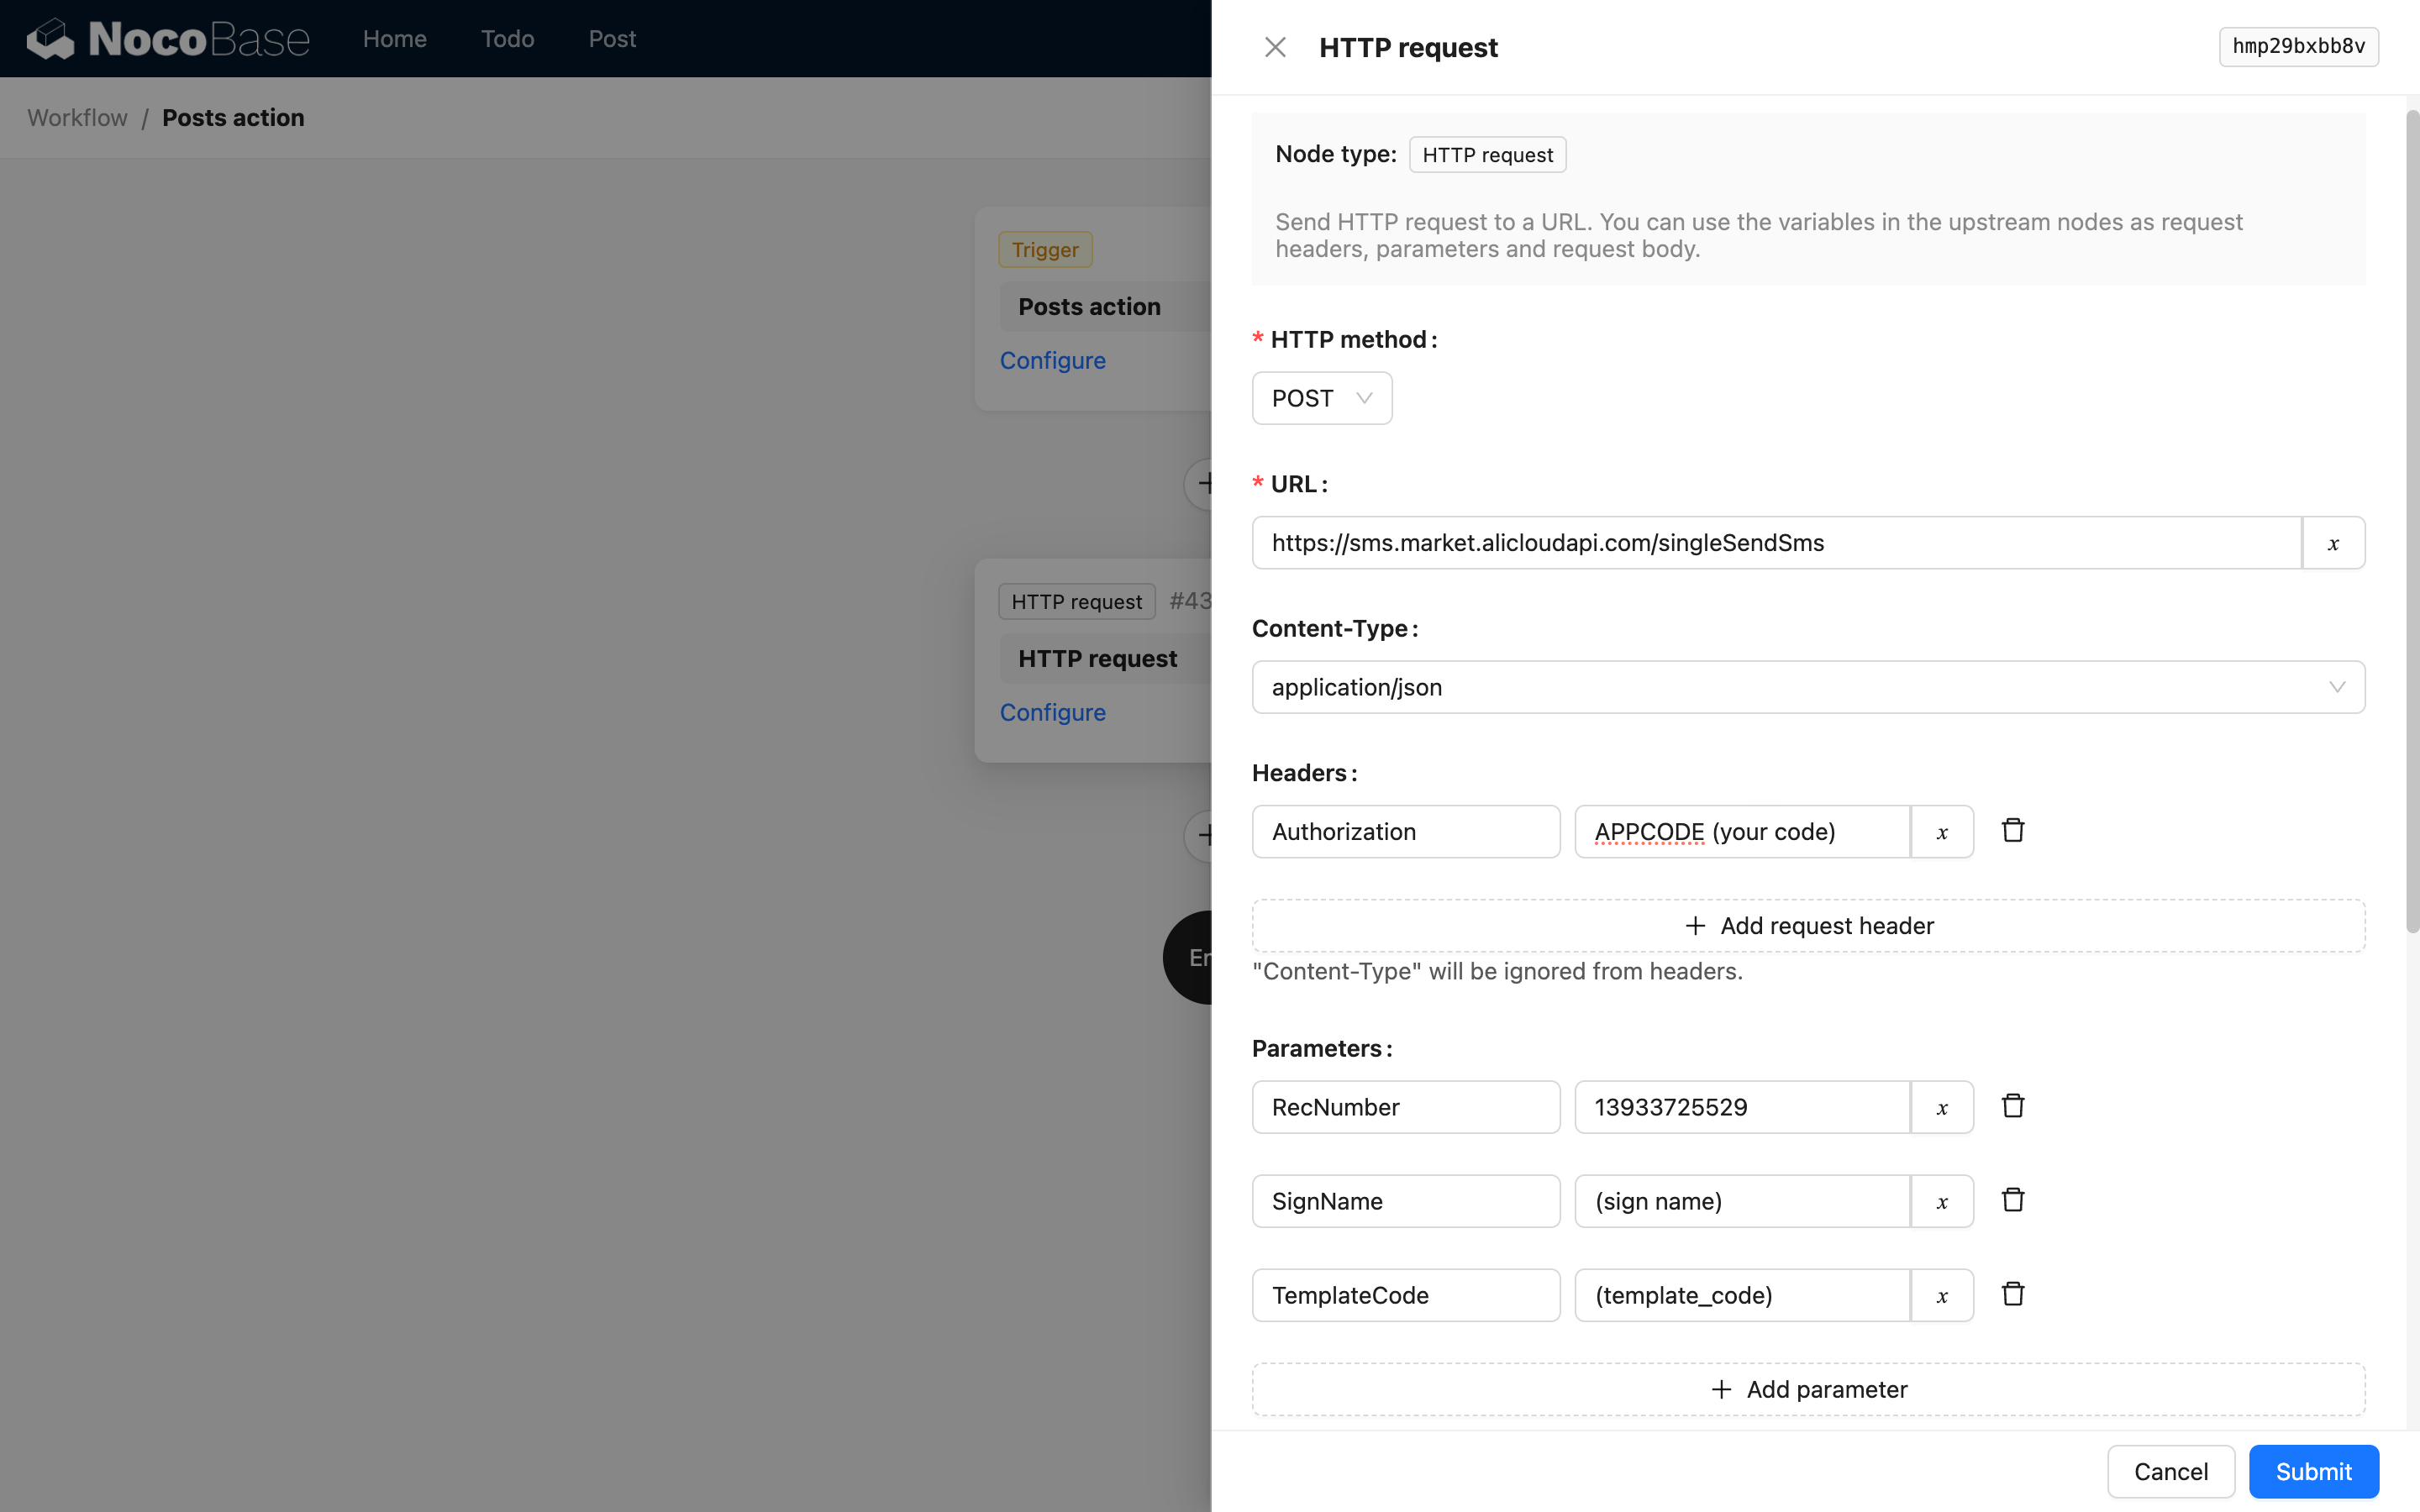
application/json
Supports standard JSON formatted text. You can insert variables from the workflow context using the variable button in the upper right corner of the text editor.
Variables must be used within a JSON string, for example: { "a": "{{$context.data.a}}" }.
application/x-www-form-urlencoded
Key-value pair format. The values can use variables from the workflow context. When variables are included, they will be parsed as a string template and concatenated into the final string value.
application/xml
Supports standard XML formatted text. You can insert variables from the workflow context using the variable button in the upper right corner of the text editor.
multipart/form-data v1.8.0+
Supports key-value pairs for form data. Files can be uploaded when the data type is set to a file object. Files can only be selected via variables from existing file objects in the context, such as the results of a query on a file collection or related data from an associated file collection.
When selecting file data, ensure that the variable corresponds to a single file object, not a list of files (in a one-to-many or many-to-many relationship query, the value of the relationship field will be an array).
Timeout Settings
When a request does not respond for a long time, the timeout setting can be used to cancel its execution. If the request times out, the current workflow will be terminated prematurely with a failed status.
Ignore Failures
The request node considers standard HTTP status codes between 200 and 299 (inclusive) as successful, and all others as failed. If the "Ignore failed requests and continue workflow" option is checked, the subsequent nodes in the workflow will continue to execute even if the request fails.
Using the Response Result
The response result of an HTTP request can be parsed by the JSON Query node for use in subsequent nodes.
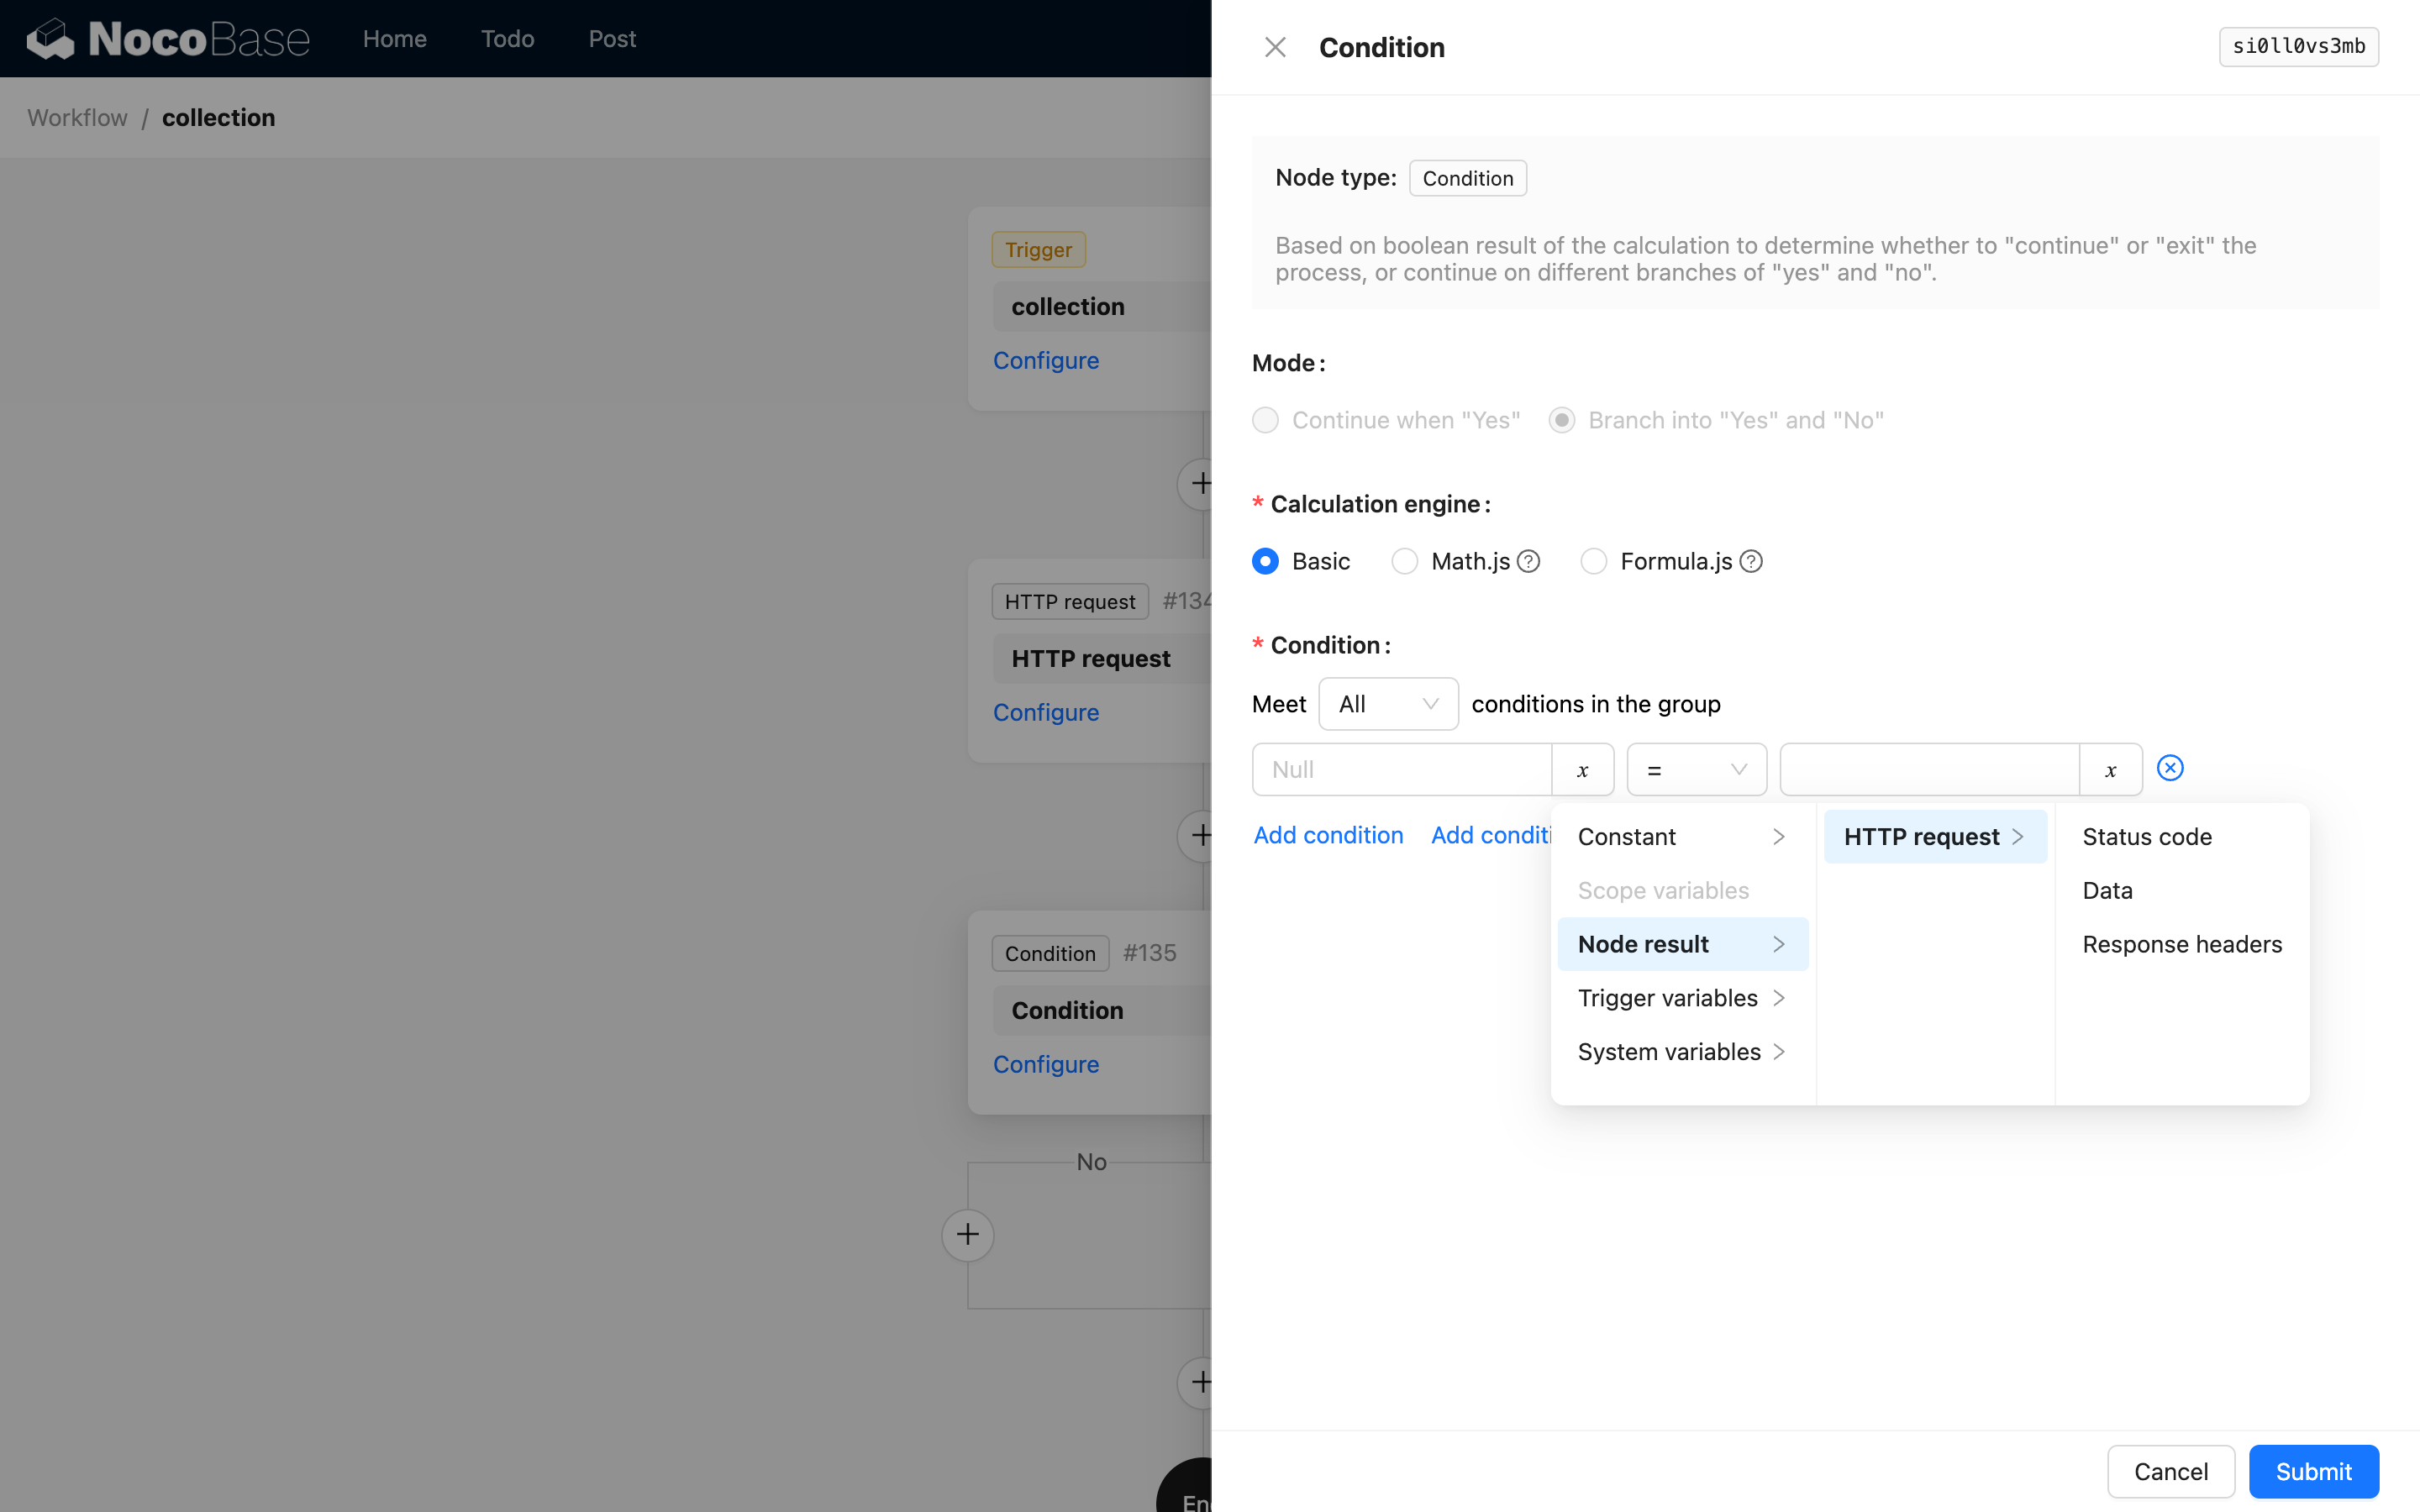
Since version v1.0.0-alpha.16, three parts of the request node's response result can be used as separate variables:
- Response status code
- Response headers
- Response data
The response status code is usually a standard HTTP status code in numeric form, such as 200, 403, etc. (as provided by the service provider).
The response headers are in JSON format. Both the headers and the JSON-formatted response data still need to be parsed using a JSON node before they can be used.
Example
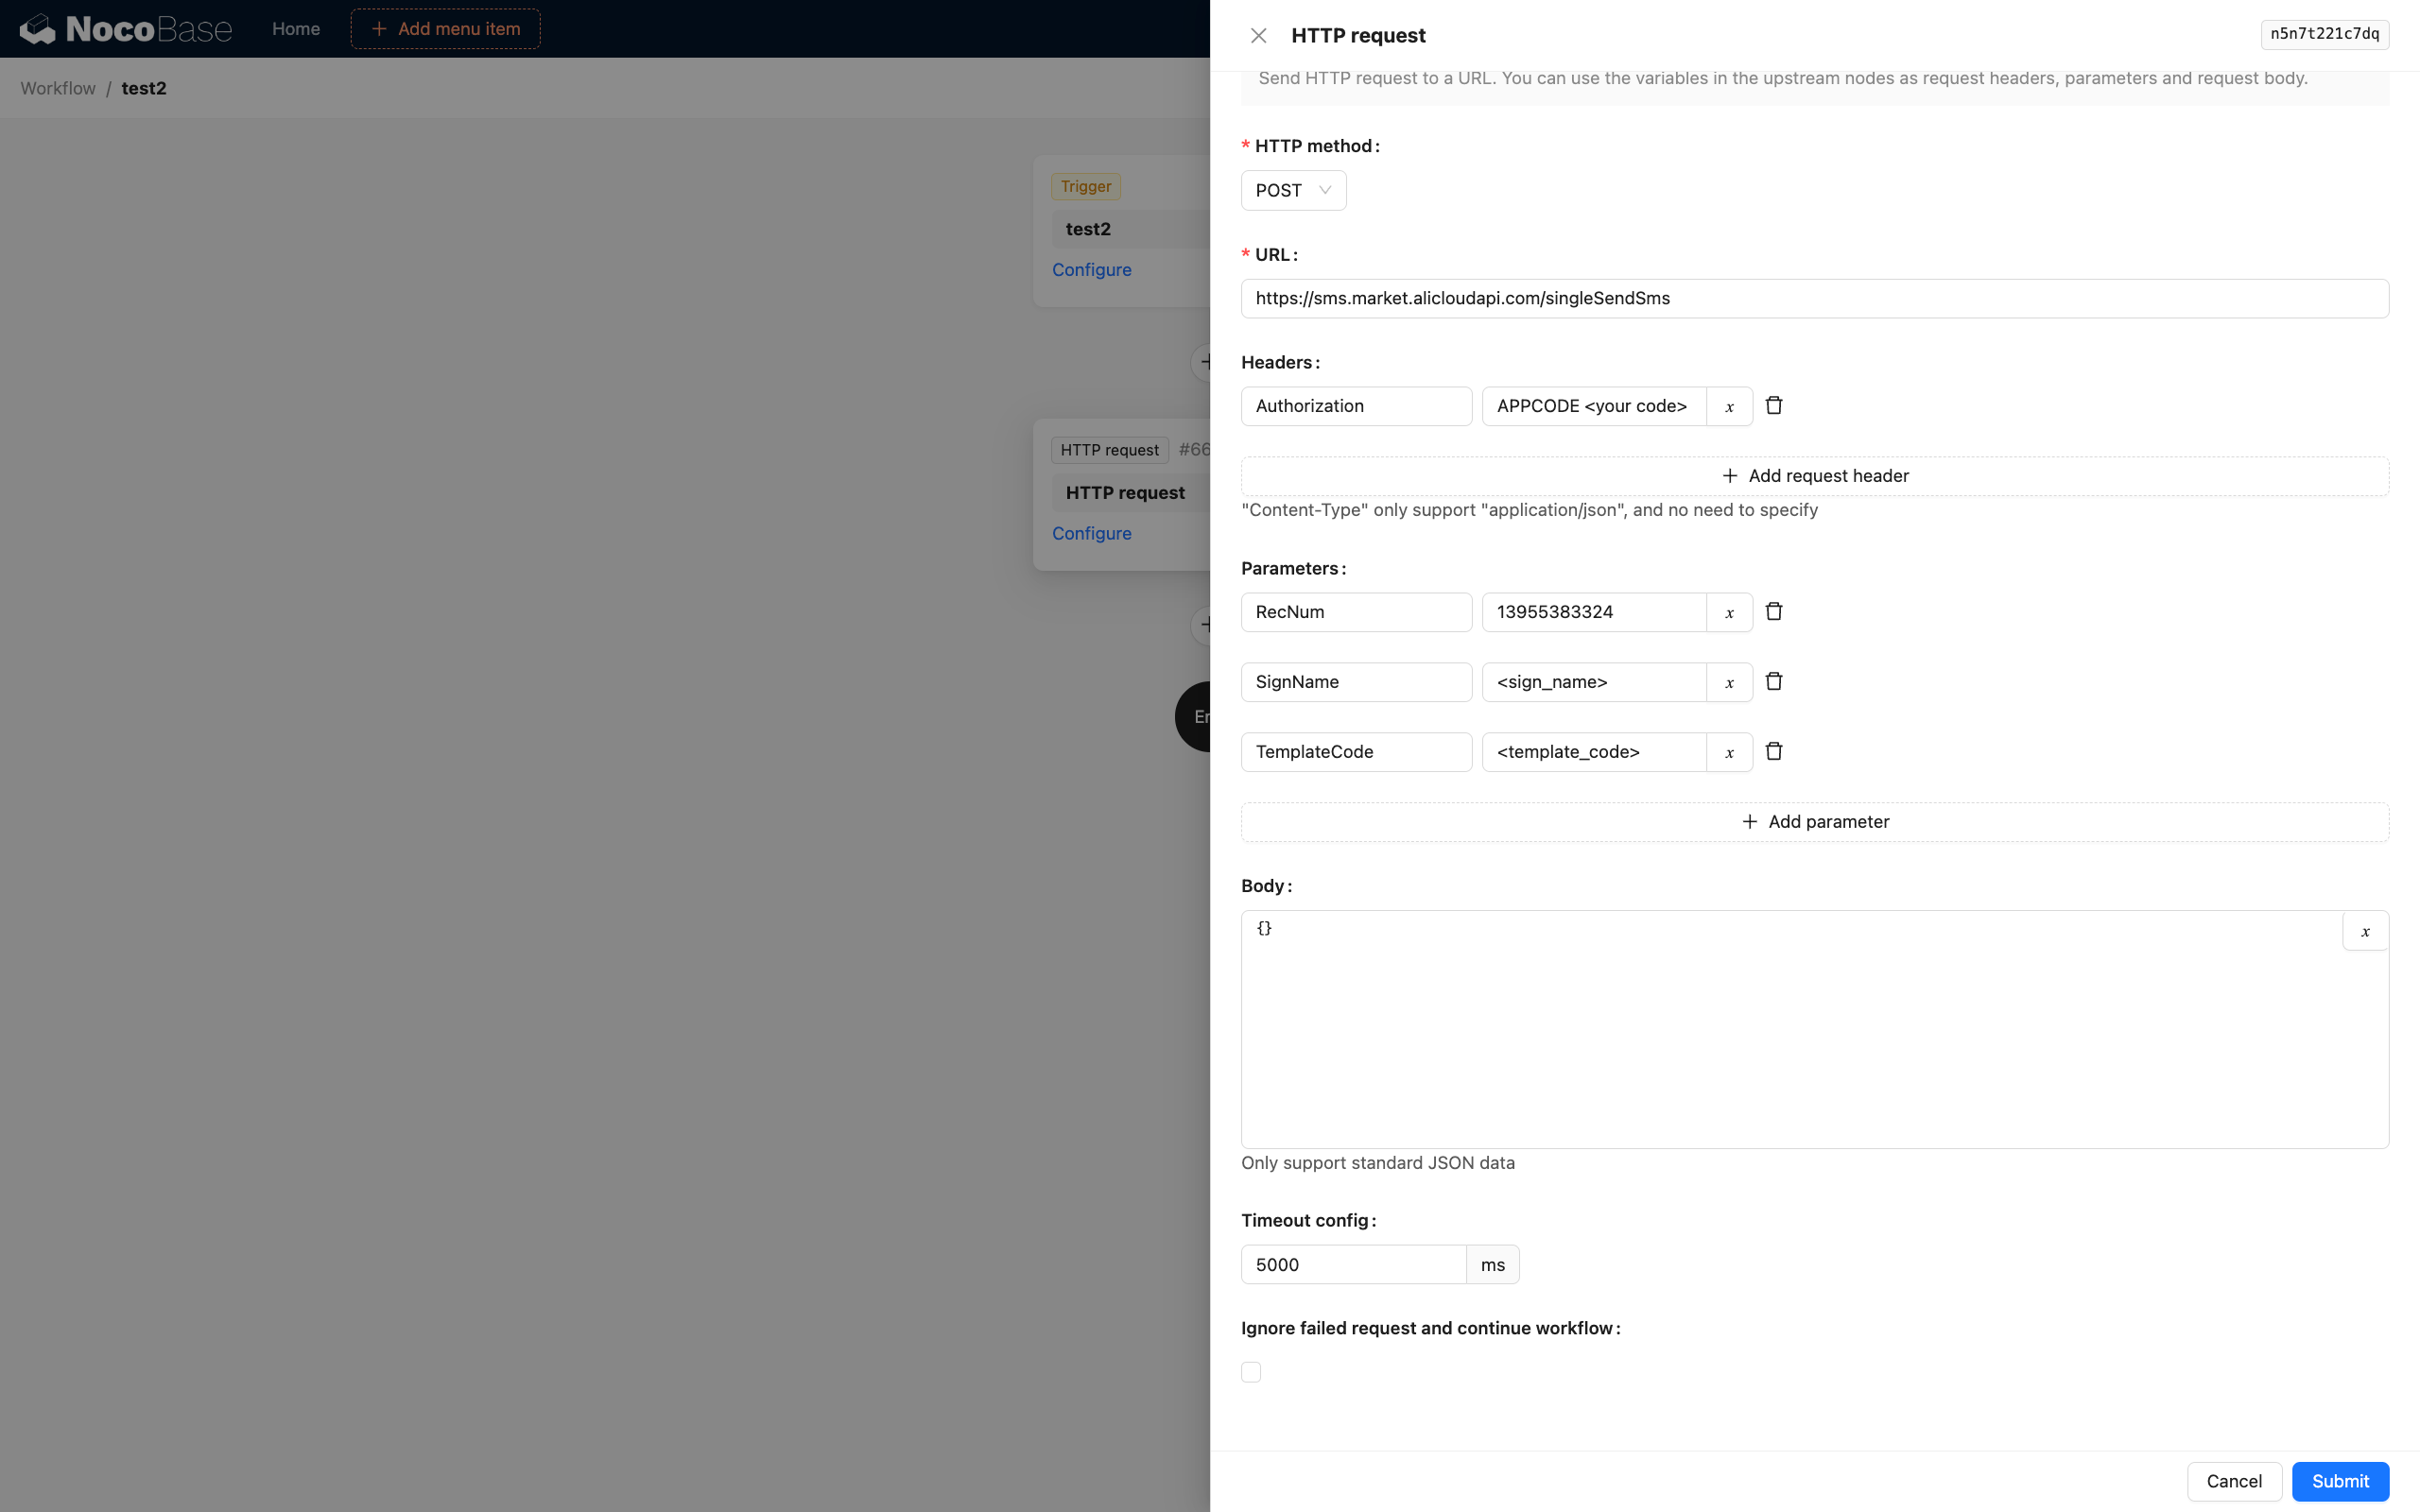
For example, we can use the request node to connect with a cloud platform to send notification SMS. The configuration for a cloud SMS API might look like the following (you will need to consult the specific API's documentation to adapt the parameters):
When the workflow triggers this node, it will call the SMS API with the configured content. If the request is successful, an SMS will be sent through the cloud SMS service.